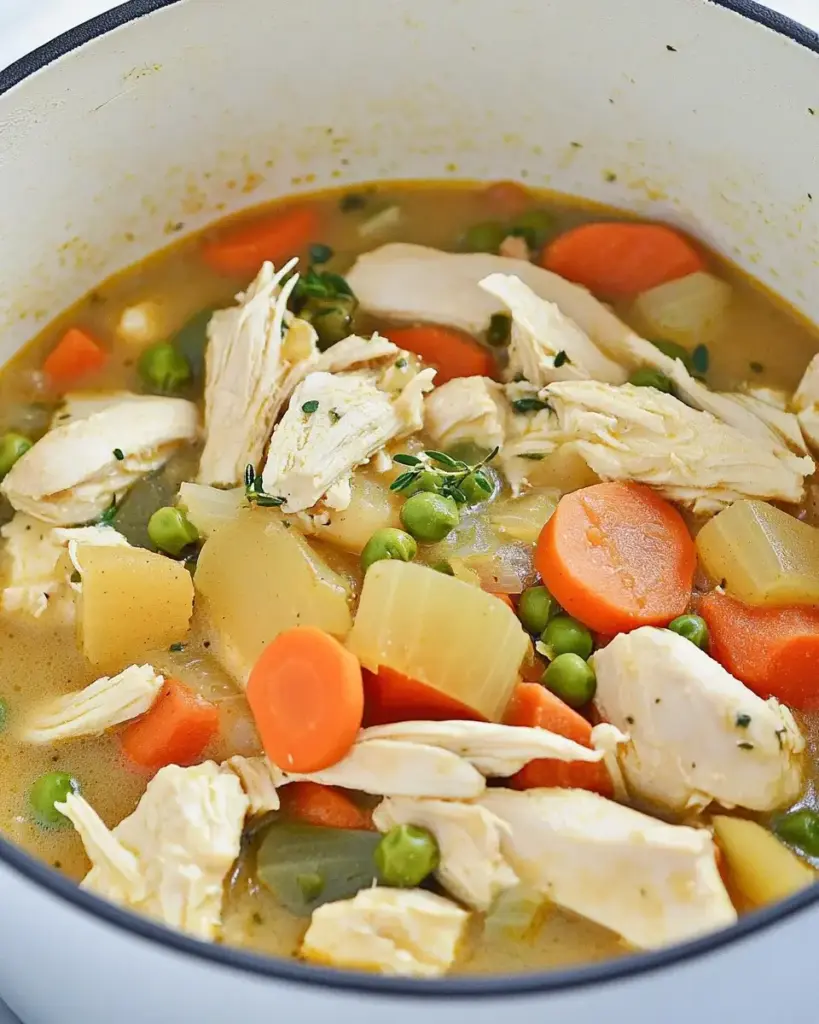
Sloppy Joe Casserole Recipe is a must-try dish!

What is a Sloppy Joe Casserole?

A Sloppy Joe Casserole is a delightful twist on the classic Sloppy Joe sandwich. It combines the savory flavors of ground beef, tangy sloppy joe sauce, and fluffy biscuit dough into a hearty, comforting dish. This casserole is baked until golden brown, creating a deliciously satisfying meal that is perfect for family dinners or gatherings. The best part? It’s easy to prepare and can be ready in no time, making it a go-to recipe for busy weeknights.

Why You Should Try This Sloppy Joe Casserole Recipe

There are many reasons to give this Sloppy Joe Casserole Recipe a try. First, it’s incredibly simple to make, requiring just a few ingredients that you likely already have in your pantry. Second, it’s a crowd-pleaser! The combination of flavors and textures appeals to both kids and adults alike. Plus, it’s versatile; you can easily customize it to suit your taste preferences. Whether you want to add extra veggies or spice it up with some hot sauce, the options are endless. Lastly, this casserole is perfect for meal prep. You can make it ahead of time and reheat it for a quick and delicious meal. So, gather your ingredients and get ready to enjoy a comforting dish that will warm your heart and satisfy your taste buds!

Ingredients for Sloppy Joe Casserole Recipe

To create a mouthwatering Sloppy Joe Casserole, you’ll need a few simple ingredients. Here’s what you’ll need:

  • 1 pound ground beef
  • 1 small onion, diced
  • 1 can (15 ounces) sloppy joe sauce
  • 1 can (16 ounces) refrigerated biscuit dough
  • 1 cup shredded cheddar cheese
  • 1 teaspoon garlic powder
  • 1 teaspoon Worcestershire sauce
  • Salt and pepper to taste
  • Fresh parsley, chopped (for garnish)

These ingredients come together to create a deliciously hearty meal. The ground beef provides protein, while the biscuit dough adds a fluffy texture. The sloppy joe sauce brings a tangy flavor that ties everything together. Don’t forget the cheese! It melts beautifully on top, creating a golden crust that everyone will love. You can also customize this recipe by adding your favorite vegetables or spices. So, gather these ingredients and get ready to whip up a delightful Sloppy Joe Casserole!

Step-by-Step Preparation of Sloppy Joe Casserole Recipe

Step 1: Prepping the Ingredients

Before you start cooking, it’s important to prep your ingredients. First, gather all the items you need. This includes the ground beef, diced onion, sloppy joe sauce, biscuit dough, shredded cheddar cheese, garlic powder, Worcestershire sauce, salt, and pepper. Having everything ready will make the cooking process smoother.

Next, take a moment to dice the onion. A small, sharp knife works best for this task. Aim for small, even pieces so they cook quickly and blend well with the beef. If you want to add extra veggies, chop them now too. Bell peppers or mushrooms are great options!

Step 2: Cooking the Meat Mixture

Now it’s time to cook the meat mixture. Heat a large skillet over medium heat. Once hot, add the ground beef and diced onion. Cook them together for about 5-7 minutes. Stir occasionally to break up the beef and ensure it cooks evenly. You’ll know it’s done when the beef is browned and the onion is soft.

After cooking, drain any excess fat from the skillet. This step is important to keep your casserole from being greasy. Then, stir in the sloppy joe sauce, garlic powder, Worcestershire sauce, salt, and pepper. Let this mixture cook for another 2-3 minutes until everything is heated through. The aroma will be mouthwatering!

Step 3: Assembling the Casserole

With the meat mixture ready, it’s time to assemble your casserole. Open the can of biscuit dough and cut each biscuit into quarters. This will help them mix well with the meat. In a large mixing bowl, combine the biscuit pieces with the sloppy joe mixture. Gently stir to coat the biscuits evenly. Be careful not to mash them!

Next, pour the entire mixture into a greased 9×13-inch baking dish. Spread it out evenly. This ensures that every bite is filled with delicious flavors. Finally, sprinkle the shredded cheddar cheese over the top. This will create a cheesy, golden crust as it bakes.

Step 4: Baking the Casserole

Now that your casserole is assembled, it’s time to bake! Place the baking dish in the preheated oven at 350°F. Bake for 25-30 minutes. Keep an eye on it as it cooks. You want the biscuits to be golden brown and fully cooked. The cheese should be melted and bubbly, adding to the deliciousness of the dish.

Once done, remove the casserole from the oven and let it cool for a few minutes. This will make it easier to serve. Before serving, garnish with chopped fresh parsley for a pop of color and flavor. Now, you’re ready to enjoy your Sloppy Joe Casserole!

Variations of Sloppy Joe Casserole Recipe

Vegetarian Sloppy Joe Casserole

If you’re looking for a meatless option, a Vegetarian Sloppy Joe Casserole is a fantastic choice! You can easily swap out the ground beef for a plant-based alternative. Consider using lentils, black beans, or even crumbled tofu. These ingredients provide a hearty texture and are packed with protein.

To make the vegetarian version, start by sautéing diced onions and bell peppers in a skillet. Then, add your choice of beans or lentils along with the sloppy joe sauce, garlic powder, Worcestershire sauce, salt, and pepper. Mix everything well and let it simmer for a few minutes. Follow the same steps for assembling and baking the casserole as in the original recipe. The result is a delicious, satisfying dish that everyone can enjoy!

Gluten-Free Sloppy Joe Casserole

For those who need a gluten-free option, you can easily adapt the Sloppy Joe Casserole Recipe. Start by using gluten-free biscuit dough, which is widely available in stores. You can also make your own using gluten-free flour and baking powder.

When preparing the meat mixture, ensure that the sloppy joe sauce is gluten-free. Many brands offer gluten-free options, so check the label. Follow the same cooking and assembly steps as the original recipe. This gluten-free version will still deliver all the comforting flavors of the classic dish, making it a hit for everyone at the table!

Cooking Note for Sloppy Joe Casserole Recipe

When preparing your Sloppy Joe Casserole, there are a few important cooking notes to keep in mind. First, always ensure that your ground beef is cooked thoroughly. This not only enhances the flavor but also ensures food safety. Use a meat thermometer to check that the internal temperature reaches 160°F.

Next, consider the texture of your biscuit dough. If you prefer a softer biscuit, you can slightly underbake the casserole. On the other hand, if you like a crunchier texture, bake it a little longer. Just keep an eye on it to prevent burning.

Additionally, feel free to experiment with the spices. Adding a pinch of cayenne pepper or smoked paprika can elevate the flavor profile. If you enjoy a bit of sweetness, a tablespoon of brown sugar can balance the tanginess of the sloppy joe sauce.

Lastly, remember that leftovers can be just as delicious! Store any uneaten casserole in an airtight container in the refrigerator. Reheat it in the oven or microwave for a quick meal that tastes just as good as the first time. Enjoy your cooking adventure with this Sloppy Joe Casserole Recipe!

Serving Suggestions for Sloppy Joe Casserole Recipe

When it comes to serving your Sloppy Joe Casserole, there are plenty of delicious options to enhance the meal. This hearty dish is versatile and pairs well with various sides and toppings. Here are some serving suggestions to consider:

  • Fresh Salad: A crisp green salad is a perfect complement to the rich flavors of the casserole. Consider a simple garden salad with lettuce, tomatoes, cucumbers, and a light vinaigrette. The freshness of the salad balances the hearty casserole.
  • Coleslaw: A tangy coleslaw adds a crunchy texture and a refreshing taste. The coolness of the slaw contrasts nicely with the warm, savory casserole. You can make a classic coleslaw or try a vinegar-based version for a lighter option.
  • Garlic Bread: Serve your casserole with warm garlic bread for a comforting touch. The buttery, garlicky flavor of the bread pairs wonderfully with the Sloppy Joe Casserole, making it even more satisfying.
  • Pickles: Adding pickles on the side can provide a nice crunch and a tangy flavor that cuts through the richness of the dish. Dill pickles or bread-and-butter pickles are both great choices.
  • Hot Sauce: For those who enjoy a bit of heat, offer hot sauce on the side. A few dashes can elevate the flavors and add an exciting kick to each bite.
  • Cheese Toppings: Consider serving extra shredded cheese on top of the casserole. This allows guests to customize their servings with more melty goodness.

These serving suggestions not only enhance the meal but also make it more enjoyable for everyone at the table. Feel free to mix and match based on your preferences and what you have on hand. With these ideas, your Sloppy Joe Casserole will be a hit at any gathering!
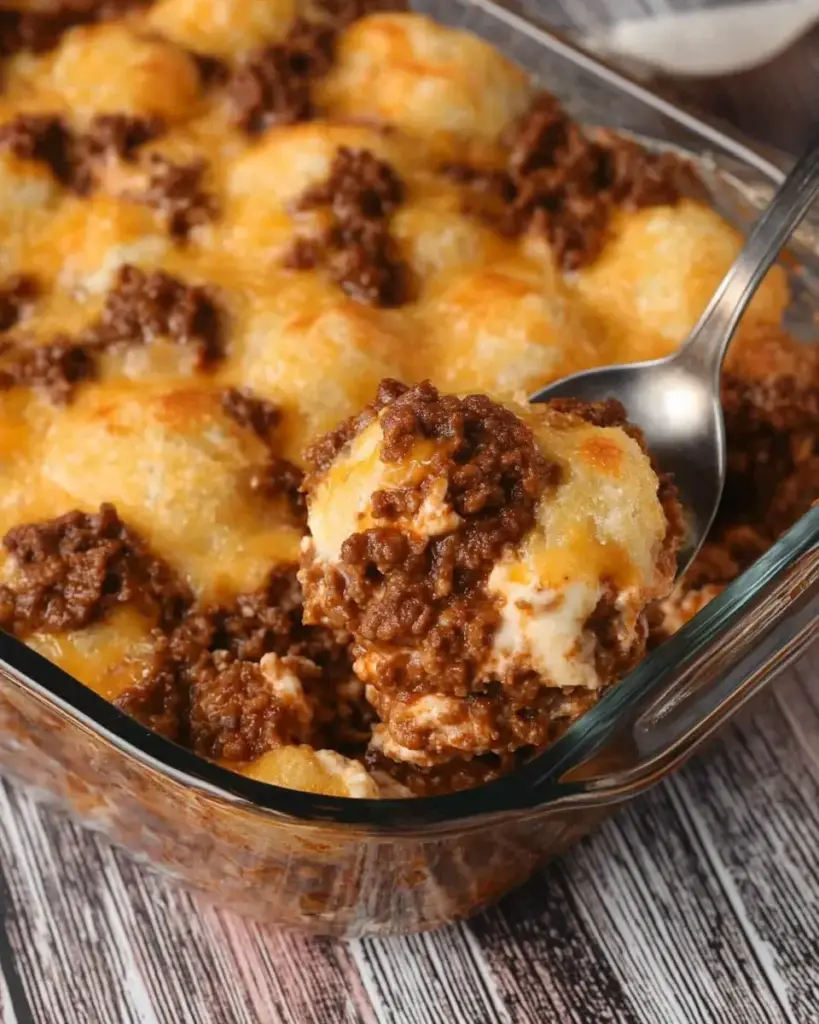
Tips for Perfecting Your Sloppy Joe Casserole Recipe

To make your Sloppy Joe Casserole truly shine, consider these helpful tips. They will ensure that every bite is packed with flavor and that your dish turns out perfectly every time.

  • Choose Quality Ingredients: Start with fresh ground beef and high-quality sloppy joe sauce. The better the ingredients, the tastier your casserole will be. If you can, opt for homemade sauce for a personal touch.
  • Don’t Skip the Seasoning: Season your meat mixture well. Salt and pepper are essential, but don’t hesitate to add other spices like onion powder or paprika. These will enhance the overall flavor.
  • Mix Gently: When combining the biscuit pieces with the meat mixture, stir gently. You want the biscuits to be coated without breaking them apart. This keeps the texture fluffy and enjoyable.
  • Check for Doneness: Keep an eye on your casserole while it bakes. The biscuits should be golden brown, and the cheese should be bubbly. If you notice the top browning too quickly, cover it with aluminum foil to prevent burning.
  • Let It Rest: After baking, allow the casserole to cool for a few minutes before serving. This helps the layers set, making it easier to cut and serve. Plus, it allows the flavors to meld together beautifully.
  • Experiment with Toppings: Feel free to get creative with toppings! Consider adding sliced green onions, jalapeños, or even a dollop of sour cream for extra flavor. These additions can elevate your dish to the next level.
  • Make It Ahead: If you’re short on time, prepare the casserole ahead of time. Assemble it, cover it tightly, and store it in the fridge. When you’re ready to bake, just pop it in the oven. This is a great way to save time on busy nights!

By following these tips, you’ll be well on your way to creating a Sloppy Joe Casserole that everyone will love. Enjoy the process and have fun experimenting with flavors!

Breakdown of Time for Sloppy Joe Casserole Recipe

Prep Time

The prep time for your Sloppy Joe Casserole is quite manageable. You can expect to spend about 10-15 minutes gathering and preparing your ingredients. This includes dicing the onion, cutting the biscuit dough, and measuring out your spices. Having everything ready will make the cooking process smoother and more enjoyable.

Cooking Time

Once you start cooking, the actual cooking time will take around 15-20 minutes. This includes browning the ground beef and onions, mixing in the sloppy joe sauce, and allowing it to heat through. After that, you’ll bake the casserole for 25-30 minutes in the oven. During this time, the biscuits will rise and become golden brown, while the cheese melts beautifully on top.

Total Time

In total, you can expect the entire process to take about 50-65 minutes from start to finish. This includes both prep and cooking time. With such a quick turnaround, this Sloppy Joe Casserole Recipe is perfect for busy weeknights or last-minute gatherings. You’ll have a delicious, hearty meal ready in no time!

Nutritional Information for Sloppy Joe Casserole Recipe

Calories

When it comes to enjoying a hearty meal, knowing the calorie content can help you make informed choices. Each serving of this Sloppy Joe Casserole contains approximately 350 calories. This makes it a satisfying option for dinner without going overboard on calories. The combination of ground beef, biscuit dough, and cheese contributes to the overall calorie count, providing a filling meal that is sure to please.

Protein

Protein is an essential nutrient that helps build and repair tissues in our bodies. This Sloppy Joe Casserole is a great source of protein, offering about 20 grams per serving. The ground beef is the primary contributor to this protein content, making it a nutritious choice for those looking to increase their protein intake. Pairing this casserole with a side salad can further enhance your meal’s nutritional value.

Sodium

Sodium is another important factor to consider when evaluating the nutritional profile of a dish. Each serving of the Sloppy Joe Casserole contains around 800 milligrams of sodium. While this is a reasonable amount for a flavorful dish, it’s wise to be mindful of your overall sodium intake throughout the day. If you’re watching your sodium levels, consider using low-sodium sloppy joe sauce or reducing the added salt in the recipe.

FAQs about Sloppy Joe Casserole Recipe

Can I make Sloppy Joe Casserole ahead of time?

Absolutely! Making Sloppy Joe Casserole ahead of time is a great idea. You can prepare the entire casserole, cover it tightly, and store it in the refrigerator for up to 24 hours before baking. This is perfect for busy weeknights or when you have guests coming over. When you’re ready to bake, simply preheat your oven and pop it in. You may need to add a few extra minutes to the baking time since it will be cold from the fridge.

What can I serve with Sloppy Joe Casserole?

There are many delicious options to serve alongside your Sloppy Joe Casserole. A fresh garden salad is a great choice, as it adds a light and crunchy contrast to the rich flavors of the casserole. You can also serve coleslaw for a tangy crunch or garlic bread for a comforting touch. Pickles or hot sauce on the side can enhance the meal, giving it an extra kick. Feel free to mix and match based on your preferences!

How do I store leftovers of Sloppy Joe Casserole?

Storing leftovers of your Sloppy Joe Casserole is easy! Allow the casserole to cool completely before transferring it to an airtight container. You can keep it in the refrigerator for up to 3-4 days. When you’re ready to enjoy it again, simply reheat individual portions in the microwave or warm it up in the oven. If you want to store it for a longer period, consider freezing it. Just make sure to use a freezer-safe container, and it can last for up to 3 months. Reheat thoroughly before serving!

Conclusion on Sloppy Joe Casserole Recipe

In conclusion, the Sloppy Joe Casserole Recipe is a delightful and easy dish that brings comfort and satisfaction to any meal. With its rich flavors and simple preparation, it’s perfect for busy families or anyone looking for a quick yet hearty dinner option. The combination of ground beef, tangy sloppy joe sauce, and fluffy biscuit dough creates a unique twist on the classic Sloppy Joe sandwich that everyone will love.

This casserole not only offers a delicious taste but also provides versatility. You can easily customize it to fit your dietary needs or personal preferences. Whether you choose to make a vegetarian or gluten-free version, the essence of this dish remains intact, ensuring that no one misses out on the fun. Plus, with the option to prepare it ahead of time, you can enjoy a homemade meal without the stress of last-minute cooking.

As you gather around the table with family and friends, this Sloppy Joe Casserole will surely be a hit. Its warm, cheesy goodness and comforting flavors will create lasting memories and happy moments. So, don’t hesitate to try this recipe and make it a regular part of your meal rotation. Happy cooking!
Paul

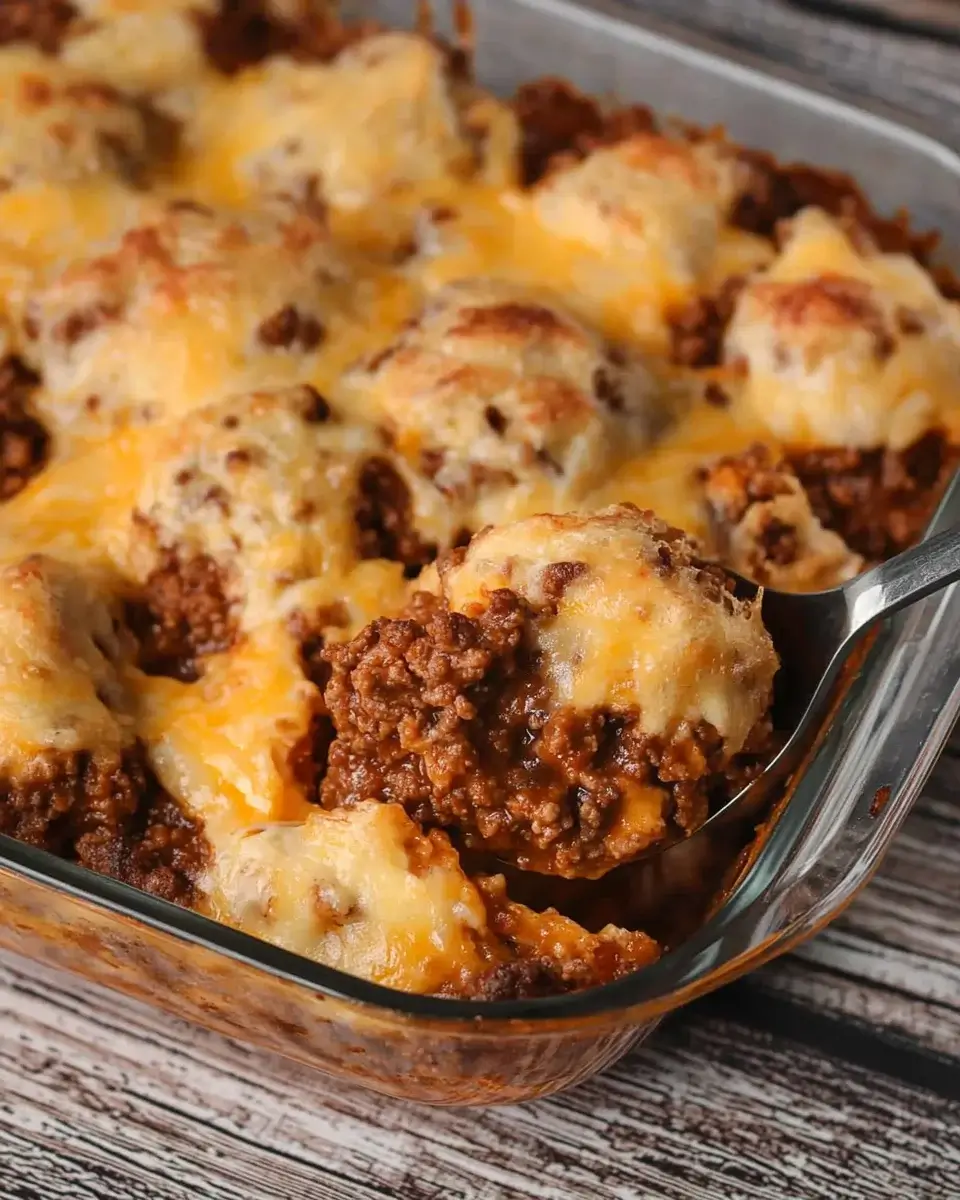
Sloppy Joe Casserole Recipe is a must-try dish!

This Sloppy Joe Biscuit Casserole is cozy, cheesy, and downright comforting! With savory saucy beef, golden biscuit pieces, and melty cheddar cheese baked into one irresistible dish, it’s a family-friendly weeknight favorite you’ll make on repeat.
Prep Time 10 minutes
Cook Time 30 minutes
Total Time 40 minutes
Servings: 6 servings
Course: Casserole, Main Course
Cuisine: American

Ingredients
  

  • 1 pound ground beef or substitute with ground turkey
  • ¾ cup ketchup
  • ¼ cup water
  • 3 teaspoons brown sugar
  • 2 teaspoons Worcestershire sauce
  • 2 teaspoons mustard
  • 1 teaspoon garlic powder
  • 1 teaspoon onion powder
  • ¼ teaspoon salt
  • 1 12 oz can Pillsbury biscuits (Grands Jr’s preferred), cut into quarters
  • 1 cup shredded cheddar cheese

Method
 

  1. Preheat oven to 350°F (175°C). Lightly grease a 9×13-inch baking dish with cooking spray.
  2. Cook the meat: In a skillet over medium heat, cook the ground beef (or turkey) until no longer pink. Drain excess fat.
  3. Make the sauce: Stir in ketchup, water, brown sugar, Worcestershire sauce, mustard, garlic powder, onion powder, and salt. Let the mixture simmer for 5 minutes to meld flavors.
  4. Mix in biscuits: Transfer the meat mixture to a large bowl. Add the quartered biscuit pieces and gently toss to coat them evenly.
  5. Assemble the casserole: Spread the biscuit-meat mixture evenly into the prepared baking dish.
  6. Top with cheese: Sprinkle shredded cheddar cheese evenly over the top.
  7. Bake: Place in the oven and bake for 28 to 30 minutes, or until the biscuits are golden brown and cooked through.
  8. Serve hot: Let cool slightly before serving, then dig into this cheesy, bubbly goodness!

Notes

  • Don’t overmix the biscuits: Gently folding the biscuit pieces prevents them from becoming soggy or tearing.
  • Add veggies: You can sneak in finely chopped bell peppers or onions while cooking the beef for added flavor and nutrition.
  • Spice it up: A dash of chili powder or hot sauce in the sauce mixture adds a flavorful kick if you like heat.
  • Freezer tip: Assemble the casserole ahead and freeze unbaked. Thaw overnight in the fridge and bake as directed.
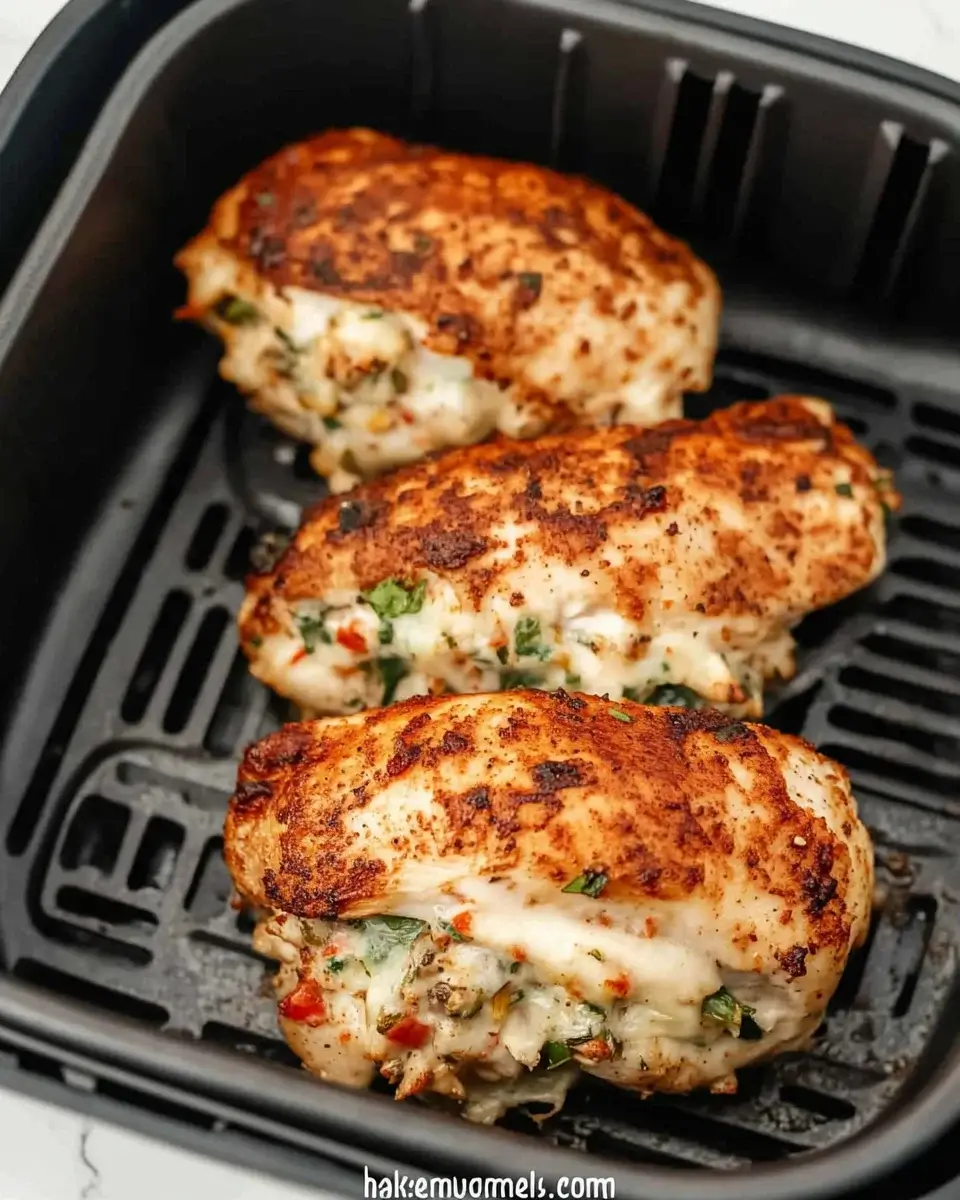
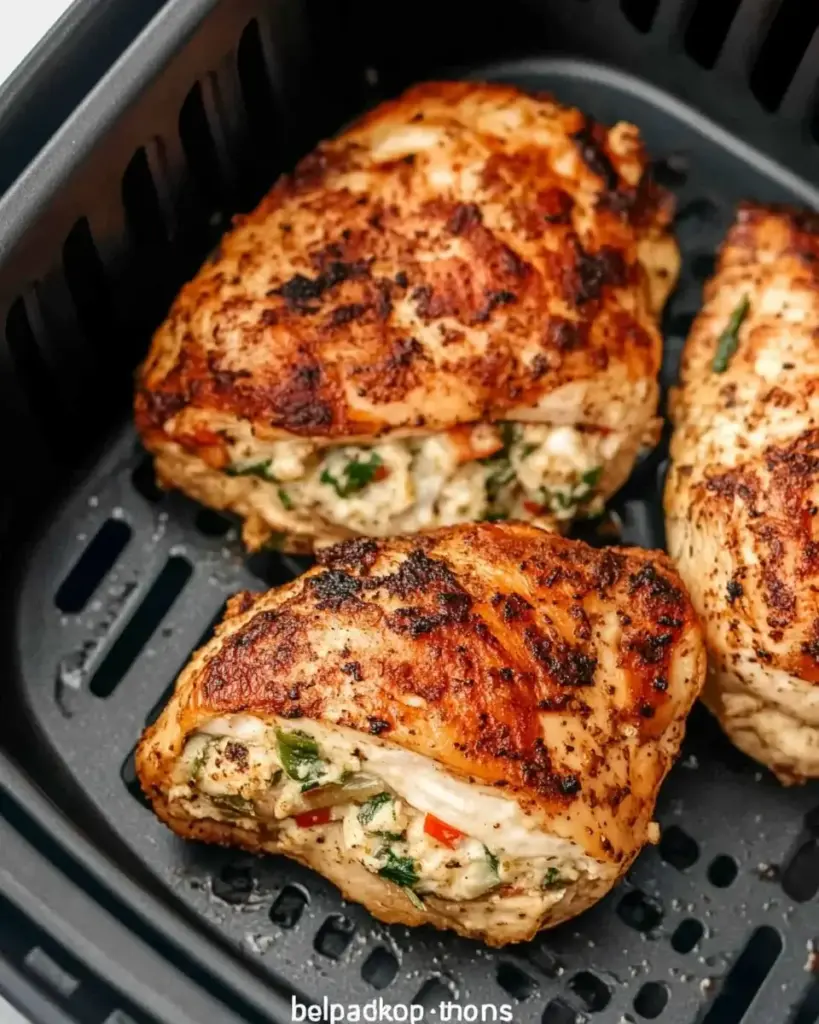
Stuffed chicken breasts in the air fryer are easy to make.

Are you looking for a delicious and easy dinner idea? Stuffed chicken breasts in the air fryer might just be the perfect solution! This dish combines juicy chicken with a creamy, flavorful filling, making it a hit for family dinners or special occasions. The air fryer cooks the chicken to perfection, giving it a crispy exterior while keeping the inside moist and tender.

Using an air fryer not only saves time but also reduces the amount of oil needed for cooking. This means you can enjoy a healthier version of your favorite stuffed chicken without sacrificing taste. Plus, the air fryer is incredibly easy to use, making it a great option for both novice and experienced cooks.

In this article, we will guide you through the ingredients, preparation steps, and cooking methods for making stuffed chicken breasts in the air fryer. You’ll also discover variations and tips to elevate your dish. So, let’s dive into the world of stuffed chicken breasts and explore how to create a meal that’s sure to impress!

Ingredients for Stuffed Chicken Breasts in the Air Fryer

To create mouthwatering stuffed chicken breasts in the air fryer, you’ll need a few simple ingredients. Each component plays a vital role in delivering flavor and texture. Here’s what you’ll need:

  • 1 pound boneless, skinless chicken breasts: This typically amounts to about four chicken breasts. Choose fresh, high-quality chicken for the best results.
  • 1 cup fresh spinach, chopped: Spinach adds a nutritious touch and a lovely green color to your stuffing.
  • 1/2 cup cream cheese, softened: Cream cheese provides a rich, creamy base for the stuffing, making it deliciously smooth.
  • 1/2 cup shredded mozzarella cheese: This cheese melts beautifully, adding a gooey texture that complements the other ingredients.
  • 1/4 cup grated Parmesan cheese: Parmesan brings a sharp, nutty flavor that enhances the overall taste of the dish.
  • 2 cloves garlic, minced: Garlic adds a wonderful aroma and depth of flavor to the stuffing.
  • 1 teaspoon Italian seasoning: This blend of herbs elevates the dish with a classic Italian flavor profile.
  • Salt and pepper to taste: Seasoning is key! Adjust these to your preference for the best flavor.
  • 1 tablespoon olive oil: Olive oil helps to crisp the chicken’s exterior while adding a touch of healthy fat.

These ingredients come together to create a delightful filling that pairs perfectly with the chicken. Feel free to get creative! You can add sun-dried tomatoes, artichokes, or even different herbs to customize your stuffed chicken breasts in the air fryer.

Preparation of Stuffed Chicken Breasts in the Air Fryer

Now that you have gathered all your ingredients, it’s time to prepare your stuffed chicken breasts in the air fryer. This process is straightforward and fun! Follow these steps to create a delicious meal that your family will love.

Step 1: Preparing the Chicken Breasts

Start by rinsing the chicken breasts under cold water. Pat them dry with paper towels. This helps to remove any excess moisture, ensuring a better sear. Next, take a sharp knife and carefully slice each chicken breast horizontally. Create a pocket, but be cautious not to cut all the way through. This pocket will hold your tasty stuffing!

Step 2: Making the Stuffing

In a mixing bowl, combine the chopped spinach, softened cream cheese, shredded mozzarella, grated Parmesan, minced garlic, and Italian seasoning. Mix everything together until it’s well combined. The mixture should be creamy and thick, making it easy to stuff into the chicken. Don’t forget to season with salt and pepper to enhance the flavors!

Step 3: Stuffing the Chicken Breasts

Now comes the fun part! Take a spoonful of the stuffing mixture and carefully fill each chicken breast pocket. Make sure to pack it in gently, so it doesn’t spill out. If needed, use toothpicks to secure the opening of the chicken breasts. This will keep the stuffing inside while cooking, ensuring every bite is full of flavor.

Step 4: Prepping the Air Fryer

Before cooking, preheat your air fryer to 375°F. This step is crucial as it helps the chicken cook evenly and achieve that golden-brown exterior. While the air fryer is heating up, brush the outside of each stuffed chicken breast with olive oil. This will help create a crispy texture. Season the outside with a little more salt and pepper for added flavor.

Step 5: Cooking the Stuffed Chicken Breasts

Once the air fryer is preheated, place the stuffed chicken breasts in the basket in a single layer. Avoid overcrowding to ensure even cooking. Cook for 18-20 minutes, flipping them halfway through. The chicken is done when it reaches an internal temperature of 165°F and has a beautiful golden color. After cooking, let the chicken rest for about 5 minutes before serving. This allows the juices to redistribute, making each bite juicy and tender!

Variation of Stuffed Chicken Breasts in the Air Fryer

While the classic spinach and cheese stuffing is delicious, there are many ways to customize your stuffed chicken breasts in the air fryer. Exploring different stuffing options can add variety to your meals and keep things exciting. Let’s look at some tasty alternatives!

Different Stuffing Options

Get creative with your stuffing! Here are some delightful ideas to try:

  • Sun-Dried Tomatoes and Feta: Combine chopped sun-dried tomatoes with crumbled feta cheese for a Mediterranean twist. This combination adds a tangy flavor that pairs beautifully with chicken.
  • Artichoke and Spinach: Mix chopped artichokes with spinach and cream cheese for a rich, creamy filling. This classic combination is sure to impress!
  • Mushroom and Swiss: Sauté mushrooms and mix them with Swiss cheese for a savory stuffing. This option is perfect for mushroom lovers!
  • Broccoli and Cheddar: Steam some broccoli and mix it with sharp cheddar cheese. This stuffing is not only tasty but also adds a pop of color to your dish.
  • Buffalo Chicken: For a spicy kick, mix shredded cooked chicken with buffalo sauce and cream cheese. This option is great for those who love bold flavors!

Feel free to mix and match ingredients based on your preferences. The possibilities are endless, and you can create a unique dish every time!

Alternative Cooking Methods

If you don’t have an air fryer, don’t worry! You can still enjoy stuffed chicken breasts using other cooking methods. Here are a couple of alternatives:

  • Oven Baking: Preheat your oven to 375°F. Place the stuffed chicken breasts in a baking dish and cover with foil. Bake for about 25-30 minutes, removing the foil for the last 10 minutes to allow the chicken to brown.
  • Grilling: Preheat your grill to medium heat. Grill the stuffed chicken breasts for about 6-8 minutes on each side, or until the internal temperature reaches 165°F. This method adds a lovely smoky flavor!

These alternative cooking methods can yield delicious results, so feel free to experiment and find your favorite way to prepare stuffed chicken breasts!

Cooking Note for Stuffed Chicken Breasts in the Air Fryer

Cooking stuffed chicken breasts in the air fryer is a fantastic way to achieve a crispy exterior while keeping the inside juicy and flavorful. However, there are a few important notes to keep in mind to ensure your dish turns out perfectly every time.

First, always check the size of your chicken breasts. If they are particularly thick, you may need to adjust the cooking time. Thicker breasts will require a longer cooking time to reach the safe internal temperature of 165°F. Using a meat thermometer is the best way to ensure your chicken is cooked through without overcooking it.

Next, consider the stuffing. If you choose to add ingredients that release moisture, like tomatoes or mushrooms, be mindful of how this affects the cooking time. These ingredients can make the stuffing wetter, which may require a slight adjustment in cooking time to ensure the chicken cooks evenly.

Additionally, avoid overcrowding the air fryer basket. Cooking in batches may be necessary if you are preparing multiple stuffed chicken breasts. This allows hot air to circulate freely around each piece, ensuring even cooking and browning.

Lastly, let the stuffed chicken breasts rest for a few minutes after cooking. This resting period allows the juices to redistribute throughout the meat, resulting in a more tender and flavorful dish. Cutting into the chicken too soon can cause the juices to run out, leaving you with dry meat.

By following these cooking notes, you can enjoy perfectly cooked stuffed chicken breasts in the air fryer every time. Happy cooking!

Serving Suggestions for Stuffed Chicken Breasts in the Air Fryer

Once your stuffed chicken breasts in the air fryer are cooked to perfection, it’s time to think about how to serve them. Presentation and pairing can elevate your meal, making it even more enjoyable. Here are some delightful serving suggestions to consider:

  • Fresh Salad: Serve your stuffed chicken breasts alongside a crisp salad. A mix of greens, cherry tomatoes, cucumbers, and a light vinaigrette can provide a refreshing contrast to the rich filling.
  • Roasted Vegetables: Pair the chicken with a side of roasted vegetables. Carrots, bell peppers, and zucchini drizzled with olive oil and herbs make a colorful and nutritious addition to your plate.
  • Quinoa or Rice: For a heartier meal, serve the stuffed chicken over a bed of quinoa or rice. These grains absorb the flavors from the chicken and stuffing, creating a delicious combination.
  • Pasta: A light pasta dish tossed with olive oil, garlic, and herbs can complement the stuffed chicken beautifully. Consider adding a sprinkle of Parmesan cheese for extra flavor.
  • Garlic Bread: If you’re in the mood for something comforting, serve your chicken with warm garlic bread. The crispy bread is perfect for soaking up any juices from the chicken.

Don’t forget to garnish your stuffed chicken breasts with fresh herbs like parsley or basil before serving. This adds a pop of color and enhances the dish’s aroma. You can also drizzle a bit of balsamic glaze or a squeeze of lemon juice over the top for an extra burst of flavor.

With these serving suggestions, your stuffed chicken breasts in the air fryer will not only taste amazing but also look appealing on the plate. Enjoy your meal with family and friends, and watch them be impressed by your culinary skills!

Tips for Perfect Stuffed Chicken Breasts in the Air Fryer

Creating perfect stuffed chicken breasts in the air fryer is all about attention to detail. With a few helpful tips, you can ensure that your dish turns out delicious every time. Here are some essential tips to keep in mind:

  • Choose the Right Chicken Breasts: Opt for chicken breasts that are uniform in size. This helps them cook evenly. If you have larger breasts, consider butterflying them for quicker cooking.
  • Don’t Overstuff: While it’s tempting to pack in a lot of stuffing, overstuffing can lead to spillage during cooking. Aim for a generous but manageable amount of filling in each pocket.
  • Use a Meat Thermometer: To ensure your chicken is cooked perfectly, use a meat thermometer. The internal temperature should reach 165°F. This guarantees that your chicken is safe to eat and juicy.
  • Let the Chicken Rest: After cooking, allow the stuffed chicken breasts to rest for about 5 minutes. This resting time helps the juices redistribute, making the chicken more tender and flavorful.
  • Experiment with Seasonings: Don’t hesitate to get creative with your seasonings. Adding spices or herbs to the chicken’s exterior can enhance the overall flavor. Consider using paprika, cumin, or fresh herbs for a unique twist.
  • Keep the Air Fryer Clean: Regularly clean your air fryer to prevent any lingering flavors from previous meals. A clean air fryer ensures that your stuffed chicken breasts taste fresh and delicious.
  • Cook in Batches if Necessary: If you’re making multiple stuffed chicken breasts, cook them in batches. Overcrowding the air fryer can lead to uneven cooking and less crispy results.
  • Pair with Dipping Sauces: Consider serving your stuffed chicken breasts with a dipping sauce. A creamy ranch or zesty marinara can add an extra layer of flavor and make the meal more enjoyable.

By following these tips, you’ll be well on your way to mastering stuffed chicken breasts in the air fryer. Each bite will be bursting with flavor, and your family will be asking for seconds!

Breakdown of Time for Stuffed Chicken Breasts in the Air Fryer

Understanding the time required for preparing and cooking stuffed chicken breasts in the air fryer is essential for planning your meal. Here’s a simple breakdown to help you manage your time effectively.

Prep Time

The prep time for stuffed chicken breasts in the air fryer is approximately 15-20 minutes. This includes gathering your ingredients, preparing the chicken, and making the stuffing. Here’s a quick overview of what you’ll do during this time:

  • Rinse and dry the chicken breasts.
  • Slice the chicken to create pockets.
  • Mix the stuffing ingredients in a bowl.
  • Stuff the chicken breasts and secure them if needed.

With a little organization, you can have everything ready to go in no time!

Cooking Time

The cooking time for stuffed chicken breasts in the air fryer is about 18-20 minutes. During this time, the air fryer will cook the chicken evenly, giving it a crispy exterior while keeping the inside juicy. Here’s what to keep in mind:

  • Preheat the air fryer to 375°F before cooking.
  • Cook the stuffed chicken breasts for 18-20 minutes, flipping them halfway through.
  • Always check the internal temperature to ensure it reaches 165°F.

This cooking method is quick and efficient, making it perfect for busy weeknights!

Total Time

In total, you can expect to spend about 35-40 minutes from start to finish when making stuffed chicken breasts in the air fryer. This includes both prep and cooking time. Here’s a quick summary:

  • Prep Time: 15-20 minutes
  • Cooking Time: 18-20 minutes
  • Total Time: 35-40 minutes

This makes stuffed chicken breasts in the air fryer a fantastic option for a delicious meal that doesn’t take all evening to prepare. Enjoy your cooking!

Nutritional Information for Stuffed Chicken Breasts in the Air Fryer

When it comes to enjoying stuffed chicken breasts in the air fryer, knowing the nutritional information can help you make informed choices. This dish is not only delicious but also packed with nutrients. Let’s break down the key nutritional components of this meal.

Calories

Each serving of stuffed chicken breasts in the air fryer contains approximately 350 calories. This makes it a satisfying option for dinner without being overly heavy. The combination of chicken and cheese provides a good balance of energy, making it a great choice for a fulfilling meal.

Protein

One of the standout features of this dish is its high protein content. Each serving offers about 40 grams of protein. Chicken is an excellent source of lean protein, which is essential for muscle repair and growth. This makes stuffed chicken breasts a fantastic option for those looking to increase their protein intake while enjoying a tasty meal.

Sodium

The sodium content in each serving is approximately 600 milligrams. While this is a reasonable amount for a flavorful dish, it’s always a good idea to monitor your sodium intake, especially if you are watching your salt consumption. You can reduce the sodium by using low-sodium cheese or seasoning your chicken with herbs instead of salt.

Overall, stuffed chicken breasts in the air fryer provide a nutritious meal option that is rich in protein and relatively low in calories. By being mindful of the ingredients you choose, you can enjoy a delicious dish that fits well into a balanced diet. Whether you’re cooking for yourself or for family, this meal is sure to please!

FAQs about Stuffed Chicken Breasts in the Air Fryer

Can I use frozen chicken breasts for this recipe?

Yes, you can use frozen chicken breasts for stuffed chicken breasts in the air fryer! However, it’s important to note that you will need to adjust the cooking time. Start by cooking the frozen chicken breasts for about 10-15 minutes longer than the usual cooking time. Make sure to check the internal temperature to ensure it reaches 165°F. To make stuffing easier, consider thawing the chicken breasts in the refrigerator overnight before preparing your dish.

What are the best stuffing ingredients for stuffed chicken breasts?

The best stuffing ingredients for stuffed chicken breasts are those that complement the chicken while adding flavor and texture. Some popular options include:

  • Cheeses: Cream cheese, mozzarella, and feta are great choices.
  • Vegetables: Spinach, sun-dried tomatoes, and artichokes add freshness.
  • Herbs: Fresh herbs like basil, parsley, or Italian seasoning enhance the flavor.
  • Grains: Cooked quinoa or rice can add heartiness to the stuffing.

Feel free to mix and match these ingredients to create a stuffing that suits your taste!

How do I know when the stuffed chicken breasts are done?

The best way to know when your stuffed chicken breasts are done is to use a meat thermometer. Insert the thermometer into the thickest part of the chicken breast. It should read 165°F for safe consumption. Additionally, the chicken should be golden brown on the outside, and the juices should run clear when you cut into it. If you don’t have a thermometer, you can also check for firmness; the chicken should feel firm to the touch.

Can I make stuffed chicken breasts in advance?

Absolutely! You can prepare stuffed chicken breasts in advance. After stuffing the chicken, cover them tightly with plastic wrap or place them in an airtight container. Store them in the refrigerator for up to 24 hours before cooking. This allows the flavors to meld together beautifully. When you’re ready to cook, simply follow the air fryer instructions. If they are cold from the fridge, you may need to add a few extra minutes to the cooking time.

Conclusion on Stuffed Chicken Breasts in the Air Fryer

In conclusion, stuffed chicken breasts in the air fryer are a fantastic way to enjoy a delicious and nutritious meal with minimal effort. This recipe not only highlights the versatility of chicken but also allows for endless creativity with stuffing options. Whether you prefer classic flavors or want to experiment with new ingredients, the air fryer makes it easy to achieve perfectly cooked chicken every time.

By following the steps outlined in this article, you can create a dish that is sure to impress your family and friends. The combination of juicy chicken and flavorful stuffing is a winning recipe for any occasion. Plus, the air fryer ensures that your meal is healthier without sacrificing taste.

Remember to keep the tips and variations in mind as you prepare your stuffed chicken breasts. With a little practice, you’ll master this dish and make it a regular part of your dinner rotation. So, gather your ingredients, fire up the air fryer, and enjoy a delightful meal that brings joy to your table!

Happy cooking, and may your stuffed chicken breasts be as delicious as they are satisfying!

Paul

Stuffed chicken breasts in the air fryer are easy to make.

These Air Fryer Stuffed Chicken Breasts are crispy on the outside, juicy on the inside, and packed with creamy, savory goodness. With a flavorful mix of cream cheese, spinach, sun-dried tomatoes, and herbs inside, this quick air fryer recipe is perfect for an impressive yet easy dinner.
Prep Time 10 minutes
Cook Time 20 minutes
Total Time 30 minutes
Servings: 4 servings
Course: Main Course
Cuisine: American

Ingredients
  

For the Chicken:
  • 4 boneless skinless chicken breasts (5 to 6 ounces each)
  • 1 tablespoon olive oil
  • ¼ teaspoon paprika
  • ¼ teaspoon garlic powder
  • ¼ teaspoon salt
  • ¼ teaspoon black pepper
For the Filling:
  • 4 ounces cream cheese softened
  • 2 tablespoons parmesan cheese
  • 1 clove garlic minced
  • 1 cup fresh spinach finely chopped
  • 3 tablespoons chopped sun-dried tomatoes
  • ½ teaspoon Italian seasoning

Method
 

  1. Preheat the air fryer to 360°F (182°C).
  2. Make the filling: In a medium bowl, combine the cream cheese, parmesan cheese, minced garlic, chopped spinach, sun-dried tomatoes, and Italian seasoning. Mix until well blended.
  3. Prepare the chicken: Slice each chicken breast horizontally to form a pocket (be careful not to slice all the way through).
  4. Stuff the chicken: Divide the filling evenly and stuff it into each chicken breast. Use toothpicks to secure the edges if needed.
  5. Season: Rub each stuffed breast with olive oil, then season both sides with paprika, garlic powder, salt, and black pepper.
  6. Air fry: Place the stuffed chicken breasts in the air fryer basket in a single layer. Cook for 18 to 22 minutes, or until the internal temperature reaches 165°F (74°C).
  7. Rest and serve: Let the chicken rest for a few minutes before slicing or serving.

Notes

  • Room-temperature cream cheese makes mixing much easier and ensures a smooth filling.
  • Fresh vs. frozen spinach: You can use frozen spinach, just make sure to thaw and squeeze out excess moisture with paper towels to avoid a watery filling.
  • Secure well: Toothpicks help keep the filling inside and prevent it from leaking during cooking.
  • Cheese swap: Mozzarella or feta can be substituted for a different flavor twist.

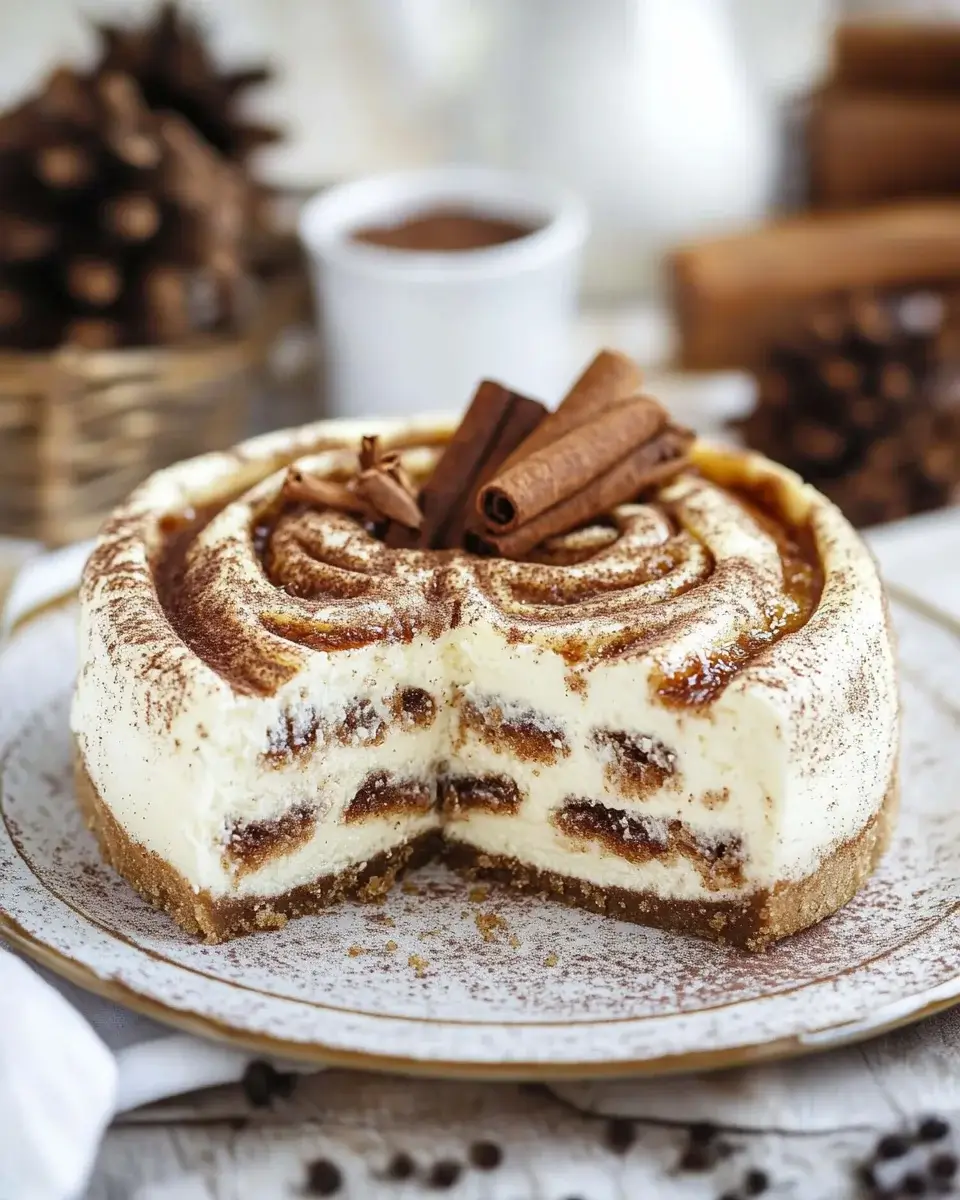
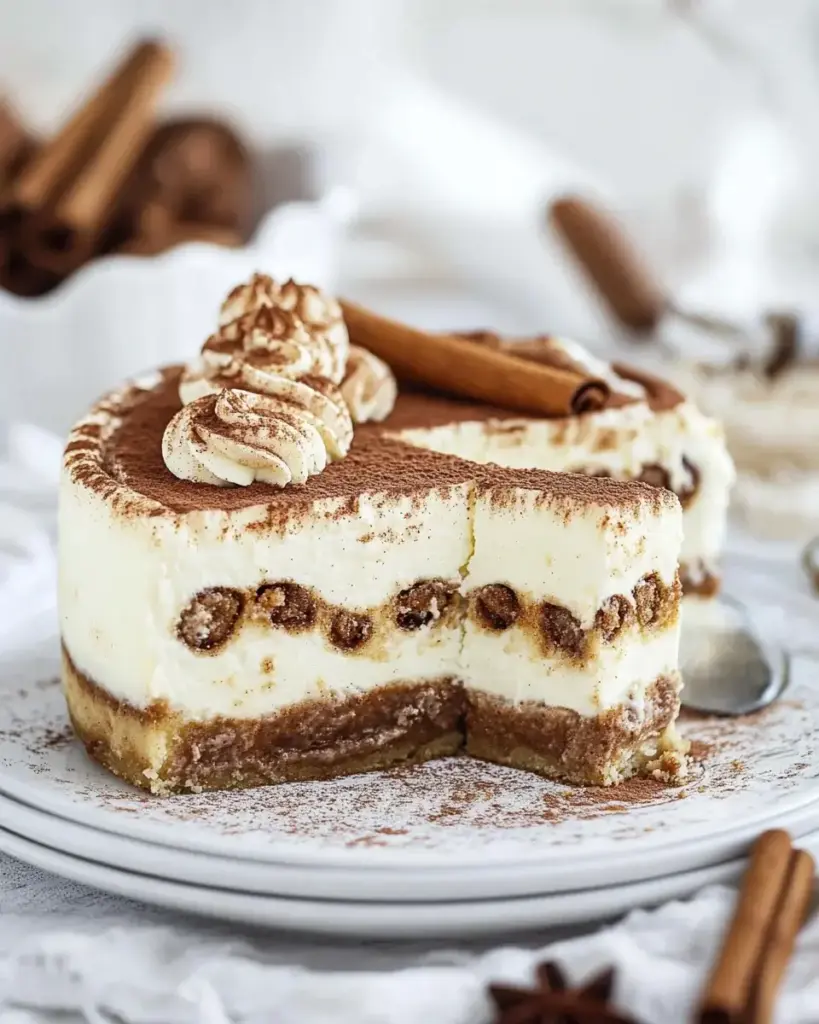
Cinnamon Roll Cheesecake Recipe is a must-try dessert!

Introduction to the Cinnamon Roll Cheesecake Recipe

Cinnamon Roll Cheesecake Recipe is a delightful fusion of creamy cheesecake and warm, spiced cinnamon rolls. This dessert is perfect for any occasion, whether it’s a family gathering, a holiday celebration, or simply a sweet treat for yourself. With its rich flavors and smooth texture, this cheesecake will surely impress your guests and leave them wanting more.

What Makes the Cinnamon Roll Cheesecake Recipe Unique?

What sets this recipe apart is its unique layering of flavors and textures. The buttery graham cracker crust provides a crunchy base, while the creamy cheesecake filling is infused with cinnamon and sugar, reminiscent of classic cinnamon rolls. The addition of whipped cream on top adds a light and airy finish, making each bite a delightful experience.

Cinnamon Roll Cheesecake Recipe means you can make it your own, ensuring it suits your taste preferences perfectly.

In the following sections, we will guide you through the ingredients, preparation steps, and variations of this scrumptious dessert. Get ready to bake a cheesecake that will become a favorite in your household!

Ingredients for the Cinnamon Roll Cheesecake Recipe

Cinnamon Roll Cheesecake Recipe, you will need a variety of ingredients that come together to form a rich and flavorful dessert. Here’s a complete list of what you’ll need:

  • 2 cups graham cracker crumbs
  • 1/2 cup unsalted butter, melted
  • 1/4 cup granulated sugar
  • 4 (8-ounce) packages cream cheese, softened
  • 1 cup granulated sugar
  • 1 teaspoon vanilla extract
  • 4 large eggs
  • 1 cup sour cream
  • 1 teaspoon ground cinnamon
  • 1/2 cup brown sugar
  • 1/4 cup all-purpose flour
  • 1/2 cup chopped pecans (optional)
  • 1/2 cup heavy cream

Each ingredient plays a crucial role in achieving the perfect balance of flavors and textures. The graham cracker crumbs form a sturdy crust, while the cream cheese provides that creamy, dreamy filling. The combination of sugars and spices gives the cheesecake its signature cinnamon roll taste. If you love nuts, adding pecans can enhance the crunch and flavor, but feel free to skip them if you prefer a nut-free version.

Gather these ingredients, and you’ll be well on your way to creating a delightful dessert that everyone will love. Now, let’s move on to the step-by-step preparation of this amazing cheesecake!

Step-by-Step Preparation of the Cinnamon Roll Cheesecake Recipe

Cinnamon Roll Cheesecake Recipe. Follow these simple steps to create a dessert that will wow your family and friends!

Step 1: Preparing the Cinnamon Roll Base

First, let’s get started on the crust. Preheat your oven to 325°F (163°C). While the oven heats up, take a medium bowl and combine the graham cracker crumbs, melted butter, and 1/4 cup of granulated sugar. Mix everything together until it’s well combined. The mixture should resemble wet sand.

Next, press this mixture firmly into the bottom of your greased 9-inch springform pan. Make sure it’s even and compact. This will create a sturdy base for your cheesecake. Bake the crust for about 10 minutes, then remove it from the oven and let it cool while you prepare the filling.

Step 2: Making the Cheesecake Filling

Now, let’s whip up that creamy filling! In a large mixing bowl, beat the softened cream cheese with 1 cup of granulated sugar and the vanilla extract. Use an electric mixer on medium speed until the mixture is smooth and creamy. This step is crucial for a lump-free cheesecake.

Once it’s smooth, add the eggs one at a time. Mix well after each addition to ensure everything is fully incorporated. After the eggs, stir in the sour cream until it’s blended in nicely. In a separate bowl, mix together the ground cinnamon, brown sugar, and flour. Gradually add this mixture to the cream cheese batter, mixing until just combined. Be careful not to overmix!

Step 3: Assembling the Cinnamon Roll Cheesecake

With the crust cooled and the filling ready, it’s time to assemble your cheesecake. Pour half of the cheesecake batter over the cooled crust. If you’re using chopped pecans, sprinkle them evenly over this layer. Then, pour the remaining cheesecake batter on top, smoothing it out with a spatula.

This layering creates a delightful texture and flavor combination. The pecans add a nice crunch, but if you prefer a nut-free version, feel free to skip this step!

Step 4: Baking the Cinnamon Roll Cheesecake

Now, let’s bake this beauty! Place the springform pan into a larger baking pan. Fill the outer pan with hot water until it reaches halfway up the sides of the springform pan. This water bath helps the cheesecake bake evenly and prevents cracking.

Bake the cheesecake for about 1 hour. You’ll know it’s done when the center is set but still slightly jiggly. Once baked, turn off the oven and crack the door open. Allow the cheesecake to cool in the oven for 1 hour. This gradual cooling helps prevent cracks on the surface.

Step 5: Cooling and Serving the Cinnamon Roll Cheesecake

After the hour is up, remove the cheesecake from the oven and let it cool to room temperature. Once cooled, refrigerate it for at least 4 hours, or overnight if you can wait! This chilling time allows the flavors to meld beautifully.

Cinnamon Roll Cheesecake Recipe is ready to be enjoyed!

Variations of the Cinnamon Roll Cheesecake Recipe

Cinnamon Roll Cheesecake Recipe is not only delicious but also versatile. You can easily adapt it to fit different dietary needs or personal preferences. Here are two popular variations that you can try!

Gluten-Free Cinnamon Roll Cheesecake Recipe

If you or someone you know is gluten-sensitive, you can still enjoy this delightful dessert! To make a gluten-free version, simply substitute the graham cracker crumbs with gluten-free graham cracker crumbs or almond flour. Make sure to check the labels to ensure they are certified gluten-free.

For the filling, all the other ingredients are naturally gluten-free, so you can follow the original recipe without any changes. This way, you can savor the same creamy and spiced flavors without worrying about gluten. Your friends and family will love this gluten-free treat just as much as the classic version!

Vegan Cinnamon Roll Cheesecake Recipe

Cinnamon Roll Cheesecake Recipe. Start by replacing the cream cheese with a vegan cream cheese alternative. There are many brands available that offer a similar texture and taste.

Instead of eggs, use flax eggs or aquafaba (the liquid from canned chickpeas) to help bind the ingredients. For the sour cream, you can use a dairy-free yogurt or a homemade cashew cream. The rest of the ingredients can remain the same, ensuring you still get that delicious cinnamon flavor.

Cinnamon Roll Cheesecake Recipe a favorite!

Cooking Note for the Cinnamon Roll Cheesecake Recipe

Cinnamon Roll Cheesecake Recipe, there are a few important cooking notes to keep in mind. These tips will help ensure that your cheesecake turns out perfectly every time.

First, always use room temperature ingredients. This includes the cream cheese, eggs, and sour cream. Room temperature ingredients blend more easily, resulting in a smoother batter. If you forget to take them out ahead of time, you can place the cream cheese in a microwave for about 10-15 seconds to soften it slightly.

Next, be gentle when mixing the batter. Overmixing can introduce too much air, which may cause the cheesecake to crack during baking. Mix until just combined, especially after adding the eggs and dry ingredients.

Additionally, the water bath is crucial for even baking. It helps maintain a moist environment in the oven, preventing the cheesecake from drying out. Make sure the water is hot when you pour it into the outer pan, and check that it doesn’t splash into the cheesecake batter.

Lastly, patience is key! Allow the cheesecake to cool gradually in the oven after baking. This step helps prevent cracks and ensures a creamy texture. Once it’s cooled to room temperature, refrigerate it for the recommended time. The longer it chills, the better the flavors will meld together.

Cinnamon Roll Cheesecake Recipe that will impress everyone at your next gathering!

Serving Suggestions for the Cinnamon Roll Cheesecake Recipe

Cinnamon Roll Cheesecake Recipe is ready, it’s time to think about how to serve it! Presentation can elevate your dessert experience, making it even more enjoyable for you and your guests. Here are some delightful serving suggestions to consider:

  • Garnish with Whipped Cream: After spreading whipped cream on top, consider adding a sprinkle of cinnamon or a drizzle of caramel sauce. This adds a beautiful touch and enhances the flavor.
  • Fresh Fruit: Serve slices of cheesecake with fresh fruit like strawberries, raspberries, or blueberries. The tartness of the fruit complements the sweetness of the cheesecake perfectly.
  • Chocolate Drizzle: For chocolate lovers, a drizzle of melted chocolate or chocolate sauce can add a rich flavor. It pairs wonderfully with the cinnamon and cream cheese.
  • Ice Cream: A scoop of vanilla or cinnamon ice cream on the side can make your dessert even more indulgent. The cold ice cream contrasts nicely with the creamy cheesecake.
  • Nut Topping: If you used pecans in your cheesecake, consider toasting some extra nuts to sprinkle on top. This adds a crunchy texture and enhances the nutty flavor.
  • Serve with Coffee: Pairing your cheesecake with a cup of coffee or a latte can create a delightful dessert experience. The warmth of the coffee complements the flavors of the cheesecake beautifully.

Cinnamon Roll Cheesecake Recipe but also add layers of flavor that will impress your guests. Feel free to mix and match these ideas to create your perfect dessert presentation!

Tips for Perfecting Your Cinnamon Roll Cheesecake Recipe

Cinnamon Roll Cheesecake Recipe can be a delightful journey. To ensure your cheesecake turns out creamy, flavorful, and visually appealing, here are some essential tips to keep in mind:

  • Use Quality Ingredients: The flavor of your cheesecake greatly depends on the quality of your ingredients. Opt for high-quality cream cheese and fresh eggs for the best results. This will enhance the overall taste and texture of your cheesecake.
  • Don’t Skip the Water Bath: As mentioned earlier, using a water bath is crucial. It helps maintain moisture in the oven, preventing cracks. Make sure the water is hot when you pour it into the outer pan for optimal results.
  • Check for Doneness: Keep an eye on your cheesecake as it bakes. The center should be set but still slightly jiggly. Overbaking can lead to a dry texture, so it’s better to err on the side of caution.
  • Cool Gradually: Allow your cheesecake to cool slowly in the oven with the door cracked. This gradual cooling process helps prevent cracks and ensures a smooth surface.
  • Chill Overnight: For the best flavor and texture, refrigerate your cheesecake overnight. This allows the flavors to meld beautifully, resulting in a richer taste.
  • Experiment with Flavors: Don’t hesitate to get creative! You can add different spices, such as nutmeg or ginger, to the batter. You can also mix in chocolate chips or fruit for a unique twist.
  • Slice with Care: When it’s time to serve, use a sharp knife dipped in hot water to slice the cheesecake. This will give you clean, beautiful slices without damaging the edges.
  • Store Properly: If you have leftovers, store them in an airtight container in the refrigerator. This will keep your cheesecake fresh for several days.

Cinnamon Roll Cheesecake Recipe. Each step you take will bring you closer to creating a dessert that’s not only delicious but also visually stunning. Happy baking!

Breakdown of Time for the Cinnamon Roll Cheesecake Recipe

Cinnamon Roll Cheesecake Recipe is essential for planning your baking session. Here’s a detailed breakdown of the time you’ll need to create this delicious dessert.

Prep Time

The prep time for this cheesecake is approximately 30 minutes. This includes gathering your ingredients, preparing the crust, and mixing the cheesecake filling. Make sure to have everything ready before you start, as it will make the process smoother and more enjoyable.

Cooking Time

Once you’ve prepped your cheesecake, the cooking time is about 1 hour. During this time, the cheesecake will bake in the oven. Remember to keep an eye on it to ensure it doesn’t overbake. After baking, you’ll also need to allow the cheesecake to cool in the oven for an additional hour.

Total Time

Cinnamon Roll Cheesecake Recipe. This includes the prep time, cooking time, and the minimum chilling time of 4 hours in the refrigerator. For the best results, consider chilling it overnight to enhance the flavors.

By keeping track of these timeframes, you can ensure that your cheesecake turns out perfectly every time. Happy baking!

Nutritional Information for the Cinnamon Roll Cheesecake Recipe

Cinnamon Roll Cheesecake Recipe is important, especially if you’re mindful of your dietary choices. Here’s a breakdown of the key nutritional information per serving, which is based on a serving size of 1 slice (1/12 of the cheesecake).

Calories

Each slice of this delicious cheesecake contains approximately 350 calories. This makes it a rich dessert, perfect for special occasions or when you want to treat yourself. The combination of cream cheese, sugar, and butter contributes to the calorie count, but the flavors are well worth it!

Protein

In terms of protein, each serving provides about 6 grams. The cream cheese and eggs are the primary sources of protein in this recipe. While it may not be a high-protein dessert, it does offer a satisfying amount that can help keep you feeling full.

Sodium

Each slice contains around 300 milligrams of sodium. This amount is fairly standard for desserts, especially those that include cream cheese and butter. If you’re watching your sodium intake, consider enjoying this cheesecake in moderation.

Cinnamon Roll Cheesecake Recipe is a delightful treat that balances flavor and nutrition. While it’s indulgent, it can be enjoyed as part of a balanced diet. Remember to savor each bite, and don’t hesitate to share this delicious dessert with friends and family!

FAQs about the Cinnamon Roll Cheesecake Recipe

Can I make the Cinnamon Roll Cheesecake Recipe ahead of time?

Cinnamon Roll Cheesecake Recipe is perfect for making ahead of time. In fact, it tastes even better after chilling overnight. This allows the flavors to meld beautifully. You can prepare it a day or two in advance, making it a great option for parties or gatherings. Just remember to store it in the refrigerator until you’re ready to serve!

How do I store leftovers of the Cinnamon Roll Cheesecake Recipe?

Cinnamon Roll Cheesecake Recipe, place the cheesecake in an airtight container. If you don’t have one, you can cover the cheesecake with plastic wrap or aluminum foil. Keep it in the refrigerator, where it will stay fresh for up to 5 days. Just make sure to slice it carefully to avoid damaging the edges!

Can I use store-bought cinnamon rolls for the Cinnamon Roll Cheesecake Recipe?

Cinnamon Roll Cheesecake Recipe. Simply chop the cinnamon rolls into small pieces and layer them in the crust or mix them into the cheesecake batter. This will add a delightful cinnamon flavor and a unique texture to your cheesecake. Just be mindful of the added sweetness from the rolls!

What toppings can I add to the Cinnamon Roll Cheesecake Recipe?

Cinnamon Roll Cheesecake Recipe! Here are a few ideas:

  • Whipped Cream: A classic topping that adds a light and fluffy texture.
  • Cinnamon Sugar: A sprinkle of cinnamon sugar on top enhances the cinnamon flavor.
  • Caramel Sauce: Drizzling caramel sauce adds a rich sweetness that pairs perfectly with the cheesecake.
  • Chopped Nuts: Toasted pecans or walnuts can add a nice crunch and flavor.
  • Fresh Fruit: Slices of strawberries or blueberries can add a refreshing touch.

Feel free to mix and match these toppings to create your perfect dessert presentation. The options are endless!

Conclusion on the Cinnamon Roll Cheesecake Recipe

Cinnamon Roll Cheesecake Recipe is a delightful dessert that beautifully combines the rich flavors of cheesecake with the warm, comforting essence of cinnamon rolls. This recipe is not only easy to follow but also allows for creativity and personalization, making it a perfect choice for any occasion. Whether you’re celebrating a special event or simply treating yourself, this cheesecake is sure to impress.

By following the steps outlined in this article, you can create a stunning dessert that will leave your guests raving. Remember to take your time during the preparation and baking process, as patience is key to achieving that perfect creamy texture. With the right ingredients and a little love, your cheesecake will turn out delicious every time.

Don’t forget to explore the various variations and serving suggestions to make this recipe your own. From gluten-free options to vegan adaptations, there’s a version for everyone to enjoy. So gather your ingredients, roll up your sleeves, and get ready to bake a cheesecake that will become a cherished favorite in your home.

Cinnamon Roll Cheesecake Recipe. Happy baking, and may each slice bring joy and sweetness to your table!

Paul

Cinnamon Roll Cheesecake Recipe is a must-try dessert!

This Cinnamon Roll Cheesecake is a dreamy mashup of two beloved desserts—swirls of buttery cinnamon sugar layered between rich, creamy cheesecake on a spiced cookie crust, all topped with a silky cream cheese frosting. Every bite is indulgent, cozy, and sure to wow at any gathering or holiday table.
Prep Time 30 minutes
Servings: 12 -14 servings
Course: Dessert
Cuisine: American

Ingredients
  

For the Crust:
  • cups vanilla wafer crumbs or graham cracker crumbs
  • ¼ cup sugar
  • 1 teaspoon ground cinnamon
  • 5 tablespoons melted butter
For the Cheesecake Filling:
  • 24 oz cream cheese room temperature
  • 1 cup sugar
  • 3 tablespoons all-purpose flour
  • 1 cup sour cream
  • 2 teaspoons vanilla extract
  • 2 teaspoons ground cinnamon
  • 4 large eggs room temperature
For the Cinnamon Filling:
  • cups packed light brown sugar
  • 5 tablespoons ground cinnamon
  • ¾ cup all-purpose flour
  • ½ cup melted unsalted butter
For the Frosting:
  • 2 oz cream cheese room temperature
  • 6 tablespoons butter room temperature
  • ½ teaspoon vanilla extract
  • cups powdered sugar
  • 4 to 5 tablespoons heavy cream

Method
 

  1. Preheat the oven to 325°F (163°C). Line the bottom of a 9-inch springform pan with parchment paper and grease the sides.
  2. Mix the crust ingredients until well combined. Press firmly into the bottom and slightly up the sides of the pan. Bake for 10 minutes, then cool. Wrap the pan in foil to prepare for a water bath.
  3. Lower the oven temperature to 300°F (148°C).
  4. In a large bowl, beat the cream cheese, sugar, and flour on low speed until smooth. Add sour cream, vanilla, and cinnamon; mix to combine. Beat in eggs one at a time, mixing on low speed.
  5. In a separate bowl, make the cinnamon filling by combining brown sugar, cinnamon, and flour. Stir in melted butter until a moist mixture forms.
  6. Assemble the cheesecake by sprinkling ¼ of the cinnamon filling over the crust, followed by ⅓ of the cheesecake batter. Repeat the layers until you end with cinnamon on top.
  7. Place the cheesecake pan into a larger pan. Fill the outer pan with hot water halfway up the sides for a water bath. Bake for 1 hour 20 minutes, until the center jiggles slightly.
  8. Turn off the oven and leave the cheesecake inside with the door closed for 30 minutes. Then crack the oven door and leave it for another 30 minutes before removing to cool completely. Refrigerate for at least 4–5 hours or overnight.
  9. For the frosting, beat cream cheese and butter until smooth. Add vanilla and powdered sugar, then beat in heavy cream until the mixture is smooth and pipeable.
  10. Pipe or spread the frosting on top of the chilled cheesecake in a swirl pattern before serving.

Notes

  • Use full-fat cream cheese and sour cream for best texture.
  • Let all dairy ingredients come to room temperature before mixing to avoid lumps.
  • You can freeze the cheesecake (without frosting) for up to 2 months.
  • For a shortcut, use store-bought cinnamon swirl filling, but the homemade version is hard to beat.

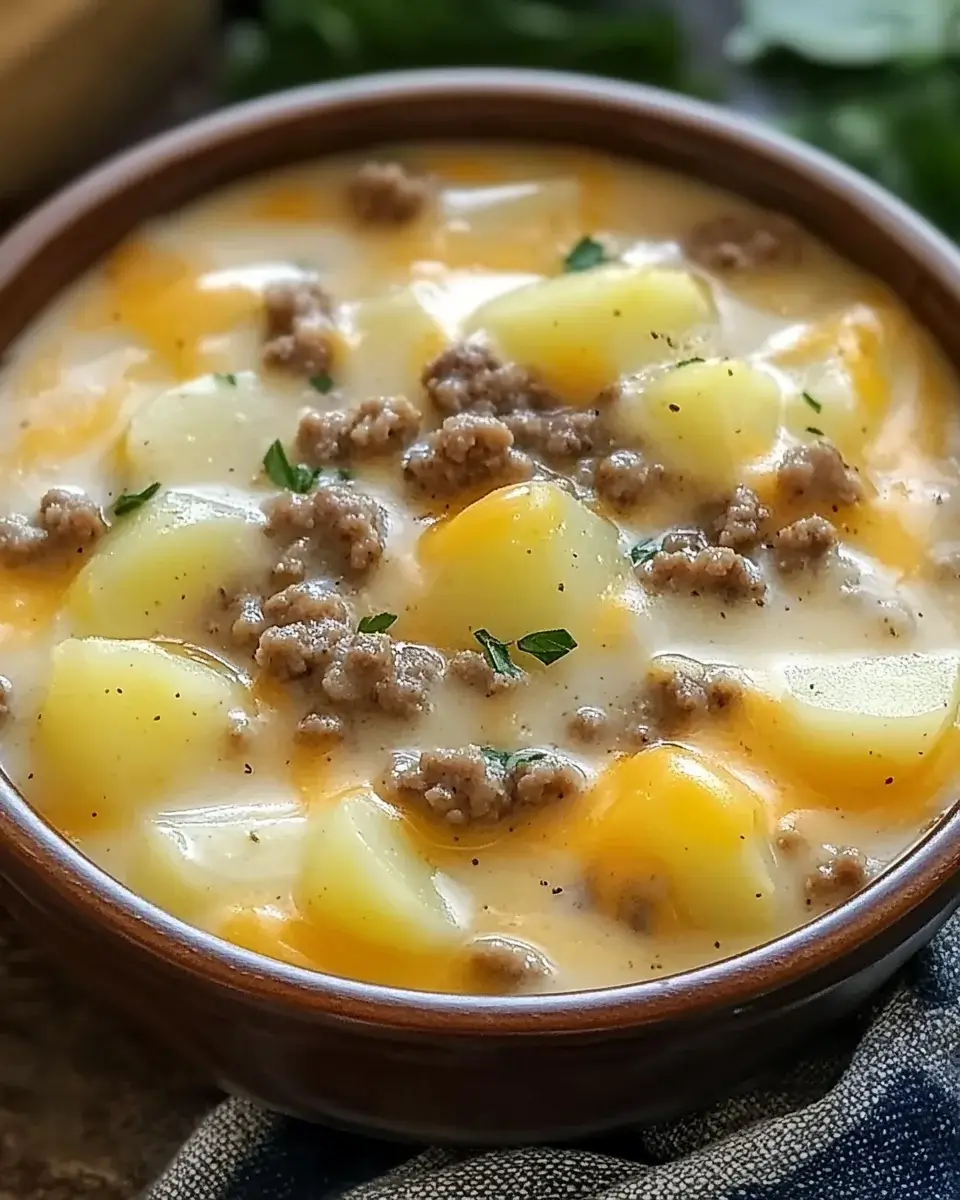
Cheesy Hamburger Potato Soup warms your soul and heart.

What Makes Cheesy Hamburger Potato Soup Special?

Cheesy Hamburger Potato Soup is a delightful dish that brings warmth and comfort to any table. This soup combines the rich flavors of ground beef with creamy cheddar cheese and hearty potatoes. The result is a satisfying meal that is both filling and delicious. What sets this soup apart is its simplicity and the ability to customize it to your taste. Whether you prefer a little spice or extra veggies, this recipe can easily adapt to your preferences.

The Comfort of Homemade Soup

There’s something truly special about homemade soup. It evokes feelings of nostalgia and warmth, reminding us of cozy family dinners. Cheesy Hamburger Potato Soup is perfect for chilly evenings or when you need a quick, comforting meal. The aroma of sautéing onions and garlic fills the kitchen, creating an inviting atmosphere. Plus, making this soup from scratch allows you to control the ingredients, ensuring a wholesome and tasty dish. So, gather your loved ones and enjoy a bowl of this comforting soup that warms both the heart and the soul.

Ingredients for Cheesy Hamburger Potato Soup

To create a delicious pot of Cheesy Hamburger Potato Soup, you’ll need a few simple ingredients. Each component plays a vital role in building the rich flavors and creamy texture that make this soup so special. Here’s what you’ll need:

  • 2 tablespoons olive oil: This helps to sauté the vegetables and adds a nice flavor.
  • 1 pound ground beef: The star of the soup, providing protein and a hearty taste.
  • 1 medium onion, diced: Adds sweetness and depth to the flavor.
  • 2 cloves garlic, minced: Enhances the aroma and taste of the soup.
  • 4 cups potatoes, peeled and diced: These make the soup filling and creamy.
  • 4 cups beef broth: The base of the soup, adding richness and flavor.
  • 1 cup milk: This creates a creamy texture that balances the soup.
  • 1 cup shredded cheddar cheese: The key ingredient that gives the soup its cheesy goodness.
  • 1 teaspoon salt: Enhances all the flavors in the soup.
  • 1/2 teaspoon black pepper: Adds a touch of spice.
  • 1 teaspoon dried thyme: Provides an earthy flavor that complements the beef.
  • 1/2 teaspoon paprika: Adds a hint of smokiness and color.
  • 1 cup frozen corn (optional): For added sweetness and texture.
  • Chopped green onions for garnish (optional): Adds a fresh touch when serving.

With these ingredients on hand, you’re ready to whip up a comforting bowl of Cheesy Hamburger Potato Soup. Each bite will be a delightful mix of flavors and textures, perfect for any occasion!

Step-by-Step Preparation of Cheesy Hamburger Potato Soup

Step 1: Brown the Ground Beef

To start, heat 2 tablespoons of olive oil in a large pot over medium heat. Once the oil is hot, add 1 pound of ground beef. Cook the beef for about 5-7 minutes, breaking it apart with a spoon as it cooks. You want it to be nicely browned. If there’s excess fat, drain it off to keep the soup from being greasy. This step is crucial as it builds the foundation of flavor for your Cheesy Hamburger Potato Soup.

Step 2: Sauté the Vegetables

Next, add 1 medium diced onion and 2 cloves of minced garlic to the pot. Sauté these for about 3-4 minutes. You’ll know they’re ready when the onion turns translucent and the garlic becomes fragrant. This step adds a wonderful aroma and depth to your soup, making it even more inviting.

Step 3: Add the Potatoes and Broth

Now it’s time to add the heartiness! Stir in 4 cups of peeled and diced potatoes along with 4 cups of beef broth. Season with 1 teaspoon of salt, 1/2 teaspoon of black pepper, 1 teaspoon of dried thyme, and 1/2 teaspoon of paprika. Bring the mixture to a boil. Once boiling, reduce the heat and let it simmer. This will take about 15-20 minutes, or until the potatoes are tender. The broth will absorb all the flavors, making your soup rich and delicious.

Step 4: Simmer the Soup

During the simmering process, keep an eye on the potatoes. You want them soft enough to easily mash with a fork. This step is essential for achieving that creamy texture in your Cheesy Hamburger Potato Soup. Stir occasionally to prevent anything from sticking to the bottom of the pot.

Step 5: Stir in the Cheese

Once the potatoes are tender, it’s time to make your soup creamy! Add 1 cup of milk and 1 cup of shredded cheddar cheese to the pot. Stir well until the cheese melts completely, creating a luscious, cheesy base. If you’re using frozen corn, now is the time to add 1 cup of it. Heat everything through for an additional 5 minutes. This will enhance the flavor and add a delightful texture to your soup.

Step 6: Final Seasoning and Serve

Finally, taste your soup and adjust the seasoning if needed. You might want to add a pinch more salt or pepper, depending on your preference. Once you’re satisfied with the flavor, it’s time to serve! Ladle the hot soup into bowls and garnish with chopped green onions if desired. Enjoy your warm, comforting bowl of Cheesy Hamburger Potato Soup!

Variations of Cheesy Hamburger Potato Soup

Adding Different Cheeses

One of the best things about Cheesy Hamburger Potato Soup is its versatility. While cheddar cheese is the star, you can easily switch things up by adding different types of cheese. For a sharper flavor, try using aged cheddar or gouda. If you prefer a creamier texture, consider adding cream cheese or even mozzarella. Mixing cheeses can create a delightful depth of flavor. Just remember to adjust the amount based on how cheesy you want your soup to be!

Incorporating Vegetables

Want to boost the nutrition of your Cheesy Hamburger Potato Soup? Incorporating more vegetables is a fantastic way to do it! You can add diced carrots, celery, or bell peppers when you sauté the onions and garlic. Spinach or kale can be stirred in during the last few minutes of cooking for added color and nutrients. Not only do these veggies enhance the flavor, but they also make the soup even heartier and more satisfying.

Making it Spicy

If you enjoy a little heat, consider making your Cheesy Hamburger Potato Soup spicy! You can add a teaspoon of red pepper flakes or diced jalapeños when cooking the ground beef. For an extra kick, try a splash of hot sauce or a sprinkle of cayenne pepper. These additions will give your soup a delightful warmth that pairs perfectly with the creamy cheese. Just be sure to taste as you go, so you can find the right level of spice for your palate!

Cooking Note for Cheesy Hamburger Potato Soup

When preparing Cheesy Hamburger Potato Soup, a few cooking notes can help ensure your dish turns out perfectly every time. First, always use a large pot to give your ingredients enough space to cook evenly. This prevents overcrowding, which can lead to uneven cooking.

Next, consider the type of potatoes you use. Russet potatoes are a popular choice due to their starchy texture, which helps create a creamy soup. However, Yukon Gold potatoes also work well, offering a buttery flavor. Avoid waxy potatoes like red potatoes, as they may not break down as nicely in the soup.

Additionally, be mindful of the cooking time. Overcooking the potatoes can lead to a mushy texture, while undercooking them can leave them too firm. Aim for a tender consistency that still holds its shape. Stirring occasionally during the simmering process can help achieve this balance.

Lastly, if you want to make your soup even creamier, consider blending a portion of it. Using an immersion blender, blend about half of the soup until smooth, then stir it back into the pot. This technique adds a velvety texture without losing the chunky goodness of the potatoes and beef.

By keeping these cooking notes in mind, you’ll create a delicious and satisfying Cheesy Hamburger Potato Soup that your family will love!

Serving Suggestions for Cheesy Hamburger Potato Soup

Best Accompaniments

When it comes to serving Cheesy Hamburger Potato Soup, the right accompaniments can elevate your meal. Here are some delightful options to consider:

  • Crusty Bread: A warm, crusty loaf of bread is perfect for dipping into the creamy soup. Consider sourdough or a baguette for a satisfying crunch.
  • Salad: A fresh garden salad adds a nice contrast to the richness of the soup. Toss together some mixed greens, cherry tomatoes, and a light vinaigrette for a refreshing side.
  • Grilled Cheese Sandwich: For a classic pairing, serve your soup with a gooey grilled cheese sandwich. The combination of melted cheese and hearty soup is simply irresistible.
  • Pickles or Relish: A side of pickles or a dollop of relish can add a tangy flavor that complements the creamy soup beautifully.
  • Chips: For a bit of crunch, serve your soup with tortilla chips or potato chips. They add a fun texture and are great for scooping!

These accompaniments not only enhance the meal but also make it more enjoyable. Feel free to mix and match based on your preferences and what you have on hand!

Ideal Serving Temperature

Serving temperature plays a crucial role in enjoying your Cheesy Hamburger Potato Soup. Ideally, the soup should be served hot, around 160°F to 180°F (70°C to 82°C). This temperature ensures that the cheese is melted and the flavors are at their peak.

To maintain the heat, consider using warmed bowls. You can do this by rinsing them with hot water before ladling in the soup. If you need to keep the soup warm for a longer period, place it on low heat on the stove, stirring occasionally. Just be careful not to let it boil again, as this can affect the creamy texture.

When serving, allow your guests to add their favorite garnishes, like chopped green onions or extra cheese, to personalize their bowls. This interactive element makes the meal even more enjoyable!

Tips for Perfecting Cheesy Hamburger Potato Soup

Choosing the Right Potatoes

When it comes to making Cheesy Hamburger Potato Soup, the type of potatoes you choose can make a big difference. For the best results, opt for starchy potatoes like Russets. They break down easily during cooking, creating a creamy texture that blends beautifully with the soup. Yukon Gold potatoes are another excellent choice, offering a buttery flavor that enhances the overall taste.

Avoid using waxy potatoes, such as red potatoes, as they tend to hold their shape and may not create the desired creamy consistency. If you want to mix things up, consider using a combination of different potatoes for added flavor and texture. Just remember to cut them into uniform pieces to ensure even cooking!

Storing Leftovers

Leftover Cheesy Hamburger Potato Soup can be a delightful treat for the next day! To store it properly, let the soup cool to room temperature before transferring it to an airtight container. This helps prevent condensation, which can make the soup watery. Store the container in the refrigerator, where it will keep well for up to 3-4 days.

If you want to keep the soup for a longer period, consider freezing it. Pour the cooled soup into freezer-safe containers, leaving some space at the top for expansion. It can last in the freezer for up to 3 months. When you’re ready to enjoy it again, simply thaw it in the refrigerator overnight before reheating.

Reheating Tips

Reheating your Cheesy Hamburger Potato Soup is easy, but there are a few tips to keep in mind for the best results. If you stored the soup in the refrigerator, pour it into a pot and heat it over medium-low heat. Stir occasionally to ensure even heating and prevent sticking. If the soup seems too thick, add a splash of milk or broth to reach your desired consistency.

For frozen soup, it’s best to thaw it in the refrigerator overnight. Once thawed, follow the same reheating instructions. If you’re in a hurry, you can also reheat the soup in the microwave. Just be sure to use a microwave-safe bowl and heat it in short intervals, stirring in between to avoid hot spots.

By following these tips, you can enjoy your Cheesy Hamburger Potato Soup at its best, whether it’s fresh or reheated!

Breakdown of Time for Cheesy Hamburger Potato Soup

Prep Time

Preparing Cheesy Hamburger Potato Soup is quick and easy! The prep time typically takes about 15-20 minutes. During this time, you’ll gather all your ingredients, dice the onion, mince the garlic, and peel and chop the potatoes. Having everything ready before you start cooking makes the process smoother and more enjoyable.

Cooking Time

The cooking time for this delicious soup is approximately 30-35 minutes. This includes browning the ground beef, sautéing the vegetables, and simmering the potatoes in the broth. The key is to let the soup simmer long enough for the flavors to meld together and for the potatoes to become tender. Stirring occasionally during this time ensures even cooking.

Total Time

In total, you can expect to spend about 45-55 minutes from start to finish when making Cheesy Hamburger Potato Soup. This includes both prep and cooking time. It’s a perfect option for a weeknight dinner when you want something hearty and satisfying without spending hours in the kitchen. Plus, the delightful aroma that fills your home while it cooks is an added bonus!

Nutritional Information for Cheesy Hamburger Potato Soup

Calories

When it comes to enjoying a hearty bowl of Cheesy Hamburger Potato Soup, understanding its caloric content is essential. Each serving contains approximately 320 calories. This makes it a satisfying meal option without being overly heavy. The combination of ground beef, potatoes, and cheese provides a good balance of energy, making it perfect for a filling lunch or dinner.

Protein

Protein is a vital nutrient, and Cheesy Hamburger Potato Soup delivers! Each serving offers around 20 grams of protein. The ground beef is the primary source of this protein, contributing to muscle repair and overall health. This makes the soup not only delicious but also a great choice for those looking to increase their protein intake in a comforting way.

Sodium

Sodium content is another important factor to consider. Each serving of Cheesy Hamburger Potato Soup contains about 800 milligrams of sodium. While this adds flavor, it’s essential to be mindful of your overall sodium intake, especially if you are watching your salt consumption. You can reduce the sodium level by using low-sodium beef broth or adjusting the amount of added salt to suit your dietary needs.

FAQs about Cheesy Hamburger Potato Soup

Can I make Cheesy Hamburger Potato Soup in advance?

Absolutely! Making Cheesy Hamburger Potato Soup in advance is a great idea. In fact, the flavors often deepen and improve after sitting for a day. To prepare it ahead of time, simply follow the recipe as usual, then let the soup cool completely before storing it in an airtight container. You can keep it in the refrigerator for up to 3-4 days. When you’re ready to enjoy it, just reheat on the stove or in the microwave until hot. This makes it a perfect meal prep option for busy weeknights!

What can I substitute for ground beef?

If you’re looking for alternatives to ground beef, there are plenty of options! You can use ground turkey or chicken for a leaner version of the soup. These meats will still provide a hearty flavor while reducing the fat content. For a vegetarian option, consider using lentils or black beans. They add protein and texture without the meat. You can also use plant-based ground meat substitutes available in stores. Just remember to adjust the cooking time as needed, especially for lentils, which may require longer to soften.

Is Cheesy Hamburger Potato Soup gluten-free?

Yes, Cheesy Hamburger Potato Soup can easily be made gluten-free! The main ingredients in the recipe, such as potatoes, beef, and cheese, are naturally gluten-free. However, be cautious with the beef broth, as some brands may contain gluten. Always check the label to ensure it’s gluten-free. If you’re making the soup from scratch, you can use homemade beef broth to guarantee it’s safe for those with gluten sensitivities. Enjoy this comforting soup without worry!

How can I make Cheesy Hamburger Potato Soup healthier?

Making Cheesy Hamburger Potato Soup healthier is simple with a few adjustments. First, consider using lean ground beef or substituting it with ground turkey or chicken. You can also increase the vegetable content by adding more diced veggies like carrots, celery, or spinach. Using low-fat milk or a dairy-free alternative can reduce calories and fat. Additionally, opt for low-sodium beef broth to cut down on sodium levels. These small changes can make your soup lighter while still keeping it delicious and satisfying!

Conclusion on Cheesy Hamburger Potato Soup

In conclusion, Cheesy Hamburger Potato Soup is a delightful dish that combines comfort and flavor in every bowl. Its creamy texture, hearty ingredients, and rich taste make it a favorite for families and friends alike. Whether you’re enjoying it on a chilly evening or serving it at a gathering, this soup is sure to please everyone at the table.

With its simple preparation and versatile ingredients, you can easily customize the recipe to suit your taste. From adding different cheeses to incorporating more vegetables or even making it spicy, the possibilities are endless. Plus, the nutritional benefits, including protein and essential vitamins, make it a wholesome choice for any meal.

So, gather your ingredients, follow the steps, and create a pot of this comforting Cheesy Hamburger Potato Soup. Your loved ones will appreciate the effort, and you’ll enjoy the warm, satisfying flavors that come with each spoonful. Don’t forget to share your variations and tips with others, as this dish is meant to be enjoyed and celebrated together!

Happy cooking, and may your kitchen be filled with the delightful aroma of Cheesy Hamburger Potato Soup!

Paul

Cheesy Hamburger Potato Soup warms your soul and heart.

This Cheesy Hamburger Potato Soup is the ultimate bowl of cozy comfort! Loaded with hearty ground beef, tender potatoes, creamy broth, and melty cheddar cheese, it’s a rich and satisfying one-pot meal perfect for chilly nights. Quick to make, ultra-filling, and endlessly customizable, this soup is everything comfort food should be.
Prep Time 10 minutes
Cook Time 30 minutes
Total Time 40 minutes
Servings: 6 servings
Course: Soup
Cuisine: American Comfort Food

Ingredients
  

  • 1 pound ground beef
  • 1 small onion diced
  • 3 cloves garlic minced
  • 4 cups potatoes peeled and diced
  • 4 cups chicken broth
  • 2 cups shredded cheddar cheese
  • 1 cup milk
  • 1 cup heavy cream
  • 1 tablespoon olive oil
  • Salt and pepper to taste

Method
 

  1. In a large soup pot, heat olive oil over medium heat. Add diced onion and minced garlic. Cook for 3 to 4 minutes until softened and fragrant.
  2. Add ground beef and cook until browned, breaking it into crumbles as it cooks. Drain excess fat.
  3. Stir in diced potatoes and chicken broth. Bring to a boil, then reduce heat and simmer for 15 to 20 minutes, or until the potatoes are fork-tender.
  4. Pour in the milk and heavy cream. Stir gently and allow the mixture to heat through without bringing it to a boil.
  5. Gradually add shredded cheddar cheese while stirring continuously until melted and the soup is smooth and creamy.
  6. Season with salt and pepper to taste. Let the soup simmer for another 5 to 10 minutes to allow flavors to meld.
  7. Serve hot, garnished with extra cheese, crispy bacon, or green onions if desired.

Notes

  • For a thicker soup, mash a few of the potatoes before adding the milk and cheese.
  • Freshly shredded cheese melts more smoothly than pre-shredded varieties.
  • Swap the potatoes with cauliflower for a lower-carb version.
  • Store leftovers in the fridge for up to 3 days—reheat gently on the stove.


Crispy Honey Garlic Salmon Recipe is a must-try dish!

Crispy Honey Garlic Salmon Recipe is here to impress your taste buds. This dish combines the rich flavors of honey and garlic with the tender, flaky texture of salmon. It’s not just tasty; it’s also quick to prepare, making it perfect for busy weeknights or special occasions.

What Makes This Recipe Special?

What sets this recipe apart is its perfect balance of sweet and savory. The honey caramelizes beautifully in the oven, creating a crispy glaze that enhances the salmon’s natural flavors. Plus, the addition of garlic and ginger adds a delightful kick. This dish is not only visually appealing but also packed with nutrients. It’s a meal that everyone will love!

Benefits of Cooking Salmon

Salmon is a fantastic choice for a healthy diet. It’s rich in omega-3 fatty acids, which are great for heart health. These healthy fats can help reduce inflammation and lower the risk of chronic diseases. Additionally, salmon is an excellent source of protein, making it a perfect option for those looking to build muscle or maintain a healthy weight. Cooking salmon at home allows you to control the ingredients, ensuring a nutritious meal without any hidden additives.

Crispy Honey Garlic Salmon Recipe is not just a meal; it’s a delightful experience. With its unique flavors and health benefits, it’s a dish you’ll want to make again and again!

Ingredients for Crispy Honey Garlic Salmon Recipe

Crispy Honey Garlic Salmon Recipe, you’ll need a few simple ingredients. Each component plays a vital role in achieving that perfect balance of flavors. Here’s what you’ll need:

  • 2 (6-ounce) salmon fillets
  • 1 tablespoon olive oil
  • 1/4 teaspoon salt
  • 1/4 teaspoon black pepper
  • 1/4 cup honey
  • 2 tablespoons soy sauce
  • 2 cloves garlic, minced
  • 1 teaspoon fresh ginger, grated
  • 1 tablespoon lemon juice
  • 1 tablespoon chopped green onions (for garnish)
  • Lemon wedges (for serving)

These ingredients are not only easy to find but also work together to create a delicious dish. The salmon fillets are the star of the show, providing a rich source of protein. Olive oil adds healthy fats, while honey and soy sauce bring sweetness and depth. Garlic and ginger add a zesty kick, and lemon juice brightens the flavors. Finally, the green onions and lemon wedges enhance the presentation and add a fresh touch.

Gather these ingredients, and you’re ready to embark on a culinary adventure that will leave your family and friends asking for seconds!

Step-by-Step Preparation of Crispy Honey Garlic Salmon Recipe

Crispy Honey Garlic Salmon Recipe. This step-by-step guide will help you create a delicious meal that’s sure to impress. Let’s get started!

Step 1: Preparing the Marinade

First, you’ll want to prepare the marinade. In a small bowl, combine the honey, soy sauce, minced garlic, grated ginger, and lemon juice. Mix these ingredients well until they are fully blended. This marinade is the heart of the dish, bringing together sweet and savory flavors that will enhance the salmon.

Step 2: Marinating the Salmon

Next, take your salmon fillets and pat them dry with paper towels. This step is important as it helps the marinade stick better. Place the salmon skin-side down on a baking sheet lined with parchment paper. Drizzle the olive oil over the fillets, then sprinkle with salt and black pepper. Now, pour the marinade over the salmon, ensuring each piece is well coated. Let the salmon marinate for at least 15 minutes. This allows the flavors to soak in, making the fish even tastier!

Step 3: Cooking the Salmon

Once the salmon has marinated, it’s time to cook! Preheat your oven to 400°F (200°C). Place the marinated salmon in the oven and bake for 12-15 minutes. You’ll know it’s done when the salmon flakes easily with a fork. The high heat helps create that crispy texture on top, while keeping the inside moist and tender.

Step 4: Making the Honey Garlic Sauce

While the salmon is baking, you can prepare the honey garlic sauce. In a small saucepan over medium heat, pour in the remaining marinade. Bring it to a simmer and cook for about 2-3 minutes, stirring constantly. This will thicken the sauce slightly, making it perfect for drizzling over the salmon once it’s cooked.

Step 5: Combining and Serving

Crispy Honey Garlic Salmon Recipe!

Variations of Crispy Honey Garlic Salmon Recipe

Crispy Honey Garlic Salmon Recipe is delightful as is, there are many ways to switch things up! Whether you want to try different flavors or cooking methods, these variations will keep your meals exciting. Let’s explore some alternative ingredients and cooking methods that can enhance your salmon experience.

Alternative Ingredients

Experimenting with different ingredients can lead to new and exciting flavors. Here are some alternatives you might consider:

  • Maple Syrup: Swap honey for maple syrup for a unique twist. It adds a rich sweetness that pairs well with salmon.
  • Teriyaki Sauce: Use teriyaki sauce instead of soy sauce for a different flavor profile. It brings a sweet and savory taste that complements the fish.
  • Mustard: Add a teaspoon of Dijon mustard to the marinade for a tangy kick. This can enhance the overall flavor and add depth.
  • Herbs: Fresh herbs like dill or parsley can be added for a fresh touch. Sprinkle them on top before serving for added flavor and color.
  • Vegetables: Consider adding sliced bell peppers or zucchini to the baking sheet. They will roast alongside the salmon, creating a complete meal.

These alternative ingredients can help you customize the dish to your taste preferences. Feel free to mix and match to find your favorite combination!

Cooking Methods

In addition to ingredient variations, you can also try different cooking methods to prepare your salmon. Here are a few options:

  • Grilling: For a smoky flavor, grill the salmon instead of baking it. Preheat your grill and cook the marinated salmon for about 5-7 minutes on each side, depending on thickness.
  • Pan-Seering: Heat a skillet over medium-high heat and add a little olive oil. Cook the salmon fillets for about 4-5 minutes on each side until crispy and golden brown.
  • Broiling: If you want an extra crispy top, broil the salmon for the last 2-3 minutes of cooking. Keep a close eye to prevent burning!
  • Air Frying: For a healthier option, use an air fryer. Cook the salmon at 375°F (190°C) for about 10-12 minutes for a crispy finish.

Crispy Honey Garlic Salmon Recipe in new ways. Try them out and see which method you prefer!

Cooking Note for Crispy Honey Garlic Salmon Recipe

Crispy Honey Garlic Salmon Recipe, there are a few important cooking notes to keep in mind. These tips will help ensure that your salmon turns out perfectly every time, making your meal a delightful experience.

First, always choose fresh salmon fillets. Fresh fish not only tastes better but also has a firmer texture. If you can, buy wild-caught salmon for the best flavor and health benefits. Look for fillets that are bright in color and have a clean, ocean-like smell.

Next, pay attention to the thickness of your salmon fillets. Thicker fillets may require a bit more cooking time, while thinner ones will cook faster. A good rule of thumb is to cook salmon for about 4-6 minutes per half-inch of thickness. This ensures that the fish is cooked through but still moist.

Additionally, let the salmon rest after baking. This resting period allows the juices to redistribute throughout the fish, resulting in a more flavorful and tender bite. If you cut into the salmon too soon, you may lose those delicious juices.

Lastly, don’t forget to keep an eye on the honey garlic sauce while it simmers. Stir it constantly to prevent it from burning. The goal is to achieve a nice, thick consistency that will coat the salmon beautifully. If it becomes too thick, you can always add a splash of water to loosen it up.

Crispy Honey Garlic Salmon Recipe. Enjoy the process and savor the delicious results!

Serving Suggestions for Crispy Honey Garlic Salmon Recipe

Crispy Honey Garlic Salmon Recipe, it’s time to think about how to serve it. The right side dishes and presentation can elevate your meal, making it even more enjoyable. Here are some fantastic suggestions to complement your salmon dish.

Side Dishes to Pair

Choosing the right side dishes can enhance the flavors of your salmon. Here are some delicious options:

  • Steamed Vegetables: Broccoli, asparagus, or green beans are great choices. They add color and nutrition to your plate.
  • Rice or Quinoa: Serve the salmon over a bed of fluffy rice or quinoa. Both options absorb the honey garlic sauce beautifully.
  • Mashed Potatoes: Creamy mashed potatoes provide a comforting side that pairs well with the sweet and savory salmon.
  • Salad: A fresh garden salad with mixed greens, cherry tomatoes, and a light vinaigrette can balance the richness of the salmon.
  • Roasted Potatoes: Crispy roasted potatoes seasoned with herbs make for a hearty side that complements the dish perfectly.

These side dishes not only taste great but also add variety to your meal. Feel free to mix and match based on your preferences and what you have on hand!

Presentation Tips

Crispy Honey Garlic Salmon Recipe. Here are some tips to make your dish look as good as it tastes:

  • Use a White Plate: A simple white plate allows the vibrant colors of the salmon and sides to stand out.
  • Garnish: Sprinkle chopped green onions or fresh herbs on top of the salmon for a pop of color and freshness.
  • Lemon Wedges: Place lemon wedges on the side for a bright touch. They also invite guests to add a squeeze of citrus for extra flavor.
  • Layering: Arrange the salmon on top of your chosen side, like rice or quinoa, to create height and visual interest.
  • Drizzle Sauce: Drizzle any remaining honey garlic sauce over the salmon and sides for a glossy finish.

Crispy Honey Garlic Salmon Recipe!

Tips for Perfecting Your Crispy Honey Garlic Salmon Recipe

Crispy Honey Garlic Salmon Recipe turns out perfectly every time, it’s essential to be aware of common mistakes and how to store leftovers properly. Here are some helpful tips to guide you through the process.

Common Mistakes to Avoid

Even the best cooks can make mistakes! Here are some common pitfalls to watch out for:

  • Not Patting Dry: Failing to pat the salmon dry can lead to a soggy texture. Always use paper towels to remove excess moisture before marinating.
  • Skipping the Marinade Time: Allowing the salmon to marinate for at least 15 minutes is crucial. Skipping this step can result in less flavorful fish.
  • Overcooking: Salmon can dry out quickly if overcooked. Keep an eye on it and check for doneness around the 12-minute mark.
  • Ignoring the Sauce: Don’t forget to simmer the leftover marinade to create a delicious sauce. This adds flavor and moisture to the dish.
  • Using Low-Quality Ingredients: The quality of your ingredients matters! Fresh salmon and high-quality honey will elevate the dish significantly.

Crispy Honey Garlic Salmon Recipe and impressing everyone at the dinner table!

Storage Tips

If you have leftovers, proper storage is key to maintaining the salmon’s flavor and texture. Here are some tips for storing your dish:

  • Refrigeration: Store leftover salmon in an airtight container in the refrigerator. It will stay fresh for up to 3 days.
  • Freezing: If you want to keep it longer, you can freeze the cooked salmon. Wrap it tightly in plastic wrap and then place it in a freezer-safe bag. It can last for up to 3 months.
  • Reheating: When reheating, do so gently. Use the oven at a low temperature (around 275°F or 135°C) to warm it up without drying it out. You can also microwave it on low power, covered with a damp paper towel.
  • Don’t Reheat Multiple Times: To maintain quality, only reheat the portion you plan to eat. Repeated reheating can lead to a loss of flavor and texture.

Crispy Honey Garlic Salmon Recipe even after the initial meal, ensuring that every bite remains delicious!

Breakdown of Time for Crispy Honey Garlic Salmon Recipe

Crispy Honey Garlic Salmon Recipe can help you plan your meal better. Here’s a quick breakdown of the prep time, cooking time, and total time required to create this delicious dish.

Prep Time

The prep time for this recipe is quite short, making it perfect for busy evenings. You’ll need about 15 minutes to gather your ingredients and prepare the salmon. This includes:

  • Gathering all ingredients
  • Mixing the marinade
  • Marinating the salmon

With just a little organization, you can have everything ready to go in no time!

Cooking Time

Once your salmon is marinated, the cooking time is approximately 12-15 minutes. This includes:

  • Baking the salmon in the oven
  • Simmering the honey garlic sauce

During this time, you can prepare your side dishes or set the table, making the most of your cooking time.

Total Time

Crispy Honey Garlic Salmon Recipe to take about 30 minutes from start to finish. This includes:

  • 15 minutes for prep
  • 12-15 minutes for cooking

This quick and easy recipe allows you to enjoy a delicious, homemade meal without spending hours in the kitchen. Perfect for any night of the week!

Nutritional Information for Crispy Honey Garlic Salmon Recipe

Crispy Honey Garlic Salmon Recipe not only delights your taste buds but also provides valuable nutrients. Here’s a breakdown of the key nutritional information per serving:

Calories

Each serving of this delicious salmon dish contains approximately 350 calories. This makes it a satisfying option for dinner without being overly heavy. The combination of healthy fats from the salmon and the natural sweetness from honey contributes to the overall calorie count. Enjoying this meal can fit well into a balanced diet, especially when paired with nutritious side dishes.

Protein

Crispy Honey Garlic Salmon Recipe is its high protein content. Each serving provides about 30 grams of protein. Salmon is an excellent source of protein, which is essential for muscle repair and growth. Including protein-rich foods in your diet can help keep you feeling full and satisfied, making this dish a great choice for those looking to maintain or build muscle.

Sodium

When it comes to sodium, this recipe contains approximately 600 milligrams per serving. The sodium primarily comes from the soy sauce used in the marinade. While sodium is necessary for various bodily functions, it’s important to monitor your intake. If you’re watching your sodium levels, consider using low-sodium soy sauce or adjusting the amount to suit your dietary needs.

Crispy Honey Garlic Salmon Recipe is not only delicious but also packed with nutrients. With a good balance of calories, protein, and sodium, it’s a meal that can support your health goals while satisfying your cravings. Enjoy this flavorful dish knowing it’s a wholesome choice for you and your family!

FAQs about Crispy Honey Garlic Salmon Recipe

Can I use frozen salmon for this recipe?

Crispy Honey Garlic Salmon Recipe. However, it’s important to thaw the salmon properly before cooking. The best way to do this is to place the frozen fillets in the refrigerator overnight. If you’re short on time, you can also thaw them under cold running water for about 30 minutes. Once thawed, pat the salmon dry and follow the recipe as usual. Just keep in mind that cooking times may vary slightly, so check for doneness to ensure it’s cooked through.

What can I substitute for honey?

Crispy Honey Garlic Salmon Recipe, there are several options you can try. Maple syrup is a popular alternative that provides a similar sweetness. You can also use agave nectar or brown sugar mixed with a little water to create a syrup-like consistency. If you prefer a sugar-free option, consider using a sugar substitute like stevia or monk fruit sweetener. Just remember that each substitute may slightly alter the flavor, so choose one that suits your taste preferences!

How do I know when the salmon is cooked?

Knowing when your salmon is cooked is key to achieving the perfect texture. The best way to check is by using a fork. Gently flake the salmon with a fork at the thickest part. If it flakes easily and is opaque in color, it’s done! The internal temperature should reach 145°F (63°C) for safe consumption. If you don’t have a thermometer, just keep an eye on the cooking time. For most fillets, 12-15 minutes in a 400°F (200°C) oven will do the trick. Remember, it’s better to slightly undercook than overcook, as salmon continues to cook a bit after being removed from the oven.

Conclusion on Crispy Honey Garlic Salmon Recipe

Crispy Honey Garlic Salmon Recipe is a delightful dish that combines simplicity with incredible flavor. Whether you’re a seasoned cook or just starting out, this recipe is easy to follow and yields delicious results. The balance of sweet honey, savory garlic, and tender salmon creates a meal that is sure to impress anyone at your dinner table.

Not only is this dish quick to prepare, but it also offers numerous health benefits. Salmon is packed with essential nutrients, including omega-3 fatty acids and high-quality protein. By incorporating this recipe into your meal rotation, you can enjoy a nutritious dinner that supports your health goals.

Feel free to experiment with the variations and cooking methods mentioned earlier. This flexibility allows you to tailor the dish to your taste preferences and keep your meals exciting. Whether you choose to grill, bake, or air fry, the flavors will shine through, making each meal a unique experience.

Crispy Honey Garlic Salmon, remember to pair it with delicious side dishes and present it beautifully. A well-plated meal not only looks appealing but also enhances the dining experience for you and your loved ones.

Crispy Honey Garlic Salmon Recipe is sure to become a favorite in your home. Happy cooking!

Paul

Crispy Honey Garlic Salmon Recipe is a must-try dish!

This juicy, spice-rubbed Texas Roadhouse-style salmon is baked to perfection with bold Southern flavors and a citrusy finish. Quick, simple, and full of flavor, it’s a restaurant-worthy meal you can whip up in under 30 minutes. Serve it with roasted veggies, mashed potatoes, or a fresh salad for a hearty, feel-good dinner at home.
Prep Time 10 minutes
Servings: 2 servings
Course: Main Course
Cuisine: American / Southern

Ingredients
  

  • 2 salmon fillets about 6 oz each
  • 2 tablespoons olive oil or avocado oil or melted butter
  • 1 teaspoon garlic powder
  • 1 teaspoon onion powder
  • 1 teaspoon paprika
  • 1 teaspoon dried oregano
  • 1/2 teaspoon cayenne pepper adjust to taste
  • Salt and black pepper to taste
  • Juice of 1 lemon
  • Fresh parsley chopped (for garnish)
  • Lemon slices for serving

Method
 

  1. Preheat the oven to 400°F (200°C). Line a baking sheet with parchment paper for easy cleanup.
  2. In a small bowl, mix the olive oil, garlic powder, onion powder, paprika, oregano, cayenne, salt, and pepper to form a spice rub.
  3. Pat the salmon fillets dry with paper towels. Place them on the prepared baking sheet.
  4. Brush or rub the spice mixture evenly over each fillet.
  5. Squeeze fresh lemon juice over the top of the salmon.
  6. Bake for 12 to 15 minutes, or until the salmon flakes easily with a fork and is opaque in the center.
  7. Let the salmon rest for a few minutes before serving.
  8. Garnish with chopped parsley and serve with lemon slices.

Notes

  • Use lime juice for a tangy twist if you’re out of lemon.
  • Adjust cayenne to your spice preference, or omit for a milder version.
  • This recipe also works great in an air fryer at 375°F for about 10–12 minutes.
  • Leftovers keep well refrigerated and make a great protein topper for salads or wraps the next day.

Chicken and Dumplings Recipe: A Comforting Classic Dish

The Comfort of Chicken and Dumplings

There’s something truly special about a warm bowl of chicken and dumplings. This classic dish has been a favorite in many households for generations. It brings a sense of comfort and nostalgia, often reminding us of family gatherings and cozy evenings. The rich flavors of tender chicken, savory broth, and fluffy dumplings create a delightful experience that warms both the heart and the stomach.

Chicken and dumplings are not just a meal; they are a hug in a bowl. The combination of ingredients is simple yet satisfying. As the chicken simmers in the broth, it releases its flavors, creating a delicious base. Meanwhile, the dumplings rise and soak up the savory goodness, making each bite a treat. This dish is perfect for chilly days or when you need a little extra comfort.

Moreover, this chicken and dumplings recipe is versatile. You can easily customize it to suit your taste. Whether you prefer adding vegetables or trying different herbs, the possibilities are endless. This adaptability makes it a go-to recipe for many home cooks.

In this article, we will guide you through the ingredients, preparation steps, and tips to make the perfect chicken and dumplings. So, grab your apron and let’s dive into this delightful culinary adventure!

Ingredients for Chicken and Dumplings Recipe

To create a delicious chicken and dumplings recipe, you’ll need a variety of fresh and pantry ingredients. Each component plays a vital role in building the rich flavors and comforting textures that make this dish so beloved. Here’s what you’ll need:

  • 2 tablespoons olive oil: This adds a nice flavor and helps sauté the vegetables.
  • 1 medium onion, diced: Onions provide a sweet and savory base for the broth.
  • 2 carrots, diced: Carrots add sweetness and color to the dish.
  • 2 celery stalks, diced: Celery contributes a fresh crunch and depth of flavor.
  • 3 cloves garlic, minced: Garlic enhances the overall taste with its aromatic qualities.
  • 1 teaspoon dried thyme: Thyme brings an earthy flavor that complements the chicken.
  • 1 teaspoon dried rosemary: Rosemary adds a fragrant touch to the dish.
  • 1 teaspoon salt: Salt is essential for enhancing all the flavors.
  • 1/2 teaspoon black pepper: Black pepper adds a mild heat and depth.
  • 4 cups chicken broth: This is the heart of the dish, providing moisture and flavor.
  • 2 cups cooked chicken, shredded: Use leftover chicken or rotisserie chicken for convenience.
  • 1 cup frozen peas: Peas add a pop of color and sweetness.
  • 1 cup milk: Milk helps create a creamy texture in the broth.
  • 2 cups all-purpose flour: Flour is the main ingredient for the dumplings.
  • 1 tablespoon baking powder: This helps the dumplings rise and become fluffy.
  • 1/2 teaspoon salt: A little extra salt for the dumpling dough.
  • 1/4 cup unsalted butter, melted: Butter adds richness to the dumplings.
  • 3/4 cup milk (for dumplings): This is used to moisten the dumpling dough.

Gathering these ingredients will set you on the right path to making a delightful chicken and dumplings recipe. Each item contributes to the overall flavor and texture, ensuring a satisfying meal for you and your loved ones.

Step-by-Step Preparation of Chicken and Dumplings Recipe

Now that you have all your ingredients ready, it’s time to dive into the step-by-step preparation of this delightful chicken and dumplings recipe. Each step is simple and straightforward, ensuring that you can create this comforting dish with ease. Let’s get started!

Step 1: Preparing the Chicken

First, you need to prepare the chicken. If you have leftover cooked chicken, that’s perfect! Simply shred it into bite-sized pieces. If you’re starting with raw chicken, you can boil it in water until fully cooked, then shred it. This step is crucial as it adds the main protein to your dish. The shredded chicken will soak up the flavors of the broth, making it even more delicious.

Step 2: Making the Broth

Next, let’s make the broth. In a large pot, heat the olive oil over medium heat. Once hot, add the diced onion, carrots, and celery. Sauté these vegetables for about 5 minutes until they soften. Then, stir in the minced garlic, dried thyme, dried rosemary, salt, and black pepper. Cook for another minute until the garlic becomes fragrant. This mixture creates a flavorful base for your chicken and dumplings recipe.

After that, pour in the chicken broth and bring it to a gentle simmer. Add the shredded chicken and frozen peas, stirring everything together. Let this mixture simmer for about 10 minutes. This allows the flavors to meld beautifully, creating a rich and savory broth.

Step 3: Creating the Dumpling Dough

While the broth simmers, it’s time to create the dumpling dough. In a separate bowl, whisk together the all-purpose flour, baking powder, and salt. Then, add the melted butter and 3/4 cup of milk. Mix until just combined. The dough will be thick, which is perfect for fluffy dumplings. Avoid over-mixing, as this can make the dumplings tough.

Step 4: Cooking the Chicken and Dumplings

Now comes the exciting part! Drop spoonfuls of the dumpling batter onto the simmering chicken mixture. Make sure to cover the pot with a lid. This is important because the dumplings need steam to cook properly. Let them cook for about 15 minutes without lifting the lid. This will ensure that the dumplings become fluffy and light.

Once the dumplings are cooked through, your chicken and dumplings are ready to be served! Ladle the warm mixture into bowls and garnish with fresh herbs if desired. Enjoy this comforting dish with your family and friends!

Variation of Chicken and Dumplings Recipe

While the classic chicken and dumplings recipe is a beloved favorite, there are many ways to switch things up. Whether you want to try different ingredients or explore various cooking methods, these variations can add a unique twist to your dish. Let’s take a closer look at some alternative ingredients and cooking methods for chicken and dumplings.

Alternative Ingredients for Chicken and Dumplings

One of the best things about chicken and dumplings is its versatility. You can easily customize the recipe to suit your taste or dietary needs. Here are some alternative ingredients you might consider:

  • Protein Options: Instead of chicken, you can use turkey, beef, or even shrimp. Each protein brings its own flavor to the dish.
  • Vegetable Additions: Feel free to add your favorite vegetables. Corn, green beans, or bell peppers can enhance the dish’s color and nutrition.
  • Herbs and Spices: Experiment with different herbs like parsley, basil, or oregano. These can add fresh flavors to your broth.
  • Gluten-Free Dumplings: For a gluten-free option, substitute all-purpose flour with a gluten-free flour blend. This allows everyone to enjoy the dish.
  • Creamy Variations: For a richer taste, stir in a splash of heavy cream or sour cream just before serving. This adds a delightful creaminess to the broth.

These alternative ingredients can help you create a chicken and dumplings recipe that suits your preferences while still delivering that comforting taste.

Different Cooking Methods for Chicken and Dumplings

In addition to ingredient variations, you can also explore different cooking methods for chicken and dumplings. Here are a few options:

  • Slow Cooker: For a hands-off approach, use a slow cooker. Simply add all the ingredients and let it cook on low for 6-8 hours. This method allows the flavors to develop beautifully.
  • Instant Pot: If you’re short on time, an Instant Pot can be a lifesaver. Cook the chicken and broth on high pressure for about 10 minutes, then add the dumplings and cook for an additional 5 minutes.
  • Baking Method: For a baked version, prepare the chicken mixture in a casserole dish. Top it with the dumpling batter and bake in the oven until the dumplings are golden brown.

These cooking methods can change the texture and flavor of your chicken and dumplings, making it a fun dish to experiment with. No matter how you choose to prepare it, the comforting essence of chicken and dumplings will always shine through!

Cooking Note for Chicken and Dumplings Recipe

When preparing your chicken and dumplings recipe, there are a few important cooking notes to keep in mind. These tips will help ensure that your dish turns out perfectly every time. Let’s explore some key points to consider while cooking.

First, always use fresh ingredients when possible. Fresh vegetables and herbs can significantly enhance the flavor of your chicken and dumplings. If you have access to fresh thyme or rosemary, consider using them instead of dried. Fresh herbs provide a vibrant taste that can elevate your dish.

Next, be mindful of the cooking time for the dumplings. It’s crucial not to lift the lid while they are cooking. The steam trapped inside the pot is what makes the dumplings fluffy and light. If you peek too soon, you risk deflating them, which can lead to dense dumplings.

Additionally, if you prefer a thicker broth, you can add a cornstarch slurry. Mix equal parts cornstarch and cold water, then stir it into the simmering broth. This will help thicken the liquid without altering the flavor.

Lastly, don’t hesitate to taste as you go! Adjust the seasoning to your liking. If you find the broth needs more salt or pepper, feel free to add it. Cooking is all about personal preference, and this chicken and dumplings recipe is no exception.

By keeping these cooking notes in mind, you’ll be well on your way to creating a delicious and comforting chicken and dumplings dish that your family will love!

Serving Suggestions for Chicken and Dumplings Recipe

Once your chicken and dumplings are ready, it’s time to serve this delightful dish! The way you present your meal can enhance the dining experience. Here are some serving suggestions to make your chicken and dumplings recipe even more enjoyable:

  • Garnish with Fresh Herbs: A sprinkle of fresh parsley or thyme on top adds a pop of color and freshness. It also enhances the aroma, making the dish even more inviting.
  • Pair with a Side Salad: A light green salad with a tangy vinaigrette complements the richness of the chicken and dumplings. The crispness of the salad balances the hearty dish.
  • Serve with Crusty Bread: A slice of warm, crusty bread is perfect for soaking up the delicious broth. It adds a satisfying crunch to each bite.
  • Offer a Variety of Condiments: Consider providing options like hot sauce or a sprinkle of lemon juice. These can add a zesty kick that some diners may enjoy.
  • Use Individual Bowls: Serving chicken and dumplings in individual bowls can make the meal feel special. It also allows everyone to enjoy their portion without needing to share.

These serving suggestions can elevate your chicken and dumplings recipe, making it a delightful centerpiece for any meal. Whether it’s a family dinner or a gathering with friends, this dish is sure to impress!

Tips for Perfect Chicken and Dumplings Recipe

Creating the perfect chicken and dumplings recipe is all about attention to detail and a few helpful tips. With these suggestions, you can ensure that your dish turns out delicious every time. Let’s explore some essential tips to elevate your chicken and dumplings experience!

  • Choose Quality Chicken: For the best flavor, use high-quality chicken. Whether you opt for rotisserie chicken or cook your own, ensure it’s fresh and tender. This will enhance the overall taste of your dish.
  • Don’t Rush the Broth: Allow your broth to simmer gently. This slow cooking process helps develop rich flavors. The longer it simmers, the more delicious it becomes!
  • Perfect Dumpling Consistency: When making the dumpling dough, aim for a thick but spoonable consistency. If it’s too runny, the dumplings won’t hold their shape. If it’s too thick, they may turn out dense.
  • Cover While Cooking: Always keep the pot covered while the dumplings cook. This traps steam, ensuring they rise and become fluffy. Lifting the lid can lead to flat dumplings, so resist the urge to peek!
  • Season to Taste: Don’t forget to taste your broth as it cooks. Adjust the seasoning with salt and pepper according to your preference. This step is crucial for achieving a well-balanced flavor.
  • Let It Rest: After cooking, let your chicken and dumplings sit for a few minutes before serving. This allows the flavors to meld together and makes for a more enjoyable eating experience.
  • Experiment with Herbs: Feel free to experiment with different herbs and spices. Fresh herbs can add a burst of flavor, while dried herbs provide a more subtle taste. Find the combination that you love!
  • Store Properly: If you have leftovers, store them in an airtight container in the fridge. Reheat gently on the stove, adding a splash of broth or milk to restore creaminess.

By following these tips, you’ll be well on your way to mastering the art of chicken and dumplings. Each step contributes to creating a comforting and satisfying dish that your family will love. Enjoy the process and happy cooking!

Breakdown of Time for Chicken and Dumplings Recipe

Understanding the time needed for each step in your chicken and dumplings recipe can help you plan your cooking better. Here’s a breakdown of the time required for preparation and cooking, ensuring you can enjoy this delightful dish without any rush.

Prep Time

The prep time for this chicken and dumplings recipe is approximately 20 minutes. During this time, you will gather all your ingredients, dice the vegetables, and shred the chicken. Having everything ready before you start cooking makes the process smoother and more enjoyable.

Cooking Time

The cooking time for the chicken and dumplings is about 30 minutes. This includes sautéing the vegetables, simmering the broth, and cooking the dumplings. It’s essential to allow the dumplings to steam properly, so be sure to keep the lid on during this time. This step is crucial for achieving fluffy dumplings that everyone will love!

Total Time

In total, you can expect to spend around 50 minutes from start to finish. This includes both prep and cooking time. With just under an hour, you can create a comforting meal that serves six people. It’s a perfect option for busy weeknights or cozy weekends when you want to enjoy a hearty dish without spending all day in the kitchen.

Nutritional Information for Chicken and Dumplings Recipe

Understanding the nutritional information of your chicken and dumplings recipe is essential for maintaining a balanced diet. This dish not only offers comfort but also provides a good amount of nutrients. Here’s a breakdown of the key nutritional components per serving:

Calories

Each serving of this chicken and dumplings recipe contains approximately 350 calories. This makes it a satisfying meal that can fit into a variety of dietary plans. The combination of chicken, vegetables, and dumplings provides a hearty dish without excessive calories.

Protein

Protein is an important part of any meal, and this recipe delivers! With about 25 grams of protein per serving, chicken and dumplings are a great source of this essential nutrient. The shredded chicken contributes significantly to the protein content, helping to keep you full and satisfied.

Sodium

When it comes to sodium, this chicken and dumplings recipe contains around 800 milligrams per serving. While this is a reasonable amount for a comforting dish, it’s always a good idea to monitor your sodium intake. You can reduce the sodium by using low-sodium chicken broth or adjusting the salt added during cooking.

Overall, this chicken and dumplings recipe offers a balanced meal with a good mix of calories, protein, and sodium. It’s a delightful option for family dinners, providing nourishment and comfort in every bite!

FAQs about Chicken and Dumplings Recipe

What is the best type of chicken to use for Chicken and Dumplings?

When it comes to chicken and dumplings, the best type of chicken is one that is tender and flavorful. Many people prefer using rotisserie chicken for its convenience and rich taste. You can also use leftover cooked chicken from previous meals. If you’re starting with raw chicken, consider using bone-in, skin-on chicken thighs or breasts. These cuts provide more flavor and moisture, making your dish even more delicious. Whichever option you choose, ensure the chicken is cooked thoroughly before shredding it for the recipe.

Can I make Chicken and Dumplings ahead of time?

Yes, you can make chicken and dumplings ahead of time! This dish is perfect for meal prep. You can prepare the chicken and broth in advance and store them separately from the dumplings. When you’re ready to serve, simply reheat the broth and add the dumplings for cooking. This method helps maintain the dumpling’s fluffy texture. However, if you plan to store the entire dish, keep in mind that the dumplings may become softer when reheated. It’s best to enjoy them fresh for the best texture.

How do I store leftovers of Chicken and Dumplings?

Storing leftovers of chicken and dumplings is easy! Allow the dish to cool completely before transferring it to an airtight container. Store it in the refrigerator for up to 3 days. When reheating, add a splash of chicken broth or milk to restore moisture, as the dumplings may absorb some liquid. Heat gently on the stove or in the microwave until warmed through. This way, you can enjoy the comforting flavors of chicken and dumplings even after the initial meal!

Can I freeze Chicken and Dumplings?

Freezing chicken and dumplings is possible, but it’s best to freeze the chicken and broth separately from the dumplings. The dumplings may become mushy when thawed and reheated. To freeze, let the chicken and broth cool, then transfer them to a freezer-safe container. They can be stored for up to 3 months. When you’re ready to enjoy, thaw the mixture in the refrigerator overnight, then reheat on the stove. Prepare fresh dumplings to add just before serving for the best texture!

Conclusion on Chicken and Dumplings Recipe

In conclusion, the chicken and dumplings recipe is a timeless classic that brings warmth and comfort to any table. This dish is not only easy to prepare but also offers a delightful combination of flavors and textures. From the tender chicken to the fluffy dumplings, every bite is a reminder of home-cooked goodness.

As you explore this recipe, remember that it’s all about making it your own. Whether you choose to add different vegetables, switch up the protein, or try various cooking methods, the essence of chicken and dumplings remains the same. It’s a dish that invites creativity and personalization, allowing you to cater to your family’s tastes.

Moreover, the nutritional benefits of this recipe make it a wholesome choice for family meals. With a good balance of protein, carbohydrates, and essential nutrients, chicken and dumplings can be a satisfying option for any occasion. Plus, the leftovers are just as delicious, making it a great meal prep option for busy days.

So, gather your ingredients, follow the steps, and enjoy the process of creating this comforting dish. Whether it’s a chilly evening or a special gathering, chicken and dumplings are sure to bring smiles and satisfaction to your loved ones. Happy cooking!

Melany

Chicken and Dumplings Recipe: A Comforting Classic Dish

This cozy Chicken and Dumplings recipe brings all the heartwarming flavors of a classic comfort meal into one pot. Tender shredded chicken, rich creamy broth, and soft, pillowy dumplings come together for a soul-soothing dish that feels like a hug in a bowl. Perfect for chilly nights, family dinners, or anytime you crave something comforting and filling.
Prep Time 15 minutes
Cook Time 35 minutes
Total Time 50 minutes
Servings: 6 servings (about 12 dumplings)
Course: Dinner
Cuisine: American Comfort Food

Ingredients
  

For the Chicken Soup:
  • 3 to 4 cups shredded rotisserie chicken or 2 large cooked chicken breasts
  • 8 cups water
  • 4 tablespoons Better Than Bouillon Chicken
  • 4 tablespoons salted butter
  • 4 carrots halved lengthwise and diced
  • 4 celery stalks diced
  • 2 small yellow onions finely diced
  • 1/2 cup all-purpose flour
  • 1 cup milk
  • 1 teaspoon Italian seasoning
  • 1 teaspoon salt
  • 1 teaspoon garlic powder
  • 1 teaspoon onion powder
For the Dumplings:
  • 2 cups Bisquick
  • 1 teaspoon salt
  • 1 teaspoon garlic powder
  • 1 teaspoon Italian seasoning
  • 2/3 cup milk

Method
 

  1. Prepare the Broth:In a large bowl, combine 8 cups of water with Better Than Bouillon. Microwave for 3 minutes, stir well, and set aside.
  2. Cook the Vegetables:In a large stockpot over medium heat, melt butter. Add carrots, celery, and onions. Cook for 10 minutes, stirring occasionally until softened.
  3. Build the Base:Stir in flour to coat the vegetables. Slowly add the prepared broth, stirring until well combined. Bring to a gentle boil.
  4. Add Chicken and Seasonings:Stir in the shredded chicken, milk, Italian seasoning, salt, garlic powder, and onion powder. Reduce heat and let the soup simmer on low.
  5. Make the Dumpling Dough:In a separate bowl, whisk Bisquick, salt, garlic powder, and Italian seasoning. Gradually stir in milk until just combined. Let rest for 1–2 minutes.
  6. Drop the Dumplings:Use a cookie scoop or spoon (about 1.5 tablespoons) to gently drop dumpling dough into the simmering soup. Space them out — they will expand while cooking.
  7. Steam the Dumplings:Cover the pot with a lid and let simmer for 15 minutes on low heat. Do not lift the lid during this time.
  8. Finish Cooking:Carefully flip each dumpling and cook uncovered for another 2 to 3 minutes. Test with a toothpick — it should come out clean.
  9. Serve:Ladle into bowls and garnish with chopped parsley if desired. Serve hot and enjoy!

Notes

  • For extra richness, substitute half-and-half or heavy cream for the milk.
  • Add frozen peas or corn during the final 5 minutes of simmering for a veggie boost.
  • The dumplings will steam and expand—avoid overcrowding or stirring once added.
  • Leftovers can be stored in the fridge for up to 3 days and reheated gently on the stove.

Slow-Roasted Barbecue Brisket Recipe for Perfect Flavor

Slow-Roasted Barbecue Brisket Recipe is a true delight for meat lovers. This dish is not just a meal; it’s an experience that brings family and friends together. With its rich, smoky flavor and juicy tenderness, it’s no wonder this recipe has become a favorite at gatherings and celebrations.

What Makes This Recipe Special?

What sets this brisket recipe apart? First, it’s all about the slow cooking process. Cooking the brisket at a low temperature allows the meat to become incredibly tender. The spice rub adds a burst of flavor that seeps into every bite. Plus, the final touch of barbecue sauce caramelizes beautifully, creating a sticky, sweet glaze that’s hard to resist. This recipe is perfect for both novice cooks and seasoned chefs, making it accessible to everyone.

The History of Barbecue Brisket

Barbecue brisket has a rich history that dates back to the early days of American cooking. Originating from Texas, this dish has roots in both Mexican and Southern cuisine. Traditionally, brisket was a cut of meat that was tough and required long cooking times to become tender. Over the years, pitmasters have perfected the art of smoking and slow-roasting brisket, turning it into a beloved staple at barbecues and cookouts. Today, brisket is celebrated not just in Texas but across the United States and beyond, with each region adding its unique twist to this classic dish.

Ingredients for Slow-Roasted Barbecue Brisket Recipe

Slow-Roasted Barbecue Brisket Recipe, you’ll need a few key ingredients. Each component plays a vital role in building flavor and ensuring the brisket turns out tender and delicious. Here’s what you’ll need:

  • 3 to 4 pounds beef brisket: Choose a well-marbled cut for the best flavor and tenderness.
  • 2 tablespoons brown sugar: This adds sweetness and helps create a caramelized crust.
  • 1 tablespoon smoked paprika: This ingredient gives the brisket a smoky flavor, enhancing the barbecue experience.
  • 1 tablespoon garlic powder: Garlic powder adds depth and richness to the spice rub.
  • 1 tablespoon onion powder: This complements the garlic and adds a savory note.
  • 1 teaspoon black pepper: Freshly ground black pepper adds a bit of heat and flavor.
  • 1 teaspoon salt: Salt is essential for enhancing all the flavors in the dish.
  • 1 teaspoon cayenne pepper (optional): If you like a little kick, this will spice things up!
  • 1 cup barbecue sauce: Use your favorite brand for a delicious glaze.
  • 1/2 cup beef broth: This keeps the brisket moist during cooking and adds extra flavor.

Gathering these ingredients is the first step toward creating a memorable meal. Each item contributes to the overall taste and texture of the brisket, making it a dish that everyone will love. Now that you have your ingredients ready, let’s move on to the preparation steps!

Step-by-Step Preparation of Slow-Roasted Barbecue Brisket Recipe

Slow-Roasted Barbecue Brisket Recipe. Each step is crucial for achieving that tender, flavorful brisket you crave. Let’s break it down step by step!

Step 1: Preparing the Brisket

Start by taking your brisket out of the packaging. Rinse it under cold water and pat it dry with paper towels. This helps remove any excess moisture, allowing the spice rub to stick better. Next, trim any excess fat from the brisket, but leave a thin layer. This fat will melt during cooking, keeping the meat juicy and flavorful.

Step 2: Creating the Marinade

In a small bowl, combine the brown sugar, smoked paprika, garlic powder, onion powder, black pepper, salt, and cayenne pepper (if you’re using it). Mix these ingredients well to create a spice rub. This blend will add a wonderful depth of flavor to your brisket, making each bite a delight.

Step 3: Marinating the Brisket

Now it’s time to apply the spice rub. Generously coat the brisket with the spice mixture, ensuring every inch is covered. For the best flavor, consider marinating the brisket overnight in the refrigerator. This allows the spices to penetrate the meat, enhancing the overall taste. If you’re short on time, a few hours will still work wonders!

Step 4: Prepping the Oven or Smoker

Preheat your oven to 300°F. If you prefer using a smoker, set it to 225°F. Both methods will yield delicious results, but the oven is a great option for those without a smoker. Prepare a roasting pan by placing the brisket fat side up in the center. Pour the beef broth around the brisket to keep it moist during cooking.

Step 5: Slow-Roasting the Brisket

Cover the roasting pan tightly with aluminum foil. This helps trap steam, ensuring the brisket cooks evenly and becomes tender. Place the pan in the preheated oven and roast for 3 to 4 hours. You’ll know it’s done when the brisket is tender and easily pulls apart with a fork. The low and slow cooking method is key to achieving that melt-in-your-mouth texture.

Step 6: Resting the Brisket

Once the brisket is cooked, remove it from the oven. Carefully take off the foil, as steam will escape. Brush your favorite barbecue sauce generously over the top of the brisket. Increase the oven temperature to 350°F and return the brisket to the oven, uncovered, for an additional 30 minutes. This step caramelizes the sauce, creating a delicious glaze. Afterward, let the brisket rest for at least 15 minutes before slicing against the grain. This resting period allows the juices to redistribute, ensuring each slice is juicy and flavorful.

Variations of Slow-Roasted Barbecue Brisket Recipe

Slow-Roasted Barbecue Brisket Recipe is a crowd-pleaser, there are many ways to switch things up! Exploring different marinades and cooking methods can elevate your brisket experience. Let’s dive into some exciting variations!

Different Marinade Options

Marinades can transform your brisket, adding unique flavors that cater to your taste. Here are a few ideas:

  • Sweet and Spicy: Combine honey, soy sauce, and a splash of hot sauce for a sweet and spicy kick.
  • Herb-Infused: Use fresh herbs like rosemary and thyme mixed with olive oil and garlic for a fragrant twist.
  • Citrus Zest: Add orange or lemon juice to your spice rub for a refreshing citrus flavor that brightens the dish.
  • Beer Marinade: Soak the brisket in your favorite beer mixed with mustard and brown sugar for a rich, malty flavor.

Feel free to experiment with these marinades! Each one brings a different taste profile, making your brisket unique every time you cook it.

Cooking Methods: Oven vs. Smoker

When it comes to cooking your brisket, you have options! Both the oven and smoker yield delicious results, but they offer different experiences:

  • Oven: The oven is a convenient choice, especially for those who may not have a smoker. It allows for controlled cooking temperatures and is easy to monitor. Plus, it’s perfect for indoor cooking, regardless of the weather!
  • Smoker: Smoking the brisket adds a deep, smoky flavor that many barbecue enthusiasts love. Cooking at a low temperature for several hours allows the meat to absorb the smoke, resulting in a tender and flavorful brisket. If you have a smoker, this method is worth trying!

Whichever method you choose, you’ll end up with a delicious brisket that’s sure to impress. So, gather your ingredients and get ready to enjoy a fantastic meal!

Cooking Note for Slow-Roasted Barbecue Brisket Recipe

Slow-Roasted Barbecue Brisket Recipe requires patience and attention to detail. The key to a perfect brisket lies in understanding the cooking process and making adjustments as needed. Here are some important notes to keep in mind while preparing your brisket:

  • Temperature Matters: Always use a meat thermometer to check the internal temperature of the brisket. Aim for around 195°F to 205°F for optimal tenderness. This temperature allows the collagen in the meat to break down, resulting in a juicy and flavorful brisket.
  • Resting is Crucial: After cooking, let the brisket rest for at least 15 minutes. This step is essential as it allows the juices to redistribute throughout the meat. If you skip this step, you may end up with dry slices.
  • Adjust Cooking Time: Cooking times can vary based on the size of your brisket and your oven’s accuracy. Always check for tenderness rather than relying solely on time. If it’s not tender yet, give it more time in the oven.
  • Foil Technique: When covering the brisket with foil, ensure it’s tightly sealed. This helps trap moisture and steam, which is vital for achieving that melt-in-your-mouth texture.
  • Experiment with Flavors: Don’t hesitate to tweak the spice rub or barbecue sauce to suit your taste. Adding different spices or sauces can create a unique flavor profile that your family and friends will love.

By keeping these cooking notes in mind, you’ll be well on your way to mastering the art of slow-roasting brisket. Enjoy the process, and remember that great food takes time and care!

Serving Suggestions for Slow-Roasted Barbecue Brisket Recipe

Slow-Roasted Barbecue Brisket Recipe is ready, it’s time to think about how to serve it! The right side dishes can elevate your meal, making it even more enjoyable. Plus, there are creative ways to use any leftovers, ensuring nothing goes to waste. Let’s explore some delicious options!

Best Side Dishes to Pair

When it comes to pairing side dishes with brisket, you want options that complement its rich flavors. Here are some fantastic choices:

  • Coleslaw: A crunchy, tangy coleslaw adds a refreshing contrast to the smoky brisket. The coolness of the slaw balances the richness of the meat.
  • Macaroni and Cheese: Creamy mac and cheese is a classic comfort food that pairs perfectly with brisket. The cheesy goodness makes every bite delightful!
  • Grilled Vegetables: Seasonal grilled vegetables, like zucchini and bell peppers, add color and nutrition to your plate. Their smoky flavor complements the brisket beautifully.
  • Potato Salad: A creamy potato salad is another great option. It’s filling and adds a nice texture to your meal.
  • Cornbread: Sweet cornbread is a Southern favorite that goes hand-in-hand with barbecue. Its sweetness balances the savory flavors of the brisket.

These side dishes not only enhance the meal but also create a well-rounded dining experience. Feel free to mix and match based on your preferences and what you have on hand!

Creative Ways to Serve Leftovers

Leftover brisket is a treasure! There are many creative ways to enjoy it beyond just reheating. Here are some fun ideas:

  • Brisket Tacos: Shred the leftover brisket and serve it in warm tortillas with your favorite toppings like salsa, avocado, and cilantro. It’s a tasty twist!
  • Brisket Sandwiches: Pile slices of brisket on a bun with coleslaw and barbecue sauce for a delicious sandwich. It’s perfect for lunch or a casual dinner.
  • Brisket Chili: Chop the brisket and add it to a pot of chili for a hearty meal. The smoky flavor will enhance the chili, making it even more satisfying.
  • Brisket Hash: Dice the brisket and sauté it with potatoes, onions, and peppers for a flavorful breakfast hash. Top it with a fried egg for extra goodness!
  • Brisket Pizza: Use the brisket as a topping for pizza. Add barbecue sauce, cheese, and your favorite veggies for a unique and delicious pie.

These ideas will help you make the most of your leftovers, ensuring that every bite is just as enjoyable as the first. Get creative and have fun with your brisket!

Tips for Perfecting Your Slow-Roasted Barbecue Brisket Recipe

Slow-Roasted Barbecue Brisket Recipe, a few tips can make all the difference. From selecting the right cut of meat to maintaining the perfect cooking temperature, these insights will help you create a brisket that’s tender, flavorful, and unforgettable. Let’s explore these essential tips!

Choosing the Right Cut of Brisket

The cut of brisket you choose plays a significant role in the final outcome of your dish. Here are some key points to consider:

  • Flat vs. Point Cut: Brisket comes in two main cuts: the flat and the point. The flat cut is leaner and cooks evenly, while the point cut has more marbling and fat, making it juicier. For a balance of flavor and tenderness, consider using a whole packer brisket, which includes both cuts.
  • Marbling Matters: Look for brisket with good marbling. The fat within the meat melts during cooking, keeping it moist and flavorful. A well-marbled brisket will yield a more tender result.
  • Freshness is Key: Always choose fresh brisket from a reputable butcher or grocery store. Check the sell-by date and look for bright red color. Avoid any cuts that appear brown or have an off smell.

By selecting the right cut of brisket, you set the foundation for a delicious meal. Take your time to choose wisely, and you’ll be rewarded with a fantastic dish!

Importance of Temperature Control

Temperature control is crucial when cooking brisket. Here’s why it matters and how to manage it effectively:

  • Low and Slow: The key to tender brisket is cooking it at a low temperature for an extended period. This method allows the collagen in the meat to break down, resulting in a melt-in-your-mouth texture. Aim for a cooking temperature of around 225°F to 300°F, depending on your method.
  • Use a Meat Thermometer: Invest in a good meat thermometer to monitor the internal temperature of your brisket. The ideal range for a perfectly cooked brisket is between 195°F and 205°F. This ensures that the meat is tender and juicy.
  • Resting Time: After cooking, let your brisket rest for at least 15 minutes before slicing. This resting period allows the juices to redistribute throughout the meat, preventing dryness and enhancing flavor.

By mastering temperature control, you’ll elevate your brisket cooking skills. Remember, patience is key, and the results will be worth the wait!

Breakdown of Time for Slow-Roasted Barbecue Brisket Recipe

Slow-Roasted Barbecue Brisket Recipe is essential for planning your cooking process. Here’s a detailed breakdown of the time you’ll need to prepare and cook this delicious dish.

Prep Time

The prep time for this recipe is relatively short, making it easy to get started. Here’s what to expect:

  • Brisket Preparation: 10-15 minutes. This includes rinsing, drying, and trimming the brisket.
  • Spice Rub Preparation: 5 minutes. Mixing the spices together is quick and straightforward.
  • Marinating Time: 1 hour (or overnight for best results). While this isn’t active prep time, it’s important to plan for it.

In total, you can expect about 15-20 minutes of active prep time, plus additional marinating time if you choose to let it sit overnight.

Cooking Time

The cooking time is where the magic happens! Here’s how long you’ll need:

  • Slow-Roasting: 3 to 4 hours. This low and slow method is crucial for achieving tender brisket.
  • Caramelizing the Sauce: 30 minutes. This step adds a delicious glaze to your brisket.

Overall, the cooking time will take approximately 3.5 to 4.5 hours, depending on the size of your brisket and your oven’s accuracy.

Total Time

When you combine the prep and cooking times, here’s the total time you’ll need:

  • Total Active Time: 15-20 minutes (not including marinating).
  • Total Cooking Time: 3.5 to 4.5 hours.
  • Total Time (including marinating): 4.5 to 24 hours, depending on whether you marinate overnight.

Slow-Roasted Barbecue Brisket Recipe without any stress. Just remember, the longer you let it marinate, the more flavorful your brisket will be!

Nutritional Information for Slow-Roasted Barbecue Brisket Recipe

Slow-Roasted Barbecue Brisket Recipe is essential for making informed choices about your meals. This dish is not only delicious but also provides a good balance of nutrients. Here’s a breakdown of the key nutritional components per serving:

Calories

Each serving of this flavorful brisket contains approximately 350 calories. This makes it a hearty option for dinner, especially when paired with nutritious side dishes. The calorie count can vary slightly based on the specific ingredients and portion sizes you use, but it remains a satisfying choice for meat lovers.

Protein

One of the standout features of brisket is its high protein content. Each serving provides around 30 grams of protein. Protein is essential for building and repairing tissues, making it a vital part of a balanced diet. Enjoying this brisket can help you meet your daily protein needs, especially when served alongside protein-rich sides.

Sodium

The sodium content in this recipe is approximately 800 milligrams per serving. While sodium is necessary for various bodily functions, it’s important to monitor your intake, especially if you’re watching your salt consumption. To reduce sodium levels, consider using low-sodium beef broth and barbecue sauce. This way, you can enjoy the rich flavors of the brisket while keeping your health in check.

Slow-Roasted Barbecue Brisket Recipe while maintaining a balanced diet. Remember, moderation is key, and pairing this dish with fresh vegetables or whole grains can enhance its nutritional value even further!

FAQs about Slow-Roasted Barbecue Brisket Recipe

How long should I marinate the brisket?

Marinating the brisket is a great way to enhance its flavor. Ideally, you should marinate it for at least 1 hour. However, for the best results, consider marinating it overnight in the refrigerator. This allows the spices to penetrate the meat deeply, resulting in a more flavorful brisket. If you’re short on time, even a quick 30-minute marinade can still add some nice flavor!

Can I use a different cut of meat?

Yes, you can use different cuts of meat if brisket isn’t available. Cuts like chuck roast or beef shoulder can work well, but keep in mind that they may require different cooking times. These cuts are also tougher and benefit from slow cooking, just like brisket. The key is to ensure that the meat is well-marbled, as this will help keep it juicy and tender during the cooking process.

What is the best way to store leftovers?

To store leftover brisket, first let it cool to room temperature. Then, wrap it tightly in plastic wrap or aluminum foil, or place it in an airtight container. Store it in the refrigerator for up to 3-4 days. If you want to keep it longer, consider freezing it. Wrap the brisket well and place it in a freezer-safe bag. It can last for up to 3 months in the freezer. When ready to eat, thaw it in the refrigerator overnight and reheat gently.

How do I know when the brisket is done?

The best way to check if your brisket is done is by using a meat thermometer. Aim for an internal temperature of 195°F to 205°F. At this temperature, the collagen in the meat breaks down, making it tender and juicy. Additionally, you can test for tenderness by inserting a fork into the meat; it should pull apart easily. If it feels tough, give it more time in the oven!

Conclusion on Slow-Roasted Barbecue Brisket Recipe

Slow-Roasted Barbecue Brisket Recipe is a fantastic dish that brings warmth and joy to any gathering. With its tender texture and rich flavors, it’s sure to impress your family and friends. The slow cooking method allows the spices to meld beautifully, creating a mouthwatering experience that’s hard to forget.

Whether you’re a seasoned cook or just starting out, this recipe is approachable and rewarding. By following the steps outlined, you can create a brisket that rivals those found in the best barbecue joints. Remember, the key is patience—allowing the meat to cook slowly ensures it becomes tender and flavorful.

As you explore different marinades and cooking methods, don’t hesitate to make this recipe your own. Each variation can bring a new twist to the classic dish, keeping your meals exciting and fresh. Plus, with the tips provided, you’ll be well-equipped to tackle any challenges that may arise during the cooking process.

Slow-Roasted Barbecue Brisket Recipe is not just about the food; it’s about creating memories around the table. Happy cooking!

Paul

Slow-Roasted Barbecue Brisket Recipe for Perfect Flavor

This tender, juicy Slow Roasted Barbecue Brisket is loaded with smoky, savory flavor and melts in your mouth with every bite. A bold spice rub, tangy BBQ sauce, and low-and-slow oven roasting come together to make this a crave-worthy centerpiece for any meal—perfect for Sunday dinner, game day, or holiday gatherings. Minimal effort, maximum reward.
Prep Time 15 minutes
Servings: 6 –8 servings
Course: Main Dish
Cuisine: American BBQ

Ingredients
  

  • 3½ to 4½ pound flat cut beef brisket fat cap trimmed to ¼-inch
  • 1 tablespoon dried thyme leaves
  • 1 tablespoon smoked paprika
  • 2 teaspoons freshly ground black pepper
  • 2 teaspoons kosher salt
  • 1 teaspoon onion powder
  • ½ teaspoon garlic powder
  • ½ teaspoon cayenne pepper
  • ½ teaspoon ground cumin
  • 2 tablespoons Worcestershire sauce
  • 1 cup BBQ sauce use your favorite brand or homemade

Method
 

  1. Preheat oven to 300°F (150°C). Line a roasting pan or baking dish with foil.
  2. Trim the brisket fat cap to about ¼-inch if needed. Pat dry.
  3. In a small bowl, mix the thyme, smoked paprika, black pepper, salt, onion powder, garlic powder, cayenne pepper, and cumin to create the dry rub.
  4. Rub the spice mixture generously over both sides of the brisket.
  5. Place the brisket in the prepared pan, fat side up. Drizzle with Worcestershire sauce and BBQ sauce, then spread evenly with a spatula.
  6. Cover the pan tightly with foil and roast for 2 hours without uncovering.
  7. Remove from the oven, flip the brisket, re-cover with foil, and return to the oven. Roast for another 1½ to 2 hours, or until the brisket is fork-tender.
  8. Transfer the brisket to a cutting board, slice against the grain, and drizzle with pan sauce before serving.

Notes

  • Use a meat thermometer to ensure the brisket reaches around 190–205°F internally for optimal tenderness.
  • Let the brisket rest for 10–15 minutes before slicing to retain juices.
  • Leftovers make excellent sandwiches, tacos, or wraps the next day.
  • For extra smoky flavor, use a smoked BBQ sauce or add a few drops of liquid smoke.

Hawaiian Shoyu Chicken: Discover This Delicious Recipe!

Introduction to Hawaiian Shoyu Chicken

Have you ever found yourself dreaming of a dish that whisks you away to a tropical paradise with just one bite? Well, let me introduce you to Hawaiian Shoyu Chicken. This delightful recipe is like a mini-vacation for your taste buds, offering a savory-sweet escape that’s perfect for those hectic days when you need a quick yet impressive meal. As a busy mom myself, I know how precious time is, and this dish is a lifesaver. It’s not just a meal; it’s a warm hug on a plate, ready to bring joy to your dinner table.

Why You’ll Love This Hawaiian Shoyu Chicken

Imagine a dish that’s as easy as pie but tastes like a gourmet masterpiece. Hawaiian Shoyu Chicken is your go-to for those whirlwind days. It’s quick to prepare, bursting with flavor, and a guaranteed crowd-pleaser. The savory-sweet marinade transforms simple chicken thighs into a succulent delight. Plus, it’s versatile enough to pair with your favorite sides, making dinner a breeze.

Ingredients Hawaiian Shoyu Chicken

Creating this Hawaiian Shoyu Chicken is a breeze with a handful of pantry staples and a few fresh ingredients. Let’s dive into what you’ll need:

  • Chicken Thighs: Opt for bone-in, skin-on for juicy, flavorful results. You can substitute with boneless if preferred.
  • Soy Sauce: The heart of the marinade, providing that umami punch. Choose low-sodium if you’re watching salt intake.
  • Brown Sugar: Adds a touch of sweetness, balancing the savory notes. Feel free to swap with honey or maple syrup.
  • Water: Helps to dilute the marinade, ensuring the flavors meld beautifully.
  • Rice Vinegar: Offers a subtle tang, enhancing the overall taste. Apple cider vinegar works as a substitute.
  • Garlic: Freshly minced for a robust, aromatic kick. Garlic powder can be used in a pinch.
  • Fresh Ginger: Grated for a warm, spicy undertone. Ground ginger is an alternative, though fresh is best.
  • Black Pepper: Adds a hint of heat, complementing the sweetness.
  • Red Pepper Flakes: Optional, for those who like a bit of spice. Adjust to your heat preference.
  • Green Onions: Sliced for a fresh, vibrant garnish that adds color and flavor.
  • Sesame Seeds: Optional, for a nutty crunch that elevates the dish’s presentation.

Exact quantities for each ingredient are listed at the bottom of the article, ready for printing.

How to Make Hawaiian Shoyu Chicken

Prepare the Marinade

Start by gathering all your ingredients. In a large bowl, whisk together the soy sauce, brown sugar, water, rice vinegar, minced garlic, grated ginger, black pepper, and red pepper flakes. Stir until the sugar dissolves completely. This marinade is the heart of your Hawaiian Shoyu Chicken, infusing it with that irresistible savory-sweet flavor.

Marinate the Chicken

Place the chicken thighs into the marinade, ensuring each piece is well-coated. Cover the bowl with plastic wrap and pop it in the fridge. Let the chicken soak up all those delicious flavors for at least an hour. If you have time, marinate overnight for an even deeper taste. Trust me, the wait is worth it!

Preheat the Oven

When you’re ready to cook, preheat your oven to 375°F (190°C). This temperature is perfect for baking the chicken to juicy perfection. While the oven heats up, take a moment to prepare your baking dish. A little anticipation goes a long way in the kitchen.

Bake the Chicken

Transfer the marinated chicken thighs to your baking dish, pouring the remaining marinade over the top. This ensures every bite is packed with flavor. Slide the dish into the oven and bake for 35-40 minutes. You’ll know it’s done when the chicken reaches an internal temperature of 165°F (74°C).

Broil for Extra Flavor

If you love a bit of caramelization, switch your oven to broil for the last 5 minutes. Keep a close eye to prevent burning. This step adds a delightful crispiness to the skin, making your Hawaiian Shoyu Chicken even more irresistible.

Rest and Garnish

Once out of the oven, let the chicken rest for about 5 minutes. This allows the juices to redistribute, keeping the meat tender. Before serving, sprinkle with sliced green onions and sesame seeds for a pop of color and flavor. Now, you’re ready to enjoy a taste of paradise!

Tips for Success

  • For maximum flavor, marinate the chicken overnight. The longer it sits, the better it tastes.
  • Use a meat thermometer to ensure the chicken reaches 165°F for safe consumption.
  • For a thicker sauce, simmer the leftover marinade on the stove until it reduces.
  • Experiment with adding pineapple juice for a tropical twist.
  • Always let the chicken rest before serving to lock in the juices.

Equipment Needed

  • Large Bowl: For mixing the marinade. A deep dish works too.
  • Baking Dish: To bake the chicken. A roasting pan is a good alternative.
  • Whisk: For blending the marinade ingredients. A fork can substitute.
  • Meat Thermometer: Ensures chicken is cooked through. Essential for safety.
  • Plastic Wrap: To cover the marinating chicken. A lid or foil works as well.

Variations

  • Gluten-Free: Swap soy sauce with tamari or coconut aminos for a gluten-free version.
  • Spicy Kick: Add more red pepper flakes or a dash of sriracha for extra heat.
  • Low-Sodium: Use low-sodium soy sauce and reduce added salt for a heart-friendly option.
  • Vegetarian: Substitute chicken with firm tofu or tempeh, marinating and baking as directed.
  • Citrus Twist: Add a splash of orange or lime juice to the marinade for a zesty flavor.

Serving Suggestions

  • Steamed Rice: A classic pairing that soaks up the savory sauce beautifully.
  • Quinoa: For a nutty, protein-packed alternative to rice.
  • Grilled Pineapple: Adds a sweet, tropical touch to your plate.
  • Green Salad: A fresh, crisp side to balance the rich flavors.
  • Chilled White Wine: Complements the dish with its light, refreshing notes.

FAQs about Hawaiian Shoyu Chicken

Can I use chicken breasts instead of thighs?

Absolutely! While chicken thighs offer a juicier result, chicken breasts work well too. Just be mindful of the cooking time, as breasts may cook faster. Ensure they reach an internal temperature of 165°F to avoid dryness.

Is it possible to make this dish ahead of time?

Yes, Hawaiian Shoyu Chicken is perfect for meal prep. You can marinate the chicken up to 24 hours in advance. After baking, store it in an airtight container in the fridge for up to three days. Reheat gently to maintain its succulent texture.

What can I do with leftover marinade?

Leftover marinade can be transformed into a delicious sauce. Simply bring it to a boil on the stove, then simmer until it thickens. This makes a great drizzle over the chicken or rice, adding an extra burst of flavor.

Can I freeze Hawaiian Shoyu Chicken?

Yes, you can freeze both the marinated raw chicken and the cooked dish. For raw, place the chicken and marinade in a freezer-safe bag, removing excess air. For cooked, store in an airtight container. Both can be frozen for up to three months.

What if I don’t have rice vinegar?

No worries! You can substitute rice vinegar with apple cider vinegar or white wine vinegar. Each will add a slightly different tang, but the dish will still be deliciously flavorful.

Final Thoughts

Hawaiian Shoyu Chicken is more than just a meal; it’s a culinary journey to the islands, right from your kitchen. The savory-sweet harmony of flavors is like a gentle ocean breeze, soothing and satisfying. Whether you’re a busy mom juggling a million tasks or a professional seeking a quick yet delightful dinner, this dish is your ticket to a stress-free evening. It’s a reminder that even on the busiest days, a delicious, home-cooked meal can bring warmth and joy to your table. So, gather your loved ones and savor the taste of paradise together.

Hawaiian Shoyu Chicken
Paul

Hawaiian Shoyu Chicken: Discover This Delicious Recipe!

Hawaiian Shoyu Chicken is a flavorful dish featuring chicken thighs marinated in a savory-sweet soy sauce mixture, then baked to perfection.
Prep Time 1 hour 10 minutes
Cook Time 40 minutes
Total Time 1 hour 50 minutes
Servings: 4 servings
Course: Main Course
Cuisine: Hawaiian
Calories: 350

Ingredients
  

  • 2 pounds chicken thighs bone-in and skin-on
  • 1 cup soy sauce
  • 1/2 cup brown sugar
  • 1/2 cup water
  • 1/4 cup rice vinegar
  • 4 cloves garlic minced
  • 1 tablespoon fresh ginger grated
  • 1 teaspoon black pepper
  • 1/2 teaspoon red pepper flakes optional
  • 2 green onions sliced (for garnish)
  • Sesame seeds for garnish, optional

Method
 

  1. In a large bowl, whisk together the soy sauce, brown sugar, water, rice vinegar, garlic, ginger, black pepper, and red pepper flakes until the sugar is dissolved.
  2. Add the chicken thighs to the marinade, ensuring they are well coated. Cover and refrigerate for at least 1 hour, or up to overnight for best flavor.
  3. Preheat your oven to 375°F (190°C).
  4. Place the marinated chicken thighs in a baking dish, pouring the marinade over the top.
  5. Bake for 35-40 minutes, or until the chicken is cooked through and reaches an internal temperature of 165°F (74°C).
  6. For extra caramelization, switch the oven to broil for the last 5 minutes of cooking, watching closely to prevent burning.
  7. Remove from the oven and let the chicken rest for 5 minutes before serving. Garnish with sliced green onions and sesame seeds if desired.

Notes

  • For a sweeter flavor, add a tablespoon of pineapple juice to the marinade.
  • Serve the chicken over steamed rice or quinoa to soak up the delicious sauce.

Donut Trifle Recipe: A Delightful Dessert to Enjoy

Introduction to Donut Trifle Recipe

What is a Donut Trifle?

A donut trifle is a delightful dessert that combines the sweetness of glazed donuts with creamy layers of pudding and fresh fruits. Imagine a beautiful glass dish filled with soft donut halves, rich vanilla pudding, and vibrant berries. This dessert is not only visually appealing but also incredibly tasty. Each spoonful offers a mix of textures and flavors that will make your taste buds dance with joy. It’s a fun twist on traditional trifles, making it a perfect treat for any occasion.

Why You Should Try This Donut Trifle Recipe

There are many reasons to try this donut trifle recipe. First, it’s easy to make! With just a few simple ingredients, you can whip up a dessert that looks like it came from a fancy bakery. Second, it’s versatile. You can customize it with your favorite fruits or even switch up the pudding flavor. Plus, it’s a crowd-pleaser! Whether you’re hosting a party or just want a sweet treat for your family, this trifle will impress everyone. Lastly, it’s a great way to use leftover donuts, turning them into something special. So, gather your ingredients and get ready to create a dessert that everyone will love!

Ingredients for Donut Trifle Recipe

To create your delicious donut trifle, you will need the following ingredients. Each component plays a vital role in building layers of flavor and texture. Here’s what you’ll need:

  • 2 cups of glazed donut holes, cut in half
  • 1 cup of vanilla pudding mix
  • 2 cups of milk
  • 1 cup of whipped cream (store-bought or homemade)
  • 1 teaspoon of vanilla extract
  • 1 cup of fresh strawberries, sliced
  • 1 cup of blueberries
  • 1/2 cup of chocolate chips (optional)
  • Mint leaves for garnish (optional)

These ingredients come together to create a delightful dessert that is both creamy and fruity. The glazed donut holes provide a sweet base, while the vanilla pudding adds a rich creaminess. Fresh strawberries and blueberries not only enhance the flavor but also add a pop of color. If you want to take it up a notch, sprinkle some chocolate chips on top for an extra treat. Don’t forget the mint leaves for a refreshing touch!

Step-by-Step Preparation of Donut Trifle Recipe

Step 1: Gather Your Ingredients

Before you start making your donut trifle, it’s important to gather all your ingredients. This will make the process smoother and more enjoyable. Make sure you have:

  • 2 cups of glazed donut holes, cut in half
  • 1 cup of vanilla pudding mix
  • 2 cups of milk
  • 1 cup of whipped cream
  • 1 teaspoon of vanilla extract
  • 1 cup of fresh strawberries, sliced
  • 1 cup of blueberries
  • 1/2 cup of chocolate chips (optional)
  • Mint leaves for garnish (optional)

Having everything ready will help you create this delicious dessert without any interruptions. Plus, it’s always fun to see all the colorful ingredients laid out!

Step 2: Prepare the Donuts

Now that you have your ingredients, it’s time to prepare the donuts. Take your glazed donut holes and cut them in half. This will allow them to soak up the creamy pudding and blend beautifully with the other layers. If you prefer, you can use regular donuts, but glazed ones work best for this recipe. Set the halved donuts aside while you prepare the pudding mixture.

Step 3: Make the Cream Mixture

Next, let’s make the creamy layer that will bring everything together. In a medium bowl, whisk together the vanilla pudding mix and milk. Keep whisking until the mixture is smooth and free of lumps. After that, let it sit for about 5 minutes. This will allow the pudding to thicken nicely. Once thickened, gently fold in the whipped cream and vanilla extract. This will create a light and fluffy cream that adds a delightful texture to your trifle.

Step 4: Assemble the Donut Trifle

Now comes the fun part—assembling your donut trifle! In a large trifle dish or individual serving cups, start with a layer of the halved donuts at the bottom. Next, add a generous layer of the creamy pudding mixture over the donuts. Then, sprinkle a layer of sliced strawberries and blueberries on top. Repeat this layering process until you’ve used all your ingredients. Make sure to finish with a layer of whipped cream on top for a beautiful presentation!

Step 5: Chill and Serve

After assembling your trifle, it’s time to let it chill. Cover the trifle with plastic wrap and place it in the refrigerator for at least 1 hour. This chilling time allows the flavors to meld together, making each bite even more delicious. When you’re ready to serve, you can sprinkle some chocolate chips on top and garnish with fresh mint leaves for a lovely touch. Enjoy your delightful donut trifle!

Variations of Donut Trifle Recipe

Seasonal Variations

One of the best things about the donut trifle recipe is its versatility. You can easily adapt it to fit the seasons! For spring, consider adding fresh peaches or cherries to your layers. Their juicy sweetness will brighten up the dessert. In summer, mix in some raspberries or blackberries for a refreshing twist. Autumn calls for pumpkin spice donuts, which can be paired with spiced pudding and caramel sauce. Finally, during winter, you might want to use peppermint-flavored donuts and add crushed candy canes for a festive touch. These seasonal variations will keep your donut trifle exciting all year round!

Alternative Ingredients for Donut Trifle Recipe

If you want to switch things up, there are plenty of alternative ingredients you can use in your donut trifle recipe. For instance, instead of glazed donut holes, try chocolate or jelly-filled donuts for a different flavor experience. You can also experiment with different pudding flavors, such as chocolate or butterscotch, to create a unique taste. If you’re looking for a healthier option, consider using Greek yogurt instead of whipped cream. This will add protein while still keeping the dessert creamy. Lastly, feel free to mix in nuts or granola for added crunch. These alternative ingredients will help you create a donut trifle that suits your taste perfectly!

Cooking Note for Donut Trifle Recipe

When preparing your donut trifle, there are a few important cooking notes to keep in mind. First, the quality of your ingredients can greatly affect the final taste. Always opt for fresh fruits and high-quality donuts. This will ensure that each layer is bursting with flavor. If you’re using store-bought donuts, check the expiration date to guarantee freshness.

Another key point is the layering technique. Make sure to layer the ingredients gently. This will help maintain the structure of your trifle and prevent the layers from mixing too much. If you’re using individual cups, it’s easier to control the layers and create a beautiful presentation.

Additionally, chilling the trifle is crucial. Allowing it to sit in the refrigerator for at least an hour helps the flavors meld together. If you can, let it chill overnight. This will enhance the taste even more! Just remember to cover it well to prevent any odors from the fridge affecting your dessert.

Lastly, feel free to get creative with your presentation. Use clear glass dishes to showcase the colorful layers. You can also add decorative touches, like a drizzle of chocolate sauce or a sprinkle of nuts, to make it even more appealing. With these cooking notes in mind, you’re all set to create a stunning and delicious donut trifle that everyone will love!

Serving Suggestions for Donut Trifle Recipe

When it comes to serving your delightful donut trifle, presentation is key! Here are some fun and creative serving suggestions to make your dessert even more enjoyable:

  • Individual Cups: For a more personal touch, serve the trifle in individual cups or jars. This makes it easy for guests to grab their own serving and adds a charming look to your dessert table.
  • Layered Glass Dish: If you prefer a more traditional approach, use a large glass trifle dish. This allows everyone to see the beautiful layers of donuts, pudding, and fruit. It’s a showstopper that will impress your guests!
  • Garnish Creatively: Don’t forget to garnish your trifle! A sprinkle of chocolate chips, a dollop of whipped cream, or a few fresh mint leaves on top can elevate the look and taste. You can also add a drizzle of chocolate or caramel sauce for an extra touch of sweetness.
  • Pair with Beverages: Consider serving your donut trifle with a refreshing beverage. A glass of cold milk, iced coffee, or even a fruity punch can complement the sweetness of the trifle perfectly.
  • Serve with a Side: For a more filling dessert experience, pair your trifle with a side of fresh fruit or a scoop of ice cream. This adds variety and makes the dessert feel even more special.

These serving suggestions will not only enhance the visual appeal of your donut trifle but also create a delightful experience for everyone enjoying it. Whether it’s a family gathering, a birthday party, or just a sweet treat at home, your donut trifle will surely be a hit!


Tips for Perfecting Your Donut Trifle Recipe

Creating the perfect donut trifle is all about attention to detail and a few helpful tips. Here are some suggestions to ensure your dessert turns out delicious and visually stunning:

  • Choose Fresh Ingredients: Always opt for fresh fruits and quality donuts. Fresh strawberries and blueberries will enhance the flavor and appearance of your trifle. If possible, buy seasonal fruits for the best taste.
  • Layering Technique: When layering your trifle, start with the donuts at the bottom. This helps them soak up the pudding without becoming too soggy. Be gentle when adding each layer to maintain the structure.
  • Chill Time: Allow your trifle to chill for at least one hour before serving. This helps the flavors meld together beautifully. If you can, let it sit overnight for an even richer taste.
  • Experiment with Flavors: Don’t hesitate to try different pudding flavors or fruits. Chocolate pudding with bananas or butterscotch pudding with apples can create exciting new variations of your trifle.
  • Presentation Matters: Use clear glass dishes to showcase the colorful layers of your trifle. A beautiful presentation will make your dessert even more appealing to guests.
  • Garnish Wisely: A simple garnish can elevate your trifle. Consider adding a sprinkle of nuts, a drizzle of chocolate sauce, or a few mint leaves on top for a pop of color and flavor.
  • Make it Ahead: If you’re preparing for a gathering, consider making your trifle a day in advance. This not only saves time but also allows the flavors to develop even more.
  • Keep it Balanced: Ensure that each layer has a good balance of donuts, pudding, and fruit. This will create a delightful mix of textures and flavors in every bite.

By following these tips, you’ll be well on your way to creating a donut trifle that is not only delicious but also a feast for the eyes. Enjoy the process and have fun experimenting with different combinations!

Breakdown of Time for Donut Trifle Recipe

Prep Time

Preparing your donut trifle is a breeze! The prep time for this delightful dessert is approximately 20 minutes. This includes gathering your ingredients, cutting the donut holes, and mixing the pudding and whipped cream. It’s a quick process that allows you to get started on your delicious creation without any hassle.

Cooking Time

While there’s no actual cooking involved in this recipe, you will need some time for the pudding to thicken. This takes about 5 minutes. After that, you’ll spend a few minutes assembling the trifle layers. So, the total time spent on the “cooking” aspect is around 10 minutes. It’s all about layering and letting the flavors come together!

Total Time

In total, you can expect to spend about 30 minutes on your donut trifle recipe. This includes both prep and assembly time. However, don’t forget to factor in the chilling time! It’s best to let your trifle chill in the refrigerator for at least 1 hour before serving. This allows the flavors to meld beautifully, making each bite even more enjoyable. So, while the active time is short, the waiting time is essential for a delicious dessert!

Nutritional Information for Donut Trifle Recipe

Calories

When indulging in a delicious donut trifle, it’s good to know what you’re consuming. Each serving of this delightful dessert contains approximately 280 calories. This makes it a sweet treat that can fit into your dessert plans without going overboard. Enjoying a serving of this trifle can satisfy your sweet tooth while still being mindful of your calorie intake.

Protein

In addition to its delightful taste, the donut trifle also provides some protein. Each serving contains about 4 grams of protein. This comes mainly from the whipped cream and the milk used in the pudding mixture. While it’s not a high-protein dessert, it does offer a little boost, making it a more balanced option compared to other sugary treats.

Sodium

When it comes to sodium content, each serving of the donut trifle has around 150 milligrams. This is a moderate amount, especially for a dessert. It’s always a good idea to keep an eye on sodium intake, but this trifle can be enjoyed as part of a balanced diet. Just remember to pair it with other low-sodium foods throughout the day for a healthier overall meal plan.

Overall, the donut trifle recipe is a delightful dessert that offers a balance of flavors and textures. With its reasonable calorie count, a bit of protein, and moderate sodium levels, it can be a sweet addition to your dessert repertoire. Enjoy it in moderation, and you’ll have a treat that’s both delicious and satisfying!

FAQs about Donut Trifle Recipe

Can I use store-bought donuts for the Donut Trifle Recipe?

Absolutely! Using store-bought donuts is a great option for your donut trifle recipe. It saves time and effort, allowing you to focus on assembling the layers. Just make sure to choose fresh, high-quality donuts for the best flavor. Glazed donuts work wonderfully, but feel free to experiment with other varieties like chocolate or jelly-filled donuts. They can add a unique twist to your trifle!

How long can I store the Donut Trifle?

Your donut trifle can be stored in the refrigerator for up to 2 days. However, it’s best enjoyed within the first day for optimal freshness. As it sits, the donuts may absorb more moisture from the pudding, which can change their texture. To keep it fresh, cover the trifle tightly with plastic wrap or a lid. This will help prevent any odors from the fridge from affecting your dessert.

Can I make the Donut Trifle ahead of time?

Yes, you can definitely make the donut trifle ahead of time! In fact, preparing it a day in advance can enhance the flavors as they meld together. Just remember to cover it well and store it in the refrigerator. This way, you’ll have a delicious dessert ready to serve when you need it. Just add any garnishes, like chocolate chips or mint leaves, right before serving for the best presentation!

Conclusion on Donut Trifle Recipe

In conclusion, the donut trifle recipe is a delightful and easy dessert that everyone can enjoy. With its layers of sweet glazed donuts, creamy pudding, and fresh fruits, it offers a wonderful mix of flavors and textures. Whether you’re celebrating a special occasion or simply treating yourself, this dessert is sure to impress.

Not only is it simple to prepare, but it also allows for endless customization. You can switch up the fruits, pudding flavors, and even the type of donuts you use. This versatility makes it a fantastic choice for any season or gathering. Plus, the vibrant colors and beautiful layers make it a showstopper on any dessert table.

Remember to follow the tips and variations shared throughout this article to create your perfect donut trifle. With a little creativity and some fresh ingredients, you can make a dessert that’s not only delicious but also visually stunning. So, gather your ingredients, get your trifle dish ready, and enjoy the process of making this delightful treat!

As you serve your donut trifle, watch as smiles light up the faces of your family and friends. It’s a dessert that brings joy and sweetness to any occasion. So go ahead, indulge in this delightful donut trifle recipe, and make some sweet memories!

Paul

Donut Trifle Recipe: A Delightful Dessert to Enjoy

This Easy Donut Dessert Trifle is a show-stopping, no-bake treat layered with fluffy pudding, homemade whipped cream, and sweet glazed donut holes. Perfect for parties, brunches, or whenever you’re craving something whimsical and delicious — it’s a guaranteed crowd-pleaser!
Prep Time 20 minutes
Cook Time 1 hour
Total Time 1 hour 20 minutes
Servings: 10 –12 servings
Course: Dessert
Cuisine: American

Ingredients
  

  • 1 box vanilla instant pudding mix 5.1 oz size
  • 3 cups milk for the pudding
  • 2 cups heavy cream
  • 1/2 cup powdered sugar
  • 1 teaspoon vanilla extract
  • Approximately 48 glazed donut holes
  • Sprinkles optional for garnish

Method
 

  1. In a large mixing bowl, beat the heavy cream, powdered sugar, and vanilla extract together using a hand mixer or stand mixer until stiff peaks form. Set aside.
  2. In another bowl, whisk together the vanilla pudding mix and milk until smooth and slightly thickened. Let sit for 5 minutes to fully set.
In a trifle dish or large glass bowl, assemble the dessert in layers:
  1. First, add one-third of the donut holes to the bottom.
  2. Then spoon one-third of the vanilla pudding over the donuts.
  3. Top with one-third of the whipped cream.
  4. Repeat the layers two more times in the same order, ending with a final layer of whipped cream on top.
  5. Garnish with sprinkles or a few extra donut holes if desired.
  6. Chill in the refrigerator for at least 1 hour before serving.

Notes

  • Make Ahead: This trifle can be assembled up to 1 day in advance. The longer it sits, the softer the donuts become.
  • Flavor Swaps: Try using chocolate pudding or cinnamon donut holes for a fun variation.
  • Individual Servings: Use small mason jars or cups to create single-serve trifles.
  • Whipped Cream Tip: Make sure your cream is cold and your bowl is chilled for the best texture.

Hearty Chicken Stew Recipe warms your soul and belly.

Hearty Chicken Stew Recipe is a comforting dish that brings together tender chicken, fresh vegetables, and aromatic herbs. This one-pot meal is not only delicious but also easy to prepare, making it perfect for busy weeknights or cozy family gatherings.

Imagine the rich aroma of chicken simmering with garlic and herbs wafting through your kitchen. It’s a dish that warms the heart and fills the belly. Plus, it’s packed with nutrients, making it a wholesome choice for everyone. Whether you’re a seasoned cook or just starting out, this recipe is straightforward and forgiving, allowing you to customize it to your taste.

In this article, we’ll guide you through the ingredients, preparation steps, and variations of this delightful stew. You’ll learn how to create a meal that not only satisfies hunger but also brings joy to your dining table. So, grab your apron and let’s dive into the world of hearty chicken stew!

Ingredients for Hearty Chicken Stew Recipe

Hearty Chicken Stew Recipe, you’ll need a variety of fresh ingredients. Each component plays a vital role in building flavor and texture. Here’s what you’ll need:

  • 2 tablespoons olive oil: This will be used for sautéing and adds a rich flavor.
  • 1 pound boneless, skinless chicken thighs: Cut into bite-sized pieces for easy cooking and eating.
  • 1 medium onion: Diced to enhance the stew’s base flavor.
  • 2 cloves garlic: Minced for that aromatic touch.
  • 3 medium carrots: Sliced to add sweetness and color.
  • 2 medium potatoes: Diced for heartiness and to help thicken the stew.
  • 1 cup green beans: Trimmed and cut into 1-inch pieces for a crunchy texture.
  • 4 cups chicken broth: This is the stew’s liquid base, providing depth of flavor.
  • 1 teaspoon dried thyme: A classic herb that complements chicken beautifully.
  • 1 teaspoon dried rosemary: Adds a fragrant, earthy note.
  • Salt and pepper: To taste, enhancing all the flavors.
  • 2 tablespoons fresh parsley: Chopped for garnish, adding a fresh finish.

Hearty Chicken Stew Recipe lies in its flexibility, allowing you to make it your own!

Step-by-Step Preparation of Hearty Chicken Stew Recipe

Hearty Chicken Stew Recipe is simple and straightforward, making it easy for anyone to follow. Let’s break it down step by step!

Step 1: Preparing the Ingredients

Before you start cooking, it’s important to prepare all your ingredients. Begin by washing and chopping the vegetables. Dice the onion, mince the garlic, slice the carrots, and dice the potatoes. Trim the green beans and cut them into 1-inch pieces. Having everything ready will make the cooking process smoother and more enjoyable.

Step 2: Sautéing the Aromatics

In a large pot, heat the olive oil over medium heat. Once the oil is hot, add the diced onion and minced garlic. Sauté them for about 2-3 minutes. You want the onion to become translucent and fragrant. This step is crucial as it builds the base flavor for your stew.

Step 3: Browning the Chicken

Next, add the bite-sized chicken pieces to the pot. Season them with salt and pepper. Cook the chicken for about 5-7 minutes, stirring occasionally. You want the chicken to be browned on all sides. This not only adds flavor but also gives the stew a beautiful color.

Step 4: Adding Vegetables and Broth

Once the chicken is browned, it’s time to add the vegetables. Stir in the sliced carrots, diced potatoes, and green beans. Mix everything well and let it cook for another 5 minutes. After that, pour in the chicken broth. Add the dried thyme and rosemary, stirring to combine all the ingredients.

Step 5: Simmering the Stew

Bring the mixture to a boil. Once it’s boiling, reduce the heat to low. Cover the pot and let it simmer for 30-35 minutes. This allows the flavors to meld together and the vegetables to become tender. You’ll know it’s ready when the chicken is cooked through and the veggies are soft.

Step 6: Final Seasoning and Serving

After simmering, taste the stew and adjust the seasoning with more salt and pepper if needed. Once you’re satisfied with the flavor, it’s time to serve! Ladle the hearty chicken stew into bowls and garnish with fresh parsley. Enjoy your warm, comforting meal!

Variations of Hearty Chicken Stew Recipe

Hearty Chicken Stew Recipe lies in its versatility. You can easily adapt it to suit your taste or use what you have on hand. Here are some exciting variations to consider:

Adding Different Vegetables

One of the easiest ways to customize your stew is by adding different vegetables. While the classic recipe includes carrots, potatoes, and green beans, feel free to experiment! You can add:

  • Peas: Sweet and tender, they add a pop of color.
  • Corn: Adds a sweet crunch that complements the chicken.
  • Bell Peppers: Chopped bell peppers bring a vibrant flavor and texture.
  • Spinach or Kale: Stir in some greens for added nutrition.

Mixing and matching vegetables not only enhances the flavor but also boosts the nutritional value of your stew. Just remember to adjust cooking times based on the vegetables you choose!

Using Alternative Proteins

If you want to switch things up, consider using alternative proteins. While chicken is the star of this recipe, you can try:

  • Turkey: Ground turkey or turkey thighs work well for a leaner option.
  • Beef: Use beef stew meat for a heartier flavor.
  • Vegetarian Options: Replace chicken with chickpeas or lentils for a plant-based stew.

Each protein brings its unique taste and texture, allowing you to create a stew that fits your dietary preferences.

Spicing It Up: Flavor Variations

Hearty Chicken Stew Recipe, consider incorporating different spices and herbs. Here are some ideas:

  • Cayenne Pepper: A pinch can add heat without overpowering the dish.
  • Smoked Paprika: This adds a smoky flavor that enhances the overall taste.
  • Italian Seasoning: A blend of herbs can give your stew an Italian twist.
  • Fresh Herbs: Try adding fresh basil or cilantro just before serving for a burst of freshness.

These flavor variations can transform your stew into something new and exciting, making it a dish you’ll want to make again and again!

Cooking Note for Hearty Chicken Stew Recipe

Hearty Chicken Stew Recipe is not just about following steps; it’s also about understanding the process. Here are some important notes to keep in mind while preparing your stew:

First, always use fresh ingredients when possible. Fresh vegetables and herbs enhance the flavor and nutritional value of your stew. If you have leftover vegetables in your fridge, don’t hesitate to toss them in. This recipe is forgiving and allows for creativity!

Next, consider the size of your chicken pieces. Cutting them into uniform, bite-sized pieces ensures even cooking. If the pieces are too large, they may not cook through properly, leaving you with tough chicken. Aim for pieces that are about 1 to 1.5 inches in size.

When it comes to seasoning, remember that you can always add more, but you can’t take it away. Start with a little salt and pepper, and adjust to your taste as the stew simmers. This way, you can control the flavor without overwhelming the dish.

Another tip is to let the stew simmer gently. A rolling boil can make the chicken tough and dry. Instead, keep the heat low and let the flavors meld together slowly. This patience pays off with a richer, more flavorful stew.

Lastly, don’t forget to taste as you go! This is the best way to ensure your stew turns out just right. Adjust the seasoning, add more herbs, or even a splash of lemon juice for brightness. Cooking is an art, and your taste buds are the best guide.

Hearty Chicken Stew Recipe that’s not only delicious but also a true reflection of your culinary skills. Enjoy the process and the delightful meal that follows!

Serving Suggestions for Hearty Chicken Stew Recipe

Hearty Chicken Stew Recipe is ready, it’s time to think about how to serve it. A well-presented meal can elevate the dining experience, making it even more enjoyable. Here are some delightful serving suggestions to consider:

  • Crusty Bread: Serve your stew with a side of warm, crusty bread. This is perfect for dipping and soaking up the delicious broth. A baguette or sourdough loaf works wonderfully!
  • Rice or Quinoa: For a heartier meal, consider serving the stew over a bed of rice or quinoa. This adds an extra layer of texture and makes the dish even more filling.
  • Salad: A fresh green salad can complement the warmth of the stew. Toss together some mixed greens, cherry tomatoes, and a light vinaigrette for a refreshing side.
  • Mashed Potatoes: If you want to indulge, serve the stew over creamy mashed potatoes. This combination is comforting and satisfying, perfect for chilly evenings.
  • Garnishes: Don’t forget to sprinkle some extra fresh parsley or even a dash of grated Parmesan cheese on top of the stew before serving. This adds a pop of color and flavor!

Hearty Chicken Stew Recipe shine. Enjoy every bite!

Tips for Perfecting Your Hearty Chicken Stew Recipe

Hearty Chicken Stew Recipe is all about attention to detail and a few helpful tips. With these suggestions, you can elevate your stew to new heights, ensuring it’s not just good, but truly exceptional. Here are some tips to keep in mind:

  • Choose Quality Chicken: Opt for fresh, high-quality chicken thighs. They are more flavorful and tender compared to chicken breasts. If you can, buy organic or free-range chicken for the best taste.
  • Brown the Chicken Well: Don’t rush the browning process. Take your time to get a nice golden color on the chicken. This step adds depth and richness to the stew.
  • Layer Flavors: Consider adding a splash of white wine after browning the chicken. This deglazes the pot and adds a wonderful flavor. Just let it cook off for a minute before adding the broth.
  • Use Homemade Broth: If possible, use homemade chicken broth. It’s richer and more flavorful than store-bought options. If you’re short on time, look for low-sodium varieties to control the saltiness.
  • Don’t Overcrowd the Pot: If you’re making a large batch, consider cooking in two pots. Overcrowding can lead to uneven cooking and steaming instead of browning.
  • Adjust Cooking Time: Keep an eye on the vegetables. If you prefer them to have a bit of crunch, reduce the simmering time. For softer veggies, let them cook a bit longer.
  • Let It Rest: After cooking, let the stew sit for about 10 minutes before serving. This allows the flavors to meld together even more, enhancing the overall taste.
  • Experiment with Herbs: Fresh herbs can make a big difference. Try adding fresh thyme or rosemary just before serving for a burst of flavor. You can also experiment with other herbs like dill or tarragon.
  • Store Properly: If you have leftovers, store them in an airtight container in the fridge. The flavors will deepen overnight, making the stew even tastier the next day!

Hearty Chicken Stew Recipe. Each step you take will contribute to a dish that’s not only delicious but also a true reflection of your cooking skills. Enjoy the process and the delightful results!

Breakdown of Time for Hearty Chicken Stew Recipe

Hearty Chicken Stew Recipe can help you plan your cooking session better. Here’s a simple breakdown of the time involved in preparing this delicious dish:

Prep Time

The prep time for this hearty stew is approximately 15-20 minutes. During this time, you’ll wash, chop, and measure all your ingredients. Having everything ready before you start cooking makes the process smoother and more enjoyable. It’s a great way to ensure you don’t miss any steps!

Cooking Time

Hearty Chicken Stew Recipe is about 40-45 minutes. This includes browning the chicken, sautéing the vegetables, and simmering the stew until everything is tender and flavorful. The simmering stage is crucial, as it allows the flavors to meld beautifully.

Total Time

In total, you can expect to spend around 55-65 minutes from start to finish. This includes both prep and cooking time. It’s a relatively quick meal for a one-pot dish, making it perfect for busy weeknights or when you want to impress guests without spending all day in the kitchen.

Hearty Chicken Stew Recipe into your schedule. Enjoy the process and the delicious results that follow!

Nutritional Information for Hearty Chicken Stew Recipe

Hearty Chicken Stew Recipe not only satisfies your taste buds but also provides a good mix of nutrients. Here’s a breakdown of the nutritional information per serving:

Calories

Each serving of this delicious stew contains approximately 320 calories. This makes it a hearty yet manageable option for a main meal. The combination of chicken, vegetables, and broth ensures that you’re getting a filling dish without excessive calories. It’s perfect for those looking to enjoy a comforting meal without overindulging.

Protein

Protein is a vital nutrient for building and repairing tissues, and this stew delivers! Each serving provides about 28 grams of protein. The boneless, skinless chicken thighs are an excellent source of lean protein, making this stew a great choice for anyone looking to increase their protein intake. It’s especially beneficial for active individuals and those looking to maintain muscle mass.

Sodium

Hearty Chicken Stew Recipe can vary based on the chicken broth used. On average, each serving contains around 600-800 mg of sodium. To keep the sodium levels in check, consider using low-sodium chicken broth. This way, you can enjoy the rich flavors of the stew without worrying about excessive salt intake. Always remember to taste and adjust the seasoning as needed!

Hearty Chicken Stew Recipe while being mindful of your dietary needs. It’s a wholesome meal that nourishes both body and soul!

FAQs about Hearty Chicken Stew Recipe

Can I make Hearty Chicken Stew Recipe in a slow cooker?

Hearty Chicken Stew Recipe in a slow cooker is a fantastic option. Simply follow the same steps for browning the chicken and sautéing the aromatics. Then, transfer everything to your slow cooker. Add the vegetables, broth, and seasonings, and cook on low for 6-8 hours or on high for 3-4 hours. This method allows the flavors to develop beautifully while you go about your day!

What can I serve with Hearty Chicken Stew Recipe?

Hearty Chicken Stew Recipe. Consider pairing it with:

  • Crusty Bread: Perfect for dipping into the stew.
  • Rice or Quinoa: Adds a hearty base to soak up the flavors.
  • Fresh Salad: A light salad can balance the richness of the stew.
  • Mashed Potatoes: For a comforting and filling combination.

These sides will enhance your meal and make it even more satisfying!

How long does Hearty Chicken Stew Recipe last in the fridge?

Hearty Chicken Stew Recipe can last in the fridge for about 3-4 days when stored in an airtight container. Make sure to let it cool completely before refrigerating. This allows the flavors to deepen, making it even tastier the next day!

Can I freeze Hearty Chicken Stew Recipe?

Hearty Chicken Stew Recipe for later enjoyment! Allow the stew to cool completely, then transfer it to freezer-safe containers. It can be frozen for up to 3 months. When you’re ready to enjoy it, simply thaw it in the fridge overnight and reheat on the stove or in the microwave. This makes for a quick and easy meal on busy days!

Conclusion on Hearty Chicken Stew Recipe

Hearty Chicken Stew Recipe is a delightful dish that brings warmth and comfort to any table. With its rich flavors, tender chicken, and vibrant vegetables, it’s a meal that not only satisfies hunger but also nourishes the soul. Whether you’re cooking for your family or hosting friends, this stew is sure to impress.

As you’ve seen, the recipe is versatile and forgiving, allowing you to make adjustments based on your preferences or what you have on hand. From adding different vegetables to experimenting with spices, the possibilities are endless. This adaptability makes it a perfect choice for any occasion, whether it’s a cozy weeknight dinner or a festive gathering.

Moreover, the nutritional benefits of this stew make it a smart choice for those looking to maintain a balanced diet. With a good amount of protein and essential vitamins from the vegetables, you can enjoy a hearty meal without compromising on health.

Hearty Chicken Stew Recipe. Don’t forget to share it with loved ones, as meals are best enjoyed together. Happy cooking, and may your kitchen be filled with the delightful aroma of this comforting stew!

Paul

Hearty Chicken Stew Recipe warms your soul and belly.

This One-Pot Chicken Stew is cozy, hearty, and packed with nourishing vegetables and tender shredded chicken. It’s the kind of soul-warming meal that comes together in a single pot — easy to make, easy to clean up, and perfect for chilly nights or wholesome weeknight dinners.
Prep Time 15 minutes
Cook Time 30 minutes
Total Time 45 minutes
Servings: 4 servings
Course: Soup / Stew
Cuisine: American

Ingredients
  

  • 2 tablespoons butter
  • 1/2 medium onion diced
  • 1/2 medium red bell pepper diced
  • 2 large carrots peeled and sliced into rounds
  • 2 stalks celery diced
  • Salt and pepper to taste
  • 3 cloves garlic minced
  • 2 tablespoons all-purpose flour
  • 1 1/2 pounds boneless skinless chicken breasts (or thighs)
  • 3/4 pound baby potatoes quartered
  • 3 sprigs fresh thyme plus more for garnish, optional
  • 1 bay leaf
  • 3 1/2 cups low-sodium chicken broth
  • 1 cup green beans cut
  • Fresh parsley optional for garnish

Method
 

  1. In a large Dutch oven or heavy-bottomed pot, melt the butter over medium heat.
  2. Add diced onions, carrots, and celery. Season with salt and pepper. Sauté for 5–8 minutes until softened. Add minced garlic and stir for 1 minute.
  3. Sprinkle flour over the sautéed veggies and stir to coat evenly, cooking for 1–2 minutes.
  4. Add the chicken breasts (or thighs), potatoes, red bell pepper, thyme sprigs, and bay leaf. Pour in chicken broth and season with additional salt and pepper.
  5. Bring to a gentle simmer. Cover and cook for 25–30 minutes, or until chicken is cooked through and vegetables are tender.
  6. Add green beans during the last 10 minutes of simmering.
  7. Remove bay leaf and thyme stems. Shred the chicken with two forks and return it to the pot. Stir well to combine.
  8. Serve hot, garnished with fresh thyme or parsley if desired.

Notes

  • Make It Creamy: Stir in a splash of cream or a dollop of sour cream for a richer stew.
  • Slow Cooker Tip: You can adapt this recipe for a slow cooker — cook on low for 6–7 hours or high for 3–4 hours before shredding the chicken.
  • Freezer-Friendly: Freeze cooled stew in airtight containers for up to 2 months. Thaw and reheat gently on the stove.
  • Vegetable Variations: Swap in peas, corn, or chopped spinach depending on what’s in season or in your fridge.