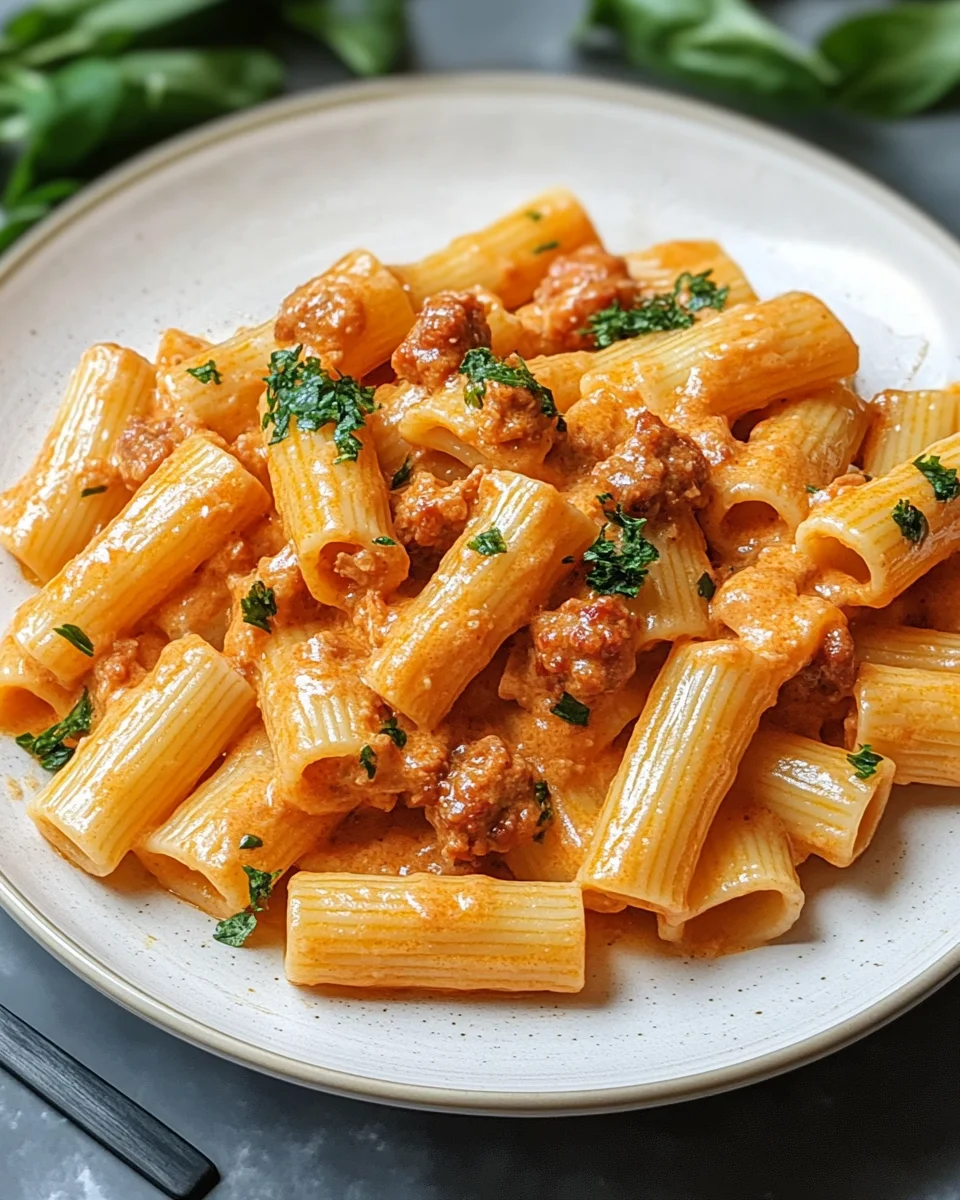
The Comfort of Creamy Sausage Rigatoni: A Dish That Feels Like Home

A Bowl Full of Memories

There’s something undeniably magical about a dish that takes you back to a cherished moment. For me, that moment was a chilly autumn evening at my grandmother’s house, where the aroma of simmering tomatoes, garlic, and Italian sausage filled the kitchen. The laughter of family echoed in the background, and the warmth of a bubbling pot on the stove made the entire house feel like the safest place in the world.

That night, she served us a pasta dish so rich, creamy, and packed with flavor that I’ve spent years recreating it in my own kitchen. While I’ve added my own touches, the essence remains the same: comfort, love, and the kind of satisfaction that only a home-cooked meal can bring.

Creamy Sausage Rigatoni is that dish for me. It’s hearty but not heavy, indulgent but simple. It’s the kind of meal that turns an ordinary night into a cozy, unforgettable experience. Whether you’re making it for your family, a loved one, or just for yourself after a long day, this pasta dish is sure to bring comfort with every bite.

What Makes This Dish So Special?

One-Pan Wonder

Busy weeknights demand meals that don’t require hours of preparation and a mountain of dishes to clean. This recipe is a one-pan miracle, where everything—yes, even the pasta—cooks in the same skillet. That means fewer dishes, less hassle, and more time to enjoy your meal.

A Perfect Balance of Flavors

The combination of creamy sauce, robust Italian sausage, and rich tomato base makes this dish irresistible. The rigatoni holds onto the sauce beautifully, ensuring that every bite is infused with deep, comforting flavors.

Customizable to Your Taste

One of the best things about this dish is its flexibility. Whether you prefer a spicy kick, a cheesier finish, or a lighter version with a vegetarian twist, there’s always a way to make it your own.

Gather Your Ingredients: The Building Blocks of Flavor

  • 1 tablespoon olive oil – Helps sauté the sausage and prevents sticking
  • 15 oz Italian sausage (crumbled) – Sweet or spicy, your choice
  • 8 oz rigatoni (uncooked) – Perfect for holding the creamy sauce
  • 1 cup chicken broth – Adds depth to the sauce
  • 1 cup heavy cream – Creates a luscious, velvety texture
  • 4 cloves garlic (minced) – Essential aromatic boost
  • 1 teaspoon Italian seasoning or Herbs de Provence – Classic Italian herb blend
  • 15 oz tomato sauce – Tomato pasta sauce or marinara works well
  • 5 oz fresh spinach – Adds color and a healthy touch
  • Salt and coarsely ground black pepper – To season to taste
  • Red pepper flakes (optional) – For a little heat

Step-by-Step Guide: From Skillet to Table

  1. Sizzle the Sausage
    Heat olive oil in a large skillet over medium heat. Add the crumbled sausage and cook for about 5 minutes, breaking it apart as it browns. Drain excess grease if needed.
  2. Bring on the Base
    To the same skillet, add uncooked rigatoni, chicken broth, heavy cream, garlic, Italian seasoning, and tomato sauce. Stir everything to combine.
  3. Simmer to Perfection
    Bring to a gentle boil, then cover and cook for 10-15 minutes, stirring occasionally, until the pasta is al dente and absorbs the creamy sauce.
  4. Spinach Finale
    Stir in the fresh spinach and cook for a few minutes until wilted. Alternatively, cover the skillet and let the residual heat soften the spinach for 4 minutes.
  5. Perfect the Texture
    If you prefer a thicker sauce, let the dish cook uncovered for a couple more minutes. Stir occasionally to prevent sticking.
  6. Season and Serve
    Remove from heat and season with salt, black pepper, and red pepper flakes if desired. Serve immediately.

Nutritional Snapshot: Indulgence Meets Balance

  • Calories: ~550 per serving
  • Protein: ~25g
  • Carbohydrates: ~50g
  • Fat: ~30g
  • Fiber: ~5g
  • Sodium: Varies based on sausage and seasoning

Pro Tips & Variations

  • Make It Cheesier: Stir in grated Parmesan or Pecorino Romano before serving.
  • Swap the Pasta: Penne or ziti work as great alternatives.
  • Vegetarian Twist: Replace sausage with mushrooms or plant-based sausage.
  • Customize the Heat: Use spicy sausage and extra red pepper flakes for a kick.

A quick, creamy, and satisfying dish that’s perfect for any night of the week!

Frequently Asked Questions

1. Can I Use a Different Type of Pasta?

Absolutely! While rigatoni is ideal because its ridges help the sauce cling to it, you can substitute penne, ziti, or even fusilli. Avoid long pastas like spaghetti or linguine, as they won’t hold the creamy sauce as well.

2. What Type of Sausage Works Best?

Italian sausage is the star here. You can use sweet Italian sausage for a milder taste or spicy Italian sausage for a bit of heat. If you want a leaner option, turkey or chicken sausage works well, too.

3. Can I Make It Dairy-Free?

Yes! Swap out the heavy cream for full-fat coconut milk or a dairy-free heavy cream alternative. The texture will still be rich and creamy, with just a slight hint of coconut.

4. How Do I Store Leftovers?

Leftovers can be stored in an airtight container in the refrigerator for up to three days. When reheating, add a splash of broth or cream to bring the sauce back to life. Avoid microwaving for too long, as the pasta may dry out.

5. Can I Make This Dish in Advance?

Yes, but with a slight modification. If making it ahead, slightly undercook the pasta so it doesn’t turn mushy when reheated. Store the sauce separately and combine when ready to serve.

6. How Can I Make the Sauce Thicker or Thinner?

If you prefer a thicker sauce, reduce the amount of chicken broth or let the dish simmer uncovered for a few extra minutes. For a thinner sauce, add a splash of broth or cream at the end.

7. What Sides Go Well with This Dish?

A crisp Caesar salad, roasted vegetables, or a slice of garlic bread complement this pasta beautifully. If you’re feeling indulgent, a glass of red wine, such as Chianti or Pinot Noir, pairs wonderfully with the flavors of the dish.

Variations to Try

The Spicy Kick Version

Love heat? Use spicy Italian sausage and add a generous pinch of red pepper flakes while cooking. You can even stir in a bit of Calabrian chili paste for an extra fiery touch.

The Extra Cheesy Version

If you can’t get enough cheese, stir in freshly grated Parmesan or Pecorino Romano just before serving. A sprinkle of mozzarella melted on top can also make this dish even more indulgent.

The Vegetarian Twist

For a meat-free option, replace the sausage with sautéed mushrooms or a plant-based sausage substitute. You can also add roasted red peppers or sun-dried tomatoes for a burst of extra flavor.

The Lighter Alternative

If you want a slightly healthier version, swap out the heavy cream for half-and-half or a Greek yogurt and milk mixture. You can also use whole wheat pasta for added fiber.

Tips for the Best Creamy Sausage Rigatoni

1. Use Fresh Ingredients Whenever Possible

Fresh garlic, high-quality tomato sauce, and good Parmesan cheese make all the difference in flavor. While pantry staples work in a pinch, using fresh ingredients will elevate your dish.

2. Don’t Overcook the Pasta

Since the pasta cooks in the sauce, check it a couple of minutes before the suggested time to ensure it stays al dente. Overcooking can lead to a mushy texture.

3. Let the Flavors Develop

If you have a few extra minutes, let the dish sit for a couple of minutes after cooking. This allows the flavors to meld together beautifully.

4. Adjust the Seasoning to Taste

Sausage can be salty, so taste before adding extra salt. If the dish needs a little more depth, a pinch of sugar can balance out the acidity of the tomatoes.

The Heart of Home Cooking

What makes this dish truly special isn’t just the flavors or the ease of preparation—it’s the way it brings people together. It’s the kind of meal you can make when you want to impress someone without spending hours in the kitchen. It’s the dish you whip up when you need a little warmth and comfort after a long day.

For me, it’s a reminder of home, of family, of the simple joys of gathering around a table with good food and good company. Whether this becomes a staple in your weekly menu or a special meal for when you need a little extra comfort, one thing is certain—every bite is a reminder that the best meals aren’t just about taste. They’re about the memories we make along the way.
aiting

The Comfort of Creamy Sausage Rigatoni: A Dish That Feels Like Home

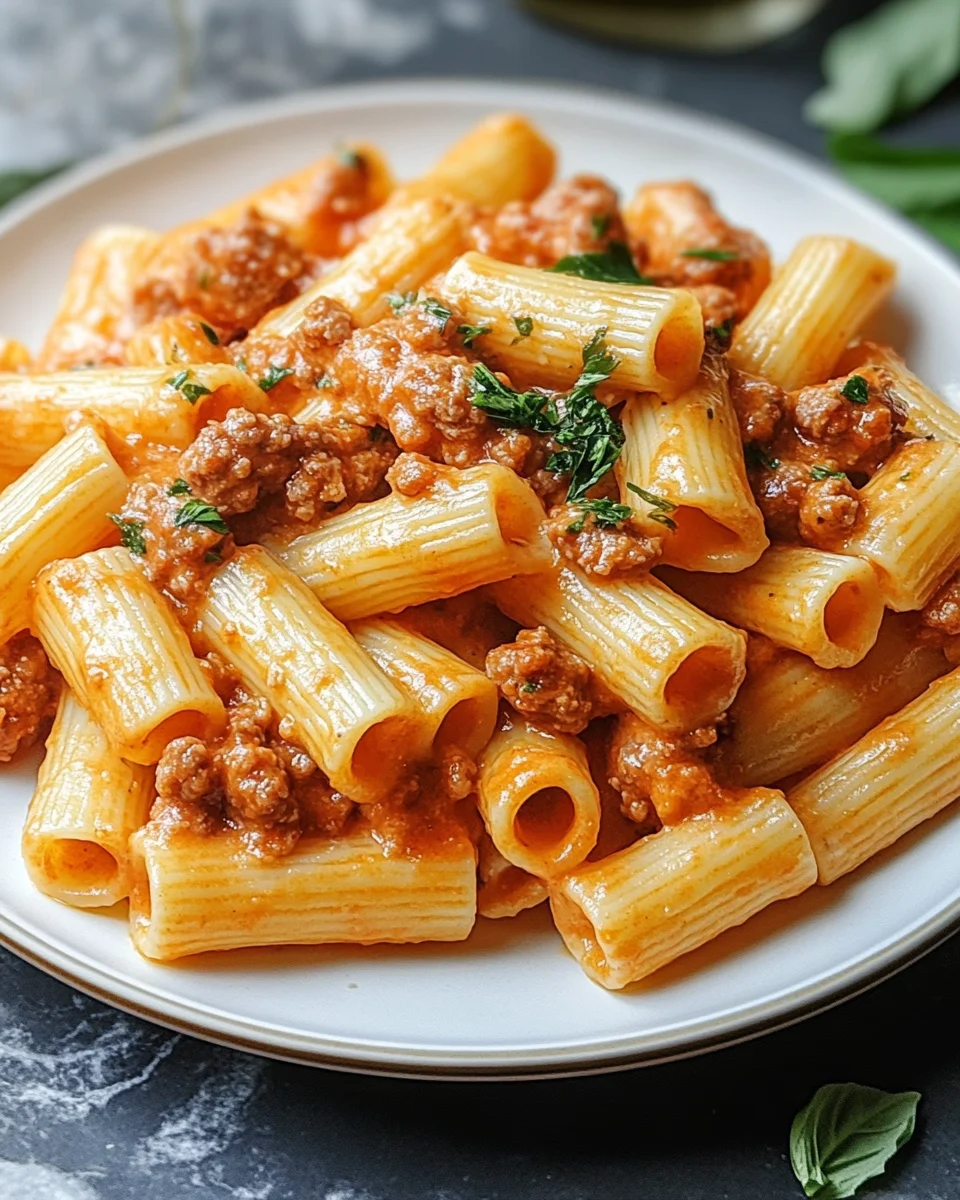
This Creamy Sausage Rigatoni is the ultimate comfort meal! A rich, velvety sauce made with Italian sausage, tomato sauce, and cream coats every bite of tender rigatoni. Best of all, it’s made in just one pan—perfect for a quick and delicious weeknight dinner!
Prep Time 10 minutes
Cook Time 20 minutes
Total Time 30 minutes
Servings: 4 servings
Course: Main Dish
Cuisine: Italian-American

Ingredients
  

  • 1 tablespoon olive oil
  • 15 oz Italian sausage crumbled, sweet or spicy
  • 8 oz rigatoni uncooked
  • 1 cup chicken broth
  • 1 cup heavy cream
  • 4 cloves garlic minced
  • 1 teaspoon Italian seasoning or Herbs de Provence
  • 15 oz tomato sauce or marinara sauce
  • 5 oz fresh spinach
  • Salt and coarsely ground black pepper to taste
  • Red pepper flakes optional, for heat

Method
 

Sizzle the Sausage:
  1. Heat olive oil in a large skillet over medium heat.
  2. Add the crumbled sausage and cook for about 5 minutes, breaking it apart as it browns.
  3. Drain excess grease if needed.
Bring on the Base:
  1. To the same skillet, add uncooked rigatoni, chicken broth, heavy cream, garlic, Italian seasoning, and tomato sauce.
  2. Stir everything to combine.
Simmer to Perfection:
  1. Bring to a gentle boil, then cover and cook for 10-15 minutes, stirring occasionally, until the pasta is al dente and absorbs the creamy sauce.
Spinach Finale:
  1. Stir in the fresh spinach and cook for a few minutes until wilted.
  2. Alternatively, cover the skillet and let the residual heat soften the spinach for 4 minutes.
Perfect the Texture:
  1. If you prefer a thicker sauce, let the dish cook uncovered for a couple more minutes.
  2. Stir occasionally to prevent sticking.
Season and Serve:
  1. Remove from heat and season with salt, black pepper, and red pepper flakes if desired.
  2. Serve immediately.

Notes

  • Make It Cheesier: Stir in grated Parmesan or Pecorino Romano before serving.
  • Swap the Pasta: Penne or ziti work as great alternatives.
  • Vegetarian Twist: Replace sausage with mushrooms or plant-based sausage.
  • Customize the Heat: Use spicy sausage and extra red pepper flakes for a kick.
  • Storage Tip: Store leftovers in an airtight container in the fridge for up to 3 days. Reheat on the stovetop with a splash of cream or broth.
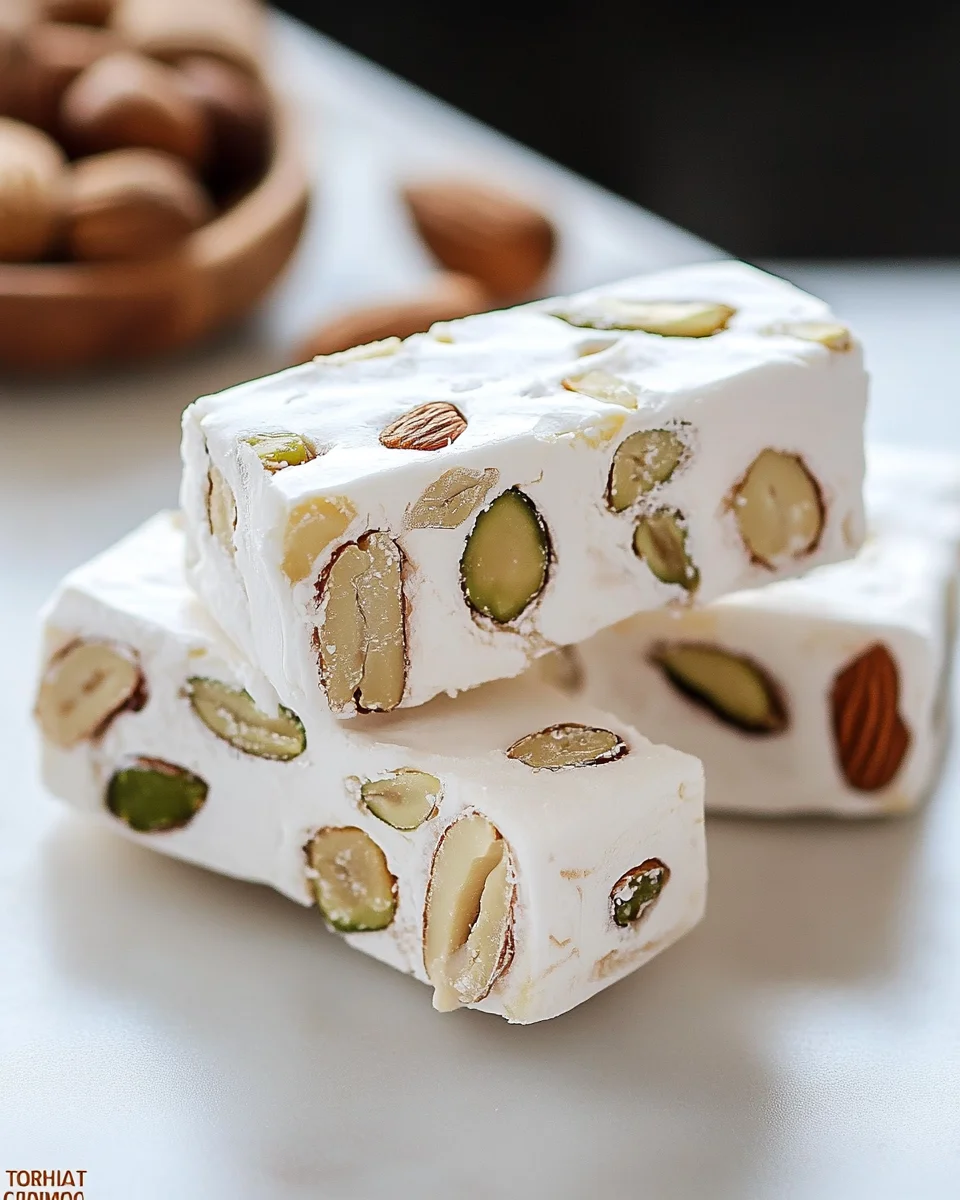
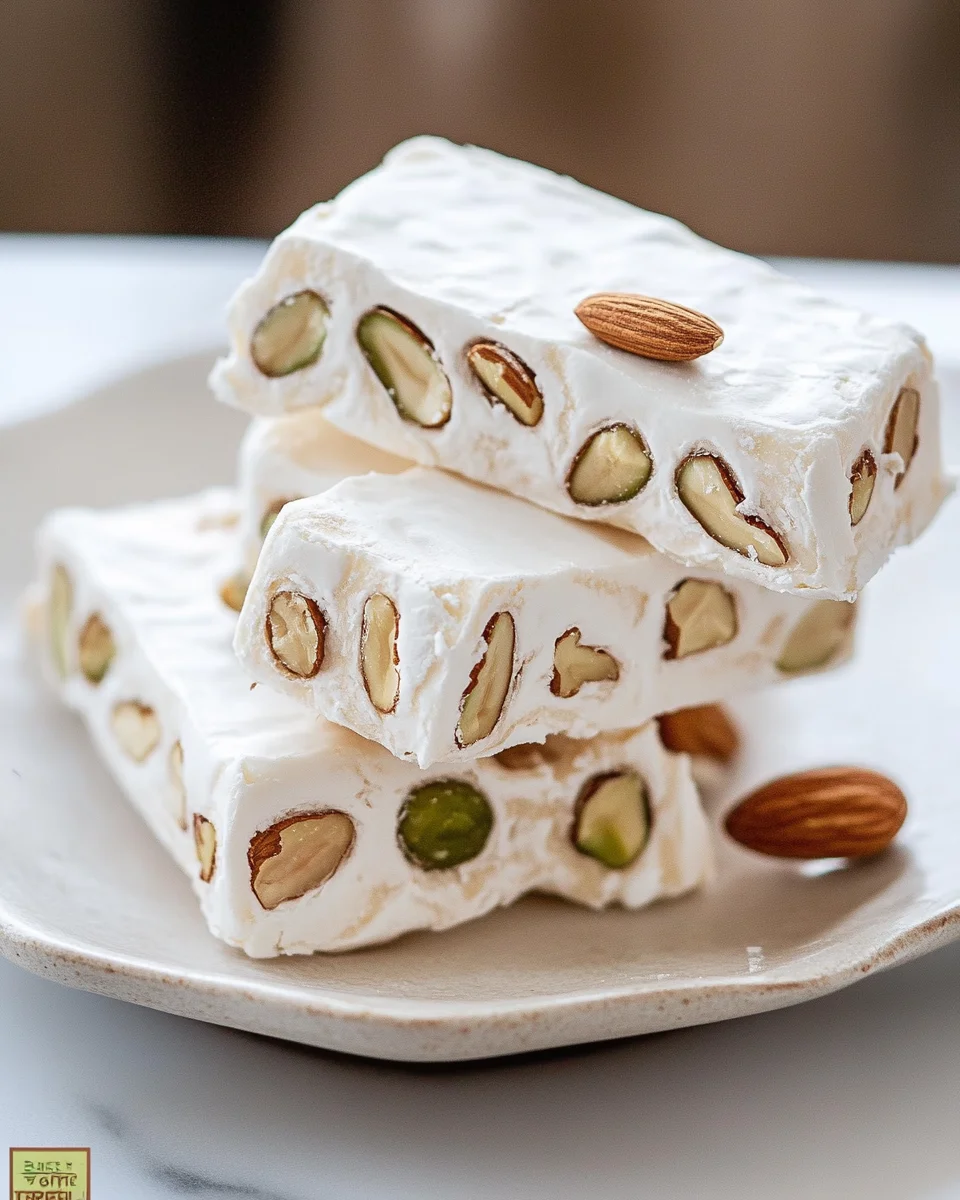
Torrone: The Timeless Italian Treat That Brings Families Together

A Sweet Memory Wrapped in Nougat

There’s something magical about food that connects generations. For me, torrone is more than just a confection; it’s a memory, a story, and a tradition woven into my family’s holiday gatherings. I remember being a child, standing by the kitchen counter, watching my grandmother carefully stir a bubbling pot of golden honey. The sweet aroma filled the air, blending with the nutty scent of toasted almonds and pistachios. She would hum an old Italian tune as she worked, her hands moving with the precision of someone who had done this a hundred times before.

When the torrone was ready, she pressed it into a pan lined with delicate wafer paper, smoothing it down with a well-worn wooden spoon. Then, we waited—an eternity for a child—until the nougat had set. When she finally cut the torrone into perfect little squares, she handed me the first piece. It was warm, chewy, and bursting with the flavors of honey and nuts. That moment was the essence of the holidays for me: love, warmth, and the joy of sharing something handmade.

Now, I make torrone every year, passing the tradition on to my own family. There’s something deeply satisfying about carrying on a recipe that has been cherished for centuries, knowing that each bite holds a history of celebration, love, and craftsmanship. Whether you’re making it for a festive gathering or as a thoughtful homemade gift, torrone is a timeless treasure that brings people together.

The History of Torrone: A Treat With a Story

Torrone has been a part of Italian culinary history for centuries, with origins that stretch back to at least the 15th century. Some say the name comes from the Latin word torrere, meaning “to toast,” a reference to the toasted nuts at the heart of the recipe. Others believe it was inspired by an Arabic confection introduced to Italy during medieval times.

One of the most famous stories about torrone’s origins comes from the city of Cremona, where it is said to have been first made in 1441 for the wedding of Francesco Sforza and Bianca Maria Visconti. The nougat was shaped to resemble the city’s bell tower, Torrazzo, giving rise to the name “torrone.” Whether or not this story is true, Cremona remains one of the most well-known producers of torrone today.

Over the centuries, torrone has evolved into many regional varieties. In some areas, it is soft and chewy, while in others, it is hard and brittle. Some recipes include chocolate, citrus zest, or even a splash of liqueur. But at its core, torrone is always a blend of honey, sugar, whipped egg whites, and nuts—a simple yet elegant confection that has stood the test of time.

Why Torrone Is More Than Just a Candy

Torrone isn’t just another holiday sweet; it carries deep cultural significance. It is a symbol of festivity, family, and tradition. In Italy, you’ll find it in abundance during Christmas markets, wrapped in colorful paper and sold in charming little shops. Families gift it to friends and neighbors, a sweet gesture of goodwill and togetherness.

Beyond Italy, torrone has found its way into Spanish (turrón), French (nougat de Montélimar), and even Latin American cuisines. Each culture has its own spin on the classic treat, but the essence remains the same—a delightful blend of chewy nougat and crunchy nuts that brings joy with every bite.

How to Enjoy Torrone Like an Italian

Torrone is incredibly versatile. It can be enjoyed on its own, but Italians often pair it with espresso or dessert wine for a truly indulgent experience. Here are a few ways to serve it:

  • With Coffee or Espresso: The slight bitterness of coffee complements the sweet and nutty flavors of torrone beautifully.
  • On a Dessert Platter: Arrange pieces of torrone alongside biscotti, amaretti cookies, and dried fruit for an elegant holiday spread.
  • Dipped in Chocolate: Some variations of torrone are coated in a thin layer of dark chocolate, adding an extra layer of richness.
  • Crumpled Over Ice Cream: A little crushed torrone sprinkled over vanilla gelato is pure heaven.
  • As a Gift: Wrap individual pieces in parchment paper or decorative boxes for a thoughtful homemade present.

Ingredients – A Sweet Symphony

  • 1 cup (340g) honey – The heart of the nougat, adding deep sweetness
  • 1 cup (200g) sugar – For balance and texture
  • 1/4 cup (60ml) water – Helps dissolve the sugar
  • 2 egg whites – Whipped for a light, airy consistency
  • 1 cup (100g) toasted almonds – Traditional and rich in flavor
  • 1 cup (100g) toasted pistachios or mixed nuts – Adds crunch and color
  • 1 tsp vanilla extract or citrus zest – Enhances the aroma and taste

Directions – The Art of Nougat Crafting

  1. Toast the Nuts:
    • Preheat the oven to 350°F (175°C).
    • Spread almonds and pistachios on a baking sheet and toast for 8-10 minutes until fragrant. Let cool.
  2. Create the Honey Base:
    • In a heavy-bottomed saucepan, heat honey over low heat.
    • Stir occasionally and cook until it reaches 250°F (120°C) on a candy thermometer.
  3. Prepare the Sugar Syrup:
    • In a separate saucepan, combine sugar and water.
    • Heat over medium heat until it reaches 300°F (150°C).
  4. Whip the Egg Whites:
    • Using a stand mixer, beat egg whites until soft peaks form.
    • Slowly drizzle in the hot honey while continuing to whip.
  5. Combine and Mix:
    • Gradually add the sugar syrup, whipping continuously until thick and glossy.
    • Fold in the toasted nuts and vanilla extract or zest.
  6. Shape the Torrone:
    • Line a baking dish with edible wafer paper or parchment paper.
    • Pour the nougat mixture into the dish and spread evenly.
    • Cover with another sheet of wafer paper.
  7. Set and Slice:
    • Allow the torrone to cool at room temperature for at least 4 hours (overnight is best).
    • Slice into rectangles or squares using a sharp knife.

Nutritional Breakdown – A Sweet Indulgence

  • Calories: 210 kcal
  • Carbohydrates: 35g
  • Sugar: 30g
  • Fat: 6g
  • Saturated Fat: 1g
  • Protein: 4g

Pro Tips for the Perfect Torrone

  • Use a candy thermometer to ensure the perfect texture.
  • Toast the nuts to enhance their flavor.
  • Work quickly—the mixture sets fast.
  • Experiment with flavors—try cinnamon, cocoa powder, or even a splash of almond liqueur.

Torrone is a timeless Italian treat, perfect for holidays, gifting, or simply indulging in something special. Enjoy!

Frequently Asked Questions About Torrone

1. What’s the Difference Between Soft and Hard Torrone?

Torrone comes in two main textures: soft (morbido) and hard (duro). The difference lies in the cooking temperature of the sugar and honey mixture. Soft torrone is cooked to a lower temperature, making it chewy and airy, while hard torrone is heated to a higher temperature, resulting in a firm, brittle texture.

2. Can I Make Torrone Without Wafer Paper?

Yes! While wafer paper gives torrone a smooth, professional finish and prevents sticking, you can line your baking dish with parchment paper instead. Just be sure to grease it lightly to make removing the torrone easier.

3. How Long Does Torrone Last?

Torrone has a long shelf life when stored properly. Keep it in an airtight container at room temperature, away from humidity and direct sunlight. It will stay fresh for up to two weeks. If you want to store it longer, you can freeze it for up to two months.

4. Can I Use Different Nuts?

Absolutely! While almonds are the traditional choice, many variations use pistachios, hazelnuts, or a mix of nuts. Toasting the nuts before adding them to the nougat enhances their flavor.

5. What’s the Best Honey for Torrone?

High-quality honey makes all the difference. Acacia honey or orange blossom honey works beautifully, as they have delicate flavors that don’t overpower the nougat. Avoid overly strong honeys, like buckwheat, which can dominate the taste.

6. Can I Add Other Flavors to Torrone?

Yes! Many people like to add a touch of citrus zest (lemon or orange), a pinch of cinnamon, or even a splash of liqueur like Amaretto for a more complex flavor.

7. Why Did My Torrone Turn Out Too Hard or Too Soft?

The texture of torrone depends on reaching the right sugar and honey temperatures. Using a candy thermometer is crucial. If the temperature is too low, the nougat will be too soft and sticky. If it’s too high, the torrone will be too hard.

Final Thoughts: A Tradition Worth Keeping

Torrone is more than just a candy; it’s a tradition, a story, and a piece of history wrapped in every chewy bite. Whether you’re making it for the first time or continuing a long-standing family tradition, the process of creating torrone is just as rewarding as eating it.

There’s something special about standing over a warm pot of honey and sugar, watching it transform into something magical. The anticipation as it sets, the joy of slicing into the finished nougat, and the pleasure of sharing it with loved ones—all of these moments make torrone a treat worth savoring.

So, the next time you take a bite of this delightful confection, remember that you’re not just enjoying a sweet—you’re indulging in centuries of history, love, and craftsmanship.

aiting

Torrone: The Timeless Italian Treat That Brings Families Together

A classic Italian confection, this Heavenly Torrone is a sweet, nutty nougat with a perfectly chewy texture. Made with honey, toasted nuts, and a touch of vanilla or citrus, this treat is perfect for holidays, gifting, or a luxurious homemade indulgence.
Prep Time 15 minutes
Cook Time 20 minutes
Total Time 4 hours 35 minutes
Servings: 12 -16 pieces
Course: Dessert
Cuisine: Italian

Ingredients
  

  • 1 cup 340g honey
  • 1 cup 200g sugar
  • 1/4 cup 60ml water
  • 2 egg whites
  • 1 cup 100g toasted almonds
  • 1 cup 100g toasted pistachios or mixed nuts
  • 1 tsp vanilla extract or citrus zest

Method
 

Toast the Nuts:
  1. Preheat the oven to 350°F (175°C).
  2. Spread almonds and pistachios on a baking sheet and toast for 8-10 minutes until fragrant. Let cool.
Create the Honey Base:
  1. In a heavy-bottomed saucepan, heat honey over low heat.
  2. Stir occasionally and cook until it reaches 250°F (120°C) on a candy thermometer.
Prepare the Sugar Syrup:
  1. In a separate saucepan, combine sugar and water.
  2. Heat over medium heat until it reaches 300°F (150°C).
Whip the Egg Whites:
  1. Using a stand mixer, beat egg whites until soft peaks form.
  2. Slowly drizzle in the hot honey while continuing to whip.
Combine and Mix:
  1. Gradually add the sugar syrup, whipping continuously until thick and glossy.
  2. Fold in the toasted nuts and vanilla extract or zest.
Shape the Torrone:
  1. Line a baking dish with edible wafer paper or parchment paper.
  2. Pour the nougat mixture into the dish and spread evenly.
  3. Cover with another sheet of wafer paper.
Set and Slice:
  1. Allow the torrone to cool at room temperature for at least 4 hours (overnight is best).
  2. Slice into rectangles or squares using a sharp knife.

Notes

  • Use a candy thermometer to ensure the perfect texture.
  • Toast the nuts to enhance their flavor.
  • Work quickly—the mixture sets fast.
  • Experiment with flavors—try cinnamon, cocoa powder, or even a splash of almond liqueur.

Black Cocoa & White Chocolate Cookies: A Deeply Decadent Delight

A Cookie That Feels Like Home

There is something truly magical about the combination of dark, rich cocoa and smooth, sweet white chocolate. It reminds me of childhood evenings spent baking with my grandmother. She was the kind of woman who always had a tin of cookies on the counter, ready for anyone who stopped by. One of my favorites was her chocolate crinkle cookies—crisp on the outside, chewy on the inside, dusted with powdered sugar like freshly fallen snow.

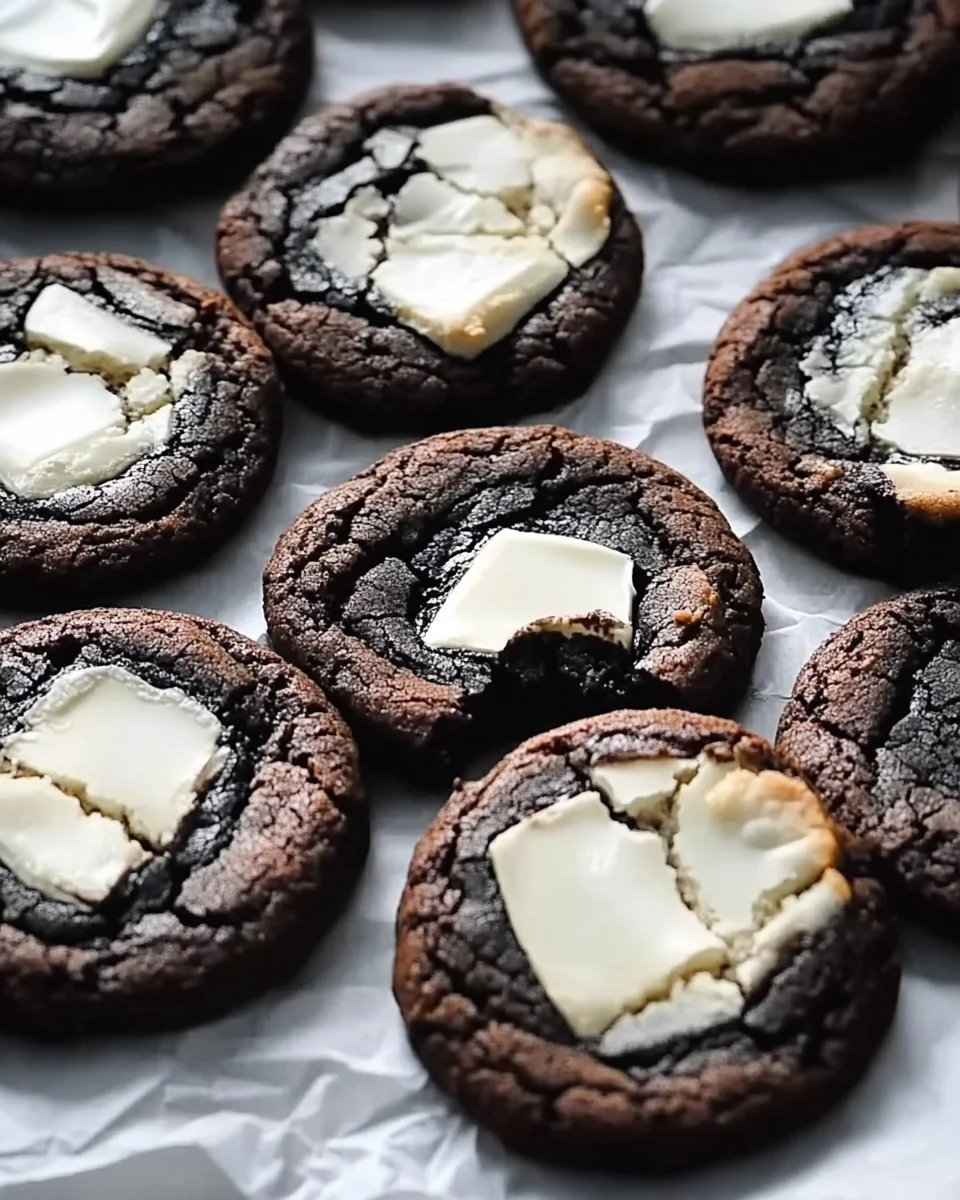
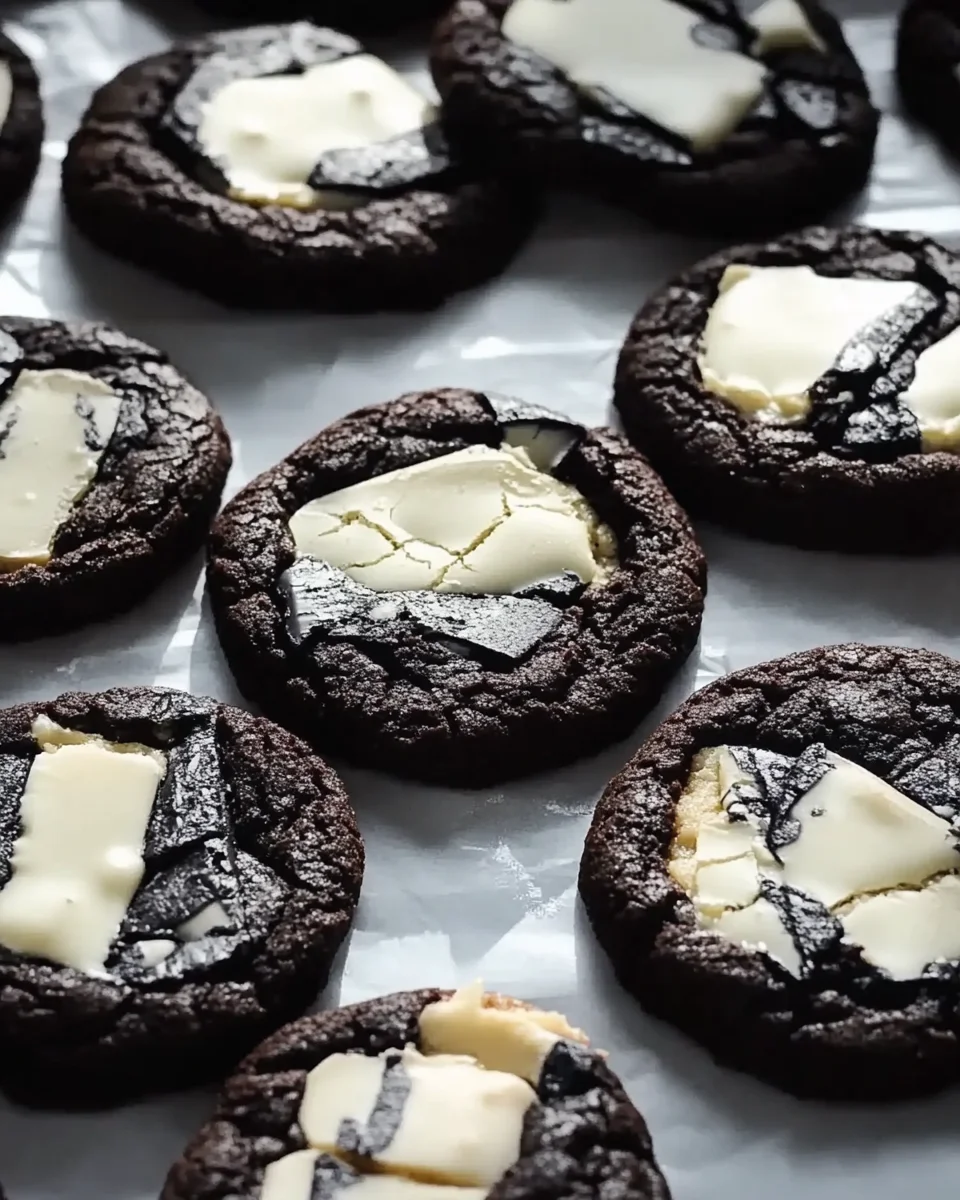
Years later, when I started experimenting with black cocoa powder, I found myself longing for those same nostalgic flavors but with a modern twist. That’s when I created these black cocoa cookies with white chocolate. They take that deep, almost smoky chocolate flavor and balance it with the smooth, creamy sweetness of high-quality white chocolate. The way the white chocolate melts into the dark dough, creating marbled cracks across the surface, makes them just as beautiful as they are delicious.

These cookies aren’t just a treat; they’re a moment of comfort, a reminder of home, and a perfect companion to a quiet evening with a cup of coffee.

Why Black Cocoa? The Secret to the Deepest Chocolate Flavor

Black cocoa powder is not your average cocoa. It has been heavily alkalized, meaning the natural acidity of the cocoa bean is neutralized, resulting in a cocoa powder that is darker, smoother, and less bitter than traditional Dutch-processed cocoa. This is the same type of cocoa used to make Oreo cookies, which explains why these cookies have that signature deep, almost smoky chocolate taste.

While you could substitute regular cocoa powder in this recipe, you wouldn’t get the same striking color or the same depth of flavor. The black cocoa gives these cookies their dramatic appearance and an intense chocolate profile that pairs beautifully with the sweetness of white chocolate.

If you’ve never baked with black cocoa before, this recipe is the perfect introduction. Once you start using it, you’ll find yourself wanting to experiment with it in brownies, cakes, and even homemade hot cocoa.

The Art of the Perfect Cookie Texture

One of the things that makes these cookies so irresistible is their texture. They have crisp, delicate edges that give way to a soft and chewy center. Achieving that perfect texture comes down to a few key elements:

  • Butter Preparation: Instead of using softened butter, this recipe starts with melted butter. This helps create a denser, chewier cookie rather than a cakey one.
  • Chilling the Dough: Letting the dough rest in the fridge for at least four hours (or overnight) is essential. This allows the flour to fully absorb the moisture, preventing excess spread during baking and enhancing the chewiness.
  • Baking Time: Pulling the cookies out of the oven at just the right moment—when the edges are set but the centers still look slightly underbaked—ensures they remain soft once they cool.

These steps might require a little patience, but the result is well worth it.

White Chocolate: Choosing the Best for Baking

Not all white chocolate is created equal. If you’ve ever been disappointed by white chocolate that tastes overly sweet or artificial, it’s likely because it wasn’t made with real cocoa butter. The best white chocolate for baking will have cocoa butter listed as one of the main ingredients, rather than just vegetable oils.

For this recipe, look for a high-quality white chocolate bar rather than white chocolate chips. Chips are often formulated to hold their shape and won’t melt as beautifully over the cookies as a chopped chocolate bar will. Some great options include:

  • Valrhona Ivoire
  • Lindt Classic White Chocolate
  • Green & Black’s Organic White Chocolate

Breaking the chocolate into rough squares rather than uniform pieces adds to the rustic, artistic look of these cookies.

Ingredients: Midnight Magic Mix

  • Butter – 140g (½ cup + 2 tbsp), unsalted, cold is fine
  • Brown Sugar – 150g (¾ cup), light or dark
  • Granulated Sugar – 100g (½ cup), fine
  • Egg – 1 large
  • Salt – ½ tsp fine sea salt
  • Vanilla Extract – 1 tsp, pure
  • Baking Powder – ¼ tsp
  • Baking Soda – ½ tsp
  • Black Cocoa Powder – 25g (¼ cup)
  • Dutch-Process Cocoa Powder – 25g (¼ cup)
  • Flour – 200g (1 cup + scant ⅔ cup), high protein (11-12%) all-purpose
  • White Chocolate – 125g, good quality (made with cocoa butter)

Directions: The Path to Perfection

  1. Butter Magic – Melt butter halfway, then whisk to fully liquefy.
  2. Sweet Fusion – Add both sugars, salt, and vanilla. Whisk thoroughly for one minute.
  3. Egg Elevation – Add the egg and whisk until smooth and creamy.
  4. Dry Mix Alchemy – Stir in baking powder, baking soda, both cocoas, and flour. Mix until no dry spots remain.
  5. Chill & Rest – Cover dough and refrigerate for at least 4 hours or overnight.
  6. Prep for Greatness – Preheat oven to 350°F (175°C). Grease and line two baking sheets with parchment paper.
  7. Scoop & Shape – Portion dough into 1.5 tbsp rounds, leaving space for spreading.
  8. Chocolate Crown – Place a 1-inch square of white chocolate on each dough ball, pressing gently.
  9. Bake to Brilliance – Bake for 10-12 minutes, until cookies spread, crackle, and the white chocolate begins to caramelize at the edges.
  10. Cool & Enjoy – Let cookies rest on the baking sheet before devouring! Store leftovers in an airtight container.

Nutritional Notes: A Bite of the Details

(Approximate values per cookie)

  • Calories – ~200 kcal
  • Carbohydrates – ~25g
  • Sugar – ~15g
  • Fat – ~10g
  • Protein – ~2.5g
  • Fiber – ~1g

These chewy, chocolatey delights bring together deep black cocoa richness with the creamy contrast of melting white chocolate. A true treat for chocolate lovers!

FAQs: Everything You Need to Know

1. Why didn’t my cookies spread properly?

If your cookies didn’t spread, there could be a few reasons:

  • The dough was too cold when it went into the oven. Let it sit at room temperature for a few minutes before baking.
  • You may have used too much flour. Measuring by weight (instead of cups) ensures accuracy.
  • Your oven temperature may be too low. Use an oven thermometer to check if your oven runs cooler than the set temperature.

2. My cookies spread too much. What happened?

Overly flat cookies can be caused by:

  • Too little flour or too much butter. Again, using a kitchen scale helps prevent measuring errors.
  • Using European-style butter, which has a higher fat content. This can cause extra spreading.
  • Not chilling the dough long enough. The colder the dough, the slower it will spread in the oven.

3. Can I freeze the dough?

Absolutely. In fact, freezing cookie dough is a great way to always have freshly baked cookies on hand. Scoop the dough into balls, freeze them on a baking sheet for about 30 minutes, then transfer to a freezer bag. When you’re ready to bake, let the dough come to a cool room temperature before adding the white chocolate and baking.

4. Can I make these cookies without black cocoa powder?

Yes, but they won’t have the same deep flavor or color. If you don’t have black cocoa, you can use all Dutch-processed cocoa, but expect a lighter brown cookie with a slightly different taste.

5. What’s the best way to store these cookies?

Store them in an airtight container at room temperature for up to five days. If you want to keep them fresh longer, you can refrigerate them for up to a week or freeze them for up to three months.

Serving Suggestions: Making the Most of Every Bite

These cookies are a treat on their own, but here are a few ways to take them to the next level:

  • Pair with Coffee or Tea: The slightly bitter notes of black cocoa balance beautifully with a strong cup of espresso or a lightly sweetened chai tea.
  • Ice Cream Sandwiches: Use two cookies to sandwich a scoop of vanilla or cookies-and-cream ice cream for a truly indulgent dessert.
  • Holiday Gifting: Their striking black-and-white contrast makes them perfect for holiday cookie boxes or special occasions. Wrap them in parchment paper and tie with a ribbon for an elegant homemade gift.

Conclusion: A Cookie Worth Every Bite

These black cocoa and white chocolate cookies aren’t just about satisfying a sweet tooth—they’re about contrast, balance, and indulgence. The rich, bold cocoa meets the creamy sweetness of white chocolate, and together they create something truly special.

More than just a recipe, these cookies are an experience. They remind us of childhood comforts while offering a sophisticated twist. They require patience, but in return, they give you the kind of homemade treat that brings joy to anyone who takes a bite.

So whether you’re baking these for a holiday gathering, a late-night snack, or just because you need a little chocolate therapy, know that every crackly, chewy, deeply flavorful cookie is worth the effort.

aiting

Black Cocoa & White Chocolate Cookies: A Deeply Decadent Delight

Indulge in these rich, chewy Dark & Dreamy White Chocolate Cookies! Featuring deep black cocoa, velvety Dutch-process cocoa, and creamy white chocolate, these cookies are an irresistible treat for any chocolate lover. Perfectly crackled and loaded with flavor, they are sure to satisfy your sweet tooth!
Prep Time 10 minutes
Cook Time 4 hours
Total Time 4 hours 20 minutes
Servings: 12 -16 cookies
Course: Dessert
Cuisine: American

Ingredients
  

  • 140 g ½ cup + 2 tbsp unsalted butter, cold is fine
  • 150 g ¾ cup light or dark brown sugar
  • 100 g ½ cup granulated sugar
  • 1 large egg
  • ½ tsp fine sea salt
  • 1 tsp pure vanilla extract
  • ¼ tsp baking powder
  • ½ tsp baking soda
  • 25 g ¼ cup black cocoa powder
  • 25 g ¼ cup Dutch-process cocoa powder
  • 200 g 1 cup + scant ⅔ cup high-protein (11-12%) all-purpose flour
  • 125 g good-quality white chocolate made with cocoa butter

Method
 

Butter Magic:
  1. Melt butter halfway, then whisk to fully liquefy.
Sweet Fusion:
  1. Add both sugars, salt, and vanilla. Whisk thoroughly for one minute.
Egg Elevation:
  1. Add the egg and whisk until smooth and creamy.
Dry Mix Alchemy:
  1. Stir in baking powder, baking soda, both cocoas, and flour. Mix until no dry spots remain.
Chill & Rest:
  1. Cover dough and refrigerate for at least 4 hours or overnight.
Prep for Greatness:
  1. Preheat oven to 350°F (175°C). Grease and line two baking sheets with parchment paper.
Scoop & Shape:
  1. Portion dough into 1.5 tbsp rounds, leaving space for spreading.
Chocolate Crown:
  1. Place a 1-inch square of white chocolate on each dough ball, pressing gently.
Bake to Brilliance:
  1. Bake for 10-12 minutes, until cookies spread, crackle, and the white chocolate begins to caramelize at the edges.
Cool & Enjoy:
  1. Let cookies rest on the baking sheet before devouring! Store leftovers in an airtight container.

Notes

  • Using high-quality white chocolate ensures a creamy, rich contrast to the dark cookie.
  • Chilling the dough enhances the texture and deepens the flavors.
  • These cookies freeze well—store dough balls in the freezer and bake as needed.
  • Slightly underbaking keeps them soft and chewy!

Bunny Cinnamon Rolls – A Whimsical Easter Tradition

A Sweet Memory That Sticks Like Cinnamon

Easter mornings in my childhood home always had a special kind of magic. While some families spent the early hours hunting for eggs, my fondest memories revolve around the smell of warm cinnamon filling the air. My mother would wake before dawn, her hands dusted in flour as she carefully rolled out the dough for our traditional cinnamon rolls.

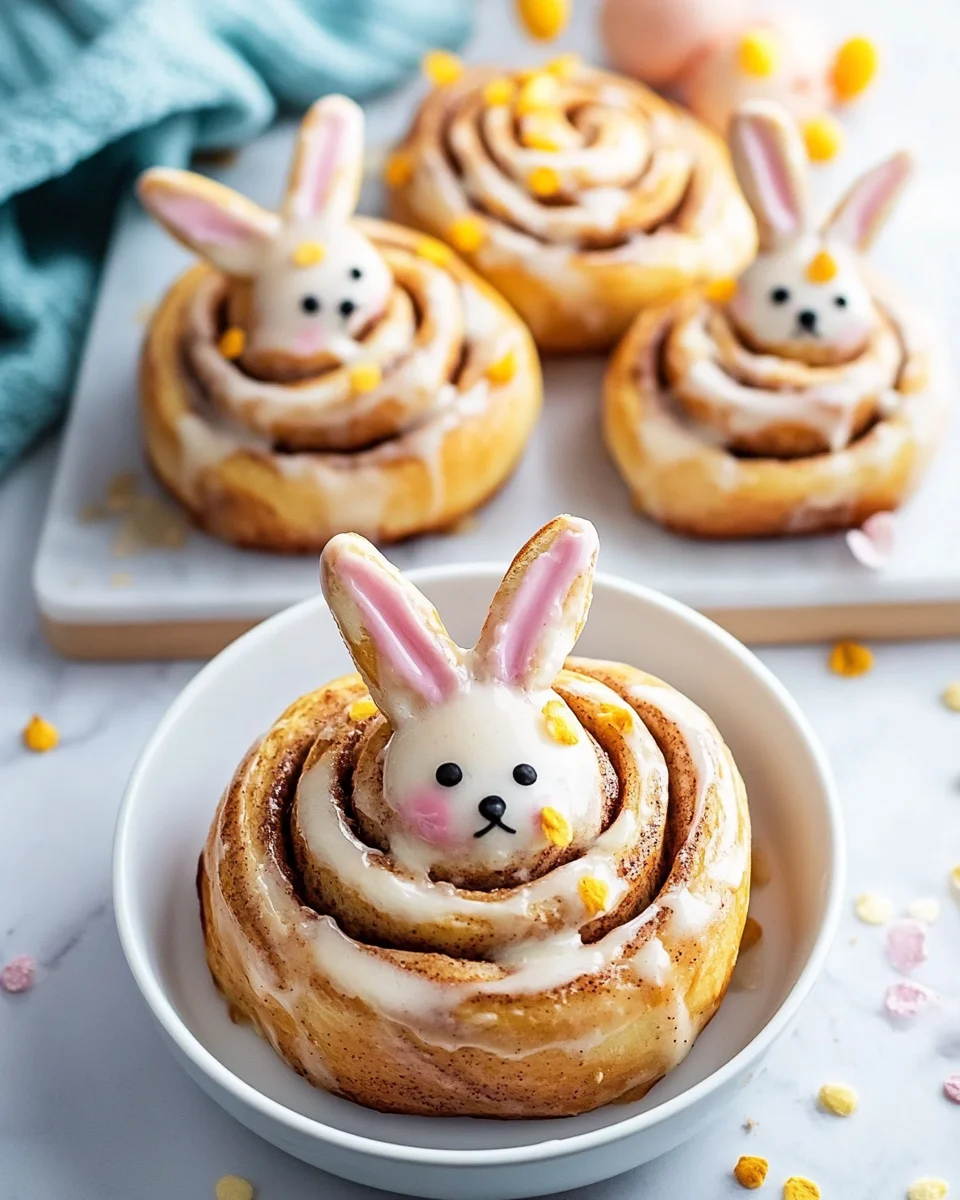
But one particular Easter stood out from the rest. My younger sister, barely five at the time, insisted that the cinnamon rolls we baked that year needed “bunny ears” to match her stuffed animal. With a giggle, my mother humored her request, shaping the dough into bunny faces and looping long strips for ears. That morning, as we pulled the golden-brown pastries from the oven, I remember watching my sister beam with pride, convinced she had created something truly magical.

Decades later, the tradition continues in my own kitchen. Bunny-shaped cinnamon rolls have become a beloved Easter staple, not just for the taste but for the memories they create. Whether it’s little hands excitedly shaping dough or the joy of sharing something homemade with loved ones, these treats hold more than just sweet flavors—they hold the warmth of togetherness.

Now, let’s explore everything you need to know about making, serving, and enjoying these delightful Bunny Cinnamon Rolls.

Why These Bunny Cinnamon Rolls Are So Special

There are plenty of Easter treats to choose from—sugar cookies, carrot cakes, and chocolate eggs—but Bunny Cinnamon Rolls bring a unique charm that sets them apart. Here’s why they deserve a place on your Easter table:

  1. Playful and Festive: Shaped like adorable bunnies, these cinnamon rolls bring a sense of fun and creativity to the holiday. Kids love helping shape the ears, making it an interactive baking experience.
  2. Comfort in Every Bite: The combination of warm cinnamon, buttery layers, and a soft, fluffy texture creates a dessert that feels like a hug.
  3. Perfect for All Ages: Whether you’re hosting a brunch with friends or making memories with young children, these rolls are a crowd-pleaser.
  4. Customizable Toppings: From pastel sprinkles to shredded coconut, you can decorate these treats to match any Easter theme.
  5. Great for Make-Ahead Preparation: With a little planning, you can prepare the dough ahead of time, making Easter morning stress-free.

Expert Tips for the Best Bunny Cinnamon Rolls

Baking cinnamon rolls may seem straightforward, but achieving the perfect balance of soft, fluffy dough and gooey filling requires a few key techniques. Here’s what I’ve learned through trial and error:

1. The Secret to Soft, Fluffy Dough

The key to achieving soft cinnamon rolls is giving the dough enough time to rise. Yeast thrives in a warm, draft-free environment, so always let your dough rise in a covered bowl at room temperature. If you’re in a hurry, placing the bowl near a slightly warm oven can speed up the process.

2. Don’t Skimp on the Filling

A cinnamon roll is only as good as its filling. A generous spread of softened butter, brown sugar, and cinnamon ensures that each bite is rich and flavorful. Be sure to cover the entire surface of the dough before rolling it up.

3. Keep the Bunny Ears in Place

One common issue when shaping the bunny rolls is that the ears can shift or separate during baking. To prevent this, press the ends of the ears firmly into the “face” portion of the roll. You can even use a tiny dab of water to help them stick.

4. Watch the Oven Like a Hawk

Cinnamon rolls bake quickly, and there’s a fine line between golden perfection and overbaking. Check on them around the 15-minute mark, and if they start to brown too quickly, cover them loosely with foil.

5. Glazing at the Right Time

If you drizzle glaze over hot cinnamon rolls, it will melt into the layers and create a sticky coating. For a more defined drizzle, let the rolls cool slightly before adding the glaze.

How to Make These Rolls Ahead of Time

Holidays can be hectic, and the last thing you want on Easter morning is a flour-covered kitchen. Fortunately, these bunny cinnamon rolls can be prepped in advance in several ways:

  • Refrigerate Overnight: After shaping the rolls, cover them tightly and store them in the fridge overnight. The next morning, let them sit at room temperature for about 30 minutes before baking.
  • Freeze Before Baking: Place the shaped (but unbaked) rolls on a tray and freeze them until solid. Once frozen, transfer them to a sealed container. When ready to bake, let them thaw in the fridge overnight, then bake as usual.
  • Bake and Reheat: Fully baked cinnamon rolls can be stored for up to three days. Warm them in the oven at 300°F for about 10 minutes to revive their softness.

Ingredients – Gather Your Magic Mix

For the Dough (if making from scratch)
  • 3 ½ cups all-purpose flour
  • ¼ cup granulated sugar
  • 2 ¼ teaspoons (1 packet) instant yeast
  • ½ teaspoon salt
  • ¾ cup warm milk (about 110°F)
  • ¼ cup unsalted butter, melted
  • 1 egg
For the Filling
  • ½ cup unsalted butter, softened
  • ¾ cup brown sugar
  • 1 tablespoon ground cinnamon
For the Vanilla Glaze
  • 1 cup powdered sugar
  • 2 tablespoons milk
  • ½ teaspoon vanilla extract
Optional Toppings
  • Pastel sprinkles
  • Shredded coconut
  • Mini marshmallows

Directions – Bake Up Some Bunny Joy

1. Create the Dough (Skip if Using Store-Bought)
  • In a large bowl, whisk together flour, sugar, yeast, and salt.
  • Add warm milk, melted butter, and egg, then mix until combined.
  • Knead the dough on a floured surface for 8-10 minutes until smooth and elastic.
  • Place in a greased bowl, cover, and let rise for 1 hour or until doubled in size.
2. Prepare the Sweet Filling
  • In a small bowl, mix softened butter, brown sugar, and cinnamon until spreadable.
3. Shape the Bunny Cinnamon Rolls
  • Preheat oven to 350°F (175°C) and line a baking sheet with parchment paper.
  • Roll out dough into a ¼-inch thick rectangle.
  • Spread cinnamon filling evenly, then roll tightly from the long side to form a log.
  • Slice into 1-inch thick rounds for bunny faces.
  • Cut a small strip of dough, split lengthwise, and shape into loops for ears. Press them onto the top of each roll.
4. Bake to Golden Perfection
  • Place shaped bunnies on a baking sheet, leaving space between them.
  • Bake for 15-18 minutes or until golden brown and puffed.
  • Let cool slightly before adding glaze.
5. Add the Sweet Finishing Touches
  • Whisk powdered sugar, milk, and vanilla extract until smooth.
  • Drizzle over warm cinnamon roll bunnies.
  • Decorate with sprinkles, coconut, or mini marshmallows for extra fun.

Nutritional Information – The Sweet Stats

  • Serving Size: 1 roll (out of 12)
  • Calories: 409
  • Total Fat: 16g
  • Saturated Fat: 10g
  • Cholesterol: 49mg
  • Sodium: 158mg
  • Carbohydrates: 61g
  • Fiber: 3g
  • Sugar: 29g
  • Protein: 6g

Enjoy these adorable Bunny Cinnamon Rolls for Easter breakfast, dessert, or a cozy afternoon treat!

FAQs About Bunny Cinnamon Rolls

1. Can I Use Store-Bought Dough?

Absolutely! If you’re short on time, pre-made cinnamon roll dough can be easily adapted. Simply unroll the dough, reshape it into bunny faces, and bake as directed.

2. What’s the Best Way to Store Leftovers?

Store leftover rolls in an airtight container at room temperature for up to two days. For longer storage, keep them in the fridge and reheat before serving.

3. Can I Add Other Flavors to the Filling?

Yes! While classic cinnamon sugar is the traditional choice, you can experiment with:

  • Orange zest for a citrusy twist
  • Chopped pecans or walnuts for a nutty crunch
  • A sprinkle of cardamom for a spiced flavor profile

4. How Can I Make Them Extra Festive?

Aside from shaping them like bunnies, you can enhance their Easter charm by:

  • Using pastel-colored sprinkles
  • Adding edible candy eyes
  • Dusting them with powdered sugar for a “fluffy” look

5. Can I Make These Rolls Dairy-Free?

Yes! Substitute dairy-free butter and plant-based milk in the recipe. The taste will still be rich and indulgent.

A Sweet Ending: More Than Just a Treat

Bunny Cinnamon Rolls are more than just a delicious Easter dessert. They represent the joy of tradition, the creativity of baking, and the warmth of gathering around the table with loved ones. Whether you’re making them with little hands eager to help or surprising guests with a charming brunch spread, these rolls bring smiles to every celebration.

As I continue this tradition in my own family, I’m reminded that food has a way of connecting us—not just to our past but to each other. The scent of cinnamon on a cool spring morning, the laughter over misshapen bunny ears, the sticky fingers reaching for just one more bite—these are the moments that matter.

So, this Easter, as you bake your own batch of Bunny Cinnamon Rolls, take a moment to savor not just the flavor but the love and joy that come with it. Because sometimes, the sweetest memories are made in the simplest ways.

aiting

Bunny Cinnamon Rolls – A Whimsical Easter Tradition

Soft, sweet, and perfectly spiced, these adorable Bunny Cinnamon Rolls are a festive Easter treat that everyone will love!
Prep Time 20 minutes
Cook Time 1 hour 18 minutes
Total Time 1 hour 38 minutes
Servings: 12 cinnamon rolls
Course: Breakfast
Cuisine: Holiday/Easter

Ingredients
  

For the Dough (if making from scratch):
  • 3 ½ cups all-purpose flour
  • ¼ cup granulated sugar
  • 2 ¼ teaspoons 1 packet instant yeast
  • ½ teaspoon salt
  • ¾ cup warm milk about 110°F
  • ¼ cup unsalted butter melted
  • 1 egg
For the Filling:
  • ½ cup unsalted butter softened
  • ¾ cup brown sugar
  • 1 tablespoon ground cinnamon
For the Vanilla Glaze:
  • 1 cup powdered sugar
  • 2 tablespoons milk
  • ½ teaspoon vanilla extract
Optional Toppings:
  • Pastel sprinkles
  • Shredded coconut
  • Mini marshmallows

Method
 

  1. Step 1: Create the Dough (Skip if Using Store-Bought)
  2. In a large bowl, whisk together flour, sugar, yeast, and salt.
  3. Add warm milk, melted butter, and egg, then mix until combined.
  4. Knead the dough on a floured surface for 8-10 minutes until smooth and elastic.
  5. Place in a greased bowl, cover, and let rise for 1 hour or until doubled in size.
Step 2: Prepare the Sweet Filling
  1. In a small bowl, mix softened butter, brown sugar, and cinnamon until spreadable.
Step 3: Shape the Bunny Cinnamon Rolls
  1. Preheat oven to 350°F (175°C) and line a baking sheet with parchment paper.
  2. Roll out dough into a ¼-inch thick rectangle.
  3. Spread cinnamon filling evenly, then roll tightly from the long side to form a log.
  4. Slice into 1-inch thick rounds for bunny faces.
  5. Cut a small strip of dough, split lengthwise, and shape into loops for ears. Press them onto the top of each roll.
Step 4: Bake to Golden Perfection
  1. Place shaped bunnies on a baking sheet, leaving space between them.
  2. Bake for 15-18 minutes or until golden brown and puffed.
  3. Let cool slightly before adding glaze.
Step 5: Add the Sweet Finishing Touches
  1. Whisk powdered sugar, milk, and vanilla extract until smooth.
  2. Drizzle over warm cinnamon roll bunnies.
  3. Decorate with sprinkles, coconut, or mini marshmallows for extra fun.

Notes

  • Store leftovers in an airtight container at room temperature for up to 2 days or in the fridge for up to 5 days.
  • To make ahead, prepare the dough and shape the rolls the night before, then refrigerate overnight. Bake fresh in the morning!
  • Serve warm for the best flavor and texture.

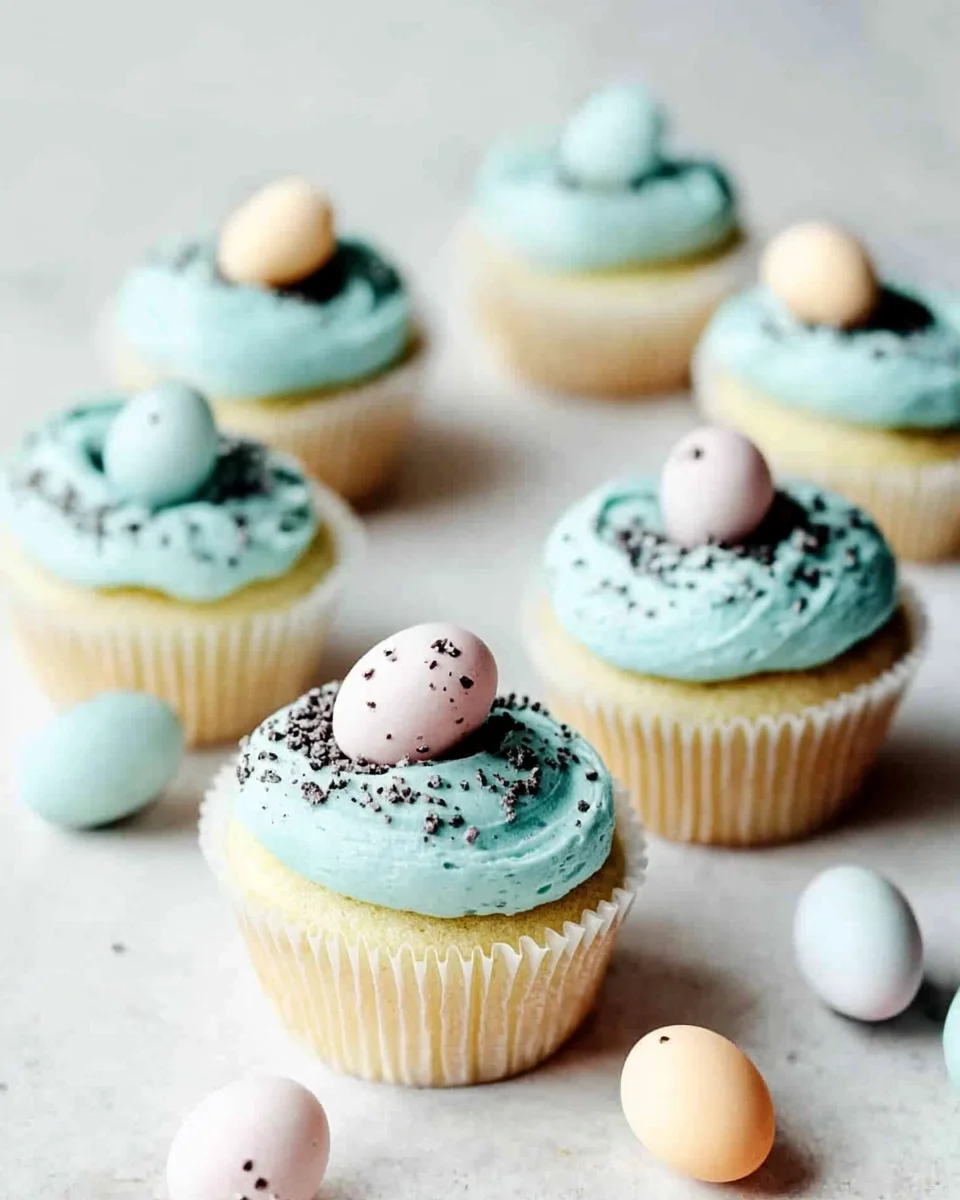
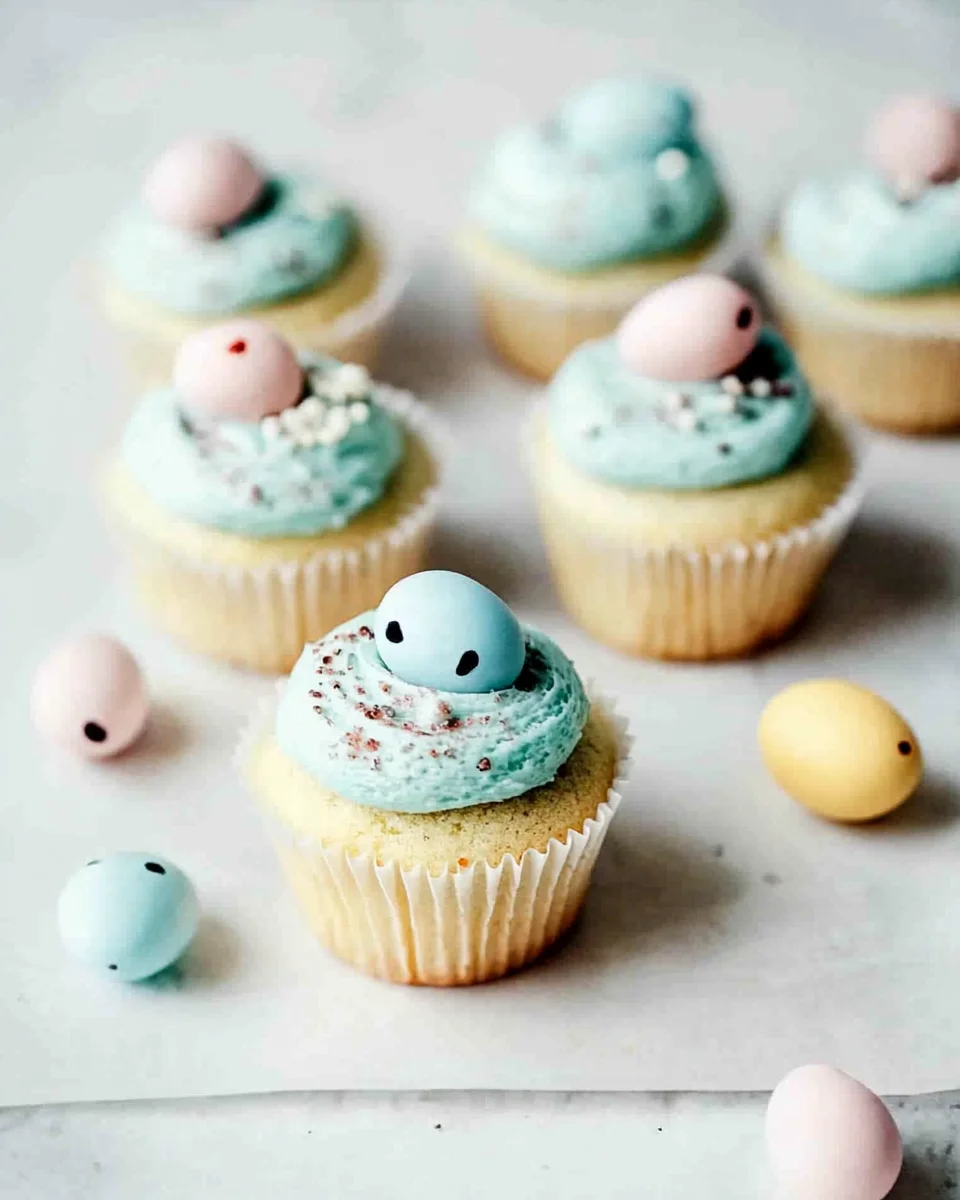
Easter Bunny Egg Cupcakes: A Delightful Treat for Spring Celebrations

A Sweet Childhood Memory Turned Easter Tradition

There’s something magical about Easter. The pastel colors, the scent of fresh flowers, and the joyful laughter of children hunting for eggs bring warmth to the heart. For me, Easter always meant family gatherings filled with homemade treats, but one dessert stood out—cupcakes.

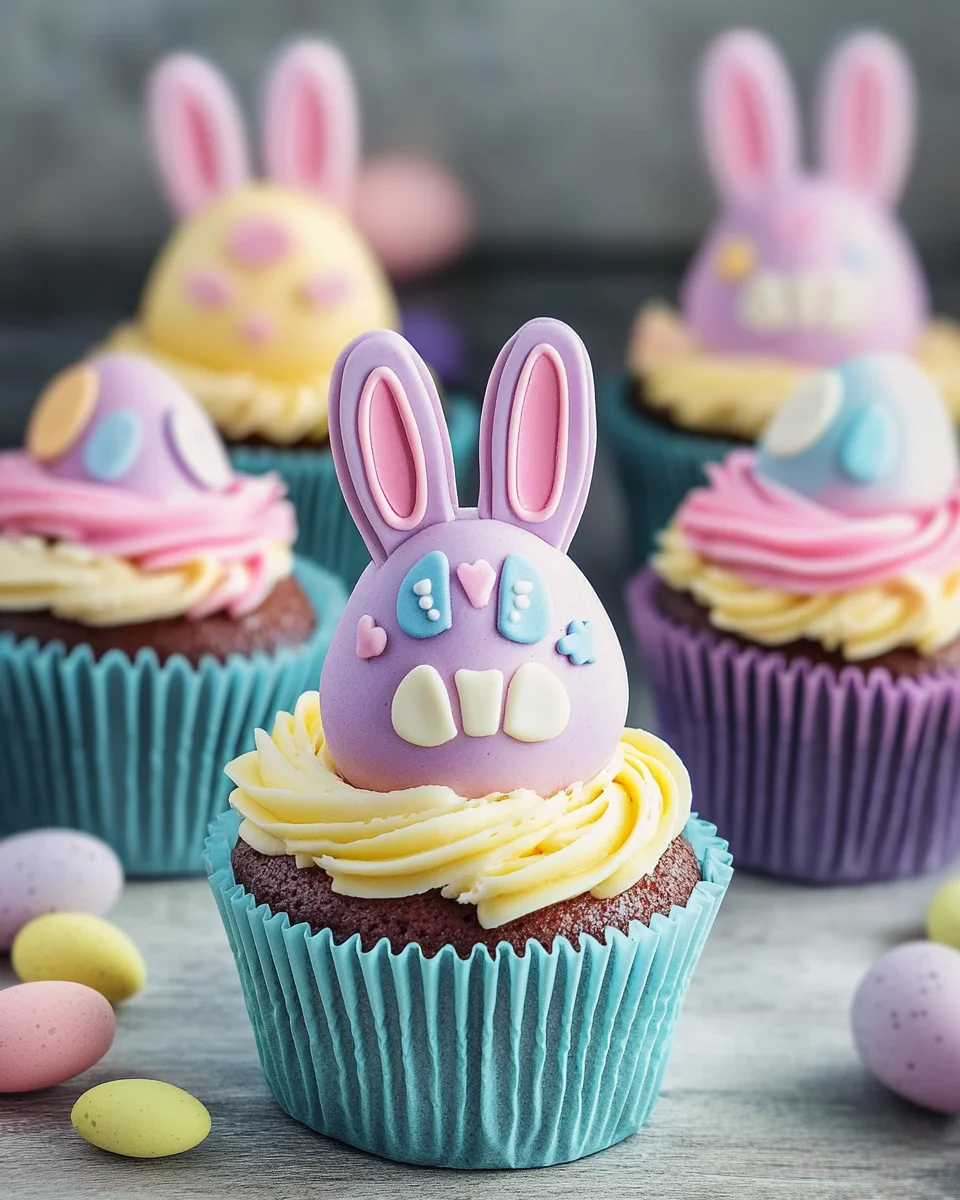
I vividly remember the first time I attempted to make Easter-themed cupcakes with my grandmother. Her kitchen smelled of cocoa and vanilla, and I could barely contain my excitement as I watched the batter rise in the oven. When they cooled, we swirled soft pastel frosting on top, adding little fondant bunny ears for the final touch. I must have placed the ears too close together because my bunnies looked more like confused kittens, but my grandmother laughed and reassured me that “imperfect” meant “made with love.”

That tradition never left me. Now, every Easter, I find myself baking these whimsical Easter Bunny Egg Cupcakes, not just for the joy of indulging in a delicious treat, but for the nostalgia they bring. They are a delightful combination of moist chocolate cake, smooth pastel buttercream, and playful decorations that capture the essence of spring and celebration.

Why These Cupcakes Are the Perfect Easter Dessert

Easter desserts should be more than just sweet; they should tell a story, create memories, and bring people together. Here’s why these cupcakes are the ultimate Easter treat:

  • Fun and Interactive – Whether you’re baking with children or hosting an Easter gathering, decorating these cupcakes is an activity everyone will enjoy. From coloring the buttercream to shaping the bunny ears, it’s a creative experience.
  • Visually Stunning – With their soft pastel hues and adorable bunny ears, these cupcakes are Instagram-worthy and make for a stunning dessert display.
  • Rich Yet Balanced Flavors – The deep chocolate cake pairs beautifully with the light, fluffy buttercream, ensuring a not-too-sweet, perfectly balanced bite.
  • Customizable for Any Preference – Whether you prefer vanilla, red velvet, or even carrot cake, the design of these cupcakes can be adapted to any flavor.

Tips and Tricks for the Best Easter Bunny Egg Cupcakes

Even though this recipe is straightforward, a few extra tips can elevate your cupcakes from good to outstanding.

1. The Secret to Moist Chocolate Cupcakes

One of the key ingredients that sets these cupcakes apart is boiling water. While it might seem unusual, adding hot water to the batter activates the cocoa powder, giving the cake an intense chocolate flavor and a soft, tender crumb. If you’ve ever had dry cupcakes, chances are they lacked enough moisture in the batter.

2. Buttercream That’s Light, Not Overly Sweet

Many people shy away from buttercream because it can be cloyingly sweet. The secret to achieving a smooth and luxurious frosting without overwhelming sweetness is:

  • Using unsalted butter for a creamy texture
  • Adding heavy cream to lighten the consistency
  • Whipping the frosting for at least 2-3 minutes to create an airy texture

For extra flavor, try adding a hint of almond extract, lemon zest, or even a drop of lavender essence to the frosting for a unique twist.

3. Perfecting the Bunny Ear Decorations

Working with fondant can be intimidating, but it’s easier than it looks. If you don’t have fondant, marshmallow pieces or white chocolate can also work for the bunny ears. To ensure they stand upright, let them dry for at least 30 minutes before placing them on the cupcakes. If you want extra stability, insert small toothpicks into the base of each ear before drying.

Ingredients: The Magic Behind the Treats

For the Chocolate Cupcakes
  • 1 ½ cups all-purpose flour
  • 1 cup granulated sugar
  • ½ cup unsweetened cocoa powder
  • 1 teaspoon baking powder
  • ½ teaspoon baking soda
  • ½ teaspoon salt
  • 2 large eggs
  • ¾ cup milk
  • ½ cup vegetable oil
  • 1 teaspoon vanilla extract
  • ¾ cup boiling water
For the Vanilla Buttercream Frosting
  • 1 cup unsalted butter, softened
  • 4 cups powdered sugar
  • 2-3 tablespoons heavy cream (or milk)
  • 1 teaspoon vanilla extract
  • Gel food coloring (pastel pink, blue, yellow, green, or purple)
For the Bunny Ear Decorations
  • White fondant
  • Pink fondant
  • Small candy eggs (like mini chocolate eggs or speckled eggs)
  • Edible glue or water

Directions: Crafting the Ultimate Easter Delight

Step 1: Bake the Chocolate Cupcakes

  1. Preheat oven to 350°F (175°C) and line a muffin tin with cupcake liners.
  2. In a large bowl, sift together flour, sugar, cocoa powder, baking powder, baking soda, and salt.
  3. Add eggs, milk, vegetable oil, and vanilla extract. Mix until smooth.
  4. Gradually stir in the boiling water, ensuring the batter is thin and uniform.
  5. Fill each liner about ⅔ full and bake for 18-22 minutes, or until a toothpick inserted in the center comes out clean.
  6. Let cupcakes cool completely before decorating.

Step 2: Whip Up the Dreamy Buttercream Frosting

  1. In a large bowl, beat softened butter until creamy.
  2. Gradually add powdered sugar, mixing on low speed.
  3. Add heavy cream and vanilla extract. Beat on high speed for 2-3 minutes until fluffy.
  4. Divide frosting into separate bowls and tint each with gel food coloring for pastel shades.

Step 3: Shape the Bunny Ears

  1. Roll out white fondant to ⅛ inch thick and cut small ovals for ears.
  2. Roll out pink fondant and cut smaller ovals for the inner ear details.
  3. Attach pink pieces to the white ears using edible glue or water.
  4. Let dry for about 30 minutes to firm up.

Step 4: Assemble Your Easter Cupcakes

  1. Pipe a swirl of pastel-colored frosting onto each cupcake.
  2. Place a small candy egg on top to serve as the bunny’s nose.
  3. Insert fondant ears into the frosting, positioning them upright.
  4. Sprinkle with colorful edible pearls or sprinkles for extra charm.

Nutritional Goodness: What’s Inside Each Cupcake?

  • Calories: 593
  • Total Fat: 30g
  • Saturated Fat: 13g
  • Trans Fat: 0g
  • Unsaturated Fat: 15g
  • Cholesterol: 96mg
  • Sodium: 235mg
  • Carbohydrates: 78g
  • Fiber: 1g
  • Sugar: 62g
  • Protein: 5g

These Easter Bunny Egg Cupcakes bring a festive and delicious charm to any springtime gathering. Enjoy baking, decorating, and sharing them with loved ones!

Frequently Asked Questions (FAQs)

1. Can I Make These Cupcakes Ahead of Time?

Yes! These cupcakes store well, making them perfect for prepping in advance. The unfrosted cupcakes can be baked up to two days ahead and stored in an airtight container at room temperature. The frosting can be made in advance and kept refrigerated for up to three days. Before using, allow it to come to room temperature and whip it again for a fluffy texture.

2. What’s the Best Way to Store Leftovers?

If you happen to have any leftovers (which is rare in my house), store them in an airtight container.

  • At room temperature: For up to 2 days
  • In the refrigerator: For up to 5 days (bring to room temperature before serving for the best texture)
  • In the freezer: Cupcakes can be frozen without frosting for up to 3 months. Wrap them tightly in plastic wrap and place in a freezer-safe container.

3. Can I Use a Different Frosting?

Absolutely! While vanilla buttercream pairs beautifully with chocolate, you can experiment with other frostings like:

  • Cream cheese frosting – for a slightly tangy, less sweet topping
  • Whipped ganache – for a rich, chocolatey experience
  • Coconut buttercream – to add a tropical twist

4. Are There Any Substitutions for Dietary Restrictions?

Yes! Here are a few modifications:

  • Gluten-Free: Use a 1:1 gluten-free flour blend in place of all-purpose flour.
  • Dairy-Free: Substitute almond milk, coconut milk, or oat milk for regular milk, and use dairy-free butter for the frosting.
  • Egg-Free: Replace each egg with 1/4 cup unsweetened applesauce or a flaxseed egg (1 tbsp ground flaxseed + 3 tbsp water, let sit for 5 minutes).

5. What Other Decorations Can I Use?

While fondant bunny ears are classic, you can also use:

  • Piped white chocolate ears for a delicate touch
  • Mini marshmallows cut into ear shapes
  • Shredded coconut sprinkled over the frosting for a fuzzy bunny look

Creative Serving Ideas for an Easter Celebration

These cupcakes are already a showstopper, but here are some fun ways to serve them at your Easter gathering:

  • Cupcake Platter: Arrange them on a pastel-colored tray with Easter grass and mini chocolate eggs scattered around.
  • Easter Dessert Board: Pair them with sugar cookies, chocolate-covered strawberries, and Easter candy for a dessert grazing table.
  • Personalized Cupcakes: Add name tags to each cupcake and use them as place settings for an Easter brunch.

For an extra special touch, consider gifting them in decorative cupcake boxes with ribbon for a thoughtful homemade treat.

Final Thoughts: More Than Just a Cupcake

Easter Bunny Egg Cupcakes are more than just a seasonal dessert; they are a symbol of joy, creativity, and togetherness. Baking these cupcakes is not just about following a recipe—it’s about making memories, whether with family, friends, or even by yourself as a therapeutic baking session.

The combination of rich chocolate cake, fluffy pastel frosting, and adorable bunny decorations makes these cupcakes a perfect addition to any Easter celebration. They bring smiles to both kids and adults, making them a tradition worth keeping year after year.

So this Easter, gather your ingredients, put on your favorite apron, and let the kitchen be filled with the sweet scent of tradition. Because sometimes, the best memories start with a simple cupcake.

aiting

Easter Bunny Egg Cupcakes: A Delightful Treat for Spring Celebrations

These adorable Easter cupcakes combine rich chocolate cake, fluffy pastel buttercream, and charming bunny ear decorations for a festive springtime treat!
Prep Time 30 minutes
Cook Time 20 minutes
Total Time 50 minutes
Servings: 12 servings
Course: Dessert
Cuisine: Easter/Springtime

Ingredients
  

For the Chocolate Cupcakes:
  • 1 ½ cups all-purpose flour
  • 1 cup granulated sugar
  • ½ cup unsweetened cocoa powder
  • 1 teaspoon baking powder
  • ½ teaspoon baking soda
  • ½ teaspoon salt
  • 2 large eggs
  • ¾ cup milk
  • ½ cup vegetable oil
  • 1 teaspoon vanilla extract
  • ¾ cup boiling water
For the Vanilla Buttercream Frosting:
  • 1 cup unsalted butter softened
  • 4 cups powdered sugar
  • 2-3 tablespoons heavy cream or milk
  • 1 teaspoon vanilla extract
  • Gel food coloring pastel pink, blue, yellow, green, or purple
For the Bunny Ear Decorations:
  • White fondant
  • Pink fondant
  • Small candy eggs like mini chocolate eggs or speckled eggs
  • Edible glue or water

Method
 

  1. Step 1: Bake the Chocolate Cupcakes
  2. Preheat oven to 350°F (175°C) and line a muffin tin with cupcake liners.
  3. In a large bowl, sift together flour, sugar, cocoa powder, baking powder, baking soda, and salt.
  4. Add eggs, milk, vegetable oil, and vanilla extract. Mix until smooth.
  5. Gradually stir in the boiling water, ensuring the batter is thin and uniform.
  6. Fill each liner about ⅔ full and bake for 18-22 minutes, or until a toothpick inserted in the center comes out clean.
  7. Let cupcakes cool completely before decorating.
Step 2: Whip Up the Dreamy Buttercream Frosting
  1. In a large bowl, beat softened butter until creamy.
  2. Gradually add powdered sugar, mixing on low speed.
  3. Add heavy cream and vanilla extract. Beat on high speed for 2-3 minutes until fluffy.
  4. Divide frosting into separate bowls and tint each with gel food coloring for pastel shades.
Step 3: Shape the Bunny Ears
  1. Roll out white fondant to ⅛ inch thick and cut small ovals for ears.
  2. Roll out pink fondant and cut smaller ovals for the inner ear details.
  3. Attach pink pieces to the white ears using edible glue or water.
  4. Let dry for about 30 minutes to firm up.
Step 4: Assemble Your Easter Cupcakes
  1. Pipe a swirl of pastel-colored frosting onto each cupcake.
  2. Place a small candy egg on top to serve as the bunny’s nose.
  3. Insert fondant ears into the frosting, positioning them upright.
  4. Sprinkle with colorful edible pearls or sprinkles for extra charm.

Notes

  • Store cupcakes in an airtight container at room temperature for up to 2 days or in the fridge for up to 5 days.
  • If you don’t have fondant, try making bunny ears with white chocolate and pink candy melts.
  • For an extra festive touch, use a mix of pastel sprinkles and edible glitter.

Raspberry Mille-Feuille Cookies: A Bite-Sized French Indulgence

A Sweet Memory in Paris: How This Recipe Stole My Heart

The first time I had a mille-feuille, I was sitting at a tiny café in the heart of Paris. The air was crisp, the aroma of freshly baked pastries lingered, and I was surrounded by the quiet hum of people enjoying their morning rituals. The waiter placed a delicate mille-feuille in front of me, its layers so perfectly crisp and golden that I hesitated for a moment, almost afraid to ruin its perfection. But the first bite was pure magic—the contrast between the flaky pastry and the luscious, sweet filling was unlike anything I had tasted before.

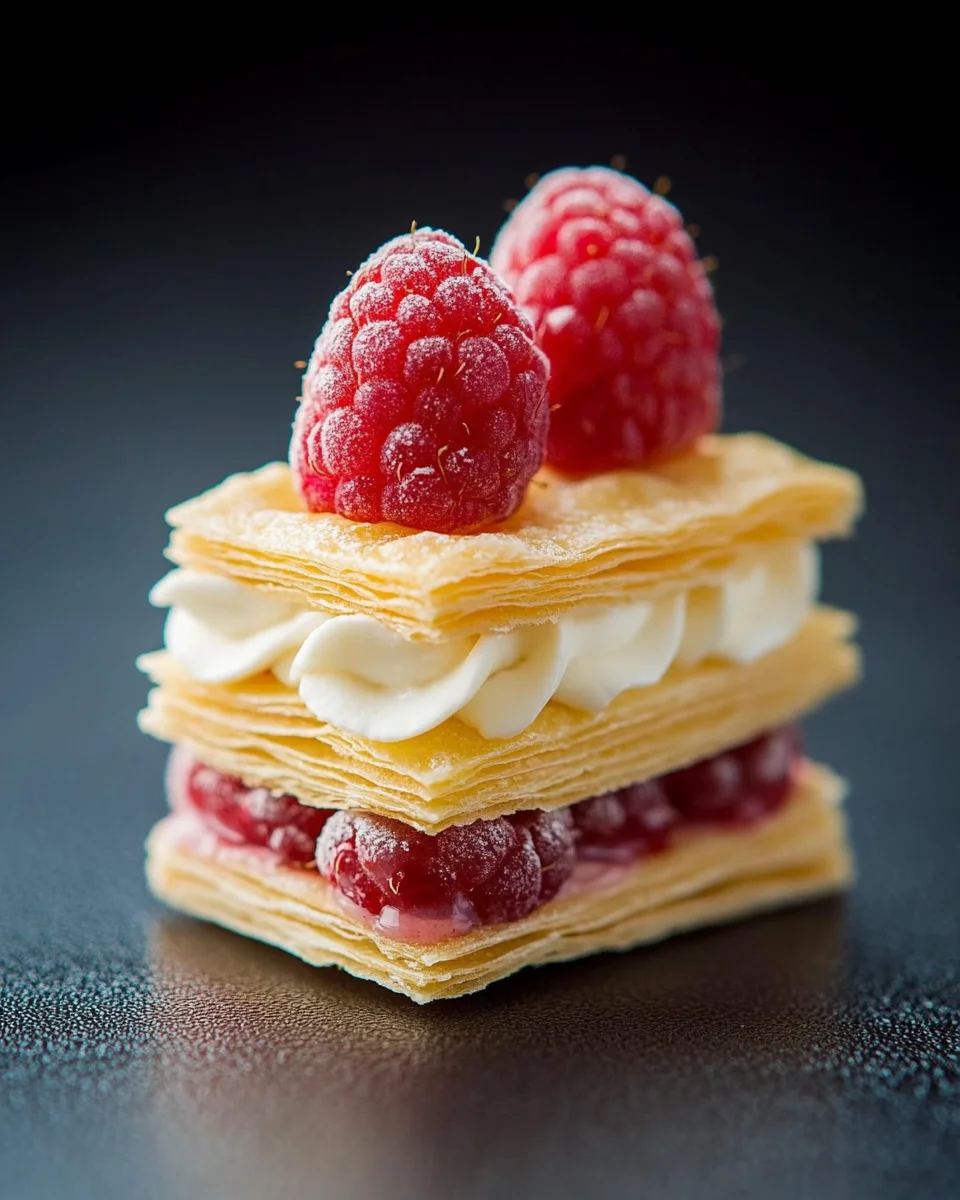
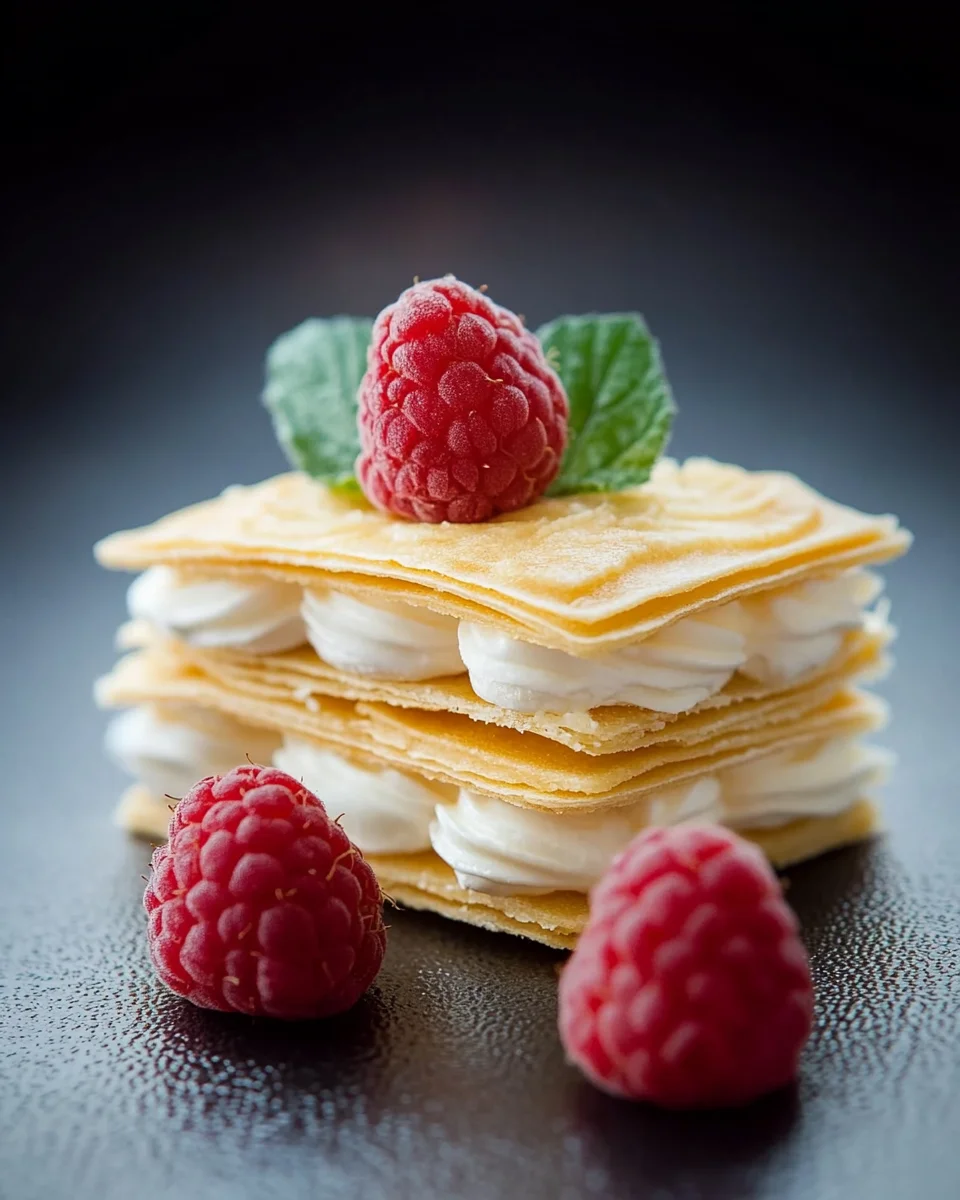
That moment stayed with me. I knew I had to recreate that experience in my own kitchen, but with a fun and approachable twist. That’s how these Raspberry Mille-Feuille Cookies were born. Instead of the traditional, towering layers of a classic mille-feuille, these cookies are more accessible, easier to eat, and just as indulgent. They’re perfect for elegant gatherings, afternoon tea, or simply as a well-earned treat for yourself.

Now, let’s dive deeper into what makes this recipe so special.

What Makes Raspberry Mille-Feuille Cookies Special?

These cookies take the essence of the classic mille-feuille and transform it into a more playful and convenient form. Instead of a large pastry that requires careful slicing, these cookies allow you to experience the same delicate textures in a single, perfectly portioned bite.

A Harmony of Textures

The true beauty of mille-feuille lies in the contrast between textures. The puff pastry is crisp and shatters with each bite, while the vanilla whipped cream is silky and smooth. The fresh raspberries add a bright, juicy tartness that cuts through the richness, creating an irresistible balance of flavors.

A French Pastry Classic, Simplified

Traditional mille-feuille can be intimidating for home bakers, often requiring careful pastry layering, custard preparation, and intricate assembly. This version eliminates the stress while keeping all the elegance. With store-bought puff pastry and a simple whipped cream filling, anyone can make these cookies effortlessly.

Perfect for Any Occasion

  • Elegant desserts for entertaining – These cookies are visually stunning, making them a sophisticated addition to dinner parties or afternoon tea.
  • A quick yet impressive treat – Since the recipe requires minimal prep and baking time, you can easily whip up a batch when craving something special.
  • A fun baking project – If you love experimenting in the kitchen, you can customize these cookies with different fillings, toppings, and shapes.

The History Behind Mille-Feuille

Mille-feuille, meaning “a thousand leaves” in French, dates back to the 17th century. The earliest mention of this delicate pastry was in a cookbook by François Pierre La Varenne in 1651. Traditionally, it consists of three layers of puff pastry filled with pastry cream and dusted with powdered sugar.

Over time, mille-feuille has evolved into many variations. Some feature fruit preserves, chocolate fillings, or even savory components. The American version, known as a Napoleon, is often topped with icing and has a slightly different cream filling. Despite these variations, the core concept remains the same: flaky layers and a rich, creamy filling.

By turning this elegant dessert into a cookie format, we are keeping the legacy alive while making it more accessible for everyday enjoyment.

Creative Variations to Try

One of the best things about this recipe is its versatility. Here are a few ways to put your own spin on these delicate cookies:

Swap the Filling

  • Chocolate Ganache – Replace the vanilla whipped cream with a rich, silky chocolate ganache for a decadent twist.
  • Lemon Curd – If you love citrusy desserts, a layer of lemon curd will add a bright, zesty contrast.
  • Mascarpone Cream – Swap out the whipped cream for mascarpone mixed with a little honey for a richer, slightly tangy filling.

Experiment with the Pastry

  • Homemade Puff Pastry – If you’re feeling adventurous, making your own puff pastry will take these cookies to the next level.
  • Cocoa Puff Pastry – Dust the pastry with cocoa powder before baking for a subtle chocolate flavor.

Add a Unique Garnish

  • Caramel Drizzle – A light drizzle of caramel sauce can elevate the presentation and add an extra layer of flavor.
  • Crushed Pistachios – Sprinkle finely chopped pistachios for a hint of nuttiness and a pop of color.

The Magic in the Mix: Ingredients

For the Puff Pastry Layers

  • 1 sheet of puff pastry (store-bought or homemade)
  • 2 tablespoons granulated sugar (for sprinkling)

For the Vanilla Whipped Cream

  • 1 cup heavy cream, chilled
  • 2 tablespoons powdered sugar
  • 1 teaspoon pure vanilla extract

For the Garnish

  • 1 pint fresh raspberries
  • Fresh mint leaves (optional, for garnish)

Step-by-Step to Perfection: Directions

Step 1: Crafting the Flaky Layers

  1. Preheat the oven to 400°F (200°C).
  2. Roll out the puff pastry on a lightly floured surface until it’s about 1/8 inch thick.
  3. Cut the pastry into small, bite-sized rectangles (approximately 1 inch by 2 inches).
  4. Place them on a parchment-lined baking sheet and prick all over with a fork to prevent excessive puffing.
  5. Lightly sprinkle granulated sugar on top for extra crispiness.
  6. Bake for 10-12 minutes or until golden brown and crisp. Cool on a wire rack.

Step 2: Whipping Up the Vanilla Cream

  1. In a mixing bowl, combine the chilled heavy cream, powdered sugar, and vanilla extract.
  2. Beat with an electric mixer or whisk until soft peaks form. Avoid overwhipping.

Step 3: Assembling the Masterpiece

  1. Once the pastry rectangles are cool, start layering.
  2. Place one piece on a clean surface and pipe or spoon small dollops of vanilla whipped cream on top.
  3. Add a second pastry piece and repeat with whipped cream.
  4. Finish with a third pastry layer, a final dollop of whipped cream, and 2-3 fresh raspberries.
  5. Garnish with a mint leaf for a touch of elegance.
  6. Repeat the process for all cookies.

The Sweet Breakdown: Nutritional Information

(Approximate values per serving)

  • Calories: 220
  • Total Fat: 14g
  • Saturated Fat: 8g
  • Carbohydrates: 20g
  • Sugar: 8g
  • Protein: 2g
  • Fiber: 1g

Enjoy these delicate, flaky, and creamy delights—a French-inspired indulgence made simple!

Frequently Asked Questions

1. Can I Make These Cookies in Advance?

Yes! You can prepare the puff pastry layers a day ahead and store them in an airtight container at room temperature. However, it’s best to assemble the cookies just before serving to prevent the pastry from becoming soggy.

2. Can I Use Frozen Puff Pastry?

Absolutely. Just make sure to let it thaw in the refrigerator before rolling it out. This ensures it remains cold enough to create those perfect flaky layers during baking.

3. Can I Make This Dairy-Free?

Yes! Use a dairy-free whipped topping or coconut whipped cream instead of heavy cream. Make sure your puff pastry is dairy-free as well, as some brands contain butter.

4. How Should I Store Leftovers?

If you have any leftovers (which is rare!), store them in an airtight container in the refrigerator for up to 24 hours. Keep in mind that the pastry may lose its crispness over time.

5. What’s the Best Way to Serve These Cookies?

They are best enjoyed fresh with a dusting of powdered sugar. Pair them with a cup of tea or coffee for an extra luxurious experience.

Final Thoughts: A Dessert Worth Indulging In

There’s something truly magical about desserts that combine elegance with ease. These Raspberry Mille-Feuille Cookies take a beloved French pastry and transform it into a treat that’s approachable, yet undeniably impressive. Whether you’re looking to wow your guests or simply treat yourself to something special, this recipe is sure to satisfy.

The joy of baking isn’t just in the final product—it’s in the memories created along the way. Whether it’s a quiet moment in your kitchen or the excitement of sharing these cookies with loved ones, each bite carries a little bit of that magic.

aiting

Raspberry Mille-Feuille Cookies: A Bite-Sized French Indulgence

A delicate and flaky French-inspired treat, these Mille-Feuille cookies are layered with light vanilla whipped cream and fresh raspberries for the perfect bite-sized indulgence!
Prep Time 15 minutes
Cook Time 12 minutes
Total Time 27 minutes
Servings: 8 servings
Course: Dessert
Cuisine: French-inspired

Ingredients
  

For the Puff Pastry Layers:
  • 1 sheet of puff pastry store-bought or homemade
  • 2 tablespoons granulated sugar for sprinkling
For the Vanilla Whipped Cream:
  • 1 cup heavy cream chilled
  • 2 tablespoons powdered sugar
  • 1 teaspoon pure vanilla extract
For the Garnish:
  • 1 pint fresh raspberries
  • Fresh mint leaves optional, for garnish

Method
 

  1. Step 1: Crafting the Flaky Layers
  2. Preheat the oven to 400°F (200°C).
  3. Roll out the puff pastry on a lightly floured surface until it’s about 1/8 inch thick.
  4. Cut the pastry into small, bite-sized rectangles (approximately 1 inch by 2 inches).
  5. Place them on a parchment-lined baking sheet and prick all over with a fork to prevent excessive puffing.
  6. Lightly sprinkle granulated sugar on top for extra crispiness.
  7. Bake for 10-12 minutes or until golden brown and crisp. Cool on a wire rack.
Step 2: Whipping Up the Vanilla Cream
  1. In a mixing bowl, combine the chilled heavy cream, powdered sugar, and vanilla extract.
  2. Beat with an electric mixer or whisk until soft peaks form. Avoid overwhipping.
Step 3: Assembling the Masterpiece
  1. Once the pastry rectangles are cool, start layering.
  2. Place one piece on a clean surface and pipe or spoon small dollops of vanilla whipped cream on top.
  3. Add a second pastry piece and repeat with whipped cream.
  4. Finish with a third pastry layer, a final dollop of whipped cream, and 2-3 fresh raspberries.
  5. Garnish with a mint leaf for a touch of elegance.
  6. Repeat the process for all cookies.

Notes

  • For extra crispiness, allow the puff pastry to cool completely before assembling.
  • If you prefer a sweeter cream, add an extra tablespoon of powdered sugar.
  • Best enjoyed fresh, but leftovers can be stored in an airtight container in the refrigerator for up to 24 hours.

A Game-Changer for Busy Nights: Air Fryer Chicken and Vegetables

A Personal Touch: The Recipe That Saved My Evenings

There was a time when dinner felt like an afterthought. Between work, family, and the never-ending list of responsibilities, cooking seemed like just another chore. I remember those exhausting evenings, staring into my fridge, wondering what I could throw together that was both quick and healthy. Takeout was tempting, but deep down, I wanted something homemade—something that wouldn’t leave me feeling sluggish and regretful afterward.

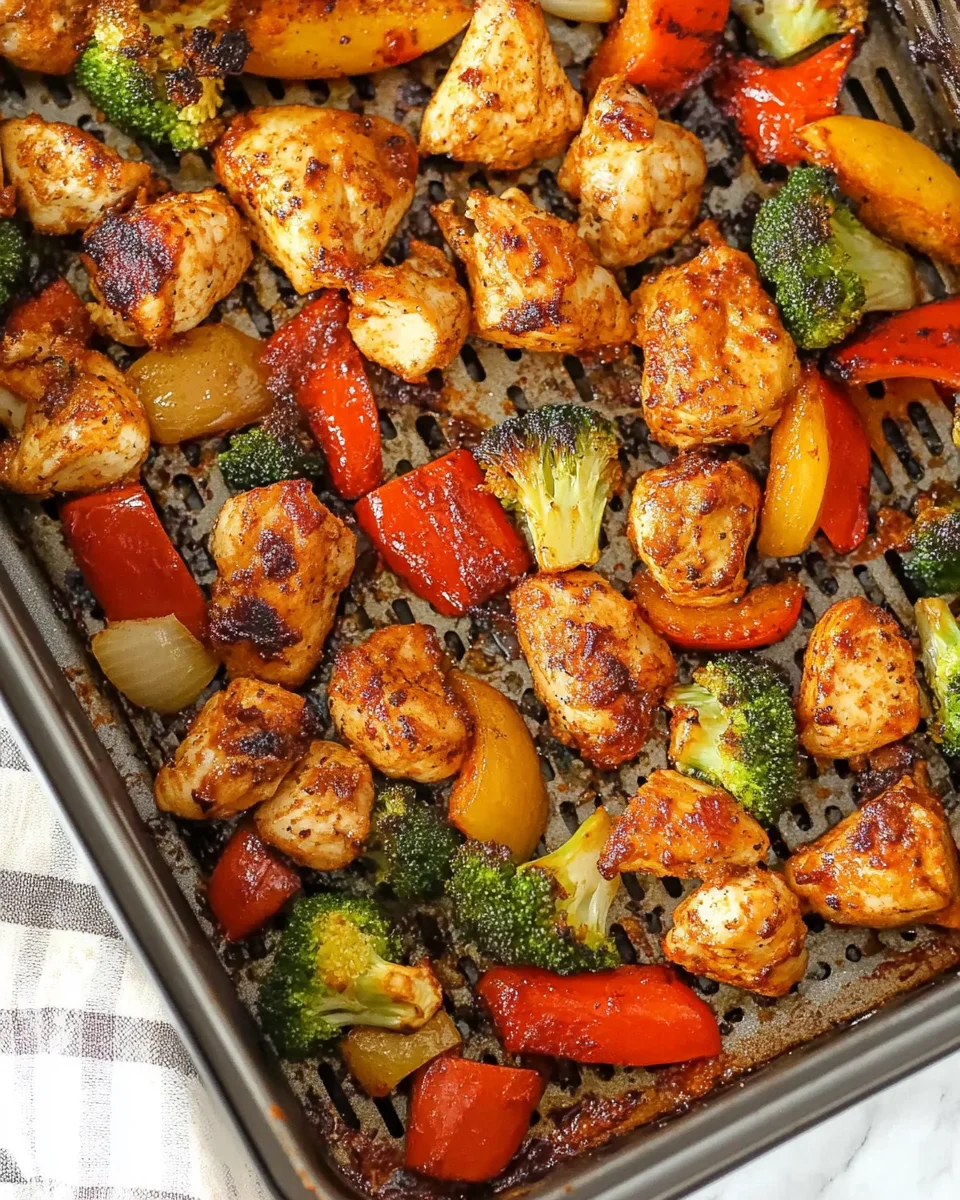
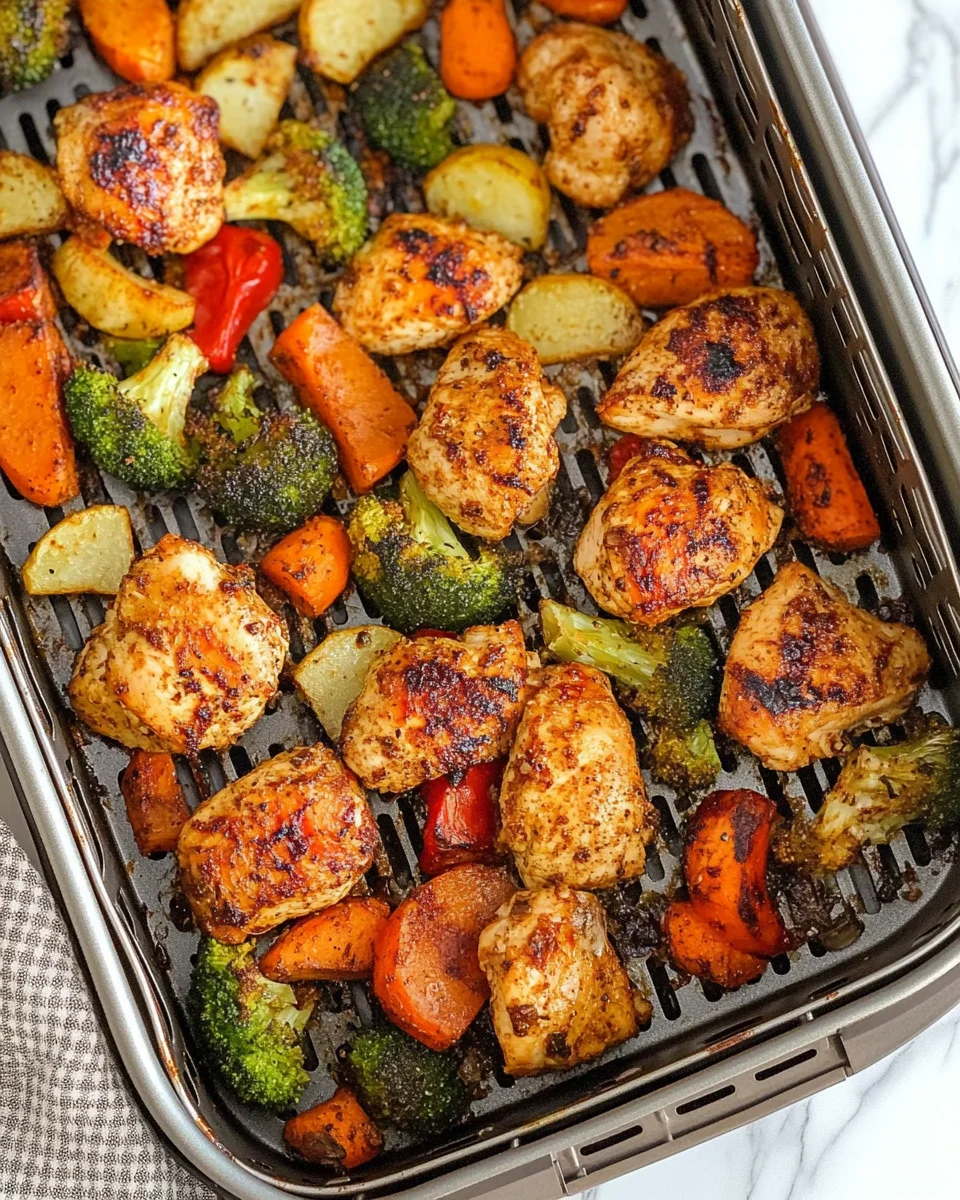
Then, I discovered the magic of the air fryer. It wasn’t just another kitchen gadget collecting dust on my counter; it became my secret weapon. The first time I made air fryer chicken and vegetables, I was amazed. In just 20 minutes, I had a wholesome, flavorful meal that tasted like something straight out of a restaurant. The chicken was juicy, the veggies had the perfect char, and the seasoning blend made everything irresistible.

This recipe changed the way I approached cooking. It brought back the joy of making meals from scratch without the stress and time commitment. Now, I’m excited to share this foolproof dinner solution with you—one that’s perfect for meal preppers, health-conscious eaters, and anyone who wants a delicious meal without spending hours in the kitchen.

Why This Recipe Works So Well

This air fryer chicken and vegetables dish is not just about convenience—it’s about achieving the perfect balance of flavors and textures with minimal effort. Here’s why it has become a go-to meal for so many:

1. A Perfect Balance of Nutrition

This dish offers everything you need in a single bowl:

  • Lean Protein: Chicken provides a high-protein base, keeping you full and supporting muscle growth.
  • Colorful Vegetables: Broccoli, bell peppers, zucchini, and onions bring fiber, vitamins, and antioxidants to the plate.
  • Healthy Fats: A small amount of olive oil not only enhances flavor but also helps with nutrient absorption.

2. Faster Than Traditional Cooking Methods

Compared to roasting in the oven or cooking on the stovetop, the air fryer slashes cooking time in half. With preheating, you’re looking at just 15-20 minutes from start to finish.

3. Restaurant-Quality Texture

One of the biggest struggles with cooking chicken and vegetables together is uneven doneness. The air fryer solves this by circulating hot air evenly, ensuring that the chicken stays moist while the veggies get a slight crisp without becoming mushy.

4. Minimal Cleanup

Nobody enjoys washing a sink full of dishes after a long day. This recipe requires just one bowl for tossing the ingredients and the air fryer basket, making cleanup a breeze.

5. Easily Customizable

This recipe is a great base for experimentation. You can:

  • Swap chicken breast for chicken thighs for extra juiciness.
  • Change up the vegetables—try carrots, green beans, or cauliflower.
  • Experiment with seasonings like Cajun, lemon-pepper, or Italian herbs.
  • Make it spicy with chili powder or cayenne pepper.

Tips for the Best Air Fryer Chicken and Vegetables

Even though this is a simple recipe, a few small tweaks can take it from good to absolutely amazing.

1. Cut Ingredients Evenly

Uniformly chopped chicken and vegetables ensure everything cooks at the same rate. Try to keep chicken cubes at 1 to 1 ½ inches and veggies in similar-sized chunks.

2. Don’t Overcrowd the Air Fryer

For the best texture, spread the ingredients in a single layer. If needed, cook in batches. Crowding the basket leads to steaming rather than crisping.

3. Preheat Your Air Fryer

Though it’s not always necessary, preheating for 3-5 minutes at 400°F ensures a crispier exterior on both the chicken and vegetables.

4. Shake or Toss Halfway Through

This promotes even browning, especially for the vegetables. A quick shake at the 5-minute mark helps get everything golden and delicious.

5. Check the Internal Temperature

Use a meat thermometer to confirm that the chicken reaches 165°F (74°C) in the thickest part. This prevents overcooking while ensuring food safety.

Serving Suggestions: How to Make It a Complete Meal

While this dish is fantastic on its own, pairing it with the right side can elevate it even further. Here are some great serving ideas:

1. Over a Bed of Rice or Quinoa

Adding white rice, brown rice, or quinoa makes it more filling and adds extra texture.

2. With a Side of Roasted Potatoes

For a heartier meal, serve with crispy roasted potatoes or sweet potato fries.

3. Wrapped in a Low-Carb Tortilla

Transform leftovers into a delicious wrap by stuffing them into a whole wheat or low-carb tortilla with a drizzle of yogurt sauce.

4. Topped with a Creamy Dressing

A light drizzle of tzatziki, ranch, or a garlic yogurt sauce can add extra flavor and moisture.

The Magic Mix: Ingredients

Main Ingredients:

  • 2 boneless, skinless chicken breasts (about 1 pound)
  • 1 bunch broccoli, cut into florets (approx. 1 ½-2 cups)
  • 1 red bell pepper, seeded and chopped
  • 1 zucchini, cut into half-moons
  • 1 small onion, coarsely chopped
  • 3 tablespoons olive oil
  • ¼ cup shredded parmesan cheese (optional)

Seasoning Blend:

  • 1 ½ teaspoons paprika
  • 1 ½ teaspoons garlic powder
  • 1 ½ teaspoons onion powder
  • ½ teaspoon dried basil (optional)
  • 1 teaspoon kosher salt
  • ½ teaspoon ground black pepper

The Golden Path: Directions

Step 1: Prep the Air Fryer

Preheat the air fryer to 400ºF for at least 3 minutes, or as per the manufacturer’s instructions.

Step 2: Season the Chicken

In a large bowl, whisk together olive oil, paprika, garlic powder, onion powder, dried basil, salt, and pepper. Cut the chicken into 1-1 ½” cubes and toss in the seasoned oil mixture until well coated.

Step 3: Add the Veggies

Add the broccoli, bell pepper, zucchini, and chopped onion to the bowl. Toss again to distribute the seasoning and oil evenly.

Step 4: Air Fry in Batches

Transfer half of the mixture to the preheated air fryer basket, spreading it in an even layer. Cook for 10 minutes, turning the chicken pieces halfway through and stirring the vegetables to ensure even browning.

Step 5: Check for Doneness

Ensure the thickest portion of the chicken reaches an internal temperature of at least 165ºF. Remove from the air fryer and repeat with the remaining batch.

Step 6: Serve & Enjoy!

Transfer the cooked chicken and veggies to a bowl, garnish with parmesan cheese (if desired), and serve immediately.

Oven Option: Broil on a parchment-lined baking sheet for 10-11 minutes, turning the chicken and stirring the vegetables halfway through.

The Nutrition Breakdown: A Healthy Bite

  • Calories: 268 kcal
  • Carbohydrates: 18g
  • Protein: 20g
  • Fat: 15g
  • Saturated Fat: 3g
  • Cholesterol: 42mg
  • Sodium: 814mg
  • Potassium: 962mg
  • Fiber: 6g
  • Sugar: 6g
  • Vitamin A: 2419 IU
  • Vitamin C: 185mg
  • Calcium: 153mg
  • Iron: 2mg

This air fryer chicken and veggies recipe is a perfect mix of protein, fiber, and healthy fats—great for a balanced meal!

Frequently Asked Questions

1. Can I Use Frozen Chicken?

Yes, but you’ll need to adjust the cooking time. Add an extra 5-7 minutes and check the internal temperature to ensure it reaches 165°F.

2. What Other Vegetables Work Well?

This recipe is super versatile! Some great options include:

  • Green beans
  • Carrots (cut into sticks)
  • Brussels sprouts
  • Cherry tomatoes
  • Mushrooms

3. How Do I Store Leftovers?

Store in an airtight container in the refrigerator for up to 3 days.

4. How Do I Reheat This Dish?

  • Air Fryer: Reheat at 350°F for 3-5 minutes to restore crispiness.
  • Microwave: Heat in 30-second intervals until warmed through.

5. Can I Meal Prep This Recipe?

Absolutely! Portion it into meal prep containers with a side of rice, quinoa, or a fresh salad. It stays fresh in the fridge for up to 3 days.

Final Thoughts: Why This Recipe Belongs in Your Rotation

If you’ve ever struggled to put together a nutritious meal on a busy night, this air fryer chicken and vegetables recipe is your answer. It’s fast, packed with flavor, and completely foolproof. Whether you’re cooking for yourself, your family, or meal prepping for the week, this dish never disappoints.

More than just a recipe, this has become a reminder that eating well doesn’t have to be complicated. It’s about finding small, simple solutions that fit into our everyday lives. The air fryer has given me that—and I hope this recipe does the same for you.

So next time you’re staring at your fridge, unsure of what to make, remember this: a handful of ingredients, a dash of seasoning, and 20 minutes are all you need for a meal that’s as satisfying as it is effortless.

aiting

A Game-Changer for Busy Nights: Air Fryer Chicken and Vegetables

A quick, healthy, and delicious air fryer meal that combines tender, juicy chicken with perfectly roasted veggies. Packed with protein and flavor, this dish is perfect for busy weeknights!
Prep Time 10 minutes
Servings: 4 servings
Course: Main Dish
Cuisine: Healthy

Ingredients
  

Main Ingredients:
  • 2 boneless skinless chicken breasts (about 1 pound)
  • 1 bunch broccoli cut into florets (approx. 1 ½-2 cups)
  • 1 red bell pepper seeded and chopped
  • 1 zucchini cut into half-moons
  • 1 small onion coarsely chopped
  • 3 tablespoons olive oil
  • ¼ cup shredded parmesan cheese optional
Seasoning Blend:
  • 1 ½ teaspoons paprika
  • 1 ½ teaspoons garlic powder
  • 1 ½ teaspoons onion powder
  • ½ teaspoon dried basil optional
  • 1 teaspoon kosher salt
  • ½ teaspoon ground black pepper

Method
 

  1. Step 1: Prep the Air Fryer
  2. Preheat the air fryer to 400ºF for at least 3 minutes, or as per the manufacturer’s instructions.
Step 2: Season the Chicken
  1. In a large bowl, whisk together olive oil, paprika, garlic powder, onion powder, dried basil, salt, and pepper. Cut the chicken into 1-1 ½” cubes and toss in the seasoned oil mixture until well coated.
Step 3: Add the Veggies
  1. Add the broccoli, bell pepper, zucchini, and chopped onion to the bowl. Toss again to distribute the seasoning and oil evenly.
Step 4: Air Fry in Batches
  1. Transfer half of the mixture to the preheated air fryer basket, spreading it in an even layer. Cook for 10 minutes, turning the chicken pieces halfway through and stirring the vegetables to ensure even browning.
Step 5: Check for Doneness
  1. Ensure the thickest portion of the chicken reaches an internal temperature of at least 165ºF. Remove from the air fryer and repeat with the remaining batch.
Step 6: Serve & Enjoy!
  1. Transfer the cooked chicken and veggies to a bowl, garnish with parmesan cheese (if desired), and serve immediately.
  2. Oven Option: Broil on a parchment-lined baking sheet for 10-11 minutes, turning the chicken and stirring the vegetables halfway through.

Notes

  • For extra crispiness, avoid overcrowding the air fryer basket.
  • Swap out veggies based on preference—mushrooms, carrots, or asparagus work great!
  • Leftovers can be stored in an airtight container in the fridge for up to 3 days

Buffalo Chicken Stuffed Peppers: A Spicy Twist on a Comfort Classic

A Bite of Nostalgia with a Fiery Kick

Stuffed peppers have always been a staple in my family’s kitchen. I remember the warmth of my grandmother’s home, the rich aroma of roasted bell peppers filled with savory ground beef and rice wafting through the air. It was a meal that brought us together, a dish that somehow tasted even better when shared around the table.

As I grew older and started experimenting with flavors in my own kitchen, I realized that comfort food doesn’t have to be ordinary. That’s when the idea of Buffalo Chicken Stuffed Peppers was born—a bold, spicy, and utterly satisfying take on a childhood favorite. Instead of the traditional beef and rice, I opted for tender shredded chicken coated in fiery buffalo sauce, creamy mayo, and a perfect balance of seasonings. The result? A dish that carries the nostalgia of my grandmother’s recipe but with a modern, flavor-packed twist that never fails to impress.

These buffalo chicken stuffed peppers are not only a feast for the taste buds but also a healthier alternative to many classic comfort foods. They’re naturally low-carb, keto-friendly, and dairy-free, making them a versatile option for anyone looking for a nutritious yet indulgent meal. Whether you’re preparing them for a weeknight dinner, meal prepping for the week, or serving them at a gathering, these peppers are bound to become a favorite in your kitchen, just as they have in mine.

Why Buffalo Chicken Stuffed Peppers Stand Out

These stuffed peppers are a game-changer for several reasons:

  • Bold, Spicy, and Flavorful – The combination of shredded chicken, buffalo sauce, and seasonings delivers a powerful punch of flavor.
  • Healthy and Nutritious – With lean protein, healthy fats, and no unnecessary carbs, this dish is perfect for those on Whole30, keto, or paleo diets.
  • Quick and Easy to Make – Unlike traditional stuffed peppers that require rice and long cook times, this version is much simpler and comes together with minimal effort.
  • Great for Meal Prep – Make a batch ahead of time and enjoy throughout the week. They reheat beautifully and taste just as delicious the next day.
  • Customizable – You can easily adjust the spice level, swap out ingredients, or add toppings to make this dish your own.

What to Serve with Buffalo Chicken Stuffed Peppers

While these stuffed peppers are satisfying on their own, pairing them with the right side dishes can elevate the meal even further. Here are some excellent options to serve alongside them:

  • Roasted Sweet Potatoes – A slightly sweet contrast to the spicy filling.
  • Garlic Green Beans – Adds a fresh and garlicky crunch.
  • Mashed Cauliflower – A creamy, low-carb alternative to mashed potatoes.
  • Mexican Roasted Cauliflower – A spicy and flavorful veggie side.
  • Simple Green Salad – A refreshing way to balance out the heat.

If you want to keep things ultra simple, a drizzle of ranch dressing and some extra green onions on top can be enough to complete the dish!

Gather Your Goodies: Ingredients

  • Bell Peppers – 3 large, any color, cut in half lengthwise and seeds removed
  • Shredded Chicken – 4 cups (a rotisserie chicken works great!)
  • Mayonnaise – 1 cup (avocado oil mayo for Whole30/paleo-friendly)
  • Hot Sauce – ½ cup (Frank’s Red Hot or a Whole30-compatible buffalo sauce)
  • Garlic Powder – 1 teaspoon
  • Onion Powder – 1 teaspoon
  • Kosher Salt – 1 teaspoon
  • Black Pepper – ¼ teaspoon
  • Nutritional Yeast – 2 tablespoons (optional, for added umami flavor)
  • Green Onions – 1 bunch, thinly sliced (white and light green parts; save some for garnish)
  • Whole30 Ranch Dressing – for drizzling on top
  • Fresh Herbs – for garnish

The Magic Process: Directions

  1. Heat Things Up – Preheat your oven to 400°F (200°C).
  2. Prepare the Peppers – Arrange cut and de-seeded bell peppers in a lightly greased baking dish, cut side up.
  3. Mix the Filling – In a large bowl, combine shredded chicken, mayonnaise, hot sauce, garlic powder, onion powder, salt, black pepper, nutritional yeast, and green onions. Mix well and taste—add more hot sauce or salt if needed.
  4. Stuff It! – Fill each pepper with the buffalo chicken mixture, packing it in.
  5. Bake & Wait – Cover the dish with foil and bake for 30 minutes. Remove foil and bake another 20 minutes until the peppers are tender and the filling is bubbling and slightly browned.
  6. Top & Serve – Drizzle with ranch dressing, sprinkle with fresh herbs and extra green onions, and serve hot!

Power-Packed Nutrition: What’s Inside

  • High in Protein – Thanks to the shredded chicken
  • Low Carb & Keto-Friendly – No rice, just wholesome ingredients
  • Dairy-Free – Perfect for Whole30 and paleo diets
  • Healthy Fats – From avocado oil mayonnaise

Enjoy these spicy, creamy, and utterly satisfying buffalo chicken stuffed peppers for your next meal!

Common Questions About Buffalo Chicken Stuffed Peppers

Can I Make These Ahead of Time?

Absolutely! These stuffed peppers can be prepped in advance, making them perfect for meal planning. Simply prepare the filling and stuff the peppers, then store them in an airtight container in the refrigerator. When ready to eat, bake them as instructed, or reheat them in the oven until warmed through.

What’s the Best Way to Reheat Them?

  • In the Oven – Place the stuffed peppers in a baking dish, cover with foil, and warm at 350°F for about 10–15 minutes.
  • On the Stovetop – Add a little water to a skillet, place the peppers in, cover, and warm over medium-low heat.
  • In the Microwave – Cover with a paper towel and microwave for 2–3 minutes, cutting them in half first to speed up the process.

Can I Use Pre-Cooked Chicken?

Yes! A store-bought rotisserie chicken works perfectly for this recipe. Simply shred the meat and mix it with the buffalo sauce and other ingredients. This shortcut saves time and makes the dish even easier to prepare.

What If I Don’t Like Spicy Food?

If you’re sensitive to spice, you can adjust the heat level by using a milder buffalo sauce or reducing the amount of hot sauce in the mixture. You can also balance out the spice with an extra drizzle of ranch dressing on top.

Can I Add Cheese?

Yes! While this recipe is designed to be dairy-free, you can absolutely add shredded cheddar, mozzarella, or blue cheese crumbles if you’re not following a strict Whole30 or paleo diet. Sprinkle some on top before baking for a deliciously melty finish.

What’s the Best Type of Bell Pepper to Use?

You can use any color of bell pepper—green, red, yellow, or orange. Green peppers tend to be slightly more bitter, while red, yellow, and orange peppers are sweeter. If you prefer a naturally sweeter flavor, go with red or yellow peppers.

Can I Make This Recipe in the Air Fryer?

Yes! If you’re short on time, you can cook these in the air fryer at 375°F for about 15–18 minutes, checking for doneness along the way. The air fryer gives them a slightly crispier texture while keeping the inside juicy and flavorful.

Ways to Customize This Recipe

If you love getting creative in the kitchen, here are some ways to put your own spin on these buffalo chicken stuffed peppers:

  • Swap the Protein – Use shredded turkey, ground chicken, or even shredded beef for a different take on the filling.
  • Make It Vegetarian – Substitute the chicken with a plant-based alternative like jackfruit or chickpeas.
  • Use a Different Sauce – Try BBQ sauce for a smoky twist or a garlic parmesan sauce for a milder, creamy version.
  • Add More Veggies – Mix in diced celery, carrots, or spinach for extra nutrients and texture.
  • Make It Extra Crispy – Sprinkle crushed pork rinds or breadcrumbs on top for a crunchy finish.

Final Thoughts: A Dish That Keeps on Giving

Buffalo Chicken Stuffed Peppers are more than just a recipe—they’re a reminder that comfort food can be both nostalgic and innovative. They take the warmth of traditional stuffed peppers and elevate them with bold, spicy flavors that keep you coming back for more.

Whether you’re making them for a cozy family dinner, a meal prep staple, or even a party appetizer, these stuffed peppers are guaranteed to impress. They’re easy to prepare, packed with nutrition, and endlessly customizable to suit your taste.

So the next time you’re craving something hearty and satisfying, give this recipe a try. You just might find yourself making it again and again—just like I do.

aiting

Buffalo Chicken Stuffed Peppers: A Spicy Twist on a Comfort Classic

A spicy, creamy, and protein-packed dish that’s perfect for a quick, nutritious meal! These buffalo chicken stuffed peppers are Whole30, paleo, and keto-friendly, making them a great choice for any diet.
Prep Time 10 minutes
Cook Time 50 minutes
Total Time 1 hour
Servings: 6 servings
Course: Main Dish
Cuisine: American

Ingredients
  

  • 3 large bell peppers any color, cut in half lengthwise and seeds removed
  • 4 cups shredded chicken a rotisserie chicken works great!
  • 1 cup mayonnaise avocado oil mayo for Whole30/paleo-friendly
  • 1/2 cup hot sauce Frank’s Red Hot or a Whole30-compatible buffalo sauce
  • 1 teaspoon garlic powder
  • 1 teaspoon onion powder
  • 1 teaspoon kosher salt
  • 1/4 teaspoon black pepper
  • 2 tablespoons nutritional yeast optional, for added umami flavor
  • 1 bunch green onions thinly sliced (white and light green parts; save some for garnish)
  • Whole30 ranch dressing for drizzling on top
  • Fresh herbs for garnish

Method
 

1. Heat Things Up:
  1. Preheat your oven to 400°F (200°C).
2. Prepare the Peppers:
  1. Arrange cut and de-seeded bell peppers in a lightly greased baking dish, cut side up.
3. Mix the Filling:
  1. In a large bowl, combine shredded chicken, mayonnaise, hot sauce, garlic powder, onion powder, salt, black pepper, nutritional yeast, and green onions. Mix well and taste—add more hot sauce or salt if needed.
4. Stuff It!:
  1. Fill each pepper with the buffalo chicken mixture, packing it in.
5. Bake & Wait:
  1. Cover the dish with foil and bake for 30 minutes. Remove foil and bake another 20 minutes until the peppers are tender and the filling is bubbling and slightly browned.
6. Top & Serve:
  1. Drizzle with ranch dressing, sprinkle with fresh herbs and extra green onions, and serve hot!

Notes

  • If you like extra spice, add a pinch of cayenne pepper to the filling.
  • For a cheesier version, sprinkle dairy-free or regular shredded cheese on top before baking.
  • Store leftovers in an airtight container in the fridge for up to 3 days.

Easter Cake Pops: A Sweet Tradition of Joy and Creativity

A Childhood Easter Memory: Where It All Began

Easter in my family was always a time of togetherness, laughter, and—most importantly—desserts. My grandmother, a baking enthusiast, would fill our kitchen with the scent of warm vanilla and melted chocolate. The highlight of the celebration was always the brightly decorated cake pops, an Easter treat that felt like edible magic. My siblings and I would huddle around the kitchen table, hands covered in sprinkles and pastel-colored chocolate, creating tiny edible masterpieces.

Cake pops weren’t just desserts; they were an experience. They symbolized patience (waiting for the chocolate to set), creativity (choosing decorations), and the joy of sharing. Now, as I pass this tradition down to my own children, I see the same excitement in their eyes—the thrill of turning simple cake crumbs into something beautiful. This is why Easter cake pops remain a staple in my home, and why I want to share the magic with you.

The Appeal of Easter Cake Pops

Why do cake pops continue to be such a beloved treat? The answer is simple: they are fun, festive, and full of flavor. Unlike a traditional cake that needs plates and forks, cake pops are portable, mess-free, and bite-sized, making them ideal for Easter celebrations, kids’ parties, or as thoughtful homemade gifts.

Beyond their practicality, Easter cake pops allow for endless creativity. Whether you prefer classic pastel coatings, speckled egg designs, or adorable bunny faces, they can be tailored to any theme. Plus, they’re an excellent way to use up leftover cake and transform it into something visually stunning and delicious.

Creative Variations to Try

1. Chocolate Lover’s Delight

Swap out vanilla cake for rich chocolate cake and coat the pops in milk or dark chocolate. Add a drizzle of white chocolate for an elegant touch.

2. Carrot Cake Pops with Cream Cheese Filling

Easter and carrot cake go hand in hand! Use spiced carrot cake mixed with cream cheese frosting for a decadent treat. Cover in white chocolate and top with crushed walnuts or a small fondant carrot.

3. Speckled Egg Cake Pops

For a realistic Easter egg look, dip your cake pops in pastel-colored chocolate and use a small paintbrush to flick specks of edible cocoa or food coloring onto them. These will resemble tiny robin’s eggs!

4. Bunny and Chick Cake Pops

For an adorable Easter-themed batch, decorate some pops as bunnies (using fondant ears and a pink candy nose) and others as chicks (with yellow candy coating and mini chocolate eyes). These make for delightful centerpieces or edible gifts.

Expert Tips for Perfect Cake Pops

1. The Right Cake-to-Frosting Ratio

One of the most common mistakes is adding too much frosting to the cake crumbs, resulting in a mushy texture. You want just enough frosting to bind the cake crumbs together—typically a few tablespoons, not an entire cup.

2. Chill Before Dipping

If your cake balls are too soft, they will fall apart when dipped in chocolate. Always chill them in the fridge for at least an hour or freeze for 15 minutes before dipping. This helps them hold their shape.

3. Use Candy Melts or Tempered Chocolate

Candy melts provide a smooth, glossy finish and come in a variety of Easter colors. If using real chocolate, add a bit of coconut oil or vegetable oil to thin it out for easier dipping.

4. Stick Stability

Dip the end of each lollipop stick in melted chocolate before inserting it into a cake ball. This acts as “glue” and prevents the cake pop from sliding off.

5. Drying Without Smudging

Once dipped, stick the cake pops into a styrofoam block or cake pop stand to dry upright. If you lay them flat on parchment paper, one side may get a flattened edge.

Common Cake Pop Problems and How to Fix Them

Why Are My Cake Pops Cracking?

  • This happens when the cake balls are too cold and the melted chocolate is too hot. Let the cake balls sit at room temperature for a few minutes before dipping.

Why Are They Falling Off the Stick?

  • Either the cake mixture is too soft, or the stick wasn’t secured properly. Try chilling longer and ensuring the stick is dipped in melted chocolate before inserting.

Why Is the Coating Lumpy?

  • If the chocolate isn’t smooth, it may have been overheated. Melt it in short intervals and stir frequently. If needed, add a teaspoon of vegetable oil to thin it out.

Why Won’t the Decorations Stick?

  • If sprinkles or decorations are falling off, the coating may have set too quickly. Decorate immediately after dipping while the chocolate is still wet.

Great! Here’s a homemade recipe inspired by the Easter Cake Pops from Harry & David.

Whimsical Easter Cake Pops Recipe

Magic Mix: Ingredients

  • For the Cake:
    • 1 ½ cups all-purpose flour
    • 1 cup granulated sugar
    • ½ cup unsalted butter, softened
    • 2 eggs
    • ½ cup whole milk
    • 1 teaspoon vanilla extract
    • 1 ½ teaspoons baking powder
    • ¼ teaspoon salt
  • For the Frosting:
    • ½ cup unsalted butter, softened
    • 1 ½ cups powdered sugar
    • 1 teaspoon vanilla extract
    • 2 tablespoons heavy cream
  • For the Coating:
    • 2 cups white chocolate or candy melts (pastel colors for Easter)
    • 1 tablespoon vegetable oil (for smooth dipping)
    • Sprinkles, edible glitter, or crushed candy for decoration
  • Other Essentials:
    • Lollipop sticks
    • Styrofoam block or cake pop stand for drying

The Enchanting Process: Directions

Step 1: Bake the Cake

  1. Preheat oven to 350°F (175°C). Grease a cake pan.
  2. In a bowl, cream together butter and sugar until light and fluffy.
  3. Add eggs, vanilla, and milk, mixing well.
  4. Sift in flour, baking powder, and salt, stirring until smooth.
  5. Pour batter into the pan and bake for 25-30 minutes, or until a toothpick comes out clean.
  6. Let the cake cool completely before crumbling.

Step 2: Make the Cake Pop Dough

  1. Crumble the cooled cake into fine crumbs using your hands or a food processor.
  2. In a separate bowl, beat butter, powdered sugar, vanilla, and heavy cream until fluffy to make the frosting.
  3. Mix the frosting into the cake crumbs a little at a time, stirring until the mixture is moldable (like cookie dough).

Step 3: Shape and Chill

  1. Roll the mixture into 1-inch balls and place them on a lined baking sheet.
  2. Chill in the fridge for 1 hour (or freeze for 15 minutes) to firm up.

Step 4: Dip and Decorate

  1. Melt candy melts or chocolate in the microwave in 30-second intervals, stirring in between.
  2. Stir in vegetable oil for a smoother consistency.
  3. Dip one end of each lollipop stick into melted chocolate, then insert halfway into a cake ball. Let it set for a few minutes.
  4. Fully dip each cake pop into the melted chocolate, letting the excess drip off.
  5. Decorate immediately with sprinkles, edible glitter, or crushed candy.
  6. Stick the cake pops into a styrofoam block to dry completely.

Sweet Stats: Nutritional Information (Per Cake Pop)

  • Calories: ~180
  • Carbohydrates: 22g
  • Fat: 9g
  • Protein: 2g
  • Sugar: 15g

Now you’ve got homemade Easter Cake Pops that are just as festive and delicious! Let me know if you want variations like chocolate cake pops or vegan options. Happy baking!

FAQs About Easter Cake Pops

1. Can I Make Cake Pops Ahead of Time?

Yes! Cake pops can be stored in the refrigerator for up to a week or frozen for up to two months. If freezing, wrap them individually in plastic wrap and store in an airtight container.

2. Do I Need a Cake Pop Mold?

No, a mold is not necessary. Traditional cake pops are made by rolling cake crumbs with frosting. However, if you prefer a perfectly round shape, a mold can help.

3. Can I Make These Without a Cake Mix?

Absolutely! While many people use store-bought cake mix for convenience, you can make your own cake from scratch for a richer homemade flavor.

4. How Can I Make These Healthier?

For a healthier version, use Greek yogurt instead of frosting to bind the cake crumbs, and coat with dark chocolate instead of candy melts.

5. How Do I Transport Cake Pops Without Smudging the Decoration?

Place them in a cake pop stand or individual treat bags to keep them upright. If packing them together, use tissue paper to separate them.

The Sweetest Part: A Tradition Worth Sharing

Easter cake pops are more than just a treat—they are a tradition, a creative expression, and a bonding experience with loved ones. Whether you’re making them for a holiday gathering, a school party, or simply as a weekend baking project, they bring joy and excitement to any occasion.

The best part? Each cake pop is unique, just like the people who make them. Whether you’re decorating with pastel swirls, tiny bunny ears, or a drizzle of gold dust, you’re creating more than just dessert—you’re making memories.

So, this Easter, gather your family, grab some sprinkles, and let the magic begin. Because sometimes, the smallest treats bring the biggest smiles.

aiting

Easter Cake Pops: A Sweet Tradition of Joy and Creativity

Celebrate Easter with these adorable homemade cake pops! These bite-sized treats are made with a moist vanilla cake, a creamy frosting, and a pastel-colored chocolate coating for the perfect festive touch. Perfect for Easter baskets, parties, or as a fun baking project!
 
Prep Time 30 minutes
Cook Time 40 minutes
Total Time 2 hours
Servings: 24 cake pops
Course: Dessert
Cuisine: American

Ingredients
  

For the Cake:
  • 1 ½ cups all-purpose flour
  • 1 cup granulated sugar
  • ½ cup unsalted butter softened
  • 2 eggs
  • ½ cup whole milk
  • 1 teaspoon vanilla extract
  • 1 ½ teaspoons baking powder
  • ¼ teaspoon salt
For the Frosting:
  • ½ cup unsalted butter softened
  • 1 ½ cups powdered sugar
  • 1 teaspoon vanilla extract
  • 2 tablespoons heavy cream
For the Coating:
  • 2 cups white chocolate or candy melts pastel colors for Easter
  • 1 tablespoon vegetable oil for smooth dipping
  • Sprinkles edible glitter, or crushed candy for decoration
Other Essentials:
  • Lollipop sticks
  • Styrofoam block or cake pop stand for drying

Method
 

  1. Step 1: Bake the Cake
  2. Preheat oven to 350°F (175°C) and grease a cake pan.
  3. In a bowl, cream together butter and sugar until light and fluffy.
  4. Add eggs, vanilla, and milk, mixing well.
  5. Sift in flour, baking powder, and salt, stirring until smooth.
  6. Pour batter into the pan and bake for 25-30 minutes, or until a toothpick comes out clean.
  7. Let the cake cool completely before crumbling.
Step 2: Make the Cake Pop Dough
  1. Crumble the cooled cake into fine crumbs using your hands or a food processor.
  2. In a separate bowl, beat butter, powdered sugar, vanilla, and heavy cream until fluffy to make the frosting.
  3. Mix the frosting into the cake crumbs a little at a time, stirring until the mixture is moldable (like cookie dough).
Step 3: Shape and Chill
  1. Roll the mixture into 1-inch balls and place them on a lined baking sheet.
  2. Chill in the fridge for 1 hour (or freeze for 15 minutes) to firm up.
Step 4: Dip and Decorate
  1. Melt candy melts or chocolate in the microwave in 30-second intervals, stirring in between.
  2. Stir in vegetable oil for a smoother consistency.
  3. Dip one end of each lollipop stick into melted chocolate, then insert halfway into a cake ball. Let it set for a few minutes.
  4. Fully dip each cake pop into the melted chocolate, letting the excess drip off.
  5. Decorate immediately with sprinkles, edible glitter, or crushed candy.
  6. Stick the cake pops into a styrofoam block to dry completely.

Notes

  • For a chocolate variation, substitute ½ cup of flour with cocoa powder.
  • Use gel food coloring to tint white chocolate for a custom pastel shade.
  • Store cake pops in an airtight container at room temperature for up to 3 days or refrigerate for up to a week.
  • Freeze undecorated cake pops for up to 3 months and decorate when ready

Robin’s Egg Easter Cupcakes: A Sweet Taste of Springtime Joy

A Nostalgic Easter Tradition

Every spring, when the days start getting warmer and the scent of blooming flowers fills the air, I’m reminded of Easter mornings from my childhood. My siblings and I would wake up early, giddy with excitement, rushing outside to hunt for brightly colored eggs hidden in the dew-kissed grass. But what I remember most vividly wasn’t just the hunt—it was the moment we gathered around the kitchen table afterward, nibbling on sweet treats our mother had lovingly prepared.

Among the homemade delights, there was always something special, something that embodied the essence of spring itself—soft, pastel-colored cupcakes that looked just like the robin’s eggs we had just collected from the garden. These cupcakes, adorned with speckled frosting and topped with candy eggs, felt like edible pieces of Easter magic.

Now, as an adult, I love recreating that same magic for my own family. Robin’s Egg Easter Cupcakes have become a staple in our home, a symbol of joy, renewal, and the simple pleasures of baking. They are more than just a dessert; they are a reminder of cherished traditions, the laughter of loved ones, and the delight that comes from making something beautiful with your own hands.

If you’re looking for the perfect Easter treat, these cupcakes are it. They are light, fluffy, and infused with rich vanilla flavor, while the buttercream frosting—tinted a delicate robin’s egg blue—is both creamy and dreamy. The speckled design adds a touch of whimsy, making them almost too pretty to eat. Almost.

What Makes These Cupcakes Special?

There are plenty of cupcake recipes out there, but these Robin’s Egg Easter Cupcakes stand out for a few reasons:

  • Homemade Goodness: Unlike store-bought cupcakes or cake mixes, these are made completely from scratch, giving them a richer, more authentic flavor.
  • The Perfect Spring Aesthetic: The pastel blue frosting and speckled cocoa splatter make these cupcakes almost look like real robin’s eggs—ideal for Easter and spring celebrations.
  • A Fun Decorating Experience: If you love DIY projects, you’ll appreciate the creative process of flicking cocoa paint onto the frosting. It’s a bit messy but so much fun!
  • A Kid-Friendly Activity: If you have children, let them help with the decorating! They’ll love placing the mini eggs on top and creating their own unique speckled designs.

Whether you’re hosting an Easter brunch, bringing dessert to a spring picnic, or simply indulging in some festive baking, these cupcakes are guaranteed to be a hit.

Expert Tips for Perfect Easter Cupcakes

To ensure your cupcakes turn out light, fluffy, and picture-perfect, keep these baking tips in mind:

Use Room Temperature Ingredients

Cold ingredients don’t mix as well, which can lead to dense cupcakes. Allow your butter, eggs, sour cream, and milk to come to room temperature before you start baking.

Don’t Overmix the Batter

Overmixing activates the gluten in the flour, which can make your cupcakes tough instead of soft and airy. Mix just until the ingredients are combined.

Bake at the Right Temperature

Make sure your oven is fully preheated before placing your cupcakes inside. Baking at 350°F ensures even cooking and a golden, slightly domed top.

Let the Cupcakes Cool Completely Before Frosting

If you frost warm cupcakes, the buttercream will melt and slide off. Be patient and wait until they are completely cool before decorating.

Go Easy on the Food Coloring

A little goes a long way when tinting the frosting. Start with just a drop or two of blue food coloring, mix well, and add more if needed. You want a soft, pastel hue rather than an intense blue.

Control the Cocoa Splatter

The speckling effect can get messy. To keep your kitchen from looking like a cocoa crime scene, place a baking sheet behind your workspace to catch the splatter. You can also do this step outdoors for easy cleanup.

Whimsical Ingredients for a Spring Delight

For the Cupcakes:

  • 1 ½ cups all-purpose flour
  • ¼ cup cornstarch
  • 1 teaspoon baking powder
  • ¼ teaspoon baking soda
  • ¼ teaspoon salt
  • ½ cup salted butter (room temperature)
  • 1 cup granulated sugar
  • 3 egg whites (room temperature)
  • 3 teaspoons vanilla extract or vanilla bean paste
  • ½ teaspoon almond extract (optional)
  • ½ cup sour cream (room temperature)
  • ½ cup whole milk (room temperature)

For the Frosting:

  • 1 cup salted butter (room temperature)
  • 4 cups powdered sugar
  • 2-3 tablespoons heavy cream
  • 2 teaspoons vanilla extract
  • ½ teaspoon coconut extract (optional)
  • Pinch of salt
  • Blue food coloring

For the Speckled Decoration:

  • 1 tablespoon cocoa powder
  • 3-4 teaspoons vanilla extract
  • Cadbury mini eggs

Step-by-Step Magic: Crafting Your Cupcakes

1. Baking the Cupcakes:

  • Preheat the oven to 350°F and line muffin pans with cupcake liners.
  • In a large bowl, whisk together flour, cornstarch, baking powder, baking soda, and salt.
  • Using a stand or hand mixer, beat butter on high speed for 1 minute until creamy. Add sugar and beat for another 2 minutes.
  • Mix in egg whites, vanilla, and almond extract, then fold in sour cream.
  • Add the dry ingredients and mix on low speed. Gradually pour in milk while mixing until just combined.
  • Fill cupcake liners about ⅔ full and bake for 19-22 minutes, or until a toothpick comes out clean. Let them cool completely before frosting.

2. Whipping Up the Frosting:

  • Beat butter for 2-3 minutes until light and fluffy.
  • Add half of the powdered sugar, mix well, then add the remaining sugar and beat again.
  • Pour in heavy cream, vanilla, coconut extract (if using), and a pinch of salt, beating until smooth.
  • Mix in blue food coloring until you achieve a soft robin’s egg shade.
  • Transfer frosting to a piping bag and swirl onto cooled cupcakes.

3. Decorating with a Speckled Touch:

  • Arrange three Cadbury mini eggs on top of each frosted cupcake.
  • In a small bowl, whisk together cocoa powder and vanilla extract to create “speckle paint.”
  • Dip a stiff pastry brush (or a new paintbrush) into the cocoa mixture and flick speckles onto each cupcake for a natural egg effect.

Nutritional Breakdown Per Cupcake

  • Calories: 461 kcal
  • Carbohydrates: 62g
  • Protein: 3g
  • Fat: 23g
  • Saturated Fat: 14g
  • Cholesterol: 60mg
  • Sodium: 288mg
  • Sugar: 49g
  • Calcium: 47mg
  • Iron: 1mg

These festive cupcakes are perfect for Easter gatherings and can be stored for a few days or frozen for future celebrations!

FAQs: Everything You Need to Know

1. Can I Make These Cupcakes Ahead of Time?

Absolutely! You can bake the cupcakes a day or two in advance and store them in an airtight container at room temperature. If you need to store them longer, unfrosted cupcakes can be frozen for up to two months. Just thaw them overnight in the fridge before decorating.

2. How Long Do These Cupcakes Stay Fresh?

Once frosted and decorated, they will stay fresh at room temperature for 2-3 days. If you refrigerate them, they’ll last up to 5 days. Just let them come to room temperature before serving for the best flavor and texture.

3. Can I Use a Cake Mix Instead of Making Them from Scratch?

Yes, you can, but the homemade version has a superior taste and texture. If you do use a cake mix, consider adding a teaspoon of vanilla extract and a bit of sour cream to enhance the flavor.

4. What Other Flavors Work for These Cupcakes?

While the classic vanilla base is always a winner, you can experiment with different flavors like coconut, lemon, almond, or even a light chocolate cupcake. Just make sure the frosting remains a soft pastel blue to keep the robin’s egg look.

5. Can I Use Store-Bought Frosting?

Technically, yes, but homemade buttercream is much richer and creamier. Store-bought frosting tends to be overly sweet and lacks the fluffy texture that makes these cupcakes truly special.

6. What If I Don’t Have a Piping Bag for the Frosting?

No worries! You can simply spread the frosting on with a knife or use a heavy-duty plastic bag with a corner snipped off. The smooth, rounded frosting look works best for this design.

7. What’s the Best Way to Get the Speckled Effect?

Use a stiff pastry brush or a clean paintbrush to flick the cocoa and vanilla mixture onto the cupcakes. Practice on a plate first to get a feel for the technique before moving to your cupcakes.

8. Can I Make These Gluten-Free?

Yes! Substitute the all-purpose flour with a 1:1 gluten-free flour blend. Just be sure to check that your other ingredients are also gluten-free.

9. How Can I Make These Even More Festive?

Try adding shredded coconut on top for a “nest” effect before placing the mini eggs. You can also mix up the egg colors or use different pastel shades for the frosting.

10. Can I Use a Different Type of Mini Eggs?

Cadbury Mini Eggs are the classic choice, but you can use any pastel-colored chocolate eggs or even jelly beans for a unique twist.

A Sweet Ending: More Than Just a Cupcake

There’s something truly magical about baking during the holidays. It’s not just about the ingredients or the final product—it’s about the memories we create along the way. These Robin’s Egg Easter Cupcakes capture the joy of spring, the excitement of Easter, and the warmth of time spent with loved ones.

So whether you’re making them for a family gathering, a school bake sale, or simply as a treat for yourself, know that you’re baking more than just a dessert. You’re creating a little piece of happiness, a delicious tradition, and a sweet reminder that the simplest things in life—like a perfectly frosted cupcake—can bring the biggest smiles.

aiting

Robin’s Egg Easter Cupcakes: A Sweet Taste of Springtime Joy

Celebrate spring with these adorable Robin’s Egg Easter Cupcakes! Light and fluffy vanilla cupcakes are topped with a luscious buttercream frosting, speckled for a festive touch, and finished with Cadbury mini eggs. These treats are perfect for Easter gatherings and springtime celebrations!
Prep Time 20 minutes
Cook Time 25 minutes
Total Time 45 minutes
Servings: 12 cupcakes
Course: Dessert
Cuisine: American

Ingredients
  

For the Cupcakes:
  • 1 ½ cups all-purpose flour
  • ¼ cup cornstarch
  • 1 teaspoon baking powder
  • ¼ teaspoon baking soda
  • ¼ teaspoon salt
  • ½ cup salted butter room temperature
  • 1 cup granulated sugar
  • 3 egg whites room temperature
  • 3 teaspoons vanilla extract or vanilla bean paste
  • ½ teaspoon almond extract optional
  • ½ cup sour cream room temperature
  • ½ cup whole milk room temperature
For the Frosting:
  • 1 cup salted butter room temperature
  • 4 cups powdered sugar
  • 2-3 tablespoons heavy cream
  • 2 teaspoons vanilla extract
  • ½ teaspoon coconut extract optional
  • Pinch of salt
  • Blue food coloring
For the Speckled Decoration:
  • 1 tablespoon cocoa powder
  • 3-4 teaspoons vanilla extract
  • Cadbury mini eggs

Method
 

  1. Step 1: Baking the Cupcakes
  2. Preheat the oven to 350°F and line muffin pans with cupcake liners.
  3. In a large bowl, whisk together flour, cornstarch, baking powder, baking soda, and salt.
  4. Using a stand or hand mixer, beat butter on high speed for 1 minute until creamy. Add sugar and beat for another 2 minutes.
  5. Mix in egg whites, vanilla, and almond extract, then fold in sour cream.
  6. Add the dry ingredients and mix on low speed. Gradually pour in milk while mixing until just combined.
  7. Fill cupcake liners about ⅔ full and bake for 19-22 minutes, or until a toothpick comes out clean.
  8. Let them cool completely before frosting.
Step 2: Whipping Up the Frosting
  1. Beat butter for 2-3 minutes until light and fluffy.
  2. Add half of the powdered sugar, mix well, then add the remaining sugar and beat again.
  3. Pour in heavy cream, vanilla, coconut extract (if using), and a pinch of salt, beating until smooth.
  4. Mix in blue food coloring until you achieve a soft robin’s egg shade.
  5. Transfer frosting to a piping bag and swirl onto cooled cupcakes.
Step 3: Decorating with a Speckled Touch
  1. Arrange three Cadbury mini eggs on top of each frosted cupcake.
  2. In a small bowl, whisk together cocoa powder and vanilla extract to create “speckle paint.”
  3. Dip a stiff pastry brush (or a new paintbrush) into the cocoa mixture and flick speckles onto each cupcake for a natural egg effect.
  4.  

Notes

  • If you don’t have almond extract, simply use extra vanilla extract.
  • For a richer cupcake, substitute sour cream with Greek yogurt.
  • Store in an airtight container at room temperature for 2 days or in the fridge for up to 5 days.
  • Cupcakes can be frozen without frosting for up to 3 months.