Coffee Mousse Recipe: A Simple Delight to Enjoy!

A Taste of Comfort: My First Encounter with Coffee Mousse

There are some desserts that feel like a warm embrace, a sweet indulgence that takes you back to a cherished moment in time. Coffee mousse is one of them for me.

I still remember the first time I tasted it. It was a rainy afternoon, the kind that makes you want to curl up with a book and something sweet. My grandmother, a woman with an impeccable taste for both coffee and desserts, had a knack for transforming simple ingredients into something magical. That day, she placed a delicate glass of coffee mousse in front of me—a swirl of velvety smoothness topped with a dusting of cocoa.

“Take a bite,” she said with a knowing smile.

The first spoonful was an experience in itself—light as air, yet rich with the deep aroma of coffee. The gentle bitterness balanced perfectly with the creaminess, melting away almost instantly. It was love at first taste.

Since that moment, coffee mousse has been more than just a dessert to me. It’s a symbol of quiet indulgence, of slowing down and savoring something truly special. Whether enjoyed alone in a peaceful moment or served to guests at a gathering, coffee mousse never fails to impress. It’s elegant, effortless, and utterly irresistible.

In this article, we’ll explore everything you need to know about coffee mousse—from its origins to expert tips, FAQs, and creative serving ideas. If you’re a coffee lover, this dessert might just become your new favorite.

The Allure of Coffee Mousse

Coffee mousse combines the richness of strong brewed coffee with the airy texture of whipped cream and egg whites, creating a dessert that is both indulgent and refreshing. Unlike traditional chocolate mousse, coffee mousse offers a sophisticated bitterness that enhances the overall experience. It’s a dessert that caters to both coffee enthusiasts and those who appreciate light, yet decadent sweets.

One of the best things about coffee mousse is its versatility. It can be dressed up for an elegant dinner party or enjoyed as a simple treat on a quiet afternoon. The basic recipe is easy to master, but it also allows for endless creativity—whether you prefer a splash of liqueur for an extra kick or layers of textures with crushed biscuits or caramel drizzle.

Why Coffee Mousse is a Dessert Worth Making

1. A Perfect Balance of Flavors

Unlike heavier desserts, coffee mousse strikes a balance between richness and lightness. The bold coffee flavor prevents it from being overly sweet, making it a perfect choice for those who prefer desserts with depth.

2. No Baking Required

For those who love desserts but don’t want to deal with the hassle of baking, coffee mousse is a dream come true. All it takes is some whipping, folding, and chilling—making it an effortless yet impressive option.

3. A Make-Ahead Marvel

Coffee mousse is the perfect dessert for entertaining because it can be made ahead of time. Preparing it a day before allows the flavors to develop, ensuring a more intense and satisfying taste when served.

4. A Treat for Every Season

Whether it’s summer or winter, coffee mousse never feels out of place. In warmer months, it’s a refreshing, chilled treat. In colder seasons, its rich coffee notes provide a cozy indulgence, especially when paired with a cup of espresso or hot chocolate.

Expert Tips for the Perfect Coffee Mousse

Making a flawless coffee mousse requires some finesse. Here are a few expert tips to ensure your dessert turns out beautifully every time.

1. Use High-Quality Coffee

Since coffee is the star ingredient, its quality makes a significant difference. Opt for a strong, freshly brewed espresso or dark roast for the best flavor. Avoid using weak or instant coffee unless it’s of premium quality.

2. Whip with Precision

Both the egg whites and whipped cream play a crucial role in achieving the mousse’s airy texture. Overwhipping can lead to a grainy or stiff consistency, while underwhipping may result in a runny mousse. Whip until soft peaks form and fold gently to maintain the lightness.

3. Chill for the Best Texture

Patience is key when making mousse. Allowing it to chill for at least four hours (preferably overnight) ensures that the flavors meld together and the mousse achieves the right consistency.

4. Experiment with Flavors

For an extra layer of depth, consider adding coffee liqueur, a touch of cinnamon, or even a hint of caramel extract. Each variation brings out a new dimension of flavor, making the dessert uniquely yours.

5. Play with Presentation

Serve your coffee mousse in elegant glass cups or ramekins, and don’t shy away from garnishes. A dusting of cocoa powder, chocolate curls, or a dollop of whipped cream can elevate the visual appeal and add an extra touch of indulgence.

Ingredients for a Dreamy Delight

  • 1 cup strong brewed coffee (preferably espresso)
  • 3 tablespoons granulated sugar (adjust for sweetness)
  • 1 tablespoon instant coffee granules (for an extra punch)
  • 3 large eggs (separated)
  • 1 cup heavy whipping cream (for a velvety texture)
  • 1 teaspoon vanilla extract (adds depth)
  • Pinch of salt (enhances flavor)

Steps to Indulge in Perfection

Step 1: Brew the Bold Base

  • Prepare 1 cup of strong coffee and let it cool slightly.

Step 2: Whip the Clouds

  • In a clean bowl, beat 3 egg whites with a pinch of salt until soft peaks form.
  • Gradually add 1 tablespoon of sugar and continue whipping until glossy and stiff peaks form. Set aside.

Step 3: Create the Coffee Cream

  • In a separate bowl, whisk 3 egg yolks with 2 tablespoons of sugar, 1 tablespoon of instant coffee, and 1 teaspoon of vanilla until pale and creamy.
  • Slowly whisk in the cooled coffee until fully combined.

Step 4: The Fluffy Touch

  • In another bowl, whip 1 cup of heavy cream until soft peaks form.

Step 5: Blend with Grace

  • Gently fold half of the whipped cream into the coffee mixture to lighten it.
  • Fold in the remaining whipped cream, followed by the egg whites. Be gentle to keep the airy texture.

Step 6: The Grand Chill

  • Spoon the mousse into serving glasses or cups.
  • Refrigerate for at least 4 hours or overnight for a perfectly set texture.

Step 7: Serve with Elegance

  • Top with whipped cream, chocolate shavings, or a dusting of cocoa powder before serving.

Nutritional Highlights

  • Calories: 250
  • Sugar: 12g
  • Fat: 20g
  • Carbohydrates: 18g
  • Protein: 4g

Enjoy every spoonful of this rich, creamy, and coffee-infused delight!


FAQs About Coffee Mousse

1. Can I Make Coffee Mousse Without Eggs?

Yes! If you prefer an eggless version, you can replace egg whites with whipped aquafaba (chickpea water) or simply rely on whipped cream for structure. The texture will be slightly different, but it will still be delicious.

2. Can I Use Decaffeinated Coffee?

Absolutely! If you want to enjoy coffee mousse without the caffeine buzz, feel free to use decaf espresso or strongly brewed decaf coffee.

3. How Long Does Coffee Mousse Last?

Coffee mousse can be stored in the refrigerator for up to three days. Make sure to cover it well to prevent it from absorbing any fridge odors.

4. Can I Freeze Coffee Mousse?

While it’s possible to freeze mousse, the texture may change slightly upon thawing. If you do freeze it, let it thaw in the refrigerator before serving.

5. How Can I Make Coffee Mousse Vegan?

To make a vegan version, use coconut cream instead of heavy cream, aquafaba instead of egg whites, and a plant-based milk alternative for any liquid components. You can also use agar-agar for added stability.

6. Can I Add Alcohol to Coffee Mousse?

Yes! Coffee liqueur, rum, or Irish cream can add a delightful kick. Just be mindful of the amount so the mousse retains its structure.

Creative Ways to Serve Coffee Mousse

  • Coffee Parfait: Layer coffee mousse with crushed biscuits and whipped cream for a stunning parfait.
  • Chocolate Coffee Duo: Serve coffee mousse alongside chocolate mousse for a contrasting yet complementary dessert experience.
  • Tiramisu-Inspired: Add a layer of soaked ladyfingers to mimic the flavors of tiramisu in mousse form.
  • Espresso Shot Mousse: Serve mousse in small espresso cups for a charming, portion-controlled treat.

Conclusion: A Dessert Worth Savoring

Coffee mousse is more than just a dessert; it’s an experience. From its silky-smooth texture to its deep, aromatic flavor, every spoonful is a moment of indulgence. Whether you make it for a special occasion or as a personal treat, it has a way of making ordinary moments feel extraordinary.

So next time you crave something sweet yet sophisticated, let coffee mousse be your go-to choice. Pour yourself a cup of coffee, take a spoonful of this velvety delight, and enjoy the magic of this timeless dessert.

aiting

Coffee Mousse Recipe: A Simple Delight to Enjoy!

Indulge in a light, airy, and velvety coffee mousse that melts in your mouth with every spoonful. Made with rich brewed coffee, fluffy egg whites, and creamy whipped topping, this dessert is a dreamy treat for all coffee lovers!

Prep Time 15 minutes
Cook Time 4 hours
Total Time 4 hours 15 minutes
Servings: 4 servings
Course: Dessert
Cuisine: French

Ingredients
  

  • 1 cup strong brewed coffee preferably espresso3 tablespoons granulated sugar (adjust for sweetness)1 tablespoon instant coffee granules (for an extra punch)3 large eggs (separated)1 cup heavy whipping cream (for a velvety texture)1 teaspoon vanilla extract (adds depth)Pinch of salt (enhances flavor)

Method
 

Brew the Coffee:
  1. Prepare 1 cup of strong coffee and let it cool slightly.
Whip the Egg Whites:
  1. In a clean bowl, beat 3 egg whites with a pinch of salt until soft peaks form.
  2. Gradually add 1 tablespoon of sugar and continue whipping until glossy and stiff peaks form. Set aside.
Prepare the Coffee Cream:
  1. In a separate bowl, whisk 3 egg yolks with 2 tablespoons of sugar, 1 tablespoon of instant coffee, and 1 teaspoon of vanilla extract until pale and creamy.
  2. Slowly whisk in the cooled coffee until fully combined.
Whip the Heavy Cream:
  1. In another bowl, whip 1 cup of heavy cream until soft peaks form.
Fold Everything Together:
  1. Gently fold half of the whipped cream into the coffee mixture to lighten it.
  2. Fold in the remaining whipped cream, followed by the egg whites. Be gentle to maintain the airy texture.
Chill the Mousse:
  1. Spoon the mousse into serving glasses or cups.
  2. Refrigerate for at least 4 hours or overnight for the best texture.
Serve & Enjoy:
  1. Top with whipped cream, chocolate shavings, or a dusting of cocoa powder before serving.

Notes

  • Use decaf coffee if you want a caffeine-free version.
  • For extra richness, add a splash of coffee liqueur to the mixture.
  • If you prefer a sweeter mousse, increase the sugar by 1 tablespoon.
  • Store leftovers in an airtight container in the fridge for up to 3 days.
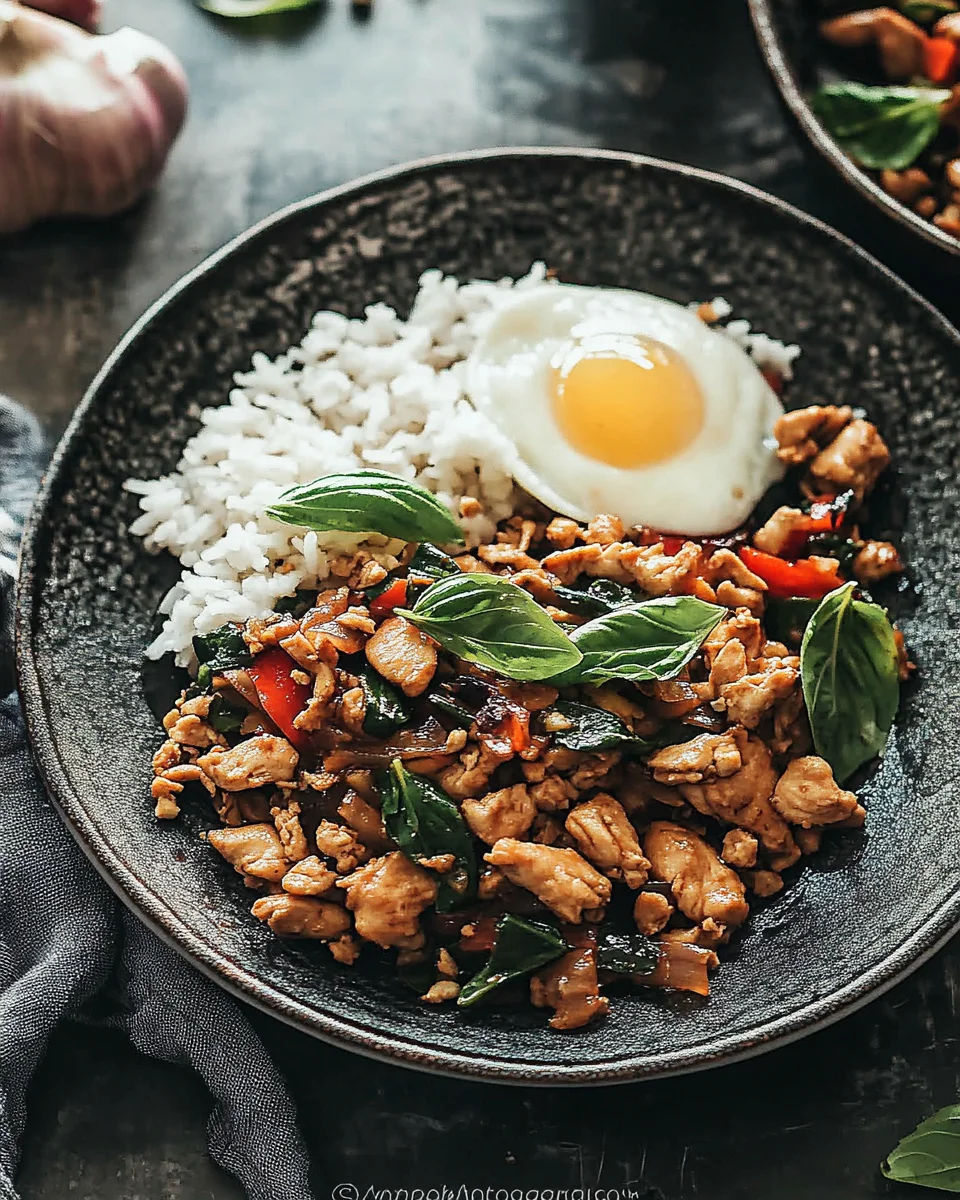
Thai Basil Chicken Stir-Fry is a quick, tasty meal.

Introduction to Thai Basil Chicken Stir-Fry Recipe

Thai Basil Chicken Stir-Fry Recipe. This dish is not just a meal; it’s an experience filled with vibrant flavors and fresh ingredients. If you’re looking for a quick and tasty dinner option, this recipe is perfect for you. It combines tender chicken, crisp vegetables, and aromatic Thai basil, all tossed together in a savory sauce. Let’s dive into what makes this dish so special!

What Makes Thai Basil Chicken Stir-Fry Unique?

Thai Basil Chicken Stir-Fry Recipe apart from other stir-fries? First, it features Thai basil, which has a distinct flavor that’s slightly sweet and peppery. This herb is essential in Thai cooking and adds a unique twist to the dish. Additionally, the combination of soy sauce, oyster sauce, and fish sauce creates a rich umami flavor that tantalizes your taste buds.

Moreover, the use of fresh ingredients like bell peppers and green beans not only enhances the taste but also adds a pop of color to your plate. The balance of protein, vegetables, and herbs makes this stir-fry a wholesome meal. Plus, it’s quick to prepare, making it ideal for busy weeknights. Whether you’re a seasoned cook or a beginner, this recipe is easy to follow and guarantees delicious results.

So, are you ready to bring the flavors of Thailand into your kitchen? Let’s gather our ingredients and get started on this mouthwatering journey!

Ingredients for Thai Basil Chicken Stir-Fry Recipe

Thai Basil Chicken Stir-Fry Recipe, you’ll need a variety of fresh ingredients. Each component plays a vital role in building the dish’s unique flavor profile. Here’s what you’ll need:

  • 2 tablespoons vegetable oil: This oil is perfect for stir-frying, as it has a high smoke point.
  • 1 pound boneless, skinless chicken thighs: Thinly sliced for quick cooking and tenderness.
  • 4 cloves garlic: Minced to add a fragrant aroma and depth of flavor.
  • 2-3 Thai bird’s eye chilies: Chopped for a spicy kick. Adjust according to your spice preference.
  • 1 red bell pepper: Sliced to add sweetness and color to the dish.
  • 1 cup green beans: Trimmed and cut into 2-inch pieces for a crunchy texture.
  • 2 tablespoons soy sauce: This adds saltiness and umami flavor.
  • 1 tablespoon oyster sauce: Provides a rich, savory taste.
  • 1 tablespoon fish sauce: A staple in Thai cooking, it enhances the overall flavor.
  • 1 tablespoon sugar: Balances the savory elements with a hint of sweetness.
  • 1 cup fresh Thai basil leaves: The star ingredient that gives the dish its signature taste.

Thai Basil Chicken Stir-Fry Recipe. Each item contributes to the overall harmony of flavors, making this dish a favorite among many. Now that you have everything ready, let’s move on to the preparation steps!

Step-by-Step Preparation of Thai Basil Chicken Stir-Fry Recipe

Thai Basil Chicken Stir-Fry Recipe is straightforward and quick, making it perfect for any night of the week. Follow these steps to create a delicious meal that will impress your family and friends.

Step 1: Preparing the Ingredients

Before you start cooking, it’s essential to prepare all your ingredients. This step ensures a smooth cooking process. Begin by:

  • Thinly slicing the boneless, skinless chicken thighs.
  • Mincing the garlic cloves.
  • Chopping the Thai bird’s eye chilies, adjusting the amount based on your spice preference.
  • Slicing the red bell pepper into thin strips.
  • Trimming the green beans and cutting them into 2-inch pieces.
  • Washing and drying the fresh Thai basil leaves.

Having everything prepped will make your stir-fry come together quickly and easily!

Step 2: Cooking the Chicken

Thai Basil Chicken Stir-Fry Recipe.

Step 3: Stir-Frying the Vegetables

Once the chicken is cooked, it’s time to add the vegetables. Add the minced garlic and chopped chilies to the skillet. Stir them for about 30 seconds until they become fragrant. Then, toss in the sliced red bell pepper and green beans. Cook these vegetables for another 3-4 minutes. You want them to be tender-crisp, adding a delightful crunch to your dish.

Step 4: Combining Ingredients

Thai Basil Chicken Stir-Fry Recipe.

Step 5: Adding the Thai Basil

Thai Basil Chicken Stir-Fry Recipe is now ready to be served!

Variations of Thai Basil Chicken Stir-Fry Recipe

Thai Basil Chicken Stir-Fry Recipe lies in its versatility. You can easily adapt this dish to suit different dietary preferences or to use what you have on hand. Here are some exciting variations to consider!

Vegetarian Options

Thai Basil Chicken Stir-Fry Recipe, you can replace the chicken with tofu. Firm tofu works best as it holds its shape during cooking. Here’s how to make it:

  • Press the tofu to remove excess moisture, then cut it into cubes.
  • Follow the same cooking steps as the chicken, sautéing the tofu until golden brown.
  • Continue with the recipe as usual, adding the vegetables and sauce.

For an extra flavor boost, consider marinating the tofu in soy sauce and garlic before cooking. You can also add more vegetables like mushrooms, carrots, or zucchini to enhance the dish’s texture and nutrition.

Alternative Proteins

If you prefer a different protein, shrimp or beef can be excellent substitutes. Here’s how to adjust the recipe:

  • Shrimp: Use peeled and deveined shrimp. Cook them for about 3-4 minutes until they turn pink and opaque.
  • Beef: Thinly slice flank steak or sirloin. Cook it for about 5-6 minutes until browned and cooked through.

Thai Basil Chicken Stir-Fry Recipe a fantastic choice for any meal!

Cooking Note for Thai Basil Chicken Stir-Fry Recipe

Thai Basil Chicken Stir-Fry Recipe, a few cooking notes can help you achieve the best results. First, ensure your skillet or wok is hot before adding the oil. This step is crucial for achieving that perfect sear on the chicken, which locks in flavor and moisture.

Additionally, it’s important to keep your ingredients moving in the pan. Stir-frying is a quick cooking method, and constant movement helps prevent burning while ensuring even cooking. If you notice that the ingredients are sticking, you can add a splash of water or broth to deglaze the pan.

Another tip is to use fresh Thai basil. This herb is key to the dish’s flavor profile. If you can’t find Thai basil, you can use regular basil, but the taste will differ slightly. Also, remember that the heat from the chilies can vary, so taste as you go. Adjust the number of chilies based on your spice tolerance.

Thai Basil Chicken Stir-Fry Recipe with jasmine rice. This fragrant rice complements the dish beautifully and soaks up the delicious sauce. Enjoy your cooking adventure, and savor the delightful flavors of Thailand!

Serving Suggestions for Thai Basil Chicken Stir-Fry Recipe

Thai Basil Chicken Stir-Fry Recipe, it’s time to think about how to serve it! Presentation can elevate your meal, making it even more enjoyable. Here are some serving suggestions to enhance your dining experience:

  • Over Steamed Rice: The classic way to serve this stir-fry is over a bed of fluffy steamed jasmine rice. The rice absorbs the savory sauce, making each bite delightful.
  • With Noodles: For a different twist, serve the stir-fry over rice noodles or egg noodles. This adds a unique texture and makes the dish even more filling.
  • Garnish with Fresh Herbs: Consider garnishing your dish with extra Thai basil leaves or cilantro. This adds a fresh touch and enhances the dish’s aroma.
  • Serve with Lime Wedges: A squeeze of fresh lime juice over the stir-fry can brighten the flavors. It adds a zesty kick that complements the savory elements beautifully.
  • Pair with a Side Salad: A light cucumber salad or a simple green salad can balance the richness of the stir-fry. The crunchiness of the salad adds a refreshing contrast.
  • Accompany with Spring Rolls: For a complete Thai meal, serve your stir-fry with crispy spring rolls. They make for a delightful appetizer or side dish.

Thai Basil Chicken Stir-Fry Recipe more appealing but also create a well-rounded meal. Enjoy sharing this flavorful dish with family and friends, and watch them savor every bite!

Tips for Perfecting Your Thai Basil Chicken Stir-Fry Recipe

Thai Basil Chicken Stir-Fry Recipe truly shine, consider these helpful tips. They will ensure that your dish is not only delicious but also visually appealing and satisfying. Let’s explore some key pointers to elevate your cooking experience!

  • Use Fresh Ingredients: Fresh vegetables and herbs make a significant difference in flavor. Always opt for fresh Thai basil, crisp bell peppers, and vibrant green beans. The freshness enhances the overall taste of your stir-fry.
  • Prep Ahead: To save time, prepare your ingredients in advance. Chop the vegetables and slice the chicken before you start cooking. This way, you can focus on stir-frying without interruptions.
  • Control the Heat: Stir-frying requires high heat. Make sure your skillet or wok is hot before adding the oil. This helps to sear the chicken quickly, locking in moisture and flavor.
  • Don’t Overcrowd the Pan: If you have a lot of ingredients, consider cooking in batches. Overcrowding can lead to steaming instead of stir-frying, which affects the texture of your dish.
  • Adjust the Sauce: Feel free to tweak the sauce ingredients to suit your taste. If you prefer a sweeter flavor, add a bit more sugar. For a saltier kick, increase the soy sauce. Taste as you go!
  • Experiment with Add-Ins: Get creative by adding other vegetables or proteins. Carrots, snap peas, or even baby corn can add variety. You can also toss in some nuts for added crunch.
  • Serve Immediately: Stir-fries are best enjoyed fresh. Serve your Thai Basil Chicken Stir-Fry Recipe right after cooking to maintain the vibrant colors and crisp textures.
  • Pair with the Right Sides: Consider serving your stir-fry with complementary sides like jasmine rice or a light salad. This balance enhances the meal and makes it more satisfying.

Thai Basil Chicken Stir-Fry Recipe. Each step contributes to a delicious and memorable dish that you and your loved ones will enjoy time and time again. Happy cooking!

Breakdown of Time for Thai Basil Chicken Stir-Fry Recipe

Thai Basil Chicken Stir-Fry Recipe can help you plan your cooking efficiently. Here’s a simple breakdown of the time you’ll need for preparation and cooking.

Prep Time

The prep time for this delicious stir-fry is quite short. You’ll need about 15 minutes to gather and prepare all your ingredients. This includes slicing the chicken, chopping the vegetables, and mincing the garlic. Having everything ready will make the cooking process smooth and quick!

Cooking Time

Once you start cooking, the actual cooking time is approximately 15 minutes. This includes:

  • Cooking the chicken for about 5-7 minutes until browned.
  • Stir-frying the garlic, chilies, and vegetables for another 3-4 minutes.
  • Combining the sauce and adding the Thai basil, which takes about 1-2 minutes.

Overall, the cooking process is quick, making this dish perfect for busy weeknights!

Total Time

Thai Basil Chicken Stir-Fry Recipe without spending hours in the kitchen. It’s a fantastic option for a satisfying meal that doesn’t compromise on taste!

Nutritional Information for Thai Basil Chicken Stir-Fry Recipe

Thai Basil Chicken Stir-Fry Recipe not only delights your taste buds but also provides a good mix of nutrients. Here’s a breakdown of the key nutritional information for this dish:

Calories

Thai Basil Chicken Stir-Fry Recipe contains approximately 350 calories. This makes it a satisfying yet light option for dinner. The calorie count comes from the combination of chicken, vegetables, and sauces, providing a well-rounded meal without excessive calories.

Protein

Protein is vital for muscle repair and overall health. This recipe packs a punch with about 30 grams of protein per serving. The boneless, skinless chicken thighs are the primary source of protein, making this dish an excellent choice for those looking to increase their protein intake.

Sodium

Thai Basil Chicken Stir-Fry Recipe contains around 800 milligrams per serving. This amount is primarily due to the soy sauce and fish sauce used in the recipe. If you’re watching your sodium intake, consider using low-sodium soy sauce or reducing the amount of fish sauce to make it healthier without sacrificing flavor.

Thai Basil Chicken Stir-Fry Recipe is a nutritious option that balances protein, calories, and flavor. It’s a great way to enjoy a delicious meal while also being mindful of your dietary needs. Enjoy this dish knowing it’s not just tasty but also good for you!

FAQs about Thai Basil Chicken Stir-Fry Recipe

Can I use other types of basil in this recipe?

Yes, you can use other types of basil if you can’t find Thai basil. However, keep in mind that the flavor will differ. Sweet basil or regular basil can be used as substitutes, but they won’t provide the same unique taste that Thai basil offers. If you want to mimic the flavor, try adding a bit of mint or a squeeze of lime to enhance the freshness.

What can I serve with Thai Basil Chicken Stir-Fry?

Thai Basil Chicken Stir-Fry Recipe. The most popular choice is steamed jasmine rice, which absorbs the flavorful sauce beautifully. You can also serve it over rice noodles or egg noodles for a different texture. For a refreshing contrast, consider a light cucumber salad or crispy spring rolls as a side dish. These options will complement the stir-fry and create a well-rounded meal.

How spicy is Thai Basil Chicken Stir-Fry?

Thai Basil Chicken Stir-Fry Recipe can vary based on the number of Thai bird’s eye chilies you use. Typically, this dish has a mild to moderate heat level. If you prefer a milder version, you can reduce the number of chilies or omit them entirely. On the other hand, if you love spice, feel free to add more chilies or even a dash of chili sauce for an extra kick!

Can I make Thai Basil Chicken Stir-Fry ahead of time?

Thai Basil Chicken Stir-Fry Recipe is best enjoyed fresh, you can prepare some components ahead of time. You can slice the chicken and chop the vegetables a few hours in advance. However, it’s recommended to cook the dish just before serving to maintain the vibrant colors and crisp textures. If you have leftovers, store them in an airtight container in the fridge for up to two days. Reheat gently on the stove to enjoy again!

FAQs about Thai Basil Chicken Stir-Fry Recipe

Can I use other types of basil in this recipe?

Yes, you can use other types of basil if you can’t find Thai basil. However, keep in mind that the flavor will differ. Sweet basil or regular basil can be used as substitutes, but they won’t provide the same unique taste that Thai basil offers. If you want to mimic the flavor, try adding a bit of mint or a squeeze of lime to enhance the freshness.

What can I serve with Thai Basil Chicken Stir-Fry?

Thai Basil Chicken Stir-Fry Recipe. The most popular choice is steamed jasmine rice, which absorbs the flavorful sauce beautifully. You can also serve it over rice noodles or egg noodles for a different texture. For a refreshing contrast, consider a light cucumber salad or crispy spring rolls as a side dish. These options will complement the stir-fry and create a well-rounded meal.

How spicy is Thai Basil Chicken Stir-Fry?

Thai Basil Chicken Stir-Fry Recipe can vary based on the number of Thai bird’s eye chilies you use. Typically, this dish has a mild to moderate heat level. If you prefer a milder version, you can reduce the number of chilies or omit them entirely. On the other hand, if you love spice, feel free to add more chilies or even a dash of chili sauce for an extra kick!

Can I make Thai Basil Chicken Stir-Fry ahead of time?

Thai Basil Chicken Stir-Fry Recipe is best enjoyed fresh, you can prepare some components ahead of time. You can slice the chicken and chop the vegetables a few hours in advance. However, it’s recommended to cook the dish just before serving to maintain the vibrant colors and crisp textures. If you have leftovers, store them in an airtight container in the fridge for up to two days. Reheat gently on the stove to enjoy again!

Conclusion on Thai Basil Chicken Stir-Fry Recipe

Thai Basil Chicken Stir-Fry Recipe is a delightful dish that brings the vibrant flavors of Thailand right to your kitchen. With its combination of tender chicken, fresh vegetables, and aromatic Thai basil, this stir-fry is not only quick to prepare but also incredibly satisfying. Whether you’re cooking for yourself or entertaining guests, this recipe is sure to impress.

As you’ve seen, the versatility of this dish allows for various adaptations. You can easily switch out the protein or make it vegetarian, ensuring that everyone at the table can enjoy it. The cooking process is straightforward, making it accessible for cooks of all skill levels. Plus, with the tips and serving suggestions provided, you can elevate your meal to new heights.

Thai Basil Chicken Stir-Fry Recipe a try? Gather your ingredients, follow the steps, and savor the delicious results. This dish is perfect for busy weeknights or any occasion when you crave something flavorful and wholesome. Enjoy the journey of cooking and the joy of sharing this delightful meal with your loved ones!

aiting

Thai Basil Chicken Stir-Fry is a quick, tasty meal.

A bold and aromatic Thai-inspired dish with tender ground chicken, fiery chilies, and fragrant basil, all coated in a savory sauce. Served over rice with a crispy fried egg, this dish is an easy, restaurant-quality meal made in under 30 minutes!


Prep Time 10 minutes
Cook Time 15 minutes
Total Time 25 minutes
Servings: 4 servings
Course: Main Course
Cuisine: Thai

Ingredients
  

  • Main Ingredients:1 lb 454 g ground chicken (or substitute with ground pork or beef)4 to 6 Thai bird’s eye chilies, chopped (adjust for spice preference)6 cloves garlic, smashed
  • For the Sauce:1 tablespoon oyster sauce2 teaspoons soy sauce2 teaspoons dark soy sauce½ teaspoon fish sauce optional, for an authentic Thai kick1 teaspoon sugar
  • For the Stir-Fry:1 tablespoon vegetable oil½ yellow onion diced4 oz (113 g) green beans, cut into 1-inch (2.5 cm) pieces1 bunch basil (holy basil preferred, Thai basil or regular basil as alternatives)
  • Optional Garnishes:Fried eggsLime wedges

Method
 

Prepare the Aromatics:
  1. Finely mince the Thai chilies and garlic together until they form a rough paste. Use a mortar and pestle or food processor for efficiency.
Make the Sauce:
  1. In a small bowl, mix oyster sauce, soy sauce, dark soy sauce, fish sauce (if using), and sugar. Stir until the sugar dissolves.
Cook the Aromatics:
  1. Heat vegetable oil in a large skillet over medium-high heat.
  2. Add the garlic-chili paste and sauté until fragrant, about 30 seconds. Be careful not to burn the garlic.
Cook the Chicken:
  1. Add the ground chicken to the skillet, spreading it out evenly. Let it sear undisturbed for about a minute to develop a golden crust.
  2. Break apart the chicken and cook until most of the liquid evaporates, about 2 minutes.
Add the Sauce & Vegetables:
  1. Pour in the prepared sauce and mix well to coat the chicken.
  2. Stir in diced onions and green beans. Cook for another 1-2 minutes, ensuring the vegetables remain crisp.
Finish with Basil:
  1. Turn off the heat and stir in the basil leaves. Toss until they wilt into the dish.
Serve & Enjoy:
  1. Spoon the Thai basil chicken over steamed rice.
  2. Top with a crispy fried egg and squeeze fresh lime juice for extra flavor.

Notes

  • Adjust the spice level by adding more or fewer chilies.
  • Swap green beans with bell peppers, carrots, or zucchini for variety.
  • For a vegetarian version, replace chicken with crumbled tofu or mushrooms.
  • Serve with jasmine rice or cauliflower rice for a low-carb option.

Korean Ground Beef Bowl Recipe is a must-try dish!

Introduction to the Korean Ground Beef Bowl Recipe

Korean Ground Beef Bowl Recipe is a fantastic choice. This dish combines savory flavors with fresh vegetables, making it both satisfying and nutritious. It’s perfect for busy weeknights or when you want to impress your family and friends with minimal effort.

The beauty of this recipe lies in its simplicity. With just a few ingredients, you can create a flavorful meal that captures the essence of Korean cuisine. The ground beef is seasoned with garlic, ginger, and soy sauce, giving it a rich taste that pairs wonderfully with steamed broccoli and fluffy rice.

Not only is this dish easy to prepare, but it also offers versatility. You can customize it to suit your taste preferences or dietary needs. Whether you want to add more vegetables, spice it up, or even switch out the protein, the options are endless!

Korean Ground Beef Bowl Recipe. By the end, you’ll be ready to whip up this delightful dish in no time. So, let’s dive in and discover how to make this delicious meal!

Ingredients for the Korean Ground Beef Bowl Recipe

Korean Ground Beef Bowl Recipe, you’ll need a selection of fresh ingredients. Each component plays a vital role in building the dish’s rich flavors and textures. Here’s what you’ll need:

  • 1 pound ground beef: This is the star of the dish, providing a hearty base.
  • 1 tablespoon vegetable oil: Used for cooking the beef and adding a bit of richness.
  • 3 cloves garlic, minced: Garlic adds a wonderful aroma and depth of flavor.
  • 1 tablespoon fresh ginger, minced: Ginger brings a zesty kick that complements the beef.
  • 1/4 cup soy sauce: This salty ingredient enhances the umami flavor.
  • 2 tablespoons brown sugar: Brown sugar balances the saltiness of the soy sauce.
  • 1 tablespoon sesame oil: This oil adds a nutty flavor that is essential in Korean cooking.
  • 1 teaspoon red pepper flakes: Adjust this to your spice preference for a little heat.
  • 1 cup cooked white rice: Rice serves as a comforting base for the bowl.
  • 1 cup broccoli florets: Broccoli adds color and nutrition to the dish.
  • 1/2 cup shredded carrots: Carrots provide a sweet crunch that contrasts nicely with the beef.
  • 2 green onions, sliced: Green onions add freshness and a pop of color.
  • Sesame seeds for garnish: These seeds add a delightful crunch and visual appeal.

Korean Ground Beef Bowl Recipe. Each item contributes to the overall flavor and presentation, making your meal not only tasty but also visually appealing!

Step-by-Step Preparation of the Korean Ground Beef Bowl Recipe

Korean Ground Beef Bowl Recipe is straightforward and quick, making it perfect for any home cook. Follow these steps to create a delicious meal that everyone will love!

Step 1: Preparing the Ingredients

Before you start cooking, it’s essential to prepare your ingredients. Begin by mincing the garlic and ginger. This will ensure they release their flavors quickly when cooked. Next, slice the green onions and set them aside for garnish. Finally, measure out the soy sauce, brown sugar, and sesame oil. Having everything ready will make the cooking process smooth and enjoyable!

Step 2: Cooking the Ground Beef

Korean Ground Beef Bowl Recipe.

Step 3: Making the Sauce

After the beef is browned, it’s time to add the minced garlic and ginger. Sauté them for 1-2 minutes until they become fragrant. This will fill your kitchen with a wonderful aroma! Next, stir in the soy sauce, brown sugar, sesame oil, and red pepper flakes. Cook this mixture for an additional 2-3 minutes. The sauce should thicken slightly, coating the beef beautifully.

Step 4: Combining Ingredients

While the beef mixture is cooking, steam the broccoli florets until they are tender, which should take about 4-5 minutes. Once everything is ready, it’s time to combine the ingredients. In a bowl, place a scoop of cooked white rice. Top it with the Korean ground beef mixture, steamed broccoli, and shredded carrots. This layering creates a colorful and appetizing dish!

Step 5: Serving the Dish

Korean Ground Beef Bowl Recipe, garnish with sliced green onions and a sprinkle of sesame seeds. These toppings not only add flavor but also enhance the visual appeal of your meal. Serve immediately while it’s hot, and enjoy the delightful combination of flavors and textures!

Variations of the Korean Ground Beef Bowl Recipe

Korean Ground Beef Bowl Recipe is incredibly versatile. You can easily adapt it to suit different dietary preferences or to simply mix things up. Here are some exciting variations to consider!

Vegetarian Alternatives

If you’re looking for a vegetarian option, you can replace the ground beef with plant-based proteins. Here are a few ideas:

  • Ground Tofu: Crumble firm tofu and sauté it just like you would the beef. It absorbs flavors well and provides a great texture.
  • Tempeh: This fermented soy product has a nutty flavor. Crumble it and cook it in the same way as the beef for a protein-packed meal.
  • Chickpeas: Use canned chickpeas for a quick option. Sauté them with the garlic and ginger for a hearty twist.
  • Vegetable Medley: Combine a mix of your favorite vegetables, such as bell peppers, zucchini, and mushrooms, for a colorful and nutritious bowl.

Korean Ground Beef Bowl Recipe.

Spicy Additions

Korean Ground Beef Bowl Recipe. Here are some suggestions:

  • Extra Red Pepper Flakes: Increase the amount of red pepper flakes in the sauce to kick up the heat.
  • Chili Paste: Add a spoonful of gochujang, a Korean chili paste, for a rich and spicy flavor.
  • Sriracha Sauce: Drizzle some Sriracha on top of your bowl before serving for an extra spicy kick.
  • Spicy Kimchi: Serve your bowl with a side of kimchi. This fermented dish adds heat and tanginess.

Korean Ground Beef Bowl Recipe and satisfy your cravings for heat. Feel free to experiment and find the perfect balance that suits your taste!

Cooking Note for the Korean Ground Beef Bowl Recipe

Korean Ground Beef Bowl Recipe, there are a few cooking notes to keep in mind. These tips will help you achieve the best results and ensure your dish is both delicious and visually appealing.

First, choose high-quality ground beef. Look for lean options to reduce excess fat while still enjoying the rich flavor. If you prefer a healthier alternative, consider using ground turkey or chicken. These options can provide a lighter version without sacrificing taste.

Next, be mindful of the cooking temperature. Cooking the beef over medium heat allows it to brown evenly without burning. This step is crucial for developing a deep flavor. If the heat is too high, the beef may cook too quickly and become tough.

Additionally, when making the sauce, taste it as you go. Adjust the soy sauce, brown sugar, and red pepper flakes according to your preference. This flexibility allows you to create a sauce that perfectly suits your taste buds.

Lastly, don’t skip the garnishes! Sliced green onions and sesame seeds not only enhance the dish’s appearance but also add fresh flavors and textures. A well-garnished bowl makes for a more enjoyable dining experience.

Korean Ground Beef Bowl Recipe. Enjoy the process and have fun experimenting with flavors!

Serving Suggestions for the Korean Ground Beef Bowl Recipe

Korean Ground Beef Bowl Recipe, presentation and pairing can elevate your meal to new heights. Here are some delightful serving suggestions to enhance your dining experience:

  • Colorful Plates: Use vibrant bowls or plates to serve your Korean ground beef bowl. The colorful ingredients, like bright green broccoli and orange carrots, will pop against a contrasting background.
  • Side Dishes: Consider serving your bowl with traditional Korean side dishes, known as banchan. Options like pickled radishes, seasoned spinach, or cucumber salad can add variety and freshness to your meal.
  • Fresh Herbs: Garnish with fresh herbs like cilantro or mint for an aromatic touch. These herbs can brighten the flavors and add a refreshing element to the dish.
  • Rice Variations: Instead of plain white rice, try serving your beef bowl over brown rice or cauliflower rice for a healthier twist. This change can add a nutty flavor and extra nutrients.
  • Wrap It Up: For a fun twist, serve the beef mixture in lettuce wraps. This allows everyone to create their own wraps, making it a hands-on dining experience.
  • Drinks: Pair your meal with a refreshing drink. Iced green tea or a light Korean beer can complement the flavors beautifully.

Korean Ground Beef Bowl Recipe more enjoyable but also create a memorable dining experience for you and your guests. Feel free to mix and match these ideas to find what works best for your taste!

Tips for Perfecting the Korean Ground Beef Bowl Recipe

Korean Ground Beef Bowl Recipe, a few tips can make a significant difference. These suggestions will help you enhance the flavors and presentation of your dish, ensuring that every bite is delicious!

  • Use Fresh Ingredients: Fresh garlic, ginger, and vegetables will elevate the taste of your dish. Always opt for the freshest produce available to maximize flavor.
  • Marinate the Beef: For an extra layer of flavor, consider marinating the ground beef in soy sauce, ginger, and garlic for 30 minutes before cooking. This step allows the meat to absorb the flavors deeply.
  • Adjust the Sweetness: Depending on your taste, you can modify the amount of brown sugar in the sauce. If you prefer a sweeter dish, add a bit more sugar, or reduce it for a more savory flavor.
  • Experiment with Vegetables: Feel free to add other vegetables like bell peppers, snap peas, or zucchini. This not only adds color but also boosts the nutritional value of your bowl.
  • Cook Rice Perfectly: For fluffy rice, rinse it under cold water before cooking to remove excess starch. This will prevent it from becoming sticky and clumpy.
  • Let It Rest: After cooking, let the beef mixture sit for a few minutes before serving. This allows the flavors to meld together, creating a more harmonious taste.
  • Garnish Generously: Don’t skimp on the garnishes! A generous sprinkle of sesame seeds and sliced green onions not only enhances the flavor but also makes the dish visually appealing.
  • Serve Hot: Enjoy your Korean Ground Beef Bowl Recipe immediately after serving. The flavors are best when the dish is hot, and the textures are fresh.

Korean Ground Beef Bowl Recipe that will impress your family and friends. Enjoy the cooking process and savor every delicious bite!

Breakdown of Time for the Korean Ground Beef Bowl Recipe

Korean Ground Beef Bowl Recipe can help you plan your cooking efficiently. Here’s a breakdown of the time you’ll need for preparation and cooking:

Prep Time

The prep time for this delicious dish is quite short. You’ll need about 10-15 minutes to gather and prepare all your ingredients. This includes mincing the garlic and ginger, slicing the green onions, and measuring out the sauces. Having everything ready will make the cooking process smoother and more enjoyable!

Cooking Time

Once you start cooking, the total cooking time is approximately 15-20 minutes. This includes:

  • Cooking the ground beef: 5-7 minutes
  • Sautéing the garlic and ginger: 1-2 minutes
  • Making the sauce: 2-3 minutes
  • Steaming the broccoli: 4-5 minutes

These steps come together quickly, allowing you to enjoy a flavorful meal in no time!

Total Time

Korean Ground Beef Bowl Recipe, you’ll have a delicious and satisfying dish ready to serve in no time!

Nutritional Information for the Korean Ground Beef Bowl Recipe

Korean Ground Beef Bowl Recipe not only offers delicious flavors but also provides valuable nutrients. Here’s a breakdown of the nutritional information per serving:

Calories

Korean Ground Beef Bowl Recipe contains approximately 450 calories. This makes it a satisfying meal option that can fit well into a balanced diet. The combination of protein, carbohydrates, and healthy fats contributes to its calorie content, ensuring you feel full and energized.

Protein

Protein is a vital nutrient for building and repairing tissues. In this recipe, you’ll find about 25 grams of protein per serving. The ground beef is the primary source of protein, making this dish an excellent choice for those looking to increase their protein intake. Pairing it with rice and vegetables adds additional nutrients, creating a well-rounded meal.

Sodium

Korean Ground Beef Bowl Recipe is approximately 800 milligrams per serving. This is mainly due to the soy sauce used in the recipe. While sodium is necessary for bodily functions, it’s important to monitor your intake. If you’re watching your sodium levels, consider using low-sodium soy sauce or adjusting the amount to suit your dietary needs.

Korean Ground Beef Bowl Recipe provides a balanced mix of calories, protein, and sodium, making it a nutritious option for any meal. Enjoy this delicious dish while being mindful of your nutritional goals!

FAQs about the Korean Ground Beef Bowl Recipe

What can I substitute for ground beef in the Korean Ground Beef Bowl Recipe?

Korean Ground Beef Bowl Recipe, you have several tasty options. Ground turkey or chicken can be used for a leaner protein choice. They cook similarly and absorb the flavors of the sauce well.

For a vegetarian option, consider using crumbled tofu or tempeh. Both provide a great texture and soak up the delicious sauce. You can also use canned chickpeas for a hearty twist. They add protein and fiber, making your bowl nutritious and filling.

Feel free to experiment with different proteins to find the one that suits your taste best!

Can I make the Korean Ground Beef Bowl Recipe ahead of time?

Korean Ground Beef Bowl Recipe is perfect for meal prep. You can cook the ground beef mixture and steam the vegetables ahead of time. Store them separately in airtight containers in the refrigerator.

When you’re ready to eat, simply reheat the beef and veggies in a skillet or microwave. Prepare fresh rice or use leftover rice to save time. This way, you can enjoy a delicious meal in just a few minutes!

What sides pair well with the Korean Ground Beef Bowl Recipe?

Korean Ground Beef Bowl Recipe. Traditional Korean side dishes, known as banchan, are a great choice. Options like pickled radishes, seasoned spinach, or cucumber salad add freshness and variety.

You can also serve a light soup, such as miso soup, to complement the flavors of the beef bowl. For a crunchy texture, try serving some crispy seaweed snacks or a simple green salad with sesame dressing.

These sides will not only elevate your meal but also create a more authentic Korean dining experience!

Conclusion on the Korean Ground Beef Bowl Recipe

Korean Ground Beef Bowl Recipe is a delightful dish that brings together rich flavors, vibrant colors, and nutritious ingredients. It’s an excellent choice for anyone looking to enjoy a quick yet satisfying meal. With its simple preparation and versatility, this recipe can easily become a staple in your kitchen.

Whether you’re cooking for yourself, your family, or friends, this dish is sure to impress. The combination of savory ground beef, fresh vegetables, and fluffy rice creates a balanced meal that is both filling and delicious. Plus, the ability to customize the recipe with various proteins and vegetables means you can adapt it to suit your taste preferences or dietary needs.

Korean Ground Beef Bowl Recipe serves as a fantastic introduction. It’s a dish that not only satisfies your hunger but also allows you to experience the unique flavors of Korea right in your home. So, gather your ingredients, follow the steps, and enjoy the process of creating this wonderful meal!

Korean Ground Beef Bowl Recipe. Happy cooking, and enjoy every delicious bite!

aiting

Korean Ground Beef Bowl Recipe is a must-try dish!

A quick and flavorful Korean-inspired beef bowl packed with umami, fragrant garlic, and a touch of sesame. Serve it over a warm bed of rice and top with fresh veggies, kimchi, or a fried egg for the perfect balance of taste and texture!


Prep Time 10 minutes
Cook Time 15 minutes
Total Time 25 minutes
Servings: 4 servings
Course: Main Course
Cuisine: Korean-Inspired

Ingredients
  

  • Essential Ingredients:1 pound ground beef 80/20 for optimal flavor2 tablespoons soy sauce (or tamari for gluten-free)1 tablespoon sesame oil3 cloves garlic, minced1 teaspoon ginger, minced2 green onions, chopped (plus extra for garnish)Salt and pepper to taste2 cups cooked rice (jasmine, basmati, or brown rice)
  • Optional Additions:Toppings: Sesame seeds sliced cucumber, kimchi, or pickled vegetablesVegetables: Bell peppers, carrots, broccoli, or spinachEgg: A fried egg on top for added richness

Method
 

Cook the Rice:
  1. Stovetop: Rinse 1 cup of rice under cold water until the water runs clear. Combine with 2 cups of water in a pot, bring to a boil, then reduce heat to low, cover, and simmer for about 15 minutes. Let it rest for 5 minutes before fluffing.
  2. Rice Cooker: Add rinsed rice and water to the rice cooker and cook according to the manufacturer’s instructions.
  3. Instant Pot: Combine rinsed rice and water in the pot. Seal the lid, cook on high pressure for 3 minutes, then allow a natural release.
Prepare the Beef:
  1. Heat a large skillet over medium-high heat. Add the ground beef and break it apart as it cooks, browning for 5-7 minutes. Drain excess fat if needed.
  2. Stir in minced garlic and ginger, cooking for another 1-2 minutes until fragrant.
  3. Add soy sauce, sesame oil, and chopped green onions. Stir well and let simmer for a couple of minutes to blend the flavors. Season with salt and pepper to taste.
Assemble Your Bowl:
  1. Spoon a generous amount of cooked rice into a bowl.
  2. Layer the seasoned beef on top.
  3. Add steamed or fresh vegetables, such as broccoli, bell peppers, or carrots.
  4. Garnish with sesame seeds, extra green onions, kimchi, or a fried egg.

Notes

  • Add a spicy kick by mixing in gochujang or red pepper flakes.
  • Substitute ground beef with ground turkey or chicken for a leaner option.
  • For a low-carb version, swap rice with cauliflower rice.
  • Store leftovers in an airtight container in the fridge for up to 3 days.

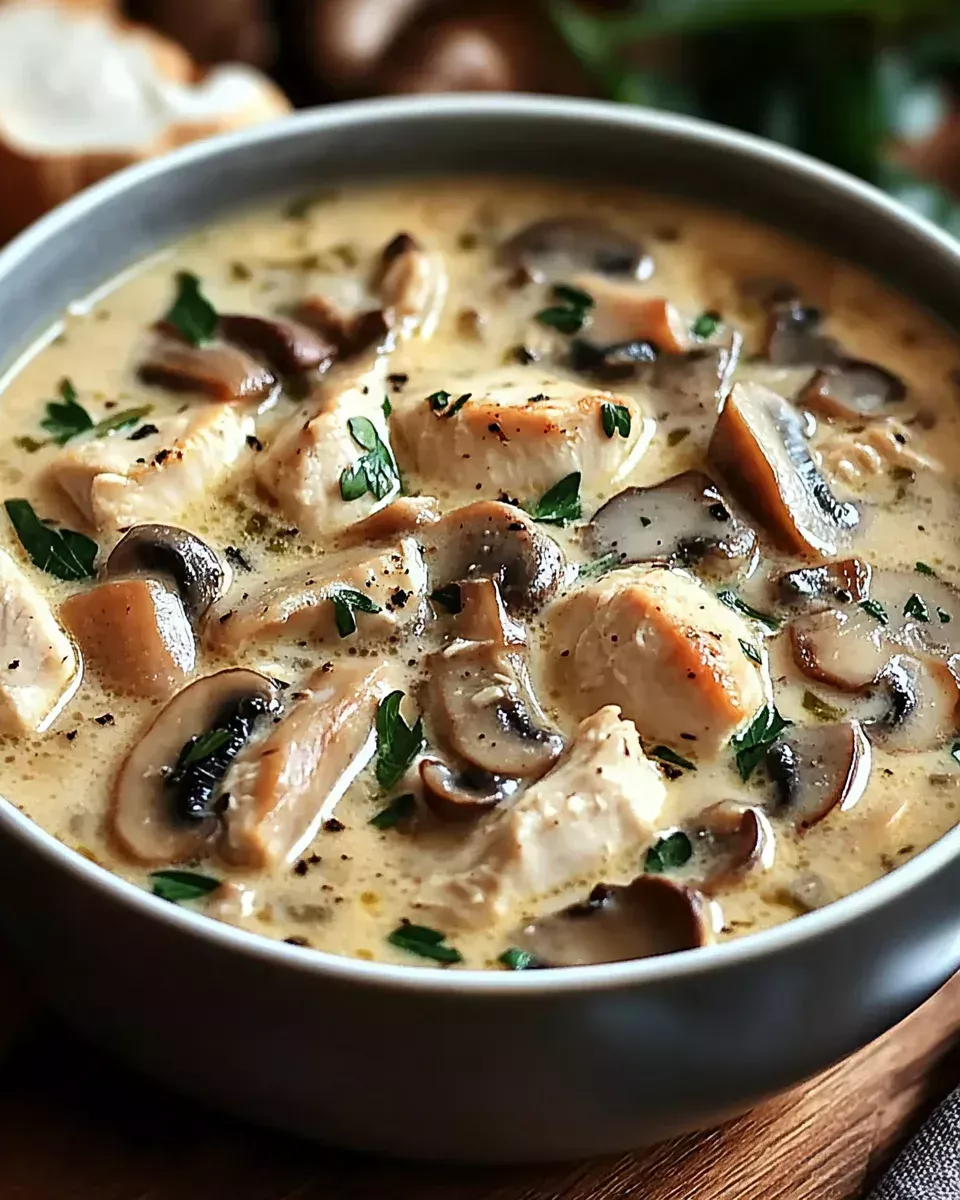
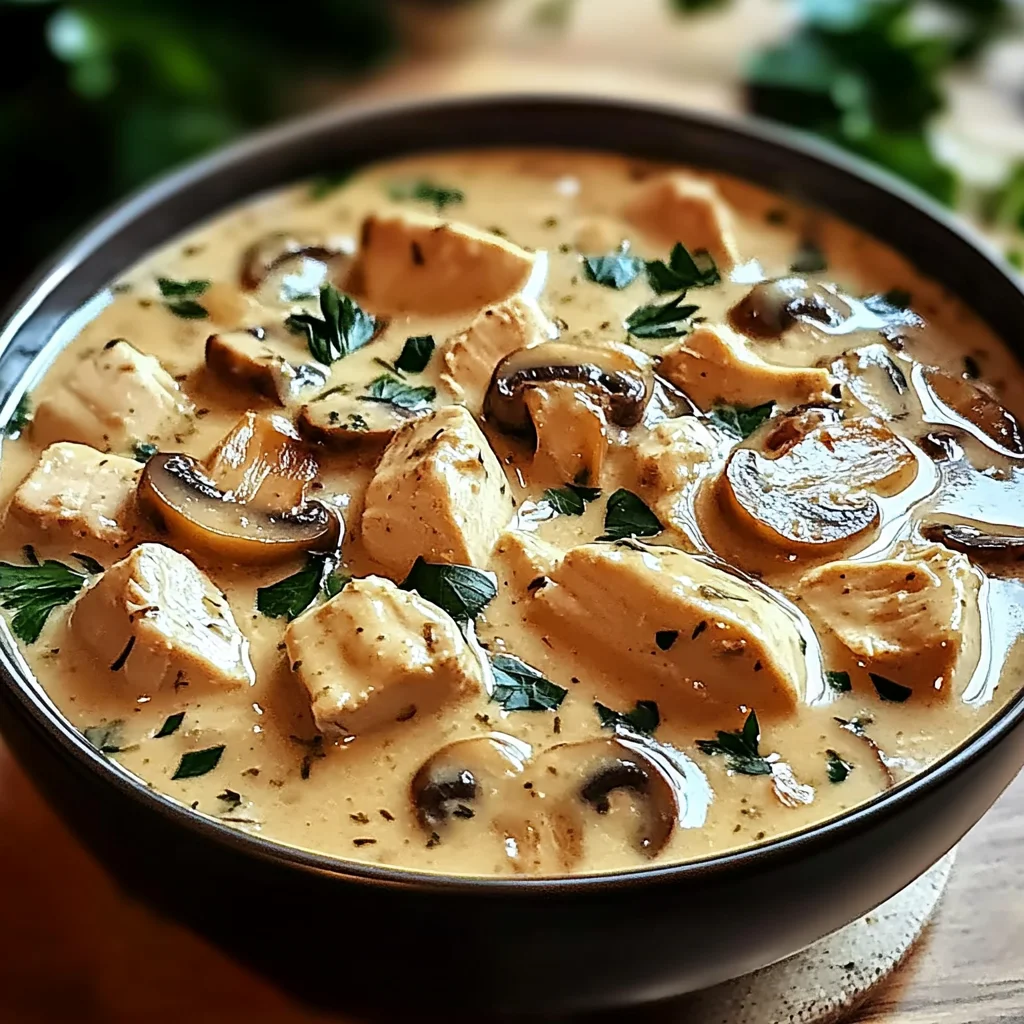
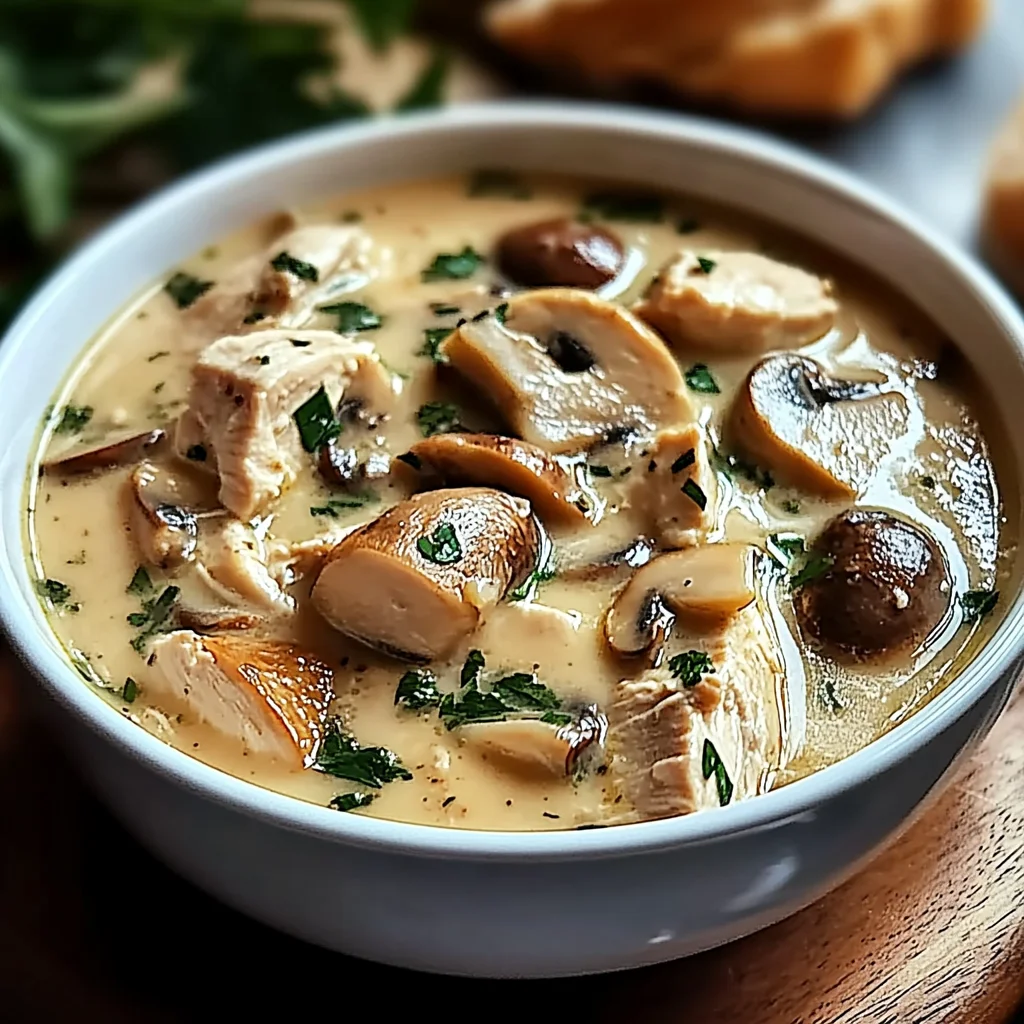
Creamy Rotisserie Chicken Mushroom Soup: Irresistible Comfort

Introduction to Creamy Rotisserie Chicken Mushroom Soup

When you need a cozy meal that comes together with minimal effort, this Creamy Rotisserie Chicken Mushroom Soup is just the ticket. Made with tender rotisserie chicken, earthy mushrooms, and a rich, velvety broth, this soup brings all the comfort of a home-cooked classic without the fuss. It’s the kind of dish that warms you from the inside out — perfect for chilly evenings, quick lunches, or anytime you need a bowlful of comfort. Serve it with crusty bread or a fresh salad, and you’ve got a satisfying, soul-soothing meal ready in no time.

Why You’ll Love This Creamy Rotisserie Chicken Mushroom Soup

This soup is a lifesaver for those whirlwind days when time slips through your fingers. It’s quick to prepare, yet it tastes like you’ve been simmering it all day. The creamy texture and savory flavors make it a family favorite, even for the pickiest eaters. Plus, it’s a versatile dish that can easily adapt to your dietary needs or ingredient availability.

Ingredients for Creamy Rotisserie Chicken Mushroom Soup

Let’s gather the essentials for this delightful soup. First, you’ll need some rotisserie chicken, which adds a savory depth and saves time. Olive oil is perfect for sautéing, bringing out the flavors of the onion and garlic. Speaking of which, onions and garlic are the aromatic base, infusing the soup with warmth and richness.

Mushrooms are the star here, offering an earthy, umami punch. Chicken broth forms the soup’s backbone, while heavy cream lends that luscious, creamy texture we all adore. Dried thyme and rosemary add a fragrant, herbal note, elevating the dish to gourmet status.

Don’t forget the salt and pepper for seasoning, and a sprinkle of fresh parsley for a pop of color and freshness. If you’re feeling adventurous, toss in some spinach or carrots for extra nutrition. Remember, exact quantities are at the bottom of the article, ready for printing!

How to Make Creamy Rotisserie Chicken Mushroom Soup

Sauté the Aromatics

Start by heating a tablespoon of olive oil in a large pot over medium heat. Once the oil shimmers, toss in the diced onion. Let it sauté for about five minutes until it turns translucent and fragrant. This step is crucial as it builds the flavor foundation for our soup.

Cook the Mushrooms

Next, add the minced garlic and sliced mushrooms to the pot. Stir them around, letting the mushrooms soak up the aromatic goodness. Cook for an additional five to seven minutes. You’ll know they’re ready when the mushrooms are tender and have a lovely golden hue.

Add Chicken and Broth

Now, it’s time to introduce the shredded rotisserie chicken to the mix. Pour in the chicken broth, ensuring everything is well combined. Sprinkle in the dried thyme and rosemary, which will infuse the soup with a delightful herbal aroma. Bring the mixture to a gentle simmer and let it cook for about ten minutes.

Stir in the Cream

Reduce the heat to low and slowly stir in the heavy cream. This is where the magic happens, transforming the soup into a creamy delight. Be careful not to let it boil, as we want to maintain that smooth, velvety texture. Stir gently until everything is well incorporated.

Season and Serve

Finally, season the soup with salt and pepper to taste. Give it a final stir, ensuring all the flavors are well blended. Ladle the soup into bowls, and garnish with a sprinkle of fresh parsley for a burst of color. Serve hot, and enjoy the comforting warmth of this creamy creation!

Tips for Success

  • Use fresh mushrooms for the best flavor; avoid canned ones.
  • Shred the rotisserie chicken while it’s warm for easier handling.
  • Adjust the seasoning gradually to suit your taste preferences.
  • For a thicker soup, simmer longer or add a cornstarch slurry.
  • Garnish with extra herbs for a vibrant presentation.

Equipment Needed

  • Large pot or Dutch oven for even cooking.
  • Wooden spoon for stirring without scratching.
  • Sharp knife for precise chopping.
  • Cutting board to protect your countertops.
  • Ladle for easy serving.
  • Measuring cups and spoons for accuracy.

Variations

  • For a dairy-free version, swap heavy cream with coconut milk for a subtle tropical twist.
  • Add a handful of spinach or kale for a nutrient boost and vibrant color.
  • Incorporate diced carrots or celery for added texture and sweetness.
  • Spice it up with a pinch of red pepper flakes for a gentle kick.
  • Use turkey instead of chicken for a post-holiday twist.
  • Try adding a splash of white wine for a sophisticated depth of flavor.

Serving Suggestions

  • Pair with a crusty baguette or garlic bread for dipping.
  • Serve alongside a fresh green salad with a tangy vinaigrette.
  • Complement with a glass of chilled white wine or sparkling water.
  • Top with grated Parmesan for an extra cheesy touch.
  • Present in rustic bowls for a cozy, homestyle feel.

FAQs about Creamy Rotisserie Chicken Mushroom Soup

Can I make this soup ahead of time?

Absolutely! This Creamy Rotisserie Chicken Mushroom Soup is perfect for meal prep. Simply store it in an airtight container in the fridge for up to three days. Reheat gently on the stovetop, adding a splash of broth if it thickens too much.

What can I use instead of rotisserie chicken?

If you don’t have rotisserie chicken on hand, cooked chicken breast or thighs work just as well. You can also use leftover turkey for a delightful twist, especially after the holidays.

Is there a way to make this soup vegetarian?

Yes, you can easily adapt this recipe for a vegetarian diet. Substitute the chicken with chickpeas or tofu, and use vegetable broth instead of chicken broth. The mushrooms will still provide that hearty, umami flavor.

How can I thicken the soup if needed?

If you prefer a thicker soup, try adding a cornstarch slurry. Mix one tablespoon of cornstarch with two tablespoons of cold water, then stir it into the simmering soup until it reaches your desired consistency.

Can I freeze this soup?

Yes, you can freeze this soup for up to three months. Allow it to cool completely before transferring to a freezer-safe container. Thaw overnight in the fridge and reheat gently on the stovetop, stirring occasionally.

Final Thoughts

There’s something truly magical about a bowl of Creamy Rotisserie Chicken Mushroom Soup. It’s like a warm embrace, offering comfort and joy with every spoonful. Whether you’re a busy mom juggling a million tasks or a professional seeking a moment of culinary bliss, this soup is your go-to. It’s a testament to the power of simple ingredients coming together to create something extraordinary. As you savor each bite, may it remind you of the warmth of home and the joy of sharing a meal with loved ones. Here’s to many cozy evenings filled with delicious memories!

Creamy Rotisserie Chicken Mushroom Soup
Paul

Creamy Rotisserie Chicken Mushroom Soup: Irresistible Comfort

A comforting and creamy soup made with rotisserie chicken and mushrooms, perfect for a cozy meal.
Prep Time 10 minutes
Cook Time 30 minutes
Total Time 40 minutes
Servings: 6 servings
Course: Soup
Cuisine: American
Calories: 320

Ingredients
  

  • 3 cups rotisserie chicken shredded
  • 1 tablespoon olive oil
  • 1 medium onion diced
  • 2 cloves garlic minced
  • 8 ounces mushrooms sliced
  • 4 cups chicken broth
  • 1 cup heavy cream
  • 1 teaspoon dried thyme
  • 1 teaspoon dried rosemary
  • Salt and pepper to taste
  • 2 tablespoons fresh parsley chopped (for garnish)

Method
 

  1. In a large pot, heat the olive oil over medium heat. Add the diced onion and sauté for about 5 minutes until translucent.
  2. Stir in the minced garlic and sliced mushrooms, cooking for an additional 5-7 minutes until the mushrooms are tender and browned.
  3. Add the shredded rotisserie chicken to the pot, followed by the chicken broth, dried thyme, and dried rosemary. Bring the mixture to a simmer and let it cook for 10 minutes.
  4. Reduce the heat to low and stir in the heavy cream. Allow the soup to heat through, but do not let it boil. Season with salt and pepper to taste.
  5. Serve hot, garnished with fresh parsley.

Notes

  • For a lighter version, substitute heavy cream with half-and-half or coconut milk.
  • Add vegetables like spinach or carrots for extra nutrition and flavor.

The Magic of Éclairs: A Taste of Elegance in Every Bite

A Sweet Memory: The First Bite of an Éclair

There’s something magical about the first time you taste an éclair. I still remember mine—standing in a little Parisian bakery, mesmerized by the delicate pastries displayed behind the glass. The scent of freshly baked choux pastry filled the air, mingling with the rich aroma of melted chocolate. As I took my first bite, the crisp pastry shell gave way to a luscious vanilla cream filling, perfectly balanced by the smooth, bittersweet ganache. It was love at first taste.

Years later, I found myself determined to recreate that unforgettable experience in my own kitchen. After several trials (and a few flat éclairs along the way), I finally perfected the technique. Making éclairs from scratch may seem daunting at first, but once you master the process, the rewards are immeasurable. There’s a deep satisfaction in creating something so elegant, so classic—something that carries the essence of French pastry tradition right into your home.

In this article, we’ll dive deeper into the world of éclairs, exploring their origins, variations, expert tips, and frequently asked questions. Whether you’re a seasoned baker or a curious beginner, this guide will inspire you to bring the art of éclairs into your own kitchen.

The History Behind Éclairs: A Pastry with a Story

Éclairs, known in France as Éclair au Chocolat, date back to the early 19th century. The word “éclair” translates to “lightning” in French, and while the exact reason for this name remains debated, some say it refers to the way they disappear in a flash when served. Others believe it describes the shiny, lightning-like streak of chocolate glaze on top.

The invention of éclairs is often credited to Marie-Antoine Carême, one of the most influential pastry chefs in French history. Carême was known for his elaborate and artistic approach to baking, and he revolutionized the use of pâte à choux (choux pastry), the dough used to make éclairs, profiteroles, and cream puffs. His influence set the foundation for modern French pâtisserie, making éclairs a staple in bakeries worldwide.

While the classic chocolate-filled éclair remains the most popular, variations have emerged over the years. From coffee-flavored to caramel, pistachio, and fruit-infused fillings, éclairs continue to evolve, capturing new flavors while maintaining their timeless elegance.

Secrets to Perfect Éclairs: Expert Tips for Success

Making éclairs is both a science and an art. Every element, from the dough to the filling and glaze, plays a crucial role in achieving perfection. Here are some expert tips to ensure your éclairs turn out bakery-quality every time.

1. Mastering the Choux Pastry

  • Cook the dough properly: When adding flour to the butter-water-milk mixture, stir vigorously until a smooth dough forms. It should pull away from the sides of the pan without sticking.
  • Cool before adding eggs: Adding eggs to hot dough can result in scrambled eggs. Let the mixture cool slightly before incorporating them.
  • The right consistency matters: The dough should be thick, glossy, and pipeable. If it’s too runny, your éclairs won’t hold their shape.

2. The Baking Process: Puff and Hollow Perfection

  • Preheat your oven properly: Choux pastry relies on steam to puff up, so ensure your oven is fully heated before baking.
  • Avoid opening the oven too soon: This can cause éclairs to collapse. Let them bake undisturbed for the full time, then turn off the oven and let them rest inside for a few minutes before removing them.
  • Crispier shells? Extend baking time: If your éclairs are too soft, bake them at a lower temperature (325°F) for an additional 5 minutes to remove excess moisture.

3. The Art of Filling Éclairs

  • Use a piping bag for an even fill: Poke small holes in the bottom of the éclairs and pipe the cream inside gently, making sure not to overfill them.
  • Let the filling cool completely: Warm pastry cream can make éclairs soggy, so ensure it’s chilled before using.
  • Experiment with flavors: While classic vanilla pastry cream is a favorite, try coffee, hazelnut, or even fruit-flavored fillings for a creative twist.

4. The Final Touch: Chocolate Ganache

  • Use high-quality chocolate: Since the ganache is the first thing people taste, opt for premium dark chocolate for the best flavor.
  • Heat cream gently: Overheating can cause the chocolate to separate. Pour warm cream over chopped chocolate and stir until smooth.
  • Dip éclairs smoothly: Hold each éclair upside down and gently dip the top into the ganache, allowing excess to drip off for a neat finish.

Ingredients: The Essentials for Perfect Éclairs

For the Choux Pastry:

  • ½ cup (120ml) water
  • ½ cup (120ml) milk
  • ½ cup (115g) unsalted butter
  • ½ tsp salt
  • 1 cup (125g) all-purpose flour
  • 4 large eggs

For the Pastry Cream (Filling):

  • 2 cups (500ml) milk
  • 4 egg yolks
  • ½ cup (100g) sugar
  • ¼ cup (30g) cornstarch
  • 1 tsp vanilla extract

For the Chocolate Ganache (Topping):

  • 4oz (115g) dark chocolate, chopped
  • ½ cup (120ml) heavy cream

Directions: The Path to Pastry Perfection

Step 1: Create the Choux Pastry

  1. In a saucepan, bring water, milk, butter, and salt to a boil.
  2. Remove from heat and quickly stir in the flour. Return to low heat and mix until a smooth ball forms.
  3. Transfer dough to a bowl, let it cool slightly, then beat in eggs one at a time until glossy.

Step 2: Pipe and Bake the Éclair Shells

  1. Preheat oven to 375°F (190°C).
  2. Fill a piping bag with the dough and pipe 4-inch logs onto a parchment-lined baking sheet.
  3. Bake for 30-35 minutes until golden and puffed. Turn off the oven, crack the door open, and let them cool inside for 10 minutes.

Step 3: Prepare the Pastry Cream

  1. Heat milk in a saucepan until steaming.
  2. In a separate bowl, whisk egg yolks, sugar, and cornstarch until smooth.
  3. Slowly pour the hot milk into the egg mixture while whisking, then return to heat and cook until thickened.
  4. Remove from heat, stir in vanilla extract, and let cool.

Step 4: Assemble the Éclairs

  1. Poke small holes in the bottom of each shell and pipe in the pastry cream.

Step 5: Prepare the Chocolate Ganache and Finish

  1. Heat heavy cream until warm, then pour over chopped dark chocolate. Stir until smooth.
  2. Dip the tops of the éclairs into the ganache and let them set before serving.

Nutritional Breakdown: A Treat Worth Every Bite

  • Calories: 220 kcal
  • Sugar: 10g
  • Fat: 12g
  • Saturated Fat: 7g
  • Carbohydrates: 22g
  • Protein: 5g

Enjoy your homemade éclairs, a delightful French classic that melts in your mouth with every bite!

Frequently Asked Questions About Éclairs

Why did my éclairs turn out flat?

Flat éclairs are often caused by too much moisture in the dough or underbaking. Make sure the dough is cooked properly before adding eggs and avoid opening the oven door too early.

Can I make éclairs without a piping bag?

Yes! While a piping bag helps create uniform shapes, you can spoon the dough onto a baking sheet. Just smooth out any rough edges with a wet finger to help maintain their shape.

How do I keep my éclairs from getting soggy?

Let the baked shells cool completely before filling them. You can also poke small holes in them right after baking to allow excess steam to escape.

Can éclairs be made in advance?

Yes! The shells can be made up to two days ahead and stored in an airtight container. The pastry cream can be made a day in advance and kept chilled. However, filled éclairs are best enjoyed fresh.

Can éclairs be frozen?

Unfilled éclair shells can be frozen for up to a month. When ready to use, bake them at 300°F for a few minutes to crisp them up before filling.

Serving and Presentation: Elevate Your Éclairs

Éclairs are already a stunning dessert, but a few finishing touches can make them even more irresistible.

  • Dust with powdered sugar for a simple, elegant look.
  • Drizzle with caramel or white chocolate for extra indulgence.
  • Top with chocolate shavings or edible gold flakes for a gourmet touch.
  • Pair with espresso or champagne for a luxurious dessert experience.

For special occasions, consider decorating éclairs with themed toppings, such as crushed nuts, fruit slices, or edible flowers.

Conclusion: The Joy of Homemade Éclairs

Making éclairs from scratch is more than just a baking project—it’s a journey into the heart of French pastry tradition. While they require patience and precision, the reward is well worth the effort. There’s something deeply satisfying about watching your éclairs rise perfectly in the oven, filling them with creamy goodness, and dipping them in glossy chocolate.

Homemade éclairs bring a sense of accomplishment, a connection to history, and a moment of pure indulgence. Whether you’re making them for a special occasion or just to treat yourself, these delicate pastries are sure to impress.

So, roll up your sleeves, gather your ingredients, and step into the world of French pâtisserie. Once you taste the results, you’ll understand why éclairs have remained a timeless classic for centuries.

aiting

The Magic of Éclairs: A Taste of Elegance in Every Bite

These Golden Éclairs are a true French classic, featuring delicate choux pastry shells filled with rich pastry cream and topped with a silky chocolate ganache. Perfect for a sophisticated dessert that will impress any crowd!
Prep Time 20 minutes
Cook Time 35 minutes
Total Time 55 minutes
Servings: 10 -12 éclairs
Course: Dessert
Cuisine: French

Ingredients
  

For the Choux Pastry:
  • 1/2 cup 120ml water
  • 1/2 cup 120ml milk
  • 1/2 cup 115g unsalted butter
  • 1/2 tsp salt
  • 1 cup 125g all-purpose flour
  • 4 large eggs
For the Pastry Cream (Filling):
  • 2 cups 500ml milk
  • 4 egg yolks
  • 1/2 cup 100g sugar
  • 1/4 cup 30g cornstarch
  • 1 tsp vanilla extract
For the Chocolate Ganache (Topping):
  • 4 oz 115g dark chocolate, chopped
  • 1/2 cup 120ml heavy cream

Method
 

  1. Prepare the Choux Pastry: In a saucepan, bring water, milk, butter, and salt to a boil. Remove from heat and quickly stir in the flour. Return to low heat and mix until a smooth ball forms. Transfer dough to a bowl, let it cool slightly, then beat in eggs one at a time until glossy.
  2. Pipe and Bake the Éclair Shells: Preheat oven to 375°F (190°C). Fill a piping bag with the dough and pipe 4-inch logs onto a parchment-lined baking sheet. Bake for 30-35 minutes until golden and puffed. Turn off the oven, crack the door open, and let them cool inside for 10 minutes.
  3. Prepare the Pastry Cream: Heat milk in a saucepan until steaming. In a separate bowl, whisk egg yolks, sugar, and cornstarch until smooth. Slowly pour the hot milk into the egg mixture while whisking, then return to heat and cook until thickened. Remove from heat, stir in vanilla extract, and let cool.
  4. Assemble the Éclairs: Poke small holes in the bottom of each shell and pipe in the pastry cream.
  5. Make the Chocolate Ganache and Finish: Heat heavy cream until warm, then pour over chopped dark chocolate. Stir until smooth. Dip the tops of the éclairs into the ganache and let them set before serving.

Notes

  • Store éclairs in the refrigerator for up to 2 days.
  • Use a serrated knife to carefully slice the shells if piping the filling from the side.
  • Try white chocolate ganache for a twist on the classic recipe.

A Taste of Home: The Comfort of Lemon Balsamic Chicken and Potatoes

There are certain meals that have a way of bringing people together. They fill the kitchen with warmth, the air with rich aromas, and the heart with memories. This Lemon Balsamic Chicken and Potatoes recipe is one of those meals for me.

I remember growing up in a house where dinner was more than just food—it was an event. My mother, a firm believer in the magic of simple ingredients, always had a way of turning everyday staples into something extraordinary. On busy weeknights, she would throw everything onto a single pan, season it with love, and let the oven do the work. The scent of roasting garlic, fresh herbs, and caramelizing balsamic vinegar would seep into every corner of our home, promising a meal that was equal parts delicious and effortless.

Now, as an adult with a home of my own, I find myself craving that same simplicity and comfort. This Lemon Balsamic Chicken and Potatoes recipe is my modern take on my mother’s one-pan wonders. It’s a dish that marries Mediterranean flavors with a rustic, home-cooked feel—crispy golden potatoes, juicy roasted chicken, tangy balsamic, and a creamy, herby topping that ties everything together. Whether you’re making it for a weeknight dinner or a casual gathering with friends, this recipe is about more than just food. It’s about slowing down, savoring each bite, and sharing something special with the people you love.

Why This Recipe Stands Out

1. A One-Pan Marvel

Busy lives call for easy solutions, and a sheet pan meal is the perfect answer. Instead of juggling multiple pots and pans, everything in this dish cooks together, allowing the flavors to meld beautifully while minimizing cleanup.

2. Balanced and Nutritious

This meal isn’t just about convenience—it’s also packed with wholesome ingredients. Lean protein from the chicken, fiber-rich potatoes, and heart-healthy olive oil make this a well-rounded dish. The addition of fresh herbs and a creamy feta sauce brings a dose of Mediterranean goodness, known for its anti-inflammatory and heart-boosting benefits.

3. Layers of Flavor

  • Balsamic vinegar adds a deep, caramelized tang that balances the richness of the roasted chicken.
  • Lemon brightens the entire dish, cutting through the savory elements with a hint of acidity.
  • Paprika and chili flakes introduce a gentle heat, making every bite warm and inviting.
  • The herby olive topping infuses the dish with a briny, aromatic punch, elevating it beyond the ordinary.

The Perfect Pairings

While this dish is a complete meal on its own, there are a few sides that can enhance the experience:

  • Warm Naan or Pita: Perfect for scooping up the flavorful sauce left on the plate.
  • Simple Green Salad: A mix of arugula, cucumbers, and tomatoes drizzled with lemon vinaigrette complements the roasted flavors.
  • Grilled Vegetables: If you’re looking to add more variety, grilled zucchini or asparagus makes a great addition.
  • A Glass of Crisp White Wine: A Sauvignon Blanc or Pinot Grigio pairs beautifully with the lemony, herbaceous notes of the dish.

Ingredients: The Flavor Ensemble

For the Chicken & Potatoes:

  • 1.5 lbs baby potatoes, halved (if large)
  • 4 tablespoons olive oil, divided
  • Salt and black pepper, to taste
  • 1.5 lbs boneless, skinless chicken breasts or thighs
  • 2 tablespoons balsamic vinegar
  • 1 tablespoon Dijon mustard
  • 1 teaspoon dried oregano
  • 1 teaspoon paprika
  • 4 cloves garlic, minced
  • 1 shallot, thinly sliced
  • ½ teaspoon crushed red pepper flakes

For the Herby Olive Topping:

  • ⅓ cup olive oil
  • Juice of 1 lemon
  • ¼ cup fresh herbs (parsley, oregano, or basil), chopped
  • ¼ cup pepperoncini, sliced
  • ½ cup green olives, halved
  • 1 tablespoon toasted sesame seeds

For the Creamy Feta Tzatziki:

  • ½ cup store-bought or homemade Tzatziki sauce
  • ⅓ cup crumbled feta cheese

Directions: Your Path to Deliciousness

1. Preheat & Prep
Preheat the oven to 425°F (220°C). Toss the baby potatoes with 2 tablespoons olive oil, salt, and black pepper on a large baking sheet.

2. Marinate the Chicken
In a bowl, mix 2 tablespoons olive oil, balsamic vinegar, Dijon mustard, oregano, paprika, garlic, shallot, salt, pepper, and red pepper flakes. Coat the chicken in this flavorful blend.

3. Roast to Perfection
Nestle the marinated chicken onto the baking sheet with the potatoes. If desired, add a few lemon wedges for extra citrusy notes. Roast for 25-30 minutes or until the chicken is cooked through and the potatoes are golden.

4. Create the Herby Olive Mix
While the chicken is roasting, mix olive oil, lemon juice, fresh herbs, pepperoncini, green olives, and toasted sesame seeds in a small bowl.

5. Whip Up the Feta Tzatziki
Combine Tzatziki sauce with crumbled feta cheese for a creamy, tangy finish.

6. Assemble & Serve
Once the chicken and potatoes are out of the oven, spoon over the herby olive mix and let the flavors meld for a few minutes. Serve with the creamy feta Tzatziki and enjoy with warm naan or pita!

Nutritional Highlights: A Balanced Bite

  • Calories per serving: 520 kcal
  • Servings: 6

This dish is packed with lean protein, heart-healthy olive oil, and fiber-rich potatoes, making it a satisfying and nutritious meal.

Common Questions About This Recipe

Can I Use Chicken Thighs Instead of Breasts?

Absolutely! Chicken thighs are a fantastic alternative, as they tend to be juicier and more forgiving in the oven. Just keep in mind that they may take a few extra minutes to cook compared to breasts.

How Can I Make This Recipe Dairy-Free?

If you’re avoiding dairy, simply skip the feta cheese in the tzatziki or use a dairy-free alternative. The sauce will still be creamy and delicious without it.

What Other Vegetables Can I Use Instead of Potatoes?

If you’re looking to mix things up, try swapping the potatoes for:

  • Sweet potatoes for a slightly sweeter contrast
  • Cherry tomatoes for a burst of juiciness
  • Zucchini or bell peppers for a lighter, summery twist

Can I Meal Prep This Recipe?

Yes! This dish holds up well in the fridge for up to three days. Store the chicken and potatoes separately from the feta tzatziki sauce to keep everything fresh. When reheating, pop the chicken and potatoes back in the oven at 350°F for about 10 minutes to maintain their texture.

Is There a Way to Make This Dish Vegetarian?

For a plant-based version, swap the chicken for chickpeas or tofu and use the same seasonings. Roasted chickpeas will add a lovely crunch, while tofu will absorb all the flavorful spices and balsamic glaze.

What’s the Best Way to Store Leftovers?

Leftovers can be stored in an airtight container in the refrigerator for up to three days. To maintain the best texture, reheat in the oven rather than the microwave.

A Dish That Brings People Together

There’s something special about meals that require little effort but deliver big on flavor. Lemon Balsamic Chicken and Potatoes is one of those dishes that feels both comforting and sophisticated, simple yet layered with complexity. It’s the kind of meal that doesn’t just fill your stomach but also warms your soul.

I often find myself making this dish on nights when I want to slow down, light a few candles, and enjoy a quiet dinner with my loved ones. It’s not fussy or complicated, yet every bite feels like an invitation to savor the moment. Whether you’re making it for a weeknight dinner, a special occasion, or just because you crave something wholesome and delicious, this recipe will quickly become a favorite in your home.

So gather your ingredients, preheat your oven, and get ready for a meal that feels like a warm hug on a plate.

aiting

A Taste of Home: The Comfort of Lemon Balsamic Chicken and Potatoes

This Zesty Mediterranean Chicken and Potatoes dish is a bold and vibrant meal featuring juicy roasted chicken, crispy potatoes, and a tangy herby olive topping. Paired with a creamy feta tzatziki, this one-pan dish is packed with Mediterranean flavors and perfect for any occasion!
Prep Time 15 minutes
Cook Time 30 minutes
Total Time 45 minutes
Servings: 6 servings
Course: Main Course
Cuisine: Mediterranean

Ingredients
  

For the Chicken & Potatoes:
  • 1.5 lbs baby potatoes halved (if large)
  • 4 tablespoons olive oil divided
  • Salt and black pepper to taste
  • 1.5 lbs boneless skinless chicken breasts or thighs
  • 2 tablespoons balsamic vinegar
  • 1 tablespoon Dijon mustard
  • 1 teaspoon dried oregano
  • 1 teaspoon paprika
  • 4 cloves garlic minced
  • 1 shallot thinly sliced
  • 1/2 teaspoon crushed red pepper flakes
For the Herby Olive Topping:
  • 1/3 cup olive oil
  • Juice of 1 lemon
  • 1/4 cup fresh herbs parsley, oregano, or basil, chopped
  • 1/4 cup pepperoncini sliced
  • 1/2 cup green olives halved
  • 1 tablespoon toasted sesame seeds
For the Creamy Feta Tzatziki:
  • 1/2 cup store-bought or homemade Tzatziki sauce
  • 1/3 cup crumbled feta cheese

Method
 

  1. Preheat & Prep: Preheat the oven to 425°F (220°C). Toss the baby potatoes with 2 tablespoons olive oil, salt, and black pepper on a large baking sheet.
  2. Marinate the Chicken: In a bowl, mix 2 tablespoons olive oil, balsamic vinegar, Dijon mustard, oregano, paprika, garlic, shallot, salt, pepper, and red pepper flakes. Coat the chicken in this flavorful blend.
  3. Roast to Perfection: Nestle the marinated chicken onto the baking sheet with the potatoes. If desired, add a few lemon wedges for extra citrusy notes. Roast for 25-30 minutes or until the chicken is cooked through and the potatoes are golden.
  4. Create the Herby Olive Mix: While the chicken is roasting, mix olive oil, lemon juice, fresh herbs, pepperoncini, green olives, and toasted sesame seeds in a small bowl.
  5. Whip Up the Feta Tzatziki: Combine Tzatziki sauce with crumbled feta cheese for a creamy, tangy finish.
  6. Assemble & Serve: Once the chicken and potatoes are out of the oven, spoon over the herby olive mix and let the flavors meld for a few minutes. Serve with the creamy feta Tzatziki and enjoy with warm naan or pita!

Notes

  • Swap chicken breasts for thighs for extra juiciness.
  • For a low-carb option, substitute baby potatoes with cauliflower or zucchini.
  • Store leftovers in an airtight container for up to 3 days.

A Taste of the Tropics: The Shrimp and Avocado Bowl Story

I still remember the first time I had a meal that truly transported me. It was during a trip to the coast, where the air smelled of salt and fresh citrus, and the local seafood was prepared with a simplicity that let the ingredients shine. One evening, a small beachside café served me a dish I would never forget—perfectly grilled shrimp nestled over a bed of warm, fluffy rice, topped with sweet mango salsa and a drizzle of creamy, zesty sauce.

It wasn’t just the flavors that made an impact; it was the feeling of sitting in that moment, soaking in the warmth of the setting sun, a cool breeze carrying the scent of grilled seafood and fresh herbs. That meal was more than just food—it was an experience, a celebration of bright, bold ingredients that complemented each other in the most unexpected ways.

Years later, I found myself recreating that memory in my own kitchen, hoping to bring back even a fraction of that bliss. That’s how this Shrimp and Avocado Bowl with Mango Salsa and Lime-Chili Sauce came to be. It’s not just a recipe; it’s a little piece of sunshine, something that reminds me of travel, adventure, and the magic of good food shared with good company.

If you’re looking for a dish that is as vibrant as it is satisfying, this recipe is for you. It’s packed with fresh, wholesome ingredients that create a symphony of flavors—sweet, smoky, spicy, and tangy—all in one beautiful, nourishing bowl.

Why This Recipe Works

This dish is more than just aesthetically pleasing; it’s a thoughtfully balanced meal that checks all the boxes—taste, texture, and nutrition. Here’s why it’s a standout:

1. A Perfect Balance of Flavors

  • The smoky, slightly charred shrimp provide a deep umami taste that pairs beautifully with the fresh elements.
  • The sweet mango salsa adds a tropical brightness, while the red onion and jalapeño bring just the right amount of heat.
  • The creamy avocado smooths out the bold flavors, offering a luxurious mouthfeel.
  • The lime-chili sauce ties everything together with a tangy kick that makes every bite exciting.

2. A Wholesome, Nutrient-Packed Meal

  • Protein-Powered: Shrimp is a lean source of protein, making this dish filling without being heavy.
  • Healthy Fats: Avocado provides heart-healthy monounsaturated fats, which are great for brain function and skin health.
  • Vitamins & Minerals: Mango is packed with vitamin C and antioxidants, while the lime juice boosts vitamin C absorption.
  • Fiber-Rich Base: Whether you choose rice or quinoa, you’re getting a dose of fiber that supports digestion and keeps you full longer.

3. Easy and Customizable

  • You can swap shrimp for grilled chicken, tofu, or even salmon if you prefer different protein sources.
  • Adjust the heat level by adding or reducing the jalapeño in the salsa or the chili powder in the shrimp seasoning.
  • Make it even heartier by adding black beans, corn, or shredded lettuce for an extra crunch.

Ingredients:

For the Bowls:

  • 1 lb large shrimp, peeled and deveined
  • 1–2 ripe avocados, sliced
  • 1 large ripe mango, diced
  • 2 cups cooked rice or quinoa
  • Fresh cilantro, chopped (for garnish)
  • Lime wedges (for serving)

For the Lime-Chili Sauce:

  • 1/4 cup plain Greek yogurt
  • 1 tbsp mayonnaise (optional)
  • 1 tsp chili powder
  • Zest and juice of 1 lime
  • 1 tsp honey or agave
  • Salt and pepper to taste

For the Mango Salsa:

  • 1 diced mango
  • 1/4 cup diced red onion
  • 1 small jalapeño, finely chopped (optional)
  • Juice of 1 lime
  • 1–2 tbsp chopped fresh cilantro
  • Salt to taste

Directions:

Step 1: Fresh Mango Salsa Magic

In a bowl, mix diced mango, red onion, jalapeño, lime juice, cilantro, and a pinch of salt. Let it chill in the fridge while preparing the other ingredients.

Step 2: Zesty Lime-Chili Sauce

Whisk together Greek yogurt, mayonnaise, chili powder, lime zest and juice, honey, salt, and pepper. Adjust the seasoning and set aside.

Step 3: Perfectly Grilled Shrimp

Pat shrimp dry, then season with chili powder, garlic powder, salt, and pepper. Heat a grill pan or skillet over medium-high heat with a drizzle of olive oil. Cook shrimp for 2-3 minutes per side until pink and slightly charred.

Step 4: Assembling the Tropical Bowl

Divide cooked rice or quinoa into bowls. Arrange grilled shrimp, sliced avocado, and mango salsa on top.

Step 5: Finishing Touches

Drizzle the lime-chili sauce generously over the bowls. Garnish with chopped cilantro and serve with lime wedges. Enjoy immediately!

Nutritional Highlights:

  • Rich in Protein: Shrimp provides lean protein for muscle health.
  • Healthy Fats: Avocado offers heart-friendly monounsaturated fats.
  • Vitamin-Packed: Mango delivers a boost of vitamin C and antioxidants.
  • Fiber-Rich: Quinoa and rice contribute to digestive health.

This vibrant dish is perfect for a refreshing, nutritious meal that feels like a tropical getaway in every bite!

Frequently Asked Questions

What kind of shrimp should I use?

Look for large, peeled, and deveined shrimp for the best texture and flavor. If using frozen shrimp, make sure to thaw them properly in the refrigerator before cooking. Wild-caught shrimp tend to have a better taste than farmed shrimp, but both work well in this recipe.

Can I make this dish ahead of time?

Absolutely! Here’s how to prep in advance:

  • The mango salsa can be made a day ahead and stored in the refrigerator.
  • The lime-chili sauce stays fresh for up to three days when refrigerated in an airtight container.
  • The shrimp is best when freshly grilled, but you can cook it a few hours in advance and reheat gently before serving.

How can I make this recipe vegan?

For a plant-based version, replace the shrimp with grilled tofu, tempeh, or roasted chickpeas. The flavors in the marinade and sauce work beautifully with plant proteins.

What can I use instead of mango?

If mango isn’t available or isn’t in season, you can use pineapple, peaches, or even diced strawberries for a different but equally delicious fruit salsa.

What’s the best way to store leftovers?

For best results, store the ingredients separately in airtight containers:

  • Shrimp: Refrigerate for up to 3 days or freeze for up to 1 month.
  • Mango salsa: Keep in the fridge for 1-2 days, but note that the texture may soften over time.
  • Lime-chili sauce: Lasts 3-4 days in the fridge.

Can I serve this dish cold?

Yes! If you’re meal-prepping, you can enjoy this dish as a cold shrimp and avocado salad bowl, skipping the heating step altogether. It makes a great refreshing meal for warm days.

What’s the best rice to use?

This dish works with almost any grain, but here are some recommendations:

  • White jasmine rice for a classic, fragrant base.
  • Brown rice for extra fiber and nutrients.
  • Quinoa for a protein-packed, gluten-free alternative.
  • Cauliflower rice for a low-carb option.

Serving Suggestions and Pairings

To make this meal even more exciting, consider serving it with:

  • Grilled corn on the cob with a sprinkle of chili-lime seasoning.
  • A side of crispy tortilla chips for scooping up extra mango salsa.
  • A fresh coconut or citrus-based mocktail to enhance the tropical theme.
  • A light cucumber salad with lemon and herbs for added crunch and freshness.

The Joy of Cooking with Fresh Ingredients

There’s something incredibly rewarding about creating a meal with fresh, vibrant ingredients. Every bite of this Shrimp and Avocado Bowl tells a story—the smoky warmth of the shrimp, the creamy indulgence of the avocado, the burst of citrus and spice from the salsa, and the comforting base of rice or quinoa bringing it all together.

It’s a dish that embodies warmth, adventure, and balance. Whether you’re enjoying it as a quick weeknight meal, meal-prepping for a busy week, or serving it to friends at a summer gathering, this bowl is a reminder that healthy eating can be both nourishing and deeply satisfying.

So the next time you’re craving a little taste of the tropics, don’t just dream about it—bring it to your kitchen and savor every vibrant, delicious bite.

aiting

A Taste of the Tropics: The Shrimp and Avocado Bowl Story

This Tropical Shrimp Bowl is a refreshing and nutrient-packed dish featuring juicy grilled shrimp, sweet mango salsa, creamy avocado, and a zesty lime-chili sauce over a bed of rice or quinoa. A perfect balance of bold flavors and wholesome ingredients!
Prep Time 15 minutes
Cook Time 10 minutes
Total Time 25 minutes
Servings: 3 -4 servings
Course: Main Course
Cuisine: Tropical / Fusion

Ingredients
  

  • 1 lb large shrimp peeled and deveined
  • 1 –2 ripe avocados sliced
  • 1 large ripe mango diced
  • 2 cups cooked rice or quinoa
  • Fresh cilantro chopped (for garnish)
  • Lime wedges for serving
For the Lime-Chili Sauce:
  • 1/4 cup plain Greek yogurt
  • 1 tbsp mayonnaise optional
  • 1 tsp chili powder
  • Zest and juice of 1 lime
  • 1 tsp honey or agave
  • Salt and pepper to taste
For the Mango Salsa:
  • 1 diced mango
  • 1/4 cup diced red onion
  • 1 small jalapeño finely chopped (optional)
  • Juice of 1 lime
  • 1 –2 tbsp chopped fresh cilantro
  • Salt to taste

Method
 

  1. Prepare the Mango Salsa: In a bowl, mix diced mango, red onion, jalapeño, lime juice, cilantro, and a pinch of salt. Let it chill in the fridge while preparing the other ingredients.
  2. Make the Lime-Chili Sauce: Whisk together Greek yogurt, mayonnaise, chili powder, lime zest and juice, honey, salt, and pepper. Adjust seasoning as needed and set aside.
  3. Cook the Shrimp: Pat shrimp dry, then season with chili powder, garlic powder, salt, and pepper. Heat a grill pan or skillet over medium-high heat with a drizzle of olive oil. Cook shrimp for 2-3 minutes per side until pink and slightly charred.
  4. Assemble the Bowl: Divide cooked rice or quinoa into bowls. Arrange grilled shrimp, sliced avocado, and mango salsa on top.
  5. Finish and Serve: Drizzle the lime-chili sauce generously over the bowls. Garnish with chopped cilantro and serve with lime wedges. Enjoy immediately!

Notes

  • Swap quinoa for cauliflower rice for a low-carb option.
  • Adjust spice levels by adding more or less jalapeño and chili powder.
  • Store leftovers in an airtight container for up to 2 days.

Everything Bagel Chicken Salad: A Flavorful Twist on a Classic Favorite

A Bite of Nostalgia: The Story Behind This Recipe

Growing up, everything bagels were a weekend tradition in my house. The scent of warm, toasted bagels coated in sesame seeds, poppy seeds, garlic, and onion filled our kitchen as my family gathered around the breakfast table. It wasn’t just about the food—it was about connection. We would slather on cream cheese, sometimes add a slice of smoked salmon, and dive into the bold flavors that felt like home.

Years later, as I became more conscious of my eating habits, I wanted to capture that same comforting, salty, and savory experience in a healthier way. That’s how this Everything Bagel Chicken Salad was born. It takes the unmistakable flavor of an everything bagel and transforms it into a protein-packed, creamy, and crunchy dish that you can enjoy for lunch, dinner, or even meal prep. It’s a nostalgic nod to those weekend breakfasts, but with a fresh and healthy twist.

Why This Everything Bagel Chicken Salad Stands Out

A Flavor Explosion in Every Bite

The beauty of this chicken salad lies in its balance of flavors. Everything bagel seasoning is the real star here, infusing every bite with a blend of nutty, garlicky, and slightly salty goodness. The seasoning clings to tender shredded chicken, creamy Greek yogurt, and crisp celery, creating a dish that is both satisfying and refreshing.

Packed with Protein, Low in Carbs

One of the best things about this recipe is how nutritious it is. Unlike traditional mayo-based chicken salads, this version swaps in Greek yogurt, which not only lightens it up but also adds an extra dose of protein. With over 25g of protein per serving, this salad keeps you full and energized for hours. Whether you’re following a low-carb, high-protein, or balanced diet, this recipe checks all the boxes.

Quick and Easy to Make

Let’s be honest—sometimes we just don’t have the time to cook elaborate meals. That’s where this chicken salad comes in handy. Using a rotisserie chicken makes prep incredibly fast, turning this into a 15-minute meal. It’s perfect for busy weekdays, meal prepping, or those times when you just need something quick without sacrificing flavor.

Ways to Serve and Enjoy This Dish

One of the reasons I love this recipe is how versatile it is. You can enjoy it in so many different ways depending on your mood or dietary preferences. Here are a few of my favorite ways to serve Everything Bagel Chicken Salad:

  • On a Toasted Bagel: Bring it back to its roots by serving it on an everything bagel or whole wheat bagel. Add some fresh tomato slices or avocado for extra creaminess.
  • Lettuce Wraps: For a low-carb option, scoop the chicken salad into crisp romaine or butter lettuce leaves.
  • As a Dip: Serve with crackers, pita chips, or sliced veggies like cucumber and bell peppers.
  • Over a Salad: Add it to a fresh bed of greens with some extra veggies for a light and healthy meal.
  • Stuffed in a Sweet Potato: A unique and delicious combination of flavors that works surprisingly well.
  • Wrapped in a Tortilla: Turn it into a chicken salad wrap with some extra greens for crunch.

Customization Ideas: Make It Your Own

One of the best things about this recipe is how adaptable it is. You can tweak it to suit your personal taste or dietary needs. Here are a few fun variations you can try:

For a Creamier Texture:

If you prefer a richer, creamier chicken salad, try adding a small amount of mashed avocado or a tablespoon of light cream cheese.

Dairy-Free Option:

Use dairy-free Greek yogurt made from coconut or almond milk for a completely dairy-free version.

Add a Sweet Touch:

For a bit of natural sweetness, mix in some diced apples, dried cranberries, or sliced grapes.

Make It Extra Crunchy:

If you love a bit of crunch in your chicken salad, toss in some chopped walnuts, almonds, or sunflower seeds.

Spice It Up:

If you’re a fan of heat, sprinkle in a dash of cayenne pepper or a few dashes of hot sauce.

Wholesome Ingredients:

  • 2.5 cups cooked shredded chicken (about 1 lb)
  • 1 cup plain nonfat Greek yogurt (use ½ cup for a drier salad)
  • ½ cup celery, finely diced
  • ¼ cup white onion, finely diced (or substitute red onion)
  • ⅓ cup scallions, sliced
  • 1 teaspoon garlic powder
  • 1 teaspoon onion powder
  • 1 tablespoon everything bagel seasoning

Simple Steps to Perfection:

  1. Cook the Chicken:
    • Bring a pot of water to a boil and cook the chicken for 10–14 minutes.
    • Alternatively, use an Instant Pot, slow cooker, or a store-bought rotisserie chicken for convenience.
  2. Prep the Veggies:
    • While the chicken is cooking, finely chop the celery, onion, and scallions.
  3. Shred & Mix:
    • Once cooked, shred the chicken with two forks.
    • In a large bowl, combine shredded chicken, chopped veggies, spices, and Greek yogurt.
  4. Toss & Serve:
    • Mix everything thoroughly until evenly coated.
    • Serve on a sandwich, over a salad, or as a dip with crackers.

Nutritional Highlights (Per 1 Cup Serving):

  • Calories: 150 kcal
  • Carbohydrates: 5g
  • Protein: 26g
  • Fat: 3g
  • Saturated Fat: 1g
  • Cholesterol: 63mg
  • Sodium: 314mg
  • Potassium: 502mg
  • Fiber: 1g
  • Sugar: 2g
  • Calcium: 76mg
  • Iron: 1mg

Enjoy this flavorful, high-protein, and easy-to-make chicken salad that brings the magic of everything bagel seasoning to your plate!

FAQs: Everything You Need to Know

1. How long does this chicken salad last?

This chicken salad will stay fresh in an airtight container in the refrigerator for up to four days. After that, the texture may start to change, and it’s best to make a fresh batch.

2. Can I freeze this chicken salad?

It’s not recommended to freeze this chicken salad. The Greek yogurt doesn’t freeze well and may become watery or separate when thawed.

3. Can I use canned chicken instead of fresh chicken?

Yes, you can use canned chicken, but the texture will be softer and less firm than using freshly shredded or rotisserie chicken. If using canned chicken, make sure to drain and rinse it well before mixing it with the other ingredients.

4. What brand of everything bagel seasoning should I use?

You can use any brand of everything bagel seasoning you like. Trader Joe’s Everything But The Bagel Seasoning is a popular choice, but many grocery stores carry their own versions. You can also make your own by mixing sesame seeds, poppy seeds, dried garlic, dried onion, and coarse salt.

5. Can I use regular yogurt instead of Greek yogurt?

Greek yogurt is preferred because it’s thicker and creamier, but you can use plain regular yogurt if needed. However, the consistency may be a bit thinner.

6. Is this recipe keto-friendly?

Yes, this recipe is naturally low in carbs, making it a great keto-friendly meal. Just be mindful of what you serve it with—opting for lettuce wraps instead of bread will keep it keto-compliant.

7. Can I add cheese to this chicken salad?

Absolutely! Crumbled feta, goat cheese, or shredded cheddar would all make great additions to this recipe.

8. What can I do if my chicken salad is too dry?

If you prefer a creamier chicken salad, you can add an extra scoop of Greek yogurt or a drizzle of olive oil to enhance the texture.

The Final Bite: Why You Need This Recipe in Your Life

Everything Bagel Chicken Salad is more than just a meal—it’s a celebration of bold flavors, wholesome ingredients, and the comfort of familiar tastes. Whether you’re someone who grew up loving everything bagels or you’re just looking for a new go-to lunch recipe, this dish delivers on all fronts.

It’s easy to make, packed with protein, and endlessly versatile. Plus, it brings a little bit of nostalgia to the table in the best possible way. So the next time you’re craving something satisfying but healthy, give this recipe a try. It just might become a new favorite in your kitchen, just like it did in mine.

aiting

Everything Bagel Chicken Salad: A Flavorful Twist on a Classic Favorite

This Savory Crunch Everything Bagel Chicken Salad is a high-protein, flavorful dish packed with crunchy veggies, creamy Greek yogurt, and bold everything bagel seasoning. Perfect for sandwiches, salads, or a protein-packed snack!
Prep Time 10 minutes
Cook Time 14 minutes
Total Time 24 minutes
Servings: 4 servings
Course: Salad
Cuisine: American

Ingredients
  

  • 2.5 cups cooked shredded chicken about 1 lb
  • 1 cup plain nonfat Greek yogurt use 1/2 cup for a drier salad
  • 1/2 cup celery finely diced
  • 1/4 cup white onion finely diced (or substitute red onion)
  • 1/3 cup scallions sliced
  • 1 teaspoon garlic powder
  • 1 teaspoon onion powder
  • 1 tablespoon everything bagel seasoning

Method
 

  1. Cook the Chicken: Bring a pot of water to a boil and cook the chicken for 10–14 minutes. Alternatively, use an Instant Pot, slow cooker, or store-bought rotisserie chicken for convenience.
  2. Prep the Veggies: While the chicken is cooking, finely chop the celery, onion, and scallions.
  3. Shred & Mix: Once cooked, shred the chicken with two forks. In a large bowl, combine shredded chicken, chopped veggies, spices, and Greek yogurt.
  4. Toss & Serve: Mix everything thoroughly until evenly coated. Serve on a sandwich, over a salad, or as a dip with crackers.

Notes

  • Adjust Greek yogurt amount based on desired creaminess.
  • Try adding chopped nuts or seeds for extra crunch.
  • This salad stores well in the fridge for up to 3 days.

M&M Nutella Cookie Cups: A Sweet Treat for Every Occasion

A Bite of Nostalgia: The Sweetest Childhood Memories

Growing up, cookies were always more than just a dessert in our household—they were little tokens of love. Whether it was the smell of freshly baked sugar cookies wafting through the kitchen or the sight of colorful M&M’s nestled into warm dough, these sweet treats carried with them a sense of comfort and nostalgia.

I remember rainy afternoons spent in the kitchen with my grandmother, who always had a way of making baking feel magical. She would hand me a spoonful of Nutella as we mixed dough together, laughing at the mess I managed to make. It was in those moments that I learned baking wasn’t just about following a recipe—it was about creating memories, sharing joy, and finding a little sweetness in the simple things.

Now, as I recreate these M&M Nutella Cookie Cups, I can’t help but think back to those days. This recipe isn’t just about indulging in a delicious dessert; it’s about bringing people together, celebrating life’s little joys, and making memories one bite at a time.

The Magic Behind M&M Nutella Cookie Cups

These delightful cookie cups combine the best of three worlds: the buttery goodness of sugar cookies, the rich and creamy indulgence of Nutella, and the crunch of colorful M&M’s. The result is a bite-sized treat that is not only visually appealing but also irresistibly delicious.

One of the greatest things about these cookie cups is their versatility. They can be dressed up for the holidays with seasonal M&M’s, made extra decadent with a drizzle of melted chocolate, or even customized with different fillings. Whether you’re baking them for a party, a family gathering, or just because you need a sweet pick-me-up, they never fail to impress.

Why These Cookie Cups Stand Out

A Perfect Balance of Textures

The magic of these M&M Nutella Cookie Cups lies in their texture. The cookie base is soft and slightly chewy, providing the perfect foundation for the creamy Nutella filling. The M&M’s on top add a slight crunch, creating a delightful contrast with every bite. Unlike regular cookies, these cookie cups have a unique structure that holds the Nutella beautifully, ensuring a balanced bite every time.

An Easy Yet Impressive Dessert

Not everyone has the time to make intricate desserts, but that doesn’t mean you have to settle for something ordinary. These cookie cups are incredibly easy to make, yet they look like something straight out of a bakery display case. The simple process of forming the dough into mini muffin tins creates a perfectly shaped cup, eliminating the need for any complicated techniques.

A Treat for Every Season

While they are perfect for springtime celebrations and Easter gatherings, these cookie cups can easily be adapted for any time of year. Use red and green M&M’s for Christmas, pastel shades for a baby shower, or classic rainbow colors for a fun and festive birthday treat.

Ingredients

  • 1 cup unsalted butter, softened
  • ¾ cup sugar
  • 1 teaspoon salt
  • 2 teaspoons vanilla extract
  • 2 cups all-purpose flour
  • Nutella, for filling (chocolate frosting can be substituted)
  • M&M’s, preferably dark chocolate

Directions

  1. Preheat & Prepare
    • Preheat oven to 300°F (150°C).
    • Grease a mini muffin pan and set aside.
  2. Mix the Dough
    • Using a stand mixer or hand mixer, cream the butter and sugar together.
    • Gradually add the salt, vanilla, and flour. Mix well until fully combined.
  3. Shape the Cookie Cups
    • Roll a small ball of cookie dough, slightly larger than a ping pong ball.
    • Place the dough balls into the greased mini muffin pan.
    • Press down in the center with your thumb to create a well.
  4. Bake to Perfection
    • Bake for about 20 minutes or until the cookie cups are set.
    • Remove from the oven and let the pan cool completely on a wire rack.
  5. Fill & Decorate
    • Once cooled, fill each well with Nutella.
    • Top with M&M’s for a colorful finish.
  6. Enjoy & Share
    • Use a knife or your fingers to gently remove the cookie cups from the pan.
    • Serve and savor the delightful combination of sugar cookies, Nutella, and chocolate!

Nutritional Info (Per Cookie Cup, Approximate)

  • Calories: 180-200
  • Fat: 10g
  • Carbohydrates: 22g
  • Sugar: 12g
  • Protein: 2g

A perfect treat for celebrations, parties, or simply indulging in a sweet craving!

FAQs About M&M Nutella Cookie Cups

Can I Make These in Advance?

Absolutely! These cookie cups store well in an airtight container at room temperature for up to 3 days. If you need them to last longer, refrigerate them for up to a week. You can also freeze them (before filling with Nutella) for up to three months—just let them thaw and add the filling when you’re ready to serve.

What Can I Use Instead of Nutella?

If you’re looking for an alternative filling, there are plenty of delicious options:

  • Chocolate ganache for a rich and creamy center
  • Peanut butter or almond butter for a nutty twist
  • Caramel sauce for a gooey surprise
  • Cream cheese frosting for a tangy contrast to the sweetness

How Do I Prevent the Cookie Cups from Sticking to the Pan?

Greasing the mini muffin pan generously is key. If you want extra assurance, you can also use mini cupcake liners. Another trick is to let the cookie cups cool completely before attempting to remove them—this helps them firm up and pop out easily.

Can I Use a Different Type of Cookie Dough?

Yes! While the sugar cookie base complements the Nutella beautifully, you can experiment with different cookie doughs such as:

  • Chocolate chip cookie dough for a classic twist
  • Peanut butter cookie dough for a nutty flavor profile
  • Brownie batter for an ultra-rich experience

Do These Cookie Cups Work for Dietary Restrictions?

If you need a gluten-free version, simply use a 1:1 gluten-free flour blend in place of regular flour. To make them dairy-free, substitute the butter with a plant-based alternative and use a dairy-free chocolate spread in place of Nutella.

Tips for the Best Cookie Cups

Use Room Temperature Butter

Softened butter ensures the dough comes together smoothly and creates a tender cookie texture. If your butter is too cold, it won’t incorporate well with the sugar, leading to a denser cookie base.

Don’t Overbake

Because the cookie cups will continue to firm up as they cool, it’s best to take them out of the oven as soon as they look set. Overbaking can lead to a dry or crumbly texture, which takes away from the overall indulgence of this treat.

Get Creative with Toppings

While M&M’s add a fun pop of color and crunch, feel free to experiment with additional toppings like:

  • Chopped nuts for a bit of extra texture
  • Mini chocolate chips for double the chocolate goodness
  • A dusting of powdered sugar for a bakery-style finish

The Joy of Baking and Sharing

There’s something truly special about baking treats that bring smiles to people’s faces. These M&M Nutella Cookie Cups aren’t just about satisfying a sweet tooth—they’re about sharing joy, making memories, and embracing the simple pleasures of homemade desserts.

Whether you make them for a special occasion or just because, each bite is a little reminder of how the best desserts are the ones made with love. So go ahead, bake a batch, and share the sweetness with those around you—you never know whose day you might brighten with a simple, delicious cookie cup.

aiting

M&M Nutella Cookie Cups: A Sweet Treat for Every Occasion

These M&M Nutella Cookie Cups are the ultimate bite-sized treat! A buttery, soft cookie base filled with rich Nutella and topped with colorful M&M’s makes for an irresistible dessert. Perfect for parties, holidays, or a simple indulgence!
Prep Time 15 minutes
Cook Time 20 minutes
Total Time 35 minutes
Servings: 24 cookies cups
Course: Dessert
Cuisine: American

Ingredients
  

  • 1 cup unsalted butter softened
  • ¾ cup sugar
  • 1 teaspoon salt
  • 2 teaspoons vanilla extract
  • 2 cups all-purpose flour
  • Nutella for filling (chocolate frosting can be substituted)
  • M&M’s preferably dark chocolate

Method
 

Preheat & Prepare:
  1. Preheat oven to 300°F (150°C).
  2. Grease a mini muffin pan and set aside.
Mix the Dough:
  1. Using a stand mixer or hand mixer, cream the butter and sugar together.
  2. Gradually add the salt, vanilla, and flour. Mix well until fully combined.
Shape the Cookie Cups:
  1. Roll a small ball of cookie dough, slightly larger than a ping pong ball.
  2. Place the dough balls into the greased mini muffin pan.
  3. Press down in the center with your thumb to create a well.
Bake to Perfection:
  1. Bake for about 20 minutes or until the cookie cups are set.
  2. Remove from the oven and let the pan cool completely on a wire rack.
Fill & Decorate:
  1. Once cooled, fill each well with Nutella.
  2. Top with M&M’s for a colorful finish.
Enjoy & Share:
  1. Use a knife or your fingers to gently remove the cookie cups from the pan.
  2. Serve and savor the delightful combination of sugar cookies, Nutella, and chocolate!

Notes

  • Chilling the dough for 30 minutes before baking can help maintain shape.
  • Experiment with fillings like peanut butter, caramel, or white chocolate.
  • Use festive M&M’s to match holidays or celebrations.
  • Store in an airtight container at room temperature for up to 4 days.

Easter Bunny Sugar Cookies: A Delightful Treat for the Season

A Sweet Tradition of Easter Baking

When I think of Easter, I think of pastel colors, blooming flowers, and the warmth of family gatherings. But more than anything, I think of the kitchen filled with the aroma of sugar cookies baking in the oven. As a child, my grandmother would invite all the grandkids over a few days before Easter for what she called our “Bunny Baking Day.” She’d pull out her old tin cookie cutters—some slightly bent from years of use—and we’d roll out the dough, pressing in the shapes with eager hands. Our bunnies rarely looked perfect, but that never mattered. What mattered was the laughter, the flour-dusted countertops, and the sense of togetherness.

Now, I carry on that tradition with my own family. Easter Bunny Sugar Cookies aren’t just a recipe; they’re a memory in the making. They offer the perfect balance of buttery crispness and sweet icing, making them as delicious as they are adorable. Whether you’re baking with kids, preparing treats for an Easter gathering, or simply indulging in a bit of festive creativity, these cookies are a must-have for the season.

Why These Easter Bunny Cookies Stand Out

There’s no shortage of sugar cookie recipes out there, but this one is special. Here’s why:

  • Holds Its Shape Perfectly – One of the biggest frustrations with sugar cookies is when they spread in the oven and lose their design. This dough is firm enough to retain crisp bunny outlines while staying tender inside.
  • Not Overly Sweet – The cookies have a lightly sweet, buttery flavor that pairs beautifully with the icing. They’re not overly sugary, making them enjoyable even without decorations.
  • Great for Decorating – The icing is smooth and easy to work with, making these cookies a fun canvas for creativity. Whether you go for simple or elaborate designs, they’ll look beautiful every time.
  • Make-Ahead Friendly – Easter can be a busy holiday, but these cookies store well. You can prepare them in advance and decorate them at your convenience.

Creative Ways to Decorate Your Easter Bunny Cookies

One of the best parts of baking these cookies is the decorating. Whether you prefer a classic, simple look or something more intricate, here are a few fun ideas to try:

  • Classic Easter Bunny – Use white icing for the body, pink for the ears and nose, and a tiny dot of black for the eyes.
  • Fluffy Tail Bunnies – Add a small dollop of icing on the tail and press in some shredded coconut or a mini marshmallow for a cute fluffy effect.
  • Pastel Patterns – Instead of sticking to realistic bunny colors, get creative with pastel blues, purples, and yellows for a whimsical springtime look.
  • Floral Bunnies – Pipe on tiny flowers along the edges or a small floral crown on top of the bunny’s head for an elegant touch.
  • Chocolate-Dipped Bunnies – Dip half of the bunny in melted white or dark chocolate and sprinkle with crushed nuts or colorful sprinkles for a sophisticated twist.

Ingredients for the Cookies

  • 3 cups all-purpose flour
  • 1 teaspoon baking powder
  • 1/2 teaspoon salt
  • 1 cup unsalted butter, softened
  • 1 1/2 cups granulated sugar
  • 2 large eggs
  • 2 teaspoons vanilla extract

Ingredients for the Icing

Hopping into Baking

  1. Prep the Butter – Let the butter sit out for about an hour until soft but not greasy.
  2. Mix Dry Ingredients – Whisk together the flour, baking powder, and salt in a medium bowl.
  3. Cream Butter & Sugar – Beat butter until creamy, then mix in sugar until light and fluffy (2-3 minutes).
  4. Incorporate Eggs & Vanilla – Add eggs one at a time, mixing well after each, then blend in vanilla.
  5. Combine Wet & Dry – Gradually mix the dry ingredients into the wet until a dough forms.
  6. Chill the Dough – Divide dough into two discs, wrap in plastic wrap, and refrigerate for at least 2 hours.
  7. Preheat & Roll – Set oven to 350°F. Roll out dough on a floured surface to 1/4 inch thick.
  8. Shape & Bake – Cut out bunny shapes, place on a baking sheet, and bake for 10-12 minutes until edges are slightly golden. Cool on a wire rack.

Icing Magic

  1. Mix Icing – Stir powdered sugar, milk, and vanilla until smooth, adjusting milk for desired consistency.
  2. Color & Decorate – Divide icing and add food coloring. Pipe outlines first, let set, then fill in the centers.
  3. Let It Set – Allow icing to dry completely (4-6 hours) before stacking or packaging.

Nutritional Snapshot (Per Cookie)

Approximate values based on a batch of 30 cookies.

  • Calories: 180
  • Fat: 8g
  • Carbohydrates: 25g
  • Sugar: 15g
  • Protein: 2g

Perfect for Easter celebrations, these cookies balance a crisp texture with buttery sweetness. Enjoy them with milk, tea, or as festive gifts!

Common Questions About Easter Bunny Sugar Cookies

1. Can I Make These Cookies Without Chilling the Dough?

While it might be tempting to skip the chilling time, it’s a crucial step. Chilling firms up the dough, which helps the cookies hold their shape during baking. If you’re short on time, you can speed up the process by placing the dough in the freezer for about 30 minutes instead of refrigerating for two hours.

2. How Can I Make the Icing Thicker or Thinner?

Royal icing consistency is key to perfect decorating. If your icing is too thick, add milk or water a teaspoon at a time until it flows smoothly. If it’s too thin, mix in a little more powdered sugar until you reach the desired consistency. For outlining cookies, you want the icing to be thick enough to hold its shape. For flooding (filling in the design), it should be slightly thinner so it spreads smoothly.

3. Can I Use Buttercream Instead of Royal Icing?

Absolutely! If you prefer a softer, creamier icing, buttercream works well. Just keep in mind that buttercream doesn’t harden like royal icing, so the cookies will be more delicate when stacking or transporting.

4. How Long Do These Cookies Stay Fresh?

Undecorated cookies can be stored in an airtight container for up to a week. Decorated cookies should be eaten within five days for the best taste and texture. If you need to store them longer, you can freeze the undecorated cookies for up to three months. Just make sure they’re completely cool before freezing, and layer them between sheets of parchment paper to prevent sticking.

5. What’s the Best Way to Package These as Gifts?

These cookies make excellent Easter gifts! Once the icing is completely dry, stack them in clear cellophane bags and tie them with pastel-colored ribbons. You can also place them in decorative tins or Easter-themed boxes for a more festive presentation.

Making These Cookies a Family Tradition

Baking Easter Bunny Sugar Cookies is more than just an afternoon in the kitchen—it’s an experience that brings people together. If you have kids, let them be in charge of rolling the dough or adding sprinkles. If you’re baking solo, put on your favorite spring playlist and take your time decorating each bunny with care. No matter how they turn out, they’ll be perfect because they were made with love.

For me, every time I bake these cookies, I think back to those childhood Easter baking sessions with my grandmother. I remember the way she’d hum while rolling out the dough, the way she’d let us “accidentally” eat the broken cookies before they could be decorated, and the way she always made sure everyone felt included—no matter how messy their cookies looked. Now, as I continue this tradition with my own family, I realize that baking isn’t just about food. It’s about joy, creativity, and making memories that last a lifetime.

Conclusion: A Recipe to Celebrate Easter with Love

Easter Bunny Sugar Cookies are more than just a dessert; they’re a celebration of the season, a tribute to tradition, and a chance to create something beautiful. Whether you’re making them for an Easter brunch, as gifts for loved ones, or just for the simple joy of baking, these cookies will bring a little extra magic to your holiday. So roll out the dough, grab your favorite cookie cutters, and get ready to make a batch of sweet memories this Easter.

aiting

Easter Bunny Sugar Cookies: A Delightful Treat for the Season

These Bunny Bliss Sugar Cookies are the perfect festive treat for Easter! Soft, buttery, and decorated with a simple icing, these cookies are as adorable as they are delicious. Great for gifting, decorating with kids, or enjoying with a cup of tea!
Prep Time 20 minutes
Cook Time 2 hours
Servings: 30 cookies
Course: Dessert
Cuisine: American

Ingredients
  

  • 3 cups all-purpose flour
  • 1 teaspoon baking powder
  • 1/2 teaspoon salt
  • 1 cup unsalted butter softened
  • 1 1/2 cups granulated sugar
  • 2 large eggs
  • 2 teaspoons vanilla extract
  • 3 cups powdered sugar
  • 3-4 tablespoons milk
  • 1 teaspoon vanilla extract
  • Food coloring pink, black
  • Decorative sprinkles optional

Method
 

Prep the Butter:
  1. Let the butter sit out for about an hour until soft but not greasy.
Mix Dry Ingredients:
  1. Whisk together the flour, baking powder, and salt in a medium bowl.
Cream Butter & Sugar:
  1. Beat butter until creamy, then mix in sugar until light and fluffy (2-3 minutes).
Incorporate Eggs & Vanilla:
  1. Add eggs one at a time, mixing well after each, then blend in vanilla.
Combine Wet & Dry:
  1. Gradually mix the dry ingredients into the wet until a dough forms.
Chill the Dough:
  1. Divide dough into two discs, wrap in plastic wrap, and refrigerate for at least 2 hours.
Preheat & Roll:
  1. Set oven to 350°F. Roll out dough on a floured surface to 1/4 inch thick.
Shape & Bake:
  1. Cut out bunny shapes, place on a baking sheet, and bake for 10-12 minutes until edges are slightly golden. Cool on a wire rack.
Mix Icing:
  1. Stir powdered sugar, milk, and vanilla until smooth, adjusting milk for desired consistency.
Color & Decorate:
  1. Divide icing and add food coloring. Pipe outlines first, let set, then fill in the centers.
Let It Set:
  1. Allow icing to dry completely (4-6 hours) before stacking or packaging.

Notes

  • Chilling the dough helps maintain shape when baking.
  • For extra flavor, swap vanilla extract for almond or lemon extract.
  • Use piping bags for precise decoration, or dip cookies for a rustic look.
  • Store in an airtight container for up to a week.
  • Freeze dough discs for up to 2 months and bake fresh!