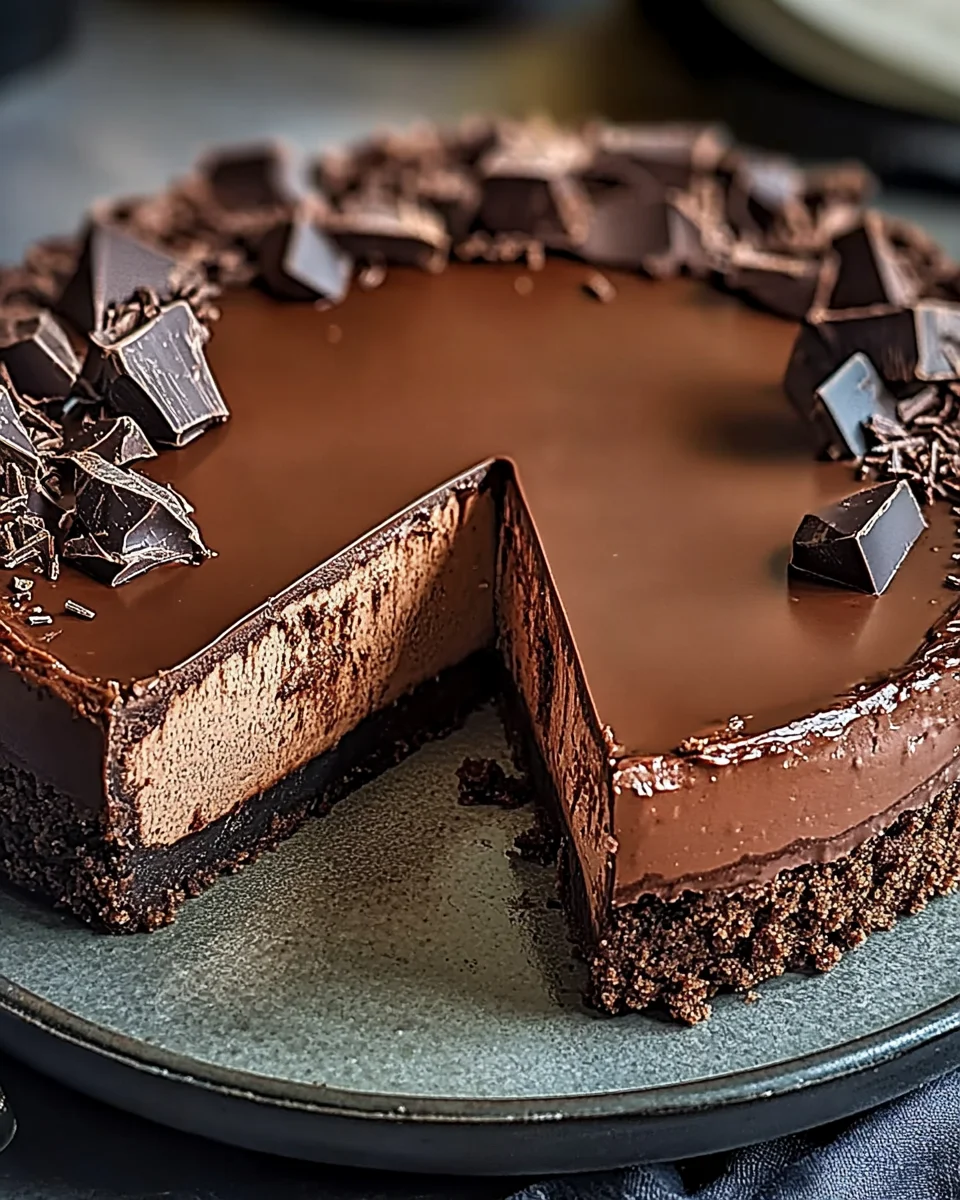
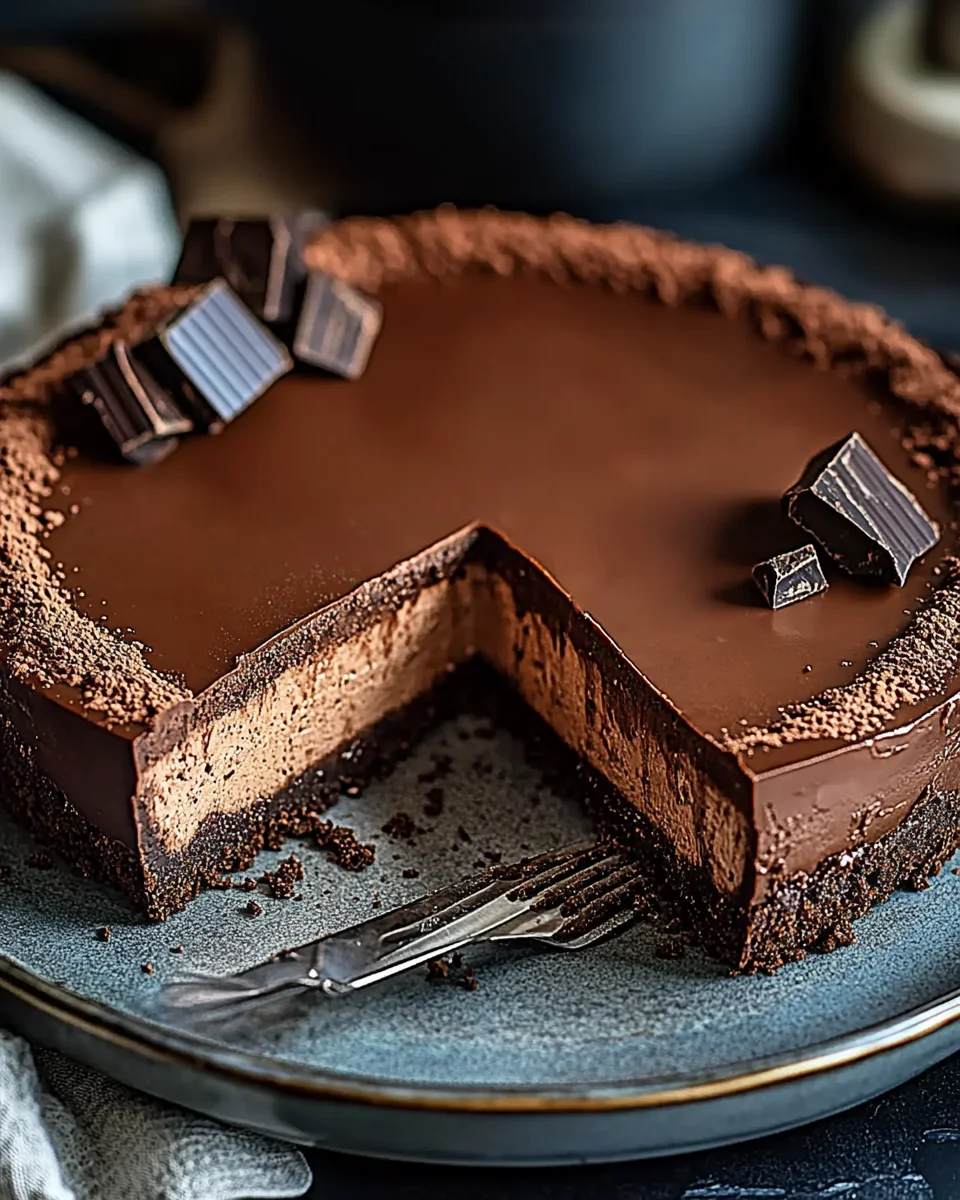
Chocolate Mascarpone Cheesecake: A Decadent Treat for the Soul

A Sweet Memory: The Cheesecake That Started It All

I still remember the first time I made a chocolate mascarpone cheesecake. It was a cold winter evening, and my family was gathered around the kitchen, eagerly watching as I pulled the dessert out of the oven. The scent of melted chocolate and creamy mascarpone filled the air, wrapping us in a warmth that only homemade treats can provide.

That night, as we sliced into the cheesecake, the velvety texture and deep chocolate flavor melted on our tongues. It was rich but not overwhelming, sweet yet sophisticated. My grandmother, who was known for her discerning taste in desserts, smiled and said, “This reminds me of the cheesecakes we used to have in Italy.” That was the moment I knew this recipe was something special.

Chocolate mascarpone cheesecake isn’t just a dessert—it’s an experience. It’s the kind of treat that brings people together, creates lasting memories, and makes any occasion feel extraordinary. Whether you’re baking it for a family gathering, a romantic dinner, or simply to indulge in a moment of self-care, this cheesecake is bound to become a favorite in your home.

Why Mascarpone Makes the Difference

Traditional cheesecakes are made with cream cheese, which gives them a tangy and slightly dense texture. Mascarpone, however, takes the experience to another level. It’s an Italian cream cheese known for its rich, buttery consistency and subtle sweetness. When combined with high-quality chocolate, mascarpone creates a cheesecake that is smoother, silkier, and more refined than any traditional version.

This key ingredient not only enhances the texture but also balances the deep flavors of dark chocolate, making the cheesecake taste luxurious without being overly sweet. Mascarpone’s mild flavor allows the chocolate to shine while adding a velvety richness that lingers with every bite.

The Secret to a Perfect Chocolate Mascarpone Cheesecake

Achieving the perfect chocolate mascarpone cheesecake requires attention to detail and a few expert tips:

1. Choosing the Right Chocolate

The quality of chocolate you use will define the flavor of your cheesecake. Opt for dark chocolate with at least 60-70% cocoa content. This will give your cheesecake a deep, rich taste without excessive sweetness. Semisweet chocolate can also work if you prefer a milder chocolate flavor.

2. Gentle Mixing for a Smooth Texture

Overmixing can introduce too much air into the batter, leading to cracks or a dense texture. Mix each ingredient just until incorporated. Pay special attention when adding the eggs—beating them too much can cause the cheesecake to puff up during baking and then collapse as it cools.

3. The Importance of a Water Bath

A water bath (also called a bain-marie) helps the cheesecake bake evenly and prevents cracks. The gentle steam keeps the texture smooth and creamy. To do this, wrap the springform pan in aluminum foil, place it in a larger baking dish, and fill the dish with an inch or two of hot water before baking.

4. Slow Cooling for the Best Consistency

Once the cheesecake is done baking, don’t rush to remove it from the oven. Let it cool inside with the door slightly ajar for about 30 minutes. This gradual cooling process prevents sudden temperature changes that could cause cracks.

5. Chilling Time is Key

Chocolate mascarpone cheesecake is best enjoyed after it has had time to fully set in the refrigerator. Ideally, let it chill for at least 4 hours, but overnight is even better. This allows the flavors to meld and results in a firmer, more luscious texture.

What You’ll Need: The Perfect Ingredients

For the Crust:

  • 1 ½ cups chocolate graham cracker crumbs
  • ¼ cup unsalted butter, melted
  • 2 tablespoons granulated sugar

For the Filling:

  • 8 oz cream cheese, softened
  • 8 oz mascarpone cheese, softened
  • 1 cup granulated sugar
  • ½ cup sour cream
  • 1 teaspoon vanilla extract
  • 3 large eggs
  • ½ cup melted dark chocolate (70% cocoa or higher)
  • ¼ cup cocoa powder, sifted

For the Ganache Topping (Optional):

  • ½ cup heavy cream
  • ½ cup dark chocolate, chopped

Step-by-Step: Bringing It to Life

1. Crafting the Crust:

  • Preheat the oven to 350°F (175°C).
  • Mix chocolate graham cracker crumbs, melted butter, and sugar.
  • Press mixture into the bottom of a 9-inch springform pan.
  • Bake for 8-10 minutes, then set aside to cool.

2. Preparing the Luxurious Filling:

  • In a large bowl, beat cream cheese, mascarpone, and sugar until smooth.
  • Mix in sour cream and vanilla extract.
  • Add eggs one at a time, mixing on low speed.
  • Stir in melted dark chocolate and sifted cocoa powder.

3. Baking to Perfection:

  • Pour filling over the cooled crust and spread evenly.
  • Bake for 50-60 minutes, until the center is slightly set but still jiggly.
  • Turn off the oven, crack the door open, and let it cool inside for an hour.
  • Remove and let it reach room temperature before refrigerating for at least 4 hours (preferably overnight).

4. Elevate with Ganache (Optional):

  • Heat heavy cream until simmering (but not boiling).
  • Pour over chopped dark chocolate and let sit for 2-3 minutes.
  • Stir until smooth and spread over the chilled cheesecake.

5. Serve & Savor:

  • Slice and serve with fresh berries, chocolate shavings, or whipped cream.

Nutrition Facts (Per Serving):

  • Calories: 450
  • Fat: 34g
  • Carbohydrates: 30g
  • Protein: 8g

Enjoy this rich, creamy Chocolate Mascarpone Cheesecake—every bite is pure bliss.

FAQs About Chocolate Mascarpone Cheesecake

1. Can I Substitute Cream Cheese for Mascarpone?

Yes, but the texture and flavor will be different. Mascarpone has a higher fat content and is less tangy than cream cheese, which makes it smoother and richer. If you substitute cream cheese, your cheesecake will still be delicious, but it will have a denser and slightly tangier taste.

2. Can I Use Milk Chocolate Instead of Dark Chocolate?

Milk chocolate can be used, but it will make the cheesecake much sweeter. If you prefer a lighter chocolate flavor, you might want to reduce the sugar in the recipe slightly to maintain balance.

3. Why Did My Cheesecake Crack?

Cracks can occur for several reasons:

  • Overmixing the batter, which introduces too much air.
  • Baking at too high a temperature.
  • Cooling too quickly after baking.

To prevent this, always mix gently, bake at a low temperature, and let the cheesecake cool gradually. Using a water bath also helps keep the texture smooth and crack-free.

4. How Do I Know When My Cheesecake Is Done?

The edges should be set, but the center should still have a slight jiggle when you shake the pan. The cheesecake will continue to firm up as it cools, so it’s better to slightly underbake than to overbake.

5. Can I Freeze Chocolate Mascarpone Cheesecake?

Absolutely! To freeze, wrap individual slices in plastic wrap and place them in a freezer-safe container. When ready to eat, thaw overnight in the refrigerator. This cheesecake maintains its creamy texture even after freezing.

6. What Are the Best Toppings for This Cheesecake?

This cheesecake is incredible on its own, but toppings can take it to the next level. Some great options include:

  • A drizzle of chocolate ganache
  • Fresh berries (strawberries, raspberries, or blackberries)
  • A dusting of cocoa powder
  • Whipped cream for an extra creamy touch

7. Can I Make This Cheesecake Without a Springform Pan?

A springform pan is ideal because it allows for easy removal without damaging the cheesecake. However, if you don’t have one, you can use a deep pie dish or a regular cake pan lined with parchment paper. Just be extra careful when removing the cheesecake.

8. How Long Will This Cheesecake Stay Fresh?

Stored in the refrigerator, this cheesecake will stay fresh for up to 5 days. Be sure to cover it well to prevent it from absorbing any unwanted fridge odors.

A Dessert Worth Every Bite

Chocolate mascarpone cheesecake is more than just a dessert—it’s a celebration of rich, luxurious flavors and creamy, melt-in-your-mouth texture. Every bite is a balance of deep chocolate and silky mascarpone, making it a truly indulgent treat for any occasion.

Whether you’re serving it at a holiday gathering, surprising a loved one, or simply treating yourself, this cheesecake never fails to impress. And beyond its taste, it’s the kind of dessert that brings people together, creating moments of joy and connection.

So, the next time you need a little indulgence, let this chocolate mascarpone cheesecake be your go-to. After all, life is too short to skip dessert.
aiting

Chocolate Mascarpone Cheesecake: A Decadent Treat for the Soul

Decadent, creamy, and utterly irresistible, this Chocolate Mascarpone Cheesecake is a dream dessert. With a rich chocolate graham cracker crust, a velvety mascarpone filling, and an optional dark chocolate ganache topping, every bite melts in your mouth. Perfect for special occasions—or just because you deserve it!
Prep Time 20 minutes
Cook Time 1 hour
Total Time 5 hours
Servings: 8 -10 servings
Course: Dessert
Cuisine: American

Ingredients
  

  • For the crust:1 ½ cups chocolate graham cracker crumbs ¼ cup unsalted butter (melted), 2 tablespoons granulated sugar.
  • For the filling:8 oz cream cheese softened, 8 oz mascarpone cheese (softened), 1 cup granulated sugar, ½ cup sour cream, 1 teaspoon vanilla extract, 3 large eggs, ½ cup melted dark chocolate (70% cocoa or higher), ¼ cup cocoa powder (sifted).
  • For the ganache topping optional:½ cup heavy cream, ½ cup dark chocolate (chopped).

Method
 

  1. Make the Crust – Preheat the oven to 350°F (175°C). Mix graham cracker crumbs, melted butter, and sugar. Press into the bottom of a 9-inch springform pan. Bake for 8-10 minutes, then set aside to cool.
  2. Prepare the Filling – In a bowl, beat cream cheese, mascarpone, and sugar until smooth. Mix in sour cream and vanilla extract. Add eggs one at a time, mixing on low speed. Stir in melted dark chocolate and sifted cocoa powder.
  3. Bake the Cheesecake – Pour the filling over the cooled crust. Bake for 50-60 minutes until the center is slightly set but still jiggly. Turn off the oven, crack the door open, and let it cool for an hour. Then, let it reach room temperature before refrigerating for at least 4 hours (preferably overnight).
  4. Make the Ganache (Optional) – Heat heavy cream until simmering, then pour over chopped dark chocolate. Let sit for 2-3 minutes, stir until smooth, and spread over the chilled cheesecake.
  5. Serve & Enjoy – Slice and serve with fresh berries, chocolate shavings, or whipped cream.

Notes

  • Use high-quality dark chocolate for a richer flavor.
  • Allowing the cheesecake to chill overnight enhances the texture.
  • For a crunchier crust, chill it for 15 minutes before adding the filling.
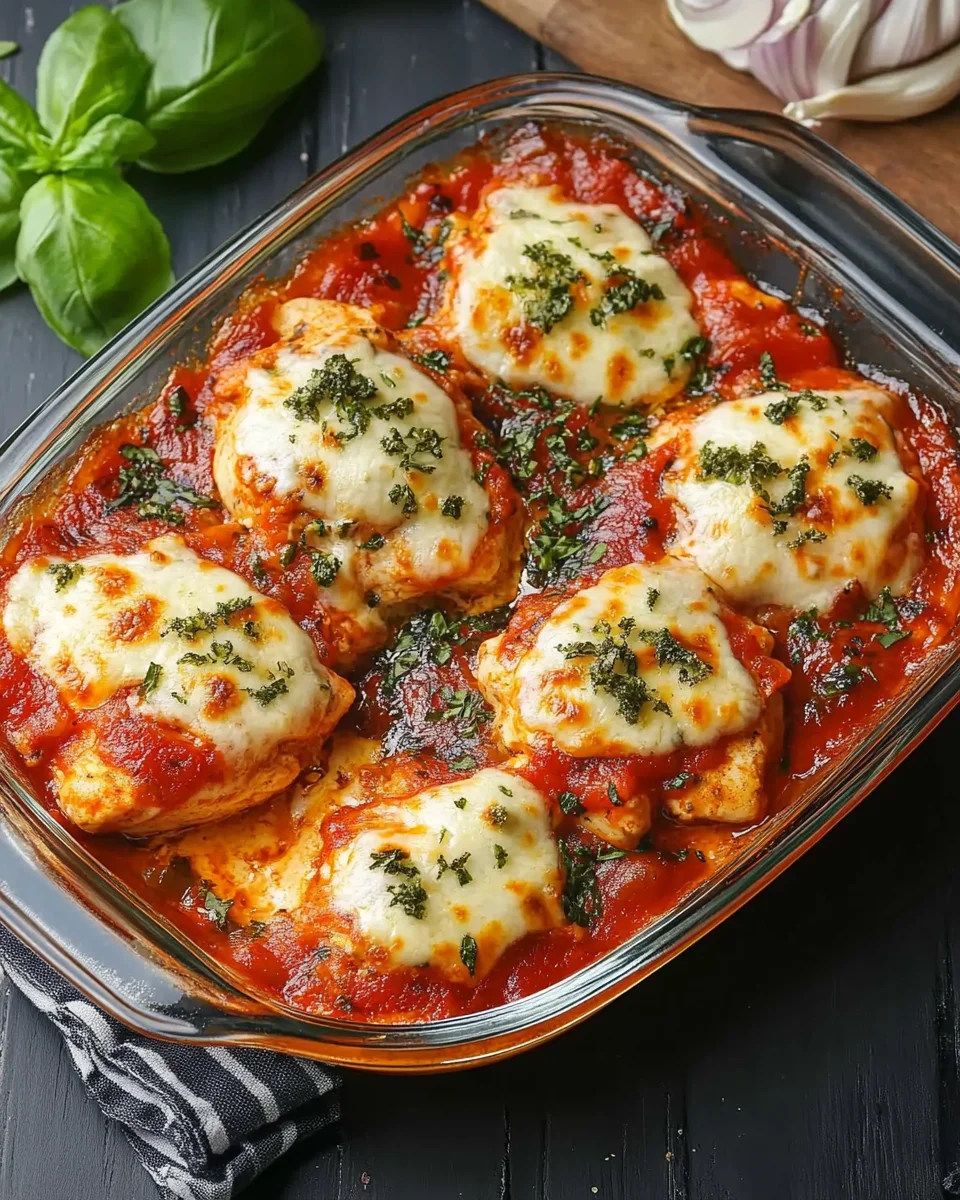
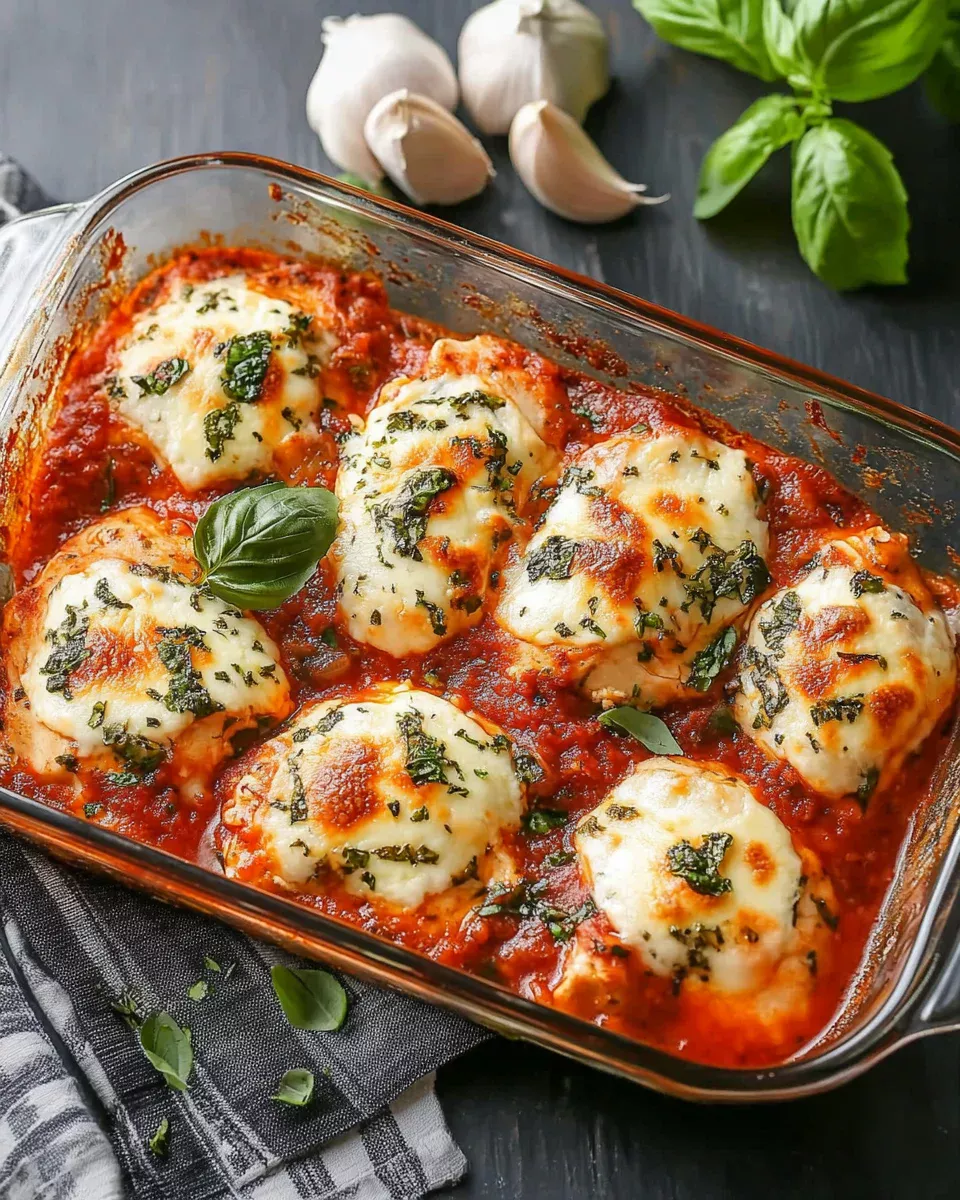
A Taste of Home: The Comforting Embrace of Chicken & Mozzarella Bake

Some meals are more than just food—they carry warmth, nostalgia, and the essence of home. I still remember the first time I had a dish like this. It was one of those long, exhausting days when nothing seemed to go right. The kind of day where you just crave something hearty, familiar, and soul-soothing. I stepped into the kitchen, aimlessly searching for inspiration, and found myself reaching for simple, staple ingredients: chicken, mozzarella, tomatoes, and a handful of aromatic herbs.

As the dish baked, the scent filled the air, wrapping me in a sense of calm. The moment I took the first bite—juicy chicken bathed in a tangy tomato sauce, blanketed with melted mozzarella—I knew this was going to be a household favorite. That’s the beauty of the Chicken & Mozzarella Bake. It’s simple yet indulgent, comforting yet wholesome, and it never fails to bring people together.

This dish isn’t just a recipe; it’s an experience. Whether you’re looking for a quick weeknight dinner, a meal to impress guests, or a wholesome comfort food option, this bake is everything you need and more. Let’s dive into what makes it special and why it deserves a permanent spot in your recipe collection.

Why You’ll Love This Chicken & Mozzarella Bake

1. A Balance of Indulgence and Health

Many comfort foods tend to lean toward the heavy, carb-loaded side, but this dish offers all the indulgence of a rich, cheesy meal while remaining protein-packed and low in carbs. It’s a keto-friendly and gluten-free option that still satisfies cravings without the guilt.

2. Effortless Yet Elegant

There’s something special about a dish that looks gourmet but requires minimal effort. With just a handful of ingredients and a single baking dish, you can create a meal that feels restaurant-worthy, even on a busy night.

3. Perfect for Meal Prep

If you’re someone who loves to prep meals in advance, this bake is a lifesaver. It stores well in the fridge, reheats beautifully, and can be paired with different sides throughout the week for variety.

4. Crowd-Pleaser

From kids to adults, picky eaters to foodies, this recipe has universal appeal. The classic combination of chicken, tomato sauce, and gooey mozzarella is one that everyone loves.

Creative Variations to Try

One of the best things about this recipe is its versatility. Once you’ve mastered the base version, you can easily tweak it to suit different cravings or dietary preferences. Here are some creative ways to switch it up:

1. Mediterranean Twist

Add sliced black olives, sun-dried tomatoes, and crumbled feta cheese for a Mediterranean-inspired version that brings a briny, tangy depth of flavor.

2. Spicy Kick

If you love a little heat, toss some red pepper flakes or diced jalapeños into the sauce before baking. You can also drizzle some hot honey or chili oil over the top before serving.

3. Creamy & Cheesy Upgrade

For an extra layer of indulgence, mix a bit of ricotta or cream cheese into the tomato sauce before layering it over the chicken. It creates a creamy, luscious texture that pairs beautifully with the mozzarella.

4. Pesto Lover’s Dream

Swap the tomato sauce for a rich basil pesto, and you’ll get a completely different but equally delicious flavor profile. Pesto pairs exceptionally well with mozzarella and chicken.

5. Vegetable-Loaded Version

Want to add more nutrients to the dish? Toss in some spinach, zucchini, or mushrooms into the baking dish along with the chicken. They will soak up the flavors and make the dish even heartier.

Pairing Perfection: What to Serve with Chicken & Mozzarella Bake

While this bake is delicious on its own, pairing it with the right side dishes can elevate the experience even more. Here are some great options:

  • Caesar Salad – The crisp lettuce, creamy dressing, and crunchy croutons provide a refreshing contrast to the cheesy bake.
  • Garlic Bread – Perfect for soaking up every last bit of the tomato sauce.
  • Roasted Vegetables – Try roasted asparagus, bell peppers, or Brussels sprouts for a healthy and flavorful side.
  • Steamed Rice or Quinoa – A great base to make the meal more filling.
  • Pasta Primavera – Light, fresh, and veggie-packed pasta that balances out the richness of the bake.

Gather Your Essentials

  • 4 boneless, skinless chicken breasts – The star of the show, juicy and tender.
  • 1 tsp garlic powder – For a rich, savory kick.
  • 1 tsp onion powder – Adds a subtle sweetness.
  • 1 tsp Italian seasoning – A blend of herbs for that signature Italian flair.
  • Salt & black pepper (to taste) – Enhances all the flavors.
  • 16 oz can chopped tomatoes – The heart of the sauce, tangy and fresh.
  • 3 cloves garlic, minced – Brings deep, aromatic richness.
  • ½ red onion, chopped – A sharp bite with a hint of sweetness.
  • 1 tsp oregano – Earthy and bold, a perfect complement.
  • 1 cup shredded mozzarella – The gooey, melty magic.
  • 2-3 fresh basil leaves – A fresh, fragrant garnish.
  • 2 tbsp olive oil – For sautéing and adding a velvety finish.

Bringing It to Life

  1. Preheat & Prep – Heat your oven to 375°F. Rinse and pat dry the chicken breasts.
  2. Score for Flavor – Make shallow cuts in a crisscross pattern on the chicken (don’t cut through).
  3. Season It Up – Place chicken in a baking dish. Sprinkle salt, pepper, Italian seasoning, onion powder, and garlic powder. Drizzle with olive oil.
  4. Saucy Perfection – In a bowl, mix chopped tomatoes, garlic, red onion, oregano, and a pinch of salt and pepper. Stir well.
  5. Layer the Love – Pour the sauce over the chicken, making sure it’s evenly covered.
  6. Cheese It Up – Generously sprinkle mozzarella on top.
  7. Bake to Perfection – Bake for 25-30 minutes. When the chicken is cooked through and the cheese is bubbling, broil for a few minutes for a golden finish.
  8. Final Touch – Garnish with fresh basil leaves and serve warm.

Nutritional Breakdown (Per Serving)

  • Calories: 439 kcal
  • Carbohydrates: 9g
  • Protein: 56g
  • Fat: 19g
  • Saturated Fat: 6g
  • Cholesterol: 167mg
  • Sodium: 602mg
  • Potassium: 1127mg
  • Fiber: 2g
  • Sugar: 4g
  • Vitamin A: 420 IU
  • Vitamin C: 15mg
  • Calcium: 214mg
  • Iron: 3mg

Pair it with garlic bread, roasted vegetables, or a light Caesar salad for a well-rounded meal. Enjoy your indulgent yet healthy Italian-inspired creation!

FAQs: Everything You Need to Know

1. Can I Make This Dish Ahead of Time?

Absolutely! You can prepare the entire dish ahead of time, cover it, and store it in the refrigerator for up to 24 hours before baking. When ready to cook, simply place it in the oven and add a few extra minutes to the baking time.

2. How Do I Store and Reheat Leftovers?

Leftovers can be stored in an airtight container in the fridge for up to 4 days. To reheat, place the portion in an oven-safe dish and bake at 350°F for about 10 minutes, or microwave in 30-second intervals until warmed through.

3. Can I Freeze This Dish?

Yes! This dish freezes well. Allow it to cool completely, then transfer it to a freezer-safe container. It will last up to 3 months in the freezer. To reheat, thaw overnight in the fridge and bake at 350°F until heated through.

4. What Type of Chicken Works Best?

Boneless, skinless chicken breasts are ideal for this recipe, but you can also use boneless chicken thighs for a juicier texture. Just adjust the cooking time accordingly, as thighs may take a few extra minutes to cook.

5. Can I Use Fresh Tomatoes Instead of Canned?

Definitely! If you prefer fresh tomatoes, dice about 3-4 medium tomatoes and use them in place of canned ones. You might want to add a splash of tomato paste for extra depth of flavor.

6. How Can I Make It More Kid-Friendly?

If you have picky eaters, consider using a mild marinara sauce instead of chopped tomatoes, and reduce the amount of herbs and garlic. Kids tend to love the cheesy goodness of this dish, so keeping it simple works best.

Final Thoughts: The Dish That Feels Like a Hug

There’s something deeply satisfying about a meal that is both comforting and nourishing. The Chicken & Mozzarella Bake is a dish that brings warmth to the table, making even the most ordinary nights feel special. Whether you’re sharing it with family, serving it to guests, or enjoying it as a solo treat, it’s one of those recipes that stays with you—becoming a staple in your kitchen and a memory in your heart.

Cooking isn’t just about following a recipe. It’s about the emotions tied to the meals we make, the stories we share around the table, and the moments we create with every bite. This dish is a reminder that even the simplest ingredients can come together to create something truly magical.

So next time you need a pick-me-up or just want to impress without the stress, remember this Chicken & Mozzarella Bake—a dish that’s as easy to make as it is to love.

aiting

A Taste of Home: The Comforting Embrace of Chicken & Mozzarella Bake

This Savory Chicken & Mozzarella Bliss Bake is a one-pan wonder loaded with juicy chicken, a rich tomato-garlic sauce, and bubbly, golden mozzarella. With a perfect balance of herbs and seasonings, it’s an easy and satisfying meal that brings the flavors of Italy straight to your table.
Prep Time 10 minutes
Cook Time 30 minutes
Total Time 40 minutes
Servings: 4 servings
Course: Main Course
Cuisine: Italian

Ingredients
  

  • 4 boneless skinless chicken breasts
  • 1 tsp garlic powder
  • 1 tsp onion powder
  • 1 tsp Italian seasoning
  • Salt & black pepper to taste
  • 16 oz can chopped tomatoes
  • 3 cloves garlic minced
  • ½ red onion chopped
  • 1 tsp oregano
  • 1 cup shredded mozzarella
  • 2-3 fresh basil leaves
  • 2 tbsp olive oil

Method
 

  1. Preheat & Prep – Preheat the oven to 375°F. Pat the chicken dry.
  2. Score & Season – Lightly score the chicken and season with salt, pepper, Italian seasoning, onion powder, and garlic powder. Drizzle with olive oil.
  3. Make the Sauce – In a bowl, mix chopped tomatoes, garlic, red onion, oregano, salt, and pepper.
  4. Assemble – Pour the tomato mixture over the chicken in a baking dish, then top with mozzarella.
  5. Bake – Bake for 25-30 minutes until the chicken is cooked through and the cheese is bubbly. Broil for 2-3 minutes for a golden finish.
  6. Garnish & Serve – Top with fresh basil leaves and enjoy!

Notes

  • Serve with garlic bread, roasted veggies, or a light Caesar salad.
  • For extra richness, add a drizzle of balsamic glaze before serving.
  • Use fresh mozzarella for an extra creamy melt.

Coconut Curry Salmon with Garlic Butter: A Dish That Feels Like Home

A Personal Connection to a Comforting Meal

Some dishes have a way of wrapping you in warmth, making you feel at home no matter where you are. For me, this coconut curry salmon with garlic butter is one of them. I remember the first time I made a dish like this—it was a rainy evening, and I was craving something both hearty and soothing. The rich aroma of coconut milk, infused with garlic and red curry, filled my kitchen as the salmon gently simmered in the sauce. The first bite was a revelation—flaky salmon, buttery smooth curry, and just the right hint of spice. It felt like a meal that nourished more than just my body; it was pure comfort in a bowl.

Since then, this recipe has become a staple in my home, whether for quick weeknight dinners or special gatherings where I want to impress without the stress. It’s a dish that delivers gourmet flavor with minimal effort, proving that sometimes, the most satisfying meals come from the simplest of ingredients.

If you’ve never made coconut curry salmon before, this is your chance to create something truly special—something that might just become your own personal comfort dish.

Why This Recipe Deserves a Spot on Your Table

A Harmony of Flavors

Coconut curry salmon with garlic butter is the perfect marriage of bold and creamy. The richness of the coconut milk balances the heat of the curry, while garlic butter adds depth, making each bite a luxurious experience. It’s the kind of dish that lingers on your palate, keeping you coming back for more.

Quick and Effortless

With a total cooking time of about 25 minutes, this recipe is ideal for busy nights. There’s no need for multiple pots and pans—everything comes together in a single skillet, minimizing both effort and cleanup.

Nutrient-Rich and Wholesome

Not only does this dish taste incredible, but it’s also packed with nutrients. Salmon is rich in omega-3 fatty acids, known for supporting brain health and reducing inflammation. Coconut milk provides healthy fats, while garlic and curry bring powerful antioxidants. This is a meal that satisfies without compromising on health.

A Dish for Every Occasion

Whether you’re cooking for yourself, your family, or hosting guests, this dish is versatile enough to fit any situation. It’s elegant enough for date nights but easy enough to whip up after a long day. Serve it with rice for a cozy meal or alongside a fresh salad for something lighter.

Pro Tips for the Best Coconut Curry Salmon

To take your dish from good to great, here are a few expert tips:

1. Choose the Right Salmon

  • Opt for fresh, wild-caught salmon whenever possible. It has a richer flavor and better texture compared to farmed varieties.
  • If using frozen salmon, let it thaw completely and pat it dry to ensure a perfect sear.

2. Don’t Skip the Butter

  • Butter adds a silky texture and enhances the richness of the dish. For an extra layer of flavor, try using ghee or clarified butter.

3. Adjust the Spice Level to Your Preference

  • Red curry paste can range from mild to very spicy, depending on the brand. Start with less and add more as needed.
  • If you love heat, a pinch of chili flakes will take the dish up a notch.

4. Let the Sauce Simmer

  • Simmering allows the flavors to meld beautifully. The longer the sauce sits, the more depth it develops.

5. Balance the Flavors

  • A squeeze of fresh lime juice at the end brightens the dish and balances the richness of the coconut milk.

Perfect Pairings: What to Serve with Your Salmon

To complete your meal, consider these delicious pairings:

  • Steamed Jasmine Rice: The light fragrance of jasmine rice perfectly complements the creamy curry sauce.
  • Garlic Naan: Ideal for scooping up every last bit of sauce.
  • Quinoa or Cauliflower Rice: A great option if you’re looking for a lower-carb alternative.
  • Sautéed Greens: A simple side of spinach, bok choy, or green beans adds a fresh contrast to the dish.
  • Chilled White Wine: A crisp Sauvignon Blanc or a lightly oaked Chardonnay pairs beautifully with the richness of the curry.

Ingredients: The Stars of the Dish

  • Salmon Fillets – 4 fillets (6 oz each), skin-on for the best texture
  • Coconut Milk – 1 can (13.5 oz), full-fat for creaminess
  • Red Curry Paste – 2 tablespoons, for bold, spicy depth
  • Butter – 3 tablespoons, divided for cooking and flavor
  • Garlic – 4 cloves, minced for aromatic richness
  • Fresh Lime Juice – 1 tablespoon, to brighten the dish
  • Salt and Pepper – To taste
  • Optional:
    • Chili Flakes – ¼ teaspoon, for an extra kick
    • Fresh Cilantro – For garnish

Directions: The Path to Perfection

1. Sear the Salmon

  • Pat the salmon fillets dry with a paper towel and season both sides with salt and pepper.
  • Heat 1 tablespoon of butter in a large skillet over medium-high heat.
  • Once the butter is melted and foamy, add the salmon fillets, skin-side down.
  • Sear for 3-4 minutes per side until golden brown and cooked through. Remove and set aside.

2. Create the Coconut Curry Sauce

  • In the same skillet, add the remaining 2 tablespoons of butter.
  • Add minced garlic and sauté for about 1 minute until fragrant.
  • Stir in the red curry paste and cook for 2 minutes, letting the flavors bloom.
  • Pour in the coconut milk, stirring to combine.
  • Let the sauce simmer for 5-7 minutes, thickening into a luscious consistency.
  • Season with lime juice, salt, and pepper to taste.

3. Bring it All Together

  • Return the seared salmon fillets to the skillet, nestling them into the curry sauce.
  • Let them simmer for an additional 5-7 minutes, allowing the flavors to meld.
  • If you love spice, sprinkle with chili flakes before serving.

Nutritional Breakdown: A Bite of Balance

  • Calories: 425 kcal per serving
  • Protein: High in omega-3-rich salmon
  • Fats: Healthy fats from coconut milk and butter
  • Carbs: Low-carb and keto-friendly
  • Flavor: Unforgettable

Serving Suggestions

  • Pair with jasmine rice, quinoa, or naan for a heartier meal.
  • Garnish with fresh cilantro and a squeeze of lime for extra vibrancy.
  • Want more texture? Add sautéed bell peppers or spinach.

This one-pan wonder delivers a creamy, spicy, and buttery indulgence in just 25 minutes—perfect for a quick, restaurant-quality meal at home.

FAQs: Everything You Need to Know

Can I use a different type of fish?
Absolutely! While salmon works beautifully in this dish, you can also use cod, halibut, or even shrimp. Just adjust the cooking time accordingly.

Can I make this dish dairy-free?
Yes! Simply swap out the butter for a dairy-free alternative like coconut oil or vegan butter.

What if I don’t have red curry paste?
You can substitute with yellow or green curry paste for a different flavor profile. Yellow curry is milder, while green curry has a sharper, herbaceous taste.

Can I make this ahead of time?
Yes, but with a few considerations. The curry sauce can be made ahead and stored in the fridge for up to two days. However, for the best texture, cook the salmon fresh before serving.

How do I store and reheat leftovers?
Store leftovers in an airtight container in the refrigerator for up to two days. To reheat, gently warm the salmon and sauce in a skillet over low heat to prevent the fish from drying out.

Can I freeze this dish?
It’s best enjoyed fresh, but you can freeze the sauce separately. Let it cool completely before transferring to an airtight container. When ready to use, reheat the sauce and add freshly cooked salmon.

How can I make this dish even healthier?
For a lower-calorie version, use light coconut milk, reduce the butter, and add more vegetables like bell peppers, zucchini, or spinach to increase the fiber content.

Conclusion: A Dish That Feels Like a Warm Hug

Coconut curry salmon with garlic butter is more than just a recipe—it’s a dish that delivers comfort, indulgence, and nourishment all in one. Whether you’re making it for a cozy night in or serving it to impress, it’s a meal that never fails to delight. With its rich flavors, creamy sauce, and perfectly cooked salmon, this dish will leave you craving it again and again.

So the next time you’re in need of something truly satisfying, give this recipe a try. Who knows? It might just become your new favorite comfort food, just as it did for me.

aiting

Coconut Curry Salmon with Garlic Butter: A Dish That Feels Like Home

A rich and flavorful salmon dish bathed in a velvety coconut curry sauce, infused with garlic butter and a touch of lime. This one-pan meal is quick, indulgent, and packed with bold flavors—perfect for a restaurant-quality dinner at home.
Prep Time 5 minutes
Cook Time 20 minutes
Total Time 25 minutes
Servings: 4 servings
Course: Main Course
Cuisine: Thai-Inspired

Ingredients
  

For the Salmon:
  • 4 salmon fillets 6 oz each, skin-on for the best texture
  • Salt and pepper to taste
  • 1 tablespoon butter for searing
For the Coconut Curry Sauce:
  • 2 tablespoons butter
  • 4 cloves garlic minced
  • 2 tablespoons red curry paste
  • 1 can 13.5 oz full-fat coconut milk
  • 1 tablespoon fresh lime juice
  • 1/4 teaspoon chili flakes optional, for spice
  • Fresh cilantro for garnish

Method
 

  1. Sear the Salmon
  2. Pat the salmon fillets dry with a paper towel and season both sides with salt and pepper.
  3. Heat 1 tablespoon of butter in a large skillet over medium-high heat.
  4. Once the butter is melted and foamy, add the salmon fillets, skin-side down.
  5. Sear for 3-4 minutes per side until golden brown and cooked through. Remove and set aside.
  6. Create the Coconut Curry Sauce
  7. In the same skillet, add the remaining 2 tablespoons of butter.
  8. Add minced garlic and sauté for about 1 minute until fragrant.
  9. Stir in the red curry paste and cook for 2 minutes, letting the flavors bloom.
  10. Pour in the coconut milk, stirring to combine.
  11. Let the sauce simmer for 5-7 minutes, thickening into a luscious consistency.
  12. Season with lime juice, salt, and pepper to taste.
  13. Bring it All Together
  14. Return the seared salmon fillets to the skillet, nestling them into the curry sauce.
  15. Let them simmer for an additional 5-7 minutes, allowing the flavors to meld.
  16. If you love spice, sprinkle with chili flakes before serving.

Notes

  • For extra richness, use ghee instead of butter.
  • Adjust the spice level by increasing or reducing the red curry paste and chili flakes.
  • Serve with steamed jasmine rice, quinoa, or naan for a heartier meal.
  • Add sautéed bell peppers or spinach for extra texture and nutrients.
  • Store leftovers in an airtight container for up to 2 days; reheat gently to maintain texture.

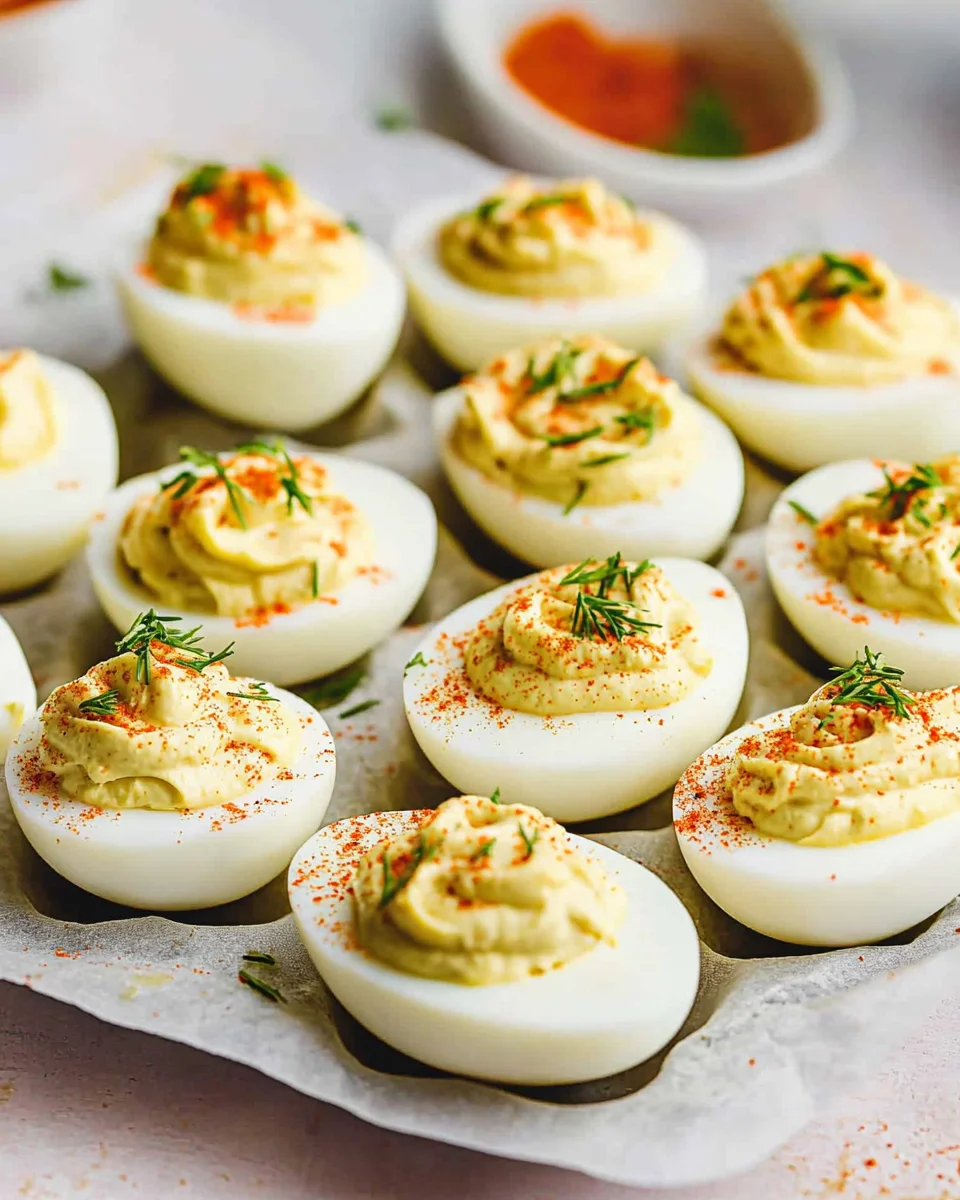
Deviled Eggs: A Classic Bite of Nostalgia and Flavor

A Personal Tale: The Taste of Tradition

There’s something about deviled eggs that instantly transports me back to childhood gatherings. Every Easter, summer picnic, or holiday party, a beautifully arranged platter of these creamy, tangy bites would appear, always disappearing faster than any other dish on the table. My grandmother had a way of making them just right—rich yet light, with a perfect balance of tang and creaminess.

I remember sitting on a high kitchen stool, watching her methodically peel eggs with a patience I admired but never quite mastered. She would mash the yolks with just the right amount of mayonnaise, mustard, and a splash of something mysterious that made her version unforgettable. When I finally got to help fill the egg whites, I felt like I was part of something important, something passed down.

As I grew older, I tried different variations—some with bold spices, others with unique mix-ins—but I always found myself returning to the classic. There’s a reason deviled eggs have remained a beloved staple for generations. They are simple yet sophisticated, humble yet indulgent. Today, I share a version inspired by those family gatherings, a recipe that balances nostalgia with a touch of modern flair.

Why Deviled Eggs are the Ultimate Crowd-Pleaser

Deviled eggs are a time-honored appetizer with a universal appeal. Their creamy texture, slight tang, and savory richness make them irresistible. But beyond their flavor, deviled eggs hold a special place at gatherings because they are:

  • Versatile: Easily customizable with different ingredients and toppings.
  • Make-Ahead Friendly: Perfect for prepping before a party.
  • Nutrient-Dense: Packed with protein, healthy fats, and essential vitamins.
  • Aesthetically Pleasing: Their elegant presentation makes them a star on any appetizer spread.

Whether you’re hosting a family brunch, a holiday dinner, or a casual get-together, deviled eggs fit right in. They can be dressed up for a formal occasion or kept simple for an afternoon snack.

The Secret to Perfect Deviled Eggs

While deviled eggs seem simple, a few key techniques can elevate them from good to unforgettable.

1. The Perfect Hard-Boiled Egg

Overcooked eggs lead to rubbery whites and green-tinged yolks, while undercooked ones make peeling a nightmare. The trick? An ice bath. Boiling the eggs for precisely 11 minutes, then plunging them into ice water, ensures easy peeling and a bright yellow yolk.

2. The Right Balance of Ingredients

Deviled eggs should be creamy, tangy, and well-seasoned. A mix of mayonnaise, mustard, and vinegar creates that perfect blend, while the addition of dill relish and fresh herbs enhances the depth of flavor.

3. Texture Matters

A smooth, airy filling is key. Mashing yolks thoroughly and using a ziplock bag (or piping bag) ensures even, beautiful filling placement. If you want a restaurant-quality texture, consider blending the mixture for extra silkiness.

4. A Touch of Creativity

Classic deviled eggs are delicious, but experimenting with flavors can add a fun twist. Try:

  • Smoky Heat: Add a pinch of smoked paprika and cayenne.
  • Herbaceous Freshness: Mix in extra chives, tarragon, or basil.
  • Savory Indulgence: Crisped bacon bits or crumbled feta add depth.

Ingredients: A Flavor-Packed Lineup

  • 12 eggs
  • 2 tbsp celery stalk, minced (about 1 stalk)
  • 2 tbsp mayo (Homemade or Primal Kitchen’s recommended)
  • 1 tsp yellow mustard
  • 1 tbsp dill relish, drained
  • 1 tbsp fresh dill, finely chopped
  • 1 tsp parsley, finely chopped
  • 2 cloves garlic, minced
  • 1/2 tsp kosher salt
  • 1/4 tsp black pepper
  • 1 tbsp distilled white vinegar
  • Paprika, for garnish

Directions: Crafting the Perfect Bite

  1. Boil the Eggs:
    • Fill a large pot halfway with water and bring to a boil.
    • Carefully lower the eggs into the water and boil for 11 minutes.
    • Prepare an ice bath (a large bowl filled with ice water).
    • After boiling, transfer eggs into the ice bath and let them cool for 10 minutes.
  2. Prepare the Filling:
    • In a bowl, mix together celery, mayo, mustard, dill relish, dill, parsley, garlic, salt, pepper, and vinegar until well combined.
  3. Assemble the Deviled Eggs:
    • Peel the cooled eggs and slice them lengthwise.
    • Carefully scoop out the yolks and add them to the prepared filling mixture.
    • Using a fork, mash the yolks and stir until the mixture is smooth.
  4. Pipe & Garnish:
    • Transfer the filling into a sandwich-sized ziplock bag and snip a small corner off the bottom.
    • Gently squeeze the filling into each egg white cavity.
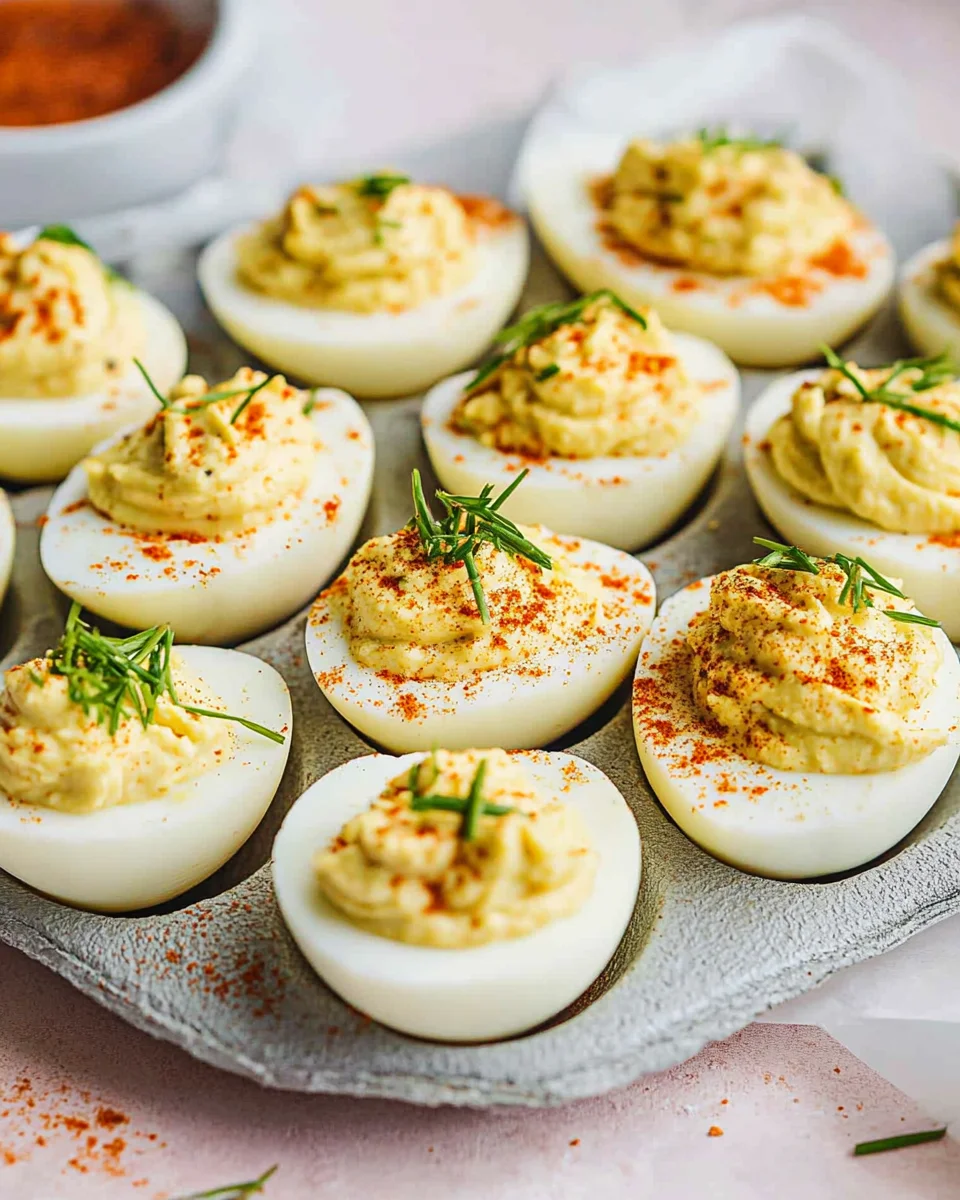
    • Sprinkle with paprika for a finishing touch.
  5. Serve & Enjoy!
    • These can be made ahead and stored in an airtight container in the fridge for up to 3-4 days.

Nutritional Snapshot (Approximate per Egg)

  • Calories: ~70
  • Protein: ~6g
  • Fat: ~5g
  • Carbohydrates: ~1g
  • Sodium: Varies based on salt and relish

Enjoy these creamy, tangy, and utterly delicious deviled eggs at your next gathering!

Common FAQs About Deviled Eggs

1. Can I Make Deviled Eggs Ahead of Time?

Absolutely! Deviled eggs can be made a day in advance and stored in an airtight container in the refrigerator. However, for the freshest taste and texture, it’s best to keep the filling separate and pipe it into the egg whites just before serving.

2. How Long Do Deviled Eggs Last?

Properly stored, deviled eggs remain fresh for 3-4 days in the refrigerator. However, since they contain mayonnaise and eggs, they should not sit out at room temperature for more than 2 hours.

3. What’s the Best Way to Peel Hard-Boiled Eggs?

Peeling eggs can be frustrating, but these tips help:

  • Use older eggs (7-10 days old) as fresh eggs are harder to peel.
  • After boiling, transfer eggs immediately to an ice bath for at least 10 minutes.
  • Gently tap the egg on a hard surface, then roll it to loosen the shell.
  • Peel under running water to help slide off stubborn bits.

4. Can I Use Greek Yogurt Instead of Mayonnaise?

Yes! If you want a lighter version, substituting Greek yogurt for mayo works well. It adds a tangy twist while keeping the creamy consistency.

5. How Do I Prevent Deviled Eggs from Tasting Too Dry?

If the filling seems dry, add a splash more mayonnaise or a tiny bit of pickle juice. This restores creaminess without making the mixture too heavy.

6. Why Are They Called “Deviled” Eggs?

The term “deviled” dates back to the 18th century, referring to foods that were heavily spiced. While today’s deviled eggs are not necessarily spicy, the name stuck due to their seasoned filling.

Ways to Elevate Your Deviled Eggs Presentation

Since deviled eggs are often served at gatherings, a little extra effort in presentation can make them stand out.

  • Garnish Creatively: A sprinkle of paprika, fresh herbs, or microgreens adds a pop of color.
  • Use a Decorative Piping Tip: Instead of spooning the filling, use a star-shaped tip to create an elegant swirl.
  • Add a Crunch: A tiny slice of radish, crispy bacon bits, or toasted breadcrumbs adds texture.
  • Serve on a Unique Platter: A deviled egg tray or a bed of greens can make them even more visually appealing.

The Deviled Egg Legacy: A Dish That Brings People Together

Deviled eggs aren’t just an appetizer; they’re a conversation starter. They evoke nostalgia, bring families together, and fit seamlessly into any occasion. Whether it’s a backyard barbecue, an Easter brunch, or a holiday dinner, deviled eggs are a dish that never goes out of style.

Food has the power to connect us—to past memories, to traditions, and to loved ones. Every time I make deviled eggs, I think of my grandmother’s careful hands, the laughter around the dinner table, and the joy of sharing something made with love.

So next time you make a batch, take a moment to appreciate their simplicity, their history, and the people you’re sharing them with. Because the best recipes aren’t just about flavor—they’re about the memories they create.

aiting

Deviled Eggs: A Classic Bite of Nostalgia and Flavor

These Ultimate Tangy Deviled Eggs are packed with bold flavors and a creamy, zesty filling. Perfect for parties, gatherings, or just a protein-packed snack, these deviled eggs combine fresh herbs, tangy relish, and a hint of garlic for a delicious twist on a classic favorite!
Prep Time 15 minutes
Cook Time 11 minutes
Total Time 26 minutes
Servings: 12 servings (24 deviled eggs)
Course: Appetizer
Cuisine: American

Ingredients
  

  • 12 eggs
  • 2 tbsp celery stalk minced (about 1 stalk)
  • 2 tbsp mayo Homemade or Primal Kitchen’s recommended
  • 1 tsp yellow mustard
  • 1 tbsp dill relish drained
  • 1 tbsp fresh dill finely chopped
  • 1 tsp parsley finely chopped
  • 2 cloves garlic minced
  • 1/2 tsp kosher salt
  • 1/4 tsp black pepper
  • 1 tbsp distilled white vinegar
  • Paprika for garnish

Method
 

  1. Step 1: Boil the Eggs
  2. Fill a large pot halfway with water and bring to a boil.
  3. Carefully lower the eggs into the water and boil for 11 minutes.
  4. Prepare an ice bath (a large bowl filled with ice water).
  5. After boiling, transfer eggs into the ice bath and let them cool for 10 minutes.
Step 2: Prepare the Filling
  1. In a bowl, mix together celery, mayo, mustard, dill relish, dill, parsley, garlic, salt, pepper, and vinegar until well combined.
Step 3: Assemble the Deviled Eggs
  1. Peel the cooled eggs and slice them lengthwise.
  2. Carefully scoop out the yolks and add them to the prepared filling mixture.
  3. Using a fork, mash the yolks and stir until the mixture is smooth.
Step 4: Pipe & Garnish
  1. Transfer the filling into a sandwich-sized ziplock bag and snip a small corner off the bottom.
  2. Gently squeeze the filling into each egg white cavity.
  3. Sprinkle with paprika for a finishing touch.
Step 5: Serve & Enjoy!
  1. These can be made ahead and stored in an airtight container in the fridge for up to 3-4 days.

Notes

  • Want extra tang? Add 1 tsp Dijon mustard for an extra punch of flavor.
  • For a spicy kick, mix in a dash of cayenne pepper or hot sauce to the filling.
  • Make it extra creamy! Substitute half of the mayo with Greek yogurt for a lighter version.
  • Serving Tip: Arrange on a platter with fresh herbs or microgreens for a decorative touch.

Easter Egg Cake: A Festive Delight for Your Spring Celebration

A Cake That Brings Back Childhood Memories

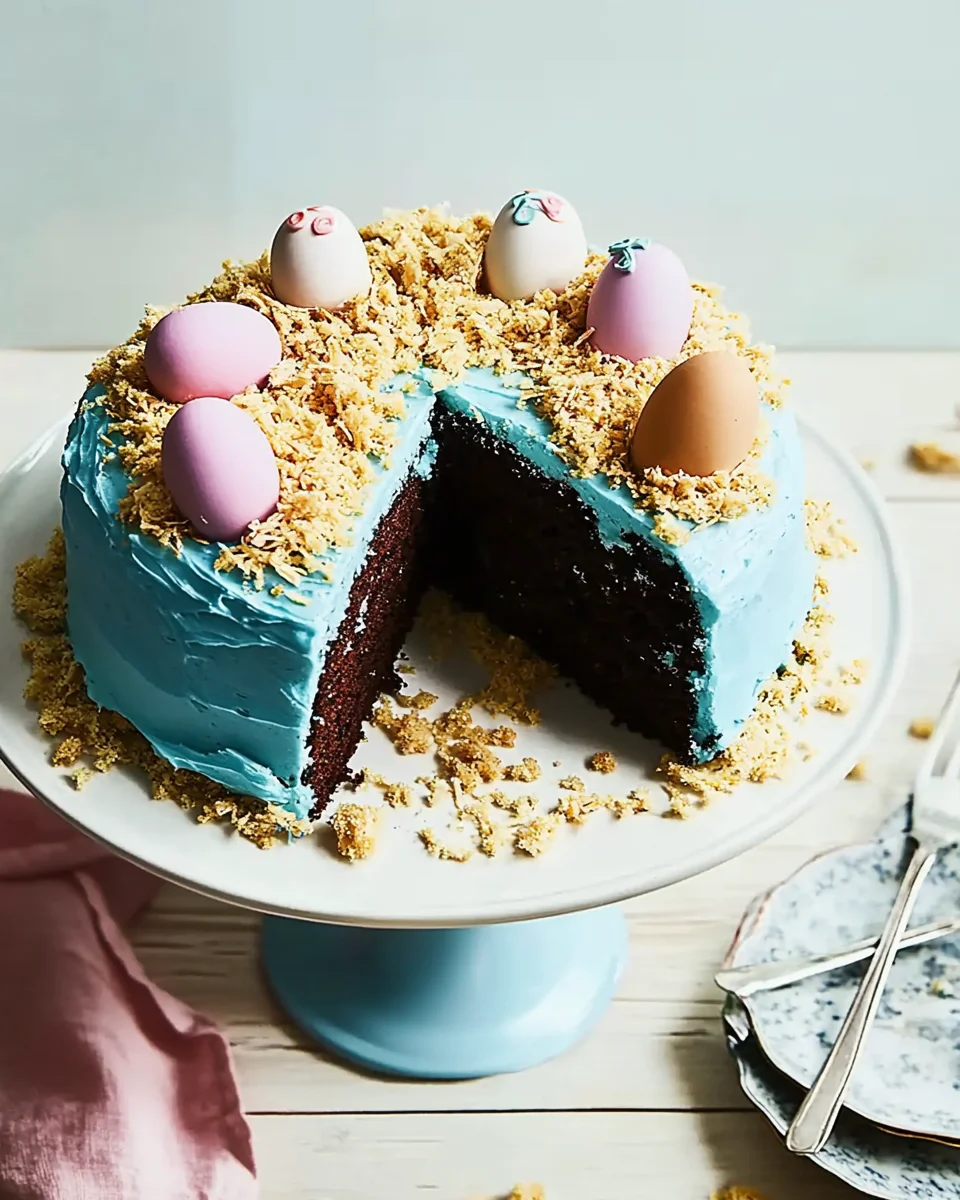
When I think of Easter, I’m instantly transported back to my grandmother’s cozy kitchen, where the scent of vanilla, chocolate, and freshly toasted coconut filled the air. As children, my siblings and I would gather around her large wooden table, eyes wide with excitement, waiting for our turn to help decorate the Easter cake. It wasn’t just any cake—it was a masterpiece, a tradition, and a symbol of the joy that Easter brought to our family.

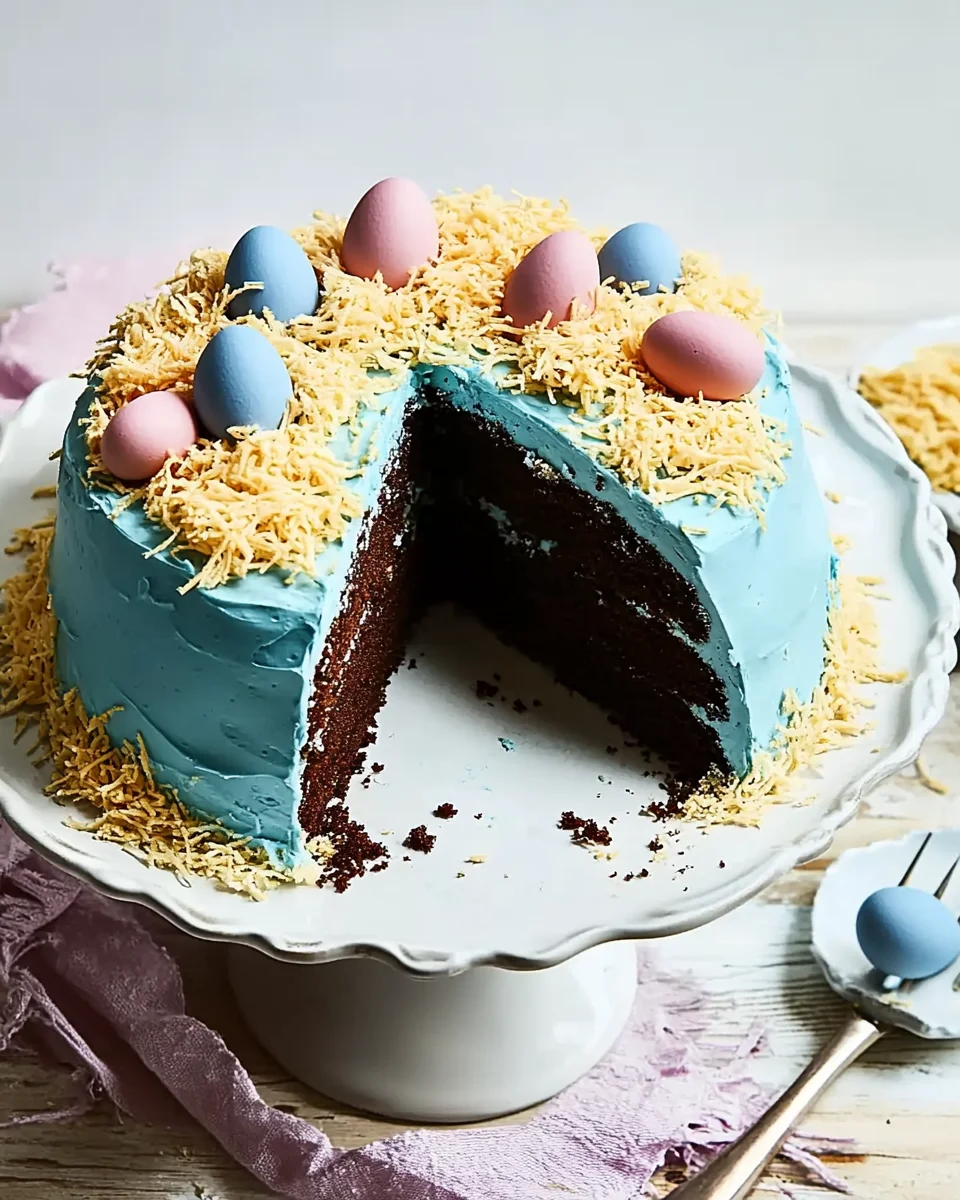
We’d watch in awe as she layered the soft, chocolate cake with rich cream cheese frosting, carefully smoothing each layer with the precision only years of experience could perfect. Then came the magic—she would tint the frosting the perfect shade of sky blue, sprinkle toasted coconut to form a nest, and finally, let us place colorful candy eggs on top. It wasn’t just about baking; it was about creating something beautiful together, a tradition we cherished year after year.

Now, every time I bake an Easter Egg Cake, I relive those moments. It’s more than a dessert—it’s a celebration of love, family, and the simple joys of spring.

Why the Easter Egg Cake Stands Out

Easter baking is a tradition that goes back centuries. While carrot cake and coconut cake often take center stage during Easter celebrations, this Easter Egg Cake offers something truly unique—a whimsical, festive, and visually stunning dessert that’s surprisingly easy to make.

What makes this cake special?

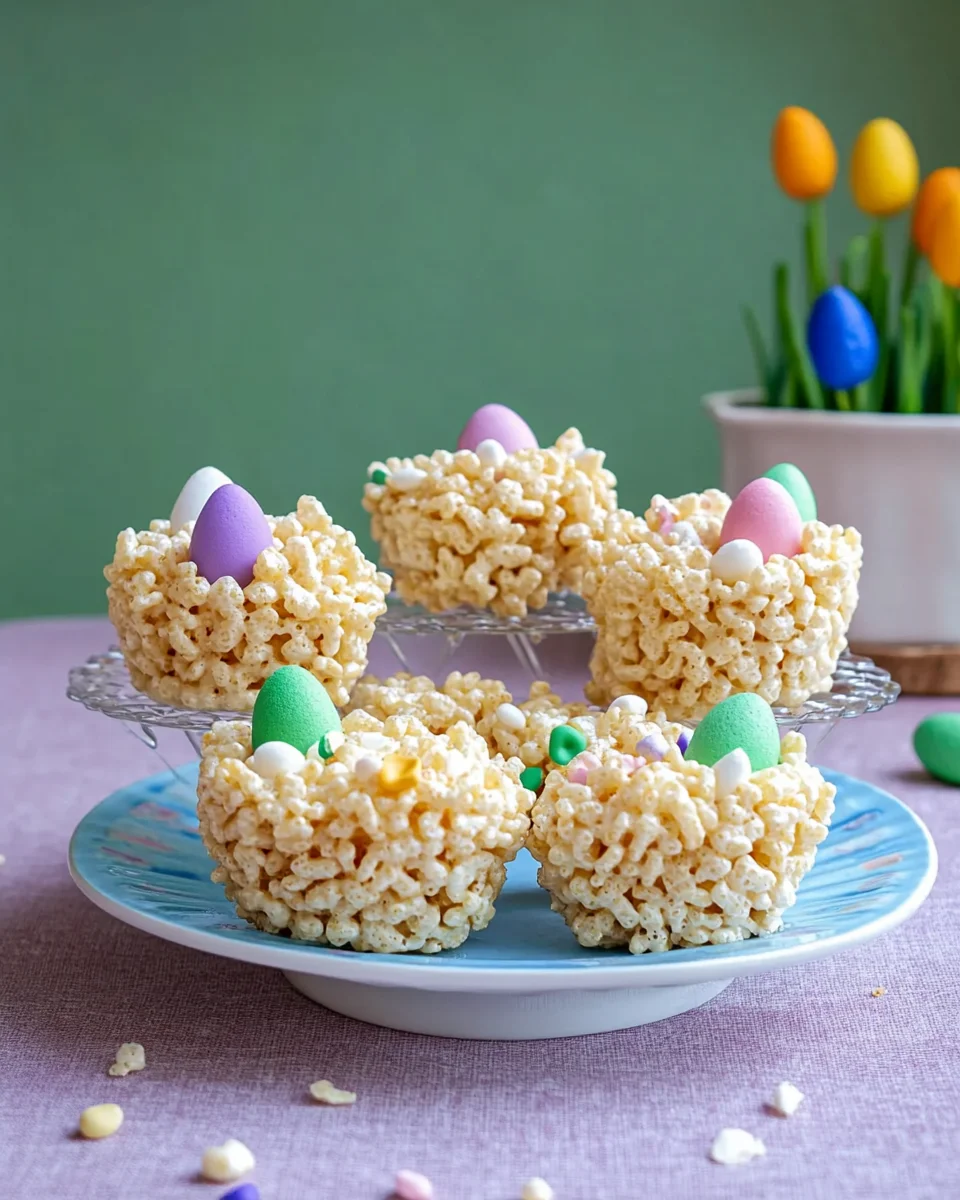
  • A Feast for the Eyes: The delicate blue frosting, coconut nest, and pastel candy eggs make it a centerpiece-worthy creation.
  • Flavor Perfection: A rich, moist chocolate cake paired with a smooth, tangy cream cheese frosting creates the perfect balance of sweetness.
  • A Symbol of the Season: Eggs have long been associated with Easter as a symbol of renewal and new beginnings. Incorporating them into the cake design adds meaning to the celebration.
  • Beginner-Friendly Elegance: Despite its intricate appearance, the use of a high-quality cake mix makes it a stress-free yet show-stopping dessert.

The Art of Decorating: Tips for the Perfect Easter Egg Cake

Creating an Easter Egg Cake is as much about the artistry as it is about the baking. Here are some tips to make your cake truly special:

1. Achieving the Perfect Shade of Blue

The frosting’s dreamy blue hue is created using food coloring gel, which provides a more vibrant and smooth color than liquid dyes. Mix sky blue and royal blue for a soft, Easter-appropriate tone. If you want a more pastel look, start with a tiny amount of food coloring and gradually add more.

2. Toasting the Coconut for a Nest-Like Texture

Lightly toasting shredded coconut brings out a nutty aroma and a golden-brown color that perfectly mimics a bird’s nest. Spread the coconut on a baking sheet and toast it in the oven at 325°F for 5-7 minutes, stirring occasionally.

3. Creative Easter Egg Decorations

While Whoppers Robin Eggs are a classic choice, you can mix in different textures and colors by using:

  • Speckled candy eggs for a realistic look
  • Mini chocolate eggs for a rich indulgence
  • Jelly beans for a pop of bright color

4. Smooth Frosting for a Professional Finish

To get a bakery-style smooth finish, chill the cake in the refrigerator for 30 minutes after the first layer of frosting. Then, apply the final coat to create a flawless look. A bench scraper or an offset spatula helps achieve a polished appearance.

Ingredients: Chocolate Bliss Base

  • Cooking spray
  • 4 large eggs
  • 1 1/3 cups water
  • 2/3 cup vegetable oil
  • 2 (12.75-oz.) packages double chocolate cake mix (such as Ghirardelli)

Ingredients: Dreamy Frosting & Decorations

  • 2 (8-oz.) packages cream cheese, softened
  • 1/2 cup (4 oz.) unsalted butter, softened
  • 8 cups (about 32 oz.) powdered sugar
  • 2 teaspoons vanilla extract
  • 3 drops sky blue food coloring gel
  • 2 drops royal blue food coloring gel
  • 1 cup unsweetened shredded coconut, toasted
  • Candied egg-shaped malted milk balls (such as Whoppers Robin Eggs)

Directions: Crafting the Masterpiece

Step 1: Bake the Cake Layers

  1. Preheat oven to 350°F. Lightly grease three 8-inch round cake pans with cooking spray, line with parchment paper, and grease again.
  2. In a stand mixer, beat eggs, water, and vegetable oil on medium speed for 1 minute.
  3. Add cake mix and beat on low until combined, then increase speed to medium-high for 2 minutes until smooth.
  4. Divide batter evenly into prepared pans and bake for 18-22 minutes, until a toothpick inserted comes out clean.
  5. Let cakes cool in pans for 5 minutes, then transfer to wire racks to cool completely (about 30 minutes).

Step 2: Whip Up the Frosting

  1. In a stand mixer, beat cream cheese and butter on medium-high until fluffy (about 3 minutes).
  2. Reduce speed to medium-low and gradually add powdered sugar, ½ cup at a time, mixing well after each addition (about 4 minutes total).
  3. Add vanilla and food coloring, then beat on medium-high for 2 more minutes until smooth and airy.

Step 3: Assemble the Cake

  1. Place one cake layer on a serving plate or stand and spread 1 cup frosting evenly on top.
  2. Repeat with the second cake layer and another cup of frosting.
  3. Place the final cake layer on top and cover the top with 1 cup frosting.
  4. Spread 2 cups frosting evenly around the sides, smoothing it out.
  5. Refrigerate for 30 minutes, then apply the remaining frosting for a smooth finish.

Step 4: Add the Easter Magic

  1. Arrange ¼ cup shredded coconut in the center of the cake to create a “nest.”
  2. Sprinkle the remaining ¾ cup coconut around the cake base.
  3. Nestle the candied eggs inside the coconut nest on top.

Nutritional Info (Per Slice, Approximate)

  • Calories: 520
  • Total Fat: 24g
  • Saturated Fat: 10g
  • Carbohydrates: 72g
  • Sugar: 60g
  • Protein: 5g

This cake is a festive treat that will have everyone at your Easter gathering reaching for seconds. Enjoy!

FAQs About Easter Egg Cake

1. Can I Make This Cake in Advance?

Absolutely! You can bake the cake layers a day or two in advance and store them wrapped in plastic wrap at room temperature. The frosting can also be prepared ahead and stored in the refrigerator. Simply bring it to room temperature and re-whip before frosting the cake.

2. Can I Use a Different Cake Flavor?

While the recipe uses a rich double chocolate cake mix, you can experiment with other flavors like:

  • Vanilla cake for a lighter option
  • Lemon cake for a fresh, citrusy twist
  • Coconut cake to enhance the tropical notes

3. What If I Don’t Have a Stand Mixer?

No problem! A hand mixer works just as well. If mixing by hand, ensure you beat the frosting until it’s light and fluffy to achieve the perfect consistency.

4. How Do I Store the Cake?

Since this cake contains cream cheese frosting, it should be stored in the refrigerator. Cover it with plastic wrap or place it in an airtight container. Let it sit at room temperature for 20-30 minutes before serving to soften the frosting.

5. Can I Make It Gluten-Free?

Yes! Simply use a gluten-free chocolate cake mix and ensure all other ingredients are gluten-free. The texture and taste remain just as delicious.

How to Elevate Your Easter Egg Cake Presentation

If you want to make your cake stand out even more, here are a few ways to enhance its presentation:

  • Gold Dust Accents: Lightly brush edible gold dust onto some of the candy eggs for a touch of elegance.
  • Fresh Flowers: Decorate the base of the cake stand with fresh spring flowers like tulips, daisies, or baby’s breath.
  • Cake Topper: A small “Happy Easter” sign or bunny figurines can add charm to the final presentation.
  • Layered Coconut: Use different shades of toasted coconut to create an ombré effect around the cake.

The Joy of Easter Baking

There’s something truly special about baking for the holidays—it’s not just about the food but the memories created along the way. Whether you’re making this cake for a family gathering, a church celebration, or simply as a way to welcome spring, the Easter Egg Cake is a reminder of the simple joys of baking and the beauty of tradition.

As you whip up this cake, take a moment to embrace the experience. Let the scent of chocolate and vanilla fill your kitchen. Laugh as you frost the layers and carefully place each candy egg. Share the joy with your loved ones, just as I did in my grandmother’s kitchen all those years ago.

Because in the end, the best part of baking isn’t just the cake—it’s the love and tradition baked into every bite.

Happy Easter and happy baking!

aiting

Easter Egg Cake: A Festive Delight for Your Spring Celebration

A stunning showstopper, this Easter Egg Cake is the perfect festive centerpiece. With rich chocolate layers, luscious cream cheese frosting, and a whimsical coconut nest, it’s as delicious as it is beautiful. Perfect for Easter celebrations or any springtime gathering!
Prep Time 25 minutes
Cook Time 22 minutes
Total Time 1 hour
Servings: 12 servings
Course: Dessert
Cuisine: American

Ingredients
  

For the Chocolate Cake Base:
  • Cooking spray
  • 4 large eggs
  • 1 1/3 cups water
  • 2/3 cup vegetable oil
  • 2 12.75-oz. packages double chocolate cake mix (such as Ghirardelli)
For the Creamy Frosting & Decorations:
  • 2 8-oz. packages cream cheese, softened
  • 1/2 cup 4 oz. unsalted butter, softened
  • 8 cups about 32 oz. powdered sugar
  • 2 teaspoons vanilla extract
  • 3 drops sky blue food coloring gel
  • 2 drops royal blue food coloring gel
  • 1 cup unsweetened shredded coconut toasted
  • Candied egg-shaped malted milk balls such as Whoppers Robin Eggs

Method
 

  1. Step 1: Bake the Cake Layers
  2. Preheat oven to 350°F (175°C). Lightly grease three 8-inch round cake pans with cooking spray, line with parchment paper, and grease again.
  3. In a stand mixer, beat eggs, water, and vegetable oil on medium speed for 1 minute.
  4. Add cake mix and beat on low until combined, then increase speed to medium-high for 2 minutes until smooth.
  5. Divide batter evenly into prepared pans and bake for 18-22 minutes, until a toothpick inserted comes out clean.
  6. Let cakes cool in pans for 5 minutes, then transfer to wire racks to cool completely (about 30 minutes).
Step 2: Whip Up the Frosting
  1. In a stand mixer, beat cream cheese and butter on medium-high until fluffy (about 3 minutes).
  2. Reduce speed to medium-low and gradually add powdered sugar, ½ cup at a time, mixing well after each addition (about 4 minutes total).
  3. Add vanilla and food coloring, then beat on medium-high for 2 more minutes until smooth and airy.
Step 3: Assemble the Cake
  1. Place one cake layer on a serving plate or stand and spread 1 cup frosting evenly on top.
  2. Repeat with the second cake layer and another cup of frosting.
  3. Place the final cake layer on top and cover the top with 1 cup frosting.
  4. Spread 2 cups frosting evenly around the sides, smoothing it out.
  5. Refrigerate for 30 minutes, then apply the remaining frosting for a smooth finish.
Step 4: Add the Easter Magic
  1. Arrange ¼ cup shredded coconut in the center of the cake to create a “nest.”
  2. Sprinkle the remaining ¾ cup coconut around the cake base.
  3. Nestle the candied eggs inside the coconut nest on top.

Notes

  • Want extra flavor? Add a teaspoon of almond extract to the frosting for a delightful twist.
  • Prefer a different color? Swap the blue food coloring for pastel pink, purple, or green for a different festive look.
  • Make ahead! Bake the cake layers a day in advance and refrigerate before frosting.
  • Storage Tip: Keep leftover cake covered in the fridge for up to 3 days.

The Comfort of a Home-Cooked Meal: Loaded Potato Ranch Chicken Casserole

A Recipe That Feels Like Home

Some recipes have a way of bringing warmth to the table, not just through their flavors but through the memories they create. For me, casseroles have always been a symbol of comfort, a reminder of childhood evenings spent gathered around the dinner table with family. Growing up, my mother would often make hearty, oven-baked meals, filling our home with an irresistible aroma that could turn even the worst day into something better.

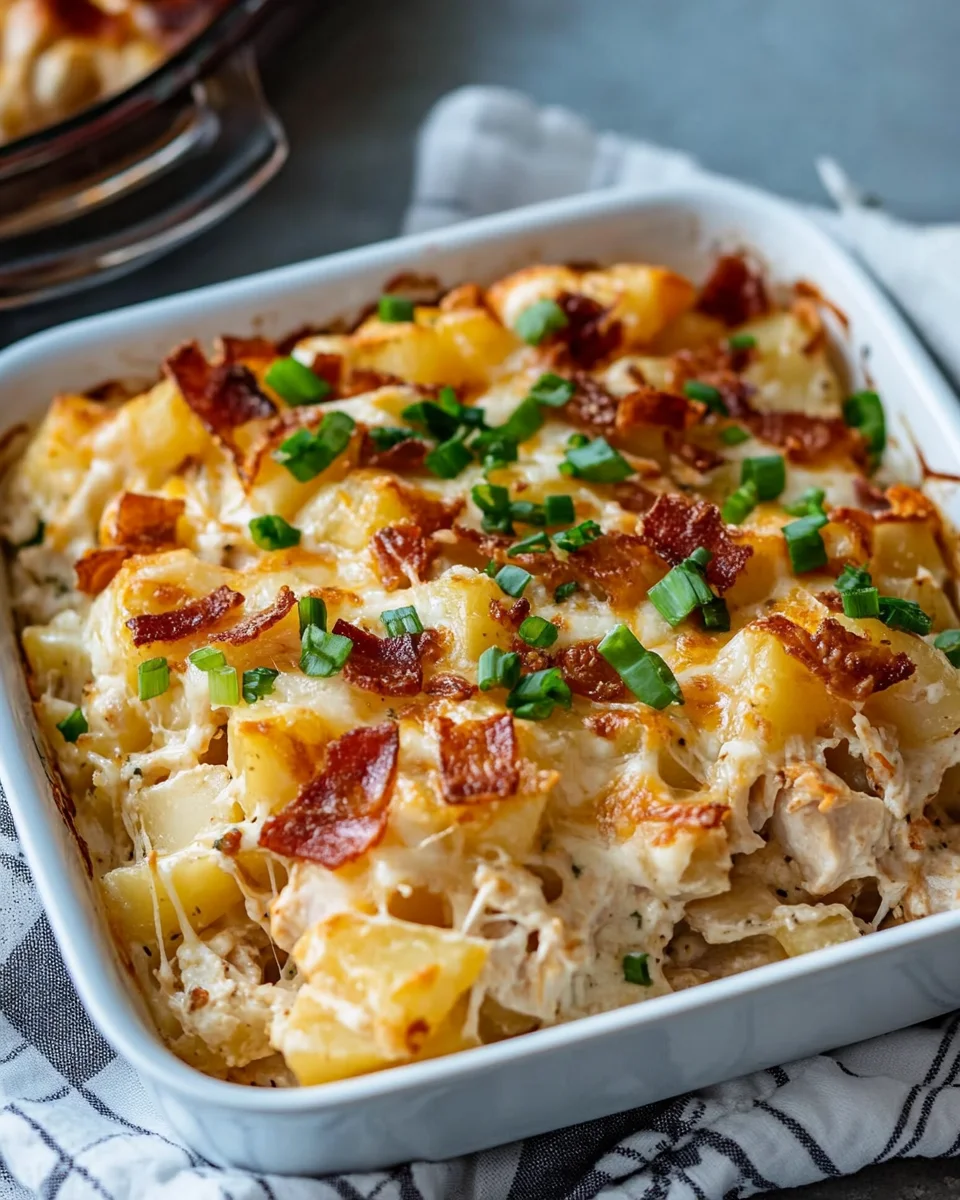
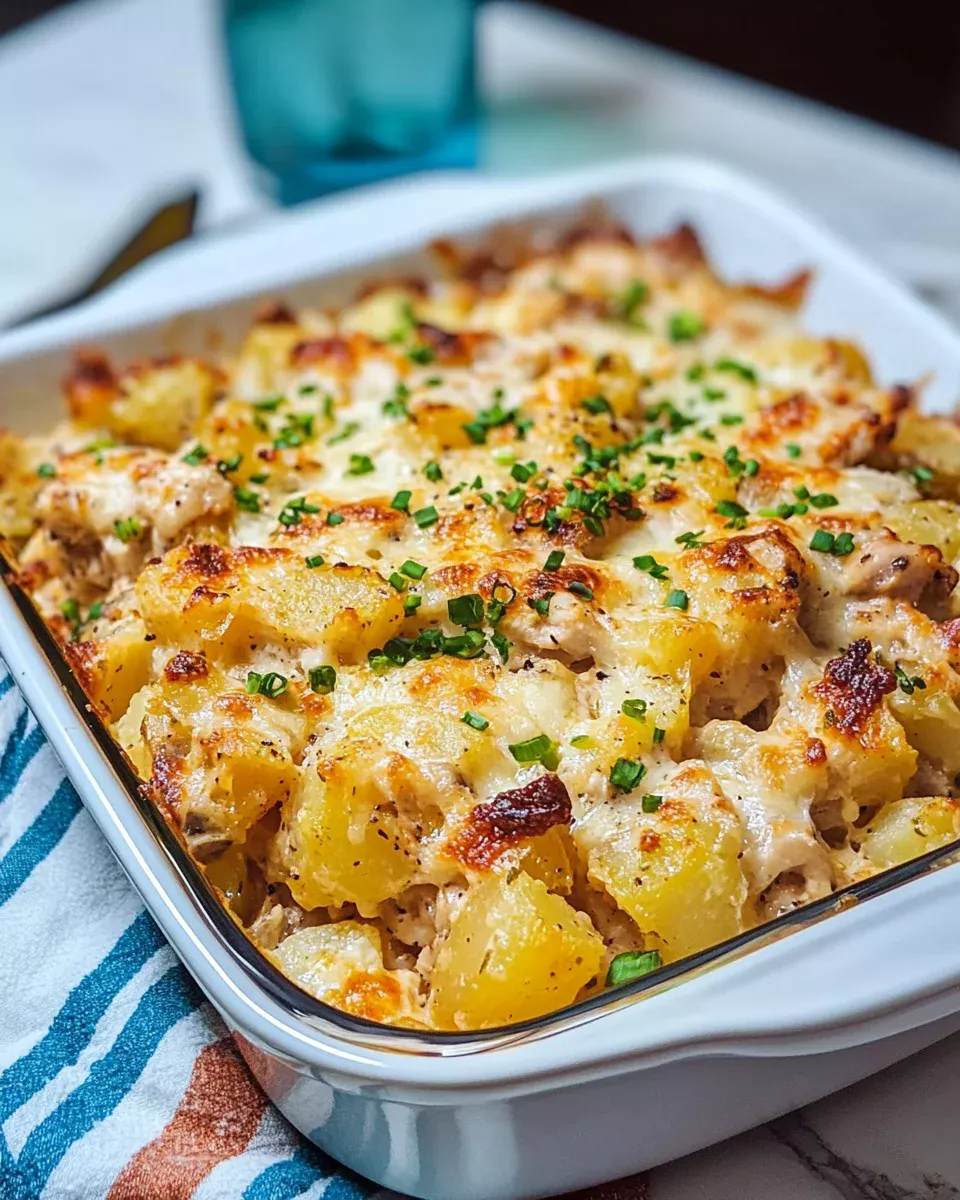
One of my favorites was always a chicken and potato bake—simple yet rich in flavor, the kind of dish that made you want to go back for seconds (or thirds). Years later, when I started cooking for my own family, I found myself longing for that same feeling of warmth and nostalgia. That’s when I stumbled upon the perfect twist: Loaded Potato Ranch Chicken Casserole. With its creamy ranch dressing, crispy bacon, and melted cheese over tender chicken and golden potatoes, it quickly became a household favorite.

If you’re looking for a meal that brings people together, that fills your kitchen with an inviting aroma and keeps everyone coming back for more, this casserole is the answer.

Why This Casserole Stands Out

The Perfect Balance of Flavors

What makes this dish irresistible is the way it combines contrasting flavors and textures. The tangy ranch dressing seeps into the potatoes and chicken, ensuring every bite is rich and flavorful. The smokiness of the bacon enhances the dish, while the melted cheese ties everything together with its gooey, comforting goodness.

Easy, One-Dish Meal

Casseroles are known for their convenience, and this one is no exception. With just a few simple steps, you get a well-balanced meal that requires minimal cleanup. Everything is baked in one dish, making it an ideal choice for busy weeknights or when you need a stress-free meal that still feels homemade.

Customizable to Your Taste

One of the best things about this recipe is its versatility. Whether you prefer extra spice, different cheeses, or additional veggies, there are plenty of ways to make this dish your own.

  • Add a kick: Sprinkle some red pepper flakes or a dash of hot sauce into the mix.
  • Switch up the cheese: While a Mexican blend works wonderfully, you can also try cheddar, Monterey Jack, or even pepper jack for more heat.
  • Make it healthier: Swap regular ranch for a light version, use turkey bacon instead of pork, or add extra vegetables like bell peppers or broccoli for added nutrition.

Serving Suggestions: What to Pair It With

While this casserole is satisfying on its own, pairing it with the right side dishes can elevate the meal. Here are a few great options:

  • Fresh Garden Salad – A crisp, refreshing salad with a light vinaigrette balances out the richness of the casserole.
  • Steamed Vegetables – Broccoli, asparagus, or green beans with a squeeze of lemon can complement the dish beautifully.
  • Garlic Bread – Warm, buttery garlic bread adds an extra layer of indulgence to the meal.
  • Coleslaw – The crunchiness and tanginess of coleslaw provide a nice contrast to the creamy and cheesy texture of the casserole.

Storage and Meal Prep Tips

One of the best parts about making this dish is that it stores well, making it perfect for leftovers.

Refrigerating:

Allow the casserole to cool completely before transferring it to an airtight container. It will stay fresh in the fridge for up to four days.

Freezing:

If you want to make this meal ahead of time, you can freeze it for up to four months. Be sure to wrap it tightly in plastic wrap and aluminum foil or store it in a freezer-safe container. To reheat, thaw it overnight in the fridge and bake at 350°F until warmed through.

Reheating:

To retain the best texture, reheat in the oven at 350°F for 15–20 minutes. If you’re in a hurry, the microwave works too, but the potatoes may soften more than desired.

Gather Your Goodies (Ingredients)

  • 4 cups Yukon gold potatoes, unpeeled and diced
  • 2 lb boneless, skinless chicken breast, cut into 1-inch cubes
  • ⅔ cup Ranch dressing, divided
  • 1 tablespoon dried parsley
  • 1 teaspoon dried oregano
  • 1 teaspoon paprika
  • Salt and pepper to taste
  • 1 cup cooked and crumbled bacon
  • 1 ½ cups shredded Mexican cheese blend
  • ½ cup green onions, chopped

Let’s Get Cooking (Directions)

Step 1: Roast Those Potatoes

  1. Preheat your oven to 450°F.
  2. In a medium-sized bowl, toss diced potatoes with ⅓ cup Ranch dressing, parsley, oregano, paprika, salt, and pepper.
  3. Spread the potatoes evenly in a 9×13-inch casserole dish and bake uncovered for 30 minutes, stirring every 10 minutes.

Step 2: Prep the Chicken

  1. Reduce oven temperature to 400°F.
  2. In the same bowl, mix the diced chicken with the remaining ⅓ cup Ranch dressing, salt, and pepper.
  3. Remove the potatoes from the oven and layer the chicken on top. Cover with foil and bake for 20 minutes.

Step 3: Load It Up!

  1. Take the dish out, sprinkle crumbled bacon and shredded cheese over the chicken.
  2. Return to the oven uncovered and bake for another 10 minutes until the cheese is melted and bubbly.
  3. Garnish with chopped green onions before serving.

Fuel for Your Body (Nutritional Info Per Serving)

  • Calories: 636
  • Total Fat: 30g
  • Saturated Fat: 10g
  • Trans Fat: 0g
  • Unsaturated Fat: 18g
  • Cholesterol: 175mg
  • Sodium: 736mg
  • Carbohydrates: 27g
  • Fiber: 3g
  • Sugar: 3g
  • Protein: 61g

Enjoy your ranch-packed, bacon-loaded, cheesy chicken casserole!

Frequently Asked Questions

1. Can I use a different type of potato?

Absolutely! While Yukon Gold potatoes provide a creamy and slightly buttery texture, you can also use russet potatoes for a fluffier interior or red potatoes for a firmer bite.

2. Can I make this casserole ahead of time?

Yes! You can prepare the casserole up until the baking stage, then cover and refrigerate it for up to 24 hours. When ready to bake, simply add a few extra minutes to the cooking time to ensure everything is heated through.

3. Is there a way to make this recipe dairy-free?

Definitely! Use a dairy-free ranch dressing, swap the cheese for a plant-based alternative, and ensure that your bacon choice is dairy-free.

4. What if I don’t have ranch dressing?

You can easily make a homemade version by mixing mayonnaise, sour cream, garlic powder, onion powder, dried dill, and a splash of lemon juice.

5. Can I use leftover chicken instead of raw?

Yes! If you have cooked chicken on hand, simply dice it and add it to the dish during the final 10–15 minutes of baking. This way, it won’t dry out while reheating.

6. Can I make this in a slow cooker?

Yes, though the texture will be slightly different. Layer the potatoes on the bottom, followed by the chicken, seasonings, and ranch dressing. Cook on low for 6–7 hours or high for 3–4 hours, then add the cheese and bacon in the last 30 minutes.

A Meal That Brings Everyone Together

There’s something truly special about a meal that brings people together, and this Loaded Potato Ranch Chicken Casserole does exactly that. It’s the kind of dish that reminds us of family dinners, cozy weekends, and the simple joys of home-cooked comfort food.

Whether you’re making it for a busy weeknight, a family gathering, or simply craving something indulgent, this casserole won’t disappoint. With its creamy ranch dressing, crispy bacon, golden potatoes, and melted cheese, every bite is pure satisfaction. And the best part? It’s easy to prepare, adaptable to your taste, and perfect for leftovers.

So the next time you’re looking for a dish that’s as comforting as it is delicious, give this casserole a try. You might just find that it becomes a staple in your home, just like it did in mine.

aiting

The Comfort of a Home-Cooked Meal: Loaded Potato Ranch Chicken Casserole

Indulge in this Ranch-Infused Loaded Chicken Casserole, a comforting and flavor-packed dish featuring tender chicken, crispy bacon, golden roasted potatoes, and a cheesy, ranch-infused goodness. This easy-to-make casserole is perfect for busy weeknights or when you need a satisfying, crowd-pleasing meal!
Prep Time 10 minutes
Cook Time 1 hour
Total Time 1 hour 10 minutes
Servings: 6 servings
Course: Main Course
Cuisine: American

Ingredients
  

  • 4 cups Yukon gold potatoes unpeeled and diced
  • 2 lb boneless skinless chicken breast, cut into 1-inch cubes
  • cup Ranch dressing divided
  • 1 tablespoon dried parsley
  • 1 teaspoon dried oregano
  • 1 teaspoon paprika
  • Salt and pepper to taste
  • 1 cup cooked and crumbled bacon
  • 1 ½ cups shredded Mexican cheese blend
  • ½ cup green onions chopped

Method
 

  1. Step 1: Roast Those Potatoes
  2. Preheat your oven to 450°F (230°C).
  3. In a medium-sized bowl, toss diced potatoes with ⅓ cup Ranch dressing, parsley, oregano, paprika, salt, and pepper.
  4. Spread the potatoes evenly in a 9×13-inch casserole dish and bake uncovered for 30 minutes, stirring every 10 minutes.
Step 2: Prep the Chicken
  1. 4. Reduce oven temperature to 400°F (200°C).
  2. 5. In the same bowl, mix the diced chicken with the remaining ⅓ cup Ranch dressing, salt, and pepper.
  3. 6. Remove the potatoes from the oven and layer the chicken on top. Cover with foil and bake for 20 minutes.
Step 3: Load It Up!
  1. 7. Take the dish out, sprinkle crumbled bacon and shredded cheese over the chicken.
  2. 8. Return to the oven uncovered and bake for another 10 minutes, until the cheese is melted and bubbly.
  3. 9. Garnish with chopped green onions before serving.

Notes

  • Want extra crispiness? Broil for the last 2-3 minutes to give the cheese a golden-brown finish.
  • Swap the protein! Try this with boneless chicken thighs or even ground turkey for a different take.
  • Make it spicy! Add red pepper flakes or diced jalapeños for a kick.
  • Storage Tip: Store leftovers in an airtight container in the fridge for up to 4 days.

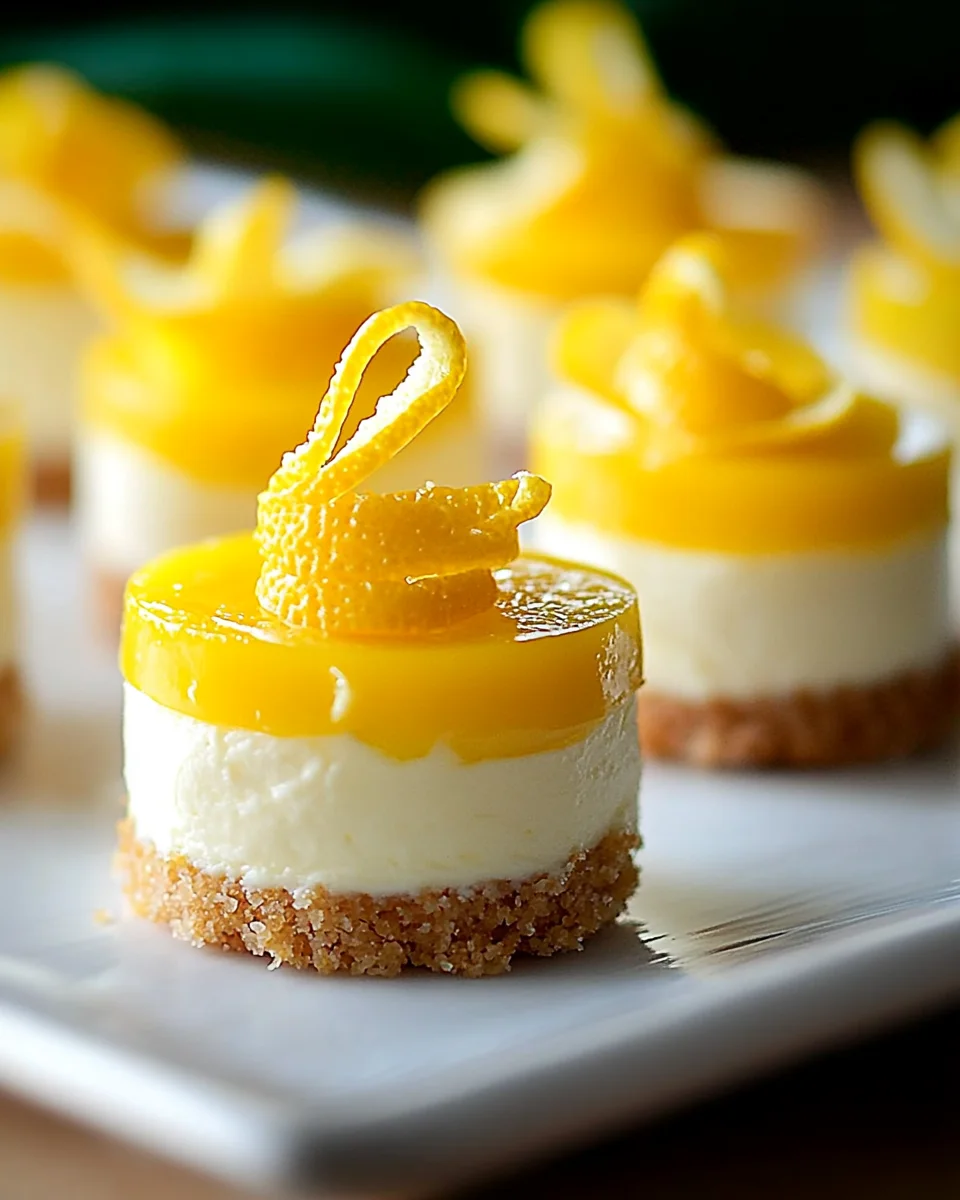
Mini Lemon Cheesecakes: A Bite of Sunshine in Every Bite

A Taste of Home: My First Encounter with Mini Lemon Cheesecakes

Growing up, my grandmother’s kitchen always smelled of something wonderful—warm vanilla, freshly squeezed citrus, and the irresistible scent of buttery graham cracker crust baking in the oven. Every weekend, she would let me help her make desserts, but one day, she introduced me to something new—mini lemon cheesecakes.

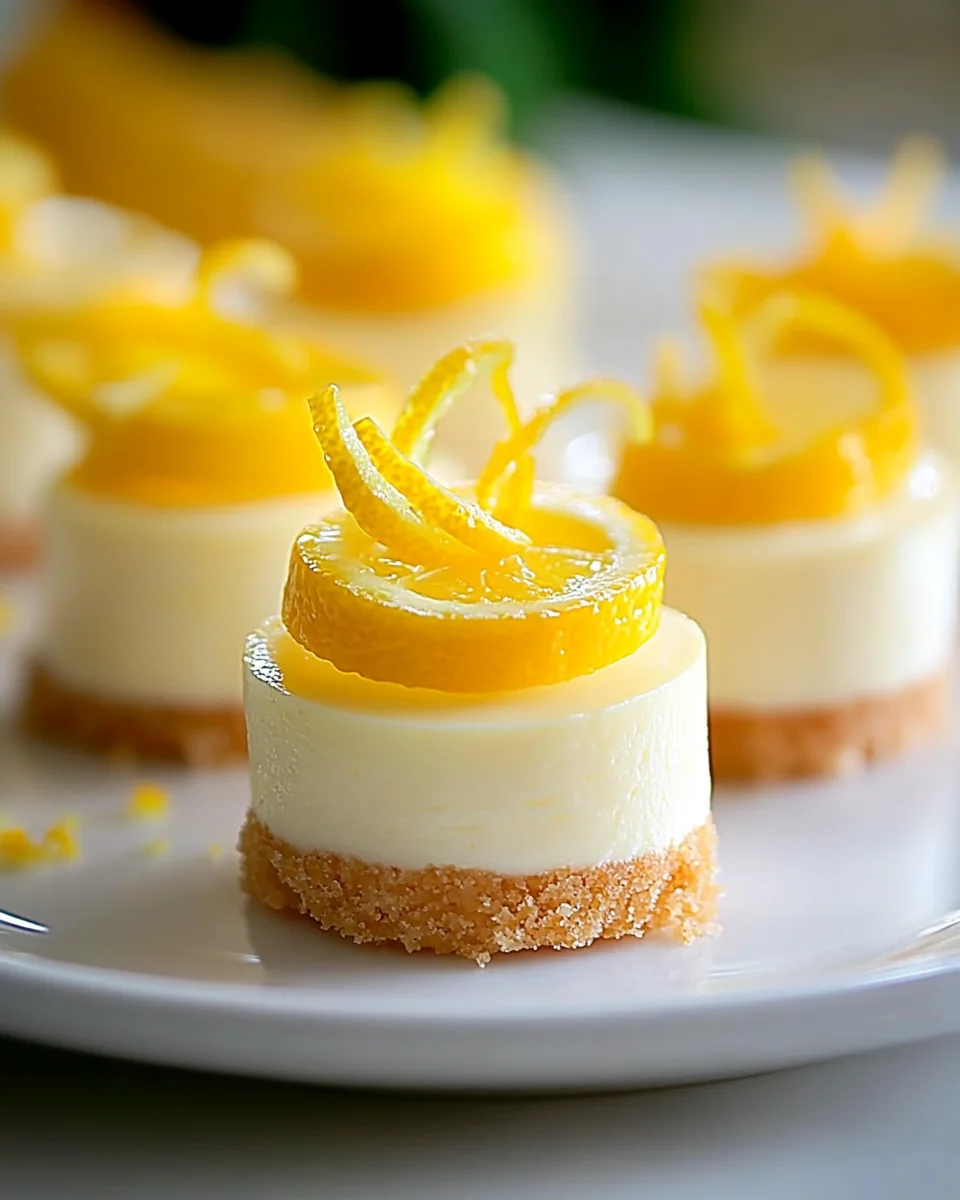
I still remember watching her zest a lemon with a twinkle in her eye, telling me that the secret to a perfect cheesecake wasn’t just the ingredients but the love and care put into every step. As a child, I didn’t quite understand what she meant, but after my first bite—tangy, creamy, and perfectly sweet—I knew this was something special.

Years later, these little cheesecakes have become a tradition in my own home, bringing comfort and joy with every batch. They remind me of warm summers, family gatherings, and the simple magic that happens when you combine a few humble ingredients into something extraordinary. If you’ve never tried making them before, let me tell you why they deserve a place in your kitchen.

Why Mini Lemon Cheesecakes Are Simply Irresistible

There’s something about the combination of tangy lemon and creamy cheesecake that makes this dessert an instant favorite. Mini lemon cheesecakes are not only adorable but also the perfect way to enjoy the richness of cheesecake without committing to an entire slice. Here’s why they’re worth making:

  • Perfectly Balanced Flavor: The bright citrusy notes of lemon cut through the richness of the cream cheese, creating a refreshing yet indulgent bite.
  • Individual Servings: No messy slicing required—just grab one and enjoy! They’re great for parties, picnics, or when you need a quick treat.
  • Easy to Customize: Whether you prefer a classic graham cracker crust, a cookie base, or a nutty alternative, these cheesecakes can be easily tailored to your taste.
  • Great for Any Occasion: Whether it’s a holiday gathering, a casual brunch, or a midnight snack, mini lemon cheesecakes fit any setting.

If you’re a fan of citrus desserts, this one is bound to become a favorite in your home.

The Secret to Perfect Mini Lemon Cheesecakes

While making mini cheesecakes is relatively simple, a few tips can elevate your dessert to bakery-level perfection.

1. Start with High-Quality Ingredients

The best recipes begin with the best ingredients. Use freshly squeezed lemon juice instead of bottled, real vanilla extract, and full-fat cream cheese for the smoothest texture.

2. Don’t Overmix the Batter

Overbeating the cheesecake batter can incorporate too much air, leading to cracks. Mix just until everything is combined for a silky, dense filling.

3. Bake with Precision

Mini cheesecakes bake quickly, so keep an eye on them. They should be slightly jiggly in the center when you remove them from the oven—this ensures they stay creamy.

4. Cool Slowly

Let the cheesecakes cool at room temperature before transferring them to the fridge. Rapid cooling can cause cracks or a dense texture.

5. Have Fun with Toppings

While these cheesecakes are delicious on their own, the right toppings can take them to another level. Some great options include:

  • Fresh berries for a pop of color and natural sweetness
  • Whipped cream for extra creaminess
  • Lemon zest for an extra citrus boost
  • A drizzle of white chocolate or honey for added indulgence

Bright & Fresh Ingredients

  • For the Crust:
    • 1 ¾ cups graham cracker crumbs
    • ½ cup sugar
    • ½ cup unsalted butter, melted
  • For the Cheesecake Filling:
    • 16 oz cream cheese, softened
    • ½ cup sour cream
    • 2 large eggs
    • 1 cup lemon juice
    • 1 tsp vanilla extract
    • Zest of 1 lemon

Whisk, Bake & Enjoy: Step-by-Step Directions

  1. Preheat & Prep: Preheat your oven to 325°F (160°C). Line a muffin tin with cupcake liners.
  2. Create the Crust: In a bowl, mix graham cracker crumbs, sugar, and melted butter. Press this mixture firmly into the bottom of each liner.
  3. Blend the Filling: In another bowl, beat the cream cheese, sour cream, and sugar until smooth. Add eggs, lemon juice, vanilla extract, and lemon zest. Mix until well incorporated.
  4. Fill & Bake: Pour the cheesecake batter over the crust in each liner, filling them about 2/3 full. Bake for 20-25 minutes, or until the centers are set with a slight jiggle.
  5. Cool & Chill: Let the cheesecakes cool at room temperature, then refrigerate for at least 2 hours before serving.

Bonus Tip: Top with whipped cream, fresh berries, or a drizzle of melted chocolate for extra indulgence!

Nutritional Snapshot (Per Mini Cheesecake, Approx.)

  • Calories: ~220
  • Total Fat: 14g
  • Carbohydrates: 20g
  • Protein: 4g
  • Sugar: 14g

A perfect balance of creamy, tangy, and sweet—these mini lemon cheesecakes are sure to brighten any occasion!

FAQs About Mini Lemon Cheesecakes

Can I Use a Different Base Instead of Graham Crackers?

Absolutely! While graham crackers are a classic choice, you can experiment with:

  • Oreo cookies for a chocolatey twist
  • Digestive biscuits for a subtle sweetness
  • Almond flour and butter for a gluten-free option

How Long Do Mini Lemon Cheesecakes Last?

Stored in an airtight container in the refrigerator, these cheesecakes can last up to 5 days. For longer storage, freeze them for up to 3 months and thaw in the fridge before serving.

Can I Make These Cheesecakes Without Dairy?

Yes! Use dairy-free alternatives like:

  • Vegan cream cheese (cashew-based or coconut-based)
  • Coconut yogurt instead of sour cream
  • A flaxseed egg as an egg substitute

The texture may be slightly different, but the lemony goodness will remain!

What’s the Best Way to Avoid Cracks in the Cheesecakes?

Cracks usually happen due to overbaking or rapid cooling. To prevent this:

  • Remove them from the oven when the center still has a slight jiggle.
  • Let them cool slowly before refrigerating.
  • Use a water bath in the oven to add moisture if needed.

Can I Add Other Flavors to the Cheesecake Filling?

Of course! While lemon is the star, you can mix in:

  • A splash of raspberry puree for a fruity swirl
  • A bit of matcha powder for an earthy contrast
  • A touch of almond extract for a nutty depth of flavor

Can I Turn These Into a Full-Sized Cheesecake?

Yes! Simply press the crust into a springform pan and increase the baking time to about 45-50 minutes, following the same cooling process.

Creative Variations to Try

Once you’ve mastered the classic version, why not experiment with some fun variations?

  • Lemon Blueberry Cheesecakes: Add fresh or frozen blueberries into the batter for a burst of fruity goodness.
  • Lemon Meringue Cheesecakes: Pipe a swirl of toasted meringue on top for a fancy finish.
  • Lemon Coconut Cheesecakes: Stir shredded coconut into the batter for a tropical twist.
  • Lavender Lemon Cheesecakes: Add a hint of dried lavender for a sophisticated floral note.

Final Thoughts: The Magic of Homemade Cheesecake

There’s something special about making mini cheesecakes from scratch. Whether you’re baking for family, friends, or just yourself, the process is filled with little moments of joy—from the first whiff of lemon zest to the satisfying sight of a perfectly baked cheesecake.

Every bite of these mini lemon cheesecakes is a reminder that simple ingredients can create something extraordinary. So the next time you’re in the mood for a dessert that’s both elegant and easy, give these a try. Who knows? They might just become a cherished tradition in your home too.

aiting

Mini Lemon Cheesecakes: A Bite of Sunshine in Every Bite

Delight in these Mini Lemon Cheesecakes, a perfect combination of creamy, tangy, and sweet flavors in a bite-sized treat! With a buttery graham cracker crust and a luscious lemon-infused cheesecake filling, these little delights are ideal for any occasion, from brunch gatherings to dessert cravings.

Prep Time 15 minutes
Cook Time 25 minutes
Total Time 2 hours 40 minutes
Servings: 12 mini cheesecakes
Course: Dessert
Cuisine: American

Ingredients
  

For the Crust:
  • 1 ¾ cups graham cracker crumbs
  • ½ cup sugar
  • ½ cup unsalted butter melted
For the Cheesecake Filling:
  • 16 oz cream cheese softened
  • ½ cup sour cream
  • 2 large eggs
  • 1 cup lemon juice
  • 1 tsp vanilla extract
  • Zest of 1 lemon

Method
 

  1. Step 1: Preheat & Prep
  2. Preheat your oven to 325°F (160°C).
  3. Line a muffin tin with cupcake liners.
Step 2: Create the Crust
  1. In a bowl, mix graham cracker crumbs, sugar, and melted butter.
  2. Press this mixture firmly into the bottom of each liner.
Step 3: Blend the Filling
  1. In another bowl, beat the cream cheese, sour cream, and sugar until smooth.
  2. Add eggs, lemon juice, vanilla extract, and lemon zest.
  3. Mix until well incorporated.
Step 4: Fill & Bake
  1. Pour the cheesecake batter over the crust in each liner, filling them about 2/3 full.
  2. Bake for 20-25 minutes, or until the centers are set with a slight jiggle.
Step 5: Cool & Chill
  1. Let the cheesecakes cool at room temperature.
  2. Refrigerate for at least 2 hours before serving.

Notes

  • Want extra texture? Add a sprinkle of crushed graham crackers or toasted coconut on top before serving.
  • For a richer flavor, use full-fat cream cheese and sour cream.
  • Make ahead! These mini cheesecakes can be refrigerated for up to 3 days or frozen for later enjoyment.
  • Toppings: Enhance with whipped cream, fresh berries, or a drizzle of melted chocolate for an extra indulgence.

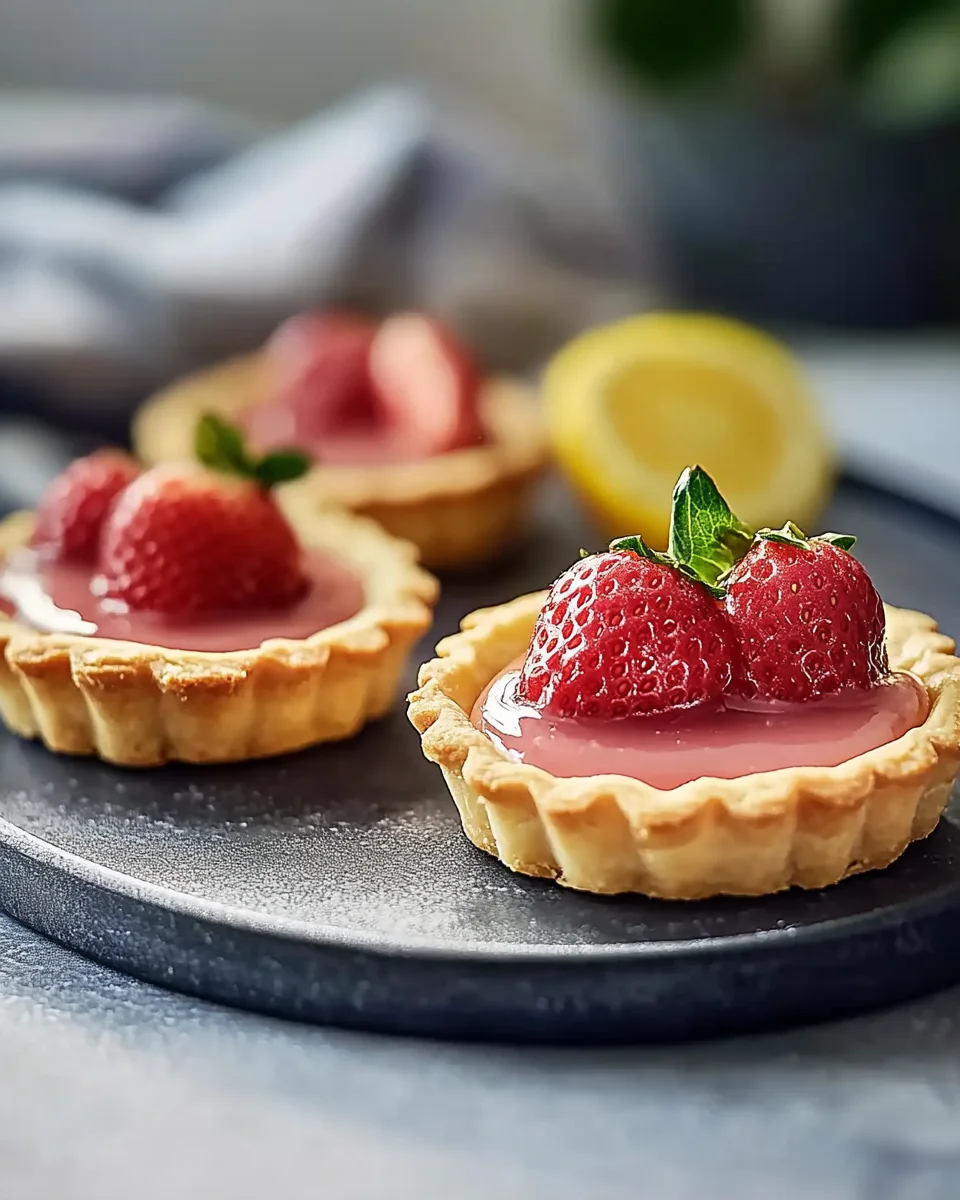
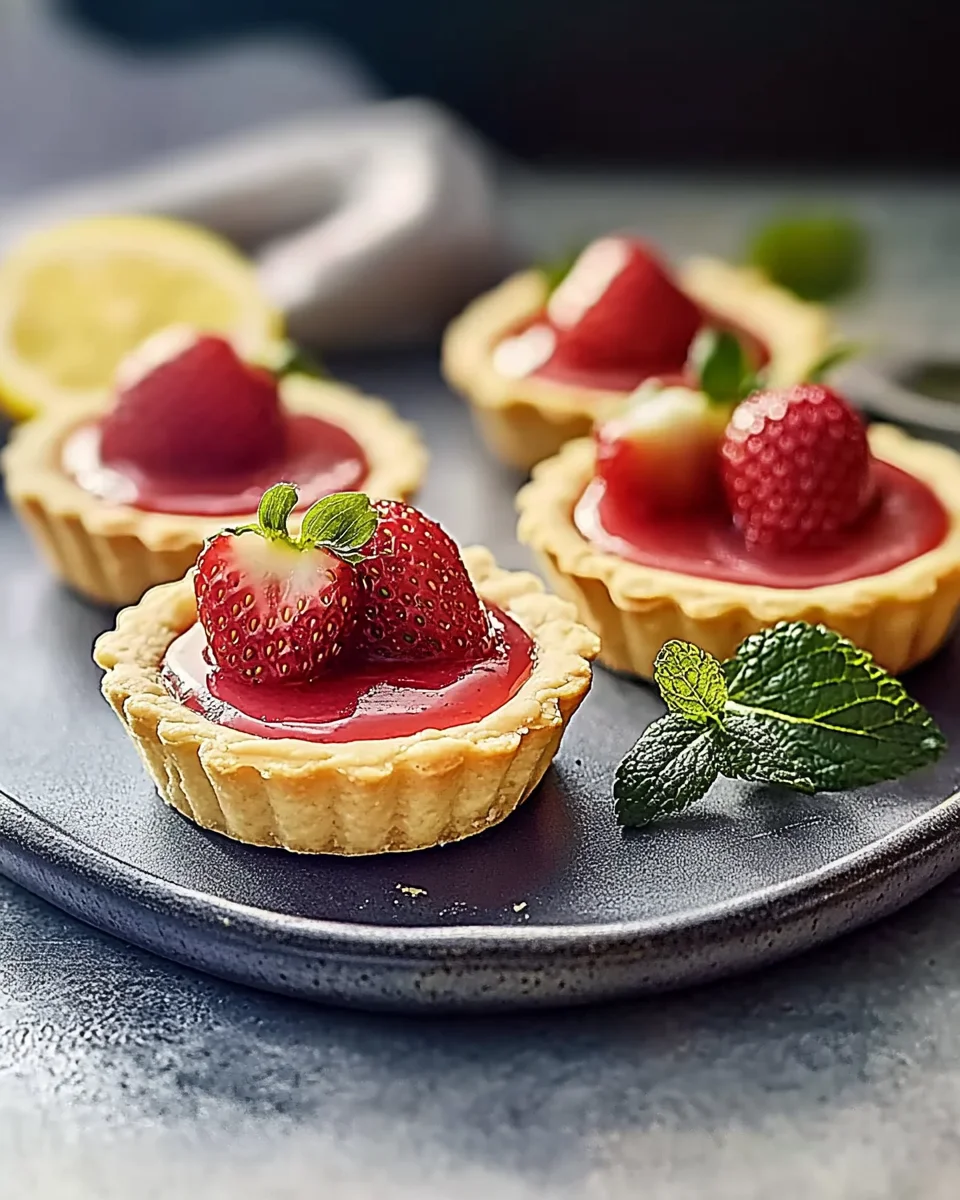
A Bite of Summer: Strawberry Mascarpone Tartlets with Lemon Curd

A Childhood Memory Wrapped in Pastry

Growing up, summer was my favorite season—not just for the warm sunshine or the long days spent playing outside, but for the way my grandmother transformed the simplest ingredients into magic. Her kitchen smelled of freshly baked pastries, ripe berries, and the unmistakable tang of citrus.

She never followed a written recipe, yet every creation felt like perfection. One dessert, in particular, stood out: delicate tartlets filled with a creamy, cloud-like mascarpone, brightened by a swirl of homemade lemon curd, and crowned with ruby-red strawberries. I remember sitting at the counter, watching her arrange the berries with care, as if she were painting a masterpiece.

Those tartlets tasted like happiness—light, refreshing, and bursting with flavor. Now, every time I make them, I’m transported back to those summer afternoons, my grandmother humming as she worked, the scent of butter and sugar wrapping around me like a warm embrace.

These Strawberry Mascarpone Tartlets with Lemon Curd carry more than just a delicious combination of flavors; they are little pockets of nostalgia, a testament to the beauty of simple, fresh ingredients coming together in perfect harmony.

Why These Tartlets Deserve a Spot on Your Dessert Table

There’s something undeniably elegant about tartlets. They are small but impactful, delicate but packed with flavor, and most importantly, they allow for endless creativity. This recipe strikes the perfect balance between sweet, tangy, creamy, and crisp—a symphony of textures and tastes that will impress at any gathering.

A Dessert for Every Occasion

Whether you’re planning a romantic dinner, a garden brunch, or simply treating yourself on a quiet afternoon, these tartlets fit the occasion. Their individual serving size makes them effortless to present, while their sophisticated flavor profile elevates them beyond the ordinary.

The Perfect Balance of Flavors

  • The buttery crust provides a crisp contrast to the luscious filling.
  • The mascarpone cream is rich yet airy, offering a gentle sweetness that pairs beautifully with the tartness of the lemon curd.
  • The lemon curd adds a bright, citrusy zing, cutting through the richness and keeping the dessert light and refreshing.
  • The strawberries lend natural sweetness, a juicy texture, and a pop of vibrant color.

Easier Than You Think

Despite their bakery-worthy appearance, these tartlets don’t require professional baking skills. The process can be broken into manageable steps—baking the tart shells, preparing the fillings, and assembling everything with ease. Plus, many of the components can be made ahead of time, making this an ideal recipe for entertaining without stress.

Tips to Elevate Your Tartlets

Even simple recipes can be taken to the next level with a few expert tricks. Here’s how to ensure your tartlets turn out perfectly every time:

1. Chill the Dough for a Flaky, Crisp Crust

The key to a tender, crisp tart shell is cold ingredients and a chilled dough. When the butter remains in small, solid pieces within the dough, it melts in the oven, creating delicate layers. Always chill the dough before rolling it out and again before baking to prevent shrinking.

2. Blind Bake for a Sturdy Base

A soggy crust can ruin an otherwise perfect tartlet. Blind baking (pre-baking the shells before filling them) ensures they stay crisp and hold up under the creamy filling. Using pie weights or dried beans prevents the dough from puffing up during baking.

3. Get the Silkiest Lemon Curd

For a smooth, velvety lemon curd, cook it low and slow while stirring constantly. If you rush and use high heat, the eggs can scramble, leaving you with a lumpy texture. If this happens, don’t worry—just strain the curd through a fine-mesh sieve to remove any bits.

4. Use the Best Strawberries You Can Find

Since strawberries are the star of this dessert, opt for ripe, in-season berries. The natural sweetness and juiciness of fresh strawberries make all the difference. If they aren’t in season, you can try raspberries, blueberries, or a mix of berries for a similar effect.

5. Let the Flavors Meld Together

Although it’s tempting to dive in right away, these tartlets taste even better after an hour or two in the fridge. This allows the mascarpone and lemon curd to set slightly, giving you a firmer texture and a more balanced flavor.

Gather Your Magic Ingredients

For the Tartlet Shells:

  • 1 ½ cups (190g) all-purpose flour
  • ½ cup (113g) unsalted butter, cold and cubed
  • 2 tbsp granulated sugar
  • 1 large egg yolk
  • 2-3 tbsp ice water (as needed)

For the Luscious Mascarpone Filling:

  • 1 cup (240g) mascarpone cheese, at room temperature
  • ½ cup (120ml) heavy cream
  • 2 tbsp powdered sugar
  • 1 tsp vanilla extract

For the Tangy Lemon Curd:

  • 2 large eggs
  • ½ cup (120ml) fresh lemon juice (about 2 lemons)
  • 1 tbsp lemon zest (from 1 lemon)
  • ½ cup (100g) granulated sugar
  • 4 tbsp (60g) unsalted butter, cubed

For the Tantalizing Toppings:

  • Fresh strawberries, sliced
  • Mint leaves (optional, for garnish)
  • Powdered sugar (optional, for dusting)

Step-by-Step Culinary Magic

Step 1: Craft the Buttery Tartlet Shells

  1. Make the dough: In a food processor, blend flour, sugar, and a pinch of salt. Add cold butter and pulse until it resembles coarse crumbs. Add egg yolk and pulse again. Gradually add ice water, one tablespoon at a time, until the dough just comes together.
  2. Chill the dough: Shape it into a disc, wrap it in plastic, and refrigerate for 30 minutes.
  3. Roll and shape: Roll out the chilled dough to ¼-inch thickness. Cut circles to fit tartlet pans and gently press the dough in. Trim excess.
  4. Blind bake: Line the tart shells with parchment, add pie weights, and bake at 350°F (175°C) for 10-12 minutes. Remove weights and bake another 5 minutes until golden. Cool completely.

Step 2: Whip Up the Zesty Lemon Curd

  1. Whisk it up: In a saucepan over medium heat, whisk eggs, sugar, lemon juice, and zest until smooth.
  2. Cook with care: Stir constantly until the mixture thickens (about 8-10 minutes).
  3. Add the butter: Remove from heat and stir in butter until smooth. Cool completely.

Step 3: Create the Creamy Mascarpone Filling

  1. Whip the cream: Using an electric mixer, whip heavy cream and powdered sugar until stiff peaks form.
  2. Blend and fold: In another bowl, beat mascarpone and vanilla until smooth. Gently fold in the whipped cream for a light and fluffy texture.

Step 4: Assemble These Little Beauties

  1. Fill the shells: Spoon or pipe mascarpone filling into each tartlet shell.
  2. Add the curd: Swirl a spoonful of lemon curd on top.
  3. Garnish with strawberries: Arrange fresh strawberry slices on each tartlet.
  4. Chill before serving: Refrigerate for an hour to set before enjoying.

A Peek at the Nutrition Stats

  • Calories: 280
  • Sugar: 17g
  • Sodium: 45mg
  • Fat: 18g
  • Carbohydrates: 27g
  • Fiber: 1g
  • Protein: 4g
  • Cholesterol: 55mg

Enjoy these Strawberry Mascarpone Tartlets with Lemon Curd as the ultimate summer treat—sweet, creamy, tangy, and utterly irresistible!

Frequently Asked Questions (FAQs)

1. Can I Make These Tartlets Ahead of Time?

Absolutely! The tart shells can be baked a day or two in advance and stored in an airtight container at room temperature. The lemon curd can be prepared up to a week ahead and kept in the fridge. However, for the freshest taste, assemble the tartlets on the day you plan to serve them.

2. Can I Use Store-Bought Lemon Curd?

Yes! If you’re short on time, a high-quality store-bought lemon curd works perfectly fine. Look for one with natural ingredients and a good balance of sweetness and tartness.

3. What Can I Substitute for Mascarpone?

Mascarpone has a uniquely creamy, slightly tangy flavor, but if you can’t find it, you can substitute cream cheese, ricotta, or a mix of Greek yogurt and cream cheese. Keep in mind that cream cheese is tangier and denser, so the texture may be slightly different.

4. How Do I Keep the Crust from Getting Soggy?

Blind baking is the first step, but if you want extra insurance, brush the baked tart shells with a thin layer of melted white chocolate before filling them. This creates a moisture barrier, keeping the crust crisp.

5. Can I Freeze These Tartlets?

The tart shells can be frozen for up to a month before filling. However, once assembled, they don’t freeze well because the mascarpone filling and lemon curd can become watery upon thawing.

6. What Other Fruits Can I Use?

While strawberries are classic, this recipe also works beautifully with raspberries, blueberries, blackberries, or even thinly sliced peaches or nectarines. You can mix and match based on what’s in season.

7. Can I Make a Gluten-Free Version?

Yes! Simply substitute the all-purpose flour in the tart shell with a gluten-free flour blend. Ensure that the blend contains a binding agent like xanthan gum for the best texture.

A Sweet Ending: The Magic of Homemade Desserts

In a world where we often rush through meals and grab desserts from store shelves, there is something deeply satisfying about baking from scratch. It’s an act of love, a way to slow down and appreciate the beauty of simple ingredients coming together.

These Strawberry Mascarpone Tartlets with Lemon Curd are more than just a recipe—they’re an experience. From the moment you roll out the dough to the first bite of creamy, citrusy perfection, you’re creating memories, much like my grandmother did for me.

So whether you’re making these for a special occasion or simply to indulge in something homemade, I hope they bring you as much joy as they have brought me. Because at the end of the day, the best desserts are the ones that remind us of love, warmth, and the sweetness of life itself.

Enjoy, and happy baking!

aiting

A Bite of Summer: Strawberry Mascarpone Tartlets with Lemon Curd

Delight in the flavors of summer with these Berry Bliss Tartlets, a perfect combination of crisp buttery shells, creamy mascarpone filling, and tangy lemon curd. Topped with fresh strawberries, these tartlets are a refreshing and elegant treat for any occasion!
Prep Time 20 minutes
Cook Time 15 minutes
Total Time 1 hour 15 minutes
Servings: 6 tartlets
Course: Dessert
Cuisine: French-inspired

Ingredients
  

  • 1 ½ cups 190g all-purpose flour
  • ½ cup 113g unsalted butter, cold and cubed
  • 2 tbsp granulated sugar
  • 1 large egg yolk
  • 2-3 tbsp ice water as needed
For the Luscious Mascarpone Filling:
  • 1 cup 240g mascarpone cheese, at room temperature
  • ½ cup 120ml heavy cream
  • 2 tbsp powdered sugar
  • 1 tsp vanilla extract
For the Tangy Lemon Curd:
  • 2 large eggs
  • ½ cup 120ml fresh lemon juice (about 2 lemons)
  • 1 tbsp lemon zest from 1 lemon
  • ½ cup 100g granulated sugar
  • 4 tbsp 60g unsalted butter, cubed
For the Tantalizing Toppings:
  • Fresh strawberries sliced
  • Mint leaves optional, for garnish
  • Powdered sugar optional, for dusting

Method
 

  1. Step 1: Craft the Buttery Tartlet Shells
  2. Make the dough: In a food processor, blend flour, sugar, and a pinch of salt. Add cold butter and pulse until the mixture resembles coarse crumbs. Add egg yolk and pulse again. Gradually add ice water, one tablespoon at a time, until the dough just comes together.
  3. Chill the dough: Shape it into a disc, wrap it in plastic, and refrigerate for 30 minutes.
  4. Roll and shape: Roll out the chilled dough to ¼-inch thickness. Cut circles to fit tartlet pans and gently press the dough in. Trim excess.
  5. Blind bake: Line the tart shells with parchment paper, add pie weights, and bake at 350°F (175°C) for 10-12 minutes. Remove weights and bake another 5 minutes until golden. Cool completely.
Step 2: Whip Up the Zesty Lemon Curd
  1. Whisk it up: In a saucepan over medium heat, whisk eggs, sugar, lemon juice, and zest until smooth.
  2. Cook with care: Stir constantly until the mixture thickens (about 8-10 minutes).
  3. Add the butter: Remove from heat and stir in butter until smooth. Cool completely.
Step 3: Create the Creamy Mascarpone Filling
  1. Whip the cream: Using an electric mixer, whip heavy cream and powdered sugar until stiff peaks form.
  2. Blend and fold: In another bowl, beat mascarpone and vanilla until smooth. Gently fold in the whipped cream for a light and fluffy texture.
Step 4: Assemble These Little Beauties
  1. Fill the shells: Spoon or pipe mascarpone filling into each tartlet shell.
  2. Add the curd: Swirl a spoonful of lemon curd on top.
  3. Garnish with strawberries: Arrange fresh strawberry slices on each tartlet.
  4. Chill before serving: Refrigerate for an hour to set before enjoying.

Notes

  • Want extra crunch? Add crushed graham crackers or a sprinkle of toasted almonds on top.
  • Dairy-free option: Swap mascarpone for coconut cream and use dairy-free butter for the crust.
  • Storage Tip: Keep tartlets refrigerated for up to 2 days for the freshest flavor

Easter Rice Krispie Nests: A Nostalgic Springtime Treat

A Childhood Memory in Every Bite

Every year, as the first signs of spring would emerge—daffodils blooming and birds chirping—my grandmother would gather us in the kitchen to make Easter treats. Among our favorite traditions was making Rice Krispie Nests. The warm, buttery scent of marshmallows melting on the stove signaled the beginning of something magical. My siblings and I would eagerly mix in the cereal, our small hands sticky with the gooey mixture. The real fun began when we shaped the warm mixture into tiny nests, carefully placing pastel-colored chocolate eggs inside, imagining we were creating little homes for Easter chicks.

Now, as an adult, I continue this tradition with my own children. Watching their eyes light up as they press their tiny fingers into the soft, warm cereal mixture brings back the same joy I felt all those years ago. These Easter Rice Krispie Nests are more than just a festive treat; they are a symbol of childhood nostalgia, family togetherness, and the simple pleasures of holiday baking. Whether you’re making them with little ones or as a fun seasonal dessert, these no-bake nests are guaranteed to bring smiles to faces both young and old.

Why These Easter Nests Are the Ultimate Spring Dessert

1. No Oven, No Hassle

Spring is the perfect time to embrace no-bake desserts, and this recipe makes it easier than ever. Without the need to turn on the oven, you can enjoy the process without heating up your kitchen. This makes it a fantastic choice for families looking for quick, mess-free holiday baking.

2. A Fun and Interactive Recipe for Kids

One of the biggest joys of Easter is getting kids involved in the kitchen. This recipe is perfect for little hands—whether they’re stirring the gooey marshmallow mixture, shaping the nests, or decorating with colorful candies. It’s a great way to introduce young ones to baking without the complications of precise measurements or baking times.

3. Customizable and Versatile

While mini chocolate eggs are the classic filling, there are endless ways to get creative. From jelly beans and peanut butter cups to pastel-colored sprinkles and edible flowers, you can customize these nests to match any Easter theme. You can even add a touch of green food coloring to the icing to resemble grass, creating an even more realistic nest effect.

4. Light Yet Indulgent

Unlike heavy cakes and rich chocolate treats, these Rice Krispie Nests have an airy, crispy texture that keeps them from feeling too rich. They’re sweet enough to satisfy a sugar craving but light enough that you won’t feel overly full after indulging.

Creative Ways to Elevate Your Rice Krispie Nests

1. Make Them Extra Chocolatey

If you want to add a chocolatey twist, mix in a handful of melted white or milk chocolate with the marshmallow mixture. You can also drizzle melted chocolate over the nests before adding the candy eggs for a richer flavor.

2. Add a Nutty Crunch

For those who enjoy a little extra texture, consider mixing in chopped nuts like almonds, hazelnuts, or pecans. This gives the nests a slightly crunchy contrast to the soft marshmallow binding.

3. Experiment with Different Cereals

While Rice Krispies are the classic choice, you can try using Cocoa Krispies for a chocolate version, Fruity Pebbles for a colorful twist, or even cornflakes for a slightly different texture.

4. Turn Them Into Bite-Sized Treats

Instead of using a muffin tin, try shaping smaller nests by hand or using mini cupcake liners. This makes them perfect for party trays, Easter baskets, or quick grab-and-go snacks.

5. Make It Vegan or Allergy-Friendly

For those with dietary restrictions, swap out the butter for a dairy-free alternative and use vegan marshmallows. Double-check that your cereal and decorations are gluten-free if needed, and opt for dairy-free chocolate eggs or jelly beans as a substitute.

Storage and Make-Ahead Tips

Since these nests are made with simple ingredients, they are best enjoyed fresh. However, with proper storage, they can last for a few days.

  • Room Temperature Storage: Keep the nests in an airtight container at room temperature for up to 3 days. Beyond that, they may start to harden.
  • Refrigeration: While not necessary, refrigerating them can help them hold their shape better, especially in warmer climates.
  • Freezing: These treats do not freeze well, as the texture becomes too hard when frozen. It’s best to make them fresh.

If making them ahead of time for a party or event, assemble the nests but wait to add the icing and candies until just before serving to keep them looking and tasting their best.

Ingredients:

For the Nests:

  • 2 tablespoons butter
  • 8 oz (220g) marshmallows (small or chopped large ones)
  • 4 cups (110g) Rice Krispies cereal

For Decorating:

  • 6 tablespoons powdered icing sugar
  • 4 teaspoons water
  • Green food coloring (optional)
  • Mini egg candies
  • Sprinkles

Directions:

  1. Lightly grease a 12-cup muffin tin with oil or non-stick spray.
  2. Melt the butter in a large pan over medium-low heat.
  3. Add the marshmallows and stir until fully melted.
  4. Remove from heat and mix in the Rice Krispies until fully coated.
  5. Spoon the mixture into the muffin tin, pressing down slightly to form a nest shape. Use a lightly buttered teaspoon to create an indentation in the center.
  6. Let the nests cool completely before removing from the tin.

To Decorate:

  1. Prepare a thick icing by mixing powdered sugar with 2 teaspoons of water (adjust as needed for consistency).
  2. Add a few drops of green food coloring to resemble grass (optional).
  3. Spoon a little icing into each nest and place mini eggs inside.
  4. Top with sprinkles and serve!

Nutritional Information (Per Nest):

  • Calories: 128 kcal
  • Carbohydrates: 27g
  • Protein: 1g
  • Fat: 2g
  • Saturated Fat: 1g
  • Trans Fat: 1g
  • Cholesterol: 5mg
  • Sodium: 81mg
  • Potassium: 13mg
  • Fiber: 1g
  • Sugar: 16g
  • Vitamin A: 679 IU
  • Vitamin C: 6mg
  • Calcium: 2mg
  • Iron: 3mg

These adorable, no-bake Easter treats are fun to make and perfect for holiday celebrations!

Frequently Asked Questions

1. What can I use instead of marshmallows to bind the cereal together?

If you prefer not to use marshmallows, you can try using a mixture of honey and almond butter or maple syrup and peanut butter as a sticky, natural alternative.

2. Can I make these without a muffin tin?

Absolutely! While a muffin tin helps create uniform shapes, you can easily shape the nests by hand on a parchment-lined tray. Just coat your hands lightly with butter or oil to prevent sticking.

3. How do I keep the mixture from sticking to my hands?

To avoid sticky hands, lightly grease your hands with butter or spray them with a bit of cooking oil. A buttered spoon also works well for pressing the mixture into the nest shape.

4. Can I make these in advance for an Easter party?

Yes! These nests can be made 1-2 days in advance, but it’s best to store them in an airtight container at room temperature. For the best appearance, decorate them right before serving.

5. What are some fun alternative toppings besides chocolate eggs?

There are so many fun ways to customize your nests! Try filling them with:

  • Jelly beans for a colorful surprise
  • Mini marshmallows for a fluffy look
  • Crushed graham crackers for a nest-like texture
  • Edible flowers for a springtime aesthetic

6. Can I make these in different sizes?

Yes! You can create mini nests using a mini muffin tin or shape them into larger nests using a small bowl instead of a muffin tin. Just adjust the amount of cereal mixture accordingly.

7. How can I make them healthier?

For a slightly healthier version, use brown rice cereal instead of traditional Rice Krispies and opt for dark chocolate eggs or dried fruit instead of candy. You can also reduce the sugar by using unsweetened nut butter as a binding agent.

A Sweet Tradition Worth Keeping

Easter Rice Krispie Nests are more than just a festive dessert—they are a reminder of childhood memories, family traditions, and the joy of simple, creative baking. Whether you make them for an Easter party, as a fun activity with kids, or just to satisfy your own sweet tooth, these no-bake treats will always bring a little extra magic to the season.

So gather your loved ones, melt some marshmallows, and start shaping your own edible nests. Because sometimes, the best memories are made in the kitchen, one sticky hand at a time.

aiting

Easter Rice Krispie Nests: A Nostalgic Springtime Treat

Celebrate the joy of Easter with these adorable, no-bake Rice Krispies nests. They’re sweet, crunchy, and perfectly decorated with mini egg candies and festive sprinkles—a delightful treat that’s as fun to make as it is to eat!
Prep Time 10 minutes
Cook Time 5 minutes
Servings: 12 nests
Course: No-Bake Treats / Desserts
Cuisine: American / Holiday

Ingredients
  

  • For the nests gather: • 2 tablespoons butter• 8 oz (220g) marshmallows (small ones or chopped larger ones work best)• 4 cups (about 110g) Rice Krispies cereal
  • For decorating you’ll need: • 6 tablespoons powdered icing sugar• 4 teaspoons water• A few drops of green food coloring (optional, for that grassy look)• Mini egg candies• Sprinkles

Method
 

  1. Start by lightly greasing a 12-cup muffin tin with oil or non-stick spray to ensure easy release later.
  2. In a large pan over medium-low heat, melt the butter. Once melted, add the marshmallows and stir continuously until they’re fully melted and smooth.
  3. Remove the pan from the heat and immediately mix in the Rice Krispies until every piece is evenly coated with the marshmallow mixture.
  4. Spoon the mixture into each muffin cup, pressing down slightly with a lightly buttered teaspoon to shape them into neat nest forms and create a small indentation in the center for decorating.
  5. Allow the nests to cool completely in the tin before gently removing them.
To Decorate:
  1. In a small bowl, prepare a thick icing by mixing the powdered icing sugar with 2 teaspoons of water (adjust as needed to achieve the desired consistency). If you like, add a few drops of green food coloring to mimic grass.
  2. Spoon a little of the icing into the center of each nest, then place mini egg candies into the indentation.
  3. Top with a light sprinkle of extra festive sprinkles, and your nests are ready to serve!

Notes

• Patience is key—ensure the nests have cooled completely so the candy coating sets firmly.
• For extra fun, try experimenting with different colored icing and decorations for a personalized touch.
• These treats are best enjoyed the day they’re made, but you can store any extras in an airtight container for a couple of days.

Shamrock Chocolate Pretzel M&M Cookies: A Sweet Twist on Tradition

A Nostalgic Bite of Celebration

Holidays are more than just dates on the calendar—they’re moments woven together by traditions, flavors, and memories. For me, St. Patrick’s Day has always been one of those occasions that didn’t require grand plans or elaborate feasts, yet it remained deeply special. Growing up, my mom had a knack for turning even the simplest holidays into something memorable.

St. Patrick’s Day wasn’t about big parades or fancy meals in our house; instead, it was about small but meaningful touches—green pancakes for breakfast, mischievous “leprechaun tricks” left around the house, and, of course, festive treats. One of my fondest childhood memories was helping my mom create little bite-sized sweets for our school parties. The excitement of dipping pretzels in chocolate, choosing the perfect M&M for the center, and sprinkling each piece with just the right amount of sugar was more than just baking—it was a ritual of love, laughter, and togetherness.

These Shamrock Chocolate Pretzel M&M Cookies are a tribute to those cherished moments. They take the classic sweet-and-salty combination and turn it into a festive, no-bake treat that is as fun to make as it is to eat. Whether you’re preparing for a classroom party, a St. Patrick’s Day gathering, or simply want to bring a bit of luck into your home, these little shamrocks are a simple yet special way to celebrate.

Why This Recipe is a Must-Try

No-Bake Simplicity

There’s something truly satisfying about a treat that requires no oven time. These cookies come together with minimal effort, making them perfect for busy parents, last-minute party planners, or anyone who wants a festive snack without the fuss of traditional baking.

Perfect Balance of Sweet and Salty

The combination of crunchy pretzels, creamy candy melts, and chocolatey M&Ms is irresistible. The light saltiness of the pretzels enhances the sweetness, creating an addictive bite that keeps you reaching for more.

A Fun and Interactive Experience

This recipe is more than just a sweet treat—it’s an activity. Kids and adults alike can get involved in the dipping, assembling, and decorating process. It’s the perfect way to turn St. Patrick’s Day into a hands-on celebration.

Endlessly Customizable

While the classic green-and-white theme is perfect for St. Patrick’s Day, this recipe can easily be adapted for other holidays. Swap out the colors for red and pink for Valentine’s Day, or go with red, white, and blue for the Fourth of July. The possibilities are endless.

Creative Variations to Try

One of the best things about this recipe is its versatility. Here are a few ways to switch things up while keeping the charm of the original:

Chocolate Lovers’ Delight

Instead of using green and white candy melts, opt for dark or milk chocolate. The richer flavor pairs beautifully with the salty pretzels, giving the treat a more indulgent feel.

Peanut Butter Perfection

For a nutty twist, drizzle melted peanut butter over the finished shamrocks before they harden. The combination of peanut butter, chocolate, and pretzels is a match made in heaven.

Minty Fresh Upgrade

Since St. Patrick’s Day and mint flavors go hand in hand, consider adding a drop of peppermint extract to the candy melts for a refreshing touch. You can also use mint-flavored M&Ms for an extra burst of coolness.

White Chocolate Elegance

If you prefer a sweeter and creamier taste, use white chocolate instead of candy melts. Pairing it with golden sugar sprinkles adds a touch of sophistication to these fun treats.

Filled Pretzel Shamrocks

For an extra indulgent variation, fill each pretzel with melted chocolate before assembling the shamrock shape. This method takes a little more time but results in a richer bite with a gooey chocolate center.

Ingredients:

  • Mini Pretzel Twists (Snyder’s Itty-Bitty Mini Pretzel Twists work best, but regular mini pretzel twists can be used)
  • Candy Melts (Wilton Bright Green and White Candy Melts)
  • Green M&M’s
  • Green Sugar Sprinkles
  • Wax or Parchment Paper

Directions:

  1. Prepare Your Workspace – Cover your work surface with wax or parchment paper and secure the corners with tape.
  2. Sort Your Pretzels – Divide pretzels into groups of three, discarding any broken pieces.
  3. Melt the Candy – Melt the green and white candy melts separately, following package directions.
  4. Form the Shamrocks – Arrange three pretzels in a triangular shape to resemble a shamrock.
  5. Dip the Pretzels – Using a fork, dip each pretzel in melted candy, gently shake off excess, and place it on the parchment paper to harden.
  6. Assemble the Shamrocks – Place the dipped pretzels together so that their sides touch.
  7. Secure the Center – Add a small dollop of melted candy to the center where the pretzels meet.
  8. Add the M&M Touch – Place a green M&M in the center of each shamrock.
  9. Sprinkle for a Festive Look – Lightly dust the shamrocks with green sugar sprinkles.
  10. Let Them Set – Allow the cookies to dry completely so they harden into one piece.

Optional Variation: For a filled version, first fill each pretzel with melted candy before connecting them to form the shamrock.

Nutritional Highlights:

(Approximate per serving, depending on portion size)

  • Calories: ~100 per shamrock
  • Carbohydrates: 12g
  • Fat: 4g
  • Protein: 1g
  • Sugar: 7g

These adorable no-bake cookies are the perfect mix of salty, sweet, and festive fun! Enjoy them at your St. Patrick’s Day celebration.

Frequently Asked Questions

1. How Long Do These Cookies Last?

If stored properly in an airtight container, these treats will stay fresh for up to a week. The key is keeping them in a cool, dry place to prevent the chocolate from melting or the pretzels from becoming stale.

2. Can I Use Different Types of Pretzels?

Yes! Mini pretzel twists work best for creating the shamrock shape, but if you can’t find them, you can use regular-sized mini pretzels. Just keep in mind that larger pretzels may require more melted chocolate to hold their shape.

3. What’s the Best Way to Melt the Candy Melts?

The easiest method is using a microwave. Heat the candy melts in 20-second intervals, stirring in between to prevent burning. If you prefer a stovetop method, use a double boiler to gently melt the candy without overheating it.

4. Can I Make These in Advance?

Absolutely! These cookies are great for making ahead of time. If you’re preparing them for an event, you can make them a day or two in advance and store them in an airtight container.

5. What Can I Use Instead of Candy Melts?

If you don’t have candy melts on hand, you can use white chocolate chips mixed with a teaspoon of vegetable oil. This helps create a smooth, easy-to-dip consistency.

6. How Can I Prevent the Candy from Hardening Too Quickly?

If you find that the candy melts are hardening before you finish assembling the shamrocks, try working in small batches. You can also keep the melted candy in a warm water bath to maintain its liquid consistency.

7. Can I Add More Decorations?

Of course! These shamrock cookies are a blank canvas for creativity. Try adding gold sugar pearls for a leprechaun treasure effect or drizzling them with melted dark chocolate for extra flair.

Conclusion: A Treat That’s More Than Just a Cookie

At the heart of every holiday treat lies more than just ingredients—it’s about the experience of creating something special, the joy of sharing it with others, and the nostalgia that lingers long after the last bite is gone. These Shamrock Chocolate Pretzel M&M Cookies embody all of that.

They remind us that even the simplest traditions can hold the most meaning. Whether you’re making them with your kids, surprising your coworkers, or simply indulging in a little festive sweetness for yourself, these treats bring a bit of luck and happiness to everyone who enjoys them.

So, as St. Patrick’s Day approaches, take a moment to celebrate not just with green outfits and clover decorations, but with something homemade, heartfelt, and delicious. After all, the best traditions are the ones that taste as good as they feel.

aiting

Shamrock Chocolate Pretzel M&M Cookies: A Sweet Twist on Tradition

Celebrate St. Patrick’s Day in style with these festive, no-bake treats! Combining the perfect crunch of mini pretzel twists with a sweet, colorful candy coating and a pop of green from M&M’s, these shamrock-shaped cookies are a delightful blend of salty and sweet—ideal for parties, snacks, or any day you need a little luck!
Course: No-Bake Cookies / Party Snacks
Cuisine: Festive / American-Inspired

Ingredients
  

  • For this recipe you’ll need mini pretzel twists (Snyder’s Itty-Bitty Mini Pretzel Twists work best, though any mini pretzel twists will do), green and white candy melts (preferably Wilton Bright Green and White), green M&M’s, and green sugar sprinkles. Also, have some wax or parchment paper on hand to set up your workspace.

Method
 

  1. Set Up Your Workspace: Cover your work surface with wax or parchment paper and secure the corners with tape so it stays in place.
  2. Sort the Pretzels: Group the mini pretzel twists into sets of three, discarding any broken pieces for a uniform look.
  3. Melt the Candy: Melt the green and white candy melts separately according to the package directions until they’re smooth and ready for dipping.
  4. Form Your Shamrocks: Arrange each group of three pretzels in a triangular pattern to mimic a shamrock.
  5. Dip Each Pretzel: Using a fork, dip each pretzel into the melted candy. Gently shake off any excess candy before placing them on your prepared paper to harden.
  6. Assemble the Shamrock: Once dipped, bring the pretzels together so their sides touch, forming the shamrock shape.
  7. Seal the Center: Add a small dollop of melted candy at the center where the pretzels meet to secure the shape.
  8. Finish with a Touch of Festivity: Place a green M&M in the very center of each shamrock.
  9. Sprinkle the Fun: Lightly dust the assembled shamrocks with green sugar sprinkles for that extra festive flair.
  10. Let Set: Allow the cookies to dry completely until the candy coating hardens and holds the shamrock together.
  11. Optional Variation: For a delicious twist, try filling each pretzel with a little melted candy before assembling the shamrock for an extra gooey treat.

Notes

• Since these are no-bake cookies, patience is key—make sure they set fully before serving.
• They’re best enjoyed fresh; store any extras in an airtight container to keep them crisp.
• Adjust the dipping and assembly process as needed to create uniformly shaped shamrocks.