Turtle Lush: A No-Bake Chocolate-Caramel Dream

A Sweet Memory in Every Bite

I still remember the first time I tasted a dessert that combined the rich flavors of chocolate, caramel, and pecans. It was during a family gathering at my grandmother’s house, where she always had a way of making desserts feel like a warm hug. She pulled out a tray of something layered and luscious, topped with a drizzle of caramel and a sprinkling of pecans. With just one bite, I was hooked. The creamy chocolate, the buttery pecans, and the smooth caramel melted together perfectly.

That dessert became a staple in our household, always present at birthdays, holidays, and even quiet Sunday afternoons. Years later, when I stumbled upon the idea of Turtle Lush, it immediately transported me back to those cherished family moments. The best part? This dessert is a no-bake masterpiece, making it simple to create while still delivering an indulgent experience. Whether you’re looking for a dessert to impress guests or just something to treat yourself, Turtle Lush is the kind of dessert that brings comfort, nostalgia, and joy in every bite.

What Makes Turtle Lush So Special?

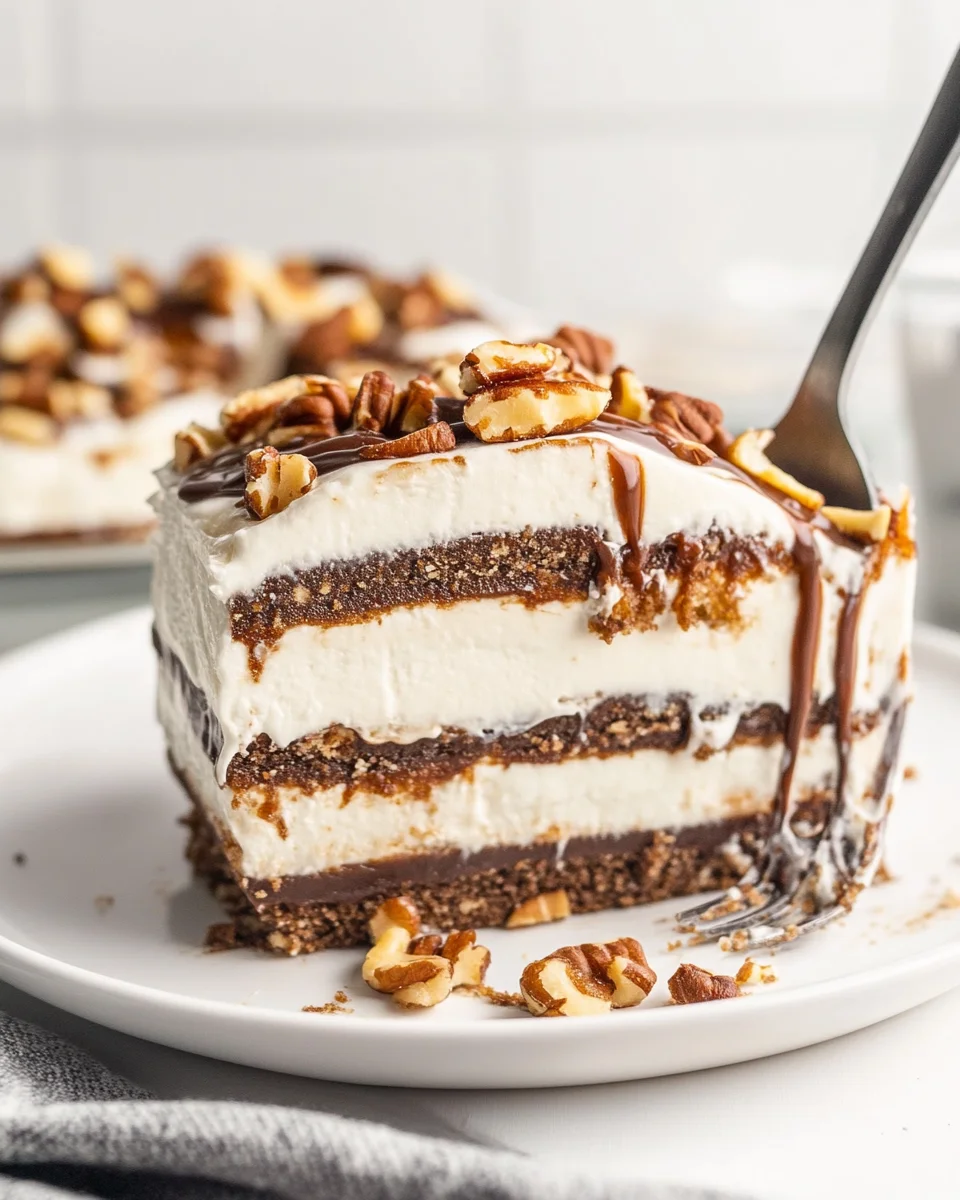
Turtle Lush is not your average layered dessert. It’s an explosion of flavors and textures, combining:

  • A buttery Oreo crust that adds a deep chocolatey crunch
  • A smooth and sweet cream cheese layer that provides a tangy contrast
  • A decadent chocolate pudding layer that melts in your mouth
  • A light and airy whipped topping that balances the richness
  • A generous drizzle of caramel and chocolate syrup to tie it all together
  • A sprinkle of crunchy pecans for the final touch

This dessert takes the beloved flavors of Turtle candies and transforms them into a creamy, layered delight that is both satisfying and elegant. It requires no oven, no complicated techniques, and no hours of labor—just simple layering and chilling.

Why You’ll Love This Recipe

1. No-Bake Convenience

One of the greatest things about Turtle Lush is that it doesn’t require an oven. Whether it’s summer and you want to avoid heating up the kitchen, or you just need a quick dessert that comes together effortlessly, this recipe is perfect.

2. Perfect for Any Occasion

Turtle Lush is a crowd-pleaser that fits any event. Whether you’re hosting a family dinner, attending a potluck, or looking for a sweet treat after a long day, this dessert delivers. Its beautiful layered presentation also makes it Instagram-worthy for special occasions.

3. Balanced Flavors and Textures

The layers of Turtle Lush offer a delightful contrast—a crunchy base, creamy middle, rich chocolate, and nutty caramel topping. Each bite is a harmony of sweet, salty, and buttery goodness.

4. Easily Customizable

Want to make it even more decadent? Add some mini chocolate chips, toffee bits, or extra pecans for more texture. Prefer a slightly less sweet version? Swap the chocolate pudding for a dark chocolate version. The beauty of this dessert is that you can make it your own.

Gather Your Magic Ingredients

  • Oreo Crust:
    • 3 cups Oreo crumbs
    • 8 tablespoons unsalted butter, melted
  • Creamy Layer:
    • 1 (8-ounce) package of cream cheese, softened
    • 1/2 cup powdered sugar
    • 8 ounces whipped topping, thawed
  • Chocolate Pudding Layer:
    • 1 (5.9-ounce) box instant chocolate pudding mix
    • 3 cups cold milk
  • Crunch & Drizzle:
    • 1 cup chopped pecans, divided
    • 1/2 cup caramel sauce
    • 1/4 cup chocolate syrup
    • Remaining 8 ounces whipped topping

Step-by-Step Bliss

  1. Build the Base – Mix Oreo crumbs with melted butter, press into a 13×9 dish, and freeze for 20 minutes.
  2. Whip Up the Creamy Layer – Beat cream cheese and powdered sugar until smooth. Fold in 8 ounces of whipped topping.
  3. Create the Chocolate Dream – Whisk pudding mix with cold milk for 2 minutes, then let it thicken for another 2-3 minutes.
  4. Layer It Up
    • Spread the cream cheese mixture over the chilled Oreo crust.
    • Sprinkle 1/2 cup of chopped pecans and press lightly.
    • Spread the chocolate pudding over the pecan layer.
    • Top with the remaining 8 ounces of whipped topping.
  5. Chill to Perfection – Cover and refrigerate for at least 4 hours (overnight is best!).
  6. The Final Touch – Before serving, drizzle caramel sauce and chocolate syrup, then sprinkle remaining pecans. Slice, serve, and enjoy!

Nutritional Breakdown (Per Serving, Approximate)

  • Calories: ~350-400
  • Carbohydrates: ~45g
  • Fat: ~20g
  • Protein: ~5g
  • Sugar: ~30g

This no-bake delight is the perfect balance of chocolate, caramel, and crunch. Perfect for family gatherings, parties, or whenever your sweet tooth craves something indulgent!

Frequently Asked Questions About Turtle Lush

1. Can I Use a Different Type of Cookie for the Crust?

Yes! While Oreo crumbs provide a classic chocolatey base, you can experiment with other cookies like:

  • Graham crackers for a milder, buttery flavor
  • Chocolate chip cookies for extra sweetness
  • Shortbread cookies for a richer, melt-in-your-mouth experience

Just ensure you crush them finely and mix them well with melted butter to hold the crust together.

2. How Do I Keep the Layers from Mixing Together?

To achieve clean, distinct layers, make sure each layer is properly chilled before adding the next.

  • Freeze the Oreo crust before adding the cream cheese mixture.
  • Let the chocolate pudding sit for a couple of minutes to thicken before spreading it over the cream cheese.
  • Chill the entire dessert for at least 4 hours (overnight is even better) before serving.

3. Can I Make This Dessert in Advance?

Absolutely! Turtle Lush actually tastes better the next day because the flavors have more time to meld together. Prepare it a day ahead, cover it tightly with plastic wrap, and store it in the fridge until ready to serve.

4. Can I Use Homemade Whipped Cream Instead of Whipped Topping?

Yes! If you prefer a homemade touch, you can make your own whipped cream by beating:

  • 2 cups of heavy whipping cream
  • 1/4 cup of powdered sugar
  • 1 teaspoon of vanilla extract

Whip until stiff peaks form, and use it as a substitute for the store-bought whipped topping.

5. What’s the Best Way to Store Leftovers?

Cover any leftovers with plastic wrap or store them in an airtight container in the refrigerator for up to 4 days. Avoid freezing, as the pudding and whipped layers may not hold their texture well after thawing.

6. Can I Make a Gluten-Free Version?

Yes! Simply swap out the Oreo cookies for a gluten-free chocolate cookie alternative, and ensure your pudding mix and other ingredients are labeled gluten-free.

7. Can I Make This Recipe Nut-Free?

Definitely! If you or someone you’re serving has a nut allergy, just leave out the pecans. You can replace them with crushed pretzels for a salty crunch or just enjoy the dessert without them.

Serving and Presentation Tips

Turtle Lush is not only delicious but also visually stunning when served properly. Here are a few presentation ideas:

  • Drizzle with extra caramel and chocolate sauce right before serving for a glossy, mouthwatering finish.
  • Garnish with whole pecans to make it extra eye-catching.
  • Chill it well before slicing for those perfectly layered bars.
  • Serve with a scoop of vanilla ice cream for an ultra-decadent dessert experience.

This dessert can be cut into bars for easy serving at a party, or spooned into dessert cups for a more elegant presentation.

Conclusion: A Treat Worth Indulging In

There are desserts that you enjoy, and then there are desserts that become a part of your memories. Turtle Lush is one of those special treats that brings people together—whether it’s at a family gathering, a holiday dinner, or just a quiet night in. The rich chocolate, creamy layers, and buttery pecans create an unforgettable combination that will have everyone coming back for more.

If you’re looking for a foolproof, no-bake dessert that is as easy as it is indulgent, Turtle Lush is your answer. So go ahead, make a batch, savor each bite, and create your own sweet memories.
aiting

Turtle Lush: A No-Bake Chocolate-Caramel Dream

Indulge in the ultimate no-bake dessert with Turtle Lush, a decadent blend of chocolate, caramel, and crunchy pecans. This layered delight features an Oreo crust, creamy cheesecake filling, rich chocolate pudding, and a luscious drizzle of caramel and chocolate syrup. Perfect for special occasions or satisfying your sweet tooth!
Prep Time 20 minutes
Cook Time 4 hours
Total Time 4 hours 20 minutes
Servings: 12 servings
Course: Dessert
Cuisine: American

Ingredients
  

Oreo Crust:
  • 3 cups Oreo crumbs
  • 8 tablespoons unsalted butter melted
Creamy Layer:
  • 1 8-ounce package of cream cheese, softened
  • 1/2 cup powdered sugar
  • 8 ounces whipped topping thawed
Chocolate Pudding Layer:
  • 1 5.9-ounce box instant chocolate pudding mix
  • 3 cups cold milk
Crunch & Drizzle:
  • 1 cup chopped pecans divided
  • 1/2 cup caramel sauce
  • 1/4 cup chocolate syrup
  • Remaining 8 ounces whipped topping

Method
 

  1. Step 1: Build the Base
  2. Mix Oreo crumbs with melted butter until well combined.
  3. Press the mixture into a 13×9 dish to form a firm crust.
  4. Freeze for 20 minutes to set.
Step 2: Whip Up the Creamy Layer
  1. In a mixing bowl, beat cream cheese and powdered sugar until smooth.
  2. Gently fold in 8 ounces of whipped topping until combined.
  3. Spread this layer evenly over the chilled Oreo crust.
Step 3: Create the Chocolate Dream
  1. In another bowl, whisk together chocolate pudding mix and cold milk for 2 minutes.
  2. Let the pudding thicken for 2-3 minutes before spreading over the cream cheese layer.
Step 4: Layer It Up
  1. Sprinkle 1/2 cup of chopped pecans over the chocolate pudding layer.
  2. Top with the remaining 8 ounces of whipped topping, spreading evenly.
Step 5: Chill to Perfection
  1. Cover the dish and refrigerate for at least 4 hours (overnight is best for the best texture).
Step 6: The Final Touch
  1. Before serving, drizzle caramel sauce and chocolate syrup over the top.
  2. Sprinkle the remaining chopped pecans for added crunch.
  3. Slice, serve, and enjoy this indulgent treat!

Notes

  • For extra crunch, add a layer of crushed pretzels between the cream cheese and pudding layers.
  • Use a mix of dark and milk chocolate syrup for a more balanced sweetness.
  • Store leftovers in the refrigerator for up to 4 days.
  • Swap out pecans for walnuts or almonds if preferred.
A rich and creamy dessert that’s as easy to make as it is to devour—Turtle Lush is the ultimate chocolate-caramel dream!
 

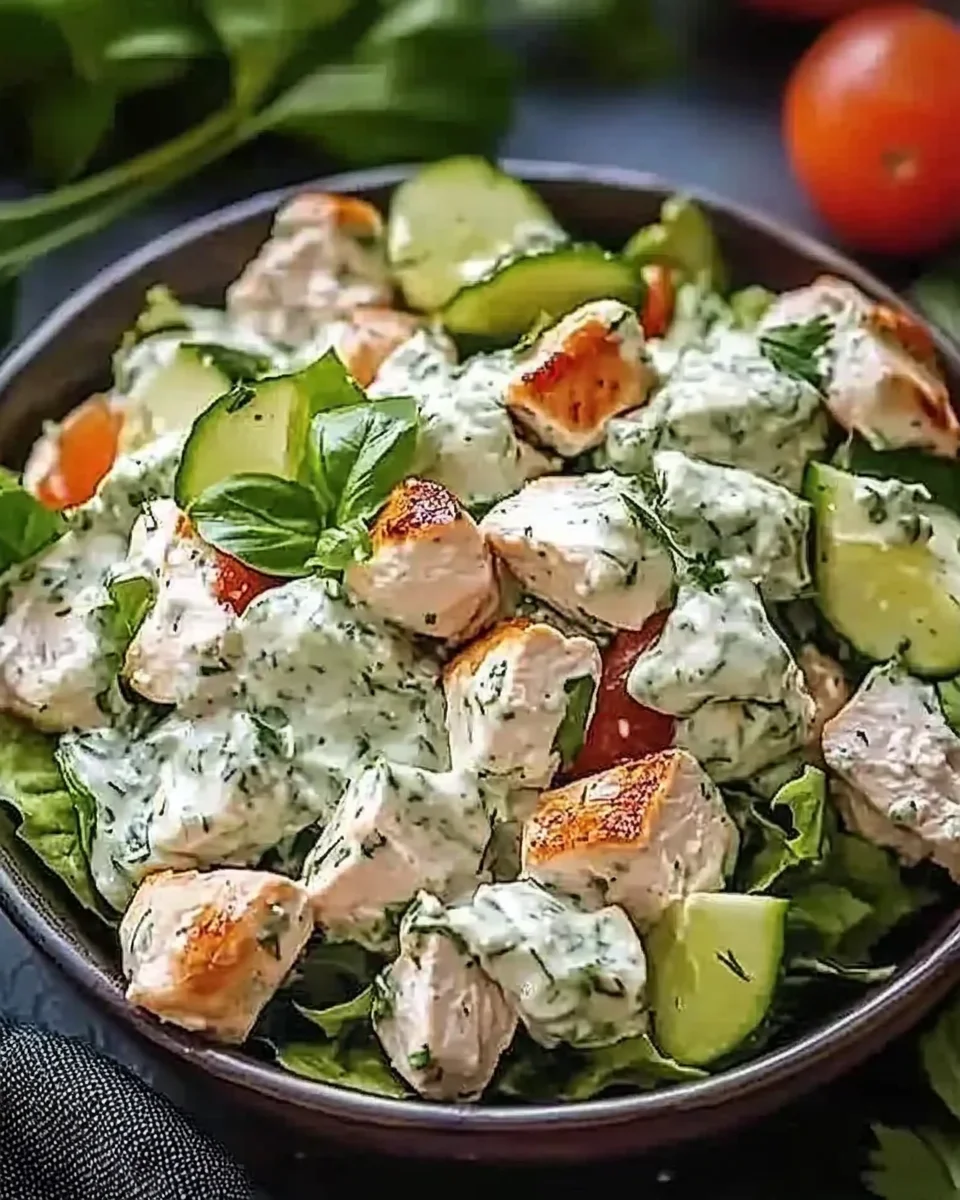
Tzatziki Chicken Salad: A Taste of the Mediterranean in Every Bite

A Journey Through Flavor and Memory

Food has an incredible way of connecting us to moments, places, and people. For me, Tzatziki Chicken Salad is more than just a meal; it’s a dish wrapped in nostalgia, reminding me of warm summer afternoons spent on the Greek coastline. I still remember my first time wandering through the bustling streets of Athens, drawn in by the scent of freshly grilled chicken and the cool, refreshing aroma of tzatziki sauce wafting from small family-owned tavernas.

One evening, I sat at a seaside café, watching the waves roll in as I enjoyed a plate of chicken drizzled with creamy tzatziki, served alongside crisp vegetables and a sprinkle of feta cheese. The flavors were simple yet vibrant—creamy, tangy, savory, and fresh, all in one bite. It was a meal that felt effortless yet so deeply satisfying. When I returned home, I was determined to recreate that experience, but in a way that fit into my everyday life. That’s how this Tzatziki Chicken Salad became a staple in my kitchen—a refreshing, protein-packed dish that brings the essence of Mediterranean cuisine to the table without the need for a passport.

Whether you’re looking for a healthy lunch, a quick dinner, or a meal prep option for the week, this salad offers all the goodness of fresh, wholesome ingredients while being incredibly easy to make.

Why You’ll Love This Salad

A Burst of Mediterranean Goodness

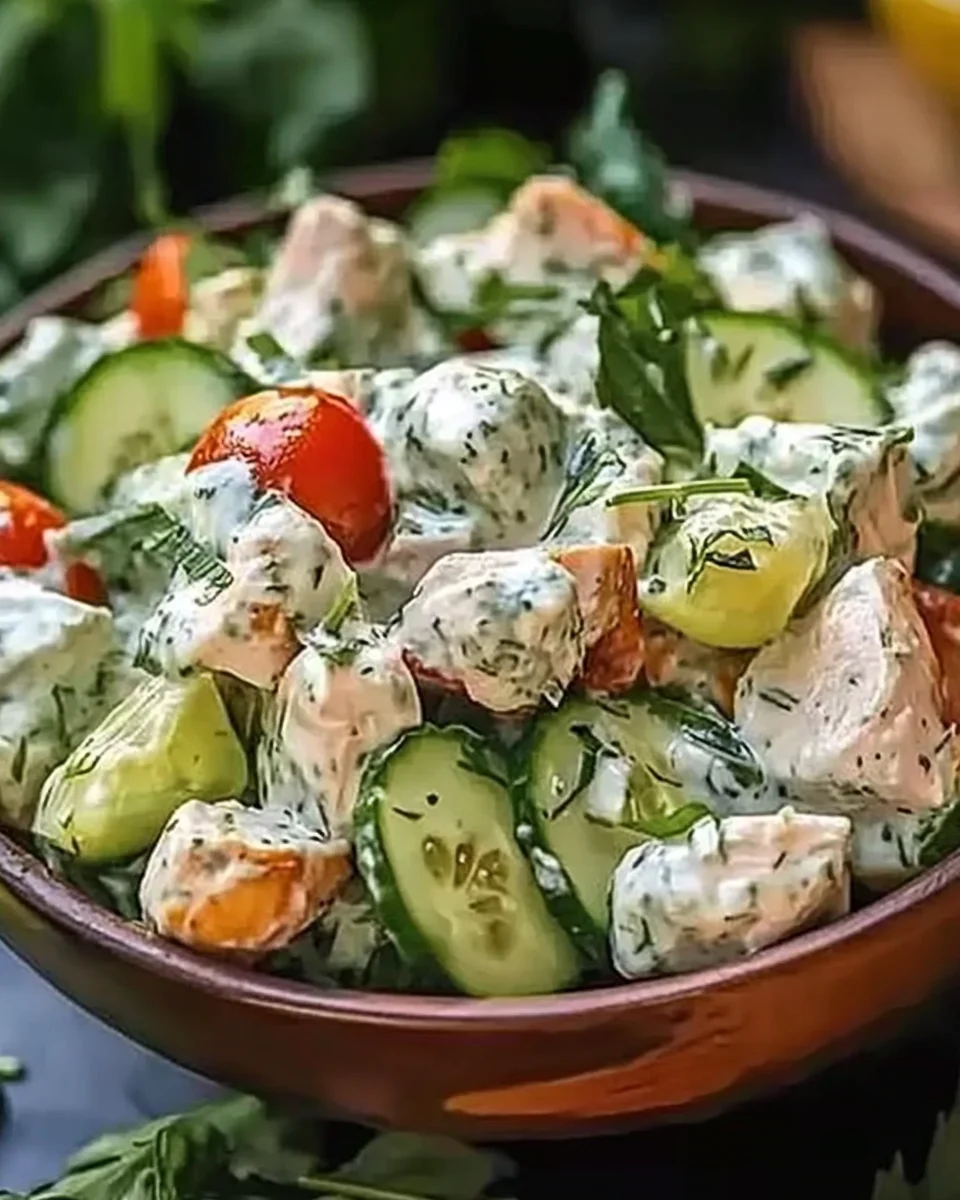
Greek cuisine is known for its bright, fresh flavors and nutrient-dense ingredients. This salad embodies that tradition, combining crisp greens, juicy tomatoes, tangy feta cheese, and savory chicken with the creamy richness of homemade tzatziki.

Perfect for Any Occasion

Whether you’re hosting a summer gathering, preparing a nutritious work lunch, or looking for a post-workout meal, this salad checks all the boxes. It’s light yet satisfying, making it ideal for both hot days and cozy indoor meals.

Healthy Without Compromising on Taste

One of the biggest struggles with eating healthy is finding meals that are both nutritious and delicious. This salad is packed with lean protein, healthy fats, and fiber-rich vegetables, making it a well-balanced meal that doesn’t feel like “diet food.” Plus, the probiotics in the Greek yogurt-based tzatziki sauce support gut health, adding another layer of wellness benefits.

Customization: Make It Your Own

One of the best things about this Tzatziki Chicken Salad is its versatility. While the classic recipe is already a winner, you can easily customize it to match your taste preferences or dietary needs.

For a Heartier Meal

  • Add cooked quinoa, farro, or couscous for extra texture and fiber.
  • Toss in roasted chickpeas or white beans for a plant-based protein boost.
  • Include sliced avocado for extra creaminess and healthy fats.

For a Lighter Option

  • Serve the salad in lettuce cups instead of a bowl.
  • Swap feta cheese for a lighter dairy-free alternative or omit it entirely.
  • Use grilled shrimp or tofu instead of chicken for a different protein source.

For Extra Crunch and Flavor

  • Sprinkle toasted pine nuts, almonds, or sunflower seeds on top.
  • Add thinly sliced radishes or bell peppers for more color and bite.
  • Drizzle with a touch of balsamic glaze for a sweet-savory contrast.

Serving Suggestions: Pairing Perfection

Tzatziki Chicken Salad is fantastic on its own, but if you’re looking to round out your meal, here are some great pairing ideas:

Bread & Grains

  • Warm pita bread or naan for scooping up the tzatziki sauce.
  • A side of fluffy couscous or quinoa for added substance.
  • Whole wheat crackers for a crunchy contrast.

Drinks

  • A crisp white wine, such as Sauvignon Blanc or Pinot Grigio, complements the fresh flavors beautifully.
  • A refreshing iced herbal tea with lemon and mint enhances the Mediterranean feel.
  • A simple cucumber-infused water for a hydrating, spa-like experience.

Sides

  • A small bowl of hummus with veggie sticks or pita chips.
  • A serving of grilled eggplant or zucchini drizzled with olive oil.
  • A light lentil soup for a well-rounded Mediterranean-inspired meal.

Storage & Meal Prep Tips

Keeping It Fresh

  • Store the tzatziki sauce separately to prevent the salad from becoming soggy.
  • Keep the chicken in an airtight container and refrigerate for up to three days.
  • Assemble the salad fresh before serving for the best texture and taste.

Meal Prep Hack

If you’re prepping for the week, chop the veggies in advance and store them separately. When ready to eat, simply assemble and drizzle with tzatziki for a quick, fuss-free meal.

Ingredients for a Flavor-Packed Salad

Tzatziki Sauce:
  • 1 cup + 2 tbsp Plain Greek Yogurt
  • ½ Cucumber, grated
  • 2-3 Garlic Cloves, pressed
  • 2 tbsp Olive Oil
  • 2 tbsp Fresh Dill, chopped
  • Salt and Pepper to taste
Salad:
  • 2 cups Cooked Chicken, chopped
  • 2 cups Romaine Lettuce, chopped
  • 1 cup Grape Tomatoes, halved
  • ½ cup Pepperoncini Peppers, sliced
  • ½ cup Kalamata Olives, sliced
  • ¼ cup Red Onion, chopped
  • ½ cup Feta Cheese, crumbled

Step-by-Step Directions to Perfection

1. Prepare the Creamy Tzatziki Sauce
  • In a mixing bowl, combine Greek yogurt, grated cucumber, pressed garlic, and fresh dill.
  • Drizzle in olive oil and mix well.
  • Season with salt and pepper. Let it chill for 10 minutes to enhance the flavors.
2. Build the Vibrant Salad Base
  • In a large bowl, toss together romaine lettuce, grape tomatoes, pepperoncini, Kalamata olives, and red onion.
  • Layer the chopped chicken over the greens.
3. Add the Tzatziki Magic
  • Generously drizzle the prepared tzatziki sauce over the salad.
4. The Final Touch of Feta
  • Sprinkle crumbled feta cheese on top for a burst of creamy, tangy flavor.

Nutritional Breakdown: A Healthy Delight

  • Calories: 320
  • Carbohydrates: 12g
  • Protein: 24g
  • Fat: 20g
  • Saturated Fat: 6g
  • Cholesterol: 75mg
  • Sodium: 720mg
  • Fiber: 4g
  • Vitamin A: 70% DV
  • Vitamin C: 20% DV
  • Calcium: 15% DV
  • Iron: 10% DV

This Tzatziki Chicken Salad is a perfect blend of fresh ingredients and Mediterranean flavors, making it a nutritious, satisfying meal! Let me know if you need any modifications or serving suggestions.

Frequently Asked Questions (FAQs)

1. Can I make this salad ahead of time?

Yes! For the freshest taste, store the ingredients separately and assemble just before serving. The tzatziki sauce will keep in the refrigerator for about three days.

2. Is there a dairy-free alternative to tzatziki?

Absolutely! Use a dairy-free yogurt alternative (such as coconut or almond yogurt) to make the tzatziki sauce. The texture and flavor will still be deliciously creamy.

3. What type of chicken works best?

Grilled, baked, or even shredded rotisserie chicken all work well. If you have leftover roast chicken, this is a great way to use it up.

4. How do I keep my tzatziki sauce from getting watery?

Make sure to squeeze out as much liquid as possible from the grated cucumber before mixing it into the yogurt. This prevents excess moisture from thinning out the sauce.

5. Can I turn this into a wrap?

Yes! Stuff the salad into a whole wheat pita or wrap it in a tortilla for an easy, portable meal.

6. What if I don’t like olives or pepperoncini?

Feel free to omit them or swap them out with ingredients you love, such as roasted red peppers or artichoke hearts.

Final Thoughts: More Than Just a Salad

Tzatziki Chicken Salad isn’t just a recipe; it’s an experience—a way to bring the warmth and vibrancy of Mediterranean cuisine into your home. Whether it reminds you of a past travel adventure, a favorite family meal, or simply a moment of culinary joy, this dish is one that resonates beyond the plate.

With its balance of creamy, tangy, and savory flavors, along with its endless customization options, this salad is bound to become a staple in your kitchen. So the next time you’re craving something fresh, healthy, and satisfying, whip up a bowl of Tzatziki Chicken Salad and let every bite transport you to a sun-drenched Greek island.

If you try this recipe, let me know how you made it your own. Happy cooking!

aiting

Tzatziki Chicken Salad: A Taste of the Mediterranean in Every Bite

Enjoy a refreshing and protein-packed Tzatziki Chicken Salad, bursting with Mediterranean flavors! Juicy chicken, crisp romaine lettuce, tangy feta, and a creamy homemade tzatziki sauce come together in this light yet satisfying dish. Perfect for a quick lunch or a nutritious dinner!
Prep Time 10 minutes
Cook Time 5 minutes
Total Time 15 minutes
Servings: 2 servings
Course: Salad
Cuisine: Mediterranean

Ingredients
  

Tzatziki Sauce:
  • 1 cup + 2 tbsp Plain Greek Yogurt
  • ½ Cucumber grated
  • 2-3 Garlic Cloves pressed
  • 2 tbsp Olive Oil
  • 2 tbsp Fresh Dill chopped
  • Salt and Pepper to taste
Salad:
  • 2 cups Cooked Chicken chopped
  • 2 cups Romaine Lettuce chopped
  • 1 cup Grape Tomatoes halved
  • ½ cup Pepperoncini Peppers sliced
  • ½ cup Kalamata Olives sliced
  • ¼ cup Red Onion chopped
  • ½ cup Feta Cheese crumbled

Method
 

  1. Step 1: Prepare the Creamy Tzatziki Sauce
  2. In a mixing bowl, combine Greek yogurt, grated cucumber, pressed garlic, and fresh dill.
  3. Drizzle in olive oil and mix well.
  4. Season with salt and pepper. Let it chill for 10 minutes to enhance the flavors.
Step 2: Build the Vibrant Salad Base
  1. In a large bowl, toss together romaine lettuce, grape tomatoes, pepperoncini, Kalamata olives, and red onion.
  2. Layer the chopped chicken over the greens.
Step 3: Add the Tzatziki Magic
  1. Generously drizzle the prepared tzatziki sauce over the salad.
Step 4: The Final Touch of Feta
  1. Sprinkle crumbled feta cheese on top for a burst of creamy, tangy flavor.

Notes

  • For extra flavor, marinate the chicken in lemon juice, olive oil, and oregano before cooking.
  • Substitute feta with goat cheese for a milder tang.
  • Add a handful of toasted pita chips for a crunchy twist.
  • Store extra tzatziki sauce in an airtight container in the fridge for up to 3 days.
A light and healthy meal that’s big on taste—this Tzatziki Chicken Salad is your go-to dish for Mediterranean freshness!
 

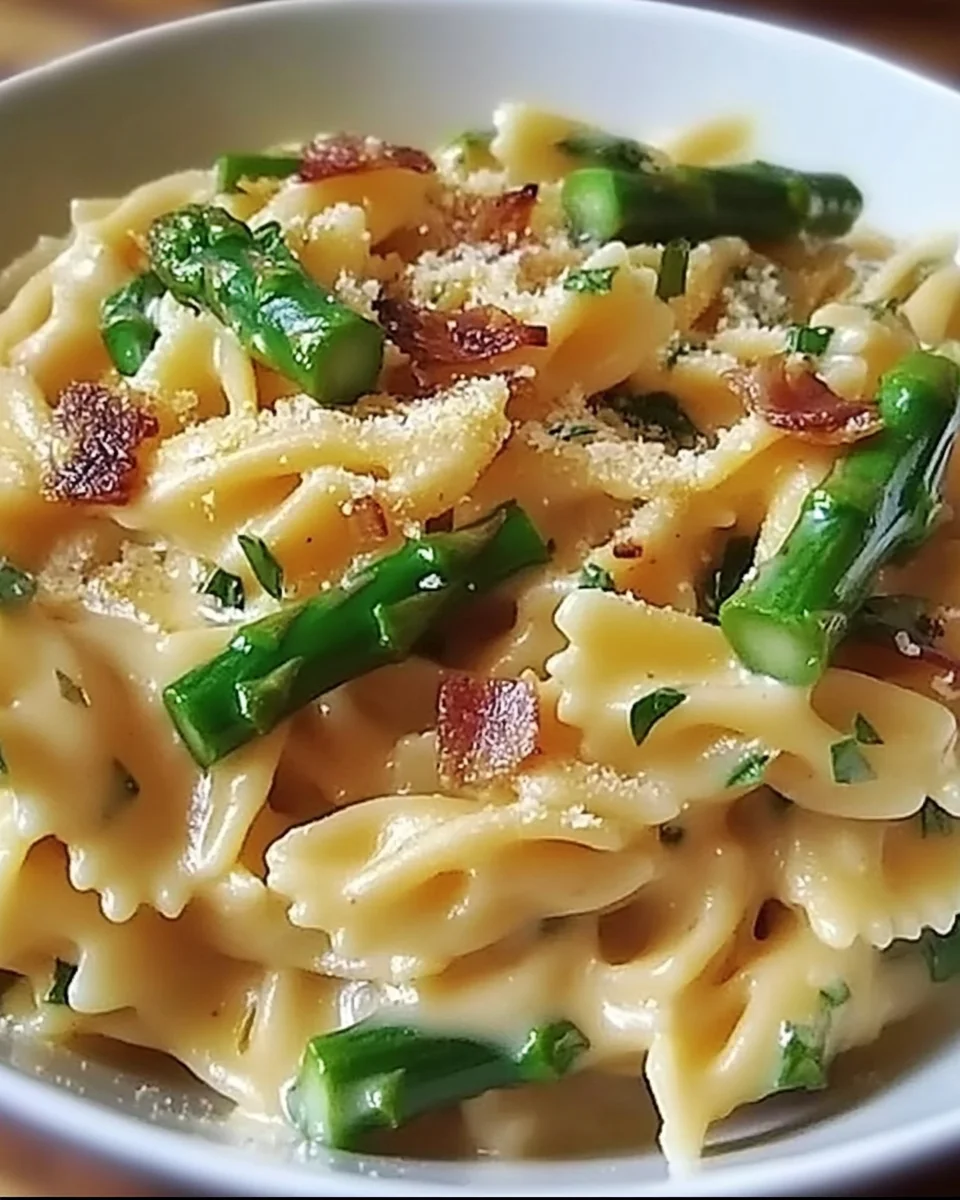
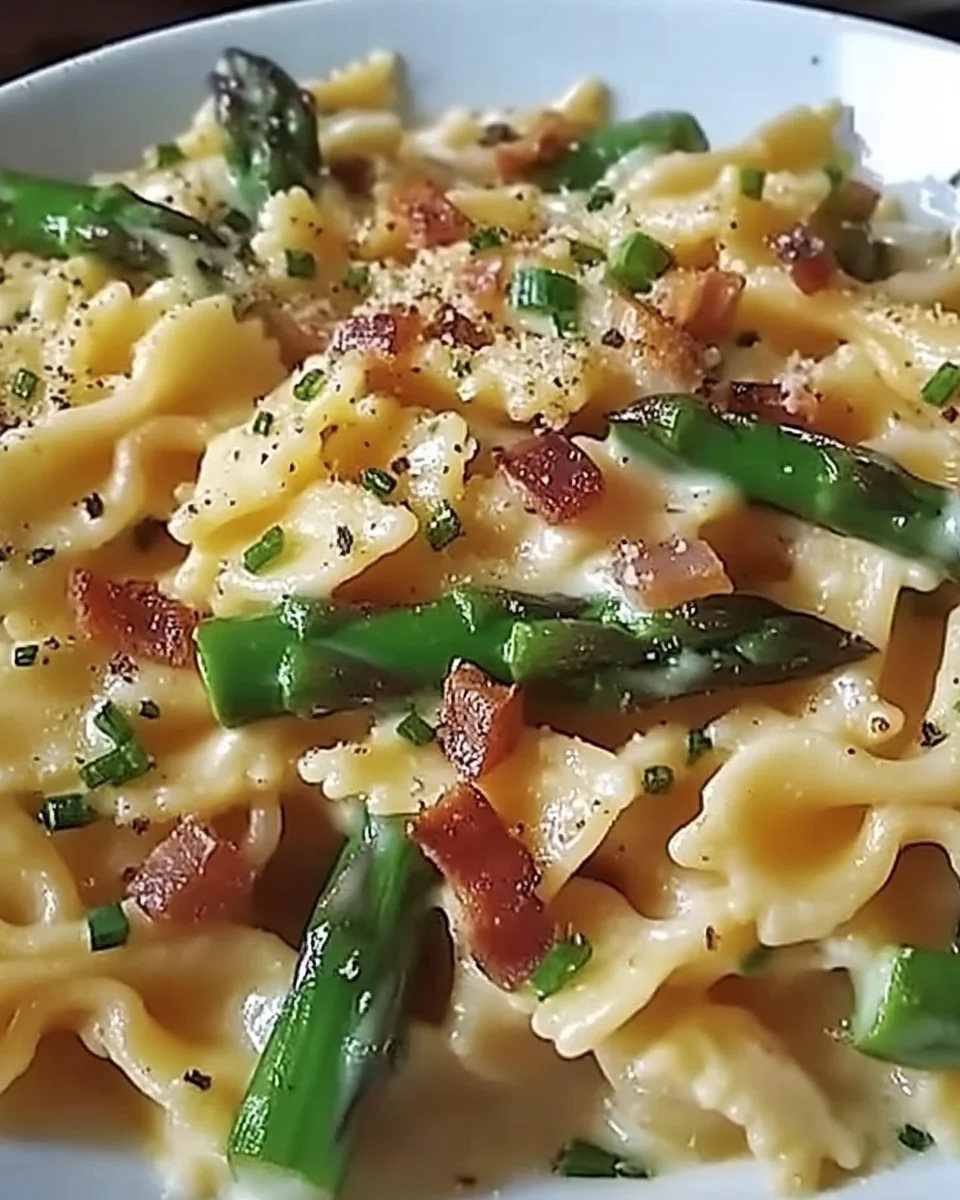
Creamy Pasta with Asparagus: A Dish of Comfort and Elegance

A Taste of Nostalgia: My Journey with Creamy Pasta

Growing up, Sunday dinners were sacred in my family. They weren’t just meals; they were moments of togetherness, stories shared across the table, and the comforting aroma of home-cooked food filling the air. My mother had a special knack for transforming simple ingredients into something extraordinary, and one of my fondest memories is of her creamy pasta dishes.

She would take fresh seasonal vegetables from the farmer’s market—crisp asparagus in the spring, sun-ripened tomatoes in the summer—and craft meals that tasted like love in every bite. The way she carefully stirred the sauce, making sure it was velvety smooth, the way she plated the dish with a final sprinkle of Parmesan—it was a ritual, a labor of love.

This Creamy Pasta with Asparagus recipe brings me right back to those warm, laughter-filled evenings. It embodies everything I cherish about food: simplicity, richness, and a touch of nostalgia. Whether you’re making this for a family gathering, a romantic dinner, or just a quiet night in, this dish has the power to turn an ordinary meal into something memorable.

Why This Recipe Works: The Perfect Harmony of Flavors

This dish is a balance of textures and flavors, offering a satisfying, restaurant-quality meal that can be made right in your kitchen.

  • The Perfect Pasta Choice: Bow tie pasta (farfalle) isn’t just visually appealing; its ridges and folds help trap the creamy sauce, ensuring every bite is indulgent.
  • Creamy But Not Overpowering: The sauce is rich but well-balanced, allowing the natural sweetness of asparagus to shine through without being overshadowed by the dairy.
  • A Touch of Crunch: Toasted pine nuts provide a delicate crunch that contrasts beautifully with the creaminess of the dish.
  • Bright and Fresh Elements: Fresh parsley adds an herbaceous note, cutting through the richness, while asparagus brings a natural vibrancy.

This recipe highlights the beauty of simple, high-quality ingredients coming together to create a dish that is both elegant and comforting.

The Nutritional Power of Asparagus: More Than Just a Pretty Green

Asparagus is more than just a vibrant addition to this pasta—it’s a powerhouse of nutrients that elevate this dish beyond its creamy decadence.

  • Rich in Antioxidants: Asparagus is packed with vitamins A, C, and E, which help fight inflammation and boost immunity.
  • Supports Digestive Health: With its fiber content, asparagus promotes a healthy gut and aids digestion.
  • Good for the Heart: It contains folate and potassium, which support cardiovascular health and help regulate blood pressure.
  • Bone Health Booster: Asparagus is a great source of Vitamin K, which plays a vital role in bone strength and blood clotting.

Pairing asparagus with a creamy sauce might seem indulgent, but the combination creates a dish that is both nourishing and comforting.

Variations to Suit Every Palate

One of the best things about this recipe is its versatility. With a few tweaks, you can tailor it to different dietary preferences and flavor profiles.

For Meat Lovers

  • Add grilled chicken strips or shrimp for a protein boost. The mild sweetness of shrimp pairs beautifully with the creamy sauce.
  • Crumbled crispy bacon adds a smoky depth to the dish.

For Vegetarians & Vegans

  • Substitute Parmesan cheese with a vegan alternative like nutritional yeast.
  • Use coconut cream or a cashew-based sauce instead of heavy cream for a dairy-free version.

For the Health-Conscious

  • Swap heavy cream for half-and-half or a Greek yogurt mixture for a lighter version.
  • Use whole wheat pasta or even spiralized zucchini noodles to reduce carbs.

For a Spicy Kick

  • Add a pinch of red pepper flakes or a dash of cayenne pepper to the sauce for some heat.
  • Stir in sun-dried tomatoes for a tangy contrast.

With these variations, this dish can be enjoyed in countless ways, making it a staple for any season or occasion.

Pairing Ideas: The Perfect Complements to Your Pasta

To elevate this creamy pasta to a full dining experience, consider pairing it with the right side dishes and beverages.

Wine Pairings

  • White Wine: A crisp Sauvignon Blanc or Pinot Grigio cuts through the richness of the cream sauce, enhancing the asparagus’s fresh notes.
  • Light Red Wine: A fruity Pinot Noir pairs surprisingly well, offering a delicate balance without overpowering the dish.

Side Dishes

  • Garlic Bread: A warm, crusty slice of garlic bread is the perfect way to scoop up extra sauce.
  • Simple Green Salad: A light salad with a lemon vinaigrette provides a refreshing contrast.
  • Roasted Vegetables: Try roasted cherry tomatoes or zucchini for an extra serving of veggies.

Gather Your Culinary Arsenal

Ingredients:

  • Pasta Perfection: 4 oz bow tie pasta (farfalle)
  • Rich Foundation: 2 tbsp unsalted butter
  • Flavor Booster: 1 clove garlic, finely minced
  • Cheesy Indulgence: 1/3 cup grated Parmesan cheese
  • Umami Depth: 1 tsp chicken soup base (L.B. Jamison’s recommended)
  • Creamy Goodness: 2/3 cup heavy cream
  • Seasoning Magic: Salt & freshly ground black pepper, to taste
  • Green Crispness: 6 thin asparagus spears, cut into 2-inch pieces, blanched
  • Nutty Crunch: 2 tbsp toasted pine nuts
  • Fresh Finish: 1 tbsp chopped parsley
  • Extra Garnish: Additional Parmesan cheese

Mastering the Magic: Step-by-Step Directions

Step 1: Pasta Prep

  1. Boil a medium pot of salted water.
  2. Cook the bow tie pasta according to package directions (about 8-10 minutes) until al dente.
  3. Drain and set aside.

Step 2: Asparagus Elegance

  1. In another pot, bring water to a boil.
  2. Add asparagus and blanch for 2-4 minutes until bright green and slightly crisp.
  3. Drain and rinse under cold water to halt cooking.

Step 3: Creamy Sauce Symphony

  1. Melt butter in a 9-inch skillet over medium heat.
  2. Add garlic and sauté for about one minute until fragrant.
  3. Stir in Parmesan cheese and chicken soup base until well combined.
  4. Slowly pour in heavy cream while stirring constantly.
  5. Season with salt and black pepper. Let simmer until slightly thickened.

Step 4: Bringing It All Together

  1. Toss cooked pasta into the creamy sauce, ensuring every piece is well coated.
  2. Fold in the blanched asparagus.
  3. Sprinkle in toasted pine nuts and chopped parsley for added texture and freshness.
  4. Serve immediately, topped with extra Parmesan cheese if desired.

Nutritional Breakdown: A Balance of Indulgence & Benefits

  • Calories: ~580 kcal per serving
  • Carbohydrates: 60g – Energy-packed pasta goodness
  • Protein: 18g – Strength-building with asparagus & Parmesan
  • Fats: 28g – Creamy and satisfying richness
  • Fiber: 2g – Gut-friendly boost from asparagus
  • Vitamins & Minerals: High in Vitamin K (bone health) & Folate (cell growth)

This dish is a creamy, cheesy, and slightly nutty delight that brings comfort with every bite. Whether for a cozy night in or an elegant dinner, this Creamy Pasta with Asparagus is a showstopper!

FAQs: Your Questions Answered

1. Can I make this ahead of time?

Yes! While it’s best enjoyed fresh, you can prepare the pasta and sauce separately, then reheat and combine when ready to serve. Add a splash of cream or milk while reheating to restore the sauce’s silky texture.

2. How do I prevent the sauce from becoming too thick or clumpy?

  • Stir continuously when adding the Parmesan cheese to ensure it melts evenly.
  • Use medium-low heat to prevent curdling or separation.
  • If the sauce thickens too much, add a bit of reserved pasta water or a splash of milk to loosen it.

3. What can I substitute for pine nuts?

If you don’t have pine nuts, try toasted almonds, walnuts, or sunflower seeds for a similar crunchy contrast.

4. How can I store leftovers?

Store in an airtight container in the refrigerator for up to three days. Reheat gently on the stove, adding a little cream or water to bring back the creamy consistency.

5. Can I make this gluten-free?

Absolutely! Use gluten-free pasta and ensure any broth or thickening agents used are gluten-free.

Final Thoughts: A Dish That Brings People Together

Cooking is more than just following a recipe—it’s about creating an experience. This Creamy Pasta with Asparagus is more than just a meal; it’s an invitation to slow down, savor the moment, and appreciate the simple joys of homemade food.

Whether you’re making this for a weeknight dinner, a special gathering, or just to treat yourself, this dish is proof that comfort and elegance can coexist beautifully on a plate. So gather your ingredients, stir up a little love, and enjoy a pasta dish that feels like a warm embrace with every bite.

aiting

Creamy Pasta with Asparagus: A Dish of Comfort and Elegance

Indulge in the ultimate comfort dish with this Creamy Pasta with Asparagus. This delightful recipe features tender bow tie pasta enveloped in a luscious Parmesan cream sauce, perfectly balanced with blanched asparagus and crunchy toasted pine nuts. A luxurious yet simple dish that will elevate any meal!
Prep Time 10 minutes
Cook Time 15 minutes
Total Time 20 minutes
Servings: 2 servings
Course: Main Course
Cuisine: Italian-inspired

Ingredients
  

  • 4 oz bow tie pasta farfalle
  • 2 tbsp unsalted butter
  • 1 clove garlic finely minced
  • 1/3 cup grated Parmesan cheese
  • 1 tsp chicken soup base L.B. Jamison’s recommended
  • 2/3 cup heavy cream
  • Salt & freshly ground black pepper to taste
  • 6 thin asparagus spears cut into 2-inch pieces, blanched
  • 2 tbsp toasted pine nuts
  • 1 tbsp chopped parsley
  • Additional Parmesan cheese for garnish

Method
 

  1. Step 1: Pasta Preparation
  2. Bring a medium pot of salted water to a boil.
  3. Cook the bow tie pasta according to package directions (about 8-10 minutes) until al dente.
  4. Drain and set aside.
Step 2: Blanch the Asparagus
  1. In another pot, bring water to a boil.
  2. Add asparagus and blanch for 2-4 minutes until bright green and slightly crisp.
  3. Drain and rinse under cold water to stop cooking.
Step 3: Prepare the Creamy Sauce
  1. Melt butter in a 9-inch skillet over medium heat.
  2. Add garlic and sauté for about one minute until fragrant.
  3. Stir in Parmesan cheese and chicken soup base until well combined.
  4. Slowly pour in heavy cream while stirring constantly.
  5. Season with salt and black pepper. Let simmer until slightly thickened.
Step 4: Assemble the Dish
  1. Toss cooked pasta into the creamy sauce, ensuring every piece is well coated.
  2. Fold in the blanched asparagus.
  3. Sprinkle in toasted pine nuts and chopped parsley for added texture and freshness.
  4. Serve immediately, garnished with extra Parmesan cheese.

Notes

  • For a vegetarian version, substitute the chicken soup base with vegetable broth powder.
  • Adjust seasoning as needed to balance the richness of the cream sauce.
  • If you prefer extra crunch, add more toasted pine nuts before serving.
  • Try whole wheat pasta for a healthier twist without compromising on taste.
Enjoy this rich and creamy pasta dish that pairs beautifully with a crisp white wine or a refreshing side salad!
 

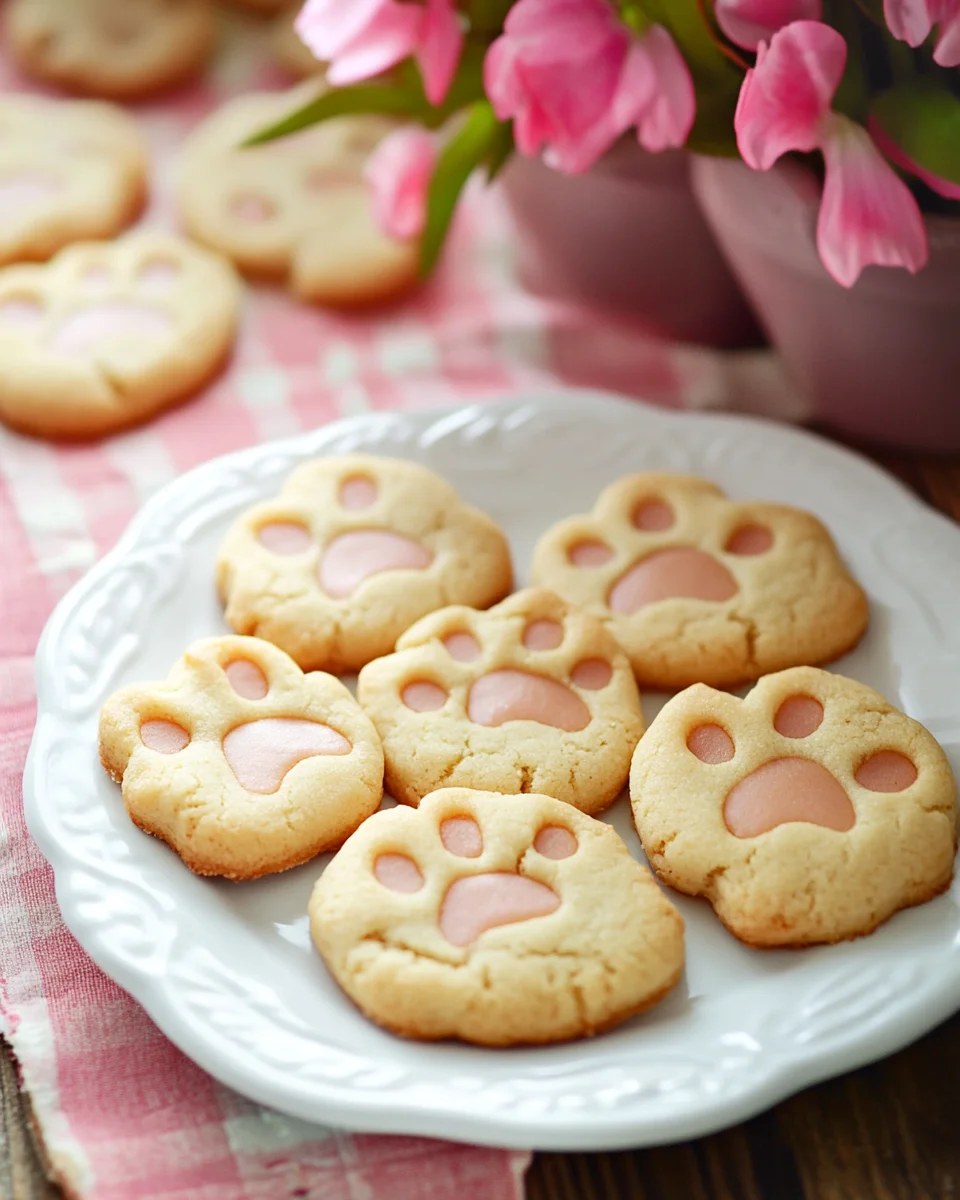
Bunny Paw Print Cookies: A Sweet Easter Memory

A Tradition Baked with Love

Some of my fondest childhood memories are tied to the kitchen, where my grandmother would patiently teach me the art of baking. The warmth of the oven, the scent of sugar and vanilla filling the air, and the joy of sneaking a taste of the cookie dough before it was baked—these moments made every holiday special.

One Easter, she surprised us with something different—cookies shaped like little bunny paws. She said they were left behind by the Easter Bunny himself, and my siblings and I, wide-eyed with excitement, were convinced we had proof that he had visited our home. Years later, when I had children of my own, I wanted to pass on that same magic. Bunny Paw Print Cookies became a cherished Easter tradition, one that my kids now eagerly look forward to every year.

These cookies are more than just a dessert; they represent love, laughter, and the joy of family. They are a reminder that sometimes, the simplest things—a bit of dough, a sprinkle of sugar, and a whole lot of imagination—can create the most lasting memories.

The Story Behind Bunny Paw Print Cookies

Bunny Paw Print Cookies are a whimsical take on traditional sugar cookies, designed to look like the footprints of an Easter Bunny. Soft, buttery, and lightly sweetened, they have a melt-in-your-mouth texture that pairs beautifully with a simple homemade icing. Their adorable design makes them a favorite among children, and they add a delightful touch to any Easter celebration.

What makes these cookies extra special is their interactive nature. Kids love rolling the dough into little balls, arranging them into paw prints, and helping decorate with pastel-colored icing. They are not only fun to make but also an enjoyable way to bond with family during the Easter season.

Baking Tips for the Perfect Bunny Paw Print Cookies

1. Use Room Temperature Ingredients

To achieve the best texture, ensure that the butter and egg are at room temperature before mixing. This helps create a smooth dough and prevents it from becoming too stiff.

2. Don’t Overbake

These cookies should be soft and slightly chewy. Since ovens vary, check them at the 7-minute mark. They may look slightly underdone, but they will continue to set as they cool.

3. Make Perfect Paw Prints

Pressing the indentations into the cookies right after baking is key. Use the back of a tablespoon for the foot and a teaspoon for the toes while the cookies are still warm. This ensures the icing sits neatly in the grooves.

4. Get Creative with Colors

While classic pink icing gives the cookies a traditional Easter look, feel free to experiment with different pastel shades like lavender, baby blue, or mint green for a festive variety.

5. Use a Piping Bag for Neat Icing

For clean and precise icing application, use a piping bag or a plastic sandwich bag with the tip snipped off. This prevents mess and ensures the paw prints look neat.

Fun Variations to Try

1. Chocolate Bunny Paw Prints

For a richer variation, replace half of the flour with cocoa powder to create a chocolate version of the cookies. Use white or light pink icing for contrast.

2. Coconut-Coated Paws

After adding the icing, dip the cookies in shredded coconut for a fuzzy, bunny-like effect. This adds both texture and flavor.

3. Sprinkle Surprise

For extra fun, sprinkle sanding sugar or edible glitter over the icing while it’s still wet for a sparkly finish.

4. Lemon or Almond Twist

Swap out the vanilla extract for lemon or almond extract to give the cookies a unique flavor profile.

5. Mini Bunny Paws

Make smaller bite-sized versions by halving the dough portions and using a smaller spoon for the indentations. These are perfect for little hands and Easter party platters.

How to Store and Keep Fresh

  • Room Temperature: Store cookies in an airtight container for up to 5 days. Layer them between sheets of parchment paper to prevent sticking.
  • Refrigerator: If you need to keep them longer, store in the fridge for up to 1 week, though they may lose a bit of softness.
  • Freezing: Both the unbaked dough and baked cookies freeze well. Wrap unbaked dough tightly and store for up to 3 months. Baked cookies can be frozen for up to 2 months; just thaw at room temperature before serving.

Serving Suggestions

  • Easter Brunch Centerpiece: Arrange these cookies on a pastel platter alongside fresh fruit and tea sandwiches for a charming Easter table.
  • Gift-Worthy Treats: Package them in decorative boxes or clear treat bags tied with ribbons for adorable homemade Easter gifts.
  • Dessert Board Addition: Serve alongside chocolate eggs, marshmallow bunnies, and Easter cupcakes for a stunning holiday dessert board.
  • Pairing Idea: Enjoy them with a glass of milk, a warm cup of tea, or even a creamy hot chocolate for a comforting treat.

Whimsical Ingredients

For the Cookies:

  • 1 cup butter, softened
  • 1 1/2 cups powdered sugar
  • 1 egg
  • 1 tsp vanilla extract
  • 1/2 tsp almond extract
  • 2 1/2 cups all-purpose flour
  • 1 tsp baking soda
  • 1 tsp cream of tartar

For the Icing:

  • 2 cups powdered sugar
  • 2 Tbsp milk (plus an extra 1 tsp if needed)
  • 1/2 tsp vanilla extract
  • 5-6 drops red food coloring

Magic in the Making

  1. Mix the Magic: In a mixer, cream together the butter and powdered sugar. Add the egg, vanilla, and almond extract, then mix until smooth.
  2. Dry Ingredients Dance: In a separate bowl, whisk together flour, baking soda, and cream of tartar. Gradually add to the butter mixture and blend until fully combined.
  3. Shape the Paws:
    • Use a tablespoon of dough to roll a large ball for the “foot.”
    • Roll three teaspoon-sized balls to create the “toes” and arrange them next to the foot on a baking sheet.
    • Gently flatten the foot slightly with your fingers for even baking.
  4. Bake to Perfection: Bake at 375°F for 7-8 minutes—no longer!
  5. Paw Print Impressions: Immediately after baking, use a tablespoon to press an indent in the foot and a teaspoon to press indents in the toes. Let cookies cool.
  6. Whip Up the Icing: In a bowl, beat together powdered sugar, milk, vanilla, and food coloring until smooth.
  7. Decorate with Delight: Pipe icing into the indents using a piping bag or a plastic bag with the corner snipped.
  8. Let Set & Enjoy: Allow icing to set before serving these adorable Easter treats!

A Peek at the Goodness

While exact nutrition values may vary, here’s a general estimate per cookie:

  • Calories: ~150
  • Fat: ~7g
  • Carbohydrates: ~20g
  • Sugar: ~12g
  • Protein: ~1g

These Bunny Paw Print Cookies are a fun, festive, and delicious way to celebrate Easter!

Frequently Asked Questions

1. Can I Make These Cookies Ahead of Time?

Yes! You can prepare the dough a day in advance and refrigerate it. If it’s too firm after chilling, let it sit at room temperature for about 10 minutes before rolling.

2. Why Did My Cookies Spread Too Much?

If your cookies spread too much, it could be due to overly softened butter or not enough flour. Be sure to measure accurately and refrigerate the dough for 15-20 minutes before baking if needed.

3. Can I Use Store-Bought Icing?

Absolutely! While homemade icing gives the best flavor, store-bought royal icing or decorating gels work as a quick alternative.

4. What If My Cookies Crack?

Cookies may crack if the dough is too dry. Ensure you’re using softened butter and not overmixing the dough. Also, press the indentations gently to avoid breaking the surface.

5. Can I Make These Without Almond Extract?

Yes! You can simply increase the vanilla extract or substitute another flavor, like lemon or orange.

6. How Can I Make These Healthier?

Try reducing the sugar slightly or using a whole wheat flour blend. You can also experiment with natural food coloring for the icing.

A Sweet Easter Tradition Worth Keeping

Bunny Paw Print Cookies are more than just a dessert; they’re a symbol of holiday joy, creativity, and togetherness. Whether you’re baking them with children, gifting them to loved ones, or simply indulging in a bit of nostalgic fun, these cookies bring warmth and happiness to any Easter celebration.

The best part? Every time you make them, you’re creating cherished memories—ones that, just like those soft, buttery cookies, will linger long after the last crumb has been enjoyed. So gather your loved ones, roll up your sleeves, and start a tradition of your own.

Happy Easter and happy baking!

aiting

Bunny Paw Print Cookies: A Sweet Easter Memory

Hop into Easter with these Bunny Paw Print Cookies—soft, buttery treats shaped like adorable bunny paws! Topped with a sweet pink icing, these festive cookies are perfect for holiday gatherings, kids’ activities, or simply adding a touch of magic to your dessert table.
Prep Time 15 minutes
Cook Time 8 minutes
Total Time 23 minutes
Servings: 24 cookies
Course: Dessert
Cuisine: American

Ingredients
  

For the Cookies:
  • 1 cup butter softened
  • 1 1/2 cups powdered sugar
  • 1 egg
  • 1 teaspoon vanilla extract
  • 1/2 teaspoon almond extract
  • 2 1/2 cups all-purpose flour
  • 1 teaspoon baking soda
  • 1 teaspoon cream of tartar
For the Icing:
  • 2 cups powdered sugar
  • 2 tablespoons milk plus an extra 1 teaspoon if needed
  • 1/2 teaspoon vanilla extract
  • 5-6 drops red food coloring

Method
 

  1. Cream the Butter & Sugar – In a mixer, beat together the butter and powdered sugar until smooth. Add the egg, vanilla extract, and almond extract, mixing until fully combined.
  2. Combine the Dry Ingredients – In a separate bowl, whisk together flour, baking soda, and cream of tartar. Gradually add this mixture to the butter mixture, blending until fully incorporated.
  3. Shape the Bunny Paws
  4. Roll a tablespoon-sized dough ball for the “foot.”
  5. Roll three teaspoon-sized dough balls for the “toes” and arrange them next to the foot on a baking sheet.
  6. Gently flatten the foot slightly with your fingers for even baking.
  7. Bake to Perfection – Preheat oven to 375°F (190°C) and bake for 7-8 minutes—do not overbake!
  8. Make the Paw Prints – Right after baking, use a tablespoon to press an indent into the foot and a teaspoon to press indents into the toes. Let cookies cool completely before decorating.
  9. Prepare the Icing – In a bowl, whisk together powdered sugar, milk, vanilla extract, and red food coloring until smooth. Adjust consistency by adding more milk if needed.
  10. Decorate the Cookies – Pipe the icing into the indents using a piping bag or a plastic bag with a small corner snipped off.
  11. Let the Icing Set & Enjoy – Allow icing to fully set before serving these delightful Easter treats!

Notes

  • Store cookies in an airtight container at room temperature for up to 5 days.
  • Swap almond extract for additional vanilla extract if preferred.
  • Use gel food coloring for a more vibrant pink hue.

The Magic of Easter Bunny Sugar Cookies

Growing up, Easter was always a special time in my family. It wasn’t just about the Easter egg hunts or the excitement of finding a chocolate bunny hidden in the backyard—it was about tradition. My grandmother had a way of turning the simplest moments into something magical, and one of my favorite memories was baking sugar cookies with her every spring. The sweet aroma of vanilla and butter filled the kitchen as we rolled out the dough, cutting each cookie into fun shapes, dusting them with sprinkles, and giggling as we sneaked bites of raw dough when she wasn’t looking.

Now, as a parent, I find myself recreating that magic with my own children. These Chocolate-Dipped Easter Bunny Sugar Cookies have become a staple in our home, not just because they taste incredible, but because they bring people together. Whether you’re baking them with little hands eager to help or making them as a delightful surprise for an Easter gathering, these cookies capture the joy of the season in every bite.

Why You’ll Love These Easter Bunny Sugar Cookies

Easter baking should be easy, fun, and, most importantly, delicious. These cookies check all the boxes. Here’s why they are a must-try:

  • Perfectly Soft Texture – These cookies have a delicate crisp edge with a soft, buttery center that melts in your mouth.
  • Festive and Fun – The pastel sprinkles and chocolate dip make them a visually stunning treat that fits right in with Easter festivities.
  • Kid-Friendly Recipe – From mixing the dough to cutting out bunnies and decorating with sprinkles, kids will love getting involved.
  • Simple Ingredients, Big Flavor – Made with pantry staples, these cookies are full of rich vanilla and buttery goodness.
  • Versatile for Any Occasion – Though perfect for Easter, you can swap out the cookie cutter shape and sprinkle colors to make them suitable for any holiday or celebration.

The Secret to the Perfect Sugar Cookie

Anyone who has baked sugar cookies before knows that they can be a bit finicky. Too much flour, and they turn out dry. Too little chilling time, and they spread too much. Here are some key tips to ensure success every time:

1. Measure Flour Correctly

One of the most common mistakes in baking sugar cookies is adding too much flour. The best way to measure is by using the spoon-and-level method—spoon the flour into the measuring cup, then level it off with a knife. Avoid scooping directly from the bag, as this compacts the flour and leads to dense cookies.

2. Don’t Skip the Chilling Step

Refrigerating the dough is crucial for two reasons: it allows the butter to firm up, preventing the cookies from spreading too much in the oven, and it enhances the flavor. Ideally, chill the dough for at least an hour, but overnight is even better.

3. Rolling Out Dough with Plastic Wrap

Instead of using extra flour when rolling out your dough, try placing it between two sheets of plastic wrap. This prevents sticking without adding excess flour, which can make the cookies tough.

4. Even Thickness is Key

For uniform baking, aim to roll the dough to about ⅓-inch thickness. If your cookies are too thin, they’ll bake too quickly and become crisp rather than soft. If they’re too thick, they may not bake evenly.

5. Watch the Bake Time Carefully

Sugar cookies are best when they are just barely golden on the edges. Overbaking will make them crunchy instead of soft. Check them around the 8-minute mark and remove them once they are set but still slightly soft in the center—they will continue to firm up as they cool.

Customizing Your Easter Bunny Cookies

One of the best things about these cookies is that they are completely customizable! Here are a few creative ideas to make them your own:

1. Alternative Toppings

Not a fan of chocolate-dipped cookies? Try these instead:

  • Buttercream Frosting – Pipe pastel-colored buttercream on top for a whimsical, fluffy look.
  • Royal Icing – Decorate with detailed designs using royal icing for a professional finish.
  • Colored Sanding Sugar – Sprinkle colored sugar over a thin glaze for a sparkly effect.

2. Flavor Twists

While the classic vanilla flavor is always a hit, consider these variations:

  • Lemon Zest – Add a teaspoon of fresh lemon zest for a bright, citrusy twist.
  • Almond Extract – Swap half of the vanilla for almond extract for a nutty depth.
  • Coconut Flakes – Sprinkle coconut on the chocolate-dipped section for a tropical touch.

3. Shape Variations

If you don’t have a bunny-shaped cookie cutter, don’t worry! You can use any Easter-themed shape, such as:

  • Eggs
  • Chicks
  • Flowers
  • Carrots

Ingredients

For the Cookies:

  • 3 cups all-purpose flour
  • 2 teaspoons baking powder
  • 1 teaspoon salt
  • 1 cup unsalted butter, room temperature
  • 1 cup granulated sugar
  • 1 large egg, room temperature
  • 2 teaspoons vanilla extract
  • ½ cup pastel sprinkles (plus more for decorating)

For the Chocolate Coating:

  • 1 cup semisweet chocolate chips
  • 1 teaspoon vegetable shortening (if needed for consistency)

Directions

Step 1: Mix the Dry Ingredients
In a medium bowl, whisk together the flour, baking powder, and salt. Set aside.

Step 2: Cream the Butter and Sugar
Using a stand mixer with the paddle attachment (or a hand mixer), cream the butter until smooth. Add sugar and beat until light and fluffy.

Step 3: Combine Wet and Dry Ingredients
Mix in the egg and vanilla until fully incorporated. Gradually add the flour mixture, one cup at a time, until just combined. Gently fold in the pastel sprinkles.

Step 4: Chill the Dough
Divide the dough into two large balls, wrap in plastic wrap, and flatten into thick disks. Refrigerate for at least one hour or overnight.

Step 5: Roll and Cut
Preheat oven to 350°F (175°C). Line a baking sheet with parchment paper. Roll out the chilled dough between plastic wrap (or on a lightly floured surface) to ⅓-inch thickness. Use a bunny-shaped cookie cutter to cut out cookies and place them on the prepared baking sheet.

Step 6: Bake and Cool
Bake for 8-10 minutes or until edges are just lightly golden. Let cookies cool on the sheet for a few minutes before transferring to a wire rack.

Step 7: Dip in Chocolate
Melt the chocolate chips in a microwave-safe bowl for 60 seconds, stirring until smooth. If the chocolate is too thick, add a teaspoon of vegetable shortening.

Step 8: Decorate
Dip each cooled cookie partially in melted chocolate, then sprinkle extra pastel sprinkles on top. Place cookies back on the wire rack until the chocolate sets.

Nutritional Information (Per Cookie)

  • Calories: 202
  • Total Fat: 11g
  • Saturated Fat: 6g
  • Cholesterol: 29mg
  • Sodium: 150mg
  • Carbohydrates: 26g
  • Fiber: 1g
  • Sugar: 13g
  • Protein: 2g

Enjoy these adorable and delicious Easter Bunny Sugar Cookies—perfect for your holiday dessert table!

Frequently Asked Questions

1. Can I Make These Cookies Ahead of Time?

Yes! These cookies store beautifully. You can make them up to 2 weeks in advance and keep them in an airtight container in the fridge. If you want to keep them longer, freeze them for up to 3 months.

2. Can I Freeze the Dough?

Absolutely. After making the dough, shape it into flattened disks, wrap in plastic wrap, and store in a freezer bag. When ready to bake, thaw the dough in the refrigerator overnight before rolling and cutting.

3. What’s the Best Chocolate for Dipping?

Semi-sweet chocolate chips work great, but you can also use dark, white, or even colored candy melts for a more festive look. If your melted chocolate is too thick, add a teaspoon of vegetable shortening to thin it out.

4. Can I Make These Cookies Gluten-Free?

Yes! Simply substitute the all-purpose flour with a 1:1 gluten-free flour blend. Make sure it contains xanthan gum for the best texture.

5. Why Did My Cookies Spread Too Much?

If your cookies spread too much, the butter may have been too warm. Make sure to chill your dough thoroughly before baking. Additionally, avoid overmixing the dough, as this can cause spreading.

The Sweetest Easter Tradition

Baking is more than just mixing ingredients—it’s about creating moments, traditions, and memories that last a lifetime. These Easter Bunny Sugar Cookies aren’t just delicious; they bring joy to those who make and share them. Whether you’re baking with family, surprising a friend, or simply indulging in a sweet treat for yourself, these cookies add a touch of magic to the holiday.

So gather your ingredients, roll out the dough, and let the scent of freshly baked sugar cookies fill your home. And as you take that first bite—soft, buttery, with a hint of crunch from the sprinkles—know that you’re not just enjoying a cookie. You’re carrying on a tradition of love, warmth, and Easter cheer.

aiting

The Magic of Easter Bunny Sugar Cookies

Celebrate Easter with these Chocolate-Dipped Easter Sugar Cookies—buttery, soft, and full of festive pastel sprinkles. Dipped in rich chocolate for a sweet finishing touch, these adorable bunny-shaped treats are perfect for springtime celebrations!
Prep Time 15 minutes
Cook Time 10 minutes
Servings: 24 cookies
Course: Dessert
Cuisine: American

Ingredients
  

For the Cookies:
  • 3 cups all-purpose flour
  • 2 teaspoons baking powder
  • 1 teaspoon salt
  • 1 cup unsalted butter room temperature
  • 1 cup granulated sugar
  • 1 large egg room temperature
  • 2 teaspoons vanilla extract
  • ½ cup pastel sprinkles plus more for decorating
For the Chocolate Coating:
  • 1 cup semisweet chocolate chips
  • 1 teaspoon vegetable shortening if needed for consistency

Method
 

  1. edients – In a medium bowl, whisk together flour, baking powder, and salt. Set aside.
  2. Cream the Butter & Sugar – Using a stand mixer with a paddle attachment (or a hand mixer), beat the butter until smooth. Add sugar and continue beating until light and fluffy.
  3. Combine Wet & Dry Ingredients – Mix in the egg and vanilla until fully incorporated. Gradually add the flour mixture, one cup at a time, mixing until just combined. Gently fold in pastel sprinkles.
  4. Chill the Dough – Divide the dough into two large balls, wrap in plastic wrap, and flatten into thick disks. Refrigerate for at least one hour or overnight.
  5. Roll & Cut the Cookies – Preheat oven to 350°F (175°C). Line a baking sheet with parchment paper. Roll out the chilled dough between plastic wrap (or on a lightly floured surface) to ⅓-inch thickness. Use a bunny-shaped cookie cutter to cut out cookies and place them on the prepared baking sheet.
  6. Bake & Cool – Bake for 8-10 minutes or until edges are just lightly golden. Let cookies cool on the sheet for a few minutes before transferring to a wire rack.
  7. Dip in Chocolate – Melt chocolate chips in a microwave-safe bowl for 60 seconds, stirring until smooth. If needed, add a teaspoon of vegetable shortening for a smoother consistency.
  8. Decorate – Dip each cooled cookie partially in melted chocolate, then sprinkle with extra pastel sprinkles. Place cookies back on the wire rack until the chocolate sets.

Notes

  • Store in an airtight container at room temperature for up to 5 days or freeze for up to 3 months.
  • For extra fun, drizzle additional white or dark chocolate over the cookies after dipping.
  • These cookies make great Easter gifts when wrapped in decorative bags!

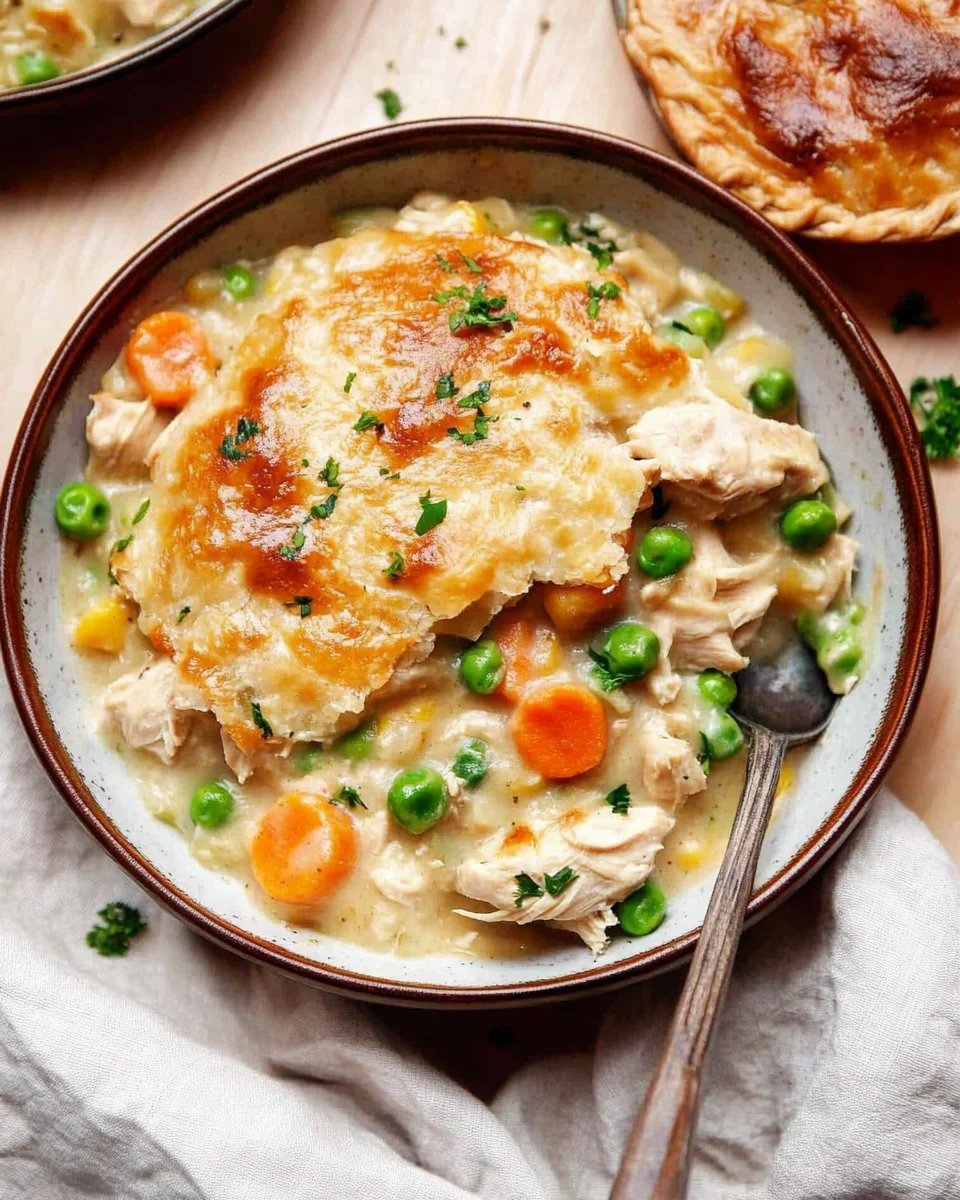
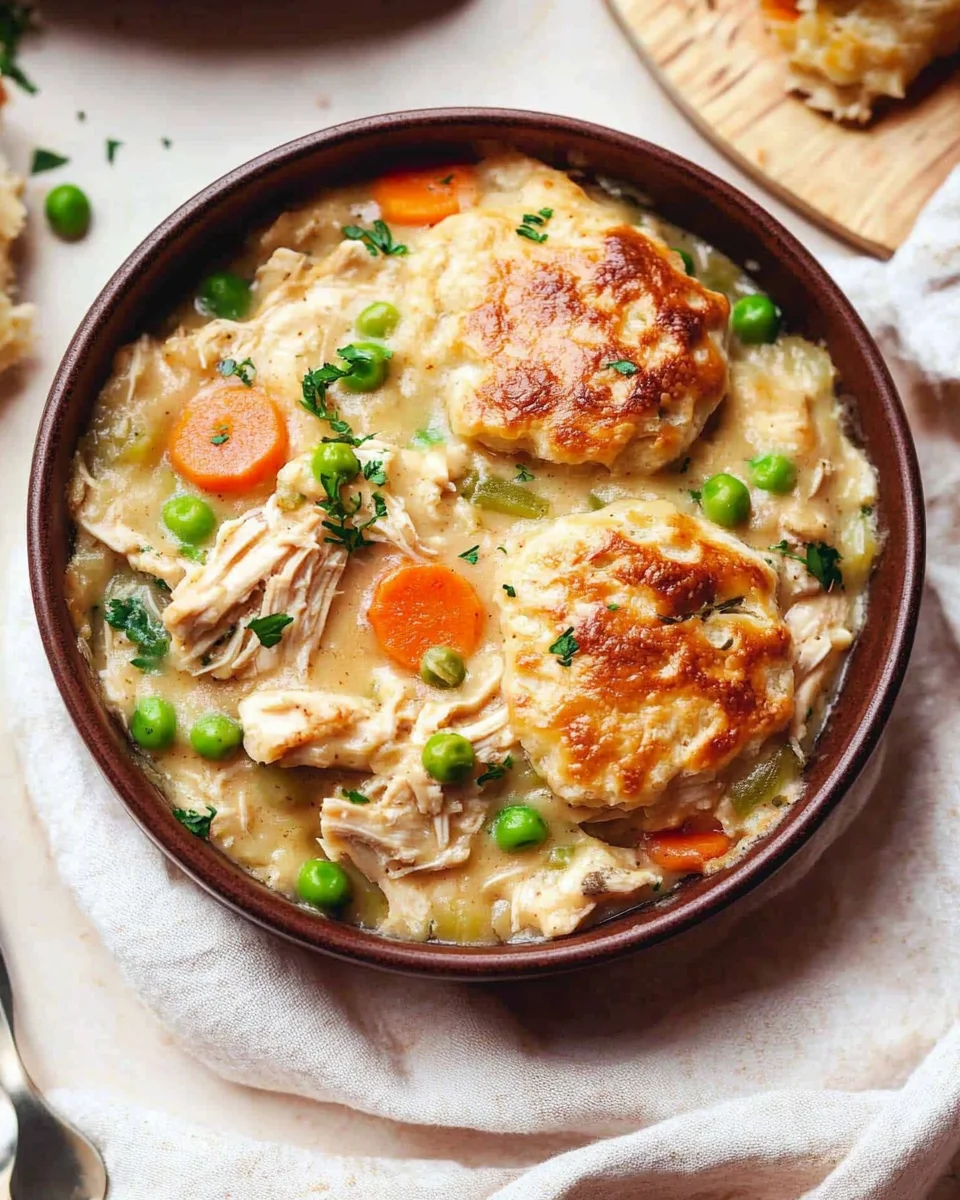
Crustless Chicken Pot Pie: A Comforting Classic Without the Extra Fuss

A Taste of Home in Every Spoonful

There’s something undeniably comforting about a warm bowl of chicken pot pie. The creamy texture, the rich flavors, the familiar blend of vegetables, tender chicken, and savory broth—it all brings back memories of cozy family dinners. For me, chicken pot pie was a staple in my childhood home. My grandmother made it from scratch, rolling out the pie crust with expert hands, filling the house with the scent of butter, herbs, and slow-cooked goodness.

But as life got busier, homemade pot pies became more of a special occasion meal. Between work, family responsibilities, and the ever-growing to-do list, the time-consuming process of making the perfect crust felt like a luxury I couldn’t afford. That’s when I discovered the magic of a crustless version. It had all the heartwarming flavors of my grandmother’s recipe but without the added work of making and baking a crust.

Now, crustless chicken pot pie is a go-to in my household. It’s quick, made in one pot, and still gives that same nostalgic comfort. It’s a meal that brings people together, whether it’s a casual weeknight dinner or a meal prepped ahead of time for busy days. If you love creamy, hearty, and wholesome dishes, this recipe will quickly become a favorite in your kitchen too.

Why Crustless Chicken Pot Pie is a Must-Try

This dish is more than just a time-saver. It’s a healthier take on a classic, with fewer carbs and fats while keeping all the rich flavors intact. Here’s why you’ll love it:

  • Less Work, Same Flavor – Traditional chicken pot pie requires making or buying a crust, rolling it out, and baking it separately. This version skips that step while keeping the creamy, savory filling intact.
  • One-Pot Wonder – No need to juggle multiple dishes—this meal comes together in a single pot, making cleanup effortless.
  • Healthy & Wholesome – Packed with lean protein, fiber-rich vegetables, and nourishing broth, this meal is both filling and nutritious.
  • Perfect for Meal Prep – Stores well in the fridge and freezes beautifully, so you can enjoy a home-cooked meal any night of the week.
  • Customizable – Whether you want to make it dairy-free, gluten-free, or add your favorite vegetables, this recipe is incredibly versatile.

What Makes This Recipe Stand Out?

Many recipes claim to be “quick and easy,” but this one truly delivers. With a 30-minute cook time and minimal prep, it’s ideal for anyone who loves homemade meals but doesn’t always have the time to make them from scratch.

Unlike many creamy soups that rely on heavy cream, this recipe uses milk and a flour-based roux to achieve a velvety texture. It’s lighter but still satisfying. Plus, the use of sweet potatoes or Yukon gold potatoes adds natural creaminess and a subtle sweetness that balances the savory flavors beautifully.

One of the best parts of this dish is that it doesn’t sacrifice texture or taste. The thickened broth mimics the creamy filling of a traditional pot pie, and the combination of shredded chicken, tender vegetables, and herbs makes it taste just as indulgent as the classic version.

Wholesome Ingredients for a Cozy Meal

  • Butter – 1-2 tbsp (unsalted preferred)
  • Onion – 1 small yellow onion, chopped
  • Carrots – 2 large, sliced into coins
  • Celery – 2 large sticks, sliced (~½ cup)
  • Garlic – 3 large cloves, minced
  • Flour – ⅓ cup whole wheat or all-purpose (gluten-free if needed)
  • Chicken Stock – 4 cups, low-sodium
  • Milk – 1 cup (skim, 2%, or whole; dairy-free alternatives work)
  • Sweet Potatoes – 1½ cups (~1 medium), diced into small cubes (or Yukon potatoes)
  • Salt – 1 tsp, plus more to taste
  • Black Pepper – ½ tsp, plus more to taste
  • Thyme – 1-2 tbsp fresh or 1 tsp dried
  • Cooked Chicken – 3-4 cups, shredded (rotisserie recommended)
  • Frozen Peas – 1 cup
  • Fresh Parsley – ¼ cup, finely chopped
  • Baby Spinach – 2-4 cups, chopped (optional)

Simple Steps to One-Pot Perfection

1. Sauté the Base:
Melt butter in a large pot over medium-low heat. Add chopped onion, carrots, and celery, cooking for 6-8 minutes until soft. Stir every minute. Add minced garlic for the last 30 seconds and mix well.

2. Create the Roux:
Sprinkle in flour and stir until vegetables are coated. Cook for 1 minute.

3. Build the Broth:
Pour in chicken stock, milk, sweet potatoes, salt, pepper, and thyme. Stir well. Bring to a boil, then reduce heat and let it simmer for 15-20 minutes, stirring every few minutes until potatoes are tender.

4. Add the Protein & Greens:
Mix in shredded chicken, frozen peas, parsley, and optional spinach. Simmer for 5 more minutes. Adjust seasoning to taste.

5. Serve & Enjoy:
Remove from heat and ladle into bowls. Pair with a biscuit, garlic bread, or toasted bread.

Nutritional Breakdown (Per Serving)

  • Calories: 309 kcal
  • Carbohydrates: 25g
  • Protein: 32g
  • Fat: 10g
  • Saturated Fat: 3g
  • Fiber: 5g
  • Sodium: 476mg
  • Vitamin A: 11,398 IU
  • Vitamin C: 23mg
  • Calcium: 129mg
  • Iron: 3mg

This hearty, crustless chicken pot pie soup is perfect for meal prep, family dinners, or cozy nights in. Store leftovers in the fridge for up to 5 days or freeze for up to 3 months. Reheat on the stovetop for the best flavor.

FAQs About Crustless Chicken Pot Pie

1. Can I Make This Recipe Gluten-Free?

Yes! Simply swap the flour for a gluten-free all-purpose flour blend. Everything else in the recipe is naturally gluten-free, making it an easy modification for those with dietary restrictions.

2. What Can I Use Instead of Sweet Potatoes?

If you’re not a fan of sweet potatoes, Yukon gold, russet, or baby potatoes work just as well. Butternut squash is another great alternative if you’re looking for a slightly different flavor.

3. Can I Use Uncooked Chicken Instead of Rotisserie Chicken?

Absolutely. If you’re using raw chicken breasts, simply cut them into bite-sized pieces and cook them in the pot before adding the flour and broth. This ensures the chicken is fully cooked while still absorbing all the flavors of the dish.

4. How Long Can I Store Leftovers?

This dish keeps well in the refrigerator for up to 5 days in an airtight container. It can also be frozen for up to 3 months. When reheating, do so over medium heat on the stovetop or in the microwave in 30-second intervals, stirring between each round.

5. Can I Make This Dairy-Free?

Yes! Substitute butter with olive oil or vegan butter and use an unsweetened dairy-free milk like almond, cashew, or oat milk. The result will be just as creamy and delicious.

6. How Can I Make This Recipe Even More Flavorful?

If you love bold flavors, consider adding a pinch of smoked paprika, a dash of Worcestershire sauce, or a splash of white wine while cooking the vegetables. Fresh herbs like rosemary and sage also pair beautifully with the dish.

7. What Can I Serve with Crustless Chicken Pot Pie?

Since this dish is already packed with protein and vegetables, it doesn’t need much to complete the meal. However, it pairs wonderfully with:

  • Biscuits or Garlic Bread – Perfect for dipping into the creamy broth.
  • Side Salad – A simple green salad with a tangy vinaigrette balances the richness of the dish.
  • Roasted Vegetables – If you want to add more veggies, roasted Brussels sprouts or asparagus make a great side.

8. Can I Make This in a Slow Cooker?

Yes, but with a few adjustments. Cook the chicken and vegetables in the slow cooker on low for 6-7 hours or high for 3-4 hours, then whisk in the flour and milk during the last 30 minutes to thicken the broth.

Tips to Elevate Your Crustless Chicken Pot Pie

  • Use Homemade Stock – If you have time, making your own chicken stock adds an extra layer of depth and richness to the dish.
  • Don’t Skip the Flour – This is key to getting the creamy consistency that makes pot pie filling so comforting.
  • Stir Regularly – Since this dish thickens as it cooks, stirring frequently prevents it from sticking to the bottom of the pot.
  • Garnish for Extra Freshness – A sprinkle of fresh parsley or thyme right before serving enhances both the flavor and presentation.

Conclusion: A Meal That Feels Like Home

Crustless chicken pot pie is more than just a quick dinner—it’s a dish that brings warmth, comfort, and nostalgia to the table. Whether it reminds you of home-cooked meals from your childhood or becomes a new favorite in your household, it’s the kind of recipe that stays with you.

By skipping the crust, you not only make the dish easier and healthier, but you also highlight the creamy, hearty filling that makes pot pie so beloved. Whether you’re making this on a chilly night, meal prepping for the week, or simply looking for a wholesome dish that feels like a hug in a bowl, this recipe delivers every time.

aiting

Crustless Chicken Pot Pie: A Comforting Classic Without the Extra Fuss

Enjoy the comforting flavors of Chicken Pot Pie without the crust! This hearty, creamy, one-pot meal is packed with tender chicken, vibrant vegetables, and a rich, flavorful broth. Perfect for meal prep, cozy dinners, or anytime you crave a warm, nourishing dish.
Prep Time 10 minutes
Cook Time 30 minutes
Total Time 40 minutes
Servings: 6 servings
Course: Soup
Cuisine: American

Ingredients
  

Short & Engaging Description:
  • Enjoy the comforting flavors of Chicken Pot Pie without the crust! This hearty creamy, one-pot meal is packed with tender chicken, vibrant vegetables, and a rich, flavorful broth. Perfect for meal prep, cozy dinners, or anytime you crave a warm, nourishing dish.

Method
 

  1. Sauté the Vegetables – Melt butter in a large pot over medium-low heat. Add chopped onion, carrots, and celery, cooking for 6-8 minutes until softened. Stir every minute. Add minced garlic for the last 30 seconds and mix well.
  2. Make the Roux – Sprinkle in flour and stir until vegetables are coated. Cook for 1 minute to remove the raw flour taste.
  3. Add the Broth & Potatoes – Pour in chicken stock, milk, sweet potatoes, salt, pepper, and thyme. Stir well. Bring to a gentle boil, then reduce heat and let it simmer for 15-20 minutes, stirring occasionally, until the potatoes are tender.
  4. Incorporate the Chicken & Greens – Mix in shredded chicken, frozen peas, parsley, and optional spinach. Simmer for 5 more minutes until heated through. Adjust seasoning to taste.
  5. Serve & Enjoy – Remove from heat and ladle into bowls. Pair with a biscuit, garlic bread, or toasted bread for the ultimate comforting meal.

Notes

  • Storage: Refrigerate in an airtight container for up to 5 days or freeze for up to 3 months. Reheat gently on the stovetop.
  • Thickening Tip: If you prefer a thicker consistency, mash some of the cooked sweet potatoes or add a cornstarch slurry.
  • Substitutions: Swap sweet potatoes for Yukon golds or add mushrooms for an earthy depth of flavor.

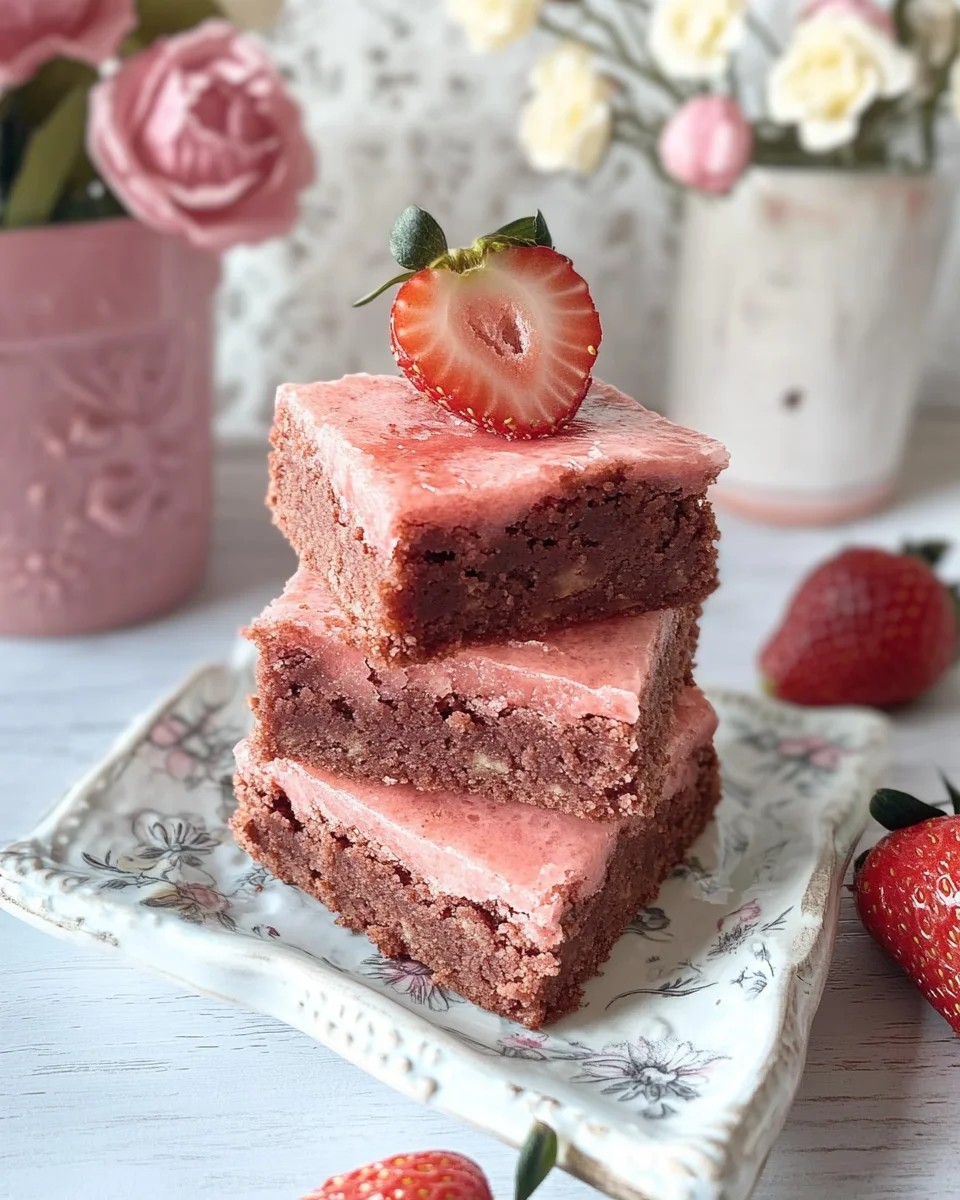
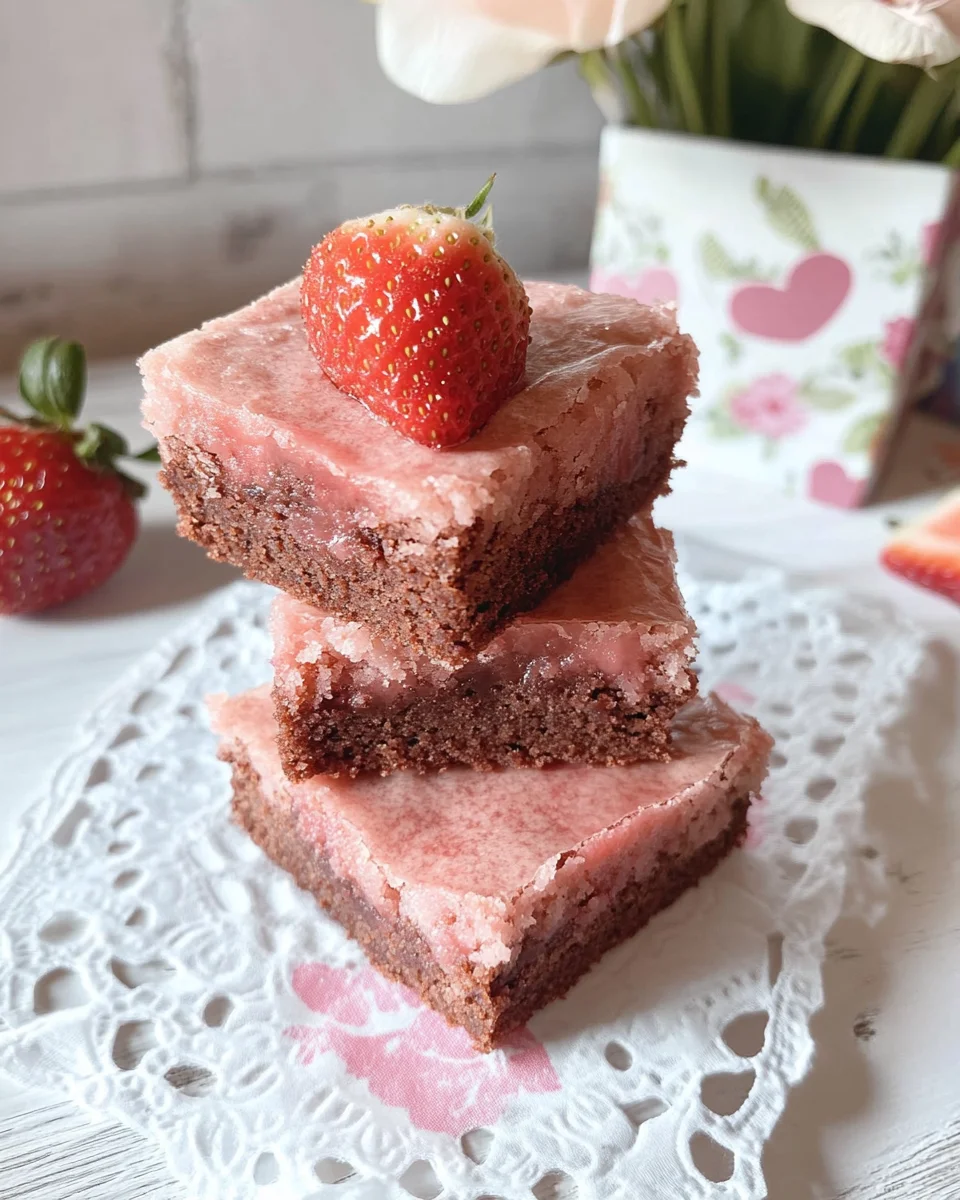
Strawberry Sweetheart Brownies: A Love Story in Dessert Form

A Bite of Nostalgia and Love

Growing up, my grandmother had a way of making every occasion feel magical with food. Whether it was birthdays, holidays, or even just a rainy afternoon, she believed that a sweet treat could make anything better. One of my fondest memories is of the pink-hued desserts she would make every spring, using the juiciest strawberries from her backyard garden. The aroma of fresh berries mixed with warm vanilla would fill the kitchen, creating an unspoken promise of something delicious to come.

Years later, I found myself searching for a dessert that could recreate that feeling—a treat that wasn’t just about taste, but about warmth, nostalgia, and love. That’s when I came across these Strawberry Sweetheart Brownies. Unlike your traditional chocolate brownie, these are a beautiful shade of pink, bursting with real strawberry flavor and the creamy sweetness of white chocolate. They are the perfect way to say “I love you” without words, making them ideal for Valentine’s Day, anniversaries, or simply a cozy evening with a cup of tea.

Let’s dive into what makes these brownies so special, including tips, variations, and answers to common questions you might have before making them.

What Makes Strawberry Sweetheart Brownies Unique?

Brownies are typically known for their rich, chocolatey goodness, but these Strawberry Sweetheart Brownies take a different approach. They bring together the fudgy texture of classic brownies with the light, fruity essence of fresh strawberries and the smoothness of white chocolate.

Here’s what sets them apart:

  • Fresh Strawberry Purée – Unlike artificial strawberry-flavored desserts, these brownies use real strawberries, giving them a natural and vibrant taste.
  • White Chocolate Base – Instead of cocoa, these brownies rely on melted white chocolate for richness, adding depth to the flavor profile.
  • Soft and Fudgy Texture – Just like a traditional brownie, they are soft in the center, slightly chewy around the edges, and topped with a glossy, sweet strawberry icing.
  • Heart-Shaped Appeal – While you can bake them in any pan, using a heart-shaped cake pan makes them perfect for romantic occasions or special treats.

Pro Tips for Perfect Strawberry Brownies

Even though this recipe is straightforward, a few expert tips can help you get the best possible results:

  1. Use Fresh, Ripe Strawberries – The quality of your strawberries affects the flavor. Look for berries that are deep red, juicy, and fragrant for the best results.
  2. Strain the Purée – Removing seeds from the purée ensures a smooth batter and icing without unwanted texture.
  3. Watch the Baking Time – Overbaking can result in dry brownies. The toothpick should come out with a few moist crumbs, not wet batter.
  4. Let Them Cool Before Icing – The icing sets best when applied to completely cooled brownies, preventing it from becoming too runny.
  5. Enhance the Color Naturally – If you want a more vibrant pink color without food coloring, try adding a teaspoon of beet juice or a touch of raspberry purée.

Creative Variations to Try

While these brownies are already delightful as they are, you can always add your own twist to make them even more special:

  • Chocolate Strawberry Brownies – Drizzle melted dark chocolate over the top or fold in white chocolate chips for added texture.
  • Berry Bliss – Mix in some raspberries or blueberries for a multi-berry flavor.
  • Nutty Indulgence – Add crushed almonds or pecans to the batter for a slight crunch.
  • Cheesecake Swirl – Swirl in a mixture of cream cheese, sugar, and vanilla for a marbled effect.
  • Lemon Kissed – Add a teaspoon of lemon zest for a slight citrus contrast to the sweetness.

Ingredients

For the Strawberry Brownies:

  • 7 tablespoons (3 1/2 ounces) unsalted butter, cubed
  • 6 ounces white chocolate, finely chopped
  • 3/4 cup (5 1/4 ounces) sugar
  • 1/4 teaspoon fine sea salt
  • 1 large egg
  • 2 large egg yolks
  • 1/2 cup (4 ounces) strawberry purée, divided
  • 1/2 teaspoon pure vanilla extract
  • 1/2 teaspoon pure strawberry extract
  • 1 petite pea-sized drop of pink gel food color (optional)
  • 1 1/2 cups (6 3/4 ounces) all-purpose flour, sifted

For the Strawberry Icing:

  • 3/4 cup (3 ounces) powdered sugar, sifted
  • 1 tablespoon unsalted butter, melted
  • 2 tablespoons reserved strawberry purée
  • 1/4 teaspoon pure vanilla extract
  • 1/4 teaspoon pure strawberry extract
  • A dash of fine sea salt

Directions

For the Strawberry Brownies:

  1. Preheat the oven to 325ºF. Line the bottom of an 8-inch heart-shaped cake pan with parchment paper and spray the insides with nonstick spray.
  2. In a large heat-safe bowl, melt the butter and white chocolate together. Do this carefully over a pan of barely simmering water or in the microwave in 20-second intervals, stirring each time to prevent overheating.
  3. Stir in the sugar and salt until well combined.
  4. Add the egg and egg yolks, whisking until smooth.
  5. Pass the strawberry purée through a sieve to remove seeds. Set aside 2 tablespoons for the icing. Add the remaining purée to the batter and mix well.
  6. Stir in the vanilla extract, strawberry extract, and food coloring (if using) until fully incorporated.
  7. Gently fold in the sifted flour, mixing until just combined.
  8. Pour the batter into the prepared pan and bake for 25-30 minutes. The brownies are done when a toothpick inserted in the center comes out with a few moist crumbs. Do not overbake.
  9. Let the brownies cool in the pan before removing and icing.

For the Strawberry Icing:

  1. In a small bowl, whisk together all icing ingredients until smooth.
  2. Spread over the cooled brownies and let set before slicing.

Nutritional Highlights

(Approximate values per serving)

  • Calories: ~250
  • Fat: 12g
  • Carbohydrates: 33g
  • Protein: 3g
  • Sugar: 21g

These Strawberry Sweetheart Brownies are a delightful blend of white chocolate and fresh strawberries, offering a fudgy texture with a sweet, fruity finish. Perfect for sharing with loved ones or savoring all to yourself.

FAQs About Strawberry Sweetheart Brownies

1. Can I use frozen strawberries instead of fresh ones?

Yes! If fresh strawberries aren’t in season, you can use frozen strawberries. Just make sure to thaw and drain them well before puréeing to prevent excess liquid from affecting the batter’s consistency.

2. How do I store these brownies?

Store them in an airtight container at room temperature for up to 2 days or refrigerate them for up to a week. If refrigerated, let them sit at room temperature for a few minutes before serving to soften.

3. Can I freeze these brownies?

Yes! Wrap individual pieces in plastic wrap, then store them in an airtight container in the freezer for up to 2 months. Thaw at room temperature before eating.

4. What if I don’t have a heart-shaped pan?

No problem! An 8-inch round cake pan works perfectly, or you can use a square baking dish and cut the brownies into heart shapes using a cookie cutter.

5. Why is my batter too thick?

White chocolate-based batters can be thicker than regular brownie batter. If it feels too thick, you can add a tablespoon of milk to loosen it slightly.

6. Can I make these gluten-free?

Absolutely! Substitute the all-purpose flour with a 1:1 gluten-free baking blend for a gluten-free version.

7. Is the pink food coloring necessary?

Not at all! The food coloring is optional and only enhances the pink hue. The brownies will still taste delicious without it.

8. Can I make this recipe dairy-free?

Yes, with a few modifications. Use dairy-free butter and replace white chocolate with a dairy-free alternative. For the icing, use a plant-based butter substitute.

9. What’s the best way to serve these brownies?

These brownies taste amazing on their own, but you can also:

  • Serve them with a scoop of vanilla ice cream.
  • Pair them with fresh strawberries and whipped cream.
  • Drizzle them with white or dark chocolate for extra indulgence.

Final Thoughts: A Treat to Share and Savor

Baking has always been more than just a way to satisfy a sweet tooth—it’s a way to create memories, share love, and bring joy to those around us. Strawberry Sweetheart Brownies are the kind of dessert that does exactly that. They are sweet but not overpowering, rich but balanced, and most importantly, made with real ingredients that highlight the beauty of simple flavors.

Whether you’re baking these for someone special, for a festive gathering, or simply as a treat for yourself, they are bound to bring smiles. After all, some of the best moments in life are shared over something warm, sweet, and made with love.

So go ahead, preheat that oven, and whip up a batch of these strawberry-filled delights. Your kitchen will be filled with the scent of nostalgia, and your heart will be filled with joy.

aiting

Strawberry Sweetheart Brownies: A Love Story in Dessert Form

These Strawberry Sweetheart Brownies are a love letter in dessert form—fudgy, sweet, and infused with fresh strawberry flavor. A luscious combination of white chocolate and strawberries, topped with a dreamy strawberry icing, makes these perfect for special occasions or just indulging in a little extra sweetness.
Prep Time 15 minutes
Cook Time 30 minutes
Total Time 45 minutes
Servings: 12 brownies
Course: Dessert
Cuisine: American

Ingredients
  

For the Strawberry Brownies:
  • 7 tablespoons 3 1/2 ounces unsalted butter, cubed
  • 6 ounces white chocolate finely chopped
  • 3/4 cup 5 1/4 ounces sugar
  • 1/4 teaspoon fine sea salt
  • 1 large egg
  • 2 large egg yolks
  • 1/2 cup 4 ounces strawberry purée, divided
  • 1/2 teaspoon pure vanilla extract
  • 1/2 teaspoon pure strawberry extract
  • 1 petite pea-sized drop of pink gel food color optional
  • 1 1/2 cups 6 3/4 ounces all-purpose flour, sifted
For the Strawberry Icing:
  • 3/4 cup 3 ounces powdered sugar, sifted
  • 1 tablespoon unsalted butter melted
  • 2 tablespoons reserved strawberry purée
  • 1/4 teaspoon pure vanilla extract
  • 1/4 teaspoon pure strawberry extract
  • A dash of fine sea salt

Method
 

For the Strawberry Brownies:
  1. Preheat & Prepare – Preheat the oven to 325ºF (163ºC). Line the bottom of an 8-inch heart-shaped cake pan with parchment paper and spray the insides with nonstick spray.
  2. Melt the Chocolate & Butter – In a large heat-safe bowl, melt the butter and white chocolate together. Do this carefully over a pan of barely simmering water or in the microwave in 20-second intervals, stirring each time.
  3. Mix the Base – Stir in the sugar and salt until well combined.
  4. Incorporate the Eggs – Add the egg and egg yolks, whisking until smooth.
  5. Add the Strawberry Flavor – Pass the strawberry purée through a sieve to remove seeds. Set aside 2 tablespoons for the icing. Add the remaining purée to the batter and mix well.
  6. Enhance with Extracts – Stir in the vanilla extract, strawberry extract, and food coloring (if using) until fully incorporated.
  7. Fold in Flour – Gently fold in the sifted flour, mixing until just combined. Do not overmix.
  8. Bake – Pour the batter into the prepared pan and bake for 25-30 minutes, or until a toothpick inserted in the center comes out with a few moist crumbs. Avoid overbaking.
  9. Cool Completely – Let the brownies cool in the pan before removing and icing.
For the Strawberry Icing:
  1. Make the Icing – In a small bowl, whisk together powdered sugar, melted butter, reserved strawberry purée, vanilla extract, strawberry extract, and salt until smooth.
  2. Glaze & Set – Spread over the cooled brownies and let set before slicing.

Notes

  • Store in an airtight container at room temperature for up to 3 days or refrigerate for up to a week.
  • Enhance the flavor by using fresh, ripe strawberries for the purée.
  • For a decorative touch, add heart-shaped sprinkles or a drizzle of melted white chocolate.

White Chocolate Raspberry Bliss Bites: A Sweet Memory in Every Bite

I still remember the first time I made these White Chocolate Raspberry Bliss Bites. It was a chilly winter afternoon, and I wanted to surprise my grandmother with something special. She had always been the one to fill our home with the comforting aroma of freshly baked goods, but as she got older, she preferred simpler, no-fuss desserts. I knew she loved raspberries and white chocolate, so I set out to create something that would capture those flavors while being easy to make.

As I dipped each cheesecake ball into the smooth, melted chocolate, I thought about how food connects us to people, places, and memories. These little treats reminded me of the raspberry bushes she used to tend in her backyard, the same ones we’d pick from every summer, our fingers stained red as we popped the freshest berries into our mouths. When I presented her with a plate of these bite-sized delights, her eyes lit up. She took a bite, savored the creamy filling, and smiled—one of those genuine, heartwarming smiles that make everything worth it.

Since then, this recipe has become a staple in my kitchen, perfect for gatherings, gifts, or just a moment of sweet indulgence. Whether you’re making them for yourself or sharing them with loved ones, these cheesecake bites are a reminder that the simplest recipes often hold the most meaning.

Why You’ll Love This Recipe

No-Bake Convenience

Baking can be a joy, but sometimes you just want something easy yet delicious. These bliss bites require no oven time, making them a fantastic choice for those who want a quick and mess-free dessert.

Perfectly Balanced Flavors

The tangy raspberries cut through the richness of the cream cheese, while the white chocolate adds just the right amount of sweetness. Each bite is a harmonious blend of flavors and textures.

Aesthetic and Elegant

Their beautiful white chocolate shell, accented by a sprinkle of freeze-dried raspberry powder, makes these treats as visually stunning as they are tasty. Whether for a wedding, baby shower, or holiday platter, they add a touch of sophistication.

Great for Gifting and Entertaining

Homemade gifts always feel more special, and these cheesecake bites are no exception. Pack them in a decorative box, and you have a thoughtful treat for friends and family.

Expert Tips for the Perfect Bliss Bites

1. Use High-Quality Ingredients

Since this is a simple recipe, the quality of your ingredients makes a huge difference. Opt for full-fat cream cheese for a rich texture and high-quality white chocolate for a smooth, luxurious finish.

2. Keep Everything Chilled

One of the keys to success with this recipe is keeping the cheesecake mixture and shaped balls cold before dipping. This prevents them from falling apart and ensures a clean, smooth chocolate coating.

3. Work Quickly with the Chocolate

White chocolate can be temperamental—it tends to seize up if overheated or exposed to moisture. Melt it gently in short intervals, stirring between each, and dip the cheesecake balls while they’re still frozen to maintain their shape.

4. Customize the Flavors

Want to switch things up? Try using dark chocolate for a richer contrast, or swap raspberries for strawberries or blackberries. You can also mix in finely chopped nuts for added texture.

5. Experiment with Garnishes

A light dusting of crushed freeze-dried raspberries enhances both the flavor and visual appeal. You can also try edible glitter, shredded coconut, or even a drizzle of contrasting chocolate for a decorative touch.

What You’ll Need

Cheesecake Magic

  • 8 oz cream cheese, softened
  • 1/4 cup powdered sugar
  • 1 teaspoon vanilla extract
  • 1/4 cup fresh raspberries, mashed (or raspberry preserves)

Silky Chocolate Coating

  • 1 cup white chocolate chips or melting wafers
  • 1 tablespoon coconut oil or shortening (optional, for smoother melting)

Finishing Touches

  • Freeze-dried raspberry powder or crushed freeze-dried raspberries
  • White chocolate drizzle (optional)

How to Make the Magic Happen

1. Whip Up the Filling

  • In a medium bowl, beat cream cheese, powdered sugar, and vanilla extract until smooth.
  • Gently fold in the mashed raspberries until well combined.
  • Chill for 30 minutes to firm up.

2. Shape the Bites

  • Scoop about 1 tablespoon of the mixture and roll it into a ball.
  • Place on a parchment-lined baking sheet.
  • Freeze for 1 hour to solidify.

3. Coat in White Chocolate

  • Melt white chocolate chips with coconut oil in 20-second microwave intervals, stirring in between.
  • Using a fork or toothpick, dip each frozen cheesecake ball into the melted chocolate, ensuring full coverage.
  • Let excess chocolate drip off before placing back on the baking sheet.

4. Add the Final Touches

  • While the chocolate is still wet, sprinkle with freeze-dried raspberry powder or drizzle with additional melted white chocolate.
  • Refrigerate for at least 30 minutes to fully set.

Nutrition at a Glance (Per Serving, Approximate)

  • Calories: 120
  • Fat: 8g
  • Carbohydrates: 10g
  • Protein: 2g
  • Sugar: 8g

These White Chocolate Raspberry Bliss Bites are a simple yet elegant treat that’s sure to impress. Store them in the fridge for up to 5 days or freeze for longer indulgence.

Frequently Asked Questions

1. Can I Use Frozen Raspberries Instead of Fresh?

Yes, but make sure to thaw and pat them dry before mashing. Too much moisture can make the cheesecake mixture too soft, making it difficult to shape.

2. Why Is My Cheesecake Mixture Too Soft to Roll?

This can happen if the cream cheese was over-softened or if there’s too much moisture from the raspberries. Chilling the mixture for an extra 15-30 minutes should help. If the problem persists, try adding a bit more powdered sugar or even finely crushed graham crackers to firm it up.

3. How Long Do These Cheesecake Bites Last?

Stored in an airtight container in the refrigerator, they will stay fresh for up to five days. If you need to keep them longer, you can freeze them for up to three months. Just thaw in the fridge before serving.

4. My White Chocolate Coating Is Too Thick—How Can I Fix It?

If the melted white chocolate seems too thick for dipping, add a teaspoon of coconut oil or shortening. This will help create a thinner, smoother consistency for coating.

5. Can I Make These Dairy-Free or Vegan?

Absolutely! Use dairy-free cream cheese and white chocolate alternatives. There are several plant-based cream cheeses that work well in this recipe, and dairy-free white chocolate chips are available in many health food stores.

6. Can I Make These in Advance?

Yes! These are a great make-ahead dessert. You can roll and freeze the cheesecake balls ahead of time, then coat them in chocolate the day before serving for the freshest taste.

7. What Can I Do If My Cheesecake Balls Crack After Dipping?

This usually happens if the chocolate is too hot or if the cheesecake balls have started to thaw too much before dipping. Keep the balls frozen until right before dipping, and let the chocolate cool slightly before using.

Creative Variations

Berry Medley Bites

Instead of just raspberries, try mixing in a combination of berries like blueberries, blackberries, and strawberries for a more complex fruit flavor.

Chocolate Lover’s Edition

For those who love an extra dose of chocolate, use a dark chocolate coating instead of white. You can even add a teaspoon of cocoa powder to the cheesecake mixture for a more decadent experience.

Nutty Delight

Mix in finely chopped toasted almonds, hazelnuts, or pistachios for a nutty crunch. You can also roll the finished bites in crushed nuts instead of freeze-dried raspberries.

Festive Holiday Treats

For Christmas, drizzle with green and red-tinted white chocolate. For Valentine’s Day, shape them into hearts instead of round balls. These little changes make them perfect for any occasion.

Conclusion: A Sweet Treat for Every Occasion

White Chocolate Raspberry Bliss Bites are more than just a dessert—they’re a reminder of how food brings us together and connects us to cherished memories. Whether you’re making these as a thoughtful gift, a party treat, or simply for yourself, each bite is a perfect blend of creamy, fruity, and sweet flavors.

From their effortless preparation to their luxurious taste, these cheesecake bites prove that sometimes, the simplest desserts are the most satisfying. So the next time you want to create a moment of joy—whether for yourself or someone else—whip up a batch of these little gems. After all, a bite-sized treat can hold a world of sweetness and nostalgia in just one taste.

aiting

White Chocolate Raspberry Bliss Bites: A Sweet Memory in Every Bite

Indulge in the White Chocolate Raspberry Bliss Bites, a dreamy no-bake treat that combines rich cheesecake, tart raspberries, and a silky white chocolate shell. Perfect for parties, gifting, or simply treating yourself to a bite of luxury!
Prep Time 15 minutes
Servings: 12 bites
Course: Dessert
Cuisine: American

Ingredients
  

For the Cheesecake Filling:
  • 8 oz cream cheese softened
  • 1/4 cup powdered sugar
  • 1 teaspoon vanilla extract
  • 1/4 cup fresh raspberries mashed (or raspberry preserves)
For the White Chocolate Coating:
  • 1 cup white chocolate chips or melting wafers
  • 1 tablespoon coconut oil or shortening optional, for smoother melting
For Garnish:
  • Freeze-dried raspberry powder or crushed freeze-dried raspberries
  • White chocolate drizzle optional

Method
 

  1. Prepare the Cheesecake Filling – In a medium bowl, beat cream cheese, powdered sugar, and vanilla extract until smooth. Fold in the mashed raspberries until well combined. Chill for 30 minutes to firm up.
  2. Form the Bites – Scoop about 1 tablespoon of the mixture and roll it into a ball. Place on a parchment-lined baking sheet and freeze for 1 hour to solidify.
  3. Melt the White Chocolate – In a microwave-safe bowl, melt white chocolate chips with coconut oil in 20-second intervals, stirring between each until smooth.
  4. Coat the Bites – Using a fork or toothpick, dip each frozen cheesecake ball into the melted white chocolate, ensuring full coverage. Let excess drip off before placing back on the baking sheet.
  5. Garnish & Set – While the chocolate is still wet, sprinkle with freeze-dried raspberry powder or drizzle with additional melted white chocolate. Refrigerate for at least 30 minutes to fully set.

Notes

  • Store in an airtight container in the refrigerator for up to 5 days.
  • Freeze for up to 1 month and thaw in the fridge before serving.
  • For a variation, swap raspberries for strawberries or blueberries.
  • Use high-quality white chocolate for the best taste and texture.

Peepin’ Chickies Deviled Eggs: Delightful Easter Treat!

Introduction to Peepin’ Chickies Deviled Eggs

Ah, the joy of Easter gatherings! There’s something magical about bringing a dish that not only tastes divine but also sparks a smile. Enter Peepin’ Chickies Deviled Eggs, a delightful treat that transforms the classic deviled egg into adorable little chicks. Perfect for busy moms and professionals, this recipe is a quick solution for those bustling days when you want to impress without the stress. Imagine the delight on your loved ones’ faces as they peep at these charming creations. Let’s dive into this culinary adventure and make your Easter table the talk of the town!

Why You’ll Love This Peepin’ Chickies Deviled Eggs

These Peepin’ Chickies Deviled Eggs are a breeze to whip up, making them perfect for those hectic days when time is of the essence. With their adorable appearance and delightful taste, they’re sure to be a hit with both kids and adults alike. Plus, they add a touch of whimsy to your Easter spread, turning a simple appetizer into a festive centerpiece. What’s not to love?

Ingredients Peepin’ Chickies Deviled Eggs

Creating these charming Peepin’ Chickies Deviled Eggs is a delightful experience, and it all starts with the right ingredients. You’ll need large eggs, the stars of the show, which provide a creamy base for our filling. Mayonnaise adds a rich, smooth texture, while a touch of Dijon mustard brings a subtle tanginess. A splash of white vinegar enhances the flavors, making them pop. Season with salt and pepper to taste, ensuring a balanced flavor profile.

For a sunny hue, a few drops of yellow food coloring can be added, though it’s entirely optional. To bring our little chicks to life, black olives serve as the perfect eyes, and carrot sticks make adorable beaks. If you’re feeling adventurous, consider a pinch of smoked paprika for a smoky twist. For a lighter version, swap mayonnaise with Greek yogurt. Exact quantities are listed at the bottom of the article, ready for printing.

How to Make Peepin’ Chickies Deviled Eggs

Boil the Eggs

Start by placing your eggs in a saucepan, ensuring they’re snug but not overcrowded. Cover them with cold water, about an inch above the eggs. Bring the water to a rolling boil over medium-high heat. Once you see those bubbles dancing, cover the pot, remove it from the heat, and let it sit for 12 minutes. This method ensures perfectly cooked eggs every time.

After the timer dings, transfer the eggs to a bowl of ice water. This icy bath halts the cooking process and makes peeling a breeze. Let them chill for about 5 minutes. Once cooled, gently tap and roll each egg on the counter to crack the shell, then peel them under running water for ease.

Prepare the Yolk Mixture

With your eggs peeled, slice them in half lengthwise. Carefully scoop out the yolks and place them in a mixing bowl. Add mayonnaise, Dijon mustard, and a splash of white vinegar to the yolks. Season with salt and pepper to taste. For a cheerful yellow hue, add a few drops of yellow food coloring, but that’s entirely up to you.

Using a fork, mash the yolk mixture until it’s smooth and creamy. This is where the magic happens, as the flavors meld into a delightful filling. If you’re feeling adventurous, a pinch of smoked paprika can add a smoky depth to the mix.

Assemble the Chicks

Now, it’s time to bring your little chicks to life! Spoon or pipe the yolk mixture back into the egg whites, creating a generous mound. For the eyes, cut small pieces of black olives and gently press them into the yolk filling. Carrot sticks, cut into tiny triangles, make perfect beaks.

Arrange your Peepin’ Chickies Deviled Eggs on a platter, and watch as they transform into the stars of your Easter table. Serve them immediately, or refrigerate until you’re ready to dazzle your guests. These charming appetizers are best enjoyed the same day, ensuring their freshness and flavor.

Tips for Success

  • Use fresh eggs for easier peeling; older eggs can be stubborn.
  • Chill eggs in ice water immediately after boiling to prevent overcooking.
  • For a smoother yolk mixture, use a food processor instead of a fork.
  • Experiment with different mustards for unique flavor profiles.
  • Prepare the yolk mixture a day ahead to save time on busy days.

Equipment Needed

  • Saucepan: A medium-sized one works best for boiling the eggs.
  • Mixing Bowl: For combining the yolk mixture.
  • Fork or Food Processor: To mash the yolks smoothly.
  • Knife: For slicing eggs and cutting decorations.
  • Piping Bag or Spoon: To fill the egg whites with the yolk mixture.

Variations

  • For a spicy kick, add a dash of hot sauce or a pinch of cayenne pepper to the yolk mixture.
  • Swap the mayonnaise with avocado for a creamy, dairy-free alternative.
  • Incorporate finely chopped herbs like dill or chives for a fresh, aromatic twist.
  • Use pickled jalapeños instead of black olives for a zesty eye decoration.
  • Try adding crumbled bacon bits to the yolk mixture for a savory, smoky flavor.

Serving Suggestions

  • Pair with a crisp, refreshing salad to balance the richness of the eggs.
  • Serve alongside a chilled glass of sparkling lemonade for a zesty contrast.
  • Arrange on a bed of fresh greens for a vibrant presentation.
  • Complement with a platter of assorted cheeses and crackers.
  • Garnish with fresh herbs like parsley or dill for an aromatic touch.

FAQs about Peepin’ Chickies Deviled Eggs

How far in advance can I make Peepin’ Chickies Deviled Eggs?

You can prepare the yolk mixture a day ahead and store it in the fridge. Assemble the chicks on the day of serving for the freshest taste and appearance. This ensures your Peepin’ Chickies Deviled Eggs are as delightful as they are delicious.

Can I make these deviled eggs without mayonnaise?

Absolutely! You can substitute mayonnaise with Greek yogurt or mashed avocado for a lighter, creamy alternative. Both options maintain the delightful texture while offering a unique twist to your Peepin’ Chickies Deviled Eggs.

What can I use instead of black olives for the eyes?

If black olives aren’t your thing, try using capers or small pieces of pickled jalapeños. These alternatives add a zesty touch to your Peepin’ Chickies Deviled Eggs, keeping them both cute and flavorful.

How do I prevent the eggs from cracking while boiling?

To avoid cracks, start with cold water and bring it to a gentle boil. Adding a pinch of salt or a splash of vinegar to the water can also help keep the eggs intact, ensuring your Peepin’ Chickies Deviled Eggs are picture-perfect.

Can I add other flavors to the yolk mixture?

Of course! Feel free to experiment with flavors like smoked paprika, hot sauce, or fresh herbs. These additions can elevate your Peepin’ Chickies Deviled Eggs, making them a unique and tasty treat for your Easter gathering.

Final Thoughts

Creating Peepin’ Chickies Deviled Eggs is more than just a culinary task; it’s a joyful experience that brings a smile to everyone involved. These little chicks are not only a feast for the eyes but also a delight for the taste buds. As you place them on your Easter table, watch as they become the centerpiece of conversation and laughter. Whether you’re a busy mom or a professional juggling life’s demands, this recipe offers a moment of creativity and connection. So, gather your loved ones, share the joy, and let these charming chicks peep their way into your heart.

Peepin' Chickies Deviled Eggs
Paul

Peepin’ Chickies Deviled Eggs: Delightful Easter Treat!

Peepin’ Chickies Deviled Eggs are a delightful Easter treat, featuring deviled eggs decorated to look like little chicks, perfect for festive gatherings.
Prep Time 15 minutes
Cook Time 12 minutes
Total Time 27 minutes
Servings: 6 servings
Course: Appetizer
Cuisine: American
Calories: 100

Ingredients
  

  • 6 large eggs
  • 3 tablespoons mayonnaise
  • 1 teaspoon Dijon mustard
  • 1 teaspoon white vinegar
  • Salt and pepper to taste
  • Yellow food coloring optional
  • Black olives for decoration
  • Carrot sticks for decoration

Method
 

  1. Place the eggs in a saucepan and cover them with cold water. Bring the water to a boil over medium-high heat. Once boiling, cover the pot, remove it from heat, and let it sit for 12 minutes.
  2. After 12 minutes, transfer the eggs to a bowl of ice water and let them cool for about 5 minutes. Once cooled, peel the eggs and slice them in half lengthwise.
  3. Remove the yolks from the egg whites and place them in a mixing bowl. Add the mayonnaise, Dijon mustard, white vinegar, salt, and pepper. If desired, add a few drops of yellow food coloring to achieve a cheerful yellow hue.
  4. Mash the yolk mixture with a fork until smooth and well combined. Spoon or pipe the yolk mixture back into the egg whites.
  5. To create the ‘chick’ look, cut small pieces of black olives for eyes and use carrot sticks for beaks. Place them on the yolk filling to resemble little chicks.
  6. Serve immediately or refrigerate until ready to serve. These deviled eggs are best enjoyed the same day.

Notes

  • For a fun twist, try adding a pinch of smoked paprika to the yolk mixture for extra flavor.
  • You can also substitute the mayonnaise with Greek yogurt for a lighter version.

Easter Brunch Delight: Crescent Roll Carrots with a Twist

A Sweet Childhood Memory Turned Easter Tradition

Every Easter morning, my grandmother would wake up early to prepare a feast for the family. She always believed that food should be as festive as the occasion itself. I remember watching her shape dough with practiced hands, her fingers carefully crafting something magical out of the simplest ingredients. One year, she surprised us with golden-brown crescent rolls shaped like carrots, stuffed with creamy egg salad, and garnished with fresh dill. They looked so real that for a moment, my younger self hesitated—was this a pastry or an actual carrot?

That Easter, those Crescent Roll Carrots became an instant tradition in our family. They weren’t just a fun and festive dish; they symbolized the warmth and creativity that my grandmother brought to every meal. Over the years, I’ve carried on her tradition, tweaking the recipe slightly to add my own touch. Now, it’s a staple on my Easter brunch table, bringing smiles to my loved ones just as it did for me as a child.

There’s something undeniably joyful about food that sparks conversation and excitement. These Crescent Roll Carrots do exactly that—they’re not only delicious but also a creative centerpiece that adds charm to any Easter spread. Whether you’re making them for a gathering of family and friends or introducing a fun new tradition for your kids, these pastries are bound to become a highlight of your holiday meal.

Why Crescent Roll Carrots Are the Perfect Easter Treat

Easter is a time for creativity in the kitchen, and this recipe is a fantastic way to make your brunch table more festive. The combination of flaky crescent rolls and creamy egg or ham salad creates a perfect balance of texture and flavor. Here’s why these edible “carrots” deserve a spot on your holiday menu:

1. A Fun, Kid-Friendly Recipe

Children love colorful, playful foods, and this dish makes eating an Easter-themed meal extra fun. They’ll enjoy the novelty of eating a “carrot” that’s actually a delicious pastry. If you let them help in the kitchen, they can participate in rolling the dough or brushing on the orange color. Cooking together is a great way to create lasting family memories.

2. A Versatile Crowd-Pleaser

These Crescent Roll Carrots can be customized with different fillings to suit your guests’ tastes. While traditional egg or ham salad is a classic choice, you can also experiment with chicken salad, tuna salad, or even a vegetarian option like herbed cream cheese or hummus.

3. Aesthetic Appeal for Your Easter Spread

Easter tables are often decorated with pastel colors, fresh flowers, and festive treats. These crescent roll carrots add a visually appealing element that blends perfectly with the holiday theme. With their bright orange hue and delicate sprigs of dill, they look just like real carrots—only much tastier!

Gather Your Ingredients:

  • 1 tube Pillsbury Crescent Recipe Creations Crescent Seamless Dough Sheet
  • 1 egg (whisked with 1 teaspoon of water for egg wash)
  • Yellow and red liquid food coloring (or natural alternatives)
  • 1 ½ cups of your favorite egg or ham salad
  • 1 bunch of fresh dill or parsley

Special Tools for Success:

  • Pizza cutter or knife
  • 6 metal cream horn molds
  • Pastry brush
  • Non-stick aluminum foil-lined baking sheet

Step-by-Step Directions to Easter Perfection

Step 1: Prepping the Dough

Preheat your oven to 400°F. Roll out the Pillsbury Crescent Dough Sheet onto a cutting board and use a pizza cutter or knife to slice it into 6 equal strips.

Step 2: Rolling the Dough Logs

Brush one strip with egg wash, then roll it into a 17–18-inch-long log. Pinch the seam shut and roll it thinner with your hands. Repeat this step for all six strips.

Step 3: Shaping the Carrots

Wrap each dough log around a metal cream horn mold, keeping the seam side against the mold. Ensure the dough doesn’t hang over the open end, as this will make removal tricky after baking.

Step 4: Coloring the Carrots

Mix about 60 drops of yellow food coloring with 2 drops of red to create orange. Using a pastry brush, coat the dough with the food coloring. If you prefer, you can brush the dough with just egg wash for a golden-brown effect.

Step 5: Baking the Carrot Crescents

Place the shaped dough on a lined baking sheet and bake for 6–8 minutes, rotating the pan halfway through for even browning. Let them cool for about 5 minutes before carefully twisting and removing the cream horn molds.

Step 6: Filling & Finishing Touches

Once completely cooled, spoon your favorite egg or ham salad into each crescent roll “carrot.” Garnish with sprigs of fresh dill or parsley for that leafy green effect.

Tip: These are best served fresh but can be stored in the fridge for up to two days.

Nutritional Highlights (Per Serving – Approximate Values)

  • Calories: ~220
  • Carbohydrates: ~18g
  • Protein: ~6g
  • Fat: ~14g
  • Fiber: ~1g

A perfect balance of flaky pastry and creamy filling, these Crescent Roll Carrots are a fun and festive addition to any Easter brunch table!

Common Questions About Crescent Roll Carrots

If you’re making these for the first time, you might have a few questions. Here are some frequently asked questions to help you perfect this Easter recipe.

1. Can I Make These Ahead of Time?

Yes! The crescent rolls can be baked in advance and stored in an airtight container for up to two days. However, it’s best to fill them just before serving to prevent the pastry from becoming soggy. If needed, you can prepare the filling a day ahead and refrigerate it separately.

2. What If I Don’t Have Metal Cream Horn Molds?

No problem! You can make DIY molds by rolling aluminum foil into cone shapes. Some people even use sugar cones as a substitute, though you’ll need to wrap them in foil to prevent burning.

3. Can I Use Puff Pastry Instead of Crescent Dough?

Absolutely! Puff pastry will give the carrots a flakier texture, but it works just as well. Just be sure to pinch the seams together to prevent the layers from separating during baking.

4. How Can I Make These More Natural Without Food Coloring?

If you prefer to avoid artificial food coloring, you can use natural alternatives such as:

  • Carrot juice or puree – Brush it onto the dough for a mild orange tint.
  • Paprika and turmeric – Mix these spices with egg wash for a natural color boost.
  • Beet juice – A tiny drop mixed with yellow food coloring creates a more natural orange shade.

5. Can I Make These Gluten-Free?

Yes! There are gluten-free crescent roll alternatives available in most grocery stores. Just be aware that gluten-free doughs may be more delicate and require extra care when shaping.

6. What Other Fillings Work Well?

Beyond egg and ham salad, consider trying:

  • Smoked salmon and cream cheese for a savory, sophisticated twist.
  • Chicken salad with grapes and almonds for a sweet and crunchy filling.
  • Buffalo chicken dip for a spicy, crowd-pleasing option.
  • Herbed ricotta and spinach for a vegetarian-friendly choice.

Tips for Making the Best Crescent Roll Carrots

To ensure your Crescent Roll Carrots turn out perfectly every time, keep these tips in mind:

1. Roll the Dough Evenly

For uniform carrots, make sure to roll your dough strips evenly before wrapping them around the molds. Uneven dough may cause them to bake inconsistently.

2. Keep an Eye on Baking Time

Crescent dough can go from golden to overbaked quickly, so check them at the 6-minute mark. Rotate the pan halfway through baking for even color.

3. Let Them Cool Before Removing the Molds

Removing the molds too soon can cause the pastries to collapse. Let them cool for at least 5 minutes before gently twisting and pulling out the molds.

4. Don’t Overfill the Carrots

While it’s tempting to load them up with filling, too much can cause the crescent rolls to break apart. Fill them just enough to maintain their structure while still being generous with the stuffing.

A Festive Finish: Making Easter Memorable

Holidays are about more than just food—they’re about the memories we create around the table. These Crescent Roll Carrots are more than just a fun recipe; they represent creativity, joy, and the spirit of celebration. Every time I make them, I think back to that Easter morning in my grandmother’s kitchen, watching her turn simple ingredients into something magical.

Whether you’re making these for a large family gathering, a kids’ Easter party, or a cozy brunch with loved ones, these Crescent Roll Carrots are guaranteed to bring smiles. They remind us that sometimes, the best holiday traditions start with a simple, creative idea—and a little bit of dough.

So this Easter, why not start a new tradition? Get the kids involved, embrace the fun, and watch as these charming edible carrots become a favorite in your household for years to come.

aiting

Easter Brunch Delight: Crescent Roll Carrots with a Twist

These Golden Carrot Crescents are a fun and festive Easter treat! Light, flaky pastry is shaped like a carrot, baked to golden perfection, and filled with your favorite egg or ham salad. A sprig of fresh dill adds the perfect finishing touch, making them a whimsical and delicious addition to your holiday spread.
Prep Time 15 minutes
Cook Time 8 minutes
Total Time 25 minutes
Servings: 6 servings
Course: Appetizer
Cuisine: American

Ingredients
  

  • 1 tube Pillsbury Crescent Recipe Creations Crescent Seamless Dough Sheet 1 egg (whisked with 1 teaspoon of water for egg wash), yellow and red liquid food coloring (or natural alternatives), 1 ½ cups egg or ham salad, 1 bunch fresh dill or parsley.

Method
 

  1. Prepare the Dough – Preheat oven to 400°F. Roll out the Crescent Dough Sheet and cut into 6 equal strips using a pizza cutter or knife.
  2. Shape the Dough – Brush one strip with egg wash, then roll it into a long, thin log (about 17-18 inches). Repeat with the remaining strips.
  3. Wrap & Form – Wrap each dough log around a metal cream horn mold, keeping the seam side down. Avoid overhanging dough at the open end.
  4. Color the Carrots – Mix 60 drops of yellow food coloring with 2 drops of red to create orange. Use a pastry brush to coat the dough. Alternatively, brush with only egg wash for a golden-brown finish.
  5. Bake – Place on a lined baking sheet and bake for 6-8 minutes, rotating halfway through. Let cool for 5 minutes before carefully removing from molds.
  6. Fill & Garnish – Once cooled, spoon egg or ham salad into each crescent roll “carrot.” Garnish with fresh dill or parsley for a realistic touch.

Notes

  • These are best served fresh but can be refrigerated for up to two days.
  • For a natural orange hue, use carrot juice or turmeric instead of food coloring.
  • Fill them just before serving to keep the pastry crisp.