Skinny Chicken and Avocado Caesar Salad: A Guilt-Free Classic

A Salad That Became a Family Tradition

There’s something nostalgic about a Caesar salad. For me, it brings back memories of weekend lunches with my grandmother, who had a knack for turning simple ingredients into a meal that felt special. She would make a classic Caesar salad, complete with a rich, creamy dressing and golden croutons toasted to perfection. But as I grew older and became more conscious of what I was eating, I found myself torn. Could I still enjoy this childhood favorite without feeling weighed down afterward?

That’s when I discovered a way to make Caesar salad not just delicious, but also healthier. By swapping heavy dressing for a Greek yogurt-based version, adding lean protein like grilled chicken, and throwing in creamy avocado for extra richness, I found the perfect balance between indulgence and nutrition. This Skinny Chicken and Avocado Caesar Salad is a meal that doesn’t leave you feeling guilty—but still delivers on flavor and satisfaction.

Why This Salad Is a Game-Changer

A Perfect Balance of Protein, Healthy Fats, and Crunch

One of the biggest problems with traditional salads is that they can leave you feeling hungry an hour later. But this version? It’s packed with protein from grilled chicken, eggs, and Greek yogurt. The avocado brings healthy monounsaturated fats that keep you full and satisfied, while crispy bacon and toasted ciabatta add that irresistible crunch.

A Lighter Yet Creamy Dressing

The secret to making this salad healthier without sacrificing flavor lies in the dressing. Traditional Caesar dressing is made with mayonnaise and sometimes even heavy cream, making it high in fat and calories. This version swaps in Greek yogurt, which not only reduces the fat content but also adds a boost of protein and probiotics for gut health. The result is a dressing that’s creamy, tangy, and packed with flavor—without the guilt.

Health Benefits of This Salad

Lean, High-Quality Protein

  • Chicken breast is one of the best sources of lean protein, essential for muscle maintenance, satiety, and metabolism.
  • Eggs provide additional protein along with essential vitamins like B12 and choline, which support brain function.

Heart-Healthy Fats

  • Avocado is loaded with monounsaturated fats, which help lower bad cholesterol and promote heart health.
  • Olive oil, used in both the dressing and for toasting the bread, is another excellent source of these healthy fats.

Nutrient-Dense Greens

  • Romaine or baby cos lettuce isn’t just a crunchy base—it’s packed with vitamins A and K, essential for skin health and bone strength.
  • Parmesan cheese, when used in moderation, provides calcium and umami flavor without overwhelming the dish.

Got it! Let me try again to retrieve the recipe for you. One moment.

What You’ll Need – Ingredients

For the Salad:

  • ½ loaf ciabatta, sliced
  • 1 lb skinless, boneless chicken breast fillets (halved horizontally to make 4 fillets)
  • 1 tbsp garlic powder
  • 2 tbsp dried parsley flakes
  • 1 pinch salt
  • 7 oz shortcut bacon, cut into strips
  • 2 large eggs, boiled (soft or hard, sliced)
  • 2 heads baby cos lettuce, washed and dried
  • 1 medium avocado, sliced
  • ½ cup shaved Parmesan cheese

For the Dressing:

  • ⅔ cup Greek yogurt
  • 1 tbsp olive oil
  • 2 cloves garlic, crushed
  • 2 fillets anchovy, finely chopped (or sub with 2 tbsp black pitted olives + 1 tsp fish sauce)
  • ½ large lemon, juiced
  • 3 tbsp freshly grated Parmesan cheese
  • Salt and pepper, to taste

Step-by-Step – Directions

  1. Crisp Up the Bread – Preheat your oven to grill/broil on medium-high heat. Place the ciabatta slices on an oven tray, drizzle with olive oil, and toast until crispy.
  2. Sizzle the Chicken & Bacon – While the bread toasts, season the chicken fillets with garlic powder, parsley, and salt. Heat a non-stick grill pan with a drizzle of olive oil and cook the chicken until golden on both sides. Remove and set aside. In the same pan, fry the bacon strips until crispy.
  3. Boil the Eggs – While cooking the bacon, boil your eggs to your preferred doneness.
  4. Whisk the Dressing – In a bowl, combine Greek yogurt, olive oil, garlic, anchovies (or olive substitute), lemon juice, and Parmesan. Whisk well and season with salt and pepper to taste.
  5. Assemble the Salad – In a large bowl, toss together the lettuce, sliced chicken, crispy bacon, eggs, avocado, shaved Parmesan, and toasted bread pieces. Drizzle with the creamy dressing, mix well, and serve immediately.

The Good Stuff – Nutritional Breakdown

  • Calories: 559 kcal
  • Carbohydrates: 40g
  • Protein: 54g
  • Fat: 20g
  • Saturated Fat: 5g
  • Cholesterol: 163mg
  • Sodium: 1,672mg
  • Fiber: 5g
  • Vitamin A: 1,519 IU
  • Vitamin C: 9mg
  • Calcium: 217mg
  • Iron: 2mg

Enjoy this light yet satisfying take on a classic Caesar salad! Let me know if you need modifications.

Frequently Asked Questions

1. Can I Make This Salad Ahead of Time?

Yes! However, it’s best to store the components separately and assemble just before serving. Keep the dressing in an airtight container, and only slice the avocado fresh to prevent browning.

2. What Can I Use Instead of Chicken?

This salad is incredibly versatile. You can substitute grilled shrimp, salmon, or even tofu for a plant-based version.

3. How Can I Make It Dairy-Free?

To make this salad dairy-free, swap the Greek yogurt in the dressing for a dairy-free alternative like coconut yogurt or a cashew-based Caesar dressing. Use nutritional yeast instead of Parmesan cheese for a similar savory flavor.

4. Is There a Low-Carb Version?

Yes! Simply leave out the ciabatta croutons or swap them for roasted chickpeas or toasted almonds for a crunchy alternative.

5. Can I Use Store-Bought Caesar Dressing?

Of course! While homemade dressing is fresher and healthier, a high-quality, light Caesar dressing can be a great time-saver. Just be mindful of added sugars and preservatives in store-bought versions.

Creative Variations to Try

Grilled Shrimp Avocado Caesar

Swap the chicken for grilled shrimp seasoned with garlic and paprika for a seafood twist.

Spicy Chipotle Caesar

Add a teaspoon of chipotle powder or a splash of hot sauce to the dressing for a smoky, spicy kick.

Mediterranean Caesar Salad

Replace bacon with sun-dried tomatoes and add some kalamata olives for a Mediterranean-inspired flavor profile.

Kale and Quinoa Caesar

Mix in some massaged kale and cooked quinoa for an extra fiber boost, making it even more filling and nutritious.

Why You’ll Love This Salad

This Skinny Chicken and Avocado Caesar Salad proves that healthy eating doesn’t mean sacrificing flavor. It’s creamy, crispy, salty, and refreshing all at once. Whether you’re making it for a weekday lunch, a weekend brunch, or even a light dinner, this salad delivers satisfaction without the heaviness of traditional Caesar salads.

And for me, it’s more than just a meal—it’s a way to enjoy an old favorite in a new, nourishing way. Every time I make it, I’m reminded of those childhood lunches, but now with a version I feel good about eating.

So the next time you’re craving a Caesar salad, give this lighter take a try. You just might find it becomes a new favorite in your home, too.

Would you like me to refine any sections or add more details? Let me know how I can make it perfect for your website!

aiting

Skinny Chicken and Avocado Caesar Salad: A Guilt-Free Classic

Elevate your salad game with this vibrant twist on a classic Caesar. Juicy grilled chicken, crispy bacon, and perfectly boiled eggs mingle with crisp baby cos lettuce, creamy avocado slices, and crunchy ciabatta croutons—all tossed in a tangy, Greek yogurt-based Caesar dressing. This salad is light yet satisfying, making it the perfect choice for a fresh lunch or dinner.
Prep Time 15 minutes
Cook Time 15 minutes
Total Time 30 minutes
Course: Salad
Cuisine: Fusion

Ingredients
  

  • For the salad you’ll need:• ½ loaf ciabatta, sliced• 1 lb skinless, boneless chicken breast fillets (halved horizontally to yield 4 fillets)• 1 tbsp garlic powder• 2 tbsp dried parsley flakes• A pinch of salt• 7 oz shortcut bacon, cut into strips• 2 large eggs, boiled (soft or hard, as you prefer) and sliced• 2 heads baby cos lettuce, washed and dried• 1 medium avocado, sliced• ½ cup shaved Parmesan cheese
  • For the dressing mix together:• ⅔ cup Greek yogurt• 1 tbsp olive oil• 2 cloves garlic, crushed• 2 anchovy fillets, finely chopped (or substitute with 2 tbsp black pitted olives plus 1 tsp fish sauce)• Juice from ½ a large lemon• 3 tbsp freshly grated Parmesan cheese• Salt and pepper, to taste

Method
 

  1. Crisp Up the Bread: Preheat your oven to a medium-high grill/broil setting. Arrange the ciabatta slices on a baking tray, drizzle with olive oil, and toast until golden and crunchy.
  2. Sizzle the Chicken & Bacon: Season the chicken fillets with garlic powder, dried parsley, and a pinch of salt. Heat a non-stick grill pan with a drizzle of olive oil, then cook the chicken until it’s golden on both sides; set aside. In the same pan, fry the bacon strips until they’re perfectly crisp.
  3. Boil the Eggs: Boil the eggs to your desired doneness. Once cooled, slice them into rounds.
  4. Whisk the Dressing: In a bowl, combine Greek yogurt, olive oil, crushed garlic, anchovies (or the olive substitute), lemon juice, and Parmesan cheese. Whisk until smooth and season with salt and pepper.
  5. Assemble the Salad: In a large bowl, toss together the baby cos lettuce, sliced chicken, crispy bacon, eggs, avocado slices, shaved Parmesan, and toasted ciabatta pieces. Drizzle over the creamy dressing, gently mix, and serve immediately.

Notes

• For the best texture, enjoy the salad right after assembling so the ciabatta croutons stay crisp.
• Feel free to adjust the seasoning in the dressing to match your taste preference.
• The combination of warm grilled elements and fresh veggies creates a delightful contrast in every bite.
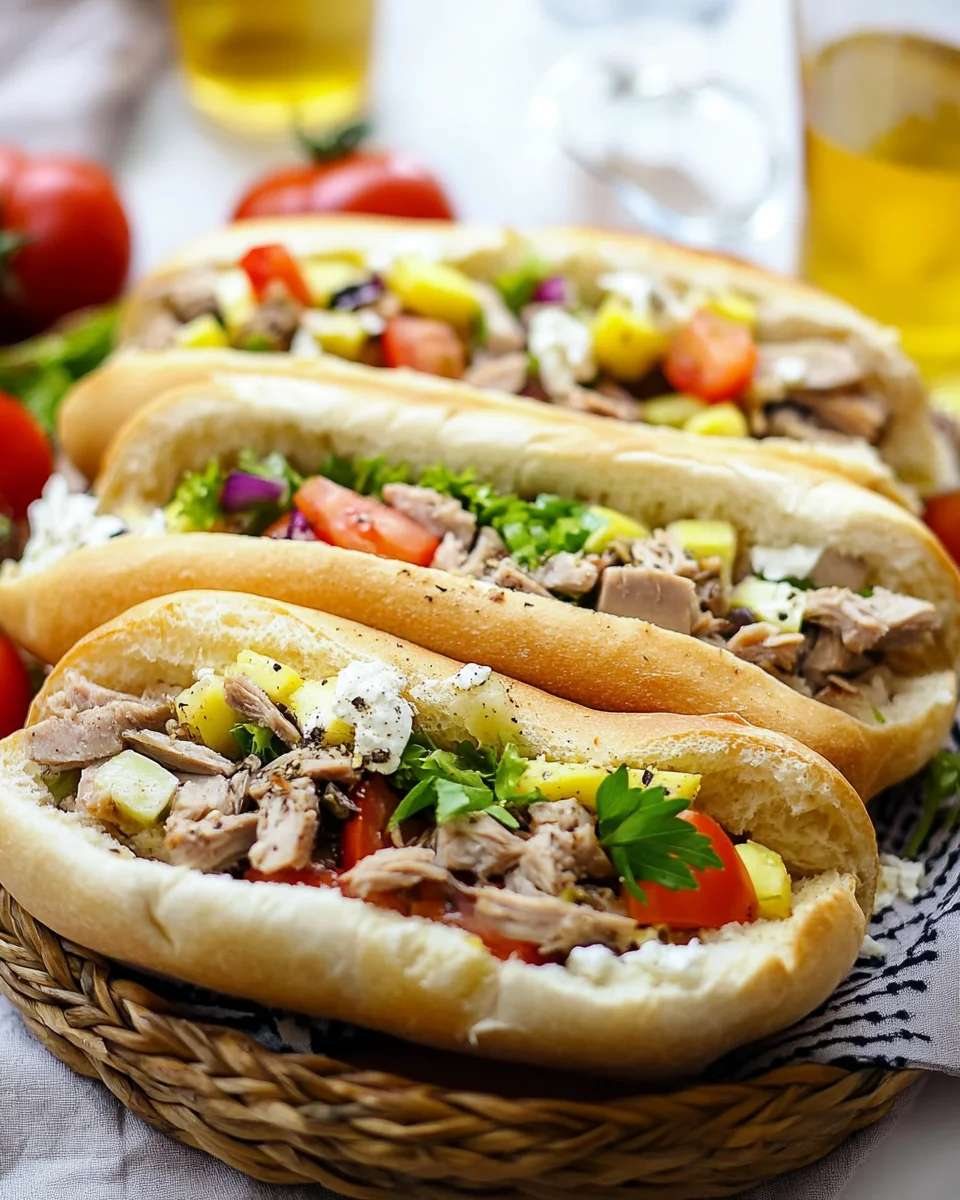

Bocadillo with Tuna: A Taste of Simplicity and Comfort

A Sandwich That Feels Like Home

Some of the best food memories are tied to the simplest of dishes. For me, the Bocadillo with Tuna is one of those meals that instantly transports me back to childhood. I remember lazy summer afternoons when my grandmother would bring out a fresh loaf of bread, a can of tuna, and whatever ingredients she had on hand. With swift and practiced hands, she would assemble a sandwich that was somehow always perfect—soft bread, flavorful tuna, crunchy vegetables, and just the right amount of sauce.

It wasn’t anything fancy, but that was the beauty of it. A bocadillo doesn’t need to be complicated. It’s a humble, satisfying meal that has been enjoyed for generations, offering nourishment and comfort in every bite. Whether you’re making it as a quick lunch, a picnic snack, or a travel-friendly meal, this sandwich is proof that simple ingredients, when combined thoughtfully, can create something truly special.

The Story Behind the Bocadillo

A bocadillo is a traditional Spanish sandwich made with crusty bread, usually a baguette or a similar type of roll, and a variety of fillings. Unlike soft sandwiches made with sliced bread, bocadillos have a rustic charm, offering a satisfying bite with a slightly crisp exterior and a tender interior.

While the most common versions include jamón (Spanish ham), cheese, or omelets, the Bocadillo with Tuna has become a popular variation due to its simplicity, affordability, and high nutritional value. It is widely enjoyed across Spain and other Mediterranean countries, often served in cafés, school lunchboxes, and even as a quick dinner at home.

What makes it so special is its adaptability. Every family, café, and region has its own way of making a bocadillo, adding unique twists that reflect local tastes and traditions.

Customizing Your Bocadillo: Endless Possibilities

One of the greatest things about a Bocadillo with Tuna is that you can tweak it to suit your preferences. Here are some creative ways to customize your sandwich:

1. Bread Selection: The Foundation of Flavor

  • Classic baguette – Crisp on the outside, soft inside, perfect for a traditional bocadillo.
  • Ciabatta – A rustic Italian bread with a chewy texture that absorbs flavors well.
  • Soft rolls – If you prefer a gentler bite, go for brioche or sandwich buns.
  • Whole grain or seeded bread – For a healthier option with added fiber and nutrients.

2. Tuna Variations: Bold or Mild?

  • Canned tuna in olive oil – Rich and flavorful, ideal for an authentic Mediterranean taste.
  • Water-packed tuna – A lighter choice for those watching their calorie intake.
  • Fresh grilled tuna – Elevate your bocadillo by using freshly seared tuna steaks.

3. Sauce Options: A Touch of Creaminess or Spice

  • Classic mayonnaise – A simple, creamy addition that complements tuna beautifully.
  • Aioli – Garlic-infused mayo for an extra punch of flavor.
  • Harissa or sriracha mayo – For those who love a spicy kick.
  • Yogurt-based sauce – A lighter alternative with a tangy twist.

4. Add Some Crunch and Freshness

  • Lettuce or arugula – Adds a fresh, crisp texture.
  • Pickles or capers – A hint of acidity to balance the richness of the tuna.
  • Red onion or shallots – For a sharp, slightly sweet contrast.
  • Cucumber slices – A refreshing addition that keeps the sandwich light.

5. Extra Protein and Texture

  • Hard-boiled eggs – A classic Spanish addition for extra richness.
  • Grated cheese – Manchego or cheddar work wonderfully.
  • Avocado slices – A creamy, nutrient-dense upgrade.

The beauty of the bocadillo lies in its adaptability. You can make it as simple or as gourmet as you like, depending on your mood and what ingredients you have on hand.

Why This Sandwich Is More Than Just a Quick Meal

1. A Nutritional Powerhouse

A Bocadillo with Tuna isn’t just delicious—it’s packed with nutrients. Tuna is an excellent source of lean protein, omega-3 fatty acids, and essential vitamins like B12 and D. The vegetables add fiber and antioxidants, while whole grain bread provides sustained energy.

2. A Meal for Any Occasion

This sandwich is perfect for:

  • Quick lunches – Easy to prepare and satisfying.
  • Picnics and outdoor adventures – Travels well and doesn’t require reheating.
  • Post-workout meals – A great source of protein for muscle recovery.
  • Lazy dinner nights – When you want something delicious but low-effort.

3. Budget-Friendly Goodness

A Bocadillo with Tuna proves that good food doesn’t have to be expensive. Canned tuna is an affordable protein source, and most of the other ingredients are pantry staples.

Ingredients

For the Bread (Dough):
  • 400 g flour
  • 100 g fine semolina
  • 10 g instant yeast
  • 8 g salt
  • 12 g granulated sugar
  • 30 ml sunflower oil
  • 100 g yogurt
  • 215 ml water
For the Filling:
  • Lettuce
  • Tuna
  • Fried diced potatoes
  • Boiled egg
  • Tomato sauce
  • Pickle
  • Red onion
  • Green olives
  • Sauce of choice

Step-by-Step: Crafting the Perfect Bocadillo

  1. Prepare the Dough
    In a deep bowl, mix flour, semolina, yeast, salt, sugar, sunflower oil, yogurt, and water. Knead for 10-12 minutes until smooth.
  2. Let It Rise
    Cover the dough and let it rise in a warm place for about an hour or until doubled in size.
  3. Shape the Buns
    Divide the dough into 7 equal pieces (around 120 g each). Roll each into an oval shape (24×12 cm), then fold it closed lengthwise.
  4. Final Proofing
    Dip one side of each dough piece in semolina, place them on a lined baking sheet, and let them rise for another 30 minutes until doubled in size.
  5. Bake to Perfection
    Preheat the oven to 200℃ and bake for 10-15 minutes until golden brown. Once out of the oven, cover with a tea towel to keep them soft.
  6. Assemble the Bocadillo
    Slice the buns open and fill with lettuce, tuna, fried potatoes, boiled egg, tomato sauce, pickle, red onion, green olives, and your favorite sauce.

Nutritional Perks: A Healthy Indulgence

  • Protein Power – Tuna and eggs provide essential proteins for muscle growth and repair.
  • Fiber Boost – Lettuce and pickles add fiber for digestive health.
  • Healthy Fats – Olives and sunflower oil contribute to heart-healthy fats.
  • Energy-Packed – Potatoes and bread offer complex carbohydrates for sustained energy.

Enjoy your homemade Bocadillo with Tuna—a perfect balance of taste and nutrition in every bite!

FAQs: Everything You Need to Know

1. Can I make a bocadillo in advance?

Yes! You can prepare the sandwich a few hours ahead, but if using wet ingredients like tomatoes or sauce, consider packing them separately to avoid soggy bread.

2. What’s the best tuna to use?

For the most authentic taste, use canned tuna in olive oil. It has a richer flavor and softer texture. If you prefer a lighter option, water-packed tuna works well too.

3. How do I store leftovers?

If you have extra bocadillos, wrap them tightly in foil or place them in an airtight container in the fridge. They are best eaten within 24 hours.

4. Can I make this sandwich gluten-free?

Absolutely! Just swap the bread for a gluten-free roll or wrap.

5. What can I serve with a Bocadillo with Tuna?

It pairs beautifully with:

  • A simple green salad
  • Crispy potato chips or fries
  • A bowl of gazpacho (Spanish cold tomato soup)
  • Marinated olives and cheese for a tapas-style meal

Final Thoughts: The Joy of Simple, Good Food

There’s something deeply satisfying about a Bocadillo with Tuna. It’s a sandwich that doesn’t try too hard yet manages to deliver on every front—taste, texture, nutrition, and nostalgia. Whether you make it with the simplest ingredients or give it a gourmet twist, it remains a celebration of honest, wholesome food.

So the next time you’re looking for a quick, delicious meal, skip the store-bought sandwiches and make your own bocadillo. You’ll taste the difference in every bite.

aiting

Bocadillo with Tuna: A Taste of Simplicity and Comfort

Discover a harmonious blend of textures and flavors with this homemade bocadillo. Freshly baked, soft buns cradle a vibrant mix of crisp lettuce, savory tuna, crispy fried potatoes, a perfectly boiled egg, tangy tomato sauce, zesty pickles, sharp red onion, and briny green olives—all tied together with your favorite sauce. This hearty yet healthy treat is ideal for a fulfilling lunch or an indulgent snack.
Prep Time 20 minutes
Servings: 7 buns
Course: Sandwich / Bocadillo
Cuisine: Spanish-Inspired / Fusion

Ingredients
  

  • For the Bread Dough:• 400 g flour• 100 g fine semolina• 10 g instant yeast• 8 g salt• 12 g granulated sugar• 30 ml sunflower oil• 100 g yogurt• 215 ml water
  • For the Filling:• Lettuce• Tuna• Fried diced potatoes• Boiled egg• Tomato sauce• Pickle• Red onion• Green olives• Sauce of choice

Method
 

  1. Prepare the Dough: In a deep bowl, combine flour, semolina, yeast, salt, sugar, sunflower oil, yogurt, and water. Knead the mixture for 10–12 minutes until the dough becomes smooth and elastic.
  2. Let It Rise: Cover the bowl with a clean cloth and let the dough rise in a warm spot for about 1 hour, or until it has doubled in size.
  3. Shape the Buns: Divide the dough into 7 equal portions (approximately 120 g each). Roll each portion into an oval shape, roughly 24 x 12 cm, then fold each oval closed lengthwise to form a bun.
  4. Final Proofing: Lightly dip one side of each bun in semolina, place them on a baking sheet lined with parchment paper, and let them rise for another 30 minutes until they have doubled again.
  5. Bake to Perfection: Preheat your oven to 200℃ (about 392°F). Bake the buns for 10–15 minutes until they turn a lovely golden brown. Once baked, cover them with a tea towel to maintain their softness.
  6. Assemble the Bocadillo: Slice open each bun and layer with lettuce, tuna, fried diced potatoes, sliced boiled egg, tomato sauce, pickle, red onion, green olives, and finish with your favorite sauce.

Notes

• The combination of tuna and egg delivers a robust protein punch, while the fresh vegetables and semolina-infused bread add a nutritious fiber boost.
• For the best flavor, assemble your bocadillo just before serving to enjoy the contrast between the warm, soft bread and the cool, crisp filling.

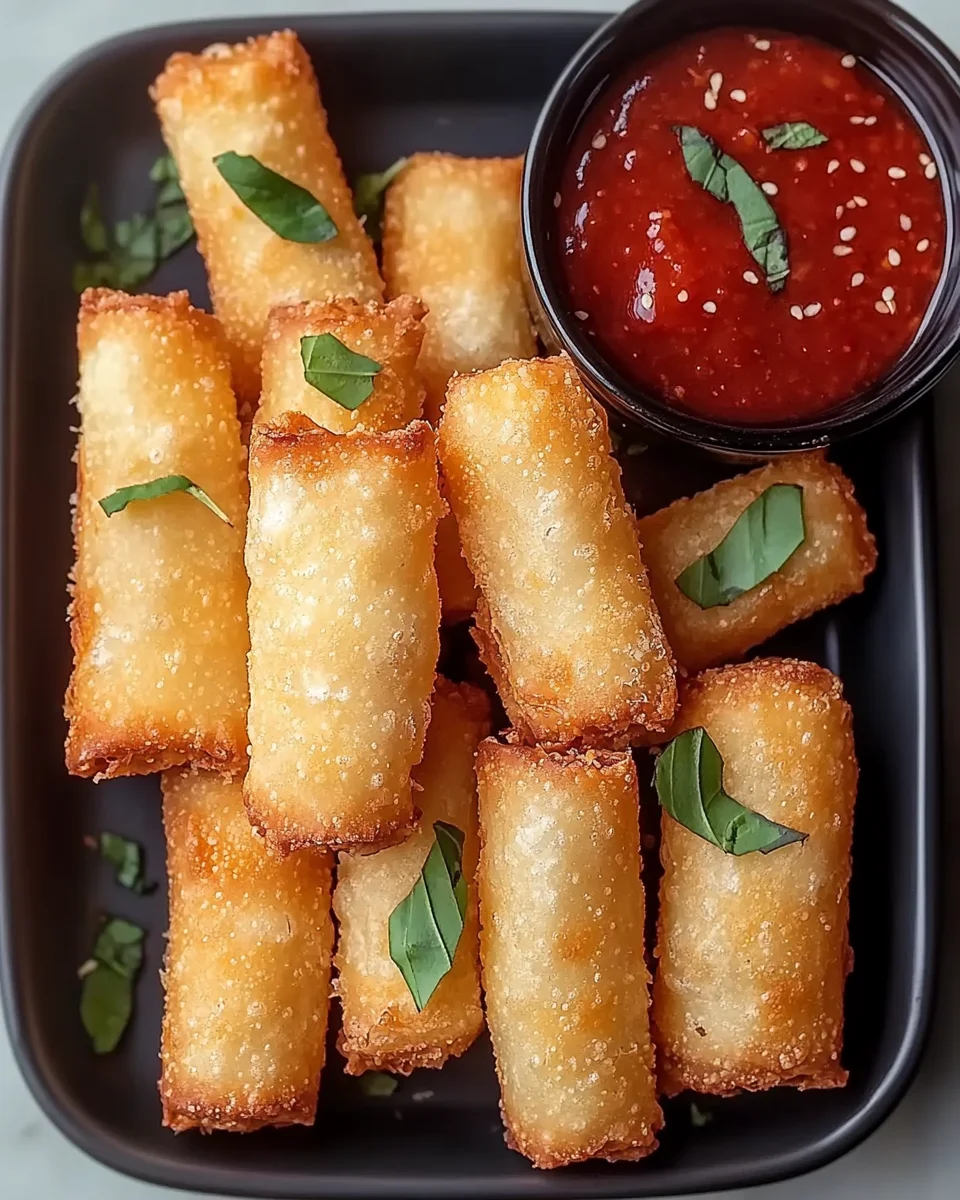
Crispy, Cheesy, and Irresistible: Wonton Mozzarella Sticks

A Bite of Nostalgia: How These Mozzarella Sticks Became a Family Favorite

Growing up, my family had a tradition of making snacks together on the weekends. My mom, always looking for creative ways to keep things fun in the kitchen, introduced me to mozzarella sticks at an early age. We’d coat cheese in breadcrumbs, fry them up, and sit around the table with marinara sauce, eagerly awaiting the first bite.

But one evening, in the midst of a kitchen experiment gone wrong—where our breadcrumbs wouldn’t stick properly—she had an idea. Instead of the traditional method, she pulled out a pack of wonton wrappers from the fridge and suggested we try wrapping the cheese in those. The result? A mozzarella stick with an ultra-crispy shell that was lighter, flakier, and even more satisfying than the usual version.

Ever since that night, wonton mozzarella sticks have been my go-to snack for parties, movie nights, and casual gatherings. They’re easy, require just a handful of ingredients, and deliver an incredible crunch with that perfect cheese pull. Now, let’s dive into what makes them so special and how you can make them at home.

Why Wonton Wrappers? The Secret to the Ultimate Crunch

Traditional mozzarella sticks rely on breadcrumbs for their crispy coating, but wonton wrappers bring something different to the table. They are:

  • Thin and delicate, creating an airy, shatteringly crisp bite
  • Easier to work with than a three-step breading process
  • Perfect for sealing in cheese, reducing the risk of melting leaks
  • Less greasy, since they absorb less oil than breadcrumbs

The result? A mozzarella stick that feels lighter but still delivers on flavor and crunch. If you’ve never tried this method before, you’re in for a treat.

Choosing the Best Mozzarella for Maximum Cheese Pull

The best mozzarella sticks have a gooey, stretchy interior, and the type of cheese you use plays a big role in achieving this.

Best option: String cheese

  • Pre-portioned and easy to wrap
  • Designed to hold its shape while melting
  • Stretches beautifully without becoming overly gooey

Alternative: Block mozzarella

  • Can be cut into sticks
  • Whole milk mozzarella melts better than low-moisture versions
  • Requires a bit more effort to portion correctly

If you’re feeling adventurous, you can also experiment with cheddar, pepper jack, or gouda for a different flavor profile—but be aware that some cheeses melt faster than mozzarella and might require adjustments in frying time.

Common Mistakes and How to Avoid Them

Even though this recipe is simple, a few things can go wrong. Here’s how to prevent them:

1. Cheese Leaking Out

  • Make sure to seal the edges properly by brushing them with egg wash and pressing firmly.
  • Avoid air pockets, as they can cause the wrapper to burst.
  • Use cold string cheese—warm cheese melts too quickly and may escape.

2. Soggy or Greasy Mozzarella Sticks

  • Keep the oil at the right temperature (350°F/175°C)—too hot and the outside burns before the cheese melts, too cool and the sticks absorb too much oil.
  • Fry in small batches to prevent temperature drops in the oil.

3. Wonton Wrappers Tearing

  • Don’t overfill—too much cheese can make sealing difficult.
  • Keep wrappers moist but not wet—if they dry out, they become brittle and crack.

Creative Variations to Try

Once you’ve mastered the classic version, it’s time to get creative!

1. Spicy Kick Mozzarella Sticks

  • Add a sprinkle of chili flakes inside each wrapper before sealing.
  • Serve with sriracha mayo instead of marinara sauce.

2. Garlic Butter Mozzarella Sticks

  • Brush the wrappers with garlic butter before frying.
  • Sprinkle with grated Parmesan right after they come out of the oil.

3. Air-Fryer Wonton Mozzarella Sticks

  • Lightly spray with oil and air-fry at 375°F (190°C) for 5-7 minutes, flipping halfway through.
  • A great option for those who want a lighter, less greasy version.

Serving Suggestions: The Perfect Pairings

1. Dipping Sauces

While marinara sauce is a classic, try these alternatives:

  • Ranch dressing for a creamy contrast
  • Spicy honey for a sweet and savory balance
  • Garlic aioli for extra richness

2. Party Platter Ideas

These mozzarella sticks are perfect for game-day spreads. Serve them alongside:

  • Buffalo wings
  • Jalapeño poppers
  • Loaded nachos

3. Light and Fresh Complements

Balance the richness with a fresh side like:

  • A crisp Caesar salad
  • Sliced cucumbers and cherry tomatoes
  • Pickled vegetables for acidity

How to Store and Reheat for Later

1. Refrigerating Leftovers

  • Store in an airtight container in the fridge for up to 2 days.
  • Keep in mind that they lose their crispiness over time.

2. Freezing for Meal Prep

  • Assemble the sticks but don’t fry them.
  • Freeze on a baking sheet, then transfer to a freezer bag.
  • Fry directly from frozen, adding an extra minute to the cooking time.

3. Reheating for Maximum Crunch

  • Oven: Bake at 350°F (175°C) for 5-7 minutes.
  • Air fryer: Heat at 375°F (190°C) for 2-3 minutes.
  • Avoid the microwave—it makes them soggy and rubbery.

Ingredients: A Simple Yet Flavorful Lineup

  • 1 cup cooking oil (vegetable, canola, or peanut oil)
  • 1 large egg, whisked
  • 4 string cheese sticks, cut in half
  • 8 wonton wrappers
  • 1/2 cup marinara sauce (store-bought or homemade)

Directions: From Prep to Crispy Perfection

Step 1: Heat the Oil

  • In a medium skillet, heat vegetable oil to 325°F (163°C).
  • Make sure the oil is deep enough to cover the mozzarella sticks halfway.

Step 2: Prepare the Egg Wash

  • In a small bowl, whisk together the egg and 1 tablespoon of water.
  • This mixture helps seal the wonton wrappers securely.

Step 3: Wrap the Cheese

  • Lay one wonton wrapper flat and brush the edges with egg wash.
  • Place a halved string cheese stick in the center.
  • Fold the bottom edge over the cheese, then roll tightly to enclose it completely.
  • Press firmly to seal, ensuring no air pockets remain.
  • Repeat with the remaining cheese and wrappers.

Step 4: Fry to Golden Perfection

  • Carefully place the wrapped mozzarella sticks into the heated skillet.
  • Fry until golden brown and crispy, about 1-2 minutes per side.
  • Monitor closely to prevent burning.

Step 5: Drain and Serve

  • Transfer the fried mozzarella sticks to a plate lined with paper towels to absorb excess oil.
  • Serve immediately with warm marinara sauce for dipping.

Nutritional Breakdown: Indulgent but Worth It

(Estimated for the entire recipe without optional ingredients)

  • Calories: 1300-1500
  • Protein: 40-50g
  • Fat: 120-130g
  • Carbohydrates: 40-50g

Enjoy these crispy, cheesy bites as a perfect party snack or game-day treat!

Frequently Asked Questions

1. Can I bake these instead of frying?

Yes! Brush them with oil and bake at 375°F (190°C) for 10-12 minutes, flipping halfway through.

2. What oil is best for frying?

Use a neutral oil with a high smoke point, such as vegetable, canola, or peanut oil. Avoid olive oil, as it burns too quickly.

3. Can I use egg roll wrappers instead?

Yes, but you’ll need to cut them down to size and adjust frying time since they’re thicker.

4. Why is my cheese not melting properly?

Your oil might be too hot—try lowering the temperature slightly. Also, make sure your cheese isn’t too cold when frying.

5. How do I prevent air bubbles in the wrapper?

Press out as much air as possible when sealing. Air pockets expand during frying, which can cause uneven cooking.

Final Thoughts: A Snack Worth Sharing

Wonton mozzarella sticks are the ultimate comfort food—crispy, cheesy, and incredibly easy to make. Whether you’re cooking for a crowd, looking for a new game-day snack, or simply craving something delicious, this recipe delivers every time.

So, the next time you’re in the mood for something crunchy and gooey, skip the frozen store-bought version and make these from scratch. They’re quick, fun to prepare, and always a hit. Plus, nothing beats that satisfying cheese pull.

Now, what are you waiting for? Gather your ingredients and get frying—you won’t regret it.

aiting

Crispy, Cheesy, and Irresistible: Wonton Mozzarella Sticks

Savor these irresistible, crunchy-on-the-outside, melty-on-the-inside wonton mozzarella sticks—a playful twist on a classic snack that’s perfect for parties, game days, or any time you crave a cheesy bite!
Prep Time 10 minutes
Cook Time 6 minutes
Total Time 16 minutes
Servings: 8 crispy mozzarella sticks
Course: Appetizer, Snack
Cuisine: Fusion

Ingredients
  

  • 1 cup cooking oil vegetable, canola, or peanut• 1 large egg, whisked with 1 tablespoon water (for the egg wash)• 4 string cheese sticks, each cut in half• 8 wonton wrappers• 1/2 cup marinara sauce (choose your favorite—store-bought or homemade)

Method
 

  1. Heat the Oil: In a medium skillet, heat the oil to 325°F (163°C). Ensure there’s enough oil so that the mozzarella sticks are partially submerged during frying.
  2. Prepare the Egg Wash: In a small bowl, whisk the egg with 1 tablespoon water. This mixture will help seal the wonton wrappers.
  3. Wrap the Cheese: Lay a wonton wrapper flat and brush its edges with the egg wash. Place a halved string cheese stick in the center. Fold the bottom edge over the cheese, then roll the wrapper tightly, pressing firmly to seal and eliminate any air pockets. Repeat this process for all cheese pieces.
  4. Fry to Golden Perfection: Carefully place the wrapped cheese into the heated oil. Fry for about 1–2 minutes on each side until they turn golden brown and crispy. Keep a close eye to avoid burning.
  5. Drain and Serve: Remove the mozzarella sticks with a slotted spoon and let them drain on paper towels. Serve immediately with warm marinara sauce for dipping.

Notes

• Keep a close watch during frying as these treats cook very quickly.
• For best results, ensure the oil temperature remains steady.
• Enjoy these crispy delights while they’re hot for that perfect gooey cheese pull!

Easter Oreos: A Whimsical Treat for the Holiday Season

A Sweet Memory of Easter Celebrations

As a child, Easter was always a magical time in my house. The scent of fresh blooms filled the air, pastel-colored baskets lined the kitchen counter, and the thrill of the annual Easter egg hunt never got old. But the highlight of the day was always the dessert table. My grandmother had a knack for turning simple treats into edible works of art, and among my favorites were chocolate-covered Oreos decorated to match the season. She would transform ordinary cookies into adorable bunnies, chicks, and speckled eggs, each one a tiny masterpiece.

Now, as an adult, I find myself carrying on that tradition. There’s something incredibly nostalgic about dipping Oreos into melted chocolate, carefully placing the tiny candy eyes, and watching them transform into festive Easter delights. These Easter Oreos aren’t just cookies—they are memories in the making. Whether you’re creating them for a family gathering, Easter baskets, or simply to bring a little joy to your home, they are a delightful way to celebrate the season.

Why These Easter Oreos are a Must-Try

A Fun and Easy Treat for All Ages

One of the best things about making Easter Oreos is how simple they are to prepare. Unlike complex baked goods that require precise measurements and baking times, these cookies involve minimal effort and zero baking. That makes them an excellent choice for kids, who love to get involved in decorating. Sprinkling sugar on bunny ears or placing tiny candy feet on chicks can turn into a fun-filled family activity.

Perfect for Easter Baskets and Gift Giving

Handmade treats always feel more special than store-bought candy. Whether you’re assembling Easter baskets for little ones or preparing thoughtful gifts for neighbors and friends, these festive Oreos are a charming addition. Wrapped in clear cellophane bags with a pastel ribbon, they look as good as they taste.

Versatile and Customizable

These cookies offer endless possibilities for creativity. While the classic designs include bunnies, chicks, and Easter eggs, you can experiment with different themes. Try using lavender and mint-colored chocolate for a spring-inspired twist, or add edible glitter for a touch of sparkle. The options are limitless, allowing you to tailor the cookies to your own style.

Tips for Making the Perfect Easter Oreos

Choosing the Right Chocolate

The key to smooth and glossy chocolate-covered Oreos lies in selecting the right chocolate. Belgian white chocolate is an excellent choice, but candy melts work just as well. If using white chocolate chips, add a small amount of coconut oil or vegetable shortening to achieve a silky consistency.

The Art of Dipping

Dipping Oreos in melted chocolate can get messy, but a few tricks make it easier:

  • Use a fork to lower the cookie into the chocolate, ensuring full coverage.
  • Tap the fork gently against the bowl’s edge to remove excess chocolate.
  • Place the dipped Oreo on a wax-paper-lined tray and avoid touching it until it sets completely.

Decorating Like a Pro

  • Use tweezers for precise placement: Small sprinkles and decorations can be difficult to handle with fingers. Using clean kitchen tweezers helps position eyes, noses, and other details without smudging.
  • Work while the chocolate is still wet: Decorations adhere best when the chocolate hasn’t yet hardened, so move quickly when adding sprinkles and embellishments.
  • Freeze for fast setting: If you’re short on time, pop the decorated Oreos into the freezer for about 10 minutes. This speeds up the hardening process and prevents accidental smudging.

Whimsical Ingredients for a Sweet Delight

  • 8 Oreo cookies (or chocolate sandwich cookies)
  • Oil-based candy color (white, yellow, pink, and light blue)
  • ½ cup melted Belgian white chocolate (for Bunny Oreo, colored white)
  • ½ cup melted Belgian white chocolate (for Chick Oreo, colored yellow)
  • ½ cup melted Belgian white chocolate (for Easter Egg Oreo, colored pink)
  • ½ cup melted Belgian white chocolate (for Easter Egg Oreo, colored blue)
  • Assorted sprinkles
  • Pink sanding sugar

Step-by-Step Magic to Make Easter Oreos

Bunny Oreo Bliss
  1. Melt ½ cup white chocolate in a microwave-safe bowl in 20-second intervals, stirring until smooth.
  2. Mix in white candy color to achieve the desired shade.
  3. Using a fork, dip an Oreo into the melted chocolate, ensuring full coverage, and let excess chocolate drip off. Place it on wax paper.
  4. While the chocolate is still wet, add black sprinkles for the eyes and a pink heart sprinkle for the nose.
  5. Pipe two bunny ears and two paws using melted white chocolate onto wax paper, then sprinkle them with pink sanding sugar.
  6. Freeze for 10 minutes until set, then attach ears and feet using melted chocolate. Let set completely.
Chirpy Chick Oreo
  1. Melt ½ cup white chocolate in 20-second increments and stir until smooth.
  2. Mix in yellow candy color until the desired hue is reached.
  3. Dip an Oreo in the yellow chocolate, ensuring it’s fully covered, then place it on wax paper.
  4. While still wet, add black nonpareil sprinkles for eyes and an orange round sprinkle for the nose.
  5. Carefully add three orange jimmies per foot to create tiny chick legs. Let set completely.
Easter Egg Oreo Extravaganza
  1. Melt ½ cup white chocolate each in two bowls in 20-second increments, stirring until smooth.
  2. Mix pink candy color in one bowl and blue in the other.
  3. Using a fork, dip Oreos in pink or blue chocolate, ensuring full coverage. Place them on wax paper and freeze for 10 minutes.
  4. Fill a piping bag with melted pink or blue chocolate and pipe zig-zag or line patterns on set Oreos.
  5. Sprinkle with decorative sprinkles while the chocolate is still wet.
  6. Allow to set completely before serving.

Nutritious Bites of Easter Joy

(Per 1 Oreo serving)

  • Calories: 234 kcal
  • Carbohydrates: 28g
  • Protein: 3g
  • Fat: 13g
  • Saturated Fat: 7g
  • Sodium: 76mg
  • Sugar: 24g
  • Calcium: 68mg
  • Iron: 2mg

Store these festive delights in an airtight container at room temperature for up to 2 weeks.

Enjoy making and sharing these adorable, chocolate-covered Easter Oreos with friends and family!

Frequently Asked Questions

1. How far in advance can I make these Easter Oreos?

These chocolate-covered Oreos can be made up to two weeks in advance if stored properly. Keep them in an airtight container at room temperature, away from direct sunlight or heat sources. Avoid refrigeration, as it can cause condensation and make the chocolate look dull.

2. Can I use regular food coloring instead of oil-based candy color?

No, regular liquid or gel food coloring does not mix well with chocolate. It can cause the chocolate to seize, creating a grainy texture. Always use oil-based candy color for smooth and even coloring.

3. What can I use instead of Oreos?

If you want to try something different, consider using:

  • Golden Oreos for a vanilla twist.
  • Homemade sugar cookies for a from-scratch version.
  • Ritz cracker peanut butter sandwiches for a sweet and salty combination.

4. How do I prevent my chocolate from getting too thick?

If your melted chocolate thickens too quickly, add a small amount of coconut oil or vegetable shortening and stir until smooth. This helps maintain a dipping consistency.

5. Can I freeze decorated Oreos?

While freezing is possible, it’s not always recommended. The chocolate may develop condensation when thawing, which can affect the appearance. If you must freeze them, store in an airtight container with wax paper between layers and allow them to thaw at room temperature before serving.

6. What is the best way to package these for gifts?

For gifting, place the Oreos in clear treat bags or decorative boxes, using shredded paper or parchment paper to cushion them. If adding them to an Easter basket, consider packing them in a single layer to prevent smudging or breakage.

7. How can I make these Oreos allergy-friendly?

For a nut-free version, ensure that your chocolate and decorations are free from cross-contamination warnings. If making a dairy-free version, use dairy-free white chocolate and check ingredient labels carefully.

Making Easter Memories One Cookie at a Time

Baking and decorating treats is about more than just creating something delicious—it’s about making memories. These Easter Oreos embody the spirit of the holiday: bright, joyful, and made with love. Whether you’re preparing them for an Easter celebration, a classroom party, or simply as a fun weekend project, they bring happiness to anyone who sees and tastes them.

So gather your sprinkles, melt your chocolate, and let your creativity shine. Who knows? Maybe one day, a little one in your family will look back on these cookies as a cherished part of their own Easter traditions—just as I do now.

aiting

Easter Oreos: A Whimsical Treat for the Holiday Season

Celebrate Easter with these adorable, chocolate-covered Oreos! These whimsical treats come in Bunny, Chick, and Easter Egg designs, each coated in smooth Belgian white chocolate and decorated with festive colors and sprinkles. A fun, creative, and delicious way to spread holiday cheer!
Prep Time 15 minutes
Total Time 15 minutes
Servings: 8 decorated Oreos
Course: Dessert
Cuisine: American

Ingredients
  

  • 8 Oreo cookies or chocolate sandwich cookies, oil-based candy color (white, yellow, pink, and light blue), ½ cup melted Belgian white chocolate (for Bunny Oreo, colored white), ½ cup melted Belgian white chocolate (for Chick Oreo, colored yellow), ½ cup melted Belgian white chocolate (for Easter Egg Oreo, colored pink), ½ cup melted Belgian white chocolate (for Easter Egg Oreo, colored blue), assorted sprinkles, pink sanding sugar.

Method
 

  1. Bunny Oreo Bliss
  2. Melt ½ cup white chocolate in a microwave-safe bowl in 20-second intervals, stirring until smooth.
  3. Mix in white candy color to achieve the desired shade.
  4. Using a fork, dip an Oreo into the melted chocolate, ensuring full coverage, and let excess chocolate drip off. Place it on wax paper.
  5. While the chocolate is still wet, add black sprinkles for the eyes and a pink heart sprinkle for the nose.
  6. Pipe two bunny ears and two paws using melted white chocolate onto wax paper, then sprinkle them with pink sanding sugar.
  7. Freeze for 10 minutes until set, then attach ears and feet using melted chocolate. Let set completely.
Chirpy Chick Oreo
  1. Melt ½ cup white chocolate in 20-second increments and stir until smooth.
  2. Mix in yellow candy color until the desired hue is reached.
  3. Dip an Oreo in the yellow chocolate, ensuring it’s fully covered, then place it on wax paper.
  4. While still wet, add black nonpareil sprinkles for eyes and an orange round sprinkle for the nose.
  5. Carefully add three orange jimmies per foot to create tiny chick legs. Let set completely.
Easter Egg Oreo Extravaganza
  1. Melt ½ cup white chocolate each in two bowls in 20-second increments, stirring until smooth.
  2. Mix pink candy color in one bowl and blue in the other.
  3. Using a fork, dip Oreos in pink or blue chocolate, ensuring full coverage. Place them on wax paper and freeze for 10 minutes.
  4. Fill a piping bag with melted pink or blue chocolate and pipe zig-zag or line patterns on set Oreos.
  5. Sprinkle with decorative sprinkles while the chocolate is still wet.
  6. Allow to set completely before serving.

Notes

  • Storage: Keep in an airtight container at room temperature for up to 2 weeks.
  • Customization: Try different colors and designs for a unique Easter-themed look.
  • Make-ahead tip: Melted chocolate can be prepared in advance and stored at room temperature.
Enjoy making and sharing these adorable, festive Easter Oreos with friends and family!

Baileys Bliss: The Ultimate Boozy Chocolate Cookie Experience

A Sweet Memory in Every Bite

There’s something about the combination of chocolate and Baileys that feels like a warm hug from the past. I still remember the first time I tasted Baileys Irish Cream—I was sitting in my grandmother’s kitchen, watching her prepare dessert for a holiday gathering. She poured a splash into her coffee, then winked at me as if she had a delicious secret. That smooth, creamy flavor blended so perfectly with chocolate that I knew it was something special.

Years later, when I first experimented with baking, I wanted to recreate that feeling. That’s how these Baileys Irish Cream cookies were born. They’re rich, chocolatey, and just indulgent enough to feel like a treat for adults. Every bite reminds me of cozy evenings, laughter in the kitchen, and the simple joys of good food shared with loved ones.

Whether you’re making these for St. Patrick’s Day, a holiday gathering, or just a casual weekend treat, these cookies bring people together. The hint of Irish cream, the chewiness of the chocolate cookie, and the smooth icing create a perfect harmony of flavors. So, pour yourself a cup of coffee (maybe with a splash of Baileys), grab a warm cookie, and savor the moment.

Why These Cookies Stand Out

1. The Perfect Blend of Flavors

These cookies aren’t just another chocolate treat—they have layers of flavor that elevate them beyond a standard dessert. The cocoa powder gives them a deep chocolate base, while a touch of espresso powder enhances the richness. But the true star? Baileys Irish Cream. It adds a smooth, slightly boozy note that complements the sweetness perfectly.

2. Soft and Chewy Texture

Texture matters just as much as taste, and these cookies deliver. They have slightly crisp edges and a chewy center, making them irresistible. The key is to bake them just until the edges are set while keeping the center soft.

3. A Grown-Up Twist on a Classic Treat

We all love the nostalgia of chocolate cookies, but adding Baileys makes them feel a little more sophisticated. They’re the kind of treat you’d bring to a holiday party, serve with coffee after dinner, or enjoy on a cozy night in.

4. Customizable and Fun

Want to make them even more indulgent? Add white chocolate chips or drizzle them with extra Baileys glaze. You can also turn them into cookie sandwiches by adding Baileys buttercream between two cookies.

Expert Tips for the Best Baileys Cookies

  • Use Quality Cocoa Powder – A rich cocoa powder makes all the difference. Dutch-processed cocoa will give you a deeper, smoother chocolate flavor.
  • Room Temperature Ingredients – Butter and eggs mix better when they’re at room temperature, leading to a smoother dough.
  • Don’t Overmix – Overworking the dough can lead to tough cookies. Mix just until the ingredients are combined.
  • Chill the Dough if Necessary – If your dough feels too soft, refrigerate it for 30 minutes before baking to help the cookies hold their shape.
  • Let the Icing Set – It’s tempting to eat them right away, but giving the icing time to set ensures a perfect finish.

Decadent Ingredients

Cookies:

  • 2 ½ cups (312 g) all-purpose flour
  • ½ cup (48 g) unsweetened cocoa powder
  • 1 teaspoon espresso powder (or instant coffee)
  • 1 teaspoon baking soda
  • ½ teaspoon salt
  • ¾ cup unsalted butter, room temperature
  • ¾ cup (150 g) granulated sugar
  • ½ cup (100 g) light brown sugar
  • 2 large eggs, room temperature
  • ¼ cup (60 ml) Baileys Irish Cream

Icing:

  • 1 cup (120 g) confectioners’ sugar, sifted
  • 2 tablespoons Baileys Irish Cream

Step-by-Step Indulgence

  1. Prep for Perfection – Preheat oven to 350°F (175°C) and line a baking sheet with parchment paper.
  2. Dry Blend – In a medium bowl, whisk together flour, cocoa powder, espresso powder, baking soda, and salt. Set aside.
  3. Creamy Foundation – In a large mixing bowl, beat butter, granulated sugar, and brown sugar until light and fluffy (about 2-3 minutes).
  4. Rich Infusion – Add eggs one at a time, mixing well after each. Pour in Baileys and mix until just combined.
  5. Dough Creation – Gradually add the dry ingredients to the wet mixture, stirring just until incorporated.
  6. Shape & Bake – Scoop tablespoon-sized portions of dough, roll into balls, and place 2 inches apart on the prepared baking sheet.
  7. Bake to Perfection – Bake for 10 minutes until edges are set and tops appear soft. Let cool for 5 minutes on the sheet before transferring to a wire rack.
  8. Icing Elegance – Whisk together confectioners’ sugar and Baileys until smooth. Dip half of each cooled cookie in the icing. Add sprinkles if desired.

Nutritional Bites (Per Cookie)

  • Calories: 206 kcal
  • Carbohydrates: 30 g
  • Protein: 2 g
  • Fat: 9 g
  • Saturated Fat: 5 g
  • Sugar: 18 g
  • Sodium: 102 mg

Enjoy these rich, chocolatey Baileys-infused cookies—perfect for a festive treat!

FAQs: Everything You Need to Know

1. Can I Make These Cookies Without Alcohol?

Yes! If you want to make a nonalcoholic version, you can substitute Baileys coffee creamer or heavy cream with a splash of vanilla extract. The flavor will still be rich and delicious.

2. Do These Cookies Need to Be Refrigerated?

No, they don’t need to be refrigerated. Store them in an airtight container at room temperature for up to five days. If you want to keep them longer, freeze them for up to three months.

3. Can I Freeze the Dough?

Absolutely. You can prepare the dough ahead of time and freeze it for up to three months. When you’re ready to bake, let the dough thaw in the refrigerator overnight, or bake the cookie dough balls straight from frozen at 325°F for 12-14 minutes.

4. What Other Flavors Pair Well with Baileys?

Baileys has a creamy, slightly whiskey-infused flavor that pairs beautifully with chocolate, coffee, caramel, and even nuts like hazelnuts or pecans. You can get creative by adding these flavors into your cookies!

5. How Do I Get the Perfect Cookie Consistency?

For chewy cookies, bake them just until the edges are set and let them cool on the baking sheet for a few minutes before transferring them to a wire rack. If you prefer crispier cookies, bake them for an extra minute or two.

6. Can I Double the Recipe?

Yes! This recipe doubles easily if you’re baking for a party or event. Just make sure to mix in batches so that everything blends evenly.

7. What’s the Best Way to Serve These Cookies?

These cookies are fantastic on their own, but they’re even better when served with a cup of coffee, a glass of Baileys on the rocks, or even a scoop of vanilla ice cream.

8. Can I Make These Cookies Gluten-Free?

Yes! Substitute the all-purpose flour with a high-quality gluten-free baking blend that contains xanthan gum. The texture might be slightly different, but the flavor will still be amazing.

The Magic of Baking with Baileys

Baking is more than just mixing ingredients—it’s about creating something special, something that brings joy. These Baileys cookies are more than just a dessert; they’re a moment of indulgence, a reason to slow down and enjoy the present.

I always think back to my grandmother’s kitchen when I make these cookies. The warmth, the laughter, the aroma of chocolate filling the air. Now, every time I bake these, I share that feeling with others. Whether you’re making them for yourself, your family, or a gathering of friends, these cookies have a way of making any occasion feel just a little more special.

So go ahead, bake a batch, pour yourself a drink, and savor the magic of Baileys in every bite.

aiting

Baileys Bliss: The Ultimate Boozy Chocolate Cookie Experience

Indulge in these rich, chocolatey cookies infused with Baileys Irish Cream for a decadent, boozy twist. Perfect for festive gatherings or a luxurious treat, these cookies have a deep cocoa flavor balanced with smooth, creamy icing.
Prep Time 15 minutes
Cook Time 10 minutes
Total Time 25 minutes
Servings: 24 cookies
Course: Dessert
Cuisine: American

Ingredients
  

  • Cookies: 2 ½ cups 312 g all-purpose flour, ½ cup (48 g) unsweetened cocoa powder, 1 teaspoon espresso powder (or instant coffee), 1 teaspoon baking soda, ½ teaspoon salt, ¾ cup unsalted butter (room temperature), ¾ cup (150 g) granulated sugar, ½ cup (100 g) light brown sugar, 2 large eggs (room temperature), ¼ cup (60 ml) Baileys Irish Cream.
  • Icing: 1 cup 120 g confectioners’ sugar (sifted), 2 tablespoons Baileys Irish Cream.

Method
 

  1. Prep for Perfection – Preheat oven to 350°F (175°C) and line a baking sheet with parchment paper.
  2. Dry Blend – In a medium bowl, whisk together flour, cocoa powder, espresso powder, baking soda, and salt. Set aside.
  3. Creamy Foundation – In a large mixing bowl, beat butter, granulated sugar, and brown sugar until light and fluffy (about 2-3 minutes).
  4. Rich Infusion – Add eggs one at a time, mixing well after each. Pour in Baileys and mix until just combined.
  5. Dough Creation – Gradually add the dry ingredients to the wet mixture, stirring just until incorporated.
  6. Shape & Bake – Scoop tablespoon-sized portions of dough, roll into balls, and place 2 inches apart on the prepared baking sheet.
  7. Bake to Perfection – Bake for 10 minutes until edges are set and tops appear soft. Let cool for 5 minutes on the sheet before transferring to a wire rack.
  8. Icing Elegance – Whisk together confectioners’ sugar and Baileys until smooth. Dip half of each cooled cookie in the icing. Add sprinkles if desired

Notes

  • For a stronger Baileys flavor, add an extra splash to the icing.
  • Make-ahead tip: Store unbaked dough in the fridge for up to 48 hours or freeze for later use.
  • For extra crunch, sprinkle sea salt over the icing before it sets.
Enjoy these decadent Baileys-infused cookies—a perfect blend of chocolate, coffee, and creamy Irish liqueur!

The Perfect Balance of Sweet, Spicy, and Smoky: Honey Garlic Jerk Chicken Wings

A Story of Flavor, Family, and Tradition

Growing up, Sundays were more than just a day of rest; they were a celebration of food, family, and flavor. My grandmother, originally from the Caribbean, would fill the kitchen with the intoxicating aroma of jerk spices, their smoky heat mingling with the comforting scent of garlic and honey. She never measured—just a sprinkle here, a taste there, always guided by instinct.

The moment those wings hit the table, it was a free-for-all. Sticky fingers, satisfied sighs, and the occasional playful argument over who got the last piece. That’s the magic of Honey Garlic Jerk Chicken Wings—they aren’t just food; they’re an experience. A bold, fiery, and sweet combination that makes your taste buds dance and keeps you reaching for just one more.

If you’ve never had jerk-seasoned wings glazed in a rich honey garlic sauce, prepare yourself for a culinary adventure.

What Makes Honey Garlic Jerk Chicken Wings Special?

These wings bring together the best of two worlds: the bold heat of jerk seasoning and the sticky-sweet depth of honey garlic sauce.

  • Jerk seasoning is a powerhouse of Caribbean flavors, typically made with allspice, thyme, cinnamon, nutmeg, and fiery Scotch bonnet peppers. The blend is both smoky and aromatic, hitting every part of your palate with spice and warmth.
  • Honey garlic sauce is the perfect counterbalance, offering a smooth, caramelized sweetness with a garlicky punch that coats each wing beautifully.
  • Air frying or baking keeps the wings crispy while locking in the juicy tenderness inside, making them lighter than traditional deep-fried wings.

It’s a dish that excites the senses—the crispness of the skin, the sticky glaze on your fingers, the heat that lingers just long enough to make you crave another bite.

The Origins of Jerk Seasoning

Jerk seasoning has deep roots in Jamaican history, dating back to the Maroons—escaped enslaved Africans who developed this method of cooking in the mountains. They used wild ingredients to create a unique spice blend and slow-cooked their meats over pimento wood, infusing them with an unmistakable smoky flavor.

Today, jerk cooking is an essential part of Caribbean cuisine, celebrated worldwide for its complex heat and earthy richness. The addition of honey and garlic in this recipe is a modern twist, creating a fusion of island tradition and global flavors.

The Magic Behind the Cooking Method

The key to perfect wings isn’t just the seasoning—it’s how you cook them.

Air Fryer Magic

Air frying gives you the best of both worlds—a crispy exterior without the excess oil of deep frying. At 400°F, the wings cook to golden perfection in just 15-17 minutes, flipping halfway through. This method keeps them light, crunchy, and flavorful.

Oven Roasting for a Classic Touch

If you prefer oven-baked wings, set your temperature to 425°F. Spread the wings on a lined baking sheet and roast for about 40 minutes, flipping halfway. This method allows the spices to deepen in flavor, creating a rich, aromatic crust.

The Finishing Touch: Glazing the Wings

Once cooked, the wings are tossed in the honey garlic sauce, ensuring every piece is coated in that sticky, sweet, and spicy glaze. For an extra layer of flavor, pop them back in the air fryer or oven for another 5-8 minutes to let the sauce caramelize.

The Flavor Profile: A Symphony in Every Bite

What makes these wings irresistible is the balance of flavors:

  • Sweet – The honey smooths out the heat and creates a beautiful glaze.
  • Spicy – The jerk seasoning packs a punch, with layers of warmth and fire.
  • Savory – The garlic and soy (tamari) add umami depth.
  • Smoky – A touch of smoked paprika enhances the Caribbean essence.

The result? Wings that are bold, complex, and completely addictive.

Serving Suggestions: What to Pair with Your Wings

These wings are a showstopper on their own, but pairing them with the right sides takes them to the next level.

Classic Pairings:

  • Coconut Rice & Peas – The creamy, slightly sweet rice balances the spice.
  • Grilled Pineapple Slices – Adds a tropical freshness.
  • Crispy Plantain Chips – A crunchy, salty contrast.
  • Cooling Dips – Ranch or blue cheese can tame the heat for spice-sensitive guests.

Beverage Pairings:

  • Tropical Fruit Punch – Complements the jerk spice beautifully.
  • Iced Mango Tea – A cool, refreshing contrast to the heat.
  • Crisp Beer or Cider – Cuts through the richness and enhances the smoky notes.

Storage and Reheating Tips

These wings are so good, it’s rare to have leftovers—but if you do, here’s how to keep them fresh.

Refrigeration

Store in an airtight container for up to 3 days.

Reheating

  • Air Fryer: 350°F for 5-7 minutes—brings back the crispiness.
  • Oven: 375°F for 10 minutes—keeps them juicy.
  • Microwave: Not recommended, as it softens the skin.

Bold and Spicy Ingredients

  • 2 1/2 lb party chicken wings (disjointed, tips removed)
  • Salt and pepper (to taste)
  • 8-9 tsp jerk seasoning (adjust for spice preference)
  • 2 tsp baking powder (for extra crispiness)
  • Cooking spray (to prevent sticking)
  • 2 tbsp salted butter (adds richness)
  • 5 garlic cloves, minced (for a strong garlic kick)
  • 1/4 cup honey (brings sweetness)
  • 1 1/2 tsp tamari (gluten-free soy sauce alternative)
  • 1/4 tsp gluten-free hot sauce (for extra heat)
  • 1/4 tsp ground ginger or fresh grated ginger (for warmth)
  • 1/8 tsp smoked paprika (for a subtle smokiness)

Sizzling Step-by-Step Directions

  1. Season the Wings – Pat the wings dry with a paper towel. Toss them in salt, pepper, jerk seasoning, and baking powder until evenly coated.
  2. Preheat the Air Fryer – Set to 400°F, spray the rack with oil, and place wings in a single layer.
  3. Crisp to Perfection – Air-fry for 15-17 minutes, flipping halfway through.
  4. Prepare the Sauce – In a pot over medium heat, melt butter and sauté minced garlic until fragrant.
  5. Add the Flavor Boost – Stir in honey, tamari, hot sauce, ginger, and smoked paprika. Simmer for 3-4 minutes before removing from heat.
  6. Coat the Wings – Toss the crispy wings in the sauce until fully coated. For extra flavor, brush them with sauce and air-fry for 8 more minutes.
  7. Serve Hot – Enjoy immediately for the best texture and taste.

Nutritional Breakdown (Per Serving)

  • Calories: 400
  • Total Fat: 25g
  • Total Carbohydrates: 20g
  • Protein: 30g

Enjoy these sweet, spicy, and smoky wings that pack a punch! Perfect for game nights, parties, or a flavor-packed dinner.

Frequently Asked Questions

Can I make these wings ahead of time?

Absolutely! You can season the wings and keep them in the fridge overnight for deeper flavor. Just cook them fresh when ready to serve.

Is there a substitute for tamari?

Yes, regular soy sauce works, but tamari keeps it gluten-free. Coconut aminos are a great soy-free option.

What if I don’t have an air fryer?

You can bake them at 425°F for 40 minutes, flipping halfway, or deep-fry them at 350°F for 8-10 minutes.

How can I adjust the spice level?

  • Less Spicy? Use mild jerk seasoning or reduce the amount.
  • More Spicy? Add a dash of cayenne or Scotch bonnet pepper to the sauce.

Can I use boneless chicken?

Yes! Boneless thighs work great. Just adjust the cooking time—about 12-15 minutes in the air fryer.

Conclusion: A Dish That Captures the Best of Sweet and Spicy

Honey Garlic Jerk Chicken Wings are more than just a dish; they’re a celebration of bold flavors and Caribbean heritage. Whether you’re making them for a game night, family gathering, or just because you crave something delicious, these wings deliver on heat, sweetness, and smoky goodness in every bite.

So grab some napkins, because these wings are meant to be sticky, spicy, and devoured with joy.

aiting

The Perfect Balance of Sweet, Spicy, and Smoky: Honey Garlic Jerk Chicken Wings

These Fiery Honey Garlic Jerk Wings bring the perfect balance of sweet, spicy, and smoky flavors. Crispy, air-fried chicken wings are tossed in a bold honey garlic jerk sauce, making them an irresistible treat for game nights, parties, or a flavor-packed dinner!
Prep Time 10 minutes
Cook Time 25 minutes
Total Time 35 minutes
Servings: 4 servings
Course: Appetizer
Cuisine: Caribbean

Ingredients
  

  • 2 1/2 lb party chicken wings disjointed, tips removed, salt and pepper to taste, 8-9 tsp jerk seasoning (adjust for spice preference), 2 tsp baking powder (for extra crispiness), cooking spray, 2 tbsp salted butter, 5 garlic cloves (minced), 1/4 cup honey, 1 1/2 tsp tamari, 1/4 tsp gluten-free hot sauce, 1/4 tsp ground ginger or fresh grated ginger, 1/8 tsp smoked paprika.

Method
 

  1. Season the Wings – Pat the wings dry with a paper towel. Toss them in salt, pepper, jerk seasoning, and baking powder until evenly coated.
  2. Preheat the Air Fryer – Set to 400°F, spray the rack with oil, and place wings in a single layer.
  3. Crisp to Perfection – Air-fry for 15-17 minutes, flipping halfway through.
  4. Prepare the Sauce – In a pot over medium heat, melt butter and sauté minced garlic until fragrant.
  5. Add the Flavor Boost – Stir in honey, tamari, hot sauce, ginger, and smoked paprika. Simmer for 3-4 minutes before removing from heat.
  6. Coat the Wings – Toss the crispy wings in the sauce until fully coated. For extra flavor, brush them with sauce and air-fry for 8 more minutes.
  7. Serve Hot – Enjoy immediately for the best texture and taste.

Notes

  • For extra crispiness, pat the wings dry thoroughly before seasoning.
  • Adjust spice levels by modifying the jerk seasoning and hot sauce.
  • For a richer flavor, let the wings marinate in jerk seasoning for 1 hour before cooking.
Enjoy these sweet, spicy, and smoky wings that bring the heat with every bite!

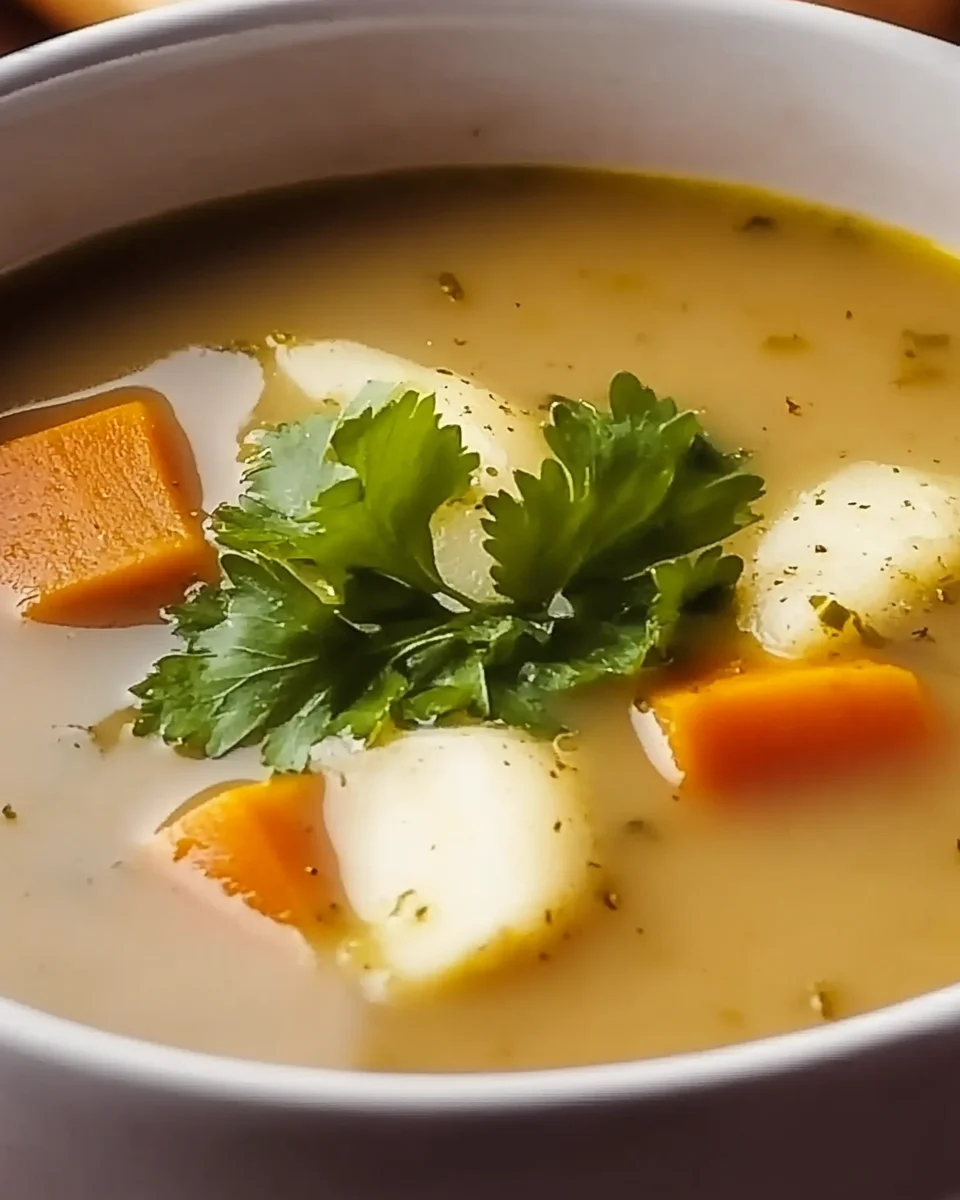
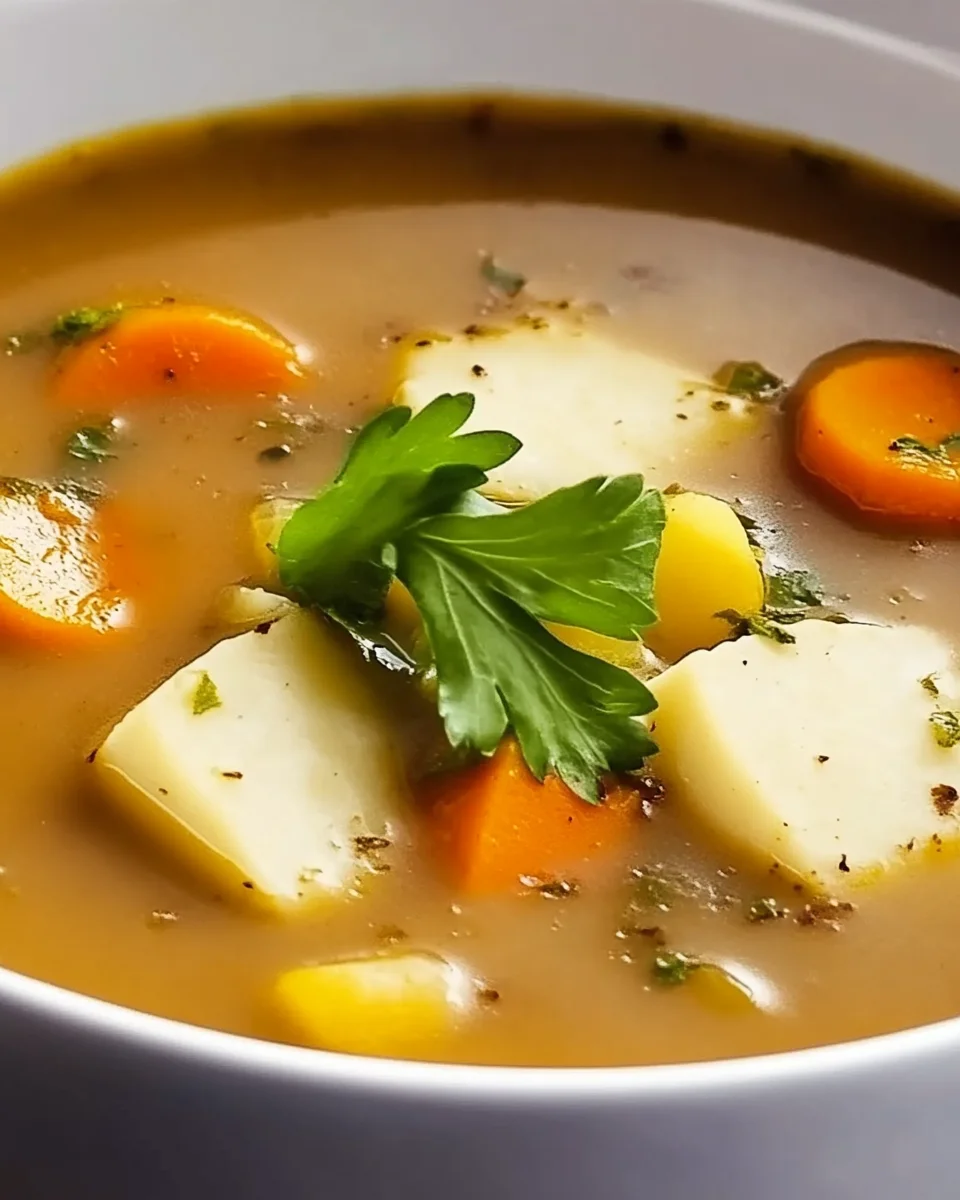
A Bowl of Irish Comfort: The Heartwarming Tradition of Irish Soup

A Taste of Home: A Personal Connection to Irish Soup

There’s something magical about the scent of simmering soup filling the house on a cold evening. I still remember the first time I had a true Irish soup—it wasn’t in a fancy restaurant or at a well-known pub but in the warm embrace of my grandmother’s kitchen. She wasn’t Irish by birth, but she had a way of making dishes that felt like they had been passed down through generations.

She ladled a steaming bowl into my hands, its aroma rich with earthy vegetables and savory broth, and said, “This is the kind of food that keeps a family together.” I didn’t fully understand what she meant until years later, when I made my first pot of Irish soup on my own. Cooking it felt like an unspoken connection to the past, a way to carry on a tradition of warmth and nourishment.

Irish soup isn’t just food—it’s a hug in a bowl. It’s the meal you share when the rain won’t stop falling, when the wind howls outside, or when you simply need the comfort of something familiar. Rooted in history, shaped by necessity, and perfected by love, this dish is more than a recipe—it’s a piece of Ireland itself.

A Dish Steeped in Tradition

Irish soup is a reflection of Ireland’s culinary history—simple, hearty, and deeply satisfying. Dating back centuries, it was born out of the need to create nourishing meals from what was readily available. In a country where the land provided an abundance of root vegetables, grains, and dairy, Irish families developed soups that combined these staples into one warm, wholesome dish.

The classic version typically features cabbage, potatoes, onions, and a protein like ham hock or beef. Some variations include barley, which not only thickens the soup but also adds a satisfying chew. The ingredients are slow-simmered to extract deep, rich flavors, making it a meal that’s both economical and delicious.

But what truly sets Irish soup apart isn’t just its ingredients—it’s the way it brings people together. It’s the kind of dish that encourages long conversations at the dinner table, where stories are shared and memories are made. In many ways, a pot of Irish soup is a reflection of Irish hospitality itself—warm, generous, and always inviting.

Endless Variations: Making Irish Soup Your Own

One of the best things about Irish soup is its versatility. Over time, people have adapted the recipe based on dietary needs, ingredient availability, and personal taste. Here are some popular variations:

Meat Choices: Beyond the Traditional Ham Hock

  • Lamb or Beef: Some Irish families prefer using lamb or beef instead of pork, which gives the soup a richer, more robust flavor.
  • Chicken: A lighter alternative that still provides plenty of depth, especially when paired with homemade broth.
  • Vegetarian Option: By skipping the meat and using vegetable broth, the soup becomes a plant-based powerhouse. Lentils or mushrooms can add extra heartiness.

Grain Additions for Extra Texture

  • Barley: A classic addition that thickens the soup and adds a delightful chew.
  • Oats: Less common but historically used in Irish cooking to provide extra nourishment.
  • Rice or Quinoa: Modern adaptations that can work well for those looking for gluten-free options.

Vegetable Enhancements

  • Carrots, Turnips, and Parsnips: These root vegetables enhance the sweetness and depth of the soup.
  • Leeks: A fantastic substitute for onions, giving the broth a milder, slightly sweet taste.
  • Kale or Spinach: A great way to boost the nutrition while adding a vibrant green color.

Dietary Modifications

  • Keto-Friendly: Replace potatoes with cauliflower or radishes for a low-carb alternative.
  • Whole30 and Paleo: Stick to meat, root vegetables, and broth, omitting grains and dairy.
  • Gluten-Free: Naturally gluten-free, as long as no barley is added.

Gather Your Ingredients: The Irish Pantry

  • 4 cups chicken stock – The soul of the soup, rich and savory
  • 1 ham hock – Adds deep, smoky flavor
  • 3 cups shredded cabbage – Earthy and slightly sweet
  • 2 cups thinly sliced potatoes – Creamy and comforting
  • 1 teaspoon cream or milk (optional) – A touch of indulgence
  • Salt and pepper (to taste) – Essential for balance

Cooking Magic: Step-by-Step Directions

  1. In a large stockpot, combine chicken stock, ham hock, and cabbage. Bring to a boil.
  2. Lower the heat, cover, and let simmer for about 30 minutes, or until potatoes are fork-tender.
  3. Carefully remove the ham hock from the pot. Separate the meat from the bone and discard the bone.
  4. Return the shredded meat to the soup and stir to distribute evenly.
  5. Stir in cream, if using, for a smooth, velvety texture.
  6. Season with salt and pepper to taste.
  7. Serve hot, ideally with a slice of crusty Irish soda bread.

Nutritional Snapshot: A Bowl of Comfort

  • Calories: Approx. 250 per serving
  • Protein: High, thanks to the ham hock
  • Carbohydrates: Moderate, from potatoes and cabbage
  • Healthy Fats: Minimal, but can be increased with cream
  • Vitamins & Minerals: Packed with fiber, vitamin C, and iron

This soup is a cozy embrace on a chilly evening, bringing the rustic flavors of Ireland straight to your table. Enjoy!

FAQs: Your Irish Soup Questions Answered

Can I Make Irish Soup in a Slow Cooker or Instant Pot?

Absolutely! The slow cooker method allows the flavors to deepen over several hours, making it even more delicious. Just toss in all the ingredients and let it cook on low for 6-8 hours. For an Instant Pot, use the pressure cooking function for about 15 minutes, then let the pressure release naturally.

Should I Use Homemade or Store-Bought Broth?

Homemade broth always wins in terms of flavor, but a good-quality store-bought broth works just fine in a pinch. If using store-bought, opt for low-sodium versions so you can control the saltiness of your soup.

Can I Freeze Irish Soup?

Yes! Irish soup freezes well, making it a great make-ahead meal. Just leave out any dairy (like cream) before freezing, as it can separate when reheated. Store in portion-sized containers and thaw overnight in the fridge before reheating.

What Should I Serve With Irish Soup?

  • Traditional Irish Soda Bread: The perfect companion, great for soaking up every last bit of broth.
  • Crusty Baguette or Rolls: A good option if you don’t have soda bread on hand.
  • Side Salad: A fresh contrast to the hearty soup.
  • Cheese Board: Irish cheeses like cheddar or Cashel Blue pair wonderfully with the meal.

Can I Add Alcohol for Extra Depth?

A splash of Guinness or Irish whiskey can elevate the broth’s depth of flavor. The alcohol cooks off, leaving behind a subtle richness. It’s not traditional, but it’s a fun twist for those who enjoy experimenting in the kitchen.

How Can I Thicken My Irish Soup?

If you prefer a thicker consistency, try:

  • Mashing some of the potatoes before serving.
  • Adding a small amount of flour or cornstarch.
  • Stirring in a handful of oats or barley.

A Final Reflection: The Comfort of a Timeless Dish

Irish soup is more than just a meal; it’s a tradition, a memory, and a symbol of home. Whether you make it the way your grandmother did or put your own modern spin on it, every bowl carries a story. It’s the kind of dish that welcomes you after a long day, that fills the kitchen with warmth, that turns a simple collection of ingredients into something deeply nourishing.

So the next time you need a bit of comfort, consider making a pot of Irish soup. Let it simmer, let the flavors meld, and let yourself be reminded of the simple joy of a good meal shared with people you love.

aiting

A Bowl of Irish Comfort: The Heartwarming Tradition of Irish Soup

This traditional Irish soup is a warm, comforting bowl of goodness featuring tender ham, creamy potatoes, and hearty cabbage. Rich in flavor and simple to make, this rustic dish brings the charm of Ireland straight to your table.
Prep Time 10 minutes
Cook Time 30 minutes
Total Time 40 minutes
Servings: 4 servings
Course: Soup
Cuisine: Irish

Ingredients
  

  • 4 cups chicken stock 1 ham hock, 3 cups shredded cabbage, 2 cups thinly sliced potatoes, 1 teaspoon cream or milk (optional), salt and pepper to taste.

Method
 

  1. Start the Base – In a large stockpot, combine chicken stock, ham hock, and cabbage. Bring to a boil.
  2. Simmer for Flavor – Lower the heat, cover, and let simmer for about 30 minutes, or until potatoes are fork-tender.
  3. Prepare the Ham – Carefully remove the ham hock from the pot. Separate the meat from the bone and discard the bone.
  4. Combine & Stir – Return the shredded meat to the soup and stir to distribute evenly.
  5. Creamy Finish – Stir in cream, if using, for a smooth, velvety texture.
  6. Final Touch – Season with salt and pepper to taste.
  7. Serve & Enjoy – Ladle into bowls and pair with a slice of crusty Irish soda bread.

Notes

  • For a vegetarian version, swap the ham hock for a smoked paprika seasoning and use vegetable broth.
  • Enhance the depth of flavor by adding a bay leaf or a dash of nutmeg.
  • Make it heartier with a handful of diced carrots or leeks.
This classic Irish soup is simple yet deeply satisfying—a perfect way to savor the flavors of the Emerald Isle!

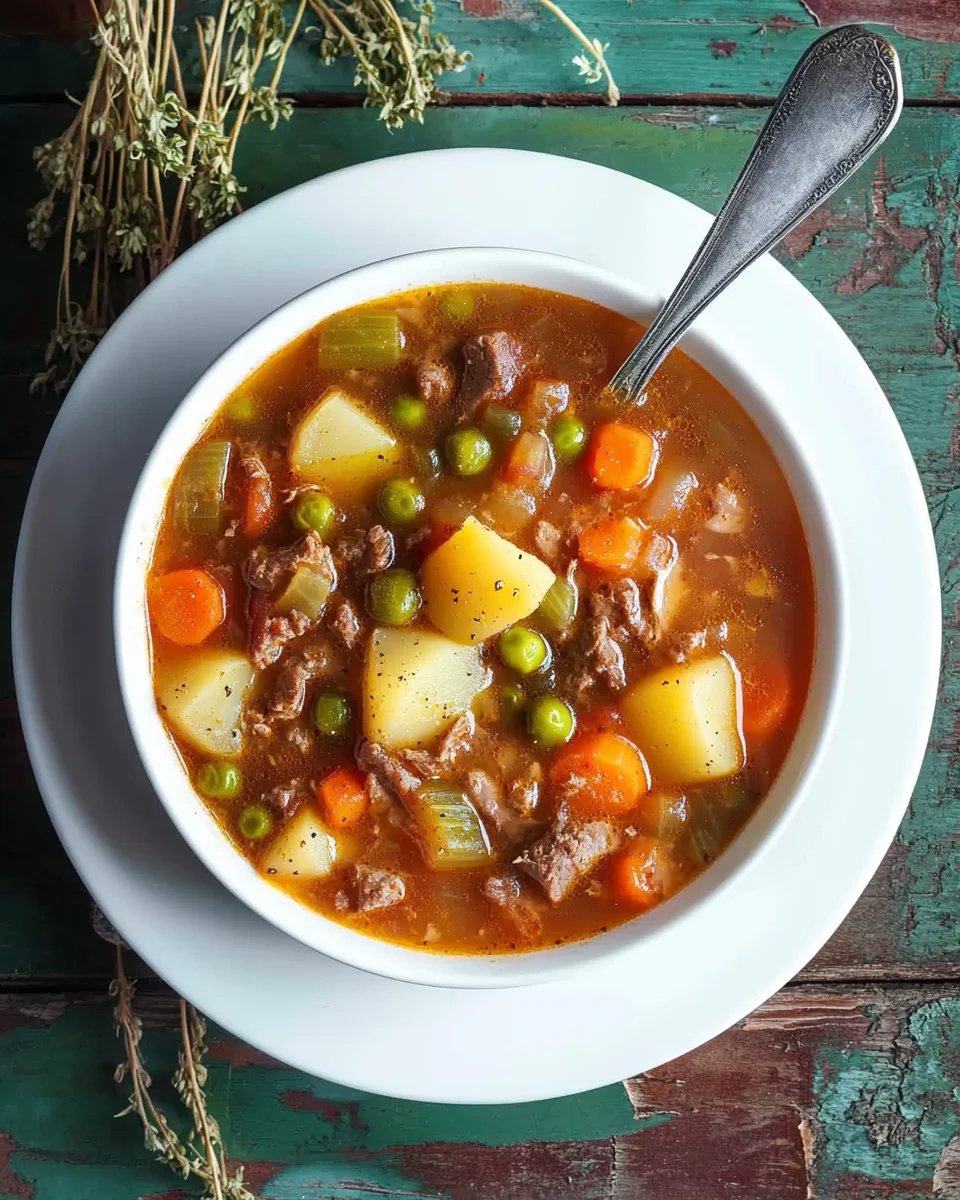
A Bowl of Comfort: The Story Behind My Mom’s Old-Fashioned Vegetable Beef Soup

A Taste of Home in Every Spoonful

There’s something about the aroma of slow-simmering soup that transports me back to childhood. The kind of meal that fills the entire house with warmth, signaling that dinner is going to be something special. My mom’s old-fashioned vegetable beef soup was more than just food—it was a tradition, a reminder of crisp autumn evenings and winter nights when nothing else could warm us up quite like a steaming bowl of this homemade classic.

I remember coming home from school, my fingers red from the cold, kicking off my snow-covered boots by the door. As I stepped into the kitchen, the scent of slow-cooked beef, sweet carrots, and rich tomato broth filled the air. My mom would be at the stove, ladling the soup into bowls, always reminding us that it had been cooking all day so the flavors could come together just right.

It wasn’t just a meal; it was a gesture of love. This soup carried the stories of generations—my grandfather, a farmer, always made sure we had the best beef, and my grandmother taught my mom how to make it just the way we loved it. Now, every time I make it myself, I feel connected to those memories, as if I’m wrapping myself in a blanket of the past.

Why This Soup Stands the Test of Time

Many recipes come and go, but some remain a staple in our kitchens for decades. This vegetable beef soup is one of them. It’s not just delicious—it’s practical, nourishing, and comforting in a way that few meals can match.

A Perfect Balance of Flavor and Texture

The beauty of this soup lies in its simplicity and balance. The rich broth, slightly thickened by the starch from the potatoes, blends perfectly with the natural sweetness of carrots and corn. The beef, slow-cooked until it practically melts in your mouth, adds a hearty depth, while the combination of vegetables provides layers of texture and color. Every bite is a mix of savory, sweet, and umami flavors that make this soup a true comfort dish.

Nourishment in a Bowl

This soup isn’t just about taste—it’s packed with nutrients. The beef provides protein and iron, the vegetables bring in fiber and vitamins, and the broth keeps everything hydrating and easy to digest. It’s a well-rounded meal that fills you up without feeling heavy, making it perfect for cold nights or whenever you need a pick-me-up.

Make It Once, Enjoy It for Days

One of my favorite things about this soup is how well it stores and reheats. It only gets better over time as the flavors continue to meld. A big pot can last for several meals, and it freezes beautifully, making it ideal for meal prep. Just defrost a portion, heat it up, and it’s as good as new.

Tips for Making the Best Vegetable Beef Soup

While this recipe is incredibly simple, a few key tips can take it from good to unforgettable.

Choose the Right Cut of Beef

The best soups start with the right ingredients, and the beef is no exception. A chuck roast or pot roast works best because of its marbling and tenderness when slow-cooked. Leaner cuts tend to dry out, so always opt for something with a little fat.

Don’t Rush the Cooking Process

The secret to deep, developed flavor is low and slow cooking. The longer you let the soup simmer, the better the flavors meld. If you’re short on time, a slow cooker is your best friend—set it in the morning, and come home to a perfectly cooked meal.

Frozen vs. Fresh Vegetables

A lot of people hesitate to use frozen vegetables, but for this soup, they work beautifully. They hold their texture well and make prep so much easier. Of course, if you have fresh veggies on hand, feel free to use them, but don’t be afraid to take the shortcut when needed.

Seasoning Matters

A little salt and pepper go a long way, but don’t be afraid to customize the seasoning. A bay leaf or a touch of garlic powder can add another dimension of flavor. Some even like a splash of Worcestershire sauce for an extra savory kick.

Delicious Variations to Try

One of the best things about this soup is how versatile it is. Whether you want to adjust it based on dietary needs or just shake things up a little, here are a few fun variations:

Swap the Protein

  • Instead of beef, try ground beef, turkey, or shredded chicken for a lighter twist.
  • Short on time? Use pre-cooked rotisserie chicken to make this soup even faster.

Change Up the Vegetables

  • Add mushrooms, zucchini, or cabbage for extra texture and nutrients.
  • If you like a spicier kick, toss in some diced jalapeños or a pinch of red pepper flakes.

Make It Heartier

  • Stir in barley, lentils, or small pasta for a more filling version.
  • If you prefer a thicker broth, add an extra can of tomato soup or blend a portion of the soup and mix it back in.

Low-Carb or Keto Version

  • Skip the potatoes and replace them with cauliflower florets.
  • Reduce the amount of carrots and corn to cut down on sugar content.

Gather Your Goodies

  • 1 pot roast (about 2 pounds)
  • 2 russet potatoes, chopped
  • 1 bag frozen seasoning blend (or just chopped onions)
  • 1 bag frozen peas
  • 1 bag frozen green beans
  • 1 bag frozen corn
  • 4 large carrots, chopped
  • 1 (32 oz) container beef broth
  • 2 (10.75 oz) cans tomato soup
  • 1 can filled with water
  • Salt and pepper, to taste

Step-by-Step Simmering Magic

  1. Prep the Beef: Season the roast with salt and pepper. Place it in your slow cooker with half a can of beef broth and cook on LOW for about 10 hours until it’s tender. Shred with two forks.
  2. Sauté the Veggies: In a large pot, heat 1 tablespoon of oil and sauté the carrots and seasoning blend until tender.
  3. Build the Broth: Add the shredded beef, potatoes, remaining vegetables, remaining beef broth, tomato soup, water, salt, and pepper.
  4. Let It Simmer: Bring everything to a boil, then lower the heat, cover, and simmer for about an hour. Add water if needed for desired consistency.

Slow Cooker Alternative

Want a hands-off approach? Toss everything in your slow cooker and cook on LOW for 6-8 hours. Once done, shred the beef and mix it back in.

Nutritional Snapshot (Per 2-Cup Serving)

  • Calories: 240
  • Total Fat: 4g
  • Cholesterol: 14mg
  • Sodium: 1205mg
  • Carbohydrates: 40g
  • Fiber: 5g
  • Sugar: 12g
  • Protein: 11g

Freeze for Later

Cool the soup completely before storing it in airtight containers. Freeze in single servings for easy reheating on busy days.

This classic, comforting soup is perfect for chilly evenings and busy weeks—enjoy every hearty spoonful!

Frequently Asked Questions

1. Can I make this soup in the Instant Pot?
Yes! Sauté the beef and veggies on the sauté function, then add the broth and other ingredients. Cook on high pressure for 35 minutes, followed by a natural release.

2. How long does this soup last in the fridge?
Stored in an airtight container, it will stay fresh for 4-5 days.

3. Can I freeze this soup?
Absolutely! Freeze it in single-serving portions for easy reheating. It will keep well for up to 3 months.

4. What’s the best way to reheat it?
Warm it over medium-low heat on the stove, adding a little water if it has thickened. You can also microwave it, stirring occasionally.

5. Can I use canned vegetables instead of frozen?
Yes, but be sure to add them towards the end so they don’t overcook and turn mushy.

A Meal That Feels Like a Hug

Some recipes are more than just food—they’re a connection to our past, a way to bring family together, and a reminder of the little things that make life special. My mom’s old-fashioned vegetable beef soup is one of those meals. It’s not about fancy ingredients or complicated techniques; it’s about love, warmth, and tradition.

So whether you’re making this for a family dinner, meal prepping for the week, or simply craving something cozy, know that every bowl carries a story. And maybe, just maybe, this soup will become a favorite in your home just like it has in mine.

aiting

A Bowl of Comfort: The Story Behind My Mom’s Old-Fashioned Vegetable Beef Soup

A rich and comforting vegetable beef soup packed with tender shredded beef, hearty potatoes, and a medley of flavorful vegetables. Slow-cooked to perfection, this warm and nourishing dish is perfect for chilly evenings and meal prepping!
Prep Time 20 minutes
Servings: 8 servings
Course: Soup
Cuisine: American

Ingredients
  

  • 1 pot roast about 2 pounds, 2 russet potatoes (chopped), 1 bag frozen seasoning blend (or chopped onions), 1 bag frozen peas, 1 bag frozen green beans, 1 bag frozen corn, 4 large carrots (chopped), 1 (32 oz) container beef broth, 2 (10.75 oz) cans tomato soup, 1 can filled with water, salt and pepper to taste.

Method
 

  1. Prep the Beef – Season the roast with salt and pepper. Place it in your slow cooker with half a can of beef broth and cook on LOW for about 10 hours until it’s tender. Shred with two forks.
  2. Sauté the Veggies – In a large pot, heat 1 tablespoon of oil and sauté the carrots and seasoning blend until tender.
  3. Build the Broth – Add the shredded beef, potatoes, remaining vegetables, remaining beef broth, tomato soup, water, salt, and pepper.
  4. Let It Simmer – Bring everything to a boil, then lower the heat, cover, and simmer for about an hour. Add water if needed for desired consistency.
  5. Slow Cooker Alternative
  6. For a hands-off approach, toss everything in your slow cooker and cook on LOW for 6-8 hours. Once done, shred the beef and mix it back in.

Notes

  • Make it your own – Add extra veggies like zucchini, bell peppers, or mushrooms.
  • Lower sodium – Use low-sodium broth and season to taste.
  • Freeze for later – Cool completely and store in airtight containers. Freeze in single servings for easy reheating on busy days.
Enjoy a classic homestyle soup that’s rich, hearty, and full of flavor!
 

A Fresh and Whimsical Easter Delight: Bunny Hop Fruit Salad

A Sweet Memory of Easter Gatherings

Every Easter, my family gathers around the table, sharing stories, laughter, and, of course, delicious food. As a child, I remember the excitement of searching for Easter eggs, but as I grew older, I began to cherish the moments spent in the kitchen just as much. My grandmother, a woman who could turn the simplest ingredients into something magical, always had a way of making holidays feel extra special.

One year, she introduced us to a colorful fruit salad, filled with fresh berries, juicy melon, and sweet pineapple. But what made it truly unforgettable was the way she cut the fruit into playful bunny shapes. She said, “Food should bring joy, not just nourishment,” and that lesson has stayed with me ever since.

Now, I carry on this tradition, creating an Easter Fruit Salad that is as delightful to look at as it is to eat. Whether you’re making it for kids, a spring brunch, or just to add a refreshing balance to your Easter feast, this salad is a simple yet meaningful way to celebrate the holiday.

Why This Easter Fruit Salad is a Must-Try

A Healthier Easter Treat

Easter is often synonymous with chocolates, marshmallow bunnies, and sugary candies. While these treats are fun, sometimes it’s nice to balance things out with something fresh and nutritious. This fruit salad offers natural sweetness, vibrant colors, and a refreshing taste that complements heavier Easter dishes.

Fruits are naturally rich in vitamins, minerals, and antioxidants, making this salad a guilt-free addition to your holiday table. Unlike traditional Easter desserts, it keeps you energized rather than sluggish, making it perfect for both kids and adults.

A Visual Feast for the Eyes

What sets this fruit salad apart is the fun, festive presentation. By using bunny-shaped cookie cutters, the fruit transforms into adorable Easter-themed pieces. This little touch makes the dish extra special, especially for children who might otherwise overlook a bowl of fruit in favor of chocolate eggs.

The combination of bright red strawberries, deep purple grapes, golden pineapple, and soft pink watermelon creates a rainbow of colors that instantly makes the table look more inviting. It’s a dish that feels like spring in every bite.

Perfect for Any Easter Gathering

This salad isn’t just for kids. Whether you’re hosting a formal Easter brunch, a casual picnic, or simply preparing a refreshing side dish, it fits effortlessly into any menu. It pairs beautifully with ham, roasted vegetables, or even light breakfast options like yogurt and granola.

Plus, it’s incredibly easy to customize. You can add your favorite fruits, mix in some honey or lime juice for an extra kick, or even top it with shredded coconut or nuts for a bit of crunch.

Ingredients:

  • 8 cups of chopped fruit
    • Grapes
    • Melons
    • Strawberries (halved or whole)
    • Pineapple
    • Berries
  • ½ of a small watermelon
  • 3 slices of pineapple

Directions:

  1. Wash & Prep: Rinse all fruit thoroughly. Cut into bite-sized pieces as needed.
  2. Create the Bunny Shapes: Slice the watermelon into circles and use bunny-shaped cookie cutters to cut out fun fruit shapes. Repeat with the pineapple slices.
  3. Assemble the Salad: Place all chopped fruit in a large serving bowl. Arrange the fruit bunny cutouts on top for a festive touch.
  4. Serve & Enjoy: Chill before serving, or enjoy immediately as a fresh and colorful Easter treat.

Nutritional Highlights:

  • Rich in Vitamins – Packed with vitamin C from strawberries, pineapple, and melons.
  • Hydrating & Refreshing – Watermelon and grapes provide natural hydration.
  • Natural Antioxidants – Berries offer a healthy dose of antioxidants for immune support.
  • Low in Calories – A naturally sweet treat without added sugars.

This Easter Fruit Salad is a vibrant, healthy, and festive way to add fresh flavors to your spring celebration!

FAQs About Easter Fruit Salad

1. Can I Make This Fruit Salad Ahead of Time?

Yes, but it’s best when prepared no more than a day in advance. If you make it too early, the fruit may release excess juice and become soggy. To keep it fresh, store it in an airtight container in the refrigerator and add any delicate fruits (like berries) right before serving.

2. What Other Fruits Can I Use?

This recipe is highly versatile. If you want to switch things up, try adding:

  • Kiwi slices for a bright green contrast
  • Mango chunks for a tropical twist
  • Bananas (add just before serving to prevent browning)
  • Pomegranate seeds for an extra pop of color

The key is to choose fruits that hold their shape well and don’t brown too quickly.

3. How Do I Keep the Fruit from Turning Brown?

Some fruits, like apples and bananas, oxidize quickly, turning brown when exposed to air. To prevent this, you can toss them with a bit of lemon or lime juice. However, since this recipe already includes fruits that don’t brown easily, you may not need to worry about this.

4. Can I Freeze Leftovers?

Yes, you can freeze fruit salad, but the texture may change once thawed. Some fruits, like berries and pineapple, hold up well, but others, like watermelon, become mushy. If you do freeze it, use the thawed fruit for smoothies rather than serving it as a fresh salad.

5. How Can I Make This Fruit Salad More Special?

If you want to elevate the recipe, here are a few ideas:

  • Drizzle a Honey-Lime Dressing: Mix honey and lime juice for a simple yet flavorful addition.
  • Add Whipped Cream or Yogurt: Serve with a dollop of whipped cream or Greek yogurt for a creamy contrast.
  • Sprinkle with Coconut Flakes or Nuts: Adds a delightful crunch and a hint of tropical flavor.
  • Serve in a Watermelon Bowl: Hollow out a watermelon and use it as a serving dish for an impressive presentation.

The Magic of Easter Traditions

Food has a way of connecting us—to each other, to our memories, and to the seasons. This Easter Fruit Salad is more than just a recipe; it’s a celebration of freshness, fun, and family.

Whether you’re carrying on a long-standing tradition or starting a new one, this dish brings joy to any Easter table. Its simplicity allows you to focus on what truly matters—spending time with loved ones and savoring the little moments that make holidays special.

So as you prepare your Easter feast, consider adding this light and colorful salad to the mix. It’s a beautiful reminder that sometimes, the simplest dishes bring the most happiness.

aiting

A Fresh and Whimsical Easter Delight: Bunny Hop Fruit Salad

This Bunny Hop Easter Fruit Salad is a bright and refreshing way to celebrate spring! Packed with colorful fruit and adorable bunny-shaped cutouts, it’s a healthy, festive, and naturally sweet treat perfect for Easter gatherings.
Prep Time 15 minutes
Total Time 15 minutes
Servings: 6 -8 serves
Course: Salad, Snack
Cuisine: American

Ingredients
  

  • 8 cups of chopped fruit
  • Grapes
  • Melons
  • Strawberries halved or whole
  • Pineapple
  • Berries
  • ½ of a small watermelon
  • 3 slices of pineapple

Method
 

  1. Wash & Prep: Rinse all fruit thoroughly. Cut into bite-sized pieces as needed.
  2. Create the Bunny Shapes: Slice the watermelon into circles and use bunny-shaped cookie cutters to cut out fun fruit shapes. Repeat with the pineapple slices.
  3. Assemble the Salad: Place all chopped fruit in a large serving bowl. Arrange the fruit bunny cutouts on top for a festive touch.
  4. Serve & Enjoy: Chill before serving, or enjoy immediately as a fresh and colorful Easter treat.

Notes

  • Swap in your favorite seasonal fruits for variety.
  • Add a drizzle of honey or a sprinkle of shredded coconut for extra sweetness.
  • Serve with a side of yogurt dip for a creamy complement.

A Decadent Celebration: Guinness Chocolate Cupcakes with Baileys Frosting

A Taste of Tradition and Nostalgia

Every year, as St. Patrick’s Day approaches, I find myself reminiscing about the first time I truly embraced the holiday’s spirit. It wasn’t in a crowded pub or during a parade, but in my grandmother’s cozy kitchen, where the air was thick with the scent of warm chocolate and something deeper—something rich and slightly bitter. She wasn’t Irish by blood, but she had a way of bringing people together with food, and her love for baking was contagious.

That year, she handed me a bottle of Guinness with a knowing smile. “Trust me,” she said, pouring it into the batter. “The beer makes the chocolate sing.” At first, I was skeptical. Beer and cupcakes? It seemed like an odd combination. But as the cupcakes baked, their aroma filled the kitchen with a deep, malty richness. When they finally emerged from the oven, she topped them with a frosting infused with Baileys Irish Cream, and suddenly, I understood. The contrast of deep chocolate and silky, boozy sweetness was pure magic.

Now, every time I make these Guinness Chocolate Cupcakes with Baileys Frosting, I think of that moment. It’s more than just a dessert—it’s a connection to tradition, a tribute to the unexpected, and a delicious way to toast to the joy of sharing food with the people you love.

Why Guinness and Chocolate Work So Well Together

If you’ve never baked with beer before, you might be wondering why Guinness is the perfect addition to chocolate cake. The answer lies in the unique properties of stout beer. Guinness, with its dark, roasted malt flavors, enhances the deep, bittersweet notes of chocolate, making for a richer, more complex dessert.

The carbonation in the beer also plays a crucial role, helping the cupcakes rise beautifully while keeping them incredibly moist. Unlike other liquids used in baking, Guinness doesn’t just add moisture—it adds depth. It brings a subtle bitterness that balances out the sweetness of the sugar and frosting, ensuring that every bite is indulgent but not overpowering.

For those who might be hesitant about the taste of beer in dessert, rest assured: the alcohol content bakes off, leaving behind only its warm, malty essence. What you’re left with is a cupcake that feels luxurious, velvety, and just the right amount of decadent.

Baileys Frosting: A Dreamy, Boozy Indulgence

No cupcake is complete without frosting, and in this case, Baileys Irish Cream is the perfect finishing touch. This rich and creamy liqueur, made with Irish whiskey, fresh dairy cream, and a hint of cocoa, blends seamlessly into the frosting, creating a smooth and luscious topping.

The balance of flavors is what makes this frosting so irresistible. The tanginess of cream cheese tempers the sweetness, while the Baileys adds warmth and a hint of spice. It’s a grown-up twist on a classic cream cheese frosting—just boozy enough to feel indulgent without being overwhelming.

For those who prefer a lighter frosting, the amount of Baileys can be adjusted to taste. Want something extra rich? Add a splash more. Prefer just a whisper of the Irish cream flavor? Reduce it slightly. Either way, the result is a silky, spreadable frosting that pairs perfectly with the deep chocolate base of the cupcakes.

Rich & Boozy Ingredients

For the Cupcakes:
  • 2 cups unbleached all-purpose flour
  • ½ cup cocoa powder
  • ¼ teaspoon salt
  • 1 ½ teaspoons baking soda
  • 1 cup granulated sugar
  • ½ cup light or dark brown sugar
  • ½ cup unsalted butter, softened
  • 2 teaspoons vanilla extract
  • 2 eggs
  • ½ cup sour cream
  • 1 (12 oz) bottle Guinness or stout beer
For the Frosting:
  • 1 (8 oz) bar cream cheese, softened
  • 1 (4 oz) stick unsalted butter, softened
  • 2 cups confectioner’s sugar
  • 4–6 tablespoons Baileys Irish Cream

Step-by-Step Directions to Dessert Bliss

Baking the Cupcakes:
  1. Preheat oven to 350°F and line two 12-count muffin tins with butter or paper liners.
  2. In a large bowl, whisk together the flour, cocoa powder, baking soda, and salt.
  3. Using a stand mixer or hand mixer, beat the butter, granulated sugar, and brown sugar until light and fluffy.
  4. Add one egg at a time, beating until fully incorporated. Stir in the vanilla extract.
  5. Mix in the sour cream until combined.
  6. With the mixer running, slowly pour in the Guinness.
  7. Sift the dry ingredients into the batter and stir gently until fully mixed, ensuring no flour pockets remain.
  8. Divide the batter evenly into muffin cups (about ¼ cup per cupcake).
  9. Bake for 20–25 minutes or until a toothpick inserted in the center comes out clean.
  10. Let the cupcakes cool on a rack before frosting.
Whipping Up the Baileys Frosting:
  1. In a mixing bowl, beat the cream cheese, butter, and confectioner’s sugar until light and fluffy.
  2. Slowly drizzle in the Baileys, adjusting the amount to taste.
  3. Beat until smooth and fully incorporated.
  4. Transfer frosting to a piping bag or ziplock bag and frost the cooled cupcakes.

Sweet Indulgence with a Boozy Twist

No official nutrition info is provided, but expect these cupcakes to be rich, decadent, and the perfect St. Patrick’s Day treat. Enjoy responsibly!

Common Questions About Guinness Chocolate Cupcakes

1. Can I Make These Cupcakes Without Alcohol?

Absolutely! If you want to enjoy the deep chocolate flavor without the beer, you can substitute the Guinness with strong brewed coffee. Coffee enhances chocolate in a similar way, bringing out its richness and complexity. For the frosting, replace Baileys with heavy cream and a splash of vanilla extract.

2. Will These Cupcakes Taste Like Beer?

Not at all! The Guinness enhances the chocolate flavor rather than overpowering it. The final taste is more like an extra-deep, almost smoky chocolate rather than a beer-infused dessert.

3. Can I Make These Cupcakes in Advance?

Yes! These cupcakes actually taste even better the next day as the flavors have time to develop. Store them unfrosted in an airtight container at room temperature for up to two days. If frosted, keep them refrigerated and bring them to room temperature before serving.

4. What’s the Best Way to Frost These Cupcakes?

For a professional look, use a piping bag with a star tip to swirl the frosting on top. If you prefer a rustic, homemade feel, a simple spatula works just as well. Either way, the rich, velvety frosting is the star of the show.

5. Can I Use a Different Stout Beer?

While Guinness is the classic choice, you can experiment with other stouts. Look for stouts with chocolate or coffee notes for the best results. Avoid overly bitter or hoppy beers, as they might clash with the sweetness of the cupcakes.

Pairing Suggestions for the Ultimate Dessert Experience

These cupcakes are already a showstopper, but pairing them with the right drink can elevate them even further. Here are a few delicious pairings to consider:

  • Irish Coffee: A strong black coffee with a splash of Irish whiskey complements the cupcakes’ deep flavors.
  • More Baileys: Serve these cupcakes alongside a small glass of Baileys on the rocks for a full-circle dessert experience.
  • Milk Stout or Porter: If you want to keep the beer theme going, pair these cupcakes with a smooth, chocolatey stout.
  • Espresso or Cold Brew: For those who prefer non-alcoholic options, a bold espresso or cold brew coffee balances the cupcakes’ richness beautifully.

A Final Toast to Sweet Memories

Food has a way of connecting us to moments, people, and traditions, and these Guinness Chocolate Cupcakes with Baileys Frosting do just that. They bring together bold flavors, a hint of nostalgia, and the joy of baking something truly special.

Whether you’re making them for St. Patrick’s Day, a special celebration, or just because you crave something indulgent, these cupcakes offer a little taste of magic in every bite. So, raise a cupcake, take a bite, and savor the flavors of rich chocolate, smooth Irish cream, and the warmth of a recipe made with love.

aiting

A Decadent Celebration: Guinness Chocolate Cupcakes with Baileys Frosting

Celebrate St. Patrick’s Day with these rich and indulgent Guinness Chocolate Cupcakes, topped with a smooth and creamy Baileys frosting. These decadent treats combine deep chocolate flavor with a hint of stout and a boozy frosting that will make any celebration extra special!
Prep Time 15 minutes
Cook Time 25 minutes
Total Time 40 minutes
Servings: 12 cupcakes
Course: Dessert
Cuisine: American

Ingredients
  

For the Cupcakes:
  • 2 cups unbleached all-purpose flour
  • ½ cup cocoa powder
  • ¼ teaspoon salt
  • 1 ½ teaspoons baking soda
  • 1 cup granulated sugar
  • ½ cup light or dark brown sugar
  • ½ cup unsalted butter softened
  • 2 teaspoons vanilla extract
  • 2 eggs
  • ½ cup sour cream
  • 1 12 oz bottle Guinness or stout beer
For the Frosting:
  • 1 8 oz bar cream cheese, softened
  • 1 4 oz stick unsalted butter, softened
  • 2 cups confectioner’s sugar
  • 4 –6 tablespoons Baileys Irish Cream
  •  

Method
 

Baking the Cupcakes:
  1. Preheat oven to 350°F and line two 12-count muffin tins with butter or paper liners.
  2. In a large bowl, whisk together the flour, cocoa powder, baking soda, and salt.
  3. Using a stand mixer or hand mixer, beat the butter, granulated sugar, and brown sugar until light and fluffy.
  4. Add one egg at a time, beating until fully incorporated. Stir in the vanilla extract.
  5. Mix in the sour cream until combined.
  6. With the mixer running, slowly pour in the Guinness.
  7. Sift the dry ingredients into the batter and stir gently until fully mixed, ensuring no flour pockets remain.
  8. Divide the batter evenly into muffin cups (about ¼ cup per cupcake).
  9. Bake for 20–25 minutes or until a toothpick inserted in the center comes out clean.
  10. Let the cupcakes cool on a rack before frosting.
Whipping Up the Baileys Frosting:
  1. In a mixing bowl, beat the cream cheese, butter, and confectioner’s sugar until light and fluffy.
  2. Slowly drizzle in the Baileys, adjusting the amount to taste.
  3. Beat until smooth and fully incorporated.
  4. Transfer frosting to a piping bag or ziplock bag and frost the cooled cupcakes.

Notes

  • For extra richness, add a pinch of espresso powder to the cupcake batter.
  • Store cupcakes in the refrigerator for up to three days for the freshest taste.
  • Swap Baileys for Irish whiskey for an even stronger kick in the frosting!