The Ultimate Guide to Biscoff Banana Pudding

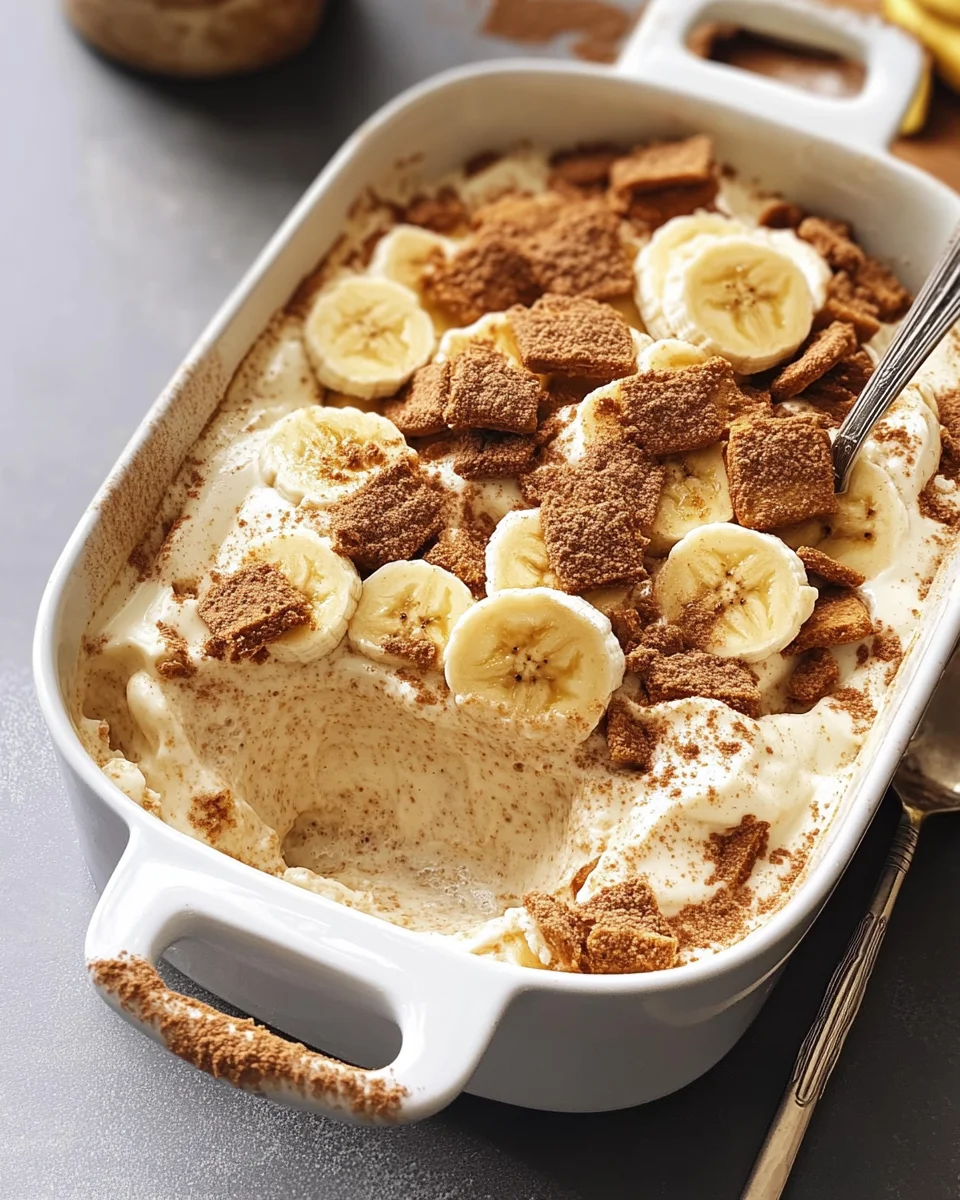
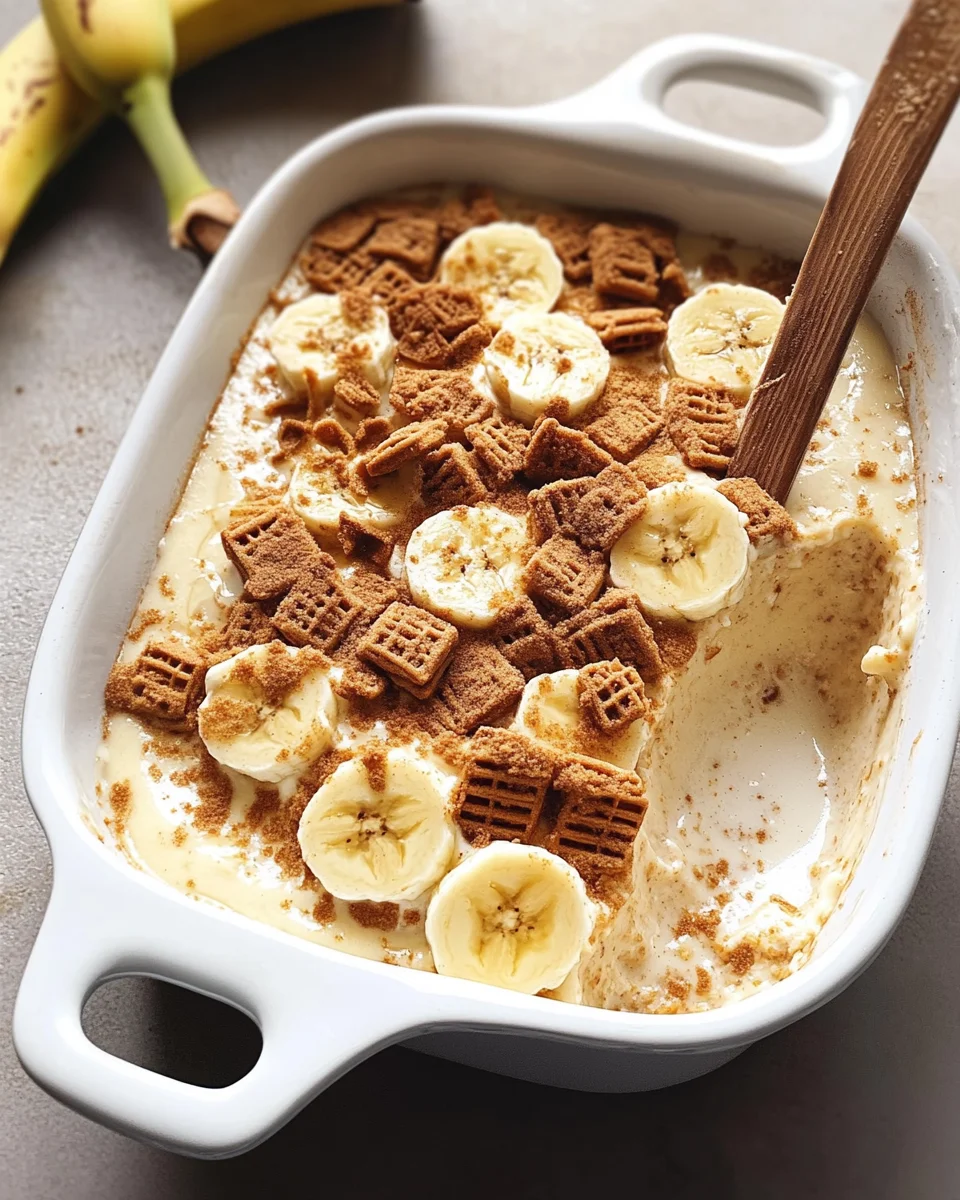
Biscoff banana pudding is a creamy, no-bake dessert that combines layers of rich vanilla pudding, fresh bananas, and spiced Biscoff cookies. This recipe is a twist on the classic Southern banana pudding, replacing traditional Nilla wafers with caramelized, cinnamon-spiced Lotus Biscoff cookies. The result is a decadent dessert with a deeper flavor profile, perfect for those who love the comforting taste of banana pudding but want something a little more unique.

In this guide, we will explore what makes Biscoff banana pudding special, how to customize it, serving suggestions, storage tips, frequently asked questions, and expert advice to ensure you achieve the perfect consistency and flavor.

Why Biscoff Banana Pudding Stands Out

Classic banana pudding has long been a staple at family gatherings, potlucks, and holiday celebrations. While traditional versions use Nilla wafers, this version elevates the dish with the deep caramelized notes of Biscoff cookies.

1. A More Complex Flavor Profile

Biscoff cookies have a warm, spiced flavor with hints of caramel and cinnamon, making them a perfect complement to the sweetness of ripe bananas and the creamy pudding. Unlike Nilla wafers, which serve as a neutral base, Biscoff cookies add a rich dimension to every bite.

2. Creamy and Dreamy Texture

By combining instant vanilla pudding mix with sweetened condensed milk and freshly whipped cream, this recipe creates an ultra-smooth, luxurious texture. The whipped cream lightens the pudding, making it airy and melt-in-your-mouth soft.

3. No-Bake Convenience

One of the best things about Biscoff banana pudding is that it requires no baking. The cookies absorb moisture from the pudding over time, creating a soft, cake-like texture without ever needing to turn on the oven. This makes it an ideal dessert for warm weather or when you need a quick, impressive treat.

4. Perfect for Any Occasion

Whether served in a large dish for a crowd or in individual jars for a stylish presentation, Biscoff banana pudding is versatile enough to fit any setting. It is easy to make in advance, making it an excellent choice for parties, picnics, and holiday dinners.

Customizing Your Biscoff Banana Pudding

While the classic version is delicious on its own, there are many ways to tweak this recipe to suit different tastes and dietary preferences.

1. Make It Chocolatey

For a richer variation, add a layer of chocolate ganache or chocolate pudding between the banana and cookie layers. The combination of banana, Biscoff, and chocolate creates a well-balanced dessert with a touch of indulgence.

2. Use Different Cookies

If you cannot find Biscoff cookies, you can substitute them with other spiced cookies like gingersnaps, speculoos cookies, or even graham crackers. Each option will provide a slightly different texture and flavor.

3. Add a Caramel Drizzle

Enhance the caramel notes of the Biscoff cookies by drizzling a layer of homemade or store-bought caramel sauce over the pudding. This addition adds a gooey richness that pairs perfectly with the creamy pudding.

4. Make It a Frozen Dessert

If you love ice cream, try freezing individual portions of Biscoff banana pudding. It transforms into a creamy, semi-frozen treat similar to ice cream cake. Let it thaw slightly before serving for the best texture.

5. Try a Dairy-Free Version

To make this recipe dairy-free, swap the milk for oat milk or almond milk, use a dairy-free whipped topping, and replace the sweetened condensed milk with coconut condensed milk. These substitutions will maintain the creamy texture while making the dessert suitable for those with dietary restrictions.

Serving Suggestions

Biscoff banana pudding is a visually appealing dessert that can be served in various ways to make it even more inviting.

1. Classic Family-Style Dish

Serve the pudding in a 9×13-inch dish and allow guests to scoop out portions. This method works well for potlucks, picnics, and holiday gatherings.

2. Individual Dessert Cups

For a more elegant presentation, layer the pudding in small glasses or mason jars. This makes portioning easy and adds a stylish touch to dinner parties or bridal showers.

3. Topped with Whipped Cream and Biscoff Crumbles

For extra decadence, top each serving with a dollop of freshly whipped cream and crushed Biscoff cookies. This adds both texture and visual appeal.

4. Paired with Coffee or Tea

Since Biscoff cookies are often enjoyed with coffee, this dessert pairs beautifully with a cup of espresso, cappuccino, or chai tea. The warm spices complement the drink’s flavors, making it an excellent after-dinner treat.

Storage and Make-Ahead Tips

One of the best things about Biscoff banana pudding is that it gets better as it sits. The cookies soften as they absorb the pudding, creating a texture that resembles cake. However, to keep it fresh, follow these storage tips:

Refrigeration

  • Store the pudding in an airtight container in the refrigerator for up to 3 days.
  • If you are making it ahead of time, add the final layer of banana slices just before serving to prevent browning.

Freezing

  • Biscoff banana pudding can be frozen for up to 1 month in an airtight container.
  • To serve, thaw in the refrigerator overnight or eat slightly frozen for a chilled, ice cream-like experience.

Preventing Brown Bananas

  • Use slightly underripe bananas (ones with a little green) to keep them firm longer.
  • Slice bananas just before layering them into the pudding.
  • Toss banana slices in lemon juice to slow oxidation and prevent browning.

Ingredients

For the Creamy Pudding Base:

  • Cold milk
  • Sweetened condensed milk
  • Instant vanilla pudding mix
  • Whipping cream

For the Layers:

  • Lotus Biscoff cookies (or similar spiced cookies)
  • Ripe bananas

Directions

Creating the Pudding Mixture

  1. In a medium bowl, whisk together cold milk, condensed milk, and vanilla pudding mix until smooth.
  2. Place the mixture in the refrigerator to set while preparing the whipped cream.

Making the Whipped Cream

  1. In a large mixing bowl, use an electric mixer to whip the cream until firm peaks form.
  2. Gently fold the chilled pudding mixture into the whipped cream until fully combined and smooth.

Assembling the Layers

  1. Spread half of the pudding mixture into a 9×13-inch dish.
  2. Slice bananas into thin coins and layer them on top of the pudding.
  3. Crumble Biscoff cookies and sprinkle them over the banana layer.
  4. Add the remaining pudding mixture and spread it evenly.
  5. Top with more banana slices and crushed Biscoff cookies for garnish.

Chilling & Serving

  1. Cover and refrigerate for at least 2 hours, preferably overnight, to allow the flavors to meld.
  2. Serve chilled, either scooped directly from the dish or portioned into smaller cups.

Nutritional Information (Per Serving)

  • Calories: 682 kcal
  • Carbohydrates: 91g
  • Protein: 11g
  • Fat: 32g
  • Saturated Fat: 18g
  • Cholesterol: 89mg
  • Sodium: 412mg
  • Potassium: 597mg
  • Fiber: 3g
  • Sugar: 59g

Enjoy this creamy, spiced twist on a classic banana pudding with the rich caramelized notes of Biscoff cookies!

Frequently Asked Questions

1. Can I Make This Recipe Ahead of Time?

Yes! In fact, Biscoff banana pudding tastes even better after sitting for a few hours or overnight. This allows the cookies to soften and the flavors to meld together.

2. How Can I Make the Pudding Thicker?

If you prefer a thicker consistency, use slightly less milk when mixing the pudding. Chilling the pudding for at least 2 hours before assembling the dessert also helps it firm up.

3. Can I Use Homemade Pudding Instead of Instant?

Absolutely. If you prefer to make vanilla pudding from scratch, you can replace the instant pudding mix with a homemade custard. Just be sure to let it cool completely before layering.

4. Why Is My Banana Pudding Runny?

A runny pudding can result from not whipping the cream to firm peaks or from adding too much liquid to the pudding mixture. Always make sure to measure ingredients precisely and chill the pudding before assembling.

5. Can I Use Other Fruits?

Yes! While bananas are the star ingredient, you can mix in other fruits like sliced strawberries or caramelized apples for a different twist.

6. What’s the Best Way to Crumble Biscoff Cookies?

For a fine crumble, use a food processor. If you prefer larger cookie chunks, simply crush them by hand or place them in a zip-top bag and use a rolling pin to break them into pieces.

7. Do I Have to Chill It Before Eating?

You can eat the pudding immediately, but chilling it for a few hours enhances the texture as the cookies soften into a cake-like consistency.

Conclusion: A Dessert Worth Every Bite

Biscoff banana pudding is a simple yet indulgent twist on a classic dessert. With its layers of creamy pudding, spiced Biscoff cookies, and fresh bananas, this no-bake treat offers a perfect balance of flavors and textures. Whether you are making it for a casual family gathering or an elegant celebration, it is a guaranteed crowd-pleaser.

The beauty of this recipe lies in its flexibility. You can customize it with different flavors, serve it in various ways, and even make it ahead of time for convenience. By following the tips and tricks outlined in this guide, you can achieve a perfectly creamy, flavorful banana pudding every time.

Next time you are craving something sweet and comforting, give this Biscoff banana pudding a try. It is easy to make, visually stunning, and utterly delicious—everything a great dessert should be.
aiting

The Ultimate Guide to Biscoff Banana Pudding

Indulge in this rich and creamy Biscoff Banana Pudding, where velvety vanilla pudding meets layers of spiced Biscoff cookies and ripe bananas. This dessert is the perfect balance of sweetness and crunch, making it an irresistible treat for any occasion.
Prep Time 15 minutes
Cook Time 2 hours
Total Time 2 hours 15 minutes
Servings: 8 -10 servings
Course: Dessert
Cuisine: American

Ingredients
  

For the Creamy Pudding Base:
  • Cold milk
  • Sweetened condensed milk
  • Instant vanilla pudding mix
  • Whipping cream
For the Layers:
  • Lotus Biscoff cookies or similar spiced cookies
  • Ripe bananas

Method
 

  1. Creating the Pudding Mixture
  2. In a medium bowl, whisk together cold milk, condensed milk, and vanilla pudding mix until smooth.
  3. Place the mixture in the refrigerator to set while preparing the whipped cream.
Making the Whipped Cream
  1. In a large mixing bowl, use an electric mixer to whip the cream until firm peaks form.
  2. Gently fold the chilled pudding mixture into the whipped cream until fully combined and smooth.
Assembling the Layers
  1. Spread half of the pudding mixture into a 9×13-inch dish.
  2. Slice bananas into thin coins and layer them on top of the pudding.
  3. Crumble Biscoff cookies and sprinkle them over the banana layer.
  4. Add the remaining pudding mixture and spread it evenly.
  5. Top with more banana slices and crushed Biscoff cookies for garnish.
Chilling & Serving
  1. Cover and refrigerate for at least 2 hours, preferably overnight, to allow the flavors to meld.
  2. Serve chilled, either scooped directly from the dish or portioned into smaller cups.

Notes

  • For added crunch, mix some crushed Biscoff cookies into the pudding layers.
  • To prevent bananas from browning, lightly toss them with a bit of lemon juice before layering.
  • This pudding tastes even better the next day, so consider making it ahead of time.

The Ultimate Guide to Butter Poached Lobster

Butter poached lobster is a luxurious dish that transforms tender lobster tails into a rich, buttery delicacy. This cooking technique, often associated with fine dining, results in succulent, flavorful lobster without the toughness that can sometimes come from other cooking methods. Poaching lobster in butter enhances its natural sweetness and creates a velvety texture that melts in your mouth.

Whether you are preparing this dish for a special occasion or simply indulging in an elegant meal at home, butter poached lobster is surprisingly easy to make. With just a handful of high-quality ingredients and a little attention to detail, you can create a restaurant-worthy dish in under 30 minutes.

In this guide, we will explore why this recipe works so well, common variations, the best ways to serve butter poached lobster, and frequently asked questions. By the end, you will have all the knowledge you need to perfect this classic seafood dish.

Why Butter Poaching Makes the Best Lobster

Traditional methods of cooking lobster, such as boiling or steaming, can sometimes result in rubbery, overcooked meat if not done correctly. Butter poaching, on the other hand, allows for precise temperature control and ensures that the lobster remains moist and tender throughout the cooking process.

Here are a few reasons why butter poaching is the superior method:

1. Gentle Cooking for Perfect Texture

Lobster meat is delicate, and high heat can cause it to become tough. Butter poaching uses low, consistent heat to gently cook the lobster, preserving its tenderness and making each bite irresistibly juicy.

2. Infused Flavor

Since the lobster cooks directly in a pool of rich, aromatic butter, it absorbs all the buttery goodness. Adding garlic, lemon, and herbs enhances the dish further, creating layers of flavor.

3. No Waterlogging

Boiling lobster can dilute its natural sweetness, while poaching in butter concentrates its flavor. Instead of draining away into cooking water, the rich flavors remain locked in the meat.

4. Restaurant-Quality Results at Home

Butter poaching is a technique used by top chefs to achieve perfectly cooked seafood. It may sound fancy, but it is easy to master at home with just a few simple steps.

Customizing Your Butter Poached Lobster

While the classic recipe is delicious on its own, there are several ways to customize butter poached lobster to suit your personal taste.

1. Herb-Infused Butter

Enhance the butter with fresh herbs like thyme, rosemary, tarragon, or chives. These herbs add depth to the flavor without overpowering the natural sweetness of the lobster.

2. White Wine Reduction

For an extra layer of sophistication, start by reducing dry white wine in the pan before adding the butter. The acidity balances the richness of the butter and adds complexity to the dish.

3. Spicy Kick

If you enjoy a bit of heat, sprinkle in some red pepper flakes or cayenne pepper. This pairs well with the buttery richness and gives the lobster a slight kick.

4. Citrus Zest

Adding lemon or orange zest to the butter enhances the dish with a subtle brightness. The citrusy aroma lifts the flavors and prevents the dish from feeling too heavy.

5. Smoked Butter Twist

For a smoky, slightly nutty taste, try using smoked butter or adding a few drops of smoked paprika to the poaching liquid.

The Best Ways to Serve Butter Poached Lobster

Butter poached lobster is a versatile dish that pairs beautifully with a variety of sides and accompaniments. Here are some of the best ways to serve it:

1. Classic Pairings

  • Garlic Mashed Potatoes – The creamy texture of mashed potatoes complements the buttery richness of the lobster.
  • Steamed Asparagus – Light and slightly crisp, asparagus adds a fresh contrast to the dish.
  • Crusty Bread – Perfect for soaking up every last drop of the flavorful butter sauce.

2. Surf and Turf

Pairing lobster with a perfectly seared steak creates the ultimate surf and turf experience. Filet mignon is a great choice as its tenderness matches the luxurious texture of the lobster.

3. Elevated Pasta Dishes

Butter poached lobster can be served over pasta with a light lemon butter sauce, garlic, and fresh herbs. A simple fettuccine or linguine works best to let the lobster shine.

4. Lobster Rolls with a Gourmet Touch

For an upscale take on the classic lobster roll, use butter poached lobster instead of the usual mayonnaise-based filling. Serve it in a toasted brioche bun for an added layer of decadence.

5. Light and Fresh Salad

A simple salad with arugula, spinach, citrus segments, and a light vinaigrette pairs beautifully with butter poached lobster. It keeps the meal balanced and refreshing.

Ingredients

For the Lobster:

  • 6 medium lobster tails
  • ½ teaspoon kosher salt
  • ¼ teaspoon black pepper

For the Butter Poaching Sauce:

  • 12 tablespoons butter (1.5 sticks)
  • 4 cloves garlic, minced
  • Parsley, for garnish (optional)
  • Lemon wedges, for serving

Directions

Preparing the Lobster Tails

  1. If using frozen lobster tails, thaw them in a bowl of ice water for about 1 hour, changing the water every 20 minutes.
  2. Flip the lobster tail onto its back. Use kitchen shears to cut along the underside of the shell, stopping at the tail fin.
  3. Gently open the shell and carefully remove the lobster meat in one piece.
  4. Pat the lobster tails dry with paper towels and season with salt and pepper.

Making the Butter Sauce

  1. In a large skillet, melt the butter over medium-low heat.
  2. Add minced garlic and stir constantly for about 1 minute, until fragrant.

Poaching the Lobster

  1. Place the lobster meat in the skillet, working in batches if needed to avoid overcrowding.
  2. Baste the lobster with the garlic butter, cooking for 2-4 minutes per side (6-8 minutes total), until the meat is fully opaque and curls slightly.
  3. Use an instant-read thermometer to ensure the lobster reaches 135-140°F in the thickest part.
  4. Remove the lobster from the pan immediately and set aside.

Serving

  1. Squeeze fresh lemon juice over the lobster and garnish with parsley.
  2. Serve with the remaining butter sauce for dipping.

Nutritional Information (Per Serving)

  • Calories: 379 kcal
  • Protein: 16g
  • Carbohydrates: 1g
  • Fat: 35g
  • Saturated Fat: 22g
  • Cholesterol: 211mg
  • Sodium: 963mg

Enjoy this rich and decadent butter-poached lobster as a special occasion meal!

Frequently Asked Questions

1. What is the Best Type of Lobster for Butter Poaching?

Cold-water lobster tails are the best choice for butter poaching. They are sweeter, more tender, and have a better texture compared to warm-water varieties. If possible, choose Maine or Canadian lobster tails for the highest quality.

2. Can I Use Frozen Lobster Tails?

Yes, frozen lobster tails work well for this recipe. Just be sure to thaw them properly by placing them in a bowl of ice water for about an hour. Avoid thawing them in warm water, as this can start cooking the meat prematurely.

3. How Do I Know When the Lobster is Cooked?

Lobster meat should turn from translucent to opaque and reach an internal temperature of 135-140°F. The tails will slightly curl when they are fully cooked.

4. Can I Make Butter Poached Lobster Ahead of Time?

Lobster is best enjoyed fresh, but if you need to prepare it in advance, cook the lobster slightly underdone, then gently reheat it in the butter before serving.

5. What Can I Do with Leftover Butter Sauce?

Do not let that flavorful butter go to waste. Drizzle it over vegetables, use it as a dipping sauce for bread, or toss it with pasta for an easy garlic butter dish.

6. What Kind of Butter Should I Use?

High-quality butter makes a big difference in this dish. European-style butter, which has a higher butterfat content, is an excellent choice for a richer flavor.

7. Is Butter Poached Lobster the Same as Lobster in Beurre Monté?

Not exactly. While both involve cooking lobster in butter, beurre monté is an emulsified butter sauce that stays liquid at higher temperatures. Traditional butter poaching can be done with just melted butter, but using a beurre monté technique keeps the butter stable for longer poaching.

8. How Can I Prevent Overcooking the Lobster?

Keep the heat at medium-low and monitor the cooking time carefully. Using an instant-read thermometer ensures the lobster is cooked to the perfect temperature.

Conclusion: Elevate Your Seafood Game

Butter poached lobster is a dish that delivers unparalleled richness and elegance with minimal effort. By using simple, high-quality ingredients and following the gentle poaching method, you can achieve a perfectly tender, flavorful lobster every time.

This dish is perfect for special occasions, date nights, or anytime you want to indulge in a restaurant-quality meal at home. Pair it with your favorite sides, experiment with different flavor enhancements, and enjoy the luxurious experience of butter poached lobster.

Mastering this cooking technique will open up a world of gourmet possibilities in your kitchen. Whether served on its own, in a surf and turf pairing, or as part of a pasta dish, butter poached lobster is a guaranteed showstopper that will impress any seafood lover.

aiting

The Ultimate Guide to Butter Poached Lobster

Indulge in the luxurious taste of Golden Butter Poached Lobster! Tender lobster tails are gently poached in a rich garlic butter sauce, creating a melt-in-your-mouth experience. Perfect for special occasions or an elegant dinner at home, this dish is simple yet incredibly decadent.
Prep Time 10 minutes
Cook Time 10 minutes
Total Time 20 minutes
Servings: 4 servings
Course: Main Dish
Cuisine: American

Ingredients
  

For the Lobster:
  • 6 medium lobster tails
  • ½ teaspoon kosher salt
  • ¼ teaspoon black pepper
For the Butter Poaching Sauce:
  • 12 tablespoons butter 1.5 sticks
  • 4 cloves garlic minced
  • Parsley for garnish (optional)
  • Lemon wedges for serving

Method
 

  1. Preparing the Lobster Tails
  2. If using frozen lobster tails, thaw them in a bowl of ice water for about 1 hour, changing the water every 20 minutes.
  3. Flip the lobster tail onto its back. Use kitchen shears to cut along the underside of the shell, stopping at the tail fin.
  4. Gently open the shell and carefully remove the lobster meat in one piece.
  5. Pat the lobster tails dry with paper towels and season with salt and pepper.
Making the Butter Sauce
  1. In a large skillet, melt the butter over medium-low heat.
  2. Add minced garlic and stir constantly for about 1 minute, until fragrant.
Poaching the Lobster
  1. Place the lobster meat in the skillet, working in batches if needed to avoid overcrowding.
  2. Baste the lobster with the garlic butter, cooking for 2-4 minutes per side (6-8 minutes total), until the meat is fully opaque and curls slightly.
  3. Use an instant-read thermometer to ensure the lobster reaches 135-140°F in the thickest part.
  4. Remove the lobster from the pan immediately and set aside.
Serving
  1. Squeeze fresh lemon juice over the lobster and garnish with parsley.
  2. Serve with the remaining butter sauce for dipping.

Notes

  • Serve with a side of garlic mashed potatoes or grilled asparagus for a complete meal.
  • For an even richer taste, use clarified butter (ghee) in place of regular butter.
  • Do not overcook the lobster, as it can become tough and rubbery.

The Ultimate Buffalo Chicken Tenders Guide

Buffalo chicken tenders are the perfect combination of crispy, juicy, and spicy, making them a go-to choice for game nights, parties, and comfort food cravings. Unlike traditional buffalo wings, these tenders are boneless, easy to eat, and packed with bold flavors. Whether you’re a spice lover or just looking for a delicious fried chicken recipe, buffalo chicken tenders offer a satisfying crunch with a kick of heat from their signature buffalo sauce.

In this guide, we will explore the origins of buffalo chicken, why this recipe works so well, variations to suit different tastes, cooking tips for the best results, frequently asked questions, and a conclusion that ties it all together.

The Story Behind Buffalo Chicken Tenders

Buffalo-style chicken first gained popularity in the 1960s at the famous Anchor Bar in Buffalo, New York, where deep-fried chicken wings were tossed in a buttery hot sauce. This simple but revolutionary concept turned into a nationwide sensation, and soon after, chefs and home cooks began experimenting with other forms of buffalo chicken.

Buffalo chicken tenders were created as a boneless alternative, offering the same bold flavors and crispy texture without the hassle of eating around bones. This made them especially appealing to those who wanted an easier, mess-free way to enjoy the beloved buffalo wing taste. Today, buffalo chicken tenders are served in restaurants, bars, and homes across the country, often paired with creamy dips like ranch or blue cheese.

What Makes This Recipe Special?

Buffalo chicken tenders stand out for several reasons:

  1. Marination Magic – The secret to juicy, flavorful chicken starts with marination. A buttermilk and buffalo sauce marinade not only tenderizes the chicken but also infuses it with layers of flavor. The longer the marination time, the better the results.
  2. Crispy Coating Perfection – The combination of flour, cornstarch, and panko bread crumbs creates an irresistibly crispy crust that holds up even after being coated in buffalo sauce. Unlike simple flour coatings, this triple-layer breading adds extra texture and crunch.
  3. Frying for the Best Texture – Deep frying at the right temperature ensures that the chicken is crispy on the outside and tender on the inside. Cooking in small batches prevents overcrowding and helps maintain an even golden-brown finish.
  4. Buffalo Sauce Coating – Tossing the freshly fried chicken in buffalo sauce ensures every bite is packed with bold, tangy heat. Using a high-quality buffalo sauce or a homemade version with butter and hot sauce makes all the difference in taste.
  5. Perfect Pairings – These tenders are best enjoyed with classic dipping sauces like ranch or blue cheese, which help balance the spiciness. Serving them with celery and carrot sticks adds a refreshing contrast to the heat.

Variations and Customizations

Buffalo chicken tenders can be adapted in numerous ways to suit different dietary needs and flavor preferences. Here are some creative variations:

Baked Buffalo Chicken Tenders

For a lighter option, the tenders can be baked instead of fried. Simply place them on a wire rack over a baking sheet and bake at 400°F for 20-25 minutes, flipping halfway through. While they won’t be as crispy as the fried version, they still offer a satisfying crunch.

Air Fryer Buffalo Chicken Tenders

An air fryer provides a great balance between crispiness and health-conscious cooking. Cook the breaded tenders in an air fryer at 375°F for about 12-15 minutes, shaking the basket halfway through for even cooking.

Buffalo Chicken Tenders with a Twist

  • Extra Spicy: Add cayenne pepper or a few dashes of hot sauce to the marinade for an extra fiery kick.
  • Garlic Parmesan Buffalo Tenders: Toss the tenders in a mix of buffalo sauce, melted butter, and grated parmesan for a spicy, garlicky twist.
  • Honey Buffalo Tenders: Mix honey into the buffalo sauce to create a sweet-heat combination that balances out the spice.
  • Gluten-Free Version: Swap out the flour and panko bread crumbs for gluten-free alternatives to make the recipe accessible to those with dietary restrictions.

Cooking Tips for Perfect Buffalo Chicken Tenders

Making buffalo chicken tenders at home is easy, but a few expert tips can help you achieve the best results every time.

  1. Let the Chicken Rest After Marinating – Allowing the chicken to come to room temperature after marinating helps it cook more evenly. Cold chicken can cause the oil temperature to drop, leading to soggy tenders.
  2. Use a Thermometer for Frying – Maintaining an oil temperature of 350°F is key to getting the perfect crispy texture without burning the breading. A cooking thermometer takes the guesswork out of frying.
  3. Don’t Overcrowd the Pan – Frying too many pieces at once lowers the oil temperature, leading to uneven cooking and a greasy texture. Cook in small batches for the best results.
  4. Drain Excess Oil Properly – After frying, place the chicken on a wire rack or paper towels to drain excess oil. This prevents sogginess and keeps the tenders crispy.
  5. Toss in Sauce Just Before Serving – To maintain the crispiness, coat the tenders in buffalo sauce right before serving. Letting them sit too long in the sauce can make the breading soft.

Ingredients

For the Chicken Marinade:

  • 3 boneless, skinless chicken breasts, cut into vertical strips
  • 1 teaspoon salt
  • ½ teaspoon black pepper
  • 3 cups buttermilk
  • ¼ cup buffalo sauce

For the Crispy Coating:

  • 4 cups all-purpose flour
  • ¼ cup cornstarch
  • 1 teaspoon kosher salt
  • 2 cups panko bread crumbs
  • 2 large eggs, room temperature
  • 1 teaspoon water

For Frying & Tossing:

  • 2 cups buffalo sauce
  • Oil, for frying (canola or vegetable)

The Road to Crispy Perfection

1. Marinate for Maximum Flavor:

  • Place chicken strips in a large bowl and season with salt and pepper.
  • Pour in buttermilk and buffalo sauce, ensuring all chicken is submerged.
  • Cover and refrigerate for at least 3 hours (or up to 48 hours for deeper flavor).

2. Prep the Crunchy Coating:

  • Set out three bowls:
    • Bowl 1: Combine flour, cornstarch, and salt.
    • Bowl 2: Whisk eggs and water together.
    • Bowl 3: Mix 2 cups of the flour mixture with panko bread crumbs.
  • Line a baking sheet with parchment paper.

3. Coat for the Ultimate Crisp:

  • Remove chicken from the marinade and let it come to room temperature.
  • Dredge each piece through the flour mixture, then the egg mixture, and finally coat with the panko mixture.
  • Place coated pieces on the baking sheet.

4. Heat Up the Oil:

  • Pour about 2 inches of oil into a pot and heat over medium-low.
  • Bring the oil to 350°F (use a thermometer or the wooden spoon/bread test).

5. Fry to Golden Perfection:

  • Fry 3-4 chicken tenders at a time for 5-6 minutes, until golden brown and crispy.
  • Drain on a paper towel-lined plate.

6. Coat in Spicy Buffalo Goodness:

  • Toss the hot tenders in buffalo sauce, ensuring each piece is well coated.
  • Serve immediately with ranch or blue cheese dressing.

Nutritional Breakdown (Per Serving)

Serving Size: 1/4 of the recipe

  • Calories: ~1333 kcal
  • Protein: ~50g
  • Carbohydrates: ~120g
  • Fat: ~75g
  • Sodium: High (depends on buffalo sauce and seasoning)

Enjoy these crispy, spicy buffalo tenders with your favorite dip!

Frequently Asked Questions

1. Can I Make These in Advance?

Yes, you can prepare the breaded chicken tenders in advance and store them in the refrigerator for up to 24 hours before frying. You can also freeze them before frying for longer storage.

2. How Do I Store Leftovers?

Store leftover buffalo chicken tenders in an airtight container in the refrigerator for up to 3 days. To reheat, use an oven or air fryer at 375°F to restore crispiness.

3. Can I Use Chicken Thighs Instead of Breasts?

Absolutely. Chicken thighs are juicier and have more flavor, making them a great alternative. Just cut them into strips before marinating and follow the same cooking process.

4. What’s the Difference Between Buffalo Sauce and Hot Sauce?

Buffalo sauce is made by mixing hot sauce with butter, which gives it a smoother, richer texture. Hot sauce alone is more acidic and intense, while buffalo sauce has a balanced, tangy heat.

5. How Can I Make These Less Spicy?

If you want a milder version, use less buffalo sauce or mix it with melted butter or honey to tone down the heat. Serving with a creamy dip also helps balance the spice.

6. Can I Make a Dairy-Free Version?

Yes, replace buttermilk with a dairy-free alternative like almond milk mixed with lemon juice. Use dairy-free butter for the buffalo sauce.

7. What’s the Best Oil for Frying?

Canola oil, vegetable oil, or peanut oil are great choices for frying because they have high smoke points and neutral flavors. Avoid using olive oil, as it burns too quickly.

Conclusion: The Perfect Buffalo Chicken Experience

Buffalo chicken tenders are more than just a snack—they’re a celebration of bold flavors and satisfying textures. Whether you stick to the classic deep-fried version or experiment with baked, air-fried, or gluten-free variations, these tenders are sure to be a hit at any gathering. Their crispy coating, juicy interior, and spicy buffalo sauce make them a go-to favorite for spice lovers and comfort food enthusiasts alike.

By following expert cooking tips and customizing the recipe to your taste, you can create the perfect buffalo chicken tenders that rival any restaurant version. Pair them with your favorite dipping sauces, serve them alongside a cool, refreshing drink, and enjoy a plate of crispy, flavorful goodness.

ating

The Ultimate Buffalo Chicken Tenders Guide

These Spicy Crunch Buffalo Tenders deliver the ultimate crispy, spicy bite! Marinated in a flavorful buttermilk and buffalo sauce blend, coated in a crunchy panko crust, and fried to golden perfection, they’re then tossed in fiery buffalo sauce for the perfect game-day or comfort food indulgence.
Prep Time 15 minutes
Cook Time 20 minutes
Total Time 35 minutes
Servings: 4 servings
Course: Main Dish
Cuisine: American

Ingredients
  

For the Chicken Marinade:
  • 3 boneless skinless chicken breasts, cut into vertical strips
  • 1 teaspoon salt
  • ½ teaspoon black pepper
  • 3 cups buttermilk
  • ¼ cup buffalo sauce
For the Crispy Coating:
  • 4 cups all-purpose flour
  • ¼ cup cornstarch
  • 1 teaspoon kosher salt
  • 2 cups panko bread crumbs
  • 2 large eggs room temperature
  • 1 teaspoon water
For Frying & Tossing:
  • 2 cups buffalo sauce
  • Oil for frying (canola or vegetable)

Method
 

Marinate for Maximum Flavor:
  1. Place chicken strips in a large bowl and season with salt and pepper.
  2. Pour in buttermilk and buffalo sauce, ensuring all chicken is submerged.
  3. Cover and refrigerate for at least 3 hours (or up to 48 hours for deeper flavor).
Prep the Crunchy Coating:
    Set out three bowls:
    1. Bowl 1: Combine flour, cornstarch, and salt.
    2. Bowl 2: Whisk eggs and water together.
    3. Bowl 3: Mix 2 cups of the flour mixture with panko bread crumbs.
    4. Line a baking sheet with parchment paper.
    Coat for the Ultimate Crisp:
    1. Remove chicken from the marinade and let it come to room temperature.
    2. Dredge each piece through the flour mixture, then the egg mixture, and finally coat with the panko mixture.
    3. Place coated pieces on the baking sheet.
    Heat Up the Oil:
    1. Pour about 2 inches of oil into a pot and heat over medium-low.
    2. Bring the oil to 350°F (use a thermometer or the wooden spoon/bread test).
    Fry to Golden Perfection:
    1. Fry 3-4 chicken tenders at a time for 5-6 minutes, until golden brown and crispy.
    2. Drain on a paper towel-lined plate.
    Coat in Spicy Buffalo Goodness:
    1. Toss the hot tenders in buffalo sauce, ensuring each piece is well coated.
    2. Serve immediately with ranch or blue cheese dressing.

    Notes

    • Letting the chicken marinate overnight enhances the tenderness and flavor.
    • Adjust the buffalo sauce amount to control the heat level.
    • Serve with celery sticks and carrots for a classic touch.

    One-Pot Italian Sausage Tortellini Soup: The Ultimate Comfort in a Bowl

    A hearty, soul-warming soup is always a welcome addition to the dinner table, especially when it comes together effortlessly in one pot. One-Pot Italian Sausage Tortellini Soup is a rich and creamy dish packed with Italian flavors, making it a go-to meal for busy weeknights or chilly evenings.

    This recipe balances the savory depth of Italian sausage, the bright acidity of tomatoes, and the creamy richness of heavy cream, all tied together with tender cheese tortellini and fresh spinach. The best part? It’s ready in under 30 minutes, meaning you can enjoy a homemade, restaurant-quality meal with minimal effort.

    In this guide, we’ll explore everything you need to know about this incredible dish, including variations, storage tips, serving suggestions, and answers to frequently asked questions.

    Why This Soup Is a Must-Try

    1. One-Pot Wonder

    Cooking everything in a single pot means fewer dishes to clean and an easier cooking process. The flavors meld beautifully in the pot, creating a dish that tastes like it’s been simmering for hours—without the actual wait.

    2. Bursting with Flavor

    From the savory Italian sausage to the aromatic blend of garlic and Italian seasoning, every bite of this soup delivers deep, comforting flavors. The addition of tomato paste enhances the richness, while the heavy cream balances the acidity and creates a silky texture.

    3. Quick and Easy

    Unlike traditional slow-simmered soups, this one comes together in under 30 minutes, making it ideal for a weeknight dinner or a last-minute meal when you need something filling but fast.

    4. Customizable to Your Taste

    This soup is incredibly versatile, allowing you to swap ingredients to fit your preferences or dietary needs. Whether you want to spice it up, make it lighter, or add more vegetables, there are endless ways to adapt this dish.

    Delicious Variations to Try

    1. Make It Spicier

    If you love bold flavors, swap the mild Italian sausage for hot Italian sausage or add red pepper flakes for an extra kick. You can also use fire-roasted diced tomatoes with green chilies to introduce a subtle heat.

    2. Lighten It Up

    For a lighter version, substitute:

    • Turkey or chicken sausage instead of pork sausage
    • Half-and-half or whole milk instead of heavy cream
    • Vegetable broth instead of chicken broth for a vegetarian-friendly version (if using cheese tortellini)

    3. Add More Vegetables

    Boost the nutrition by adding more veggies like:

    • Carrots for a touch of sweetness
    • Mushrooms for an earthy, umami flavor
    • Zucchini for a fresh, light addition
    • Bell peppers for extra color and crunch

    4. Use Different Tortellini

    While cheese tortellini is the classic choice, you can experiment with meat-filled tortellini, spinach and ricotta tortellini, or even mushroom tortellini to add variety.

    Serving Suggestions: The Perfect Pairings

    While this soup is satisfying on its own, pairing it with complementary sides takes the meal to another level.

    1. Crusty Bread or Garlic Bread

    A warm, crusty loaf or buttery garlic bread is the perfect side to soak up the creamy broth.

    2. A Simple Green Salad

    Balance out the richness with a light salad featuring mixed greens, cherry tomatoes, cucumbers, and a tangy vinaigrette.

    3. Roasted Vegetables

    For an extra dose of nutrition, serve with roasted asparagus, Brussels sprouts, or broccoli.

    4. A Glass of Wine

    A medium-bodied red wine like Chianti, Sangiovese, or Pinot Noir pairs beautifully with the savory flavors of this soup.

    Storage and Reheating Tips

    This soup is great for meal prep and can be stored for later. However, because tortellini continues to absorb liquid, you may need to adjust the consistency when reheating.

    Refrigeration:

    • Store in an airtight container in the refrigerator for 3-4 days.
    • When reheating, add a splash of broth or water to loosen up the soup.

    Freezing:

    • Cool completely before transferring to a freezer-safe container.
    • Store for up to 3 months.
    • When ready to eat, thaw in the fridge overnight and reheat on the stove, stirring occasionally.

    Tip: If you plan to freeze, consider cooking the tortellini separately and adding it fresh when reheating to prevent it from getting mushy.

    Ingredients – A Symphony of Flavors

    • 1 pound ground mild Italian sausage
    • ½ medium yellow onion, diced (~½ cup)
    • 1 can (28 ounces) diced tomatoes
    • 2 tablespoons tomato paste
    • 3 cups (720 g) chicken broth
    • 2 teaspoons minced garlic
    • 2 teaspoons Italian seasoning
    • 1 teaspoon kosher salt
    • ½ teaspoon black pepper
    • 1 bag (20 ounces) fresh cheese tortellini, refrigerated
    • 1 cup (238 g) heavy cream
    • 2 cups fresh spinach
    • Shaved parmesan cheese (for garnish)

    Directions – A Cozy Bowl in Minutes

    1. Sear the Sausage – In a large heavy-bottomed pot over medium heat, cook the Italian sausage, stirring occasionally and breaking it up as it cooks. This should take 8-10 minutes until the meat is browned. Drain excess grease if needed.
    2. Sauté the Aromatics – Add diced onions and cook until they turn translucent (3-5 minutes).
    3. Build the Base – Stir in diced tomatoes, tomato paste, chicken broth, garlic, Italian seasoning, salt, and pepper. Bring to a simmer.
    4. The Finishing Touches – Add tortellini, heavy cream, and spinach. Stir to combine.
    5. Let It Simmer – Allow the soup to cook until the tortellini is tender and the spinach is wilted (8-10 minutes).
    6. Garnish & Serve – Ladle into bowls and top with shaved parmesan for the ultimate comfort dish.

    Nutritional Breakdown – A Balanced Indulgence

    • Servings: 8
    • Calories per Serving: 410
    • Protein: High-protein from sausage and cheese tortellini
    • Carbs: Moderate from tortellini and tomatoes
    • Fats: Rich from heavy cream and sausage
    • Fiber: Boosted by fresh spinach

    This hearty and flavorful soup comes together in under 30 minutes and is perfect for cozy nights. Enjoy!

    Frequently Asked Questions

    1. Can I Make This Soup in a Slow Cooker?

    Yes! To make it in a slow cooker, follow these steps:

    • Brown the Italian sausage first.
    • Add onions, tomatoes, tomato paste, broth, garlic, Italian seasoning, salt, pepper, and heavy cream to the slow cooker.
    • Cook on low for 3-4 hours.
    • Add the spinach and tortellini in the last 7-8 minutes, just before serving.

    2. How Do I Prevent the Tortellini from Overcooking?

    Tortellini cooks quickly, so add it near the end and watch closely. If storing leftovers, the tortellini will continue to absorb broth, so you may need to add more liquid when reheating.

    3. Can I Make This Soup Dairy-Free?

    Yes! Substitute coconut milk or a dairy-free heavy cream alternative for the heavy cream. Use dairy-free tortellini or swap it for a different pasta.

    4. Can I Use Frozen Tortellini?

    Yes! Add frozen tortellini directly to the soup during the last 5-7 minutes of cooking. No need to thaw beforehand.

    5. What’s the Best Type of Italian Sausage to Use?

    You can use mild, sweet, or spicy Italian sausage depending on your flavor preference. You can also use ground turkey, chicken, or even plant-based sausage as alternatives.

    Conclusion: A Bowl of Comfort You’ll Make Again and Again

    There’s something truly special about a warm, hearty bowl of One-Pot Italian Sausage Tortellini Soup. It’s the perfect balance of rich, creamy, and savory flavors wrapped in a simple, effortless recipe. Whether you’re making it for a family dinner, meal prep, or just because you need some comfort food, this soup delivers on taste, ease, and versatility.

    Try experimenting with different ingredients, spice levels, or serving styles to make it uniquely yours. And don’t forget to pair it with a crusty loaf of bread and a glass of wine for the ultimate dining experience.

    Once you make this soup, it’s bound to become a staple in your kitchen. Enjoy every spoonful!

    ating

    One-Pot Italian Sausage Tortellini Soup: The Ultimate Comfort in a Bowl

    This hearty and flavorful one-pot tortellini dish comes together in under 30 minutes, making it the perfect meal for cozy nights. Packed with sausage, cheese tortellini, and a creamy tomato broth, it’s a delicious and satisfying comfort dish.
    Prep Time 10 minutes
    Cook Time 20 minutes
    Total Time 30 minutes
    Servings: 8 servings
    Course: Main Course, Soup
    Cuisine: Italian-American

    Ingredients
      

    • 1 pound ground mild Italian sausage
    • ½ medium yellow onion diced (~½ cup)
    • 1 can 28 ounces diced tomatoes
    • 2 tablespoons tomato paste
    • 3 cups 720 g chicken broth
    • 2 teaspoons minced garlic
    • 2 teaspoons Italian seasoning
    • 1 teaspoon kosher salt
    • ½ teaspoon black pepper
    • 1 bag 20 ounces fresh cheese tortellini, refrigerated
    • 1 cup 238 g heavy cream
    • 2 cups fresh spinach
    • Shaved parmesan cheese for garnish

    Method
     

    1. Sear the Sausage – In a large heavy-bottomed pot over medium heat, cook the Italian sausage, stirring occasionally and breaking it up as it cooks. This should take 8-10 minutes until the meat is browned. Drain excess grease if needed.
    2. Sauté the Aromatics – Add diced onions and cook until they turn translucent (3-5 minutes).
    3. Build the Base – Stir in diced tomatoes, tomato paste, chicken broth, garlic, Italian seasoning, salt, and pepper. Bring to a simmer.
    4. The Finishing Touches – Add tortellini, heavy cream, and spinach. Stir to combine.
    5. Let It Simmer – Allow the soup to cook until the tortellini is tender and the spinach is wilted (8-10 minutes).
    6. Garnish & Serve – Ladle into bowls and top with shaved parmesan for the ultimate comfort dish.

    Notes

    • For a spicier kick, use hot Italian sausage instead of mild.
    • Substitute kale for spinach if desired.
    • Store leftovers in an airtight container in the fridge for up to 3 days.

    Carrot Cake Cookies: A Chewy, Creamy Twist on a Classic Dessert

    Carrot cake has long been a favorite for its warm spices, moist texture, and rich cream cheese frosting. But what if you could enjoy all that goodness in a chewy, handheld treat? That’s exactly what Carrot Cake Cookies deliver—a perfectly spiced cookie packed with finely grated carrots, a surprise cream cheese filling, and a soft, chewy texture that melts in your mouth.

    These cookies take everything we love about traditional carrot cake and transform it into an easier, more portable dessert. Whether you’re making them for Easter, spring gatherings, or just because you love carrot cake, this recipe will quickly become a favorite.

    In this article, we’ll explore why these cookies are so special, creative variations to try, expert baking tips, storage advice, and answers to common questions about the recipe.

    Why These Carrot Cake Cookies Stand Out

    1. A Classic Dessert in Cookie Form

    Carrot cake is a timeless favorite, but baking a full cake can be time-consuming. These cookies offer the same great flavors—cinnamon, nutmeg, brown sugar, and vanilla—but in an easy-to-eat form.

    2. A Surprise Cream Cheese Filling

    While traditional carrot cake is topped with cream cheese frosting, these cookies take it to the next level by tucking the cream cheese inside. Each bite delivers a creamy, tangy center that perfectly balances the sweetness of the cookie.

    3. Chewy, Moist, and Perfectly Spiced

    With finely grated fresh carrots and the right blend of spices, these cookies are incredibly soft and chewy. The butter and brown sugar give them richness, while the hint of vanilla adds depth.

    4. Festive and Fun to Decorate

    For those who love a little extra flair, these cookies can be decorated with a piped carrot design made from cream cheese frosting. It’s a great way to add a playful touch, especially for Easter or spring celebrations.

    5. A Make-Ahead Dessert

    Unlike cakes that need immediate frosting and slicing, these cookies can be made ahead of time and stored easily. They even taste better after chilling in the fridge!

    Creative Variations to Try

    While the classic version of these cookies is already amazing, you can customize them to fit different preferences and occasions.

    1. Carrot Cake Oatmeal Cookies

    For a heartier texture, mix in ½ cup of oats to add a little chewiness. This variation makes the cookies feel even more like a comforting, home-baked treat.

    2. Nutty Carrot Cake Cookies

    Carrot cake lovers know that chopped pecans or walnuts are a classic addition. Stir in ½ cup of finely chopped nuts for an extra crunch.

    3. Raisins or Coconut for Extra Sweetness

    If you love the flavor of raisins or shredded coconut in carrot cake, try adding them to the dough. About ¼ cup of golden raisins or ½ cup of shredded coconut will add an extra layer of sweetness and texture.

    4. Gluten-Free Carrot Cake Cookies

    Swap out the all-purpose flour for a 1:1 gluten-free flour blend to make this recipe gluten-free. The cookies remain just as soft and chewy.

    5. Mini Bite-Sized Cookies

    Instead of large cookies, use a smaller cookie scoop and make mini carrot cake cookies. This is perfect for party platters or for when you just want a small bite of something sweet.

    Expert Tips for Perfect Carrot Cake Cookies

    Baking the perfect batch of Carrot Cake Cookies requires attention to detail. Follow these expert tips to ensure your cookies turn out chewy, flavorful, and beautifully filled with cream cheese.

    1. Use Freshly Grated Carrots

    Pre-packaged shredded carrots won’t work as well because they are too dry and thick. Instead, use a fine grater to freshly shred your carrots. This keeps the cookies moist and evenly textured.

    2. Drain Excess Moisture from the Carrots

    Carrots contain a lot of water, which can make the cookie dough too wet. After grating, use a paper towel to squeeze out excess moisture before mixing them into the dough.

    3. Freeze the Cream Cheese Filling

    The key to keeping the cream cheese filling intact inside the cookies is to freeze it beforehand. This helps it hold its shape while baking instead of melting into the dough.

    4. Don’t Overmix the Dough

    Overmixing can lead to tough cookies instead of soft, chewy ones. Mix just until the ingredients are combined.

    5. Chill the Dough Before Baking

    Letting the dough rest for at least 10 minutes helps it absorb moisture and prevents the cookies from spreading too much in the oven.

    6. Space the Cookies Properly

    Since these cookies are stuffed with cream cheese, they spread slightly during baking. Place them at least 2 inches apart on the baking sheet.

    7. Let Them Cool Before Eating

    While it’s tempting to eat them warm, these cookies taste even better when chilled. The flavors meld together, and the cream cheese filling firms up for the perfect bite.

    How to Store and Freeze Carrot Cake Cookies

    Storing in the Refrigerator

    Since these cookies have a cream cheese filling, they should be stored in an airtight container in the fridge. They will stay fresh for up to 5 days.

    Freezing for Later

    • To freeze unbaked cookie dough: Assemble the cookies with the frozen cream cheese filling and place them on a baking sheet in the freezer. Once solid, transfer them to a freezer bag and store them for up to 30 days. Bake straight from frozen, adding 1-2 extra minutes to the bake time.
    • To freeze baked cookies: Let them cool completely, then store them in an airtight container with parchment paper between layers. Thaw at room temperature or in the fridge before serving.

    Ingredients: A Perfect Blend of Spice and Sweetness

    For the Cream Cheese Filling

    • Cream cheese, room temperature
    • Granulated sugar
    • Vanilla extract

    For the Carrot Cake Cookies

    • All-purpose flour
    • Baking soda
    • Salt
    • Ground cinnamon
    • Ground nutmeg
    • Unsalted butter, melted and cooled
    • Brown sugar (light or dark)
    • Granulated sugar
    • Finely grated fresh carrots
    • Vanilla extract
    • Egg yolks

    For the Frosting Decoration (Optional)

    • Cream cheese, room temperature
    • Unsalted butter, room temperature
    • Powdered sugar, sifted
    • Vanilla extract
    • Orange and green food gel dye

    Directions: From Dough to Delicious in Just a Few Steps

    1. Prepare the Cream Cheese Filling – Beat the cream cheese until smooth, then mix in the sugar and vanilla extract. Scoop small dollops onto a lined baking sheet and freeze until solid.
    2. Mix the Dry Ingredients – Sift together the flour, baking soda, salt, cinnamon, and nutmeg in a medium bowl.
    3. Combine the Wet Ingredients – In a mixing bowl, beat the melted butter, brown sugar, and granulated sugar until combined. Add the grated carrots, vanilla extract, and egg yolks, then mix well.
    4. Form the Dough – Gradually add the dry ingredients to the wet ingredients, mixing until fully combined. Let the dough rest for 10 minutes.
    5. Assemble the Cookies – Scoop out cookie dough balls, pressing a small indent into the center. Place a frozen dollop of cream cheese filling inside and cover it completely with dough. Freeze the filled cookie dough balls for 10 minutes.
    6. Bake to Perfection – Arrange cookies on a lined baking sheet and bake at 350°F for 13-15 minutes. Let them cool on the sheet for 10-15 minutes before transferring to a wire rack.
    7. Optional Decoration – If decorating, beat the frosting ingredients together until smooth. Dye portions of the frosting orange and green, then pipe carrot shapes onto the cooled cookies.

    Nutritional Breakdown: A Sweet Indulgence

    (Per cookie, approximate values)

    • Calories: 385
    • Carbohydrates: 53g
    • Protein: 4g
    • Fat: 21g
    • Saturated Fat: 13g
    • Sodium: 302mg
    • Sugar: 26g
    • Fiber: 1g

    These Carrot Cake Cookies bring all the warm, spiced flavors of classic carrot cake into a chewy, creamy-filled cookie. Whether you’re making them for Easter, a spring celebration, or just to satisfy a craving, these cookies are a delightful twist on a beloved dessert!

    Frequently Asked Questions (FAQs)

    1. Can I Make These Cookies Without the Cream Cheese Filling?

    Yes! If you prefer a simpler version, you can skip the cream cheese filling and just make soft carrot cake cookies. They will still be chewy and delicious.

    2. Can I Add Spices Like Ginger or Cloves?

    Absolutely! If you love an even spicier carrot cake flavor, try adding ¼ teaspoon ground ginger or a pinch of ground cloves to the dough.

    3. Can I Make the Dough Ahead of Time?

    Yes! The dough can be made 24 hours in advance and kept in the fridge. Just let it sit at room temperature for 10-15 minutes before scooping and baking.

    4. Why Did My Cookies Spread Too Much?

    There are a few possible reasons:

    • The butter was too warm when mixed in.
    • The cookie dough wasn’t chilled before baking.
    • The oven wasn’t fully preheated before baking.

    5. Can I Use Pre-Shredded Carrots?

    It’s not recommended, as pre-shredded carrots are too dry and thick. Always grate fresh carrots for the best texture.

    Conclusion: A Cookie That Delivers the Best of Both Worlds

    Carrot Cake Cookies are the perfect fusion of chewy cookies and classic carrot cake. They bring together the best parts of a beloved dessert—the warm spices, the soft texture, and the rich cream cheese filling—into a convenient and irresistible treat.

    Whether you’re making them for Easter, a spring gathering, or just because you love homemade cookies with a twist, these cookies are sure to be a hit. Their perfectly balanced sweetness, moist texture, and hint of spice make them stand out from the usual cookie lineup.

    So, next time you’re craving carrot cake but don’t want to bake a full cake, give these cookies a try. One bite, and you’ll see why they’re a game-changer!

    aiting

    Carrot Cake Cookies: A Chewy, Creamy Twist on a Classic Dessert

    These Carrot Cake Cookies bring all the warm, spiced flavors of classic carrot cake into a chewy, cream-filled cookie. Whether for Easter, a spring celebration, or just to satisfy a craving, these cookies offer a delightful twist on a beloved dessert!
    Prep Time 20 minutes
    Cook Time 15 minutes
    Total Time 35 minutes
    Servings: 12 -15 cookies
    Course: Dessert
    Cuisine: American

    Ingredients
      

    For the Cream Cheese Filling:
    • Cream cheese room temperature
    • Granulated sugar
    • Vanilla extract
    For the Carrot Cake Cookies:
    • All-purpose flour
    • Baking soda
    • Salt
    • Ground cinnamon
    • Ground nutmeg
    • Unsalted butter melted and cooled
    • Brown sugar light or dark
    • Granulated sugar
    • Finely grated fresh carrots
    • Vanilla extract
    • Egg yolks
    For the Frosting Decoration (Optional):
    • Cream cheese room temperature
    • Unsalted butter room temperature
    • Powdered sugar sifted
    • Vanilla extract
    • Orange and green food gel dye

    Method
     

    1. Prepare the Cream Cheese Filling – Beat the cream cheese until smooth, then mix in the sugar and vanilla extract. Scoop small dollops onto a lined baking sheet and freeze until solid.
    2. Mix the Dry Ingredients – Sift together the flour, baking soda, salt, cinnamon, and nutmeg in a medium bowl.
    3. Combine the Wet Ingredients – In a mixing bowl, beat the melted butter, brown sugar, and granulated sugar until combined. Add the grated carrots, vanilla extract, and egg yolks, then mix well.
    4. Form the Dough – Gradually add the dry ingredients to the wet ingredients, mixing until fully combined. Let the dough rest for 10 minutes.
    5. Assemble the Cookies – Scoop out cookie dough balls, pressing a small indent into the center. Place a frozen dollop of cream cheese filling inside and cover it completely with dough. Freeze the filled cookie dough balls for 10 minutes.
    6. Bake to Perfection – Arrange cookies on a lined baking sheet and bake at 350°F for 13-15 minutes. Let them cool on the sheet for 10-15 minutes before transferring to a wire rack.
    7. Optional Decoration – If decorating, beat the frosting ingredients together until smooth. Dye portions of the frosting orange and green, then pipe carrot shapes onto the cooled cookies.

    Notes

    • Ensure the cream cheese filling is fully frozen to prevent melting during baking.
    • Let cookies cool completely before adding frosting for the best results.
    • Store cookies in an airtight container in the refrigerator for up to 5 days.

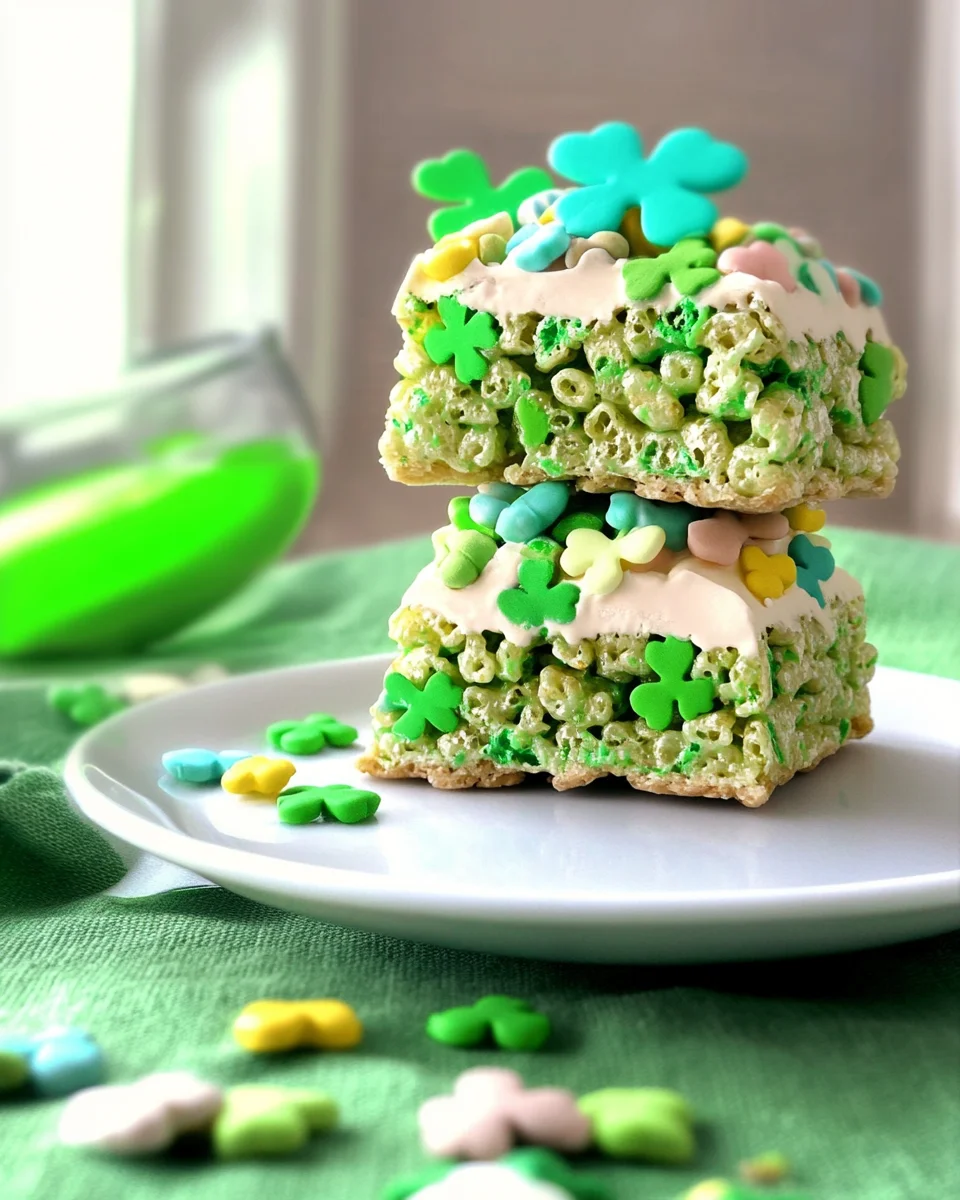
    Lucky Charms Rice Krispies Treats: A Magical St. Patrick’s Day Delight

    There’s something undeniably nostalgic and fun about a gooey, chewy Rice Krispies treat. Now, imagine taking that classic dessert and giving it a St. Patrick’s Day twist—that’s exactly what Lucky Charms Rice Krispies Treats bring to the table! These colorful, marshmallow-packed bars take the traditional Rice Krispies squares and elevate them with Lucky Charms cereal, green food coloring, and a sprinkle of festive magic.

    Perfect for holiday parties, classroom treats, or a fun baking activity with kids, these bars are easy to make, irresistibly delicious, and packed with whimsical charm. Whether you’re looking to add a little luck to your celebration or just want an excuse to indulge in a childhood favorite, these treats are a must-try.

    In this guide, we’ll explore why this recipe is a hit, creative variations, pro tips for perfecting your treats, storage recommendations, and answers to the most frequently asked questions about this festive dessert.

    Why You’ll Love These Lucky Charms Rice Krispies Treats

    1. A Festive St. Patrick’s Day Treat

    With their bright green hue and colorful Lucky Charms marshmallows, these bars are the perfect dessert for celebrating St. Patrick’s Day. They’re fun, eye-catching, and an easy way to get into the holiday spirit.

    2. Quick and Easy to Make

    You don’t need to be a professional baker to whip up these treats. With just a few simple ingredients and about 10 minutes of prep time, you’ll have a batch of sweet, sticky goodness ready to enjoy.

    3. A Fun Baking Activity for Kids

    Kids love helping in the kitchen, and this recipe is perfect for little hands. From stirring in the cereal to pressing the mixture into the pan, there are plenty of easy tasks for kids to assist with.

    4. Customizable to Your Taste

    Whether you prefer extra marshmallows, a mix of cereals, or a drizzle of white chocolate, this recipe is incredibly versatile. You can easily adjust it to fit your preferences or what you have on hand.

    5. No-Bake Convenience

    No need to turn on the oven! These bars set at room temperature, making them a hassle-free dessert that comes together in no time.

    Creative Variations to Try

    1. Classic Rice Krispies with a Lucky Twist

    If you love the traditional Rice Krispies treats but want to incorporate the Lucky Charms theme, try using half Lucky Charms and half Rice Krispies cereal for a perfect balance of crunch and marshmallow goodness.

    2. Chocolate-Dipped Lucky Charms Bars

    For an indulgent upgrade, melt some white or dark chocolate and drizzle it over the top of the treats. You can also dip one end of each bar into melted chocolate for a bakery-style finish.

    3. Extra Marshmallow Magic

    If you can’t get enough of those signature Lucky Charms marshmallows, set some aside and press them into the top of the treats before they set. This ensures they stay visible and don’t get coated in green food coloring.

    4. Mini Bite-Sized Treats

    Instead of making traditional bars, press the mixture into mini muffin tins to create individual, bite-sized treats. These are great for portion control and perfect for party snack trays.

    5. St. Patrick’s Day Ice Cream Sandwiches

    Take two squares of Lucky Charms Rice Krispies treats and sandwich a scoop of vanilla or mint chocolate chip ice cream in between for a fun and festive frozen dessert.

    6. Layered Treats with Marshmallow Fluff

    For an extra gooey texture, spread a layer of marshmallow fluff between two layers of Lucky Charms treats. This creates a thicker, chewier dessert that’s even more decadent.

    Expert Tips for Perfect Lucky Charms Treats

    1. Use Fresh Marshmallows

    Old or stale marshmallows won’t melt as smoothly, which can lead to a dry, crumbly texture. Always use fresh, soft marshmallows for the best results.

    2. Don’t Overheat the Marshmallows

    When melting the butter and marshmallows, use low heat and stir constantly. Overheating can cause the marshmallow mixture to become too stiff, making it harder to mix with the cereal.

    3. Grease Your Hands or Utensils

    Sticky marshmallow mixture can be tricky to work with. To prevent it from sticking to your hands or spatula, lightly grease them with butter or non-stick spray before pressing the mixture into the pan.

    4. Don’t Press Too Hard

    Gently press the mixture into the pan without compacting it too much—this will help keep the treats light and chewy rather than dense and hard.

    5. Let Them Cool Completely Before Cutting

    For clean, even slices, allow the treats to set for at least 30 minutes at room temperature. If you’re in a hurry, pop them in the freezer for 10 minutes to speed up the process.

    How to Store and Keep Fresh

    Storing at Room Temperature

    • Keep your Lucky Charms Rice Krispies treats in an airtight container at room temperature for up to 3 days.
    • To prevent them from drying out, place a sheet of wax paper or parchment paper between layers.

    Refrigerating for Longer Freshness

    • If you want to store them for up to a week, refrigerate them in an airtight container.
    • Allow them to come to room temperature before serving for the best texture.

    Freezing for Later Enjoyment

    • Wrap individual bars in plastic wrap, then store them in a freezer-safe bag.
    • They can be frozen for up to 2 months—just thaw at room temperature before enjoying.

    Ingredients: A Whimsical Blend of Sweetness

    • 6 tablespoons butter
    • 1 (10-ounce) bag white mini marshmallows
    • Green food coloring (about 20-40 drops, or to desired shade)
    • 6 cups Lucky Charms cereal
    • 1 teaspoon vanilla extract
    • 1 cup colored mini marshmallows (optional, for topping)
    • Green sprinkles or St. Patrick’s Day-themed sprinkles (optional, for decoration)

    Directions: Creating a Sweet and Festive Treat

    1. Prepare the Pan – Lightly spray a 9×12 baking dish with cooking spray and set it aside.
    2. Melt the Butter & Marshmallows – In a large pot over medium heat, melt the butter. Reduce heat to low and add the mini marshmallows, stirring continuously until fully melted.
    3. Color the Mixture – Add green food coloring to the melted marshmallows, stirring until you achieve the desired shade of green. Remove from heat.
    4. Mix in the Cereal – Stir in the vanilla extract, then gradually fold in the Lucky Charms cereal, ensuring each piece is evenly coated in the marshmallow mixture.
    5. Add Extra Magic – If using colored mini marshmallows, gently stir in half of them, leaving some visible for extra color.
    6. Shape the Treats – Pour the mixture into the prepared baking dish. Using wax paper, parchment paper, or greased fingers, press the mixture lightly to form an even layer.
    7. Decorate & Set – Sprinkle with green sprinkles and press the remaining colored marshmallows into the top for extra festivity. Allow the treats to set before cutting.
    8. Speed Up the Process – If you’re in a hurry, place the dish in the freezer for 10 minutes to set faster.
    9. Cut & Serve – Slice into squares and enjoy a fun, festive, and delicious treat!

    Nutritional Breakdown: A Bite of Sweet Luck

    (Per serving, approximate values)

    • Calories: 137
    • Carbohydrates: 19g
    • Protein: 2g
    • Fat: 7g
    • Saturated Fat: 4g
    • Cholesterol: 15mg
    • Sodium: 166mg
    • Fiber: 1g
    • Sugar: 9g

    These Lucky Charms Rice Krispies Treats are the perfect way to add a touch of magic to any St. Patrick’s Day celebration. Whether you’re making them for a holiday party, a fun kids’ activity, or just as a sweet snack, they’re quick, easy, and full of festive charm!

    Frequently Asked Questions (FAQs)

    1. Can I Make These Treats Without Green Food Coloring?

    Yes! The food coloring is purely for St. Patrick’s Day flair, so feel free to skip it if you prefer a more natural look.

    2. Can I Make These in the Microwave?

    Absolutely! Melt the butter and marshmallows in a microwave-safe bowl, stirring every 30 seconds until smooth. Then follow the rest of the recipe as usual.

    3. Can I Use Different Cereal?

    Definitely! You can swap out Lucky Charms for any other cereal, like:

    • Fruity Pebbles for a colorful, fruity version.
    • Cinnamon Toast Crunch for a cinnamon-flavored twist.
    • Golden Grahams for a s’mores-inspired treat.

    4. How Do I Keep the Treats from Getting Hard?

    • Use fresh marshmallows—old ones don’t melt as well.
    • Melt on low heat and avoid overheating.
    • Don’t pack them too tightly into the pan.

    5. Are These Treats Gluten-Free?

    While Rice Krispies cereal contains malt (which has gluten), Lucky Charms cereal is labeled gluten-free. If making this recipe gluten-free, check your ingredient labels to be sure.

    Conclusion: A Lucky Treat for Any Occasion

    Lucky Charms Rice Krispies Treats aren’t just a fun and festive St. Patrick’s Day dessert—they’re a deliciously nostalgic snack that brings joy to kids and adults alike. The combination of gooey marshmallow, crispy cereal, and whimsical Lucky Charms marshmallows makes these bars as visually delightful as they are tasty.

    Whether you’re making them for a St. Patrick’s Day celebration, a classroom treat, or a weekend baking activity with kids, these easy, no-bake bars are a guaranteed hit. With endless customization options and simple storage solutions, this recipe is one you’ll want to make year after year.

    So grab a box of Lucky Charms, melt those marshmallows, and create a little kitchen magic! Your taste buds will thank you.

    aiting

    Lucky Charms Rice Krispies Treats: A Magical St. Patrick’s Day Delight

    These Lucky Charms Rice Krispies Treats are the perfect way to add a touch of magic to any St. Patrick’s Day celebration. Quick, easy, and packed with festive charm, they make a delicious snack for kids and adults alike!
    Prep Time 10 minutes
    Cook Time 5 minutes
    Total Time 15 minutes
    Servings: 12 -16 squares
    Course: Dessert, Snack
    Cuisine: American

    Ingredients
      

    • 6 tablespoons butter
    • 1 10-ounce bag white mini marshmallows
    • Green food coloring about 20-40 drops, or to desired shade
    • 6 cups Lucky Charms cereal
    • 1 teaspoon vanilla extract
    • 1 cup colored mini marshmallows optional, for topping
    • Green sprinkles or St. Patrick’s Day-themed sprinkles optional, for decoration

    Method
     

    1. Prepare the Pan – Lightly spray a 9×12 baking dish with cooking spray and set it aside.
    2. Melt the Butter & Marshmallows – In a large pot over medium heat, melt the butter. Reduce heat to low and add the mini marshmallows, stirring continuously until fully melted.
    3. Color the Mixture – Add green food coloring to the melted marshmallows, stirring until you achieve the desired shade of green. Remove from heat.
    4. Mix in the Cereal – Stir in the vanilla extract, then gradually fold in the Lucky Charms cereal, ensuring each piece is evenly coated in the marshmallow mixture.
    5. Add Extra Magic – If using colored mini marshmallows, gently stir in half of them, leaving some visible for extra color.
    6. Shape the Treats – Pour the mixture into the prepared baking dish. Using wax paper, parchment paper, or greased fingers, press the mixture lightly to form an even layer.
    7. Decorate & Set – Sprinkle with green sprinkles and press the remaining colored marshmallows into the top for extra festivity. Allow the treats to set before cutting.
    8. Speed Up the Process – If you’re in a hurry, place the dish in the freezer for 10 minutes to set faster.
    9. Cut & Serve – Slice into squares and enjoy a fun, festive, and delicious treat!

    Notes

    • Store treats in an airtight container at room temperature for up to 3 days.
    • For extra crunch, add 1 cup of Rice Krispies cereal along with the Lucky Charms.
    • Swap out green food coloring for another festive shade for different holidays

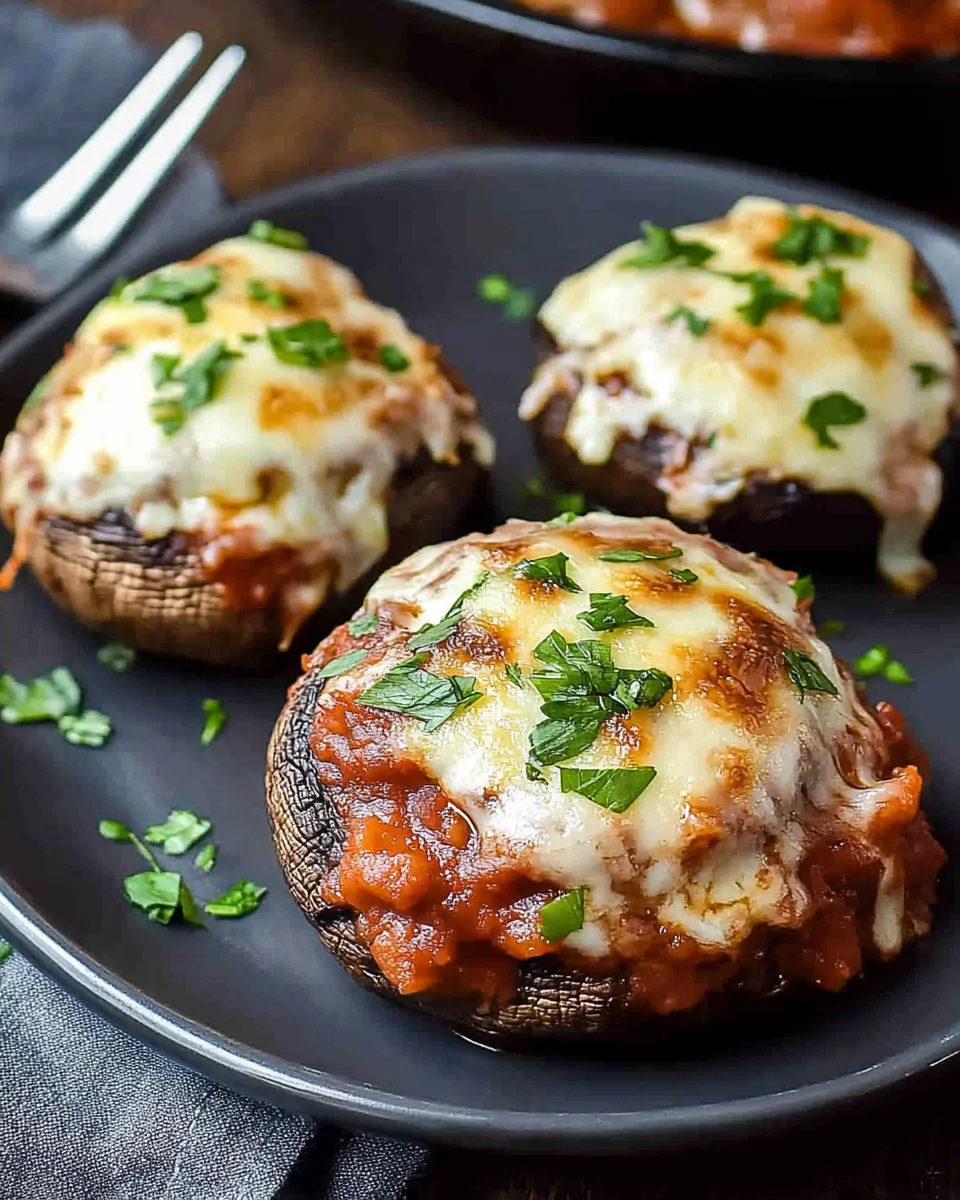
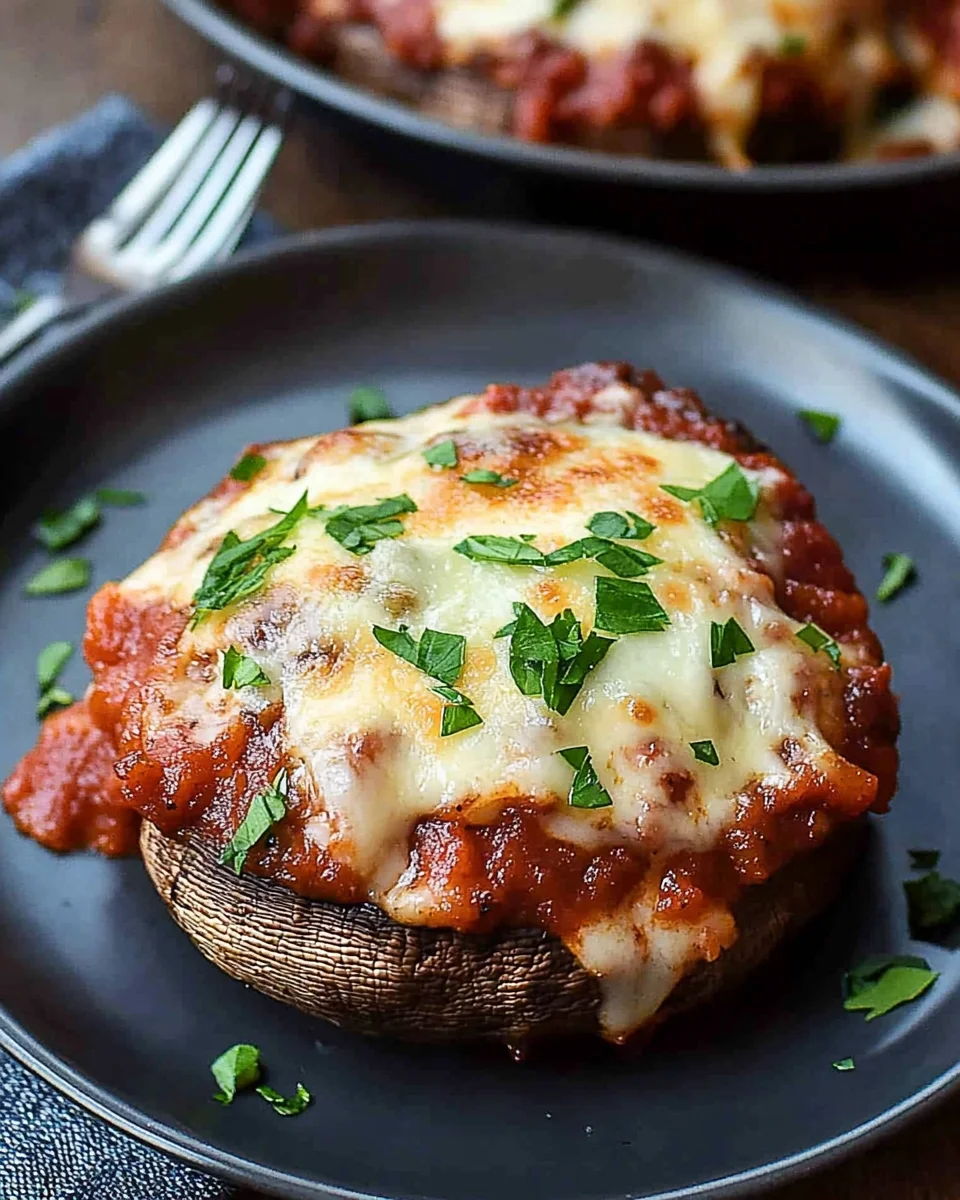
    Lasagna Stuffed Mushrooms: A Low-Carb Twist on a Comfort Food Classic

    Lasagna is a beloved Italian dish known for its rich layers of cheese, sauce, and hearty meat filling. But what if you could enjoy all the flavors of lasagna without the heaviness of pasta? That’s where Lasagna Stuffed Mushrooms come in—a delicious, low-carb alternative that delivers the same cheesy, meaty goodness in a lighter and more nutritious way.

    This dish swaps traditional pasta sheets for portobello mushrooms, which serve as the perfect edible vessel for a savory lasagna-inspired filling. Whether you’re looking for a keto-friendly dinner, a creative way to enjoy mushrooms, or simply a fresh take on lasagna, these stuffed mushrooms are bound to become a favorite.

    In this article, we’ll explore everything you need to know about Lasagna Stuffed Mushrooms, including why they’re so special, creative variations, pro cooking tips, storage instructions, and answers to frequently asked questions.

    Why You’ll Love Lasagna Stuffed Mushrooms

    1. All the Comfort, None of the Guilt

    Traditional lasagna is a carb-heavy dish, which can leave you feeling sluggish after a meal. By using portobello mushrooms instead of pasta, this recipe keeps things light while still delivering the rich, cheesy, and saucy flavors you love.

    2. Perfect for Low-Carb & Keto Lifestyles

    If you’re following a low-carb or keto diet, finding satisfying comfort foods can be a challenge. These mushrooms are naturally low in carbohydrates while still being packed with protein and healthy fats, making them a great meal for anyone watching their carb intake.

    3. Quick and Easy to Make

    Traditional lasagna takes time to layer and bake, but this recipe cuts down the prep time significantly. With just a handful of ingredients and a simple assembly process, you can have dinner on the table in about 40 minutes.

    4. Versatile and Customizable

    One of the best things about this recipe is how easy it is to customize. You can swap out the proteins, add more vegetables, or play around with different cheeses to create your perfect version of stuffed mushrooms.

    5. Great for Meal Prep

    These mushrooms reheat beautifully, making them a fantastic meal-prep option. Prepare a batch in advance and enjoy a delicious, protein-packed meal throughout the week.

    Creative Variations to Try

    While the classic lasagna stuffed mushroom is already delicious, there are countless ways to customize this dish based on your preferences or dietary needs.

    1. Vegetarian Lasagna Stuffed Mushrooms

    If you want to skip the meat but keep the heartiness, try replacing the ground beef with:

    • Sautéed spinach and mushrooms for an earthy, umami-rich filling.
    • Lentils or quinoa for a protein-packed alternative.
    • Chopped walnuts and ricotta for a creamy, nutty twist.

    2. Spicy Italian Stuffed Mushrooms

    For those who love a little heat, amp up the spice factor by:

    • Adding red pepper flakes or diced jalapeños to the filling.
    • Using spicy Italian sausage instead of ground beef.
    • Drizzling the finished dish with hot honey for a sweet-heat balance.

    3. Extra Cheesy Version

    Lasagna is all about the cheese, so if you’re a cheese lover, consider:

    • Mixing in smoked gouda, asiago, or fontina for extra depth.
    • Using burrata or fresh mozzarella for a creamy, melty center.
    • Sprinkling extra parmesan crisps on top for crunch.

    4. Chicken Alfredo Stuffed Mushrooms

    If you’re in the mood for a white lasagna twist, swap out the marinara for alfredo sauce and use:

    • Shredded rotisserie chicken instead of ground beef.
    • Spinach and artichokes for an Italian-inspired flavor.
    • A pinch of nutmeg in the ricotta mixture for extra warmth.

    5. Tex-Mex Style Lasagna Mushrooms

    For a southwestern take, replace Italian seasoning with taco seasoning, and swap marinara for salsa or enchilada sauce. You can also:

    • Use pepper jack cheese instead of mozzarella.
    • Add black beans and corn to the filling.
    • Top with cilantro and avocado for a fresh finish.

    Pro Tips for the Best Stuffed Mushrooms

    1. Choosing the Right Mushrooms

    For this recipe, portobello mushrooms are the best choice because of their large size and sturdy texture. Make sure to:

    • Choose mushrooms that are firm and not too soft.
    • Avoid mushrooms with too much moisture, as they can become soggy while baking.

    2. Cleaning Mushrooms the Right Way

    Mushrooms are highly absorbent, so don’t rinse them under running water. Instead, gently clean them using:

    • A damp paper towel or a soft brush to remove dirt.
    • A quick wipe with a dry cloth if they look slightly wet.

    3. Preventing Soggy Mushrooms

    To keep your stuffed mushrooms firm and flavorful, follow these tips:

    • Remove the gills using a spoon to reduce excess moisture.
    • Pre-bake the mushroom caps for 5-7 minutes before adding the filling.
    • Use a thicker filling to absorb any moisture released during baking.

    4. Enhancing the Flavor

    • Toast your seasonings in the skillet before adding meat for deeper flavor.
    • Grate your own cheese instead of using pre-shredded cheese for better melting.
    • Drizzle with balsamic glaze before serving for extra richness.

    Storage & Reheating Instructions

    How to Store Leftovers

    If you have leftovers, store them properly to maintain texture and flavor:

    • Refrigerate: Keep them in an airtight container for up to 3 days.
    • Freeze: Wrap individually and freeze for up to 2 months (though the texture may soften slightly upon thawing).

    How to Reheat

    • Oven: Bake at 350°F for 10-15 minutes until warmed through.
    • Microwave: Heat in 30-second intervals (but the mushrooms may release some moisture).
    • Air Fryer: Reheat at 325°F for about 5 minutes for a crispy finish.

    Ingredients: A Flavor-Packed CombinationMushrooms
  1. 4 large portobello mushroom caps (3-4 inches in diameter)

  2. 1 tablespoon extra virgin olive oil

  3. ½ teaspoon kosher salt

  4. ¼ teaspoon black pepper

  5. Filling
  6. ½ pound ground beef

  7. 2 cups (452 g) marinara sauce, divided

  8. 1 cup (113 g) mozzarella cheese, shredded, divided

  9. ½ cup (123 g) ricotta cheese

  10. ½ cup (50 g) parmesan cheese, grated

  11. 1 teaspoon Italian seasoning

  12. 1 teaspoon kosher salt

  13. ½ teaspoon black pepper

  14. Chopped parsley for garnish


  15. Directions: From Prep to Perfection
  16. Preheat & Prep – Preheat the oven to 350°F and line a baking sheet with parchment paper.

  17. Prepare the Mushrooms – Wipe the mushrooms with a damp cloth, remove the stems, and gently scrape out the gills. Brush each cap with olive oil and season with salt and pepper.

  18. Cook the Beef – In a skillet over medium heat, brown the ground beef, breaking it apart with a spatula. Drain excess grease. Stir in 1 cup of marinara sauce and let it simmer for a few minutes.

  19. Mix the Ricotta Filling – In a bowl, combine ¼ cup of mozzarella cheese, ricotta, parmesan, Italian seasoning, salt, and pepper.

  20. Assemble the Mushrooms – Divide the ricotta mixture evenly among the mushroom caps, spreading it out. Top each with 3-4 tablespoons of the beef mixture, then sprinkle the remaining mozzarella cheese over the tops.

  21. Bake to Perfection – Place the stuffed mushrooms on the baking sheet and bake for 20 minutes, or until the cheese is melted and bubbly and the mushrooms are tender.

  22. Garnish & Serve – Sprinkle with chopped parsley and serve with the remaining marinara sauce for dipping.

  23. Nutritional Breakdown: A Satisfying Bite


    (Per stuffed mushroom, approximate values)
  24. Calories: 387

  25. Protein: 28g

  26. Carbohydrates: 10g

  27. Fat: 26g

  28. Sodium: 780mg


  29. These Lasagna Stuffed Mushrooms offer all the cheesy, meaty goodness of traditional lasagna without the pasta, making them a delicious low-carb option for dinner. Whether you’re following a keto lifestyle or just looking for a fresh twist on a classic dish, this recipe is sure to become a favorite.

    Frequently Asked Questions (FAQs)

    1. Can I make these stuffed mushrooms ahead of time?

    Yes! Assemble them in advance and store them in the fridge for up to 24 hours before baking.

    2. Are these mushrooms keto-friendly?

    Absolutely! Since they are low in carbs and high in fat and protein, they are perfect for keto dieters.

    3. What type of marinara sauce works best?

    Use a thicker marinara sauce to prevent excess moisture. Homemade or store-bought both work, but look for one with low sugar if you’re watching your carbs.

    4. Can I use different types of mushrooms?

    Yes! If you want a smaller, appetizer-style version, try using baby bella mushrooms (cremini).

    5. What sides pair well with this dish?

    These mushrooms are hearty enough on their own, but you can serve them with:

    • A side salad for freshness.
    • Garlic roasted vegetables for added nutrition.
    • A low-carb bread alternative to soak up the sauce.

    Conclusion: A Dish Worth Trying

    Lasagna Stuffed Mushrooms are proof that comfort food can be both delicious and nutritious. They offer all the rich, cheesy flavors of traditional lasagna without the carb-heavy pasta, making them a fantastic option for anyone looking for a healthier, low-carb alternative.

    Whether you follow a keto diet, love Italian flavors, or simply enjoy mushrooms, this dish is easy to make, endlessly customizable, and perfect for meal prep. With the right seasonings, cheese, and filling, these stuffed mushrooms are sure to become a go-to dinner favorite.

    So why not give them a try? Once you experience the melty cheese, savory beef, and bold Italian flavors, you might never go back to traditional lasagna again!

    aiting

    Lasagna Stuffed Mushrooms: A Low-Carb Twist on a Comfort Food Classic

    These Lasagna Stuffed Mushrooms bring all the rich, cheesy flavors of traditional lasagna in a delicious, low-carb form. Perfect for a keto-friendly meal or an Italian-inspired appetizer, these stuffed mushrooms are hearty, satisfying, and easy to make!
    Prep Time 15 minutes
    Cook Time 20 minutes
    Total Time 35 minutes
    Servings: 4 servings
    Course: Appetizer, Main Course
    Cuisine: Italian, Low-Carb

    Ingredients
      

    Mushrooms:
    • 4 large portobello mushroom caps 3-4 inches in diameter
    • 1 tablespoon extra virgin olive oil
    • ½ teaspoon kosher salt
    • ¼ teaspoon black pepper
    Filling:
    • ½ pound ground beef
    • 2 cups marinara sauce divided
    • 1 cup mozzarella cheese shredded, divided
    • ½ cup ricotta cheese
    • ½ cup parmesan cheese grated
    • 1 teaspoon Italian seasoning
    • 1 teaspoon kosher salt
    • ½ teaspoon black pepper
    • Chopped parsley for garnish

    Method
     

    1. Preheat & Prep – Preheat the oven to 350°F and line a baking sheet with parchment paper.
    2. Prepare the Mushrooms – Wipe the mushrooms with a damp cloth, remove the stems, and gently scrape out the gills. Brush each cap with olive oil and season with salt and pepper.
    3. Cook the Beef – In a skillet over medium heat, brown the ground beef, breaking it apart with a spatula. Drain excess grease. Stir in 1 cup of marinara sauce and let it simmer for a few minutes.
    4. Mix the Ricotta Filling – In a bowl, combine ¼ cup of mozzarella cheese, ricotta, parmesan, Italian seasoning, salt, and pepper.
    5. Assemble the Mushrooms – Divide the ricotta mixture evenly among the mushroom caps, spreading it out. Top each with 3-4 tablespoons of the beef mixture, then sprinkle the remaining mozzarella cheese over the tops.
    6. Bake to Perfection – Place the stuffed mushrooms on the baking sheet and bake for 20 minutes, or until the cheese is melted and bubbly and the mushrooms are tender.
    7. Garnish & Serve – Sprinkle with chopped parsley and serve with the remaining marinara sauce for dipping.

    Notes

    • For a vegetarian version, substitute the ground beef with sautéed spinach or mushrooms.
    • Use full-fat cheeses for a richer, creamier texture.
    • Serve with a side salad or roasted vegetables for a complete meal.

    Jalapeño Popper Pinwheels: A Spicy Twist on a Classic Appetizer

    Jalapeño Popper Pinwheels are a fiery, cheesy, and irresistibly crispy appetizer that combines the beloved flavors of jalapeño poppers with the flakiness of puff pastry. These pinwheels are an excellent choice for game nights, holiday gatherings, or even a casual snack with a little kick. The combination of creamy cheese, smoky bacon, and mildly spicy jalapeños wrapped in buttery pastry makes them a crowd-pleaser every time.

    But what makes these pinwheels so special? Why should you choose them over other appetizers? In this article, we’ll dive deep into the details of this mouthwatering dish, including variations, tips for perfect execution, storage advice, and answers to the most frequently asked questions.

    Why You’ll Love Jalapeño Popper Pinwheels

    There are countless reasons why these pinwheels should be on your appetizer menu, but here are just a few:

    • Easy to Make – With minimal prep work and simple ingredients, these pinwheels come together quickly.
    • Perfectly Balanced Flavors – The creaminess of the cheese balances the heat of the jalapeños, while the bacon adds a savory, smoky touch.
    • Great for Any Occasion – Whether you’re hosting a dinner party, bringing a dish to a potluck, or simply making a snack for yourself, these pinwheels fit any occasion.
    • Customizable – You can easily tweak the recipe to fit your taste preferences, whether that means adding extra spice, using different cheeses, or even making a vegetarian version.
    • Make-Ahead Friendly – You can assemble them ahead of time, store them in the fridge, and bake them fresh when needed.

    Creative Variations to Try

    While the classic version of this recipe is already delicious, you can experiment with different variations to switch things up. Here are a few creative twists:

    1. Extra Spicy Jalapeño Pinwheels

    If you’re a spice lover, take the heat level up a notch by:

    • Using extra jalapeños or adding a pinch of cayenne pepper to the filling.
    • Incorporating pepper jack cheese instead of cheddar.
    • Drizzling with hot sauce before serving.

    2. Buffalo Chicken Jalapeño Pinwheels

    For a tangy and spicy kick, try adding shredded rotisserie chicken and buffalo sauce to the filling. This adds a hearty twist while keeping the jalapeño popper essence alive.

    3. Vegetarian-Friendly Pinwheels

    Want to skip the bacon? No problem! Substitute it with roasted bell peppers, caramelized onions, or even smoked paprika for a similar depth of flavor.

    4. Ranch Lover’s Pinwheels

    Amp up the ranch flavor by using extra seasoning or even mixing in a tablespoon of ranch dressing with the cream cheese for an ultra-creamy consistency.

    5. Italian-Inspired Jalapeño Pinwheels

    For a unique twist, replace the cheddar cheese with mozzarella and parmesan, and add some sun-dried tomatoes or fresh basil for a Mediterranean touch.

    Expert Tips for Perfect Pinwheels

    To ensure your pinwheels turn out flawless every time, follow these expert tips:

    1. Use Cold Puff Pastry

    Puff pastry is much easier to work with when it’s slightly chilled. If it gets too soft, it can become sticky and difficult to roll. Keep it in the refrigerator until you’re ready to use it.

    2. Don’t Overload the Filling

    While it may be tempting to pile on the cheese and bacon, using too much filling can cause the pinwheels to burst open while baking. A thin, even layer works best.

    3. Roll Tightly for a Perfect Swirl

    A loose roll can result in pinwheels that unravel while baking. Roll the pastry tightly and seal the edge with a bit of water or a beaten egg to keep everything intact.

    4. Chill Before Slicing

    For cleaner cuts and better shape retention, refrigerate the rolled dough for about 10-15 minutes before slicing it into pinwheels. This helps the pastry firm up and makes slicing easier.

    5. Watch Your Oven Temperature

    Puff pastry bakes best at high heat to ensure a crisp and flaky texture. Make sure your oven is fully preheated before baking.

    How to Store and Reheat Pinwheels

    If you have leftovers (which is rare!), or you want to make them ahead of time, here’s how to store and reheat them:

    Storing in the Refrigerator

    • Store cooked pinwheels in an airtight container in the fridge for up to 3 days.
    • To keep them from becoming soggy, place parchment paper between layers if stacking.

    Freezing for Later

    • You can freeze the unbaked pinwheel log for up to 3 months. When ready to bake, simply slice and bake straight from the freezer, adding a couple of extra minutes to the baking time.
    • Alternatively, freeze fully baked pinwheels and reheat them in the oven when needed.

    Reheating Tips

    • Oven: Reheat at 350°F for about 10 minutes to restore crispiness.
    • Air Fryer: Heat at 325°F for 2-3 minutes for a quick, crispy refresh.
    • Microwave: While not ideal, you can microwave them for 30 seconds, but they may lose their crisp texture.

    Ingredients: A Fiery Fusion of Flavor

    Pinwheels

    • 8 ounces cream cheese, room temperature
    • 1 tablespoon dry ranch seasoning
    • 1 cup (113 g) mild cheddar cheese, shredded
    • 2 medium jalapeño peppers, seeded and finely diced
    • 3 slices bacon, cooked and crumbled
    • 1 sheet puff pastry, thawed according to package instructions

    Garlic Butter Glaze

    • 3 tablespoons unsalted butter, melted
    • 1 teaspoon garlic, minced
    • 1 teaspoon fresh parsley, finely chopped
    • 1 teaspoon kosher salt

    Directions: From Dough to Golden Perfection

    1. Preheat & Prep – Preheat your oven to 400°F (200°C) and line a baking sheet with parchment paper.
    2. Mix the Filling – In a medium bowl, combine cream cheese, ranch seasoning, cheddar cheese, jalapeños, and bacon. Stir until well blended.
    3. Roll It Out – On a lightly floured surface, roll the puff pastry into a 9×12-inch rectangle.
    4. Spread & Roll – Evenly spread the jalapeño popper mixture over the pastry, leaving about ½ inch of space along one long edge. Wet this edge with water or beaten egg to help seal the roll.
    5. Slice & Bake – Roll the pastry into a tight log and gently press the seam to secure. Using a sharp knife, slice into 12 equal pieces. Place them on the prepared baking sheet and bake for 18-20 minutes until golden brown.
    6. Prepare the Garlic Butter – While the pinwheels bake, melt butter in a small saucepan over medium heat. Stir in garlic, parsley, and salt, cooking for 2-3 minutes.
    7. Finish & Serve – Once baked, brush the warm pinwheels with the garlic butter glaze. Serve immediately and enjoy!

    Nutritional Breakdown: A Guilt-Worthy Indulgence

    (Per Pinwheel, Approximate)

    • Calories: 175
    • Protein: 4g
    • Carbohydrates: 10g
    • Fat: 14g
    • Sodium: 250mg

    These crispy, cheesy, and slightly spicy pinwheels are the perfect party appetizer. Whether baked in the oven or air-fried to crispy perfection, they’re bound to disappear fast!

    Frequently Asked Questions (FAQs)

    1. Can I use crescent roll dough instead of puff pastry?

    Yes! Crescent roll dough will work as a softer alternative. The texture will be more bread-like rather than flaky, but it’s still delicious.

    2. What’s the best way to seed jalapeños without getting the spice on my hands?

    Use gloves or a spoon to scrape out the seeds and membranes. Washing your hands immediately after handling jalapeños also helps prevent irritation.

    3. How do I prevent the filling from oozing out while baking?

    Rolling the pastry tightly, leaving a small empty border at the edge, and chilling before slicing will help keep the filling in place.

    4. Can I make these pinwheels ahead of time?

    Absolutely! You can assemble the roll, wrap it in plastic, and refrigerate it for up to 24 hours before slicing and baking.

    5. How can I make these less spicy?

    For a milder version, remove all the seeds from the jalapeños or substitute them with mild green chilies. Using a mix of cheddar and mozzarella cheese can also tone down the heat.

    6. Are these pinwheels good for meal prep?

    Yes! You can make a batch, freeze them, and reheat them whenever you need a quick appetizer or snack.

    Conclusion: A Must-Try Appetizer for Any Occasion

    Jalapeño Popper Pinwheels are the perfect combination of spicy, creamy, and crispy, making them an instant hit at any gathering. Whether you’re serving them at a party, making a fun snack for game day, or looking for a unique twist on a classic appetizer, these pinwheels will not disappoint.

    With simple ingredients, easy preparation, and endless ways to customize, this recipe is a must-try. From the classic version to creative variations, there’s a pinwheel for everyone. Plus, their make-ahead and freezer-friendly nature means you’ll always have a delicious appetizer ready to go.

    So why not spice up your next gathering with these irresistible jalapeño popper pinwheels? Once you make them, they might just become your go-to party appetizer.

    aiting

    Jalapeño Popper Pinwheels: A Spicy Twist on a Classic Appetizer

    These crispy, cheesy, and slightly spicy Jalapeño Popper Pinwheels are the perfect party appetizer. Made with flaky puff pastry, a creamy jalapeño-cheddar filling, and a savory garlic butter glaze, they are irresistibly delicious and easy to make!
    Prep Time 10 minutes
    Cook Time 20 minutes
    Total Time 30 minutes
    Servings: 12 pinwheels
    Course: Appetizer
    Cuisine: American

    Ingredients
      

    Pinwheels:
    • 8 ounces cream cheese room temperature
    • 1 tablespoon dry ranch seasoning
    • 1 cup 113 g mild cheddar cheese, shredded
    • 2 medium jalapeño peppers seeded and finely diced
    • 3 slices bacon cooked and crumbled
    • 1 sheet puff pastry thawed according to package instructions
    Garlic Butter Glaze:
    • 3 tablespoons unsalted butter melted
    • 1 teaspoon garlic minced
    • 1 teaspoon fresh parsley finely chopped
    • 1 teaspoon kosher salt

    Method
     

    1. Preheat & Prep – Preheat your oven to 400°F (200°C) and line a baking sheet with parchment paper.
    2. Mix the Filling – In a medium bowl, combine cream cheese, ranch seasoning, cheddar cheese, jalapeños, and bacon. Stir until well blended.
    3. Roll It Out – On a lightly floured surface, roll the puff pastry into a 9×12-inch rectangle.
    4. Spread & Roll – Evenly spread the jalapeño popper mixture over the pastry, leaving about ½ inch of space along one long edge. Wet this edge with water or beaten egg to help seal the roll.
    5. Slice & Bake – Roll the pastry into a tight log and gently press the seam to secure. Using a sharp knife, slice into 12 equal pieces. Place them on the prepared baking sheet and bake for 18-20 minutes until golden brown.
    6. Prepare the Garlic Butter – While the pinwheels bake, melt butter in a small saucepan over medium heat. Stir in garlic, parsley, and salt, cooking for 2-3 minutes.
    7. Finish & Serve – Once baked, brush the warm pinwheels with the garlic butter glaze. Serve immediately and enjoy!

    Notes

    • For an extra spicy kick, leave some jalapeño seeds in the filling.
    • Can be made ahead and refrigerated before baking.
    • Air fryer option: Cook at 375°F for 10-12 minutes for an ultra-crispy texture.

    Cinnamon Swirl Sourdough Bread: Bake This Irresistible Loaf Today!

    Introduction to Cinnamon Swirl Sourdough Bread

    There’s something magical about the aroma of freshly baked bread wafting through the house, isn’t there? Especially when it’s Cinnamon Swirl Sourdough Bread, a delightful treat that combines the tangy goodness of sourdough with a sweet cinnamon swirl. This recipe is a lifesaver for those busy days when you crave something homemade but don’t have hours to spare. It’s perfect for impressing your loved ones or simply indulging in a moment of self-care. So, grab your apron, and let’s embark on this delicious baking adventure together. Trust me, your taste buds will thank you!

    Why You’ll Love This Cinnamon Swirl Sourdough Bread

    This Cinnamon Swirl Sourdough Bread is a game-changer in the kitchen. It’s not just about the heavenly taste; it’s about the joy of creating something special with your own hands. The recipe is straightforward, making it perfect for busy schedules. Plus, the combination of tangy sourdough and sweet cinnamon is simply irresistible. It’s a comforting hug in bread form, ready to brighten your day!

    Ingredients Cinnamon Swirl Sourdough Bread

    Creating this delightful Cinnamon Swirl Sourdough Bread requires a handful of pantry staples and a few special touches. Let’s dive into the ingredients that make this bread a standout:

    • All-purpose flour: The backbone of our bread, providing structure and texture.
    • Sourdough starter: The star of the show, lending that signature tangy flavor and natural leavening.
    • Warm water: Helps activate the starter and brings the dough together.
    • Brown sugar: Adds a rich sweetness and depth to the dough.
    • Salt: Enhances the flavors and balances the sweetness.
    • Ground cinnamon: The aromatic spice that gives our bread its signature swirl.
    • Unsalted butter: Adds richness and moisture to the cinnamon filling.
    • Granulated sugar: Sweetens the cinnamon filling, creating a delightful contrast.
    • Vanilla extract: Infuses the filling with a warm, inviting aroma.

    Optional ingredients like chopped walnuts or pecans can add a delightful crunch, while a pinch of nutmeg or a splash of maple syrup can elevate the flavor profile. For exact measurements, scroll to the bottom of the article where you can print the full recipe.

    How to Make Cinnamon Swirl Sourdough Bread

    Prepare the Dough

    Start by mixing the warm water and sourdough starter in a large bowl. Stir until they’re well combined. Next, add the all-purpose flour, brown sugar, salt, and ground cinnamon. Mix until you have a shaggy dough. Now, it’s time to knead! On a lightly floured surface, knead the dough for about 8-10 minutes. You’re aiming for a smooth and elastic texture. Once kneaded, place the dough in a greased bowl. Cover it with a damp cloth and let it rise in a warm spot for 1-2 hours, or until it doubles in size.

    Create the Cinnamon Filling

    While the dough is rising, let’s whip up the cinnamon filling. In a small bowl, combine the softened butter, granulated sugar, and vanilla extract. Mix until smooth and creamy. This sweet, buttery mixture will be the heart of your cinnamon swirl. If you’re feeling adventurous, consider adding a pinch of nutmeg or a splash of maple syrup for an extra flavor boost.

    Assemble the Bread

    Once your dough has risen, punch it down gently to release any air bubbles. Turn it out onto a floured surface and roll it into a rectangle about 1/2 inch thick. Spread the cinnamon filling evenly over the dough, leaving a small border around the edges. Now, starting from one long edge, carefully roll the dough into a tight log. Pinch the seams to seal it. Place the rolled dough seam-side down in a greased loaf pan. Cover it and let it rise for another 30-45 minutes.

    Bake to Perfection

    Preheat your oven to 350°F. Once the dough has risen again, it’s time to bake! Place the loaf in the oven and bake for 30-35 minutes. You’re looking for a golden brown crust and a hollow sound when tapped on the bottom. Once baked, let the bread cool in the pan for 10 minutes. Then, transfer it to a wire rack to cool completely. This step is crucial for the perfect texture. Now, slice and enjoy your homemade Cinnamon Swirl Sourdough Bread!

    Tips for Success

    • Ensure your sourdough starter is active and bubbly for the best rise.
    • Use room temperature ingredients to help the dough rise evenly.
    • Don’t rush the rising process; patience is key for fluffy bread.
    • For a neat swirl, roll the dough tightly and seal the edges well.
    • Let the bread cool completely before slicing to maintain its structure.

    Equipment Needed

    • Mixing bowl: A large one for combining ingredients.
    • Measuring cups and spoons: Essential for accuracy.
    • Rolling pin: To shape the dough; a wine bottle works too!
    • Loaf pan: For baking; a cake pan can substitute in a pinch.
    • Wire rack: For cooling the bread evenly.

    Variations

    • Nutty Delight: Add 1/2 cup of chopped walnuts or pecans to the cinnamon filling for a crunchy twist.
    • Spiced Up: Sprinkle a pinch of nutmeg or cardamom into the filling for a warm, aromatic flavor.
    • Maple Infusion: Drizzle a tablespoon of maple syrup over the filling before rolling for a sweet, earthy note.
    • Raisin Swirl: Incorporate 1/2 cup of raisins into the filling for a chewy, sweet surprise.
    • Gluten-Free Option: Use a gluten-free flour blend to accommodate dietary needs, ensuring the starter is also gluten-free.

    Serving Suggestions

    • Breakfast Bliss: Pair with a steaming cup of coffee or a frothy cappuccino for a cozy morning treat.
    • Afternoon Delight: Serve with a dollop of whipped cream or a scoop of vanilla ice cream for a sweet snack.
    • Presentation Perfection: Slice the bread thickly and arrange on a wooden board for a rustic, inviting look.

    FAQs about Cinnamon Swirl Sourdough Bread

    Can I make this bread without a sourdough starter?

    Absolutely! If you don’t have a sourdough starter, you can substitute it with a mixture of equal parts water and flour, along with a teaspoon of instant yeast. This will give you a similar rise, though the tangy flavor will be less pronounced.

    How do I store Cinnamon Swirl Sourdough Bread?

    To keep your bread fresh, store it in an airtight container at room temperature for up to three days. For longer storage, wrap it tightly in plastic wrap and freeze it. When you’re ready to enjoy, simply thaw at room temperature or warm it in the oven.

    Can I add other spices to the cinnamon filling?

    Yes, feel free to get creative! Adding spices like nutmeg, cardamom, or even a hint of ginger can elevate the flavor profile. Just be sure to balance the spices so they complement the cinnamon rather than overpower it.

    What if my dough doesn’t rise?

    If your dough isn’t rising, it might be due to an inactive sourdough starter or a cool environment. Ensure your starter is bubbly and active before using. If the room is chilly, try placing the dough in a warm spot, like near a sunny window or in an oven with the light on.

    Can I make this bread vegan?

    Yes, you can make a vegan version by substituting the butter with a plant-based alternative and using a vegan sourdough starter. The result will be just as delicious and satisfying!

    Final Thoughts

    Baking Cinnamon Swirl Sourdough Bread is more than just a culinary task; it’s a journey of flavors and aromas that fills your home with warmth and comfort. Each slice is a testament to the love and care you’ve kneaded into the dough, creating a bread that’s both a treat and a triumph. Whether you’re sharing it with family or savoring a quiet moment alone, this bread is a reminder of the simple joys in life. So, embrace the process, enjoy the results, and let this delightful loaf become a cherished part of your baking repertoire.

    Cinnamon Swirl Sourdough Bread
    Paul

    Cinnamon Swirl Sourdough Bread: Bake This Irresistible Loaf Today!

    Cinnamon Swirl Sourdough Bread is a delicious homemade bread with a sweet cinnamon filling, perfect for breakfast or a snack.
    Prep Time 15 minutes
    Cook Time 35 minutes
    Total Time 2 hours 45 minutes
    Servings: 1 loaf
    Course: Bread
    Cuisine: American
    Calories: 180

    Ingredients
      

    • 3 cups all-purpose flour
    • 1 cup sourdough starter active and bubbly
    • 1 cup warm water about 110°F
    • 1/4 cup brown sugar packed
    • 1 teaspoon salt
    • 1 teaspoon ground cinnamon
    • 1/4 cup unsalted butter softened
    • 1/4 cup granulated sugar
    • 1/2 teaspoon vanilla extract

    Method
     

    1. In a large mixing bowl, combine the warm water and sourdough starter. Stir until well mixed.
    2. Add the all-purpose flour, brown sugar, salt, and ground cinnamon to the bowl. Mix until a shaggy dough forms.
    3. Knead the dough on a lightly floured surface for about 8-10 minutes, or until smooth and elastic.
    4. Place the dough in a greased bowl, cover with a damp cloth, and let it rise in a warm place for about 1-2 hours, or until doubled in size.
    5. In a small bowl, mix together the softened butter, granulated sugar, and vanilla extract to create the cinnamon filling.
    6. Once the dough has risen, punch it down and turn it out onto a floured surface. Roll it into a rectangle about 1/2 inch thick.
    7. Spread the cinnamon filling evenly over the dough, leaving a small border around the edges.
    8. Starting from one long edge, carefully roll the dough into a tight log. Pinch the seams to seal.
    9. Place the rolled dough seam-side down in a greased loaf pan. Cover and let it rise for another 30-45 minutes.
    10. Preheat the oven to 350°F. Bake the bread for 30-35 minutes, or until golden brown and sounds hollow when tapped on the bottom.
    11. Allow the bread to cool in the pan for 10 minutes before transferring it to a wire rack to cool completely.

    Notes

    • For a nutty twist, add 1/2 cup of chopped walnuts or pecans to the cinnamon filling.
    • To enhance the flavor, consider adding a pinch of nutmeg or a tablespoon of maple syrup to the filling mixture.

    Cadbury Mini Egg Cookie Bars: The Ultimate Easter Treat

    Cadbury Mini Egg Cookie Bars are the perfect way to celebrate Easter or any springtime gathering. These bars combine the buttery chewiness of a cookie with the indulgent crunch of Cadbury Mini Eggs, all topped with a smooth, pastel blue frosting that makes them as visually stunning as they are delicious.

    If you love soft and chewy cookie bars but want something extra festive, this recipe is the perfect choice. The crushed Cadbury Mini Eggs add a delightful crunch inside the cookie base while the whole eggs on top give them a decorative, colorful finish.

    In this guide, we’ll take a deep dive into everything you need to know about making these bars, from expert tips to frequently asked questions and creative variations. Whether you’re an experienced baker or new to making cookie bars, this article will help you perfect your batch.

    Why These Cookie Bars Are a Must-Try

    1. A Festive Springtime Dessert

    Cadbury Mini Eggs are an iconic Easter candy, and these cookie bars make them the star of the show. The pastel blue speckled frosting and rich chocolate crunch from the Mini Eggs make them perfect for Easter gatherings, spring brunches, or just an afternoon treat.

    2. Easier Than Traditional Cookies

    Cookie bars skip the hassle of rolling and shaping individual cookies. Instead, the dough is spread into a baking dish, baked as one large slab, and then cut into squares. This means you get all the deliciousness of cookies with half the effort.

    3. The Perfect Balance of Texture

    These bars have a chewy, buttery cookie base, a crunch from the Mini Eggs, and a smooth, creamy frosting. Each bite has just the right amount of chewiness, crunch, and sweetness.

    4. Great for Make-Ahead Baking

    Planning for a holiday gathering? These bars can be made ahead of time and stored for a few days without losing their texture. You can also freeze them for longer storage, making them a convenient option for busy holiday preparations.

    Expert Tips for the Best Cookie Bars

    1. Crush Mini Eggs the Right Way

    Cadbury Mini Eggs are hard-shelled chocolates, and cutting them with a knife can be tricky. Instead of slicing them, try:

    • Using the flat side of a knife to gently press down and break them apart.
    • Placing them in a zip-top bag and crushing them with a rolling pin.
    • Using a food processor for a quick, even crush (but don’t overdo it—small chunks work best).

    2. Let the Cookie Bars Cool Completely Before Frosting

    Frosting warm cookie bars will cause the icing to melt and slide off. Allow the bars to cool fully at room temperature before spreading on the frosting.

    3. Achieving the Perfect Pastel Frosting

    The blue frosting gives these bars their signature robin’s egg look. To get the perfect color:

    • Start with one small drop of blue food coloring, then gradually add more if needed.
    • Mix well before deciding to add more—food coloring gets darker as it blends.
    • Aim for a light pastel shade to match the classic look of Cadbury Mini Eggs.

    4. How to Get That Speckled Egg Effect

    To create the speckled frosting effect, mix cocoa powder with water and lightly flick it onto the frosting using a clean paintbrush or toothbrush. This technique mimics the natural speckled appearance of bird eggs and adds a professional touch to your cookie bars.

    5. Cutting Clean, Even Squares

    For neat and professional-looking cookie bars:

    • Use a warm knife (run it under hot water and wipe dry before cutting).
    • Clean the knife between each cut to prevent sticking.
    • Chill the bars slightly before cutting for extra precision.

    Creative Ways to Customize This Recipe

    1. Make It a Cookie Cake

    Instead of cutting the bars into squares, bake the dough in a round cake pan and frost the entire surface. This creates a Cadbury Mini Egg Cookie Cake, perfect for birthdays or Easter celebrations.

    2. Swap the Mini Eggs for Other Candies

    Not a fan of Mini Eggs? Try using:

    • Chopped chocolate bars (like Hershey’s or Dove).
    • Pastel M&Ms for a similar festive look.
    • Peanut butter eggs for a chocolate-peanut butter variation.

    3. Add a Chocolate Drizzle

    For an extra touch of decadence, drizzle melted dark or white chocolate over the frosted bars before adding the Mini Eggs.

    4. Turn Them Into Ice Cream Sandwiches

    Cut the bars in half horizontally and sandwich a scoop of vanilla ice cream between two layers. Freeze until firm for a fun, Easter-themed ice cream sandwich.

    5. Skip the Frosting for a Simpler Version

    If you prefer a less sweet treat, omit the frosting entirely and simply sprinkle crushed Mini Eggs on top before baking.

    Gather Your Goodies: Ingredients

    For the Cookie Bars

    • Unsalted butter (softened)
    • Granulated sugar
    • Large egg
    • Salt
    • Baking powder
    • Vanilla extract
    • All-purpose flour
    • Cadbury Mini Eggs (crushed)

    For the Frosting

    • Unsalted butter (softened)
    • Powdered sugar
    • Milk
    • Blue food coloring

    The Baking Adventure: Directions

    Step 1: Crafting the Cookie Base

    • Preheat oven to 350°F and prepare an 8×8-inch pan with parchment paper.
    • Cream butter and sugar until light and fluffy.
    • Beat in the egg and vanilla extract until fully combined.
    • Add salt, baking powder, and flour, mixing until the dough forms.
    • Fold in the crushed Cadbury Mini Eggs for a burst of chocolatey goodness.
    • Spread the dough evenly in the pan and bake for 20-25 minutes, or until golden around the edges.

    Step 2: Whipping Up the Frosting

    • In a large bowl, beat butter and powdered sugar until fluffy.
    • Add milk and beat for another 2-3 minutes to achieve a creamy texture.
    • Slowly add blue food coloring until the perfect pastel shade is reached.

    Step 3: Bringing It All Together

    • Once the cookie bars are completely cooled, spread the frosting evenly over the top.
    • Garnish with extra Cadbury Mini Eggs for a festive touch.
    • Use a warm, clean knife to cut into 9 squares for perfect edges.

    Nutritional Breakdown (Per Bar, Approximate)

    • Calories: 320
    • Carbohydrates: 45g
    • Protein: 3g
    • Fat: 15g
    • Sugar: 30g
    • Sodium: 95mg

    These cookie bars combine a buttery, chewy base with a sweet and creamy frosting, creating a festive, indulgent treat perfect for Easter or any springtime celebration!

    Frequently Asked Questions

    1. Can I Make These Cookie Bars Without Frosting?

    Yes! The bars are delicious on their own. If you prefer a simpler dessert, just skip the frosting step and enjoy them as chewy, chocolate-studded cookie bars.

    2. How Long Do These Cookie Bars Last?

    • At Room Temperature: Store in an airtight container for up to 3 days.
    • In the Refrigerator: They will stay fresh for up to a week.
    • In the Freezer: Freeze unfrosted bars for 4-6 weeks. Thaw at room temperature before serving.

    3. Can I Double the Recipe?

    Absolutely! Simply double all ingredients and bake in a 9×13-inch pan. You may need to increase the baking time slightly, so check for doneness by inserting a toothpick—it should come out with a few moist crumbs.

    4. Can I Use Gel Food Coloring Instead of Liquid?

    Yes! Gel food coloring is more concentrated, so use a tiny amount at first and adjust as needed.

    5. How Do I Prevent My Bars From Becoming Too Hard?

    • Don’t overbake—remove them when the edges turn golden brown.
    • Use parchment paper to prevent sticking and ensure even baking.
    • Store in an airtight container to maintain softness.

    6. What’s the Best Way to Transport These Bars?

    If bringing these to a party or event:

    • Leave them uncut until you arrive for easier transport.
    • Use a sturdy container with a lid to keep them fresh.
    • If stacking, place parchment paper between layers to prevent sticking.

    Final Thoughts: Why You Should Try These Bars

    Cadbury Mini Egg Cookie Bars are more than just a festive dessert—they’re a fun, easy-to-make treat that captures the spirit of spring. With their chewy cookie base, crunchy chocolate eggs, and creamy frosting, they bring together all the best elements of an indulgent dessert.

    Not only are they perfect for Easter, but they can be easily adapted for any occasion. Whether you customize them with different candies, turn them into a cookie cake, or enjoy them as-is, they’re bound to become a seasonal favorite.

    So, if you’re looking for a delicious, crowd-pleasing dessert that’s simple to make yet visually stunning, these Cadbury Mini Egg Cookie Bars are the answer. Gather your ingredients, preheat your oven, and get ready to bake up a batch of springtime sweetness!

    aiting

    Cadbury Mini Egg Cookie Bars: The Ultimate Easter Treat

    These Cadbury Mini Egg Cookie Bars bring together a chewy, buttery cookie base with a creamy pastel blue frosting for the ultimate festive treat. Packed with crunchy Cadbury Mini Eggs and topped with a smooth, sweet frosting, these bars are perfect for Easter or any springtime gathering!
    Prep Time 15 minutes
    Cook Time 25 minutes
    Total Time 40 minutes
    Servings: 9 bars
    Course: Dessert
    Cuisine: American

    Ingredients
      

    • For the cookie bars: unsalted butter softened, granulated sugar, large egg, salt, baking powder, vanilla extract, all-purpose flour, Cadbury Mini Eggs (crushed).
    • For the frosting: unsalted butter softened, powdered sugar, milk, blue food coloring.

    Method
     

    1. Crafting the Cookie Base – Preheat oven to 350°F and prepare an 8×8-inch pan with parchment paper. Cream butter and sugar until light and fluffy. Beat in egg and vanilla extract until fully combined. Add salt, baking powder, and flour, mixing until the dough forms. Fold in the crushed Cadbury Mini Eggs. Spread the dough evenly in the pan and bake for 20-25 minutes, or until golden around the edges.
    2. Whipping Up the Frosting – In a large bowl, beat butter and powdered sugar until fluffy. Add milk and beat for another 2-3 minutes until creamy. Slowly add blue food coloring until the desired pastel shade is reached.
    3. Bringing It All Together – Once the cookie bars are completely cooled, spread the frosting evenly over the top. Garnish with extra Cadbury Mini Eggs for a festive touch. Use a warm, clean knife to cut into 9 squares for perfect edges.

    Notes

    • For extra crunch, leave some larger chunks of Cadbury Mini Eggs in the dough.
    • Store in an airtight container at room temperature for up to 3 days, or refrigerate for longer freshness.
    • Swap out the blue food coloring for another pastel shade to match different occasions.
    Enjoy these chewy, colorful, and chocolate-packed Cadbury Mini Egg Cookie Bars for a delightful seasonal treat!