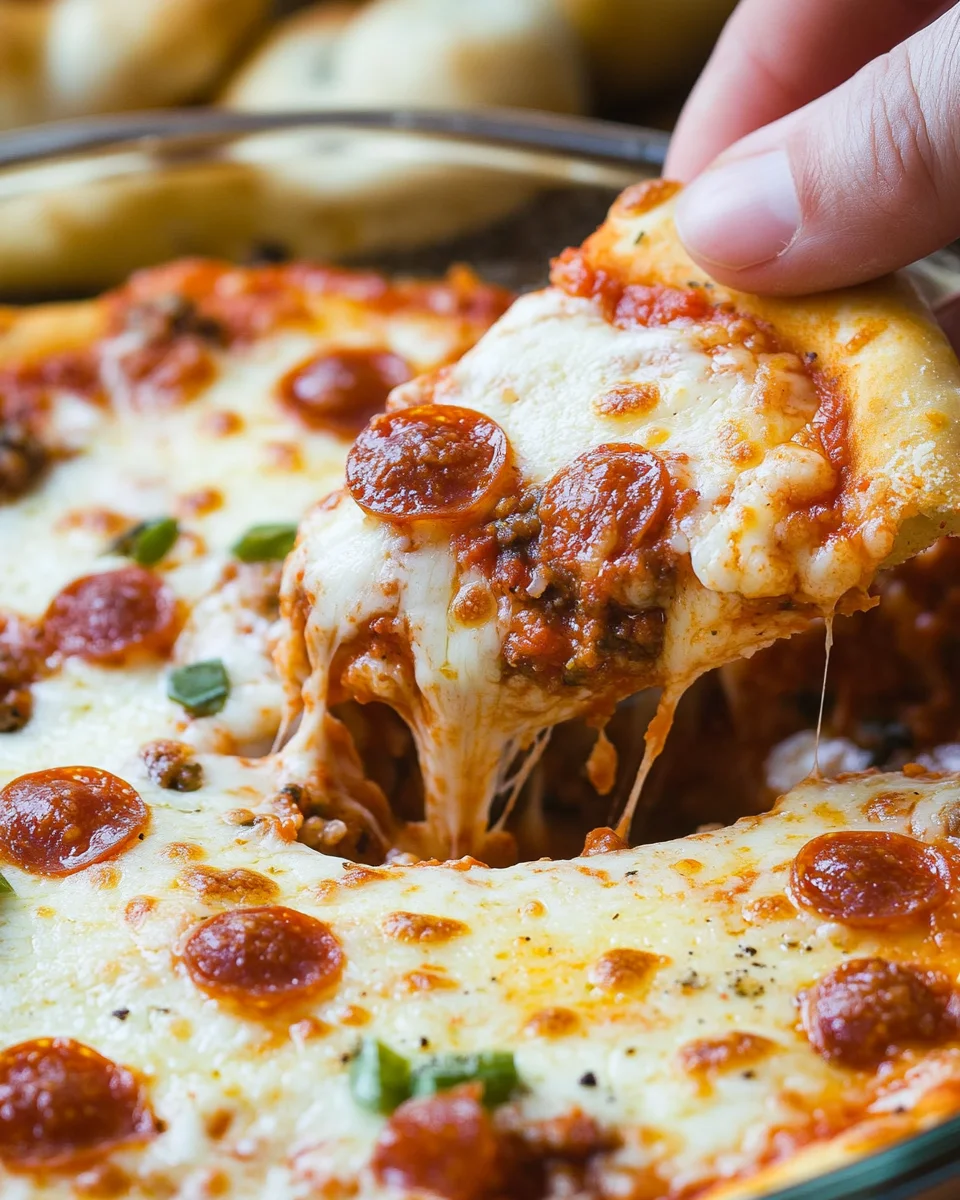
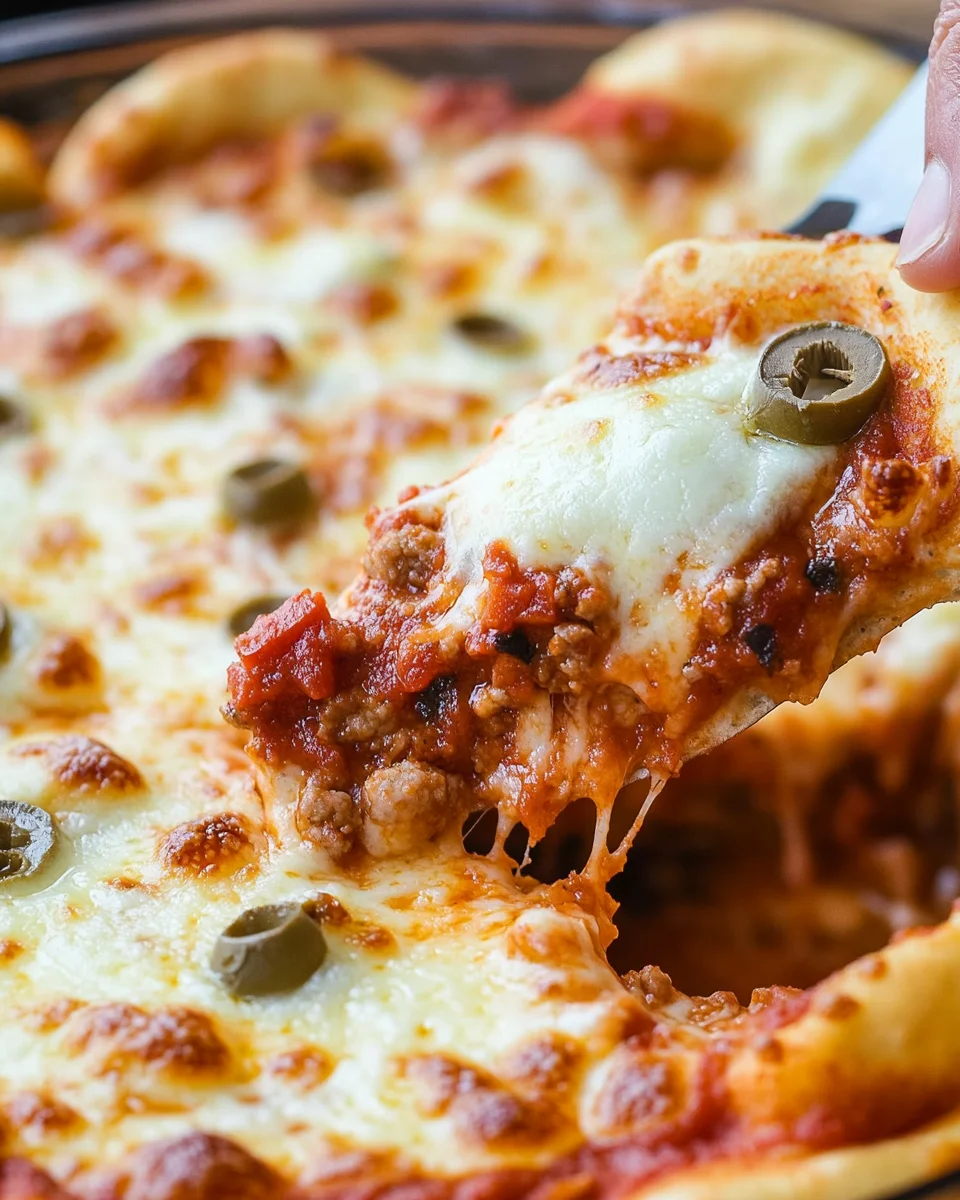
Hot Pizza Dip: The Ultimate Crowd-Pleasing Comfort Food

A Taste of Nostalgia and Togetherness

There’s something undeniably magical about the smell of pizza filling the air. It instantly transports me back to childhood movie nights, where the biggest debate wasn’t over what to watch but whether to get extra pepperoni or load up on veggies. My family’s love for pizza was unwavering, but we didn’t always want to wait for the delivery guy or spend time rolling out dough.

Then came the discovery of Hot Pizza Dip. It was a game-changer—a dish that delivered all the flavors of a supreme pizza but in a warm, creamy, scoopable form. The first time I made it, I was skeptical. Could a dip really capture the essence of a classic slice? But the moment I pulled it out of the oven, bubbling with melted cheese and bursting with savory goodness, I knew we had a new family tradition.

From Super Bowl parties to last-minute gatherings, this dip has never failed to bring people together. It’s the kind of dish that gets devoured in minutes, with everyone huddled around, eagerly dunking toasted baguette slices or crunchy crackers. And the best part? You can customize it endlessly, making it your own signature appetizer.

If you’re looking for a recipe that’s easy, comforting, and guaranteed to disappear before halftime, Hot Pizza Dip is it.

Why Hot Pizza Dip is the Perfect Party Appetizer

Whether you’re hosting a casual game night or a big holiday gathering, having a reliable go-to appetizer is a must. Hot Pizza Dip is the perfect choice for several reasons:

  1. Quick and Easy – No need to spend hours in the kitchen. This dip comes together in under 30 minutes.
  2. Versatile – You can adjust the ingredients to suit any taste, whether you love classic pepperoni or prefer a veggie-packed version.
  3. Minimal Cleanup – Everything bakes in one dish, which means fewer dirty dishes to tackle after the party.
  4. A Guaranteed Crowd-Pleaser – Who doesn’t love pizza? This dip brings all those beloved flavors in a warm, dippable form.

Savory Ingredients:

  • Creamy Base:
    • 8 oz package cream cheese, softened
    • ½ cup sour cream
  • Hearty Toppings:
    • ½ pound ground Italian sausage, cooked
    • ½ cup diced bell peppers (green, red, yellow, or a mix)
    • ½ cup mini pepperoni slices
  • Flavor Enhancers:
    • ¼ teaspoon garlic powder
    • ½ teaspoon Italian seasoning
  • Classic Pizza Elements:
    • 1 cup pizza sauce
    • 1 ¼ cups shredded mozzarella cheese
  • Optional Extras:
    • Grated Parmesan cheese
    • Red pepper flakes
    • Toasted baguette slices, pita chips, or crackers for dipping

Simple Steps to Cheesy Goodness:

  1. Preheat your oven to 375°F.
  2. In a medium bowl, mix together the softened cream cheese, sour cream, cooked sausage, diced peppers, pepperoni, garlic powder, and Italian seasoning.
  3. Spread the mixture evenly into a greased pie plate or small baking dish.
  4. Layer the pizza sauce over the cream cheese mixture, then generously sprinkle mozzarella cheese on top.
  5. Add extra toppings like more pepperoni slices or crumbled sausage, but avoid too many to prevent excessive grease.
  6. Bake for 15-20 minutes, until the edges are bubbly and the cheese is perfectly melted.
  7. Garnish with Parmesan cheese and red pepper flakes, if desired.
  8. Serve warm with toasted baguette slices, pita chips, or crackers.

Nutritional Snapshot (Per ¼ Cup Serving):

  • Calories: 171 kcal
  • Carbohydrates: 4.5g
  • Protein: 8g
  • Fat: 13g
  • Saturated Fat: 7g
  • Cholesterol: 40mg
  • Sodium: 375mg
  • Fiber: 0.8g
  • Sugar: 3g
  • Vitamin A: 732 IU
  • Vitamin C: 8mg
  • Calcium: 95mg
  • Iron: 0.6mg

Enjoy this cheesy, savory, and utterly addictive dip—perfect for game days, parties, or just a cozy night in!

Frequently Asked Questions About Hot Pizza Dip

1. Can I Make Hot Pizza Dip Ahead of Time?

Absolutely. If you’re prepping for a party, you can assemble the dip a few hours (or even a day) in advance and store it covered in the refrigerator. When ready to serve, simply pop it in the oven and bake as directed.

2. How Do I Store Leftovers?

If you somehow manage to have leftovers, store them in an airtight container in the refrigerator for up to five days. Reheat in the oven at 350°F until warmed through or microwave in short intervals, stirring in between.

3. Can I Make This Dip Without Meat?

Yes! If you prefer a vegetarian version, simply omit the sausage and pepperoni. You can load it up with mushrooms, olives, bell peppers, onions, or any of your favorite pizza toppings.

4. What’s the Best Way to Serve This Dip?

Toasted baguette slices are a classic choice, but you can also serve it with:

  • Crackers (buttery Ritz, crunchy wheat crackers, or plain saltines)
  • Pita chips
  • Tortilla chips
  • Bagel chips
  • Fresh veggies like bell pepper strips, carrots, or celery

5. Can I Make This in a Slow Cooker?

Yes! If you prefer a hands-off approach, you can layer everything in a slow cooker and heat on low for 2-3 hours, or until bubbly. This is a great option for keeping the dip warm throughout a party.

6. Can I Use a Different Cheese?

Mozzarella gives that classic pizza stretch, but feel free to mix it up. Cheddar, provolone, Monterey Jack, or even a little smoked gouda can add an extra dimension of flavor.

Customizing Your Hot Pizza Dip

One of the best things about this dip is how flexible it is. You can adjust the ingredients to match your favorite pizza style.

For the Meat Lover

If you love a hearty, protein-packed pizza, consider adding:

  • Crumbled bacon
  • Cooked and crumbled ground beef or turkey
  • Shredded chicken (for a BBQ chicken pizza twist)
  • Canadian bacon

For the Veggie Lover

If you prefer a more garden-fresh approach, try:

  • Diced tomatoes
  • Sliced black or green olives
  • Diced red onions
  • Spinach or kale, finely chopped
  • Roasted mushrooms

For the Spice Enthusiast

Turn up the heat with these fiery additions:

  • Sliced jalapeños
  • Crushed red pepper flakes
  • Spicy Italian sausage
  • A drizzle of hot sauce or buffalo sauce

For the Cheese Addict

If you can’t get enough cheese, consider:

  • Adding a mix of cheeses like cheddar, provolone, and Monterey Jack
  • Stirring in ricotta for extra creaminess
  • Sprinkling Parmesan on top before baking

Making It a Complete Spread

While Hot Pizza Dip is an undeniable star, pairing it with the right accompaniments can take your appetizer table to the next level. Here are a few ideas:

Pairing Suggestions

  • Classic Appetizers: Serve alongside buffalo wings, garlic knots, or mozzarella sticks for a full-on game day feast.
  • Refreshing Sides: A crisp green salad or a tray of fresh veggies balances out the rich, cheesy dip.
  • Beverage Pairings: A cold beer, a glass of red wine, or even a fizzy soda complements the savory flavors perfectly.

Tips for the Best Hot Pizza Dip

1. Use Full-Fat Dairy for Maximum Creaminess

While you can use light cream cheese or sour cream, full-fat versions will give you the richest, smoothest texture.

2. Shred Your Own Cheese

Pre-shredded cheese contains anti-caking agents that can make it grainy when melted. For the best gooey stretch, shred your own mozzarella.

3. Don’t Overload the Toppings

It’s tempting to pile on extra toppings, but too many can make the dip greasy or watery. Keep it balanced for the best results.

4. Bake Until Bubbly and Golden

The dip is done when the edges are bubbling and the cheese is perfectly melted. If you like a crispy top, broil for 1-2 minutes at the end.

5. Serve Immediately

This dip is at its best when hot and fresh out of the oven. If you need to keep it warm, a slow cooker on the “warm” setting works well.

Conclusion: The Dip That Brings Everyone Together

Hot Pizza Dip isn’t just a recipe—it’s an experience. It’s the kind of dish that sparks conversation, brings people closer, and disappears faster than you ever expect. Whether you’re making it for a family gathering, a football party, or just a cozy night in, it’s guaranteed to deliver that irresistible pizza flavor in a warm, comforting bite.

So grab your favorite dippers, gather your friends and family, and get ready to dig into a dish that will have everyone asking for the recipe. Because when it comes to food that creates memories, nothing beats the power of a good, cheesy, pizza-inspired dip.
aiting

Hot Pizza Dip: The Ultimate Crowd-Pleasing Comfort Food

This cheesy, savory, and utterly addictive Game Day Pizza Dip is a must-have for any gathering. Packed with creamy layers, hearty toppings, and bold pizza flavors, it’s the perfect appetizer to keep everyone coming back for more!
Prep Time 10 minutes
Cook Time 20 minutes
Total Time 30 minutes
Servings: 8 servings
Course: Appetizer
Cuisine: American

Ingredients
  

Creamy Base:
  • 8 oz package cream cheese softened
  • ½ cup sour cream
Hearty Toppings:
  • ½ pound ground Italian sausage cooked
  • ½ cup diced bell peppers green, red, yellow, or a mix
  • ½ cup mini pepperoni slices
Flavor Enhancers:
  • ¼ teaspoon garlic powder
  • ½ teaspoon Italian seasoning
Classic Pizza Elements:
  • 1 cup pizza sauce
  • 1 ¼ cups shredded mozzarella cheese
Optional Extras:
  • Grated Parmesan cheese
  • Red pepper flakes
  • Toasted baguette slices pita chips, or crackers for dipping

Method
 

  1. Preheat your oven to 375°F.
  2. In a medium bowl, mix together the softened cream cheese, sour cream, cooked sausage, diced peppers, pepperoni, garlic powder, and Italian seasoning.
  3. Spread the mixture evenly into a greased pie plate or small baking dish.
  4. Layer the pizza sauce over the cream cheese mixture, then generously sprinkle mozzarella cheese on top.
  5. Add extra toppings like more pepperoni slices or crumbled sausage, but avoid too many to prevent excessive grease.
  6. Bake for 15-20 minutes, until the edges are bubbly and the cheese is perfectly melted.
  7. Garnish with Parmesan cheese and red pepper flakes, if desired.
  8. Serve warm with toasted baguette slices, pita chips, or crackers.

Notes

  • Swap out sausage for crumbled bacon or shredded rotisserie chicken for a different twist.
  • Make it vegetarian by omitting the meat and adding mushrooms, olives, or spinach.
  • Prepare in advance and refrigerate before baking—just add 5 extra minutes to the bake time.
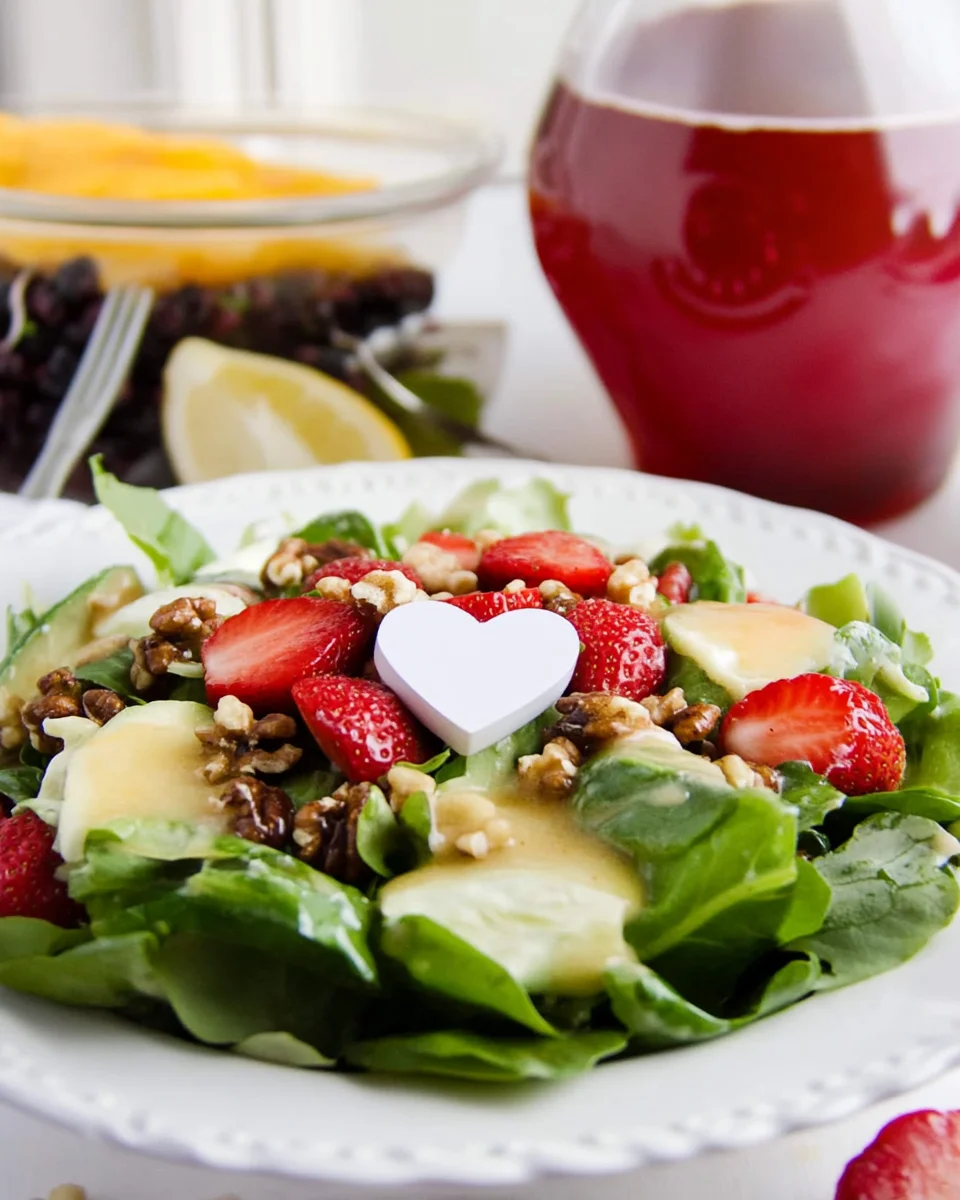
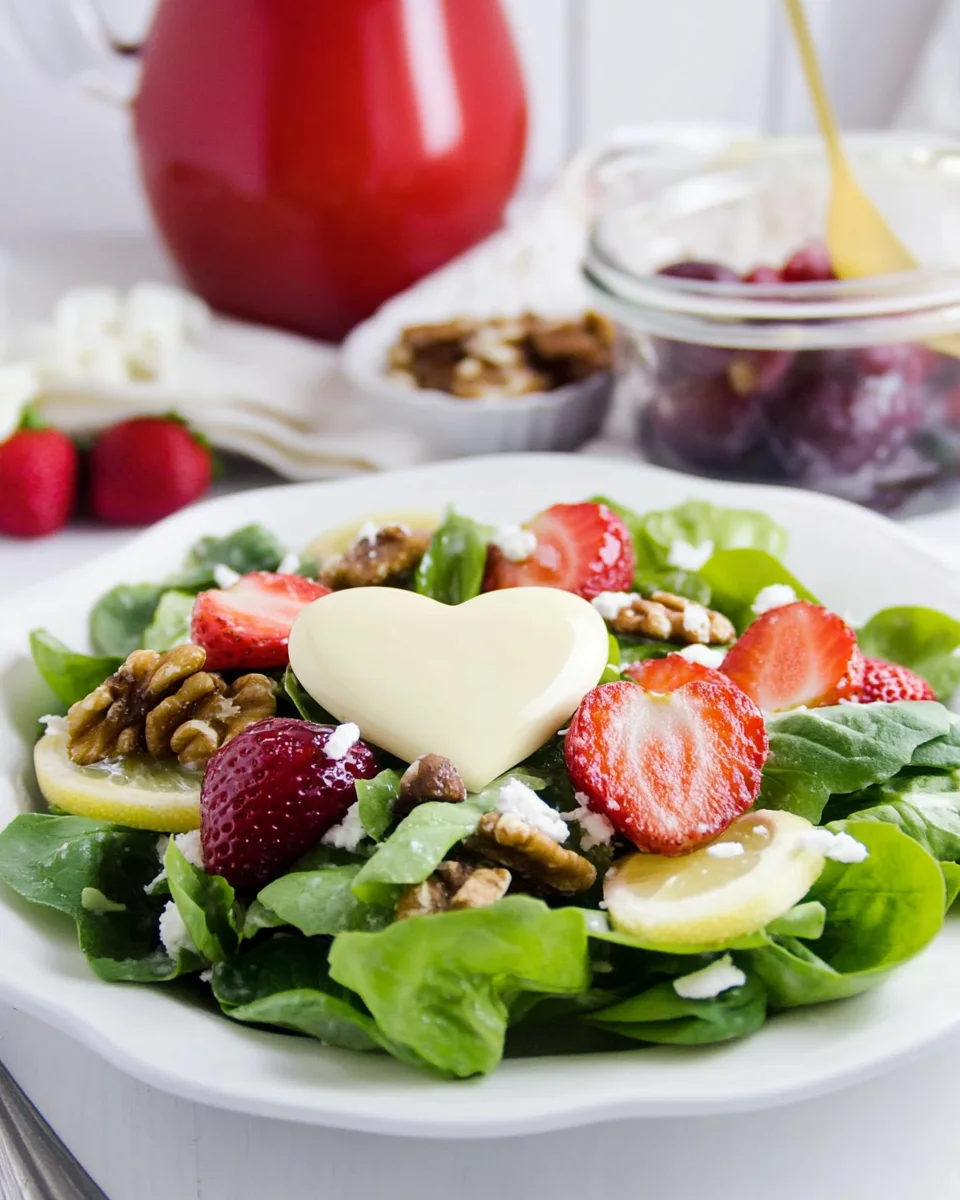
A Salad for the Heart: A Valentine’s Day Tradition

Valentine’s Day has always been special in my home. I remember my grandmother preparing a candlelit dinner for my grandfather every February 14th, even after decades of marriage. She believed that love was best expressed through food—thoughtfully prepared and shared. One of her favorite dishes to serve was a fresh, vibrant salad filled with seasonal fruits, nuts, and a light dressing.

She used to say, “A salad may seem simple, but it’s like love—balanced, nourishing, and always better when shared.” As a child, I watched her slice strawberries into delicate heart shapes, laughing as she tried to make them perfect. Now, I carry on her tradition by making a Valentine’s Day sweetheart salad of my own. It’s more than just a dish; it’s a symbol of love, care, and togetherness.

Whether you’re celebrating a new romance, cherishing a long-term relationship, or simply indulging in self-love, this salad is a refreshing and elegant way to honor the day. With fresh strawberries, creamy goat cheese, crunchy pecans, and a light Champagne vinaigrette, it’s a perfect balance of flavors—sweet, nutty, tangy, and crisp.

The Meaning Behind the Ingredients

Every component of this salad has a role to play in making it special, both in taste and symbolism.

  • Strawberries: The Fruit of Love
    Strawberries have long been associated with romance. In ancient Rome, they were a symbol of Venus, the goddess of love. Their vibrant red color and natural sweetness make them a perfect addition to a Valentine’s Day dish. When sliced into heart shapes, they serve as a beautiful, edible representation of love.
  • Goat Cheese: Creamy Indulgence
    The tangy and creamy texture of goat cheese adds a level of indulgence to the salad. It balances the sweetness of the strawberries with its slight acidity, much like how love requires a blend of sweetness and depth to thrive.
  • Pecans: A Crunch of Warmth
    Pecans, especially when roasted or caramelized, add a satisfying crunch and a subtle buttery flavor. They bring warmth and richness to the dish, symbolizing the comforting and enduring aspects of love.
  • Spring Mix: Fresh Beginnings
    A mixture of baby greens, including arugula, spinach, and lettuce, creates a fresh and crisp base. The blend of flavors—some peppery, some mild—mirrors the complexities of a relationship.
  • Champagne Vinaigrette: A Touch of Elegance
    The Champagne vinaigrette ties everything together with a light and sophisticated flavor. Just like a good relationship, a salad dressing should enhance rather than overpower, bringing out the best in every ingredient.

Perfect Pairings for a Romantic Meal

This sweetheart salad is versatile and pairs beautifully with a variety of dishes. If you’re planning a full Valentine’s Day menu, consider these complementary flavors:

  • Main Course: A grilled salmon fillet, roasted chicken with herbs, or a creamy risotto with mushrooms can enhance the lightness of the salad.
  • Side Dish: A warm baguette with herb-infused butter or a small plate of bruschetta can add a rustic touch.
  • Drink: A crisp white wine, a light rosé, or a sparkling mocktail can elevate the dining experience.
  • Dessert: Keep it romantic with a chocolate lava cake, raspberry mousse, or chocolate-dipped strawberries.

Wholesome Ingredients for Romance

  • 2 cups Spring salad mix
  • 1 cup Strawberries, sliced into heart shapes
  • ½ cup Roasted pecans (honey-roasted or caramelized)
  • ¼ cup Goat cheese, crumbled
  • Champagne vinaigrette, to taste

Steps to a Heartfelt Dish

  1. Cut a ‘V’ shape into the top of each strawberry to remove the stem and create a heart shape. Slice them thinly.
  2. Arrange the spring mix, heart-shaped strawberries, roasted pecans, and crumbled goat cheese on a plate or in a bowl.
  3. Drizzle with Champagne vinaigrette just before serving or let each person add their own.
  4. Serve and enjoy this simple yet elegant salad with your loved one.

Nutritional Love Notes (Estimated per serving)

  • Calories: ~220 kcal
  • Protein: ~6g
  • Carbohydrates: ~18g
  • Fat: ~15g
  • Fiber: ~4g
  • Sugar: ~10g

This quick and charming salad is the perfect way to start a romantic meal, balancing fresh, nutty, and creamy flavors for a delightful experience.

Frequently Asked Questions

1. Can I prepare this salad in advance?
Yes, but with a few precautions. The strawberries should be sliced just before serving to maintain their freshness. You can assemble the greens, cheese, and pecans in advance, but add the dressing at the last minute to prevent wilting.

2. What other nuts can I use?
If you’re not a fan of pecans, walnuts, almonds, or pistachios are great alternatives. Roasting them lightly enhances their flavor and adds a delicious crunch.

3. Can I make this salad vegan?
Absolutely. Replace goat cheese with a dairy-free alternative, such as cashew cheese or crumbled tofu. You can also use a maple Dijon vinaigrette instead of Champagne vinaigrette for a fully plant-based option.

4. What if I don’t have Champagne vinaigrette?
No problem. A simple balsamic glaze, honey mustard dressing, or a mix of olive oil and lemon juice can work as substitutes. The key is to use something light and slightly tangy to balance the flavors.

5. Can I add protein to make it a complete meal?
Yes! Grilled chicken, shrimp, or even a handful of quinoa can turn this salad into a satisfying main course.

6. How do I store leftovers?
If undressed, you can keep the salad in an airtight container in the fridge for up to 24 hours. If already dressed, it’s best consumed immediately, as the greens will wilt.

The Beauty of a Simple, Thoughtful Dish

Valentine’s Day is often associated with extravagant gestures—boxes of chocolates, expensive dinners, and grand surprises. But love is found in the little things: the way someone remembers your favorite dish, the warmth of a shared meal, or the simple act of preparing food together.

This sweetheart salad embodies that simplicity and thoughtfulness. It’s easy to make, yet it feels special. It allows you to slow down, savor the flavors, and appreciate the moment. Whether you’re sharing it with a partner, a friend, or enjoying it alone with a glass of wine, it’s a reminder that love, in all its forms, is best celebrated with care and intention.

So this Valentine’s Day, set the table, light a candle, and enjoy a meal that speaks from the heart. Sometimes, the simplest dishes hold the deepest meaning.

aiting

A Salad for the Heart: A Valentine’s Day Tradition

This elegant Valentine’s Day Sweetheart Salad is a delightful balance of fresh, nutty, and creamy flavors. With heart-shaped strawberries, roasted pecans, and crumbled goat cheese, it’s the perfect way to start a romantic meal with your loved one.
Prep Time 10 minutes
Total Time 10 minutes
Servings: 2 servings
Course: Salad
Cuisine: American

Ingredients
  

  • 2 cups Spring salad mix
  • 1 cup Strawberries sliced into heart shapes
  • ½ cup Roasted pecans honey-roasted or caramelized
  • ¼ cup Goat cheese crumbled
  • Champagne vinaigrette to taste

Method
 

  1. Cut a ‘V’ shape into the top of each strawberry to remove the stem and create a heart shape. Slice them thinly.
  2. Arrange the spring mix, heart-shaped strawberries, roasted pecans, and crumbled goat cheese on a plate or in a bowl.
  3. Drizzle with Champagne vinaigrette just before serving or let each person add their own.
  4. Serve and enjoy this simple yet elegant salad with your loved one.
  5.  

Notes

  • Substitute goat cheese with feta or blue cheese for a different flavor twist.
  • Add grilled chicken or shrimp for a heartier meal.
  • Pair with a glass of rosé or sparkling water with a lemon twist for a complete romantic experience.

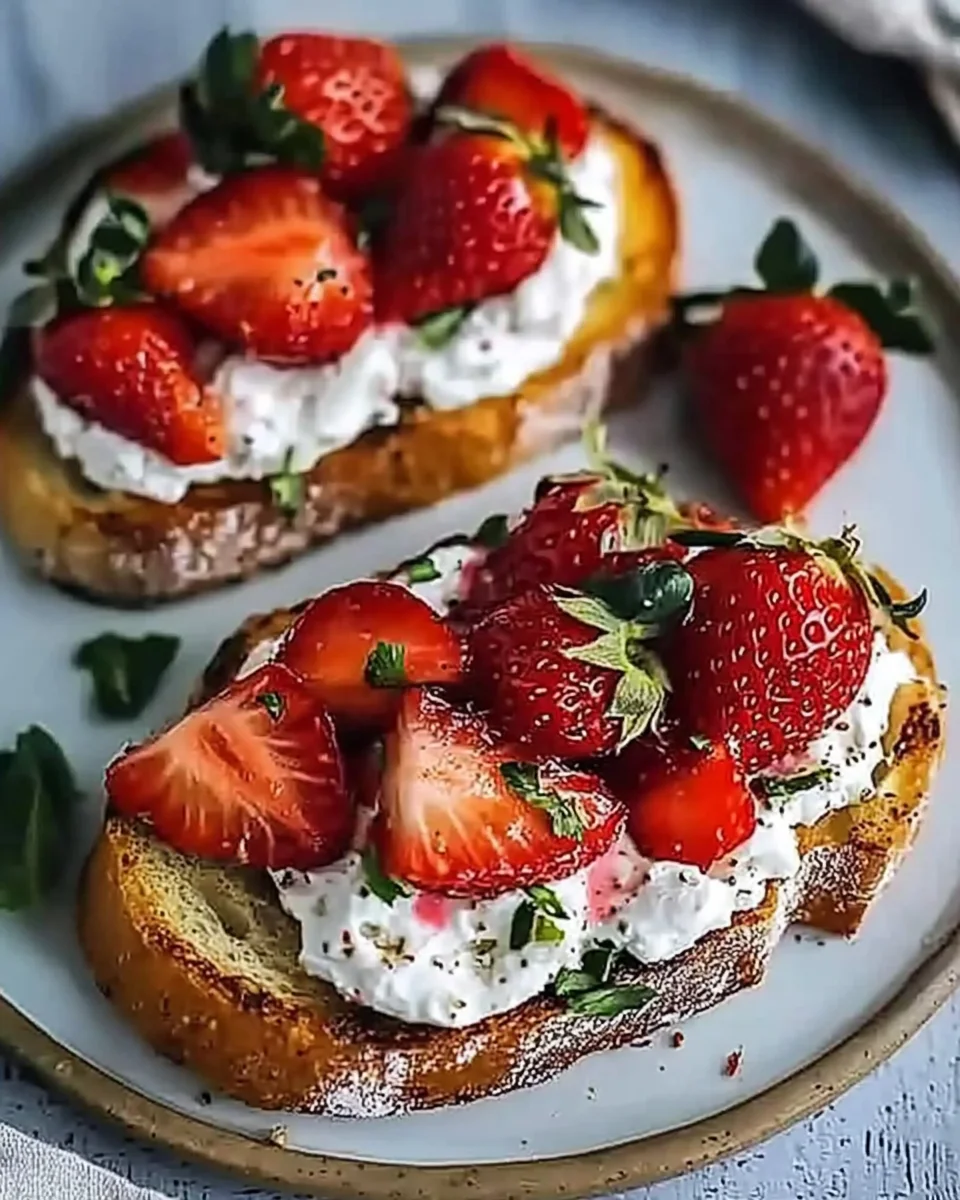
A Taste of Nostalgia: Roasted Strawberry Whipped Ricotta Toast

There’s something undeniably comforting about the combination of warm, caramelized fruit and creamy, whipped cheese. This recipe for Roasted Strawberry Whipped Ricotta Toast is more than just a dish—it’s a story of childhood summers, the scent of sun-ripened strawberries wafting through the air, and the joy of simple pleasures.

Growing up, my grandmother had a small strawberry patch in her backyard. Every summer, we’d wake up early, baskets in hand, ready to pick the ripest, juiciest berries. The scent of those freshly picked strawberries, still warm from the sun, was intoxicating. She would always save the best ones for a special breakfast—one that, at the time, felt like a luxurious treat. She would roast them with a drizzle of honey and balsamic, letting the flavors intensify into a deep, jam-like sweetness. Paired with a spread of creamy ricotta on thick slices of toasted bread, it was a meal that felt both rustic and gourmet.

As I grew older and started experimenting in my own kitchen, I found myself returning to that childhood memory. This toast is my homage to those warm mornings spent in my grandmother’s kitchen. It’s a dish that feels indulgent yet effortless, bringing together sweet, tangy, creamy, and crispy elements in every bite. Whether you’re looking for a quick breakfast, a light brunch option, or even a unique dessert, this Roasted Strawberry Whipped Ricotta Toast is a recipe that deserves a place in your collection.

The Magic of Roasting Strawberries

Strawberries are delicious on their own, but roasting takes them to another level. The natural sugars in the fruit caramelize under heat, intensifying their sweetness and adding a deeper, almost jammy texture. The slight acidity of balsamic vinegar enhances this transformation, creating a complex balance of flavors.

Unlike fresh strawberries, which can sometimes be too tart or watery, roasted strawberries become soft, syrupy, and rich. This makes them perfect for pairing with creamy ricotta. The contrast between warm, roasted fruit and cool, whipped cheese is a textural experience that makes every bite exciting.

Another benefit of roasting strawberries is that it extends their shelf life slightly, allowing you to store leftovers and use them in other dishes—swirled into yogurt, spooned over pancakes, or even blended into smoothies.

Why Whipped Ricotta?

While plain ricotta is delicious, whipping it elevates its texture, making it airy, smooth, and spreadable. The slight tanginess of ricotta cheese pairs beautifully with the sweetness of the strawberries, while a touch of honey and vanilla enhances its flavor.

Many people overlook ricotta as just a filling for lasagna or ravioli, but it has so much more to offer. Whipped ricotta can be used in both sweet and savory dishes, making it a versatile ingredient to have in your kitchen. If you’ve never tried it, this recipe is the perfect introduction.

Customizing Your Toast

One of the best things about this recipe is how adaptable it is. Here are a few ways to make it your own:

1. Experiment with Different Fruits

While strawberries are a classic choice, you can use other fruits to create different variations of this toast. Try:

  • Roasted peaches for a summery twist
  • Caramelized apples for a fall-inspired version
  • Roasted blueberries for a burst of tart sweetness

Each fruit brings its own unique flavor, making this a year-round recipe.

2. Play with Herbs and Spices

Fresh herbs like basil, thyme, or mint can add a sophisticated touch to your toast. If you prefer a bit of warmth, a pinch of cinnamon or cardamom in the ricotta will create a cozy, spiced flavor.

3. Make It More Indulgent

For an extra treat, drizzle some dark chocolate over the toast or add a handful of toasted nuts like almonds or pistachios. The crunch and depth of flavor will make this an even more decadent experience.

4. Add a Savory Twist

If you love the balance of sweet and savory, try adding a sprinkle of flaky sea salt and a drizzle of olive oil over the ricotta. You can also use a bit of goat cheese mixed with ricotta for an earthier flavor.

Gather Your Ingredients

For the Roasted Strawberries:

  • 1 pint fresh strawberries, hulled and sliced
  • 1 tablespoon honey
  • 1 teaspoon balsamic vinegar
  • Pinch of salt

For the Whipped Ricotta:

  • 1 cup ricotta cheese
  • 1 tablespoon honey
  • 1/2 teaspoon vanilla extract

For Assembly:

  • 4 slices of crusty bread, toasted
  • Fresh thyme or basil leaves (optional)
  • Extra honey for drizzling

Crafting the Perfect Bite

1. Roast the Strawberries:

  • Preheat the oven to 375°F (190°C) and line a baking sheet with parchment paper.
  • In a bowl, toss sliced strawberries with honey, balsamic vinegar, and a pinch of salt.
  • Spread evenly on the baking sheet and roast for 20-25 minutes until soft and caramelized. Let cool.

2. Whip Up the Ricotta:

  • In a mixing bowl, combine ricotta cheese, honey, and vanilla extract.
  • Using a hand mixer or whisk, whip until smooth and creamy.

3. Assemble the Toast:

  • Spread a thick layer of whipped ricotta onto each slice of toasted bread.
  • Spoon over the roasted strawberries.
  • Garnish with fresh thyme or basil and drizzle with extra honey.

Nourishing Indulgence

  • Calories: ~250 per serving
  • Serving Size: 4 servings

A perfect balance of sweet and savory flavors, this toast is ideal for breakfast, brunch, or a luxurious snack. Enjoy every bite!

Frequently Asked Questions

Can I Make This Recipe Ahead of Time?

Yes! You can roast the strawberries in advance and store them in an airtight container in the refrigerator for up to 3 days. When you’re ready to serve, simply reheat them slightly or use them chilled for a refreshing contrast. The whipped ricotta can also be made ahead and stored for a couple of days. However, it’s best to assemble the toast fresh to maintain the crispness of the bread.

What Kind of Bread Works Best?

A sturdy, crusty bread like sourdough, a rustic country loaf, or even a thick-cut brioche works well. The bread needs to be able to hold up to the creamy ricotta and juicy strawberries without becoming soggy. Avoid overly soft sandwich bread, as it won’t provide the right texture.

Can I Use Store-Bought Whipped Ricotta?

Absolutely! While homemade whipped ricotta is fresher and has a superior texture, store-bought versions work fine if you’re short on time. Just be sure to check the ingredients for added stabilizers or preservatives that might alter the taste.

Is This Recipe Gluten-Free?

Yes, as long as you use gluten-free bread. Everything else in the recipe is naturally gluten-free.

Can I Make This Vegan?

Yes! Simply substitute the ricotta with a vegan alternative like almond or cashew-based ricotta. Use maple syrup instead of honey for sweetening. There are plenty of great plant-based ricotta recipes that mimic the creamy texture beautifully.

What Other Dishes Can I Pair This With?

This toast pairs beautifully with:

  • A light arugula salad with lemon vinaigrette for a balanced meal
  • A side of scrambled eggs for added protein
  • A warm cup of coffee, a cappuccino, or a mimosa for brunch

The Beauty of Simple Ingredients

What makes this recipe so special is that it takes everyday ingredients—bread, ricotta, strawberries—and transforms them into something extraordinary. It’s proof that you don’t need complex techniques or expensive ingredients to create a dish that feels luxurious.

The best meals are often the simplest ones, rooted in nostalgia, warmth, and the joy of sharing food with loved ones. Whether you’re making this toast for a leisurely breakfast on a quiet morning or serving it to guests at a weekend brunch, it’s a recipe that brings people together.

Conclusion

Roasted Strawberry Whipped Ricotta Toast is more than just a dish—it’s an experience. The caramelized depth of roasted strawberries, the creamy lightness of whipped ricotta, and the crisp bite of toasted bread come together in a way that feels indulgent yet effortless.

This recipe is a reminder that food doesn’t have to be complicated to be memorable. Sometimes, all it takes is a handful of good ingredients and a little time in the kitchen to create something truly special.

So the next time you find yourself with a basket of ripe strawberries, take a moment to slow down, roast them to perfection, and savor the simple pleasure of a beautifully crafted toast. After all, the best flavors are the ones that bring us back home.

aiting

A Taste of Nostalgia: Roasted Strawberry Whipped Ricotta Toast

This Roasted Strawberry Whipped Ricotta Toast is a luxurious balance of sweet and savory flavors. With caramelized strawberries, creamy whipped ricotta, and golden toasted bread, it’s perfect for breakfast, brunch, or an indulgent snack.
Prep Time 10 minutes
Cook Time 25 minutes
Total Time 35 minutes
Servings: 4 servings
Course: Breakfast, Brunch, Snack
Cuisine: American

Ingredients
  

For the Roasted Strawberries:
  • 1 pint fresh strawberries hulled and sliced
  • 1 tablespoon honey
  • 1 teaspoon balsamic vinegar
  • Pinch of salt
For the Whipped Ricotta:
  • 1 cup ricotta cheese
  • 1 tablespoon honey
  • 1/2 teaspoon vanilla extract
For Assembly:
  • 4 slices of crusty bread toasted
  • Fresh thyme or basil leaves optional
  • Extra honey for drizzling

Method
 

Roast the Strawberries:
  1. Preheat the oven to 375°F (190°C) and line a baking sheet with parchment paper.
  2. In a bowl, toss sliced strawberries with honey, balsamic vinegar, and a pinch of salt.
  3. Spread evenly on the baking sheet and roast for 20-25 minutes until soft and caramelized. Let cool.
Whip Up the Ricotta:
  1. In a mixing bowl, combine ricotta cheese, honey, and vanilla extract.
  2. Using a hand mixer or whisk, whip until smooth and creamy.
Assemble the Toast:
  1. Spread a thick layer of whipped ricotta onto each slice of toasted bread.
  2. Spoon over the roasted strawberries.
  3. Garnish with fresh thyme or basil and drizzle with extra honey.

Notes

  • Swap balsamic vinegar for lemon juice for a brighter flavor.
  • Try adding a sprinkle of crushed pistachios or almonds for extra texture.
  • For a dairy-free option, substitute ricotta with whipped coconut cream.

Easter Cake Pops: A Sweet Treat for a Festive Celebration

A Nostalgic Easter Tradition

Easter has always been a time of joy, renewal, and, of course, sweet treats. As a child, I remember waking up on Easter morning to find a beautifully arranged basket filled with chocolates, marshmallow bunnies, and colorful candies. But the most exciting part of the holiday was always the time spent in the kitchen, creating festive desserts with my family.

One year, my grandmother introduced us to the magic of cake pops. Unlike the traditional cupcakes and cookies we usually made, these treats were fun-sized, perfectly coated in chocolate, and decorated with sprinkles that looked like tiny bursts of spring. Rolling the dough, dipping each pop into melted chocolate, and carefully adding sprinkles felt like an art project rather than a baking task.

Now, Easter cake pops have become a staple in my home. They’re an easy, no-bake dessert that brings the family together for an afternoon of creativity. Whether you’re making them for a holiday gathering, gifting them in treat bags, or simply enjoying them with a cup of tea, these delightful little sweets are sure to bring smiles.

Why You’ll Love These Easter Cake Pops

1. No-Bake and Easy to Make

Unlike traditional cake pops that require baking a cake, crumbling it, and mixing it with frosting, this version simplifies the process by using crushed Oreos and cream cheese. No need to turn on the oven—just mix, roll, chill, dip, and decorate!

2. Fun for All Ages

Cake pops are the perfect Easter activity for kids and adults alike. Children love rolling the mixture into balls and decorating them with colorful sprinkles, while adults appreciate the simplicity of the process. It’s a fun, mess-free way to get everyone involved in holiday baking.

3. Customizable for Any Occasion

Though these cake pops are decorated for Easter, you can easily switch up the sprinkles and colors to match any holiday or event. Use red and green for Christmas, orange and black for Halloween, or pastel shades for a spring baby shower. The possibilities are endless.

4. Perfect for Parties and Gifts

Easter cake pops are great for sharing. Arrange them in a decorative jar, wrap them individually in treat bags, or place them in a foam base to create a beautiful dessert display. They make adorable party favors and thoughtful homemade gifts.

5. A Sweet, Indulgent Treat

With a creamy Oreo and cream cheese center coated in a smooth layer of white chocolate, these cake pops are rich, decadent, and satisfying. Each bite delivers a delicious contrast between the crunchy chocolate shell and the soft, velvety filling.

Creative Ways to Enjoy and Serve Easter Cake Pops

1. Create an Easter Dessert Display

Instead of simply serving these on a plate, consider arranging them in a festive way. Stick them into a foam block wrapped in pastel tissue paper to create a “cake pop bouquet” centerpiece for your Easter table.

2. Turn Them into Easter Basket Treats

Wrap each cake pop individually in clear treat bags and tie them with a pastel ribbon. Add them to Easter baskets for a homemade touch that kids (and adults) will love.

3. Make a Cake Pop Bar

If you’re hosting an Easter gathering, set up a “cake pop bar” where guests can dip their own cake pops into melted chocolate and decorate them with sprinkles, crushed candies, or drizzled icing. It’s an interactive and fun way to get everyone involved.

4. Pair with a Cup of Coffee or Tea

While these cake pops are a hit with kids, adults can also enjoy them alongside their morning coffee or an afternoon cup of tea. The creamy, chocolatey texture pairs beautifully with a warm drink.

Ingredients

  • 15 ounces Oreos – Crushed into fine crumbs for the base.
  • 8 ounces cream cheese – Softened to mix smoothly with the Oreos.
  • 18 ounces white melting wafers – A sweet and creamy coating.
  • 36-42 lollypop sticks – To transform them into fun, handheld treats.
  • Sprinkles (optional) – For a festive Easter touch.

Directions

  1. Blend and Roll – Process the Oreos into fine crumbs, mix in the cream cheese, and form into 1-inch balls.
  2. Chill – Refrigerate for at least an hour to firm up.
  3. Dip and Decorate – Melt the white chocolate wafers, dip each ball into the coating, and add sprinkles before it sets.
  4. Set and Serve – Place the cake pops on a parchment-lined sheet and chill before serving.

Nutritional Bites (Per Serving, Approximate)

  • Calories: 341
  • Total Fat: 14g
  • Saturated Fat: 6g
  • Cholesterol: 13mg
  • Carbohydrates: 52g
  • Sugar: 28g
  • Protein: 3g

These delightful Easter cake pops are an easy, no-bake treat that’s perfect for holiday gatherings, dessert tables, or fun family baking projects. With just a few ingredients, they bring festive charm and indulgent sweetness to any celebration!

FAQs About Easter Cake Pops

1. Can I Use a Different Type of Chocolate for the Coating?

Yes! While white chocolate melting wafers give these cake pops a bright, festive look, you can also use milk chocolate, dark chocolate, or even pastel-colored candy melts for a more colorful finish. Just make sure to use high-quality melting chocolate for a smooth and even coating.

2. How Do I Keep Cake Pops from Falling Off the Stick?

One trick is to dip the tip of each lollypop stick into the melted chocolate before inserting it into the cake pop. This acts as a “glue” and helps secure the stick in place. Also, be sure to chill the cake pops before dipping to keep them firm.

3. Can I Make These in Advance?

Absolutely! These cake pops store well in an airtight container in the refrigerator for up to a week. If you want to make them even further in advance, they can be frozen for up to a month. Just let them thaw in the fridge before serving.

4. What’s the Best Way to Melt the Chocolate?

For best results, use a microwave-safe bowl and heat the chocolate in 15-second intervals, stirring in between. You can also use a double boiler for more controlled melting. Avoid overheating, as chocolate can burn quickly.

5. Can I Use a Different Type of Cookie Instead of Oreos?

Yes! While Oreos provide a deliciously rich and chocolatey base, you can experiment with different cookies like vanilla wafers, graham crackers, or even shortbread for a unique twist on the classic recipe.

6. How Do I Prevent My Cake Pops from Cracking?

Cake pops can sometimes crack if they’re too cold when dipped into warm chocolate. To prevent this, allow the cake pops to sit at room temperature for a couple of minutes after chilling before dipping them.

7. Can I Use Regular White Chocolate Instead of Melting Wafers?

You can, but melting wafers are specifically designed for dipping and will set more smoothly. Regular white chocolate can sometimes seize or develop streaks if not tempered correctly. If using regular white chocolate, consider adding a teaspoon of coconut oil to help with consistency.

Conclusion: The Sweetest Way to Celebrate Easter

Easter cake pops are more than just a dessert—they’re a celebration of family, creativity, and the simple joys of the holiday. Whether you’re making them with your kids, serving them at a party, or gifting them to loved ones, these bite-sized treats bring a touch of sweetness to any Easter gathering.

With their creamy Oreo center, smooth chocolate shell, and festive decorations, these cake pops are guaranteed to be a hit. The best part? They’re incredibly easy to make, so you can spend less time in the kitchen and more time enjoying the holiday with family and friends.

So, gather your ingredients, roll up your sleeves, and get ready to create a batch of Easter cake pops that will bring smiles to everyone who takes a bite. After all, holidays are about making memories—and what better way to do that than with a delicious treat in hand?

aiting

Easter Cake Pops: A Sweet Treat for a Festive Celebration

These Easter Wonderland Cake Pops are a delightful, no-bake treat perfect for holiday gatherings and fun family baking projects. With a creamy Oreo and cream cheese filling coated in white chocolate, these festive pops are as delicious as they are adorable!
Prep Time 20 minutes
Total Time 1 hour 20 minutes
Servings: 36 -42 cake pops
Course: Dessert
Cuisine: American

Ingredients
  

  • 15 ounces Oreos – Crushed into fine crumbs for the base.
  • 8 ounces cream cheese – Softened to mix smoothly with the Oreos.
  • 18 ounces white melting wafers – A sweet and creamy coating.
  • 36-42 lollypop sticks – To transform them into fun handheld treats.
  • Sprinkles optional – For a festive Easter touch.

Method
 

  1. Step 1: Blend and Roll
  2. Process the Oreos into fine crumbs using a food processor.
  3. Mix in the softened cream cheese until well combined.
  4. Form the mixture into 1-inch balls and place them on a baking sheet.
Step 2: Chill
  1. Refrigerate the Oreo balls for at least 1 hour to firm up.
Step 3: Dip and Decorate
  1. Melt the white chocolate wafers according to package instructions.
  2. Dip the tip of each lollypop stick into the melted chocolate, then insert it into each Oreo ball.
  3. Fully dip each ball into the melted chocolate and let excess chocolate drip off.
  4. While the coating is still wet, add sprinkles for a festive touch.
Step 4: Set and Serve
  1. Place the cake pops on a parchment-lined sheet and refrigerate until set.
  2. Once hardened, serve and enjoy these festive Easter treats!

Notes

  • For extra variety, use pastel-colored melting wafers for a spring-themed look.
  • Make ahead and store in the refrigerator for up to 5 days.
  • Gift idea – Wrap each pop individually in clear cellophane bags with ribbons for a cute Easter favor.

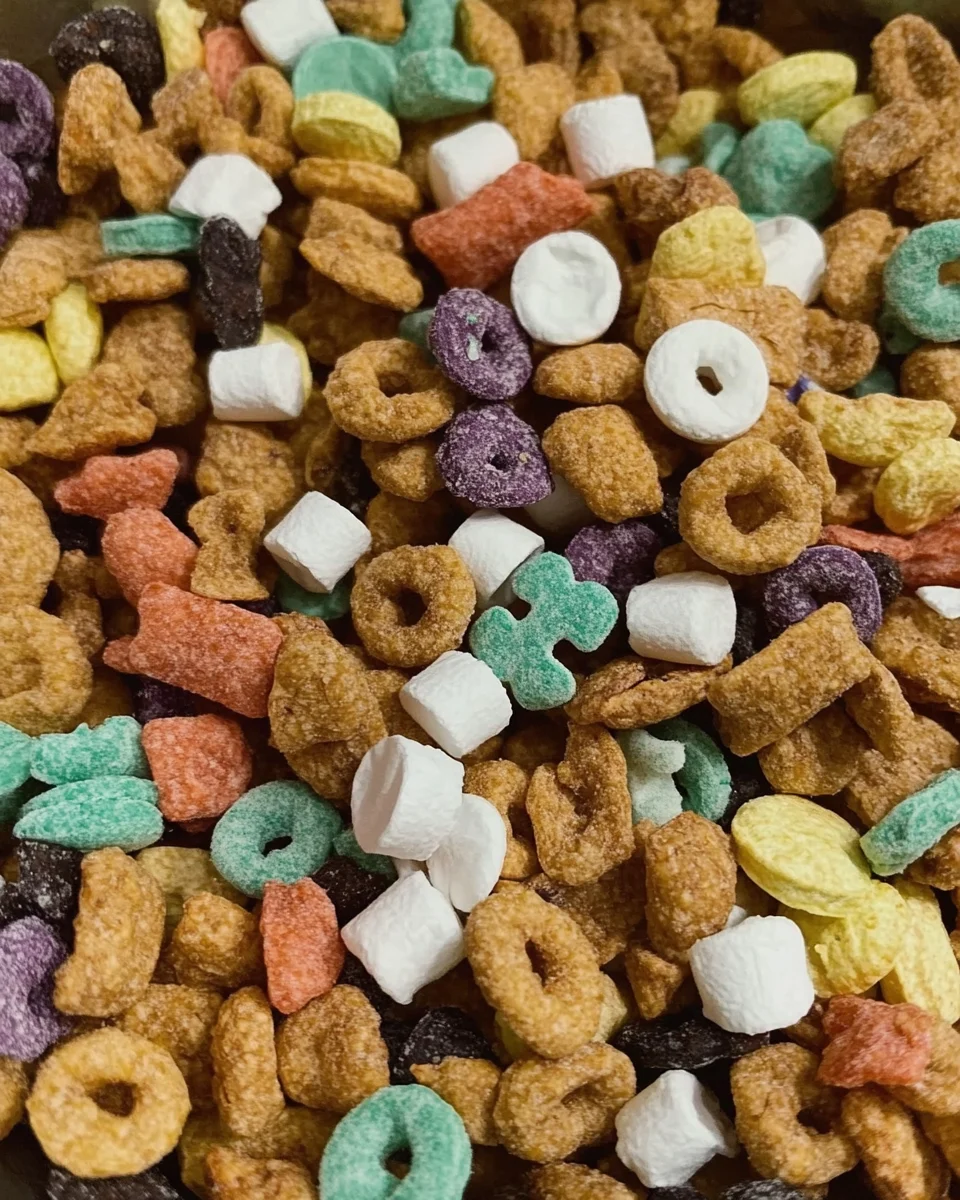
A Lucky Snack: St. Patrick’s Day Trail Mix That Brings Families Together

A Tradition Wrapped in Sweetness

Growing up, St. Patrick’s Day wasn’t just about wearing green and avoiding playful pinches—it was a time for fun traditions, festive treats, and magical stories of leprechauns hiding gold at the end of rainbows. My mom always found a way to make every holiday special, and one of my favorite memories was gathering around the kitchen table to make a festive snack mix. We’d toss together whatever sweet and crunchy ingredients we had, laughing as we tried to make sure each handful had the perfect balance of marshmallows, chocolate, and cereal.

Now that I have kids of my own, I see how much joy these little traditions bring. There’s something special about sharing a simple, homemade snack that sparks imagination and excitement. This St. Patrick’s Day Trail Mix isn’t just a treat—it’s a way to create memories, encourage creativity, and bring a little magic into your home. Whether your family enjoys it while crafting, watching a festive movie, or packing it into snack bags for a classroom party, this mix is sure to become a new holiday favorite.

Why This St. Patrick’s Day Trail Mix is a Must-Make

1. Quick, Easy, and No-Bake

With so many elaborate holiday treats out there, sometimes the simplest ones are the best. This recipe requires no baking, no complicated instructions, and no special equipment—just a bowl and a spoon. Even the youngest kids can help mix it together, making it a fun and mess-free activity.

2. Kid-Friendly and Customizable

One of the best things about this trail mix is that you can make it your own. While the basic recipe is delicious on its own, you can easily swap in your favorite ingredients. Whether your kids love green M&M’s, white chocolate chips, or even pretzels for a salty-sweet twist, the possibilities are endless. Letting children choose their own mix-ins adds an extra layer of excitement and makes them feel involved in the process.

3. A Perfect On-the-Go Snack

This trail mix isn’t just for celebrating at home—it’s a great portable snack for lunchboxes, road trips, or St. Patrick’s Day parties at school. Pack it in small snack bags or reusable containers for an easy, mess-free treat that kids (and adults) will love.

4. A Fun Way to Celebrate the Holiday

Food is a big part of holiday traditions, and this trail mix brings a festive touch to any St. Patrick’s Day celebration. The colorful cereal, golden graham pieces, and fluffy marshmallows create a snack that’s just as fun to look at as it is to eat.

Creative Ways to Enjoy This Festive Snack

If you want to get even more creative, here are some fun ways to serve and enjoy this St. Patrick’s Day Trail Mix:

1. Party Snack Bowls

Hosting a St. Patrick’s Day party? Fill small bowls with this mix and place them around the room for an easy, grab-and-go snack that guests of all ages will love.

2. Leprechaun Bait

Want to add a little magic to your celebration? Tell your kids that this mix is “leprechaun bait” and leave a small bowl out the night before St. Patrick’s Day. The next morning, replace it with a little note from a mischievous leprechaun who “snuck in and took a taste.”

3. Movie Night Treat

Turn movie night into a holiday celebration by serving this trail mix alongside a family-friendly St. Patrick’s Day movie. Pair it with a classic like Darby O’Gill and the Little People or an animated favorite featuring lucky charms and leprechauns.

4. Gift Bags for Friends and Teachers

Spread some holiday cheer by packaging this mix in clear treat bags tied with a green ribbon. Add a festive tag that says, “Wishing You a Lucky and Sweet St. Patrick’s Day!” It’s a thoughtful, homemade gift that’s perfect for teachers, classmates, and neighbors.

Ingredients

  • 2 cups mini marshmallows – Soft and chewy, adding a delightful sweetness.
  • 3 cups Golden Grahams cereal – A crunchy, honey-kissed base.
  • 3 cups Fruit Loops cereal – A colorful and fruity addition.

Optional Add-Ins:

  • Mini chocolate chips
  • Lucky Charms marshmallows
  • Green M&M’s
  • White chocolate chips

Directions

  1. Mix It Up – In a large bowl, combine the Golden Grahams, Fruit Loops, and mini marshmallows.
  2. Customize to Your Taste – Stir in any optional ingredients like chocolate chips or Lucky Charms marshmallows.
  3. Serve and Enjoy – Portion the mix into snack bags or small bowls for a fun and mess-free treat.

Nutritional Treasure Chest (Per Serving, Approximate)

  • Calories: ~150-180
  • Carbohydrates: ~30g
  • Sugars: ~15g
  • Fat: ~2-4g
  • Protein: ~2g

This festive St. Patrick’s Day trail mix is a simple, no-mess snack that’s perfect for kids’ parties, themed activities, or an on-the-go treat. The best part? It’s fully customizable, so you can make it as sweet or as balanced as you like!

FAQs About St. Patrick’s Day Trail Mix

1. Can I Make This Mix in Advance?

Yes! This trail mix stores well in an airtight container for up to a week. If you’re adding chocolate chips or marshmallows, keep in mind that they may get slightly sticky over time, so storing the mix in a cool, dry place is best.

2. Is This Recipe Allergy-Friendly?

This mix can easily be adapted for different dietary needs. If you need a gluten-free version, opt for a gluten-free cereal alternative. For a nut-free option, avoid adding any nut-based ingredients like peanut butter chips. If you’re making a dairy-free mix, use dairy-free chocolate chips.

3. Can I Make This Healthier?

Absolutely! While this mix is meant to be a fun holiday treat, you can make it a bit more balanced by adding in nuts, dried fruit, or whole-grain cereals. Try swapping out some of the sugary ingredients for healthier options like air-popped popcorn, almonds, or unsweetened coconut flakes.

4. How Do I Keep the Mix from Getting Soggy?

If you’re making a large batch and want to keep it fresh, avoid storing it in a humid environment. If your mix includes marshmallows, they may absorb moisture over time, so keeping the mix sealed in an airtight container is key.

5. Can Kids Help Make This Recipe?

Definitely! This is the perfect recipe for kids because it doesn’t require any knives, heat, or complicated steps. Let your little ones measure, pour, and mix the ingredients—it’s a great way to get them involved in the kitchen and excited about cooking.

A Sweet Ending to a Lucky Day

Holidays are about more than just decorations and traditions—they’re about the moments we create with our loved ones. This St. Patrick’s Day Trail Mix is more than just a snack; it’s an opportunity to gather in the kitchen, share laughs, and build lasting memories with family and friends.

Whether you’re making it with your kids, gifting it to friends, or simply indulging in a festive treat yourself, this easy and delicious mix is the perfect way to celebrate. So grab a bowl, toss in your favorite ingredients, and enjoy a little taste of St. Patrick’s Day magic—one handful at a time.

aiting

A Lucky Snack: St. Patrick’s Day Trail Mix That Brings Families Together

This Lucky Leprechaun Snack Mix is a fun, festive, and colorful treat perfect for St. Patrick’s Day celebrations. With crunchy Golden Grahams, fruity loops, and soft mini marshmallows, this mix is great for kids’ parties, themed activities, or a quick grab-and-go snack. Fully customizable, you can add your favorite sweets to make it even more delightful!
Prep Time 5 minutes
Total Time 5 minutes
Servings: 6 servings
Course: Snack
Cuisine: American

Ingredients
  

  • 2 cups mini marshmallows – Soft and chewy adding a delightful sweetness.
  • 3 cups Golden Grahams cereal – A crunchy honey-kissed base.
  • 3 cups Fruit Loops cereal – A colorful and fruity addition.
Optional Add-Ins
  • Mini chocolate chips
  • Lucky Charms marshmallows
  • Green M&M’s
  • White chocolate chips

Method
 

  1. 2 cups mini marshmallows – Soft and chewy, adding a delightful sweetness.
  2. 3 cups Golden Grahams cereal – A crunchy, honey-kissed base.
  3. 3 cups Fruit Loops cereal – A colorful and fruity addition.
Optional Add-Ins
  1. Mini chocolate chips
  2. Lucky Charms marshmallows
  3. Green M&M’s
  4. White chocolate chips

Notes

  • Make it healthier by adding nuts or dried fruit for extra nutrients.
  • For a chocolatey twist, drizzle melted white or milk chocolate over the mix.
  • Perfect for gifting—pack in festive bags or jars for a charming holiday giveaway.

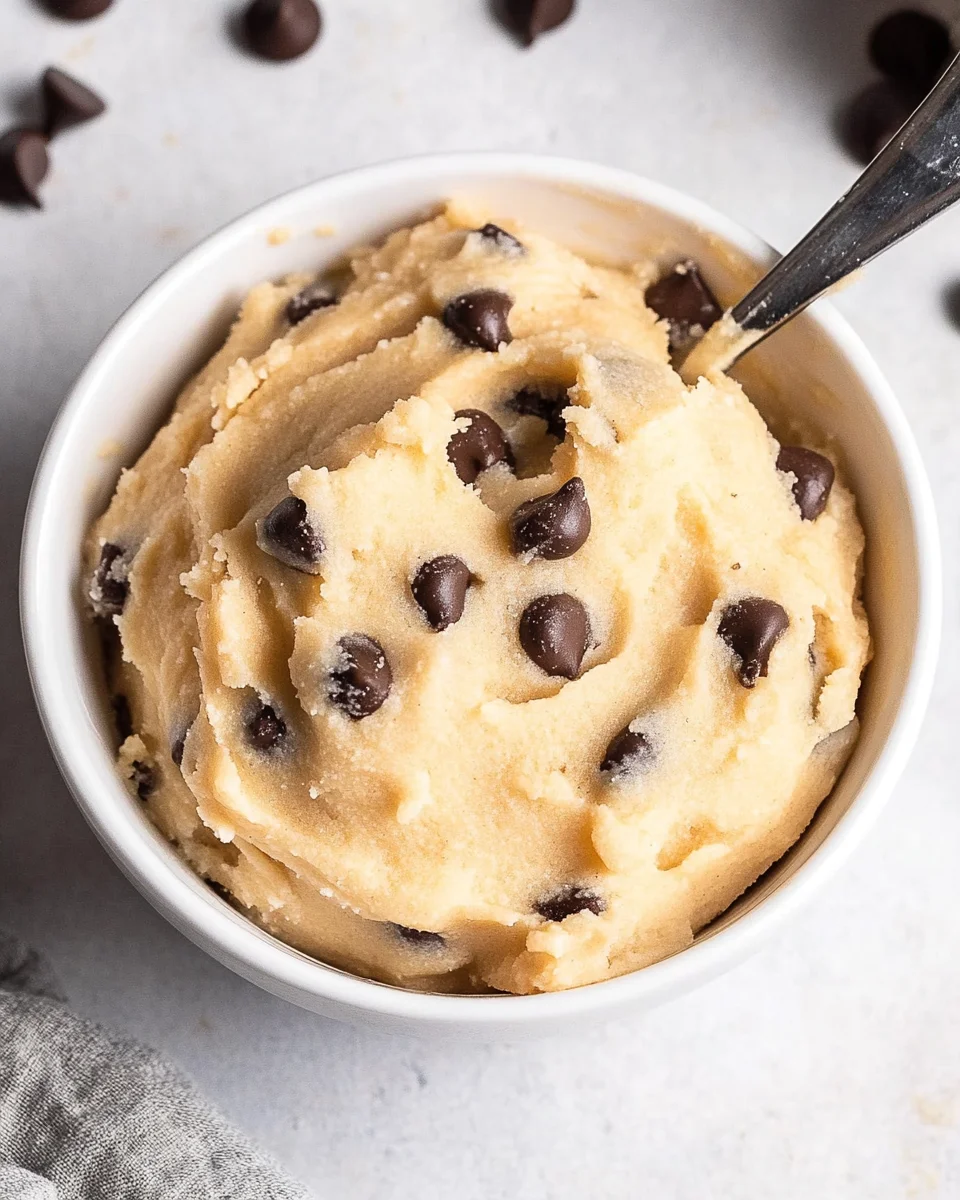
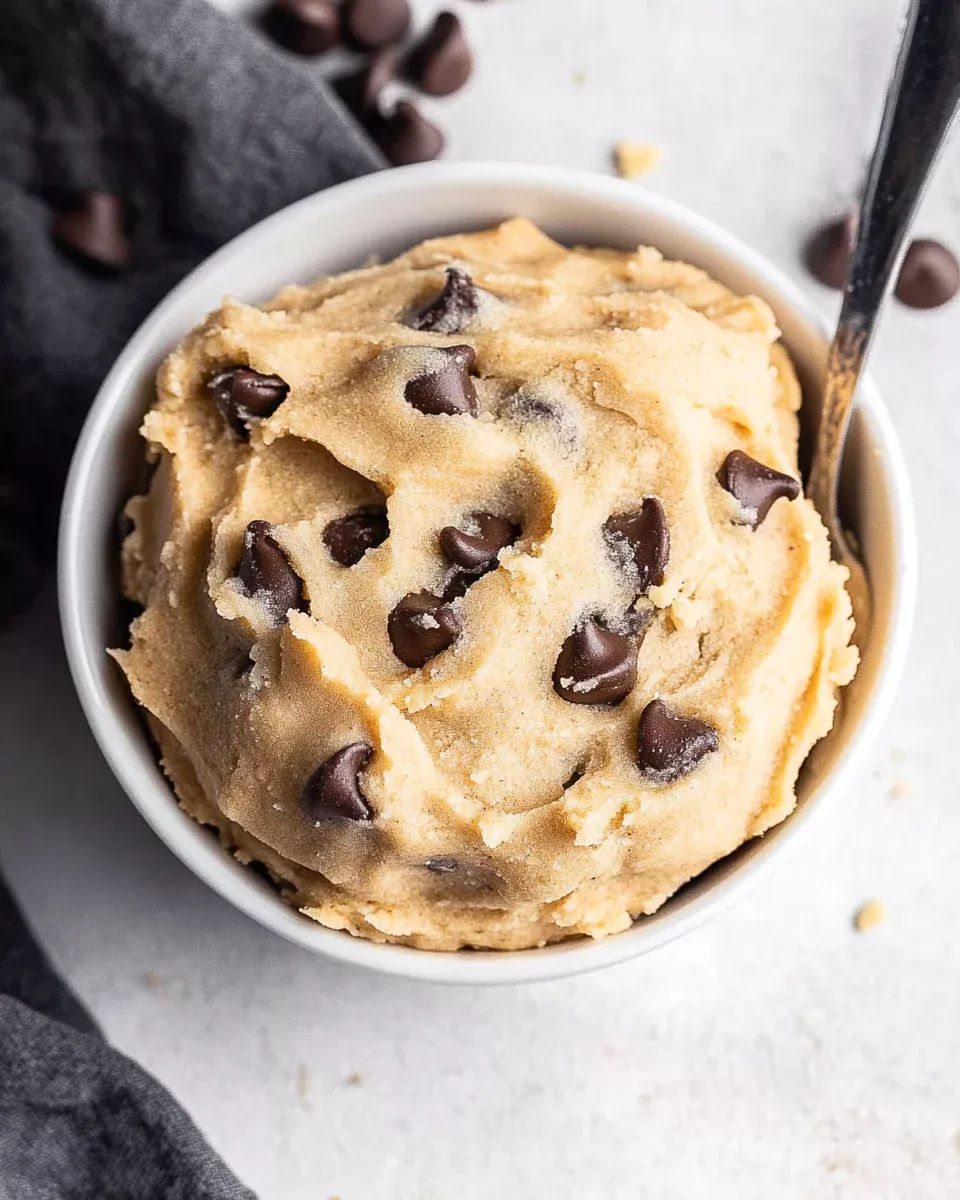
The Ultimate Gluten-Free Cookie Dough Experience

A Sweet Treat with a Story

There’s something magical about cookie dough. For many of us, it sparks memories of sneaking spoonfuls from the mixing bowl while baking cookies as kids. I remember standing on my tiptoes, barely able to reach the kitchen counter, watching my grandmother mix up a batch of chocolate chip cookie dough. She’d always tell me, “Just one bite,” but we both knew I’d end up with more than that.

As I grew older and began exploring different dietary choices, I discovered that many of my favorite childhood treats contained ingredients I needed to avoid. Traditional cookie dough, with its wheat flour and dairy, was suddenly off the table. That’s when I realized—there had to be a way to recreate that same indulgent experience without the gluten, raw eggs, or unnecessary additives.

That’s how this gluten-free edible cookie dough was born. It’s the perfect balance of nostalgia and mindful eating—creamy, sweet, and completely safe to eat raw. Whether you have dietary restrictions or simply want a quick and easy dessert, this recipe is here to satisfy your cravings without compromise.

Why This Gluten-Free Cookie Dough is a Game Changer

This recipe isn’t just about creating an alternative to traditional cookie dough—it’s about redefining what dessert can be. Here’s why you’ll love it:

1. No-Bake, No Fuss

Baking requires patience, time, and a little bit of science. But what if you could skip the baking and still enjoy that soft, melt-in-your-mouth cookie dough experience? This recipe is as simple as mix-and-enjoy—no oven required.

2. Completely Safe to Eat Raw

One of the biggest concerns with traditional cookie dough is the presence of raw eggs and untreated flour, both of which can carry harmful bacteria. This gluten-free version eliminates both risks by omitting eggs entirely and using heat-treated flour. You get all the taste with none of the worry.

3. Customizable to Your Taste

Whether you’re in the mood for a classic chocolate chip flavor, a rich double chocolate variation, or something more adventurous like matcha white chocolate, this recipe is endlessly adaptable. Want to make it extra indulgent? Stir in some peanut butter or a handful of crushed nuts.

4. Diet-Friendly and Allergy-Friendly

This cookie dough can easily be made dairy-free, vegan, or refined sugar-free. Swap out the butter for coconut oil, use a plant-based milk, and choose coconut or maple sugar for a natural sweetener. With so many variations, everyone can enjoy a spoonful (or two).

5. Perfect for Meal Prep and Snacking

Unlike traditional cookie dough that requires refrigeration before baking, this edible dough is ready as soon as you mix it up. Make a batch at the beginning of the week, store it in an airtight container, and you’ll have a ready-to-eat treat anytime those sweet cravings hit.

How to Elevate Your Cookie Dough Game

Want to take this simple recipe to the next level? Here are a few ways to make your gluten-free cookie dough even more exciting:

1. Make Cookie Dough Bites

Roll the dough into small bite-sized balls and freeze them for a grab-and-go snack. These are perfect for adding to yogurt bowls, smoothies, or even eating straight from the freezer for a firmer, fudgier texture.

2. Turn It into a Dessert Topping

Warm cookie dough drizzled over vanilla ice cream? Yes, please. Add it to pancakes, oatmeal, or even use it as a filling between layers of cake.

3. Stuff It into Brownies or Bars

Layer this cookie dough between homemade brownies for a decadent dessert bar. It adds an extra layer of creaminess and texture, making every bite more indulgent.

4. Mix in Fun Add-Ins

Chocolate chips are a classic, but why stop there? Try crushed pretzels, peanut butter swirls, sprinkles, or even caramel chunks to make your cookie dough unique.

Irresistible No-Bake Gluten-Free Cookie Dough

Ingredients

Classic Gluten-Free Cookie Dough:

  • 2 tablespoons butter or coconut oil, softened
  • 3-4 tablespoons milk (dairy or non-dairy, such as almond milk)
  • 1/4 cup sugar (brown sugar, cane sugar, coconut sugar, or maple sugar)
  • 1 teaspoon vanilla extract
  • 3/4 cup gluten-free all-purpose flour
  • 1/4 cup mini chocolate chips

Double Chocolate Gluten-Free Cookie Dough:

  • 2 tablespoons butter or coconut oil, softened
  • 3-4 tablespoons milk (dairy or non-dairy, such as almond milk)
  • 1/4 cup sugar (brown sugar, cane sugar, coconut sugar, or maple sugar)
  • 1/2 cup gluten-free all-purpose flour
  • 1/4 cup unsweetened cocoa powder
  • 1/4 cup mini chocolate chips

Directions

  1. Mix the Base – In a large bowl, combine all the ingredients except the chocolate chips. Stir until a smooth dough forms.
  2. Fold in the Chocolate – Gently mix in the chocolate chips until evenly distributed.
  3. Enjoy Immediately or Store – Serve fresh or store in an airtight container in the refrigerator for up to 5 days.

Optional Step: Heat-Treat the Flour
To ensure food safety, heat-treat the gluten-free flour by either:

  • Microwave Method – Heat for about 1 minute, ensuring it reaches 165°F.
  • Oven Method – Spread on a baking sheet and bake at 350°F for 5-10 minutes.

Nutritional Breakdown (Per Serving, Approximate)

  • Calories: ~150-180
  • Fat: ~8-10g
  • Carbohydrates: ~18-22g
  • Sugar: ~10-12g
  • Protein: ~2-3g

This gluten-free edible cookie dough is perfect for satisfying sweet cravings without baking. Enjoy it straight from the bowl, use it as an ice cream topping, or roll it into bite-sized truffles!

FAQs About Gluten-Free Edible Cookie Dough

1. Can I Bake This Cookie Dough?

No, this dough isn’t designed for baking. Since it doesn’t contain eggs or leavening agents, it won’t hold its structure in the oven. If you’re looking for a gluten-free cookie recipe, you’ll need to modify the ingredients.

2. How Do I Make Sure My Flour is Safe to Eat?

Gluten-free flour, like any flour, should be heat-treated to kill any potential bacteria. You can do this by microwaving it for about one minute or baking it at 350°F for 5-10 minutes. Let it cool before using it in the recipe.

3. How Long Does It Last?

Stored in an airtight container in the refrigerator, this cookie dough will stay fresh for up to 5 days. You can also freeze it for up to 3 months.

4. Can I Use Almond or Coconut Flour Instead?

It’s best to use a high-quality gluten-free all-purpose flour blend. Almond and coconut flour have different textures and absorb moisture differently, which can alter the consistency of the dough.

5. Is This Recipe Vegan?

It can be! Use coconut oil instead of butter and choose dairy-free chocolate chips and milk. Just like that, you have a fully plant-based, gluten-free dessert.

6. What’s the Best Gluten-Free Flour to Use?

Brands like Bob’s Red Mill 1:1 Gluten-Free Flour and King Arthur’s Gluten-Free Measure for Measure Flour work best. Avoid Trader Joe’s gluten-free flour, as it tends to have a bitter aftertaste.

Conclusion: Indulge Without Compromise

For so long, enjoying raw cookie dough felt like a guilty pleasure—one that came with risks or dietary restrictions that left some of us out. But this gluten-free, no-bake cookie dough changes everything. It’s indulgent yet mindful, nostalgic yet modern, and best of all, it’s made for everyone.

Whether you’re sneaking a spoonful straight from the fridge, rolling it into bite-sized treats, or using it as a topping for your favorite desserts, this recipe is here to satisfy your sweet tooth without limitations. So go ahead—enjoy that extra bite. After all, this cookie dough was made to be enjoyed, no baking required.

aiting

The Ultimate Gluten-Free Cookie Dough Experience

This Gluten-Free No-Bake Cookie Dough is an indulgent treat that you can enjoy straight from the bowl! Made with simple, gluten-free ingredients, this edible dough is perfect for satisfying your sweet tooth without the need for baking. Try it as an ice cream topping or roll it into bite-sized truffles!
Prep Time 5 minutes
Total Time 5 minutes
Servings: 6 servings
Course: Dessert/Snack
Cuisine: American

Ingredients
  

  • Classic Gluten-Free Cookie Dough
  • 2 tablespoons butter or coconut oil softened
  • 3-4 tablespoons milk dairy or non-dairy, such as almond milk
  • 1/4 cup sugar brown sugar, cane sugar, coconut sugar, or maple sugar
  • 1 teaspoon vanilla extract
  • 3/4 cup gluten-free all-purpose flour
  • 1/4 cup mini chocolate chips
Double Chocolate Gluten-Free Cookie Dough
  • 2 tablespoons butter or coconut oil softened
  • 3-4 tablespoons milk dairy or non-dairy, such as almond milk
  • 1/4 cup sugar brown sugar, cane sugar, coconut sugar, or maple sugar
  • 1/2 cup gluten-free all-purpose flour
  • 1/4 cup unsweetened cocoa powder
  • 1/4 cup mini chocolate chips

Method
 

  1. Step 1: Mix the Base
  2. In a large bowl, combine all the ingredients except the chocolate chips. Stir until a smooth dough forms.
Step 2: Fold in the Chocolate
  1. Gently mix in the chocolate chips until evenly distributed.
Step 3: Enjoy Immediately or Store
  1. Serve fresh or store in an airtight container in the refrigerator for up to 5 days.
Optional Step: Heat-Treat the Flour
    To ensure food safety, heat-treat the gluten-free flour by either:
    1. Microwave Method – Heat for about 1 minute, ensuring it reaches 165°F.
    2. Oven Method – Spread on a baking sheet and bake at 350°F for 5-10 minutes.

    Notes

    • Add nuts, shredded coconut, or peanut butter for extra flavor.
    • Dairy-Free? Use coconut oil and plant-based milk for a vegan option.
    • Store Leftovers in the fridge for up to 5 days or freeze for up to 2 months.

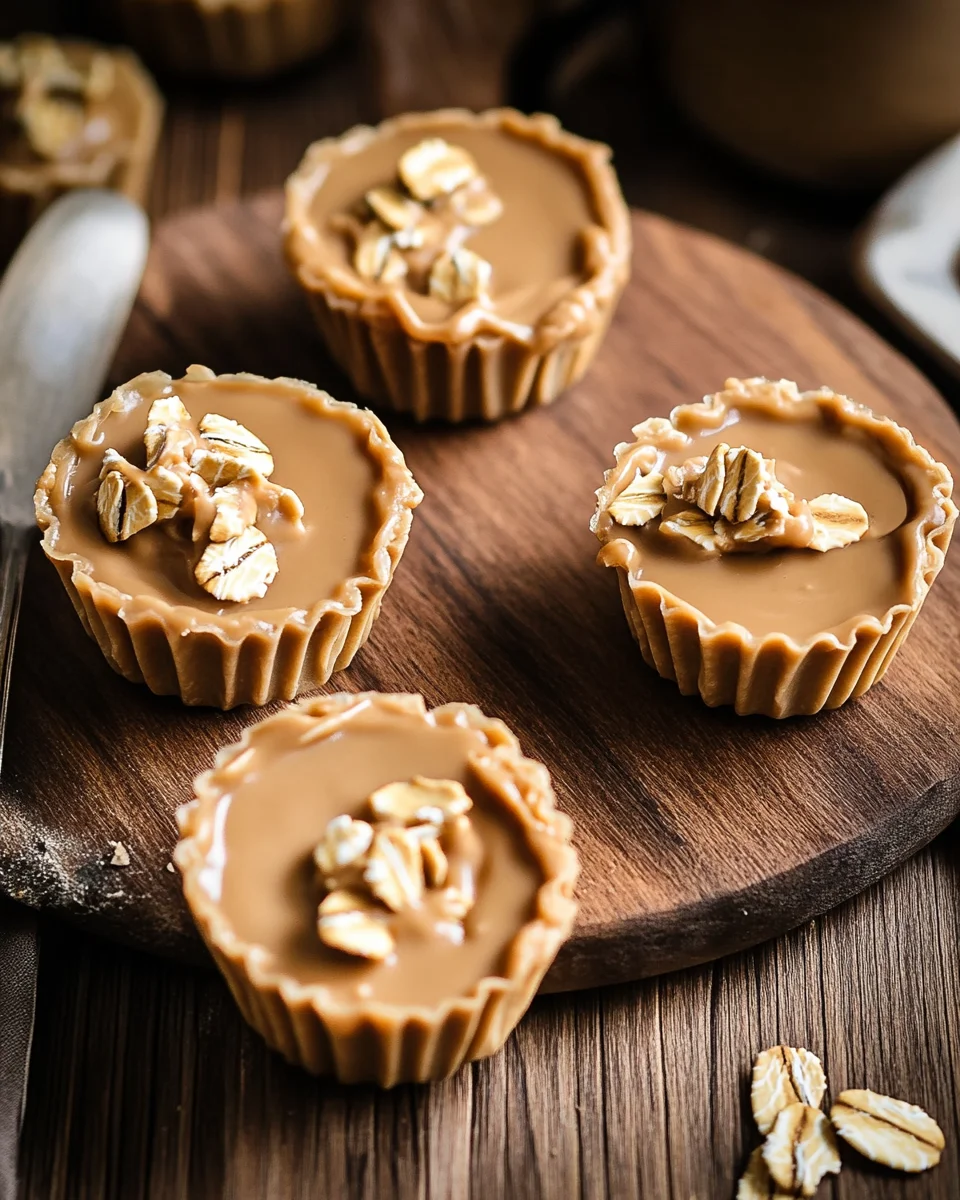
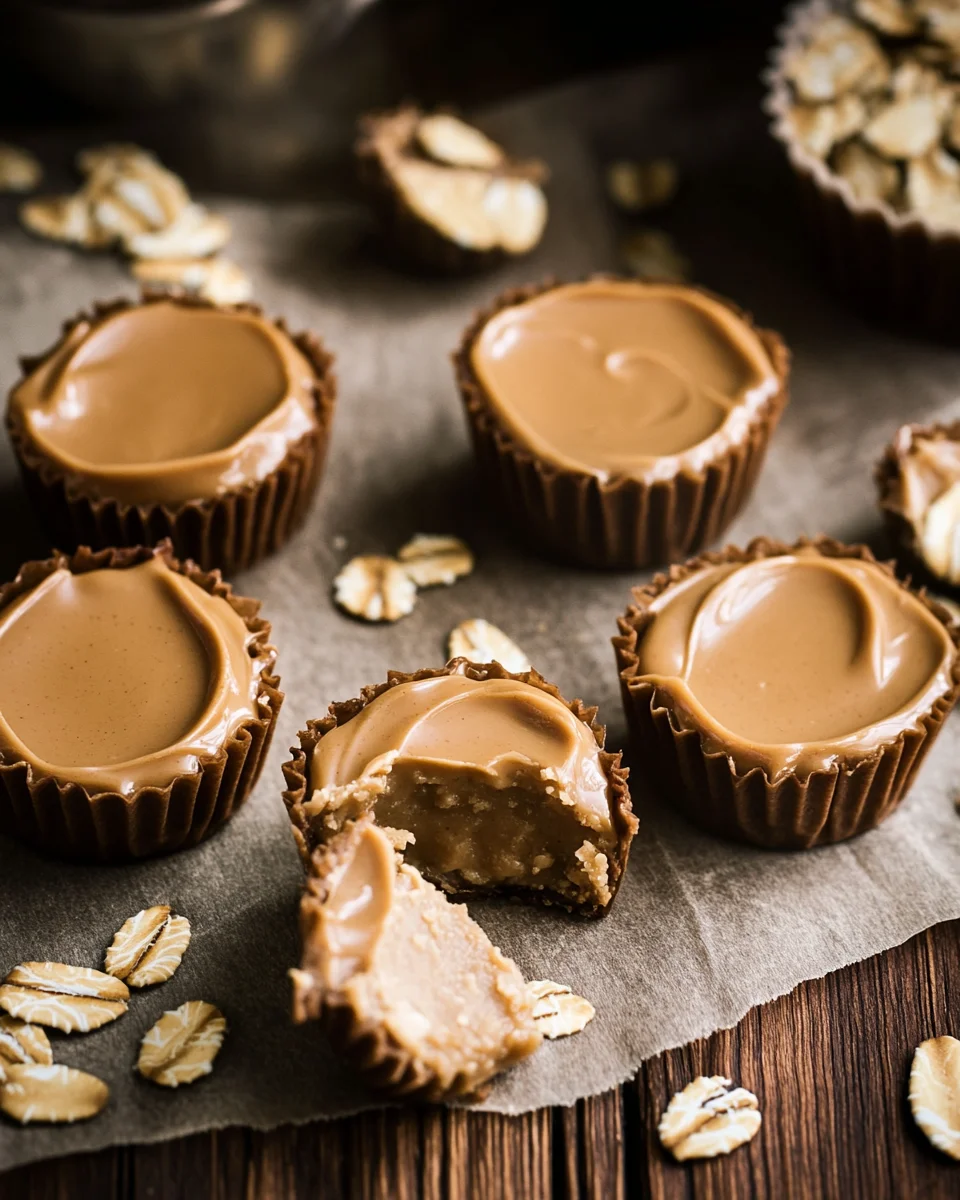
    No-Bake Peanut Butter Oat Cups: A Sweet and Wholesome Treat for Every Occasion

    A Nostalgic Bite of Comfort and Simplicity

    There’s something magical about the combination of peanut butter and oats. It reminds me of childhood afternoons spent in my grandmother’s kitchen, where she always had a jar of homemade peanut butter treats waiting for us. The warmth of peanut butter melting into oats, the hint of sweetness from honey, and the occasional surprise of chocolate chips—these simple ingredients came together in the most comforting way.

    Back then, we didn’t care about baking or following recipes perfectly. We just mixed, shaped, and waited impatiently as our no-bake treats set in the fridge. There was no need for an oven, no long list of ingredients—just a few pantry staples and a love for good food. Those little bites became more than just snacks; they were memories in the making, a symbol of care and togetherness.

    Now, as life gets busier and schedules get tighter, I find myself returning to the simplicity of those no-bake peanut butter oat cups. They’re quick, require minimal effort, and offer the same nostalgic comfort in every bite. Whether you need an afternoon pick-me-up, a healthy snack for your kids, or a guilt-free dessert, these oat cups are the perfect solution.

    Why No-Bake Peanut Butter Oat Cups Are a Must-Try

    1. Perfect for Any Occasion

    These oat cups are as versatile as they are delicious. Whether you need a quick breakfast, a midday energy boost, or a healthy dessert, they fit the bill. They’re also great for road trips, lunchboxes, or a post-workout snack.

    2. Minimal Effort, Maximum Flavor

    With just a handful of ingredients, these oat cups come together in minutes. There’s no need to turn on the oven, making them perfect for warm days when you don’t want to heat up the kitchen.

    3. Packed with Nutrients

    Peanut butter provides healthy fats and protein, oats add fiber, and honey offers natural sweetness. Dark chocolate chips (if you choose to include them) bring a touch of indulgence without overpowering the healthy nature of this snack.

    4. Easily Customizable

    You can get creative with this recipe by adding different ingredients to suit your taste and dietary needs. From seeds and nuts to dried fruit or coconut flakes, the possibilities are endless.

    Ingredients:

    • Rolled Oats – 1 cup
    • Natural Peanut Butter – ½ cup
    • Honey or Maple Syrup – ¼ cup
    • Dark Chocolate Chips – ¼ cup (optional for topping)
    • Vanilla Extract – ½ teaspoon (optional)
    • Salt – A pinch (if using unsalted peanut butter)

    Directions:

    1. Prepare the Mixture:
      In a mixing bowl, combine the oats, peanut butter, honey (or maple syrup), vanilla extract, and salt. Stir well until everything is evenly mixed and sticky.
    2. Form the Cups:
      Spoon the mixture into a mini muffin tin, pressing it firmly into each cup. For easier removal, use cupcake liners or a silicone muffin tray.
    3. Add Chocolate Topping (Optional):
      Melt the chocolate chips in a microwave-safe bowl in 15-second intervals, stirring between each until smooth. Drizzle or spread melted chocolate over each oat cup.
    4. Chill and Serve:
      Place the muffin tin in the refrigerator for at least 1 hour until the cups are firm. Once set, remove them from the tin and enjoy.

    Nutritional Information (Per Serving – Estimated):

    • Calories: ~150 kcal
    • Carbohydrates: ~14g
    • Protein: ~4g
    • Fat: ~9g
    • Saturated Fat: ~2g
    • Fiber: ~2g
    • Sugar: ~7g
    • Sodium: ~50mg

    Storage Tips:

    • Store in an airtight container in the fridge for up to one week.
    • Freeze for longer storage, letting them thaw for a few minutes before eating.

    Creative Add-Ins:

    • Shredded Coconut – For added texture and natural sweetness.
    • Chia Seeds – A boost of fiber and omega-3s.
    • Crushed Nuts – Almonds, cashews, or walnuts for extra crunch.
    • Nut Butter Alternatives – Swap peanut butter for almond or cashew butter.

    A simple, no-bake recipe that’s perfect for a healthy snack or a quick dessert. Enjoy these wholesome bites anytime!

    Frequently Asked Questions

    How Long Do These Oat Cups Last?

    Stored in an airtight container in the refrigerator, these peanut butter oat cups can last up to a week. If you want to keep them for longer, they can be frozen for up to three months. Just allow them to thaw for a few minutes before eating.

    Can I Use a Different Nut Butter?

    Absolutely. While peanut butter is the classic choice, almond butter, cashew butter, or even sunflower seed butter (for a nut-free option) work just as well. Each will slightly alter the flavor but will still create a delicious no-bake treat.

    Are These Oat Cups Healthy?

    Yes, they are a great alternative to processed snacks. Oats provide fiber, peanut butter offers protein and healthy fats, and honey adds natural sweetness. You can further enhance their nutritional value by adding chia seeds, flaxseeds, or protein powder.

    Can I Make These Without Sweetener?

    If you prefer to skip the honey or maple syrup, you can try using mashed banana or unsweetened applesauce as a natural sweetener. Keep in mind that this may slightly affect the texture.

    Do I Have to Use Dark Chocolate?

    Not at all. You can use milk chocolate, white chocolate, or even omit the chocolate altogether for a simpler version. If you’re looking for a sugar-free option, use sugar-free chocolate chips or a drizzle of unsweetened nut butter on top.

    What Type of Oats Should I Use?

    Rolled oats (also called old-fashioned oats) work best for this recipe because they hold their texture while still softening slightly when mixed with the peanut butter. Quick oats can be used but may result in a slightly softer consistency. Avoid steel-cut oats as they are too tough and chewy for no-bake recipes.

    Can I Make These Vegan?

    Yes, these oat cups can be made completely vegan by using maple syrup instead of honey and ensuring that your chocolate chips are dairy-free.

    How Can I Add More Protein?

    If you want to increase the protein content, try adding a scoop of protein powder to the mixture. You may need to adjust the consistency by adding a little extra peanut butter or a splash of almond milk.

    Ways to Elevate This Recipe

    If you want to put a twist on the classic peanut butter oat cup, here are some creative variations:

    1. Coconut Bliss Oat Cups

    Add shredded coconut to the oat mixture and sprinkle toasted coconut flakes on top for a tropical touch.

    2. Peanut Butter and Jelly Oat Cups

    After pressing the oat mixture into the muffin tin, add a small dollop of fruit preserves in the center before chilling. This creates a fun peanut butter and jelly flavor.

    3. Superfood Oat Cups

    Mix in chia seeds, flaxseeds, hemp hearts, or even a bit of matcha powder for an extra nutritional boost.

    4. Spiced Choco-Peanut Cups

    Add a pinch of cinnamon and nutmeg to the mixture for a warm, spiced flavor. This works especially well during the colder months.

    5. Crunchy Pretzel Topping

    For a salty-sweet contrast, sprinkle crushed pretzels on top of the chocolate layer before chilling.

    The Perfect Treat for All Ages

    One of the things I love most about these no-bake peanut butter oat cups is that they appeal to everyone. Kids love their sweet, chewy texture, while adults appreciate their balance of indulgence and nutrition. They are a great way to introduce little ones to homemade snacks, and they make for an excellent energy-boosting bite for busy parents, athletes, and professionals alike.

    I’ve brought these oat cups to countless gatherings, and they always disappear within minutes. There’s something about the combination of peanut butter and chocolate that is universally loved. They’re easy to make, easy to store, and even easier to enjoy.

    Conclusion: A Recipe Worth Keeping

    In a world where schedules are packed and convenience often trumps homemade meals, it’s refreshing to have a recipe that brings us back to the basics. These no-bake peanut butter oat cups are proof that delicious, wholesome treats don’t have to be complicated.

    They remind us that the best recipes aren’t always the ones with the longest ingredient list or the most intricate techniques. Sometimes, the most satisfying bites come from a simple mix of pantry staples, a bit of creativity, and a whole lot of love.

    Whether you’re making them for your family, for a special occasion, or just for yourself, these peanut butter oat cups are a snack worth savoring. They are a reminder that good food doesn’t have to be difficult—it just has to be made with care.

    So go ahead, whip up a batch, and enjoy a little moment of sweetness in your day.

    aiting

    No-Bake Peanut Butter Oat Cups: A Sweet and Wholesome Treat for Every Occasion

    These No-Bake Peanut Butter Oat Cups are a quick and nutritious treat, perfect for satisfying your sweet tooth while keeping things healthy. Made with simple ingredients like oats, peanut butter, and honey, they require no baking and can be customized with various add-ins for extra flavor and nutrition. Great for a snack, breakfast, or dessert!
    Prep Time 10 minutes
    Total Time 1 hour 10 minutes
    Servings: 12 mini oat cups
    Course: Dessert, Snack
    Cuisine: American

    Ingredients
      

    • Rolled Oats – 1 cup
    • Natural Peanut Butter – 1/2 cup
    • Honey or Maple Syrup – 1/4 cup
    • Dark Chocolate Chips – 1/4 cup optional for topping
    • Vanilla Extract – 1/2 teaspoon optional
    • Salt – A pinch if using unsalted peanut butter

    Method
     

    1. Step 1: Prepare the Mixture
    2. In a mixing bowl, combine oats, peanut butter, honey (or maple syrup), vanilla extract, and salt.
    3. Stir well until everything is evenly mixed and the texture is sticky.
    Step 2: Form the Cups
    1. Spoon the mixture into a mini muffin tin, pressing it firmly into each cup.
    2. For easier removal, use cupcake liners or a silicone muffin tray.
    Step 3: Add Chocolate Topping (Optional)
    1. Melt the chocolate chips in a microwave-safe bowl in 15-second intervals, stirring between each until smooth.
    2. Drizzle or spread the melted chocolate over each oat cup.
    Step 4: Chill and Serve
    1. Place the muffin tin in the refrigerator for at least 1 hour until the cups are firm.
    2. Once set, remove them from the tin and enjoy!

    Notes

    • For extra texture and flavor, try mixing in shredded coconut, chia seeds, or crushed nuts.
    • Use a different nut butter such as almond or cashew for variety.
    • Make ahead and store in the refrigerator for easy grab-and-go snacks.

    Bacon Crackers: The Ultimate Sweet and Savory Party Snack

    A Nostalgic Bite of Comfort and Celebration

    Growing up, my family had a tradition of gathering around the kitchen table on Sunday afternoons, sharing stories and laughter over homemade snacks. There was always something special about those simple moments—no distractions, just good food and great company. One of my earliest food memories is watching my grandmother prepare her signature bacon crackers for family get-togethers.

    She would carefully lay out the crackers, topping each with a perfectly cut piece of bacon before sprinkling them with brown sugar and a touch of spice. The aroma that filled the house was unforgettable—sweet, smoky, and buttery all at once. By the time they were out of the oven, we were already hovering around the kitchen, waiting for them to cool just enough to grab a handful.

    Even now, years later, the first bite of these crispy, caramelized treats takes me right back to those cherished moments. That’s the magic of bacon crackers—they’re not just a snack, they’re a feeling. They bring people together, spark conversation, and add a touch of indulgence to any occasion. Whether you’re hosting a holiday party, prepping for game day, or just looking for a quick and easy appetizer, these bacon crackers are guaranteed to steal the show.

    Why Bacon Crackers Are the Perfect Party Snack

    There are plenty of appetizers out there, but bacon crackers stand out for a few simple reasons:

    1. The Perfect Balance of Sweet and Savory

    The combination of crispy bacon, buttery crackers, and caramelized brown sugar creates a perfect balance of flavors. The slight heat from cayenne pepper or black pepper adds just enough spice to keep things interesting.

    2. Minimal Ingredients, Maximum Flavor

    With just five basic ingredients—crackers, bacon, brown sugar, cayenne, and black pepper—this recipe is as simple as it gets. You don’t need fancy ingredients or complicated techniques, yet the result is a gourmet-level snack that impresses every time.

    3. Effortless and Quick to Prepare

    It takes just 10 minutes of prep work before these crackers go into the oven. Whether you’re in a rush or planning ahead, this recipe fits seamlessly into any schedule.

    4. Make-Ahead Friendly

    One of the best things about bacon crackers is that they can be made in advance. This means less stress when hosting, as you can prepare them ahead of time and simply reheat or serve them at room temperature when guests arrive.

    5. Versatile and Crowd-Pleasing

    These crackers are perfect for any occasion. Serve them at a casual game night, a holiday gathering, or even as a savory addition to a charcuterie board. They also pair beautifully with dips, soups, or even a glass of wine.

    Ingredients:

    • Club Crackers – About 36 crackers (or any buttery cracker like Ritz or Townhouse)
    • Bacon – 1 pound, cut into thirds
    • Brown Sugar – ¾ cup (light or dark)
    • Cayenne Pepper – A pinch, for a hint of heat
    • Black Pepper – Freshly ground, to taste

    Directions:

    1. Preheat & Prep: Preheat oven to 300°F. Line a baking sheet with foil and place a wire cooling rack on top.
    2. Assemble: Arrange crackers in a single layer on the rack. Top each cracker with a piece of bacon.
    3. Add Flavor: Evenly sprinkle about a teaspoon of brown sugar over each cracker, followed by a pinch of cayenne and black pepper.
    4. Bake: Bake for 30-40 minutes, or until the bacon is crisp and the sugar has caramelized.
    5. Cool & Serve: Let them cool completely before serving to allow the sugar to harden.

    Nutritional Information (Per Serving):

    • Calories: 107 kcal
    • Carbohydrates: 9g
    • Protein: 5g
    • Fat: 6g
    • Saturated Fat: 2g
    • Cholesterol: 12mg
    • Sodium: 268mg
    • Sugar: 5g
    • Calcium: 15mg
    • Iron: 0.4mg

    Pro Tips for Perfection:

    • Use Scissors: Cutting bacon with scissors makes prep much easier.
    • Thin Bacon Works Best: Thick-cut bacon takes too long to crisp and may burn the crackers.
    • Add Extra Heat: For a spicy twist, top each cracker with a thin slice of jalapeño before baking.
    • Make Ahead: Store in an airtight container in the fridge for up to 3 days or freeze for up to a month.

    These sweet, salty, and spicy bacon crackers are perfect for parties, game nights, or a quick snack attack!

    Common Questions About Bacon Crackers

    Can I Make Bacon Crackers Ahead of Time?

    Yes! Bacon crackers can be stored in an airtight container in the fridge for up to three days. If you need to store them longer, they freeze well for up to a month. Simply let them come to room temperature before serving, or pop them in the oven for a few minutes to refresh their crispiness.

    What Type of Bacon Works Best?

    Thin-cut bacon is the best choice for this recipe. Thick-cut bacon takes longer to crisp, which can lead to overcooked or burnt crackers. If you only have thick-cut bacon, try partially cooking it before placing it on the crackers.

    Can I Use a Different Type of Cracker?

    Absolutely! While club crackers are the go-to choice due to their buttery texture and perfect size, you can substitute Ritz, Townhouse, or any similar buttery cracker. If using round crackers, simply cut the bacon into smaller pieces to fit.

    Is There a Way to Make These Less Sweet?

    If you prefer a more savory bite, you can reduce the brown sugar or omit it altogether. Another option is to add a sprinkle of shredded cheese before baking for an extra savory twist.

    How Can I Add More Heat?

    If you love spice, consider adding extra cayenne pepper, a pinch of red pepper flakes, or even a thin slice of fresh jalapeño on top before baking. The heat balances beautifully with the caramelized sweetness.

    What Dips Pair Well With Bacon Crackers?

    While these crackers are delicious on their own, they also pair wonderfully with dips like sour cream and onion dip, creamy herb dip, or whipped garlic feta. They’re also great alongside soups, adding a crunchy, flavorful contrast.

    Can I Use Turkey Bacon Instead?

    Yes, turkey bacon can be used as a lighter alternative. Keep in mind that it won’t render as much fat, which means you may need to brush a little melted butter on the crackers before baking to achieve the same level of crispiness.

    Serving Suggestions and Creative Twists

    If you want to elevate this recipe even further, here are some creative ways to serve and modify bacon crackers:

    1. Add Cheese for an Extra Layer of Flavor

    Before baking, sprinkle shredded cheddar, Parmesan, or even blue cheese crumbles on top of the bacon for a rich, cheesy twist.

    2. Try a Maple Glaze for a Sweet and Smoky Touch

    Instead of brown sugar, brush the bacon with a light coating of maple syrup before baking. The result is a slightly smoky, sweet, and crispy treat.

    3. Serve as a Charcuterie Board Addition

    Pair bacon crackers with cured meats, cheeses, and fresh fruits for a well-balanced charcuterie spread. Their salty-sweet crunch complements a variety of flavors.

    4. Make it Keto-Friendly

    For a low-carb version, use almond flour crackers or cheese crisps instead of traditional crackers. This keeps the delicious flavors while making it keto-friendly.

    5. Drizzle with Honey or Hot Honey

    For an added touch of sweetness or spice, drizzle finished bacon crackers with a bit of honey or hot honey before serving.

    Storage and Reheating Tips

    • At Room Temperature: Best enjoyed within two hours of baking for peak crispiness.
    • Refrigeration: Store in an airtight container for up to 3 days. Let them sit at room temperature for 15 minutes before serving.
    • Freezing: Freeze in a single layer in an airtight container for up to a month. To reheat, bake at 300°F for 5-7 minutes until crisp.

    Conclusion: A Snack Worth Sharing

    Bacon crackers are more than just an appetizer—they’re a conversation starter, a nostalgic comfort, and a bite-sized indulgence that brings people together. Whether you’re making them for a party, a family gathering, or just a quiet night in, their crispy, caramelized goodness is sure to make a lasting impression.

    There’s something undeniably satisfying about the combination of buttery crackers, crispy bacon, and sweet-spicy caramelization. Each bite delivers a contrast of textures and flavors that keep you coming back for more.

    So the next time you’re looking for an effortless yet unforgettable snack, give these bacon crackers a try. They might just become your new go-to recipe—one that, like my grandmother’s version, will create memories to savor for years to come.

    aiting

    Bacon Crackers: The Ultimate Sweet and Savory Party Snack

    These Crispy Bacon Bliss Crackers are the ultimate combination of sweet, salty, and spicy flavors. With caramelized brown sugar, crispy bacon, and a hint of heat, they make the perfect snack for parties, game nights, or whenever you’re craving something deliciously addictive.
    Prep Time 10 minutes
    Servings: 36 crackers
    Course: Appetizer / Snack
    Cuisine: American

    Ingredients
      

    • Club Crackers about 36, or any buttery cracker like Ritz or Townhouse
    • 1 pound bacon cut into thirds
    • 3/4 cup brown sugar light or dark
    • A pinch of cayenne pepper
    • Freshly ground black pepper to taste

    Method
     

    1. Preheat & Prep – Preheat oven to 300°F. Line a baking sheet with foil and place a wire cooling rack on top.
    2. Assemble – Arrange crackers in a single layer on the rack. Top each cracker with a piece of bacon.
    3. Add Flavor – Evenly sprinkle about a teaspoon of brown sugar over each cracker, followed by a pinch of cayenne and black pepper.
    4. Bake – Bake for 30-40 minutes, or until the bacon is crisp and the sugar has caramelized.
    5. Cool & Serve – Let them cool completely before serving to allow the sugar to harden.

    Notes

    • Use Scissors – Cutting bacon with scissors makes prep much easier.
    • Thin Bacon Works Best – Thick-cut bacon takes too long to crisp and may burn the crackers.
    • Add Extra Heat – For a spicy twist, top each cracker with a thin slice of jalapeño before baking.
    • Make Ahead – Store in an airtight container in the fridge for up to 3 days or freeze for up to a month.

    Easter Blossom Cookies: A Festive Springtime Delight

    Easter is a time for family gatherings, colorful decorations, and of course, delicious treats. One of the best ways to celebrate is with Easter Blossom Cookies, a delightful twist on the classic blossom cookie. These festive cookies are coated in pastel sanding sugar, baked to golden perfection, and topped with a signature Hershey Kiss.

    Soft, chewy, and visually stunning, these cookies bring the joy of spring to any Easter celebration. Whether you’re baking with family, preparing for an Easter party, or simply indulging in a seasonal treat, these cookies are sure to be a hit.

    In this guide, we’ll explore everything you need to know about Easter Blossom Cookies—including variations, storage tips, and frequently asked questions—to help you make the perfect batch for your holiday table.

    Why Easter Blossom Cookies Are a Must-Try

    Blossom cookies have been a staple in holiday baking for years. They first gained popularity as Peanut Butter Blossoms, but have since evolved into various versions, including this Easter-inspired sugar cookie adaptation.

    Here’s why these cookies stand out:

    1. A Perfect Blend of Texture and Flavor

    Easter Blossom Cookies are soft and chewy with a slightly crisp outer layer thanks to the sanding sugar. The rich chocolate center from the Hershey Kiss complements the buttery, vanilla-almond cookie base, creating an irresistible flavor combination.

    2. Easy to Make and Fun for All Ages

    One of the biggest advantages of this recipe is how simple it is. No advanced baking skills required! Even kids can participate by rolling the dough in colorful sugars or pressing the chocolate kisses onto the cookies.

    3. A Beautiful, Festive Appearance

    With their pastel sugar coating and chocolate center, these cookies are not just delicious—they’re also eye-catching. They make for an excellent addition to Easter dessert platters, cookie exchange trays, or as homemade gifts.

    4. Customizable for Any Occasion

    While these cookies are a standout for Easter, they can easily be adapted for other holidays. Swap the pastel sanding sugar for red and green during Christmas, orange and black for Halloween, or pink and red for Valentine’s Day. The possibilities are endless!

    Storing and Preserving Easter Blossom Cookies

    If you’re making a batch ahead of time or just want to enjoy them longer, here’s how to keep them fresh:

    Short-Term Storage

    Store the cookies in an airtight container at room temperature for up to 5 days. Keep them in a cool, dry place to maintain their texture.

    Refrigeration

    While not necessary, refrigerating the cookies can extend their freshness to 7-10 days. However, be aware that the Hershey Kisses may harden in the fridge. If you prefer a softer chocolate center, allow the cookies to sit at room temperature before serving.

    Freezing for Later

    Easter Blossom Cookies can be frozen for up to 3 months. To freeze:

    • Place the cookies in a single layer on a baking sheet and freeze for 1-2 hours.
    • Transfer them to a freezer-safe bag or airtight container with parchment paper between layers.
    • When ready to enjoy, thaw them at room temperature for about 15-20 minutes before serving.

    Fun Variations to Try

    1. Chocolate Lovers’ Easter Blossoms

    Swap the traditional vanilla cookie base for a chocolate sugar cookie dough and use white chocolate Hershey Kisses for a decadent twist.

    2. Fruity Springtime Blossoms

    Instead of almond extract, add a few drops of lemon or orange extract to the dough for a bright, citrusy flavor. You can also use fruit-flavored Hershey Kisses or a pastel-colored M&M in the center.

    3. Peanut Butter Blossom Easter Edition

    Take the classic Peanut Butter Blossom Cookie and coat it in pastel-colored sugar for a festive spring twist. Use Reese’s Miniatures in the center instead of Hershey Kisses for a peanut butter-chocolate combo.

    4. Sprinkle Explosion Cookies

    Instead of rolling the cookies in sanding sugar, roll them in colorful Easter sprinkles to add extra crunch and a fun decorative touch.

    5. Vegan & Gluten-Free Blossoms

    For a vegan version, substitute the butter with vegan butter or coconut oil, use a flax egg (1 tbsp ground flaxseed + 3 tbsp water), and opt for dairy-free chocolate. To make them gluten-free, swap the all-purpose flour for a gluten-free flour blend.

    Ingredients for a Festive Treat

    • Butter – Softened to create a rich and moist texture.
    • Sugar – Sweetens the cookies and enhances their chewiness.
    • Egg – Helps bind the dough together.
    • Vanilla & Almond Extracts – Adds a depth of flavor with a subtle nutty and floral note.
    • Flour – The structural base of the cookies.
    • Baking Soda – Helps the cookies rise slightly and maintain their shape.
    • Salt – Balances the sweetness and enhances the overall flavor.
    • Milk – Adds moisture to the dough.
    • Pastel Sanding Sugar – Coats the cookies for a festive, colorful finish.
    • Hershey Kisses – The signature chocolate center that completes the cookie.

    Baking Magic: How to Create These Colorful Cookies

    1. Preheat & Prepare
      • Set the oven to 350°F and line a baking sheet with parchment paper or a silicone mat.
      • Pour different pastel sanding sugars into small bowls for easy rolling later.
    2. Mix the Dough
      • Using an electric mixer, cream the butter and sugar together until light and fluffy.
      • Add the egg, vanilla, and almond extract, mixing until combined.
      • Gradually add the flour, baking soda, salt, and milk, stirring until a soft dough forms.
    3. Shape & Coat
      • Roll tablespoon-sized portions of dough into balls.
      • Coat each ball in a pastel sanding sugar of your choice and place on the prepared baking sheet.
    4. Bake to Perfection
      • Bake for 8-10 minutes until the cookies are just set but still soft.
      • Remove from the oven and let them cool for 2 minutes.
    5. Add the Finishing Touch
      • Press a Hershey Kiss into the center of each warm cookie, allowing it to slightly melt into place.
      • Let the cookies cool completely before serving.

    Nutritional Information (Per Cookie)

    • Calories: 130
    • Carbohydrates: 19g
    • Protein: 2g
    • Fat: 6g
    • Saturated Fat: 3g
    • Sugar: 11g
    • Sodium: 109mg
    • Fiber: 0.4g

    These soft and chewy cookies with a crisp exterior and chocolate center are the perfect festive treat for Easter celebrations!

    Frequently Asked Questions

    Do I Have to Use Almond Extract?

    No, almond extract is optional, but it adds a subtle nutty flavor that enhances the cookie’s overall taste. If you prefer, you can simply double the vanilla extract or experiment with citrus, coconut, or mint extracts.

    Can I Use Different Types of Chocolate in the Center?

    Absolutely! While Hershey Kisses are the classic choice, you can substitute them with:

    • Mini Cadbury Eggs
    • Chocolate Caramel Kisses
    • Peanut Butter Cups
    • White Chocolate Truffles

    Why Did My Hershey Kisses Melt Too Much?

    If your Hershey Kisses are melting excessively, try this trick:

    • Let the cookies cool for a full 5 minutes before pressing the chocolate into the center.
    • You can also freeze the Hershey Kisses before placing them on the cookies to slow the melting process.

    Can I Prepare the Dough in Advance?

    Yes! You can make the dough up to 24 hours in advance and refrigerate it. When ready to bake, simply roll the dough into balls, coat in sanding sugar, and bake as directed.

    What’s the Best Way to Keep the Cookies Soft?

    To maintain their chewy texture:

    • Store them in an airtight container with a slice of bread to retain moisture.
    • Avoid overbaking—remove them from the oven when they are just set but still soft in the center.

    Are These Cookies Good for Gifting?

    Definitely! Place them in a decorative tin or clear treat bag, tie with a pastel ribbon, and add a personalized Easter tag. They make a charming homemade gift for friends, teachers, and neighbors.

    The Final Word: A Must-Have Easter Treat

    Easter Blossom Cookies are the perfect combination of beauty, flavor, and fun. Their pastel sugar coating and rich chocolate center make them a standout treat that’s sure to brighten any Easter celebration.

    With their easy preparation, endless variations, and long-lasting freshness, these cookies are an excellent choice for both novice and experienced bakers. Whether you’re making them for an Easter party, gifting them to loved ones, or just treating yourself, they’re guaranteed to bring a taste of spring to your table.

    So, gather your ingredients, preheat your oven, and get ready to enjoy one of the most delightful Easter treats of the season!

    aiting

    Easter Blossom Cookies: A Festive Springtime Delight

    These Easter Blossom Cookies are the perfect combination of soft, chewy, and chocolatey goodness! Coated in festive pastel sanding sugar and topped with a signature Hershey Kiss, they’re a delightful treat for springtime celebrations and Easter gatherings.
    Prep Time 15 minutes
    Cook Time 10 minutes
    Total Time 25 minutes
    Servings: 24 cookies
    Course: Dessert
    Cuisine: American

    Ingredients
      

    • Butter – softened to create a rich and moist texture
    • Sugar – sweetens the cookies and enhances their chewiness
    • Egg – helps bind the dough together
    • Vanilla & Almond Extracts – adds depth of flavor with a subtle nutty and floral note
    • Flour – the structural base of the cookies
    • Baking Soda – helps the cookies rise slightly and maintain their shape
    • Salt – balances the sweetness and enhances the overall flavor
    • Milk – adds moisture to the dough
    • Pastel Sanding Sugar – coats the cookies for a festive colorful finish
    • Hershey Kisses – the signature chocolate center that completes the cookie

    Method
     

    1. Preheat & Prepare
    2. Set the oven to 350°F and line a baking sheet with parchment paper or a silicone mat.
    3. Pour different pastel sanding sugars into small bowls for easy rolling later.
    Mix the Dough
    1. Using an electric mixer, cream the butter and sugar together until light and fluffy.
    2. Add the egg, vanilla, and almond extract, mixing until combined.
    3. Gradually add the flour, baking soda, salt, and milk, stirring until a soft dough forms.
    Shape & Coat
    1. Roll tablespoon-sized portions of dough into balls.
    2. Coat each ball in a pastel sanding sugar of your choice and place on the prepared baking sheet.
    Bake to Perfection
    1. Bake for 8-10 minutes until the cookies are just set but still soft.
    2. Remove from the oven and let them cool for 2 minutes.
    Add the Finishing Touch
    1. Press a Hershey Kiss into the center of each warm cookie, allowing it to slightly melt into place.
    2. Let the cookies cool completely before serving.

    Notes

    • Swap out Hershey Kisses for mini chocolate eggs for a fun variation.
    • Store in an airtight container for up to 5 days to keep them fresh.
    • These cookies make a perfect edible gift for Easter baskets!

    Luck on a Stick: Everything You Need to Know About Pretzel Shamrocks

    St. Patrick’s Day is a time for celebration, and what better way to spread some Irish cheer than with festive, sweet-and-salty treats? Pretzel shamrocks are an easy-to-make, eye-catching snack that brings together the crunch of pretzels, the sweetness of candy melts, and the fun of themed sprinkles. These charming treats are not just great for parties but also make perfect gifts and classroom snacks. Whether you’re an experienced baker or a first-time holiday treat maker, pretzel shamrocks are a simple yet delightful addition to your St. Patrick’s Day menu.

    Why Pretzel Shamrocks Are the Perfect Treat

    When it comes to festive holiday treats, convenience and visual appeal matter just as much as taste. Pretzel shamrocks check all the boxes for an ideal St. Patrick’s Day treat.

    1. The Perfect Balance of Sweet and Salty

    One of the best things about this recipe is the combination of flavors. The saltiness of the pretzels contrasts beautifully with the sweetness of the candy coating, making each bite irresistible. Unlike overly sugary desserts, these treats strike a delicious balance that appeals to kids and adults alike.

    2. Quick and Easy for All Skill Levels

    Not everyone has time to bake elaborate desserts, and that’s where pretzel shamrocks shine. With no need for special baking skills or fancy equipment, these treats come together in under 30 minutes. Even children can get involved, making them a fantastic option for a fun kitchen activity.

    3. A Creative Way to Celebrate St. Patrick’s Day

    Food has always been a big part of holiday traditions, and St. Patrick’s Day is no exception. While many people celebrate with traditional Irish dishes, themed treats like pretzel shamrocks add a playful touch to the holiday. Whether you’re making them for a party, school event, or just as a fun snack at home, these treats are sure to stand out.

    Storage Tips: Keeping Your Pretzel Shamrocks Fresh

    If you’re making these treats ahead of time, proper storage is key to keeping them fresh and delicious.

    Short-Term Storage

    Pretzel shamrocks can be stored at room temperature for 1-2 weeks as long as they are kept in an airtight container. Make sure they are placed in a cool, dry area away from direct sunlight to prevent melting.

    Refrigeration for a Longer Shelf Life

    If you want to keep your pretzel shamrocks fresher for longer, consider storing them in the refrigerator. They can last up to 2-3 weeks in a sealed container. Some people even prefer the taste of chilled pretzels as the candy coating becomes slightly firmer, adding to the texture.

    Freezing for Future Snacking

    Although these treats are best enjoyed fresh, you can freeze them for up to a month. If freezing, place them in a single layer on a tray before transferring them to a freezer-safe bag or container. When you’re ready to enjoy them, let them thaw at room temperature for about 15 minutes.

    Fun Variations to Try

    While the classic pretzel shamrock is delicious on its own, there are plenty of ways to add a creative twist.

    1. White Chocolate and Gold Drizzle

    For an elegant look, swap the green candy melts for white chocolate. After coating the pretzels, drizzle them with edible gold dust or gold-colored melted chocolate to give them a touch of leprechaun-inspired luxury.

    2. Rainbow Sprinkle Explosion

    Since rainbows are a big part of St. Patrick’s Day symbolism, why not incorporate them into this treat? Instead of just green sprinkles, use a mix of rainbow-colored nonpareils to create a festive, vibrant look.

    3. Mint Chocolate Delight

    For a flavor upgrade, use mint-flavored green candy melts instead of regular ones. The cool taste of mint combined with the crunch of pretzels makes for an extra refreshing treat.

    4. Peanut Butter Shamrocks

    If you love the combination of peanut butter and chocolate, spread a thin layer of peanut butter on the pretzels before dipping them in melted candy. This adds an extra layer of flavor that peanut butter fans will love.

    Ingredients:

    • 36 mini pretzels (3 per shamrock)
    • 1 cup green candy melts
    • 6 lollipop sticks (or pretzel sticks as an alternative)
    • Green and white sprinkles

    Directions:

    1. Shape the Shamrocks
      • Line a baking tray with parchment paper.
      • Arrange three pretzels into a shamrock shape: place one pretzel right side up and the other two sideways, touching at the bottom.
      • Repeat until you have six shamrock shapes.
      • Slide a lollipop stick between the bottom two pretzels of each shamrock.
    2. Melt the Candy Coating
      • Microwave the candy melts on medium power for 45 seconds, stir, then heat for another 45 seconds until fully melted.
    3. Coat the Pretzels
      • Dip one pretzel at a time into the melted candy, using a fork to fully coat it.
      • Shake off excess coating and place the pretzel back on the tray.
      • Repeat for the remaining pretzels in each shamrock.
    4. Assemble & Decorate
      • Drizzle some of the melted candy onto the space between the pretzels to connect them and secure the lollipop stick.
      • Sprinkle with decorations before the candy hardens.
    5. Let Them Set
      • Chill in the fridge for 15 minutes or leave at room temperature for 30 minutes.
    6. Enjoy!
      • Serve immediately or store in an airtight container for up to two weeks.

    Nutritional Information (Approximate per Shamrock):

    • Calories: ~80
    • Carbohydrates: 12g
    • Fat: 3g
    • Protein: 1g
    • Sugar: 7g

    These festive, salty-sweet treats are perfect for St. Patrick’s Day celebrations!

    Frequently Asked Questions

    When making a themed treat like this, certain questions often arise. Below are some of the most common FAQs to ensure your pretzel shamrocks turn out perfectly.

    Do I Need to Refrigerate Pretzel Shamrocks?

    No, refrigeration isn’t necessary unless you prefer a firmer candy coating. If storing at room temperature, just keep them in an airtight container away from heat and moisture.

    Can I Use Regular Chocolate Instead of Candy Melts?

    Yes! If you prefer a richer chocolate flavor, you can melt white or milk chocolate and add a few drops of green food coloring. However, candy melts are designed for smooth, easy coating, so chocolate may require the addition of coconut oil or shortening to achieve the same consistency.

    How Can I Prevent the Candy Coating from Getting Too Thick?

    If the melted candy is too thick, try adding a teaspoon of vegetable oil or coconut oil to thin it out. Stir well before dipping your pretzels.

    What’s the Best Way to Coat the Pretzels Evenly?

    Using a fork to dip and remove the pretzels from the melted candy works best. After dipping, gently tap the fork on the side of the bowl to shake off excess coating before placing the pretzels on the tray.

    Can I Use Different Types of Pretzels?

    Absolutely! While mini pretzels are ideal for making shamrocks, you can experiment with pretzel twists or rounds for different shapes and textures.

    Are These Treats Safe for Kids with Allergies?

    This recipe is nut-free, but always check the packaging of your ingredients for potential cross-contamination. If dairy is a concern, opt for dairy-free candy melts.

    The Perfect Party Favor and Gift Idea

    Pretzel shamrocks aren’t just for snacking; they make fantastic gifts and party favors. Wrap them individually in clear cellophane bags and tie them with green ribbons for an extra festive touch. You can also add a printable tag with a fun St. Patrick’s Day message, making them the perfect treat to share with friends, coworkers, or classmates.

    For those hosting a St. Patrick’s Day gathering, consider displaying the pretzel shamrocks in a decorative jar or arranging them in a bouquet-style centerpiece. This way, they double as both a treat and a festive decoration.

    Conclusion: A Little Luck in Every Bite

    Pretzel shamrocks are the ultimate St. Patrick’s Day treat—fun to make, easy to customize, and packed with the perfect balance of sweet and salty flavors. Whether you’re whipping up a batch for a party, making them with kids, or simply treating yourself, these festive snacks are sure to bring a little extra luck to your celebration.

    With their simple preparation and charming presentation, they prove that sometimes, the best holiday treats don’t require hours in the kitchen. So grab your pretzels, melt some candy, and start creating your own batch of lucky shamrocks—because nothing says St. Patrick’s Day quite like a festive snack that’s as delightful as it is delicious.

    aiting

    Luck on a Stick: Everything You Need to Know About Pretzel Shamrocks

    These Lucky Shamrock Pretzel Pops are a delightful mix of salty and sweet, making them the perfect festive treat for St. Patrick’s Day! With a simple candy coating and a fun shamrock shape, they’re easy to make and even more fun to eat.
    Prep Time 10 minutes
    Cook Time 15 minutes
    Total Time 25 minutes
    Servings: 6 shamrock pops
    Course: Dessert
    Cuisine: American

    Ingredients
      

    • 36 mini pretzels 3 per shamrock
    • 1 cup green candy melts
    • 6 lollipop sticks or pretzel sticks as an alternative
    • Green and white sprinkles

    Method
     

    1. Shape the Shamrocks
    2. Line a baking tray with parchment paper.
    3. Arrange three pretzels into a shamrock shape: place one pretzel right side up and the other two sideways, touching at the bottom.
    4. Repeat until you have six shamrock shapes.
    5. Slide a lollipop stick between the bottom two pretzels of each shamrock.
    Melt the Candy Coating
    1. Microwave the candy melts on medium power for 45 seconds, stir, then heat for another 45 seconds until fully melted.
    Coat the Pretzels
    1. Dip one pretzel at a time into the melted candy, using a fork to fully coat it.
    2. Shake off excess coating and place the pretzel back on the tray.
    3. Repeat for the remaining pretzels in each shamrock.
    Assemble & Decorate
    1. Drizzle some of the melted candy onto the space between the pretzels to connect them and secure the lollipop stick.
    2. Sprinkle with decorations before the candy hardens.
    Let Them Set
    1. Chill in the fridge for 15 minutes or leave at room temperature for 30 minutes.

    Notes

    • Use different colored candy melts for a variety of festive looks.
    • Try adding a little peppermint extract to the melted candy for a minty twist.
    • Perfect for party favors or a fun activity with kids.