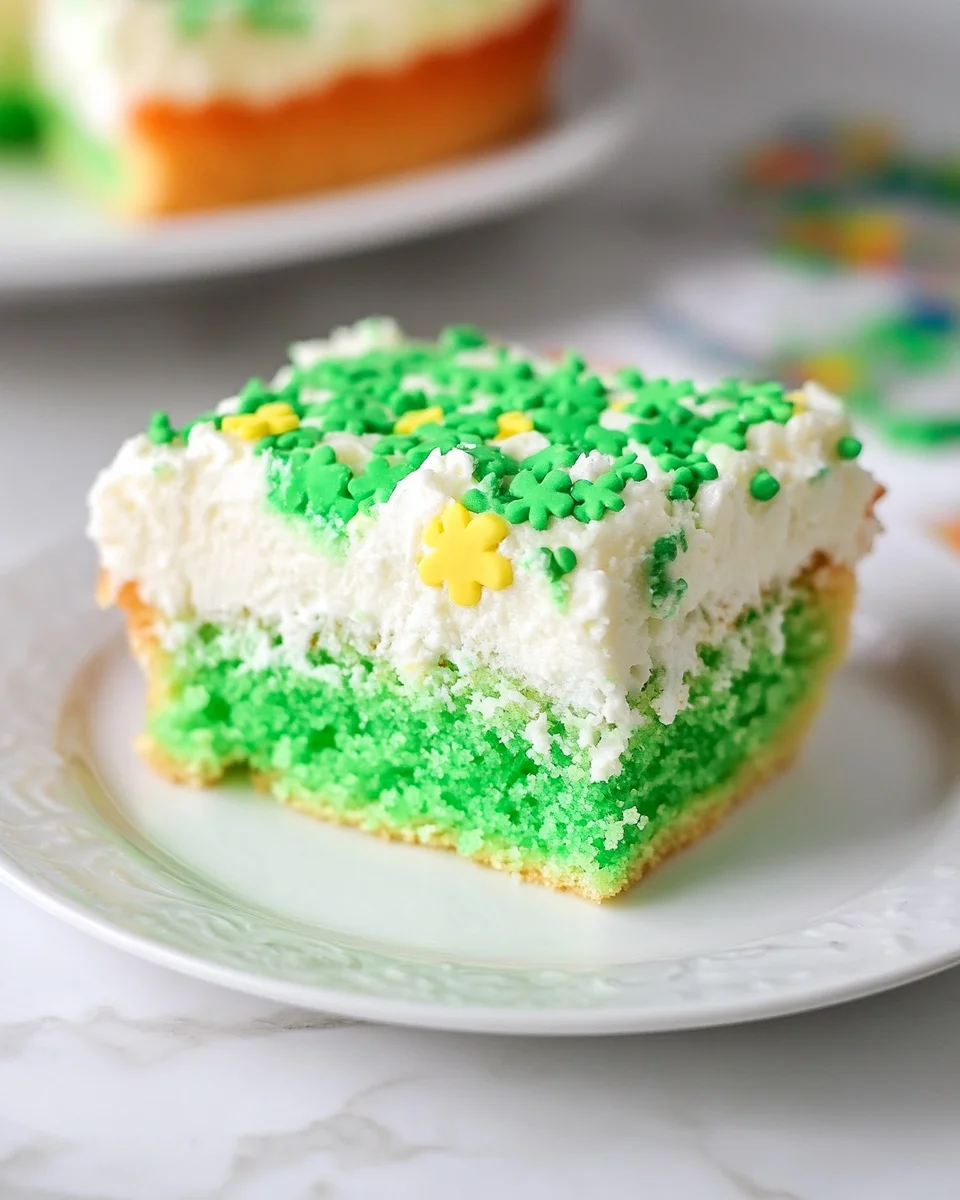
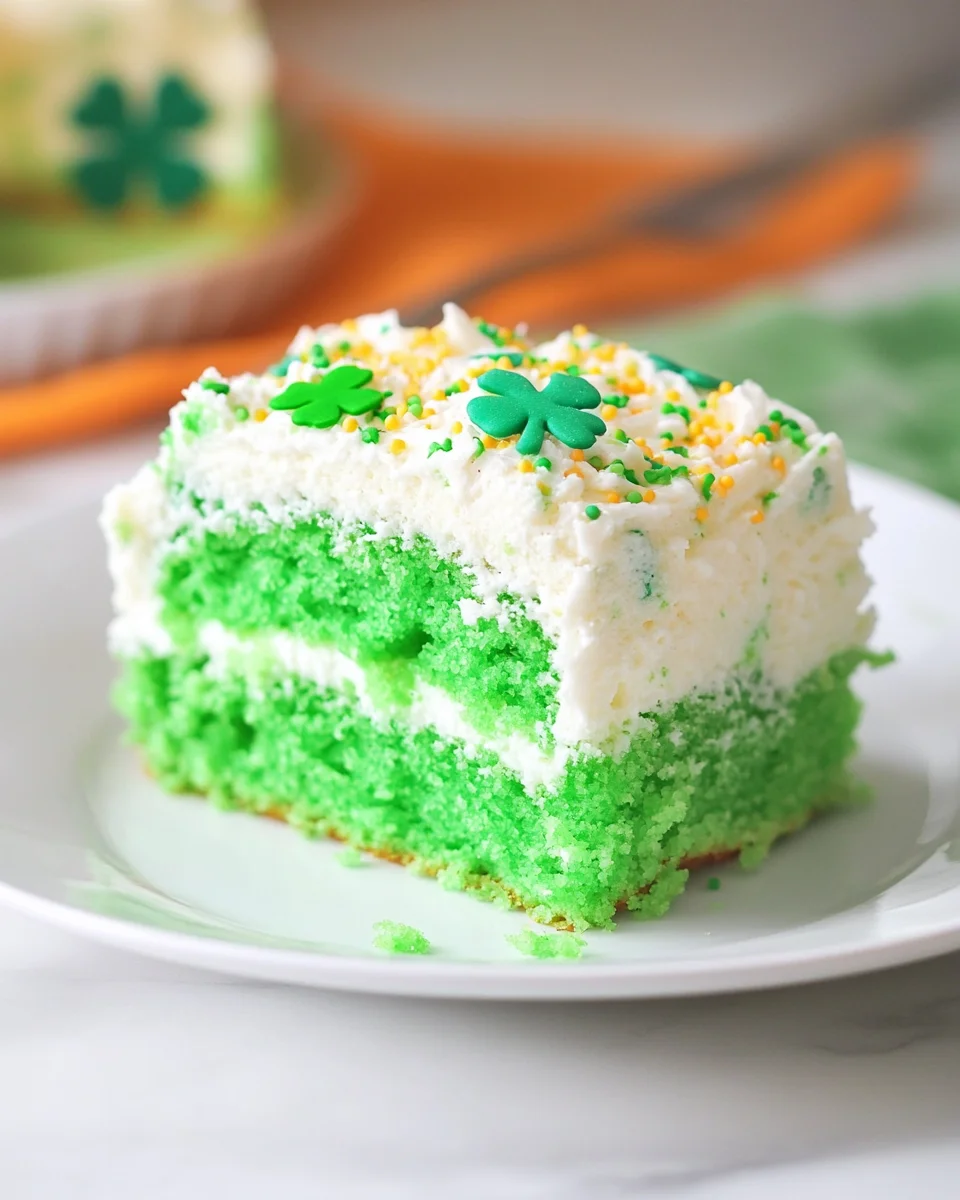
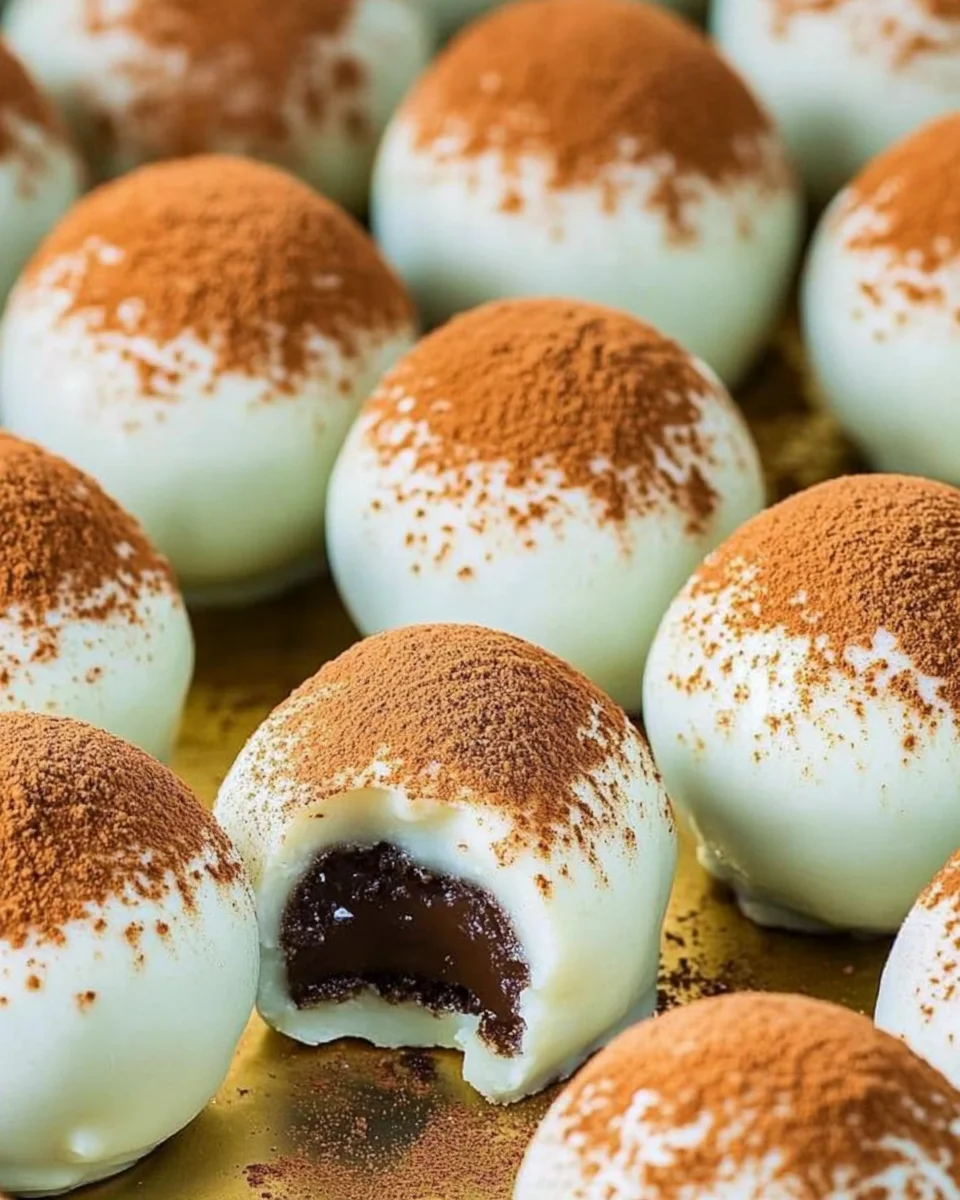
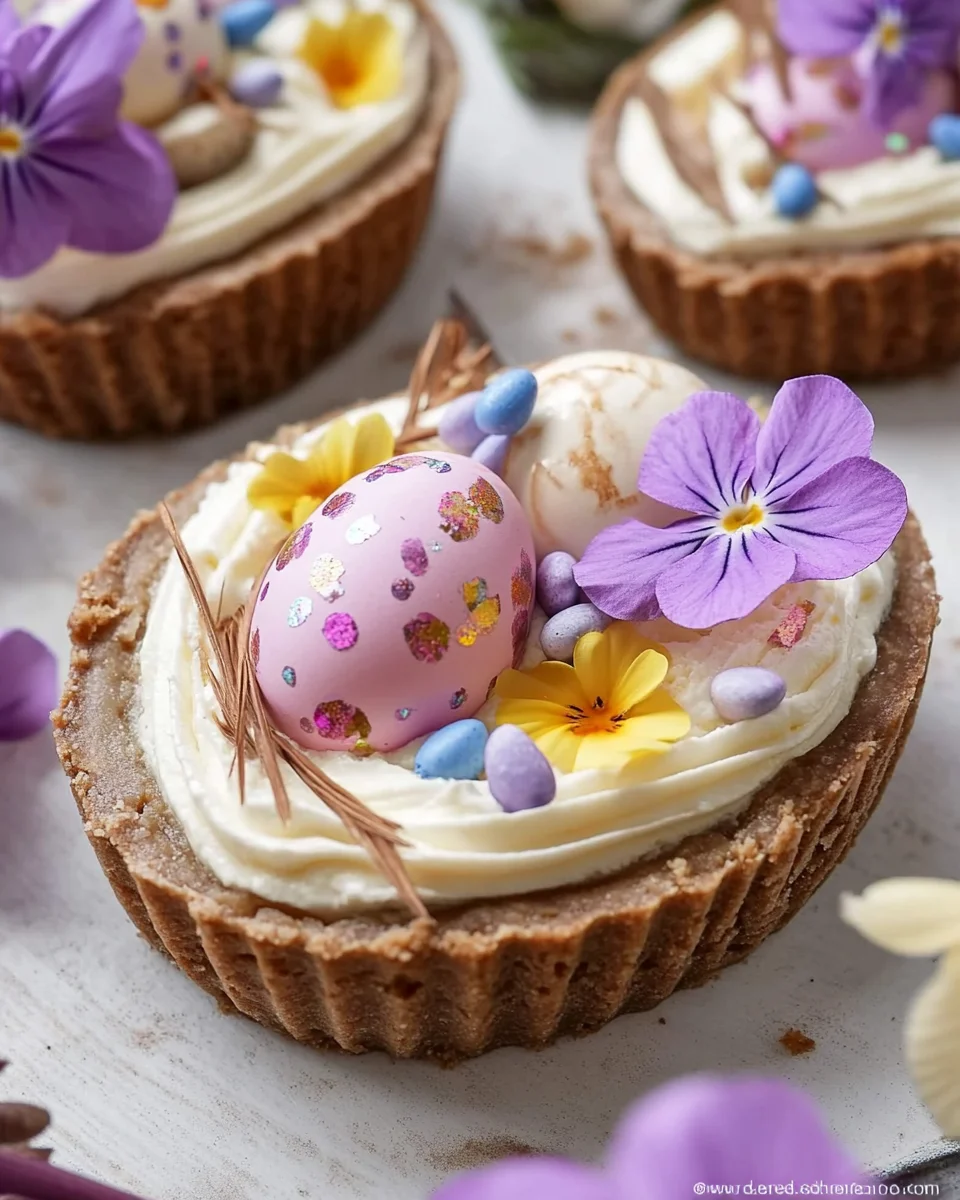
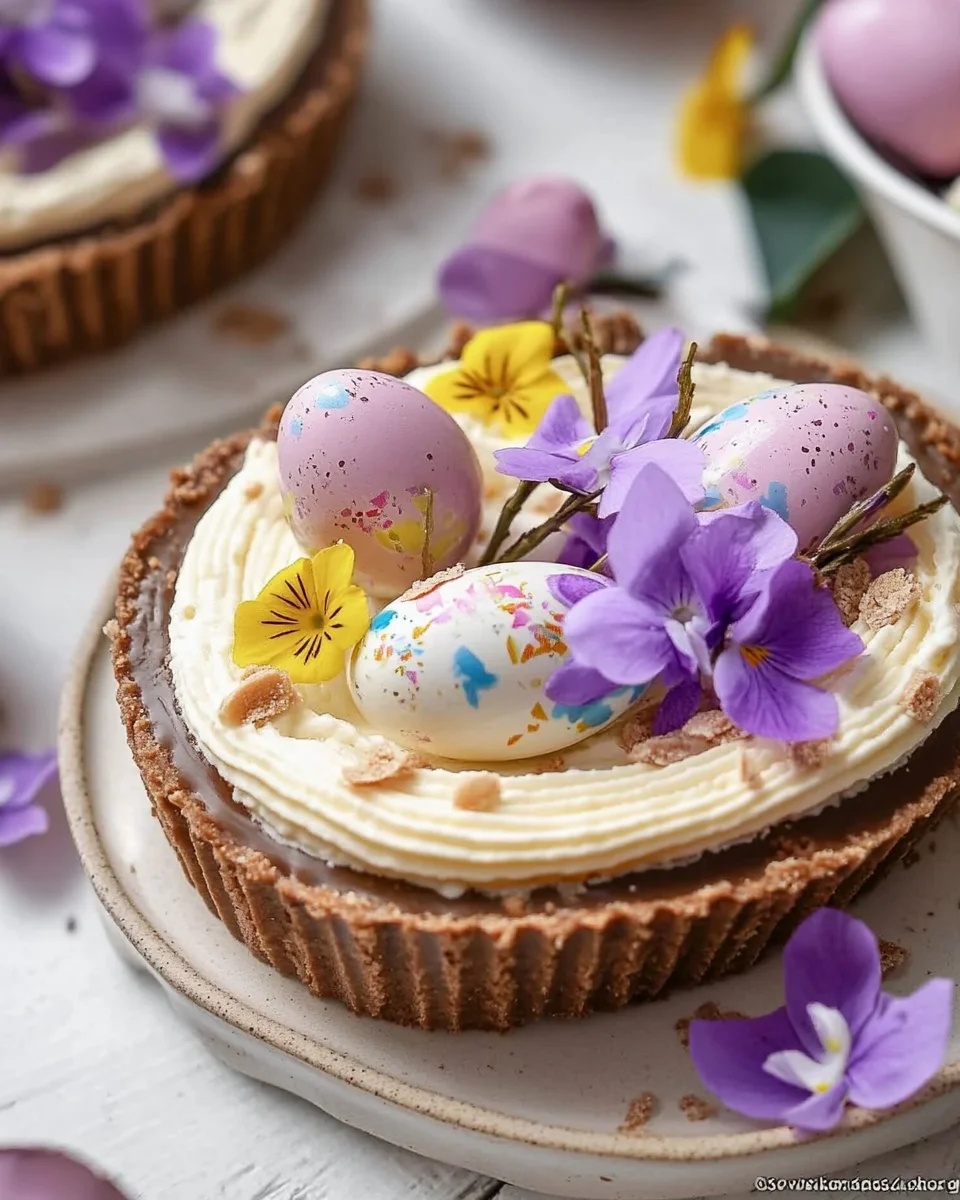
Green Velvet Brownies with Cream Cheese Frosting: A Decadent Twist on a Classic Treat

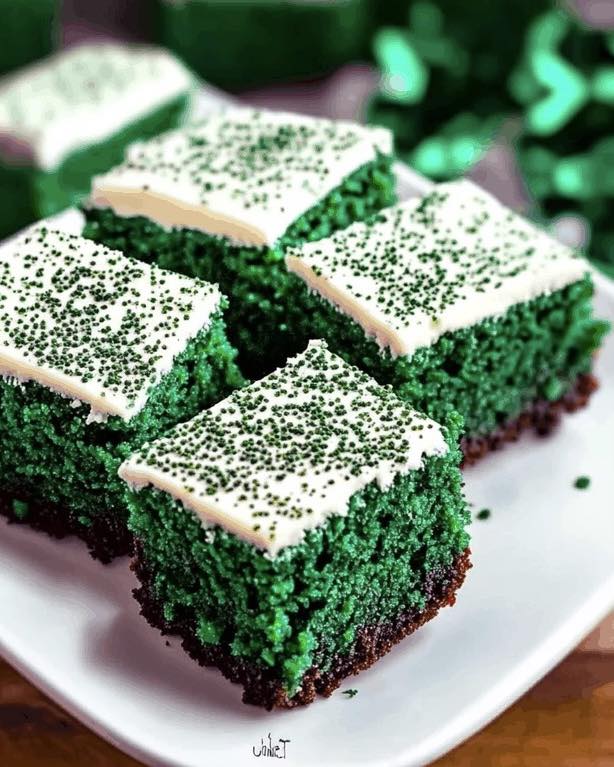
Green Velvet Brownies with Cream Cheese Frosting are a vibrant and festive dessert that combines the rich, chocolatey essence of brownies with the smooth, tangy flavor of cream cheese frosting. Whether you’re celebrating St. Patrick’s Day, hosting a themed party, or simply craving a colorful dessert, these brownies are guaranteed to impress.

This guide explores everything you need to know about making Green Velvet Brownies, from their origins to expert baking tips and frequently asked questions. By the end, you’ll have all the knowledge you need to create the perfect batch of these fudgy, eye-catching treats.

What Are Green Velvet Brownies?

Green Velvet Brownies are a colorful twist on the classic Red Velvet Brownie. Instead of the traditional red hue, green food coloring is used to create a vibrant, festive appearance. While red velvet typically has a subtle cocoa flavor with a slight tang from buttermilk, Green Velvet Brownies focus more on the rich, fudgy texture of brownies with the smooth, slightly tangy contrast of cream cheese frosting.

Unlike traditional brownies that lean purely towards dense and fudgy, these have a perfect balance between cakey and fudgy, making them a delightful hybrid that appeals to all brownie lovers. The cream cheese frosting adds an irresistible sweetness that complements the richness of the brownie base.

Why You’ll Love This Recipe

1. A Perfect St. Patrick’s Day Treat

If you’re looking for a fun and festive dessert for St. Patrick’s Day, these Green Velvet Brownies are a great alternative to the usual green-dyed cookies or cupcakes. Their bright color and indulgent flavor make them stand out on any holiday dessert table.

2. A Unique Brownie Texture

These brownies strike the perfect balance between cakey and fudgy, making them ideal for those who enjoy a brownie that’s moist and chewy, yet sturdy enough to hold its shape.

3. Cream Cheese Frosting for a Flavor Boost

The combination of a rich, slightly tangy cream cheese frosting with a deep, chocolate-infused brownie base creates a contrast of flavors that enhances every bite. It’s a match made in dessert heaven.

4. Simple to Make, Stunning to Serve

This recipe requires basic pantry ingredients, yet the final product looks like a gourmet dessert. It’s an easy way to impress guests or add a pop of color to your dessert spread.

5. Make-Ahead Friendly

These brownies store well in the fridge and can even be made a day in advance, making them a convenient dessert option for parties or special occasions.

Pro Tips for Baking the Best Green Velvet Brownies

1. Use High-Quality Chocolate

The richness of these brownies depends largely on the quality of the chocolate used. Opt for high-quality semi-sweet chocolate chips or a bittersweet chocolate bar to achieve a deep, luxurious flavor.

2. Don’t Overmix the Batter

Overmixing can incorporate too much air into the batter, resulting in a tougher, drier brownie. Mix just until the ingredients are combined for the perfect texture.

3. Use a Metal Pan for Even Baking

While glass pans can work, a metal baking pan conducts heat more evenly, ensuring the brownies bake through without overcooking the edges. If using glass, reduce the temperature slightly and increase baking time by a few minutes.

4. Let the Brownies Cool Completely Before Frosting

Warm brownies will melt the cream cheese frosting, leading to a runny mess. Allow the brownies to cool completely before adding the frosting for a clean, smooth finish.

5. Use Liquid Food Coloring for Vibrant Color

To achieve the bold green hue, use liquid food coloring rather than gel. A full bottle ensures the color remains vibrant even after baking.

6. Line Your Baking Pan for Easy Removal

Using parchment paper or foil with an overhang makes lifting the brownies out of the pan much easier, allowing for clean slicing and serving.

Ways to Customize Green Velvet Brownies

1. Make Them Even More Chocolatey

For a richer chocolate flavor, add a handful of chocolate chips to the batter before baking. This creates pockets of melted chocolate throughout the brownies.

2. Add a Crunchy Topping

If you enjoy texture in your desserts, sprinkle chopped pecans, walnuts, or crushed Oreos on top of the cream cheese frosting for an extra crunch.

3. Create a Festive Shamrock Shape

To make these brownies even more festive for St. Patrick’s Day, use a shamrock-shaped cookie cutter to create fun, themed brownie bites.

4. Swap Out the Green for Other Holidays

Love the idea of velvet brownies but want to use them for different occasions? Simply swap the green food coloring for red (Christmas or Valentine’s Day), blue (Fourth of July), or orange (Halloween) for a holiday-appropriate version.

5. Add a Swirl Effect

For a marbled effect, reserve some of the cream cheese frosting and swirl it into the batter before baking. This creates a beautiful, artistic look.

The Magic Begins: Ingredients

For the Green Velvet Brownies

  • Semi-sweet chocolate chips
  • Butter
  • Sugar
  • Eggs
  • All-purpose flour
  • Green liquid food coloring
  • Baking powder
  • Vanilla extract
  • Salt

For the Cream Cheese Frosting

  • Cream cheese (softened)
  • Butter (softened)
  • Powdered sugar
  • Vanilla extract
  • Salt

The Art of Baking: Directions

Step 1: Creating the Brownie Batter

  • Melt chocolate chips and butter until smooth.
  • Stir in sugar, followed by eggs, whisking until blended.
  • Gently fold in flour, food coloring, baking powder, vanilla, and salt.
  • Pour batter into a lined 9-inch square baking pan.

Step 2: Baking to Perfection

  • Bake at 350°F for 44-48 minutes or until a toothpick comes out with moist crumbs.
  • Let brownies cool completely before frosting.

Step 3: Crafting the Cream Cheese Frosting

  • Beat softened cream cheese and butter until creamy.
  • Gradually add powdered sugar, salt, and vanilla, mixing until smooth.

Step 4: Finishing Touches

  • Lift brownies from the pan using the foil overhang.
  • Spread frosting evenly over cooled brownies.
  • Cut into squares and garnish as desired.

Nutritional Breakdown (Per Brownie, Approximate)

  • Calories: 280
  • Carbohydrates: 38g
  • Protein: 3g
  • Fat: 14g
  • Sugar: 30g
  • Sodium: 90mg

These Green Velvet Brownies blend the best of fudgy and cakey textures, topped with a luscious cream cheese frosting—perfect for any festive occasion!

Frequently Asked Questions

1. Can I Make These Without Food Coloring?

Yes! The green food coloring is purely for appearance and does not affect the taste. If you prefer, simply omit it, and you’ll have a delicious chocolate brownie with cream cheese frosting instead.

2. Can I Use Gel Food Coloring Instead of Liquid?

Gel food coloring is more concentrated, so you’ll need less of it to achieve the same vibrant green hue. However, the recipe was tested with liquid food coloring, so adjust accordingly.

3. How Do I Store These Brownies?

  • At Room Temperature: If unfrosted, brownies can be stored in an airtight container for 1-2 days.
  • Refrigerated: Frosted brownies should be kept in the fridge and will stay fresh for up to 4 days.
  • Frozen: Brownies (without frosting) can be wrapped tightly and frozen for up to 3 months.

4. Can I Double the Recipe?

Yes! Simply double all ingredients and bake in a 9×13-inch pan. You may need to increase the baking time by a few minutes, so keep an eye on them and test doneness with a toothpick.

5. My Brownies Came Out Too Thin—What Happened?

This recipe is designed for a 9-inch square pan, so using a larger pan will result in thinner brownies. If using a 9×13-inch pan, consider doubling the recipe for a thicker result.

6. Can I Use a Different Frosting?

Absolutely! While cream cheese frosting is a classic pairing, you can also try:

  • Chocolate ganache for a richer topping
  • Buttercream frosting for a sweeter alternative
  • Whipped cream topping for a lighter option

Final Thoughts: Why These Brownies Are Worth Making

Green Velvet Brownies with Cream Cheese Frosting are more than just a festive dessert—they’re a delicious twist on a classic treat that balances chocolatey richness with creamy sweetness. Whether you’re making them for St. Patrick’s Day, a party, or simply to satisfy your sweet tooth, these brownies are easy to make, visually striking, and irresistibly delicious.

With their perfect blend of fudgy and cakey textures, a smooth and tangy frosting, and the option to customize them for any occasion, they’re bound to become a go-to dessert in your recipe collection.

So grab your mixing bowl, get that oven preheated, and treat yourself to a batch of these vibrant, decadent brownies—you won’t regret it!
aiting

Green Velvet Brownies with Cream Cheese Frosting: A Decadent Twist on a Classic Treat

These Green Velvet Brownies bring together the perfect balance of fudgy and cakey textures, infused with a festive green hue and topped with a luscious cream cheese frosting. Perfect for St. Patrick’s Day or any occasion where you want a touch of vibrant sweetness!
Prep Time 15 minutes
Cook Time 45 minutes
Total Time 1 hour
Servings: 16 brownies
Course: Dessert
Cuisine: American

Ingredients
  

  • For the Green Velvet Brownies: semi-sweet chocolate chips butter, sugar, eggs, all-purpose flour, green liquid food coloring, baking powder, vanilla extract, salt.
  • For the Cream Cheese Frosting: cream cheese softened, butter (softened), powdered sugar, vanilla extract, salt.

Method
 

  1. Creating the Brownie Batter – Melt chocolate chips and butter until smooth. Stir in sugar, followed by eggs, whisking until blended. Gently fold in flour, food coloring, baking powder, vanilla, and salt until fully incorporated. Pour batter into a lined 9-inch square baking pan.
  2. Baking to Perfection – Preheat oven to 350°F. Bake brownies for 44-48 minutes, or until a toothpick inserted comes out with moist crumbs. Let brownies cool completely before frosting.
  3. Crafting the Cream Cheese Frosting – Beat softened cream cheese and butter until creamy. Gradually add powdered sugar, salt, and vanilla, mixing until smooth.
  4. Finishing Touches – Lift brownies from the pan using the foil overhang. Spread cream cheese frosting evenly over cooled brownies. Cut into squares and garnish as desired.
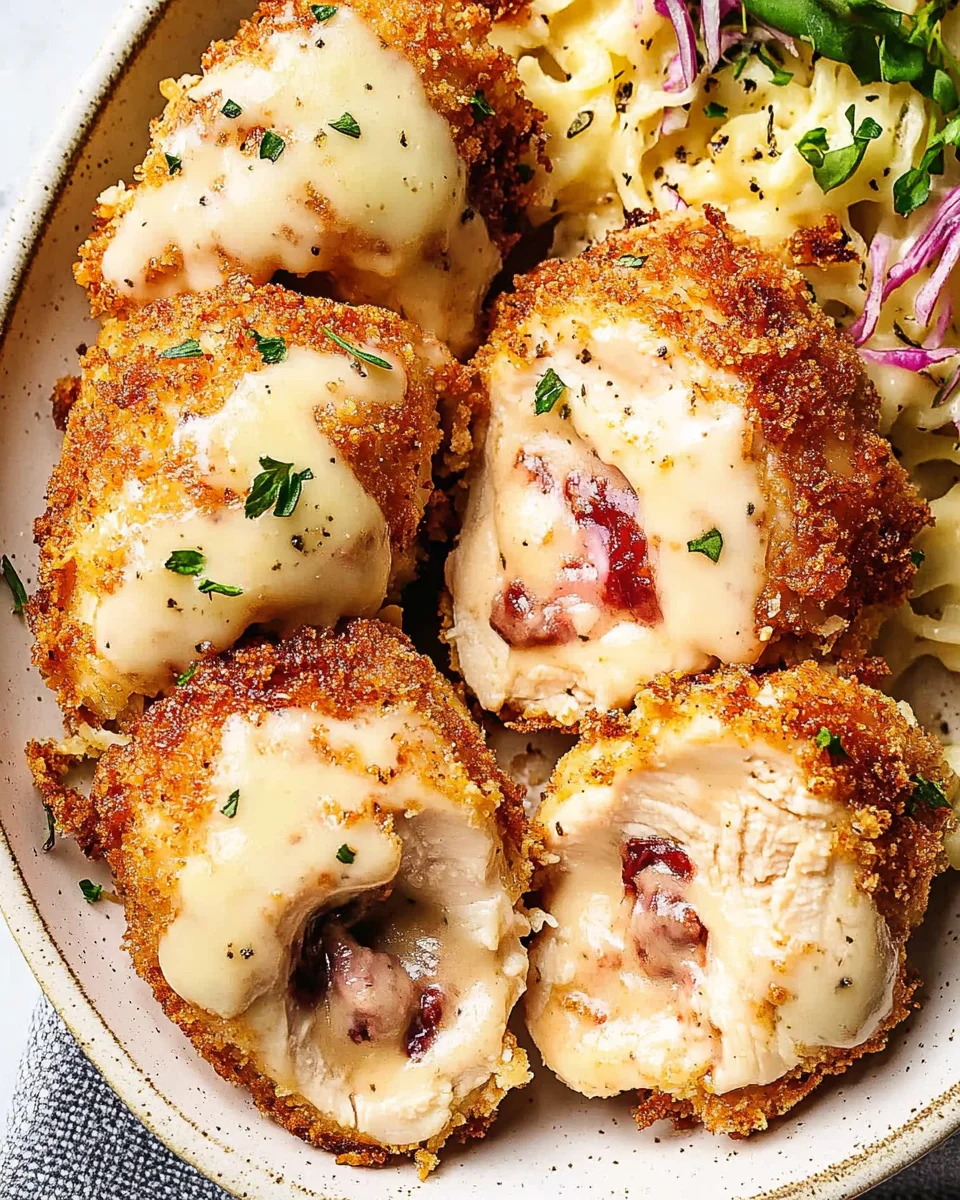
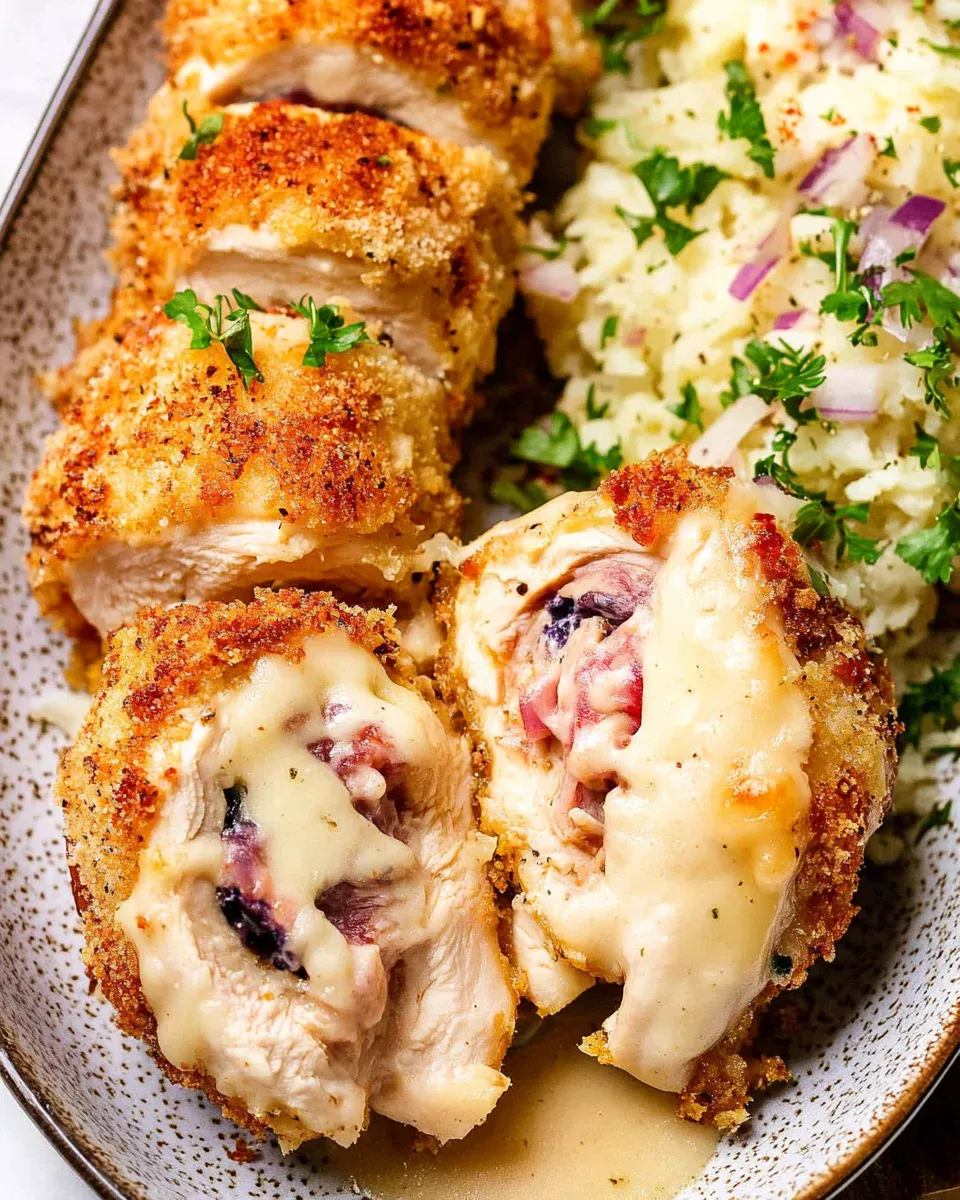
The Ultimate Guide to Baked Chicken Cordon Bleu: A Classic Reinvented

Baked Chicken Cordon Bleu is a timeless dish that brings elegance and indulgence to the dinner table. With its golden, crispy exterior, savory ham and cheese filling, and a luscious Dijon cream sauce, this dish feels like a gourmet meal—but it’s surprisingly simple to prepare. Whether you’re serving it for a family dinner, a special occasion, or even meal prepping for the week, this guide will help you perfect the art of making Chicken Cordon Bleu at home.

The Story Behind Chicken Cordon Bleu

Despite its French-sounding name, Chicken Cordon Bleu is believed to have Swiss origins. The term “cordon bleu” translates to “blue ribbon”, historically signifying a high level of culinary excellence. The dish itself is thought to have evolved from traditional schnitzel, a breaded and fried meat cutlet popular in Switzerland and Austria. By the mid-20th century, the concept of stuffing chicken with ham and cheese, breading it, and frying it had gained international popularity.

Over time, modern variations have emerged, with baking becoming a popular alternative to frying. Baking not only reduces excess oil but also allows for an easier, mess-free cooking process while still delivering a crispy, flavorful crust.

What Makes This Recipe Special?

There are many ways to make Chicken Cordon Bleu, but this version stands out due to a few key techniques:

  • Crispy, golden breading without frying – Instead of deep-frying, the breadcrumbs are toasted beforehand to achieve a deep golden color and crunch.
  • A flavorful Dijon wash – Instead of using an egg mixture for breading, this recipe uses a Dijon mustard, honey, and olive oil wash to enhance the flavor and help the breading adhere better.
  • A rich, creamy Dijon sauce – A velvety sauce made from heavy cream, Dijon mustard, and chicken broth ties the dish together with a burst of tangy, savory goodness.
  • Baking instead of frying – This method keeps the dish lighter and less greasy while still achieving a perfect crispy texture.

Why You Should Bake Instead of Fry

Traditional Chicken Cordon Bleu is often deep-fried, but baking offers several benefits:

  1. Healthier Alternative – Baking eliminates the need for excessive oil, reducing overall fat content.
  2. Less Mess, Less Effort – No need to deal with splattering oil or the hassle of frying in batches.
  3. Even Cooking – Baking allows for a more controlled cooking process, ensuring that the chicken remains juicy without overcooking the outer layers.
  4. Hands-Off Approach – Once the chicken is in the oven, you’re free to prepare sides, set the table, or relax.

How to Achieve Maximum Crispiness

A crunchy, golden-brown crust is one of the defining features of Chicken Cordon Bleu. Here are some key tips to ensure your breading is crisp and flavorful:

  • Toast the breadcrumbs beforehand – This ensures that the panko coating achieves a deep golden color and a satisfying crunch without the need for frying.
  • Use panko breadcrumbs – Panko is lighter and airier than regular breadcrumbs, which helps create a crispier coating.
  • Bake on a wire rack – Elevating the chicken allows air to circulate around the entire piece, preventing a soggy bottom.
  • Brush with oil or butter – A light coating of butter or oil before baking helps encourage even browning.

The Secret to a Perfectly Juicy Filling

The key to ensuring your Chicken Cordon Bleu remains juicy lies in how you prepare and roll the chicken:

  • Flatten the chicken evenly – Using a meat mallet to pound the chicken to an even thickness ensures it cooks evenly without drying out.
  • Use high-quality ham and cheese – Black Forest ham provides a smoky, slightly sweet flavor, while Gruyere or Swiss cheese melts beautifully without becoming greasy.
  • Roll tightly and secure with toothpicks – This prevents the cheese from leaking out while baking.

Pairing Suggestions: What to Serve with Chicken Cordon Bleu

This dish pairs beautifully with a variety of sides. Here are some ideas:

Vegetables

  • Roasted Brussels Sprouts – Their slight bitterness contrasts well with the richness of the dish.
  • Steamed Asparagus – A classic pairing with creamy, cheesy dishes.
  • Garlic Butter Green Beans – Simple yet flavorful, balancing out the meal with a fresh element.

Starches

  • Garlic Mashed Potatoes – Creamy, buttery potatoes are a perfect companion to the crispy, cheesy chicken.
  • Herbed Rice Pilaf – A light, aromatic rice dish complements the bold flavors of the dish.
  • Crispy Roasted Potatoes – Adds another layer of crunch to the meal.

Salads & Breads

  • Caesar Salad – A crisp, tangy salad cuts through the richness of the chicken.
  • Parmesan Garlic Breadsticks – A great way to soak up the extra Dijon cream sauce.
  • Apple Walnut Salad – A refreshing mix of greens, apples, nuts, and a light vinaigrette provides a sweet and crunchy contrast.

What You’ll Need: Ingredients

For the Chicken Rolls

  • Boneless, skinless chicken breasts
  • Black Forest ham (or your preferred deli ham)
  • Gruyere Swiss cheese (or regular Swiss cheese)

For the Breading

  • Panko breadcrumbs
  • Parmesan cheese
  • Olive oil & butter
  • Seasonings: parsley, basil, paprika, onion powder, garlic powder, salt, and pepper

For the Dijon Wash

  • Dijon mustard
  • Honey
  • Olive oil

For the Creamy Dijon Sauce

  • Chicken broth
  • Heavy cream (or half-and-half)
  • Dijon mustard
  • Cornstarch
  • Additional seasonings

The Art of Cooking: Directions

Step 1: Preparing the Chicken

  • Flatten chicken breasts to an even thickness using a meat mallet.
  • Layer each chicken piece with ham and shredded Gruyere cheese.
  • Roll tightly and secure with toothpicks.

Step 2: Creating the Crispy Breading

  • Toast panko breadcrumbs in butter and olive oil until golden brown.
  • Mix with Parmesan cheese and seasonings.

Step 3: Coating the Chicken

  • Whisk together Dijon mustard, honey, and olive oil to create a flavorful wash.
  • Brush each rolled chicken breast with the Dijon mixture.
  • Coat with the toasted panko mixture, pressing to adhere.

Step 4: Baking to Perfection

  • Place the chicken rolls on a wire rack over a baking sheet.
  • Bake at 350°F for about 30-35 minutes until golden and cooked through.

Step 5: Making the Dijon Cream Sauce

  • Simmer chicken broth, heavy cream, Dijon mustard, and seasonings.
  • Whisk in cornstarch for thickness.
  • Simmer until creamy and smooth.

Step 6: Serving and Enjoying

  • Slice the chicken and drizzle with the warm Dijon cream sauce.
  • Garnish with fresh parsley and serve with your favorite sides.

Nutritional Breakdown (Per Serving, Approximate)

  • Calories: 450
  • Carbohydrates: 18g
  • Protein: 40g
  • Fat: 24g
  • Sodium: 780mg

This baked Chicken Cordon Bleu offers a rich, crispy bite with a creamy, tangy sauce—perfect for an indulgent yet easy-to-make dinner!

Frequently Asked Questions

1. Can I Make Chicken Cordon Bleu Ahead of Time?

Yes! You can prepare the chicken rolls in advance and store them in the refrigerator for up to 24 hours before baking. This makes it an excellent choice for entertaining, as you can simply pop them in the oven when guests arrive.

2. Can I Freeze Chicken Cordon Bleu?

Absolutely. To freeze:

  • Before Baking: Assemble the chicken, wrap tightly in plastic wrap, and freeze for up to 3 months. Bake directly from frozen, adding an extra 10-15 minutes to the cook time.
  • After Baking: Store in an airtight container and freeze for up to 2 months. Reheat in the oven at 300°F to maintain crispiness.

3. What’s the Best Cheese for Chicken Cordon Bleu?

Gruyere is the best option for its creamy, nutty flavor and excellent melting quality. However, you can also use:

  • Swiss cheese (milder than Gruyere)
  • Provolone (mild and melty)
  • Mozzarella (for a gooey texture)
  • Cheddar (for a sharper bite)

4. Why Did My Cheese Leak Out?

This usually happens if:

  • The chicken wasn’t rolled tightly enough.
  • The edges weren’t sealed properly with toothpicks.
  • The cheese used had too much moisture (avoid overly processed or pre-shredded cheeses).

5. How Do I Reheat Chicken Cordon Bleu Without Making It Soggy?

The best way to reheat leftovers is in the oven or air fryer:

  • Oven: Bake at 300°F for about 8-10 minutes until heated through.
  • Air Fryer: Heat at 375°F for 5-7 minutes for maximum crispiness.
  • Microwave: Use as a last resort—this method softens the breading.

6. Can I Make This Recipe Gluten-Free?

Yes! Substitute regular panko with gluten-free panko breadcrumbs and ensure all other ingredients (such as Dijon mustard and seasonings) are certified gluten-free.

Final Thoughts: Why You Should Try This Recipe

Chicken Cordon Bleu is one of those dishes that never fails to impress. Its combination of crispy breading, juicy chicken, savory ham, and melty cheese creates an irresistible texture and flavor experience. While it may look and taste like a complicated dish, the baked version simplifies the process without sacrificing any of its signature indulgence.

Whether you’re cooking for a special occasion, a family dinner, or meal prepping for the week, this recipe delivers an elegant yet approachable dish that’s bound to become a household favorite. With the right techniques, a little patience, and the perfect sauce, your homemade Chicken Cordon Bleu will rival any restaurant version.

So roll up your sleeves, preheat that oven, and get ready to enjoy a golden, crispy, cheese-filled masterpiece!

aiting

The Ultimate Guide to Baked Chicken Cordon Bleu: A Classic Reinvented

This Baked Chicken Cordon Bleu offers the perfect combination of crispy, golden breadcrumbs and a rich, cheesy center. With layers of ham and Gruyere Swiss cheese wrapped in tender chicken and coated in a flavorful Dijon wash, this dish is both elegant and easy to make. Served with a creamy Dijon sauce, it’s a deliciously indulgent meal for any occasion.
Prep Time 20 minutes
Cook Time 35 minutes
Total Time 55 minutes
Servings: 4 servings
Course: Main Dish
Cuisine: French

Ingredients
  

  • For the chicken rolls: boneless skinless chicken breasts, Black Forest ham (or your preferred deli ham), Gruyere Swiss cheese (or regular Swiss cheese).
  • For the breading: panko breadcrumbs Parmesan cheese, olive oil & butter, parsley, basil, paprika, onion powder, garlic powder, salt, and pepper.
  • For the Dijon wash: Dijon mustard honey, olive oil.
  • For the creamy Dijon sauce: chicken broth heavy cream (or half-and-half), Dijon mustard, cornstarch, additional seasonings.

Method
 

  1. Prepare the Chicken – Flatten chicken breasts to an even thickness using a meat mallet. Layer each piece with ham and shredded Gruyere cheese, then roll tightly and secure with toothpicks.
  2. Create the Crispy Breading – Toast panko breadcrumbs in butter and olive oil until golden brown. Mix with Parmesan cheese and seasonings.
  3. Coat the Chicken – Whisk together Dijon mustard, honey, and olive oil to create a flavorful wash. Brush each rolled chicken breast with the Dijon mixture, then coat with the toasted panko mixture, pressing to adhere.
  4. Bake to Perfection – Place the chicken rolls on a wire rack over a baking sheet. Bake at 350°F for 30-35 minutes until golden and cooked through.
  5. Make the Dijon Cream Sauce – Simmer chicken broth, heavy cream, Dijon mustard, and seasonings in a saucepan. Whisk in cornstarch to thicken, then simmer until creamy and smooth.
  6. Serve and Enjoy – Slice the chicken and drizzle with the warm Dijon cream sauce. Garnish with fresh parsley and serve with your favorite sides.

Notes

  • For an extra crispy texture, broil the chicken for 2-3 minutes after baking.
  • Store leftovers in an airtight container in the fridge for up to 3 days.
  • Serve with steamed vegetables, mashed potatoes, or a fresh salad for a complete meal.
Enjoy this golden, crispy Baked Chicken Cordon Bleu with its irresistible creamy Dijon sauce!

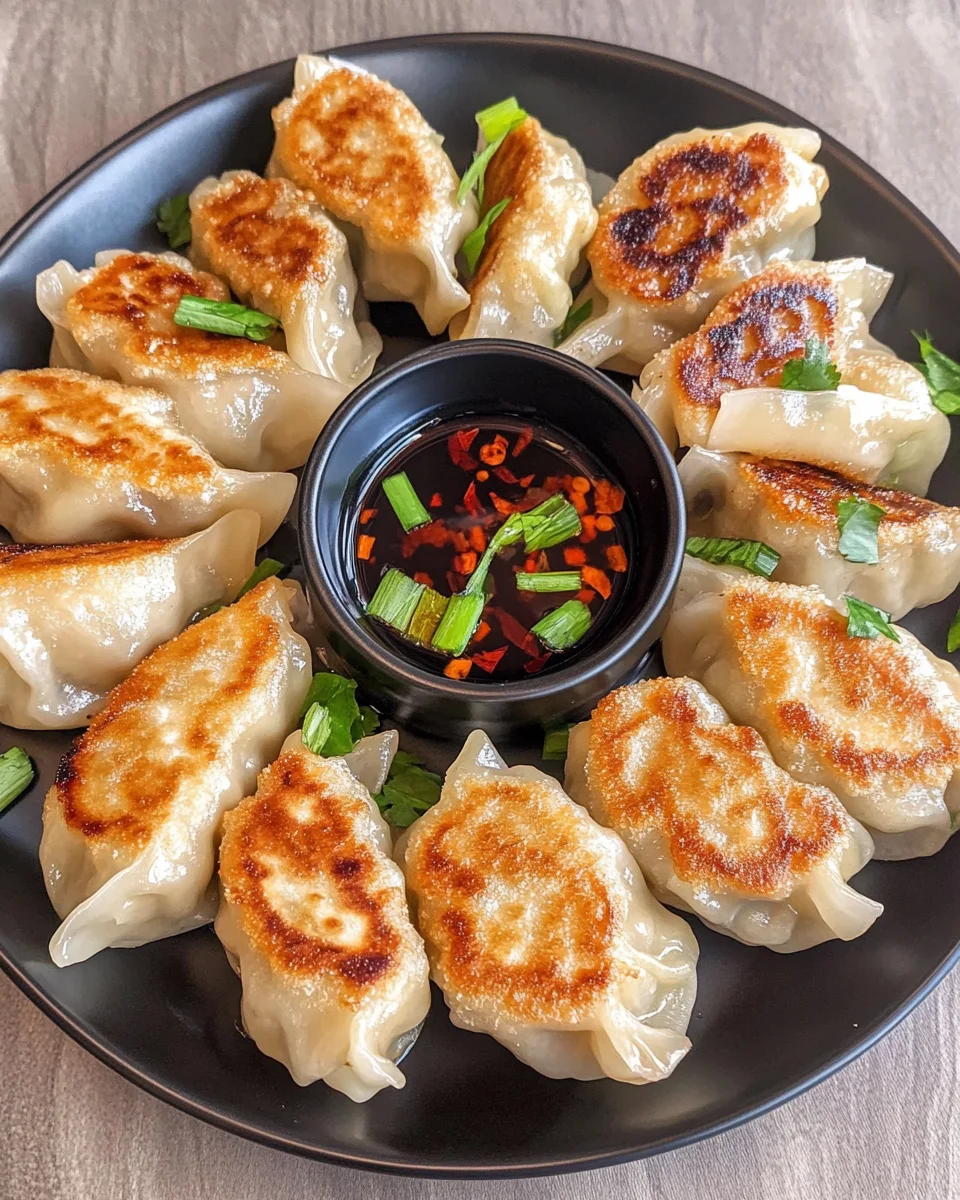
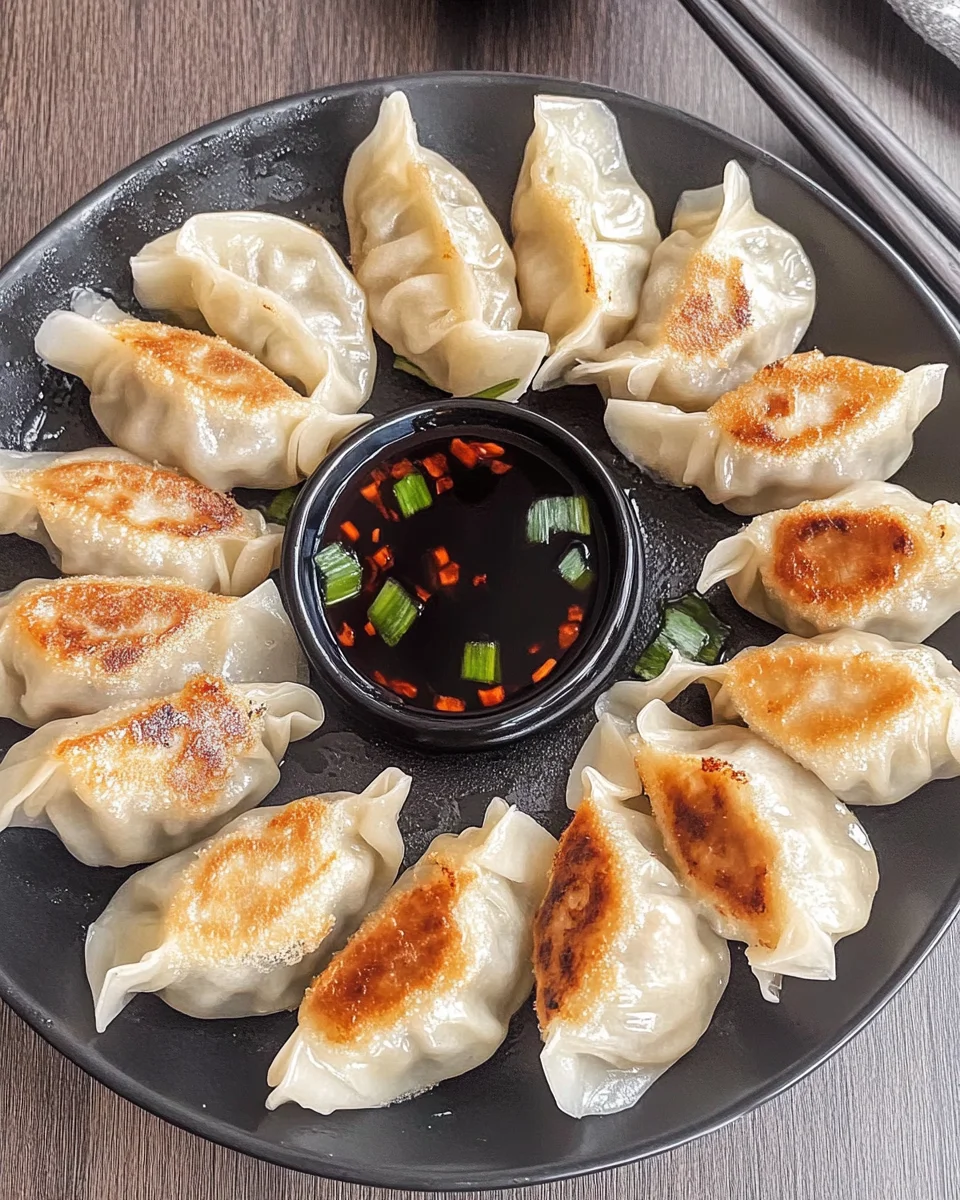
Mastering the Art of Chicken Potstickers: A Guide to Perfect Pan-Fried Dumplings

Chicken potstickers are a culinary delight that combines the crispiness of pan-fried dumplings with a juicy, flavorful filling. These dumplings are beloved in many Asian cuisines, particularly in Chinese cooking, where they are a staple dish for celebrations, family gatherings, and everyday meals. Whether you’re new to dumpling-making or looking to refine your technique, this guide will take you through everything you need to know about crafting perfect chicken potstickers at home.

The Legacy of Potstickers: A Brief History

Potstickers, or guōtiē (锅贴) in Mandarin, have a rich history dating back over a thousand years to the Song Dynasty in China. Legend has it that a chef accidentally left dumplings in a hot pan for too long, scorching the bottoms. Rather than throwing them away, he served them as a new dish, and they were an instant success. The result was a dumpling with a crispy, golden bottom and a soft, juicy filling—a texture contrast that has made potstickers a favorite worldwide.

These pan-fried dumplings are especially popular during Lunar New Year, as their shape resembles ancient Chinese gold ingots, symbolizing wealth and prosperity. They have since evolved into a household staple, enjoyed as street food, appetizers, or full meals, often paired with dipping sauces and side dishes.

What Makes a Perfect Potsticker?

A well-made potsticker is a harmony of texture and flavor. Achieving this balance requires attention to three key elements:

1. The Wrapper

The dumpling wrapper plays a crucial role in texture. A thin yet sturdy wrapper holds the filling together while allowing for crisp frying. Store-bought wrappers save time, but homemade dough offers better elasticity and chewiness.

2. The Filling

Potsticker filling should be juicy, well-seasoned, and balanced. The combination of protein (such as chicken, pork, or tofu), aromatics (ginger, garlic, green onions), and seasoning (soy sauce, sesame oil, oyster sauce) creates the signature umami-packed bite. Adding finely chopped vegetables like napa cabbage introduces freshness and crunch.

3. The Cooking Technique

The potsticker method involves both frying and steaming in the same pan. First, the dumplings are seared to form a crispy bottom. Then, water is added, and the pan is covered to allow steaming, which ensures the filling is cooked through. The final step is uncovering the pan to let any remaining moisture evaporate, leaving a crisp exterior.

Ways to Enjoy Chicken Potstickers

These versatile dumplings can be served in multiple ways:

  • As a Main Course – Serve alongside steamed rice, stir-fried vegetables, or noodle dishes for a complete meal.
  • As an Appetizer – A great way to start a meal, paired with a soy-vinegar dipping sauce or spicy chili oil.
  • In Soup – Drop cooked or frozen dumplings into a hot broth for a comforting dumpling soup.
  • With a Crispy Dumpling Skirt – For an impressive presentation, create a crispy lace by adding a cornstarch slurry while pan-frying.

Tips for Making the Best Chicken Potstickers

Choosing the Right Protein

While this recipe focuses on chicken, you can swap in ground pork, turkey, or shrimp for a different twist. Pork is a classic choice due to its natural fat content, which adds extra juiciness. If using lean meats like chicken breast or turkey, a small amount of fat (such as sesame oil) helps keep the filling moist.

Enhancing Flavor with Aromatics

Garlic, ginger, and green onions are essential for depth of flavor. For a more intense aroma, lightly sauté these ingredients before mixing them into the filling.

Avoiding Soggy Dumplings

A common issue with homemade dumplings is excessive moisture, which can make the wrappers soggy and difficult to seal. To prevent this:

  • Salt and drain the napa cabbage to remove excess water.
  • Pat dry any additional ingredients before adding them to the filling.
  • Do not overfill the dumplings—too much filling can cause them to burst during cooking.

Sealing Dumplings Properly

Properly sealed dumplings prevent leaks during cooking. Make sure to:

  • Use a light amount of water to moisten the wrapper edges (too much can make it slippery).
  • Press firmly to seal, ensuring there are no air pockets, which can cause dumplings to split open.

Cooking from Frozen

One of the best things about dumplings is that they freeze beautifully. To cook from frozen:

  • Do not thaw—place frozen dumplings directly into the pan.
  • Increase the steaming time by a couple of minutes to ensure the filling cooks through.

What You’ll Need: Ingredients

For the Dumplings

  • 1 lb ground chicken (or substitute with ground turkey or pork)
  • 1 lb circular dumpling wrappers (store-bought for convenience)
  • 2 cups napa cabbage (chopped)
  • 1 tsp salt (to draw out moisture from the cabbage)
  • 4 green onions (thinly sliced)
  • 6 garlic cloves (minced)
  • 2-inch piece of ginger (minced)
  • 1 tbsp soy sauce (for umami depth)
  • 1 tbsp oyster sauce (adds sweetness and savoriness)
  • 1 tbsp sesame oil (for nutty aroma)
  • 1 tbsp chicken bouillon (for a rich, savory boost)
  • 1 tsp white pepper (for subtle heat)

For Serving

  • Dumpling dipping sauce (soy sauce, vinegar, and chili oil recommended)
  • Green onions (for garnish)
  • Sesame seeds (for extra texture and flavor)

The Art of Dumpling Making: Directions

Step 1: Preparing the Napa Cabbage

  • Chop the napa cabbage into small pieces and place it in a bowl.
  • Toss with 1 tsp salt and let it sit for 10 minutes to draw out excess moisture.
  • Rinse off the salt and squeeze out as much water as possible to keep the filling from becoming soggy.

Step 2: Mixing the Perfect Filling

  • In a large mixing bowl, combine the ground chicken, prepared napa cabbage, green onions, garlic, ginger, soy sauce, oyster sauce, sesame oil, chicken bouillon, and white pepper.
  • Mix thoroughly until well combined.
  • To ensure the seasoning is perfect, pan-fry a small portion of the filling and taste-test. Adjust if needed before proceeding to folding.

Step 3: Folding the Dumplings

  • Set up a clean work surface with a small bowl of water, dumpling wrappers, and a damp towel to prevent drying.
  • Place a wrapper in your palm and wet the edges with water.
  • Add a small spoonful of filling to the center.
  • Fold in half but don’t seal it yet. Create three pleats on one side, then repeat on the other side before pinching the top shut.
  • Keep the folded dumplings covered with a damp towel as you work.

Step 4: Pan-Frying to Golden Perfection

  • Heat a non-stick pan over medium heat and drizzle with oil.
  • Place about 10 dumplings in the pan (don’t overcrowd).
  • Fry for 2 minutes until the bottoms turn golden brown.
  • Add just enough water to cover the bottom of the pan, then cover with a lid and steam for 5 minutes until fully cooked.

Step 5: Freezing for Later (Optional)

  • If not cooking immediately, place uncooked dumplings on a lined tray in the freezer.
  • Once fully frozen, transfer them to an airtight bag for long-term storage.
  • When ready to cook, pan-fry straight from frozen—no need to thaw.

Step 6: Serving and Enjoying

  • Serve hot with dumpling dipping sauce, a sprinkle of green onions, and sesame seeds for garnish.

Nutritional Breakdown (Per Dumpling, Approximate)

  • Calories: 36
  • Carbohydrates: 3g
  • Protein: 3g
  • Fat: 2g
  • Sodium: 85mg

These crispy, juicy chicken potstickers are a perfect appetizer, snack, or meal—enjoy them fresh or freeze a batch for a quick, delicious treat anytime!

Frequently Asked Questions

1. Can I Make Potstickers Ahead of Time?

Yes! Potstickers are perfect for meal prep. Freeze them uncooked in a single layer on a baking sheet before transferring them to a sealed bag. They can be cooked directly from frozen with no need to thaw.

2. What’s the Difference Between Potstickers and Other Dumplings?

Potstickers are pan-fried dumplings, while steamed dumplings (zhēngjiǎo, 蒸饺) are cooked solely with steam and boiled dumplings (shuǐjiǎo, 水饺) are fully submerged in water. The crispy bottom is what makes potstickers unique.

3. Can I Use Other Fillings?

Absolutely! Some popular variations include:

  • Vegetarian: Swap the meat for finely chopped mushrooms, tofu, or shredded carrots.
  • Seafood: Try a mix of shrimp and pork for a Cantonese-style dumpling.
  • Spicy: Add chopped chili peppers or a drizzle of chili oil to the filling for heat.

4. Why Did My Dumplings Stick to the Pan?

A few reasons could cause this:

  • Not enough oil—make sure to coat the pan evenly.
  • The pan wasn’t hot enough before adding the dumplings.
  • The dumplings were moved too early—allow them to form a crust before flipping.

5. How Do I Make the Perfect Dipping Sauce?

A simple yet flavorful dumpling sauce consists of:

  • 2 tbsp soy sauce
  • 1 tbsp rice vinegar
  • ½ tsp sesame oil
  • ½ tsp sugar
  • ½ tsp chili flakes or chili oil (optional)
    Mix and serve with your potstickers for the ultimate dipping experience.

6. Can I Air Fry Potstickers Instead?

Yes! Lightly brush or spray the dumplings with oil and air fry at 375°F (190°C) for 8-10 minutes, flipping halfway through. They won’t be as crispy as pan-fried potstickers but will still be delicious.

Conclusion: Why Chicken Potstickers Deserve a Spot in Your Kitchen

Making homemade chicken potstickers is an enjoyable and rewarding process. Not only do they taste far better than store-bought versions, but they also allow for customization in flavors, fillings, and cooking techniques. The balance of crispy bottoms and juicy, flavorful filling makes them an irresistible dish, whether enjoyed as a snack, appetizer, or main course.

Potstickers bring people together—whether you’re folding dumplings with family or serving them at a gathering, they always create a memorable experience. By following the tips and techniques in this guide, you’ll be well on your way to mastering the art of dumpling-making.

So, the next time you’re craving something delicious, skip the takeout and make a batch of homemade chicken potstickers. Your taste buds (and your guests) will thank you.

aiting

Mastering the Art of Chicken Potstickers: A Guide to Perfect Pan-Fried Dumplings

These crispy, juicy chicken potstickers are packed with bold flavors and a satisfying crunch. Whether you’re making them fresh or freezing a batch for later, these dumplings are the perfect appetizer, snack, or meal. Serve with a flavorful dipping sauce for an irresistible bite!
Prep Time 30 minutes
Cook Time 10 minutes
Total Time 40 minutes
Servings: 40 dumplings
Course: Appetizer, Snack
Cuisine: Asian

Ingredients
  

  • These crispy juicy chicken potstickers are packed with bold flavors and a satisfying crunch. Whether you’re making them fresh or freezing a batch for later, these dumplings are the perfect appetizer, snack, or meal. Serve with a flavorful dipping sauce for an irresistible bite!

Method
 

  1. Prepare the Napa Cabbage – Chop the napa cabbage and place it in a bowl. Toss with 1 tsp salt and let it sit for 10 minutes to draw out excess moisture. Rinse and squeeze out as much water as possible.
  2. Mix the Filling – In a large mixing bowl, combine ground chicken, prepared napa cabbage, green onions, garlic, ginger, soy sauce, oyster sauce, sesame oil, chicken bouillon, and white pepper. Mix thoroughly. To ensure the right seasoning, pan-fry a small portion and taste-test before proceeding.
  3. Fold the Dumplings – Set up a clean surface with a small bowl of water, dumpling wrappers, and a damp towel to prevent drying. Place a wrapper in your palm, wet the edges with water, and add a small spoonful of filling to the center. Fold in half but don’t seal it yet. Create three pleats on one side, then repeat on the other before pinching shut. Keep covered with a damp towel as you work.
  4. Pan-Fry to Golden Perfection – Heat a non-stick pan over medium heat with a drizzle of oil. Place about 10 dumplings in the pan, ensuring they don’t touch. Fry for 2 minutes until the bottoms turn golden brown. Add just enough water to cover the bottom, cover with a lid, and steam for 5 minutes until fully cooked.
  5. Freeze for Later (Optional) – If not cooking immediately, place uncooked dumplings on a lined tray in the freezer. Once fully frozen, transfer them to an airtight bag for storage. When ready to cook, pan-fry straight from frozen—no need to thaw.
  6. Serve and Enjoy – Serve hot with dumpling dipping sauce, green onions, and sesame seeds for garnish.

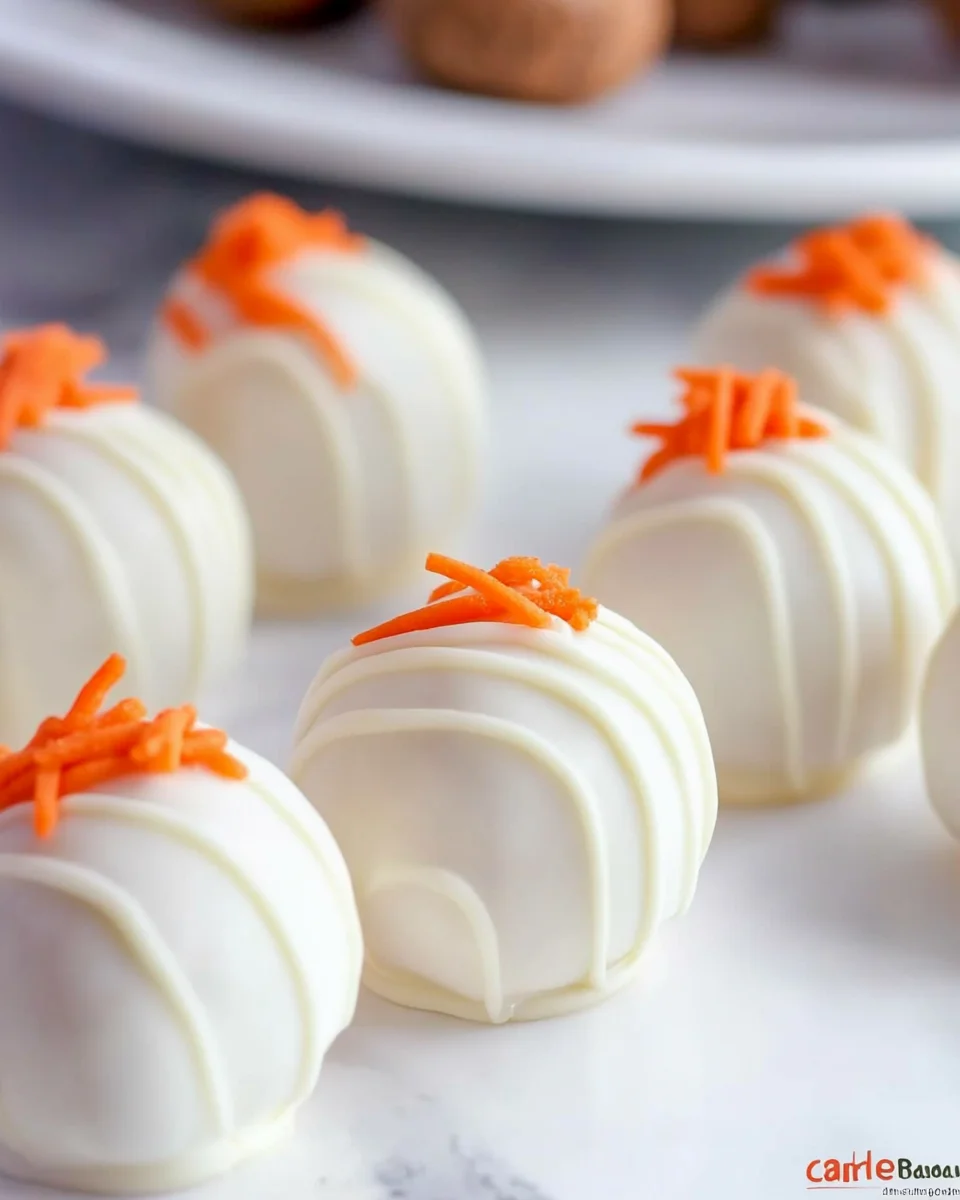
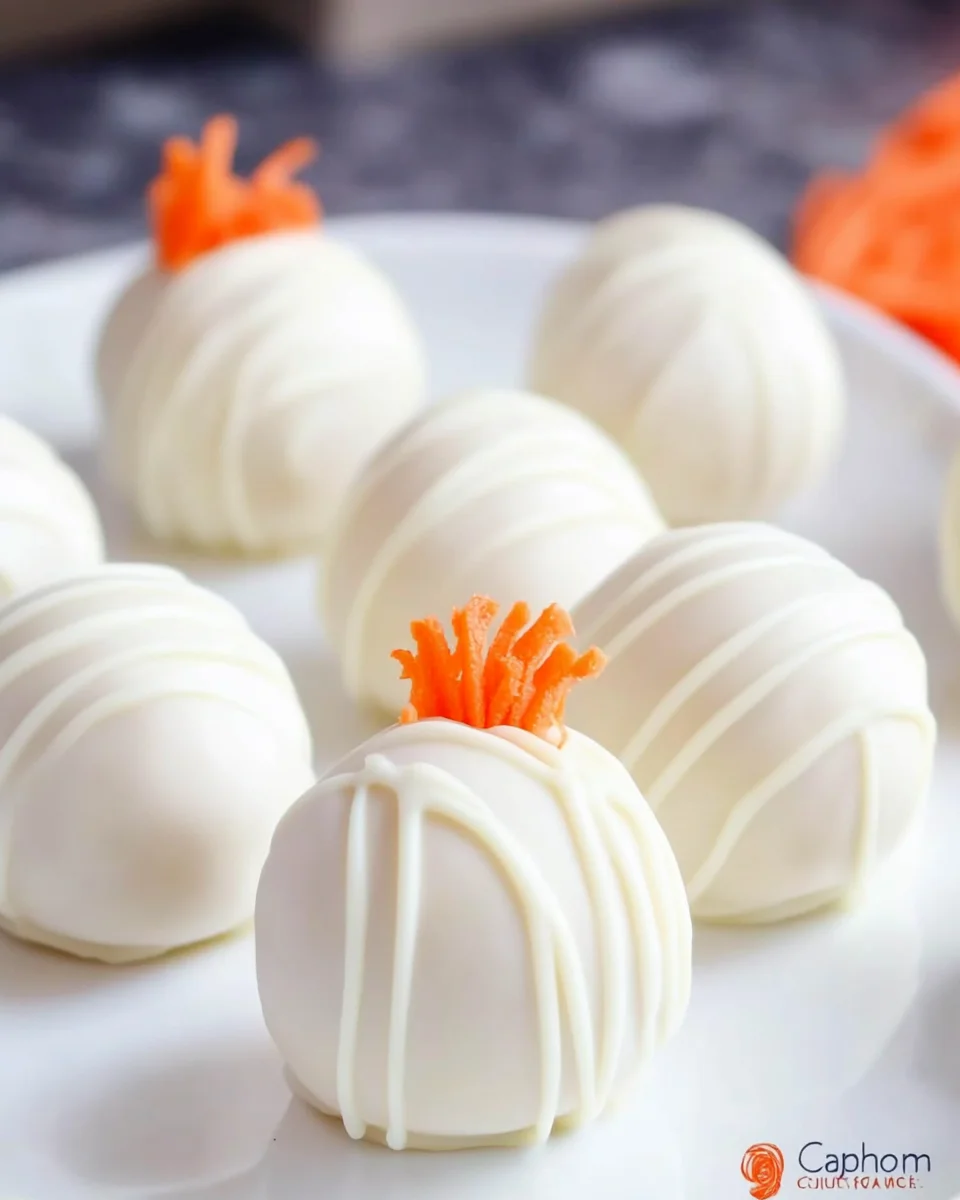
The Ultimate Guide to Carrot Cake Truffles

Carrot cake truffles are the perfect fusion of classic flavors and bite-sized indulgence. These sweet treats capture the essence of traditional carrot cake but in a convenient, no-fork-needed form. With a moist and spiced cake interior, a smooth white chocolate coating, and a festive topping, these truffles are ideal for Easter, springtime celebrations, or any occasion that calls for a delightful dessert.

In this guide, we’ll explore everything you need to know about carrot cake truffles, from their origins and flavor profile to expert tips, variations, and frequently asked questions. Whether you’re making them for a special occasion or simply indulging in a sweet craving, this comprehensive breakdown will help you perfect the recipe.

The Magic of Carrot Cake Truffles

Carrot cake is a beloved dessert known for its warm spices, moist texture, and creamy frosting. Carrot cake truffles take these same flavors and transform them into a bite-sized treat, coated in a luscious layer of white chocolate for a decadent finish.

What makes truffles so special is their versatility. They’re easy to make, require minimal baking skills, and can be customized in countless ways. Whether you prefer a classic version or want to experiment with different flavors and coatings, carrot cake truffles offer something for everyone.

Why Carrot Cake Truffles Are a Must-Try

1. A Fun Twist on a Classic Dessert

If you love traditional carrot cake but want something more portable and shareable, these truffles are the perfect solution. They maintain the signature taste of carrot cake but eliminate the need for slicing, plating, and utensils.

2. Perfect for Special Occasions

Carrot cake truffles make a great addition to dessert tables, party platters, and holiday celebrations. Their festive appearance, especially with decorative toppings like icing carrots or sprinkles, makes them a hit for Easter, baby showers, and spring gatherings.

3. Great for Gifting

Homemade treats always make thoughtful gifts, and these truffles are no exception. Package them in a decorative box or jar, and you have a delicious, homemade present for friends, family, or coworkers.

4. Easy to Customize

One of the best things about carrot cake truffles is their adaptability. You can swap the frosting flavor, use different chocolate coatings, or add mix-ins like nuts or coconut for a personalized touch.

5. Ideal for Make-Ahead Desserts

Since these truffles need time to chill before dipping in chocolate, they’re a great make-ahead option. This makes them perfect for parties or busy schedules when you want to prepare dessert in advance.

Pro Tips for the Best Carrot Cake Truffles

1. Choose the Right Cake Texture

For the perfect truffle consistency, the cake should be moist but not overly wet. If the cake is too dry, the truffles may fall apart. If too moist, they may become sticky and difficult to shape. Using the right amount of frosting is key to achieving the ideal texture.

2. Chill the Cake Mixture Before Rolling

Refrigerating the cake and frosting mixture for at least 30 minutes before shaping makes the process easier. Chilling helps firm up the mixture, preventing it from sticking to your hands and ensuring perfectly round truffles.

3. Use a Cookie Scoop for Even Sizing

For uniform truffles, use a cookie scoop to portion out the mixture before rolling. This ensures consistency in size, making them look more professional and allowing them to set evenly.

4. Master the Chocolate Coating Process

When melting the white chocolate or almond bark, use a microwave-safe bowl and heat in short intervals, stirring in between. Overheating can cause the chocolate to become lumpy. For a smoother dipping process, consider adding a small amount of vegetable oil or coconut oil to thin the chocolate.

5. Use a Toothpick or Fork for Dipping

Dipping the truffles in melted chocolate can be tricky, but using a toothpick or dipping fork makes the process easier. Tap off excess chocolate before placing the truffles on parchment paper to set.

6. Decorate Before the Chocolate Sets

If you’re adding sprinkles, chopped nuts, or icing decorations, do so while the chocolate is still wet. This ensures that the toppings adhere properly and stay in place.

7. Allow Time for the Truffles to Set

Once coated, let the truffles sit at room temperature or refrigerate them briefly to allow the chocolate to harden completely. This step ensures a smooth and glossy finish.

Creative Variations to Try

While the classic carrot cake truffle is delicious as is, there are plenty of ways to experiment with flavors and coatings. Here are a few ideas to inspire your next batch:

1. Cream Cheese Frosting Truffles

For an even more authentic carrot cake flavor, replace the vanilla frosting with cream cheese frosting. This adds a slight tanginess that balances the sweetness of the white chocolate coating.

2. Spiced Pecan Crunch

Mix finely chopped pecans and a dash of extra cinnamon into the cake mixture before rolling the truffles. The nuts add a subtle crunch and an extra layer of flavor.

3. Coconut-Coated Truffles

Instead of dipping the truffles in white chocolate, roll them in shredded coconut for a naturally sweet coating. This gives them a tropical twist while keeping them light and airy.

4. Dark Chocolate Drizzle

If you prefer a contrast to the sweetness of white chocolate, drizzle the truffles with melted dark chocolate. This adds a rich, slightly bitter note that pairs beautifully with the warm spices of carrot cake.

5. Carrot Cake Cheesecake Truffles

Blend a small amount of softened cream cheese into the cake mixture for a cheesecake-inspired variation. The result is a creamier, richer truffle with a tangy depth of flavor.

Ingredients

Decadent Cake Base

  • 1 box carrot cake mix
  • 1 cup water
  • 1/3 cup vegetable oil
  • 3 eggs

Creamy Binding Magic

  • 1/2 cup vanilla frosting

Sweet Coating

  • 16 ounces vanilla almond bark

Festive Topping

  • 25 royal icing carrots

Directions

Baking the Cake

  1. Preheat the oven to 350°F.
  2. In a large bowl, mix the cake mix, water, oil, and eggs until smooth.
  3. Pour the batter into a 9×13 pan and bake for about 30 minutes or until fully cooked.
  4. Let the cake cool completely.

Transforming Cake into Truffles

  1. Crumble the cooled cake into a large bowl.
  2. Using clean hands or gloves, mix in the vanilla frosting until fully combined.
  3. Roll 1 tablespoon of the mixture into a ball and place it on a parchment-lined baking sheet.
  4. Repeat until all truffle balls are formed.
  5. Refrigerate for 30 minutes.

Dipping in White Chocolate

  1. Melt the vanilla almond bark according to package instructions.
  2. Remove the truffles from the fridge.
  3. Using a toothpick or skewer, dip each truffle into the melted almond bark, tapping off excess coating.
  4. Place the coated truffles on parchment paper and let them set.

Final Touch of Sweetness

  1. Fill a small plastic bag with the remaining melted almond bark, snip the tip, and drizzle over truffles.
  2. While still wet, top each truffle with a royal icing carrot.
  3. Allow the truffles to set for about 15 minutes before serving.

Nutritional Highlights (Per Serving)

  • Calories: ~164
  • Total Fat: ~9g
  • Saturated Fat: ~1g
  • Cholesterol: ~26mg
  • Sodium: ~40mg
  • Carbohydrates: ~10g
  • Sugar: ~9g
  • Protein: ~1g

These carrot cake truffles are a delightful fusion of classic flavors in a bite-sized treat, perfect for Easter, spring gatherings, or any occasion that calls for a touch of sweetness.

Frequently Asked Questions

1. Can I Use Homemade Carrot Cake Instead of Boxed Mix?

Yes! If you prefer making your cake from scratch, you can use a homemade carrot cake recipe. Just be sure the cake is fully cooled before crumbling and mixing with frosting.

2. How Do I Store Carrot Cake Truffles?

Store the truffles in an airtight container in the refrigerator for up to a week. If making them ahead for an event, allow them to sit at room temperature for a few minutes before serving to soften slightly.

3. Can I Freeze Carrot Cake Truffles?

Yes! These truffles freeze well. Place them in a single layer on a baking sheet to freeze, then transfer them to an airtight container or freezer bag. They can be stored in the freezer for up to three months. Thaw in the fridge before serving.

4. What’s the Best Way to Melt White Chocolate?

For the smoothest consistency, melt white chocolate in a microwave-safe bowl in 30-second intervals, stirring in between. Alternatively, use a double boiler for gentle, even heating.

5. Can I Make These Truffles Gluten-Free?

Absolutely! Simply use a gluten-free carrot cake mix or a homemade gluten-free carrot cake recipe. Ensure that all other ingredients, including frosting and chocolate, are also gluten-free.

6. What If I Can’t Find Royal Icing Carrots for Decoration?

If you can’t find pre-made royal icing carrots, try decorating with orange and green sprinkles, crushed pecans, or a drizzle of colored white chocolate to mimic the carrot design.

Conclusion

Carrot cake truffles are a delightful way to enjoy the flavors of classic carrot cake in a bite-sized, portable treat. With their rich, spiced cake center, creamy frosting blend, and smooth chocolate coating, they bring a perfect balance of texture and flavor.

Whether you’re making them for Easter, a spring gathering, or just as a sweet snack, these truffles are guaranteed to impress. With endless variations and easy customization options, you can get creative and tailor them to your personal preferences.

Try making a batch today and experience the magic of carrot cake truffles—one bite at a time!

aiting

The Ultimate Guide to Carrot Cake Truffles

Enjoy the rich and spiced flavors of carrot cake in a delightful bite-sized truffle! These easy-to-make treats are coated in smooth vanilla almond bark and topped with a festive royal icing carrot. Perfect for Easter, spring gatherings, or anytime you crave a sweet indulgence.
Prep Time 20 minutes
Cook Time 30 minutes
Total Time 50 minutes
Servings: 12 ruffles
Course: Dessert
Cuisine: American

Ingredients
  

For the cake base:
  • 1 box carrot cake mix
  • 1 cup water
  • 1/3 cup vegetable oil
  • 3 eggs
For the creamy filling:
  • 1/2 cup vanilla frosting
For the coating:
  • 16 ounces vanilla almond bark
For garnish:
  • 25 royal icing carrots

Method
 

  1. Bake the cake: Preheat the oven to 350°F. In a large bowl, mix the cake mix, water, oil, and eggs until smooth. Pour into a 9×13 pan and bake for 30 minutes. Let cool completely.
  2. Prepare the cake mixture: Crumble the cooled cake into a large bowl. Mix in the vanilla frosting until fully combined.
  3. Form truffle balls: Roll 1 tablespoon of the mixture into a ball and place on a parchment-lined baking sheet. Repeat with remaining mixture. Refrigerate for 30 minutes.
  4. Melt the coating: Melt the vanilla almond bark according to package instructions.
  5. Dip the truffles: Using a toothpick or skewer, dip each truffle into the melted almond bark, tapping off excess. Place on parchment paper to set.
  6. Decorate: Drizzle extra melted almond bark over truffles and top with a royal icing carrot.
  7. Set and serve: Allow truffles to set for about 15 minutes before serving.

Notes

  • Ensure the cake is fully cooled before crumbling to prevent excess moisture.
  • Refrigerating the truffles before dipping helps maintain their shape.
  • For added flair, sprinkle with crushed nuts or cinnamon before the coating sets.

The Ultimate Guide to St. Patrick’s Day Poke Cake

St. Patrick’s Day is a time for festive celebrations, and what better way to add a touch of green to your dessert table than with a delicious St. Patrick’s Day poke cake? This vibrant, flavorful, and irresistibly moist cake is a crowd-pleaser, combining the simplicity of a boxed cake mix with the refreshing taste of lime Jello and a creamy whipped topping. Whether you’re hosting a party or just looking for a fun and easy dessert, this poke cake is the perfect way to bring a little Irish cheer to the occasion.

This article explores everything you need to know about this festive dessert, including its origins, variations, pro tips, and answers to frequently asked questions. If you’re planning to make this cake for your St. Patrick’s Day celebration, read on to discover how to take it to the next level.

The Origin of Poke Cakes

Poke cakes have been a beloved dessert in American households for decades. The concept is simple: after baking a cake, you poke holes throughout and pour a flavorful liquid—often gelatin, pudding, or sweetened condensed milk—over the top. The liquid seeps into the holes, infusing every bite with extra moisture and flavor.

The popularity of poke cakes surged in the 1970s when Jello started promoting the idea as a fun and creative way to use their flavored gelatin products. Over the years, this simple dessert has evolved into a versatile treat, with variations including chocolate caramel poke cakes, fruit-infused versions, and holiday-themed creations like this St. Patrick’s Day lime poke cake.

Why This St. Patrick’s Day Poke Cake is a Must-Try

1. A Festive Showstopper

The bright green hue of this cake makes it a perfect centerpiece for any St. Patrick’s Day celebration. With a fun lime flavor and festive green and gold sprinkles, it captures the holiday spirit in every slice.

2. Incredibly Easy to Make

Using a boxed cake mix as the base makes this dessert practically foolproof. Even if you’re not an experienced baker, this cake comes together effortlessly with just a few extra ingredients and simple steps.

3. Perfectly Moist and Flavorful

One of the best things about poke cakes is their incredible texture. The lime Jello seeps into every bite, making the cake ultra-moist while adding a refreshing citrus flavor that pairs beautifully with the creamy whipped topping.

4. Versatile for Any Occasion

Although this version is designed for St. Patrick’s Day, poke cakes can be customized for any celebration. Simply swap the Jello flavor or decorations to match different holidays, birthdays, or themed parties.

5. A Great Make-Ahead Dessert

Since this cake needs to be refrigerated overnight for the Jello to set, it’s an excellent make-ahead dessert. This means less stress on the day of your celebration and more time to enjoy the festivities.

Creative Variations to Try

While the classic St. Patrick’s Day poke cake is made with lime Jello and white cake mix, there are endless ways to customize it to suit your taste. Here are a few ideas to mix things up:

1. Irish Cream Poke Cake

For an adult-friendly twist, replace the Jello with a drizzle of Irish cream liqueur or Baileys-flavored pudding. This adds a rich, indulgent flavor that’s perfect for a grown-up St. Patrick’s Day gathering.

2. Lemon-Lime Citrus Burst

Combine lemon and lime Jello for a citrusy blend that enhances the cake’s tangy-sweet balance. This version is especially refreshing and pairs wonderfully with a lemon-flavored whipped topping.

3. Rainbow Poke Cake

Celebrate all things Irish by creating a rainbow poke cake. Instead of using just one color of Jello, use different colors in sections of the cake to create a fun rainbow effect. This is especially great for kids’ parties.

4. Chocolate Mint Poke Cake

For those who love the combination of chocolate and mint, try using a chocolate cake base with mint-flavored pudding or Jello. Top it with crushed mint candies for an extra festive touch.

5. Coconut Cream Poke Cake

Swap the lime Jello for coconut cream pudding and top with toasted coconut flakes for a tropical twist on the classic recipe.

Pro Tips for the Perfect Poke Cake

To ensure your St. Patrick’s Day poke cake turns out perfectly every time, keep these expert tips in mind:

1. Poke Deep but Not Too Wide

Use the handle of a wooden spoon to poke evenly spaced holes across the cake. The holes should be deep enough for the Jello to seep in but not so large that the cake loses its structure.

2. Allow the Cake to Cool Completely

Pouring Jello over a hot cake can cause it to become soggy or unevenly absorbed. Let the cake cool to room temperature before adding the Jello mixture.

3. Chill Overnight for Best Results

Although it might be tempting to serve the cake right away, letting it rest in the refrigerator overnight allows the Jello to fully set and enhances the overall texture.

4. Use Fresh Whipped Cream for an Upgrade

While Cool Whip is convenient, homemade whipped cream can take this cake to the next level. Simply whip heavy cream with a little powdered sugar and vanilla for a fresher, richer topping.

5. Don’t Overdo the Sprinkles Until Ready to Serve

If using sprinkles, add them just before serving to prevent them from dissolving into the whipped topping. This keeps the cake looking bright and festive.

Ingredients

Magical Cake Base

  • 1 box white cake mix (plus ingredients listed on the box: water, oil, egg whites)
  • 1 box (3 oz) lime Jello
  • 2 cups water

Creamy Dreamy Topping

  • 8 oz Cool Whip (or fresh whipped cream)
  • 1 box (3 oz) white chocolate instant pudding mix

Festive Finishing Touch

  • 1/3 cup St. Patrick’s Day sprinkles

Directions

Baking the Perfect Base

  1. Prepare the cake batter following the instructions on the cake mix box.
  2. Pour the batter into a 13×9-inch baking pan and bake as directed.
  3. Allow the cake to cool completely on a wire rack.

Infusing the Cake with Flavor

  1. Using the handle of a wooden spoon, poke holes evenly across the top of the cooled cake.
  2. In a saucepan, bring 1 cup of water to a boil, then remove from heat and whisk in the lime Jello mix.
  3. Add 1 cup of cold water, stirring until the Jello is completely dissolved.
  4. Pour the Jello mixture evenly over the cake, making sure it seeps into the holes.
  5. Refrigerate the cake overnight to allow the flavors to soak in.

Creating the Fluffy Topping

  1. In a large bowl, whisk together Cool Whip and white chocolate instant pudding mix until fully combined.
  2. Spread the whipped topping evenly over the entire cake using a spatula.

The Final Touch

  1. Sprinkle St. Patrick’s Day sprinkles over the top for a festive finish.
  2. Slice and serve chilled.

Nutritional Highlights (Approximate per serving)

  • Calories: ~250
  • Carbohydrates: ~40g
  • Fat: ~8g
  • Protein: ~3g
  • Sugar: ~28g

This festive and easy-to-make poke cake is perfect for any St. Patrick’s Day celebration, bringing a burst of color, flavor, and fun to your dessert table.

Frequently Asked Questions

1. Can I Use a Different Jello Flavor?

Yes! While lime is perfect for St. Patrick’s Day, you can experiment with other flavors like lemon, strawberry, or raspberry for a different taste and color combination.

2. How Should I Store Leftovers?

Poke cake should be stored in the refrigerator, covered tightly with plastic wrap or in an airtight container. It will stay fresh for up to three days.

3. Can I Make This Cake from Scratch Instead of Using a Boxed Mix?

Absolutely! If you prefer homemade cake, you can use a white or vanilla cake recipe as the base. Just ensure it’s fully cooled before adding the Jello.

4. Can I Make Cupcakes Instead of a Full Cake?

Yes! You can turn this recipe into poke cupcakes by baking cupcakes instead of a sheet cake, poking small holes with a fork, and drizzling Jello over each one before adding the whipped topping.

5. Is There a Dairy-Free Alternative?

To make this cake dairy-free, use a non-dairy whipped topping (such as coconut whipped cream) and check the Jello ingredients for dairy-free options.

6. Can I Freeze Poke Cake?

It’s not recommended to freeze poke cake, as the Jello layer may become watery upon thawing. However, you can bake the cake in advance, freeze it before adding the Jello, then complete the recipe when ready to serve.

Conclusion

St. Patrick’s Day poke cake is the perfect combination of fun, flavor, and festive spirit. With its vibrant green color, refreshing lime flavor, and irresistibly moist texture, it’s sure to be a hit at any celebration.

What makes this cake so special is its simplicity—easy enough for beginners yet impressive enough to wow a crowd. Whether you follow the traditional recipe or put your own spin on it, this poke cake is a guaranteed way to sweeten up your St. Patrick’s Day festivities.

So grab your ingredients, embrace the holiday spirit, and enjoy a slice of this lucky lime delight!

aiting

The Ultimate Guide to St. Patrick’s Day Poke Cake

A fun and festive dessert bursting with zesty lime flavor and a luscious creamy topping! This Lucky Lime Poke Cake is easy to make, delightfully moist, and perfect for any St. Patrick’s Day celebration. With a refreshing lime Jello infusion and a fluffy white chocolate topping, this cake is a crowd-pleaser that’s sure to bring a little luck to your dessert table.
Prep Time 15 minutes
Cook Time 25 minutes
Total Time 40 minutes
Servings: 12 servings
Course: Dessert
Cuisine: American

Ingredients
  

For the cake base:
  • 1 box white cake mix plus ingredients listed on the box: water, oil, egg whites
  • 1 box 3 oz lime Jello
  • 2 cups water
For the creamy topping:
  • 8 oz Cool Whip or fresh whipped cream
  • 1 box 3 oz white chocolate instant pudding mix
For garnish:
  • 1/3 cup St. Patrick’s Day sprinkles

Method
 

  1. Bake the cake: Prepare the cake batter following the instructions on the cake mix box. Pour the batter into a 13×9-inch baking pan and bake as directed. Let the cake cool completely.
  2. Poke and prepare the Jello: Using the handle of a wooden spoon, poke holes evenly across the top of the cooled cake. In a saucepan, bring 1 cup of water to a boil, then remove from heat and whisk in the lime Jello mix. Add 1 cup of cold water, stirring until dissolved.
  3. Infuse the cake: Pour the Jello mixture evenly over the cake, allowing it to seep into the holes. Refrigerate the cake overnight for the best flavor infusion.
  4. Prepare the topping: In a large bowl, whisk together Cool Whip and white chocolate instant pudding mix until fully combined. Spread evenly over the cake.
  5. Garnish and serve: Sprinkle St. Patrick’s Day sprinkles over the top. Slice and serve chilled.

Notes

  • For an extra citrusy kick, add a teaspoon of lime zest to the cake batter.
  • Ensure the cake is fully chilled before serving for the best texture and flavor.
  • Swap Cool Whip for homemade whipped cream for a richer taste.

The Ultimate Guide to Salmon Crispy Rice

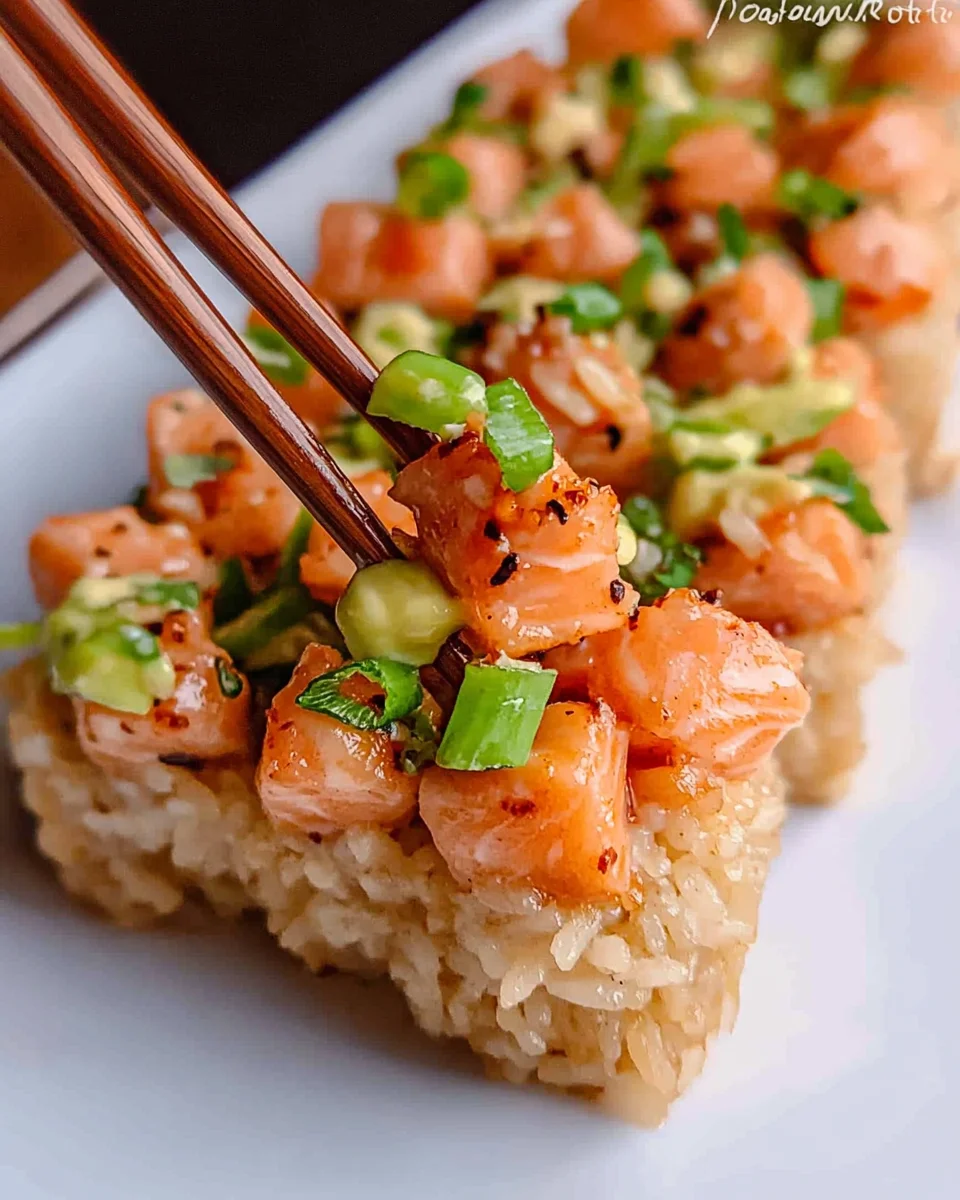
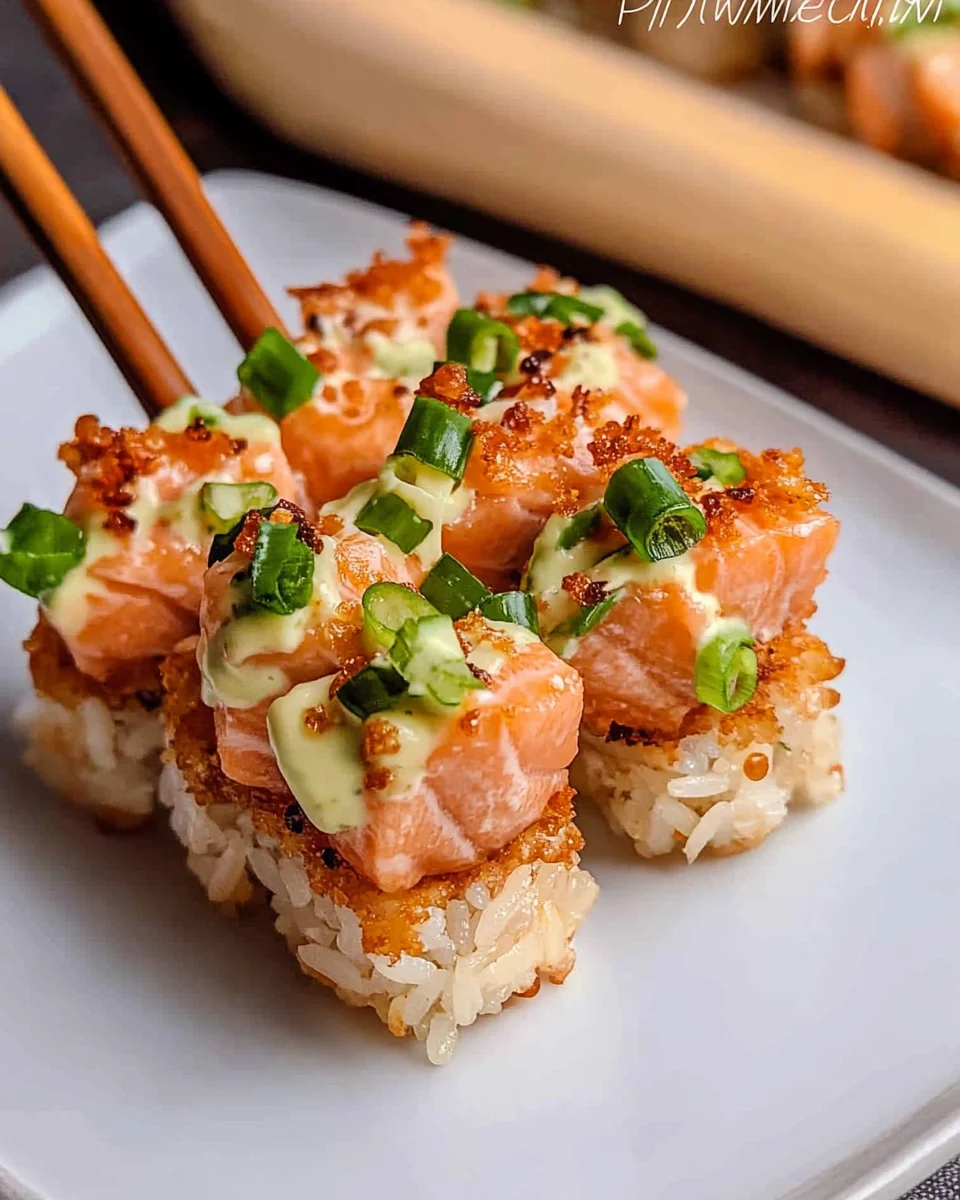
Salmon crispy rice is a delightful fusion of textures and flavors, bringing together the crunch of golden, pan-fried rice with the creamy, spicy kick of seasoned salmon. This dish has taken social media by storm, becoming a must-try for food lovers who crave both elegance and ease in their cooking. Originating as a restaurant-style appetizer, crispy rice with spicy salmon has made its way into home kitchens, proving that gourmet flavors don’t have to be complicated.

This guide dives deeper into the origins, variations, tips, and frequently asked questions about salmon crispy rice. Whether you’re new to the dish or a seasoned cook looking to perfect your technique, this comprehensive breakdown will help you understand everything about this viral favorite.

The Origins of Crispy Rice with Spicy Salmon

Crispy rice appetizers have been a staple in Japanese fusion cuisine for years, with origins tracing back to high-end restaurants like Nobu. The concept stems from the traditional technique of frying rice to create a crunchy texture, often seen in dishes like yakimeshi (Japanese fried rice) or nurungji (Korean scorched rice).

The addition of spicy salmon is a more recent trend, likely inspired by the popularity of spicy tuna crispy rice. The combination of sushi-grade fish, creamy Japanese mayo, and a hint of spice gives this dish an irresistible depth of flavor. What sets salmon crispy rice apart is its balance—crispy yet tender, spicy yet creamy, indulgent yet light enough to be a perfect appetizer.

Why Salmon Crispy Rice Is a Viral Sensation

Food trends come and go, but some dishes capture the internet’s attention and stay for good. Here’s why salmon crispy rice has remained a favorite among home cooks and restaurant-goers alike:

1. Perfect Balance of Textures

Crispy rice provides a satisfying crunch, while the spicy salmon mixture adds a smooth, melt-in-your-mouth contrast. This combination makes every bite exciting.

2. Customizable and Versatile

This dish can be adapted in countless ways. Want extra heat? Add more sriracha. Prefer a different texture? Try mixing in diced cucumbers or tobiko for an extra pop. You can even swap salmon for tuna, shrimp, or even plant-based alternatives like marinated tofu.

3. Aesthetic Appeal

It’s no secret that visually stunning food gets attention online. The contrast of golden brown rice, vibrant orange salmon, and bright green avocado makes this dish picture-perfect for social media.

4. Easy Yet Impressive

While this dish looks and tastes sophisticated, it’s surprisingly simple to make at home. With a little prep work, you can serve up a restaurant-quality appetizer that will impress guests or elevate a weeknight meal.

Pro Tips for the Best Salmon Crispy Rice

1. Choose the Right Rice

Short-grain sushi rice is the best option for crispy rice. Its high starch content allows it to stick together while frying, creating the perfect shape and texture. Avoid long-grain varieties like basmati or jasmine, as they tend to fall apart.

2. Chill the Rice Before Frying

Refrigerating or freezing the rice for at least 3 hours (or overnight) helps it firm up, making it easier to cut and fry without crumbling. This step is essential for achieving a neat, uniform shape.

3. Don’t Skimp on the Oil

For an ultra-crispy exterior, use enough oil to evenly coat the rice pieces while frying. A shallow fry works best, ensuring a crisp crust without making the rice too greasy.

4. Use High-Quality Salmon

Since the salmon is consumed raw, it’s crucial to use sushi-grade fish. If you’re unsure, check with your fishmonger or opt for pre-packaged sushi-grade salmon. Alternatively, smoked salmon can be used for a different flavor profile.

5. Taste and Adjust the Spice Level

The amount of sriracha in the spicy salmon mix can be adjusted based on your heat tolerance. For extra depth, try adding a dash of chili oil or wasabi to the mixture.

Creative Variations to Try

1. Spicy Tuna Crispy Rice

Swap out the salmon for sushi-grade tuna and follow the same seasoning process. This version is the most traditional and just as delicious.

2. Truffle Infused Crispy Rice

Drizzle a touch of truffle oil into the spicy salmon mix or over the crispy rice before serving for a luxurious twist.

3. Vegan Crispy Rice

Replace salmon with mashed avocado mixed with sriracha and vegan mayo, or use diced marinated tofu for a plant-based alternative.

4. Sesame-Crusted Crispy Rice

Before frying, coat the rice squares with a mixture of black and white sesame seeds for added crunch and flavor.

5. Teriyaki-Glazed Crispy Rice

Brush the crispy rice with a light layer of teriyaki sauce before topping with salmon to introduce a sweet-savory element.

Ingredients

Golden Crispy Rice Base

  • 3 cups cooked sushi rice (short-grain)
  • 2 tbsp rice vinegar
  • 1 tbsp sugar
  • 1 tsp salt
  • Vegetable oil (for frying)

Fiery Spicy Salmon Topping

  • 1 lb sushi-grade salmon, finely chopped
  • 4 tbsp Kewpie mayo (or regular mayo)
  • 2 tbsp sriracha
  • 2 tbsp scallions, finely chopped
  • 2 tsp soy sauce
  • 2 tsp sesame oil

Tantalizing Garnishes

  • 1 ripe avocado, sliced
  • 1 jalapeño, thinly sliced
  • Black and white sesame seeds, toasted

Directions

Crafting the Crispy Rice

  1. In a small bowl, mix rice vinegar, sugar, and salt until dissolved.
  2. Pour the mixture over freshly cooked sushi rice and gently stir.
  3. Line a baking pan with plastic wrap and press the seasoned rice into an even layer.
  4. Cover and refrigerate for at least 4 hours or overnight until firm.
  5. Once chilled, cut the rice into 16 equal rectangles.

Preparing the Spicy Salmon Mixture

  1. In a bowl, combine chopped sushi-grade salmon, Kewpie mayo, sriracha, soy sauce, scallions, and sesame oil.
  2. Stir until well mixed, cover, and refrigerate until ready to use.

Frying and Assembling the Perfect Bite

  1. Heat vegetable oil in a skillet over medium heat.
  2. Fry the rice rectangles in batches until golden brown and crispy on both sides.
  3. Transfer to a paper towel-lined plate to drain excess oil.
  4. Top each crispy rice piece with a slice of avocado, a generous scoop of spicy salmon, and a thin jalapeño slice.
  5. Sprinkle with sesame seeds and serve immediately.

Nutritional Highlights (Approximate per serving)

  • Calories: ~250
  • Protein: ~12g
  • Fat: ~10g
  • Carbohydrates: ~28g
  • Sodium: ~300mg

Enjoy this crispy, creamy, and spicy fusion dish at home!

Frequently Asked Questions

1. Can I Make This Dish in Advance?

Yes! You can prepare the rice squares ahead of time and store them in the refrigerator for up to 24 hours before frying. The spicy salmon mixture can also be made a few hours in advance and kept chilled until ready to serve. However, for the best texture, it’s recommended to fry and assemble the dish just before eating.

2. What Oil Is Best for Frying the Rice?

A neutral oil with a high smoke point, such as vegetable oil, canola oil, or avocado oil, works best for frying. Avoid olive oil, as it has a lower smoke point and can impart a strong flavor.

3. How Do I Store Leftovers?

If you have leftover crispy rice, store it separately from the salmon mixture. The rice can be refrigerated and reheated in a pan or air fryer to restore crispiness. The salmon mixture should be consumed within 24 hours and kept chilled.

4. Can I Bake or Air Fry the Rice Instead of Frying?

Yes! If you prefer a lighter version, bake the rice squares at 400°F (200°C) for about 15–20 minutes, flipping halfway through. Air frying at 375°F (190°C) for 10–12 minutes can also achieve a crispy texture with less oil.

5. Is This Dish Safe to Eat Raw?

As long as you use sushi-grade salmon and handle it properly, it’s safe to eat raw. If you’re unsure, opt for cooked or smoked salmon instead. To be extra cautious, freeze the salmon for at least 24 hours before using to kill any potential parasites.

Conclusion

Salmon crispy rice is more than just a viral food trend—it’s a delicious, satisfying dish that brings together bold flavors and contrasting textures. Whether you’re serving it as an appetizer for a dinner party or enjoying it as a special treat at home, this recipe is guaranteed to impress.

By understanding the origins, tips, and variations of crispy rice with spicy salmon, you can confidently recreate this restaurant-quality dish in your own kitchen. Experiment with flavors, make it your own, and enjoy every crispy, creamy, and spicy bite.

aiting

The Ultimate Guide to Salmon Crispy Rice

Experience the perfect bite with this crispy rice delight topped with creamy, spicy salmon. The contrast of crunchy golden rice and the rich, fiery topping makes this dish an irresistible appetizer or snack. Impress your guests or indulge yourself with this restaurant-quality fusion dish made effortlessly at home!
Prep Time 10 minutes
Cook Time 15 minutes
Total Time 25 minutes
Servings: 16 bites
Course: Appetizer, Snack
Cuisine: Japanese Fusion

Ingredients
  

For the crispy rice base:
  • 3 cups cooked sushi rice short-grain
  • 2 tablespoons rice vinegar
  • 1 tablespoon sugar
  • 1 teaspoon salt
  • Vegetable oil for frying
For the spicy salmon topping:
  • 1 pound sushi-grade salmon finely chopped
  • 4 tablespoons Kewpie mayo or regular mayo
  • 2 tablespoons sriracha
  • 2 tablespoons scallions finely chopped
  • 2 teaspoons soy sauce
  • 2 teaspoons sesame oil
For garnish:
  • 1 ripe avocado sliced
  • 1 jalapeño thinly sliced
  • Black and white sesame seeds toasted

Method
 

  1. Prepare the rice: In a small bowl, mix rice vinegar, sugar, and salt until dissolved. Pour over freshly cooked sushi rice and gently stir.
  2. Shape and chill: Line a baking pan with plastic wrap and press the seasoned rice into an even layer. Cover and refrigerate for at least 4 hours or overnight until firm. Cut into 16 equal rectangles.
  3. Make the spicy salmon: In a bowl, combine chopped salmon, Kewpie mayo, sriracha, soy sauce, scallions, and sesame oil. Stir well, cover, and refrigerate.
  4. Fry the rice: Heat vegetable oil in a skillet over medium heat. Fry the rice rectangles in batches until golden brown and crispy on both sides. Transfer to a paper towel-lined plate.
  5. Assemble: Top each crispy rice piece with a slice of avocado, a scoop of spicy salmon, and a jalapeño slice. Sprinkle with sesame seeds.
  6. Serve immediately and enjoy!

Notes

  • Chilling the rice ensures it holds its shape while frying.
  • For an extra kick, drizzle with additional sriracha or spicy mayo.
  • Use a non-stick pan to prevent rice from sticking during frying.
  • If preferred, substitute salmon with spicy tuna or crab.

The Ultimate Guide to Keto Big Mac Bites

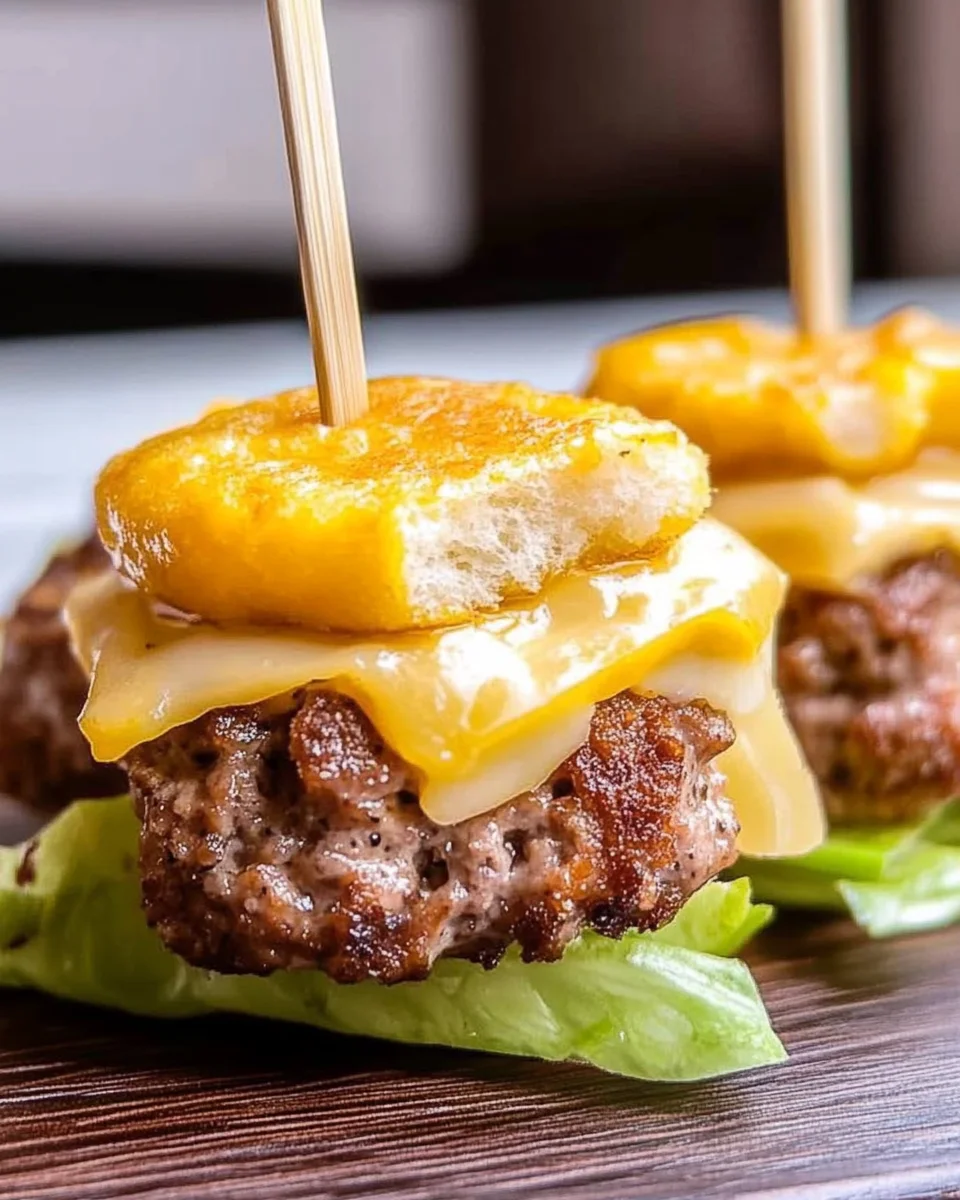
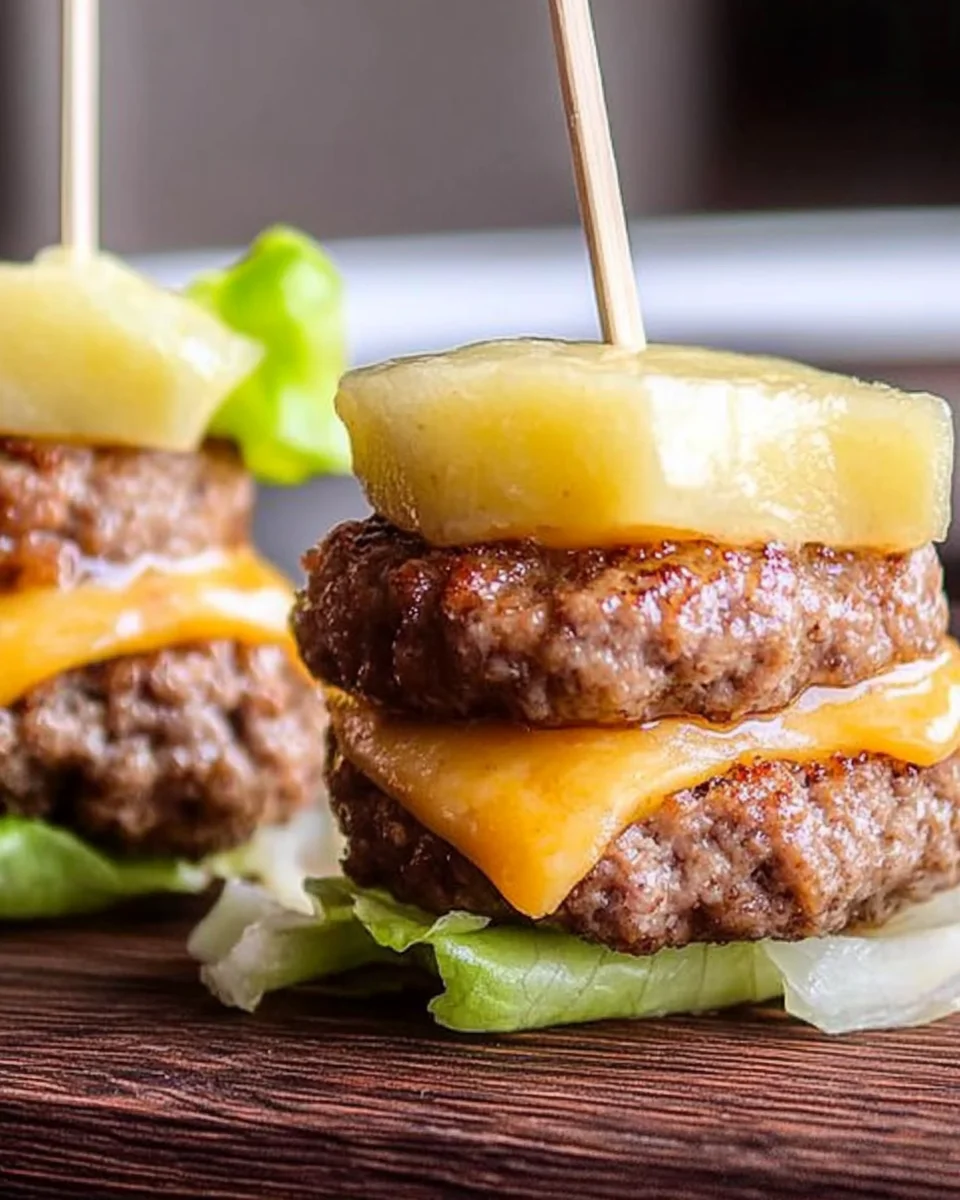
Keto Big Mac Bites are the perfect low-carb alternative to the iconic fast-food burger. These bite-sized, bunless mini burgers pack all the flavors of a Big Mac—juicy beef, melted cheese, crisp lettuce, tangy pickles, and, of course, the legendary Big Mac sauce—without the extra carbs. They are easy to make, delicious, and versatile, making them a fantastic appetizer, game-day snack, or even a quick dinner option.

If you’re following a keto or low-carb lifestyle, finding satisfying replacements for comfort food can be a challenge. These Big Mac Bites solve that problem by delivering all the nostalgic flavors of a classic burger in a convenient, guilt-free format. In this guide, we’ll explore everything you need to know about these keto-friendly mini burgers, including their benefits, variations, serving suggestions, storage tips, and answers to frequently asked questions.

Why Keto Big Mac Bites Are a Must-Try

Big Mac Bites are more than just a fun twist on a fast-food favorite—they are a practical and delicious way to enjoy burgers while keeping your carb intake in check. Here’s why they should be on your menu:

1. Perfect for Keto and Low-Carb Diets

Traditional Big Macs come with a sesame seed bun that can quickly derail your low-carb goals. By skipping the bun and keeping the essential ingredients, these mini bites allow you to enjoy the same great taste without unnecessary carbohydrates.

2. Easy to Make and Customize

With just a few simple ingredients, you can prepare these bites in less than 30 minutes. Plus, they’re highly customizable—swap out the cheese, adjust the seasoning, or add different toppings to suit your personal preferences.

3. Great for Parties and Gatherings

These bite-sized burgers are ideal for entertaining. Whether you’re hosting a game-day party, a summer barbecue, or a casual get-together, they make an excellent appetizer that both keto and non-keto guests will love.

4. Packed with Protein and Healthy Fats

Each serving is rich in protein and healthy fats, making these bites a satisfying meal option that will keep you full longer.

5. No Messy Buns, No Soggy Bottoms

One of the biggest complaints about burgers is the bun getting soggy from sauces and toppings. Without the bread, these bites remain fresh and delicious from the first bite to the last.

How to Elevate Your Keto Big Mac Bites

While the classic recipe is already delicious, there are several ways to enhance and customize your Big Mac Bites to make them even better:

1. Experiment with Cheese Options

The traditional Big Mac uses American cheese, but you can switch it up with other varieties:

  • Cheddar: Adds a sharper, more intense flavor.
  • Pepper Jack: Introduces a mild heat that pairs well with the sauce.
  • Provolone: Offers a smoother, slightly smoky taste.

2. Make It Spicy

For those who love a bit of heat, consider adding:

  • A few dashes of hot sauce or Sriracha to the sauce.
  • A sprinkle of cayenne pepper or red pepper flakes to the beef mixture.
  • Jalapeño slices on top of each bite for an extra kick.

3. Add a Crunch Factor

Want more texture? Try these add-ons:

  • Crushed pork rinds sprinkled on top for a crispy bite.
  • A few shreds of cabbage instead of lettuce for extra crunch.

4. Play Around with the Sauce

The special sauce is a major part of what makes these bites taste like a Big Mac. Here are some ways to customize it:

  • Smoky Variation: Add a teaspoon of smoked paprika.
  • Tangy Twist: Mix in a teaspoon of Worcestershire sauce.
  • Garlic Lover’s Edition: Add fresh minced garlic for a bold kick.

Best Ways to Serve Keto Big Mac Bites

These bites are incredibly versatile and can be enjoyed in multiple ways:

1. As an Appetizer

Arrange them on a platter with toothpicks and a bowl of extra sauce for dipping. They’re perfect for parties, game nights, or family gatherings.

2. As a Main Course

Pair your Big Mac Bites with a keto-friendly side dish to make a full meal. Some great options include:

  • Cauliflower mash
  • Zucchini fries
  • A fresh green salad with a tangy vinaigrette
  • Roasted Brussels sprouts

3. In a Lettuce Wrap

Turn these into mini lettuce-wrapped burgers by serving them inside crisp romaine or butter lettuce leaves.

4. Over a Bed of Salad

For a deconstructed Big Mac experience, serve the bites over a salad with chopped lettuce, shredded cheese, and extra pickles, then drizzle the special sauce on top.

How to Store and Reheat Keto Big Mac Bites

Storing Leftovers

  • Refrigerator: Store leftover patties in an airtight container for up to 4 days. Keep the toppings (lettuce and pickles) separate to prevent sogginess.
  • Freezer: You can freeze the cooked patties for up to 2 months. Let them cool completely before placing them in a freezer-safe container.

Reheating Instructions

  • Microwave: Heat individual bites for 30-45 seconds until warmed through.
  • Oven: Reheat at 350°F for 8-10 minutes for best texture.
  • Air Fryer: Reheat at 375°F for 4-5 minutes for a slightly crispy exterior.

Ingredients – The Building Blocks of Flavor

For the Burger Patties

  • 1.5 pounds ground beef (80/20 for moisture)
  • ¼ cup onion, finely diced
  • 1 teaspoon salt
  • 4 slices American cheese (or cheddar, if preferred)
  • 16 slices dill pickle
  • Lettuce, chopped

For the Signature Sauce

  • ½ cup mayonnaise
  • 4 tablespoons dill pickle relish
  • 2 tablespoons yellow mustard
  • 1 teaspoon white wine vinegar
  • 1 teaspoon paprika
  • 1 teaspoon onion powder
  • 1 teaspoon garlic powder

Directions – The Path to Perfection

Step 1: Prep the Oven

Preheat your oven to 400°F.

Step 2: Mix and Shape

In a large bowl, combine the ground beef, finely diced onions, and salt. Mix well, then roll the beef into 1.5-ounce balls. Press each ball slightly to form a mini patty and place them on a lined baking sheet.

Step 3: Bake to Juicy Perfection

Bake the patties at 400°F for about 15 minutes or until they are fully cooked.

Step 4: Create the Magic Sauce

While the burgers cook, mix all the sauce ingredients in a bowl until well combined. Set aside.

Step 5: Assemble the Bites

Once the patties are done, remove them from the oven and pat off any excess grease. Cut each cheese slice into four small squares and place one on top of each patty. Put them back in the warm oven (with the heat off) to let the cheese melt.

Step 6: Stack and Serve

Top each burger with a few pieces of lettuce and a dill pickle slice. Secure everything with a skewer. Serve with the signature sauce and enjoy!

Nutritional Breakdown – The Numbers Behind the Flavor

  • Calories: 182 kcal
  • Carbohydrates: 1g
  • Protein: 10g
  • Fat: 12g
  • Saturated Fat: 4g
  • Polyunsaturated Fat: 3g
  • Monounsaturated Fat: 2g
  • Cholesterol: 36mg
  • Sodium: 414mg
  • Potassium: 26mg
  • Vitamin A: 23 IU
  • Vitamin C: 1mg
  • Calcium: 75mg
  • Iron: 6mg

These low-carb Big Mac Bites are a guilt-free way to satisfy your burger cravings without the bun. Make extra sauce—you’ll want it for everything!

Frequently Asked Questions

1. Can I Make These in Advance?

Yes! You can prepare the patties ahead of time and store them in the fridge or freezer until ready to bake. The sauce can also be made up to 3 days in advance.

2. Can I Use Ground Turkey or Chicken Instead of Beef?

Absolutely! Ground turkey or chicken works well as a leaner alternative. Just keep in mind that they have lower fat content, so adding a bit of olive oil or an egg to the mixture can help keep them juicy.

3. Is American Cheese Keto-Friendly?

Many store-bought American cheese slices contain fillers and additives, making them less ideal for a strict keto diet. If you prefer, opt for deli-style American cheese or swap it for cheddar or another low-carb cheese.

4. Can I Cook These on the Stovetop Instead of the Oven?

Yes! Simply cook the patties in a skillet over medium heat for about 4-5 minutes per side, until fully cooked.

5. How Do I Prevent the Patties from Drying Out?

  • Use 80/20 ground beef for the best balance of fat and moisture.
  • Avoid overcooking—use a meat thermometer to check for doneness (internal temperature should reach 160°F).
  • Let the patties rest for a few minutes after cooking to retain their juices.

Conclusion: Why You Should Make Keto Big Mac Bites Today

Keto Big Mac Bites are proof that you don’t have to sacrifice flavor to enjoy a low-carb lifestyle. They capture everything you love about the classic Big Mac in a healthier, more convenient format. Whether you’re serving them as a party appetizer, a quick lunch, or a satisfying dinner, these mini burgers are guaranteed to be a crowd-pleaser.

With endless customization options, easy prep, and a crave-worthy special sauce, this recipe is one you’ll find yourself making over and over again. Try them today and see for yourself why they are one of the best keto-friendly burger alternatives out there.

aiting

The Ultimate Guide to Keto Big Mac Bites

Enjoy all the iconic flavors of a Big Mac in a keto-friendly, bite-sized version! These bunless mini burgers are perfect for parties, game nights, or a quick low-carb meal. With a creamy, tangy secret sauce and the classic toppings, these bites will be a hit with everyone at the table!
Prep Time 10 minutes
Cook Time 15 minutes
Total Time 25 minutes
Servings: 16 bites
Course: Appetizer, Snack
Cuisine: American

Ingredients
  

For the burger patties:
  • 1.5 pounds ground beef 80/20 for moisture
  • 1/4 cup onion finely diced
  • 1 teaspoon salt
  • 4 slices American cheese or cheddar, if preferred
  • 16 slices dill pickle
  • Chopped lettuce
For the signature sauce:
  • 1/2 cup mayonnaise
  • 4 tablespoons dill pickle relish
  • 2 tablespoons yellow mustard
  • 1 teaspoon white wine vinegar
  • 1 teaspoon paprika
  • 1 teaspoon onion powder
  • 1 teaspoon garlic powder

Method
 

  1. Preheat the oven to 400°F.
  2. Prepare the patties: In a large bowl, mix the ground beef, finely diced onions, and salt. Roll into 1.5-ounce balls, press slightly to form mini patties, and place them on a lined baking sheet.
  3. Bake the patties at 400°F for 15 minutes or until fully cooked.
  4. Make the sauce by mixing all sauce ingredients in a bowl until well combined. Set aside.
  5. Assemble the bites: Once patties are cooked, remove them from the oven and pat off excess grease. Cut cheese slices into four small squares and place one on each patty. Return to the warm oven (with the heat off) to let the cheese melt.
  6. Stack and serve: Top each burger with chopped lettuce and a dill pickle slice. Secure with a skewer and serve with the signature sauce.

Notes

  • For extra flavor, add a dash of Worcestershire sauce to the ground beef mixture.
  • The sauce can be made ahead and stored in the fridge for up to a week.
  • These bites can be cooked in an air fryer at 375°F for 10-12 minutes.
  • Serve with a side of crispy bacon or avocado slices for a complete keto meal

The Ultimate Guide to Air Fryer Salt and Pepper Wings

Air fryer salt and pepper wings are the perfect balance of crispy, flavorful, and easy to make. Whether you’re preparing them for a game night, a family dinner, or just a quick snack, this recipe delivers restaurant-quality wings in the comfort of your home. The combination of a perfectly seasoned crust and juicy, tender meat makes these wings irresistible.

If you’ve ever wondered how to achieve that crispy texture without deep frying, the air fryer is the answer. With just a handful of ingredients and minimal effort, you can enjoy a healthier version of this classic dish.

Why Air Fryer Wings Are a Game-Changer

Traditional deep-fried wings are undeniably delicious, but they come with a lot of oil and unnecessary calories. Air frying, on the other hand, offers the same crispy goodness with significantly less fat. Here’s why making salt and pepper wings in an air fryer is a superior choice:

1. Less Oil, More Flavor

Air fryers use hot air circulation to crisp up food, meaning you need only a fraction of the oil used in deep frying. The wings get a beautiful golden crust without being drenched in grease.

2. Faster Cooking Time

Compared to baking or frying, the air fryer speeds up the cooking process while maintaining moisture inside the wings. In less than 30 minutes, you’ll have perfectly crispy wings ready to serve.

3. Less Mess, Easier Cleanup

Say goodbye to splattering oil all over your kitchen. Since air fryers contain everything within the basket, cleanup is as easy as a quick wipe-down and washing the removable parts.

4. Consistently Crispy Results

One of the biggest challenges of oven-baked wings is achieving that deep-fried crispiness. The air fryer solves this problem by ensuring even heat distribution, giving you consistently crispy wings every time.

The Secret to Perfectly Seasoned Wings

Salt and pepper wings might sound simple, but when done right, they deliver an explosion of flavor. The key to getting them just right lies in the seasoning technique.

Choosing the Right Salt

Using high-quality salt makes all the difference. Fine table salt is good, but for a bolder taste, try using sea salt or flaky kosher salt. These salts add a more complex and balanced flavor to the wings.

Getting the Right Balance of Pepper

Freshly ground black pepper is ideal for this recipe. Pre-ground pepper can lose its potency over time, so grinding it fresh ensures maximum flavor. For an extra kick, you can mix in a bit of white pepper, which has a slightly different heat profile.

Enhancing the Flavor

While classic salt and pepper wings need no embellishments, a few small tweaks can elevate them:

  • Garlic powder adds a mild savoriness.
  • Paprika gives a smoky depth and enhances the golden color.
  • A drizzle of sesame oil before serving brings out a subtle nuttiness.

Best Dipping Sauces for Salt and Pepper Wings

While these wings are delicious on their own, pairing them with a great dip can take them to the next level. Here are some fantastic options:

  • Classic Ranch Dressing – The creamy, herby flavors of ranch contrast beautifully with the crispy wings.
  • Spicy Sriracha Mayo – A mix of mayonnaise and sriracha creates a perfect balance of heat and creaminess.
  • Honey Garlic Sauce – A sweet and savory option for those who like a little extra glaze.
  • Blue Cheese Dressing – A rich and tangy dip that complements the boldness of black pepper.
  • Chili Oil Drizzle – If you love extra heat, a light drizzle of chili oil adds a spicy crunch.

Side Dishes to Serve with Salt and Pepper Wings

To turn these wings into a full meal, pair them with delicious side dishes that complement their crispy texture and bold flavor:

  • Air Fryer Potato Wedges – A healthier alternative to fries, crispy on the outside and fluffy on the inside.
  • Coleslaw – A fresh, crunchy contrast to the richness of the wings.
  • Garlic Butter Rice – A simple yet flavorful side to soak up any extra seasoning.
  • Roasted Vegetables – A mix of bell peppers, zucchini, and carrots roasted with olive oil.
  • Corn on the Cob – Grilled or boiled corn with butter and a sprinkle of salt is always a hit.

Ingredients – The Flavor Foundation

  • 18-20 split chicken wings (drumette and winglet)
  • 3 tablespoons olive oil
  • 1 teaspoon paprika
  • 1 teaspoon garlic powder
  • ½ teaspoon salt
  • ½ teaspoon ground black pepper

Directions – The Path to Perfection

  1. In a large bowl, combine olive oil, paprika, garlic powder, salt, and black pepper. Mix well.
  2. Add the chicken wings to the bowl and toss until evenly coated with the seasoning mixture.
  3. Preheat the air fryer to 400°F for 2 minutes.
  4. Arrange the wings in a single layer in the air fryer, leaving space between them. Cook in multiple batches if needed.
  5. Air fry for 24-25 minutes, flipping the wings halfway through using tongs.
  6. Ensure the wings reach an internal temperature of 165°F before serving. The edges should be crispy.
  7. Serve immediately with your favorite dips or side dishes.

Nutritional Breakdown – The Numbers Behind the Flavor

  • Calories: 576 kcal
  • Carbohydrates: 1g
  • Protein: 40g
  • Fat: 45g
  • Saturated Fat: 11g
  • Polyunsaturated Fat: 8g
  • Monounsaturated Fat: 21g
  • Trans Fat: 0.4g
  • Cholesterol: 167mg
  • Sodium: 449mg
  • Potassium: 352mg
  • Fiber: 0.2g
  • Sugar: 0.1g
  • Vitamin A: 358 IU
  • Vitamin C: 3mg
  • Calcium: 28mg
  • Iron: 2mg

Enjoy your crispy, perfectly seasoned wings!

Frequently Asked Questions

1. Can I Use Frozen Chicken Wings?

Yes! You can cook frozen wings in the air fryer without thawing, but you’ll need to add about 5-7 extra minutes to the cooking time. Just ensure they reach an internal temperature of 165°F.

2. How Do I Keep the Wings Crispy?

To achieve the crispiest wings:

  • Preheat the air fryer before adding the wings.
  • Pat the wings dry before seasoning to remove excess moisture.
  • Do not overcrowd the basket—this allows air to circulate properly.

3. Can I Make These Wings Spicier?

Absolutely! To add some heat, mix in cayenne pepper or chili flakes with the seasoning. You can also toss the cooked wings in hot sauce for an extra kick.

4. How Long Should I Cook the Wings?

Most air fryers will cook wings in about 24-25 minutes at 400°F, but this may vary slightly depending on the brand and size of your air fryer. Always check the internal temperature for doneness.

5. Can I Store and Reheat Leftover Wings?

Yes! Store leftover wings in an airtight container in the fridge for up to four days. To reheat, place them back in the air fryer at 375°F for 5-10 minutes until heated through.

6. What If I Don’t Have an Air Fryer?

You can still make salt and pepper wings in the oven! Bake them at 425°F for 40-45 minutes, flipping halfway through for even crispiness.

Tips for Hosting a Wing Night

If you’re planning to serve these wings at a gathering, here are a few tips to make your wing night a hit:

  • Make a variety of flavors. In addition to salt and pepper wings, consider making buffalo, barbecue, or lemon pepper wings to offer variety.
  • Prepare multiple dipping sauces. Set up a dipping station with at least three sauce options so guests can customize their experience.
  • Keep them warm. If you’re making a big batch, keep the cooked wings in a warm oven (about 200°F) until serving.
  • Provide wet wipes. Wings can get messy, so having wet wipes or napkins on hand will be appreciated.

Conclusion: The Perfect Wing Recipe for Any Occasion

Air fryer salt and pepper wings are the ultimate combination of simplicity, crispiness, and bold flavor. Whether you’re making them for a casual dinner, a party, or just a quick snack, they are always a crowd-pleaser.

By following the right techniques—using high-quality seasoning, avoiding excess moisture, and cooking at the ideal temperature—you’ll achieve the perfect crispy wings every time. Plus, with countless ways to customize the recipe, from spicy variations to creative dipping sauces, you can tailor them to suit your taste.

So, grab your air fryer and get ready to enjoy the best homemade wings with minimal effort and maximum flavor. Once you try this recipe, it’s sure to become a staple in your kitchen.

aiting

The Ultimate Guide to Air Fryer Salt and Pepper Wings

Enjoy irresistibly crispy, restaurant-style salt and pepper wings made effortlessly in the air fryer! These wings are perfectly seasoned with a simple blend of paprika, garlic powder, salt, and black pepper, making them a flavorful and guilt-free indulgence. Perfect for game nights, gatherings, or a quick snack, these wings come out golden brown and crunchy every time!
Prep Time 5 minutes
Cook Time 25 minutes
Total Time 30 minutes
Servings: 4 servings
Course: Appetizer, Snack
Cuisine: American, Asian Fusion

Ingredients
  

  • 18-20 split chicken wings drumette and winglet
  • 3 tablespoons olive oil
  • 1 teaspoon paprika
  • 1 teaspoon garlic powder
  • 1/2 teaspoon salt
  • 1/2 teaspoon ground black pepper

Method
 

  1. In a large bowl, mix olive oil, paprika, garlic powder, salt, and black pepper.
  2. Add the chicken wings and toss until evenly coated.
  3. Preheat the air fryer to 400°F for 2 minutes.
  4. Arrange wings in a single layer in the air fryer basket, ensuring they aren’t overcrowded.
  5. Air fry for 24-25 minutes, flipping halfway through.
  6. Check that wings reach an internal temperature of 165°F.
  7. Serve immediately with your favorite dips or sides.

Notes

  • Cooking time may vary based on air fryer models.
  • For extra crispy wings, spray a light coat of cooking oil before air frying.
  • Experiment with different seasonings like cayenne pepper for added spice.
  • Serve with a side of ranch, blue cheese, or a squeeze of fresh lime.

The Ultimate Guide to Baileys Chocolate Truffles

Chocolate truffles are the epitome of indulgence, but when you add the smooth, creamy richness of Baileys Irish Cream, they become even more irresistible. These bite-sized confections melt in your mouth, offering a perfect balance of rich chocolate, velvety liqueur, and a hint of warmth. Whether you’re making them for a holiday gathering, as a gift, or simply to treat yourself, Baileys truffles are a luxurious yet surprisingly simple dessert to prepare.

This guide covers everything you need to know about making Baileys chocolate truffles, including expert tips, creative variations, serving ideas, and frequently asked questions.

Why You’ll Love Baileys Truffles

These truffles aren’t just your average chocolate treat. Here’s why they stand out:

1. A Decadent Flavor Combination

The rich taste of semisweet chocolate blends beautifully with the smooth, creamy, slightly boozy notes of Baileys Irish Cream. The result is a dessert that’s sophisticated yet comforting.

2. Simple Yet Elegant

Despite their gourmet appearance, truffles require minimal ingredients and effort. With just a handful of pantry staples, you can create a luxurious treat that looks like it came straight from a chocolatier.

3. Perfect for Any Occasion

Baileys truffles make a wonderful addition to holiday dessert tables, dinner parties, and romantic date nights. They also make fantastic homemade gifts, especially when elegantly packaged in a decorative box.

4. Customizable to Your Taste

The base recipe is delicious on its own, but there are countless ways to customize it. From different chocolate coatings to fun flavor infusions, you can tailor these truffles to suit your preferences.

Tips for Making the Best Baileys Truffles

Truffles are easy to make, but a few techniques can help you achieve that perfect, smooth, melt-in-your-mouth texture.

1. Choose High-Quality Chocolate

Since chocolate is the main ingredient, its quality makes a huge difference. Use a high-quality brand with at least 60% cocoa content for a rich and smooth ganache. Lower-quality chocolate may contain additives that affect the texture.

2. Melt the Chocolate Gently

Overheating chocolate can cause it to seize, leading to a grainy texture. Using a double boiler or heating chocolate in short intervals in the microwave ensures a smooth and glossy consistency.

3. Use Cold Heavy Cream

Cold heavy cream helps create a stable ganache. When whipped properly, it adds a light, airy texture to the truffle filling while balancing the richness of the chocolate.

4. Chill the Ganache Before Rolling

Letting the chocolate mixture set in the refrigerator before shaping the truffles is crucial. This step ensures the mixture is firm enough to handle and prevents the truffles from melting in your hands.

5. Work Quickly When Rolling the Truffles

Since the chocolate softens with body heat, roll the truffles quickly to maintain their shape. If needed, chill your hands under cold water before rolling to reduce heat transfer.

6. Double-Coat for a Professional Look

Dipping truffles in chocolate once creates a nice coating, but a second dip provides a thicker, more luxurious shell. Let the first coating set before dipping them again.

7. Let the Coating Set Completely

Place the truffles on a parchment-lined tray and refrigerate them after coating to ensure a crisp shell. This also enhances their texture and makes them easier to store.

Creative Variations to Try

While the classic Baileys truffle recipe is already divine, these variations add an extra touch of creativity:

1. Dark Chocolate Espresso Truffles

For a more intense flavor, add a teaspoon of espresso powder to the ganache. The deep coffee notes enhance the richness of the chocolate and pair beautifully with the Baileys.

2. Salted Caramel Baileys Truffles

Mix a small amount of caramel sauce into the ganache and sprinkle sea salt over the truffles after coating them in chocolate. The sweet and salty contrast is irresistible.

3. White Chocolate Baileys Truffles

Swap out the semisweet chocolate for white chocolate to create a smoother, creamier truffle with a sweeter, vanilla-forward profile.

4. Hazelnut Crunch Truffles

Roll the truffles in finely chopped toasted hazelnuts before dipping them in chocolate. This adds a delightful crunch to each bite.

5. Coconut-Coated Truffles

After dipping the truffles in chocolate, roll them in shredded coconut for a tropical-inspired variation.

6. Spiced Truffles

Add a pinch of cinnamon or nutmeg to the ganache for a warm, spiced flavor perfect for the holiday season.

How to Serve Baileys Truffles

Baileys truffles are indulgent on their own, but pairing them with the right accompaniments enhances their experience.

1. As a Standalone Dessert

Serve them on a decorative platter as a centerpiece for your dessert table. Their rich flavor makes them perfect for enjoying one or two at a time.

2. Paired with Coffee or Espresso

The deep, velvety chocolate pairs wonderfully with a cup of strong coffee or espresso. The contrast of bitter coffee and sweet truffle creates a sophisticated balance.

3. With a Glass of Baileys or Irish Coffee

For the ultimate indulgence, enjoy these truffles with a glass of Baileys on the rocks or a freshly made Irish coffee.

4. As a Topping for Ice Cream

Chop the truffles into smaller pieces and sprinkle them over vanilla or chocolate ice cream for an extra decadent treat.

5. Gift-Wrapped for Special Occasions

Package the truffles in a decorative box or tin, tied with a ribbon, for a thoughtful homemade gift. Perfect for holidays, birthdays, or Valentine’s Day.

Ingredients: A Decadent Combination

For the Chocolate Ganache Center

  • Semisweet chocolate chips
  • Heavy cream
  • Baileys Irish Cream
  • Pinch of kosher salt

For the White Chocolate Coating

  • White chocolate chips
  • Coconut oil
  • Cinnamon sugar (for garnish)

Directions: Crafting the Ultimate Boozy Truffles

Step 1: Melt the Chocolate and Cream

  • Use a double boiler to melt the semisweet chocolate chips with heavy cream until smooth.

Step 2: Infuse with Baileys

  • Stir in Baileys and a pinch of salt, then refrigerate the mixture until firm enough to roll.

Step 3: Shape the Truffles

  • Scoop and roll the chocolate mixture into 1-inch balls, placing them on a parchment-lined baking sheet.

Step 4: Coat in White Chocolate

  • Melt white chocolate chips with coconut oil and dip each truffle, ensuring an even coating.

Step 5: Add the Finishing Touch

  • Sprinkle with cinnamon sugar and refrigerate until fully set.

Nutritional Information: A Bite of Indulgence

(Per Truffle – Approximate)

  • Calories: 150-180
  • Carbohydrates: 14g
  • Protein: 1g
  • Fat: 10g
  • Sugar: 12g

These luxurious Baileys-infused truffles are the perfect holiday treat, making any occasion feel extra special!

Frequently Asked Questions

1. Can I Use a Different Liqueur Instead of Baileys?

Absolutely! You can substitute Baileys with other liqueurs like Kahlúa, Grand Marnier, Amaretto, or even bourbon for a unique twist.

2. How Long Do These Truffles Last?

Stored in an airtight container in the refrigerator, these truffles will stay fresh for up to two weeks. For longer storage, you can freeze them for up to three months.

3. Can I Make These Without Alcohol?

Yes! Simply omit the Baileys and replace it with an equal amount of heavy cream or a flavored extract like vanilla or almond.

4. Can I Use Milk Chocolate Instead of Semisweet?

Yes, but milk chocolate has a higher sugar content, which may make the truffles sweeter. If using milk chocolate, consider reducing the amount of added sugar.

5. Why Is My Ganache Too Soft?

If your ganache is too soft to roll, it may need more time to chill in the refrigerator. If it remains too soft, try adding a bit more melted chocolate to thicken it.

6. How Do I Prevent the Chocolate Coating from Cracking?

If the truffles are too cold when dipped in warm chocolate, the sudden temperature change can cause cracking. Let the truffles sit at room temperature for a few minutes before dipping.

7. What’s the Best Way to Coat Truffles Without a Mess?

Using a fork or dipping tool helps coat the truffles evenly while letting excess chocolate drip off. Work quickly to avoid messy coatings.

8. Can I Make These Vegan?

Yes! Use dairy-free chocolate, coconut cream instead of heavy cream, and a dairy-free Irish cream alternative to make these truffles completely vegan.

Conclusion: A Luxurious Treat Worth Making Again and Again

Baileys chocolate truffles are the perfect indulgence for any occasion. With their rich chocolate ganache, smooth Baileys flavor, and delicate coating, they offer a sophisticated yet easy-to-make dessert. Whether you’re gifting them, serving them at a gathering, or enjoying them with a cup of coffee, these truffles never disappoint.

The best part? You can experiment with flavors, coatings, and textures to create your own signature version. So, grab your ingredients, melt some chocolate, and get ready to enjoy a decadent bite of pure bliss.

aiting

The Ultimate Guide to Baileys Chocolate Truffles

These Baileys Chocolate Bliss Truffles are the ultimate indulgence, combining smooth semisweet chocolate ganache with a splash of Baileys Irish Cream, all coated in creamy white chocolate and finished with a sprinkle of cinnamon sugar. They’re a rich, boozy, and decadent treat perfect for any occasion!
Prep Time 20 minutes
Cook Time 10 minutes
Total Time 2 hours
Servings: 15 -20 ruffles
Course: Candy, Dessert
Cuisine: American, Irish

Ingredients
  

For the Chocolate Ganache Center:
  • Semisweet chocolate chips
  • Heavy cream
  • Baileys Irish Cream
  • Pinch of kosher salt
For the White Chocolate Coating:
  • White chocolate chips
  • Coconut oil
  • Cinnamon sugar for garnish

Method
 

Melt the Chocolate and Cream:
  1. Use a double boiler to melt the semisweet chocolate chips with heavy cream, stirring until smooth.
Infuse with Baileys:
  1. Stir in Baileys Irish Cream and a pinch of salt, then refrigerate the mixture until firm enough to roll into balls.
Shape the Truffles:
  1. Scoop out the chocolate mixture and roll it into 1-inch balls. Place them on a parchment-lined baking sheet.
Coat in White Chocolate:
  1. Melt white chocolate chips with coconut oil and dip each truffle, ensuring they are evenly coated.
Add the Finishing Touch:
  1. Sprinkle the truffles with cinnamon sugar and refrigerate them until they are fully set.

Notes

  • These truffles are perfect for holiday gifting or as a special treat for any celebration.
  • For an extra twist, you can roll the truffles in crushed nuts or cocoa powder instead of cinnamon sugar for different flavor options.

The Ultimate Guide to Easter Egg Cheesecake

Easter desserts are always a treat, but when you combine rich, creamy cheesecake with a chocolate shell, you get something truly special. Easter egg cheesecake is a delightful no-bake dessert that transforms classic cheesecake into a festive, individual-sized treat. Served in hollow chocolate egg shells, this dessert is as beautiful as it is delicious, making it perfect for Easter celebrations, spring gatherings, or a fun baking project with family and friends.

In this guide, we’ll explore everything you need to know about making the perfect Easter egg cheesecake, including expert tips, creative variations, serving suggestions, and frequently asked questions.

Why Easter Egg Cheesecake Is a Must-Try

Easter egg cheesecake is more than just a dessert—it’s an experience. Here’s why you should make this delicious treat:

1. A Unique Easter Dessert

Instead of the usual cakes and cookies, these cheesecakes stand out as a fun and elegant addition to any Easter spread. The combination of a smooth cheesecake filling, a crunchy cookie base, and a rich chocolate shell makes them irresistible.

2. No Baking Required

This is a true no-bake dessert, meaning you don’t need to turn on the oven. The simplicity of assembling the chocolate shells, filling them with cheesecake, and letting them chill makes this recipe accessible for all skill levels.

3. Perfect for Entertaining

Since these cheesecakes are made in individual portions, they are easy to serve at gatherings. There’s no need to slice or plate—just grab a spoon and dig in.

4. Customizable to Your Taste

The basic recipe is delicious on its own, but there are countless ways to personalize it. From different cheesecake flavors to unique toppings, you can easily make this dessert your own.

Expert Tips for the Best Easter Egg Cheesecake

Even though this dessert is simple to make, a few key techniques will help ensure perfect results:

1. Use a Warm Knife to Cut the Chocolate Eggs

Splitting hollow chocolate eggs cleanly can be tricky. Dip a sharp knife in hot water, wipe it dry, and carefully follow the seam of the egg. This will help you cut the eggs smoothly without breaking them.

2. Chill the Cheesecake Filling Before Assembling

A well-chilled cheesecake filling makes it easier to spoon into the chocolate shells and ensures the final texture is creamy yet firm.

3. Press the Cookie Crust Gently

The cookie base should be firm enough to hold together but not so hard that it’s difficult to break with a spoon. A light press with the back of a spoon is all you need.

4. Let the Cheesecakes Chill for at Least 2 Hours

Giving the cheesecakes enough time to set ensures they hold their shape and develop the perfect texture. If you have time, chilling overnight enhances the flavor even more.

5. Decorate Just Before Serving

To keep toppings fresh and crisp, add them just before serving. This prevents chocolate drizzles from melting into the cheesecake or cookie crumbs from becoming soggy.

Creative Variations to Try

Once you’ve mastered the classic version, try these fun variations to mix things up:

1. Chocolate Lovers’ Cheesecake

Add a tablespoon of cocoa powder to the cheesecake filling for a rich chocolate version. You can also stir in mini chocolate chips for extra texture.

2. Nutella Cheesecake Eggs

Mix a few tablespoons of Nutella into the cheesecake filling for a creamy, hazelnut-infused treat. Top with chopped hazelnuts for added crunch.

3. Lemon Berry Cheesecake

For a bright, tangy flavor, mix fresh lemon zest into the cheesecake filling and top with fresh berries. The tartness of the lemon balances the sweetness of the chocolate shell beautifully.

4. Biscoff Cookie Cheesecake

Replace the graham cracker or digestive biscuit crust with crushed Biscoff cookies and add a spoonful of Biscoff spread to the cheesecake filling for a caramelized cookie flavor.

5. Easter Surprise Cheesecake

Hide a mini chocolate egg inside the cheesecake filling before chilling. When guests dig in, they’ll find a hidden chocolate surprise.

Best Ways to Serve Easter Egg Cheesecake

Presentation matters just as much as flavor when it comes to a dessert this beautiful. Here are some serving ideas to impress your guests:

1. On a Decorative Easter Platter

Arrange the cheesecakes on a pastel-colored platter, surrounded by fresh flowers, Easter candies, or decorative grass for a festive look.

2. With a Spoon in Each Egg

For easy serving, place a small dessert spoon in each chocolate egg so guests can dig in immediately.

3. Drizzled with Chocolate Sauce

A drizzle of melted chocolate or caramel sauce over the top makes these cheesecakes even more decadent.

4. Paired with Whipped Cream

A dollop of whipped cream on the side adds an extra layer of indulgence.

5. With Fresh Berries

Serve the cheesecakes with a side of fresh berries like strawberries, raspberries, or blueberries for a refreshing contrast to the rich filling.

Ingredients: A Festive Treat in Every Bite

For the Chocolate Shell

  • Hollow chocolate Easter eggs

For the Cookie Crumb Base

  • Graham crackers or digestive biscuits
  • Butter (salted or unsalted)

For the Cheesecake Filling

  • Cream cheese (full-fat)
  • Powdered sugar
  • Heavy cream (whipped to stiff peaks)
  • Vanilla extract

For the Toppings

  • Melted chocolate drizzle
  • Mini chocolate eggs
  • Extra cookie crumbs

Directions: Crafting the Perfect No-Bake Easter Dessert

Step 1: Preparing the Chocolate Egg Shells

  • Carefully split hollow chocolate eggs in half using a warm knife to create a clean cut.

Step 2: Making the Cookie Base

  • Crush the cookies into fine crumbs, mix with melted butter, and press into the chocolate egg halves to form a firm crust.

Step 3: Whipping Up the Cheesecake Filling

  • Beat cream cheese, powdered sugar, and vanilla extract until smooth.
  • Fold in whipped heavy cream to create a light and airy texture.

Step 4: Assembling and Chilling

  • Spoon the cheesecake filling into the chocolate egg halves, smoothing the tops.
  • Refrigerate for at least 2 hours to set.

Step 5: Decorating and Serving

  • Drizzle with melted chocolate and garnish with mini eggs and extra cookie crumbs for a festive touch.

Nutritional Information: A Sweet and Creamy Indulgence

(Per Serving – Approximate)

  • Calories: 270
  • Total Fat: 23g
  • Carbohydrates: 12g
  • Protein: 4g
  • Sugar: 6g

This no-bake Easter egg cheesecake is the perfect balance of creamy, crunchy, and chocolatey flavors—ideal for any springtime celebration!

Frequently Asked Questions

1. Can I Use Any Type of Chocolate Egg?

Yes! While Cadbury milk chocolate eggs are a popular choice, you can use dark chocolate, white chocolate, or even flavored chocolate eggs. Just make sure they are hollow so they can be filled with cheesecake.

2. What If My Chocolate Egg Breaks While Cutting?

If the chocolate egg cracks, don’t worry. You can still use the broken pieces as a crumble topping or turn the dessert into layered cheesecake jars instead.

3. How Long Do These Cheesecakes Last?

Stored in an airtight container in the refrigerator, these cheesecakes will stay fresh for up to three days.

4. Can I Freeze Easter Egg Cheesecake?

Yes! Place the filled eggs in a freezer-safe container and freeze for up to three months. Let them thaw in the fridge overnight before serving.

5. Can I Make This Dessert Gluten-Free?

Absolutely! Just use gluten-free cookies for the crust, and make sure the chocolate eggs you choose are gluten-free.

6. Can I Prepare These in Advance?

Yes! This is a great make-ahead dessert. Assemble the cheesecakes a day in advance and store them in the fridge until ready to serve. Just wait to add toppings until just before serving.

7. What’s the Best Way to Transport These Cheesecakes?

If bringing them to a party, place each chocolate egg in a cupcake liner inside a sturdy box to keep them from shifting.

8. Can I Make a Larger Version Instead of Individual Eggs?

Definitely! Instead of filling small chocolate eggs, you can use a large chocolate Easter egg, cut it in half, and make one big cheesecake to serve multiple people.

Conclusion: A Show-Stopping Easter Dessert

Easter egg cheesecake is a fun, no-bake dessert that brings creativity and indulgence together in one delightful treat. Whether you stick to the classic version or experiment with different flavors and toppings, these cheesecakes are guaranteed to impress.

Perfect for Easter celebrations, springtime gatherings, or as a fun baking project, this dessert is both easy to make and visually stunning. So, grab your favorite chocolate eggs, whip up a creamy cheesecake filling, and enjoy a dessert that is sure to become an Easter tradition for years to come.

Whether shared with family, served at a party, or simply enjoyed as a personal treat, Easter egg cheesecake is the ultimate combination of festive fun and delicious flavor. Happy baking!

aiting

The Ultimate Guide to Easter Egg Cheesecake

This Easter Egg Cheesecake Delight combines creamy cheesecake filling, a crunchy cookie crumb base, and a festive chocolate egg shell. Drizzled with melted chocolate and topped with mini chocolate eggs, it’s a fun and delicious no-bake treat perfect for Easter celebrations!
Prep Time 20 minutes
Total Time 2 hours 20 minutes
Servings: 12 servings
Course: Dessert
Cuisine: American

Ingredients
  

For the Chocolate Shell:
  • Hollow chocolate Easter eggs
For the Cookie Crumb Base:
  • Graham crackers or digestive biscuits
  • Butter salted or unsalted
For the Cheesecake Filling:
  • Cream cheese full-fat
  • Powdered sugar
  • Heavy cream whipped to stiff peaks
  • Vanilla extract
For the Toppings:
  • Melted chocolate drizzle
  • Mini chocolate eggs
  • Extra cookie crumbs

Method
 

Preparing the Chocolate Egg Shells:
  1. Carefully split the hollow chocolate eggs in half using a warm knife to create a clean cut.
Making the Cookie Base:
  1. Crush the cookies into fine crumbs and mix with melted butter.
  2. Press the mixture firmly into the chocolate egg halves to form a solid cookie crust.
Whipping Up the Cheesecake Filling:
  1. Beat cream cheese, powdered sugar, and vanilla extract until smooth.
  2. Gently fold in the whipped heavy cream to achieve a light and airy texture.
Assembling and Chilling:
  1. Spoon the cheesecake filling into the chocolate egg halves, smoothing the tops.
  2. Refrigerate for at least 2 hours to allow the cheesecake filling to set.
Decorating and Serving:
  1. Drizzle with melted chocolate and garnish with mini chocolate eggs and extra cookie crumbs for a fun and festive touch.

Notes

  • You can use a variety of chocolate eggs depending on your preference—milk, dark, or white chocolate all work well.
  • Be sure to refrigerate the cheesecake for at least 2 hours to ensure it sets properly before serving.
  • This is an excellent dessert to make ahead of time for Easter gatherings!