As I was smitten by the bold flavors of a little Southern comfort, I stumbled upon an absolute gem that transformed my dipping game: the Popeyes Blackened Ranch. This creamy dip captures the essence of smoky, savory goodness you crave, all while being gluten-free and low-carb. The best part? You can whip it up in just under 10 minutes, perfect for those busy weeknights or impromptu gatherings. Customize the spice level to fit your taste buds, whether you like a gentle kick or more of a fiery punch. This delightful ranch creation is not only a crowd-pleaser, but it also elevates your veggies, fries, and chicken like never before. What’s your favorite way to enjoy a dip? Let’s dive into this mouthwatering journey together!
Why is Popeyes Blackened Ranch a Must-Try?
Bold Flavor: This dip packs a punch with rich blackened spices that elevate your snacks.
Quick and Easy: Whip it up in under 10 minutes for those busy days.
Customizable Heat: Adjust the cayenne or hot sauce for your perfect spice level.
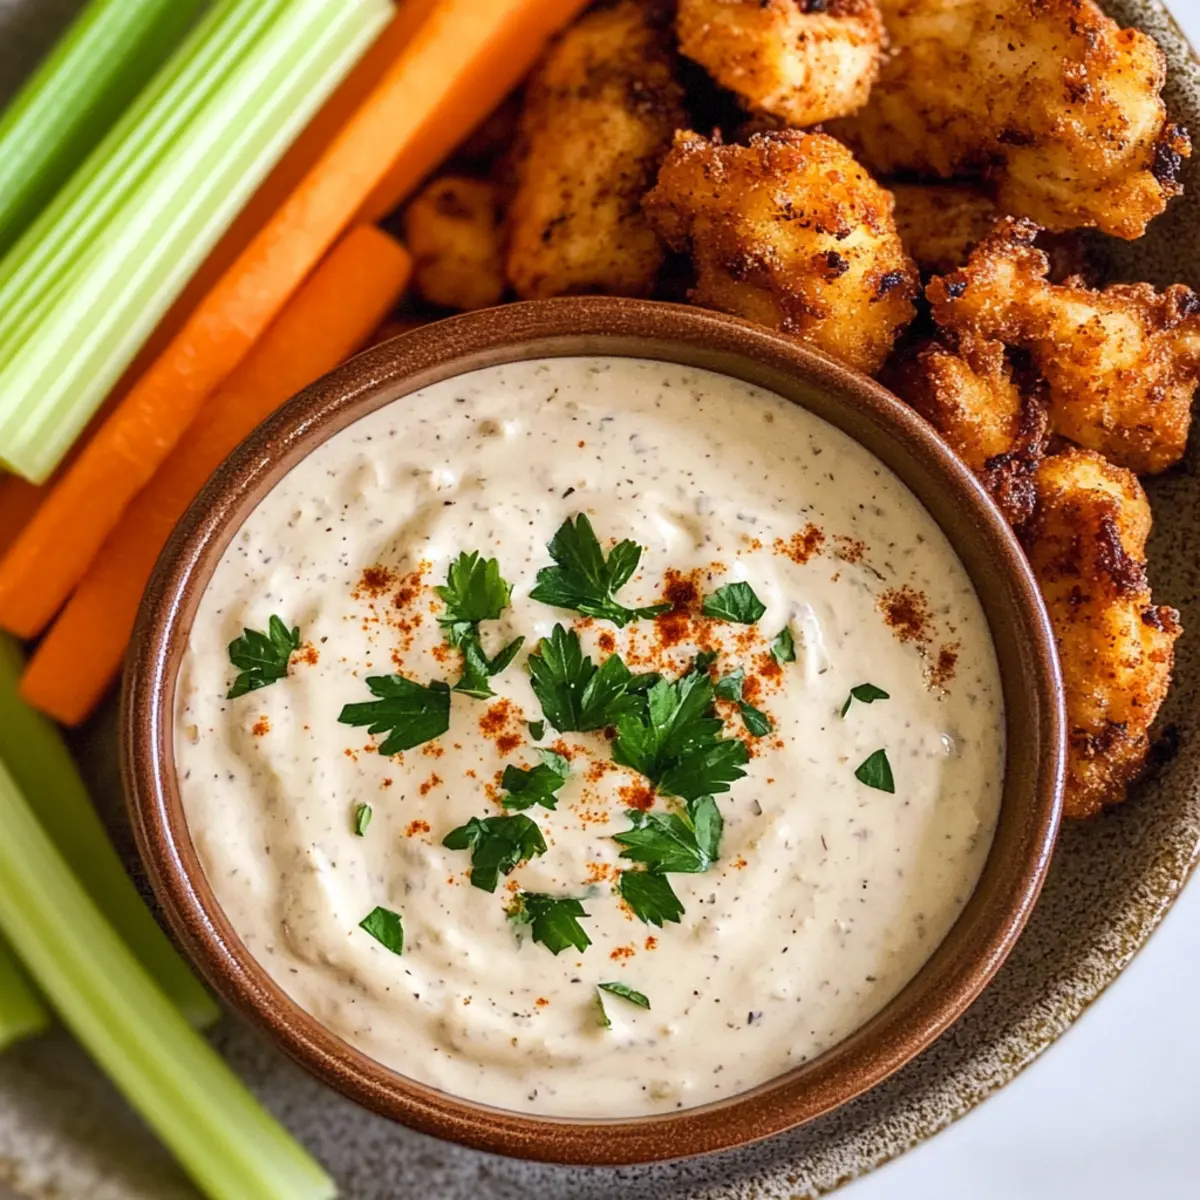
Versatile Use: Perfect for dipping veggies, fries, or chicken, it suits any occasion.
Diet-Friendly: Enjoy guilt-free as it’s gluten-free and low-carb—a win-win!
Discover how this flavorful twist on traditional ranch can transform your favorite bites—it’s a game-changer you won’t want to miss!
Popeyes Blackened Ranch Ingredients
For the Base
• Mayonnaise – provides creaminess and richness; for best results, opt for full-fat mayonnaise.
• Buttermilk – thins out the ranch while keeping it creamy; substitute with milk mixed with vinegar or lime juice if needed.
• Sour Cream – adds tanginess and enhances the creamy texture of the dip.
For the Seasoning
• Blackened Seasoning – imparts a smoky flavor; feel free to adjust to your heat preference, but check for salt content.
• Garlic Powder – enhances overall flavor with a delightful savory essence.
• Onion Powder – deepens the flavor profile, providing a warm, comforting touch.
• Dried Parsley – adds a hint of freshness and color; swap for fresh parsley if you prefer.
• Dried Chives – brings a mild onion flavor, complementing the other ingredients well.
• Dried Dill – contributes lovely herby notes; can be omitted if it’s not on hand.
• Cayenne Pepper (optional) – gives an extra kick; use based on how spicy you like it.
• Black Pepper – adds a touch of heat and earthiness; adjust to your taste.
• Salt – the essential flavor enhancer; add according to the saltiness of your blackened seasoning.
Now you have all the essentials to make your very own Popeyes Blackened Ranch, bursting with flavor and perfect for all your dipping needs!
Step‑by‑Step Instructions for Popeyes Blackened Ranch
Step 1: Combine the Base
In a spacious mixing bowl, add 1 cup of mayonnaise, ½ cup of sour cream, and ¼ cup of buttermilk. Using a whisk or spatula, blend the ingredients together until smooth and creamy, making sure there are no lumps. This rich base will serve as the foundation for your Popeyes Blackened Ranch, enveloping all the flavors beautifully.
Step 2: Add the Seasonings
Sprinkle in 2 tablespoons of blackened seasoning, along with 1 teaspoon each of garlic powder and onion powder. Then add 1 tablespoon of dried parsley, 1 teaspoon of dried chives, and ½ teaspoon of dried dill (if using). Finally, include a pinch of cayenne pepper, salt, and black pepper. Mix everything thoroughly, ensuring that the spices are evenly distributed throughout the creamy base.
Step 3: Taste and Adjust
Once well mixed, take a moment to taste your Popeyes Blackened Ranch. If it’s not spicy enough for your liking, feel free to add more cayenne or blackened seasoning. Similarly, adjust the salt based on your preference and the seasoning’s saltiness. This step ensures your dip has the right balance of flavor, tailored specifically to your taste buds.
Step 4: Chill for Maximum Flavor
Cover the bowl with plastic wrap or a lid, and place it in the refrigerator for at least 1 hour. This chilling step allows the flavors in the Popeyes Blackened Ranch to meld beautifully, creating a richer and more cohesive taste. If you can wait longer, allowing it to sit overnight will enhance the flavor even more.
Step 5: Serve and Enjoy
Once chilled, remove the dip from the fridge and give it a good stir. Transfer your delicious Popeyes Blackened Ranch into a serving bowl. This creamy dip is perfect for pairing with chicken tenders, french fries, or fresh veggies. Showcase it at your next gathering or simply enjoy it at home—it’s bound to be a hit!

Popeyes Blackened Ranch Variations
Feel free to get creative and customize your Popeyes Blackened Ranch recipe to match your cravings and dietary needs!
- Spicy Kick: Add extra cayenne pepper or a dash of your favorite hot sauce for a delightful heat boost—perfect for heat lovers!
- Herb Explosion: Use fresh herbs like cilantro, basil, or dill instead of dried for a vibrant, fresh flavor that will elevate any dip.
- Creamy & Light: Swap in light mayonnaise and Greek yogurt for a tangy, low-fat alternative that still delivers on creaminess. Enjoy the same rich flavor with fewer calories!
- Zesty Citrus: Squeeze in some fresh lime or lemon juice for a zesty twist that brightens up the overall flavor and adds that refreshing touch.
- Nutty Addition: Mix in a sprinkle of toasted sesame seeds for a unique texture and nutty flavor that brings an unexpected depth to your ranch.
- Smoky Chipotle: Replace blackened seasoning with smoked paprika or chipotle seasoning for a deeply smoky flavor that’s simply irresistible.
- Creamy Avocado: Blend in mashed avocado for a creamy, dreamy dip that not only enhances nutrition but also adds a luscious texture.
Discover the magic of customizing this dip to your taste; each variation opens a new world of delightful flavors! If you’re looking for more creative ideas, don’t forget to check out my Storage Tips for Popeyes Blackened Ranch to keep your dip fresh and delicious. Enjoy!
Make Ahead Options
These Popeyes Blackened Ranch delights are perfect for anyone looking to save time during meal prep! You can whip up the dip up to 3 days in advance, allowing the flavors to develop and meld beautifully. Simply follow the recipe instructions, cover the bowl with plastic wrap, and refrigerate it. For the best taste, let it chill for at least 1 hour, but it’s even better if you let it sit overnight. If you’re worried about it getting too thick, feel free to stir in a splash of buttermilk or milk before serving to maintain that delicious creamy texture. When you’re ready to enjoy, just give it a good stir and indulge in the smoky, savory goodness!
Storage Tips for Popeyes Blackened Ranch
- Fridge: Store your Popeyes Blackened Ranch in an airtight container for up to one week. This keeps it fresh and the flavors intact, ready for your snacking pleasure.
- Freezer: It’s not recommended to freeze this dip, as freezing may cause it to separate, losing its creamy texture upon thawing—enjoy it fresh instead!
- Reheating: Reheating isn’t necessary since it’s served cold, but if desired, gently mix before serving again to revive its creaminess.
- Serving Temperature: Allow the dip to sit at room temperature for a few minutes before serving for optimal flavor—a little warmth enhances its delightful taste!
Expert Tips for Popeyes Blackened Ranch
• Taste as You Go: Always sample your dip after adding seasonings. This ensures the Popeyes Blackened Ranch is perfectly customized for your palate.
• Chill Time Matters: Don’t skip the refrigeration! Allowing it to chill for at least an hour helps the flavors meld beautifully for a richer taste.
• Adjust Spice Wisely: Start with a small amount of cayenne pepper, especially if you’re unsure about heat levels. You can always add more if needed!
• Storage Savvy: Store your dip in an airtight container in the fridge for up to one week, keeping it fresh for all your snacking needs.
• Perfect Pairing: Try this delicious dip with various options like chicken, fries, or fresh veggies—it’s versatile and enhances the flavor of any dish!
What to Serve with Popeyes Blackened Ranch Copycat Recipe
The aromatic allure of this smoky dip opens up a world of delightful pairings to complete your meal decadently.
-
Crispy Chicken Tenders: Perfectly seasoned and crunchy, they make an ideal companion to dunk in your flavorful ranch dip.
-
Golden French Fries: Their crispy exterior and fluffy interior provide a satisfying contrast to the creamy texture of the dip.
-
Fresh Veggies Platter: Crisp bell peppers, cucumbers, and carrots bring a lightness, balancing the richness of the blackened ranch.
-
Spicy Shrimp Tacos: The creamy dip enhances the bold flavors of the shrimp, adding a delicious tang that elevates your taco night.
-
Zesty Nachos: Layered with cheese, guacamole, and jalapeños, these crunchy bites come to life with a drizzle of your ranch dip.
-
Grilled Flank Steak Slices: The dip’s smoky notes harmonize beautifully with the savory flavors of perfectly grilled steak, turning simple into sensational.
-
Cold Beer or Sparkling Water: A chilled beverage will cleanse your palate and enhance the overall experience of enjoying your dip.

Popeyes Blackened Ranch Recipe FAQs
How do I choose the right ripeness for the ingredients?
Absolutely! For the best flavor, use fresh and high-quality ingredients. Check the expiration dates on the mayonnaise, sour cream, and buttermilk. Avoid ingredients with any signs of spoilage, such as dark spots or an off smell. Fresh herbs like parsley and chives should be vibrant and crisp, ensuring a burst of flavor in your dip.
How should I store leftover Popeyes Blackened Ranch?
Store your Popeyes Blackened Ranch in an airtight container in the fridge for up to one week. This will keep it fresh while allowing all those delightful flavors to meld. Just make sure to seal it tightly; exposure to air can affect both taste and texture.
Can I freeze Popeyes Blackened Ranch?
It’s best to avoid freezing this dip, as it may separate upon thawing, resulting in a less appealing texture. If you must freeze it, do so in a tightly sealed container, and consume it within 1-2 months. When you’re ready to use it, allow the dip to thaw in the fridge overnight, then stir well before serving to try to bring it back to its original creaminess.
What should I do if my dip is too thick?
If your Popeyes Blackened Ranch is thicker than you’d like, don’t worry! Simply add a splash of buttermilk or regular milk, stirring gradually until you reach your desired consistency. This approach will maintain the creamy texture while giving it a lovely pourable quality for drizzling over other dishes too.
Is this recipe suitable for those with dietary restrictions?
Yes, it is! The Popeyes Blackened Ranch is gluten-free and low-carb, making it a fantastic option for various diets. However, always check the ingredient labels to ensure there are no hidden gluten components in your mayonnaise or ranch seasoning. If you have specific allergies, consider using alternatives, like soy yogurt instead of sour cream to accommodate your needs.
Why is my Popeyes Blackened Ranch too salty?
If your dip turned out too salty, check the salt content of your blackened seasoning, which can vary widely between brands. To balance the saltiness, try incorporating a bit more sour cream or mayonnaise to dilute the flavor. This adjustments can help you achieve a more balanced taste without sacrificing that delicious smokiness.

Popeyes Blackened Ranch: Bold Flavor for Your Dips
Ingredients
Equipment
Method
- In a spacious mixing bowl, add mayonnaise, sour cream, and buttermilk. Blend until smooth and creamy.
- Sprinkle in blackened seasoning, garlic powder, onion powder, dried parsley, dried chives, and dried dill. Mix everything thoroughly.
- Taste your dip and adjust spiciness and salt to your preference.
- Cover the bowl and place in the refrigerator for at least 1 hour.
- Once chilled, stir the dip and transfer to a serving bowl. Enjoy with chicken tenders, fries, or veggies.