

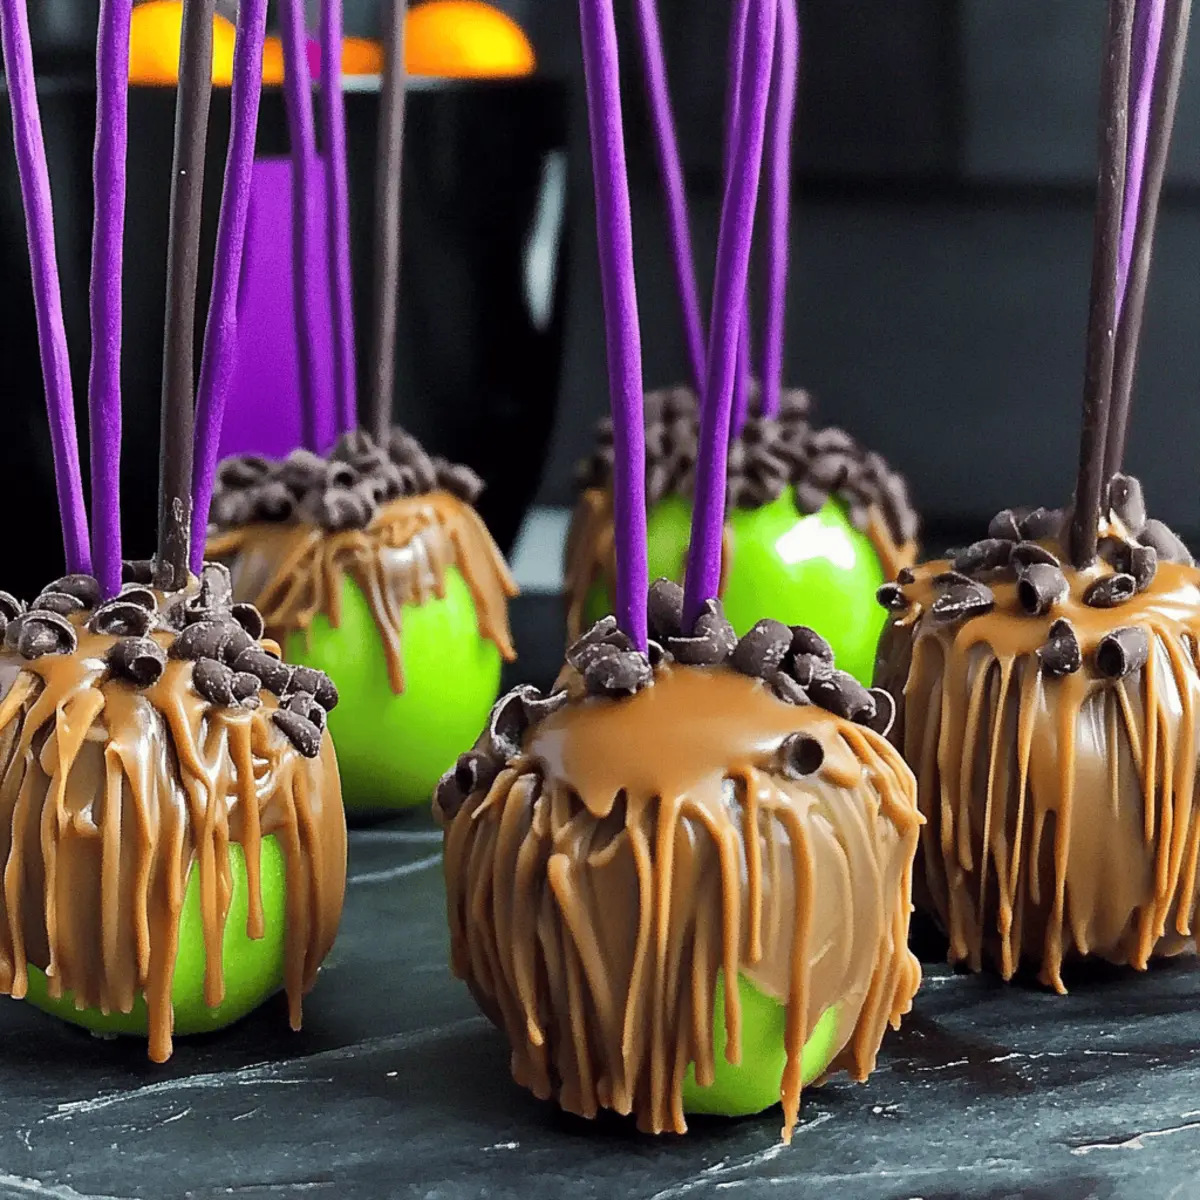
As Halloween approaches, I can’t help but reminisce about the craft projects that filled my childhood with joy and sticky fingers. It’s that same whimsical spirit that inspired these delightful Caramel Apple Witch Broomsticks. This no-bake treat is perfect for parties or a fun night in, combining the crunch of tart apples with the sweet indulgence of gooey caramel and rich chocolate. Not only are these broomsticks visually striking, but they’re also incredibly easy to whip up in just minutes using the microwave. You can customize them to suit your personal taste or décor! Ready to cast a delicious spell in your kitchen? Let’s create some enchanting treats together!
Why Are These Broomsticks So Fun?
Whimsical Delight: These Caramel Apple Witch Broomsticks are a playful twist on a classic treat, bringing a charming Halloween vibe to any gathering.
No-Bake Simplicity: With no baking required, you can make these in minutes, making them a perfect last-minute addition to your holiday celebrations.
Customizable Treats: Get creative with your decorating! Swap in different chocolate types or even use colored melts to match your party theme, just like in my Crisp Cabbage Apple recipe.
Kid-Friendly Fun: These broomsticks are not only delicious but also safe for kids to help create, adding a fun and interactive element to your Halloween festivities.
Crowd-Pleasing Appeal: The combination of crunchy apples and caramel is sure to enchant guests of all ages, making them the highlight of any Halloween event.
Get ready to enchant your guests with these unique treats that bring a smile to every face!
Caramel Apple Witch Broomsticks Ingredients
For the Broomsticks
- Mini Apples – Choose varieties like Rockit or Cosmic Crisps for the perfect balance of tartness and crunch.
- Kraft Caramels – These provide the classic chewy coating; feel free to substitute with any similar caramel brand.
- Milk Chocolate Chips – Ideal for piping broomstick “bristles,” but consider using dark chocolate or colored candy melts for a fun twist.
For Melting
- Water – Essential for achieving smooth and creamy melted caramels; no substitutes needed.
For Decorating
- Fondant (Purple, Yellow, or Orange) – Optional for adding a decorative touch to your broomsticks; icing or melted chocolate also works as a substitute.
Each of these ingredients plays a crucial role in creating your Caramel Apple Witch Broomsticks, making them a delightful centerpiece for your Halloween festivities!
Step‑by‑Step Instructions for Caramel Apple Witch Broomsticks
Step 1: Prepare the Apples
Wash and dry your mini apples thoroughly, ensuring they are clean and free from any wax. Carefully remove the stems, making it easier to insert twigs later. Choose firm, crisp apples like Rockit or Cosmic Crisps for the best balance of tartness and crunch in your Caramel Apple Witch Broomsticks.
Step 2: Insert the Sticks
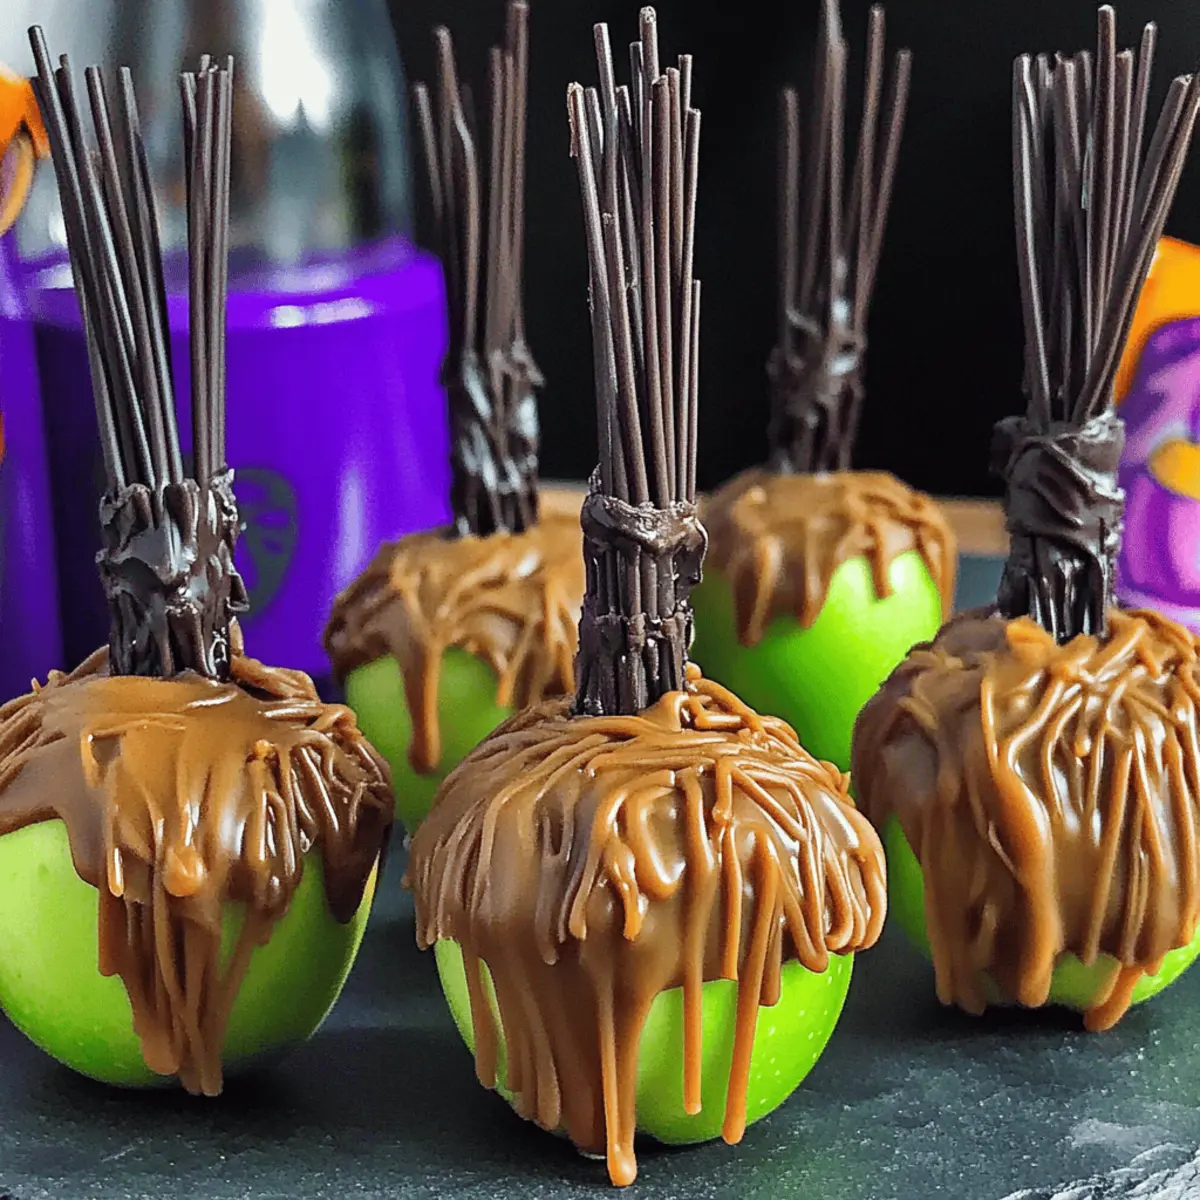
Take small twigs or sticks and push them firmly into the center of each apple, creating a sturdy handle. Ensure the twigs are secure and protrude about 2-3 inches above the apples for an authentic broomstick appearance. This step is essential for the whimsical presentation of your Halloween treats.
Step 3: Melt the Caramels
In a microwave-safe bowl, combine the unwrapped Kraft caramels with a tablespoon of water. Microwave the mixture in 1-minute intervals, stirring in between, until completely melted and smooth, which will take about 2 minutes total. This gooey caramel will coat your apples beautifully.
Step 4: Dip the Apples
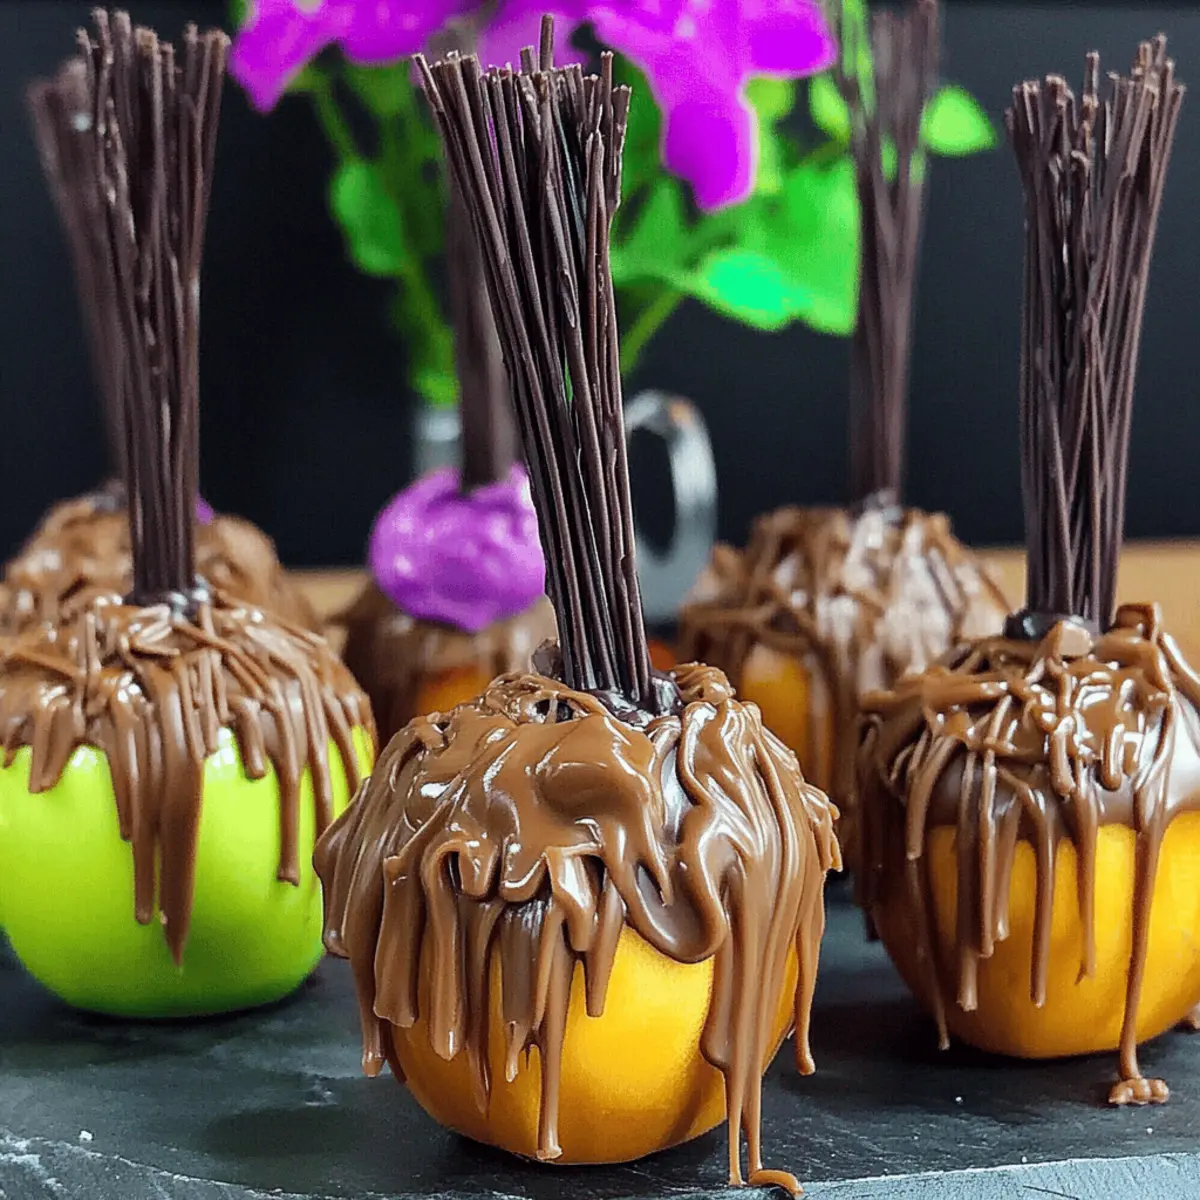
Once the caramels are melted, dip each apple into the molten caramel, making sure to coat them evenly. Hold the apple upside down to let any excess caramel drip off before placing it on a parchment-lined baking sheet. The glossy finish of the caramel will create the perfect outer layer for your Caramel Apple Witch Broomsticks.
Step 5: Allow to Set
Let the caramel coat cool and harden for about 10 minutes at room temperature. For quicker results, place the baking sheet in the freezer for 5-10 minutes. This will ensure that your caramel hardens more quickly, creating a satisfying crunch when bitten into.
Step 6: Melt the Chocolate
While the apples set, melt the milk chocolate chips in a microwave-safe bowl. Heat in 30-second intervals, stirring until the chocolate is smooth and fully melted. This chocolate will be used for piping broomstick “bristles” and adding decorative touches to your Caramel Apple Witch Broomsticks.
Step 7: Pipe the Bristles
Transfer the melted chocolate to a piping bag or a plastic zip-top bag with the corner snipped. Pipe the melted chocolate onto the top of each apple in a broomstick bristle design, creating intricate patterns that resemble broom bristles. Get creative and have fun with this decorating step!
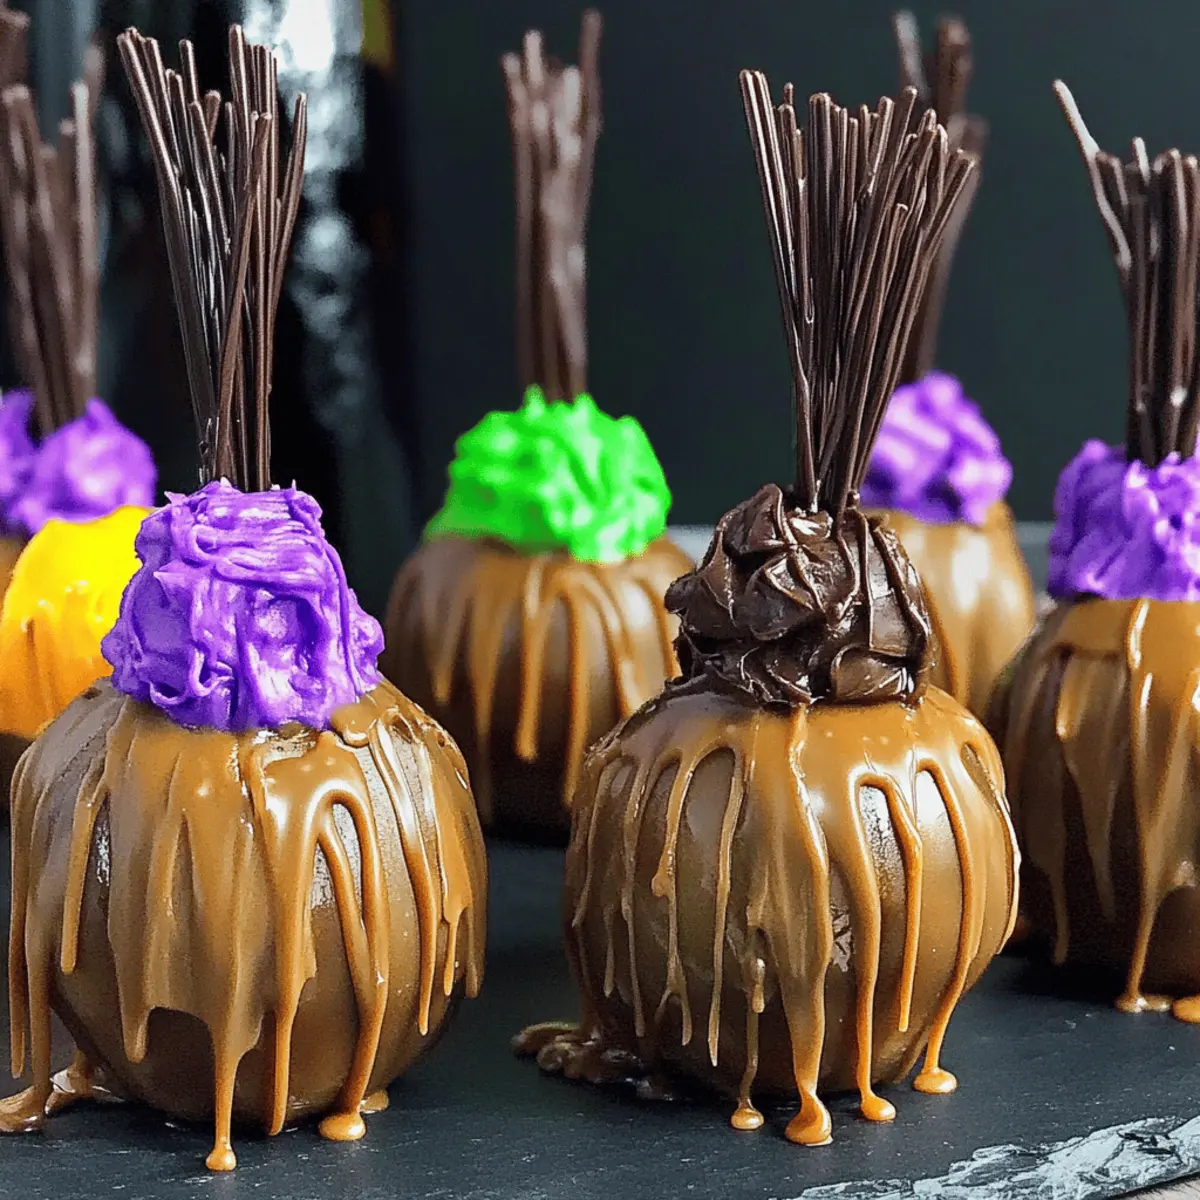
Step 8: Decorate with Fondant
If you’re using fondant for extra flair, take small pieces of colored fondant and wrap them around the top where the apple meets the stick. This decoration will enhance the whimsical appearance of your Caramel Apple Witch Broomsticks. Allow any decorations to set at room temperature for a few minutes before serving.
Step 9: Serve and Enjoy
Once the decorations have set, your Caramel Apple Witch Broomsticks are ready to delight your guests! Serve them as a striking centerpiece at your Halloween gatherings. These no-bake treats are not only visually appealing but also incredibly tasty, charming everyone who takes a bite.
Make Ahead Options
These Caramel Apple Witch Broomsticks are perfect for busy home cooks looking to save time! You can prepare the mini apples with twigs inserted up to 24 hours in advance—just refrigerate them to maintain freshness. The caramel can also be melted ahead of time and stored in an airtight container in the refrigerator for up to 3 days. When you’re ready to finish, simply reheat the caramel gently in the microwave to restore its smooth consistency. Coat the apples just before serving to ensure the caramel stays sticky and delicious. With these make-ahead tips, you’ll have delightful treats ready to cast a spell on your Halloween gatherings with minimal last-minute effort!
Expert Tips for Caramel Apple Witch Broomsticks
- Smooth Caramel: Ensure the caramel mixture is completely smooth before dipping to prevent clumping; this helps with an even coating on your broomsticks.
- Narrow Bowl Trick: Use a narrow bowl for melting caramel, making it easier to dip the apples fully without wasting any caramel.
- Chill for Crispy Coating: Don’t skip the chilling step! Allow the caramel to harden in the fridge or freezer for a perfectly crunchy finish on your Caramel Apple Witch Broomsticks.
- Decorative Variations: Get creative! Use different colored chocolates or sprinkles to customize your broomsticks for various themes or guests’ preferences.
- Kid-Friendly Activity: Invite children to help with decorating the broomsticks, making it a delightful bonding activity during Halloween prep.
Storage Tips for Caramel Apple Witch Broomsticks
Airtight Container: Store your Caramel Apple Witch Broomsticks in an airtight container at room temperature to maintain their delicious crunch for up to 2 days.
Refrigeration: If you want to keep them a bit longer, you can refrigerate the broomsticks, but consume within 2 days for best flavor and texture.
Freezing: It’s not recommended to freeze these treats, as the caramel may become too hard and the apples could lose their crispness.
Reheating: If the caramel softens, let them sit at room temperature for a bit to regain their chewy texture before serving.
Caramel Apple Witch Broomsticks Variations
Feel free to sprinkle your own creativity into this recipe! These variations will make your caramel apple broomsticks even more delightful and unique.
- Colorful Chocolates: Swap milk chocolate chips for white chocolate or colorful candy melts for a vibrant treat.
- Fruity Twist: Try using mini candy-coated apples instead of real apples to amp up the fun flavor.
- Pretzel Rod Handles: For a crunchier texture, replace the sticks with pretzel rods, providing a delightful twist to each bite.
- Nuts Galore: Sprinkle chopped nuts or crushed candy on top of the caramel for added texture and flavor. This gives a nice earthy taste that complements the sweetness.
- Flavored Caramels: Use flavored caramels, like sea salt or vanilla, for a twist that adds delicious variety to this whimsical treat!
- Spooky Sprinkles: Make them even more festive by topping the chocolate with Halloween-themed sprinkles — think ghosts or bats over your bristles!
- Darker Chocolate: Use dark chocolate for a richer depth of flavor, contrasting beautifully with the sweetness of the caramel.
- Chocolate-Covered Strawberries: Instead of apples, dip strawberries in caramel and decorate them like broomsticks for a fruitier explosion of flavor reminiscent of a fall harvest.
Let your imagination run wild with these charming alternatives, and consult these delightful inspirations like the Crisp Cabbage Apple or Easy Yummy Apple Pie to keep the festive treats growing!
What to Serve with No Bake Caramel Apple Witch Broomsticks
As Halloween festivities fill the air with excitement, pair your broomsticks with treats and sides that complement their sweet, sticky charm.
-
Spooky Cheese Platter: A selection of sharp cheeses balances the sweetness of the broomsticks, adding a savory touch that guests will love.
-
Pumpkin Spice Cupcakes: These moist, spiced desserts echo the flavors of fall, creating a delightful contrast to the chewy apples and caramel.
-
Crispy Corn Chips: The crunch of corn chips offers a satisfying texture and a salty contrast to the sweetness of your broomsticks.
-
Ghostly Fruit Salad: A medley of seasonal fruits like pomegranate, oranges, and cranberries brightens the table, providing a refreshing balance to sweet treats.
-
Mulled Apple Cider: Warm, spiced apple cider enhances the fall vibes and rounds out the indulgence of your Halloween gathering.
-
Chocolate Dipped Pretzels: Sweet and salty pretzels coated in chocolate echo the broomsticks’ flavors while adding a fun, crunchy element to your dessert spread.
-
Candy Corn Marshmallow Mix: This sweet and colorful combination captures the essence of Halloween and is perfect for topping off your spooky snack buffet.
Caramel Apple Witch Broomsticks Recipe FAQs
What type of apples work best for Caramel Apple Witch Broomsticks?
Absolutely! I recommend using mini varieties like Rockit or Cosmic Crisps for their perfect balance of tartness and crunch. Look for apples that are firm and free from dark spots or blemishes to ensure they hold up well when coated in caramel.
How should I store the Caramel Apple Witch Broomsticks?
To keep your delicious broomsticks fresh, store them in an airtight container at room temperature for up to 2 days. If you prefer to refrigerate them, enjoy them within the same timeframe for the best flavor and texture. Avoid freezing, as this can make the caramel too hard and affect the apples’ crispness.
Can I freeze the Caramel Apple Witch Broomsticks?
I don’t recommend freezing these treats, as the texture can change significantly. If you do end up with leftovers, it’s best to keep them in the fridge or at room temperature for a couple of days. If the caramel softens, just let them sit out for a bit to regain their chewiness.
What if my caramel is clumping while melting?
No worries! If your caramel mixture clumps, it might be too thick or heated too quickly. Try adding an extra splash of water to help it melt uniformly. Melt the caramels in 1-minute intervals, stirring between each to ensure an even consistency without burning.
Are these broomsticks safe for kids to eat?
Yes, indeed! The ingredients are kid-friendly, but always be cautious with children under three due to the potential choking hazard posed by whole apples, especially with the sticks involved. If allergies are a concern, ensure to check the labels on the caramels and chocolate for any common allergens.
Can I customize the decorations on my broomsticks?
Very! Get creative by using different types of chocolate or even colorful candy melts for an eye-catching twist. You can also add sprinkles or edible glitter for extra sparkle. Have fun with the decorating—there’s no right or wrong way to make your broomsticks uniquely yours!
Delicious Caramel Apple Witch Broomsticks for Easy Halloween Fun
Ingredients
Equipment
Method
- Wash and dry your mini apples thoroughly, ensuring they are clean and free from any wax. Remove the stems carefully.
- Take small twigs or sticks and insert them into the center of each apple to create handles.
- In a microwave-safe bowl, combine the unwrapped Kraft caramels and water. Microwave in 1-minute intervals until melted.
- Dip each apple into the melted caramel, ensuring an even coat, then place on a parchment-lined baking sheet.
- Let the caramel coat cool and harden for about 10 minutes, or chill in the freezer for quicker results.
- Melt the milk chocolate chips in a microwave-safe bowl, heating in 30-second intervals until smooth.
- Transfer the melted chocolate to a piping bag and pipe bristle designs on each apple.
- If using fondant, wrap small pieces around where the apple meets the stick for decoration.
- Serve once decorations have set, and enjoy your enchanting treats!