

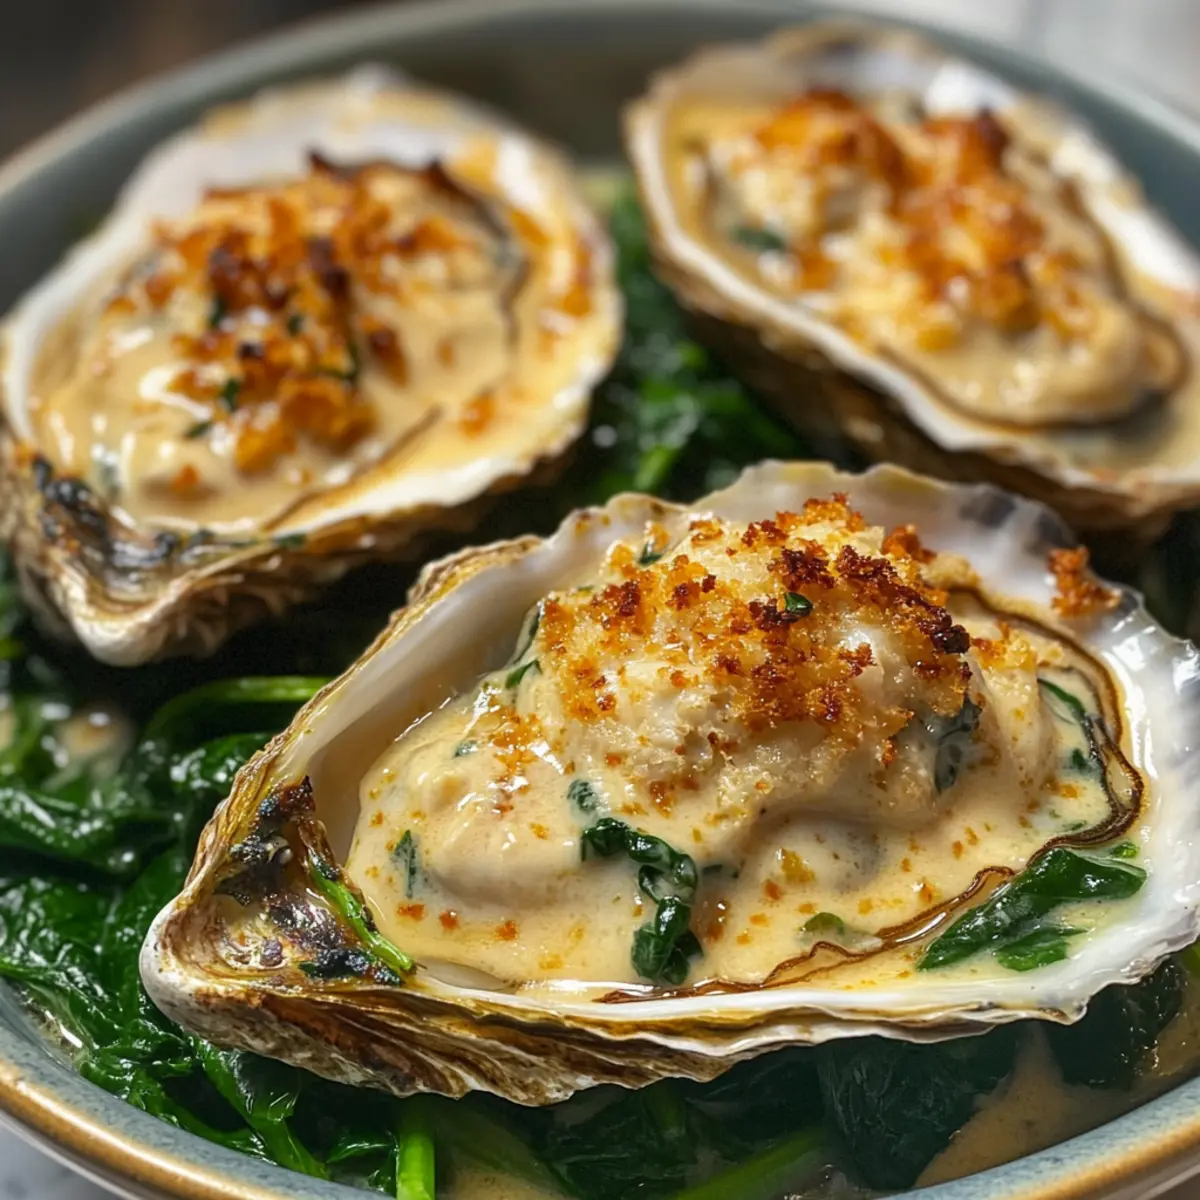
As I pulled back the lid of my steaming seafood platter, the aroma of umami-rich miso wafted through the air, instantly igniting my cravings. Miso Baked Oysters: A Quick and Easy West Coast Appetizer is my go-to for impressing guests with minimal effort. These luscious oysters, draped in a creamy miso-mayonnaise blend and nestled atop vibrant spinach, offer a delightful spin on the classic Oysters Rockefeller. Not only is this dish a gluten-free crowd-pleaser, but it also comes together in moments, making it perfect for spontaneous gatherings or quiet nights at home. With a recipe this simple, why not elevate your culinary game and bring a taste of the Pacific Northwest to your table? Are you ready to dive into a world of savory satisfaction? Let’s get started!
Why are Miso Baked Oysters irresistible?
Savory umami explosion: The rich miso-mayonnaise blend elevates these oysters with an unforgettable flavor that will have everyone raving.
Quick prep time: This recipe is not only straightforward but also takes just moments to whip up, perfect for impromptu gatherings.
Gluten-free delight: A wonderful option for gluten-sensitive diners, these oysters pack a punch without compromising on taste.
Crowd-pleasing appeal: Serve them as appetizers at your next get-together, and watch how quickly they disappear! If you’re looking for a seamless dinner idea, check out this Baguette Boat Dinner for a phenomenal pairing.
Miso Baked Oysters Ingredients
For the Oysters
• Fresh Oysters – Use large, shucked oysters for maximum flavor and a satisfying bite.
• Fresh Spinach – Adds nutrition and a splash of color; shredded or chiffonade works best.
For the Sauce
• Japanese Mayonnaise – Provides a creamy richness; if needed, substitute with regular mayo and add a touch more lemon juice.
• Miso Paste – This ingredient is the heart of the dish; light miso offers a milder flavor that won’t overpower the oysters.
• Mirin – A sweet rice wine essential for adding depth; don’t skip it for the perfect flavor balance.
• Hot Sauce – Adds a kick; Tobasco is preferred for its flavor and heat.
• Fresh Lemon Juice – Brightens up the dish and balances the sauce’s richness; always use fresh for the best flavor.
Optional Toppings
• Cheddar or Mozzarella Cheese – Use this for a bubbling, cheesy topping if you desire extra indulgence.
• Garnish – Lemon wedges, freshly chopped parsley, and a sprinkle of paprika enhance both flavor and presentation.
These Miso Baked Oysters are a delightful, gluten-free appetizer that will leave your guests craving more!
Step‑by‑Step Instructions for Miso Baked Oysters-A Quick And Easy West Coast Appetizer
Step 1: Preheat Cooking Surface
Preheat your broiler or BBQ grill to high, ensuring it reaches around 500°F (260°C). This intense heat is essential for achieving that bubbly, golden finish on your Miso Baked Oysters. A few minutes of preheating will make all the difference, so take this time to gather your ingredients and prepare the baking setup.
Step 2: Prepare Oyster Shells
Line a baking sheet with rock salt or kosher salt to stabilize your oyster shells or ramekins. If using shucked oysters, ensure they are seated securely in their shells; this will prevent them from tipping over while baking. Arrange everything on the baking sheet, setting the stage for delicious Miso Baked Oysters.
Step 3: Mix the Miso Sauce
In a mixing bowl, combine the Japanese mayonnaise, miso paste, mirin, hot sauce, and fresh lemon juice. Stir until smooth and creamy, ensuring all ingredients are well-blended for that rich flavor profile. This miso-mayonnaise sauce will become the star ingredient for your Miso Baked Oysters, adding depth and deliciousness to each bite.
Step 4: Arrange the Spinach
Evenly distribute the shredded spinach across the oyster shells or ramekins, creating a vibrant bed for the oysters. This will not only add texture and nutrition but also a burst of color to your dish. Make sure the spinach is spread uniformly, as this ensures an even distribution of flavors as you layer the remaining ingredients.
Step 5: Place the Oysters
Gently place the fresh oysters on top of the spinach layer. If using large oysters, feel free to chop them into manageable pieces to fit comfortably. This arrangement will allow the oysters to cook evenly, ensuring they remain plump and tender through the baking process, perfecting your Miso Baked Oysters.
Step 6: Apply the Miso Sauce
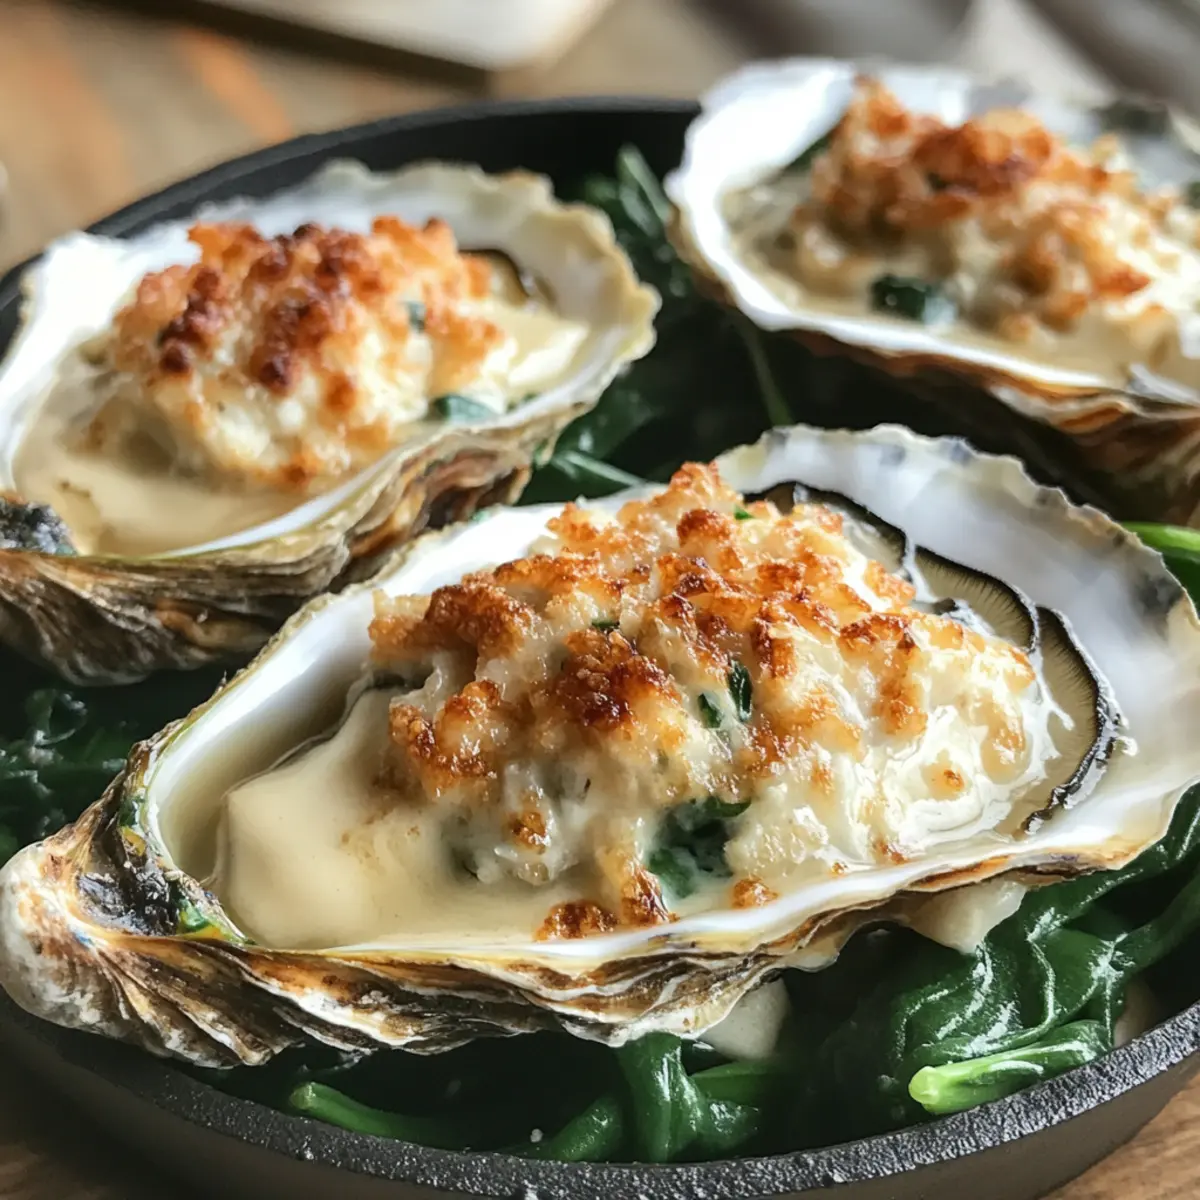
Spoon approximately one tablespoon of the prepared miso sauce over each oyster, making sure to cover them generously. If desired, sprinkle shredded cheddar or mozzarella cheese on top for an indulgent, bubbling finish. This melty layer will elevate your Miso Baked Oysters, adding a delightful richness that guests will love.
Step 7: Bake to Perfection
Place your prepared baking sheet under the broiler for about 5–8 minutes, or until the cheese is bubbling and golden, and the oysters are cooked through. Keep an eye on them during this time, as the high heat can cause them to cook quickly. The result should be a beautifully browned, savory topping crowning each oyster.
Step 8: Cool and Garnish
Once broiled, remove your Miso Baked Oysters from the oven and let them cool for about 5 minutes. This cooling period allows the flavors to settle. If desired, garnish with lemon wedges, freshly chopped parsley, and a sprinkle of paprika to brighten the presentation and add a final burst of flavor before serving.

Miso Baked Oysters Variations & Substitutions
Customize your Miso Baked Oysters with these delicious ideas, adding your personal touch and making each bite a little more special!
-
Cheese Swap: Try Gruyère or Parmesan for a different flavor profile and a unique twist on the classic topping. The nutty notes of Gruyère can be a delightful surprise!
-
Breadcrumb Topping: Add a crunchy texture by mixing breadcrumbs with grated cheese before sprinkling them over the oysters. This creates a wonderful contrast to the creamy meat.
-
Greens Alternatives: Substitute fresh spinach with chopped kale or arugula for a different flavor and texture; each green brings its charm and adds a nutrient boost.
-
Spice it Up: If you love heat, mix in some chopped jalapeños or red pepper flakes into the sauce for a spicy kick that complements the umami of the miso beautifully.
-
Asian Twist: Add a dash of sesame oil to the miso-mayo sauce for a nutty flavor that takes these oysters to the next level. The aroma of sesame will immediately transport your senses!
-
Miso Variation: Experiment with different types of miso paste, like red miso for a stronger flavor or white miso for a sweeter taste that balances well with the richness of the dish.
-
Garnish Ideas: Sprinkle with toasted sesame seeds or chopped green onions as a garnish for extra texture and a burst of flavor. It’s a great way to elevate the presentation too!
These variations can transform your Miso Baked Oysters into a unique culinary experience each time you make them. And for more delectable seafood ideas, don’t miss out on the flavors of this Inspired Cabbage Egg or the delightful crunch of Cheesy Bread. Enjoy crafting your masterpiece!
What to Serve with Miso Baked Oysters
Delight your guests with harmonious pairings that elevate your dining experience and complement the ocean-fresh flavors of this savory dish.
-
Crispy Garlic Bread: This crunchy crunch offers a perfect contrast to the creamy oysters, allowing you to soak up every bit of flavor.
-
Chilled Cucumber Salad: Refreshing and light, this salad adds a crisp bite and helps cleanse the palate between rich bites.
-
Lemon Garlic Asparagus: Tender, roasted asparagus with a hint of lemon brings a bright note that pairs beautifully with the umami of the oysters.
-
Sake or Riesling: A glass of chilled sake or a fruity Riesling will enhance the flavors of the dish, rounding off the meal with elegance.
-
Creamy Coleslaw: The crunch and creaminess of coleslaw introduce a delightful textural contrast, making each bite of oyster even more satisfying.
-
Japanese Edamame: This light, nutty appetizer complements the main dish without overpowering it, while also adding a touch of fun to the meal.
-
Miso-Glazed Cauliflower: Extending the umami theme, this dish deepens the experience with more of that beloved miso flavor in a surprising way.
-
Fresh Fruit Platter: A selection of seasonal fruits provides a sweet finish and offers a visual feast, bridging the meal from savory to sweet.
-
Green Tea Ice Cream: End your meal on a sweet and creamy note with this unique dessert that echoes the Japanese influences of your Miso Baked Oysters.
How to Store and Freeze Miso Baked Oysters
Fridge: Store leftover Miso Baked Oysters in an airtight container for up to 1 day. Gently reheat in the oven to retain their creamy texture.
Freezer: It’s best to avoid freezing Miso Baked Oysters, as the delicate oysters can become rubbery once thawed. Enjoy them fresh for the best flavor!
Reheating: To reheat, preheat the oven to 350°F (175°C) and bake for about 10 minutes or until warmed through. Avoid the microwave to maintain their texture.
Serving Reminder: For the best experience, serve these delightful Miso Baked Oysters fresh from the oven, showcasing their bubbling, savory goodness!
Make Ahead Options
These Miso Baked Oysters are a fantastic choice for busy home cooks looking to save time while still impressing guests! You can prepare the miso-mayonnaise sauce and arrange the spinach in the oyster shells up to 24 hours in advance. Simply cover the prepared shells with plastic wrap and store them in the refrigerator to maintain freshness. When you’re ready to serve, place the oysters on top of the spinach, spoon the sauce over them, and top with cheese if desired. Broil for about 5-8 minutes until bubbling and delicious, and you’ll have a stunning appetizer that tastes just as good as if made fresh!
Expert Tips for Miso Baked Oysters
-
Shell Stabilization: Use rock salt: This keeps your oyster shells upright while broiling, preventing spills and ensuring even cooking.
-
Watch the Time: Broil carefully: High heat cooks quickly—keep an eye on them to avoid overcooking. Perfect oysters should be plump and tender.
-
Freshness Matters: Choose quality oysters: Look for fresh, large oysters for the best flavor and texture in your Miso Baked Oysters.
-
Custom Sauce Balance: Adjust acidity: If substituting mayonnaise, add a touch more lemon juice for the right tang.
-
Cheese Choices: Experiment freely: Swap in different cheeses like Gruyère for a unique twist on this classic dish.
-
Flavor Depth: Include oyster liquor: Pouring in a little oyster liquor into the sauce adds bonus richness and enhances the umami flavor.
Miso Baked Oysters: A Quick and Easy Japanese-Inspired Appetizer Recipe FAQs
How do I choose the right oysters for this recipe?
Absolutely! Look for fresh, large oysters that are shucked and free of any dark spots or foul odors. Ideally, they should be plump and tightly closed; if an oyster is gaping, it may not be fresh. I personally like to visit local seafood markets to ensure I’m getting the best quality from the Pacific Northwest.
What is the best way to store leftover Miso Baked Oysters?
Leftover Miso Baked Oysters can be stored in an airtight container in the refrigerator for up to 1 day. When you’re ready to enjoy them again, gently reheat them in the oven to maintain that creamy texture—preheat to 350°F (175°C) for about 10 minutes until warmed through. Avoid the microwave for reheating, as it can make them rubbery.
Can I freeze Miso Baked Oysters?
I wouldn’t recommend freezing Miso Baked Oysters, as the delicate texture of the oysters doesn’t fare well after thawing. They may become rubbery and lose their delightful flavor. It’s best to enjoy them freshly made for the best experience—trust me, they’re too good to miss!
What should I do if my sauce looks lumpy?
Not to worry! If your miso-mayonnaise sauce looks lumpy, try whisking it vigorously until smooth; you can also use a hand blender for a creamier consistency. Make sure the miso paste is well incorporated with other ingredients. If it thickens too much, adding a teaspoon of warm water can help achieve that silky texture.
Are these Miso Baked Oysters safe for gluten-sensitive diners?
Very! This recipe is naturally gluten-free due to the ingredients used, especially if you opt for Japanese mayonnaise, which is typically gluten-free. Just double-check that the miso paste and any other products are also labeled gluten-free. It’s always a good practice to inform your guests of the ingredients when serving!
Can I use alternative greens instead of spinach?
Yes, indeed! Feel free to substitute with chopped kale or arugula for a different taste profile. Both will add a nice texture and depth of flavor to your Miso Baked Oysters while keeping the dish vibrant and delicious. The more greens, the merrier!

Savory Miso Baked Oysters: Quick West Coast Appetizer Delight
Ingredients
Equipment
Method
- Preheat your broiler or BBQ grill to high, about 500°F (260°C).
- Line a baking sheet with rock salt or kosher salt to stabilize the oyster shells.
- In a mixing bowl, combine the Japanese mayonnaise, miso paste, mirin, hot sauce, and lemon juice. Stir until smooth.
- Evenly distribute the shredded spinach across the oyster shells.
- Place the fresh oysters on top of the spinach layer.
- Spoon approximately one tablespoon of the miso sauce over each oyster.
- Place the baking sheet under the broiler for 5–8 minutes or until golden.
- Remove from the oven and let cool for about 5 minutes, then garnish before serving.