

You won’t believe how easy it is to whip up a batch of Oreo Sushi Rolls, transforming classic cookies-and-cream goodness into a no-bake dessert that’s both playful and impressive. With just a handful of ingredients, these eye-catching rolls are the ultimate crowd-pleaser, perfect for parties or cozy movie nights when you need a sweet indulgence without spending hours in the kitchen. What’s more, you can customize them to suit every palate, making them an ideal option for gatherings or even just a fun treat for yourself. How can something so simple look this fabulous? Let’s dive into the delightful world of Oreo Sushi Rolls and find out together!

Why Are Oreo Sushi Rolls So Irresistible?
Sweet, No-Bake Fun: These Oreo Sushi Rolls require no baking, making them an ideal choice for quick prep. Customizable Delight: With plenty of substitutions available, you can tailor them to your taste, whether you prefer a classic vibe or a fruity twist. Crowd-Pleaser: Perfect for parties or movie nights, they’re sure to impress family and friends alike. Visual Appeal: Each roll is as stunning as it is delicious, combining creamy filling with the rich chocolate flavor of Oreos. Don’t forget to check out our recipes for Homemade Chicken Rolls and Coconut Chocolate Rolls for more delectable crowd favorites!
Oreo Sushi Rolls Ingredients
Get ready to create these deliciously fun no-bake treats!
-
For the Outer Layer
-
Oreo Cookies – Provides the chocolate flavor and texture for both the crust and topping; substituting with Golden Oreos gives a lighter taste.
-
Cream Cheese – Essential for a smooth, tangy filling; ensure it’s softened for blending; Neufchâtel cheese can be an excellent lighter alternative.
-
For the Filling
-
Powdered Sugar – Adds sweetness and maintains a silky texture; you can use granulated sugar, but the texture may vary.
-
Vanilla Extract – Enhances flavor; almond extract can provide a nutty twist.
-
Whipped Topping – Creates a light and airy filling; homemade whipped cream can elevate this dish even further.
-
Salt – Balances sweetness and amplifies the chocolate flavor.
-
For the Drizzle
-
Chocolate Syrup – Adds a glossy finish and rich taste; melted chocolate can also work, but consistency may differ.
-
For Decoration
-
Mini Oreo Cookies – Optional for decoration, adding a playful touch to your presentation.
Dive into the fantastic world of Oreo Sushi Rolls and let your creativity flow with flavors and toppings!
Step‑by‑Step Instructions for Oreo Sushi Rolls
Step 1: Crush Oreos
Begin by placing 24 Oreo cookies into a blender or food processor. Pulse the cookies until they transform into fine crumbs, resembling sand, for approximately 30 seconds. Reserve 2 tablespoons of these crumbs for later use, as they will be sprinkled on top, adding a delightful texture to your finished Oreo Sushi Rolls.
Step 2: Make Outer Layer
In a mixing bowl, combine the crushed Oreos with 4 ounces of softened cream cheese. Using a hand mixer, blend these ingredients on medium speed for 2-3 minutes, or until a soft, dough-like consistency forms. The mixture should be well-combined and smooth, making it the perfect base for your Oreo Sushi Rolls.
Step 3: Prepare Filling
In a separate bowl, beat the remaining 4 ounces of cream cheese with powdered sugar, a splash of vanilla extract, and a pinch of salt. Mix these ingredients together for about 1-2 minutes until the mixture is completely smooth. Once combined, gently fold in 1 cup of whipped topping, creating an airy filling that will enhance your Oreo Sushi Rolls.
Step 4: Roll Out Dough
Lay a sheet of parchment paper on a clean countertop, then place the Oreo dough onto it. Using a rolling pin, roll the dough into a rectangle that’s approximately 1/4 inch thick, ensuring an even thickness throughout for optimal rolling. This step is crucial, as a uniform thickness will help your Oreo Sushi Rolls maintain their shape.
Step 5: Add Filling
Spread the prepared cream cheese filling evenly over the rolled-out Oreo dough, leaving about a 1/2 inch border around each edge. Use a spatula to ensure the filling is spread smoothly, allowing the creamy goodness to shine through once rolled. This delicious layer will be the heart of your Oreo Sushi Rolls, offering richness in every bite.
Step 6: Form Roll
Starting from one long side of the rectangle, begin to roll the dough tightly into a cylinder. Utilize the parchment paper to assist in lifting and rolling, ensuring the filling stays inside. Roll until you reach the opposite edge, sealing in the cream cheese filling, to create a perfect log of delectable Oreo goodness.
Step 7: Chill
Once the roll is formed, wrap it tightly in the parchment paper to maintain its shape and place it in the refrigerator. Chill for at least 2 hours to allow the flavors to meld and the filling to firm up. This chilling time is vital for ensuring clean slices once you’re ready to serve your Oreo Sushi Rolls.
Step 8: Slice & Serve
After chilling, remove the roll from the refrigerator and unwrap it from the parchment paper. Using a sharp knife, cut the roll into 1-inch pieces, revealing the beautiful layers inside. Drizzle chocolate syrup over the slices, and finish by sprinkling the reserved Oreo crumbs on top, along with optional mini Oreo cookies for a fun presentation.
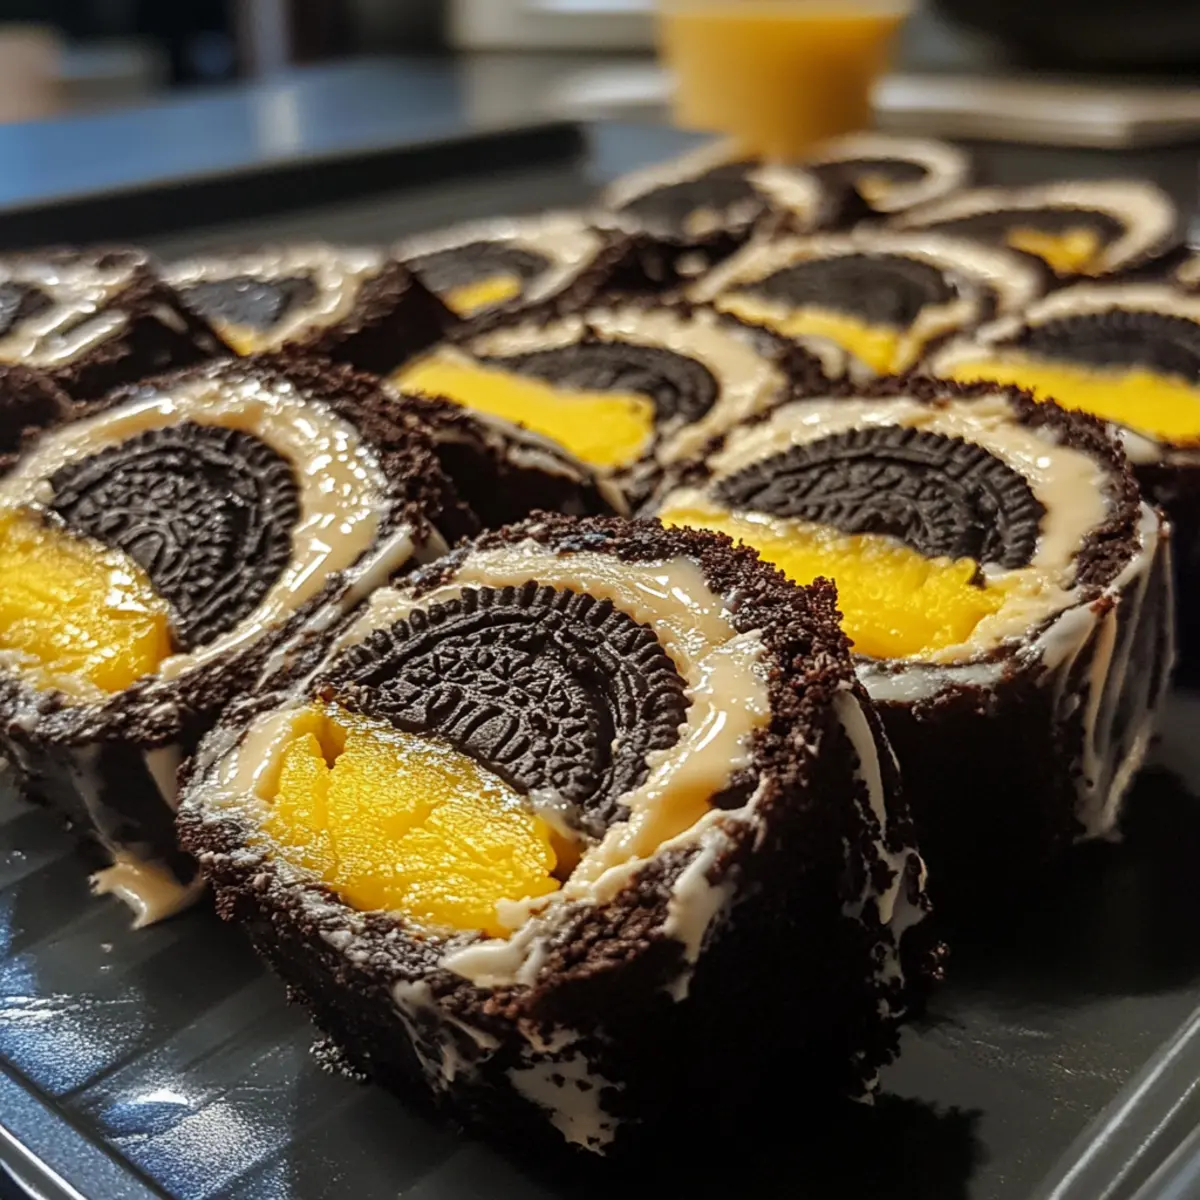
Oreo Sushi Rolls Variations & Substitutions
Feel free to get creative with these Oreo Sushi Rolls, adding your personal touch to this playful dessert!
-
Minty Fresh: Use Mint Oreos for a refreshing twist that brings a burst of flavor. The cool mint pairs perfectly with the creamy filling, creating a delightful after-dinner treat.
-
Light & Luscious: Substitute Neufchâtel cheese for cream cheese for a lighter version that’s just as delicious. You’ll save some calories without sacrificing that creamy texture everyone loves.
-
Fruity Surprise: Add fresh slices of strawberries or bananas into the filling for an unexpected fruity flavor kick. This gives a bright contrast to the chocolate and enhances the flavor profile beautifully.
-
Caramel Drizzle: Swap the chocolate syrup for caramel sauce for a sweet and buttery indulgence. This unique twist adds a whole new depth of flavor that will have everyone coming back for seconds!
-
Autumn Glow: In the fall, use Pumpkin Spice Oreos to bring some seasonal flair to your rolls. This festive touch will make your dessert stand out at any gathering.
-
Dairy-Free Treat: Replace cream cheese with blended silken tofu for a delightful dairy-free version. It’s an excellent way to make these rolls accessible for those with dietary restrictions.
Don’t forget, you can also experiment with different toppings or pair them with other delightful treats, like Cheesy Zucchini Rolls or our delicious Savory Beef Rolls. The possibilities are endless!
What to Serve with Oreo Sushi Rolls?
Elevate your dessert experience by pairing these playful treats with delightful accompaniments that enhance their flavors and textures.
-
Whipped Cream:
Adds a light, airy texture that beautifully complements the rich Oreo sushi rolls, creating a luscious contrast. A dollop of freshly whipped cream can turn each bite into a cloud of sweetness. -
Fresh Berries:
Juicy strawberries or tangy raspberries provide a vibrant burst of freshness, cutting through the sweetness of the rolls. Their bright colors also enhance the visual appeal of your dessert platter. -
Chocolate-Covered Strawberries:
An indulgent pairing, the fruity freshness and rich chocolate create a decadent duo, offering a nicely balanced treat. These delightful bites can enhance the theme of fun and playfulness. -
Ice Cream:
Creamy vanilla or chocolate ice cream gives a classic touch to your dessert table, inviting guests to dip or top their rolls. The coolness of the ice cream pairs perfectly with the texture of the sushi rolls. -
Caramel Sauce:
Drizzling some caramel adds a warm, buttery flavor that beautifully contrasts with the chocolatey goodness of the Oreo sushi rolls. This sweet addition invites an extra layer of indulgence. -
Fruit Salad:
A medley of seasonal fruits adds a refreshing crunch and color to your dessert spread. The natural sweetness of fruits like kiwi, mango, and pineapple offers a light balance to the rich rolls. -
Mint Tea:
Serve a warm cup of mint tea alongside the sushi rolls for a refreshing and soothing finish. The herbal notes can cleanse the palate and make for a delightful conclusion to your sweet feast.
Indulge in your sweet cravings while enjoying these perfect pairings with your homemade Oreo sushi rolls!
Make Ahead Options
These Oreo Sushi Rolls are a fantastic option for meal prep enthusiasts, allowing you to delight in a fun dessert without the last-minute rush! You can easily prepare the outer layer and filling up to 24 hours in advance. Simply follow the steps to create the Oreo dough and filling, then assemble the rolls as directed. Wrap them tightly in parchment paper to maintain freshness and prevent drying out while refrigerating. When you’re ready to serve, simply slice the chilled rolls, drizzle with chocolate syrup, and sprinkle with reserved crumbs for that finishing touch. Rest assured, your Oreo Sushi Rolls will taste just as delicious, making them perfect for busy weeknights or gatherings!
Expert Tips for Oreo Sushi Rolls
-
Chill for Clean Slices: Make sure to chill the roll for at least 2 hours before slicing to prevent messy filling. The colder it is, the easier it will be to cut.
-
Softened Cream Cheese: Always use softened cream cheese for a smooth, creamy filling. If it’s too cold, it can lead to a lumpy mixture.
-
Avoid Tough Texture: Be careful not to overmix your filling; doing so can make it tough. Fold in the whipped topping gently for the best texture.
-
Dough Consistency: If your Oreo dough feels too dry when mixing, add a little more cream cheese to achieve a cohesive, pliable dough perfect for rolling.
-
Customize Flavors: Don’t hesitate to experiment with different flavors of Oreos or fillings. From mint to seasonal varieties, your Oreo Sushi Rolls can reflect your taste preferences!
How to Store and Freeze Oreo Sushi Rolls
Fridge: Store leftover Oreo Sushi Rolls in an airtight container in the refrigerator for up to 4 days, ensuring they stay fresh and delicious.
Freezer: If you want to save them for later, you can freeze the uncut roll wrapped tightly in plastic wrap and foil for up to 2 months.
Thawing: To enjoy frozen Oreo Sushi Rolls, thaw them overnight in the fridge before slicing and serving.
Reheating: There’s no need to reheat; simply slice and enjoy as is! These delightful treats are best enjoyed cold, showcasing their creamy filling and chocolate goodness.

Oreo Sushi Rolls Recipe FAQs
How do I choose ripe ingredients for my Oreo Sushi Rolls?
Absolutely! For this recipe, while concerns about ripeness aren’t as relevant as in other dishes, using fresh cream cheese is essential. Ensure that your cream cheese is not nearing its expiration date for the best flavor and texture. When opting for whipped topping, check the expiry date too, as a fresh product will enhance your rolls.
How should I store leftover Oreo Sushi Rolls?
To keep your Oreo Sushi Rolls fresh, store them in an airtight container in the fridge for up to 4 days. This will help maintain their creamy texture and delightful flavor. If you’re making them ahead of time, you can make them up to 24 hours in advance, just be sure to keep them refrigerated until serving.
Can I freeze Oreo Sushi Rolls for later?
Certainly! If you want to save your rolls for future enjoyment, wrap the uncut roll tightly in plastic wrap and then in aluminum foil. This will help prevent freezer burn. They can be frozen for up to 2 months. When you’re ready to indulge, simply thaw them overnight in the fridge before slicing and serving. Enjoy them cold; no need for reheating!
What if my rolls are falling apart when slicing?
Very! If you find your Oreo Sushi Rolls are falling apart, it typically means they weren’t chilled long enough. Make sure to chill the assembled roll for at least 2 hours. If they still seem too soft, consider refrigerating them for an additional hour. Alternatively, if your dough is too dry, you might need to add a bit more cream cheese to create a cohesive texture that holds together better.
Are there any dietary considerations I should be aware of with Oreo Sushi Rolls?
Indeed! While the recipe is rich and delicious, if you have allergies, be aware that Oreo cookies contain gluten and dairy. If you’re looking for a dairy-free option, you can replace the cream cheese with blended silken tofu, making this treat safe for those who avoid dairy products. Always check the labels of your ingredients for allergens, especially if serving guests.
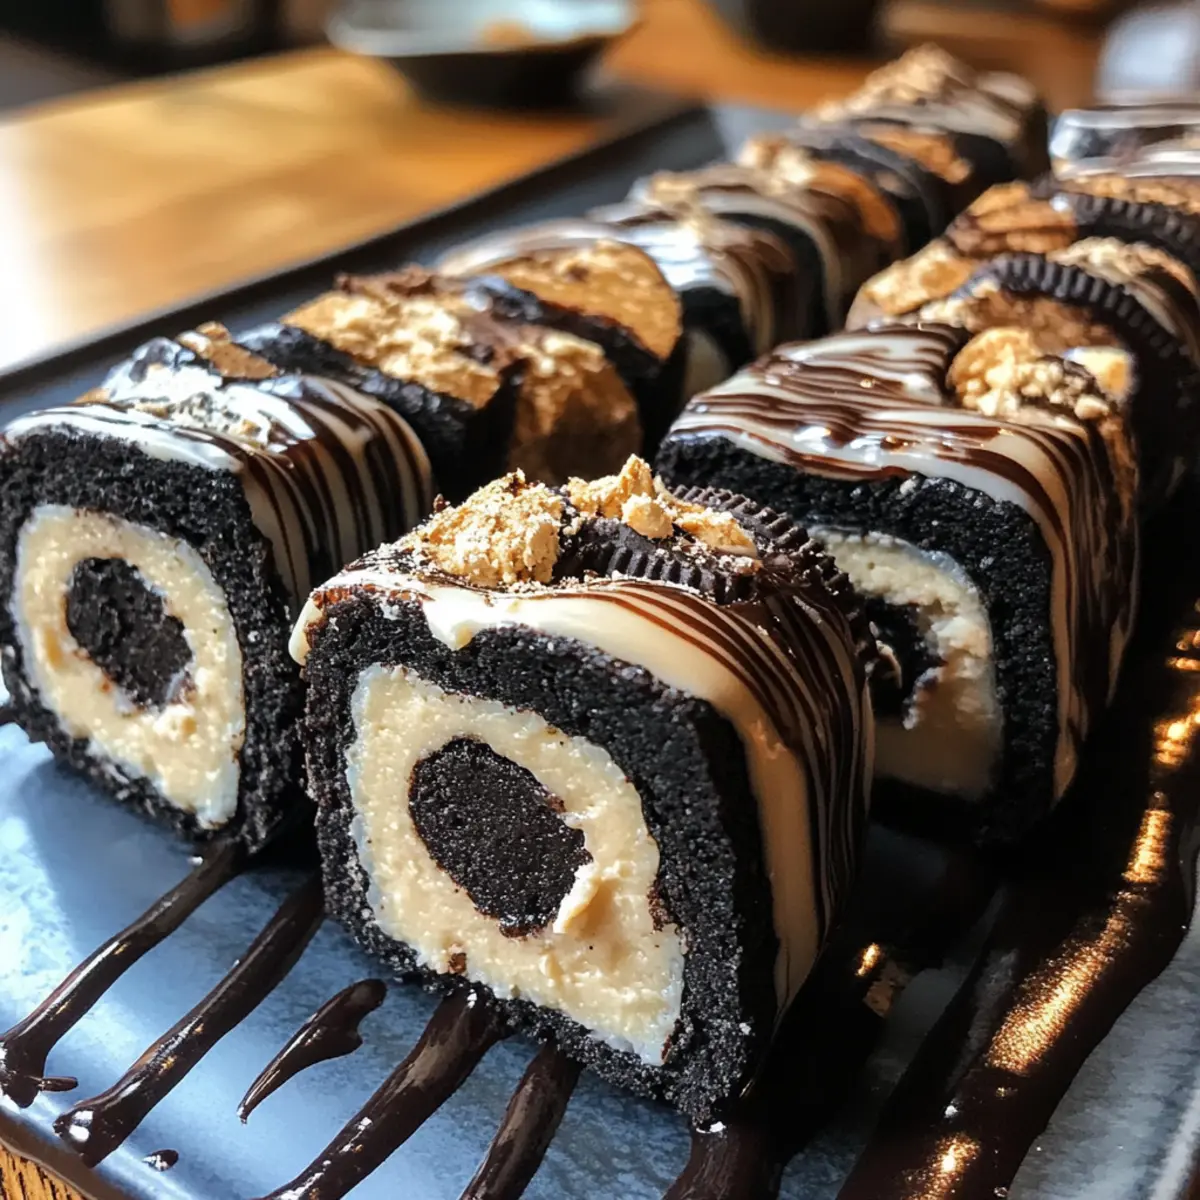
Oreo Sushi Rolls: A Fun No-Bake Dessert Everyone Will Love
Ingredients
Equipment
Method
- Begin by placing 24 Oreo cookies into a blender or food processor. Pulse the cookies until they transform into fine crumbs, resembling sand, for approximately 30 seconds. Reserve 2 tablespoons of these crumbs for later use.
- In a mixing bowl, combine the crushed Oreos with 4 ounces of softened cream cheese. Blend these ingredients on medium speed for 2-3 minutes, until a soft, dough-like consistency forms.
- In a separate bowl, beat the remaining 4 ounces of cream cheese with powdered sugar, a splash of vanilla extract, and a pinch of salt for about 1-2 minutes until smooth. Gently fold in 1 cup of whipped topping.
- Lay a sheet of parchment paper on a clean countertop, then place the Oreo dough onto it. Roll the dough into a rectangle approximately 1/4 inch thick.
- Spread the prepared cream cheese filling evenly over the rolled-out Oreo dough, leaving about a 1/2 inch border around each edge.
- Starting from one long side of the rectangle, roll the dough tightly into a cylinder, using the parchment paper to assist in rolling.
- Once the roll is formed, wrap it tightly in parchment paper and chill in the refrigerator for at least 2 hours.
- After chilling, unwrap the roll and slice into 1-inch pieces. Drizzle chocolate syrup over the slices and sprinkle the reserved Oreo crumbs on top, along with optional mini Oreo cookies.