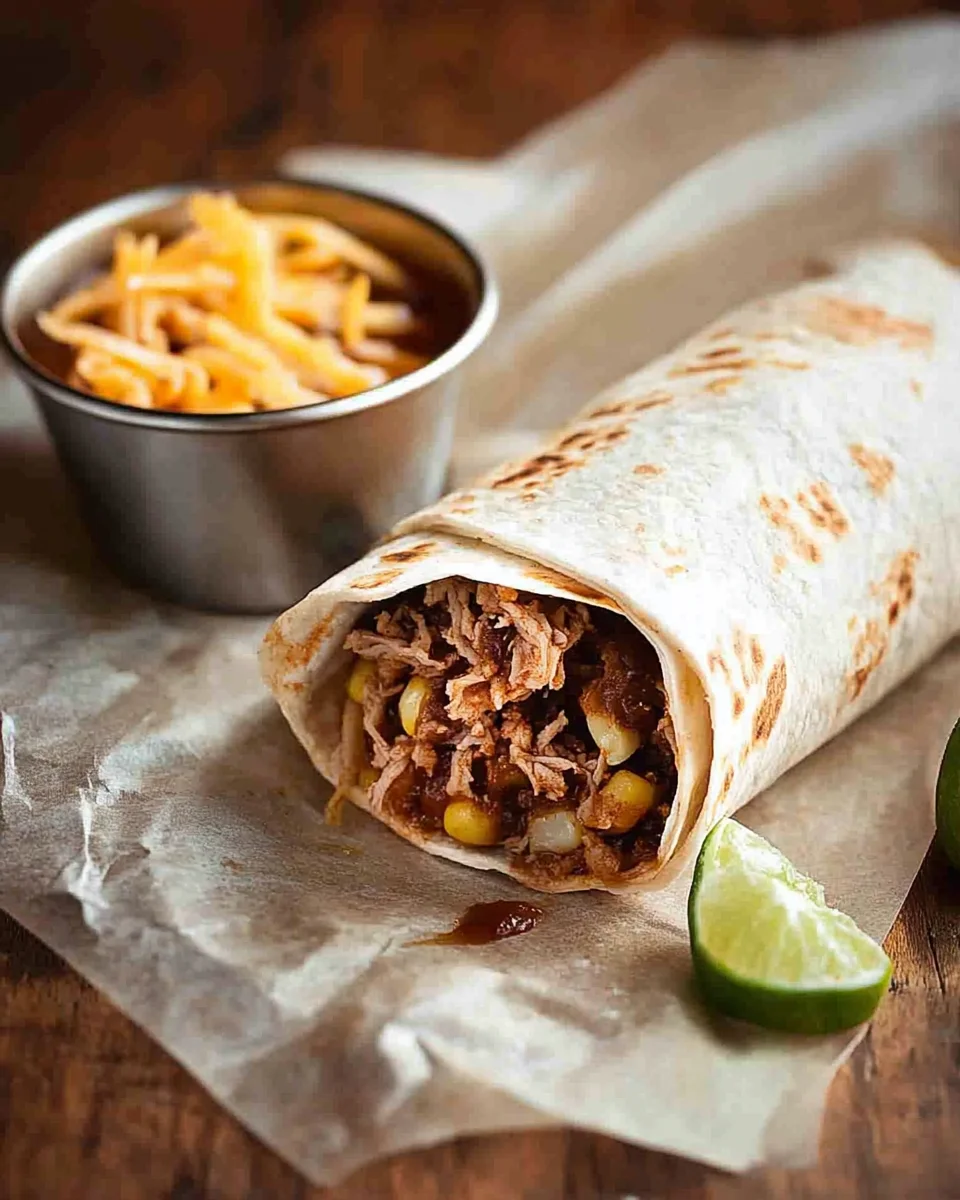
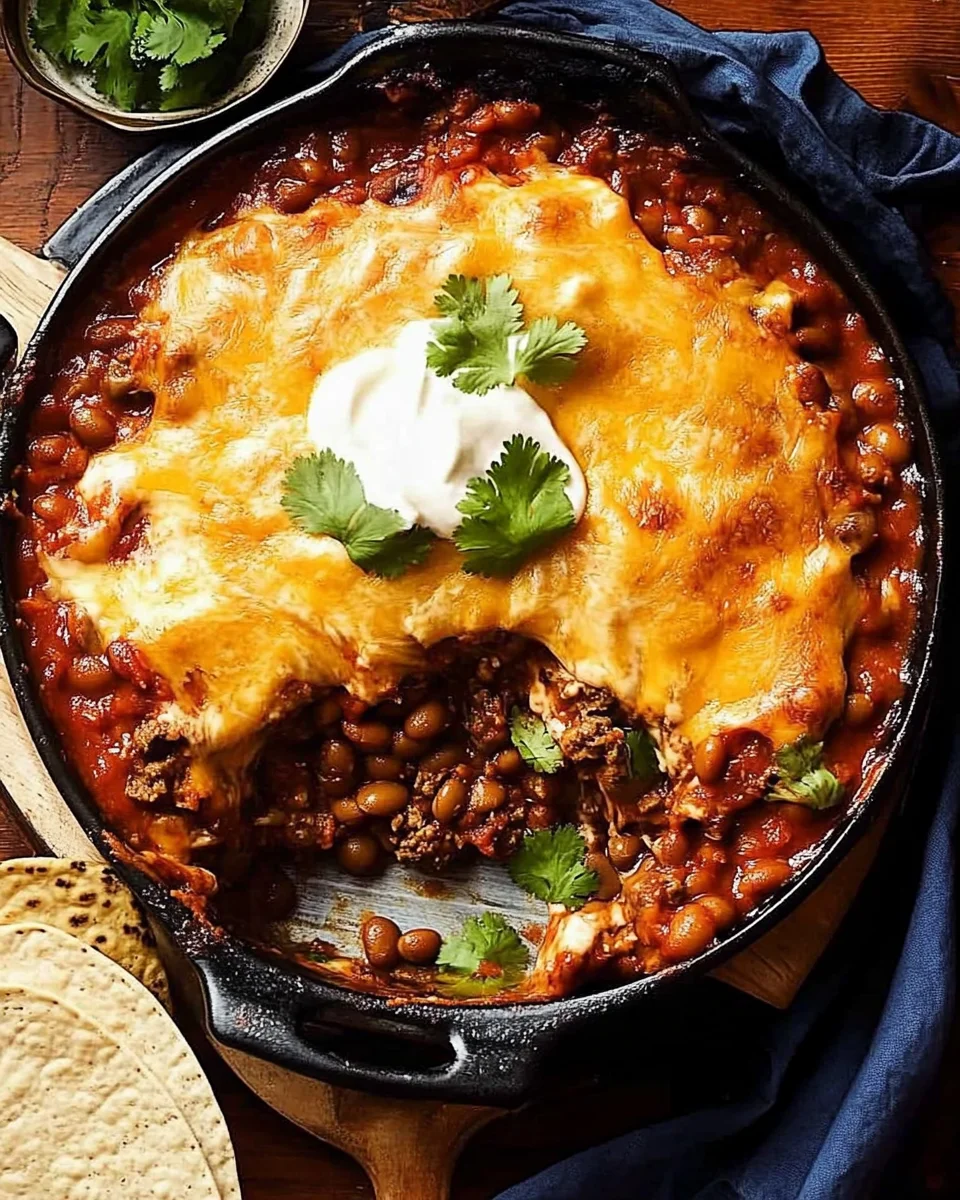
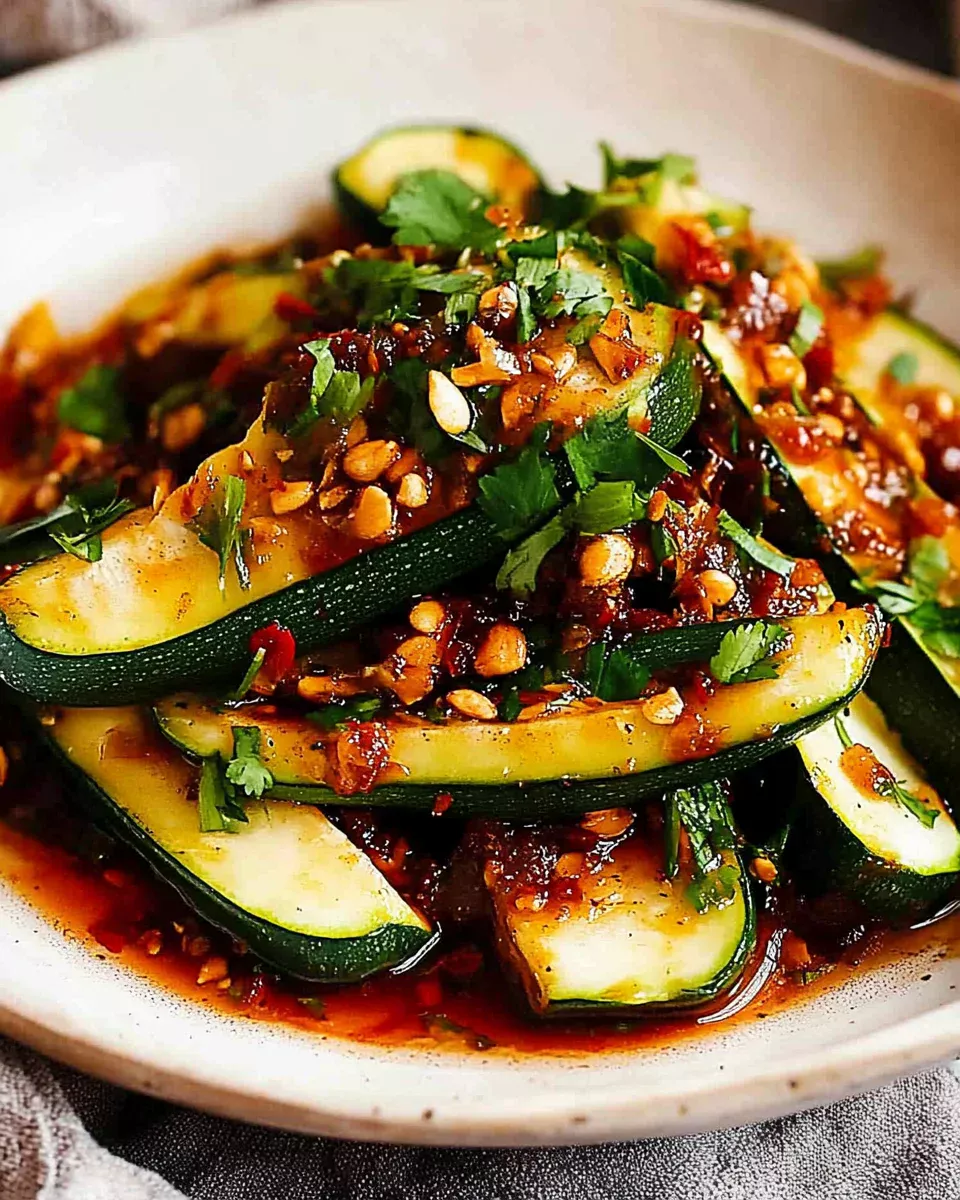
Chicken Burrito: A Flavor-Packed Mexican Classic

When was the last time you wrapped your hands around a warm, stuffed burrito and took a bite that felt like a fiesta in your mouth? A chicken burrito is a timeless comfort food that brings together juicy chicken, flavorful seasonings, tender rice, and melty cheese all tucked into a soft tortilla. Whether you’re cooking for yourself, your family, or a crowd, this recipe is your ticket to a satisfying, crowd-pleasing meal.

What Makes a Chicken Burrito Special?

Chicken burritos are a culinary celebration of bold Mexican flavors. They’re versatile, portable, and easy to customize. Each bite combines a medley of textures and tastes, from tender chicken to creamy beans and crispy tortillas. Whether you enjoy it plain or with a side of salsa, this dish is bound to become a favorite in your home.

Ingredients for the Perfect Chicken Burrito

To make this dish, you’ll need simple yet flavorful ingredients. Here’s a detailed breakdown:

Burrito Seasoning

IngredientQuantity
Onion powder1 tsp
Dried oregano1 tsp
Salt1 tsp
Cumin powder2 tsp
Paprika2 tsp
Black pepper1/4 tsp
Cayenne pepper (optional)3/4 tsp

Chicken Filling

IngredientQuantityNotes
Chicken breast600g / 1.2 lbsSliced in half horizontally
Olive oil2 tbsp, dividedFor cooking and seasoning
Onion, chopped1/2Adds sweetness and flavor
Garlic cloves, minced2Essential for aroma
Red bell pepper, diced1Adds color and crunch
Refried beans400g / 14 ozCreamy base for filling
Water1/4 cupPrevents dryness

Rice Options

TypeQuantity
Plain cooked white rice2.5 cups
Mexican Red Rice2.5 cups

Additional Fillings

IngredientQuantityNotes
Corn (canned or thawed)400g / 14 ozAdds sweetness and texture
Cheese, shredded1.5 cups (150g)Cheddar, Monterey Jack, or Mexican blend
Cilantro, finely chopped1/4 cupFresh and aromatic

Sauces for Dunking

OptionSuggestions
Avocado sauceCreamy and smooth
Sour creamClassic pairing
SalsaRestaurant-style, smooth

Step-by-Step Instructions for Chicken Burrito

Step 1: Prepare the Burrito Seasoning

  • In a small bowl, mix all the seasoning ingredients: onion powder, oregano, salt, cumin, paprika, black pepper, and optional cayenne pepper.

Step 2: Season the Chicken

  • Drizzle 1 tbsp of olive oil over the chicken slices.
  • Sprinkle the seasoning mix over the chicken and toss to coat evenly.

Step 3: Cook the Chicken

  • Heat 1 tbsp olive oil in a large skillet over high heat.
  • Add the chicken and cook for 2 minutes on one side, then flip and cook for 1.5 minutes on the other side.
  • Remove the chicken from the skillet, let it rest for 2 minutes, then chop into bite-sized pieces.

Step 4: Sauté the Vegetables

  • In the same skillet, add the chopped onion and minced garlic. Sauté for 1 minute until fragrant.
  • Add the diced red bell pepper and cook for 2 minutes until the onion becomes translucent.

Step 5: Combine the Filling

  • Add the chopped chicken back to the skillet along with the refried beans and water.
  • Stir everything together and cook for 2 minutes until the mixture thickens slightly. Let it cool for 5 minutes.

Step 6: Warm the Tortillas

  • Gently warm the flour tortillas in the microwave or on a skillet. This makes them pliable and easier to fold.

Step 7: Assemble the Burritos

  • Lay a tortilla on your work surface.
  • Spread a layer of rice on the lower third of the tortilla.
  • Add the chicken filling, a spoonful of corn, shredded cheese, and a sprinkle of cilantro.
  • Fold the sides inward, then roll tightly from the bottom to form a burrito.

Step 8: Toast or Bake the Burritos

  • For a crispy finish, pan-fry the burritos over medium-high heat (no oil needed) for 2 minutes on each side.
  • Alternatively, wrap the burritos in foil and bake them at 180°C/350°F for 10 minutes.

Step 9: Serve with Sauces

  • Serve the burritos with your choice of sauces like avocado sauce, sour cream, or salsa.

Tips for Perfect Chicken Burritos

1. Customize the Spice Level

If you’re sensitive to heat, reduce or omit the cayenne pepper in the seasoning. For extra spice, add hot sauce to the filling or drizzle it over the finished burrito.

2. Use High-Quality Tortillas

Soft, pliable flour tortillas work best. Warm them before assembling to prevent tearing.

3. Make Mexican Red Rice for Authentic Flavor

If time allows, prepare Mexican Red Rice to elevate the dish. Its seasoned, tomato-based flavor pairs beautifully with the chicken filling.

4. Keep the Filling Balanced

Avoid overstuffing the burritos, as they’ll be harder to roll and may fall apart during cooking.

5. Freeze for Later

Wrap assembled burritos tightly in foil and freeze them for up to 3 months. To reheat, bake them at 180°C/350°F for 20-25 minutes straight from the freezer.

Nutritional Information

Here’s an estimate of the nutritional content per burrito (based on 5 servings):

NutrientAmount
Calories450
Protein30g
Carbohydrates40g
Fat18g
Fiber6g
Sodium700mg

FAQs About Chicken Burritos

1. Can I use other meats instead of chicken?

Absolutely! Ground beef, shredded pork, or even grilled steak work well as substitutes.

2. How can I make this vegetarian?

Replace the chicken with black beans, chickpeas, or sautéed mushrooms for a vegetarian-friendly burrito.

3. What’s the best way to reheat a burrito?

Reheat in the oven at 180°C/350°F for 10-15 minutes or on a skillet over medium heat for 5 minutes per side.

4. Can I add guacamole to the burrito?

Yes! Guacamole adds creaminess and a rich avocado flavor. Spread it over the rice before adding the other fillings.

5. Are chicken burritos gluten-free?

They’re not unless you use gluten-free tortillas and ensure all ingredients (like refried beans) are certified gluten-free.

6. What side dishes go well with burritos?

Serve with a fresh salad, tortilla chips, salsa, or a side of Mexican rice for a complete meal.

Why You’ll Love This Chicken Burrito Recipe

From the smoky spices to the juicy chicken and creamy fillings, this recipe is bursting with bold flavors that’ll make you crave more. Plus, it’s a versatile dish you can adapt to suit any palate, making it a go-to meal for busy weeknights or casual gatherings.

Ready to Make Your Own Chicken Burritos?

Gather your ingredients, warm those tortillas, and let your kitchen be filled with the mouthwatering aroma of this classic dish. With these step-by-step instructions, you’ll have a delicious, restaurant-quality chicken burrito in no time.

Enjoy every bite and let the fiesta begin!|
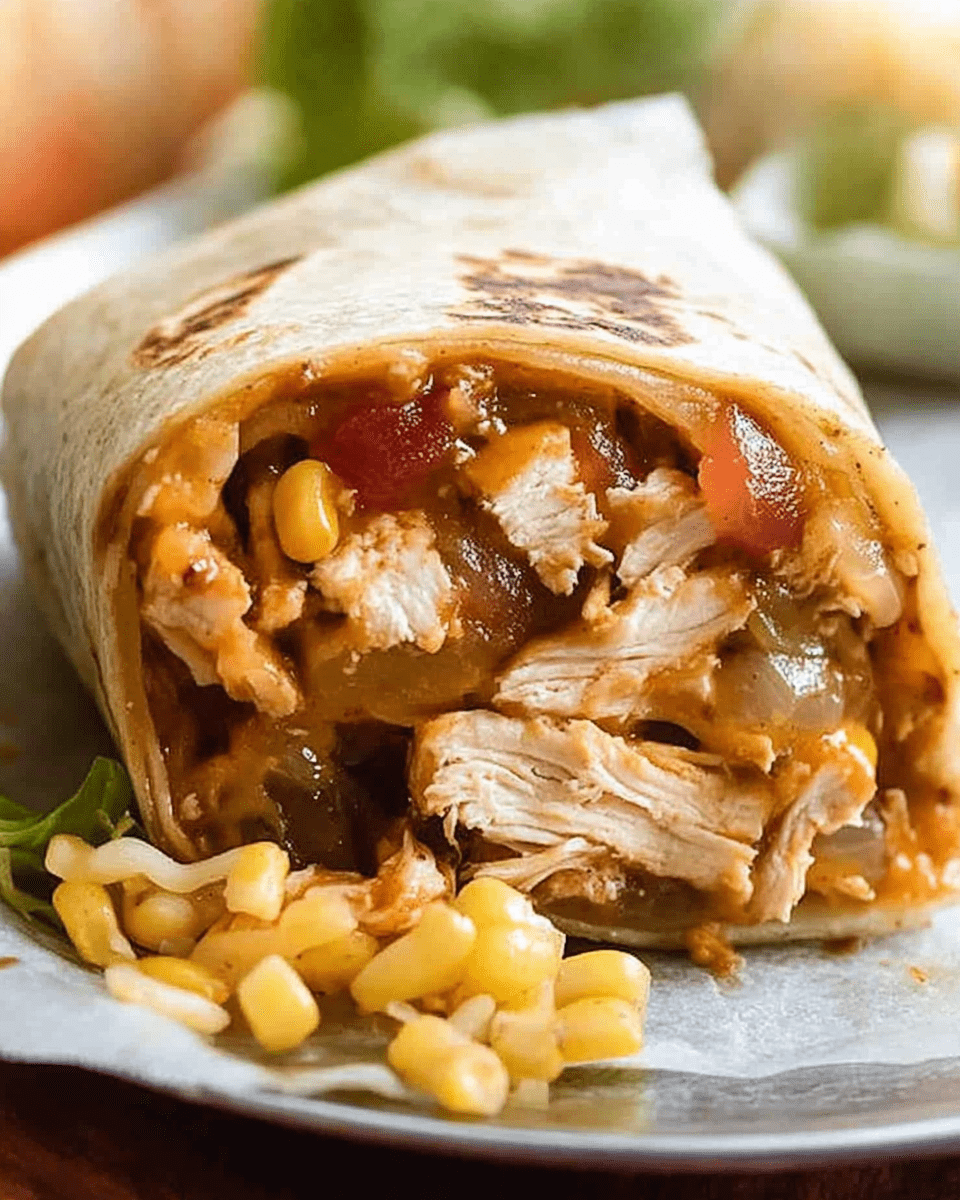
ating

Chicken Burrito: A Flavor-Packed Mexican Classic

Juicy chicken, bold Mexican spices, tender rice, and melty cheese all come together in this irresistible chicken burrito. A comforting and flavor-packed dish that’s perfect for busy weeknights or casual gatherings.
Prep Time 15 minutes
Cook Time 25 minutes
Total Time 40 minutes
Servings: 5 burritos
Course: Main Course
Cuisine: Mexican

Ingredients
  

  • 1 tsp onion powder
  • 1 tsp dried oregano
  • 1 tsp salt
  • 2 tsp cumin powder
  • 2 tsp paprika
  • 1/4 tsp black pepper
  • 3/4 tsp cayenne pepper optional
Chicken Filling
  • 600 g 1.2 lbs chicken breast, sliced in half horizontally
  • 2 tbsp olive oil divided
  • 1/2 onion chopped
  • 2 garlic cloves minced
  • 1 red bell pepper diced
  • 400 g 14 oz refried beans
  • 1/4 cup water
Rice Options
  • 2.5 cups plain cooked white rice or Mexican Red Rice
Additional Fillings
  • 400 g 14 oz canned or thawed corn
  • 1.5 cups 150g shredded cheese (cheddar, Monterey Jack, or Mexican blend)
  • 1/4 cup fresh cilantro finely chopped
Sauces for Serving
  • Avocado sauce
  • Sour cream
  • Salsa
Optional
  • 5 large flour tortillas 10-12 inches

Method
 

Prepare the Burrito Seasoning:
  1. Mix all the seasoning ingredients (onion powder, oregano, salt, cumin, paprika, black pepper, and cayenne pepper) in a small bowl.
Season the Chicken:
  1. Drizzle 1 tbsp olive oil over the chicken slices.
  2. Sprinkle the seasoning mix evenly over the chicken and toss to coat.
Cook the Chicken:
  1. Heat 1 tbsp olive oil in a large skillet over high heat.
  2. Add the chicken and cook for 2 minutes on one side, then flip and cook for 1.5 minutes on the other side.
  3. Remove the chicken from the skillet, let it rest for 2 minutes, then chop into bite-sized pieces.
Sauté the Vegetables:
  1. In the same skillet, sauté the onion and garlic for 1 minute until fragrant.
  2. Add the red bell pepper and cook for 2 minutes until the onion becomes translucent.
Combine the Filling:
  1. Add the chopped chicken, refried beans, and water to the skillet.
  2. Stir everything together and cook for 2 minutes until the mixture thickens slightly.
  3. Let it cool for 5 minutes.
Warm the Tortillas:
  1. Gently warm the tortillas in the microwave or on a skillet to make them pliable.
Assemble the Burritos:
  1. Lay a tortilla flat on your work surface.
  2. Spread a layer of rice on the lower third of the tortilla.
  3. Add the chicken filling, corn, shredded cheese, and a sprinkle of cilantro.
  4. Fold the sides inward, then roll tightly from the bottom to form a burrito.
Toast or Bake the Burritos:
  1. For a crispy finish, pan-fry the burritos over medium-high heat for 2 minutes on each side.
  2. Alternatively, wrap the burritos in foil and bake at 180°C/350°F for 10 minutes.
Serve with Sauces:
  1. Serve the burritos with avocado sauce, sour cream, or salsa on the side.

Notes

  • Customize Spice Level: Reduce or omit the cayenne pepper for less heat, or add hot sauce for extra spice.
  • Freezer-Friendly: Wrap assembled burritos in foil and freeze for up to 3 months. Reheat at 180°C/350°F for 20-25 minutes.
  • Vegetarian Option: Replace chicken with black beans, chickpeas, or sautéed mushrooms.
  • Gluten-Free Option: Use gluten-free tortillas and ensure all ingredients are certified gluten-free.

Delicious and Comforting Chinese Corn Soup with Chicken

There’s something deeply comforting about a warm bowl of Chinese Corn Soup with Chicken. Whether you’re feeling under the weather, looking for a light meal, or simply craving the nostalgic flavors of a classic Asian soup, this recipe is the answer. The combination of creamy corn, tender chicken, and delicate ribbons of egg creates a dish that’s hearty, satisfying, and perfect for any occasion.

Let’s dive into this easy yet elegant recipe, breaking it down step-by-step so you can enjoy this comforting dish at home.

Why You’ll Love Chinese Corn Soup with Chicken

This soup is a staple in Chinese cuisine and a favorite at restaurants around the world. Its silky texture, savory flavor, and simple ingredients make it a hit with kids and adults alike. Plus, it’s incredibly versatile—you can adjust the ingredients to suit your taste or make it vegetarian with a few tweaks.

Whether you’re hosting a dinner party or need a quick weeknight meal, Chinese Corn Soup with Chicken is always a winning choice.

Ingredients for Chinese Corn Soup with Chicken

Here’s a list of everything you’ll need for this recipe:

Base Ingredients

IngredientQuantity
Chicken or vegetable broth2 cups (500ml)
Creamed corn1 can (16oz/420g)
Soy sauce1 tsp
Chinese cooking wine1 tbsp (optional)
Ginger (minced)1 tsp
Garlic (minced)1 clove

Thickener and Protein

IngredientQuantity
Cornstarch mixed with water1 tsp
Egg (whisked)1
Shredded cooked chicken1 cup
Salt and white pepperTo taste
Scallions/shallots (optional)3 tbsp, sliced

Step-by-Step Guide to Making Chinese Corn Soup with Chicken

1. Prepare Your Ingredients

Start by gathering and prepping all your ingredients. Mince the garlic and ginger, shred your cooked chicken, and whisk the egg. This ensures a smooth cooking process without interruptions.

2. Combine the Base Ingredients

  • In a medium saucepan, combine the chicken broth, creamed corn, soy sauce, Chinese cooking wine (if using), ginger, garlic, and the cornstarch mixture.
  • Stir well to ensure everything is evenly distributed.

3. Bring to a Boil

  • Place the saucepan over high heat and bring the mixture to a boil.
  • Once it starts bubbling, reduce the heat to medium and let it simmer for about 5 minutes. Stir occasionally to prevent sticking.

4. Add the Egg Ribbons

  • Turn off the heat and slowly drizzle the whisked egg into the soup while gently stirring in a circular motion.
  • The heat will cook the egg immediately, forming beautiful ribbons throughout the soup. This step also helps thicken the soup naturally.

5. Incorporate the Chicken

  • Add the shredded chicken to the soup and stir well.
  • Season with white pepper and salt to taste. Adjust the seasoning as needed for your preference.

6. Garnish and Serve

  • Ladle the soup into bowls and garnish with sliced scallions or shallots for a burst of freshness. Serve hot and enjoy!

Tips for Making the Best Chinese Corn Soup with Chicken

1. Use High-Quality Broth

The broth forms the base of this soup, so choose a rich, flavorful chicken or vegetable stock for the best results.

2. Don’t Skip the Egg Ribbons

The egg ribbons are a hallmark of Chinese soups. To achieve them, pour the whisked egg slowly while stirring continuously.

3. Adjust the Texture

If you prefer a thicker soup, add a little more cornstarch mixed with water. For a lighter version, use less.

Variations and Substitutions

1. Vegetarian Version

  • Swap the chicken broth for vegetable broth and omit the chicken. Add tofu or mushrooms for extra protein and flavor.

2. Add Vegetables

  • Boost the nutritional value by adding peas, carrots, or spinach to the soup.

3. Spice It Up

  • For a spicy kick, add a dash of chili oil or sprinkle in some red pepper flakes.

Serving Suggestions for Chinese Corn Soup with Chicken

This soup pairs beautifully with other dishes or can stand alone as a light meal. Here are a few serving ideas:

  • As an Appetizer: Serve in small bowls alongside fried rice or dumplings.
  • With Crusty Bread: Use bread to soak up the savory broth for a satisfying lunch.
  • With a Salad: Pair with a fresh Asian-inspired salad for a complete meal.

Nutritional Information for Chinese Corn Soup with Chicken

NutrientPer Serving (1 Bowl)
Calories~180
Protein~12g
Carbohydrates~14g
Fats~8g
Sodium~500mg

Note: Values may vary based on specific ingredients used.

Frequently Asked Questions (FAQs)

1. Can I make Chinese Corn Soup with Chicken ahead of time?

Yes! You can prepare the soup up to two days in advance. Store it in an airtight container in the refrigerator and reheat gently on the stove before serving.

2. What’s the best way to shred cooked chicken?

The easiest method is to use two forks to pull the meat apart. You can also use a stand mixer with a paddle attachment for larger quantities.

3. Can I freeze this soup?

Absolutely! Freeze the soup in individual portions for up to three months. Thaw in the refrigerator overnight and reheat on the stove.

4. Is there a substitute for Chinese cooking wine?

If you don’t have Chinese cooking wine, you can use Mirin, dry sherry, or even apple juice as a substitute.

5. How can I thicken the soup without cornstarch?

You can use arrowroot powder or potato starch as a substitute. Alternatively, let the soup simmer longer to naturally reduce and thicken.

6. Can I use fresh corn instead of creamed corn?

Yes, but you’ll need to blend some of the corn kernels with a little broth to mimic the creamy texture of canned creamed corn.

Final Thoughts: Savor the Simplicity of Chinese Corn Soup with Chicken

Chinese Corn Soup with Chicken is more than just a dish—it’s a bowl of comfort, flavor, and nostalgia. With its creamy texture, tender chicken, and hint of ginger, this soup is sure to become a family favorite. Whether you’re cooking for a special occasion or just a quiet night in, this recipe is as satisfying as it is simple to prepare.

So why wait? Gather your ingredients, follow the steps, and enjoy the warmth and joy of homemade Chinese Corn Soup with Chicken tonight!

ating

Delicious and Comforting Chinese Corn Soup with Chicken

Warm, comforting, and incredibly flavorful, Chinese Corn Soup with Chicken is the perfect dish to soothe your soul. Featuring tender chicken, creamy corn, and delicate egg ribbons, this quick and easy recipe is ideal for any occasion. Whether served as a light meal or a starter, it’s guaranteed to impress.
Prep Time 10 minutes
Cook Time 15 minutes
Total Time 25 minutes
Course: Soup
Cuisine: Chinese

Ingredients
  

  • 2 cups 500ml chicken or vegetable broth
  • 1 can 16oz/420g creamed corn
  • 1 teaspoon soy sauce
  • 1 tablespoon Chinese cooking wine optional
  • 1 teaspoon minced ginger
  • 1 garlic clove minced
Thickener and Protein:
  • 1 teaspoon cornstarch mixed with water
  • 1 large egg whisked
  • 1 cup shredded cooked chicken
  • Salt and white pepper to taste
  • 3 tablespoons sliced scallions or shallots optional garnish

Method
 

Prepare Your Ingredients:
  1. Gather all ingredients. Mince the garlic and ginger, shred the cooked chicken, and whisk the egg.
2. Combine the Base Ingredients:
  1. In a medium saucepan, combine chicken broth, creamed corn, soy sauce, Chinese cooking wine (if using), ginger, garlic, and the cornstarch mixture.
  2. Stir well to ensure even distribution of ingredients.
3. Bring to a Boil:
  1. Place the saucepan over high heat and bring the mixture to a boil.
  2. Reduce the heat to medium and let it simmer for about 5 minutes, stirring occasionally to prevent sticking.
4. Add the Egg Ribbons:
  1. Turn off the heat and slowly drizzle the whisked egg into the soup while gently stirring in a circular motion.
  2. The egg will cook instantly, forming delicate ribbons that thicken the soup.
5. Incorporate the Chicken:
  1. Stir in the shredded chicken and mix well.
  2. Season with white pepper and salt to taste. Adjust seasoning as necessary.
6. Garnish and Serve:
  1. Ladle the soup into bowls and garnish with sliced scallions or shallots for added freshness.
  2. Serve hot and enjoy!

Notes

  • Broth Choice: Use a rich, flavorful broth as it forms the base of this dish.
  • Egg Ribbons: Pour the whisked egg slowly and stir continuously for the best texture.
  • Adjust Thickness: Add more cornstarch slurry if you prefer a thicker soup or use less for a lighter texture.

The Ultimate Guide to Creamy Seafood Lasagna: A Luxurious and Delicious Recipe

When it comes to comfort food with a gourmet twist, nothing beats Creamy Seafood Lasagna. Imagine layers of tender pasta, a rich and velvety cream sauce, and the succulent flavors of shrimp, crab, and lobster, all topped with bubbling, golden mozzarella. This dish feels like a culinary vacation and is perfect for special occasions or whenever you want to treat yourself.

If you’ve ever felt intimidated by the thought of making seafood lasagna from scratch, don’t worry! By following this detailed guide, you’ll master every step with ease and enjoy a dish that’s as beautiful to look at as it is to eat.

Why Creamy Seafood Lasagna Is Worth the Effort

There’s something magical about combining the light brininess of fresh seafood with the creamy indulgence of béchamel sauce and the satisfying chew of perfectly cooked pasta. Each bite of this lasagna is a perfect balance of flavors and textures. Whether you’re cooking for family, hosting friends, or treating yourself to a decadent dinner, this recipe is sure to impress.

Ingredients for Creamy Seafood Lasagna

To make this masterpiece, you’ll need a combination of fresh seafood, pantry staples, and simple seasonings.

For the Cream Sauce

IngredientQuantity
Unsalted butter4 tablespoons
All-purpose flour¼ cup
Clam juice1 (8-ounce) bottle
Whole milk3 cups
Kosher salt1 ½ teaspoons
Black pepper¼ teaspoon

For the Lasagna

IngredientQuantity
Dried lasagna noodles1 pound
Olive oilFor coating noodles
Fresh parsley½ bunch (¼ cup chopped)
Lemon juice1 tablespoon
Garlic cloves4, finely chopped
Unsalted butter4 tablespoons
Dry white wine½ cup (e.g., Sauvignon Blanc)
Tiny raw shrimp1 pound (70–90 per pound)
Kosher salt1 ¼ teaspoons (divided)
Ricotta cheese3 cups
Parmesan cheese1 ½ ounces, finely grated
Black pepper¼ teaspoon
Lump crab meat8 ounces
Cooked lobster meat8 ounces, chopped
Low-moisture mozzarella1 pound (shredded, about 4 cups)
Cooking sprayFor greasing foil

Step-by-Step Instructions to Make Creamy Seafood Lasagna

1. Prepare the Cream Sauce

  • Melt the butter in a medium saucepan over medium heat. Add the flour and cook, stirring constantly, for about 2 minutes, until the mixture is lightly toasted.
  • Gradually whisk in the clam juice and milk, ensuring a smooth consistency.
  • Season with kosher salt and black pepper. Increase the heat to medium-high and bring the sauce to a boil, stirring frequently. Reduce to a simmer and cook for 8–10 minutes, or until thickened. Taste and adjust seasoning as needed.

2. Cook the Lasagna Noodles

  • Bring a large pot of salted water to a boil. Add the lasagna noodles and cook until al dente according to the package directions.
  • Drain and rinse the noodles under cool water to prevent sticking. Arrange them on a baking sheet, lightly coating with olive oil, and set aside.

3. Sauté the Seafood

  • Melt butter in a large skillet over medium heat. Add the garlic and cook until fragrant and golden, about 3 minutes.
  • Pour in the white wine and cook until almost evaporated, about 3 minutes.
  • Add the shrimp and cook until pink and just cooked through, about 4 minutes.
  • Stir in the parsley, lemon juice, and kosher salt. Taste and adjust seasoning if necessary.

4. Prepare the Ricotta Mixture

  • In a medium bowl, combine the ricotta cheese, grated Parmesan, kosher salt, and black pepper. Stir until smooth and taste to ensure proper seasoning.

Assembling the Creamy Seafood Lasagna

1. Layer the Ingredients

  • Spread ½ cup of the cream sauce on the bottom of a 9×13-inch baking dish.
  • Arrange one-third of the noodles over the sauce, overlapping slightly.
  • Spread half of the ricotta mixture over the noodles, followed by half the shrimp mixture, half the lobster, and half the crab. Sprinkle with 1 cup of shredded mozzarella.
  • Dollop 1 cup of the cream sauce over the cheese.

2. Repeat the Layers

  • Add another layer of noodles, the remaining ricotta mixture, and the remaining seafood. Sprinkle with another cup of mozzarella and dollop with cream sauce.

3. Final Layer

  • Top with the final layer of noodles, spread the remaining cream sauce evenly over the top, and sprinkle with the remaining 2 cups of mozzarella.

4. Bake the Lasagna

  • Coat a large sheet of aluminum foil with cooking spray and cover the lasagna loosely, spray-side down. Bake at 350°F for 30 minutes.
  • Remove the foil and bake for an additional 20–25 minutes, or until the top is golden and bubbly.
  • Let the lasagna cool for at least 15 minutes before slicing. Garnish with reserved parsley before serving.

Tips for Perfect Creamy Seafood Lasagna

1. Use Fresh Ingredients

  • Opt for the freshest seafood possible to ensure the best flavor.

2. Avoid Overcooking the Seafood

  • Since the seafood will continue to cook slightly in the oven, ensure it’s just cooked before adding it to the lasagna.

3. Taste as You Go

  • Adjust the seasoning at every stage to ensure a well-balanced dish.

Variations to Try

1. Add Vegetables

Incorporate spinach, mushrooms, or artichoke hearts into the layers for extra texture and flavor.

2. Swap the Seafood

Try scallops, clams, or a mix of your favorite shellfish to customize the dish.

3. Make It Spicy

Add red pepper flakes or a pinch of cayenne to the cream sauce for a spicy kick.

Nutritional Information for Creamy Seafood Lasagna

NutrientPer Serving (1 Slice)
Calories~450
Protein~30g
Carbohydrates~40g
Fats~20g
Sodium~800mg

Frequently Asked Questions (FAQs)

1. Can I make seafood lasagna ahead of time?

Yes! Assemble the lasagna up to a day in advance and store it in the refrigerator. Bake it just before serving.

2. Can I freeze creamy seafood lasagna?

Absolutely. Wrap the unbaked lasagna tightly in plastic wrap and aluminum foil, and freeze for up to 3 months. Bake from frozen, adding 30–40 minutes to the cooking time.

3. What can I serve with seafood lasagna?

A fresh green salad, garlic bread, or steamed vegetables make great accompaniments.

4. Can I use no-boil lasagna noodles?

Yes, but you’ll need to add extra cream sauce to ensure the noodles cook through.

5. How do I reheat leftovers?

Reheat individual slices in the microwave or cover the dish with foil and warm in the oven at 350°F.

6. Is there a substitute for clam juice?

If you can’t find clam juice, use seafood stock or chicken broth for a similar flavor.

Final Thoughts: Dive Into a Creamy Seafood Lasagna Feast

Making Creamy Seafood Lasagna is a labor of love, but the results are well worth the effort. Whether you’re preparing it for a holiday gathering, a date night, or simply to treat yourself, this dish delivers a luxurious experience that’s guaranteed to impress. So, gather your ingredients, preheat your oven, and savor the rewards of this decadent recipe.

PAUL

The Ultimate Guide to Creamy Seafood Lasagna: A Luxurious and Delicious Recipe

Elevate your dining experience with this luxurious Creamy Seafood Lasagna. Layers of tender pasta, velvety cream sauce, and a medley of shrimp, crab, and lobster come together in this decadent dish. Perfect for special occasions or when you want to indulge, it’s a culinary masterpiece worth savoring.
Prep Time 30 minutes
Cook Time 1 hour
Total Time 1 hour 30 minutes
Course: Main Dish
Cuisine: Italian-America

Ingredients
  

  • 4 tablespoons unsalted butter
  • 1/4 cup all-purpose flour
  • 1 8-ounce bottle clam juice
  • 3 cups whole milk
  • 1 1/2 teaspoons kosher salt
  • 1/4 teaspoon black pepper
For the Lasagna:
  • 1 pound dried lasagna noodles
  • Olive oil for coating noodles
  • 1/2 bunch fresh parsley 1/4 cup chopped
  • 1 tablespoon lemon juice
  • 4 garlic cloves finely chopped
  • 4 tablespoons unsalted butter
  • 1/2 cup dry white wine e.g., Sauvignon Blanc
  • 1 pound tiny raw shrimp 70-90 per pound
  • 1 1/4 teaspoons kosher salt divided
  • 3 cups ricotta cheese
  • 1 1/2 ounces Parmesan cheese finely grated
  • 1/4 teaspoon black pepper
  • 8 ounces lump crab meat
  • 8 ounces cooked lobster meat chopped
  • 1 pound low-moisture mozzarella shredded (about 4 cups)
  • Cooking spray for greasing foil

Method
 

Prepare the Cream Sauce:
  1. Melt butter in a medium saucepan over medium heat. Add flour and cook, stirring constantly, for about 2 minutes until lightly toasted.
  2. Gradually whisk in clam juice and milk, ensuring a smooth consistency.
  3. Season with kosher salt and black pepper. Increase heat to medium-high and bring to a boil, stirring frequently. Reduce to a simmer and cook for 8–10 minutes until thickened. Adjust seasoning as needed.
2. Cook the Lasagna Noodles:
  1. Bring a large pot of salted water to a boil. Add lasagna noodles and cook until al dente according to package instructions.
  2. Drain and rinse under cool water to prevent sticking. Arrange on a baking sheet, lightly coating with olive oil. Set aside.
3. Sauté the Seafood:
  1. Melt butter in a large skillet over medium heat. Add garlic and cook until fragrant, about 3 minutes.
  2. Pour in white wine and cook until almost evaporated, about 3 minutes.
  3. Add shrimp and cook until pink and just cooked through, about 4 minutes.
  4. Stir in parsley, lemon juice, and kosher salt. Taste and adjust seasoning as needed.
4. Prepare the Ricotta Mixture:
  1. In a medium bowl, combine ricotta cheese, grated Parmesan, kosher salt, and black pepper. Stir until smooth. Taste to ensure proper seasoning.
5. Assemble the Lasagna:
  1. Spread 1/2 cup cream sauce on the bottom of a greased 9×13-inch baking dish.
  2. Arrange one-third of the noodles over the sauce, overlapping slightly.
  3. Spread half the ricotta mixture over the noodles, followed by half the shrimp mixture, half the lobster, and half the crab. Sprinkle with 1 cup mozzarella and dollop with 1 cup cream sauce.
  4. Repeat layers with remaining noodles, ricotta mixture, seafood, mozzarella, and cream sauce.
  5. Top with a final layer of noodles, spread remaining cream sauce evenly, and sprinkle with remaining mozzarella.
6. Bake the Lasagna:
  1. Preheat oven to 350°F (175°C).
  2. Coat a large sheet of aluminum foil with cooking spray and cover the lasagna loosely, spray-side down.
  3. Bake for 30 minutes. Remove foil and bake for an additional 20–25 minutes, or until the top is golden and bubbly.
  4. Let cool for at least 15 minutes before slicing. Garnish with reserved parsley.

Notes

  • Fresh Ingredients: Use the freshest seafood for the best flavor.
  • Don’t Overcook Seafood: Slightly undercook shrimp to avoid rubbery texture, as it will continue to cook in the oven.
  • Taste and Adjust: Check seasoning at every stage for a perfectly balanced dish.

Decadent Brownie Cookie Sandwich: A Perfect Indulgence

Imagine biting into a dessert that combines the rich, fudgy goodness of a brownie with the chewy, crisp edges of a cookie, all held together by a luscious layer of peanut butter frosting. That’s the magic of a Brownie Cookie Sandwich—a treat that’s as indulgent as it is irresistible. Whether you’re looking to elevate your baking skills or simply craving a homemade dessert, this recipe is sure to delight.

What Makes Brownie Cookie Sandwiches So Special?

There’s something magical about merging two dessert favorites—brownies and cookies—into one delicious creation. These sandwich cookies offer the best of both worlds: a slightly crisp exterior with a soft, melt-in-your-mouth interior. Add a creamy, slightly salty peanut butter frosting, and you’ve got a treat that feels gourmet but is simple enough for anyone to make.

Ingredients for Brownie Cookie Sandwich

Here’s what you’ll need for this recipe:

Brownie Cookie

IngredientQuantity
Unsalted butter1 stick / ½ cup / 115g
Dark chocolate chips10 oz / 300g
Caster sugar1 cup + 2 tbsp
Eggs3 large
Cocoa powder2 tbsp
Vanilla extract1 tsp
Salt½ tsp
Baking powder½ tsp
Plain flour¾ cup
Dark chocolate chips½ cup

Peanut Butter Frosting

IngredientQuantity
Smooth peanut butter1 cup
Confectioners’ sugar1 cup
Unsalted butter (softened)5 tbsp / 70g
Vanilla extract¾ tsp
Salt¼ tsp
Heavy cream⅓ cup

Step-by-Step Instructions to Make Brownie Cookie Sandwich

1. Prepare the Oven and Baking Trays

Preheat your oven to 350°F (180°C) and line two baking trays with parchment paper.

2. Melt the Butter and Chocolate

  • In a saucepan, bring 1 inch of water to a simmer. Place a heatproof bowl over the simmering water, ensuring it doesn’t touch the water.
  • Add the butter and 10 oz of chocolate chips to the bowl. Stir until melted and smooth.

3. Mix the Eggs, Cocoa Powder, and Sugar

  • In a separate bowl, beat the eggs, cocoa powder, and caster sugar on high speed for 3 minutes. Use a stand mixer with a whisk attachment or an electric hand mixer.

4. Combine the Wet Ingredients

  • Gradually pour ⅓ of the melted chocolate mixture into the egg mixture and mix well.
  • Add the remaining chocolate mixture and stir until fully combined.

5. Add Dry Ingredients

  • Mix in the vanilla extract, salt, and baking powder.
  • Slowly fold in the flour until just combined—be careful not to overmix.
  • Gently stir in the remaining ½ cup of chocolate chips.

6. Scoop and Bake

  • Drop 2-tablespoon mounds of batter onto the baking trays, leaving 2 inches between each cookie. For smaller cookies, use 1 tablespoon of batter per mound.
  • Bake large cookies for 15–20 minutes or smaller ones for 10–15 minutes. Adjust the baking time based on your preference for soft or firm cookies.
  • Let the cookies cool on the tray for 5–10 minutes before transferring them to a rack.

7. Make the Peanut Butter Frosting

  • Combine peanut butter, confectioners’ sugar, softened butter, vanilla extract, and salt in a mixing bowl.
  • Beat on high speed for 5 minutes until the mixture becomes creamy.
  • Add the heavy cream and continue beating for 2 more minutes until fluffy.

8. Assemble the Brownie Cookie Sandwich

  • Spread a generous layer of peanut butter frosting on the flat side of one cookie.
  • Place another cookie on top to create a sandwich.
  • Repeat with the remaining cookies and frosting.

Tips for Perfect Brownie Cookie Sandwiches

1. Use High-Quality Chocolate

The flavor of your cookies depends heavily on the quality of the chocolate. Opt for a rich, dark chocolate for the best results.

2. Avoid Overbaking

Brownie cookies should have a slightly soft and fudgy center. Keep an eye on them during baking to ensure they don’t become too crisp.

3. Chill the Frosting

If your frosting feels too soft to work with, chill it in the refrigerator for 10–15 minutes before assembling the sandwiches.

Variations to Try

1. Nutty Twist

Add chopped nuts like pecans, walnuts, or hazelnuts to the cookie batter for added crunch.

2. Chocolate Overload

Dip the assembled cookie sandwiches in melted chocolate and let them set for an extra indulgent treat.

3. Flavored Frosting

Experiment with flavored frostings, like a chocolate ganache or cream cheese filling, for a unique twist.

Serving and Storing Brownie Cookie Sandwiches

Serving Suggestions

  • Pair with a cold glass of milk for the ultimate treat.
  • Serve as part of a dessert platter for gatherings.

Storage

  • Room Temperature: Store in an airtight container for up to 3 days.
  • Refrigerator: Keep for up to 1 week. Allow the sandwiches to come to room temperature before serving.
  • Freezer: Freeze individually wrapped cookie sandwiches for up to 2 months. Thaw before eating.

Nutritional Information

NutrientPer Sandwich
Calories~450
Protein~8g
Carbohydrates~40g
Fats~30g
Sugar~25g

Frequently Asked Questions (FAQs)

1. Can I use a different nut butter for the frosting?

Yes! You can substitute peanut butter with almond butter or hazelnut spread for a different flavor.

2. How do I prevent my cookies from spreading too much?

Chill the cookie batter for 20 minutes before baking to help them hold their shape.

3. Can I make the frosting dairy-free?

Absolutely. Use a dairy-free butter alternative and coconut cream instead of heavy cream.

4. Are there gluten-free options for these cookies?

Yes, you can substitute plain flour with a gluten-free all-purpose flour blend.

5. Can I freeze the cookies before assembling them?

Definitely! Bake the cookies, let them cool, and freeze them. Assemble the sandwiches once they’ve thawed.

6. What’s the best way to reheat the cookies?

Reheat individual cookies in the microwave for 10–15 seconds to bring back their fudgy texture.

Final Thoughts: Treat Yourself to Brownie Cookie Sandwiches

If you’re a fan of brownies, cookies, and peanut butter, this recipe combines all three in the most decadent way possible. Perfect for celebrations or as a weekend baking project, these Brownie Cookie Sandwiches are guaranteed to impress your family and friends. So why wait? Gather your ingredients, preheat your oven, and start baking your way to dessert bliss.

PAUL

Decadent Brownie Cookie Sandwich: A Perfect Indulgence

Imagine the perfect dessert: rich, fudgy brownie cookies with crisp edges, sandwiching a creamy, peanut butter frosting. These Decadent Brownie Cookie Sandwiches are indulgent, irresistible, and surprisingly easy to make. Whether for a special occasion or a weekend treat, they’re guaranteed to impress.
Prep Time 25 minutes
Cook Time 20 minutes
Total Time 45 minutes
Servings: 10 –12 sandwiches
Course: Dessert
Cuisine: American

Ingredients
  

  • 1 stick 1/2 cup or 115g unsalted butter
  • 10 oz 300g dark chocolate chips
  • 1 cup + 2 tbsp caster sugar
  • 3 large eggs
  • 2 tbsp cocoa powder
  • 1 tsp vanilla extract
  • 1/2 tsp salt
  • 1/2 tsp baking powder
  • 3/4 cup plain flour
  • 1/2 cup dark chocolate chips additional
Peanut Butter Frosting:
  • 1 cup smooth peanut butter
  • 1 cup confectioners’ sugar
  • 5 tbsp 70g unsalted butter, softened
  • 3/4 tsp vanilla extract
  • 1/4 tsp salt
  • 1/3 cup heavy cream

Method
 

Prepare the Oven and Baking Trays:
  1. Preheat the oven to 350°F (180°C).
  2. Line two baking trays with parchment paper.
2. Melt the Butter and Chocolate:
  1. In a heatproof bowl over simmering water (double boiler method), melt the butter and 10 oz chocolate chips. Stir until smooth, then set aside to cool slightly.
3. Mix the Eggs, Cocoa Powder, and Sugar:
  1. In a separate bowl, beat the eggs, cocoa powder, and caster sugar on high speed for 3 minutes using a stand mixer or hand mixer.
4. Combine the Wet Ingredients:
  1. Gradually mix 1/3 of the melted chocolate mixture into the egg mixture. Stir well, then add the rest of the chocolate mixture until fully combined.
5. Add the Dry Ingredients:
  1. Mix in the vanilla extract, salt, and baking powder.
  2. Fold in the flour until just combined, then gently stir in the additional 1/2 cup of chocolate chips.
6. Scoop and Bake:
  1. Drop 2-tablespoon mounds of batter onto the baking trays, leaving 2 inches between each cookie. For smaller cookies, use 1 tablespoon of batter per mound.
  2. Bake for 15–20 minutes for larger cookies or 10–15 minutes for smaller ones. Cool on the tray for 5–10 minutes before transferring to a wire rack.
7. Make the Peanut Butter Frosting:
  1. Beat the peanut butter, confectioners’ sugar, softened butter, vanilla extract, and salt on high speed for 5 minutes until creamy.
  2. Add the heavy cream and beat for an additional 2 minutes until fluffy. Chill if needed for easier spreading.
8. Assemble the Sandwiches:
  1. Spread a generous layer of frosting on the flat side of one cookie.
  2. Top with another cookie to create a sandwich.
  3. Repeat with remaining cookies and frosting.

Notes

  • Chill the Batter: To prevent cookies from spreading too much, chill the batter for 20 minutes before baking.
  • Use High-Quality Chocolate: For the best flavor, choose rich, dark chocolate.
  • Customize the Frosting: Swap peanut butter for almond butter or hazelnut spread for a different twist.
  • Storage:
    • Room Temperature: Store in an airtight container for up to 3 days.
    • Refrigerator: Keep for up to 1 week; bring to room temperature before serving.
    • Freezer: Wrap individually and freeze for up to 2 months.

Crispy Zucchini Fritters: A Delicious and Easy Recipe to Savor

There’s something undeniably satisfying about crispy zucchini fritters. The golden crust, the tender interior, and the burst of flavor with every bite make them irresistible. Whether you’re looking for a quick appetizer, a light lunch, or a way to use up your zucchini stash, these fritters have you covered. By the end of this guide, you’ll have all the tips, tricks, and techniques to make them perfect every time.

Why You’ll Love Crispy Zucchini Fritters

Have you ever found yourself wondering what to do with those extra zucchinis lying in your fridge? Crispy zucchini fritters are the ultimate solution. They’re easy to make, packed with flavor, and offer a versatile base for creativity. Plus, they’re a fantastic way to sneak more vegetables into your meals while enjoying a dish that feels indulgent.

Ingredients for Crispy Zucchini Fritters

Here’s everything you’ll need for this recipe:

IngredientQuantity
Zucchini500g (1 lb) (2 medium)
Salt1 tsp
Egg1 large
Green onions2, finely sliced
Parmesan (grated)¼ cup
Garlic (minced)1 large clove
Flour½ cup (75g)
Baking powder½ tsp
PepperPinch
Olive oil4 tbsp (separated)
For serving:
Yoghurt or sour creamOptional
Chopped green onionsOptional garnish

Step-by-Step Guide to Making Crispy Zucchini Fritters

1. Prepare the Zucchini

  • Grate the zucchini using a box grater. Grating diagonally gives you longer strands, which improve the texture.
  • Place the grated zucchini in a bowl and sprinkle with salt. Mix well and let it sit for at least 10 minutes. The salt draws out the water, ensuring your fritters are crispy.

2. Remove Excess Water

  • After 10 minutes, use your hands or a tea towel to squeeze out as much water as possible. Excess moisture can make your fritters soggy, so don’t skip this step!

3. Mix the Batter

  • In the same bowl, add the squeezed zucchini, egg, green onions, parmesan, and garlic. Mix until combined.
  • Scatter the flour and baking powder over the zucchini mixture, then add a pinch of pepper. Mix gently until just incorporated. The batter should be thick but soft.

4. Cook the Fritters

  • Heat 2 tablespoons of olive oil in a non-stick pan over medium-high heat.
  • Use a ¼ cup measure or ice cream scoop to drop the batter into the pan. Cook 3–4 fritters at a time to avoid overcrowding.
  • Flatten each fritter slightly with a spatula to about 1 cm thick.
  • Cook for 3 minutes on each side, adjusting the heat if necessary to prevent burning.

5. Keep Warm

  • Transfer the cooked fritters to a tray and keep them warm in an oven set at 200°F (100°C).

6. Serve Immediately

  • Serve the fritters with a dollop of yoghurt or sour cream and garnish with extra green onions if desired.

Tips for Perfect Zucchini Fritters

1. Avoid Overmixing the Batter

Overmixing can lead to dense fritters. Mix just enough to combine the ingredients.

2. Use Fresh Zucchini

The fresher the zucchini, the better the flavor and texture.

3. Adjust Cooking Heat

If the fritters brown too quickly, lower the heat slightly. Cooking them at the right temperature ensures a crispy exterior and cooked-through interior.

Creative Ways to Customize Your Zucchini Fritters

1. Add Other Vegetables

  • Try grating carrots, sweet potatoes, or corn kernels into the batter for added flavor and texture.

2. Boost the Flavor

  • Mix in spices like paprika, cumin, or chili flakes for a bold twist.
  • Add fresh herbs such as parsley, dill, or basil for a fragrant kick.

3. Experiment with Cheese

  • Swap parmesan for cheddar, feta, or mozzarella to change the flavor profile.

Healthier Alternatives for Zucchini Fritters

1. Use Whole-Wheat Flour

Swap regular flour with whole-wheat or almond flour for a healthier option.

2. Reduce Oil

Bake the fritters in a preheated oven at 375°F (190°C) on a greased baking sheet. Flip halfway through for even crispiness.

3. Dairy-Free Option

Replace parmesan with nutritional yeast for a cheesy flavor without the dairy.

Serving Suggestions for Zucchini Fritters

  • As a Snack: Pair with a tangy dipping sauce like tzatziki or marinara.
  • For Breakfast: Top with a poached egg and avocado slices.
  • As a Side Dish: Serve alongside grilled chicken or fish for a balanced meal.

Nutritional Information for Zucchini Fritters

NutrientPer Serving (1 Fritter)
Calories~120
Protein~4g
Carbohydrates~9g
Fats~8g
Fiber~1g

Note: Values may vary based on the specific ingredients used.

Frequently Asked Questions (FAQs)

1. Can I make zucchini fritters ahead of time?

Yes! You can prepare the batter a few hours in advance or cook the fritters and reheat them in the oven before serving.

2. How do I store leftover zucchini fritters?

Store leftover fritters in an airtight container in the refrigerator for up to 3 days.

3. Can I freeze zucchini fritters?

Absolutely! Freeze cooked fritters in a single layer on a tray, then transfer them to a freezer-safe bag. Reheat directly from frozen in a skillet or oven.

4. Why are my fritters soggy?

Soggy fritters are usually caused by excess water in the zucchini. Make sure to squeeze out as much moisture as possible.

5. Can I make these fritters gluten-free?

Yes! Substitute the flour with a gluten-free alternative like almond flour or a gluten-free baking mix.

6. What can I serve with zucchini fritters?

Serve them with a side of salad, a dollop of yoghurt or sour cream, or even as part of a mezze platter with hummus and pita bread.

Final Thoughts: Crispy Zucchini Fritters for Every Occasion

Crispy zucchini fritters are a versatile, delicious, and easy recipe that you’ll want to make again and again. Whether you’re serving them as an appetizer, a snack, or a main dish, they’re guaranteed to impress. So grab your zucchini, heat up your pan, and get ready to enjoy the crispy perfection of homemade fritters.

PAUL

Crispy Zucchini Fritters: A Delicious and Easy Recipe to Savor

Golden and crispy on the outside, tender and flavorful on the inside, these Crispy Zucchini Fritters are a delightful way to enjoy your veggies. Perfect as an appetizer, snack, or light meal, they’re easy to make and customizable for any occasion. Enjoy them fresh with a dollop of sour cream or yogurt!
Prep Time 20 minutes
Cook Time 20 minutes
Total Time 40 minutes
Servings: 8 –10 fritters
Course: Appetizer / Snack
Cuisine: Global

Ingredients
  

  • 500 g 1 lb zucchini (about 2 medium)
  • 1 tsp salt
  • 1 large egg
  • 2 green onions finely sliced
  • ¼ cup grated parmesan cheese
  • 1 large garlic clove minced
  • ½ cup 75g all-purpose flour
  • ½ tsp baking powder
  • Pinch of pepper
  • 4 tbsp olive oil divided
For Serving:
  • Yogurt or sour cream optional
  • Chopped green onions optional garnish

Method
 

Prepare the Zucchini:
  1. Grate the zucchini using a box grater, preferably diagonally for longer strands.
  2. Place the grated zucchini in a bowl and sprinkle with salt. Mix well and let sit for at least 10 minutes to draw out moisture.
2. Remove Excess Water:
  1. After 10 minutes, use your hands or a clean tea towel to squeeze out as much water as possible from the zucchini. This step is essential for achieving crispy fritters.
3. Mix the Batter:
  1. In the same bowl, combine the squeezed zucchini, egg, green onions, parmesan, and garlic. Mix until well combined.
  2. Sprinkle the flour and baking powder over the mixture, add a pinch of pepper, and gently mix until just incorporated. The batter should be thick but soft.
4. Cook the Fritters:
  1. Heat 2 tablespoons of olive oil in a non-stick skillet over medium-high heat.
  2. Use a ¼ cup measure or an ice cream scoop to drop portions of batter into the skillet. Flatten each fritter slightly with a spatula to about 1 cm thick.
  3. Cook 3–4 fritters at a time, ensuring the pan isn’t overcrowded.
  4. Cook for 3 minutes on each side, adjusting the heat if necessary to prevent burning, until golden and crispy.
5. Keep Warm:
  1. Transfer cooked fritters to a tray and keep warm in an oven set to 200°F (100°C).
  2. Repeat the process with the remaining batter, adding more oil to the skillet as needed.
6. Serve Immediately:
  1. Serve the fritters hot with a dollop of yogurt or sour cream and garnish with chopped green onions if desired.

Notes

  • Squeeze Out Moisture: Removing excess water from the zucchini is key to achieving a crispy texture.
  • Avoid Overmixing: Mix the batter gently to prevent dense fritters.
  • Cooking Heat: Adjust the heat to ensure the fritters cook evenly without burning.
  • Customizations:
    • Add grated carrots, sweet potatoes, or corn for added flavor and texture.
    • Swap parmesan for cheddar, feta, or mozzarella for a different flavor profile.
    • Mix in spices like paprika, cumin, or chili flakes for a bold twist.

The Ultimate Guide to Shredded Beef Burritos: Delicious, Easy, and Irresistible

Few dishes can match the comforting, mouthwatering perfection of shredded beef burritos. Whether you’re looking for a hearty family meal, a crowd-pleasing party dish, or simply something satisfying for dinner, this recipe has you covered. By the end of this guide, you’ll not only know how to make shredded beef burritos but also master tips to customize, store, and serve them to perfection.

Why Shredded Beef Burritos Are the Perfect Meal

Imagine biting into a burrito filled with tender, flavorful shredded beef, perfectly seasoned rice, melted cheese, and a medley of beans and corn. Every bite is an explosion of textures and tastes. Burritos are not just delicious—they’re convenient, versatile, and great for meal prep. Plus, they freeze well, making them perfect for busy days.

Ingredients You’ll Need for Shredded Beef Burritos

Here’s what you’ll need to create 8 generously filled burritos:

IngredientQuantity
Extra soft flour tortillas (10”/26cm)8 large tortillas
Shredded cheese (e.g., Monterey Jack)1 ½ to 2 cups
Mexican shredded beef with sauce3 to 4 cups
Mexican red rice2 cups
Corn kernels (canned, drained)400g (14 oz)
Black beans (canned, drained)400g (14 oz)

Step-by-Step Instructions for Perfect Shredded Beef Burritos

1. Prepare the Tortillas

Microwave half of your tortillas for about 15 seconds to warm them. This keeps them soft and prevents cracking when rolled. Cover the rest with a clean tea towel to keep them warm.

2. Layer the Ingredients

  • Place a tortilla on a flat surface.
  • Add a layer of shredded cheese down the middle.
  • Spoon ⅓ cup of shredded beef on top of the cheese.
  • Add a few spoonfuls of corn kernels, black beans, and ¼ cup of rice.

3. Roll the Burrito

Fold the sides of the tortilla inward, then roll it tightly from bottom to top. Wrap it in foil to secure it.

4. Heat and Serve

  • If serving immediately, heat a skillet over medium heat. Cook each burrito for 4–5 minutes per side, ensuring the tortilla browns and the filling is heated through.
  • For a crispy finish, use a small amount of oil in the skillet.

How to Store and Reheat Shredded Beef Burritos

Refrigerating Burritos

Wrap your burritos in foil or plastic wrap and place them in an airtight container. Store them in the refrigerator for up to 3 days.

Freezing Burritos

  • Wrap each burrito in foil, then place them in a freezer-safe bag or container.
  • Burritos can be frozen for up to 3 months without losing flavor or texture.

Reheating Options

  1. From Frozen: Bake at 350°F (180°C) with foil on for 40–45 minutes.
  2. From Thawed: Reheat in a skillet as per the initial cooking instructions.
  3. Microwave: Remove the foil and heat until the burrito is warmed through, though this may result in a softer tortilla.

Customizing Your Shredded Beef Burritos

1. Add More Fillings

  • Vegetables: Bell peppers, onions, or avocado slices.
  • Spicy Kick: Add jalapeños, hot sauce, or a sprinkle of cayenne.

2. Choose Your Cheese

Swap Monterey Jack for cheddar, pepper jack, or a Mexican cheese blend.

3. Play with Proteins

Not a fan of shredded beef? Substitute with shredded chicken, pork, or even a vegetarian protein like seasoned tofu or tempeh.

Healthier Alternatives for Burritos

1. Whole-Wheat Tortillas

Opt for whole-wheat tortillas to add fiber and nutrients.

2. Low-Fat Cheese

Use reduced-fat cheese to cut calories without sacrificing flavor.

3. Add Greens

Incorporate fresh spinach or kale for a nutrient boost.

Tips for Hosting a Burrito Bar

Burrito bars are perfect for gatherings. Here’s how to set one up:

  1. Prep Ingredients in Advance: Keep shredded beef, rice, and beans warm in slow cookers.
  2. Offer Toppings: Set out bowls of cheese, sour cream, guacamole, salsa, and chopped cilantro.
  3. Customize to Preferences: Allow guests to assemble their burritos as they like.

Nutritional Information for Shredded Beef Burritos

NutrientPer Serving (1 Burrito)
Calories~420
Protein~25g
Carbohydrates~50g
Fats~12g
Fiber~6g

Note: Values may vary depending on exact ingredients used.

Frequently Asked Questions (FAQs)

1. Can I make shredded beef burritos ahead of time?

Yes! Assemble them and refrigerate or freeze as detailed above. They’re ideal for meal prep.

2. What is the best way to reheat frozen burritos?

The best method is baking them at 350°F (180°C) for about 40–45 minutes while wrapped in foil.

3. Can I use store-bought shredded beef?

Absolutely! Store-bought shredded beef works well if you’re short on time. Just ensure it’s well-seasoned.

4. Are these burritos gluten-free?

Not by default. However, you can use gluten-free tortillas and ensure all other ingredients are gluten-free.

5. How do I prevent burritos from getting soggy?

Avoid overfilling with wet ingredients and eat or store them soon after assembling.

6. What sides go well with shredded beef burritos?

Serve with tortilla chips, guacamole, a fresh salad, or even a bowl of soup for a complete meal.

Final Thoughts: Dive Into Burrito Bliss

There you have it—everything you need to make shredded beef burritos that are both delicious and easy to prepare. Whether you’re cooking for yourself or hosting a party, these burritos are sure to impress. So grab your ingredients, roll up your sleeves, and start rolling those burritos!

ating

The Ultimate Guide to Shredded Beef Burritos: Delicious, Easy, and Irresistible

Indulge in the ultimate comfort food with these Shredded Beef Burritos! Packed with tender, flavorful beef, seasoned rice, melted cheese, and hearty beans, they’re perfect for family dinners, meal prep, or a quick, satisfying lunch. Customize to your taste and enjoy the delicious convenience of these burritos anytime.
Prep Time 15 minutes
Cook Time 15 minutes
Total Time 30 minutes
Servings: 8 serves
Course: Main Dish
Cuisine: Mexican-American

Ingredients
  

Main Ingredients:
  • 8 large extra-soft flour tortillas 10”/26cm
  • 1 ½ to 2 cups shredded cheese e.g., Monterey Jack
  • 3 to 4 cups Mexican shredded beef with sauce
  • 2 cups Mexican red rice
  • 400 g 14 oz corn kernels, canned and drained
  • 400 g 14 oz black beans, canned and drained

Method
 

Prepare the Tortillas:
  1. Microwave half of the tortillas for about 15 seconds to make them pliable. Cover the remaining tortillas with a clean tea towel to keep warm.
2. Layer the Ingredients:
  1. Place a tortilla on a flat surface.
  2. Add a layer of shredded cheese down the middle.
  3. Spoon ⅓ cup of shredded beef on top of the cheese.
  4. Add a few spoonfuls of corn kernels, black beans, and ¼ cup of rice.
3. Roll the Burrito:
  1. Fold the sides of the tortilla inward, then roll it tightly from bottom to top. Wrap the burrito in foil to secure it.
4. Heat and Serve:
  1. For immediate serving, heat a skillet over medium heat. Cook each burrito for 4–5 minutes per side until the tortilla is golden and the filling is heated through.
  2. For a crispier finish, use a small amount of oil in the skillet while cooking.

Notes

  • Storage Tips:
    • Refrigerate burritos wrapped in foil or plastic wrap in an airtight container for up to 3 days.
    • Freeze burritos for up to 3 months. Wrap them individually in foil and place them in a freezer-safe bag or container.
  • Reheating Options:
    • From Frozen: Bake at 350°F (180°C) with foil on for 40–45 minutes.
    • From Thawed: Reheat in a skillet as per the initial cooking instructions.
    • Microwave: Remove foil and heat until warmed through (though the tortilla may soften).
  • Customization Ideas:
    • Add diced bell peppers, jalapeños, or avocado slices.
    • Swap shredded beef for chicken, pork, or seasoned tofu for a vegetarian option.
    • Use whole-wheat tortillas or low-fat cheese for a healthier version.

Cheesy Mexican Beef and Bean Bake: A Comforting Crowd-Pleaser

If you’re craving bold flavors, cheesy goodness, and a dish that’s as versatile as it is delicious, look no further than this cheesy Mexican beef and bean bake. Imagine tender beef, hearty beans, and vibrant spices bubbling together under a blanket of melted cheese—it’s a recipe that feels like a warm hug in every bite. Whether it’s a weeknight dinner or a festive gathering, this dish is sure to steal the spotlight.

Why You’ll Love This Recipe

There’s something magical about Mexican-inspired dishes—they’re full of flavor, simple to make, and bring people together. This cheesy Mexican beef and bean bake combines the best of all worlds: juicy ground beef, zesty spices, and creamy cheese, all baked to perfection. Plus, it’s highly customizable and can be served in so many ways, making it perfect for anyone looking to spice up their meal routine.

Ingredients for Cheesy Mexican Beef and Bean Bake

Here’s a detailed breakdown of what you’ll need:

Main Ingredients

IngredientAmountNotes
Olive oil2 tbspUse extra virgin for a richer flavor.
Red onion1, finely choppedAdds sweetness and depth.
Garlic2 cloves, mincedFresh garlic enhances the aroma.
Green capsicum (bell pepper)1, diced (1cm pieces)Any color works for variety.
Ground beef (mince)500g (1 lb)Use lean beef for a healthier option.
Kidney beans or black beans400g (14 oz) can, drainedSubstitute with pinto or mixed beans.
Tomato passata1 cupProvides a rich tomato base.
Pickled jalapeños1/3 cupAdjust for heat preference.
Colby cheese (shredded)1 1/2 cupsSubstitute with cheddar or Monterey Jack.

Mexican Spice Mix

SpiceAmountNotes
Cumin powder1 1/2 tspAdds earthy, smoky flavor.
Smoked paprika1 1/2 tspSub with regular paprika if unavailable.
Garlic powder1 tspCan swap with onion powder.
Onion powder1 tspEnhances savory depth.
Dried oregano1 tspBalances the spice with herbal notes.
Cayenne pepper1/2 tspSub with black pepper for less heat.
Cooking/kosher salt1 tspAdjust to taste.

Step-by-Step Instructions

Step 1: Preheat Your Oven

  • Preheat your oven to 200°C (400°F) or 180°C for fan-forced ovens.

Step 2: Sauté the Aromatics

  • Heat olive oil in a large oven-proof skillet over medium-high heat.
  • Add the chopped red onion, minced garlic, and diced capsicum. Sauté for about 3 minutes until softened and fragrant.

Step 3: Cook the Beef

  • Add the ground beef to the skillet. Break it up with a spatula as it cooks, ensuring even browning.
  • Once the meat is no longer pink, sprinkle in the Mexican spice mix. Cook for 1 minute to toast the spices and release their aroma.

Step 4: Add Beans and Tomato Base

  • Stir in the drained beans and tomato passata. Mix well and bring the mixture to a gentle simmer.

Step 5: Top with Jalapeños and Cheese

  • Spread the mixture evenly in the skillet. Sprinkle the pickled jalapeños across the surface, then generously top with shredded cheese.

Step 6: Bake to Perfection

  • Place the skillet in the preheated oven and bake uncovered for 15 minutes, or until the cheese is melted and bubbly with golden edges.

Step 7: Serve and Enjoy

  • Remove the skillet from the oven and let it cool slightly. Scoop portions into bowls and serve with tortilla chips, tacos, or your favorite Mexican sides.

Tips for the Best Cheesy Mexican Beef and Bean Bake

  • Use Freshly Shredded Cheese: Pre-shredded cheese contains anti-caking agents that can affect the melt.
  • Customize the Heat: If you love spice, add extra cayenne pepper or use spicier jalapeños. For a milder dish, reduce the amount of jalapeños.
  • Oven-Proof Skillet: If you don’t have a cast-iron skillet, transfer the mixture to a baking dish before adding cheese and baking.
  • Add Extra Veggies: For added nutrition, throw in diced zucchini, corn, or chopped spinach.

Creative Serving Ideas

1. Nacho Style

Serve the bake with a side of crispy tortilla chips for dipping and scooping. It’s a perfect snack for game nights or parties.

2. DIY Tacos

Spoon the cheesy beef and bean mixture into soft tortillas. Add lettuce, salsa, and sour cream for a quick taco dinner.

3. Over Rice

Transform this bake into a hearty meal by serving it over steamed rice or cilantro-lime rice.

4. Stuffed Bell Peppers

Use the beef and bean mixture as a filling for hollowed-out bell peppers. Bake until the peppers are tender for a creative twist.

Nutritional Information

Here’s an approximate breakdown of the nutritional content per serving (based on 6 servings):

NutrientPer Serving
Calories~350 kcal
Protein25g
Fat20g
Carbohydrates15g
Fiber5g

FAQs About Cheesy Mexican Beef and Bean Bake

1. Can I make this dish ahead of time?

Yes! Prepare the beef and bean mixture, store it in the fridge for up to 2 days, and bake with cheese just before serving.

2. Can I freeze leftovers?

Absolutely! Let the bake cool completely, then transfer portions to airtight containers. Freeze for up to 3 months. Reheat in the oven or microwave.

3. What’s the best cheese to use?

Colby cheese melts beautifully, but you can also use cheddar, Monterey Jack, or a blend of Mexican cheeses.

4. How do I make it vegetarian?

Substitute the ground beef with crumbled tofu, tempeh, or additional beans for a vegetarian version.

5. Can I make this spicier?

Add more cayenne pepper or use diced fresh chili peppers for extra heat. You can also drizzle hot sauce over the top.

6. What can I serve with this bake?

Pair it with guacamole, pico de gallo, sour cream, or a fresh green salad for a complete meal.

Make It Tonight!

Cheesy Mexican beef and bean bake is a recipe you’ll want to keep on repeat. Its bold flavors, gooey cheese, and hearty texture make it an irresistible choice for any occasion. So grab your skillet, gather your ingredients, and treat yourself to this comforting, flavorful dish tonight!

ating

Cheesy Mexican Beef and Bean Bake: A Comforting Crowd-Pleaser

This Cheesy Mexican Beef and Bean Bake is a crowd-pleasing dish packed with bold flavors, hearty ingredients, and gooey cheese. Perfect for weeknight dinners or festive gatherings, it’s as versatile as it is delicious.
Prep Time 15 minutes
Cook Time 25 minutes
Total Time 40 minutes
Servings: 6 servings
Course: Main Dish
Cuisine: Mexican-inspired

Ingredients
  

Main Ingredients:
  • 2 tbsp olive oil
  • 1 red onion finely chopped
  • 2 cloves garlic minced
  • 1 green capsicum bell pepper, diced into 1cm pieces
  • 500 g 1 lb ground beef (mince)
  • 1 can 400g / 14 oz kidney beans or black beans, drained
  • 1 cup tomato passata
  • 1/3 cup pickled jalapeños adjust to taste
  • 1 1/2 cups shredded Colby cheese or cheddar, Monterey Jack, etc.
Mexican Spice Mix:
  • 1 1/2 tsp cumin powder
  • 1 1/2 tsp smoked paprika
  • 1 tsp garlic powder
  • 1 tsp onion powder
  • 1 tsp dried oregano
  • 1/2 tsp cayenne pepper optional, for extra heat
  • 1 tsp cooking/kosher salt adjust to taste

Method
 

Preheat Your Oven:
  1. Preheat your oven to 200°C (400°F) or 180°C for fan-forced ovens.
Sauté the Aromatics:
  1. Heat the olive oil in a large oven-proof skillet over medium-high heat.
  2. Add the red onion, garlic, and diced green capsicum. Sauté for about 3 minutes until softened and fragrant.
Cook the Beef:
  1. Add the ground beef to the skillet. Break it up with a spatula as it cooks, ensuring even browning.
  2. Once the meat is no longer pink, sprinkle in the Mexican spice mix. Cook for 1 minute to toast the spices and release their aroma.
Add Beans and Tomato Base:
  1. Stir in the drained beans and tomato passata. Mix well and bring the mixture to a gentle simmer.
Top with Jalapeños and Cheese:
  1. Spread the beef mixture evenly in the skillet.
  2. Sprinkle the pickled jalapeños across the surface, then generously top with shredded cheese.
Bake to Perfection:
  1. Place the skillet in the preheated oven and bake uncovered for 15 minutes, or until the cheese is melted and bubbly with golden edges.
Serve and Enjoy:
  1. Remove the skillet from the oven and let it cool slightly.
  2. Scoop portions into bowls and serve with tortilla chips, tacos, or your favorite Mexican sides.

Notes

  • Freshly shredded cheese melts better than pre-shredded varieties.
  • For extra veggies, add diced zucchini, corn, or chopped spinach to the mixture.
  • Don’t have an oven-proof skillet? Transfer the mixture to a baking dish before topping with cheese and baking.

Cheese Bread (No Knead!): A Deliciously Simple Recipe for Every Baker

Imagine pulling a loaf of freshly baked cheese bread out of your oven. The golden crust is studded with bubbling, gooey cheese, and the aroma fills your kitchen with irresistible warmth. Whether you’re an experienced baker or a total novice, this no-knead cheese bread recipe is your ticket to bakery-level results without the hassle.

Why You’ll Love This Cheese Bread Recipe

There’s something magical about bread baking. It’s therapeutic, rewarding, and incredibly satisfying when you get it just right. But what if you could skip the most challenging part—kneading—and still achieve perfection? That’s where this no-knead cheese bread shines. It’s easy, foolproof, and bursting with cheesy goodness.

Ingredients for Cheese Bread

Here’s everything you’ll need for this simple, flavorful recipe:

IngredientAmountNotes
Bread flour3 cupsAll-purpose flour can work as a substitute.
Instant yeast (rapid rise)2 tspNo need to activate separately.
Cooking/kosher salt1 1/2 tspEnhances flavor.
Very warm tap water1 1/2 cupsEnsures proper yeast activation.
Colby cheese (freshly shredded)2 1/2 cupsOther cheeses like cheddar or Monterey Jack work well too.

How to Make No-Knead Cheese Bread

Step 1: Prepare the Dough

  • In a large mixing bowl, combine the flour, salt, and yeast. Mix with a rubber spatula.
  • Add the warm water and stir until no dry flour remains. The dough will be sticky but manageable.

Step 2: Let It Rise

  • Cover the bowl with cling wrap and leave it in a warm place to rise for 2-3 hours. The dough should double in size and appear bubbly.

Step 3: Preheat the Pot

  • About 30 minutes before the dough is ready, place a heavy pot (like a Dutch oven) with its lid in the oven. Preheat the oven to 240°C/450°F (220°C for fan-forced ovens).

Step 4: Shape the Dough

  • Sprinkle a clean surface with 1 tablespoon of flour and scrape the dough onto it.
  • Gently pat the dough into a disc about 20cm (8 inches) wide.
  • Spread half the cheese over the dough, then fold the edges inward four times, layering with more cheese between folds.

Step 5: Transfer to Baking Paper

  • Flip the dough onto a sheet of parchment paper with the seams down. Shape it into a neat round.
  • Top with the reserved cheese to create a golden crown.

Step 6: Bake the Bread

  • Carefully transfer the dough (on the parchment) into the preheated pot. Cover with the lid and bake for 35 minutes.
  • Remove the lid and bake for an additional 10 minutes to develop a golden, cheesy crust.

Step 7: Cool and Serve

  • Transfer the bread to a cooling rack using the parchment paper. Cool for at least 10 minutes before slicing. Enjoy warm!

Tips for Perfect No-Knead Cheese Bread

  • Choose the Right Cheese: Colby cheese melts beautifully, but feel free to experiment with other options like gouda, mozzarella, or a sharp cheddar.
  • Don’t Skip the Preheated Pot: The hot pot creates steam, which is crucial for achieving that bakery-style crust.
  • Use Fresh Ingredients: Fresh yeast and good-quality cheese make all the difference.

Nutritional Information

Here’s an estimate of the nutritional content per slice (based on 12 slices):

NutrientPer Slice
Calories~200 kcal
Protein8g
Fat8g
Carbohydrates24g
Sodium~320mg

Creative Variations for Cheese Bread

1. Herb and Garlic Cheese Bread

Add 1 teaspoon of dried oregano or Italian seasoning to the dough and mix minced garlic with the cheese for an extra flavor boost.

2. Spicy Jalapeño Cheese Bread

Fold in diced jalapeños along with the cheese for a spicy kick.

3. Sweet and Savory Twist

Combine shredded cheese with a handful of dried cranberries or raisins for a unique flavor contrast.

4. Multigrain Cheese Bread

Replace one cup of bread flour with whole wheat or multigrain flour for a healthier version.

FAQs About Cheese Bread (No Knead!)

1. Can I use all-purpose flour instead of bread flour?

Yes, but bread flour gives a chewier texture. If using all-purpose flour, the bread may be slightly less structured but still delicious.

2. What if I don’t have a Dutch oven?

You can use a heavy baking dish with a tight-fitting lid or an oven-safe pot. Alternatively, place a baking sheet with water at the bottom of the oven to create steam.

3. How do I store leftover cheese bread?

Wrap the bread in foil or store it in an airtight container. It keeps well at room temperature for 2 days or in the refrigerator for up to a week.

4. Can I freeze this bread?

Yes! Slice the bread and freeze it in a resealable bag. To reheat, toast the slices directly from frozen.

5. Why didn’t my bread rise properly?

Ensure your yeast is fresh and your water is warm but not hot (about 110°F or 43°C). If the dough is in a cold spot, the rise will be slower.

6. Can I make this bread gluten-free?

Yes, but you’ll need a gluten-free flour blend specifically designed for bread baking to achieve similar results.

Make Cheese Bread Your New Favorite Recipe

No-knead cheese bread combines simplicity with incredible flavor, making it a staple you’ll return to time and time again. Whether you’re baking for a cozy family dinner or impressing guests, this recipe delivers every single time. So grab your ingredients, roll up your sleeves, and discover the joy of homemade bread!

ating

Cheese Bread (No Knead!): A Deliciously Simple Recipe for Every Baker

This no-knead cheese bread is a simple yet delicious recipe that delivers a bakery-quality loaf with minimal effort. With a golden crust and gooey cheese throughout, it’s perfect for family dinners, potlucks, or as a cozy treat.
Prep Time 10 minutes
Cook Time 45 minutes
Total Time 3 hours 55 minutes
Servings: 1 loaf (12 slices)
Course: Bread
Cuisine: Comfort Food

Ingredients
  

  • 3 cups bread flour all-purpose flour can also be used
  • 2 tsp instant yeast rapid rise
  • 1 1/2 tsp kosher salt
  • 1 1/2 cups very warm tap water
  • 2 1/2 cups freshly shredded Colby cheese or substitute with cheddar, gouda, or Monterey Jack

Method
 

Prepare the Dough:
  1. In a large mixing bowl, combine the bread flour, kosher salt, and instant yeast.
  2. Add the very warm tap water and mix with a rubber spatula until no dry flour remains. The dough will be sticky.
Let It Rise:
  1. Cover the bowl with cling wrap and place it in a warm spot to rise for 2-3 hours. The dough should double in size and become bubbly.
Preheat the Pot:
  1. About 30 minutes before the dough is ready, place a heavy pot (like a Dutch oven) with its lid in the oven.
  2. Preheat the oven to 240°C/450°F (220°C for fan-forced ovens).
Shape the Dough:
  1. Sprinkle 1 tablespoon of flour on a clean surface and scrape the dough onto it.
  2. Gently pat the dough into a disc about 20cm (8 inches) wide.
  3. Spread half the shredded cheese over the dough, then fold the edges inward four times, layering more cheese between folds.
Prepare for Baking:
  1. Flip the dough onto a sheet of parchment paper, seams down, and shape it into a neat round.
  2. Top the dough with the reserved cheese to create a golden crown.
Bake the Bread:
  1. Carefully transfer the dough (on the parchment) into the preheated pot.
  2. Cover with the lid and bake for 35 minutes.
  3. Remove the lid and bake for an additional 10 minutes to develop a golden, cheesy crust.
Cool and Serve:
  1. Transfer the bread to a cooling rack using the parchment paper.
  2. Let it cool for at least 10 minutes before slicing. Enjoy warm!

Notes

  • Use fresh, good-quality cheese for the best flavor.
  • The preheated pot is essential for creating steam, which helps achieve a crispy crust.
  • If you don’t have a Dutch oven, use a heavy baking dish with a tight-fitting lid or place a baking sheet with water at the bottom of the oven to create steam.

Jam Drops (Thumbprint Cookies): A Timeless Treat for All Occasions

When was the last time you savored a treat that took you back to simpler, sweeter days? Jam drops, also known as thumbprint cookies, are that perfect blend of nostalgia and indulgence. These buttery, soft cookies with a dollop of vibrant jam in the center are a delight for all ages. Whether you’re a seasoned baker or just starting, making jam drops is as satisfying as eating them.

Why Jam Drops Are a Beloved Classic

Jam drops are more than just cookies; they’re a reminder of childhood baking sessions with loved ones or special holiday treats. Their simplicity doesn’t take away from their charm. These cookies are the perfect balance of buttery richness and fruity sweetness, making them a versatile dessert for tea parties, festive gatherings, or an everyday snack.

Ingredients for Jam Drops

To make the perfect jam drops, you’ll need a few simple ingredients:

IngredientAmountNotes
Unsalted butter (softened)225g (2 sticks)Essential for a rich, creamy texture.
Caster sugar (superfine sugar)3/4 cupRegular granulated sugar can be used as a substitute.
Vanilla extract2 tspAdds a warm, aromatic flavor.
Large egg1Must be at room temperature for even mixing.
Plain flour (all-purpose)2 1/2 cupsForms the cookie’s structure.
Kosher salt1/4 tspEnhances the overall flavor.
Strawberry or raspberry jam1/2 cupChoose any flavor you love, mixed well to loosen.

Step-by-Step Guide to Making Jam Drops

Step 1: Preheat the Oven

  • Preheat your oven to 180°C (350°F) or 160°C for fan-forced ovens.
  • Line two baking trays with parchment paper for easy cleanup.

Step 2: Cream the Butter and Sugar

  • Using an electric beater or stand mixer, beat the butter and sugar on medium speed for about 1.5 minutes until creamy and fluffy.

Step 3: Mix in Wet Ingredients

  • Add the vanilla extract, egg, and salt to the creamed butter mixture.
  • Beat for 20 seconds until the ingredients are just combined.

Step 4: Incorporate Dry Ingredients

  • Gradually add the flour to the mixture.
  • Beat until no visible white flour remains. The dough will have a crumbly texture.

Step 5: Shape the Cookies

  • Measure out one tablespoon of the dough and pack it tightly.
  • Roll the dough into a smooth ball about 3cm (1.2 inches) in diameter.
  • Flatten each ball into a disc about 1.25cm (0.5 inches) thick, then press your thumb into the center to create an indent.

Step 6: Add the Jam

  • Fill each indent with a slightly heaped 1/2 teaspoon of jam. Be careful not to overfill, as the jam will spread during baking.

Step 7: Bake to Perfection

  • Bake for 14 minutes, placing both trays in the oven simultaneously. Rotate and switch the trays after 10 minutes for even baking.
  • Look for edges that are light golden and surfaces that are pale golden.

Step 8: Cool and Serve

  • Let the cookies cool completely on the tray to allow the bases to set. Then, enjoy your freshly baked jam drops!

Tips for Perfect Jam Drops

  • Avoid Cracks: Roll and shape the dough tightly to prevent cracks when baking.
  • Choose the Right Jam: Use a jam with a thick consistency to prevent it from running out during baking.
  • Room Temperature Ingredients: Ensure the egg and butter are at room temperature for smoother mixing.
  • Don’t Skip the Parchment Paper: It prevents sticking and makes cleanup a breeze.

Nutritional Information

Here’s an approximate breakdown of the nutritional content per cookie:

NutrientPer Cookie
Calories~120 kcal
Protein1.5g
Fat6g
Carbohydrates15g
Sugar~7g

(Note: Values may vary based on portion size and ingredients used.)

Creative Variations of Jam Drops

1. Flavor Swaps

Experiment with different jams like apricot, blueberry, or orange marmalade for a unique twist.

2. Chocolate Lovers’ Jam Drops

Add a drizzle of melted chocolate over the cooled cookies for an extra layer of indulgence.

3. Nutty Touch

Roll the dough balls in finely chopped nuts before flattening them to add a crunchy exterior.

4. Festive Jam Drops

Use red and green jams during the holidays for a festive presentation.

FAQs About Jam Drops (Thumbprint Cookies)

1. Can I freeze jam drops?

Yes! Freeze the unbaked dough balls or baked cookies. Store unbaked balls in an airtight container for up to three months and bake from frozen. Baked cookies can be frozen for two months.

2. Why is my dough crumbly?

The dough naturally starts crumbly but comes together when pressed firmly. Make sure to pack it tightly when rolling.

3. What’s the best way to store jam drops?

Store baked cookies in an airtight container at room temperature for up to five days. They also keep well in the fridge.

4. Can I use a gluten-free flour?

Yes! Substitute plain flour with a gluten-free all-purpose blend. The texture may vary slightly.

5. How do I prevent the jam from running?

Choose a thick jam and avoid overfilling the indents. Chilling the shaped cookies before baking can also help.

6. Are jam drops suitable for kids to make?

Absolutely! Kids love rolling the dough and adding the jam. Just supervise them around the oven.

Make It Your Own

Jam drops are a delightful way to add a homemade touch to any occasion. Whether you’re creating memories with your kids, preparing treats for a bake sale, or simply satisfying your sweet tooth, these cookies are endlessly customizable. So grab your ingredients, preheat that oven, and enjoy the rewarding process of baking these classic treats.

ating

Jam Drops (Thumbprint Cookies): A Timeless Treat for All Occasions

Jam drops, also known as thumbprint cookies, are buttery and soft cookies filled with vibrant, fruity jam. Perfect for tea parties, festive gatherings, or a nostalgic everyday treat, these cookies are simple to make and delightful to eat.
Prep Time 20 minutes
Cook Time 14 minutes
Total Time 34 minutes
Servings: 24 cookies
Course: Dessert
Cuisine: Classic

Ingredients
  

  • 225 g 2 sticks unsalted butter, softened
  • 3/4 cup caster sugar superfine sugar
  • 2 tsp vanilla extract
  • 1 large egg room temperature
  • 2 1/2 cups plain flour all-purpose flour
  • 1/4 tsp kosher salt
  • 1/2 cup strawberry or raspberry jam or your preferred flavor, mixed well to loosen

Method
 

Preheat the Oven:
  1. Preheat your oven to 180°C (350°F) or 160°C for fan-forced ovens.
  2. Line two baking trays with parchment paper.
Cream the Butter and Sugar:
  1. Using an electric beater or stand mixer, beat the butter and sugar on medium speed for about 1.5 minutes until creamy and fluffy.
Mix in Wet Ingredients:
  1. Add the vanilla extract, egg, and salt to the creamed butter mixture. Beat for 20 seconds until just combined.
Incorporate Dry Ingredients:
  1. Gradually add the flour to the mixture, beating until no visible white flour remains. The dough will have a crumbly texture.
Shape the Cookies:
  1. Measure one tablespoon of dough and pack it tightly. Roll into a smooth ball (about 3cm/1.2 inches in diameter).
  2. Flatten each ball into a disc (about 1.25cm/0.5 inches thick) and press your thumb into the center to create an indent.
Add the Jam:
  1. Fill each indent with a slightly heaped 1/2 teaspoon of jam. Avoid overfilling, as the jam will spread during baking.
Bake to Perfection:
  1. Bake for 14 minutes, rotating and switching the trays after 10 minutes for even baking.
  2. The cookies are done when the edges are light golden and the surfaces are pale golden.
Cool and Serve:
  1. Let the cookies cool completely on the tray to allow the bases to set. Serve and enjoy!

Notes

  • Use room-temperature butter and egg for a smoother dough.
  • A jam with a thick consistency works best to prevent spreading.
  • For easier handling, chill the dough if it becomes too soft.

Spicy Asian Zucchini: A Flavor-Packed Side Dish You’ll Love

Spicy Asian zucchini isn’t just a side dish—it’s a culinary experience that will tantalize your taste buds and elevate your meals. With its perfect blend of heat, sweetness, and umami, this dish adds an irresistible zing to any table. Whether you’re a fan of bold flavors or just looking for a creative way to enjoy zucchini, this recipe has got you covered.

Why Spicy Asian Zucchini Is a Must-Try

Think about the crunch of fresh zucchini paired with a spicy, garlicky sauce that’s rich with sesame and soy flavors. It’s simple to prepare but packs a punch, making it perfect for family dinners, potlucks, or even a quick weekday treat. Plus, zucchini is healthy, low in calories, and loaded with nutrients, making this dish a guilt-free indulgence.

Ingredients for Spicy Asian Zucchini

Here’s what you’ll need to create this bold and flavorful dish:

Zucchini and Topping:

IngredientAmountNotes
Zucchini (small/medium)5Cut in half lengthwise.
Canola oil1 tbspOr any neutral cooking oil.
Cooking/kosher salt3/4 tspAdjust to taste.
Crispy fried shallots1/4 cupStore-bought; an Asian pantry staple.
Green onion1 stemFinely sliced for garnish.

Spicy Sauce:

IngredientAmountNotes
Canola oil1 tbspNeutral oil works best.
Garlic3 cloves, finely mincedAdds depth and aroma.
Sambal oelek1 tbspSubstitute sriracha or chili crisp.
Sesame oil (toasted)1 tbspGives the sauce a nutty finish.
Soy sauce (light/all-purpose)1 tbspAvoid dark soy; it can overpower.
Mirin2 tbspCan substitute honey for a sweeter touch.

How to Make Spicy Asian Zucchini

Step 1: Prep the Zucchini

  • Toss the zucchini with oil and sprinkle it with salt, ensuring it’s evenly coated.

Step 2: Cook the Zucchini

  • Heat a large non-stick pan over medium-high heat.
  • Place half the zucchini cut-side down and cook for 3-4 minutes until golden. Flip and cook the skin side for 3 minutes.
  • Transfer to a serving plate and repeat with the remaining zucchini.

Step 3: Make the Spicy Sauce

  • Cool the pan slightly before returning it to medium heat.
  • Heat the oil, then sauté the minced garlic until light golden.
  • Add the sambal oelek, sesame oil, soy sauce, and mirin. Simmer for 30 seconds until the sauce thickens and becomes syrupy.

Step 4: Assemble and Serve

  • Pour the sauce over the cooked zucchini.
  • Top with crispy fried shallots and sliced green onion for extra texture and flavor.

Tips for Perfect Spicy Asian Zucchini

  • Choose the Right Zucchini: Smaller zucchini are tender and absorb flavors better.
  • Don’t Skip the Shallots: The crispy fried shallots add a unique crunch and flavor.
  • Adjust the Heat: If you love spicy food, add more sambal oelek or even a pinch of red chili flakes.
  • Experiment with Substitutions: You can swap zucchini for other vegetables like eggplant or asparagus.

Nutritional Information

Here’s a breakdown of the nutritional value per serving:

NutrientPer Serving
Calories~120 kcal
Protein3g
Fat8g
Carbohydrates10g
Sodium~450mg

(Note: Values are approximate and may vary based on exact ingredients used.)

Creative Serving Ideas for Spicy Asian Zucchini

  • With Rice: Pair this dish with steamed jasmine rice for a complete meal.
  • In Stir-Fries: Toss the cooked zucchini with noodles or fried rice for a spicy twist.
  • As a Topping: Use it as a flavorful addition to grilled meats or seafood.
  • In Salads: Let the zucchini cool and serve it over a bed of mixed greens for a refreshing salad.

FAQs About Spicy Asian Zucchini

1. Can I make Spicy Asian Zucchini ahead of time?

Yes, you can prepare the zucchini and sauce separately, then combine and reheat just before serving.

2. Can I use other vegetables instead of zucchini?

Absolutely! Eggplant, bell peppers, or even green beans work well with this sauce.

3. How do I store leftovers?

Store any leftovers in an airtight container in the refrigerator for up to three days. Reheat in a pan or microwave before serving.

4. Is this recipe vegetarian or vegan?

Yes, as long as you use a vegan-friendly soy sauce and ensure the crispy fried shallots don’t contain animal products.

5. What’s a good substitute for sambal oelek?

You can use sriracha, chili garlic sauce, or even a spicy chili oil.

6. Can I bake the zucchini instead of frying?

Yes, toss the zucchini with oil and salt, then roast at 425°F (220°C) for 15-20 minutes until golden.

Final Thoughts: Make Spicy Asian Zucchini Your Own

Spicy Asian zucchini is a quick, flavorful dish that’s as versatile as it is delicious. Whether you’re cooking for yourself or hosting a dinner party, this recipe is sure to impress. Don’t be afraid to customize it—experiment with different spices, vegetables, or garnishes to make it uniquely yours. So grab your skillet, gather your ingredients, and treat yourself to a bold, tasty adventure in your kitchen!

PAUL

Spicy Asian Zucchini: A Flavor-Packed Side Dish You’ll Love

Spicy Asian Zucchini is a bold, flavorful side dish that pairs tender zucchini with a garlicky, spicy sauce infused with sesame and soy. Perfect for weeknight dinners, potlucks, or a quick snack, this dish is simple to prepare and sure to impress.
Prep Time 10 minutes
Cook Time 10 minutes
Total Time 20 minutes
Servings: 4 servings
Course: Side Dish
Cuisine: Asian-inspired

Ingredients
  

For the Zucchini and Topping:
  • 5 small or medium zucchini cut in half lengthwise
  • 1 tbsp canola oil or any neutral cooking oil
  • 3/4 tsp cooking or kosher salt adjust to taste
  • 1/4 cup crispy fried shallots store-bought
  • 1 stem green onion finely sliced (for garnish)
For the Spicy Sauce:
  • 1 tbsp canola oil neutral oil works best
  • 3 cloves garlic finely minced
  • 1 tbsp sambal oelek or substitute with sriracha or chili crisp
  • 1 tbsp toasted sesame oil
  • 1 tbsp light soy sauce
  • 2 tbsp mirin or substitute with honey for sweetness

Method
 

Prep the Zucchini:
  1. Toss the zucchini halves with 1 tablespoon of canola oil and sprinkle evenly with salt. Ensure all sides are lightly coated.
Cook the Zucchini:
  1. Heat a large non-stick skillet over medium-high heat.
  2. Place half of the zucchini cut-side down and cook for 3–4 minutes until golden brown. Flip and cook the skin side for another 3 minutes.
  3. Transfer to a serving plate and repeat with the remaining zucchini.
Make the Spicy Sauce:
  1. Reduce the heat to medium and allow the pan to cool slightly before adding the oil.
  2. Heat 1 tablespoon of canola oil, then sauté the minced garlic until light golden and aromatic.
  3. Add sambal oelek, sesame oil, soy sauce, and mirin. Simmer the mixture for 30 seconds until slightly thickened and syrupy.
Assemble and Serve:
  1. Drizzle the spicy sauce over the cooked zucchini.
  2. Top with crispy fried shallots and sliced green onion for added texture and flavor.

Notes

  • For a spicier dish, increase the sambal oelek or add a pinch of red chili flakes.
  • Smaller zucchini are more tender and absorb flavors better.
  • The crispy fried shallots provide an essential crunch and flavor; don’t skip them!
  • This dish can also be made with roasted zucchini for a healthier option.

Stay Connected

Get recipes via email: