The Best German Oatmeal Cookie Recipe: A Wholesome Treat Rooted in Tradition

There’s a particular smell that lingers in the hallway of my grandmother’s old home in southern Germany. It’s a gentle blend of toasted oats, crushed almonds, warm butter, and something subtly citrusy. That scent has followed me throughout my life, especially during the holidays when the kitchen came alive with flour-dusted aprons, clinking mixing bowls, and the comforting chatter of generations coming together.

Oatmeal cookies were not just cookies in our family — they were a ritual. While American-style oatmeal cookies are typically sweet and spiced, ours were different: lighter, heartier, and deeply satisfying, with bursts of tang from cranberries and brightness from lemon zest. They didn’t overwhelm the senses — instead, they invited them in for a slow, thoughtful indulgence.

This recipe is a homage to that memory. It draws from traditional German baking, where balance is key — sweet but not cloying, rich but not heavy, rustic yet full of character. It’s simple, nourishing, and layered with flavor, just like the stories shared over cups of coffee and cooling trays of cookies on my Oma’s wooden table.

If you’re looking for a cookie that connects warmth, nutrition, and old-world charm, this German oatmeal cookie is your answer.

Why German-Style Oatmeal Cookies Stand Out

Unlike their ultra-chewy, sugar-laden American cousins, German oatmeal cookies carry a different philosophy. They’re often less sweet, more textured, and infused with subtle enhancements like citrus zest or a whisper of spice. Almonds and dried fruit like cranberries or currants are preferred over chocolate chips, and the emphasis is often on whole ingredients and depth of flavor rather than pure decadence.

These cookies are:

  • Perfect for breakfast or afternoon coffee
  • Rich in fiber and protein from oatmeal and nuts
  • Subtly sweet, allowing the natural flavors to shine
  • Easy to make with pantry-friendly ingredients
  • Flexible for dietary adjustments (gluten-free, dairy-free, etc.)

Ingredients

IngredientAmount
Oatmeal1 cup
Almonds80 g
Dried cranberries80 g
Lemon zestZest of 1 lemon
Egg1
Butter, melted2 tbsp
Vanillin (or vanilla extract)1 tsp

Directions

  1. Preheat & Prep: Preheat your oven to 350°F (175°C). Line a baking sheet with parchment paper.
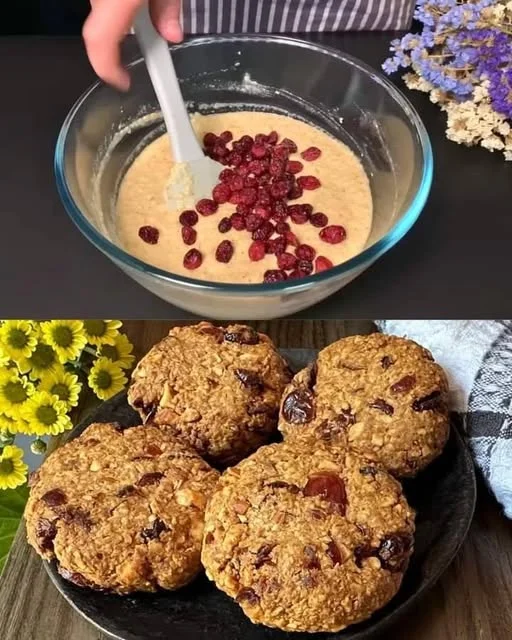
  2. Mix the Base: In a large mixing bowl, combine the oatmeal, chopped almonds, cranberries, and lemon zest.
  3. Create the Binder: In a separate bowl, whisk the egg, melted butter, and vanillin until smooth.
  4. Bring It Together: Pour the wet mixture over the dry ingredients. Stir until well combined — the mixture should hold together but not be overly wet.
  5. Shape Your Cookies: Using your hands or a spoon, form small mounds (about 1.5 tbsp each) and place them on the baking sheet, spaced slightly apart.
  6. Bake to Perfection: Bake for 12–15 minutes or until the edges are golden brown and the centers are set.
  7. Cool Down: Let the cookies cool on the tray for 5 minutes before transferring to a wire rack.

Nourishment Snapshot: Nutritional Info (Per Cookie, approx.)

NutrientAmount
Calories120 kcal
Protein3 g
Carbohydrates13 g
Sugars6 g
Fiber2 g
Fat6 g
Saturated Fat1.5 g

Behind the Ingredients: Why Each One Matters

While we won’t walk through the exact measurements and directions here, it’s worth exploring why these specific ingredients create such a memorable cookie:

  • Oatmeal brings texture and fiber, giving the cookie a hearty chew and grounding its sweetness.
  • Almonds add crunch and a touch of nutty richness that balances the fruit and oats.
  • Cranberries provide a tart contrast, brightening every bite and offering a chewy counterpoint.
  • Lemon zest lifts the flavor profile in a subtle but essential way — it’s that “what’s that?” moment.
  • Butter and egg bind everything together while adding richness and moisture.
  • Vanillin or vanilla extract gives a hint of sweetness and warmth without overwhelming the other flavors.

In essence, this cookie feels like a blend of rural countryside simplicity and quiet afternoon elegance — the kind of thing you’d enjoy with a cup of chamomile tea on a breezy Sunday.

FAQs: Everything You Need to Know

1. Can I make these cookies gluten-free?

Absolutely. Since oatmeal is naturally gluten-free (just make sure to use certified GF oats), the only potential source of gluten is cross-contamination or any add-ins. Substitute regular oats with certified gluten-free rolled oats, and you’re good to go.

If you want to be extra cautious, check the brand of dried cranberries and vanilla extract, as some processed products can have hidden gluten.

2. Can I replace the butter with a non-dairy option?

Yes! Melted coconut oil or a vegan butter substitute works wonderfully in this recipe. The result may be slightly more crumbly depending on the brand, but the flavor remains just as comforting.

3. What other nuts can I use instead of almonds?

If almonds aren’t your thing or you have a nut allergy, you can try:

  • Chopped hazelnuts (very German and deliciously aromatic)
  • Walnuts or pecans (more American in flavor, but still compatible)
  • Sunflower seeds or pumpkin seeds (nut-free options that add crunch)

4. I don’t have cranberries. Can I substitute with something else?

Yes. Raisins, chopped dried apricots, dried cherries, or even currants work well. If you’re feeling adventurous, a combination of golden raisins and orange zest brings a whole new personality to the cookie.

5. How long do these cookies stay fresh?

Stored in an airtight container at room temperature, they will stay fresh for up to 5–7 days. They can also be frozen for up to three months — just allow them to cool completely first and store with parchment between layers to avoid sticking.

6. Can I double or halve the recipe easily?

Definitely. This recipe is very forgiving and can be doubled or halved without issue. Just be mindful of baking times if you’re adjusting the size of the cookies or the batch.

7. Can I make the dough ahead of time and bake later?

Yes, and in fact, chilling the dough for an hour (or even overnight) can enhance the texture. Just cover it well and refrigerate. When ready to bake, let it soften for 5–10 minutes if it’s too firm to scoop.

8. Why do you use lemon zest instead of juice?

Lemon zest contains the essential oils that provide bright, aromatic citrus flavor without adding liquid to the dough. Juice can make the dough wetter and throw off the texture. Zest delivers a subtle, sophisticated flavor that complements the oats and nuts beautifully.

9. Are these cookies healthy?

“Healthy” is subjective, but compared to many conventional cookies, this recipe is on the more nutritious side. With whole grains, natural dried fruit, healthy fats from almonds, and relatively low sugar, it’s a wholesome treat you can enjoy without guilt.

Tips to Elevate Your Cookie Game

1. Toast the Nuts

Lightly toasting the almonds before mixing them into the dough deepens their flavor and adds complexity to the cookie.

2. Don’t Overbake

German-style cookies are often a bit firmer than American ones, but be cautious not to overbake. They should be golden on the edges but still a little soft in the center when you pull them from the oven. They’ll firm up as they cool.

3. Sprinkle with Sea Salt

A pinch of flaky sea salt on top before baking can add a sophisticated contrast to the sweetness of the cranberries and warmth of the butter.

4. Make it Seasonal

In winter, swap lemon zest for orange and add a pinch of cinnamon or cardamom. In spring, consider dried cherries and pistachios for a lighter variation.

Serving Suggestions: More Than Just a Snack

While these cookies are ideal for afternoon tea or a mid-morning coffee break, they can be dressed up in several ways:

  • Breakfast-on-the-go: Add a smear of almond butter for a protein-rich start.
  • Gift-worthy bundles: Stack a few, wrap in parchment, and tie with twine — a perfect holiday or hostess gift.
  • Picnic packs: Their sturdy texture makes them ideal for travel or lunchboxes.
  • Crumbled on yogurt: A rustic granola-style topping for a creamy dessert or healthy breakfast bowl.

A Final Word from the Heart

Food has the remarkable ability to tie us to places and people we may no longer see every day. These oatmeal cookies are more than a recipe — they’re a small edible memory of a wooden kitchen, a handwritten card tucked in a drawer, and the simple joys of good ingredients prepared with care.

In today’s fast-paced world, taking time to bake something from scratch — something with texture, with history, with balance — feels almost radical. But maybe that’s exactly why it matters.

So whether you’re craving a wholesome treat or a nostalgic nod to European baking, these cookies invite you to slow down, take a bite, and taste a little bit of home.

Amal

The Best German Oatmeal Cookie Recipe: A Wholesome Treat Rooted in Tradition

These German oatmeal cookies are a rustic, nourishing twist on a classic treat. Lightly sweetened, rich in texture, and packed with cranberries, almonds, and a hint of lemon zest, they’re the perfect companion to coffee or tea. Simple to make and full of old-world charm, they’re a wholesome indulgence rooted in tradition.
Prep Time 10 minutes
Cook Time 15 minutes
Total Time 25 minutes
Servings: 12 cookies
Course: Dessert
Cuisine: German-Inspired

Ingredients
  

  • 1 cup oatmeal rolled oats
  • 80 g almonds chopped
  • 80 g dried cranberries
  • Zest of 1 lemon
  • 1 large egg
  • 2 tablespoons butter melted
  • 1 teaspoon vanillin or vanilla extract

Method
 

  1. Preheat your oven to 350°F (175°C). Line a baking sheet with parchment paper.
  2. In a large bowl, mix together the oatmeal, chopped almonds, dried cranberries, and lemon zest.
  3. In a separate bowl, whisk the egg with the melted butter and vanillin until smooth.
  4. Combine the wet ingredients with the dry ingredients and mix until everything is evenly coated and the mixture begins to stick together.
  5. Scoop out small mounds (about 1.5 tablespoons) and place them on the prepared baking sheet. Flatten slightly if desired.
  6. Bake for 12–15 minutes, or until the edges are golden and the cookies are firm to the touch.
  7. Remove from the oven and let cool for 5 minutes on the tray before transferring to a wire rack to cool completely.

Notes

  • For extra crunch, toast the almonds lightly before adding them to the mix.
  • You can substitute raisins or chopped dates for cranberries.
  • If using vanilla extract instead of vanillin, a pure extract will add deeper flavor.
  • For a gluten-free version, make sure your oats are certified gluten-free.
  • These cookies store well in an airtight container for up to 5 days.

Chocolate Custard Dessert with Layers of Cookies and Cream: A Decadent Journey into Comfort and Indulgence

There are certain foods that take you back to a moment in time, evoking emotions and memories you never expected to resurface. For me, that food is chocolate custard. I remember the first time my grandmother made it for me—it wasn’t just a dessert; it was a promise of comfort, of warmth, and of family togetherness. Her kitchen always smelled of rich chocolate and fresh cream, a scent that seemed to draw everyone in. It was never a special occasion, yet every bite felt like a celebration of love and care.

As a child, I was fascinated by the magic of turning simple ingredients into something so luxurious and comforting. My grandmother’s chocolate custard, layered with sweet cookies and a touch of cream, was her signature dish. It was the dessert that everyone requested during holidays, family gatherings, and birthdays. Even today, as an adult, whenever I need a comforting treat or a way to unwind, I find myself recreating that same recipe. It’s a reminder of simpler times and the feeling of being truly nurtured by the people you love.

This Chocolate Custard Dessert with Layers of Cookies and Cream brings those childhood memories back to life, offering not only the indulgent richness of chocolate but also the satisfying crunch of cookies and cream. It’s a dessert that feels like a warm hug from the inside out, something that never fails to comfort me after a long day or during special occasions with my loved ones. Whether you’re a seasoned baker or someone just starting to experiment in the kitchen, this dessert is a beautiful way to add a touch of elegance and nostalgia to your table.

The Magic of Layers: Why This Dessert Works So Well

What makes this chocolate custard dessert truly special is the combination of creamy, smooth custard with the crunch of cookies. The layering effect isn’t just visually pleasing; it enhances the texture, offering a delightful contrast between the velvety custard and the crisp cookies. As you take a bite, the custard melts in your mouth, while the cookies add an unexpected yet harmonious crunch that elevates the experience.

The beauty of the custard itself lies in its simplicity. Made with just a few ingredients—egg yolks, sugar, milk, and cocoa powder—it’s a classic French-inspired dessert with rich flavor. The result is a silky smooth custard that’s not too sweet, making it the perfect base for any layer you choose to add, such as crushed cookies or whipped cream. It’s a dessert that’s both indulgent and balanced, never overpowering the senses but always satisfying.

Adding the cookies and cream layers brings a playful element to the dessert. The crunch of the cookies contrasts beautifully with the creamy custard, offering a textural experience that makes every spoonful exciting. It’s a delightful twist on the traditional custard, turning it into something both familiar and new. The cookies also provide a dose of nostalgia—whether you use classic chocolate sandwich cookies or go for something more unique like oreo-flavored varieties, each bite is a comforting reminder of the simple pleasures of childhood.

Why You Should Make This Dessert

This Chocolate Custard Dessert with Layers of Cookies and Cream is more than just a sweet treat. It’s a versatile dessert that can fit into any occasion. Whether you’re hosting a dinner party, celebrating a special event, or simply treating yourself to a decadent dessert, this chocolate custard dessert is sure to impress. Here are a few reasons why this dessert deserves a spot in your recipe repertoire:

  • Timeless Comfort: With the combination of chocolate and cream, this dessert has a timeless appeal. It’s a universal favorite, loved by both kids and adults, making it the perfect option for any age group.
  • Elegance and Simplicity: Despite its richness, the dessert is surprisingly easy to prepare. The ingredients are simple, and the preparation doesn’t require special skills or complex techniques. It’s a dessert that you can make with confidence, even if you’re a beginner.
  • Perfect for Special Occasions: The layered structure of the dessert gives it an elegant presentation, making it an ideal choice for special occasions like holidays, birthdays, or dinner parties. It looks sophisticated but is easy to serve in individual portions, making it perfect for sharing.
  • Customizable: You can easily adapt this dessert to fit your tastes. Add more layers of cookies, switch up the flavor of the cookies, or top it with whipped cream or fruit for added freshness. The possibilities are endless, allowing you to make this dessert truly your own.

Ingredients

For the Chocolate Custard:

IngredientAmount
Chicken egg yolks3
Sugar80g (1/3 cup)
Milk400ml (1 2/3 cups)
Corn starch30g (1/4 cup)
Cocoa powder40g (1/3 cup)

Directions

  1. Prepare the Egg Mixture: In a medium bowl, whisk the egg yolks and sugar together until smooth and creamy. Set aside.
  2. Mix the Dry Ingredients: In a separate bowl, sift the corn starch and cocoa powder to ensure there are no lumps. Set this aside as well.
  3. Combine Milk and Dry Ingredients: In a saucepan over medium heat, warm the milk. Gradually add the cocoa powder and corn starch mixture, stirring constantly until the mixture is smooth and begins to thicken.
  4. Temper the Eggs: Slowly add the warm milk mixture into the egg yolks while continuously whisking to prevent the eggs from scrambling.
  5. Cook the Custard: Return the combined mixture to the saucepan over low heat. Stir constantly until the custard thickens to a pudding-like consistency. Once thickened, remove from heat.
  6. Chill and Layer: Pour the custard into a bowl and cover with plastic wrap to prevent a skin from forming. Refrigerate for at least 2 hours before serving.
  7. Assemble the Dessert: Layer the chilled chocolate custard with crumbled cookies and cream for added texture and flavor. Serve chilled for the best taste.

Nutritional Information

NutrientAmount
Calories220 kcal per serving
Protein6 g
Carbohydrates28 g
Sugars18 g
Fat10 g
Saturated Fat4 g
Sodium45 mg

Frequently Asked Questions (FAQs)

1. Can I make this dessert in advance?
Absolutely! This chocolate custard dessert actually tastes better when it’s had some time to chill. You can prepare it a day ahead and let it sit in the fridge, allowing the flavors to meld together. The custard will set perfectly, and the cookies will soak up just enough of the custard to give it a delicious texture. Just make sure to cover the dessert with plastic wrap to prevent a skin from forming on the custard.

2. Can I use a different type of cookie for the layers?
Yes, you can experiment with different types of cookies! While traditional chocolate sandwich cookies are the most common choice, you can use any cookies you like. Vanilla cookies, shortbread, or even graham crackers can work well. The key is to find a cookie that contrasts nicely with the smoothness of the custard, adding texture without overpowering the flavor.

3. Is this dessert suitable for a gluten-free diet?
Yes! By using gluten-free cookies or even making your own gluten-free cookie layers, you can easily adapt this dessert to be gluten-free. Many store-bought cookies come in gluten-free options, so you have plenty of choices.

4. Can I make this dessert dairy-free?
Yes, you can. To make this dessert dairy-free, simply swap the milk for a plant-based alternative, such as almond milk, coconut milk, or oat milk. You can also use dairy-free cream to replace the creaminess of the custard. Just make sure that the cookies you use are also dairy-free, as some may contain dairy products.

5. How long does this dessert keep in the fridge?
This dessert will keep for up to 3 days in the fridge when stored properly in an airtight container. After that, the custard may start to lose its texture, and the cookies will become soggy. For the best results, try to enjoy the dessert within a couple of days.

Conclusion: A Dessert That Stands the Test of Time

This Chocolate Custard Dessert with Layers of Cookies and Cream is more than just a recipe—it’s a journey back to simpler times, a way to bring warmth and comfort to your home. Whether you’re sharing it with family and friends or enjoying a quiet moment alone, this dessert brings joy in every bite. It’s a celebration of the little things—of homemade sweetness, of memories shared, and of the simple pleasure that comes from good food made with love.

As you prepare this dessert, let it remind you of the special moments in life that deserve to be cherished. Whether you’re passing down the recipe to future generations or simply enjoying it for yourself, this chocolate custard dessert will always have a place in your heart, just like my grandmother’s did for me. It’s a dish that stands the test of time, offering both elegance and simplicity in every spoonful.

Amal

Chocolate Custard Dessert with Layers of Cookies and Cream: A Decadent Journey into Comfort and Indulgence

This Chocolate Custard Dessert with Layers of Cookies and Cream is the ultimate indulgence—a rich, creamy chocolate custard layered with the satisfying crunch of cookies and topped with a light creaminess that makes each bite more delicious than the last. Perfect for any occasion, whether you’re serving it at a dinner party or enjoying a comforting treat at home, this dessert is sure to impress.
Prep Time 20 minutes
Cook Time 15 minutes
Total Time 2 hours 35 minutes
Servings: 6 –8 servings
Course: Dessert
Cuisine: French-inspired

Ingredients
  

For the Chocolate Custard:
  • 3 large egg yolks
  • 80 g 1/3 cup sugar
  • 400 ml 1 2/3 cups milk
  • 30 g 1/4 cup corn starch
  • 40 g 1/3 cup cocoa powder
For the Layering and Garnish:
  • 12 –15 chocolate cookies crushed (such as Oreos or any of your favorite cookies)
  • Whipped cream optional, for topping

Method
 

  1. Prepare the Egg Mixture: In a medium bowl, whisk together the egg yolks and sugar until smooth and creamy. Set aside.
  2. Mix Dry Ingredients: Sift the cocoa powder and corn starch into a separate bowl to remove any lumps, then set aside.
  3. Heat the Milk: In a saucepan, gently heat the milk over medium heat, stirring occasionally.
  4. Combine Wet and Dry Ingredients: Gradually add the sifted cocoa powder and corn starch mixture to the warm milk while stirring constantly until fully combined and smooth.
  5. Temper the Eggs: Slowly pour the hot milk mixture into the egg yolk mixture, whisking constantly to avoid curdling the eggs.
  6. Cook the Custard: Return the combined mixture to the saucepan and cook over low heat, stirring constantly, until the custard thickens to a pudding-like consistency. Once thickened, remove from heat and let it cool slightly.
  7. Assemble the Dessert: In individual dessert cups or a large serving dish, layer the crushed cookies followed by the chocolate custard. Repeat the layers if necessary, finishing with a layer of custard.
  8. Chill and Serve: Refrigerate the assembled dessert for at least 2 hours or until fully set. Just before serving, top with whipped cream if desired.

Notes

  • Make Ahead: This dessert can be made a day ahead. Let the custard fully chill and set in the refrigerator before serving for the best flavor and texture.
  • Cookie Varieties: Feel free to experiment with different types of cookies. Chocolate chip cookies, shortbread, or vanilla wafers can work just as well as traditional chocolate cookies.
  • Vegan Option: You can substitute the eggs with a plant-based alternative like aquafaba (the liquid from canned chickpeas) to make this dessert vegan. Use a plant-based milk, such as almond or oat milk, to further customize it.

Oats, Apple, Yogurt, and Blueberries: A Delicious and Easy Diet Cake Recipe!

There are some dishes that are not just about satisfying hunger, but about evoking memories. For me, this Oats, Apple, Yogurt, and Blueberries Cake is one of those. I remember the days spent with my grandmother in her cozy kitchen, watching her effortlessly prepare nutritious and comforting meals. She always believed that food should nourish both the body and the soul. I used to marvel at how her dishes were filled with wholesome ingredients—each bite full of warmth and love. As I grew older, I found myself searching for ways to recreate those feelings of comfort and care in my own cooking. This cake brings me back to those simpler times, where the kitchen was a place of connection, joy, and health.

This recipe, just like my grandmother’s, is simple, wholesome, and nourishing. With the richness of oats, the sweetness of apples, the tanginess of yogurt, and the antioxidant-packed blueberries, this cake offers more than just flavor—it provides a sense of well-being. Whether you’re enjoying it for breakfast, a snack, or even a light dessert, it’s a perfect way to indulge in a healthy treat that never compromises on taste.

Let’s dive deeper into why this cake is the ideal addition to your diet, its numerous health benefits, and why it’s the perfect choice for anyone looking for a light, nutritious dessert or snack. Along the way, I’ll answer some common questions to help you get the best out of this easy recipe.

Why Oats, Apple, Yogurt, and Blueberries?

The combination of ingredients in this cake doesn’t just work on paper—it works wonders for your body. Oats are an incredible source of fiber, which helps support digestion and keeps you feeling full longer. They also contain beta-glucan, a soluble fiber known to help lower cholesterol. Apples, with their high content of vitamins, fiber, and antioxidants, provide a fresh sweetness that balances the earthy oats. Yogurt adds a creamy texture and offers a dose of probiotics, supporting gut health. Finally, blueberries—packed with vitamins and antioxidants—serve as the perfect finishing touch, offering bursts of color, flavor, and health benefits.

The beauty of this cake lies in how it brings together these ingredients to create a dessert that isn’t just indulgent but beneficial. You get the joy of a sweet treat without the guilt that often accompanies traditional cakes. This recipe proves that healthy eating doesn’t have to be boring or restrictive. You can still have your cake and eat it too!

Ingredients

IngredientAmount
Oat flakes (gluten-free)130 g (1 1/2 cups)
Hot water240 ml (1 cup)
Eggs2
Sweetener (stevia or your choice)30 g (2 1/2 tbsp)
Vanilla extract1 tsp

Directions

  1. Prepare the Oats: Begin by placing the oat flakes into a large mixing bowl. Pour the hot water over them and stir briefly. Let the oats soak for about 5 minutes to soften and absorb the moisture.
  2. Mix the Wet Ingredients: In a separate bowl, whisk the eggs with the sweetener and vanilla extract until smooth and well combined.
  3. Combine the Mixtures: Once the oats have softened, add the egg mixture to the oats, stirring gently until the ingredients are well incorporated.
  4. Bake: Preheat your oven to 350°F (175°C). Pour the oat mixture into a greased baking dish and spread it evenly. Bake for 25-30 minutes or until the cake is set and slightly golden on top.
  5. Serve and Enjoy: Allow the cake to cool for a few minutes before cutting it into squares. Serve warm or at room temperature for a deliciously healthy treat.

Nutritional Information

NutrientAmount
Calories190 kcal per serving
Protein6 g
Carbohydrates30 g
Dietary Fiber4 g
Sugars4 g
Fat6 g
Saturated Fat1 g
Sodium50 mg

Health Benefits of the Ingredients

Oats
Oats are a powerhouse of nutrition. Rich in fiber, they help regulate blood sugar levels, making them an excellent choice for those managing diabetes or those looking to stabilize their energy levels throughout the day. Oats are also known for their ability to promote heart health, thanks to the presence of beta-glucan, a soluble fiber that can reduce levels of bad cholesterol (LDL) in the blood. Additionally, oats provide essential vitamins and minerals like manganese, phosphorus, and magnesium, which contribute to strong bones and a healthy metabolism.

Apples
An apple a day might just be more than a saying—it’s backed by science! Apples are loaded with vitamin C, which helps boost the immune system and promote healthy skin. They are also a rich source of fiber, particularly soluble fiber called pectin, which supports heart health and aids in digestion. Apples contain flavonoids, which are antioxidants that can help reduce the risk of chronic diseases. With their low glycemic index, apples provide a steady release of energy, making them an ideal addition to a diet focused on balanced nutrition.

Yogurt
Yogurt is an excellent source of protein and calcium. Beyond that, it contains probiotics, which are beneficial bacteria that support gut health. A healthy gut contributes to better digestion, a stronger immune system, and even improved mood. The probiotics found in yogurt may also help in reducing inflammation and promoting the absorption of nutrients. Choosing unsweetened yogurt ensures you get the health benefits without any added sugars, making it a great fit for those looking to maintain healthy blood sugar levels.

Blueberries
Blueberries are one of the most antioxidant-rich fruits available. These tiny berries are packed with anthocyanins, which have been linked to a reduced risk of heart disease, improved brain function, and better overall health. They also contain vitamin C and fiber, which contribute to healthy skin, immune function, and digestive health. Adding blueberries to this cake not only boosts its nutritional profile but also enhances its flavor with natural sweetness and tartness.

Is This Cake Really Diet-Friendly?

When most people think of diet cakes, they imagine bland, unsatisfying desserts that leave you yearning for something more indulgent. But that’s not the case with this Oats, Apple, Yogurt, and Blueberries Cake. This cake offers a guilt-free indulgence, making it perfect for anyone looking to eat healthier without sacrificing taste.

This cake is naturally lower in sugar than most traditional cakes, especially if you use a sweetener like stevia. It also provides fiber, healthy fats, and protein, all of which contribute to a balanced meal or snack. Since it’s made with whole, nutritious ingredients, it keeps your blood sugar levels stable and promotes satiety, preventing those mid-afternoon cravings.

Frequently Asked Questions (FAQs)

1. Can I make this recipe vegan?
Yes! To make this cake vegan, you can substitute the eggs with flax eggs (1 tablespoon of ground flaxseed mixed with 3 tablespoons of water per egg) or a chia egg. Use plant-based yogurt instead of dairy yogurt, and make sure to use a sweetener that fits your dietary needs.

2. Can I substitute the apples?
Yes! If you’re not a fan of apples or they’re not in season, you can swap them with other fruits like pears, peaches, or even bananas. Just keep in mind that different fruits will change the flavor and texture of the cake slightly.

3. Can I use a different type of sweetener?
Absolutely! While the recipe calls for stevia, you can use any sweetener you prefer. Honey, maple syrup, or coconut sugar would all work well. Just adjust the quantity based on the sweetness of the sweetener you’re using.

4. How long does the cake stay fresh?
This cake can be stored in an airtight container at room temperature for up to 2-3 days. For longer storage, refrigerate it for up to a week. You can also freeze individual slices for up to a month. When ready to eat, simply defrost and enjoy!

5. Can I add other fruits or nuts to the recipe?
Yes! You can customize this cake with other ingredients like walnuts, almonds, or raisins. Feel free to experiment with different fruits like strawberries or raspberries, depending on what you have on hand. Just be sure not to overload the batter, as too many extra ingredients can affect the texture.

Tips for the Perfect Cake

1. Use rolled oats for the best texture.
While quick oats may seem like a time-saving option, rolled oats provide the best texture and chewiness for this cake. They absorb the water well and offer a heartier bite that complements the soft fruit.

2. Don’t skip the soaking step.
Soaking the oats in hot water allows them to soften and become more cohesive in the batter. This step ensures a moist and tender cake, without any dry, crumbly textures.

3. Experiment with different yogurt varieties.
While plain, unsweetened yogurt is best for this recipe, you can experiment with different varieties for added flavor. Greek yogurt will give your cake a thicker texture, while non-dairy yogurt options work just as well for vegan or lactose-free diets.

4. Add a touch of cinnamon or nutmeg.
For a warm, comforting flavor, try adding a pinch of cinnamon or nutmeg to the batter. These spices pair perfectly with the sweetness of the apples and the earthiness of the oats, taking the flavor profile to the next level.

Conclusion: A Slice of Nourishment and Joy

This Oats, Apple, Yogurt, and Blueberries Cake is more than just a dessert; it’s a celebration of wholesome ingredients coming together to create a treat that nurtures both body and spirit. Whether you’re looking for a quick snack or a healthy breakfast option, this cake fits perfectly into any routine that values balance and nourishment.

With its natural sweetness, fiber-packed oats, and antioxidant-rich fruits, this cake provides the perfect combination of flavor and health benefits. It’s a reminder that healthy eating doesn’t have to be complicated or unappetizing. By using simple, nutritious ingredients, you can create something truly special that makes you feel good inside and out.

So the next time you find yourself craving something sweet but don’t want to compromise on health, remember this recipe. Bake it, enjoy it, and share it with those you love. After all, food is not just about fueling your body—it’s about creating moments of joy, comfort, and connection.

Amal

Oats, Apple, Yogurt, and Blueberries: A Delicious and Easy Diet Cake Recipe!

This Oats, Apple, Yogurt, and Blueberries Cake is a delightful and nourishing treat that brings together the goodness of oats, the sweetness of apples, the creaminess of yogurt, and the antioxidant power of blueberries. It’s a perfect addition to your breakfast, snack, or even as a light dessert.
Prep Time 10 minutes
Cook Time 30 minutes
Total Time 40 minutes
Servings: 6 –8 servings
Course: Dessert
Cuisine: Healthy

Ingredients
  

  • 130 g 1 1/2 cups gluten-free oat flakes
  • 240 ml 1 cup hot water
  • 2 large eggs
  • 30 g 2 1/2 tbsp sweetener (such as stevia or your preferred choice)
  • 1 tsp vanilla extract

Method
 

  1. Soak the Oats: Place the oat flakes into a mixing bowl and pour hot water over them. Stir gently and let the oats soak for about 5 minutes to soften.
  2. Prepare Wet Ingredients: In another bowl, whisk together the eggs, sweetener, and vanilla extract until the mixture is smooth and well combined.
  3. Combine: After the oats have soaked and softened, add the egg mixture to the oats. Stir until everything is evenly incorporated.
  4. Bake: Preheat the oven to 350°F (175°C). Pour the oat mixture into a greased baking dish and spread it out evenly. Bake for 25–30 minutes, or until the cake is set and the top is slightly golden.
  5. Cool and Serve: Allow the cake to cool for a few minutes before cutting it into squares. Serve warm or at room temperature.

Notes

  • Vegan Version: To make this cake vegan, substitute the eggs with flax eggs (1 tablespoon ground flaxseed mixed with 3 tablespoons water per egg).
  • Sweetener Options: You can use your preferred sweetener, such as honey, maple syrup, or a sugar substitute. Adjust the amount to suit your sweetness preference.
  • Topping Ideas: This cake is delicious on its own, but you can top it with a dollop of yogurt, fresh berries, or a sprinkle of cinnamon for extra flavor.
  • Storage: Store leftovers in an airtight container in the fridge for up to 3 days. It can also be frozen for longer storage.

The Ultimate Comfort: Spinach, Mushroom & Potato Purée Casserole

Food has an uncanny way of transporting us to a place of comfort, even on the toughest days. For me, one of those dishes that evokes memories of warmth and safety is a spinach, mushroom, and potato purée casserole. This dish wasn’t something we often had growing up, but when it appeared on our dinner table, it was a sign of something special. Whether it was a weekend gathering or a cozy winter evening, this casserole seemed to have a magical way of bringing the family together.

I remember my mother preparing it, her face glowing in the warmth of the kitchen as she carefully layered the ingredients, knowing that it would be a hit for everyone. The earthy aroma of sautéed mushrooms mixed with the richness of the mashed potatoes, filling the house with a welcoming scent that made us all hungry for more than just food – it was about the connection, the laughter, and the shared moments around the table.

As I grew older and began cooking for my own family, I found myself making this dish, often adjusting it with my own creative spins, but always keeping the heart of the recipe intact. It’s one of those comforting meals that fills you with satisfaction, both physically and emotionally. The creamy potato purée forms a warm base for the savory spinach and mushrooms, offering the perfect balance of flavors. This casserole has the ability to elevate any meal, and it’s one of those dishes I hope to pass down to future generations.

Today, I’m excited to share this recipe, one that has been a part of my family for years and continues to bring us together. Whether you’re new to this dish or you’re looking for a fresh way to enjoy a classic, the spinach, mushroom, and potato purée casserole is sure to become a beloved part of your own family meals.

The Perfect Balance of Comfort and Nutrition

As much as I love indulgent dishes that treat the taste buds to a rich experience, I’ve always appreciated meals that strike a balance between comfort and nutrition. This spinach, mushroom, and potato purée casserole hits that sweet spot perfectly. It’s hearty enough to satisfy even the most voracious appetites, yet it’s made with wholesome, nutrient-dense ingredients that nourish the body.

The potatoes, for instance, provide a smooth, comforting base while offering a good source of fiber and vitamins. When mashed, they become a rich canvas for the other ingredients to shine. Spinach, often hailed as a superfood, is loaded with iron, calcium, and antioxidants, adding a healthy green component to the dish. Mushrooms, with their earthy flavor, provide an excellent source of vitamins D and B, as well as important minerals like potassium and selenium.

What makes this casserole truly great is that it’s not just about the flavors. It’s about creating a meal that feels good to eat while also being nourishing and satisfying. Whether you’re serving it as a side dish or as a main course, you can feel confident knowing that this recipe is as beneficial as it is delicious.

Ingredients:

IngredientQuantity
Fresh spinach, chopped4 cups
Potatoes, peeled and diced4 medium
Mushrooms, sliced1 ½ cups
Onion, finely chopped1 medium
Garlic, minced3 cloves
Olive oil2 tbsp
Heavy cream1 cup
Vegetable broth½ cup
Salt1 tsp
Black pepper½ tsp
Nutmeg¼ tsp
Parmesan cheese, grated½ cup
Butter2 tbsp
Fresh parsley (for garnish)2 tbsp

Directions:

  1. Prepare the potatoes: Boil the diced potatoes in salted water until they’re fork-tender, about 12-15 minutes. Drain and set aside.
  2. Sauté the vegetables: Heat olive oil in a large skillet over medium heat. Add the onions and garlic, sautéing until softened, about 4 minutes. Add the mushrooms and cook for another 5 minutes, allowing them to release their moisture and become golden.
  3. Cook the spinach: Add the chopped spinach to the skillet and sauté until wilted, about 2-3 minutes. Season with salt, pepper, and nutmeg to taste.
  4. Mash the potatoes: In a large bowl, mash the boiled potatoes with the heavy cream and vegetable broth until smooth and creamy. Stir in butter and Parmesan cheese for added richness.
  5. Combine and bake: Gently fold the sautéed vegetable mixture into the mashed potatoes. Transfer the mixture into a greased casserole dish, spreading it evenly. Top with additional Parmesan cheese and bake at 375°F (190°C) for 20-25 minutes, until the top is golden and bubbly.
  6. Serve: Garnish with fresh parsley before serving. Enjoy your comforting, creamy casserole!

Nutritional Information (per serving):

NutrientAmount per Serving
Calories250 kcal
Protein6g
Carbohydrates30g
Sugars4g
Fat12g
Saturated Fat5g
Fiber5g
Sodium450mg

Why This Casserole is Perfect for Any Occasion

There’s something about casseroles that make them perfect for gatherings. They’re easy to prepare, and they offer the convenience of being made ahead of time. Whether you’re hosting a dinner party, having a casual family meal, or preparing for a holiday feast, a casserole like this spinach, mushroom, and potato purée casserole is ideal. You can assemble it in advance, refrigerate it, and simply pop it in the oven when it’s time to eat. This convenience factor, combined with the delightful flavors, makes this dish a go-to for busy nights or special celebrations.

It’s a versatile recipe too, easily adaptable to different tastes and dietary needs. You can add more vegetables like leeks or carrots, experiment with different herbs such as thyme or rosemary, or even swap out the potatoes for cauliflower for a lower-carb version. Whether you’re serving vegetarians, vegans, or gluten-free guests, this casserole can be adjusted to accommodate various preferences without compromising its comforting essence.

The Power of Mushrooms and Spinach: A Match Made in Flavor Heaven

The combination of mushrooms and spinach in this casserole is more than just a delicious pairing—it’s an ode to two of the most versatile and healthy ingredients that nature provides. Spinach brings a mild, slightly earthy flavor that complements the richness of the mushrooms perfectly. Together, they create a balanced flavor profile that elevates the simple potatoes into something truly special.

Mushrooms, with their savory umami notes, contribute a depth of flavor that makes this casserole more than just a vegetable side dish. They add a hearty and satisfying bite, perfect for those who prefer a more filling, meatless meal. They also help to create a luxurious texture when sautéed, absorbing the flavors of the garlic and onions they’re cooked with.

Spinach, on the other hand, offers a fresh, green note to the dish that cuts through the richness of the potatoes and mushrooms. It’s vibrant and slightly bitter, balancing out the sweetness and starchiness of the mashed potatoes while adding a layer of nutrients that enhance the overall healthfulness of the casserole.

The combination of these ingredients creates a dish that’s both hearty and fresh, with layers of textures and flavors that complement one another beautifully.

Frequently Asked Questions

  1. Can I make this casserole ahead of time? Yes! You can easily prepare the casserole the day before, cover it, and store it in the fridge until you’re ready to bake it. This makes it a great option for meal prepping or for serving at large gatherings.
  2. Can I substitute the potatoes with another vegetable? Absolutely! For a lower-carb version, try using cauliflower in place of the potatoes. It will provide a similar texture and will soak up the flavors just as well. Sweet potatoes can also be used for a sweeter variation.
  3. Can I freeze this casserole? Yes, this casserole freezes well. Once it has cooled completely, wrap it tightly in plastic wrap and foil, then store it in the freezer. To reheat, bake it at 350°F (175°C) for about 40 minutes or until heated through.
  4. What can I serve with this casserole? This casserole can be served on its own as a main dish or paired with a protein like grilled chicken, turkey, or a hearty salad. It’s also great as a side to go with roasted meats or vegetable dishes.

Conclusion: A Heartwarming Dish for Every Occasion

This spinach, mushroom, and potato purée casserole is more than just a recipe—it’s a dish that brings people together, offering both nourishment and comfort in every bite. Its simplicity and versatility make it an ideal addition to any meal, while the combination of flavors and textures ensures it will never be overlooked. Whether you’re preparing it for a family dinner, a potluck, or a holiday celebration, this casserole is sure to become a staple in your culinary repertoire.

There’s something deeply satisfying about preparing a meal that nourishes both the body and the soul. This casserole does exactly that, turning everyday ingredients into a dish that feels like a warm hug on a plate. So, the next time you’re in need of comfort or simply want to create a meal that will make your loved ones feel special, turn to this spinach, mushroom, and potato purée casserole. It’s more than just food—it’s a reminder of the simple joys that come with sharing a meal.

Amal

The Ultimate Comfort: Spinach, Mushroom & Potato Purée Casserole

This Spinach, Mushroom & Potato Purée Casserole is the ultimate comfort food, perfect for family dinners or special occasions. A creamy, hearty casserole made with sautéed mushrooms, fresh spinach, and smooth mashed potatoes, topped with a layer of savory Parmesan. It’s simple, nutritious, and utterly delicious—sure to satisfy your cravings for a cozy, flavorful meal.
Prep Time 20 minutes
Cook Time 40 minutes
Total Time 1 hour
Servings: 6 -8 servings
Course: Main Dish
Cuisine: American

Ingredients
  

  • 4 cups fresh spinach chopped
  • 4 medium potatoes peeled and diced
  • 1 ½ cups mushrooms sliced
  • 1 medium onion finely chopped
  • 3 cloves garlic minced
  • 2 tbsp olive oil
  • 1 cup heavy cream
  • ½ cup vegetable broth
  • 1 tsp salt
  • ½ tsp black pepper
  • ¼ tsp nutmeg
  • ½ cup Parmesan cheese grated
  • 2 tbsp butter
  • 2 tbsp fresh parsley chopped (for garnish)

Method
 

  1. Prepare the potatoes: Boil the diced potatoes in salted water until they are tender, about 12-15 minutes. Drain and set aside.
  2. Sauté the vegetables: In a large skillet, heat olive oil over medium heat. Add the onions and garlic, cooking until softened, about 4 minutes. Add the sliced mushrooms and cook until golden, about 5 minutes. Stir in the spinach and cook until wilted, 2-3 minutes. Season with salt, pepper, and nutmeg.
  3. Mash the potatoes: In a large bowl, mash the boiled potatoes with the heavy cream and vegetable broth until smooth. Stir in the butter and Parmesan cheese.
  4. Combine and bake: Gently mix the sautéed vegetables into the mashed potatoes. Transfer the mixture to a greased casserole dish, spreading it evenly. Top with more Parmesan cheese and bake at 375°F (190°C) for 20-25 minutes, until the top is golden and bubbly.
  5. Garnish and serve: Sprinkle fresh parsley on top for added color and flavor before serving.

Notes

  • Make-Ahead: You can prepare the casserole the day before, cover it, and refrigerate it. Simply bake it when you’re ready to serve.
  • Customizations: Feel free to add more vegetables like leeks, carrots, or cauliflower for additional flavor and texture. For a dairy-free version, swap the cream and butter for coconut cream and olive oil.
  • Freezing: This casserole freezes well! You can assemble it, freeze it, and bake it from frozen, though baking may take a bit longer.

Lotus Biscoff Cheesecake: A Flavorful Journey to Sweet Memories

As a child, desserts were always a source of excitement in our home. My mother would often bake cakes, pies, and cookies, each creation marking a special occasion or simply a delightful afternoon spent together. However, there was one dessert that stood out, one that could bring the whole family together no matter how busy we were or how far we lived apart: cheesecake.

Cheesecake has a magical ability to evoke nostalgia and comfort. I remember the first time I encountered a version with a unique twist—the addition of Lotus Biscoff cookies. My cousin had introduced it to us, and at first, I was skeptical. How could a humble cookie change the timeless classic cheesecake? Yet, when I tasted it, I was hooked. The sweet, caramelized crunch of the Lotus Biscoff cookie paired with the rich, creamy cheesecake filling was an unexpected match made in dessert heaven. It was a new flavor sensation that left everyone at the table in awe, and we all agreed that this dessert was something special.

From that moment on, Lotus Biscoff Cheesecake became a cherished recipe in our family, one that I would make for special gatherings, birthdays, and even quiet nights when I needed a touch of sweetness to brighten my day. It’s funny how food can hold so much emotion and memory—every slice of this cheesecake reminds me of the joy of sharing a delicious treat with loved ones.

Now, I’m excited to share this simple yet incredibly indulgent Lotus Biscoff Cheesecake with you. It’s a dessert that’s both comforting and sophisticated, with the perfect balance of flavors. Whether you’re making it for a special occasion or just to treat yourself, this cheesecake is sure to become a favorite in your household.

The Allure of Lotus Biscoff Cookies in Desserts

Lotus Biscoff cookies, with their distinct caramelized flavor and satisfying crunch, are a dessert lover’s secret weapon. Known for their deep-spiced taste and rich, buttery texture, these cookies bring a touch of elegance and complexity to any dessert. The unique combination of brown sugar, cinnamon, and a hint of ginger makes them the perfect foil for creamy fillings like cheesecake.

The appeal of using Lotus Biscoff cookies in desserts goes beyond just their flavor. The crunch they provide when used in crusts, like in this cheesecake recipe, offers a satisfying contrast to the smooth, velvety texture of the cheesecake filling. It’s a harmonious blend that elevates the dessert from the familiar to something a bit more special, something unexpected yet delightful.

Cheesecake, on its own, can sometimes be a little too rich or too heavy, but the Lotus Biscoff crust adds a light crunch that complements the creaminess of the cheese filling. The Biscoff cookies also carry a caramelized sweetness, which means you can reduce the amount of sugar used in the filling, making the overall dessert more balanced.

What’s more, Lotus Biscoff cookies have gained a massive following in recent years, showing up not just in desserts but in lattes, spreads, and various other treats. Their widespread popularity only solidifies the idea that this cookie has the power to elevate any dessert it’s added to, including cheesecake.

Ingredients:

IngredientQuantity
Lotus Biscoff cookies16 pieces (about 150 g)
Melted butter3 tbsp
Cream cheese1 cup (240 g)
Vanilla extract1/2 tsp

Directions:

  1. Prepare the Crust: Begin by crushing the Lotus Biscoff cookies into fine crumbs using a food processor or placing them in a plastic bag and smashing them with a rolling pin. Transfer the crushed cookies to a bowl and mix in the melted butter until everything is well combined.
  2. Form the Base: Press the cookie-butter mixture into the bottom of a cheesecake pan or a springform pan. Use the back of a spoon to press it down firmly to create an even crust. Refrigerate for about 10 minutes to set.
  3. Prepare the Filling: In a separate bowl, beat the cream cheese and vanilla extract together until smooth and creamy. Add in a bit of powdered sugar if you want a sweeter filling.
  4. Assemble the Cheesecake: Once the crust has set, spread the cream cheese mixture evenly over the crust. Smooth it out with a spatula for an even layer.
  5. Chill the Cheesecake: Place the cheesecake in the fridge for at least 4 hours or overnight to allow it to set properly.
  6. Serve and Enjoy: Once chilled, slice and serve. You can top the cheesecake with extra crumbled Lotus Biscoff cookies or a drizzle of caramel sauce for an added touch of sweetness.

Nutritional Information (per serving):

NutrientAmount per Serving
Calories350 kcal
Protein5g
Carbohydrates35g
Sugars20g
Fat22g
Saturated Fat10g
Fiber1g
Sodium150mg

Why This Lotus Biscoff Cheesecake is Perfect for Any Occasion

If you’ve ever hosted a dinner party or family gathering, you know that dessert is often the highlight of the meal. A good dessert leaves everyone satisfied and happy, but a great dessert lingers in the memory long after the last bite. This Lotus Biscoff Cheesecake falls into that category. It’s a showstopper that requires minimal effort but delivers maximum flavor. Whether you’re an experienced baker or a novice in the kitchen, you’ll find that this cheesecake is surprisingly easy to make, yet it looks and tastes like a professional creation.

What makes this cheesecake stand out is its versatility. You can make it for a special occasion like a birthday or anniversary, or you can whip it up on a weekend when you just need something comforting. The beauty of the Lotus Biscoff Cheesecake is that it fits seamlessly into any setting, from casual gatherings to more formal dinners. The deep flavors of the Biscoff cookies give it an air of sophistication, while the creamy filling ensures that it remains universally appealing to guests of all ages.

Additionally, this cheesecake requires no baking, making it an ideal dessert to prepare ahead of time. You can make it the night before and let it set in the fridge overnight, ensuring that it’s ready to serve when your guests arrive. The lack of an oven also means it’s perfect for those warm summer months when you don’t want to add any extra heat to your kitchen.

Why Lotus Biscoff Cheesecake is a Winner: The Combination of Flavors and Textures

The true charm of the Lotus Biscoff Cheesecake lies in its balanced combination of flavors and textures. Each bite delivers the perfect contrast between the smooth, creamy filling and the crunchy, caramelized Biscoff cookie crust. The cream cheese filling is light yet rich, and the addition of vanilla extract enhances the overall flavor profile, making the cheesecake feel more luxurious and indulgent.

The beauty of the dessert is in its simplicity. The ingredients are minimal—just a few key components come together to create something extraordinary. But it’s in the careful balance of those components that this cheesecake truly shines. The Biscoff cookie crust offers a deep, caramelized sweetness that’s not overpowering, while the cream cheese filling brings a silky smooth texture that’s both rich and comforting.

The cheesecake is also incredibly versatile in terms of how you can customize it. You can add fruit toppings like fresh berries or even a drizzle of caramel sauce for an added layer of sweetness. The Lotus Biscoff Cheesecake can also be easily adapted for different dietary preferences. For those who are looking for a gluten-free version, simply use gluten-free cookies for the crust, and you’ll have a treat that everyone can enjoy.

Frequently Asked Questions (FAQs)

1. Can I use a different type of cookie for the crust?

While Lotus Biscoff cookies are highly recommended for their unique flavor and texture, you can use other cookies like graham crackers or shortbread as substitutes. However, the caramelized flavor of the Biscoff cookies is hard to beat, and it’s what makes this cheesecake stand out.

2. How long should I refrigerate the cheesecake before serving?

For the best results, chill the cheesecake for at least 4 hours, but overnight is ideal. This allows the cheesecake to set properly and enhances the flavors. The longer you let it chill, the better the texture and taste will be.

3. Can I make this cheesecake in advance?

Yes, this cheesecake is perfect for making ahead of time. It’s an excellent choice for a party or special occasion since it needs time to set in the fridge. Making it the day before ensures that it’s ready to serve when you need it.

4. Can I make this cheesecake without cream cheese?

If you want to avoid cream cheese, you can try substituting it with mascarpone or ricotta cheese for a slightly different flavor and texture. However, the rich, tangy flavor of cream cheese is what gives this cheesecake its signature taste.

Conclusion: A Slice of Happiness in Every Bite

Lotus Biscoff Cheesecake is more than just a dessert; it’s an experience. Every slice brings together the familiar comforts of cheesecake with the unique, indulgent flavor of Lotus Biscoff cookies. Whether it’s for a special occasion or just a simple treat, this cheesecake will surely leave a lasting impression.

There’s something incredibly satisfying about taking a bite of something that not only tastes incredible but also brings back memories of shared moments and good times. It’s a dessert that has the power to make an ordinary day feel special, turning any meal into a celebration. So, the next time you’re craving something sweet, remember that you don’t need a complicated recipe to create something extraordinary. With Lotus Biscoff Cheesecake, you can indulge in simplicity, flavor, and a little piece of happiness.

Amal

Lotus Biscoff Cheesecake: A Flavorful Journey to Sweet Memories

This Lotus Biscoff Cheesecake combines the indulgent flavors of rich cream cheese with the signature caramelized crunch of Lotus Biscoff cookies. It’s a dessert that’s easy to make but feels incredibly sophisticated, making it the perfect choice for any occasion.
Prep Time 15 minutes
Cook Time 4 hours
Total Time 4 hours 15 minutes
Servings: 8 -10 servings
Course: Dessert
Cuisine: American

Ingredients
  

  • 16 Lotus Biscoff cookies about 150 g
  • 3 tbsp melted butter
  • 1 cup 240 g cream cheese, softened
  • 1/2 tsp vanilla extract

Method
 

  1. Prepare the crust: Crush the Lotus Biscoff cookies into fine crumbs using a food processor or by placing them in a plastic bag and crushing them with a rolling pin. Combine the crumbs with melted butter in a bowl, mixing until the crumbs are fully coated.
  2. Form the base: Press the cookie-butter mixture into the bottom of a springform pan or cheesecake pan. Use a spoon to press it down evenly. Place the crust in the fridge for about 10 minutes to set.
  3. Make the filling: Beat the cream cheese and vanilla extract together until smooth and creamy. If you prefer a sweeter filling, you can add powdered sugar to taste.
  4. Assemble the cheesecake: Once the crust has set, spread the cream cheese mixture evenly over the crust. Use a spatula to smooth the top.
  5. Chill: Refrigerate the cheesecake for at least 4 hours or overnight to allow it to fully set.
  6. Serve and enjoy: Once chilled, slice and serve. Garnish with extra crushed Biscoff cookies or a drizzle of caramel for an extra special touch.

Notes

  • You can substitute the Biscoff cookies with any other cookies you prefer, such as graham crackers or digestive biscuits, although the flavor will be different.
  • For a richer cheesecake, you can add a tablespoon of heavy cream to the cream cheese mixture.
  • This cheesecake can be made in advance and stored in the fridge for up to 3 days.
  • Feel free to experiment with additional toppings like whipped cream, fresh berries, or a dusting of cinnamon to personalize the cheesecake to your liking.

A Simple Delight: Apple Puff Pastry in Just 10 Minutes

There’s something magical about the aroma of apples and cinnamon filling a kitchen, especially when you’re in the mood for a quick, comforting dessert. It takes me back to afternoons spent in my grandmother’s kitchen. She was never one for complicated recipes or long baking sessions; instead, she embraced simplicity. And some of her most unforgettable creations were born from just a few ingredients, effortlessly brought together to form something beautiful.

I still remember the first time I learned how to make a simple apple pastry, much like this recipe. I was young and struggling with the pressures of school, work, and life. One afternoon, I visited my grandmother, and she offered me a fresh, warm slice of her apple dessert. The moment I bit into the flaky pastry, with the tender apples, cinnamon, and sugar mingling together, I was transported into a state of calm. It was more than just a treat — it was a reminder that life doesn’t need to be overly complicated to bring joy.

This Apple Puff Pastry is inspired by that same spirit of simplicity and comfort. It’s the perfect dessert when you want something quick but delicious, whether you’re entertaining guests or enjoying a quiet evening at home. In just 10 minutes, you can create a dessert that’s as easy as it is comforting. Every bite is a reminder that sometimes, the best things in life come in simple packages.

Why Puff Pastry and Apples Are a Perfect Pair

There’s a reason why puff pastry and apples are a classic combination. The buttery, flaky layers of puff pastry offer the perfect contrast to the sweet, tender apples. As the pastry bakes, it rises and crisps up around the apples, creating a golden, crisp crust that holds all the juicy sweetness inside.

Apples, with their natural sweetness and crisp texture, make the ideal filling for this dessert. They hold their shape during baking, allowing the filling to stay chunky and rich, while releasing just enough moisture to soften and create a beautiful contrast against the puff pastry. The addition of cinnamon brings warmth and depth, transforming simple ingredients into a dessert that feels both indulgent and homey.

Another benefit of puff pastry is its versatility. While store-bought versions are convenient and easy to use, you can also make your own for a more homemade touch. Regardless of the option you choose, the result is a decadent, yet simple treat that’s perfect for any occasion.

Ingredients:

IngredientQuantity
Dough (store-bought or homemade)500 g
Apples2 medium, peeled and diced
Sugar20 g
Cinnamon5 g (about 1 teaspoon)

Directions:

  1. Preheat your oven to 200°C (390°F). If you’re using store-bought puff pastry, roll it out onto a baking sheet lined with parchment paper.
  2. In a small bowl, combine the diced apples with sugar and cinnamon. Mix well to coat the apples evenly.
  3. Spoon the apple mixture onto the center of the rolled-out dough, leaving a small border around the edges.
  4. Fold the edges of the dough over the apples, creating a rustic, open-faced tart.
  5. Bake in the preheated oven for 10-12 minutes, or until the puff pastry is golden and crispy, and the apples are tender.
  6. Remove from the oven, let it cool for a few minutes, then slice and serve!

Nutritional Information (per serving):

NutrientAmount per Serving
Calories150 kcal
Protein2g
Carbohydrates25g
Sugars14g
Fat6g
Saturated Fat3g
Fiber2g
Sodium120mg

The Benefits of Quick Desserts: A Solution for Busy Lives

In our fast-paced world, there are often times when we crave something sweet but don’t have the luxury of time. This is where quick and easy desserts like Apple Puff Pastry come in. The beauty of this recipe lies not just in its flavor but in its ability to come together effortlessly. In just 10 minutes, you can prepare a delightful dessert that feels like it came from a bakery, but with minimal effort.

Quick desserts also provide an opportunity to show creativity without the stress of complicated preparations. Whether you’re hosting a last-minute gathering or simply want to treat yourself after a long day, this pastry will save you time while still impressing your guests. There’s no need to spend hours in the kitchen, making multiple layers or waiting for dough to rise. Instead, this recipe offers simplicity, allowing you to focus on what really matters: enjoying the moment.

The Versatility of Apple Puff Pastry: Variations and Adaptations

What makes Apple Puff Pastry even more appealing is its versatility. While the basic combination of apples, sugar, and cinnamon is delicious on its own, there are countless ways to tweak this recipe to suit your tastes or dietary preferences. For example, you can add a handful of chopped nuts, like walnuts or pecans, to introduce a crunchy texture and an earthy flavor that complements the sweetness of the apples.

If you’re feeling adventurous, you can experiment with different fruits alongside the apples. Pears, for instance, offer a softer texture and a delicate sweetness that pairs wonderfully with cinnamon. Or, for a tropical twist, add some finely chopped pineapple for a sweet and tangy filling. You can also drizzle the pastry with honey or caramel sauce once it’s baked to elevate the dessert and add an extra touch of richness.

For those with dietary restrictions, this recipe is easily adaptable. You can use gluten-free puff pastry if necessary, or substitute the butter with coconut oil for a dairy-free version. The apples themselves are naturally gluten-free, making this dessert a great option for people with food sensitivities. Additionally, you can use a sugar substitute like stevia or monk fruit to make the recipe lower in sugar without sacrificing flavor.

Frequently Asked Questions (FAQs)

1. Can I use store-bought puff pastry?

Absolutely! Store-bought puff pastry is a great option for this recipe, especially if you’re looking for convenience. It saves time and effort while still producing a delicious dessert. Just be sure to follow the package instructions for rolling it out and baking.

2. Can I make this pastry ahead of time?

While puff pastry is best enjoyed fresh out of the oven, you can make it ahead of time and store it in the fridge for a few hours. When you’re ready to bake, simply pop it in the oven, and it will bake up fresh in just a few minutes. If you’re planning to make it in advance, be sure to store it in an airtight container to prevent it from drying out.

3. How can I make this recipe gluten-free?

To make the recipe gluten-free, use a gluten-free puff pastry alternative. You can find these at most grocery stores or online. Just make sure the rest of your ingredients, including the apples and cinnamon, are certified gluten-free.

4. Can I add other fruits to the filling?

Yes! Feel free to experiment with different fruits to customize the filling. Pears, berries, or even stone fruits like peaches work beautifully with the apples. Adjust the sugar and cinnamon based on the sweetness of the fruit to achieve the perfect flavor balance.

5. Can I make this dessert in individual servings?

Certainly! You can cut the puff pastry into smaller squares or circles and create individual portions. This makes for a more elegant presentation, and they’re easier to serve for gatherings or parties. Just adjust the baking time slightly depending on the size of the pastries.

Conclusion: A Timeless Recipe for Every Occasion

Apple Puff Pastry is a dessert that reminds us of the simple pleasures in life. It’s quick, it’s delicious, and it’s incredibly versatile. Whether you’re baking it for yourself or sharing it with others, it’s a treat that brings comfort and warmth to any occasion. The perfect balance of flaky pastry, sweet apples, and warm cinnamon makes this dessert a timeless classic that will never go out of style.

As you bake these pastries in your kitchen, take a moment to appreciate how something so simple can bring so much joy. Life may be complicated at times, but with a few simple ingredients and a little creativity, we can make something sweet out of the everyday. So go ahead, grab that puff pastry, slice those apples, and create a dessert that will make your day just a little bit brighter.

Amal

A Simple Delight: Apple Puff Pastry in Just 10 Minutes

Looking for a quick dessert that’s bursting with flavor? This Apple Puff Pastry is the perfect solution. With flaky, buttery puff pastry and tender, cinnamon-spiced apples, it’s a delightful treat that comes together in just 10 minutes.
Prep Time 5 minutes
Cook Time 15 minutes
Total Time 20 minutes
Servings: 4 –6 servings
Course: Dessert
Cuisine: American

Ingredients
  

  • 500 g store-bought or homemade puff pastry dough
  • 2 medium apples peeled and diced
  • 20 g sugar
  • 5 g about 1 teaspoon cinnamon

Method
 

  1. Preheat your oven to 200°C (390°F). If you’re using store-bought puff pastry, roll it out onto a baking sheet lined with parchment paper.
  2. In a small bowl, combine the diced apples with sugar and cinnamon. Stir until the apples are evenly coated.
  3. Spoon the apple mixture onto the center of the puff pastry, leaving a border around the edges.
  4. Fold the edges of the pastry over the apples, creating a rustic, open-faced tart.
  5. Bake in the preheated oven for 10-12 minutes or until the puff pastry is golden brown and crispy, and the apples are tender.
  6. Remove from the oven and let it cool for a few minutes before slicing and serving.

Notes

  • If you prefer a sweeter dessert, feel free to adjust the amount of sugar according to your taste.
  • You can add a sprinkle of chopped nuts, like walnuts or pecans, for an extra crunchy texture.
  • This puff pastry can be made ahead of time and stored in the fridge for a few hours before baking. Just make sure to bake it fresh when you’re ready to serve.
  • For a fun variation, try adding a drizzle of caramel or honey on top after baking for an added touch of sweetness.
  • If you need a gluten-free version, opt for gluten-free puff pastry and check the label for any other potential allergens.

Cottage Cheese Apple Muffins: A Sweet, Comforting Journey

There are moments in life that are marked by a particular scent, a flavor, or a dish that takes us back to a place of comfort. For me, Cottage Cheese Apple Muffins are one of those dishes. I can still remember the first time I made them. It was a cold winter morning, and I had spent the night before feeling a little out of sorts. Life had become overwhelming, and it seemed that everything was a little harder to handle. On that morning, I decided to try something simple and nourishing — a recipe I had come across years ago in a family cookbook. I had all the ingredients at home, and it seemed like the perfect way to start my day.

As the muffins baked, a warm, sweet aroma began to fill the house. It was as if the scent was erasing all the chaos in my mind and replacing it with calm. I felt comforted and uplifted, not just by the warm muffins, but by the process of baking itself. The texture of the cottage cheese in the batter, the sweetness of the apples, and the comforting flavor that emerged when I bit into one of those freshly baked muffins made me realize how powerful food could be in moments of stress. This recipe has since become one of my go-to choices when I need to bring some positivity back into my day.

Over the years, these muffins have evolved. Sometimes, I add in a handful of raisins or chopped nuts, depending on what I have available. But what always remains is the comforting, tender texture of the cottage cheese and the delightful freshness of the apples. Whether shared with friends or enjoyed alone on a quiet morning, Cottage Cheese Apple Muffins have become more than just a snack — they are a symbol of finding peace in the simplest moments.

The Perfect Balance of Flavor and Texture

One of the reasons Cottage Cheese Apple Muffins have become a family favorite is their remarkable balance of flavors and textures. When you think of muffins, you might imagine a soft, spongy texture and a slightly sweet flavor. While these muffins certainly have that classic muffin appeal, they also bring something unique to the table — the creamy, slightly tangy cottage cheese. This ingredient gives the muffins a richness that sets them apart from traditional muffins, while adding moisture and making them surprisingly tender.

The apples, on the other hand, add freshness, lightness, and a touch of natural sweetness. Whether you use tart Granny Smith apples or sweeter varieties like Fuji or Honeycrisp, the apples enhance the overall flavor, creating a perfect contrast to the richness of the cottage cheese. The added bonus is that the apples also add a bit of fiber, making the muffins not just a delicious treat but a satisfying one, too.

Why Cottage Cheese is the Secret Ingredient

Many people may not immediately think to add cottage cheese to muffins, but once you try it, you’ll understand why it works so well. Cottage cheese is packed with protein and offers a creamy texture that helps create a moist muffin. The presence of casein protein in cottage cheese is also beneficial for those who are looking for a more substantial snack. Unlike simple carbohydrates, the protein content helps keep you feeling fuller for longer, making these muffins a great choice for breakfast or as a mid-afternoon snack.

Cottage cheese also brings a slight tanginess to the flavor profile, which balances the sweetness of the apples and sugar. It might seem like an unconventional muffin ingredient, but the flavor and texture it imparts are what make these muffins so special.

A Versatile Recipe with Endless Variations

While the base recipe is already delicious, one of the best parts about making Cottage Cheese Apple Muffins is the ability to customize it. The muffins can easily be transformed to suit your preferences, dietary needs, or seasonal ingredients. You can add a variety of mix-ins like raisins, chopped walnuts, or even cinnamon chips. If you’re looking for a healthier option, you can substitute the butter with coconut oil or applesauce, or use whole wheat flour for added fiber.

Feel free to experiment with different apple varieties, too. For example, you could use sweet Gala apples for a sweeter muffin, or opt for tart Granny Smith apples for a more balanced, refreshing flavor. If you prefer to make a more indulgent muffin, adding a handful of chocolate chips or a sprinkle of cinnamon sugar on top before baking can take the recipe to the next level.

Ingredients:

IngredientQuantity
Cottage cheese220g
Eggs2
Butter (softened)80g
Flour1 1/2 cups (180-200g)
Sugar1/2 cup (100g)
Baking powder1 tsp (8g)
SaltA pinch
Apples (peeled and chopped)1-2
Optional: Finely chopped nuts or raisinsAs desired

Directions:

  1. Preheat your oven to 180°C (350°F) and line a muffin tin with paper liners or grease it lightly.
  2. In a large mixing bowl, whisk together the cottage cheese, eggs, and softened butter until the mixture is smooth and creamy.
  3. In another bowl, sift together the flour, sugar, baking powder, and salt.
  4. Gradually add the dry ingredients to the wet mixture, stirring gently to combine until just incorporated. Do not overmix.
  5. Fold in the chopped apples, and if desired, add finely chopped nuts or raisins for extra texture and flavor.
  6. Spoon the batter evenly into the muffin tin, filling each cup about 2/3 full.
  7. Bake for 20-25 minutes, or until the muffins are golden brown and a toothpick inserted into the center comes out clean.
  8. Allow the muffins to cool in the tin for 5 minutes before transferring them to a wire rack to cool completely.

Nutritional Information (per muffin):

NutrientAmount per Serving
Calories180 kcal
Protein5g
Carbohydrates23g
Fiber1g
Sugars12g
Fat8g
Saturated Fat5g
Sodium120mg
Calcium60mg

Frequently Asked Questions (FAQs)

1. Can I make these muffins gluten-free?

Yes! You can make these muffins gluten-free by substituting the all-purpose flour with a gluten-free flour blend. Be sure to check the measurements on the gluten-free flour bag, as it may vary slightly from regular flour. Additionally, ensure that the baking powder is also gluten-free.

2. Can I make these muffins without eggs?

If you’re looking to make these muffins without eggs, you can use a flaxseed egg substitute (1 tablespoon of ground flaxseed mixed with 3 tablespoons of water, left to sit for 5 minutes) or a commercial egg replacer. The texture may be slightly different, but the muffins will still turn out soft and delicious.

3. How do I store leftover muffins?

Once baked and cooled, these muffins can be stored in an airtight container at room temperature for up to three days. If you want to keep them for longer, you can freeze them for up to a month. To thaw, simply leave them at room temperature for a few hours or heat them in the microwave for a quick warm-up.

4. Can I use non-dairy alternatives for this recipe?

Yes! If you’re looking for a dairy-free version, you can swap the cottage cheese for a non-dairy alternative such as silken tofu or a cashew-based cream cheese. Additionally, use plant-based butter or oil in place of the regular butter. Just keep in mind that the flavor and texture might change slightly, but it should still be delicious.

5. How can I make these muffins more moist?

If you’re finding that the muffins are too dry, you can add more wet ingredients like applesauce or yogurt. This will help enhance the moisture content and make the muffins even more tender. Just be sure to adjust the flour measurements if you add extra wet ingredients to maintain the right consistency of the batter.

Conclusion: A Recipe That Transcends Time

Cottage Cheese Apple Muffins have not only become a favorite in my household but also a comforting symbol of the power of simple, nourishing ingredients. Over the years, I have found that these muffins are more than just a treat; they are a reminder of the importance of taking time to enjoy the little things, especially when life feels overwhelming. Whether I make them for a busy morning or share them with loved ones, these muffins have brought warmth, joy, and nourishment to countless moments.

If you’re looking for a recipe that blends the goodness of cottage cheese with the sweetness of apples, all wrapped up in a soft, flavorful muffin, this is the one to try. The balance of textures and flavors makes these muffins perfect for any occasion, from a comforting breakfast to an afternoon snack. Once you experience the cozy satisfaction of these muffins, you’ll understand why they hold a special place in my heart — and hopefully, in yours as well.

Amal

Cottage Cheese Apple Muffins: A Sweet, Comforting Journey

These Cottage Cheese Apple Muffins are a delightful combination of soft, tender muffin texture and a creamy, slightly tangy cottage cheese twist. Filled with the natural sweetness of apples, these muffins make a perfect breakfast or snack.
Prep Time 10 minutes
Cook Time 25 minutes
Total Time 35 minutes
Servings: 10 -12 muffins
Course: Dessert
Cuisine: American

Ingredients
  

  • 220 g cottage cheese
  • 2 eggs
  • 80 g butter softened
  • 1 1/2 cups 180-200g flour
  • 1/2 cup 100g sugar
  • 1 tsp 8g baking powder
  • A pinch of salt
  • 1-2 apples peeled and chopped
  • Optional: Finely chopped nuts or raisins to taste

Method
 

  1. Preheat your oven to 180°C (350°F) and line a muffin tin with paper liners or lightly grease the cups.
  2. In a large bowl, whisk together the cottage cheese, eggs, and softened butter until smooth and well combined.
  3. In another bowl, sift together the flour, sugar, baking powder, and salt.
  4. Gradually add the dry ingredients into the wet ingredients, stirring until just incorporated. Be careful not to overmix.
  5. Gently fold in the chopped apples, and add optional nuts or raisins if desired.
  6. Spoon the batter into the muffin cups, filling each about 2/3 full.
  7. Bake for 20-25 minutes, or until the muffins are golden brown and a toothpick inserted into the center comes out clean.
  8. Allow the muffins to cool in the tin for 5 minutes, then transfer to a wire rack to cool completely.

Notes

  • These muffins are best enjoyed fresh but can be stored in an airtight container at room temperature for up to 3 days.
  • To freeze, let the muffins cool completely, then wrap them in plastic wrap and store in a freezer-safe bag for up to 1 month. Thaw at room temperature or reheat in the microwave.
  • Feel free to experiment with different types of apples based on your preference for sweetness or tartness. You can also add cinnamon or nutmeg for extra flavor.
  • For a dairy-free version, substitute the cottage cheese with a plant-based alternative such as soy or almond-based cheese.

Energizing Seed & Apple Snack for a Slim Waist: A Journey to Wellness

There was a time in my life when I was constantly juggling the demands of work, family, and personal goals, which made it incredibly hard to focus on my health. I remember rushing from one task to the next, grabbing unhealthy snacks in between, hoping that they would provide a quick burst of energy to get me through the day. Unfortunately, these quick fixes often left me feeling sluggish, unmotivated, and unsatisfied. It wasn’t until one afternoon, when I was feeling particularly drained and irritable, that I realized the importance of fueling my body with the right foods.

It started as a simple experiment. I wanted to create a snack that would not only fuel my body for longer periods but also help me feel lighter, more energized, and content. I turned to whole foods, rich in fiber, protein, and healthy fats. The result was this Energizing Seed & Apple Snack, a recipe that I now make regularly, whether I’m heading to the gym, running errands, or simply needing a pick-me-up during a long workday. The best part is that it’s not just about energy — it’s about feeling satisfied, balanced, and confident in my body.

This snack became my go-to, helping me feel lighter and more energized without feeling heavy or bloated. It’s full of nourishing ingredients like pumpkin seeds, sesame seeds, sunflower seeds, and apples, all of which contribute to a slimmer waistline and sustained energy. This recipe quickly became a part of my routine, and it’s not just a snack — it’s a reminder that taking a moment to focus on nourishing your body can make all the difference.

Why This Snack is the Ultimate Energy Boost

We all know how hard it can be to maintain energy levels throughout the day, especially with busy schedules and endless tasks. Traditional snacks like chips or sugary treats offer a quick burst of energy but often come with a sugar crash shortly after. This Energizing Seed & Apple Snack is different. It’s a combination of wholesome ingredients that provide both sustained energy and the right nutrients to keep you feeling satisfied and balanced.

1. A Balance of Healthy Fats and Protein

One of the standout features of this recipe is its balance of healthy fats and protein, which are key to helping you feel full and energized. Pumpkin seeds, sesame seeds, and sunflower seeds are all packed with essential fatty acids that support brain function, reduce inflammation, and keep your body in an optimal state for fat burning. Additionally, these seeds are rich in protein, which helps repair and build muscles, making them an excellent choice for those with active lifestyles.

2. A Boost of Natural Energy from Apples

The addition of grated apple provides a natural sweetness and an energy boost from complex carbohydrates. Unlike the refined sugars found in many packaged snacks, the sugars in apples are slow-releasing, providing a steady source of energy without the crash. Apples are also high in fiber, which promotes healthy digestion and helps regulate blood sugar levels.

3. Low in Calories, Big on Flavor

This snack is low in calories yet packed with flavor, making it a perfect option for those looking to maintain a slim waistline without sacrificing taste. Each bite is filled with a satisfying crunch from the seeds, a touch of sweetness from the apple, and a slight richness from the egg white (or applesauce substitute). It’s a snack that satisfies both your hunger and your taste buds without making you feel weighed down.

4. Perfect for a Busy Lifestyle

One of the main reasons this snack has become a staple in my routine is because of how easy it is to prepare. Whether I’m running out the door or looking for something quick to satisfy a craving, this snack can be made ahead of time and stored for several days. It’s portable, easy to carry in a small container, and provides a convenient solution to those mid-afternoon slumps.

Ingredients:

IngredientQuantity
Raisins (dried and chopped)50 g
Apple (grated)1
Egg white (or substitute with baked applesauce)1
Pumpkin seeds1/2 cup (60 g)
Sesame seeds1/2 cup (60 g)
Sunflower seeds1/2 cup (60 g)

Directions:

  1. Preheat your oven to 350°F (175°C) and line a baking sheet with parchment paper.
  2. In a large mixing bowl, combine the grated apple, raisins, and egg white (or applesauce substitute). Stir well until everything is evenly mixed.
  3. Add the pumpkin seeds, sesame seeds, and sunflower seeds to the mixture, stirring to combine.
  4. Spoon small portions of the mixture onto the prepared baking sheet, forming bite-sized clusters.
  5. Bake for 12-15 minutes, or until the snack clusters are golden and firm to the touch.
  6. Allow the snacks to cool completely before serving or storing.

Nutritional Information (per serving):

NutrientAmount per Serving
Calories180 kcal
Protein6g
Carbohydrates20g
Fiber4g
Sugars12g
Fat10g
Saturated Fat1g
Sodium5mg
Calcium25mg

Frequently Asked Questions (FAQs)

1. How long can I store this snack?

You can store the Energizing Seed & Apple Snack in an airtight container for up to a week. For longer storage, you can freeze the clusters and thaw them as needed. The snack holds its texture well, even after freezing, making it a perfect option for meal prep.

2. Can I make this snack without the egg white?

Yes! If you prefer not to use egg white, you can substitute it with baked applesauce, which adds natural sweetness and helps hold the snack together. The baked applesauce not only provides moisture but also enhances the flavor with its rich, caramelized taste. You can also experiment with other egg substitutes like chia or flaxseed gel.

3. Is this snack suitable for a vegan diet?

Absolutely! By using baked applesauce or chia gel as a substitute for the egg white, this snack can easily be made vegan-friendly. The rest of the ingredients — the seeds, raisins, and apple — are all plant-based, making it a great option for anyone following a vegan or plant-based lifestyle.

4. Can I adjust the sweetness of the snack?

Yes! If you prefer a sweeter snack, you can increase the amount of raisins or add a drizzle of honey or maple syrup before baking. Just keep in mind that adding extra sweeteners will increase the calorie count. On the other hand, if you prefer a less sweet snack, you can reduce the raisins or omit them entirely.

5. What are the best ways to enjoy this snack?

While this snack is delicious on its own, it can also be paired with other meals. Enjoy it as a pre-workout snack, an afternoon pick-me-up, or even a topping for your morning yogurt or smoothie bowl. You can also serve it as a crunchy addition to salads or mixed with your favorite dried fruits and nuts for a homemade trail mix.

6. Is this snack suitable for those with allergies?

This recipe contains seeds, raisins, and egg whites, so if you have allergies to any of these ingredients, you can either omit them or substitute them with safe alternatives. For example, if you’re allergic to seeds, you can substitute them with oats or nuts. If you need an egg substitute, baked applesauce works well, as mentioned earlier.

7. How can I make this snack more filling?

For an extra boost of protein, you can add a spoonful of nut butter (like almond or peanut butter) to the mixture before baking. This will increase the protein and healthy fat content, making the snack even more filling. Another option is to pair the snack with a high-protein beverage, such as a smoothie or protein shake.

Conclusion: A Snack That Does More Than Just Satisfy Hunger

The Energizing Seed & Apple Snack is more than just a healthy snack — it’s a reminder that the foods we choose to fuel our bodies with have the power to enhance our energy, our mood, and our overall well-being. This simple, wholesome snack is packed with nutrients that support a slim waistline, boost energy levels, and provide long-lasting satiety. Whether you enjoy it as a snack on-the-go, a pre-workout bite, or as part of a larger meal, it’s a versatile and nourishing option that can easily fit into any lifestyle.

As we navigate through the hustle and bustle of everyday life, it’s easy to reach for quick, processed snacks. But taking the time to prepare something wholesome and full of energy-giving ingredients is a small act of self-care that can have lasting benefits. This Energizing Seed & Apple Snack isn’t just a recipe; it’s a reminder that nourishment is within reach, and sometimes the simplest ingredients are the ones that can make the biggest difference in how we feel.

Amal

Energizing Seed & Apple Snack for a Slim Waist: A Journey to Wellness

Fuel your day with this simple, nutritious, and satisfying Energizing Seed & Apple Snack. Packed with wholesome seeds and natural sweetness from grated apples, this snack will give you a steady energy boost without the sugar crash.
Prep Time 10 minutes
Cook Time 15 minutes
Total Time 25 minutes
Servings: 4 –6 servings
Course: Snack
Cuisine: Healthy

Ingredients
  

  • 50 g raisins dried and chopped
  • 1 apple grated
  • 1 egg white or substitute with baked applesauce
  • 1/2 cup 60 g pumpkin seeds
  • 1/2 cup 60 g sesame seeds
  • 1/2 cup 60 g sunflower seeds

Method
 

  1. Preheat the oven to 350°F (175°C) and line a baking sheet with parchment paper.
  2. In a large mixing bowl, combine the grated apple, raisins, and egg white (or applesauce substitute). Stir everything together until well mixed.
  3. Add the pumpkin seeds, sesame seeds, and sunflower seeds to the mixture. Stir to evenly distribute the seeds.
  4. Scoop small portions of the mixture and place them on the baking sheet, forming bite-sized clusters.
  5. Bake for 12-15 minutes, or until the clusters are golden and firm to the touch.
  6. Allow the snacks to cool completely on the baking sheet before serving or storing.

Notes

  • Store the baked snack in an airtight container for up to one week.
  • You can freeze the clusters for longer storage. Just thaw them at room temperature or reheat gently in the oven.
  • If you want a sweeter snack, feel free to increase the amount of raisins or drizzle some honey on top before baking.
  • This recipe can be made vegan by using baked applesauce or chia gel instead of the egg white.

Savory Cabbage and Carrot Scramble: A Comforting, Wholesome Meal

The first time I made this Savory Cabbage and Carrot Scramble was on a rainy Sunday afternoon when the world outside felt a little colder, a little quieter. I had just returned from the farmers’ market, bags full of fresh produce that would eventually become the base for my meals in the coming week. Among the vibrant colors of tomatoes, carrots, and leafy greens, one ingredient stood out to me — a head of cabbage. There’s something inherently comforting about cabbage; it’s humble, but it can be transformed into something truly special with the right ingredients and care.

As I started to cook, I realized just how simple and nourishing a cabbage-based dish could be. The earthy aroma of the cabbage, combined with the sweetness of carrots and the richness of eggs, brought warmth to my kitchen, not just in temperature but in spirit. I thought about all the times my grandmother used to prepare simple meals with whatever ingredients she had on hand — meals that were filled with love and care. This dish, though modern in its simplicity, felt like a tribute to her. It’s a reminder that nourishing meals don’t need to be complex to be deeply satisfying.

This Savory Cabbage and Carrot Scramble became a comforting staple in my household. It’s a dish that not only makes use of readily available ingredients but also brings people together around the table. It’s quick, hearty, and versatile, making it perfect for breakfast, lunch, or dinner. But more than that, it’s a reminder that with just a few simple ingredients, you can create something wholesome, hearty, and full of flavor.

Why This Recipe is a Winner: Comfort, Simplicity, and Nutrition

This Savory Cabbage and Carrot Scramble is a perfect example of how simple ingredients can combine to create something truly satisfying. The cabbage, a vegetable that often gets overlooked, becomes the star of the dish when cooked slowly to tender perfection. The carrots add natural sweetness, balancing the savory cabbage and eggs, while the onions and garlic infuse the entire dish with depth and fragrance.

One of the greatest things about this recipe is its versatility. You can enjoy it as a light meal on its own, or pair it with whole-grain toast, a side of roasted potatoes, or even a fresh salad. It’s an ideal dish for any meal of the day, and it can be easily customized to suit your preferences. Want to add a little protein? Throw in some crumbled feta or cooked sausage. Need to make it vegan? Simply skip the eggs and use tofu scramble as a substitute. The options are endless.

Another reason why this recipe is a keeper is its nutritional benefits. Cabbage is an incredibly nutrient-dense vegetable that’s low in calories but high in fiber, antioxidants, and vitamin C. Carrots are similarly packed with vitamins and minerals, including vitamin A, which supports healthy vision, immune function, and skin health. Eggs provide a rich source of protein and essential amino acids, making this dish not just delicious but also nourishing.

Ingredients:

IngredientQuantity
Cabbage, thinly sliced1 kg (35 oz)
Onion, finely chopped1 medium-sized
Carrot, grated1
Garlic, minced3 cloves
Eggs5 large

Directions:

  1. In a large skillet, heat a little oil over medium heat. Add the chopped onion and sauté until softened, about 4-5 minutes.
  2. Stir in the minced garlic and grated carrot, cooking for another 2 minutes until the garlic becomes fragrant.
  3. Add the thinly sliced cabbage to the skillet, stirring well to combine. Cook, stirring occasionally, for about 10 minutes or until the cabbage is tender.
  4. Crack the eggs directly into the skillet, stirring them into the vegetable mixture. Continue cooking, stirring constantly, until the eggs are fully scrambled and cooked through.
  5. Season with salt and pepper to taste, and serve warm.

Nutritional Information (per serving):

NutrientAmount per Serving
Calories170 kcal
Protein10g
Carbohydrates15g
Fiber5g
Sugars6g
Fat10g
Saturated Fat3g
Sodium210mg
Calcium50mg

Frequently Asked Questions (FAQs)

1. Can I make this dish ahead of time?

Yes! This Savory Cabbage and Carrot Scramble can be made ahead of time and stored in the refrigerator for up to 2-3 days. Simply reheat it in a skillet over medium heat with a splash of water or oil to restore its moisture. This makes it an excellent option for meal prep, allowing you to enjoy a hearty breakfast or lunch with minimal effort during the week.

2. Can I freeze the leftovers?

While this dish is best enjoyed fresh, you can freeze leftovers for up to a month. Just make sure to let the scramble cool completely before transferring it to an airtight container or freezer bag. To reheat, simply thaw overnight in the refrigerator and warm it up in a skillet. Note that the texture of the cabbage may change slightly after freezing, but the flavor will still be delicious.

3. Is this recipe suitable for a vegan diet?

Yes, this dish can easily be adapted for a vegan diet by omitting the eggs and substituting them with crumbled tofu or a plant-based egg substitute. To make the scramble even more hearty, you can also add chickpeas or other legumes to boost the protein content.

4. Can I add other vegetables to the dish?

Absolutely! This recipe is highly adaptable. Feel free to add vegetables like bell peppers, mushrooms, spinach, or even zucchini for added flavor and nutrients. You can also experiment with different herbs and spices to enhance the flavor profile. A sprinkle of turmeric or cumin can add a wonderful depth, while fresh herbs like parsley or dill can provide a fresh, aromatic finish.

5. Can I make this dish spicier?

If you enjoy a bit of heat, you can easily add some chili flakes, cayenne pepper, or a chopped fresh chili to the dish. The sweetness of the carrots and cabbage will balance out the spiciness, creating a flavorful contrast. Add the spices gradually to suit your taste.

6. What can I serve with this dish?

This scramble is delicious on its own but also pairs beautifully with a variety of side dishes. For a hearty breakfast, serve it with some crispy toast, a dollop of avocado, or a side of roasted potatoes. For lunch or dinner, you can pair it with a simple green salad or a portion of brown rice or quinoa. The dish is also great for meal prepping, as it complements other grains and vegetables well.

7. Can I use pre-shredded cabbage for this recipe?

While fresh cabbage is always preferred for this dish, pre-shredded cabbage can be used in a pinch. Just be sure to check the texture and moisture content, as pre-shredded cabbage can sometimes be a bit drier than fresh cabbage. If using pre-shredded cabbage, you may need to adjust the cooking time slightly.

8. How can I make this dish more filling?

To make this dish more filling, consider adding protein-packed ingredients like cooked chicken, turkey, sausage, or even tofu. For a vegetarian option, you can stir in some cooked quinoa or beans for extra fiber and protein. The great thing about this recipe is that it can easily be turned into a full meal with just a few additions.

Nutritional Benefits: What Makes This Dish So Healthy?

The Savory Cabbage and Carrot Scramble is not only tasty but also packed with nutrients. Here’s a closer look at the health benefits of some of the key ingredients:

Cabbage: This cruciferous vegetable is an excellent source of vitamin C, a powerful antioxidant that supports immune function and skin health. It’s also rich in fiber, which aids digestion and helps maintain healthy cholesterol levels. Cabbage is low in calories and high in water content, making it a great option for weight management.

Carrots: Carrots are loaded with beta-carotene, which the body converts into vitamin A. This vitamin is essential for maintaining good vision, supporting a healthy immune system, and promoting healthy skin. Carrots also provide a good amount of fiber, which helps regulate digestion and maintain a feeling of fullness.

Eggs: Eggs are a rich source of high-quality protein, containing all the essential amino acids that the body needs for muscle repair and growth. They also provide important nutrients like vitamin B12, choline, and selenium, which support brain health, energy production, and immune function.

Garlic and Onion: Both garlic and onion are known for their numerous health benefits. Garlic contains compounds like allicin, which have anti-inflammatory and antioxidant properties, while onions are rich in flavonoids that help reduce inflammation and promote heart health.

Conclusion: A Simple Dish with Endless Possibilities

The Savory Cabbage and Carrot Scramble is a dish that embodies everything I love about home cooking — simplicity, nourishment, and the ability to bring people together. With just a few fresh ingredients, you can create a meal that’s not only delicious but also packed with health benefits. Whether you’re cooking for yourself, your family, or friends, this dish is a reminder that the best meals don’t need to be complicated; they just need to be made with love.

This recipe has become a go-to in my home, and I’m sure it will be in yours too. It’s a dish that can be enjoyed any time of day, and it’s adaptable enough to suit any occasion or dietary preference. So, next time you find yourself with a head of cabbage and a few simple ingredients, remember this recipe — it’s a comforting, wholesome meal that will leave everyone feeling nourished and satisfied.

Amal

Savory Cabbage and Carrot Scramble: A Comforting, Wholesome Meal

This Savory Cabbage and Carrot Scramble is a simple yet nourishing dish perfect for any time of day. Tender cabbage, sweet carrots, and savory onions come together in a quick, flavorful scramble that is both comforting and nutritious. With a generous dose of eggs to tie everything together, this dish provides a wholesome and satisfying meal that is quick to prepare.
Prep Time 10 minutes
Cook Time 15 minutes
Total Time 25 minutes
Servings: 4 –6 servings
Course: Main Dish
Cuisine: Vegetarian

Ingredients
  

  • 1 kg 35 oz cabbage, thinly sliced
  • 1 medium onion finely chopped
  • 1 carrot grated
  • 3 cloves garlic minced
  • 5 large eggs
  • Salt and pepper to taste
  • Olive oil or your preferred cooking oil

Method
 

  1. Heat a tablespoon of olive oil in a large skillet over medium heat. Add the finely chopped onion and sauté for 4-5 minutes until softened.
  2. Stir in the grated carrot and cook for another 2 minutes, allowing it to become tender.
  3. Add the minced garlic to the skillet and cook for 1-2 minutes until fragrant.
  4. Add the thinly sliced cabbage to the pan, stirring to combine. Season with salt and pepper. Cook the mixture for 8-10 minutes, stirring occasionally, until the cabbage becomes tender and slightly caramelized.
  5. In a separate bowl, whisk the eggs until well combined. Pour the eggs into the skillet, stirring gently to incorporate them with the vegetables. Cook for another 3-5 minutes until the eggs are scrambled and fully cooked through.
  6. Taste and adjust seasoning with additional salt and pepper if needed, then serve warm.

Notes

  • You can prepare this dish ahead of time and store it in the refrigerator for 2-3 days. Reheat in a skillet for a quick meal.
  • For a vegan version, simply omit the eggs and use crumbled tofu or another egg alternative. You can also add chickpeas for an added protein boost.
  • Add some chili flakes or hot sauce if you like a bit of spice in your meal.
  • Feel free to experiment by adding other vegetables like bell peppers, zucchini, or spinach to the scramble for extra flavor and nutrition.

Summer Garden Zucchini Casserole: A Taste of Comfort and Freshness

I remember the first time I made this Summer Garden Zucchini Casserole. It was one of those days when the sun was shining brightly, and the warm breeze carried the promise of a delicious dinner shared with family. My garden had overflowed with fresh zucchini, and I was looking for a way to make use of all the beautiful vegetables that had flourished over the summer. The thought of creating a dish that combined the vibrant flavors of garden-fresh zucchini with the rich, comforting textures of a casserole was too tempting to resist. I wanted something that was both light and hearty, satisfying yet not too heavy, and that could hold the attention of my whole family.

As the casserole baked in the oven, the savory aroma of roasted vegetables filled my home, and soon, everyone was gathered around the dinner table, eagerly anticipating a bite. The casserole had that perfect balance of flavors: the sweet undertones of sautéed onions and peppers, the hearty richness of melted cheese, and the refreshing crispness of zucchini. Each bite was like a warm hug, a reminder of the simple joys of cooking and family.

This recipe has become a tradition in our home, not just for its incredible taste, but for the memories it creates. It’s a dish that brings us together and reminds us of the beauty of fresh, seasonal ingredients. Whether served for a casual family dinner, a potluck, or a gathering with friends, this Summer Garden Zucchini Casserole is sure to become a favorite in your home, just as it has in mine.

Why This Casserole Is a Must-Try

There’s something undeniably special about a casserole that brings together a medley of ingredients and transforms them into something greater than the sum of its parts. The Summer Garden Zucchini Casserole is no exception. The beauty of this dish lies in its simplicity, with the fresh, natural flavors of zucchini, peppers, and tomatoes shining through, while the savory cheese and seasonings add depth and richness.

Not only is this casserole a celebration of fresh vegetables, but it also offers an opportunity to experiment with different flavor combinations. If you’re looking to add a bit of heat, you can easily incorporate red pepper flakes or a dash of hot sauce. For a heartier version, add cooked chicken, ground turkey, or even quinoa. The versatility of this recipe allows you to customize it to your liking, whether you’re sticking to the original recipe or creating your own twist.

Ingredients

IngredientQuantity
Zucchini, peeled and cut into cubes2 medium-sized
SaltTo taste
Onion, chopped1 medium-sized
Olive oil2 tablespoons
Sweet green peppers, diced2
Garlic, chopped3 cloves
Tomatoes, diced3 medium-sized
Tomato paste1 tablespoon
Black pepper1/4 teaspoon
Paprika1/4 teaspoon
Dried basil1/4 teaspoon
Cheese (grated)100 grams (3.5 oz)

Directions:

  1. Preheat your oven to 375°F (190°C).
  2. In a large skillet, heat the olive oil over medium heat. Add the chopped onion and sweet green peppers, sautéing until softened, about 5-7 minutes.
  3. Add the garlic and cook for an additional 1-2 minutes, until fragrant.
  4. Stir in the diced tomatoes, tomato paste, black pepper, paprika, and dried basil. Let the mixture simmer for about 5 minutes until it thickens slightly.
  5. In a large casserole dish, combine the sautéed mixture with the zucchini cubes and salt. Mix well to ensure everything is evenly coated.
  6. Top the casserole with the grated cheese, spreading it evenly across the surface.
  7. Bake in the preheated oven for 20-25 minutes, or until the zucchini is tender and the cheese is melted and golden.
  8. Let the casserole rest for a few minutes before serving.

Nutritional Information (per serving):

NutrientAmount per Serving
Calories160 kcal
Protein4g
Carbohydrates14g
Fiber3g
Sugars6g
Fat11g
Saturated Fat3g
Sodium220mg
Calcium150mg

Frequently Asked Questions (FAQs)

1. Can I use frozen zucchini in this recipe?

While fresh zucchini is always the best choice for this casserole due to its texture and flavor, frozen zucchini can be used if fresh zucchini is unavailable. However, frozen zucchini tends to release more moisture during cooking, which can result in a slightly different texture. To mitigate this, it’s a good idea to thaw and drain the zucchini before adding it to the casserole.

2. Can I prepare this casserole ahead of time?

Yes! One of the great things about this Summer Garden Zucchini Casserole is that it can be prepared in advance. You can assemble the casserole the night before, cover it with foil, and store it in the refrigerator. The next day, simply bake it in the oven until the cheese is melted and bubbly. This makes it a fantastic option for busy nights or for entertaining guests.

3. Can I substitute the cheese for a dairy-free alternative?

Absolutely! If you are following a dairy-free diet or have a lactose intolerance, you can easily swap out the cheese for a plant-based alternative. There are several excellent dairy-free cheeses on the market that melt beautifully, such as those made from cashews or coconut milk. You can also use nutritional yeast for a cheesy flavor without the dairy.

4. How can I make this dish more filling?

If you want to make this casserole a more substantial meal, you can add some protein to it. Adding cooked chicken, ground turkey, or even crumbled tofu can turn this side dish into a main course. If you’re looking for a vegetarian option, consider adding beans like black beans or chickpeas for a hearty, plant-based protein boost.

5. Can I freeze this casserole?

Yes, this casserole freezes wonderfully! After baking, allow it to cool completely, then wrap it tightly with plastic wrap or aluminum foil before placing it in the freezer. When you’re ready to enjoy it, simply thaw it in the refrigerator overnight and reheat in the oven. This makes it a great make-ahead meal for busy days when you don’t feel like cooking.

6. Can I substitute other vegetables in this casserole?

Absolutely! While zucchini is the star of the show in this recipe, you can easily substitute it with other summer vegetables such as yellow squash, eggplant, or even mushrooms. The key is to use vegetables that have similar moisture content and cooking times to zucchini, so they don’t release too much water into the casserole.

7. Is this casserole gluten-free?

Yes, this Summer Garden Zucchini Casserole is naturally gluten-free! However, if you’re using breadcrumbs for a crunchy topping, make sure to choose gluten-free breadcrumbs or omit them altogether. The casserole is delicious without any breadcrumbs as well.

Nutritional Benefits of Summer Garden Zucchini Casserole

Not only is this casserole a comforting and satisfying meal, but it also packs a punch when it comes to nutrition. Zucchini, the main ingredient in this dish, is a low-calorie vegetable that is rich in vitamins A and C, potassium, and fiber. It’s also a great source of antioxidants, which help to fight free radicals in the body and promote overall health.

The sweet peppers and tomatoes add additional vitamins and minerals, contributing to a well-rounded, nutrient-dense meal. Onions and garlic, staples in any savory dish, are known for their immune-boosting properties and their ability to enhance the flavors of the other ingredients.

The addition of cheese provides calcium, which is essential for strong bones and teeth, as well as protein to help build and repair tissues in the body. You can make this dish even more nutrient-dense by adding lean proteins like chicken or tofu, or by incorporating quinoa for a gluten-free, protein-packed base.

A Meal for All Occasions

Whether you’re looking for a side dish for a summer barbecue, a comforting family dinner, or a dish to take to a potluck, this Summer Garden Zucchini Casserole is the perfect choice. It’s the kind of recipe that can easily be adapted to suit your dietary preferences, and it’s always a crowd-pleaser. The combination of fresh vegetables, savory seasonings, and gooey cheese makes for a dish that feels both wholesome and indulgent.

The best part? It’s incredibly easy to prepare. You don’t need to be a master chef to pull this dish together, making it a great option for novice cooks or busy weeknights. Plus, it’s a great way to make use of the abundant summer vegetables that are often sitting in your garden or at your local farmer’s market.

Conclusion: A Dish That Brings People Together

As with any recipe that is passed down or shared over the years, the Summer Garden Zucchini Casserole holds more than just its delicious flavors—it carries with it memories, traditions, and the simple joy of cooking for loved ones. This casserole is more than just a meal; it’s an experience. It’s a dish that brings people together at the dinner table, encourages conversation, and sparks memories that will last for years to come.

So, whether you’re making it for a quiet night at home, or serving it as part of a larger feast, this casserole will be a comforting and satisfying choice. With its vibrant colors, fresh flavors, and easy preparation, it’s sure to become a cherished dish in your own kitchen, just as it has in mine. Take a bite, savor the moment, and share the love.

Amal

Summer Garden Zucchini Casserole: A Taste of Comfort and Freshness

If you’re looking for a comforting yet healthy meal, this Summer Garden Zucchini Casserole is the perfect option. Packed with fresh garden vegetables, rich seasonings, and a delicious layer of melted cheese, this casserole offers the best of summer’s bounty in every bite. Whether you’re serving it as a side dish or making it the main course, it’s a dish that will impress everyone at the table.
Prep Time 15 minutes
Cook Time 25 minutes
Total Time 40 minutes
Servings: 4 –6 servings
Course: Main Dish
Cuisine: Mediterranean-Inspired

Ingredients
  

  • 2 medium zucchini peeled and cut into cubes
  • Salt to taste
  • 1 medium onion chopped
  • 2 tablespoons olive oil
  • 2 sweet green peppers diced
  • 3 cloves garlic chopped
  • 3 medium tomatoes diced
  • 1 tablespoon tomato paste
  • 1/4 teaspoon black pepper
  • 1/4 teaspoon paprika
  • 1/4 teaspoon dried basil
  • 100 grams 3.5 oz cheese, grated (cheddar, mozzarella, or your choice)

Method
 

  1. Preheat your oven to 375°F (190°C).
  2. Heat olive oil in a large skillet over medium heat. Add the chopped onion and sweet green peppers. Sauté for 5-7 minutes until they become soft and fragrant.
  3. Add the garlic and cook for another 1-2 minutes, stirring to release the flavors.
  4. Stir in the diced tomatoes, tomato paste, black pepper, paprika, and dried basil. Let the mixture simmer for 5 minutes, allowing it to thicken slightly.
  5. In a large casserole dish, combine the sautéed vegetables with the zucchini cubes and season with salt to taste. Mix everything together until well combined.
  6. Sprinkle the grated cheese evenly over the top of the casserole.
  7. Bake for 20-25 minutes, or until the zucchini is tender and the cheese has melted and is golden.
  8. Let it cool for a few minutes before serving, and enjoy!

Notes

  • You can prepare this casserole ahead of time and store it in the refrigerator overnight. Simply bake it when ready to serve.
  • Feel free to substitute the cheese with a dairy-free alternative to make it vegan-friendly.
  • For a heartier meal, add cooked chicken, turkey, or quinoa to the casserole.
  • Frozen zucchini can be used if fresh zucchini is unavailable, but be sure to thaw and drain it before adding to the dish.
  • You can freeze the casserole for future meals. Just make sure it cools completely before freezing.

Stay Connected

Get recipes via email: