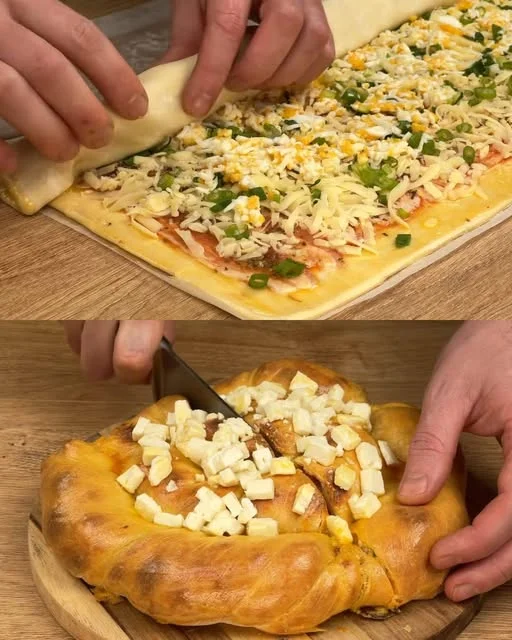
Flaky Bacon & Cheese Puff Pastry Bites – A Savory Delight

There’s something undeniably comforting about the first bite of warm, flaky puff pastry filled with creamy, cheesy goodness. It’s a combination of textures and flavors that feels indulgent yet effortless, making it perfect for any occasion.

For me, puff pastry recipes bring back memories of family gatherings and special occasions. Whether it was holiday dinners, weekend brunches, or just an afternoon treat, there was always some kind of savory pastry on the table. My grandmother, a firm believer that good food brings people together, had a way of making even the simplest of meals feel special. She would roll out puff pastry, fill it with whatever ingredients were available, and in minutes, we had golden, crispy bites that disappeared faster than they cooled.

Over the years, I’ve experimented with countless fillings, but there’s one combination I always come back to: bacon, cheese, and fresh herbs. The smoky richness of bacon, the creamy tang of feta, the smooth melt of mozzarella, and the fresh bite of parsley create a flavor profile that’s bold yet balanced. Wrapped in golden puff pastry, these ingredients transform into a dish that’s both hearty and elegant.

This Savory Puff Pastry Delight is my go-to recipe when I need something quick yet impressive. Whether you’re hosting guests, preparing a snack, or looking for the perfect appetizer, these flaky, cheesy bites are guaranteed to be a hit.

Why You’ll Love This Recipe

1. Easy Yet Impressive

Puff pastry is one of those magical ingredients that instantly elevates any dish. The best part? It does all the hard work for you! You get flaky, buttery layers without needing to knead, proof, or roll dough from scratch.

2. Loaded with Flavor

This recipe has everything you want in a savory bite—crispy, golden pastry, gooey melted cheese, salty bacon, fresh herbs, and a hint of tang from pickled cucumber and Greek yogurt.

3. Perfect for Any Occasion

These puff pastry bites work well as:
Appetizers for parties and gatherings
Snacks for a cozy evening at home
Brunch treats paired with coffee or tea
Game day food that everyone will love
Make-ahead bites that can be stored and reheated easily

4. Customizable to Your Taste

While this combination of ingredients is incredibly delicious, you can easily switch things up to suit your preferences.

Ingredients

IngredientQuantity
Puff pastry sheets400 g (2 sheets)
Bacon, cooked and chopped200 g (7 oz)
Ketchup100 g (½ cup)
Oregano1 tsp
Egg yolk1
Shredded cheese (cheddar, mozzarella, or choice)200 g (1½ cups)
Boiled eggs, chopped2
Spring onions, chopped2 tbsp
Garlic clove, minced1
Pickled cucumber, finely chopped1
Parsley, chopped2 tbsp
Greek yogurt100 g (½ cup)
Feta cheese, crumbled50 g (⅓ cup)

Directions

  1. Prepare the Filling – In a bowl, mix the cooked bacon, chopped boiled eggs, spring onions, minced garlic, pickled cucumber, parsley, shredded cheese, Greek yogurt, and crumbled feta. Stir until well combined.
  2. Roll Out the Pastry – Lightly flour a surface and roll out the puff pastry sheets. Cut into squares or desired shapes.
  3. Assemble – Spread a thin layer of ketchup over the pastry squares. Spoon the filling onto each piece and fold or roll as desired.
  4. Seal & Brush – Press the edges to seal and brush the tops with egg yolk. Sprinkle with oregano.
  5. Bake – Preheat the oven to 200°C (400°F) and bake for 15–20 minutes, or until golden brown and crispy.
  6. Serve – Enjoy warm, garnished with extra parsley if desired.

Nutritional Information (Per Serving – Approx. 1 Pastry)

NutrientAmount
Calories320 kcal
Carbohydrates28 g
Protein12 g
Fat18 g
Saturated Fat9 g
Fiber1 g
Sugar3 g
Sodium420 mg

How to Customize Your Puff Pastry Bites

Change Up the Cheese

Mozzarella and feta create a creamy, slightly salty balance, but you can try:

  • Cheddar for a sharper flavor
  • Goat cheese for a tangy bite
  • Parmesan for extra savoriness

Switch the Protein

If bacon isn’t your thing, try these variations:

  • Shredded rotisserie chicken for a heartier bite
  • Smoked salmon for an elegant twist
  • Turkey bacon for a lighter alternative

Add More Vegetables

For an extra boost of flavor and texture, try adding:

  • Sautéed mushrooms for an earthy depth
  • Roasted red peppers for a subtle sweetness
  • Spinach or kale for added nutrients

Make It Spicy

If you love heat, you can:

  • Add chopped jalapeños
  • Sprinkle in red pepper flakes
  • Drizzle with hot honey or spicy aioli before serving

FAQs: Everything You Need to Know

Q: Can I make these puff pastry bites ahead of time?

Yes! You can assemble them in advance and store them in the fridge for a few hours before baking. If you want to prepare them further in advance, you can freeze them unbaked and pop them straight into the oven when needed.

Q: How do I store leftovers?

  • Refrigerator: Store in an airtight container for up to 3 days. Reheat in the oven at 180°C (350°F) for 5–7 minutes for the best texture.
  • Freezer: Freeze unbaked pastries on a baking sheet, then transfer them to a freezer bag. Bake from frozen, adding a few extra minutes to the cooking time.

Q: Can I use homemade puff pastry?

Absolutely! If you have the time and skill, homemade puff pastry will take this recipe to the next level. However, store-bought puff pastry works beautifully and saves time.

Q: What if I don’t have feta cheese?

You can replace feta with ricotta, goat cheese, or even cream cheese for a different texture and flavor.

Q: Can I make this recipe vegetarian?

Yes! Just omit the bacon and add more vegetables or a plant-based alternative like mushrooms, sun-dried tomatoes, or caramelized onions.

Q: Can I serve these cold?

While these puff pastry bites are best enjoyed warm, they are still delicious at room temperature. If serving cold, consider adding a side of dipping sauce like tzatziki, garlic aioli, or a spicy yogurt dip.

Q: How do I get the perfect golden-brown crust?

Brushing the pastries with egg yolk before baking gives them a rich, golden shine. If you prefer a lighter, crispier crust, use an egg wash made from a whole egg whisked with a tablespoon of water.

Why This Recipe Belongs in Your Collection

These Flaky Bacon & Cheese Puff Pastry Bites are more than just a snack—they’re a crowd-pleaser, a comfort food, and a bite of pure indulgence. They bring together the perfect balance of textures and flavors, all wrapped in golden, flaky pastry.

Whether you’re making them for a special occasion, a weekend treat, or just because you crave something delicious, this recipe never disappoints. Plus, it’s versatile, easy to customize, and can be prepped ahead for ultimate convenience.

There’s something magical about biting into a crispy, cheesy, buttery pastry—a moment of simple pleasure that reminds us why homemade food always feels a little more special.

So next time you need a quick and irresistible appetizer or snack, try these savory puff pastry delights. They’re guaranteed to be a hit, no matter when or where you serve them!
Amal

Flaky Bacon & Cheese Puff Pastry Bites – A Savory Delight

Crispy, golden puff pastry filled with smoky bacon, melted cheese, and fresh herbs—these Flaky Bacon & Cheese Puff Pastry Bites are the perfect appetizer or snack. With a creamy, flavorful filling wrapped in buttery pastry, they’re quick to prepare and guaranteed to impress at any gathering!
Prep Time 15 minutes
Cook Time 20 minutes
Total Time 35 minutes
Servings: 12 pastries
Course: Snack
Cuisine: Mediterranean

Ingredients
  

  • 400 g 2 sheets puff pastry
  • 200 g 7 oz bacon, cooked and chopped
  • 100 g ½ cup ketchup
  • 1 tsp oregano
  • 1 egg yolk
  • 200 g 1½ cups shredded cheese (cheddar, mozzarella, or your choice)
  • 2 boiled eggs chopped
  • 2 tbsp spring onions chopped
  • 1 garlic clove minced
  • 1 pickled cucumber finely chopped
  • 2 tbsp parsley chopped
  • 100 g ½ cup Greek yogurt
  • 50 g ⅓ cup crumbled feta cheese

Method
 

  1. Preheat the oven to 200°C (400°F) and line a baking sheet with parchment paper.
  2. In a bowl, mix the cooked bacon, chopped boiled eggs, spring onions, minced garlic, pickled cucumber, parsley, shredded cheese, Greek yogurt, and crumbled feta until well combined.
  3. Roll out the puff pastry sheets on a lightly floured surface and cut them into squares or circles.
  4. Spread a thin layer of ketchup on each piece of pastry, then add a spoonful of the prepared filling in the center.
  5. Fold or roll the pastry over the filling, sealing the edges. Press with a fork for a decorative touch.
  6. Brush the tops with egg yolk and sprinkle with oregano.
  7. Bake for 15–20 minutes or until golden brown and crispy.
  8. Let cool slightly before serving. Enjoy warm or at room temperature!

Notes

  • For an extra crispy crust, place the pastries on a preheated baking sheet before baking.
  • These can be frozen unbaked—just bake straight from the freezer, adding a few extra minutes to the cooking time.
  • Serve with garlic yogurt dip, spicy mayo, or a side of mustard for extra flavor.
  • Store leftovers in an airtight container in the fridge for up to 3 days, reheating in the oven for the best texture.

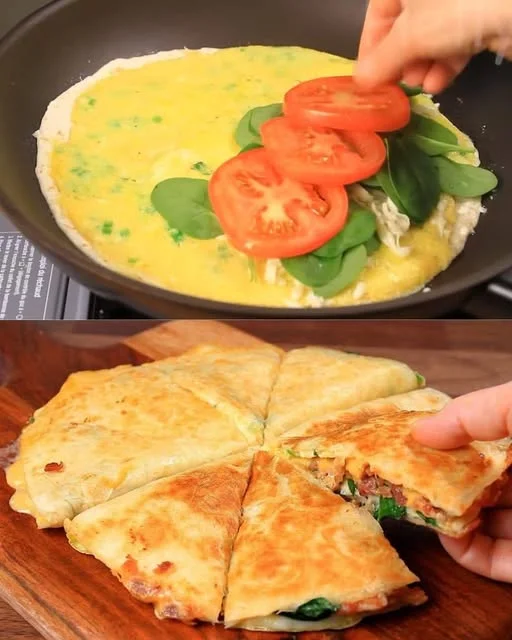
Sunrise Spinach & Mozzarella Breakfast Wrap – A Delicious Start to Your Day

There’s something special about taking a moment in the morning to enjoy a warm, homemade breakfast. In a world where mornings are often rushed—grabbing a coffee on the go, skipping breakfast entirely, or settling for something uninspiring—it feels like a luxury to sit down to something satisfying, flavorful, and nourishing.

Growing up, breakfast was more than just a meal in my household; it was a daily ritual. My mother would wake up early, filling the kitchen with the comforting aroma of eggs sizzling in butter and cheese melting over warm tortillas. No matter how busy our schedules were, she always made sure we started the day with something homemade.

One of my favorites was a simple yet delicious breakfast tortilla wrap. It wasn’t fancy—just eggs, cheese, fresh vegetables, and a crispy golden tortilla—but it was warm, cheesy, and comforting. Now, as an adult, I find myself recreating that same meal, tweaking it over time to include more greens, richer flavors, and the perfect balance of crispiness and melt-in-your-mouth texture.

This Spinach & Mozzarella Breakfast Wrap is my version of that comforting morning classic. Packed with fluffy eggs, fresh spinach, melty mozzarella, and just the right amount of seasoning, it’s easy to make yet feels like something special. Whether you’re looking for a quick weekday breakfast or a leisurely weekend treat, this wrap is guaranteed to make your morning better.

Why You’ll Love This Breakfast Wrap

1. Quick and Easy to Make

Mornings can be hectic, but this breakfast wrap comes together in under 10 minutes. No complicated techniques, no unnecessary steps—just simple, delicious flavors in every bite.

2. High in Protein and Nutrients

Eggs and mozzarella cheese provide plenty of protein, while spinach adds fiber, vitamins, and antioxidants. This combination keeps you full and energized for hours, unlike sugary cereals that leave you hungry soon after eating.

3. Crispy on the Outside, Soft on the Inside

One of the best parts of this wrap is its contrast in textures. The tortilla gets perfectly crispy in the pan, while the filling remains soft, creamy, and full of flavor. It’s the perfect balance of crunch and melt-in-your-mouth goodness.

4. Customizable to Your Taste

One of the best things about this recipe is how adaptable it is. Whether you like a bit of spice, extra veggies, or a different type of cheese, there are endless ways to make it your own.

5. Portable and Great for Meal Prep

Need breakfast on the go? This wrap is easy to take with you. Wrap it in foil or parchment paper, and you have a grab-and-go meal that’s miles better than anything you’d find at a drive-thru.

Ingredients

IngredientQuantity
Eggs3
SaltTo taste
Black pepperTo taste
Red pepper (optional)To taste
Spring onions, chopped2
Tomato, diced1
Butter1 tablespoon
Large tortilla1
Mozzarella cheese, shredded1/2 cup
Fresh spinach, roughly chopped1 cup

Directions

  1. Prepare the Eggs – In a bowl, whisk the eggs with salt, black pepper, and red pepper (if using).
  2. Sauté the Vegetables – In a skillet, melt the butter over medium heat. Add the chopped spring onions and diced tomato, cooking for 2–3 minutes until softened.
  3. Scramble the Eggs – Pour the whisked eggs into the skillet and stir gently until fully cooked but still soft. Remove from heat.
  4. Assemble the Wrap – Place the tortilla on a clean surface. Sprinkle half of the shredded mozzarella over one side, then add the scrambled eggs, fresh spinach, and the remaining cheese.
  5. Cook the Wrap – Fold the tortilla in half and place it back in the skillet over medium-low heat. Cook for 2–3 minutes per side until golden brown and the cheese is melted.
  6. Serve – Slice in half and enjoy warm!

Nutritional Information (Per Serving – 1 Wrap)

NutrientAmount
Calories350 kcal
Carbohydrates28 g
Protein22 g
Fat18 g
Saturated Fat8 g
Fiber3 g
Sugar3 g
Sodium480 mg

Ways to Customize Your Breakfast Wrap

This wrap is already packed with delicious flavors, but you can easily switch things up to match your cravings. Here are some fun ways to customize it:

Protein Options

  • Add turkey bacon, sausage crumbles, or smoked salmon for extra protein and flavor.
  • Swap mozzarella for feta or goat cheese for a tangier taste.
  • Use egg whites only for a lighter version.

Vegetable Additions

  • Add avocado slices for creaminess.
  • Sauté some mushrooms, bell peppers, or onions for extra texture.
  • Throw in some cherry tomatoes for a burst of freshness.

Spice It Up

  • Sprinkle in chili flakes, smoked paprika, or cayenne pepper for a little heat.
  • Add a drizzle of hot sauce or salsa before serving.
  • Try a garlic aioli or pesto spread inside the wrap for an extra flavor boost.

Tortilla Choices

  • Use a whole wheat tortilla for added fiber.
  • Try a low-carb or gluten-free wrap for dietary needs.
  • Swap the tortilla for a slice of sourdough toast for an open-faced version.

FAQs: Everything You Need to Know

Q: Can I make this breakfast wrap ahead of time?

Yes! You can cook the eggs and assemble the wrap, then store it in an airtight container in the fridge for up to 2 days. When ready to eat, reheat it in a skillet for 2 minutes per side or microwave for 30 seconds.

Q: Can I freeze this breakfast wrap?

Yes! Wrap it tightly in foil or plastic wrap and store in the freezer for up to 1 month. When ready to eat, unwrap and heat in a skillet or oven at 350°F (175°C) until warm.

Q: What’s the best way to reheat this wrap?

  • Skillet (Best Method): Reheat over medium heat for 2–3 minutes per side until crispy.
  • Microwave: Heat for 30–45 seconds, but note that it won’t be as crispy.
  • Oven: Wrap in foil and bake at 350°F (175°C) for 10 minutes.

Q: Can I make this without cheese?

Absolutely! While the mozzarella adds a delicious creamy texture, you can skip it or replace it with a dairy-free cheese alternative.

Q: What’s the best way to keep my tortilla from getting soggy?

If you’re making the wrap ahead of time, let the eggs cool slightly before assembling to prevent excess moisture. Also, avoid overloading with watery vegetables like tomatoes.

Q: Is this recipe vegetarian?

Yes! This recipe is naturally vegetarian. If you want to make it vegan, simply swap the eggs for scrambled tofu and use a dairy-free cheese substitute.

Q: Can I use a different type of tortilla?

Yes! While flour tortillas work best for crispiness, you can use corn tortillas, whole wheat wraps, or even naan for a slightly different texture.

Why This Recipe Deserves a Place in Your Kitchen

The beauty of this Spinach & Mozzarella Breakfast Wrap lies in its simplicity and versatility. It’s proof that a delicious, nourishing breakfast doesn’t have to be complicated or time-consuming.

This recipe is perfect for:

  • Busy mornings when you need something quick but satisfying
  • A healthy, protein-packed meal to keep you full and energized
  • A customizable dish that can be adapted to any taste
  • A way to enjoy fresh, wholesome ingredients without sacrificing flavor

Sometimes, the best meals are the ones that remind us of home—warm, familiar, and filled with flavors that bring comfort. This wrap is exactly that. Whether you make it for yourself, your family, or as a meal prep option for the week, it’s guaranteed to become a morning favorite.

So, next time you’re looking for a quick, easy, and delicious breakfast, give this wrap a try. You’ll love every bite!

Amal

Sunrise Spinach & Mozzarella Breakfast Wrap – A Delicious Start to Your Day

Start your day with this Spinach & Mozzarella Breakfast Wrap, a perfect blend of fluffy eggs, fresh spinach, melted mozzarella, and juicy tomatoes, all wrapped in a warm, crispy tortilla. Quick, satisfying, and packed with protein, this breakfast wrap is an easy way to fuel your morning!
Prep Time 5 minutes
Cook Time 10 minutes
Total Time 15 minutes
Servings: 1 wrap
Course: Breakfast
Cuisine: American

Ingredients
  

  • 3 eggs
  • Salt to taste
  • Black pepper to taste
  • Red pepper optional, to taste
  • 2 spring onions chopped
  • 1 tomato diced
  • 1 tablespoon butter
  • 1 large tortilla
  • 1/2 cup mozzarella cheese shredded
  • 1 cup fresh spinach roughly chopped

Method
 

  1. In a bowl, whisk the eggs with salt, black pepper, and red pepper (if using).
  2. Melt the butter in a skillet over medium heat. Add chopped spring onions and diced tomato, sautéing for 2–3 minutes until softened.
  3. Pour the egg mixture into the skillet, stirring gently until scrambled and cooked through. Remove from heat.
  4. Place the tortilla on a clean surface. Sprinkle half of the mozzarella cheese over one side, then top with scrambled eggs, spinach, and the remaining cheese.
  5. Fold the tortilla in half and return it to the skillet over medium-low heat. Cook for 2–3 minutes per side until golden brown and the cheese is melted.
  6. Slice in half and serve warm.

Notes

  • For extra crispiness, press the wrap gently with a spatula while cooking.
  • Add avocado, feta cheese, or hot sauce for extra flavor.
  • Store leftovers in an airtight container in the fridge for up to 2 days. Reheat in a skillet for the best texture.
  • This wrap can also be frozen. Wrap it tightly in foil and reheat in a skillet or oven when ready to eat.

Rustic No-Knead Italian Panini Bread – Simple, Flavorful, and Perfect for Sandwiches

There’s something special about the smell of fresh bread baking in the oven. It fills the kitchen with warmth, wrapping you in a sense of comfort and nostalgia. Growing up, I spent many afternoons watching my grandmother make homemade bread, her hands dusted with flour as she effortlessly kneaded dough on the countertop. She never used recipes—just instinct, tradition, and a love for feeding her family.

As much as I admired her skill, I always felt intimidated by bread-making. The idea of kneading dough for long periods, waiting for multiple rises, and hoping for the perfect texture seemed overwhelming. It wasn’t until I discovered no-knead bread that everything changed.

This No-Knead Italian Panini Bread is one of my favorite recipes because it captures everything I love about homemade bread—fluffy on the inside, slightly crisp on the outside, and full of flavor—without requiring hours of effort. Whether you’re new to baking or simply looking for an easy bread recipe, this one will quickly become a staple in your kitchen.

Perfect for panini sandwiches, this rustic Italian loaf has just the right balance of chewiness and lightness. It’s simple, foolproof, and delicious—exactly how homemade bread should be.

Why You’ll Love This No-Knead Panini Bread

1. No Kneading Required

Traditional bread recipes require a long kneading process to develop gluten, which gives bread its texture. But this recipe relies on time, not effort, allowing the dough to ferment and develop structure naturally. Just mix the ingredients, let the dough rise, and bake!

2. Perfect for Panini Sandwiches

This bread has the ideal texture for panini—it’s sturdy enough to hold all your favorite fillings without falling apart, yet soft enough to create that perfect crispy-on-the-outside, gooey-on-the-inside sandwich when grilled.

3. Simple Ingredients, Incredible Flavor

Made with basic pantry staples like flour, yeast, salt, and olive oil, this bread has a wonderfully rustic taste. The optional Italian seasoning and honey add an extra depth of flavor, making it even more irresistible.

4. Beginner-Friendly

If you’ve never made bread before, this is a great place to start. Since there’s no kneading involved, there’s very little room for error. It’s a low-stress, high-reward recipe!

5. Versatile and Customizable

While this bread is fantastic for panini, it’s also great for dipping in soups, slicing for bruschetta, or simply enjoying warm with a drizzle of olive oil and balsamic vinegar.

Ingredients

IngredientQuantity
All-purpose flour3 1/2 cups (440g)
Salt1 teaspoon
Sugar1/2 teaspoon
Active dry yeast2 teaspoons
Warm water (about 110°F/45°C)1 1/2 cups (360ml)
Olive oil2 tablespoons
Honey or sugar (optional)1 tablespoon
Italian seasoning (optional)1 teaspoon

Directions

  1. Activate the Yeast – In a bowl, mix warm water, yeast, and sugar. Let it sit for 5–10 minutes until foamy.
  2. Mix the Dough – In a large bowl, combine flour, salt, and Italian seasoning (if using). Add the yeast mixture, olive oil, and honey. Stir until a sticky dough forms.
  3. First Rise – Cover the bowl with a clean towel and let the dough rise in a warm place for 1–2 hours, or until doubled in size.
  4. Shape the Dough – Lightly flour a surface and shape the dough into a rectangle. Transfer it to a parchment-lined baking sheet.
  5. Second Rise – Cover again and let it rest for 30 minutes. Preheat the oven to 400°F (200°C).
  6. Bake – Bake for 20–25 minutes until golden brown and hollow-sounding when tapped.
  7. Cool and Serve – Let the bread cool before slicing. Enjoy with your favorite panini fillings!

Nutritional Information (Per Serving – 1 Slice)

NutrientAmount
Calories180 kcal
Carbohydrates35 g
Protein5 g
Fat3 g
Saturated Fat0.5 g
Fiber1.5 g
Sugar2 g
Sodium180 mg

The Secret to No-Knead Bread: Time and Hydration

One of the key principles behind no-knead bread is high hydration. The dough is wetter than traditional bread dough, which helps create a chewy, airy crumb. The other secret? Time. Instead of kneading, the gluten forms naturally as the dough rests.

The first rise allows the yeast to slowly ferment, developing rich, complex flavors. This fermentation process also improves the texture, making the bread lighter and more flavorful than a quick-rise dough.

If you’ve ever wondered why bakery bread has that signature crisp crust and tender inside, it’s because of this slow fermentation process. And the best part? This recipe lets you achieve bakery-quality bread at home with minimal effort.

Best Ways to Enjoy No-Knead Panini Bread

This bread is wonderfully versatile. Here are some of the best ways to use it:

1. Classic Panini Sandwiches

Grill it with prosciutto, fresh mozzarella, and basil for an authentic Italian panini, or go for a heartier filling with roast beef, caramelized onions, and provolone.

2. Garlic Bread

Slice, spread with garlic butter, and toast in the oven for an easy, flavorful side dish.

3. Bruschetta

Top with diced tomatoes, basil, and balsamic glaze for a light and refreshing appetizer.

4. Dipping Bread

Serve warm with olive oil and balsamic vinegar, or alongside a bowl of soup.

5. Breakfast Toast

Top with avocado, eggs, or ricotta and honey for a delicious breakfast.

FAQs: Everything You Need to Know

Q: Can I make this bread ahead of time?

Yes! This bread stays fresh for 2–3 days at room temperature when stored in an airtight container. If you want to keep it longer, store it in the fridge or freeze it.

Q: How do I store leftovers?

  • Room temperature: Keep in a bread bag or airtight container for up to 3 days.
  • Refrigerator: Wrap in plastic or foil and store for up to a week.
  • Freezer: Slice and freeze in a zip-top bag for up to 3 months.

Q: Can I use whole wheat flour instead of all-purpose flour?

Yes, but whole wheat flour absorbs more liquid, so you may need to add a bit more water. The bread will also be denser than if made with all-purpose flour.

Q: What if my dough doesn’t rise?

  • Make sure your yeast is fresh—expired yeast won’t activate properly.
  • Ensure your water is warm, not hot (about 110°F or 45°C). If it’s too hot, it can kill the yeast.
  • Let the dough rise in a warm place (like near a sunny window or on top of the fridge).

Q: How can I make the crust extra crispy?

Bake with a pan of water in the oven or spray the oven with water before baking—this creates steam, which helps develop a crispier crust.

Q: Can I add herbs, cheese, or other flavors to the dough?

Absolutely! Try adding:

  • Parmesan or Asiago cheese for extra savory depth
  • Garlic powder or roasted garlic for a more aromatic bread
  • Rosemary, thyme, or basil for an herby twist

Why This Recipe Belongs in Your Kitchen

There’s something incredibly rewarding about making homemade bread. The simplicity of mixing a few ingredients, watching the dough rise, and pulling a golden loaf from the oven is a deeply satisfying experience.

This No-Knead Italian Panini Bread is perfect for beginners and seasoned bakers alike. It eliminates the stress of kneading, proving that making homemade bread doesn’t have to be complicated.

Whether you’re using it for panini sandwiches, bruschetta, or simply enjoying a slice with olive oil, this bread will quickly become a household favorite. It’s a reminder that sometimes, the most delicious things in life are also the simplest.

So go ahead, give it a try—your kitchen will smell amazing, your sandwiches will never be the same, and you’ll have a fresh, homemade loaf to enjoy with every meal.

Amal

Rustic No-Knead Italian Panini Bread – Simple, Flavorful, and Perfect for Sandwiches

This No-Knead Italian Panini Bread is an easy, foolproof recipe that requires minimal effort but delivers bakery-quality results. With a crisp golden crust and a soft, airy interior, this bread is perfect for making sandwiches, dipping in olive oil, or enjoying as a side to your favorite Italian dishes. No kneading, no stress—just simple, delicious homemade bread!
Prep Time 10 minutes
Cook Time 25 minutes
Total Time 35 minutes
Servings: 8 –10 slices
Course: Bread
Cuisine: Italian-inspired

Ingredients
  

  • 3 1/2 cups 440g all-purpose flour
  • 1 teaspoon salt
  • 1/2 teaspoon sugar
  • 2 teaspoons active dry yeast
  • 1 1/2 cups 360ml warm water (about 110°F/45°C)
  • 2 tablespoons olive oil
  • 1 tablespoon honey or sugar optional, for a slight sweetness
  • 1 teaspoon Italian seasoning optional, for added flavor

Method
 

  1. In a small bowl, combine warm water, yeast, and sugar. Stir and let sit for 5–10 minutes until foamy.
  2. In a large mixing bowl, whisk together flour, salt, and Italian seasoning (if using).
  3. Pour in the yeast mixture, olive oil, and honey (if using). Stir with a spoon or spatula until a sticky dough forms.
  4. Cover the bowl with a clean towel and let the dough rise in a warm place for 1–2 hours, or until doubled in size.
  5. Lightly flour a work surface and gently shape the dough into a rectangle or oval. Transfer to a parchment-lined baking sheet.
  6. Cover again and let it rise for another 30 minutes. Meanwhile, preheat the oven to 400°F (200°C).
  7. Bake for 20–25 minutes or until the bread is golden brown and sounds hollow when tapped.
  8. Let the bread cool completely before slicing and serving.

Notes

  • For extra flavor, brush the top of the bread with olive oil before baking.
  • To make the crust crispier, place a small pan of water in the oven while baking to create steam.
  • If you prefer a softer texture, wrap the warm bread in a kitchen towel after baking.
  • This bread stores well at room temperature for up to 3 days or can be frozen for longer storage.

Golden Sunrise Breakfast Wrap – A 5-Minute Morning Delight

There’s something special about the first meal of the day. For me, breakfast isn’t just about filling an empty stomach—it’s about comfort, nostalgia, and starting the day with something that feels like a warm hug. Growing up, my mornings were always busy, and my mom knew that if she didn’t whip up something quick and delicious, I’d probably grab a sugar-packed cereal bar and rush out the door.

She had a knack for turning simple ingredients into something magical, and one of my favorites was her breakfast wrap. It wasn’t fancy—just eggs, cheese, and whatever leftovers we had in the fridge—but it was warm, melty, and perfectly crispy on the outside. Some days, she’d sneak in spinach or crispy bacon, and other times, she’d use a different kind of cheese for a new flavor twist. No matter what, it always tasted like home.

Now, as an adult, I still crave that effortless but satisfying breakfast, especially on busy mornings. That’s why this Golden Sunrise Breakfast Wrap is a staple in my kitchen. It’s simple, packed with protein, and can be made in just five minutes. Plus, it’s endlessly customizable—you can add your favorite ingredients to make it your own.

If you’ve ever wished for a breakfast that’s quick, filling, and feels like a homemade treat, this is the one. Let’s dive into why this wrap is the perfect way to start your day.

Why This Breakfast Wrap Is a Game-Changer

1. Ready in 5 Minutes

Mornings can be chaotic, whether you’re rushing to work, getting kids ready for school, or just trying to squeeze in some extra sleep. This breakfast wrap takes just five minutes from start to finish, making it the ultimate time-saver.

2. Packed with Protein and Nutrients

Eggs, cheese, and bacon provide plenty of protein, while spinach adds fiber and essential vitamins. Unlike sugary cereals or pastries, this wrap keeps you fuller for longer and helps maintain steady energy levels throughout the morning.

3. Crispy, Cheesy, and Absolutely Delicious

There’s something undeniably satisfying about biting into a crispy tortilla filled with soft scrambled eggs, melted cheese, and savory bacon. It’s the perfect balance of textures and flavors.

4. Customizable to Your Taste

One of the best things about this recipe is that you can change it up based on what you have in your fridge. Swap the mozzarella for cheddar, use turkey bacon instead of regular bacon, or add sautéed mushrooms for extra flavor.

5. Great for Meal Prepping

If you love having breakfast ready to go, you can make multiple wraps in advance, store them in the fridge or freezer, and simply heat them up when needed. It’s a meal-prepper’s dream!

Ingredients

IngredientQuantity
Eggs4
SaltA pinch
Black pepperA pinch
Green onion, chopped2 tbsp
Tortillas (23 cm)2
Mozzarella cheese, shredded1/2 cup
Bacon crumbles2 tbsp
Spinach, chopped1/2 cup

Directions

  1. In a bowl, whisk the eggs with salt, black pepper, and chopped green onions.
  2. Heat a non-stick skillet over medium heat and cook the eggs, scrambling until just set.
  3. Lay out the tortillas and evenly distribute half of the shredded mozzarella cheese on each.
  4. Spoon the scrambled eggs onto each tortilla.
  5. Sprinkle bacon crumbles and chopped spinach over the eggs, then top with the remaining cheese.
  6. Fold the tortillas into a wrap and place them back in the skillet, cooking for 1–2 minutes per side until golden and crispy.
  7. Slice in half and serve warm.

Nutritional Information (Per Serving – 1 Wrap)

NutrientAmount
Calories350 kcal
Carbohydrates28 g
Protein22 g
Fat18 g
Saturated Fat7 g
Fiber3 g
Sugar2 g
Sodium480 mg

How to Customize Your Breakfast Wrap

One of the best things about this recipe is that it can be adapted in countless ways. Here are some fun variations to try:

Protein Variations:

  • Swap the bacon for turkey bacon, sausage crumbles, or ham for a different flavor profile.
  • Make it vegetarian by skipping the meat and adding black beans or tofu scramble.
  • Want extra protein? Add an extra egg or sprinkle in some cottage cheese for a creamy twist.

Cheese Options:

  • Instead of mozzarella, try cheddar, pepper jack, Swiss, or feta for different flavors.
  • For an extra creamy texture, spread a little cream cheese inside the tortilla before adding the eggs.

Veggies & Add-ins:

  • Add sautéed bell peppers, mushrooms, or onions for extra flavor.
  • Throw in avocado slices for creaminess and healthy fats.
  • Sprinkle in some chopped jalapeños if you like a spicy kick.

Tortilla Choices:

  • Opt for a whole wheat tortilla for added fiber.
  • Use a low-carb or keto-friendly wrap if you’re watching your carbs.
  • For a gluten-free option, go with corn tortillas or a gluten-free wrap.

FAQs: Your Questions Answered

Q: Can I make this breakfast wrap ahead of time?

Yes! You can assemble the wrap, let it cool, and store it in the fridge for up to three days. To reheat, simply warm it in a skillet for a few minutes or microwave it for 30 seconds.

Q: Can I freeze these wraps?

Absolutely! Wrap them tightly in foil or plastic wrap and store them in the freezer for up to one month. To reheat, unwrap and microwave for about a minute, or heat in a pan until crispy.

Q: What’s the best way to keep the wrap from getting soggy?

If you’re making it ahead, let the eggs cool slightly before assembling the wrap. Also, avoid overfilling with ingredients that release moisture, like tomatoes.

Q: Can I make this without eggs?

Yes! If you don’t eat eggs, try a tofu scramble or mashed avocado with cheese and bacon for a protein-rich alternative.

Q: Is this wrap healthy?

This wrap is packed with protein and nutrients, making it a balanced breakfast. If you want to make it even healthier, use a whole wheat tortilla, reduce the cheese, and add more veggies.

Q: Can I use a different type of cheese?

Yes! Cheddar, feta, pepper jack, or Swiss all work great in this recipe.

Why This Breakfast Wrap Belongs in Your Routine

If you’re tired of boring breakfasts or skipping the first meal of the day altogether, this Golden Sunrise Breakfast Wrap is here to save you. It’s the perfect combination of convenience and flavor, giving you a quick, satisfying, and delicious way to fuel your morning.

Unlike store-bought breakfast sandwiches that are loaded with preservatives, this wrap is homemade, fresh, and customizable to fit your cravings. Plus, it requires minimal ingredients and effort—just a handful of staples from your fridge and five minutes of your time.

Imagine waking up, knowing that in just a few minutes, you can have a warm, cheesy, crispy, and protein-packed breakfast in your hands. No stress, no complicated cooking—just simple, delicious comfort food.

So next time you’re in a rush but still want something nourishing, skip the drive-thru and make this wrap instead. It’s fast, easy, and guaranteed to make your morning better.

Go ahead, take that first bite—you’ll wonder why you ever settled for anything less!

Amal

Golden Sunrise Breakfast Wrap – A 5-Minute Morning Delight

This Golden Sunrise Breakfast Wrap is the perfect way to start your day! Made with fluffy scrambled eggs, crispy bacon, melted mozzarella cheese, and fresh spinach, all wrapped in a warm tortilla, it’s a delicious and protein-packed breakfast that comes together in just 5 minutes. Whether you’re in a rush or want a quick and satisfying meal, this wrap is the ultimate morning fuel!
Prep Time 5 minutes
Cook Time 5 minutes
Total Time 10 minutes
Servings: 2 wraps
Course: Breakfast
Cuisine: American

Ingredients
  

  • 4 eggs
  • A pinch of salt
  • A pinch of black pepper
  • 2 tablespoons green onion chopped
  • 2 tortillas 23 cm
  • 1/2 cup mozzarella cheese shredded
  • 2 tablespoons bacon crumbles
  • 1/2 cup spinach chopped

Method
 

  1. In a bowl, whisk the eggs with salt, black pepper, and chopped green onions.
  2. Heat a non-stick skillet over medium heat and cook the eggs, stirring occasionally, until softly scrambled.
  3. Lay the tortillas flat and evenly distribute half of the shredded mozzarella cheese on each.
  4. Spoon the scrambled eggs onto the tortillas, then top with bacon crumbles and spinach.
  5. Sprinkle the remaining mozzarella cheese over the top.
  6. Fold each tortilla into a wrap, then place it back in the skillet for 1–2 minutes per side until golden and crispy.
  7. Slice in half and serve warm.

Notes

  • To make this vegetarian, skip the bacon and add sautéed mushrooms or bell peppers.
  • For extra creaminess, spread a little avocado or cream cheese inside the tortilla before adding the eggs.
  • Store leftovers in the fridge for up to 3 days, and reheat in a skillet or microwave before serving.
  • To freeze, wrap the assembled but unheated wraps in foil or plastic wrap. When ready to eat, heat in a skillet or microwave.

Golden Citrus Bliss: Italian Lemon Cream Stuffed Cannoncini

There is something magical about the aroma of fresh pastries wafting through the air, filling a home with warmth and anticipation. Growing up, Sunday afternoons were always reserved for baking with my grandmother, an Italian woman whose hands seemed to hold the secrets of generations past. She never measured ingredients with cups or spoons, but rather with instinct—a pinch of this, a handful of that—until the kitchen was filled with the comforting scents of sugar, butter, and citrus.

One of my favorite moments was watching her prepare the filling for our beloved cannoncini. While most people associate these delicate puff pastry horns with custard or chocolate cream, in our home, the star was always lemon. It was a nod to the sun-kissed lemon groves of Southern Italy, where my great-grandparents once lived, and to the philosophy that the simplest ingredients—eggs, sugar, and fresh lemons—could create something extraordinary.

Today, every time I bite into a crisp, golden cannoncino filled with silky lemon cream, I am transported back to those carefree afternoons in my grandmother’s kitchen. It is a reminder that food is more than sustenance; it is a connection to our past, a celebration of tradition, and a way to bring people together.

If you have never tried making Italian Lemon Cream Stuffed Cannoncini at home, you are in for a treat. Let’s explore what makes this dessert so special, from its rich history to its irresistible flavors.

The Story Behind Cannoncini: A Pastry with a Rich Heritage

Cannoncini, also known as “cream horns,” are a staple of Italian pastry shops, particularly in the northern regions of Italy. The name “cannoncino” (plural: cannoncini) means “small cannon,” referring to their tubular shape. Traditionally, they are made with flaky puff pastry wrapped around metal molds, baked until golden, and then filled with a variety of creams.

While custard (crema pasticcera) is the most common filling, variations include chocolate, hazelnut, and, of course, lemon. The use of lemon cream is particularly popular in Southern Italy, where citrus fruits thrive and are a fundamental part of the region’s culinary identity.

What makes cannoncini so beloved is their perfect balance of textures—the crispness of the pastry shell giving way to the rich, velvety filling inside. Each bite is an experience, a contrast of crunch and creaminess that keeps you coming back for more.

Why Lemon Cream? The Power of Citrus in Italian Desserts

Lemon plays a crucial role in Italian desserts, adding brightness and depth to everything from cakes to gelato. The lemon cream filling in these cannoncini is not just an alternative to traditional custard; it is a celebration of citrus. Here’s why lemon is a perfect match for this dessert:

  • A Refreshing Contrast – The tanginess of the lemon cuts through the richness of the cream, preventing it from being overly sweet or heavy.
  • Aromatic and Inviting – The natural oils in lemon zest enhance the pastry’s fragrance, making each bite more enticing.
  • Ties to Italian Tradition – Lemons, particularly those from the Amalfi Coast and Sicily, are highly prized in Italian cuisine. Using lemon in desserts is a way of paying homage to this heritage.

Unlike a standard pastry cream, which can sometimes feel dense, lemon cream is light, smooth, and bursting with flavor. It complements the delicate crispness of the cannoncini shells beautifully, making this version a standout.

Ingredients

For the Lemon Cream

IngredientQuantity
Large egg yolks4
Granulated sugar1/2 cup (100 g)
Cornstarch1/4 cup (30 g)
Whole milk1 1/2 cups (360 ml)
Unsalted butter2 tbsp (28 g)
Lemon zest1 tbsp (from 1 lemon)
Lemon juice1/4 cup (60 ml)
Vanilla extract1/2 tsp

For the Cannoncini

IngredientQuantity
Puff pastry sheets1 (thawed if frozen)
Granulated sugar2 tbsp
Egg wash (1 egg + 1 tbsp water)1
Powdered sugar (for dusting)As needed

Directions

Step 1: Prepare the Lemon Cream

  1. In a medium saucepan, whisk together the egg yolks, sugar, and cornstarch until smooth.
  2. Gradually add the milk while whisking to prevent lumps.
  3. Place the saucepan over medium heat, stirring constantly until the mixture thickens (about 5–7 minutes).
  4. Remove from heat and stir in the butter, lemon zest, lemon juice, and vanilla extract.
  5. Transfer the cream to a bowl, cover with plastic wrap (pressing it against the surface to prevent a skin from forming), and refrigerate until chilled.

Step 2: Prepare the Cannoncini Shells

  1. Preheat your oven to 375°F (190°C).
  2. Roll out the puff pastry sheet and cut it into 1-inch-wide strips.
  3. Wrap each strip around a metal cream horn mold, slightly overlapping the edges.
  4. Brush with egg wash and sprinkle with sugar for extra crispiness.
  5. Bake for 15–18 minutes or until golden brown and puffed.
  6. Let them cool for a few minutes, then gently remove the molds.

Step 3: Assemble and Serve

  1. Transfer the chilled lemon cream to a piping bag fitted with a round tip.
  2. Pipe the cream into the cooled pastry shells, filling them generously.
  3. Dust with powdered sugar and serve immediately for the best texture.

Nutritional Information (Per Serving – Approx. 1 Cannoncino)

NutrientAmount
Calories220 kcal
Carbohydrates28 g
Protein4 g
Fat11 g
Saturated Fat6 g
Sugar10 g
Fiber1 g
Sodium100 mg

Expert Tips for the Perfect Cannoncini

If this is your first time making Italian Lemon Cream Stuffed Cannoncini, here are some expert tips to ensure success:

1. Keep the Puff Pastry Cold

For the flakiest, crispiest pastry, always work with cold puff pastry. If it gets too soft while shaping, place it in the refrigerator for a few minutes before baking.

2. Use Fresh Lemons Only

Bottled lemon juice will never compare to the bright, aromatic flavor of fresh lemons. Use both the juice and the zest to get the most depth of flavor in your cream.

3. Whisk Constantly for a Smooth Cream

When making the lemon cream, continuous whisking prevents lumps and ensures a silky texture. Cooking over medium heat helps control the thickening process.

4. Let the Pastry Cool Completely Before Filling

Hot pastry can cause the cream to melt and become runny. Be patient—allow the shells to cool before piping in the filling.

5. Serve Fresh for the Best Texture

Cannoncini are at their best when freshly filled. If you need to store them, keep the pastry and filling separate and assemble just before serving.

FAQs: Your Cannoncini Questions Answered

Q: Can I make the lemon cream ahead of time?

Yes! The lemon cream can be made up to two days in advance. Store it in an airtight container in the refrigerator, and give it a quick whisk before piping it into the pastry.

Q: What can I use if I don’t have metal cream horn molds?

If you don’t have cream horn molds, you can create makeshift molds by wrapping aluminum foil around a wooden spoon handle or rolling strips of parchment paper into tubes.

Q: Can I use store-bought puff pastry?

Absolutely! Store-bought puff pastry works perfectly and saves time. Just make sure to choose a high-quality brand for the best flavor and texture.

Q: How do I prevent the pastry from unrolling during baking?

When wrapping the puff pastry around the mold, slightly overlap the edges and press them gently to seal. Brushing with egg wash also helps hold everything together.

Q: How should I store leftovers?

Filled cannoncini should be eaten the same day for the best texture. If you must store them, keep them in an airtight container in the refrigerator for up to 24 hours, but expect some loss of crispness.

Q: Can I make these dairy-free?

Yes! Use a plant-based butter alternative in the lemon cream, and ensure your puff pastry is dairy-free. The results will still be delicious!

A Sweet Conclusion: More Than Just a Dessert

Italian Lemon Cream Stuffed Cannoncini are more than just pastries—they are a bite of tradition, a taste of sunshine, and a way to create lasting memories in the kitchen. Whether you are making them for a special occasion or simply to satisfy a sweet craving, they bring a touch of Italian elegance to any table.

The combination of flaky, golden pastry and vibrant lemon cream is proof that the simplest ingredients can create something truly extraordinary. Just as my grandmother once taught me, the joy of baking is not just in the final product, but in the process—the mixing, the waiting, the first delicious bite.

So, gather your ingredients, roll out that puff pastry, and let your kitchen fill with the warm, citrusy aroma of these irresistible treats. One bite, and you might just find yourself transported to an Italian pastry shop or, perhaps, to your own cherished memories of baking with loved ones.

Amal

Golden Citrus Bliss: Italian Lemon Cream Stuffed Cannoncini

Crispy, golden puff pastry horns filled with luscious, tangy lemon cream—these Italian Lemon Cream Stuffed Cannoncini are a delightful balance of crunch and silkiness. Inspired by classic Italian pastry traditions, this easy-to-make dessert brings a burst of citrusy sunshine to every bite. Perfect for special occasions or as an indulgent afternoon treat!
Prep Time 20 minutes
Cook Time 15 minutes
Total Time 35 minutes
Servings: 6 –8 cannoncini
Course: Dessert
Cuisine: Italian-inspired

Ingredients
  

For the Lemon Cream:
  • 4 large egg yolks
  • 1/2 cup granulated sugar 100 g
  • 1/4 cup cornstarch 30 g
  • 1 1/2 cups whole milk 360 ml
  • 2 tbsp unsalted butter 28 g
  • 1 tbsp lemon zest from 1 lemon
  • 1/4 cup fresh lemon juice 60 ml
  • 1/2 tsp vanilla extract
For the Cannoncini Shells:
  • 1 sheet puff pastry thawed if frozen
  • 2 tbsp granulated sugar
  • 1 egg + 1 tbsp water for egg wash
  • Powdered sugar for dusting

Method
 

1. Make the Lemon Cream:
  1. In a saucepan, whisk together egg yolks, sugar, and cornstarch until smooth.
  2. Gradually whisk in the milk, ensuring there are no lumps.
  3. Cook over medium heat, stirring constantly, until thickened (about 5–7 minutes).
  4. Remove from heat and stir in butter, lemon zest, lemon juice, and vanilla extract.
  5. Transfer to a bowl, cover with plastic wrap (pressing it directly onto the surface), and refrigerate until chilled.
2. Prepare the Cannoncini Shells:
  1. Preheat oven to 375°F (190°C).
  2. Roll out the puff pastry and cut into 1-inch-wide strips.
  3. Wrap each strip around a cream horn mold, slightly overlapping.
  4. Brush with egg wash and sprinkle with sugar.
  5. Bake for 15–18 minutes until golden brown.
  6. Cool slightly, then gently remove from the molds.
3. Assemble the Cannoncini:
  1. Transfer the chilled lemon cream to a piping bag.
  2. Pipe the cream into the cooled pastry shells, filling them generously.
  3. Dust with powdered sugar before serving.

Notes

  • For extra crunch, sprinkle the pastry with sugar before baking.
  • No cream horn molds? Make DIY molds using aluminum foil wrapped around a wooden spoon handle.
  • Make-ahead option: The lemon cream can be prepared up to two days in advance and stored in the fridge.
  • Best served fresh! The pastry stays crisp if filled just before serving.

Easter Dirt Cake Casserole: A Fun and Festive No-Bake Treat

Every Easter, my family would gather around the kitchen to prepare a variety of desserts, but nothing brought more excitement than dirt cake. As a child, I loved the idea of a dessert that looked like a garden but tasted like a dream. The process was just as enjoyable as eating it—crushing Oreos, layering the creamy pudding mixture, and, of course, decorating the top with colorful candies and gummy worms.

This Easter Dirt Cake Casserole is a festive spin on the classic dirt cake, turning it into a shareable casserole-style dessert that’s perfect for holiday gatherings. It’s creamy, chocolatey, and irresistibly fun to assemble. Whether you’re making it with kids, serving it at an Easter party, or indulging in some nostalgia, this no-bake dessert is guaranteed to bring smiles.

What Makes Easter Dirt Cake Casserole Special?

Dirt cake has been a favorite for decades, but this Easter-themed version takes it to a whole new level. Here’s why you’ll love it:

1. A No-Bake, Foolproof Dessert

One of the best things about this recipe is that it requires no baking at all. You don’t need to worry about oven temperatures or complicated techniques. It’s a simple mix-and-layer dessert that comes together in minutes, making it perfect for beginners.

2. A Kid-Friendly Easter Activity

Kids love helping in the kitchen, and this dessert is perfect for little hands. They can crush Oreos, mix pudding, and—best of all—decorate the top with gummy worms, chocolate eggs, and colorful candies. It turns dessert-making into a fun Easter activity.

3. A Nostalgic Favorite for All Ages

Dirt cake isn’t just for kids. For many adults, it brings back childhood memories of birthday parties and family gatherings. The combination of crunchy cookies, creamy filling, and playful toppings makes it a treat that everyone—young and old—can enjoy.

4. Customizable for Any Occasion

While this version is designed for Easter, dirt cake is incredibly versatile. You can swap out the toppings and decorations to match any holiday or theme. From birthday parties to Halloween and even Christmas, this dessert is a year-round favorite.

Ingredients

IngredientAmount
Cream cheese, softened2 (8-ounce) packages
Powdered sugar1 cup
Whipped topping, thawed1 (12-ounce) container
Instant vanilla pudding mix1 (5.1-ounce) package
Milk3 cups
Oreo cookies, crushed1 (15-ounce) package
Gummy worms1 cup
Chocolate eggs (or other Easter candies)1 cup
Fresh mint leaves for garnish (optional)As needed

Directions

1. Make the Cream Cheese Filling

  • In a large mixing bowl, beat the softened cream cheese and powdered sugar until smooth and creamy.
  • Gently fold in the whipped topping until fully combined.

2. Prepare the Pudding Mixture

  • In another bowl, whisk together the instant vanilla pudding mix and milk until thickened (about 2 minutes).
  • Combine the pudding mixture with the cream cheese mixture, stirring until well blended.

3. Assemble the Layers

  • In a 9×13-inch casserole dish, spread half of the crushed Oreo cookies evenly on the bottom.
  • Pour half of the cream cheese and pudding mixture over the Oreos, spreading it evenly.
  • Add another layer of the remaining crushed Oreos on top.

4. Decorate with Easter Candies

  • Arrange gummy worms and chocolate eggs on top to resemble a festive Easter garden.
  • Garnish with fresh mint leaves for a decorative touch.

5. Chill and Serve

  • Cover and refrigerate for at least 2 hours before serving to allow the flavors to meld.
  • Scoop and serve chilled, making sure to include all the fun layers in each bite!

Nutritional Information (Per Serving)

NutrientAmount
Calories~380 kcal
Carbohydrates~50g
Protein~5g
Fat~18g
Saturated Fat~10g
Sugar~35g
Fiber~2g
Sodium~250mg

The History of Dirt Cake: A Playful Dessert with a Rich Past

Dirt cake has been around for decades and is believed to have originated in the Midwestern United States. Inspired by traditional layered pudding desserts, dirt cake took on a more playful twist by using crushed chocolate sandwich cookies to mimic soil.

Over time, creative variations emerged, with gummy worms being added to resemble real worms in the “dirt.” The recipe became a staple at children’s birthday parties, potlucks, and picnics, beloved for both its fun appearance and delicious taste.

Now, this Easter Dirt Cake Casserole builds upon that tradition, incorporating chocolate eggs, pastel colors, and festive decorations to make it the perfect Easter treat.

Creative Variations to Try

One of the best things about dirt cake is how easy it is to customize. Here are a few creative variations you can try:

1. Chocolate Lovers’ Version

If you’re a chocolate fanatic, swap out the vanilla pudding for chocolate pudding to intensify the chocolate flavor. You can even sprinkle in chocolate chips between the layers for extra richness.

2. Spring Garden Dirt Cake

Add a touch of spring by decorating the top with edible flowers, pastel sprinkles, and crushed green-colored coconut to resemble grass. This makes the dessert look even more like a festive Easter garden.

3. Bunny Burrow Edition

For an adorable Easter-themed presentation, place chocolate bunny figurines peeking out from the “dirt.” You can also add small shredded coconut nests filled with mini chocolate eggs.

4. Peanut Butter Twist

For a nutty variation, mix ½ cup of peanut butter into the cream cheese filling. The combination of peanut butter, chocolate cookies, and pudding makes for an indulgent treat.

5. Individual Easter Dirt Cups

Instead of making a casserole, assemble the dessert in small cups or mason jars for individual servings. These are perfect for Easter parties, making it easy for guests to grab a portion without needing to cut or scoop.

Frequently Asked Questions

1. Can I Make Easter Dirt Cake Casserole Ahead of Time?

Yes! In fact, making it a day in advance allows the flavors to blend even better. Just be sure to add the toppings (gummy worms and chocolate eggs) right before serving to keep them fresh.

2. How Long Does It Last in the Refrigerator?

This dessert can be stored in an airtight container in the refrigerator for up to 4 days. The cookies will soften over time, making the texture even more pudding-like.

3. Can I Freeze Easter Dirt Cake?

It’s best not to freeze dirt cake, as the texture of the pudding and cream cheese mixture changes when thawed. However, if you must freeze it, wrap it tightly and thaw it in the refrigerator before serving.

4. How Do I Make This Dessert Gluten-Free?

Simply substitute the Oreo cookies with gluten-free chocolate sandwich cookies. All other ingredients in the recipe are naturally gluten-free.

5. Can I Use Homemade Whipped Cream Instead of Store-Bought?

Absolutely! If you prefer a homemade touch, whip 1 ½ cups of heavy cream with ¼ cup powdered sugar until stiff peaks form, then use it in place of the store-bought whipped topping.

6. How Can I Make It Less Sweet?

If you prefer a less sweet version, use unsweetened cocoa powder in the pudding mixture and opt for a lower-sugar cookie alternative. You can also reduce the powdered sugar in the cream cheese layer.

How to Serve and Present Easter Dirt Cake Casserole

Presentation is key when serving a dessert as fun as this one. Here are some creative serving ideas to make it extra special:

  • Use a Clear Dish – A glass casserole dish or trifle bowl lets the layers show, making it visually appealing.
  • Garnish with Edible Flowers – Small edible flowers like pansies or violets add a natural and elegant touch.
  • Add More Layers – Instead of just two layers, create three or four alternating layers for extra depth.
  • Serve in Cups or Jars – Individual servings in mason jars or small cups make this dessert perfect for Easter parties.
  • Top with Crushed Pastel Cookies – Swap out some of the crushed Oreos for pastel-colored cookies for a springtime look.

Why Easter Dirt Cake Casserole is the Perfect Easter Dessert

This Easter Dirt Cake Casserole is more than just a dessert—it’s an experience. From crushing cookies to decorating with gummy worms and chocolate eggs, it’s a fun and interactive way to celebrate the holiday.

It’s easy to make, requires no baking, and can be prepared in advance, making it a stress-free option for Easter gatherings. The combination of creamy pudding, crunchy Oreos, and playful decorations creates a delightful texture and flavor that appeals to both kids and adults.

Most importantly, this dessert brings people together. Whether you’re making it with family, serving it to guests, or simply enjoying a bite of nostalgia, Easter Dirt Cake Casserole is a joyful and delicious addition to your Easter tradition.

So, gather your ingredients, embrace the playful spirit of Easter, and dig into a dessert that’s just as fun to make as it is to eat!

Amal

Easter Dirt Cake Casserole: A Fun and Festive No-Bake Treat

This Easter Dirt Cake Casserole is a fun, no-bake dessert that combines layers of creamy vanilla pudding, sweet whipped topping, and crunchy crushed Oreos. Topped with gummy worms and chocolate eggs, it resembles a festive springtime garden, making it the perfect treat for Easter gatherings. Easy to assemble and irresistibly delicious, this dessert is sure to be a hit with kids and adults alike!
Prep Time 15 minutes
Cook Time 2 hours
Total Time 2 hours 15 minutes
Servings: 12 servings
Course: Dessert
Cuisine: American

Ingredients
  

  • 2 8-ounce packages cream cheese, softened
  • 1 cup powdered sugar
  • 1 12-ounce container whipped topping, thawed
  • 1 5.1-ounce package instant vanilla pudding mix
  • 3 cups milk
  • 1 15-ounce package Oreo cookies, crushed
  • 1 cup gummy worms
  • 1 cup chocolate eggs or other Easter candies
  • Fresh mint leaves for garnish optional

Method
 

  1. Prepare the Cream Cheese Mixture
  2. In a large mixing bowl, beat the softened cream cheese and powdered sugar until smooth and creamy.
  3. Gently fold in the whipped topping until fully combined.
  4. Make the Pudding
  5. In a separate bowl, whisk together the instant vanilla pudding mix and milk until thickened (about 2 minutes).
  6. Combine the pudding mixture with the cream cheese mixture, stirring until well blended.
  7. Layer the Dessert
  8. In a 9×13-inch casserole dish, spread half of the crushed Oreo cookies evenly on the bottom.
  9. Pour half of the pudding and cream cheese mixture over the crushed Oreos and spread evenly.
  10. Add another layer of the remaining crushed Oreos on top.
  11. Decorate the Top
  12. Arrange gummy worms and chocolate eggs on top to resemble an Easter-themed garden.
  13. If desired, add fresh mint leaves for a decorative touch.
  14. Chill and Serve
  15. Cover and refrigerate for at least 2 hours to allow the flavors to meld together.
  16. Serve chilled and enjoy!

Notes

  • Use chocolate pudding instead of vanilla for an even richer flavor.
  • Swap Golden Oreos for a lighter, vanilla-flavored twist.
  • Add shredded coconut dyed green with food coloring to create a “grass” effect.
  • Serve in individual cups for an easy, grab-and-go option.
  • Store leftovers in the refrigerator for up to 4 days.

Cotton Candy Cheesecake: A Whimsical and Dreamy Delight

There’s something undeniably magical about cotton candy. The way it melts in your mouth, its airy texture, and its sweet, nostalgic flavor take us back to childhood memories of fairs, carnivals, and joyful celebrations. For many, cotton candy is more than just a sugary treat—it’s a symbol of carefree happiness and special moments.

I remember the first time I had cotton candy as a child. The pastel-colored clouds of spun sugar seemed almost too beautiful to eat. It felt like eating a piece of a dream. Years later, I wanted to capture that same whimsical feeling in a dessert, and thus, Cotton Candy Cheesecake was born.

This cheesecake combines the rich, creamy texture of a classic cheesecake with the unmistakable sweetness of cotton candy. It’s the perfect balance of nostalgia and indulgence, with a smooth and velvety filling that practically melts on your tongue. The gentle pink and blue hues, the fluffy whipped cream topping, and the final touch of real cotton candy make it an eye-catching centerpiece for birthdays, Easter, baby showers, or any celebration that calls for something extraordinary.

If you’re looking for a dessert that’s fun, elegant, and bursting with childhood charm, this Cotton Candy Cheesecake is the perfect choice.

Why You’ll Love This Cheesecake

1. A Fun and Festive Dessert

With its pastel-colored filling and fluffy cotton candy garnish, this cheesecake is as stunning as it is delicious. It’s perfect for parties, themed events, or any occasion where you want to impress your guests with a unique and beautiful dessert.

2. Creamy and Decadent Texture

The combination of cream cheese, sour cream, and eggs creates an ultra-smooth and rich texture. Every bite is melt-in-your-mouth creamy, perfectly balancing the light, airy sweetness of the cotton candy.

3. Nostalgic Cotton Candy Flavor

Unlike some overly sweet desserts, this cheesecake captures the essence of cotton candy without overwhelming the palate. It has just the right amount of sweetness, complemented by the richness of the cheesecake base.

4. Customizable and Easy to Make

Whether you prefer a no-bake version, want to experiment with different colors, or need a gluten-free crust, this cheesecake is highly adaptable. It’s an easy way to bring creativity into your baking.

Ingredients

For the Crust

IngredientAmount
Graham cracker crumbs1 ½ cups
Unsalted butter, melted½ cup
Granulated sugar2 tablespoons

For the Cheesecake Filling

IngredientAmount
Cream cheese, softened24 ounces
Granulated sugar1 cup
Vanilla extract1 teaspoon
Large eggs3
Sour cream1 cup
Cotton candy, chopped into small pieces1 cup
Food coloring (pink or blue, optional)1 teaspoon

For Topping

IngredientAmount
Whipped creamAs needed
Extra cotton candy (for garnish)As needed

Directions

1. Prepare the Crust

  • Preheat your oven to 325°F (163°C).
  • In a medium bowl, combine graham cracker crumbs, melted butter, and sugar until the mixture resembles wet sand.
  • Press firmly into the bottom of a 9-inch springform pan.
  • Bake for 8-10 minutes, then allow to cool.

2. Make the Cheesecake Filling

  • In a large bowl, beat cream cheese and sugar until smooth and creamy.
  • Add vanilla extract, mixing until incorporated.
  • Add eggs one at a time, beating on low speed after each addition.
  • Fold in sour cream until fully combined.
  • Gently mix in chopped cotton candy.
  • If using, add food coloring and stir until evenly distributed.

3. Bake the Cheesecake

  • Pour the filling over the cooled crust.
  • Place the springform pan in a larger roasting pan and fill with 1 inch of hot water for a water bath.
  • Bake for 55-65 minutes, or until the edges are set and the center has a slight jiggle.
  • Turn off the oven and let the cheesecake cool inside for 1 hour to prevent cracking.

4. Chill and Decorate

  • Once at room temperature, refrigerate for at least 4 hours, preferably overnight.
  • Before serving, top with whipped cream and extra cotton candy for a festive touch.

5. Serve and Enjoy

  • Slice with a sharp knife, wiping clean between cuts for smooth slices.
  • Serve immediately and enjoy the whimsical flavors of cotton candy!

Nutritional Information (Per Serving)

NutrientAmount
Calories~420 kcal
Carbohydrates~45g
Protein~7g
Fat~25g
Saturated Fat~14g
Sugar~35g
Fiber~1g
Sodium~220mg

The History of Cotton Candy and Cheesecake: A Perfect Match

Cotton candy has been around for over a century, originally called “fairy floss” when it was first introduced in the late 1800s. This light and airy confection was a novelty at fairs and carnivals, delighting children and adults alike with its unique texture and melt-in-your-mouth sweetness.

Cheesecake, on the other hand, dates back even further. Ancient Greeks were known to make an early version of cheesecake using honey and cheese. Over the centuries, this dessert evolved into the rich, creamy treat we know today, made famous by New York-style variations and countless flavor adaptations.

Combining these two classics—cheesecake and cotton candy—creates a dessert that bridges generations, blending the timeless richness of cheesecake with the playful sweetness of cotton candy.

Creative Variations to Try

One of the best things about this cheesecake is how easily you can customize it to suit your taste and occasion. Here are a few creative twists:

1. No-Bake Cotton Candy Cheesecake

If you want a simpler version, skip the eggs and replace them with extra whipped cream or gelatin for a no-bake variation. Let it set in the fridge for at least six hours before serving.

2. Cotton Candy Swirl Cheesecake

Instead of mixing all the food coloring into the batter, swirl pink and blue colors separately to create a beautiful marbled effect.

3. Extra Crunchy Crust

Try using crushed vanilla wafers or Oreos instead of graham crackers for a different crust flavor. A chocolate cookie crust also pairs surprisingly well with the sweet cotton candy notes.

4. Cotton Candy Cheesecake Bars

Turn this dessert into easy-to-serve bars by using a square pan and cutting it into individual portions. Perfect for parties or bite-sized indulgence.

5. Mini Cheesecakes

Make individual-sized cheesecakes by dividing the batter into cupcake liners for a cute, personal treat.

Frequently Asked Questions

1. Can I Make This Cheesecake Ahead of Time?

Yes! Cheesecake actually tastes better when it has time to chill. You can make it up to two days in advance and store it in the refrigerator until ready to serve.

2. Will the Cotton Candy Melt in the Cheesecake?

Yes, the cotton candy will dissolve into the batter, infusing it with its signature flavor. This is why it’s best to only use cotton candy as a garnish right before serving, so it stays fluffy and intact.

3. How Do I Prevent My Cheesecake from Cracking?

  • Bake it in a water bath to keep moisture in the oven.
  • Avoid overmixing the batter, which can create air bubbles.
  • Let it cool slowly by turning off the oven and leaving the door slightly open for an hour.

4. Can I Use Store-Bought Cotton Candy?

Yes! Any brand of cotton candy will work. Just make sure to chop it into small pieces before mixing it into the batter.

5. Can I Freeze This Cheesecake?

Absolutely! Wrap the cheesecake tightly in plastic wrap and store it in the freezer for up to 2 months. Let it thaw in the refrigerator overnight before serving.

6. What’s the Best Way to Slice This Cheesecake?

For clean slices, use a sharp knife dipped in hot water, wiping it clean between cuts. This will help prevent dragging and keep the slices smooth.

How to Serve and Present This Cheesecake

Presentation is key with a whimsical dessert like this! Here are some ideas to make your Cotton Candy Cheesecake look as magical as it tastes:

  • Top with Whipped Cream – Pipe delicate swirls of whipped cream around the edges for an elegant touch.
  • Garnish with Fresh Cotton Candy – Add small tufts of cotton candy just before serving for the ultimate visual appeal.
  • Use Sprinkles or Edible Glitter – A light dusting of pastel sprinkles or edible glitter adds extra fun.
  • Drizzle with White Chocolate – For a more decadent touch, drizzle melted white chocolate over the top.

Why You Need to Make This Cheesecake

There’s something about this Cotton Candy Cheesecake that brings pure joy to any celebration. It’s playful yet elegant, nostalgic yet sophisticated. It reminds us of childhood summers at the fair, yet it holds its own as a beautiful and impressive dessert for any special occasion.

From its buttery graham cracker crust to its creamy cotton candy-infused filling, every bite is an experience in texture and taste. It’s a showstopper that doesn’t just look incredible but also delivers on flavor.

Whether you’re making it for a birthday, a baby shower, or simply because you love cotton candy, this cheesecake is sure to be a conversation starter. It’s proof that sometimes, the best desserts are the ones that make us feel like kids again.

So go ahead—slice into this whimsical, pastel-hued masterpiece and enjoy a dessert that’s as dreamy as it is delicious!

Amal

Cotton Candy Cheesecake: A Whimsical and Dreamy Delight

This Cotton Candy Cheesecake is a fun and whimsical dessert that blends the rich creaminess of classic cheesecake with the nostalgic sweetness of cotton candy. With a buttery graham cracker crust, a velvety smooth filling, and soft pastel hues, this cheesecake is as beautiful as it is delicious. Perfect for birthdays, Easter, baby showers, or any occasion that calls for a touch of magic, this dessert will bring joy to every bite!
Prep Time 20 minutes
Cook Time 1 hour 5 minutes
Total Time 5 hours
Servings: 10 -12 servings
Course: Dessert
Cuisine: American

Ingredients
  

For the Crust:
  • 1 ½ cups graham cracker crumbs
  • ½ cup unsalted butter melted
  • 2 tablespoons granulated sugar
For the Cheesecake Filling:
  • 24 ounces cream cheese softened
  • 1 cup granulated sugar
  • 1 teaspoon vanilla extract
  • 3 large eggs
  • 1 cup sour cream
  • 1 cup cotton candy chopped into small pieces
  • 1 teaspoon food coloring pink or blue, optional
For Topping:
  • Whipped cream
  • Extra cotton candy for garnish

Method
 

  1. Prepare the Crust
  2. Preheat oven to 325°F (163°C).
  3. In a bowl, mix graham cracker crumbs, melted butter, and sugar until well combined.
  4. Press the mixture into the bottom of a 9-inch springform pan to form an even layer.
  5. Bake for 8-10 minutes, then remove and let it cool.
  6. Make the Cheesecake Filling
  7. In a large mixing bowl, beat the cream cheese and sugar until smooth.
  8. Add the vanilla extract, mixing until incorporated.
  9. Beat in the eggs one at a time, mixing on low speed to avoid overwhipping.
  10. Fold in the sour cream and gently stir in the chopped cotton candy.
  11. If using food coloring, mix it in until evenly distributed.
  12. Bake the Cheesecake
  13. Pour the filling over the cooled crust, spreading it evenly.
  14. Place the springform pan in a larger roasting pan and add 1 inch of hot water to create a water bath.
  15. Bake for 55-65 minutes, or until the edges are set and the center slightly jiggles.
  16. Turn off the oven, crack the door slightly, and let the cheesecake cool inside for 1 hour.
  17. Chill and Decorate
  18. Once cooled to room temperature, refrigerate for at least 4 hours, preferably overnight.
  19. Before serving, top with whipped cream and extra cotton candy for a fun, festive touch.
  20. Slice and Enjoy
  21. Use a sharp knife dipped in warm water to get clean slices.
  22. Serve immediately and enjoy the sweet, creamy, and nostalgic flavors of cotton candy in every bite!

Notes

  • Add food coloring for a soft pastel effect, or swirl two colors together for a marbled look.
  • For a no-bake version, replace eggs with 1 cup of whipped topping and refrigerate for at least 6 hours before serving.
  • Store leftovers in the refrigerator for up to 5 days.
  • To freeze, wrap the cheesecake in plastic wrap and store for up to 2 months. Thaw overnight in the refrigerator before serving.

Easter Lolly Cake: A No-Bake Chocolatey Delight

Every Easter, my kitchen fills with the familiar scents of chocolate, vanilla, and coconut, bringing back memories of childhood celebrations. Among the many sweet treats my family would prepare, one dessert always stood out—the Easter Lolly Cake.

It wasn’t just the flavors that made this treat special; it was the process. I remember standing on a stool, watching as my grandmother mixed the crushed graham crackers, mini marshmallows, and melted butter in a big bowl. The chocolate chips would always mysteriously disappear before they made it into the mixture (courtesy of my little hands). Once everything was pressed into a pan and left to set in the fridge, the waiting game began—a challenge for an eager child with a sweet tooth.

When the moment finally arrived to slice the chilled bars, I marveled at the soft marshmallows peeking through the rich chocolatey base. That first bite, with its combination of crunch, chewiness, and creamy chocolate, felt like Easter itself—joyful, sweet, and filled with love.

Now, I make this Easter Lolly Cake every year, passing the tradition down to my own family. It’s a dessert that requires no baking, no fancy techniques, just simple ingredients and a whole lot of heart.

What Makes Easter Lolly Cake Special?

The beauty of this dessert lies in its simplicity. It’s an easy-to-make, no-bake treat that delivers an irresistible combination of flavors and textures. Here’s why this cake has remained a beloved Easter tradition:

1. Perfect for Any Skill Level

This recipe requires no oven, no complicated techniques, and no special equipment. It’s an ideal treat for beginners, kids, or anyone who wants a quick and foolproof dessert.

2. A Nostalgic Classic

Lolly Cake has been a staple in many households for decades. While it’s often associated with New Zealand, variations of this treat have appeared in family recipe books worldwide. Its combination of crushed biscuits, chocolate, and marshmallows is a timeless favorite.

3. A Delightful Mix of Textures

From the crunchy graham crackers to the chewy marshmallows and smooth melted chocolate, every bite is an explosion of textures. It’s the perfect contrast between soft and crisp, making it an addictive Easter treat.

4. Customizable and Fun

The best part about this recipe? You can make it your own. Whether you swap the chocolate chips for white chocolate, add nuts for extra crunch, or sprinkle pastel-colored candy on top, there are endless ways to personalize this treat.

Ingredients

IngredientAmount
Crushed graham crackers2 cups
Sweetened shredded coconut1 cup
Mini marshmallows1 cup
Unsweetened cocoa powder1/2 cup
Unsalted butter, melted1/2 cup
Powdered sugar1/2 cup
Vanilla extract1 teaspoon
Chocolate chips (milk or dark)1 cup
Chopped nuts (optional)1/2 cup

Directions

1. Combine Dry Ingredients

  • In a large mixing bowl, add the crushed graham crackers, shredded coconut, mini marshmallows, and cocoa powder. Stir to combine.

2. Add Wet Ingredients

  • Pour in the melted butter, powdered sugar, and vanilla extract. Mix until the ingredients are evenly coated and the mixture starts to come together.

3. Fold in Chocolate and Nuts

  • If using, gently fold in the chocolate chips and chopped nuts until evenly distributed throughout the mixture.

4. Prepare the Baking Dish

  • Line an 8×8-inch baking dish with parchment paper, leaving some overhang on the sides for easy removal.

5. Press and Set

  • Firmly press the mixture into the prepared baking dish, spreading it evenly across the bottom.
  • Cover the dish with plastic wrap and refrigerate for at least 2 hours, or until firm.

6. Slice and Serve

  • Once set, lift the cake out of the dish using the parchment paper overhang.
  • Cut into squares or bars and enjoy your Easter Lolly Cake!

Nutritional Information (Per Serving)

NutrientAmount
Calories~250 kcal
Carbohydrates~32g
Protein~3g
Fat~12g
Saturated Fat~7g
Sugar~20g
Fiber~2g
Sodium~60mg

The History of Lolly Cake and Its Easter Connection

Lolly Cake, a well-known New Zealand dessert, traditionally features crushed malt biscuits, sweetened condensed milk, and colorful fruit-flavored marshmallows. However, over time, creative variations have emerged, adapting the recipe to different tastes and occasions—including Easter.

This Easter version stays true to the spirit of the original but incorporates cocoa powder, chocolate chips, and graham crackers to create a more chocolate-forward dessert, making it perfect for Easter celebrations. The mini marshmallows represent the soft pastel hues of spring, and the no-bake process makes it a stress-free addition to any holiday table.

Creative Variations to Try

One of the best things about this Easter Lolly Cake is how easy it is to customize. Here are a few ways to make it even more festive:

1. White Chocolate Easter Lolly Cake

Replace the cocoa powder and dark chocolate chips with white chocolate chips for a lighter, creamier version. Add dried cranberries or pastel-colored sprinkles for extra color.

2. Peanut Butter Twist

Stir in ¼ cup of peanut butter with the melted butter to add a nutty richness. You can also sprinkle crushed peanuts on top for a crunchy finish.

3. Fruity Easter Lolly Cake

Fold in chopped dried apricots, cherries, or cranberries to add a burst of fruity sweetness that complements the chocolatey base.

4. Biscuit Swap

Instead of graham crackers, try using digestive biscuits, vanilla wafers, or crushed shortbread cookies to change the flavor and texture of the base.

5. Layered Easter Bars

Make a double-layered Lolly Cake by pressing half of the mixture into the pan, adding a layer of melted chocolate, and then pressing the remaining mixture on top before chilling.

Frequently Asked Questions

1. Can I Make This Dessert Ahead of Time?

Yes! This is an excellent make-ahead treat since it needs to chill in the refrigerator. Prepare it a day in advance, and store it covered until you’re ready to serve.

2. How Do I Store Easter Lolly Cake?

Store it in an airtight container in the refrigerator for up to 5 days. If you’re stacking the bars, place parchment paper between layers to prevent sticking.

3. Can I Freeze Lolly Cake?

Absolutely! Cut the cake into squares, wrap them individually in plastic wrap, and store them in a freezer-safe container. They will last up to 2 months in the freezer. When ready to eat, let them thaw in the refrigerator for a few hours.

4. Why Is My Mixture Too Dry or Too Sticky?

  • If the mixture is too dry and crumbly, add a little extra melted butter to help bind it together.
  • If it’s too sticky, refrigerate it for 15-20 minutes before pressing it into the pan to make it easier to handle.

5. Can I Make a Nut-Free Version?

Yes! Simply omit the nuts or replace them with extra marshmallows or crushed cookies for added texture.

6. How Do I Cut Clean, Even Slices?

For perfect slices, use a sharp knife dipped in hot water, then wipe it dry before each cut. This helps glide through the chilled chocolate base without crumbling.

Serving and Presentation Ideas

Presentation can make all the difference, especially for a festive occasion like Easter. Here are some creative ways to serve and decorate your Easter Lolly Cake:

  • Dust with powdered sugar for a classic, elegant look.
  • Drizzle with melted chocolate for an extra indulgent touch.
  • Top with mini Easter eggs or sprinkles to enhance the holiday theme.
  • Serve with a scoop of vanilla ice cream for an extra special treat.
  • Wrap individual squares in colorful cellophane bags for a fun Easter party favor.

Why Easter Lolly Cake Is the Perfect Holiday Treat

At its core, this Easter Lolly Cake is more than just a dessert—it’s a tradition, a memory in the making, and a treat that brings people together. Its no-bake simplicity makes it accessible for everyone, from experienced bakers to children eager to help in the kitchen. The chocolatey crunch, chewy marshmallows, and hint of coconut create a flavor that’s nostalgic yet timeless.

Whether you’re celebrating Easter with a large family gathering or enjoying a quiet moment with a cup of tea and a sweet bite, this cake is a reminder of the joy found in simple things—a homemade treat, shared laughter, and the warmth of tradition.

This year, as you prepare for Easter, make a batch of Easter Lolly Cake and let its delightful flavors and textures add an extra touch of sweetness to your holiday celebration.

Amal

Easter Lolly Cake: A No-Bake Chocolatey Delight

Easter Lolly Cake is a no-bake chocolatey treat that combines crushed graham crackers, shredded coconut, mini marshmallows, and rich cocoa for a chewy, fudgy dessert. This simple yet indulgent recipe is perfect for Easter gatherings, requiring minimal effort while delivering maximum flavor. With its mix of textures and sweet, nostalgic taste, it’s a delightful addition to any festive celebration!
Prep Time 15 minutes
Cook Time 2 hours
Total Time 2 hours 15 minutes
Servings: 12 -16 squares
Course: Dessert
Cuisine: American

Ingredients
  

  • 2 cups crushed graham crackers
  • 1 cup sweetened shredded coconut
  • 1 cup mini marshmallows
  • 1/2 cup unsweetened cocoa powder
  • 1/2 cup unsalted butter melted
  • 1/2 cup powdered sugar
  • 1 teaspoon vanilla extract
  • 1 cup chocolate chips milk or dark
  • 1/2 cup chopped nuts optional

Method
 

  1. Mix the Dry Ingredients
  2. In a large mixing bowl, combine crushed graham crackers, shredded coconut, mini marshmallows, and cocoa powder. Stir until evenly mixed.
  3. Add Wet Ingredients
  4. Pour in the melted butter, powdered sugar, and vanilla extract. Mix well until everything is fully incorporated.
  5. Fold in Chocolate and Nuts
  6. If using, gently fold in the chocolate chips and chopped nuts to evenly distribute them throughout the mixture.
  7. Prepare the Baking Dish
  8. Line an 8×8-inch baking dish with parchment paper, leaving extra overhang for easy removal.
  9. Press and Chill
  10. Firmly press the mixture into the prepared baking dish, spreading it evenly.
  11. Cover with plastic wrap and refrigerate for at least 2 hours, or until firm.
  12. Slice and Serve
  13. Once set, lift the cake out of the dish using the parchment paper overhang.
  14. Cut into squares or bars and enjoy!

Notes

  • For extra decadence, drizzle melted chocolate over the top before chilling.
  • Use white chocolate chips for a sweeter, creamier variation.
  • Add dried fruit like chopped cherries or cranberries for a fruity twist.
  • Store in an airtight container in the refrigerator for up to 5 days.
  • This dessert can be frozen for up to 2 months; thaw in the fridge before serving.

Easter Swiss Roll Cake with Colorful Marbled Sponge

A Sweet Slice of Easter Memories

Easter has always been a time of joy, renewal, and family traditions. When I was a child, the kitchen would come alive with the scents of vanilla, cocoa, and fresh cream as my mother prepared our Easter desserts. Among all the treats, one stood out—the Swiss roll cake.

It wasn’t just about the taste; it was the excitement of watching her carefully roll the warm sponge, the anticipation of revealing the perfect spiral inside. I would sit at the counter, eyes wide, as she marbled the batter with soft pastel colors, turning a simple chocolate sponge into a masterpiece of swirls. The light, airy cake, paired with a fluffy whipped cream filling, felt like the essence of spring—delicate, fresh, and wonderfully sweet.

Now, I carry on this tradition in my own home, making an Easter Swiss Roll Cake with a Colorful Marbled Sponge. It’s a dessert that feels like a celebration in itself, bringing a pop of color and joy to the holiday table. Whether you’re making it for your family, friends, or simply to enjoy a moment of baking magic, this cake is bound to become a cherished Easter tradition.

What Makes This Easter Swiss Roll Special?

The Swiss roll is a classic dessert, but what sets this Easter version apart is its vibrant marbled sponge and light-as-air whipped cream filling. Here’s why it’s a must-have for your Easter gathering:

1. A Stunning Marbled Effect

The pastel-colored swirls running through the chocolate sponge create a mesmerizing look, making it as eye-catching as it is delicious. The soft hues of pink, blue, and yellow give the cake a festive touch, reminiscent of Easter eggs and springtime blooms.

2. Perfectly Light and Fluffy

Unlike heavier cakes, this Swiss roll has a delicate sponge that melts in your mouth. The airy texture pairs beautifully with the smooth whipped cream filling, making it a refreshing dessert after a hearty Easter meal.

3. A Nostalgic Yet Unique Treat

Many of us grew up enjoying Swiss rolls from bakeries or store-bought versions. This homemade version captures that nostalgia while adding an elegant, handcrafted twist that makes it even more special.

4. Surprisingly Easy to Make

Despite its intricate appearance, this cake is easier to make than it looks. The batter comes together quickly, and the rolling technique, once mastered, makes for a fun and rewarding baking experience.

Ingredients

For the Cake

IngredientAmount
Large eggs3
Granulated sugar1 cup
Vanilla extract1 teaspoon
All-purpose flour1/2 cup
Unsweetened cocoa powder1/4 cup
Baking powder1/4 teaspoon
Salt1/4 teaspoon
Milk1/4 cup
Vegetable oil1/4 cup
Food coloring (pastel colors)As needed

For the Filling

IngredientAmount
Heavy whipping cream1 cup
Powdered sugar2 tablespoons
Vanilla extract1 teaspoon

For Dusting

IngredientAmount
Powdered sugarAs needed

Directions

1. Prepare the Baking Pan

  • Preheat your oven to 350°F (175°C).
  • Line a 15×10-inch jelly roll pan with parchment paper and lightly grease it to prevent sticking.

2. Make the Cake Batter

  • In a large mixing bowl, beat the eggs and granulated sugar on high speed for about 5 minutes until the mixture becomes thick and pale.
  • Stir in the vanilla extract.

3. Combine the Dry Ingredients

  • In a separate bowl, whisk together the flour, cocoa powder, baking powder, and salt.
  • Gradually fold the dry ingredients into the egg mixture until just combined.

4. Incorporate the Liquid Ingredients

  • In a small bowl, mix the milk and vegetable oil.
  • Gently fold this mixture into the batter until smooth and fully incorporated.

5. Create the Marbled Effect

  • Divide the batter into three equal portions.
  • Tint each portion with a different pastel food coloring (such as pink, blue, and yellow).
  • Spoon dollops of the colored batter randomly onto the prepared pan.
  • Use a toothpick or skewer to gently swirl the colors together to create a marbled effect.

6. Bake the Cake

  • Bake for 10-12 minutes, or until the cake springs back when lightly touched.
  • Do not overbake, as this will make rolling more difficult.

7. Roll the Cake

  • While the cake is still warm, carefully lift it with the parchment paper and place it on a clean surface.
  • Dust a clean kitchen towel with powdered sugar and flip the cake onto the towel, removing the parchment paper.
  • Starting from the short end, gently roll the cake with the towel inside into a log shape.
  • Allow it to cool completely in this shape to prevent cracking.

8. Prepare the Whipped Cream Filling

  • In a chilled mixing bowl, beat the heavy whipping cream, powdered sugar, and vanilla extract until stiff peaks form.

9. Assemble the Swiss Roll

  • Once the cake has cooled, carefully unroll it.
  • Spread the whipped cream evenly over the surface, leaving a small border around the edges.
  • Gently re-roll the cake without the towel, making sure not to squeeze out the filling.

10. Final Touches

  • Dust the top with powdered sugar for a classic look.
  • Slice and serve your beautiful Easter Swiss Roll Cake!

Nutritional Information (Per Serving)

NutrientAmount
Calories~250 kcal
Carbohydrates~30g
Protein~4g
Fat~12g
Saturated Fat~6g
Sugar~20g
Fiber~1g
Sodium~80mg

The History of Swiss Roll Cakes

Swiss rolls, also known as jelly rolls or roulades, have been a beloved dessert for centuries. Though the exact origin is debated, many believe the cake was first developed in Central Europe, with variations appearing in Swiss, Austrian, and German pastry traditions.

These cakes gained popularity worldwide for their simple yet elegant presentation—soft sponge cake wrapped around a creamy filling. Over time, Swiss rolls evolved into different flavors, from classic vanilla and chocolate to fruit-filled variations. Today, the Easter Swiss Roll Cake adds a festive, colorful twist to this timeless dessert, making it a perfect centerpiece for holiday celebrations.

Creative Variations to Try

One of the best things about this Swiss roll is its versatility. You can easily customize it to match your personal taste or Easter theme. Here are some exciting variations to experiment with:

1. Lemon Cream Swiss Roll

Swap the cocoa powder for more flour to create a plain vanilla sponge, then fill it with a tangy lemon whipped cream. The citrusy flavor adds a bright and refreshing twist.

2. Strawberry Shortcake Swiss Roll

Fold in finely chopped strawberries into the whipped cream filling for a fruity burst of flavor. This pairs beautifully with the pastel marbled sponge.

3. Chocolate Lover’s Swiss Roll

For a richer dessert, fill the cake with a chocolate ganache or chocolate whipped cream. You can even drizzle melted chocolate over the top for an extra indulgent finish.

4. Coconut Cream Swiss Roll

Add shredded coconut to the whipped cream filling and sprinkle toasted coconut flakes on top. This tropical-inspired version is a fantastic way to welcome spring.

5. Gluten-Free Swiss Roll

Use a gluten-free flour blend in place of all-purpose flour to make this cake suitable for gluten-sensitive guests without compromising on texture.

Frequently Asked Questions

1. Why did my Swiss roll crack when I rolled it?

Swiss rolls can crack if they are overbaked or if they cool too much before rolling. To prevent this:

  • Make sure not to overbake the sponge—it should be soft and slightly springy to the touch.
  • Roll the cake while it’s still warm using a kitchen towel to help shape it.

2. Can I make this cake ahead of time?

Yes! This Swiss roll can be made a day in advance. Keep it refrigerated until ready to serve. The whipped cream filling stays fresh, and the cake holds its shape well.

3. How do I get a smooth, even swirl in my roll?

To achieve a perfect swirl:

  • Spread the filling evenly across the sponge, leaving a small border at the edges.
  • Use gentle, even pressure when rolling to keep it tight but not too compressed.

4. What food coloring should I use for the marbled effect?

Gel food coloring works best, as it provides vibrant colors without adding extra liquid to the batter. A few drops are all you need to achieve soft pastel hues.

5. Can I freeze a Swiss roll?

Yes, you can freeze it without the filling. Wrap the baked and rolled sponge in plastic wrap and store it in an airtight container for up to 1 month. When ready to use, thaw at room temperature and fill with fresh whipped cream.

How to Serve and Present Your Easter Swiss Roll

This cake is already a visual masterpiece, but you can take the presentation to the next level with a few finishing touches:

  • Dust with powdered sugar for an elegant, classic look.
  • Drizzle with melted white chocolate to enhance the festive feel.
  • Garnish with edible flowers or pastel sprinkles to make it even more Easter-themed.
  • Serve with fresh berries to add a refreshing contrast to the sweet cake.

Pair this dessert with a cup of tea, a glass of sparkling lemonade, or even a scoop of vanilla ice cream for a delightful Easter treat.


Why This Easter Swiss Roll Will Become a Family Favorite

Beyond its stunning appearance and delicious flavor, this Swiss roll carries a sense of tradition and joy. There’s something truly special about baking a cake that brings people together, whether it’s children eagerly watching the marbling process or loved ones sharing slices around the table.

This Easter, as you prepare to celebrate with family and friends, take a moment to enjoy the simple pleasures—mixing batter, rolling a warm sponge, and creating something beautiful with your hands. This Easter Swiss Roll Cake is more than just a dessert; it’s a symbol of springtime renewal, creativity, and the sweet memories that last long after the last bite.

So go ahead, roll up some Easter magic, and let this cake be the highlight of your holiday feast!

Amal

Easter Swiss Roll Cake with Colorful Marbled Sponge

This Easter Swiss Roll Cake is a light and fluffy chocolate sponge, beautifully marbled with pastel colors and filled with a rich, vanilla whipped cream. Its delicate texture and festive design make it the perfect centerpiece for your Easter dessert table. Simple to make yet stunning in presentation, this cake is sure to impress guests and add a touch of sweetness to your celebration!
Prep Time 20 minutes
Cook Time 10 minutes
Total Time 1 hour
Servings: 8 servings
Course: Dessert
Cuisine: American

Ingredients
  

For the Cake:
  • 3 large eggs
  • 1 cup granulated sugar
  • 1 teaspoon vanilla extract
  • 1/2 cup all-purpose flour
  • 1/4 cup unsweetened cocoa powder
  • 1/4 teaspoon baking powder
  • 1/4 teaspoon salt
  • 1/4 cup milk
  • 1/4 cup vegetable oil
  • Food coloring pastel colors
For the Filling:
  • 1 cup heavy whipping cream
  • 2 tablespoons powdered sugar
  • 1 teaspoon vanilla extract
For Dusting:
  • Powdered sugar

Method
 

Prepare the Baking Pan:
  1. Preheat the oven to 350°F (175°C).
  2. Line a 15×10-inch jelly roll pan with parchment paper and lightly grease it.
Make the Cake Batter:
  1. In a large bowl, beat the eggs and granulated sugar on high speed for about 5 minutes until thick and pale.
  2. Stir in the vanilla extract.
Combine the Dry Ingredients:
  1. In a separate bowl, whisk together the flour, cocoa powder, baking powder, and salt.
  2. Gradually fold the dry ingredients into the egg mixture until just combined.
Incorporate the Liquids:
  1. In a small bowl, mix the milk and vegetable oil.
  2. Gently fold this into the batter until smooth and fully incorporated.
Create the Marbled Effect:
  1. Divide the batter into three equal portions and tint each with a different pastel food coloring (e.g., pink, blue, and yellow).
  2. Spoon dollops of the colored batter randomly onto the prepared pan.
  3. Use a toothpick or skewer to gently swirl the colors together for a marbled effect.
Bake the Cake:
  1. Bake for 10-12 minutes or until the cake springs back when lightly touched.
Roll the Cake:
  1. While the cake is still warm, carefully lift it with the parchment paper and place it on a clean surface.
  2. Dust a clean kitchen towel with powdered sugar and flip the cake onto the towel.
  3. Remove the parchment paper and gently roll the cake (with the towel inside) into a log shape.
  4. Let it cool completely.
Prepare the Whipped Cream Filling:
  1. In a chilled bowl, beat the heavy whipping cream, powdered sugar, and vanilla extract until stiff peaks form.
Assemble the Swiss Roll:
  1. Carefully unroll the cooled cake.
  2. Spread the whipped cream evenly over the surface, leaving a small border around the edges.
  3. Re-roll the cake (without the towel), ensuring a tight but gentle roll.
Final Touches:
  1. Dust with powdered sugar for a simple finish.
  2. Slice and serve this beautifully marbled Swiss roll!

Notes

  • Roll the cake while it’s still warm to prevent cracks.
  • Let the Jello cool slightly before pouring it over the cream cheese layer to prevent melting.
  • Use gel food coloring for vibrant pastel shades without altering the batter consistency.
  • Store leftovers in the refrigerator for up to 3 days.

Easter Jello Pie: A Nostalgic and Colorful Delight

Growing up, Easter was one of the most magical times of the year. It wasn’t just about the Easter egg hunts or the baskets filled with candy—it was about the moments spent in the kitchen, baking and creating sweet treats that made the holiday feel special. My grandmother had a tradition of making a bright and cheerful dessert that she called Easter Jello Pie.

I remember sitting on the counter, watching in fascination as she mixed the smooth cream cheese filling, carefully poured the colorful Jello on top, and arranged fresh fruit in the most beautiful patterns. It was like an edible work of art, and I couldn’t wait to dig in. The combination of the crunchy graham cracker crust, the rich and creamy center, and the light, fruity Jello made each bite a perfect balance of textures and flavors.

Now, every Easter, I recreate this pie as a way to honor those childhood memories. It’s a simple recipe, yet it holds so much joy and nostalgia. Whether you’re making it for the first time or continuing a tradition of your own, Easter Jello Pie is the perfect way to bring a touch of sweetness and color to your holiday table.

What Makes Easter Jello Pie So Special?

Easter Jello Pie is more than just a dessert—it’s an experience. It’s a recipe that brings people together, whether you’re making it with your kids, serving it to guests, or enjoying a slice as a sweet Easter treat. Here’s why it stands out:

  • Vibrant and Festive – The bright Jello layer makes this pie visually stunning, perfect for spring celebrations.
  • Creamy and Refreshing – The smooth cream cheese filling pairs beautifully with the light, fruity Jello for a perfect contrast of flavors.
  • Easy to Make – With simple ingredients and minimal prep, this is a no-fuss dessert that anyone can make.
  • Customizable – You can use different Jello flavors, change the crust, or add extra toppings to make it your own.

Whether you’re looking for a nostalgic treat or a new Easter tradition, this pie is guaranteed to bring smiles to the table.

Ingredients

IngredientAmount
Graham cracker crumbs1 ½ cups
Unsalted butter, melted½ cup
Granulated sugar¼ cup
Cream cheese, softened1 (8-ounce) package
Powdered sugar1 cup
Vanilla extract1 teaspoon
Whipped topping, thawed1 (8-ounce) container
Flavored Jello (strawberry, lime, blue raspberry, etc.)1 (3-ounce) package
Boiling water1 cup
Cold water1 cup
Fresh fruit (strawberries, blueberries, kiwi) for garnish1 cup

Directions

  1. Prepare the Crust:
    • Preheat the oven to 350°F (175°C).
    • In a medium mixing bowl, combine the graham cracker crumbs, melted butter, and granulated sugar. Mix well until the texture resembles wet sand.
    • Press the mixture firmly into the bottom and sides of a 9-inch pie pan.
    • Bake for 8-10 minutes, or until lightly golden. Remove from the oven and let it cool completely.
  2. Make the Cream Cheese Filling:
    • In a large mixing bowl, beat the softened cream cheese with an electric mixer until smooth.
    • Gradually add the powdered sugar and vanilla extract, mixing until fully combined.
    • Gently fold in the whipped topping until the mixture becomes smooth and creamy.
    • Spread evenly over the cooled graham cracker crust.
  3. Prepare the Jello Layer:
    • In a separate bowl, dissolve the Jello in 1 cup of boiling water, stirring until fully dissolved.
    • Add 1 cup of cold water and stir well. Let the Jello mixture cool for about 10 minutes.
  4. Assemble the Pie:
    • Once the Jello has cooled slightly, pour it carefully over the cream cheese layer.
    • Use a spatula to spread it evenly if necessary.
  5. Chill and Garnish:
    • Refrigerate the pie for at least 4 hours or until the Jello is fully set.
    • Before serving, garnish with fresh fruit for an extra burst of color and flavor.
    • Slice and enjoy!

Nutritional Information (Per Serving)

NutrientAmount
Calories220 kcal
Net Carbs25g
Protein3g
Fat10g

The Tradition of Jello Desserts at Easter

Jello-based desserts have been a staple at Easter gatherings for generations. But why are they so popular?

  • A Celebration of Spring – The bright, pastel colors of Jello perfectly capture the essence of spring, making it a favorite choice for Easter desserts.
  • Refreshing and Light – After a heavy Easter feast, a chilled, fruity dessert like this pie provides a refreshing contrast.
  • Family-Friendly and Fun – Jello desserts are easy to make, which makes them a great way to involve kids in the kitchen.

Jello-based treats have stood the test of time, and this pie is a modern take on a beloved classic, blending the best of creamy and fruity flavors.

Creative Variations to Try

One of the best things about this recipe is how adaptable it is. You can change up the flavors, textures, and presentation to make it suit any occasion. Here are some fun variations to experiment with:

Layered Jello Pie

Instead of using just one flavor of Jello, try layering two or three different colors for a striped effect. Let each layer set in the refrigerator before adding the next to create a stunning visual.

No-Bake Version

If you don’t want to use the oven, you can make a no-bake graham cracker crust by simply mixing the crumbs, butter, and sugar, then pressing it into the pie pan and chilling it for at least 30 minutes before adding the filling.

Chocolate Lovers’ Twist

For a richer variation, use an Oreo cookie crust instead of graham crackers. The chocolate pairs surprisingly well with the fruity Jello layer.

Coconut Cream Jello Pie

Replace the whipped topping with coconut whipped cream and sprinkle toasted coconut flakes on top for a tropical-inspired version.

Dairy-Free Option

Substitute dairy-free cream cheese and coconut-based whipped topping to make this pie suitable for those with lactose intolerance.

Tropical Fruit Medley

Use mango or pineapple-flavored Jello and top the pie with a mix of tropical fruits like kiwi, mango, and passion fruit for an island-inspired dessert.

These variations prove that Easter Jello Pie is a versatile dessert that can be adapted to suit any taste or dietary preference.

Frequently Asked Questions

1. Can I Make Easter Jello Pie in Advance?

Yes! In fact, this pie is best when made a day ahead, as it allows the flavors to meld together and ensures the Jello is fully set. Simply keep it covered in the refrigerator until ready to serve.

2. How Long Does Easter Jello Pie Last?

Stored in an airtight container in the refrigerator, this pie will stay fresh for up to 5 days. Avoid freezing, as Jello tends to lose its texture when thawed.

3. Can I Use Homemade Whipped Cream Instead of Whipped Topping?

Absolutely! Freshly whipped cream adds a richer flavor. Just be sure to stabilize it with a bit of powdered sugar or gelatin so it holds its shape.

4. Why Did My Jello Layer Sink Into the Cream Cheese Filling?

This can happen if the Jello is too warm when poured over the cream cheese layer. To prevent sinking, let the Jello cool to room temperature but not fully set before pouring it gently over the pie.

5. What’s the Best Way to Slice This Pie?

For clean slices, run a sharp knife under hot water, dry it, and then slice. This helps prevent the Jello from sticking and gives you smooth, even pieces.

6. Can I Make This Pie in Individual Servings?

Yes! Instead of a full pie, prepare the crust and layer the fillings in individual cups or jars for a fun, grab-and-go dessert.

How to Serve and Present Easter Jello Pie

Presentation plays a huge role in making this pie a standout dessert. Here are some serving ideas:

  • Garnish with Fresh Fruit – Arrange sliced strawberries, blueberries, or kiwi on top for an elegant finish.
  • Add a Drizzle of White Chocolate – A light drizzle of melted white chocolate adds a gourmet touch.
  • Serve with Whipped Cream Swirls – Pipe dollops of whipped cream around the edges for a decorative look.
  • Use Festive Easter Decorations – Top with pastel-colored sprinkles or edible flowers for a true Easter feel.

Whether served as a whole pie or in individual portions, this dessert is guaranteed to impress your guests.

Why Easter Jello Pie Will Become Your New Favorite Tradition

Easter Jello Pie isn’t just a dessert—it’s a reminder of the simple joys of baking, the excitement of springtime, and the warmth of sharing a meal with loved ones. Its combination of crunchy, creamy, and fruity layers makes it a treat that appeals to all ages.

What makes this pie truly special is its ability to bring people together. Whether you’re making it as a family, sharing it with friends, or passing down the recipe through generations, Easter Jello Pie is a dessert that carries more than just flavor—it carries memories.

So this Easter, take a moment to slow down, gather your loved ones, and enjoy a slice of this vibrant, nostalgic, and utterly delicious pie. It may just become the sweetest part of your celebration!

Amal

Easter Jello Pie: A Nostalgic and Colorful Delight

Easter Jello Pie is a fun and vibrant dessert that combines a buttery graham cracker crust, a smooth and creamy cheesecake-style filling, and a colorful, fruity Jello topping. This no-fuss recipe is perfect for spring celebrations, adding a refreshing and festive touch to any Easter gathering. With its eye-catching layers and light, sweet flavor, this pie is sure to become a holiday favorite!
Prep Time 15 minutes
Cook Time 10 minutes
Total Time 4 hours 25 minutes
Servings: 8 servings
Course: Dessert
Cuisine: American

Ingredients
  

  • 1 ½ cups graham cracker crumbs
  • ½ cup unsalted butter melted
  • ¼ cup granulated sugar
  • 1 8-ounce package cream cheese, softened
  • 1 cup powdered sugar
  • 1 teaspoon vanilla extract
  • 1 8-ounce container whipped topping, thawed
  • 1 3-ounce package flavored Jello (strawberry, lime, or blue raspberry)
  • 1 cup boiling water
  • 1 cup cold water
  • 1 cup fresh fruit strawberries, blueberries, or kiwi for garnish

Method
 

  1. Prepare the Crust
  2. Preheat your oven to 350°F (175°C).
  3. In a medium bowl, mix the graham cracker crumbs, melted butter, and granulated sugar until well combined.
  4. Press the mixture firmly into the bottom and sides of a 9-inch pie pan.
  5. Bake for 8-10 minutes until lightly golden. Let it cool completely.
  6. Make the Cream Cheese Filling
  7. In a large mixing bowl, beat the softened cream cheese until smooth.
  8. Gradually add powdered sugar and vanilla extract, mixing until well combined.
  9. Fold in the whipped topping until the mixture is smooth and creamy.
  10. Spread evenly over the cooled graham cracker crust.
  11. Prepare the Jello Layer
  12. In a separate bowl, dissolve the Jello in 1 cup of boiling water, stirring until fully dissolved.
  13. Add 1 cup of cold water and mix well. Let the Jello cool for about 10 minutes.
  14. Assemble the Pie
  15. Carefully pour the slightly cooled Jello over the cream cheese layer.
  16. Use a spatula to spread evenly if needed.
  17. Chill and Garnish
  18. Refrigerate the pie for at least 4 hours, or until the Jello is fully set.
  19. Before serving, garnish with fresh fruit.
  20. Slice and enjoy!

Notes

  • Let the Jello cool slightly before pouring it over the cream cheese layer to prevent melting.
  • For a layered effect, let one layer of Jello set before adding another.
  • Use homemade whipped cream instead of store-bought for a richer flavor.
  • Store leftovers in the refrigerator for up to 5 days.