Cheese & Potato Pie: The Ultimate Comfort Food

There are certain recipes that feel like a warm hug. They bring back childhood memories, fill the kitchen with rich, nostalgic aromas, and remind us of home. Cheese & Potato Pie is one of those dishes for me.

Growing up, this pie was a staple in my grandmother’s kitchen. I remember sitting on a stool, watching her knead the dough with practiced hands, humming a tune as the scent of freshly mashed potatoes and melted cheese filled the air. It was always a meal made with love, served fresh from the oven, golden and crisp on the outside, warm and creamy on the inside.

It wasn’t just food—it was tradition. Whether it was a family gathering, a simple weeknight dinner, or a meal shared on a cold winter evening, this dish brought people together. Over the years, I’ve made some tweaks to the recipe, but the heart of it remains the same: a buttery, flaky crust wrapped around a creamy, cheesy potato filling that melts in your mouth.

If you’re looking for a recipe that’s hearty, satisfying, and deeply comforting, this is it.

Why You’ll Love This Cheese & Potato Pie

1. Pure Comfort in Every Bite

There’s something about the combination of buttery pastry, creamy mashed potatoes, and melted cheese that makes this dish the epitome of comfort food. It’s rich but not overwhelming, filling but not heavy.

2. Simple, Budget-Friendly Ingredients

You don’t need anything fancy to make this pie—just basic pantry staples like flour, potatoes, cheese, and butter. It’s an excellent way to use up leftover mashed potatoes, and the dough is incredibly easy to work with.

3. Perfect for Any Occasion

Whether you’re serving it as a main course, a side dish, or a party snack, this pie never disappoints. It’s great for family dinners, potlucks, or meal prep, since it reheats beautifully and even tastes better the next day.

4. A Crowd-Pleaser for All Ages

Kids love the creamy, cheesy filling, and adults appreciate the nostalgic, homemade feel of this dish. It’s a meal that brings everyone to the table, no matter their age.

5. Easily Customizable

One of the best things about this recipe is how versatile it is. Want to add some protein? Toss in some diced ham or crispy bacon. Need to sneak in some veggies? Stir in sautéed onions, mushrooms, or spinach. Prefer a stronger flavor? Try using a blend of cheeses like sharp cheddar, gouda, or gruyère.

Ingredients

For the Dough

IngredientAmount
Yeast½ teaspoon (3 g)
Sugar1 teaspoon (5 g)
Warm Milk2 cups (400 ml)
All-Purpose Flour5 cups (530 g) (adjust as needed)
Salt1 teaspoon (6 g)

For the Filling

IngredientAmount
Potatoes3 medium (500 g)
Cheddar Cheese2 cups (200 g)
Butter2 tablespoons (30 g)
Black Pepper½ teaspoon
Salt½ teaspoon
Garlic Powder½ teaspoon

Directions

Step 1: Prepare the Dough

  1. In a small bowl, dissolve yeast and sugar in warm milk. Let it sit for 5-10 minutes until foamy.
  2. In a large bowl, combine flour and salt. Gradually add the yeast mixture, kneading until a soft dough forms.
  3. Cover and let the dough rest for 1 hour or until doubled in size.

Step 2: Make the Filling

  1. While the dough rises, mash the boiled potatoes and mix with cheddar cheese, melted butter, black pepper, salt, and garlic powder.

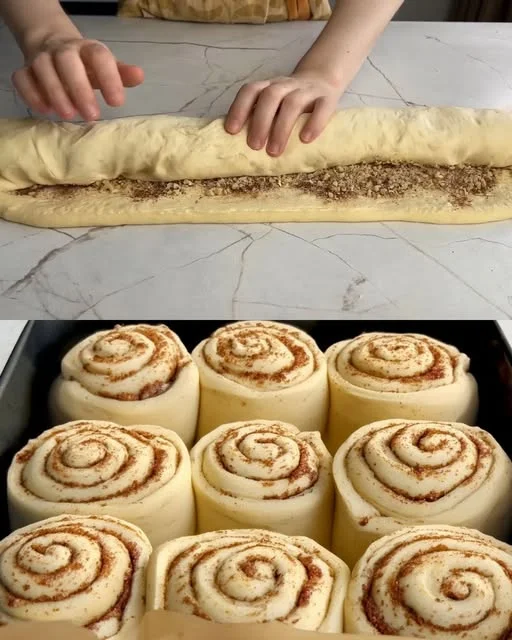
Step 3: Assemble the Pie

  1. Preheat oven to 180°C (350°F).
  2. Roll out half of the dough into a large circle and place it in a greased baking pan.
  3. Spread the cheese and potato filling evenly over the dough.
  4. Roll out the remaining dough and cover the filling, sealing the edges tightly.
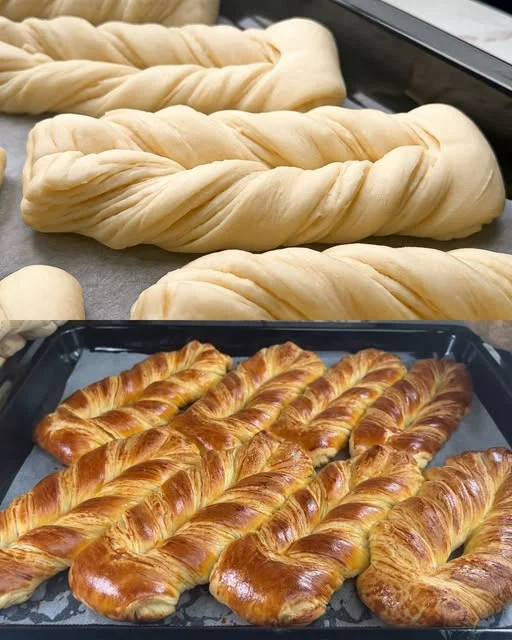
  5. Brush the top with melted butter or an egg wash for a golden crust.

Step 4: Bake & Serve

  1. Bake for 30-35 minutes or until golden brown.
  2. Let cool for 10 minutes before slicing. Serve warm and enjoy!

Nutritional Information (Per Serving)

NutrientAmount (Approx.)
Calories320 kcal
Protein12 g
Carbohydrates45 g
Fats10 g
Fiber3 g
Sodium400 mg

The Secrets to a Perfect Cheese & Potato Pie

1. Achieving the Perfect Dough

The dough is the foundation of this pie, and getting the right texture is key. A good cheese & potato pie crust should be flaky, slightly crisp, and buttery. Here are some tips to make sure yours turns out perfect every time:

  • Use warm milk in the dough—it helps activate the yeast and creates a softer texture.
  • Don’t over-knead the dough. Once it’s smooth and elastic, let it rest so it can rise properly.
  • Brush the top of the pie with butter or egg wash before baking for that beautiful golden-brown crust.

2. Mastering the Creamy, Cheesy Filling

  • Use starchy potatoes like Russet or Yukon Gold—they mash well and create a silky filling.
  • Add butter and cheese while the potatoes are still warm to help everything blend smoothly.
  • If you like a little extra richness, mix in a splash of cream or a dollop of sour cream.
  • Season generously—salt, pepper, and a touch of garlic powder elevate the flavor beautifully.

3. Baking for the Perfect Texture

  • Preheat your oven properly so the pie cooks evenly.
  • Don’t rush the baking process—30-35 minutes at 180°C (350°F) gives you a crispy top and a perfectly cooked center.
  • Let the pie cool for 10 minutes before slicing to help it set and hold its shape.

Serving Suggestions: How to Enjoy Cheese & Potato Pie

1. Pair It with a Fresh Salad

Since this pie is rich and filling, a simple side salad with crisp greens, cherry tomatoes, and a light vinaigrette makes a great contrast.

2. Serve It with Soup

A bowl of tomato soup or vegetable broth complements the creamy filling and turns this into a cozy, well-rounded meal.

3. Add a Dollop of Sour Cream

A spoonful of sour cream or Greek yogurt on top adds a tangy contrast to the cheesy filling.

4. Turn It into a Party Dish

Cut the pie into small squares or wedges and serve it as an appetizer or snack for gatherings.

5. Breakfast, Lunch, or Dinner—It Works Anytime!

  • Breakfast: Serve warm with a fried egg on top.
  • Lunch: Pair with a simple green salad.
  • Dinner: Enjoy with roasted vegetables or a protein of your choice.

Frequently Asked Questions (FAQs)

Q1: Can I make this pie ahead of time?

Yes! You can assemble the pie a day in advance and store it in the fridge. When ready to bake, just pop it in the oven—no need to adjust the baking time.

Q2: How do I store leftovers?

Leftover pie can be stored in an airtight container in the refrigerator for up to 4 days. Reheat in the oven at 180°C (350°F) for 10 minutes to crisp up the crust.

Q3: Can I freeze cheese & potato pie?

Absolutely! Let the pie cool completely, then wrap it tightly in plastic wrap and freeze for up to 2 months. Thaw in the fridge overnight and reheat in the oven.

Q4: What other cheeses can I use?

You can mix or swap cheddar with mozzarella, gouda, parmesan, or gruyère for different flavor profiles.

Q5: Can I make this pie without yeast?

Yes! If you prefer a quicker version, you can use store-bought puff pastry or a simple butter-based crust instead.

Q6: Can I add more ingredients to the filling?

Definitely! Try mixing in sautéed onions, garlic, mushrooms, or spinach for extra flavor.

Q7: How do I make it extra crispy on top?

Brush the top with melted butter or an egg wash before baking, and bake for the last 5 minutes at a slightly higher temperature.

Conclusion: A Dish That Brings People Together

Few dishes can rival the comforting, homey feeling of a Cheese & Potato Pie. It’s simple yet indulgent, filling yet not heavy, and bursting with warm, cheesy goodness. Whether you make it for a special occasion or just a regular family dinner, it’s the kind of meal that invites conversation, laughter, and a second helping.

As I continue to make this pie, I realize that it’s more than just a recipe—it’s a connection to the past, a piece of family tradition that I get to share. I hope that when you bake it, you’ll feel the same warmth and comfort that my family has enjoyed for generations.

So gather your ingredients, preheat the oven, and get ready to experience comfort food at its very best.

Amal

Cheese & Potato Pie: The Ultimate Comfort Food

This Cheese & Potato Pie is the perfect combination of a flaky, buttery crust and a rich, creamy potato filling loaded with melted cheese. It’s warm, satisfying, and brings a nostalgic sense of home-cooked comfort. Whether served as a hearty main dish or a side, this pie is guaranteed to be a family favorite. Perfect for cozy dinners, special gatherings, or meal prepping for the week!
Prep Time 15 minutes
Cook Time 35 minutes
Total Time 50 minutes
Servings: 6 –8 servings
Course: Main Dish
Cuisine: Comfort Food

Ingredients
  

  • For the Dough
  • ½ teaspoon 3 g yeast
  • 1 teaspoon 5 g sugar
  • 2 cups 400 ml warm milk
  • 5 cups 530 g all-purpose flour (adjust as needed)
  • 1 teaspoon 6 g salt
  • For the Filling
  • 3 medium 500 g potatoes, boiled and mashed
  • 2 cups 200 g cheddar cheese, shredded
  • 2 tablespoons 30 g butter, melted
  • ½ teaspoon black pepper or to taste
  • ½ teaspoon salt adjust as needed
  • ½ teaspoon garlic powder optional

Method
 

  1. Prepare the Dough: In a bowl, dissolve yeast and sugar in warm milk. Let sit for 5-10 minutes until foamy. Gradually add flour and salt, kneading until a smooth dough forms. Cover and let rise for 1 hour until doubled in size.
  2. Make the Filling: While the dough rises, mash the boiled potatoes and mix with cheddar cheese, melted butter, black pepper, salt, and garlic powder.
  3. Assemble the Pie: Preheat oven to 180°C (350°F). Roll out half the dough and place it in a greased baking dish. Spread the potato-cheese filling evenly over the dough. Roll out the remaining dough and place it on top, sealing the edges. Brush the top with melted butter or an egg wash.
  4. Bake & Serve: Bake for 30-35 minutes or until golden brown. Let cool for 10 minutes before slicing. Serve warm and enjoy!

Notes

  • For a crispier crust, bake an additional 5 minutes at a higher temperature (200°C/400°F) at the end.
  • Experiment with cheese: Try using gouda, gruyère, or a mix of your favorite cheeses for added depth.
  • Storage: Store leftovers in an airtight container in the fridge for up to 4 days. Reheat in the oven for the best texture.
  • Freezing: Freeze the baked pie for up to 2 months. Reheat in the oven before serving.

Nutritious Banana Oatmeal Muffins: A Simple & Wholesome Treat

There are certain recipes that bring back childhood memories, filling the kitchen with warmth and a sense of nostalgia. For me, banana oatmeal muffins are one of them. Growing up, my mother believed in starting the day with a hearty, nourishing breakfast, and she always found ways to turn simple, wholesome ingredients into something delicious.

Whenever we had overripe bananas on the counter, she would refuse to throw them away. Instead, she’d mash them into pancake batter, blend them into smoothies, or—my personal favorite—bake them into warm, golden banana oatmeal muffins. I remember sitting at the kitchen table, watching the muffins rise in the oven, the sweet aroma of bananas and cinnamon filling the air. She never needed a fancy recipe; she just used what we had—oats, eggs, bananas, and a touch of honey.

Now, years later, I find myself doing the same. These Healthy Banana Oatmeal Muffins have become a staple in my kitchen. They are simple, require no refined flour or sugar, and are packed with nutrients. Whether you’re looking for a quick breakfast, a post-workout snack, or a lunchbox-friendly treat, these muffins are light, naturally sweetened, and full of flavor.

Why You’ll Love These Muffins

1. Made with Simple, Wholesome Ingredients

These muffins require just a few pantry staples—oats, bananas, eggs, and honey—but deliver a rich, naturally sweet flavor without processed sugars or refined flour.

2. Packed with Nutrients

Unlike store-bought muffins that are loaded with sugar and empty calories, these homemade muffins are high in fiber, protein, and healthy carbs. Oats provide sustained energy, bananas add natural sweetness and potassium, and eggs contribute protein to keep you full longer.

3. Naturally Gluten-Free & Dairy-Free

Since these muffins are made with oats instead of flour, they are naturally gluten-free (just be sure to use certified gluten-free oats if needed). They can also be easily made dairy-free by replacing honey with maple syrup.

4. Kid-Friendly & Great for Meal Prep

These muffins are soft, moist, and perfectly sweet—ideal for kids and adults alike. Plus, they store well, making them a perfect make-ahead breakfast or snack for the week.

5. No Special Equipment Needed

No fancy mixers or kitchen gadgets required! Everything can be mixed in one bowl, making cleanup quick and easy.

Ingredients

IngredientAmountPreparation
Oatmeal1 cup (90g)
Water1 cup (240ml)
Eggs2
Banana2 medium (mashed)Ripe
Honey2 tbsp
Baking Powder1 tsp
Cinnamon1/2 tsp
Vanilla Extract1 tsp
Salt1/4 tsp

Directions

Step 1: Prepare the Oats

  1. Preheat the oven to 180°C (350°F) and grease a muffin tin.
  2. In a bowl, mix oatmeal and water, letting it soak for 5 minutes to soften.

Step 2: Mix the Batter

  1. Add mashed bananas, eggs, honey, baking powder, cinnamon, vanilla extract, and salt to the oats.
  2. Stir until fully combined.

Step 3: Bake the Muffins

  1. Pour the batter evenly into the muffin tin.
  2. Bake for 18-20 minutes, or until a toothpick inserted in the center comes out clean.

Step 4: Cool and Serve

  1. Let the muffins cool for 5 minutes, then transfer to a wire rack.
  2. Enjoy warm or store for later!

Nutritional Information (Per Muffin)

NutrientAmount (Approx.)
Calories120 kcal
Protein4g
Carbohydrates20g
Fats3g
Fiber2g
Sugar8g

The Secret to the Perfect Banana Oatmeal Muffins

1. Use Overripe Bananas for the Best Flavor

The riper the banana, the sweeter the muffin. Overripe bananas—those with brown spots—are softer, easier to mash, and naturally sweeter, eliminating the need for excessive sweeteners.

2. Let the Oats Soak

Allowing the oats to soak in water for a few minutes before mixing helps them absorb moisture, resulting in soft, tender muffins instead of dry, crumbly ones.

3. Don’t Overmix the Batter

Overmixing can make muffins dense and chewy instead of light and fluffy. Stir the ingredients just until combined for the best texture.

4. Bake Until Just Golden Brown

These muffins are best when they are lightly golden on top and spring back when touched. Baking too long can dry them out, so check them with a toothpick—it should come out clean but not wet.

Serving Ideas & Variations

1. Add Some Crunch

For added texture, stir in chopped walnuts, almonds, or pecans before baking. The nuts provide healthy fats and a delicious crunch in every bite.

2. Make Them Chocolatey

If you love a little chocolate in your breakfast, sprinkle in dark chocolate chips or cocoa nibs for an extra treat.

3. Turn Them Into a Grab-and-Go Breakfast

Pair these muffins with Greek yogurt or a smear of peanut butter for a more protein-packed breakfast that keeps you full longer.

4. Use Different Sweeteners

Instead of honey, try using maple syrup, coconut sugar, or mashed dates for a slightly different natural sweetness.

5. Add More Warm Spices

While cinnamon is a classic, you can experiment with nutmeg, cardamom, or pumpkin spice to enhance the flavor.

Frequently Asked Questions (FAQs)

Q1: Can I make these muffins without eggs?

Yes! You can replace each egg with a flaxseed egg (1 tbsp ground flaxseed + 3 tbsp water) or a chia seed egg for a plant-based version.

Q2: Can I make these muffins ahead of time?

Absolutely! These muffins stay fresh at room temperature for up to 3 days, in the fridge for up to a week, or in the freezer for up to 2 months.

Q3: Can I blend the oats into oat flour?

Yes! If you prefer a smoother texture, blend the oats in a food processor before mixing them into the batter. This will create a finer, more cake-like consistency.

Q4: How can I make these muffins more filling?

For a higher-protein version, add a scoop of vanilla protein powder or mix in some chia seeds or hemp seeds for extra nutrition.

Q5: Can I make mini muffins instead?

Definitely! If using a mini muffin tin, reduce the baking time to 10-12 minutes and check for doneness with a toothpick.

Q6: How do I prevent my muffins from sticking to the pan?

Using silicone muffin liners or parchment paper liners helps prevent sticking. You can also lightly grease the muffin tin with coconut oil or cooking spray.

Q7: Can I use quick oats instead of rolled oats?

Yes, quick oats will work, but they may absorb moisture faster, resulting in a slightly softer muffin. Rolled oats provide a heartier texture.

Conclusion: A Muffin Worth Making Again and Again

These Healthy Banana Oatmeal Muffins are proof that simple ingredients can create something truly delicious. They are nutritious, naturally sweetened, and easy to make, making them perfect for busy mornings, post-workout snacks, or even a light dessert.

What makes this recipe even more special is its connection to family and tradition. Just like my mother did years ago, I now make these muffins when I want something comforting yet wholesome. Every bite reminds me of home, of warm kitchens, and of the little joys that food can bring.

So, the next time you have a couple of ripe bananas on your counter, don’t throw them away—turn them into these soft, naturally sweet, and satisfying muffins. I promise, they’ll become a staple in your home just like they are in mine.

Amal

Nutritious Banana Oatmeal Muffins: A Simple & Wholesome Treat

These Healthy Banana Oatmeal Muffins are soft, naturally sweetened, and packed with wholesome ingredients. Made with ripe bananas, oats, and a touch of honey, they are perfect for a quick breakfast, a post-workout snack, or a lunchbox treat. They require no refined flour or sugar, making them a guilt-free indulgence that’s both nutritious and delicious!
Prep Time 10 minutes
Cook Time 20 minutes
Total Time 30 minutes
Servings: 12 muffins
Course: Breakfast
Cuisine: American

Ingredients
  

  • 1 cup 90g oatmeal
  • 1 cup 240ml water
  • 2 eggs
  • 2 medium bananas mashed
  • 2 tablespoons honey
  • 1 teaspoon baking powder
  • ½ teaspoon cinnamon
  • 1 teaspoon vanilla extract
  • ¼ teaspoon salt

Method
 

  1. Preheat the oven to 180°C (350°F) and grease a muffin tin or line it with muffin liners.
  2. In a bowl, combine oatmeal and water. Let it sit for 5 minutes to soften.
  3. Add mashed bananas, eggs, honey, baking powder, cinnamon, vanilla extract, and salt. Stir until well combined.
  4. Pour the batter evenly into the prepared muffin tin.
  5. Bake for 18-20 minutes, or until a toothpick inserted in the center comes out clean.
  6. Let the muffins cool for 5 minutes, then transfer to a wire rack. Serve warm or store for later!

Notes

  • For added crunch, mix in chopped nuts or dark chocolate chips.
  • Make it dairy-free by replacing honey with maple syrup.
  • Store leftovers in an airtight container for up to 4 days or freeze for up to 2 months.
  • Pair with Greek yogurt or peanut butter for extra protein.

Grandma’s Famous Lemon Mousse with Raspberry Sauce: A Family Tradition

There are some recipes that don’t just taste good—they bring back memories. For me, this Creamy Lemon Mousse with Raspberry Sauce is one of them. My grandmother has been making it for as long as I can remember. It was the dessert she would prepare for every family gathering, from birthdays to holidays, and even just because she felt like treating us.

As a child, I was always fascinated by how effortlessly she could turn simple ingredients into something magical. I remember sitting on the kitchen counter, watching her zest lemons, whisk cream, and carefully layer the mousse with a vibrant raspberry sauce. It wasn’t just about making dessert; it was about creating something that brought people together.

Over time, I learned how to make it myself, and now, whenever I serve it, I see the same joy on people’s faces that I felt back then. This lemon mousse is light, airy, and bursting with bright citrus flavors, perfectly complemented by the tart sweetness of fresh raspberries. It’s elegant yet simple, refreshing yet indulgent—just like my grandmother intended.

Why This Lemon Mousse Will Become Your Favorite Dessert

1. The Perfect Balance of Sweet and Tart

Lemon desserts can sometimes be too sour or too sweet, but this mousse hits the perfect balance. The tangy lemon curd is softened by the smoothness of whipped cream and Greek yogurt, creating a refreshing yet creamy texture. The raspberry sauce adds just the right touch of sweetness to complement the citrus.

2. Light, Airy, and Indulgent Without Being Heavy

Unlike rich cakes or dense cheesecakes, this mousse is fluffy and delicate. It has just the right amount of richness without being overwhelming, making it an ideal choice for those who love desserts but prefer something light and refreshing.

3. No-Bake and Easy to Make

One of the best things about this recipe is that it’s incredibly simple to prepare. With just a few steps—making the lemon curd, whipping the mousse, and layering it with the raspberry sauce—you can create a show-stopping dessert without even turning on the oven.

4. A Beautiful Presentation for Any Occasion

Whether you’re serving this mousse at a dinner party, a holiday celebration, or just as a treat for yourself, it looks as stunning as it tastes. The layers of creamy mousse and deep red raspberry sauce make for an elegant presentation that never fails to impress.

5. Naturally Gluten-Free

For those with dietary restrictions, this dessert is naturally gluten-free, making it a great choice for guests with food sensitivities. It can also be easily adapted for dairy-free diets with a few simple swaps.

Ingredients

For the Lemon Curd

IngredientAmount
Lemon juiceFrom 2 lemons (100 ml / ~2/5 cup)
Water100 ml (~2/5 cup)
Sugar120 g (2/3 cup)
Cornstarch30 g (3 tbsp)
Turmeric1/3 tsp (for color)

For the Mousse

IngredientAmount
Heavy cream250 ml (1 cup)
Greek yogurt120 g (1/2 cup)
Powdered sugar2 tbsp
Vanilla extract1 tsp

For the Raspberry Sauce

IngredientAmount
Fresh raspberries150 g (1 cup)
Sugar2 tbsp
Lemon juice1 tbsp

Directions

Step 1: Make the Lemon Curd

  1. In a saucepan, whisk together lemon juice, water, sugar, cornstarch, and turmeric.
  2. Heat over medium-low heat, stirring continuously until it thickens into a smooth curd.
  3. Remove from heat and let it cool completely before using.

Step 2: Prepare the Mousse

  1. In a bowl, beat heavy cream until soft peaks form.
  2. Gently fold in Greek yogurt, powdered sugar, and vanilla extract.
  3. Once combined, gradually add the cooled lemon curd, mixing until smooth and airy.

Step 3: Make the Raspberry Sauce

  1. In a saucepan, cook raspberries, sugar, and lemon juice over medium heat.
  2. Stir occasionally until the raspberries break down and the sauce thickens.
  3. For a smoother texture, strain the sauce to remove the seeds. Let cool.

Step 4: Assemble & Serve

  1. Spoon the lemon mousse into serving glasses, alternating layers with the raspberry sauce.
  2. Chill for at least 1 hour before serving.
  3. Garnish with fresh raspberries or lemon zest, and enjoy!

Nutritional Information (Per Serving)

NutrientAmount (Approx.)
Calories220 kcal
Protein3 g
Carbohydrates30 g
Fats10 g
Fiber2 g
Sugar20 g

Secrets to the Perfect Lemon Mousse

1. How to Get the Creamiest Texture

The key to achieving a silky smooth mousse lies in folding the whipped cream gently into the lemon curd. Over-mixing can deflate the airiness, while under-mixing can leave streaks of cream. The goal is to combine everything smoothly while maintaining the light texture.

2. Getting the Right Balance in the Raspberry Sauce

Raspberries are naturally tart, so adjusting the sweetness is important. If your berries are very sour, a little extra sugar or honey can help mellow the sharpness. If they’re naturally sweet, a splash of lemon juice enhances their freshness.

3. The Importance of Chilling

Letting the mousse chill for at least an hour before serving allows the flavors to deepen and the texture to set. If you have time, refrigerating it overnight results in an even creamier and more flavorful mousse.

4. How to Make It Dairy-Free

To make a dairy-free version, swap out the heavy cream for whipped coconut cream and replace the Greek yogurt with coconut or almond-based yogurt. The result is still rich and creamy, with a slight coconut undertone that pairs beautifully with the lemon.

Serving Ideas: How to Elevate This Dessert

1. Garnish with Fresh Herbs or Citrus Zest

A sprinkle of lemon zest or fresh mint adds a burst of color and freshness, enhancing both the visual appeal and the flavor.

2. Add a Crunchy Element

For some texture contrast, top the mousse with crushed graham crackers, shortbread crumbs, or toasted almonds before serving.

3. Serve in a Parfait Style

Instead of layering the mousse and sauce in a single glass, alternate between the two for a beautifully layered parfait effect.

4. Pair with a Biscuit or Cookie

A side of buttery shortbread or crisp biscotti adds an extra touch of indulgence, making this dessert feel even more special.

5. Turn It into a Frozen Dessert

For a fun twist, freeze the mousse for a couple of hours to create a lemon raspberry semifreddo—a cool and creamy summer treat.

Frequently Asked Questions (FAQs)

Q1: Can I make this mousse ahead of time?

Yes! This dessert actually tastes better when made in advance. The mousse can be stored in the refrigerator for up to two days before serving.

Q2: Can I use bottled lemon juice instead of fresh lemons?

Fresh lemon juice is highly recommended for the best flavor. Bottled lemon juice often has a slightly bitter or artificial aftertaste.

Q3: How do I store leftovers?

Leftovers should be stored covered in the refrigerator and consumed within 2-3 days for the best texture and flavor.

Q4: Can I freeze this mousse?

Yes! You can freeze it for up to one month. Let it thaw in the fridge for a few hours before serving. The texture may be slightly different, but it will still be creamy and delicious.

Q5: What if I don’t have raspberries?

You can substitute raspberries with strawberries, blackberries, or even a mixed berry compote. The flavors will be slightly different but still complement the lemon mousse beautifully.

Q6: Can I use honey instead of sugar?

Yes, honey can be used as a natural sweetener in both the lemon curd and the raspberry sauce. Just reduce the amount slightly since honey is sweeter than sugar.

Q7: Can I make this into a cake filling?

Definitely! This lemon mousse works wonderfully as a cake filling for layered cakes, cupcakes, or even between layers of a tart.

Conclusion: A Timeless Dessert for Every Occasion

This Creamy Lemon Mousse with Raspberry Sauce isn’t just another dessert—it’s a recipe filled with nostalgia, warmth, and love. It’s the kind of dish that brings people together, whether it’s for a family gathering, a special occasion, or simply a moment of indulgence.

Every spoonful is a perfect balance of tangy lemon, airy creaminess, and the natural sweetness of raspberries. It’s elegant, effortless, and endlessly adaptable. And the best part? It’s so easy to make that once you try it, you’ll find yourself coming back to it again and again.

So the next time you’re looking for a dessert that feels like home, give this recipe a try. It’s simple, stunning, and absolutely unforgettable.

Amal

Grandma’s Famous Lemon Mousse with Raspberry Sauce: A Family Tradition

This Creamy Lemon Mousse with Raspberry Sauce is a family-favorite dessert that’s light, refreshing, and bursting with citrus flavor. The silky-smooth lemon mousse, made with homemade lemon curd, is perfectly balanced by a tart and sweet raspberry sauce. Whether served at a special gathering or enjoyed as a simple treat, this no-bake dessert is both elegant and effortless.
Prep Time 15 minutes
Cook Time 10 minutes
Total Time 25 minutes
Servings: 4 servings
Course: Dessert
Cuisine: French-inspired

Ingredients
  

  • For the Lemon Curd
  • Lemon juice from 2 lemons 100 ml / ~2/5 cup
  • Water 100 ml / ~2/5 cup
  • Sugar 120 g / 2/3 cup
  • Cornstarch 30 g / 3 tbsp
  • Turmeric 1/3 tsp, for color
  • For the Mousse
  • Heavy cream 250 ml / 1 cup
  • Greek yogurt 120 g / 1/2 cup
  • Powdered sugar 2 tbsp
  • Vanilla extract 1 tsp
  • For the Raspberry Sauce
  • Fresh raspberries 150 g / 1 cup
  • Sugar 2 tbsp
  • Lemon juice 1 tbsp

Method
 

  1. Prepare the Lemon Curd: In a saucepan, whisk together lemon juice, water, sugar, cornstarch, and turmeric. Cook over medium-low heat, stirring constantly until thickened and smooth. Remove from heat and allow to cool completely.
  2. Make the Mousse: In a mixing bowl, beat heavy cream until soft peaks form. Fold in Greek yogurt, powdered sugar, and vanilla extract. Gently mix in the cooled lemon curd until smooth and fluffy.
  3. Prepare the Raspberry Sauce: In a saucepan, combine raspberries, sugar, and lemon juice. Cook over medium heat, stirring occasionally until the berries break down and the sauce thickens. Strain for a smoother texture if desired, then let cool.
  4. Assemble the Dessert: Spoon the lemon mousse into serving glasses, alternating with layers of raspberry sauce. Chill for at least 1 hour before serving.
  5. Serve & Enjoy: Garnish with fresh raspberries or a sprinkle of lemon zest for an elegant finish.

Notes

  • For a dairy-free version, use whipped coconut cream and a dairy-free yogurt alternative.
  • For extra texture, top with crushed graham crackers or toasted nuts.
  • Storage: Keep in the fridge for up to 2 days, covered.
  • To freeze, store in airtight containers and thaw in the fridge before serving.

Creamy Lemon Mousse with Raspberry Sauce: A Light and Luscious Dessert

There’s something truly magical about the combination of tart lemon and sweet raspberries—a balance of flavors that feels both refreshing and indulgent. Every time I make this Creamy Lemon Mousse with Raspberry Sauce, I’m reminded of warm summer afternoons in my grandmother’s kitchen, where the scent of freshly squeezed lemons filled the air.

She had a way of turning simple ingredients into something spectacular. One of her favorite desserts was lemon pudding, a rich and tangy treat she’d serve with fresh berries from the garden. As a child, I remember eagerly watching her zest lemons, fascinated by how something so small could create such bold flavors. When I got older and started experimenting in my own kitchen, I wanted to recreate that memory—something just as bright, citrusy, and creamy but with a lighter, airier texture.

This lemon mousse is exactly that. It’s silky smooth, gently sweet, and has just the right amount of tartness. Paired with a vibrant raspberry sauce, it creates a delightful contrast of flavors. Whether you’re looking for an elegant dessert for a dinner party or simply want to treat yourself to something refreshing, this recipe is pure sunshine in a glass.

Why You’ll Love This Lemon Mousse

1. Light and Refreshing

Unlike heavier desserts like cheesecakes or custards, this mousse has a delicate, airy texture that melts in your mouth. The whipped cream and yogurt create a balanced richness without being overwhelming, making it perfect after a big meal.

2. A Perfect Blend of Sweet and Tart

Lemon desserts can sometimes be overly sour, but this mousse strikes the perfect harmony between zesty citrus brightness and just the right amount of sweetness. The raspberry sauce enhances the flavors without overpowering them.

3. No-Bake and Easy to Make

This recipe doesn’t require any baking—just a little stovetop cooking for the lemon curd, and the rest comes together effortlessly. It’s a great make-ahead dessert, ideal for dinner parties or meal prepping.

4. Elegant Yet Simple

Served in individual glasses, this mousse looks beautifully sophisticated while being incredibly easy to prepare. Garnish with fresh raspberries and a sprig of mint, and you have a restaurant-worthy dessert at home.

5. Naturally Gluten-Free

For those looking for a gluten-free dessert, this mousse is a fantastic option. No flour, no crust—just pure, creamy goodness.

Ingredients

For the Lemon Curd

IngredientAmount
Lemon juiceFrom 2 lemons (100 ml / ~2/5 cup)
Water100 ml (~2/5 cup)
Sugar120 g (2/3 cup)
Cornstarch30 g (3 tbsp)
Turmeric1/3 tsp (for color)

For the Mousse

IngredientAmount
Heavy cream250 ml (1 cup)
Greek yogurt120 g (1/2 cup)
Powdered sugar2 tbsp
Vanilla extract1 tsp

For the Raspberry Sauce

IngredientAmount
Fresh raspberries150 g (1 cup)
Sugar2 tbsp
Lemon juice1 tbsp

Directions

Step 1: Prepare the Lemon Curd

  1. In a saucepan, whisk together lemon juice, water, sugar, cornstarch, and turmeric.
  2. Heat over medium-low, stirring constantly, until thickened and smooth.
  3. Remove from heat and let cool to room temperature.

Step 2: Make the Mousse

  1. In a bowl, beat heavy cream until soft peaks form.
  2. Add Greek yogurt, powdered sugar, and vanilla extract, folding gently until smooth.
  3. Gradually fold in the cooled lemon curd until well combined.

Step 3: Prepare the Raspberry Sauce

  1. In a saucepan, combine raspberries, sugar, and lemon juice over medium heat.
  2. Cook until the raspberries break down, then strain to remove seeds if desired.
  3. Let the sauce cool before serving.

Step 4: Assemble and Serve

  1. Spoon the lemon mousse into serving glasses, layering with raspberry sauce.
  2. Chill for at least 1 hour before serving for the best texture.

Nutritional Information (Per Serving)

NutrientAmount (Approx.)
Calories220 kcal
Protein3 g
Carbohydrates30 g
Fats10 g
Fiber2 g
Sugar20 g

Secrets to the Perfect Lemon Mousse

1. Getting the Right Consistency for Lemon Curd

The base of this mousse is a homemade lemon curd, which provides that deep citrus flavor. The key is to cook it slowly over medium-low heat, stirring constantly until it thickens. If heated too quickly, the eggs can scramble, resulting in a grainy texture.

2. Achieving the Perfect Airy Texture

For a light and fluffy mousse, the whipped cream should be beaten to soft peaks before folding it into the lemon curd. This ensures that the mousse holds its shape while remaining smooth and delicate.

3. Using the Right Sweetness Balance

Lemon naturally has a bold, tangy flavor, so balancing it with the right amount of sugar is essential. Too much, and you lose the refreshing tartness; too little, and it becomes too sharp. This recipe finds the perfect middle ground with just enough sweetness to let the citrus shine.

4. The Role of Raspberry Sauce

The raspberry sauce isn’t just for decoration—it adds a beautiful contrast to the creamy mousse. The natural tartness of raspberries complements the lemon flavor while adding a burst of color and freshness.

5. How to Make It Dairy-Free

If you’re avoiding dairy, this recipe can easily be adjusted. Replace the heavy cream with whipped coconut cream, and use a dairy-free yogurt alternative. The result is still just as creamy and luscious!

Serving Ideas: Elevate Your Dessert Experience

1. Garnish with Fresh Berries

A handful of fresh raspberries, blueberries, or strawberries on top adds extra texture and color.

2. Add a Crunchy Element

For contrast, sprinkle crushed graham crackers, biscotti crumbs, or toasted almonds over the mousse before serving.

3. Pair It with a Biscuit

Serve with a buttery shortbread cookie or a crisp biscotti for an extra indulgent touch.

4. Layer It for a Parfait

For a more elegant presentation, alternate layers of mousse and raspberry sauce in a tall glass to create a stunning layered dessert.

Frequently Asked Questions (FAQs)

Q1: Can I make this lemon mousse ahead of time?

Yes! This mousse actually tastes even better when made in advance because the flavors have time to meld. Store it in an airtight container in the fridge for up to 2 days before serving.

Q2: Can I use bottled lemon juice instead of fresh lemons?

Fresh lemon juice is highly recommended for the best flavor. Bottled lemon juice often has a slightly bitter aftertaste and lacks the bright, zesty notes of fresh lemons.

Q3: How do I store leftovers?

If you have leftovers, keep them covered in the refrigerator for up to 2 days. The mousse may soften slightly over time, but it will still taste delicious.

Q4: Can I freeze this mousse?

While it’s best enjoyed fresh, you can freeze this mousse for up to 1 month. Allow it to thaw in the fridge before serving. The texture may be slightly less airy, but it will still be creamy and flavorful.

Q5: What if I don’t have raspberries?

You can substitute raspberries with strawberries, blackberries, or even a mixed berry compote. Each will add a slightly different flavor, but they all pair beautifully with lemon.

Q6: Can I make this dessert vegan?

Yes! Use whipped coconut cream instead of heavy cream and a dairy-free yogurt alternative. The lemon curd can be made using cornstarch and plant-based milk instead of eggs.

Q7: Can I make this mousse without an electric mixer?

Yes! While an electric mixer makes whipping cream easier, you can whisk by hand—just be prepared for an arm workout! It takes about 5-7 minutes of continuous whisking to reach soft peaks.

Conclusion: A Dessert Worth Savoring

This Creamy Lemon Mousse with Raspberry Sauce is a dessert that feels both luxurious and effortless. It’s a treat that balances tangy citrus, velvety smoothness, and the natural sweetness of berries, creating a dessert experience that lingers long after the last spoonful.

Whether you’re making it for a special occasion, a dinner party, or simply to brighten your day, this mousse is a reminder that some of the best desserts are the ones that bring back warm memories.

So the next time you crave something light, elegant, and utterly delicious, give this recipe a try. It might just become your new favorite go-to dessert.

Amal

Creamy Lemon Mousse with Raspberry Sauce: A Light and Luscious Dessert

This Creamy Lemon Mousse with Raspberry Sauce is a light and luscious dessert, perfect for any occasion. The silky smooth lemon mousse is made with homemade lemon curd, giving it a bright and tangy citrus flavor. The fresh raspberry sauce adds a fruity contrast, balancing the richness with a natural sweetness. This no-bake treat is easy to prepare and can be made ahead, making it a perfect choice for dinner parties or a refreshing indulgence on a warm day.
Prep Time 15 minutes
Cook Time 10 minutes
Total Time 25 minutes
Servings: 4 servings
Course: Dessert
Cuisine: French-inspired

Ingredients
  

  • For the Lemon Curd
  • Lemon juice from 2 lemons 100 ml / ~2/5 cup
  • Water 100 ml / ~2/5 cup
  • Sugar 120 g / 2/3 cup
  • Cornstarch 30 g / 3 tbsp
  • Turmeric 1/3 tsp, for color
  • For the Mousse
  • Heavy cream 250 ml / 1 cup
  • Greek yogurt 120 g / 1/2 cup
  • Powdered sugar 2 tbsp
  • Vanilla extract 1 tsp
  • For the Raspberry Sauce
  • Fresh raspberries 150 g / 1 cup
  • Sugar 2 tbsp
  • Lemon juice 1 tbsp

Method
 

  1. Make the Lemon Curd: In a saucepan, whisk together lemon juice, water, sugar, cornstarch, and turmeric. Heat over medium-low, stirring constantly until thickened and smooth. Remove from heat and let it cool to room temperature.
  2. Prepare the Mousse: In a bowl, beat the heavy cream until soft peaks form. Add Greek yogurt, powdered sugar, and vanilla extract, then gently fold in the cooled lemon curd until fully combined.
  3. Make the Raspberry Sauce: In a saucepan, combine raspberries, sugar, and lemon juice over medium heat. Cook until the raspberries break down and the sauce thickens slightly. Strain for a smoother texture if desired, then let it cool.
  4. Assemble the Dessert: Spoon the lemon mousse into serving glasses, layering with raspberry sauce. Chill for at least 1 hour before serving for the best texture.
  5. Serve & Enjoy: Garnish with fresh raspberries or a sprinkle of lemon zest for an elegant finish.

Notes

  • For extra smoothness, strain the raspberry sauce to remove the seeds.
  • Make it dairy-free by substituting coconut cream and dairy-free yogurt.
  • Store leftovers covered in the refrigerator for up to 2 days.
  • To freeze, store in airtight containers and thaw in the fridge before serving.
  • For added crunch, top with crushed graham crackers or toasted almonds.

Zucchini, Carrot & Potato Muffins: A Savory Bite of Comfort

There’s something magical about the way food connects us to our past. The smell of freshly baked muffins wafting through the kitchen reminds me of early mornings in my grandmother’s home. She had a way of making simple ingredients feel special—grating fresh vegetables from her garden, whisking eggs with precision, and creating dishes that felt like a warm hug.

As a child, I wasn’t a big fan of vegetables. Like many kids, I turned my nose up at anything green on my plate. But my grandmother had a trick—she would grate zucchini, carrots, and potatoes, mix them into a batter, and bake them into golden, cheesy muffins. She never called them “healthy” or “vegetable-filled.” To me, they were just delicious little bites that I couldn’t get enough of.

Now, as an adult, I find myself recreating this dish—not just for its nostalgic warmth but for its practicality and nutrition. These Zucchini, Carrot & Potato Muffins are packed with flavor, soft on the inside, and crisp around the edges. They’re perfect for busy mornings, lunchboxes, or even as a light snack with a cup of tea. And the best part? Even picky eaters won’t be able to resist them.

Why You’ll Love These Savory Muffins

1. A Nutritious Way to Enjoy Vegetables

These muffins are an easy and delicious way to add more veggies to your diet. The combination of zucchini, carrots, and potatoes not only enhances flavor but also provides essential nutrients like fiber, vitamins A and C, and potassium.

2. A Perfect Make-Ahead Snack

Whether you’re meal-prepping for the week or looking for a grab-and-go breakfast, these muffins are a lifesaver. They stay fresh for days and reheat beautifully, making them a convenient and wholesome option.

3. Kid-Friendly and Picky-Eater Approved

If you struggle to get kids to eat vegetables, this recipe is a game-changer. The muffins are cheesy, soft, and full of familiar flavors, making them a fun and easy way to sneak in extra nutrients.

4. Naturally Gluten-Free and Customizable

You can easily adapt this recipe to fit different dietary needs. Want to make it gluten-free? Swap all-purpose flour for almond or oat flour. Looking for a dairy-free option? Use nutritional yeast instead of cheese.

Ingredients

IngredientAmountPreparation
Zucchini1 medium (150 g)Grated
Carrot1 medium (120 g)Grated
Potato1 medium (150 g)Peeled, grated
Eggs2 largeBeaten
All-Purpose Flour½ cup (60 g)
Parmesan Cheese¼ cup (25 g)Grated
Cheddar Cheese½ cup (50 g)Shredded
Baking Powder1 teaspoon
Olive Oil2 tablespoons
Salt½ teaspoon
Black Pepper½ teaspoon
Garlic Powder½ teaspoon
Green Onions2 tablespoonsChopped (optional)

Directions

Step 1: Prepare the Vegetables

  1. Preheat the oven to 180°C (350°F) and grease a muffin tin.
  2. Grate the zucchini, carrot, and potato, then squeeze out excess moisture using a clean kitchen towel.

Step 2: Mix the Batter

  1. In a large bowl, whisk together eggs, olive oil, salt, black pepper, baking powder, and garlic powder.
  2. Stir in flour, Parmesan cheese, and cheddar cheese, mixing until combined.
  3. Fold in the grated vegetables and green onions (if using).

Step 3: Bake the Muffins

  1. Evenly distribute the batter into the prepared muffin tin.
  2. Bake for 20-25 minutes, or until the tops are golden brown and firm to the touch.
  3. Let the muffins cool slightly before removing them from the tin.

Nutritional Information (Per Muffin)

NutrientAmount (Approx.)
Calories120 kcal
Protein5 g
Carbohydrates12 g
Fats6 g
Fiber2 g
Sodium220 mg

The Secret to Perfect Savory Muffins

1. The Importance of Removing Moisture

Zucchini, carrots, and potatoes all have a high water content, which can make muffins soggy. After grating the vegetables, it’s crucial to squeeze out as much liquid as possible using a kitchen towel. This step ensures your muffins turn out light and fluffy instead of dense and wet.

2. Choosing the Right Cheese

For that perfect cheesy flavor, I love using a mix of cheddar and Parmesan. The cheddar adds creaminess, while the Parmesan gives the muffins a slightly nutty and salty kick. If you want a milder taste, mozzarella is a great alternative.

3. Balancing the Flavors

The combination of garlic powder, black pepper, and a pinch of salt enhances the natural sweetness of the vegetables. Don’t skip these seasonings—they make all the difference in creating a well-rounded flavor.

4. Achieving the Right Texture

For a perfect balance of crispiness and softness, bake these muffins at the right temperature (180°C / 350°F) and allow them to cool slightly before removing them from the tin. This helps them set and keeps the edges crispy while the inside remains tender.

Serving Ideas: Ways to Enjoy These Muffins

1. As a Quick Breakfast

Pair a couple of these muffins with scrambled eggs or avocado for a nutrient-packed morning meal. They’re filling yet light, making them a great alternative to sugary pastries.

2. In a Lunchbox

These muffins are perfect for school or work lunches. Pack them with some fresh fruit and yogurt for a balanced and satisfying meal.

3. With a Bowl of Soup

Serving these muffins alongside a warm bowl of tomato or vegetable soup makes for a comforting and hearty dinner. The cheesy, savory flavors complement the rich broth beautifully.

4. As a Party Appetizer

Hosting a gathering? These muffins make a great bite-sized appetizer. Serve them with a side of sour cream or a yogurt-based dip for extra flavor.

Frequently Asked Questions (FAQs)

Q1: Can I make these muffins without cheese?

Yes! If you’re avoiding dairy, simply skip the cheese or use a dairy-free alternative like nutritional yeast. The muffins will still be delicious with their natural vegetable sweetness and seasoning.

Q2: How do I make these muffins gluten-free?

To make this recipe gluten-free, replace the all-purpose flour with almond flour, oat flour, or a gluten-free baking blend. The texture may be slightly different, but they will still be flavorful and soft.

Q3: Can I freeze these muffins?

Absolutely! These muffins freeze beautifully. Once cooled, store them in an airtight container or a freezer bag for up to 2 months. To reheat, simply warm them in the oven or microwave until heated through.

Q4: Can I use different vegetables?

Yes! This recipe is highly adaptable. You can add or substitute vegetables such as sweet potatoes, bell peppers, or spinach for a different twist. Just make sure to remove excess moisture from high-water-content veggies.

Q5: How long do these muffins stay fresh?

They will keep at room temperature for up to 3 days or in the refrigerator for up to 5 days. For the best texture, reheat them in the oven before serving.

Q6: What can I use instead of eggs?

For an egg-free version, you can use flaxseed eggs (1 tablespoon ground flaxseed + 3 tablespoons water per egg). This will help bind the ingredients together while keeping the muffins moist.

Q7: Can I make these into mini muffins?

Yes! If you prefer bite-sized muffins, use a mini muffin tin and reduce the baking time to around 12-15 minutes. They’ll be just as delicious but in a fun, smaller portion.

Conclusion: A Simple and Nourishing Treat

Savory, satisfying, and packed with wholesome ingredients, these Zucchini, Carrot & Potato Muffins are proof that healthy eating doesn’t have to be boring. They’re crispy on the outside, soft on the inside, and bursting with flavor in every bite.

What makes this recipe truly special is its versatility—whether you enjoy them for breakfast, as a snack, or as a side dish, these muffins are always a hit. Plus, they’re a great way to introduce more vegetables into your diet without sacrificing taste.

So the next time you’re looking for a hearty, nutritious, and easy-to-make recipe, give these muffins a try. They might just become a new favorite in your household, just like they did in mine.

Amal

Zucchini, Carrot & Potato Muffins: A Savory Bite of Comfort

These Savory Zucchini, Carrot & Potato Muffins are a delicious way to enjoy vegetables in a crispy, cheesy, and wholesome bite. Packed with grated zucchini, carrots, and potatoes, these muffins are soft on the inside with a golden crust on the outside. They make a perfect breakfast, snack, or side dish, and are great for meal prep. Whether you’re looking for a quick grab-and-go option or a veggie-packed treat for the whole family, these muffins are a must-try!
Prep Time 15 minutes
Cook Time 25 minutes
Total Time 40 minutes
Servings: 12 muffins
Course: Breakfast
Cuisine: American

Ingredients
  

  • 1 medium zucchini grated (about 1 cup, 150 g)
  • 1 medium carrot grated (about 1 cup, 120 g)
  • 1 medium potato peeled and grated (about 1 cup, 150 g)
  • 2 large eggs beaten
  • ½ cup 60 g all-purpose flour
  • ¼ cup 25 g Parmesan cheese, grated
  • ½ cup 50 g cheddar cheese, shredded
  • 1 teaspoon baking powder
  • 2 tablespoons olive oil
  • ½ teaspoon salt
  • ½ teaspoon black pepper
  • ½ teaspoon garlic powder
  • 2 tablespoons green onions or chives chopped (optional)

Method
 

  1. Preheat the oven to 180°C (350°F) and grease a muffin tin.
  2. Place the grated zucchini, carrot, and potato in a clean kitchen towel and squeeze out excess moisture.
  3. In a large bowl, whisk together eggs, olive oil, salt, black pepper, baking powder, and garlic powder.
  4. Stir in the flour, Parmesan cheese, and cheddar cheese until combined.
  5. Fold in the grated vegetables and green onions (if using).
  6. Spoon the mixture evenly into the prepared muffin tin.
  7. Bake for 20-25 minutes or until golden brown and firm to the touch.
  8. Let the muffins cool slightly before removing them from the tin. Serve warm and enjoy!

Notes

  • Squeeze out as much liquid as possible from the grated vegetables to prevent soggy muffins.
  • For extra crispiness, bake for an additional 5 minutes under the broiler.
  • Make it gluten-free by substituting all-purpose flour with almond flour or a gluten-free blend.
  • Store leftovers in an airtight container at room temperature for up to 3 days or refrigerate for up to 5 days.
  • Freeze for up to 2 months, and reheat in the oven before serving.
  • Perfect for meal prep—these muffins make a great lunchbox addition or quick breakfast option!

Cheesy Potato & Bacon Bake: The Ultimate Comfort Breakfast

Some of the best family traditions start in the kitchen. Growing up, breakfast wasn’t just a meal—it was an experience. Sunday mornings were special, filled with the irresistible smell of crispy bacon sizzling on the stove and potatoes frying in butter. My grandmother had a way of turning simple ingredients into the most satisfying meals, and her love for cooking left a lasting impression on me.

One of my favorite dishes she made was a cheesy potato bake with bacon, a dish so rich and comforting that we’d sit around the table, savoring every bite while sharing stories from the past week. It was never fancy, never complicated—just pure, homemade goodness. Over the years, I’ve adapted her recipe into something a little easier and more convenient, but the heart of it remains the same.

This Cheesy Potato & Bacon Bake is the perfect combination of crispy, cheesy, and savory. It has all the elements of a comforting breakfast—golden potatoes, smoky bacon, gooey melted cheese, and just the right amount of seasoning. Whether you’re making it for a cozy weekend brunch or meal-prepping for the week, this dish is guaranteed to become a household favorite.

Why You’ll Love This Recipe

1. A Perfect Balance of Crispy and Cheesy

One of the best things about this dish is the texture. The grated potatoes bake into a golden, crispy crust, while the inside stays soft and cheesy. The combination of cheddar and Parmesan creates a deep, savory flavor, and the bacon adds just the right amount of smoky crunch.

2. Simple Ingredients, Big Flavor

This recipe doesn’t require anything fancy. Potatoes, eggs, cheese, bacon, and a few pantry staples come together to create a dish that feels indulgent yet is made with everyday ingredients.

3. Versatile and Customizable

One of the best things about this cheesy potato bake is how adaptable it is. Whether you want to make it vegetarian, add extra veggies, or swap ingredients to suit dietary needs, it’s incredibly flexible. You can easily make it your own without losing the essence of its comforting flavor.

4. Great for Meal Prep

If you love planning ahead, this dish is a lifesaver. It keeps well in the fridge, reheats beautifully, and can be served for breakfast, lunch, or even as a side dish for dinner. Plus, it tastes even better the next day as the flavors deepen.

Ingredients

IngredientAmountPreparation
Potatoes2 medium (300 g)Peeled, grated
Bacon6 stripsCooked, crumbled
Cheddar Cheese1 cup (100 g)Shredded
Parmesan Cheese¼ cup (25 g)Grated
Eggs2 large
All-Purpose Flour¼ cup (30 g)
Milk½ cup (120 ml)
Butter2 tablespoonsMelted
Baking Powder1 teaspoon
Salt½ teaspoon
Black Pepper½ teaspoon
Green Onions/Chives2 tablespoonsChopped (optional)

Directions

Step 1: Prepare the Ingredients

  1. Preheat the oven to 190°C (375°F) and grease a baking dish.
  2. Use a clean kitchen towel to squeeze excess moisture from the grated potatoes. This helps achieve a crispier texture.

Step 2: Make the Batter

  1. In a mixing bowl, whisk together eggs, milk, melted butter, baking powder, salt, and black pepper until well combined.
  2. Add flour and mix until smooth and lump-free.

Step 3: Combine the Ingredients

  1. Stir in the grated potatoes, crumbled bacon, cheddar cheese, Parmesan cheese, and chopped green onions (if using). Mix well until evenly incorporated.

Step 4: Bake to Golden Perfection

  1. Transfer the mixture to the prepared baking dish and spread it evenly.
  2. Bake for 30-35 minutes, or until the top is golden brown and crispy.
  3. Let it cool for a few minutes before slicing and serving.

Nutritional Information (Per Serving)

NutrientAmount (Approx.)
Calories280 kcal
Protein12 g
Carbohydrates22 g
Fats16 g
Fiber2 g
Sodium450 mg

The Secret to the Perfect Cheesy Potato Bake

Choosing the Right Potatoes

Not all potatoes are created equal when it comes to baking. Russet potatoes are ideal for this dish because of their high starch content, which helps create that crispy exterior. If you prefer a slightly firmer texture, Yukon Gold potatoes are a great alternative.

Getting the Right Texture

One common mistake people make when baking with grated potatoes is not removing enough moisture. After grating, it’s essential to squeeze out as much liquid as possible using a clean kitchen towel. This ensures that the potatoes crisp up instead of turning soggy.

The Best Cheese for Maximum Flavor

While cheddar and Parmesan are classic choices, you can experiment with different cheeses to find your favorite combination. Gruyère, mozzarella, or even pepper jack can add unique twists to this dish. The key is to use a cheese that melts well while adding depth of flavor.

How to Get Extra Crispy Edges

For an irresistible crunch, bake the dish at a slightly higher temperature for the last 5 minutes or place it under the broiler. This gives the top a golden, crispy finish that makes each bite even more satisfying.

Serving Ideas: Elevate Your Breakfast Game

1. Pair It with a Fried or Poached Egg

Adding a perfectly cooked fried or poached egg on top takes this dish to another level. The rich yolk acts like a natural sauce, blending beautifully with the crispy potatoes and melted cheese.

2. Serve It with Fresh Greens

For a lighter contrast, serve this dish with a side of fresh greens like arugula, spinach, or a simple mixed salad. A drizzle of balsamic glaze can add a touch of acidity that balances out the richness.

3. Top It with a Dollop of Sour Cream or Yogurt

A spoonful of sour cream or Greek yogurt adds a cool, tangy element that pairs perfectly with the smoky bacon and cheese. You can also sprinkle some extra green onions or chives for a fresh touch.

4. Turn It into a Full Brunch Spread

If you’re making this for a brunch gathering, serve it alongside fresh fruit, avocado toast, or even some homemade biscuits for a well-rounded meal.

Frequently Asked Questions (FAQs)

Q1: Can I make this recipe without bacon?

Absolutely! If you’re looking for a vegetarian version, swap the bacon for sautéed mushrooms, spinach, or bell peppers. You’ll still get plenty of savory flavor without the meat.

Q2: How do I make this dish gluten-free?

To make this gluten-free, simply replace the all-purpose flour with an equal amount of gluten-free flour or almond flour. The texture will remain the same, and the dish will still be just as delicious.

Q3: Can I prepare this in advance?

Yes! You can prepare the mixture a day ahead and store it covered in the fridge. When ready to bake, just pop it in the oven and enjoy a fresh, hot meal without the prep work.

Q4: How do I store and reheat leftovers?

Store leftovers in an airtight container in the fridge for up to 4 days. Reheat in the oven at 180°C (350°F) for the best texture, or warm it in a skillet for extra crispiness.

Q5: Can I freeze this dish?

Yes! This potato bake freezes well. Allow it to cool completely, then cut it into portions and freeze in airtight containers. When ready to eat, reheat directly from frozen in the oven at 180°C (350°F) until heated through.

Q6: Can I add more vegetables to this dish?

Absolutely! Diced bell peppers, spinach, mushrooms, or even shredded zucchini make excellent additions. Just be sure to remove excess moisture from watery vegetables to keep the dish from getting soggy.

Q7: What other cheeses work well in this recipe?

While cheddar and Parmesan are classic choices, you can experiment with:

  • Gruyère for a nutty flavor
  • Pepper Jack for a spicy kick
  • Mozzarella for extra gooeyness

Conclusion: A Breakfast Worth Waking Up For

Few things in life compare to the joy of comforting, homemade food, and this Cheesy Potato & Bacon Bake is a dish that delivers on every level. It’s crispy yet creamy, simple yet indulgent, and packed with flavors that remind you of home. Whether you’re cooking for a lazy Sunday brunch, meal-prepping for the week, or just craving something warm and satisfying, this dish will always hit the spot.

So the next time you’re in the mood for something hearty and delicious, give this recipe a try. It’s a little bit nostalgic, a little bit indulgent, and completely irresistible. One bite, and it just might become your new favorite breakfast tradition.

Amal

Cheesy Potato & Bacon Bake: The Ultimate Comfort Breakfast

This Cheesy Potato & Bacon Bake is the ultimate breakfast comfort food. Made with crispy grated potatoes, smoky bacon, and a rich blend of cheddar and Parmesan cheese, it’s baked to golden perfection. The inside stays soft and cheesy, while the top develops a delicious crisp. Whether you’re making it for a cozy weekend breakfast or meal-prepping for the week, this dish is easy, satisfying, and full of flavor.
Prep Time 15 minutes
Cook Time 35 minutes
Total Time 50 minutes
Servings: 4 servings
Course: Breakfast
Cuisine: American

Ingredients
  

  • 2 medium potatoes about 300 g, peeled and grated
  • 6 strips of bacon cooked and crumbled
  • 1 cup 100 g cheddar cheese, shredded
  • ¼ cup 25 g Parmesan cheese, grated
  • 2 large eggs
  • ¼ cup 30 g all-purpose flour
  • ½ cup 120 ml milk
  • 2 tablespoons butter melted
  • 1 teaspoon baking powder
  • ½ teaspoon salt
  • ½ teaspoon black pepper
  • 2 tablespoons green onions or chives chopped (optional)

Method
 

  1. Preheat your oven to 190°C (375°F) and grease a baking dish.
  2. Place the grated potatoes in a clean kitchen towel and squeeze out excess moisture.
  3. In a large bowl, whisk together the eggs, milk, melted butter, baking powder, salt, and black pepper.
  4. Stir in the flour and mix until smooth.
  5. Add the grated potatoes, crumbled bacon, cheddar cheese, Parmesan cheese, and chopped green onions (if using). Mix well.
  6. Pour the mixture into the greased baking dish and spread evenly.
  7. Bake for 30-35 minutes, or until the top is golden brown and crispy.
  8. Let it cool for a few minutes before slicing. Serve warm and enjoy!

Notes

  • For extra crispiness, place the dish under the broiler for the last 5 minutes of baking.
  • Make it vegetarian by skipping the bacon and adding mushrooms or bell peppers.
  • Storage: Store leftovers in an airtight container in the fridge for up to 4 days. Reheat in the oven for the best texture.
  • Freezing option: Freeze individual portions and reheat in the oven at 180°C (350°F) until warmed through.
  • Serving idea: Pair with a poached egg or a dollop of sour cream for an extra indulgent breakfast.

Baked Cabbage with Lentil and Walnut Mixture: A Hearty and Wholesome Delight

Growing up, cabbage was a staple in our household. It wasn’t just another vegetable—it was a symbol of warmth, nourishment, and family gatherings. My grandmother, an exceptional home cook, always had a way of turning the simplest ingredients into the most comforting meals. One of my favorite childhood memories was watching her prepare stuffed cabbage rolls, filling them with a rich, spiced mixture of grains and legumes.

As life got busier, I found myself yearning for the same flavors but with a simpler approach. That’s when I created this Baked Cabbage with Lentil and Walnut Mixture—a dish that retains the essence of those cherished meals but requires no intricate rolling or hours of preparation. The layers of tender cabbage, hearty lentils, and crunchy walnuts blend together beautifully, offering both comfort and nutrition in every bite. Whether you’re looking for a satisfying plant-based dish or simply want to try something new, this recipe is a celebration of flavor, texture, and nostalgia.

Why This Dish Stands Out

1. A Perfect Balance of Texture and Flavor

The contrast of ingredients in this dish makes it a joy to eat. The soft, baked cabbage melts in your mouth, while the lentils and rice provide a satisfying heartiness. Walnuts add a subtle crunch, and the smoked paprika and Italian herbs infuse the dish with layers of warmth and depth. The result is a meal that feels both indulgent and wholesome.

2. Packed with Nutrients

This recipe is more than just delicious—it’s incredibly nourishing. Lentils are an excellent source of plant-based protein and fiber, making this meal filling and beneficial for digestion. Walnuts contribute healthy fats and antioxidants, while cabbage is loaded with vitamins C and K. It’s the kind of meal that leaves you feeling satisfied without weighing you down.

3. Versatile and Adaptable

One of the best things about this recipe is its versatility. You can adjust the ingredients based on what you have on hand. No walnuts? Try almonds or sunflower seeds. Prefer a spicier kick? Add a pinch of cayenne. Want a richer taste? Stir in some nutritional yeast or a splash of balsamic vinegar. Whether you’re cooking for dietary preferences or simply personal taste, this dish adapts beautifully.

Ingredients

IngredientAmountPreparation
Cabbage500g (1 lb)Chopped
Olive oil2 tablespoons
Smoked paprika1 tablespoon
Smoked garlic powder1 teaspoon
SaltTo taste
Onion1, chopped
Garlic cloves2, minced
Italian herbs1 tablespoon
Lentils190g (3/4 cup)Rinsed
Raw rice90g (1/2 cup)Rinsed
Walnuts75g (1/2 cup)Chopped
Canned chopped tomatoes400g (14 oz)
Date syrup1 tablespoon
Vegetable stock700ml (3 cups)
ChivesAs needed (optional)Chopped
Plant-based yogurtFor serving (optional)

Directions

Step 1: Sauté the Aromatics

  1. Preheat oven to 180°C (350°F).
  2. Heat olive oil in a large pan over medium heat.
  3. Add chopped onion and cook until soft (about 3 minutes).
  4. Stir in minced garlic, smoked paprika, smoked garlic powder, and Italian herbs. Sauté for 1 minute until fragrant.

Step 2: Prepare the Filling

  1. Add lentils, raw rice, walnuts, canned chopped tomatoes, date syrup, and vegetable stock to the pan.
  2. Bring to a simmer, reduce heat, and cook for 10-15 minutes until slightly thickened.

Step 3: Assemble and Bake

  1. In a greased baking dish, spread half of the chopped cabbage as a base layer.
  2. Pour the lentil-walnut mixture evenly over the cabbage.
  3. Top with the remaining cabbage.
  4. Cover with foil and bake for 40 minutes.
  5. Remove foil and bake for an additional 10 minutes for a slightly crispy top.

Step 4: Garnish and Serve

  1. Let rest for 5 minutes before serving.
  2. Garnish with chopped chives and serve with plant-based yogurt if desired.

Nutritional Information (Per Serving)

NutrientAmount (Approx.)
Calories290 kcal
Protein12g
Carbohydrates38g
Dietary Fiber9g
Fats12g
Saturated Fat1.5g
Sodium450mg

The Magic of Cabbage: An Underrated Superfood

Cabbage often gets overlooked in favor of flashier vegetables, but it deserves a place in every kitchen. Not only is it affordable and widely available, but it’s also packed with health benefits.

  • Rich in antioxidants – Helps fight inflammation and supports overall health.
  • Great for digestion – High in fiber, which promotes gut health and aids digestion.
  • Supports heart health – Contains compounds that may help lower cholesterol levels.
  • Budget-friendly and long-lasting – A cost-effective ingredient that stores well in the fridge for weeks.

When baked, cabbage transforms into something truly special. It softens, absorbs flavors beautifully, and develops a slight sweetness that makes it the perfect base for this dish.

Serving Ideas: Elevate the Experience

1. Pair It with a Fresh Side Salad

A crisp, tangy salad can complement the richness of this baked dish. A simple mix of arugula, cherry tomatoes, and a lemon vinaigrette works wonders.

2. Add a Creamy Element

A dollop of plant-based yogurt on the side adds a cool contrast to the smoky, savory filling. You can also drizzle tahini sauce or cashew cream for extra richness.

3. Enjoy It as a Main or Side Dish

This dish is hearty enough to stand alone as a main course but also pairs beautifully with roasted vegetables, quinoa, or crusty bread for a more complete meal.

4. Make It a Meal Prep Favorite

This recipe stores well, making it perfect for meal prep. Prepare a batch at the beginning of the week, and enjoy it reheated for quick lunches or dinners. The flavors deepen over time, making it even more delicious the next day.

Frequently Asked Questions

Q1: Can I make this recipe gluten-free?

Yes! The recipe is naturally gluten-free as long as you use gluten-free vegetable stock. Always check ingredient labels if you have specific dietary restrictions.

Q2: Can I use a different type of lentil?

Green or brown lentils work best because they hold their shape well. Red lentils tend to break down too much and may create a mushier texture.

Q3: How can I make this dish even more protein-rich?

You can increase the protein content by adding tofu crumbles, chickpeas, or even extra walnuts. If you’re not strictly plant-based, some crumbled feta cheese on top can add extra protein and flavor.

Q4: How do I store leftovers?

Store leftovers in an airtight container in the refrigerator for up to 4 days. Reheat in the oven at 180°C (350°F) for the best texture, or microwave if you’re short on time.

Q5: Can I freeze this dish?

Yes! Allow the dish to cool completely, then store it in freezer-safe containers. It will keep well for up to 2 months. Thaw overnight in the fridge and reheat in the oven before serving.

Q6: What can I use instead of walnuts?

If you have a nut allergy or prefer a different texture, try using sunflower seeds, pumpkin seeds, or hemp seeds for a similar crunch.

Q7: Can I prepare this in advance?

Absolutely! You can assemble the dish up to 24 hours in advance and keep it covered in the fridge. When ready to bake, simply pop it in the oven as directed.

Conclusion: A Dish That Feels Like Home

There’s something undeniably comforting about a well-baked dish that fills the kitchen with warmth and inviting aromas. This Baked Cabbage with Lentil and Walnut Mixture is more than just a meal—it’s an experience. It’s about embracing simple, wholesome ingredients and turning them into something deeply satisfying.

Whether you’re making it for a cozy weeknight dinner, a meal-prep staple, or even a special gathering, this dish brings people together. It’s hearty enough to please plant-based and non-plant-based eaters alike, easy enough for a beginner cook, and nourishing enough to fuel you through your day.

So the next time you find yourself reaching for a head of cabbage, think beyond coleslaw or soup. Give this baked dish a try, and you might just discover a new family favorite—one that feels like home with every bite.

Amal

Baked Cabbage with Lentil and Walnut Mixture: A Hearty and Wholesome Delight

This Baked Cabbage with Lentil and Walnut Mixture is a hearty, plant-based dish packed with rich flavors and wholesome ingredients. Layers of tender cabbage, smoky lentils, and crunchy walnuts come together in a savory tomato-infused sauce. It’s a comforting, protein-rich meal perfect for weeknights or meal prep.
Prep Time 15 minutes
Cook Time 50 minutes
Total Time 1 hour 5 minutes
Servings: 4 servings
Course: Main Dish
Cuisine: Mediterranean

Ingredients
  

  • 500 g 1 lb cabbage, chopped
  • 2 tablespoons olive oil
  • 1 tablespoon smoked paprika
  • 1 teaspoon smoked garlic powder
  • Salt to taste
  • 1 onion chopped
  • 2 garlic cloves minced
  • 1 tablespoon Italian herbs
  • 190 g 3/4 cup lentils, rinsed
  • 90 g 1/2 cup raw rice, rinsed
  • 75 g 1/2 cup walnuts, chopped
  • 400 g 14 oz canned chopped tomatoes
  • 1 tablespoon date syrup
  • 700 ml 3 cups vegetable stock
  • Chopped chives optional, for garnish
  • Plant-based yogurt optional, for serving

Method
 

  1. Preheat Oven: Set your oven to 180°C (350°F) and grease a baking dish.
  2. Sauté Aromatics: Heat olive oil in a pan over medium heat. Add chopped onion and cook until softened, about 3 minutes. Stir in garlic, smoked paprika, smoked garlic powder, and Italian herbs. Cook for another minute until fragrant.
  3. Prepare the Filling: Add lentils, rice, walnuts, canned tomatoes, date syrup, and vegetable stock. Stir well and let it simmer for 10-15 minutes, until slightly thickened.
  4. Assemble the Dish: Spread half of the chopped cabbage in the baking dish. Pour the lentil-walnut mixture over it, then top with the remaining cabbage.
  5. Bake: Cover with foil and bake for 40 minutes. Remove foil and bake for another 10 minutes for a slightly crispy top.
  6. Garnish & Serve: Let it rest for 5 minutes before serving. Garnish with chopped chives and serve with plant-based yogurt if desired.

Notes

  • Lentil Options: Brown or green lentils work best. Red lentils tend to get mushy.
  • Nut-Free Option: Swap walnuts for sunflower seeds or pumpkin seeds.
  • Storage: Keeps well in the fridge for up to 4 days. Freezes well for 2 months.
  • Make-Ahead Tip: Assemble up to a day in advance and bake when ready.

Dalgona Coffee Cupcakes: A Dreamy Treat for Coffee Lovers

There are certain flavors that feel like a warm hug—coffee is one of them. For many of us, coffee is more than just a drink. It’s a ritual, a moment of peace, a companion through early mornings and late-night conversations. The idea of capturing that rich, aromatic essence in a soft, fluffy cupcake was something I had been dreaming about for a while.

I remember the first time I tried Dalgona coffee. It was during the global wave of home-baking and coffee trends that took over social media. Watching instant coffee, sugar, and water transform into a silky, cloud-like foam was pure magic. But as much as I loved it, I found myself wondering—what if this same creamy coffee experience could be turned into something more indulgent?

That’s how these Dalgona Coffee Cupcakes were born. They combine the deep, bold taste of coffee with the light, airy texture of a cupcake. The cupcakes themselves are rich yet soft, with just the right balance of sweetness and bitterness. Topped with the signature whipped coffee foam, they deliver an elegant, café-style experience in every bite. Whether you’re a devoted coffee lover or simply looking for a unique dessert, these cupcakes promise to surprise and delight.

Why You’ll Love These Dalgona Coffee Cupcakes

1. A Coffee Lover’s Dream Dessert

These cupcakes are infused with coffee flavor in two ways—the moist, coffee-spiked cake and the airy Dalgona topping. Every bite tastes like your favorite latte in dessert form.

2. Eggless and Super Soft

This recipe doesn’t require eggs, making it perfect for those with dietary restrictions. The combination of milk, vinegar, and oil ensures a fluffy and tender crumb.

3. No Fancy Ingredients Required

Everything in this recipe is a kitchen staple—flour, sugar, oil, milk, and instant coffee. There’s no need to hunt for specialty ingredients.

4. A Stunning Visual Treat

The whipped Dalgona topping adds an elegant, café-style finish to the cupcakes. They look as good as they taste, making them a great choice for celebrations or gifts.

5. Easy and Fun to Make

This recipe is simple, yet it feels luxurious. Making the Dalgona topping is an enjoyable process, and the transformation from liquid to foam is nothing short of magic.

Tips for Making the Best Dalgona Coffee Cupcakes

1. Use Strong Instant Coffee for Maximum Flavor

Since this recipe relies on instant coffee, use a high-quality brand for the best taste. Stronger coffee gives the cupcakes a more pronounced, robust flavor.

2. Whisk the Dalgona Topping Until Stiff Peaks Form

For the signature airy, cloud-like texture, beat the coffee mixture long enough. Using a hand mixer will make the process much faster than whisking by hand.

3. Let the Cupcakes Cool Completely Before Adding the Topping

Warm cupcakes will cause the whipped topping to melt and lose its signature fluffiness. For the best results, allow them to cool fully before decorating.

4. Adjust the Sweetness to Your Preference

Dalgona coffee is naturally strong and slightly bitter. If you prefer a sweeter topping, add a little more sugar to balance the flavors.

5. Experiment with Toppings

For a creative twist, dust the finished cupcakes with cocoa powder, drizzle with caramel, or sprinkle with chocolate shavings.

Ingredients

For the Cupcakes:

IngredientQuantity
All-purpose flour1 ½ cups (180g)
Sugar¾ cup (150g)
Baking powder1 ½ tsp
Baking soda½ tsp
Instant coffee2 tbsp
Hot water¼ cup (60ml)
Milk½ cup (120ml)
Vegetable oil¼ cup (60ml)
Vanilla extract1 tsp
Lemon juice or vinegar1 tbsp

For the Dalgona Topping:

IngredientQuantity
Instant coffee2 tbsp
Sugar2 tbsp
Hot water2 tbsp

Directions

1. Prepare the Cupcake Batter

  • Preheat the oven to 180°C (350°F) and line a muffin tin with cupcake liners.
  • In a small bowl, dissolve instant coffee in hot water and set aside.
  • In a mixing bowl, whisk together flour, sugar, baking powder, and baking soda.
  • In another bowl, mix milk, vegetable oil, vanilla extract, lemon juice, and the dissolved coffee.
  • Gradually add the wet ingredients to the dry ingredients, stirring until well combined and smooth.

2. Bake the Cupcakes

  • Pour the batter evenly into the cupcake liners, filling each about ¾ full.
  • Bake for 18-20 minutes, or until a toothpick inserted in the center comes out clean.
  • Let the cupcakes cool completely before adding the topping.

3. Make the Dalgona Topping

  • In a bowl, whisk together instant coffee, sugar, and hot water until thick and fluffy (about 3-5 minutes).
  • Use a hand mixer or whisk vigorously until stiff peaks form.

4. Assemble the Cupcakes

  • Spoon or pipe the Dalgona topping onto each cooled cupcake.
  • Optionally, dust with cocoa powder or sprinkle with crushed coffee granules for an extra coffee kick.
  • Serve and enjoy!

Nutritional Information (Per Cupcake, Approx.)

NutrientAmount
Calories220 kcal
Protein3 g
Carbohydrates32 g
Fats9 g
Fiber1 g
Sugars18 g

Variations to Try

1. Mocha Dalgona Cupcakes

Add cocoa powder to the cupcake batter to create a rich mocha flavor. The combination of chocolate and coffee makes these even more indulgent.

2. Vanilla Caramel Dalgona Cupcakes

Replace some of the coffee in the batter with vanilla extract and drizzle caramel sauce over the whipped topping for a sweet, creamy variation.

3. Coconut Dalgona Cupcakes

Use coconut milk instead of regular milk and top with toasted coconut flakes for a tropical twist.

4. Spiced Dalgona Cupcakes

Add a pinch of cinnamon or nutmeg to the cupcake batter for a warm, spiced coffee flavor.

5. Chocolate Dipped Dalgona Cupcakes

Dip the tops of the cupcakes in melted chocolate before piping on the Dalgona topping for an extra layer of decadence.

Serving Suggestions

1. As an Afternoon Treat with Coffee

Pair these cupcakes with a hot espresso or cappuccino for the ultimate coffee experience.

2. As a Dessert for Gatherings

The elegant Dalgona topping makes these cupcakes a great choice for dinner parties, birthdays, or brunch.

3. As a Gift for Coffee Lovers

Pack these in a box and surprise a fellow coffee enthusiast with a homemade, café-style dessert.

4. With a Scoop of Ice Cream

For an extra indulgent treat, serve these cupcakes with a scoop of vanilla or coffee-flavored ice cream.

5. Chilled for a Refreshing Twist

Since the Dalgona topping is light and airy, chilling the cupcakes for a bit before serving makes them even more refreshing.

Frequently Asked Questions

1. Can I Make These Cupcakes Without Coffee?

Yes! If you love the texture but prefer a different flavor, replace the coffee with cocoa powder for a delicious chocolate version.

2. How Long Does the Dalgona Topping Last?

The whipped coffee topping holds its shape for several hours but is best enjoyed fresh. If you need to store it, keep it in the fridge and re-whip before serving.

3. Can I Use Brewed Coffee Instead of Instant Coffee?

Instant coffee is essential for making the Dalgona topping. However, you can replace the instant coffee in the cupcake batter with strong brewed coffee.

4. How Should I Store These Cupcakes?

Store the cupcakes in an airtight container at room temperature for up to two days. If refrigerated, let them sit at room temperature before serving to soften.

5. Can I Make These Cupcakes Vegan?

Yes! Use almond milk or oat milk instead of dairy milk, and replace the whipped coffee topping with a dairy-free whipped cream alternative.

6. What’s the Best Way to Whip the Dalgona Topping?

A hand mixer makes whipping the topping much faster. If whisking by hand, use a large whisk and beat vigorously for 3-5 minutes until stiff peaks form.

Final Thoughts: A Cupcake That Feels Like a Coffeehouse Treat

There’s something special about turning a beloved drink into a dessert. These Dalgona Coffee Cupcakes bring together the best of both worlds—the rich, deep taste of coffee and the fluffy, indulgent texture of a cupcake. They are simple to make yet feel like a fancy bakery treat, making them perfect for any occasion.

Whether you’re a passionate coffee lover or just someone who enjoys a unique twist on classic desserts, these cupcakes are sure to impress. With their beautiful presentation, bold coffee flavor, and irresistible texture, they’re bound to become a new favorite.

So the next time you crave a coffeehouse-style dessert, skip the café and bake these instead. They’re proof that some of the best indulgences come straight from your own kitchen.

Amal

Dalgona Coffee Cupcakes: A Dreamy Treat for Coffee Lovers

These Dalgona Coffee Cupcakes are a dream come true for coffee lovers! Soft, moist, and infused with rich coffee flavor, these eggless cupcakes are topped with a light and airy whipped Dalgona coffee frosting. Perfect for an afternoon treat or a unique dessert, these muffins bring the magic of café-style coffee into a sweet, indulgent bite.
Prep Time 10 minutes
Cook Time 20 minutes
Total Time 30 minutes
Servings: 12 cupcakes
Course: Dessert
Cuisine: International

Ingredients
  

For the Cupcakes:
  • 1 ½ cups 180g all-purpose flour
  • ¾ cup 150g sugar
  • 1 ½ tsp baking powder
  • ½ tsp baking soda
  • 2 tbsp instant coffee
  • ¼ cup 60ml hot water
  • ½ cup 120ml milk
  • ¼ cup 60ml vegetable oil
  • 1 tsp vanilla extract
  • 1 tbsp lemon juice or vinegar
For the Dalgona Topping:
  • 2 tbsp instant coffee
  • 2 tbsp sugar
  • 2 tbsp hot water

Method
 

  1. Prepare the Cupcake Batter: Preheat the oven to 180°C (350°F) and line a muffin tin with cupcake liners. Dissolve the instant coffee in hot water and set aside. In a bowl, mix dry ingredients. In another bowl, whisk the wet ingredients, including the coffee mixture. Gradually combine the wet and dry ingredients, stirring until smooth.
  2. Bake the Cupcakes: Pour the batter into cupcake liners, filling them ¾ full. Bake for 18-20 minutes or until a toothpick inserted in the center comes out clean. Let cool completely.
  3. Make the Dalgona Topping: In a bowl, whisk instant coffee, sugar, and hot water until thick and fluffy (about 3-5 minutes). Use a hand mixer or whisk vigorously until stiff peaks form.
  4. Assemble the Cupcakes: Pipe or spoon the whipped coffee topping onto the cooled cupcakes. Optionally, dust with cocoa powder or sprinkle with crushed coffee granules for an extra coffee kick.

Notes

  • For a mocha twist, add 1 tbsp cocoa powder to the cupcake batter.
  • Use a hand mixer for faster and fluffier Dalgona topping.
  • Store leftovers in the refrigerator for up to 3 days.
  • Let the cupcakes come to room temperature before serving for the best texture.

Cheesy Taco Bake: A Flavor-Packed Pastry Delight with Minced Meat

Some of the best recipes come from moments of spontaneity. I still remember the evening when I first made this cheesy taco bake. It was one of those nights when I stared at my kitchen cabinets, unsure of what to cook. My family was hungry, and I needed something filling, easy, and packed with flavor. I had ground beef, tortillas, some cheese, and a few pantry staples. That was all I needed.

Instead of making traditional tacos, I layered everything together in a baking dish, hoping for the best. As it baked, the rich aroma of seasoned meat, melted cheese, and warm tortillas filled the kitchen. The first bite was magical—gooey, cheesy, slightly crispy, and bursting with bold flavors. It was an instant hit. My family asked for seconds, and soon, this dish became a staple in our home.

Now, this cheesy taco bake is my go-to recipe for gatherings, lazy weekend dinners, and even potlucks. It combines everything we love about tacos but in a form that’s easier to serve and even more satisfying. Whether you’re feeding a crowd or simply craving something warm and comforting, this dish delivers every time.

Why This Cheesy Taco Bake is a Must-Try

1. The Perfect Balance of Flavors

This recipe blends the bold, spiced flavors of taco-seasoned ground meat with the creamy richness of melted cheese and the slight sweetness of corn and black beans. Every bite is packed with texture and depth.

2. A Crispy, Cheesy, and Satisfying Dish

Baked until golden and bubbly, this dish delivers a perfect contrast of crispy tortilla edges and gooey, cheesy layers. It’s comforting yet packed with exciting flavors.

3. Easy to Make and Even Easier to Serve

Unlike traditional tacos, which require assembling individual servings, this bake is layered like a casserole, making it a breeze to prepare. Once baked, you simply slice and serve!

4. A Meal That Feeds a Crowd

This dish is perfect for family dinners, gatherings, or potlucks. It makes multiple servings and is always a hit, no matter the occasion.

5. Highly Customizable

You can easily adapt this recipe to suit different tastes. Swap beef for chicken, add jalapeños for extra spice, or make it vegetarian with more beans and veggies. The possibilities are endless.

Ingredients

IngredientQuantity
Ground beef or turkey500 g (1 lb)
Small onion (diced)1
Olive oil1 tbsp
Taco seasoning1 packet (30 g)
Tomato sauce or salsa1 cup (250 ml)
Black beans (drained, rinsed)1 can (400 g)
Frozen corn (thawed)1 cup (250 g)
Shredded cheddar cheese2 cups (200 g)
Shredded mozzarella cheese2 cups (200 g)
Large flour tortillas6 (or corn tortillas for gluten-free)

Directions

  1. Prepare the Filling
    • Heat olive oil in a pan over medium heat.
    • Add diced onion and sauté until soft.
    • Add ground beef or turkey and cook until browned.
    • Stir in taco seasoning, tomato sauce, black beans, and corn. Simmer for 5 minutes.
  2. Assemble the Layers
    • Preheat oven to 180°C (350°F).
    • In a greased baking dish, layer tortillas, meat mixture, and cheeses. Repeat until all ingredients are used, ending with cheese on top.
  3. Bake to Perfection
    • Bake for 20-25 minutes until the cheese is melted and bubbly.
    • Let it cool slightly before slicing.
  4. Serve and Enjoy
    • Garnish with fresh herbs, sour cream, or avocado slices.

Nutritional Information (Per Serving, Approx.)

NutrientAmount
Calories420 kcal
Protein28 g
Carbohydrates32 g
Fats22 g
Fiber5 g
Sodium600 mg

Tips for Making the Best Cheesy Taco Bake

1. Choose the Right Tortillas

Flour tortillas create a softer, heartier texture, while corn tortillas give a more authentic, slightly crispier bite. If you prefer a gluten-free option, corn tortillas are the way to go.

2. Use a Good Blend of Cheese

Cheddar gives a sharp, tangy flavor, while mozzarella provides creaminess and stretchiness. Mixing both creates the ultimate cheesy topping.

3. Don’t Skip the Seasoning

A packet of taco seasoning is convenient, but if you have time, making your own with chili powder, cumin, paprika, garlic powder, and oregano adds an even fresher, more vibrant taste.

4. Let it Rest Before Slicing

Once out of the oven, let the bake sit for a few minutes. This helps it set, making it easier to slice into neat portions without everything falling apart.

5. Add a Crunchy Topping

For extra texture, top the casserole with crushed tortilla chips before baking. This creates a crispy, crunchy finish that contrasts beautifully with the soft, cheesy layers.

Creative Variations to Try

1. Spicy Kick Taco Bake

If you love heat, add chopped jalapeños, a pinch of cayenne, or a drizzle of hot sauce to the meat mixture for extra spice.

2. Vegetarian Taco Bake

Swap out the meat for extra beans, mushrooms, or roasted bell peppers. You can also use crumbled tofu seasoned with taco spices for a protein boost.

3. Breakfast Taco Bake

Turn this into a breakfast dish by adding scrambled eggs, cooked chorizo, and a layer of hash browns before baking.

4. BBQ Tex-Mex Twist

Mix some barbecue sauce into the meat mixture and use shredded smoked gouda cheese for a smoky, tangy twist.

5. Low-Carb Taco Bake

Instead of tortillas, layer the filling between roasted zucchini slices or cauliflower tortillas for a lower-carb alternative.

How to Serve This Dish

1. As a Standalone Meal

This dish is hearty enough to serve on its own. Just slice and enjoy the cheesy, meaty goodness!

2. With Classic Taco Toppings

Enhance each serving with sour cream, guacamole, salsa, or fresh diced tomatoes for added freshness.

3. Paired with a Side Salad

A simple green salad with a tangy lime dressing balances out the richness of the bake.

4. Wrapped in a Tortilla

For an extra twist, take a slice of the bake and wrap it in an additional soft tortilla for a handheld taco experience.

5. As Leftovers for Lunch

This dish reheats beautifully, making it a great meal-prep option for busy weekdays.

Frequently Asked Questions

1. Can I Make This Dish Ahead of Time?

Yes! You can assemble the entire casserole and refrigerate it overnight. When ready to serve, bake as directed.

2. How Long Does It Last in the Fridge?

Stored in an airtight container, this dish stays fresh for up to 4 days in the refrigerator.

3. Can I Freeze It?

Yes! Bake the casserole, let it cool completely, then freeze it in individual portions. Reheat in the oven or microwave when needed.

4. Can I Use Ground Chicken Instead of Beef?

Absolutely! Ground chicken or turkey works just as well and creates a slightly lighter dish.

5. What’s the Best Way to Reheat Leftovers?

For best results, reheat in the oven at 180°C (350°F) for about 10 minutes. If using a microwave, cover with a damp paper towel to keep it from drying out.

6. How Can I Make It Extra Crispy?

For an added crunch, sprinkle crushed tortilla chips or extra cheese on top before baking. Broil for the last few minutes to achieve a golden, crispy top.

Final Thoughts: A Dish That Always Delivers

There’s something special about a dish that combines simplicity with bold flavors. This cheesy taco bake is more than just an appetizer—it’s a meal that brings people together. Whether it’s a casual weeknight dinner, a family gathering, or a potluck with friends, this dish never fails to impress.

It’s rich, satisfying, and endlessly adaptable to different tastes. Plus, it’s one of those meals that tastes just as good (if not better) the next day, making it a great option for leftovers or meal prep.

So the next time you’re looking for an easy yet impressive dish, try this cheesy taco bake. One bite, and you’ll see why it has become a favorite in so many kitchens.

Amal

Cheesy Taco Bake: A Flavor-Packed Pastry Delight with Minced Meat

This cheesy taco bake is the ultimate comfort food—savory minced meat, melted cheese, and soft tortillas baked together to create a dish that’s crispy on the edges and gooey in the center. It’s perfect for family dinners, game nights, or whenever you crave a hearty, satisfying meal. Easy to make and bursting with bold flavors, this dish will quickly become a household favorite!
Prep Time 10 minutes
Cook Time 25 minutes
Total Time 35 minutes
Servings: 6 servings
Course: Main Dish
Cuisine: Mexican-inspired

Ingredients
  

For the Filling:
  • 500 g 1 lb ground beef or turkey
  • 1 small onion diced
  • 1 tbsp olive oil
  • 1 packet 30 g taco seasoning or homemade taco seasoning
  • 1 cup 250 ml tomato sauce or salsa
  • 1 can 400 g black beans, drained and rinsed
  • 1 cup 250 g frozen corn, thawed
For the Layers:
  • 6 large flour tortillas or corn tortillas for gluten-free
  • 2 cups 200 g shredded cheddar cheese
  • 2 cups 200 g shredded mozzarella cheese

Method
 

  1. Cook the Meat Mixture: In a pan, heat olive oil over medium heat. Add the diced onion and cook until softened. Add the ground beef or turkey and cook until browned. Stir in taco seasoning, tomato sauce, black beans, and corn. Simmer for 5 minutes.
  2. Assemble the Bake: Preheat the oven to 180°C (350°F). In a greased baking dish, layer tortillas, meat mixture, and cheeses. Repeat until all ingredients are used, ending with a cheese layer on top.
  3. Bake: Place the dish in the oven and bake for 20-25 minutes or until the cheese is melted and bubbly.
  4. Serve: Let it cool for a few minutes before slicing. Garnish with fresh herbs, sour cream, or avocado slices for extra flavor.

Notes

  • Use corn tortillas for a gluten-free version.
  • Add jalapeños or chili flakes for extra spice.
  • Leftovers can be stored in an airtight container in the refrigerator for up to 4 days.
  • Reheat in the oven at 180°C (350°F) for the best texture.

Chocolate Cream Cheese Delight: A Decadent No-Bake Treat in Just 5 Minutes

Some desserts are more than just a treat; they carry memories, emotions, and a sense of nostalgia. For me, this no-bake chocolate cheesecake is one of those recipes. I remember my mother making something similar whenever we had unexpected guests or when she wanted to surprise us with something sweet but effortless. She had a way of transforming simple ingredients into a dessert that tasted like it belonged in a high-end pastry shop.

I would sit by the counter, eagerly watching her crush cookies, melt chocolate, and mix everything together with ease. The hardest part was waiting for it to set in the refrigerator, but the reward was always worth it. When she finally sliced it, the layers of creamy chocolate and crunchy cookie crust were perfection. It was rich but not overwhelming, smooth yet slightly firm, and sweet with just the right balance of flavors.

Now, every time I make this dessert, I’m reminded of those moments—the laughter in the kitchen, the comforting aroma of chocolate, and the joy of sharing something delicious with family. This recipe is my way of keeping that tradition alive while making it accessible to anyone, no matter their baking experience. Whether you’re hosting a gathering, celebrating a special occasion, or simply craving something indulgent, this chocolate cream cheese dessert will never disappoint.

Why You Will Love This Recipe

1. No Baking Required

If you love rich, creamy desserts but don’t want to deal with ovens and complicated techniques, this is the perfect recipe for you. It’s completely no-bake, which means no stress about temperatures, baking times, or burnt edges.

2. Quick and Effortless

You only need about five minutes of active preparation. The hardest part is waiting for it to chill in the refrigerator, but even that only takes a couple of hours.

3. A Perfect Balance of Flavors and Textures

The chocolate cream cheese filling is smooth, velvety, and slightly tangy, while the Oreo cookie crust adds a satisfying crunch. The combination of sweetness, richness, and texture makes every bite irresistible.

4. Uses Simple, Everyday Ingredients

There’s nothing fancy or hard to find in this recipe. You probably already have most of the ingredients in your kitchen, and if not, they’re easy to get from any grocery store.

5. Great for Any Occasion

Whether it’s a last-minute dessert for a dinner party, a birthday celebration, or just a personal indulgence, this chocolate cheesecake is always a crowd-pleaser.

Ingredients

Crust

IngredientQuantity
Oreo cookies200g (0.44 lb)
Butter (melted)70g (0.15 lb)

Filling

IngredientQuantity
Chocolate (melted)300g (0.66 lb)
Cream cheese600g (1.32 lbs)
Cream100g (0.22 lb)
Condensed milk50g (0.11 lb)

Directions

  1. Prepare the Crust
    • Crush the Oreo cookies into fine crumbs using a food processor or by placing them in a sealed bag and crushing them with a rolling pin.
    • Mix the cookie crumbs with melted butter until well combined.
    • Press the mixture evenly into the bottom of a springform pan and refrigerate while preparing the filling.
  2. Make the Filling
    • In a mixing bowl, beat the cream cheese until smooth and creamy.
    • Add the melted chocolate, cream, and condensed milk, mixing until fully incorporated and silky.
  3. Assemble the Dessert
    • Pour the chocolate cream cheese mixture over the prepared crust, spreading it evenly.
    • Refrigerate for at least 2 hours to allow it to set completely.
  4. Serve and Enjoy
    • Once firm, slice and serve. Optionally, garnish with chocolate shavings, whipped cream, or fresh berries for extra flavor.

Nutritional Information (Per Serving, Approx.)

NutrientAmount
Calories380 kcal
Protein6 g
Carbohydrates32 g
Fats26 g
Sugars18 g
Fiber2 g

Tips for Making the Perfect Chocolate Cream Cheese Dessert

1. Use High-Quality Chocolate

Since chocolate is the star ingredient, using a good-quality brand makes a huge difference. Dark chocolate (50-70% cocoa) gives a richer flavor, while milk chocolate makes it sweeter and creamier.

2. Let the Cream Cheese Reach Room Temperature

Cold cream cheese can be difficult to mix and may result in a lumpy filling. Letting it sit at room temperature for 20-30 minutes before mixing ensures a smooth, even texture.

3. Crush the Cookies Finely for the Best Crust

The finer the crumbs, the better the crust will hold together. If you don’t have a food processor, place the cookies in a sealed plastic bag and crush them with a rolling pin until they reach a sandy consistency.

4. Refrigerate for at Least Two Hours

Chilling allows the filling to set properly and develop its full flavor. If you have extra time, letting it sit overnight will give it an even firmer texture and a deeper taste.

5. Customize with Toppings

This dessert is delicious on its own, but you can elevate it further with toppings like fresh berries, chocolate shavings, caramel drizzle, or whipped cream.

Creative Variations to Try

1. White Chocolate and Raspberry Cheesecake

Replace dark chocolate with white chocolate and fold in fresh raspberries before pouring the filling over the crust. The tartness of the berries perfectly balances the sweetness of the chocolate.

2. Nutty Delight

Add a layer of crushed almonds, hazelnuts, or pecans between the crust and the filling for an extra crunch and nutty flavor.

3. Coffee-Infused Chocolate Cheesecake

Stir in a teaspoon of instant espresso powder into the melted chocolate to create a mocha-flavored version of this dessert.

4. Peanut Butter Chocolate Cheesecake

Swirl in a few tablespoons of peanut butter into the filling before refrigerating for a delicious chocolate-peanut butter combination.

5. Mini Cheesecake Bites

Instead of making one large cheesecake, divide the crust and filling into muffin tins lined with paper cups. This way, you’ll have individual portions that are perfect for serving at parties.

How to Serve This Dessert

1. Straight from the Fridge

This cheesecake is best served chilled, straight from the refrigerator. The cold temperature enhances the creaminess of the filling and keeps the crust firm.

2. With a Scoop of Ice Cream

For an extra indulgent treat, pair a slice with a scoop of vanilla or caramel ice cream. The contrast between the rich cheesecake and the cold ice cream is irresistible.

3. As a Layered Dessert

Spoon the mixture into glasses or jars in alternating layers of crust and filling for a beautiful, deconstructed cheesecake presentation.

4. Drizzled with Sauce

Chocolate ganache, caramel sauce, or berry compote can take this dessert to the next level by adding extra depth of flavor.

5. Garnished with Fresh Fruit

Berries, banana slices, or citrus zest provide a refreshing contrast to the richness of the cheesecake.

Frequently Asked Questions

1. Can I Make This Dessert Ahead of Time?

Yes! This cheesecake actually tastes better when made in advance. You can prepare it up to two days ahead and store it in the refrigerator until ready to serve.

2. How Long Does It Last in the Fridge?

Stored in an airtight container, this dessert will stay fresh for up to five days.

3. Can I Freeze It?

Yes! Wrap individual slices in plastic wrap and store them in an airtight container in the freezer for up to two months. When ready to eat, thaw in the refrigerator overnight.

4. What If I Don’t Have Condensed Milk?

You can substitute condensed milk with an equal amount of heavy cream and a tablespoon of sugar for a similar consistency and sweetness.

5. Can I Make This Recipe Gluten-Free?

Absolutely! Use gluten-free cookies for the crust, and double-check that all other ingredients are certified gluten-free.

6. Can I Use a Different Type of Cheese?

While cream cheese is best for its smooth texture, you can try mascarpone for a richer, creamier version. Avoid using ricotta, as it has a grainier consistency.

Final Thoughts: A Simple Recipe That Feels Like Pure Indulgence

There’s something truly special about a dessert that requires so little effort yet delivers so much satisfaction. This chocolate cream cheese delight is rich, creamy, and perfectly balanced between sweet and tangy. Whether you’re making it for a celebration, a casual get-together, or just for yourself, this no-bake dessert will always impress.

It’s a reminder that great food doesn’t have to be complicated. With a few simple ingredients and a little patience while it chills, you can create something that feels indulgent and luxurious without spending hours in the kitchen.

So the next time you’re in the mood for a quick yet decadent treat, try this recipe—you might just find yourself making it again and again.

Amal

Chocolate Cream Cheese Delight: A Decadent No-Bake Treat in Just 5 Minutes

This no-bake chocolate cream cheese dessert is incredibly rich, creamy, and takes just minutes to prepare! A crunchy Oreo crust topped with a smooth and decadent chocolate filling makes this the perfect indulgent treat for any occasion. Whether you need a quick dessert for guests or a personal sweet escape, this recipe will impress with minimal effort.
Prep Time 5 minutes
Cook Time 2 hours
Total Time 2 hours 5 minutes
Servings: 8 -10 servings
Course: Dessert
Cuisine: International

Ingredients
  

For the Crust:
  • 200 g Oreo cookies 0.44 lb
  • 70 g butter melted (0.15 lb)
For the Filling:
  • 300 g chocolate melted (0.66 lb)
  • 600 g cream cheese 1.32 lbs
  • 100 g cream 0.22 lb
  • 50 g condensed milk 0.11 lb

Method
 

  1. Prepare the Crust: Crush the Oreo cookies into fine crumbs using a food processor or by placing them in a sealed plastic bag and crushing them with a rolling pin. Mix with melted butter and press evenly into the bottom of a springform pan. Refrigerate while preparing the filling.
  2. Make the Filling: In a bowl, beat the cream cheese until smooth. Add the melted chocolate, cream, and condensed milk, mixing until fully combined and silky.
  3. Assemble the Dessert: Pour the chocolate cream cheese mixture over the prepared crust, spreading it evenly.
  4. Chill: Refrigerate for at least 2 hours or until set.
  5. Serve and Enjoy: Slice and serve chilled. Garnish with chocolate shavings, fresh berries, or whipped cream for extra indulgence.

Notes

  • For an extra rich flavor, use dark chocolate (50-70% cocoa).
  • To make slicing easier, run a knife under hot water before cutting.
  • This dessert can be stored in the refrigerator for up to 5 days or frozen for up to 2 months.
  • Swap Oreo cookies for graham crackers or digestive biscuits for a different crust option.