Cheesy Potato & Bacon Skillet – A Comforting and Flavorful Meal

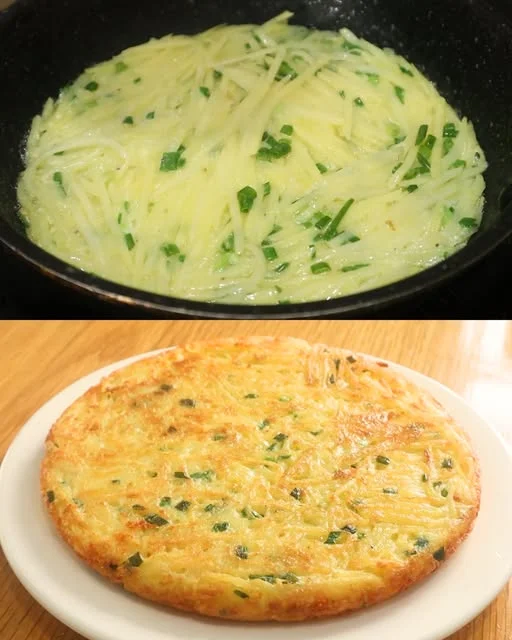
If you’re looking for a rich, hearty, and satisfying dish, this Cheesy Potato & Bacon Skillet is the perfect recipe. Combining crispy golden potatoes, savory bacon, sautéed vegetables, and gooey melted cheese, this dish delivers a burst of flavor in every bite. It’s the ultimate comfort food, ideal for a cozy dinner or a filling lunch.

What makes this dish stand out is its perfect balance of textures and flavors—crispy potatoes, smoky bacon, and creamy melted mozzarella all come together in a one-pan masterpiece. Whether you’re making a quick weekday meal or preparing something special for a weekend gathering, this recipe is bound to impress.

Why This Cheesy Potato & Bacon Skillet is a Must-Try

This dish is more than just a simple combination of potatoes, bacon, and cheese. It’s a versatile, customizable, and easy-to-make recipe that delivers big flavors with minimal effort.

1. A Comforting and Hearty Meal

There’s something incredibly satisfying about potatoes and cheese. When paired with crispy bacon and fresh vegetables, it creates a dish that is both rich and balanced.

2. Quick and Easy to Make

This one-pan meal is perfect for busy days when you want a homemade dish without spending hours in the kitchen. With simple ingredients and a straightforward cooking process, you can have a delicious meal on the table in under 40 minutes.

3. Packed with Protein and Nutrients

This skillet meal is not just delicious—it’s nutritious too!

  • Bacon provides protein and adds a smoky depth of flavor.
  • Potatoes offer fiber, potassium, and long-lasting energy.
  • Cabbage and carrots add vitamins and antioxidants, balancing the richness of the bacon and cheese.
  • Mozzarella cheese brings a creamy texture and a boost of calcium.

4. Versatile and Customizable

This recipe is easily adaptable based on your preferences. Want a spicier kick? Add some chili flakes or smoked paprika. Looking for more veggies? Try adding bell peppers or mushrooms for extra flavor.

5. A Crowd-Pleaser for Any Occasion

Whether you’re cooking for family, hosting a dinner party, or meal prepping for the week, this cheesy potato skillet is always a hit. It’s warm, comforting, and packed with bold, satisfying flavors.

Ingredients

IngredientQuantity
Hard mozzarella cheese200 g
Large potatoes3
Vegetable oilAs needed
SaltTo taste
Onion1, finely chopped
Carrot1, grated
Spring onionsA bunch, chopped
Cabbage½ head, shredded
Bacon150 g, chopped

Directions

  1. Prepare the Potatoes:
    • Peel and slice the potatoes into thin rounds or cubes.
    • Heat a large skillet with vegetable oil and fry the potatoes until golden brown and crispy. Season with salt and set aside.
  2. Sauté the Vegetables:
    • In the same skillet, sauté the chopped onion and grated carrot until softened.
    • Add the shredded cabbage and cook for 5–7 minutes until tender.
  3. Crisp the Bacon:
    • In a separate pan, cook the bacon until crispy, then mix it with the sautéed vegetables.
  4. Combine Everything:
    • Add the crispy potatoes back to the pan with the vegetables and bacon. Stir well to combine.
  5. Melt the Cheese:
    • Sprinkle the grated mozzarella cheese over the mixture and cover the skillet.
    • Let it cook on low heat for 2–3 minutes until the cheese melts.
  6. Garnish & Serve:
    • Top with chopped spring onions for a fresh, flavorful finish.
    • Serve hot and enjoy!

Nutritional Information (Per Serving, Approximate)

NutrientAmount
Calories420 kcal
Protein18 g
Carbohydrates35 g
Fiber4 g
Fats22 g
Calcium~25% DV

Tips for Making the Perfect Cheesy Potato & Bacon Skillet

To achieve the best texture and taste, follow these expert tips:

1. Choose the Right Potatoes

For the crispiest potatoes, use Yukon Gold or Russet potatoes. These varieties hold their shape well while developing a crispy, golden-brown crust when fried.

2. Cook the Bacon First for Maximum Flavor

Cooking the bacon first renders out the fat, which can be used to cook the vegetables and potatoes, adding extra depth and richness.

3. Don’t Overcrowd the Pan

To ensure the potatoes get crispy instead of soggy, cook them in a single layer with enough space between each piece. If needed, cook them in batches.

4. Add the Cheese at the Right Time

For the best melt and texture, sprinkle the cheese over the skillet in the last few minutes of cooking, covering the pan to let the heat evenly distribute.

5. Use Fresh Herbs for Extra Flavor

Garnishing with fresh parsley or chopped spring onions enhances the dish with a touch of freshness and color.

Best Ways to Serve This Dish

This cheesy potato skillet is incredibly versatile and can be served in multiple ways:

1. As a Standalone Meal

With crispy potatoes, smoky bacon, and gooey cheese, this dish is hearty enough to be a complete meal on its own. Serve it with a side of sour cream or garlic aioli for an extra flavor boost.

2. Paired with a Fresh Salad

A light salad with greens, tomatoes, and a lemon vinaigrette helps balance the richness of the dish and adds a refreshing contrast.

3. With a Fried or Poached Egg on Top

Adding a runny egg on top turns this dish into the ultimate brunch recipe. The yolk adds creaminess and enhances the overall texture.

4. As a Side Dish for Grilled Meat or Fish

Serve this skillet dish alongside grilled steak, roasted chicken, or pan-seared salmon for a complete and satisfying dinner.

5. Wrapped in a Tortilla

For a fun twist, use the cheesy potato and bacon mixture as a filling for breakfast burritos or wraps. Add some hot sauce or avocado for extra flavor.

FAQs – Everything You Need to Know About This Recipe

1. Can I Make This Dish Ahead of Time?

Yes! You can prepare and cook the ingredients ahead of time, then reheat everything in a pan or oven before serving. The flavors develop even more when allowed to sit for a few hours.

2. How Can I Store Leftovers?

  • Store leftovers in an airtight container in the refrigerator for up to 3 days.
  • Reheat in a skillet over low heat to bring back the crispiness, or microwave for a quicker option.

3. Can I Make This Recipe Vegetarian?

Absolutely! Simply skip the bacon and replace it with:

  • Sautéed mushrooms for a meaty texture
  • Smoked tofu or plant-based bacon for a smoky flavor
  • Extra vegetables like bell peppers, zucchini, or spinach

4. Can I Use a Different Cheese?

Yes! While mozzarella creates a creamy, stretchy melt, you can also use:

  • Cheddar for a sharp, tangy taste
  • Gouda for a rich, buttery flavor
  • Parmesan for extra saltiness and depth

5. Can I Use Frozen Potatoes?

Yes! If using frozen potatoes, make sure to thaw and drain any excess moisture before cooking to prevent sogginess.

6. What’s the Best Way to Make This Dish Extra Crispy?

For the crispiest potatoes:

  • Ensure they are fully dry before frying.
  • Use high heat to sear the edges before covering the pan.
  • Don’t stir too often—let them sit undisturbed to develop a crispy crust.

Conclusion – A Must-Try Comfort Food Recipe

The Cheesy Potato & Bacon Skillet is a dish that combines simplicity with bold flavors, making it a go-to recipe for cozy family dinners, quick lunches, and weekend brunches. With its crispy potatoes, smoky bacon, and rich, melty cheese, it’s a meal that satisfies both the taste buds and the soul.

What makes this dish truly special is its versatility—it can be customized, served in different ways, and prepared ahead of time. Whether you’re looking for a hearty main dish or a flavorful side, this recipe is guaranteed to become a favorite in your kitchen.

Try it once, and you’ll understand why this dish is a classic that never gets old!

Amal

Cheesy Potato & Bacon Skillet – A Comforting and Flavorful Meal

This Cheesy Potato & Bacon Skillet is the ultimate comfort food—crispy golden potatoes, smoky bacon, sautéed vegetables, and gooey melted cheese all come together in a one-pan masterpiece. It’s hearty, flavorful, and incredibly easy to make, making it the perfect meal for dinner or lunch. Whether you’re looking for a quick weekday meal or a satisfying weekend dish, this recipe is guaranteed to become a favorite in your kitchen!
Prep Time 10 minutes
Cook Time 30 minutes
Total Time 40 minutes
Servings: 4 servings
Course: Dinner
Cuisine: Comfort Food

Ingredients
  

  • 200 g hard mozzarella cheese grated
  • 3 large potatoes peeled and sliced
  • Vegetable oil as needed
  • Salt to taste
  • 1 onion finely chopped
  • 1 carrot grated
  • A bunch of spring onions chopped
  • 1/2 head of cabbage shredded
  • 150 g bacon chopped

Method
 

Prepare the Potatoes:
  1. Heat a large skillet over medium heat and add vegetable oil.
  2. Fry the sliced potatoes until golden brown and crispy. Season with salt and set aside.
Sauté the Vegetables:
  1. In the same skillet, add the chopped onion and grated carrot. Sauté until softened.
  2. Stir in the shredded cabbage and cook for another 5–7 minutes until tender.
Crisp the Bacon:
  1. In a separate pan, cook the chopped bacon until crispy. Add it to the skillet with the vegetables.
Combine Everything:
  1. Return the crispy potatoes to the pan and mix well with the vegetables and bacon.
Melt the Cheese:
  1. Sprinkle the grated mozzarella cheese over the mixture. Cover the skillet and let it cook on low heat for 2–3 minutes until the cheese melts.
Garnish & Serve:
  1. Sprinkle with chopped spring onions and serve hot. Enjoy!

Notes

  • For extra crispiness, cook the potatoes in batches to avoid overcrowding.
  • Try different cheeses, such as cheddar or gouda, for a richer flavor.
  • For a smoky kick, add a pinch of smoked paprika or chili flakes.
  • Store leftovers in an airtight container in the fridge for up to 3 days. Reheat in a skillet for the best texture.
  • Vegetarian option: Swap bacon for sautéed mushrooms or plant-based bacon.

Grated Potato Omelette – A Simple Yet Satisfying 3-Ingredient Meal

Sometimes, the simplest recipes turn out to be the most delicious and comforting. The Grated Potato Omelette is proof that you don’t need a long list of ingredients to make something truly satisfying. With just potatoes, eggs, and cheese, this dish delivers crispiness, creaminess, and flavor in every bite.

Perfect for breakfast, brunch, or even a light dinner, this omelette is a protein-packed, carb-rich, and filling meal that comes together in minutes. Whether you want something quick, affordable, or nutritious, this dish checks all the boxes.

Why You Should Try This Grated Potato Omelette

This dish is more than just a simple breakfast—it’s a balanced and wholesome meal that combines protein, healthy fats, and carbohydrates in a way that keeps you feeling full and energized. Here’s why it’s worth adding to your meal rotation:

1. Quick and Easy to Make

With just three basic ingredients and a single pan, this recipe is as simple as it gets. No special techniques or advanced cooking skills required—just grate, mix, and cook.

2. Uses Affordable, Everyday Ingredients

Potatoes, eggs, and cheese are staples in most households, making this an easy go-to dish when you need to whip up a meal without a trip to the grocery store.

3. High in Protein and Nutrients

  • Eggs provide protein, vitamins, and healthy fats, making this dish both nutritious and satisfying.
  • Potatoes offer fiber, potassium, and complex carbohydrates, giving you long-lasting energy.
  • Cheese adds creaminess and a boost of calcium, making the omelette richer in both flavor and nutrition.

4. Versatile and Customizable

While the base recipe is incredibly simple, you can easily customize it by adding spices, herbs, or extra ingredients like onions, peppers, or ham.

5. Perfect for Any Meal of the Day

This dish works for breakfast, lunch, or dinner, making it a go-to recipe whenever you need something quick and satisfying.

Ingredients

IngredientQuantity (Adjust to Serving Size)
Potatoes2 medium-sized
Eggs2 large
Cheese50 g (grated, any preferred type)

Directions

  1. Prepare the Potatoes:
    • Peel and grate the potatoes.
    • Squeeze out excess moisture using a clean kitchen towel or paper towel.
  2. Make the Egg Mixture:
    • In a bowl, beat the eggs and season with salt and pepper (optional).
    • Stir in the grated cheese.
  3. Combine & Cook:
    • Add the grated potatoes to the egg and cheese mixture.
    • Heat a non-stick pan over medium heat and lightly grease with oil or butter.
    • Pour the mixture into the pan, spreading it evenly.
  4. Cook to Perfection:
    • Cook for 4–5 minutes until the bottom is golden brown.
    • Carefully flip and cook for another 3–4 minutes until crispy and fully set.
  5. Serve & Enjoy:
    • Slice and serve warm with your favorite toppings, like fresh herbs or sour cream!

Nutritional Information (Per Serving, Approximate)

NutrientAmount
Calories280 kcal
Protein14 g
Carbohydrates25 g
Fiber3 g
Fats12 g
Calcium~20% DV

Tips for Making the Perfect Potato Omelette

1. Choose the Right Potatoes

For the best texture, use starchy potatoes like Russets or Yukon Gold. These potatoes provide a crispy outside while staying soft inside. Avoid waxy potatoes, as they won’t crisp up as well.

2. Remove Excess Moisture

Grated potatoes contain a lot of water, which can prevent them from crisping up properly. To solve this:

  • After grating, squeeze the potatoes with a clean kitchen towel or paper towel to remove excess moisture.
  • This step ensures that your omelette turns out crispy instead of soggy.

3. Use a Non-Stick Pan

A good non-stick or cast-iron pan will help prevent sticking and make flipping the omelette much easier.

4. Cook Over Medium Heat

Cooking over medium heat allows the potatoes to develop a golden crust without burning while giving the eggs time to cook through.

5. Flip Carefully

Since the omelette can be delicate, use a large spatula or slide it onto a plate and flip it back into the pan to prevent breaking.

How to Serve This Grated Potato Omelette

While this dish is delicious on its own, you can elevate it with different toppings and side dishes:

1. Classic with Sour Cream and Herbs

A dollop of sour cream and a sprinkle of fresh parsley or chives add a tangy contrast to the crispy potatoes.

2. With a Side of Fresh Salad

Pairing the omelette with a light, refreshing salad balances the richness of the dish. Try a simple salad with tomatoes, cucumbers, and a lemon vinaigrette.

3. As a Sandwich or Wrap

For a heartier meal, place the omelette in a toasted bun or wrap with some lettuce and extra cheese for a delicious breakfast sandwich.

4. With Avocado and Hot Sauce

If you love a creamy, spicy kick, top your omelette with sliced avocado and a drizzle of sriracha or hot sauce.

5. Breakfast Plate with Bacon or Sausage

For a more indulgent meal, serve the omelette with crispy bacon or sausage on the side.

FAQs – Everything You Need to Know

1. Can I Make This Omelette Without Cheese?

Yes! The cheese adds richness, but you can leave it out or replace it with dairy-free cheese for a lactose-free version.

2. Can I Add More Ingredients?

Absolutely! This recipe is versatile, and you can add ingredients like:

  • Chopped onions or scallions for extra flavor
  • Bell peppers or mushrooms for added texture
  • Ham, bacon, or cooked chicken for extra protein

3. How Do I Store Leftovers?

If you have leftovers:

  • Store in an airtight container in the refrigerator for up to 2 days.
  • Reheat in a pan over low heat to restore crispiness.

4. Can I Make This in the Oven?

Yes! If you prefer baking:

  • Preheat the oven to 190°C (375°F).
  • Pour the mixture into a greased baking dish and bake for 20–25 minutes until golden and set.

5. What’s the Best Cheese to Use?

Any melting cheese works well, such as:

  • Cheddar (sharp and flavorful)
  • Mozzarella (mild and stretchy)
  • Parmesan (adds a salty, nutty flavor)
  • Gouda or Swiss (rich and creamy)

6. Can I Make This Recipe Vegan?

Yes! Replace the eggs with:

  • Chickpea flour mixed with water (for a plant-based batter)
  • Mashed tofu (for a soft texture similar to scrambled eggs)

7. Can I Use Pre-Cooked Potatoes?

Yes! You can grate boiled potatoes instead of raw ones for a softer, more delicate texture.

Conclusion – A Must-Try Simple and Delicious Recipe

The Grated Potato Omelette is a dish that proves simple ingredients can create amazing flavors. Whether you’re looking for a quick breakfast, a satisfying lunch, or a budget-friendly dinner, this recipe is an effortless way to enjoy crispy potatoes, fluffy eggs, and melted cheese all in one bite.

With minimal prep, endless customization options, and a deliciously crispy texture, this dish is sure to become a go-to recipe in your kitchen. Try it once, and you’ll be hooked!

Amal

Grated Potato Omelette – A Simple Yet Satisfying 3-Ingredient Meal

This Grated Potato Omelette is the ultimate quick and delicious breakfast made with just three simple ingredients—potatoes, eggs, and cheese! With a crispy golden crust and a soft, cheesy interior, this dish is packed with flavor and perfect for any time of the day. Whether you need a fast breakfast, a light lunch, or a satisfying dinner, this omelette comes together in just minutes and is sure to become a household favorite!
Prep Time 5 minutes
Cook Time 10 minutes
Total Time 15 minutes
Servings: 1 serving
Course: Breakfast
Cuisine: International

Ingredients
  

  • 2 medium potatoes
  • 2 large eggs
  • 50 g ½ cup grated cheese (cheddar, mozzarella, or your favorite)

Method
 

Prepare the Potatoes:
  1. Peel and grate the potatoes using a box grater.
  2. Use a clean kitchen towel or paper towel to squeeze out any excess moisture.
Make the Egg Mixture:
  1. In a bowl, beat the eggs and mix in the grated cheese.
  2. Season with salt and pepper if desired.
Combine & Cook:
  1. Add the grated potatoes to the egg and cheese mixture, stirring to combine.
  2. Heat a non-stick pan over medium heat and lightly grease with oil or butter.
  3. Pour the mixture into the pan, spreading it evenly.
Cook Until Golden:
  1. Cook for 4–5 minutes on one side until crispy and golden brown.
  2. Flip carefully and cook for another 3–4 minutes on the other side.
Serve & Enjoy:
  1. Slice and serve warm with your favorite toppings like sour cream, herbs, or avocado!

Notes

  • For extra crispiness, let the potatoes sit for a few minutes after squeezing out moisture.
  • Additions: Try adding onions, peppers, or ham for more flavor.
  • Cheese Variations: Use cheddar, Parmesan, or Swiss for different textures and taste.
  • Storage: Store leftovers in the fridge for up to 2 days and reheat in a pan for best results.
  • Make it Spicy: Add a pinch of chili flakes or hot sauce for a spicy kick!

Crispy Tornado Potatoes – The Dinner That Conquered the World

Few dishes are as visually stunning and irresistibly crispy as tornado potatoes. With their signature spiral shape, golden crust, and bold flavors, these potatoes have taken the culinary world by storm. Originally a popular street food from Korea, tornado potatoes have now become a global sensation, appearing in restaurants, food trucks, and home kitchens alike.

With a perfect balance of crispy breadcrumbs, savory Parmesan cheese, and aromatic garlic, this recipe transforms simple potatoes into a delicious masterpiece. Whether you’re serving them as a side dish, snack, or party appetizer, tornado potatoes are guaranteed to impress.

Why Tornado Potatoes Are So Popular

Tornado potatoes are more than just a fun food trend—they’re a delicious combination of texture, flavor, and presentation. Here’s why they have become a worldwide favorite:

1. A Crispy Exterior with a Soft, Fluffy Inside

Unlike regular fries or roasted potatoes, tornado potatoes are crispy on the outside and soft on the inside. The thin spiral cuts allow for maximum crispiness, while the center stays tender and flavorful.

2. A Fun and Unique Presentation

The spiral-cut design of tornado potatoes makes them instantly recognizable. Whether served on skewers or plated as a side, their eye-catching shape adds a gourmet touch to any meal.

3. Packed with Bold Flavors

This recipe isn’t just about crispiness—it’s about deep, rich flavors. The combination of Parmesan cheese, garlic, paprika, and breadcrumbs ensures every bite is loaded with savory goodness.

4. A Versatile Dish for Any Occasion

Tornado potatoes can be served as:

  • A snack for movie nights or game days
  • A side dish with burgers, steaks, or grilled chicken
  • A party appetizer that guests will love
  • A fun addition to barbecue spreads or outdoor cookouts

5. Easy to Customize

One of the best things about tornado potatoes is how easily they can be customized. Whether you want to add heat with chili powder, make them extra cheesy, or serve them with different dipping sauces, this recipe is incredibly adaptable.

Ingredients

IngredientQuantity
Yellow potatoes4 medium-sized
Panko breadcrumbs60 g
Salt1 tsp
Black pepper½ tsp
Paprika1 tsp
Garlic powder½ tsp
Parmesan cheese30 g
Olive oil50 g
Garlic cloves4, minced
Parsley (for decoration)As needed

Directions

  1. Prepare the Potatoes: Wash and dry the potatoes. Insert a skewer through the center of each potato. Using a knife, carefully cut in a spiral motion while rotating the potato. Gently pull the slices apart to create space between the layers.
  2. Season the Potatoes: In a bowl, mix panko breadcrumbs, salt, black pepper, paprika, garlic powder, and grated Parmesan cheese.
  3. Coat with Olive Oil: Brush the potatoes evenly with olive oil to help the seasoning stick.
  4. Add the Seasoning: Sprinkle the breadcrumb mixture generously over the potatoes, making sure to coat all sides.
  5. Bake to Perfection: Preheat the oven to 200°C (390°F) and place the potatoes on a baking tray lined with parchment paper. Bake for 35–40 minutes until golden and crispy.
  6. Prepare the Garlic Oil: In a small pan, heat olive oil over low heat and sauté minced garlic until fragrant.
  7. Final Touch: Drizzle the garlic-infused olive oil over the crispy tornado potatoes and garnish with freshly chopped parsley.
  8. Serve & Enjoy: Best served hot with your favorite dipping sauce!

Nutritional Information (Per Serving, Approximate)

NutrientAmount
Calories250 kcal
Protein6 g
Carbohydrates35 g
Fiber4 g
Fats10 g
Sodium350 mg

The Secret to Perfect Tornado Potatoes

Achieving the perfect tornado potatoes takes more than just slicing and baking. Here are a few expert tips to ensure you get crispy, golden, and delicious results every time:

1. Choose the Right Potatoes

For the best texture, use yellow potatoes or russet potatoes. These varieties have a higher starch content, which helps create a crispy exterior while keeping the inside light and fluffy.

2. Use a Skewer for Stability

Inserting a skewer through the center of each potato before cutting helps maintain control and ensures even spirals. This also makes them easier to handle when seasoning and baking.

3. Get the Perfect Spiral Cut

Cutting tornado potatoes might seem tricky at first, but with a sharp knife and steady hands, you can achieve beautiful, even spirals.

  • Tip: If you’re new to spiral cutting, try using a wooden skewer to guide your cuts and help keep the shape consistent.

4. Season Generously for Maximum Flavor

The key to bold, restaurant-quality flavor is generous seasoning. Make sure every twist and turn of the potato is coated with Parmesan, panko breadcrumbs, garlic powder, salt, and paprika.

5. Bake at the Right Temperature

For the crispiest results, bake at 200°C (390°F). This allows the potatoes to cook evenly while developing that golden, crunchy coating.

6. Add Garlic Butter for Extra Flavor

Brushing the cooked potatoes with garlic-infused olive oil enhances their flavor even further, giving them a rich, buttery finish.

Best Ways to Serve Tornado Potatoes

Tornado potatoes are incredibly versatile, making them a great addition to various meals. Here are a few serving ideas to elevate your dish:

1. Classic with Dipping Sauces

Tornado potatoes pair perfectly with a variety of dipping sauces, such as:

  • Garlic aioli
  • Spicy sriracha mayo
  • Honey mustard
  • Classic ketchup
  • Ranch dressing

2. As a Side Dish for Burgers and Grilled Meats

Swap out traditional fries for tornado potatoes to upgrade your burger or steak dinner. The crispy spirals add an extra layer of texture and flavor.

3. Topped with Cheese and Bacon

Turn tornado potatoes into a loaded dish by adding:

  • Melted cheddar or mozzarella cheese
  • Crispy bacon bits
  • A dollop of sour cream

4. With a Spicy Kick

If you love heat, try seasoning tornado potatoes with:

  • Cayenne pepper or chili flakes
  • Smoked paprika
  • A drizzle of hot sauce or buffalo sauce

5. Paired with Fresh Herbs and Garlic Butter

For a gourmet touch, brush the finished potatoes with garlic butter and sprinkle with fresh parsley or chives.

FAQs – Everything You Need to Know

1. How do I get my tornado potatoes to stay crispy?

To ensure your tornado potatoes stay crispy:

  • Bake at high heat (200°C/390°F).
  • Use panko breadcrumbs for a crispier texture.
  • Don’t overcrowd the baking tray—give each potato space so they crisp up evenly.

2. Can I make these potatoes in an air fryer?

Yes! To make tornado potatoes in an air fryer:

  • Preheat the air fryer to 200°C (390°F).
  • Cook for 15–20 minutes, flipping halfway through for even crispiness.

3. Can I make tornado potatoes ahead of time?

Yes! You can prepare and season the potatoes ahead of time, then store them in the fridge until ready to bake. Bake fresh for the best crispiness.

4. Can I fry tornado potatoes instead of baking them?

Absolutely! Deep-frying creates an even crunchier texture:

  • Heat oil to 175°C (350°F).
  • Fry the potatoes for 5–7 minutes until golden and crispy.
  • Drain on a paper towel and serve immediately.

5. What’s the best cheese to use?

Parmesan is a great option for a nutty, salty flavor, but you can also try:

  • Cheddar for a sharper taste
  • Mozzarella for a gooey texture
  • Gruyère for a richer flavor

6. Can I make these without skewers?

Yes! While skewers help with the spiral shape, you can still cut and bake the potatoes in a twisted shape without them.

Conclusion – A Show-Stopping Dish for Any Occasion

Tornado potatoes are more than just a viral food trend—they’re a crispy, flavorful, and fun way to enjoy potatoes. With their golden crust, soft interior, and bold seasoning, they make the perfect side dish, snack, or appetizer.

What makes this dish so special is its simplicity and versatility. Whether you’re making them for a casual family dinner, a party snack, or a fun weekend treat, these spiral potatoes will always be a hit.

Once you try them, you’ll understand why tornado potatoes have conquered the world—and why they’ll quickly become a favorite in your kitchen!

Amal

Crispy Tornado Potatoes – The Dinner That Conquered the World

Tornado potatoes are a crispy, golden delight that turn simple potatoes into an irresistible, crunchy, and flavorful dish. Coated with a savory blend of Parmesan, panko breadcrumbs, and spices, these spiral-cut potatoes are baked to perfection. Whether served as a snack, side dish, or party appetizer, they’re guaranteed to be a crowd favorite. Easy to make and bursting with flavor, this is the ultimate potato dish that has taken the world by storm!
Prep Time 10 minutes
Cook Time 40 minutes
Total Time 50 minutes
Servings: 4 servings
Course: Snack
Cuisine: International

Ingredients
  

  • 4 yellow potatoes
  • 60 g panko breadcrumbs
  • 1 teaspoon salt
  • 1/2 teaspoon black pepper
  • 1 teaspoon paprika
  • 1/2 teaspoon garlic powder
  • 30 g Parmesan cheese grated
  • 50 g olive oil
  • 4 cloves of garlic minced
  • Fresh parsley for garnish

Method
 

Prepare the Potatoes:
  1. Wash and dry the potatoes. Insert a wooden skewer through the center of each potato.
  2. Using a sharp knife, cut in a spiral motion while rotating the potato. Gently pull the slices apart to create space between the layers.
Season the Potatoes:
  1. In a bowl, mix the panko breadcrumbs, salt, black pepper, paprika, garlic powder, and Parmesan cheese.
  2. Brush each potato with olive oil, ensuring all sides are coated.
  3. Sprinkle the seasoning mixture generously over the potatoes, pressing it into the cuts for maximum flavor.
Bake the Tornado Potatoes:
  1. Preheat the oven to 200°C (390°F).
  2. Place the potatoes on a lined baking tray and bake for 35–40 minutes or until golden and crispy.
Prepare the Garlic Oil:
  1. While the potatoes are baking, heat a small pan over low heat.
  2. Add olive oil and minced garlic, sautéing until fragrant.
Final Touches:
  1. Once the potatoes are done, brush them with the garlic-infused olive oil and garnish with fresh parsley.
  2. Serve immediately with your favorite dipping sauce!

Notes

  • For extra crispiness, increase the baking time by 5 minutes or broil for the last 2 minutes.
  • Air Fryer Option: Cook at 200°C (390°F) for 20–25 minutes, flipping halfway through.
  • Frying Option: Deep-fry the potatoes at 175°C (350°F) for 5–7 minutes until crispy.
  • Spicy Variation: Add cayenne pepper or chili flakes to the seasoning mix for a spicy kick.
  • Storage Tip: Store leftovers in an airtight container and reheat in an oven at 180°C (350°F) for 5 minutes.

No-Oven Apple Delight – A Quick and Irresistible Dessert

When you crave something sweet, fluffy, and delicious but don’t want to turn on the oven, this No-Oven Apple Delight is the perfect solution. With a soft, cake-like texture, caramelized apples, and a hint of citrus, this recipe is simple, quick, and full of comforting flavors. Best of all, it requires no yeast and no baking, making it ideal for those times when you want a homemade treat without the hassle.

This recipe is perfect for any occasion—whether you’re making a last-minute dessert, an afternoon snack, or a special breakfast treat. With minimal ingredients and a stovetop cooking method, it proves that you don’t need an oven to create a beautifully golden and flavorful dessert.

Why You’ll Love This Recipe

1. No Oven, No Problem!

Many desserts require baking, precise temperatures, and long cooking times, but this recipe is quick and foolproof. By using a stovetop cooking method, you can enjoy a soft, golden cake with caramelized apples without heating up your entire kitchen.

2. Perfectly Soft and Fluffy Texture

The combination of yogurt, eggs, and baking powder creates a light and airy texture that’s soft but not too dense. The moist dough absorbs the caramelized apple flavors, making each bite perfectly balanced between sweet, tangy, and buttery.

3. A Deliciously Caramelized Apple Topping

Unlike traditional apple cakes where apples are baked inside the batter, this recipe caramelizes the apples before mixing them in, enhancing their natural sweetness and adding a rich, buttery flavor.

4. Ready in Under 30 Minutes

You don’t need to wait hours for the dough to rise or for a cake to bake. In just 30 minutes, you’ll have a beautifully cooked, golden apple treat ready to serve.

5. Made with Simple Pantry Staples

This recipe requires basic ingredients that are likely already in your kitchen—flour, eggs, sugar, yogurt, and apples. There’s no need for special ingredients or complicated techniques.

6. Versatile and Easy to Customize

Want to make this dessert even more special? Try adding nuts, cinnamon, or a drizzle of honey for extra flavor. You can also swap the apples for pears, peaches, or berries for a different variation each time.

Ingredients

IngredientQuantity
Eggs2 large
Sugar50 g (¼ cup)
Yogurt125 g (½ cup)
Vanilla sugar8 g (1 tbsp)
Salt½ tsp
Sunflower oil50 ml (¼ cup)
Lemon zestFrom 1 lemon
All-purpose flour420 g (3½ cups)
Baking powder10 g (2 tsp)
Apples (diced)2 medium-sized
Sugar (for caramelizing)2 tbsp
Butter1 tbsp
Apricot jam1 tbsp

Directions

  1. Caramelize the Apples: In a non-stick pan, melt the butter over medium heat. Add the diced apples and 2 tablespoons of sugar. Stir occasionally and cook for 5–7 minutes until the apples are soft and caramelized. Set aside.
  2. Prepare the Batter: In a bowl, whisk together the eggs, sugar, vanilla sugar, salt, yogurt, sunflower oil, and lemon zest. Gradually add the flour and baking powder, mixing until a smooth dough forms.
  3. Combine the Apples: Gently fold the caramelized apples into the dough, ensuring even distribution.
  4. Cook in a Pan: Heat a large non-stick pan over low heat. Lightly grease it with butter or oil. Pour the batter into the pan, smoothing the top. Cover and cook for 15–20 minutes on one side, then carefully flip and cook for another 10 minutes.
  5. Glaze & Serve: Once cooked, brush the top with apricot jam for a glossy finish. Slice and enjoy warm!

Nutritional Information (Per Serving, Approximate)

NutrientAmount
Calories280 kcal
Protein6 g
Carbohydrates45 g
Fiber3 g
Fats9 g
Vitamin C~10% DV

The Secret to Perfect No-Oven Apple Delight

While this recipe is incredibly simple, a few tips and tricks will ensure that your dessert turns out perfectly every time.

1. Use Fresh, Sweet Apples

The quality of your apples matters. For the best results, use sweet and slightly tart apples like Honeycrisp, Gala, or Fuji. These apples hold their shape well and provide a natural sweetness without needing too much added sugar.

2. Caramelize the Apples for Maximum Flavor

Instead of simply mixing raw apples into the batter, cooking them with butter and sugar first brings out their natural sweetness and creates a rich, caramelized flavor. This small extra step makes a huge difference in taste.

3. Don’t Overmix the Batter

Overmixing can result in a dense and chewy texture instead of a light, fluffy cake. Stir the ingredients just until combined to keep the dough soft and tender.

4. Cook on Low Heat for Even Cooking

Since this dessert is cooked on the stovetop instead of the oven, it’s important to use low heat to ensure that the dough cooks evenly without burning the bottom. Covering the pan while cooking helps trap steam and create a soft, moist texture.

5. Flip Carefully for a Beautiful Golden Finish

Once the first side is cooked, flipping the dessert without breaking it is key. Use a large spatula or slide it onto a plate before flipping it back into the pan for the second side.

How to Serve This Delicious Apple Dessert

This stovetop apple cake is best served warm, but there are many ways to make it even more delicious:

1. Classic with a Dusting of Powdered Sugar

A simple sprinkle of powdered sugar adds a touch of sweetness and elegance.

2. Topped with Yogurt or Whipped Cream

The creamy texture of Greek yogurt or freshly whipped cream balances the sweetness of the apples beautifully.

3. Drizzled with Honey or Maple Syrup

For an extra layer of sweetness, drizzle a little honey or pure maple syrup over the top before serving.

4. Served with a Scoop of Ice Cream

Turn this dessert into an indulgent treat by pairing it with vanilla, cinnamon, or caramel ice cream.

5. With a Side of Fresh Berries

Add some fresh raspberries, strawberries, or blueberries for a refreshing contrast.

FAQs – Everything You Need to Know

1. Can I Make This Dessert Without Eggs?

Yes! You can substitute eggs with:

  • 1 mashed banana
  • ½ cup applesauce
  • 2 tablespoons ground flaxseed mixed with 5 tablespoons of water

2. What Other Fruits Can I Use Instead of Apples?

This recipe works well with pears, peaches, plums, and even bananas. Adjust the sugar levels depending on the sweetness of the fruit.

3. Can I Store Leftovers?

Yes! Store leftovers in an airtight container in the fridge for up to 3 days. Reheat gently in a pan or microwave before serving.

4. Can I Freeze This Dessert?

Yes, it freezes well! Wrap it in plastic wrap and store it in the freezer for up to 2 months. Thaw at room temperature before reheating.

5. Can I Make This Dessert Gluten-Free?

Absolutely! Replace the all-purpose flour with a gluten-free flour blend or almond flour for a gluten-free version.

6. How Do I Know When It’s Fully Cooked?

Insert a toothpick or skewer into the center—if it comes out clean, the dessert is fully cooked. If there’s batter sticking to it, cook for a few more minutes.

7. What’s the Best Way to Flip the Dessert Without Breaking It?

Use a large spatula, or slide the dessert onto a plate and flip it back into the pan carefully.

Final Thoughts – A Must-Try No-Oven Dessert

This No-Oven Apple Delight proves that you don’t need an oven to make a delicious, golden, and fluffy dessert. With simple ingredients, quick preparation, and a foolproof cooking method, this recipe is perfect for anyone looking for an easy and satisfying homemade treat.

Whether you’re making it for breakfast, an afternoon snack, or a last-minute dessert, this dish delivers sweetness, texture, and comforting flavors in every bite. The caramelized apples, soft dough, and hint of lemon zest make it a versatile and crowd-pleasing recipe that you’ll want to make again and again.

Try it once, and you’ll never need the oven for a dessert like this again!

Amal

No-Oven Apple Delight – A Quick and Irresistible Dessert

Craving something sweet but don’t want to turn on the oven? This No-Oven Apple Delight is the perfect solution! Soft, fluffy, and filled with buttery caramelized apples, this stovetop dessert is easy to make, requires no yeast, and is ready in under 30 minutes. With a hint of lemon zest and a glossy apricot jam finish, every bite is bursting with warm, comforting flavors. Serve it for breakfast, an afternoon snack, or a last-minute dessert that everyone will love!
Prep Time 10 minutes
Cook Time 25 minutes
Total Time 35 minutes
Servings: 6 –8 servings
Course: Dessert
Cuisine: European

Ingredients
  

  • 2 large eggs
  • 50 g 1/4 cup sugar
  • 125 g 1/2 cup yogurt
  • 8 g 1 tablespoon vanilla sugar
  • 1/2 teaspoon salt
  • 50 ml 1/4 cup sunflower oil
  • Zest of 1 lemon
  • 420 g 3 1/2 cups all-purpose flour
  • 10 g 2 teaspoons baking powder
  • 2 medium-sized apples peeled and diced
  • 2 tablespoons sugar for caramelizing apples
  • 1 tablespoon butter
  • 1 tablespoon apricot jam

Method
 

  1. Caramelize the Apples
  2. In a non-stick pan, melt the butter over medium heat.
  3. Add the diced apples and 2 tablespoons of sugar.
  4. Stir occasionally and cook for 5–7 minutes until the apples soften and become caramelized. Set aside.
  5. Prepare the Batter
  6. In a mixing bowl, whisk together the eggs, sugar, vanilla sugar, salt, yogurt, sunflower oil, and lemon zest.
  7. Gradually add the flour and baking powder, stirring until a smooth dough forms.
  8. Combine with Apples
  9. Gently fold the caramelized apples into the dough, making sure they are evenly distributed.
  10. Cook on the Stovetop
  11. Heat a large non-stick pan over low heat and lightly grease it with butter or oil.
  12. Pour the batter into the pan, spreading it evenly.
  13. Cover with a lid and cook for 15–20 minutes on one side.
  14. Carefully flip the dessert and cook for another 10 minutes until golden brown.
  15. Glaze and Serve
  16. Once cooked, brush the top with apricot jam for a glossy, flavorful finish.
  17. Let it cool slightly before slicing and serving warm.

Notes

  • For extra flavor, sprinkle cinnamon or nutmeg into the batter.
  • Swap apples for pears, peaches, or berries for a different variation.
  • If flipping is difficult, slide the cake onto a plate, then flip it back into the pan.
  • Store leftovers in an airtight container at room temperature for up to 2 days, or refrigerate for up to 4 days.
  • Reheat gently in a pan or microwave before serving.

Savory Spinach Pancakes – A Flavorful and Nutritious Delight

Pancakes are often associated with sweet breakfast treats, but savory pancakes can be just as satisfying, if not more. This savory spinach pancake recipe is a perfect balance of flavor, texture, and nutrition, making it an excellent choice for any meal of the day. Whether you’re looking for a hearty breakfast, a light lunch, or a quick dinner, these pancakes will quickly become a staple in your kitchen.

Made with a simple batter and a soft, tender texture, these pancakes pair wonderfully with cheese, yogurt, sautéed vegetables, or even a drizzle of garlic-infused oil. They are light yet filling, offering a delicious way to enjoy the goodness of eggs, milk, and flour.

Why These Savory Spinach Pancakes Are a Must-Try

These pancakes are far more than just another variation of the classic recipe. Here’s why they should be on your regular meal rotation:

1. Light, Fluffy, and Flavorful

The batter creates pancakes that are soft, airy, and slightly crisp on the edges, making every bite a perfect balance of texture. Unlike heavier, denser pancake variations, these are light and satisfying without feeling overly rich.

2. Quick and Easy to Prepare

With just a few basic ingredients, these pancakes can be prepared in under 15 minutes. The simple, no-fuss method makes them an ideal option for busy days when you need something nutritious yet effortless.

3. A Versatile Base for Many Dishes

One of the greatest advantages of this recipe is its versatility. These pancakes can be enjoyed in a variety of ways, including:

  • Rolled up with cheese or hummus for a quick snack
  • Served with a side of fresh salad for a balanced meal
  • Layered with sautéed mushrooms, tomatoes, or grilled vegetables
  • Paired with smoked salmon, feta cheese, or even a poached egg for a gourmet touch

4. Great for Meal Prep

If you’re looking for a meal that can be made ahead of time, these pancakes are perfect. They store well in the fridge and can be reheated easily, making them an excellent option for meal prepping.

5. Perfect for Any Time of Day

Unlike traditional pancakes that are mainly reserved for breakfast, these savory pancakes work at any meal. Whether you’re craving something different for breakfast, a light but filling lunch, or a quick dinner, this recipe fits the bill.

Ingredients

IngredientQuantity
Eggs3
Sugar1 tsp (4 g)
Salt½ tsp (2.5 g)
Milk1 cup (250 ml)
Flour1 cup (125 g)
Melted butter2 tbsp (30 g)
Warm water½ cup (125 ml)

Directions

  1. Prepare the Batter: In a large bowl, whisk the eggs, sugar, and salt until well combined.
  2. Add Liquids: Pour in the milk and warm water, whisking continuously.
  3. Incorporate the Flour: Gradually sift in the flour while stirring to prevent lumps.
  4. Add Butter: Mix in the melted butter, ensuring the batter is smooth and lump-free.
  5. Cook the Pancakes: Heat a non-stick pan over medium heat. Pour a ladleful of batter into the pan and spread evenly. Cook for 1–2 minutes until the edges start to lift, then flip and cook the other side.
  6. Serve & Enjoy: Stack the pancakes and serve warm. Pair them with cheese, yogurt, sautéed spinach, or your favorite savory toppings!

Nutritional Information (Per Serving, Approximate)

NutrientAmount
Calories180 kcal
Protein6 g
Carbohydrates20 g
Fiber1 g
Fats8 g
Calcium~10% DV

The Secret to Perfect Pancakes Every Time

Baking or cooking pancakes may seem straightforward, but there are a few key techniques that ensure your pancakes turn out perfect every single time.

1. Use Room Temperature Ingredients

Bringing the eggs and milk to room temperature before mixing helps create a smoother batter, ensuring the pancakes cook evenly and rise properly.

2. Don’t Overmix the Batter

Overmixing can result in tough, dense pancakes. Stir the ingredients just until combined to keep the texture light and airy.

3. Cook on Medium Heat

Cooking pancakes on high heat might seem like a way to speed up the process, but it burns the outside while leaving the inside undercooked. A medium heat setting allows the pancakes to cook evenly and develop a golden-brown crust.

4. Let the Batter Rest

Allowing the batter to sit for a few minutes before cooking gives the ingredients time to blend together, resulting in a better texture and flavor.

5. Use the Right Pan

A non-stick pan or cast iron skillet works best to prevent sticking and ensure an even, golden-brown surface. If using a regular pan, a light brushing of butter or oil before each pancake can help prevent sticking.

Serving Suggestions for the Best Experience

These pancakes taste amazing on their own, but pairing them with the right toppings or sides can elevate them even further. Here are some ideas to make your dish even more delicious:

1. Cheese and Yogurt Toppings

A dollop of Greek yogurt, ricotta, or cream cheese adds a tangy contrast to the soft, buttery pancakes. You can also sprinkle grated cheddar, feta, or parmesan on top for an extra layer of flavor.

2. Fresh Vegetables and Herbs

Chopped tomatoes, avocados, arugula, or sautéed mushrooms make for a colorful, nutrient-dense addition. Fresh herbs like parsley, dill, or chives add an extra burst of freshness.

3. Smoked Salmon or Grilled Chicken

For a heartier meal, pair these pancakes with smoked salmon, turkey, or grilled chicken. The combination of protein and savory flavors makes this dish a satisfying option for lunch or dinner.

4. A Drizzle of Olive Oil or Garlic Butter

A light drizzle of extra virgin olive oil, garlic-infused butter, or balsamic glaze can add a gourmet touch, enhancing the richness of the pancakes.

5. A Side of Soup or Salad

Pair these pancakes with a warm soup or a crisp green salad for a complete and well-balanced meal. They work beautifully with:

  • Tomato soup
  • Mushroom soup
  • Cucumber and yogurt salad
  • Mixed greens with lemon dressing

FAQs – Everything You Need to Know About This Recipe

1. Can I Make These Pancakes Without Eggs?

Yes! You can replace eggs with flaxseed meal (1 tbsp flaxseed + 3 tbsp water per egg) or use a mashed banana as a binding agent.

2. Can I Use a Different Type of Flour?

Yes! You can substitute regular flour with whole wheat flour, oat flour, or gluten-free flour blends for a different texture and nutritional profile.

3. Can These Pancakes Be Made Ahead of Time?

Absolutely! Store them in an airtight container in the fridge for up to 3 days. To reheat, simply warm them in a pan or microwave for a few seconds.

4. Can I Freeze These Pancakes?

Yes! Layer them between parchment paper and store them in a freezer-safe bag for up to 2 months. Thaw in the fridge and reheat as needed.

5. How Can I Make the Pancakes Extra Crispy?

For crispier edges, cook them in a pan with a little extra butter or olive oil, and allow them to cook slightly longer before flipping.

6. What’s the Best Way to Reheat These Pancakes?

To retain their texture, reheat them in a dry pan over low heat rather than microwaving them, which can make them too soft.

7. Can I Add Spinach or Other Greens to the Batter?

Yes! Finely chopped or blended spinach, kale, or zucchini can be added to the batter for extra nutrients and a beautiful green color.

Final Thoughts – A Must-Try Recipe for Every Home Cook

These savory spinach pancakes are more than just a quick meal—they are a versatile, nutritious, and incredibly flavorful dish that can be customized in many ways. Whether you prefer them plain, with cheese, or paired with fresh veggies, they provide a satisfying and well-balanced meal that is easy to prepare.

With their light texture, delicious taste, and endless serving possibilities, these pancakes are guaranteed to become a regular part of your meal rotation. Try them once, and you’ll find yourself cooking them almost every day!

Amal

Savory Spinach Pancakes – A Flavorful and Nutritious Delight

These Savory Spinach Pancakes are light, fluffy, and full of rich flavor, making them perfect for breakfast, lunch, or dinner. Made with simple ingredients, they have a soft texture and a delicious buttery taste. These pancakes pair wonderfully with cheese, yogurt, sautéed vegetables, or fresh herbs, making them a versatile and nutritious meal. Quick to prepare and incredibly satisfying, this is a recipe you’ll want to make again and again!
Prep Time 5 minutes
Cook Time 10 minutes
Total Time 15 minutes
Servings: 6 pancakes
Course: Dinner
Cuisine: European

Ingredients
  

For the Pancakes:
  • 3 eggs
  • 1 teaspoon sugar 4 g
  • 1/2 teaspoon salt 2.5 g
  • 1 cup of milk 250 ml
  • 1 cup flour 125 g
  • 2 tablespoons melted butter 30 g
  • 1/2 cup warm water 125 ml

Method
 

  1. Prepare the Batter: In a large bowl, whisk the eggs, sugar, and salt until well combined.
  2. Add Liquids: Pour in the milk and warm water, whisking continuously.
  3. Incorporate the Flour: Gradually add the flour while stirring to prevent lumps.
  4. Add Butter: Mix in the melted butter, ensuring a smooth and lump-free batter.
  5. Cook the Pancakes: Heat a non-stick pan over medium heat. Pour a ladleful of batter into the pan, spreading it evenly. Cook for 1–2 minutes until the edges start to lift, then flip and cook the other side until golden brown.
  6. Serve & Enjoy: Stack the pancakes and serve warm with cheese, yogurt, fresh herbs, or sautéed vegetables for an extra burst of flavor.

Notes

  • For a fluffier texture, let the batter rest for 5–10 minutes before cooking.
  • To make it dairy-free, use plant-based milk and oil instead of butter.
  • For extra flavor, add fresh herbs like parsley or chives to the batter.
  • Store leftovers in the fridge for up to 3 days or freeze for up to 2 months.
  • Reheat in a dry pan over low heat to retain their texture.

No-Knead Quick Bread – A Foolproof Recipe for Fresh Homemade Bread

Homemade bread is one of the simplest and most satisfying things you can bake. There is something special about pulling a golden, crusty loaf out of the oven and slicing into its soft, airy interior. But many people shy away from making their own bread because they think it’s too complicated or time-consuming.

This quick bread recipe is here to change that. It requires no kneading, minimal effort, and just a few pantry staples. Whether you’re a seasoned baker or a beginner, this recipe is so easy that you’ll never want to buy store-bought bread again.

With a crispy crust, soft crumb, and rich, homemade flavor, this bread is versatile, delicious, and perfect for any occasion. Plus, it’s a great alternative to processed supermarket loaves, which often contain unnecessary additives and preservatives.

Why This Quick Bread Recipe is a Game-Changer

Many traditional bread recipes require kneading, long resting periods, and complicated techniques. This recipe simplifies everything while still delivering a perfect, bakery-style loaf.

1. No Kneading Required

Forget about tired arms and messy countertops. This bread rises naturally without the need for kneading, making it perfect for those who want fresh homemade bread with minimal effort.

2. Quick and Easy to Make

Unlike sourdough or other artisan breads that require overnight fermentation, this quick bread recipe can be prepared, baked, and ready to enjoy in just a couple of hours.

3. Only a Few Simple Ingredients

There’s no need for fancy ingredients or special equipment. All you need is flour, water, yeast, sugar, and salt—basic pantry staples that you probably already have at home.

4. Healthier Than Store-Bought Bread

Most commercial breads contain preservatives, artificial flavors, and excess sugar. By making your own, you control exactly what goes into it, ensuring a healthier, more natural product.

5. Perfect for Any Meal

This bread is incredibly versatile. It can be used for:

  • Breakfast: Toasted with butter, jam, or avocado
  • Lunch: As a base for sandwiches
  • Dinner: Served alongside soups, stews, or salads
  • Snacks: Spread with nut butter, cheese, or hummus

Ingredients

IngredientQuantity
Bread flour2 ½ cups (320 g)
Water¾ cup + 2 tbsp (210 ml)
Brewer’s yeast1 tsp (3 g)
OR Dry yeast½ tsp (2 g)
Sugar1 tsp
Salt1 tsp

Directions

  1. Activate the Yeast: In a small bowl, mix warm water, sugar, and yeast. Let it sit for 5–10 minutes until it becomes foamy.
  2. Mix the Dough: In a large bowl, combine the flour and salt. Gradually add the yeast mixture while stirring until a dough forms.
  3. Let It Rise: Cover the bowl with a kitchen towel and let the dough rest in a warm place for 1–2 hours, or until doubled in size.
  4. Shape the Bread: Transfer the dough onto a floured surface, shape it into a loaf, and place it on a baking tray lined with parchment paper.
  5. Final Rest: Let the shaped dough rest for 15–20 minutes while preheating the oven to 200°C (390°F).
  6. Bake to Perfection: Bake for 25–30 minutes, or until the crust is golden brown and the bread sounds hollow when tapped.
  7. Cool & Enjoy: Let the bread cool before slicing for the best texture. Serve fresh or toasted!

Nutritional Information (Per Serving, Approximate)

NutrientAmount
Calories150 kcal
Protein5 g
Carbohydrates30 g
Fiber1.5 g
Fats0.5 g
Sodium250 mg

The Secret to Perfect Homemade Bread Every Time

Baking bread at home can seem intimidating, but with a few simple tricks, you’ll get perfect results every time.

1. Use the Right Flour

Bread flour is ideal because it has a higher protein content, which helps develop gluten, giving the bread a chewier, more elastic texture. If you don’t have bread flour, all-purpose flour can be used, but the bread may be slightly less structured.

2. Activate the Yeast Properly

Yeast is what makes the bread rise, so it’s essential to activate it correctly. Make sure the water is warm, but not too hot—around 100-110°F (37-43°C) is perfect. Too hot, and you’ll kill the yeast; too cold, and it won’t activate properly.

3. Give the Dough Enough Time to Rise

While this is a quick bread, the dough still needs time to rise for the best texture. Letting it rest in a warm environment helps the yeast create air pockets, resulting in a light and fluffy loaf.

4. Bake at the Right Temperature

A hot oven (200°C/390°F) helps create a crisp, golden crust while allowing the inside to cook evenly. To get an even better crust, you can place a pan of water in the oven while baking to create steam.

5. Let It Cool Before Slicing

It can be tempting to cut into fresh bread right away, but cooling is essential. Slicing too early releases steam, making the bread denser and gummier. Allowing it to cool ensures a perfectly airy and well-structured crumb.

Best Ways to Enjoy This Quick Bread

1. Classic Buttered Toast

There’s nothing better than warm, freshly baked bread spread with a bit of butter or margarine. Enjoy it with honey, jam, or peanut butter for a simple and satisfying snack.

2. Sandwiches and Paninis

This bread is perfect for making grilled sandwiches, paninis, or classic deli-style sandwiches. Its sturdy structure holds up well to various fillings, from fresh vegetables to meats and cheeses.

3. Served with Soups and Stews

A warm bowl of soup or stew pairs wonderfully with a thick slice of homemade bread. Try it with:

  • Tomato soup
  • Creamy mushroom soup
  • Lentil stew
  • Chicken noodle soup

4. Garlic Bread or Bruschetta

Slice the bread, brush it with olive oil and garlic, and toast it for a delicious homemade garlic bread. For a more gourmet touch, top with fresh tomatoes, basil, and balsamic glaze for a classic bruschetta.

5. Breakfast French Toast

Turn leftover slices into French toast by dipping them in a mixture of eggs, milk, and cinnamon, then pan-frying until golden brown.

FAQs – Everything You Need to Know About Making Quick Bread

1. Can I Use Instant Yeast Instead of Active Yeast?

Yes! Instant yeast doesn’t require proofing, so you can mix it directly into the flour. However, using active yeast allows you to ensure it’s fresh and working properly before adding it to the dough.

2. Can I Make This Bread Without Sugar?

Yes! Sugar helps activate the yeast faster, but it’s not essential. You can replace it with a small amount of honey or leave it out entirely.

3. How Can I Store Homemade Bread?

  • Room Temperature: Store in a paper bag or airtight container for 2-3 days.
  • Refrigerator: Not recommended, as it can dry out the bread.
  • Freezer: Slice the bread and freeze in an airtight bag for up to 3 months.

4. Can I Add Seeds or Herbs to the Dough?

Absolutely! Try adding sunflower seeds, flaxseeds, sesame seeds, or fresh herbs like rosemary or thyme to enhance the flavor and texture.

5. Why Didn’t My Bread Rise Properly?

This could be due to:

  • Yeast that was expired or not activated properly
  • Water that was too hot or too cold
  • Not enough rising time
  • A cold environment that slowed yeast activity

Conclusion – The Perfect Homemade Bread for Every Occasion

Once you try this no-knead quick bread recipe, you’ll wonder why you ever bought bread from the store. It’s simple, delicious, and made with wholesome ingredients, giving you complete control over what goes into your bread.

With a crispy crust, soft interior, and a rich homemade flavor, this bread is a must-have in every kitchen. Whether you enjoy it toasted, in sandwiches, or paired with a meal, it’s guaranteed to become a staple recipe you’ll return to again and again.

Give it a try, and enjoy the satisfaction of fresh, homemade bread straight from your own oven!

Amal

No-Knead Quick Bread – A Foolproof Recipe for Fresh Homemade Bread

Say goodbye to store-bought bread! This No-Knead Quick Bread is the perfect homemade alternative—soft on the inside, golden and crispy on the outside, and incredibly easy to make. With just five basic ingredients, you can enjoy a fresh, warm loaf in no time. No fancy equipment, no kneading—just mix, let it rise, and bake! Perfect for sandwiches, toast, or as a side to your favorite meals.
Prep Time 10 minutes
Cook Time 30 minutes
Total Time 1 hour 40 minutes
Servings: 1 loaf
Course: Bread
Cuisine: European

Ingredients
  

  • Bread flour: 2 ½ cups 320 grams
  • Water: ¾ cup + 2 tbsp 210 ml
  • Brewer’s yeast: 1 tsp 3g or dry yeast: ½ tsp (2g)
  • Sugar: 1 tsp
  • Salt: 1 tsp

Method
 

  1. Activate the Yeast: In a small bowl, mix warm water, sugar, and yeast. Let it sit for 5–10 minutes until it becomes foamy.
  2. Prepare the Dough: In a large bowl, combine the flour and salt. Gradually add the yeast mixture while stirring until a sticky dough forms.
  3. First Rise: Cover the bowl with a kitchen towel and let the dough rest in a warm place for 1–2 hours, or until doubled in size.
  4. Shape the Dough: Transfer the dough onto a floured surface, shape it into a loaf, and place it on a lined baking tray.
  5. Final Rest: Let the dough rest for 15–20 minutes while preheating the oven to 200°C (390°F).
  6. Bake: Bake for 25–30 minutes, or until golden brown and the loaf sounds hollow when tapped.
  7. Cool and Serve: Let the bread cool before slicing for the best texture. Enjoy fresh, toasted, or as a sandwich base!

Notes

  • For a crunchier crust, place a tray of water in the oven while baking.
  • To add extra flavor, mix in herbs, seeds, or shredded cheese to the dough.
  • Store at room temperature in an airtight container for up to 3 days, or freeze for up to 3 months.
  • If using instant yeast, skip the activation step and mix directly with the flour.
  • For a whole wheat version, replace half of the bread flour with whole wheat flour.

Flourless Cottage Cheese Pancakes – A Healthy & Delicious Breakfast Alternative

When it comes to breakfast, pancakes are a beloved classic. But what if you could enjoy pancakes that are light, fluffy, and healthy—all without flour? These flourless cottage cheese pancakes are the answer! They are high in protein, naturally low in carbs, and incredibly easy to make. In just three minutes, you can whip up a nutritious and satisfying breakfast that keeps you full and energized for hours.

Unlike traditional pancakes, which rely on refined flour and sugar, this version is made with cottage cheese, eggs, and coconut flour, creating a high-protein, fiber-rich meal that is perfect for those following a gluten-free, low-carb, or keto-friendly diet. The addition of a naturally sweet berry sauce takes these pancakes to another level, providing a burst of fruity freshness without added sugar.

Whether you’re looking for a quick weekday breakfast, a post-workout meal, or a guilt-free weekend brunch, these pancakes are an excellent choice.

Why You Should Try These Flourless Pancakes

1. High in Protein, Low in Carbs

Cottage cheese is an excellent source of protein, making these pancakes far more nutritious than traditional ones. Protein is essential for muscle repair, satiety, and metabolism regulation, making this recipe a fantastic option for those on a high-protein diet, weight-loss journey, or fitness regimen.

2. Naturally Gluten-Free & Low-Carb

Many people avoid traditional pancakes due to gluten intolerance or carb-heavy ingredients. This recipe replaces refined flour with coconut flour, which is naturally gluten-free, fiber-rich, and lower in carbohydrates.

3. Quick and Easy – Ready in 3 Minutes!

Busy mornings demand fast and easy recipes, and this one takes just a few minutes to prepare. With minimal ingredients and a simple cooking method, you can enjoy a healthy breakfast without the hassle.

4. Light, Fluffy, and Delicious

Despite being flourless, these pancakes retain a soft and fluffy texture, thanks to the combination of cottage cheese and baking soda. The result? Pancakes that are golden on the outside and soft on the inside—just like the classic ones you love!

5. A Healthy Alternative to Traditional Pancakes

Traditional pancakes are often loaded with white flour, sugar, and unhealthy fats. This version is naturally low in sugar, high in protein, and made with wholesome ingredients, making it a smart choice for anyone looking to eat healthier.

Ingredients

IngredientQuantity
Cottage cheese150 g
Coconut flour25 g
Egg1 pc
Baking soda⅓ teaspoon

For the Berry Sauce:

IngredientQuantity
Frozen berries2 cups
Lemon juice1 tablespoon
SweetenerTo taste (e.g., 1 tbsp stevia)

Directions

  1. Prepare the Pancake Batter: In a bowl, mix the cottage cheese, coconut flour, egg, and baking soda. Stir until a smooth batter forms.
  2. Cook the Pancakes: Heat a non-stick pan over medium heat. Pour small portions of batter into the pan and cook for about 1–2 minutes per side until golden brown. Flip carefully and cook the other side.
  3. Make the Berry Sauce: In a small saucepan, heat the frozen berries with lemon juice over medium heat. Stir occasionally until the berries break down and form a sauce. Add sweetener to taste.
  4. Serve & Enjoy: Stack the pancakes, drizzle with berry sauce, and serve warm!

Nutritional Information (Per Serving, Approximate)

NutrientAmount
Calories220 kcal
Protein15 g
Carbohydrates18 g
Fiber6 g
Fats9 g
Calcium~20% DV

The Nutritional Benefits of Key Ingredients

1. Cottage Cheese – The Protein Powerhouse

Cottage cheese is packed with high-quality protein and calcium, making it an excellent breakfast choice. It helps:

  • Keep you full for longer
  • Support muscle recovery and growth
  • Strengthen bones and improve metabolism

2. Coconut Flour – A Low-Carb, High-Fiber Alternative

Coconut flour is a great substitute for traditional flour. It is:

  • Naturally gluten-free
  • High in fiber, aiding digestion and gut health
  • Low in carbs, making it suitable for low-carb diets
  • Mildly sweet, reducing the need for extra sweeteners

3. Eggs – Nature’s Perfect Protein Source

Eggs bind the pancake batter together while adding extra protein, healthy fats, and essential vitamins. They contribute to:

  • Muscle building and repair
  • Improved brain function
  • A longer-lasting feeling of fullness

4. Berries – A Natural Source of Antioxidants

The berry sauce not only adds natural sweetness and vibrant color but also provides a boost of antioxidants, fiber, and vitamins. Berries help:

  • Reduce inflammation
  • Improve heart health
  • Support brain function and immunity

Best Ways to Serve These Pancakes

1. Classic with Berry Sauce

The simplest and healthiest way to enjoy these pancakes is with a homemade berry sauce. The natural sweetness of berries complements the rich, creamy pancakes perfectly.

2. With a Drizzle of Honey or Maple Syrup

For a touch of extra sweetness, you can drizzle raw honey or pure maple syrup over your pancakes.

3. Topped with Yogurt and Nuts

A dollop of Greek yogurt, chopped nuts, or a sprinkle of chia seeds can add even more protein, texture, and nutrition.

4. Served with Nut Butter

Almond butter or peanut butter adds a creamy, nutty flavor while also increasing the healthy fat and protein content.

FAQs – Everything You Need to Know

1. Can I make these pancakes dairy-free?

Yes! You can replace cottage cheese with dairy-free alternatives like almond-based or cashew-based cottage cheese for a lactose-free option.

2. What if I don’t have coconut flour?

You can substitute coconut flour with almond flour, but keep in mind that almond flour absorbs less liquid, so you may need to adjust the consistency by adding a bit more.

3. Are these pancakes suitable for meal prep?

Absolutely! These pancakes store well in the refrigerator for up to 3 days. Simply reheat them in a pan or microwave before serving.

4. Can I freeze these pancakes?

Yes! Place them in a single layer on a baking sheet, freeze for 1 hour, and then store them in an airtight container for up to 2 months. Reheat directly from frozen.

5. How can I make them fluffier?

For extra fluffy pancakes, separate the egg white, beat it until soft peaks form, and fold it into the batter before cooking.

6. Can I add other flavors to the pancakes?

Yes! Add a dash of vanilla extract, cinnamon, or nutmeg for extra warmth and depth of flavor.

7. What’s the best pan to use for cooking these pancakes?

A non-stick pan or a cast-iron skillet works best to prevent sticking and ensure even cooking.

Final Thoughts – The Perfect Healthy Pancake Alternative

These Flourless Cottage Cheese Pancakes are a nutritious, protein-packed, and low-carb way to start your morning. Whether you’re looking for a quick weekday breakfast, a post-workout meal, or a weekend treat, this recipe delivers flavor, texture, and nutrition in every bite.

By swapping out traditional flour for coconut flour and using cottage cheese for added protein, these pancakes provide all the satisfaction of a classic breakfast without the guilt.

With simple ingredients, a fast cooking time, and endless serving possibilities, this recipe is a must-try for anyone looking for a healthier way to enjoy pancakes. Give it a try, and you may never go back to traditional pancakes again!

Amal

Flourless Cottage Cheese Pancakes – A Healthy & Delicious Breakfast Alternative

These Flourless Cottage Cheese Pancakes are the perfect high-protein, low-carb breakfast option for anyone looking for a quick, nutritious, and delicious start to the day. Made with simple, wholesome ingredients, these pancakes are light, fluffy, and naturally gluten-free. Topped with a homemade berry sauce, they bring just the right amount of sweetness without added sugar. Best of all, they take just 3 minutes to prepare, making them an excellent choice for busy mornings!
Prep Time 3 minutes
Cook Time 5 minutes
Total Time 8 minutes
Servings: 3 pancakes
Course: Breakfast
Cuisine: Healthy

Ingredients
  

For the Pancakes:
  • Cottage cheese: 150 g
  • Coconut flour: 25 g
  • Egg: 1 pc
  • Baking soda: 1/3 teaspoon
For the Berry Sauce:
  • Frozen berries: 2 cups
  • Lemon juice: 1 tablespoon
  • Sweetener to taste e.g., 1 tablespoon stevia

Method
 

  1. Make the Pancake Batter: In a bowl, mix the cottage cheese, coconut flour, egg, and baking soda until smooth. The batter will be slightly thick.
  2. Cook the Pancakes: Heat a non-stick pan over medium heat. Pour small portions of batter onto the pan and cook for 1–2 minutes per side, or until golden brown. Flip carefully and cook the other side.
  3. Prepare the Berry Sauce: In a small saucepan, heat the frozen berries and lemon juice over medium heat. Stir occasionally until the berries break down and form a sauce. Add sweetener to taste.
  4. Serve & Enjoy: Stack the pancakes, drizzle with the berry sauce, and enjoy a delicious, healthy breakfast!

Notes

  • For extra fluffiness, separate the egg white, beat it until soft peaks form, and fold it into the batter before cooking.
  • If the batter is too thick, add a splash of milk (dairy or plant-based) to adjust the consistency.
  • Customize the sweetness by adding a dash of vanilla extract or cinnamon to the batter.
  • Storage Tip: These pancakes can be stored in the fridge for up to 3 days or frozen for up to 2 months. Simply reheat before serving.
  • Nut-Free Option: Swap coconut flour with oat flour for a slightly different texture while keeping it gluten-free.

The Ultimate Energy-Packed Vegan Bars – A Healthy and Delicious Snack

In today’s fast-paced world, we all need quick, nutritious, and satisfying snacks to keep us going. Whether you’re rushing out the door, heading to the gym, or looking for a mid-day energy boost, these homemade energy bars are the perfect solution.

Made with natural, plant-based ingredients, these vegan energy bars are packed with protein, fiber, and healthy fats, making them an excellent alternative to store-bought snacks that often contain preservatives, artificial sweeteners, and unhealthy additives.

With a rich, nutty flavor, a hint of natural sweetness from dates, and a chewy, satisfying texture, these bars are not only nutritious but also incredibly delicious. Plus, they are gluten-free, dairy-free, and require no baking, making them one of the easiest and healthiest snacks you can prepare at home.

Why These Vegan Energy Bars Are a Must-Try

These high-energy snack bars are more than just tasty—they are functional. Packed with nutrient-dense ingredients like almonds, walnuts, pumpkin seeds, peanut butter, and cranberries, they provide long-lasting fuel for your body. Here’s why you should incorporate them into your diet:

1. Naturally High in Protein

Unlike traditional snack bars that often rely on processed protein powders, these bars get their protein from whole, plant-based sources like almonds, walnuts, peanut butter, and pumpkin seeds. Protein is essential for muscle repair, satiety, and sustained energy, making these bars perfect for athletes, fitness enthusiasts, or anyone with an active lifestyle.

2. Packed with Fiber for Better Digestion

Dietary fiber plays a crucial role in gut health, and these bars contain a generous amount of it. Dates, nuts, and seeds all contribute to healthy digestion, regular bowel movements, and prolonged satiety, preventing unnecessary cravings and snacking.

3. A Perfect Balance of Healthy Fats

Not all fats are bad—nuts and seeds provide heart-healthy fats that support brain function, hormone regulation, and sustained energy levels. Unlike processed snack bars with refined oils, these homemade bars use only wholesome fats from natural sources.

4. A Natural Source of Energy

Thanks to the natural sugars in dates, these bars offer a quick yet sustained energy boost without the crash that comes from refined sugar. They’re an excellent choice for:

  • A pre-workout snack to fuel your exercise
  • A post-workout recovery option to replenish energy
  • A midday energy boost to keep you focused and productive

5. Completely Free from Artificial Ingredients

Many commercial energy bars contain hidden sugars, artificial flavors, and unhealthy preservatives. When you make them at home, you control the ingredients, ensuring they are fresh, wholesome, and nourishing.

Ingredients

IngredientQuantity
Almonds75 g (½ cup / 2.6 oz)
Walnuts50 g (½ cup / 1.8 oz)
Pumpkin seeds50 g (½ cup / 1.8 oz)
Dates250 g (1⅔ cups / 8.8 oz)
Cold waterFor soaking
Peanut butter100 g (⅓ cup / 3.5 oz)
Dried cranberries40 g (¼ cup / 1.4 oz)
SaltA pinch

Directions

  1. Prepare the Dates: Soak the dates in cold water for about 10 minutes to soften them. Drain well before using.
  2. Blend the Nuts & Seeds: In a food processor, add the almonds, walnuts, and pumpkin seeds. Pulse until they break down into small pieces but not too fine.
  3. Add the Dates & Peanut Butter: Add the softened dates, peanut butter, and a pinch of salt. Blend until the mixture starts to come together into a sticky dough.
  4. Incorporate the Cranberries: Stir in the dried cranberries by hand to keep their texture intact.
  5. Shape the Bars: Transfer the mixture onto a lined baking tray. Press it down firmly into an even layer, about 1–2 cm thick.
  6. Chill & Set: Place the tray in the refrigerator for at least 1 hour or in the freezer for 20–30 minutes until firm.
  7. Cut & Serve: Once set, cut into bars or squares and enjoy your homemade high-energy vegan snack!

Nutritional Information (Per Serving, Approximate)

NutrientAmount
Calories220 kcal
Protein6 g
Carbohydrates24 g
Fiber4 g
Fats12 g
Natural Sugars16 g
Iron~10% DV

The Nutritional Benefits of Key Ingredients

1. Almonds – A Powerhouse of Nutrients

Almonds are one of the most nutrient-dense nuts, offering a high dose of healthy fats, protein, fiber, and essential vitamins. They are particularly rich in vitamin E, an antioxidant that supports skin health and immune function.

2. Walnuts – Brain-Boosting Goodness

Walnuts are famous for their brain-friendly omega-3 fatty acids, which support cognitive function, heart health, and inflammation reduction. Their slightly earthy flavor also adds a wonderful depth to the bars.

3. Pumpkin Seeds – A Mineral-Rich Superfood

Pumpkin seeds are packed with iron, magnesium, zinc, and protein, making them a nutritional powerhouse. They help boost energy levels, strengthen the immune system, and support muscle recovery.

4. Dates – A Natural Sweetener with a Purpose

Unlike refined sugar, dates provide natural sweetness along with fiber, potassium, and antioxidants. They help bind the bars together while also offering a steady source of energy without sugar crashes.

5. Peanut Butter – A Protein and Flavor Boost

Peanut butter not only enhances the richness and creaminess of these bars but also contributes plant-based protein and healthy fats, making the snack more filling and satisfying.

6. Dried Cranberries – A Tangy, Antioxidant-Packed Addition

Cranberries add a burst of tartness that balances the sweetness of dates, along with antioxidants that support heart health and reduce inflammation.

How to Store These Energy Bars

One of the best things about these vegan energy bars is how easy they are to store and take on the go.

  • Refrigeration: Store the bars in an airtight container in the fridge for up to two weeks.
  • Freezing: If you want to keep them for longer, freeze them for up to three months. Just take one out and let it thaw for a few minutes before eating.
  • On-the-Go Storage: These bars hold their shape well, so you can wrap them individually in parchment paper and keep them in your bag for a quick snack anywhere, anytime.

Best Ways to Enjoy These Vegan Bars

1. As a Pre-Workout or Post-Workout Snack

Because these bars contain a balanced mix of carbs, protein, and fats, they are perfect fuel before or after exercise. Enjoy one 30–60 minutes before a workout for an energy boost or afterward to aid muscle recovery.

2. With Your Morning Coffee or Tea

Pairing one of these bars with your morning beverage makes for a quick and energizing breakfast that will keep you full until lunchtime.

3. A Healthy Alternative to Store-Bought Snacks

When hunger strikes, grab one of these bars instead of reaching for processed granola bars, candy, or chips. They provide real nutrition without unnecessary additives.

4. A Perfect Travel Companion

Whether you’re on a road trip, at work, or hiking, these bars make a mess-free, satisfying, and nourishing travel snack.

FAQs – Everything You Need to Know

1. Can I use other nuts instead of almonds and walnuts?

Yes! You can substitute with cashews, pecans, hazelnuts, or any other nut of your choice.

2. Can I replace peanut butter with another nut butter?

Absolutely! Try using almond butter, cashew butter, or sunflower seed butter for different flavors.

3. Are these bars gluten-free?

Yes! As long as you ensure that your ingredients (especially peanut butter and dried fruits) are certified gluten-free, these bars are naturally gluten-free.

4. How can I make these bars nut-free?

If you have a nut allergy, replace the almonds and walnuts with more seeds like sunflower seeds or hemp seeds and use sunflower seed butter instead of peanut butter.

5. Can I make these bars crunchier?

Yes! Lightly toast the nuts and pumpkin seeds before blending them for a crunchier texture and deeper flavor.

6. How do I make the bars softer?

If you prefer a softer, chewier texture, add a tablespoon of coconut oil or maple syrup to the mixture before blending.

7. Can I add chocolate to these bars?

Of course! Mix in some dark chocolate chips or drizzle melted chocolate on top for an extra indulgent touch.

Final Thoughts – The Perfect Snack for Any Occasion

These homemade plant-based energy bars are the ideal blend of nutrition, convenience, and taste. Whether you’re looking for a high-protein vegan snack, a healthy pre-workout boost, or a delicious midday treat, this recipe ticks all the boxes.

With no refined sugar, artificial ingredients, or unnecessary fillers, these bars are a wholesome and nourishing option that anyone can enjoy. Once you try them, they are sure to become a staple in your kitchen!

Amal

The Ultimate Energy-Packed Vegan Bars – A Healthy and Delicious Snack

These Ultimate Energy-Packed Vegan Bars are the perfect snack for a quick energy boost, pre-workout fuel, or a healthy on-the-go treat. Made with nutritious nuts, seeds, dates, and peanut butter, they are naturally sweetened, high in protein, and full of fiber. With a chewy, satisfying texture and a hint of tangy cranberries, these no-bake bars are easy to make, gluten-free, and completely plant-based.
Prep Time 10 minutes
Total Time 10 minutes
Servings: 8 –10 bars
Course: Snack
Cuisine: Healthy

Ingredients
  

  • 75 grams 1/2 cup / 2.6 oz almonds
  • 50 grams 1/2 cup / 1.8 oz walnuts
  • 50 grams 1/2 cup / 1.8 oz pumpkin seeds
  • 250 grams 1 and 2/3 cups / 8.8 oz dates
  • Cold water for soaking
  • 100 grams 1/3 cup / 3.5 oz peanut butter
  • 40 grams 1/4 cup / 1.4 oz dried cranberries
  • A pinch of salt

Method
 

  1. Soak the Dates: Place the dates in a bowl of cold water and let them soak for about 10 minutes. Drain well before using.
  2. Blend the Nuts and Seeds: In a food processor, pulse the almonds, walnuts, and pumpkin seeds until finely chopped but not too powdery.
  3. Add the Dates and Peanut Butter: Add the soaked dates, peanut butter, and a pinch of salt to the food processor. Blend until the mixture forms a sticky dough.
  4. Incorporate the Cranberries: Stir in the dried cranberries by hand to maintain their texture.
  5. Shape the Bars: Transfer the mixture to a parchment-lined baking tray. Press it down firmly into an even layer, about 1–2 cm thick.
  6. Chill and Set: Refrigerate for at least 1 hour or freeze for 20–30 minutes until firm.
  7. Cut and Serve: Once set, cut into bars or squares and enjoy your homemade high-energy vegan snack!

Notes

  • Storage: Keep the bars in an airtight container in the refrigerator for up to two weeks, or freeze them for up to three months.
  • Nut-Free Option: Substitute almonds and walnuts with sunflower seeds and use sunflower seed butter instead of peanut butter.
  • Sweeter Option: Add a drizzle of maple syrup or agave syrup for extra sweetness.
  • Crunchier Texture: Lightly toast the nuts and seeds before blending for a deeper flavor.
  • Chocolate Addition: Mix in some dark chocolate chips or drizzle melted chocolate over the bars for extra indulgence.

Golden Baked Zucchini & Potato Casserole – The Ultimate Comfort Dish

If you are searching for a dish that is both crispy and creamy, light yet satisfying, and packed with layers of flavor, look no further than this Golden Baked Zucchini & Potato Casserole. This recipe brings together the best of simple, wholesome ingredients and turns them into a beautifully baked masterpiece that will become a staple in your kitchen.

With thinly sliced zucchinis, tender potatoes, and a cheesy golden crust, this casserole delivers a perfect balance of textures—soft and creamy inside, crispy and golden on top. Whether you need a quick family dinner, a vegetarian main course, or a savory side dish, this recipe is versatile and effortless to prepare.

Why This Zucchini & Potato Casserole is a Must-Try

This recipe is not just another baked dish—it is a hidden gem. With a handful of basic ingredients, you get a sophisticated blend of flavors that make it taste far more complex than its simple preparation suggests.

1. A Perfect Blend of Crispy and Creamy

One of the best things about this dish is its contrast in textures. The base is layered with bread crumbs, which soak up flavors while adding a delicate crunch. The interior is soft and comforting, thanks to the potatoes and a rich egg mixture, while the golden top layer of cheese and bread crumbs creates a delicious crispiness.

2. A Budget-Friendly Meal That Feels Gourmet

This casserole is made with affordable, everyday ingredients, yet the final dish tastes like something from a high-end restaurant. It’s a great way to use up seasonal zucchinis and pantry staples while creating a dish that feels indulgent and special enough for gatherings.

3. A Healthier Alternative to Heavy Casseroles

Unlike many casseroles that rely on heavy cream and excessive cheese, this recipe keeps things lighter without sacrificing flavor. The natural moisture of zucchinis and eggs gives it a creamy texture without the need for high-fat dairy. Plus, zucchini is packed with vitamins, minerals, and antioxidants, making this a nutritious option for any meal.

4. Versatile and Customizable

This dish is incredibly adaptable to different preferences. Want a richer flavor? Add parmesan or cheddar. Need extra protein? Throw in some cooked chicken or tofu. Looking for a spicier version? A pinch of chili flakes will do the trick. You can tweak this recipe endlessly based on what you have in your kitchen.

Ingredients

IngredientQuantity
Bread crumbs (for the base)60 g
Zucchinis, thinly sliced3
Salt (for the zucchini)10 g
Potatoes, peeled and sliced200 g
Water400 ml
Eggs3
Salt (for the mixture)10 g
Black pepper5 g
Flour100 g
Bread crumbs (for topping)40 g
Onion, finely chopped1
Mushrooms, sliced250 g
Mozzarella cheese, shredded120 g
Oil (for cooking & greasing)20 ml
Oil for greasing the trayAs needed

Directions

  1. Prepare the Zucchini: Sprinkle 10 g of salt over the thinly sliced zucchinis and let them sit for 10 minutes to release excess moisture. Pat dry with a paper towel.
  2. Cook the Potatoes: In a pot, bring 400 ml of water to a boil. Add the sliced potatoes and cook for about 5 minutes until slightly tender. Drain and set aside.
  3. Sauté the Vegetables: Heat 20 ml of oil in a pan over medium heat. Add the chopped onion and sauté until translucent. Stir in the sliced mushrooms and cook until golden brown. Set aside.
  4. Prepare the Egg Mixture: In a bowl, whisk together the eggs, 10 g of salt, black pepper, and flour until smooth.
  5. Assemble the Casserole:
    • Grease a 22 x 22 cm baking tray with oil.
    • Sprinkle 60 g of bread crumbs evenly on the base.
    • Layer half of the sliced zucchinis, followed by the cooked potatoes.
    • Spread the sautéed mushrooms and onions over the potatoes.
    • Pour half of the egg mixture over the layers.
    • Add the remaining zucchini slices and top with the rest of the egg mixture.
  6. Final Toppings: Sprinkle shredded mozzarella cheese and the remaining 40 g of bread crumbs on top.
  7. Bake to Perfection: Preheat the oven to 180°C (350°F). Bake for 35–40 minutes, or until golden and crispy on top.
  8. Serve & Enjoy: Let the casserole cool slightly before slicing. Serve warm and enjoy this delicious, crispy, and cheesy dish!

Nutritional Information (Per Serving, Approximate)

NutrientAmount
Calories280 kcal
Protein12 g
Carbohydrates32 g
Fiber4 g
Fats12 g
Vitamin C~30% DV
Calcium~20% DV

The Magic of Zucchini and Potatoes

Zucchini and potatoes might not seem like the most exciting combination at first, but when baked together, they create something truly special.

Why Zucchini Works in This Recipe

Zucchini is mild in flavor, allowing it to absorb the seasonings and blend seamlessly with the other ingredients. When baked, it becomes soft and slightly caramelized, adding a natural sweetness that enhances the overall taste of the dish.

Additionally, zucchini is:

  • Low in calories but high in fiber, making this dish both filling and nutritious.
  • Packed with antioxidants, particularly lutein and zeaxanthin, which support eye health.
  • Hydrating, as it contains a high percentage of water, helping to keep the casserole moist and tender.

The Role of Potatoes

Potatoes provide the hearty, comforting base that gives this dish its satisfying bite. They:

  • Add substance and structure to the casserole.
  • Absorb flavors well, making them a perfect carrier for the seasonings.
  • Create a creamy texture when baked, especially when layered with eggs.

Best Ways to Serve This Casserole

This dish is fantastic on its own but can also be paired with other dishes to create a complete meal. Here are a few serving suggestions:

1. Serve It as a Standalone Meal

Thanks to the combination of vegetables, protein, and cheese, this casserole is filling enough to be a main dish. Pair it with a side salad and some crusty bread for a simple yet satisfying meal.

2. As a Side Dish for Meat or Fish

This baked zucchini and potato dish pairs beautifully with grilled chicken, roasted fish, or even a juicy steak. The mild flavors complement a variety of proteins without overpowering them.

3. Enjoy It for Breakfast or Brunch

Since this casserole contains eggs, it makes a great savory breakfast or brunch option. Serve it alongside some fresh fruit and coffee for a complete morning meal.

4. A Crowd-Pleasing Potluck Dish

If you need a dish to bring to a gathering or party, this is an excellent choice. It can be made ahead of time, holds its structure well, and is guaranteed to be a hit with guests.

FAQs – Everything You Need to Know

1. Can I make this dish ahead of time?

Yes! You can prepare the casserole up to 24 hours in advance. Simply cover it and store it in the refrigerator, then bake when ready to serve.

2. How do I store leftovers?

Store any leftovers in an airtight container in the refrigerator for up to 4 days. Reheat in the oven at 180°C (350°F) for about 10 minutes to retain its crispiness.

3. Can I freeze this casserole?

Yes, this dish freezes well. Let it cool completely, then wrap it tightly in foil or plastic wrap. Freeze for up to 3 months. Thaw overnight in the fridge before reheating.

4. Can I use sweet potatoes instead of regular potatoes?

Absolutely! Sweet potatoes will add a slightly sweeter taste and a boost of extra nutrients. The texture will be a bit softer but still delicious.

5. What other cheeses can I use?

While mozzarella provides a mild, melty texture, you can experiment with cheddar, feta, gouda, or parmesan for different flavor profiles.

6. Can I make this dish vegan?

Yes! Simply replace the eggs with a flax egg mixture (1 tbsp flaxseed meal + 3 tbsp water per egg) and use a dairy-free cheese alternative.

7. What if I don’t have bread crumbs?

You can substitute with crushed crackers, panko, or even ground oats for a similar texture.

Final Thoughts – A Must-Try Casserole for Any Occasion

This Golden Baked Zucchini & Potato Casserole is proof that simple ingredients can create extraordinary flavors. Whether you need a quick weeknight dinner, a crowd-pleasing side dish, or a healthy comfort meal, this casserole is an effortless choice.

Its versatile nature, deliciously crispy top, and melt-in-your-mouth texture make it a go-to recipe that you’ll come back to again and again. Try it once, and you’ll understand why this hidden gem deserves a place in your kitchen!

Amal

Golden Baked Zucchini & Potato Casserole – The Ultimate Comfort Dish

This Golden Baked Zucchini & Potato Casserole is a delicious blend of tender zucchini, creamy potatoes, and melted cheese, all baked to perfection with a crispy breadcrumb topping. It’s an easy-to-make dish that is light, comforting, and packed with flavor. Whether served as a main course or a side dish, this casserole is a crowd-pleaser that pairs well with any meal.
Prep Time 10 minutes
Cook Time 40 minutes
Total Time 50 minutes
Servings: 4 servings
Course: Main Dish
Cuisine: Mediterranean

Ingredients
  

  • 60 g bread crumbs for the base
  • 3 zucchinis thinly sliced
  • 10 g salt for the zucchini
  • 200 g potatoes peeled and sliced
  • 400 ml water
  • 3 eggs
  • 10 g salt for the mixture
  • 5 g black pepper
  • 100 g flour
  • 40 g bread crumbs for the topping
  • 1 onion finely chopped
  • 250 g mushrooms sliced
  • 120 g mozzarella cheese shredded
  • 20 ml oil for cooking and greasing the tray
  • Oil for greasing a 22 x 22 cm baking tray

Method
 

  1. Prepare the Zucchini: Sprinkle 10 g of salt over the thinly sliced zucchini and let them rest for 10 minutes to release excess moisture. Pat dry with a paper towel.
  2. Cook the Potatoes: Bring 400 ml of water to a boil in a pot. Add the sliced potatoes and cook for about 5 minutes until slightly tender. Drain and set aside.
  3. Sauté the Vegetables: Heat 20 ml of oil in a pan over medium heat. Add the finely chopped onion and sauté until translucent. Add the sliced mushrooms and cook until soft and golden. Set aside.
  4. Prepare the Egg Mixture: In a mixing bowl, whisk together the eggs, 10 g of salt, black pepper, and flour until smooth.
Assemble the Casserole:
  1. Grease a 22 x 22 cm baking tray with oil.
  2. Sprinkle 60 g of bread crumbs evenly across the base.
  3. Layer half of the zucchini slices, followed by the cooked potatoes.
  4. Spread the sautéed mushrooms and onions evenly on top.
  5. Pour half of the egg mixture over the layers.
  6. Add the remaining zucchini slices and top with the rest of the egg mixture.
  7. Add the Toppings: Sprinkle the shredded mozzarella cheese and the remaining 40 g of bread crumbs over the top.
  8. Bake: Preheat the oven to 180°C (350°F) and bake for 35–40 minutes, or until the top is golden and crispy.
  9. Serve & Enjoy: Let the casserole cool slightly before slicing. Serve warm as a main dish or a side.

Notes

  • For extra flavor, add grated Parmesan or cheddar cheese to the topping.
  • If you prefer a crunchier texture, increase the amount of bread crumbs on top.
  • Want a creamier texture? Mix in a bit of sour cream or ricotta cheese into the egg mixture.
  • For a spicier kick, sprinkle chili flakes or smoked paprika on top before baking.
  • Store leftovers in an airtight container in the refrigerator for up to 4 days.
  • To reheat, bake at 180°C (350°F) for 10 minutes or microwave for a quick warm-up.
  • Freezing option: Freeze before baking for up to 3 months. Thaw overnight in the fridge and bake as directed.

Golden Glow Red Lentil Soup – A Nutritious & Hearty 30-Minute Meal

Red lentil soup is one of those timeless dishes that effortlessly combines simplicity, nutrition, and comfort in a single bowl. With its vibrant color, rich texture, and warming spices, this recipe has been a staple in many cultures for centuries. Whether you’re looking for a quick weekday meal, a nourishing dish to soothe the soul, or a hearty vegan option, this red lentil soup ticks all the boxes.

Why You’ll Love This Recipe

  1. Fast and Easy – Ready in just 30 minutes, making it a perfect last-minute meal.
  2. Highly Nutritious – Packed with plant-based protein, fiber, and essential vitamins.
  3. Budget-Friendly – Uses simple, inexpensive ingredients available year-round.
  4. Comforting and Satisfying – A creamy, thick consistency that fills you up.
  5. Versatile – Easily customizable with different herbs, spices, or added ingredients.

Ingredients

IngredientQuantity
Red lentils (only red!)1 cup (~220 g)
Onion, chopped1 medium-sized
Leek, sliced1 medium-sized
Carrot, chopped1 medium-sized
Olive oil1–2 tbsp
Butter1 tsp
Potato, chopped1 medium-sized
Tomato paste1 tbsp
Boiling water or broth1 liter
Salt and pepperTo taste
CuminA pinch
Cilantro or parsley (for garnish)A small bunch

Directions

  1. Prepare the Base: Heat olive oil and butter in a large pot over medium heat. Add the chopped onion, leek, and carrot. Sauté for about 3–4 minutes until softened.
  2. Add the Potatoes: Stir in the chopped potato and cook for another 2 minutes.
  3. Incorporate Lentils & Spices: Rinse the red lentils thoroughly and add them to the pot. Season with salt, pepper, and cumin. Stir well to coat.
  4. Tomato Paste & Liquids: Stir in the tomato paste, then pour in the boiling water or broth. Mix everything well.
  5. Simmer to Perfection: Bring to a boil, then reduce heat and let simmer for about 20 minutes, stirring occasionally, until lentils and vegetables are tender.
  6. Blend if Desired: For a creamy texture, use an immersion blender to puree the soup. If you prefer a chunkier consistency, leave it as is.
  7. Taste & Serve: Adjust seasoning if needed. Garnish with freshly chopped cilantro or parsley. Serve hot with bread or a squeeze of lemon for extra zest!

Nutritional Information (Per Serving, Approximate)

NutrientAmount
Calories220 kcal
Protein10 g
Carbohydrates35 g
Fiber9 g
Fats5 g
Vitamin A~60% DV
Iron~15% DV

The Magic of Red Lentils

Red lentils are the true star of this dish. Unlike other legumes, they don’t require pre-soaking and cook quickly, breaking down into a creamy texture that forms the perfect base for soups and stews.

Health Benefits of Red Lentils

  • High in Protein – A fantastic plant-based protein source, making this soup an excellent option for vegetarians and vegans.
  • Rich in Fiber – Supports digestion and keeps you full longer, reducing unnecessary snacking.
  • Heart-Healthy – Naturally low in fat and cholesterol while being high in folate and potassium, which promote cardiovascular health.
  • Iron Boost – Helps fight fatigue and improves energy levels, making it a great meal for those with iron deficiency.
  • Low Glycemic Index – Helps regulate blood sugar levels, making it a diabetic-friendly option.

The Role of Spices in This Soup

A well-balanced spice blend enhances the flavor and health benefits of this soup. The cumin adds a warm, earthy aroma, while black pepper gives it a subtle kick. You can also add a pinch of turmeric for anti-inflammatory properties and an extra boost of color.

Serving Suggestions

This soup is incredibly versatile when it comes to serving. Here are a few ways to elevate your bowl:

  • Classic Style – Serve with a wedge of lemon for added brightness and depth of flavor.
  • With Bread – Pair with warm, crusty bread or pita for a more filling meal.
  • Topped with Yogurt – A dollop of Greek yogurt or a drizzle of coconut cream adds richness.
  • With a Protein Boost – Top with roasted chickpeas, grilled tofu, or shredded chicken.
  • Spicy Twist – Garnish with chili flakes or a drizzle of spicy olive oil for heat.

Storage and Meal Prep Tips

One of the best things about this soup is how well it stores, making it an excellent choice for meal prepping.

  • Refrigeration – Store in an airtight container for up to 4 days.
  • Freezing – Freeze in portions for up to 3 months. Thaw overnight in the fridge and reheat on the stove.
  • Reheating – Add a splash of water or broth when reheating, as the soup thickens over time.

FAQs

1. Can I use green or brown lentils instead of red?

Red lentils are preferred for their quick-cooking and creamy texture. Green or brown lentils take longer to cook and won’t break down as easily, resulting in a chunkier soup.

2. How can I make this soup spicier?

For a spicier version, add cayenne pepper, red pepper flakes, or a chopped chili during cooking. A dash of smoked paprika can also enhance the heat while adding a smoky depth.

3. Can I make this soup without a blender?

Absolutely! Red lentils naturally break down during cooking, so blending is optional. If you prefer a chunkier soup, simply mash some of the lentils with the back of a spoon.

4. Is this soup vegan and gluten-free?

Yes! This recipe is naturally vegan and gluten-free. Just ensure that your broth is plant-based if following a strict vegan diet.

5. What can I substitute for leeks?

If you don’t have leeks on hand, you can use extra onions or shallots for a similar depth of flavor.

6. Can I add other vegetables to this soup?

Certainly! You can include bell peppers, zucchini, spinach, or kale for extra nutrition and variety.

7. How do I make the soup thinner or thicker?

  • To make it thinner, add extra water or broth while reheating.
  • To make it thicker, let it simmer longer or blend a portion of the soup.

8. Can I use canned lentils?

Canned lentils aren’t ideal for this recipe, as they’re already cooked and won’t break down the same way dried red lentils do. Stick to dried red lentils for the best texture.

Final Thoughts

Golden Glow Red Lentil Soup is more than just a quick and easy meal—it’s a nourishing bowl of comfort that brings warmth and satisfaction with every spoonful. Whether you’re cooking for yourself, feeding a family, or meal prepping for the week, this hearty soup is a reliable and wholesome choice.

Its combination of nutritious ingredients, bold flavors, and simple preparation makes it a must-have recipe for anyone seeking a healthy yet delicious meal. Try it once, and it’s bound to become a regular in your kitchen.

Amal

Golden Glow Red Lentil Soup – A Nutritious & Hearty 30-Minute Meal

This Golden Glow Red Lentil Soup is a quick, nutritious, and satisfying meal perfect for any day of the week. Made with simple ingredients like red lentils, vegetables, and warm spices, this hearty soup is ready in just 30 minutes. Its creamy texture and rich flavor make it a comforting dish that’s both healthy and delicious. Serve it with a squeeze of lemon and fresh herbs for an extra burst of freshness!
Prep Time 5 minutes
Cook Time 25 minutes
Total Time 30 minutes
Servings: 4 servings
Course: Soup
Cuisine: Mediterranean

Ingredients
  

  • 1 cup ~220 g red lentils (rinsed)
  • 1 medium-sized onion chopped
  • 1 leek sliced
  • 1 medium-sized carrot chopped
  • 1 medium-sized potato chopped
  • 1 –2 tbsp olive oil
  • 1 tsp butter
  • 1 tbsp tomato paste
  • 1 liter boiling water or broth
  • 1 tsp salt adjust to taste
  • ½ tsp black pepper
  • A pinch of cumin
  • A small bunch of cilantro or parsley for garnish

Method
 

  1. Sauté the Aromatics – Heat olive oil and butter in a large pot over medium heat. Add the chopped onion, leek, and carrot. Sauté for 3–4 minutes until softened.
  2. Add the Potato and Lentils – Stir in the chopped potato and rinsed red lentils. Season with salt, black pepper, and cumin. Mix well.
  3. Incorporate Tomato Paste & Liquids – Stir in the tomato paste, then pour in the boiling water or broth. Stir to combine.
  4. Simmer Until Soft – Bring to a boil, then reduce heat and let it simmer for about 20 minutes, stirring occasionally, until the lentils and vegetables are tender.
  5. Blend for Creaminess (Optional) – For a smooth texture, use an immersion blender to puree the soup. If you prefer a chunkier consistency, leave it as is.
  6. Taste & Serve – Adjust seasoning if needed. Garnish with freshly chopped cilantro or parsley. Serve warm with a wedge of lemon and crusty bread.

Notes

  • If the soup thickens too much after sitting, add a little extra water or broth when reheating.
  • For a richer taste, substitute half of the water with coconut milk or cream.
  • A squeeze of lemon just before serving enhances the flavor and adds freshness.
  • You can add extra vegetables like bell peppers or zucchini for variation.