Pink Hot Chocolate: A Delicious, Sweet Treat You’ll Love

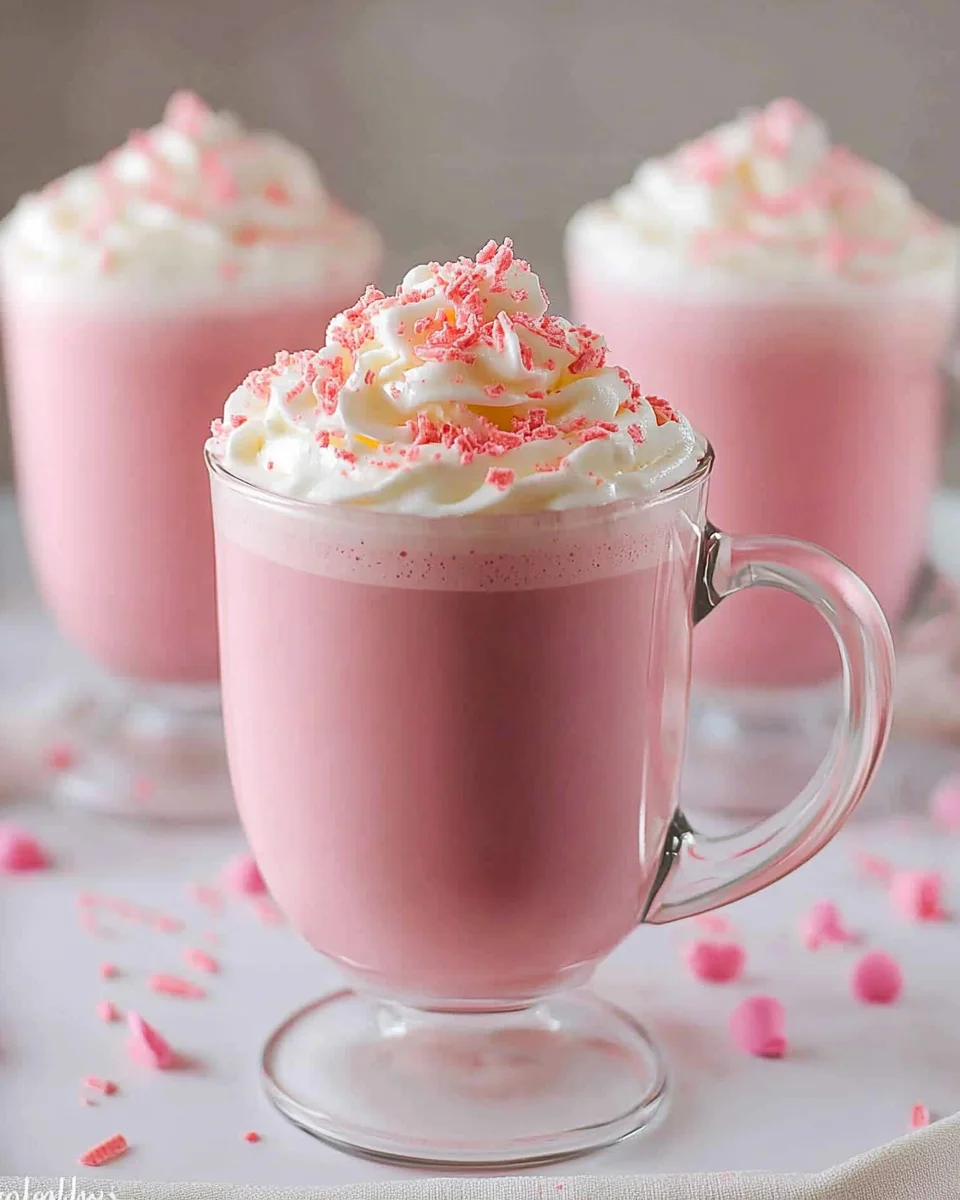
Pink hot chocolate isn’t just a drink—it’s a warm hug in a cup. Whether you’re looking for a unique treat for Valentine’s Day, a cozy winter indulgence, or a way to bring a pop of color to your dessert table, this creamy, rosy drink will become your new favorite. With its velvety texture, white chocolate richness, and fun pink hue, this recipe is perfect for kids, adults, and anyone who loves a touch of whimsy. In this guide, you’ll learn how to make pink hot chocolate at home with step-by-step instructions, tips, and even a breakdown of its nutritional value.

Let’s dive into the world of pink hot chocolate and make your next cozy moment extra special!

What Is Pink Hot Chocolate?

Pink hot chocolate is a delightful twist on the classic hot chocolate. Instead of using dark or milk chocolate, this recipe calls for white chocolate, which creates a rich, creamy base. A touch of red food coloring turns the drink into a stunning pastel pink, making it a treat for the eyes as well as the taste buds. Perfect for celebrations or even as a pick-me-up, pink hot chocolate offers all the comfort of traditional hot cocoa with an extra dose of fun.

Why You’ll Love This Recipe

  • Unique & Fun: A bright pink drink that’s as pretty as it is delicious.
  • Quick & Easy: Ready in less than 10 minutes with simple ingredients.
  • Kid-Friendly: Kids will love the color, while adults will enjoy the indulgent flavor.
  • Versatile: Great for holidays, themed parties, or a regular cold day.

Ingredients You’ll Need

Here’s a quick overview of the ingredients. You probably already have most of them in your kitchen!

IngredientAmountPurpose
Evaporated Milk¾ cupAdds a creamy, rich texture.
Whole Milk2 cupsBase liquid for the hot chocolate.
White Chocolate Chips1 cupCreates the sweet, chocolatey flavor.
Red Food Coloring2 dropsGives the drink its pink hue.
Whipped Cream (Optional)For garnishAdds fluffiness and decoration.
Sprinkles (Optional)For garnishFun finishing touch.

Why Use These Ingredients?

  • Evaporated Milk provides creaminess without being too heavy.
  • Whole Milk ensures the drink isn’t too thick or thin.
  • White Chocolate Chips melt smoothly for a luscious texture.
  • Red Food Coloring lets you control the shade of pink.

How to Make Pink Hot Chocolate

Making pink hot chocolate is incredibly simple. Follow these easy steps, and you’ll have a beautiful, delicious drink in no time.

Step-by-Step Instructions

  1. Heat the Milk
    In a saucepan over medium heat, combine the evaporated milk and whole milk. Bring the mixture to a gentle boil, stirring occasionally to prevent it from scorching or boiling over.
  2. Melt the White Chocolate
    Remove the saucepan from the heat and immediately add the white chocolate chips. Stir continuously until the chocolate is fully melted and the mixture is smooth and creamy.
  3. Add Food Coloring
    Add the red food coloring one drop at a time, stirring after each drop until you achieve the perfect soft pink color. Remember, a little goes a long way!
  4. Serve & Garnish
    Pour the hot chocolate into your favorite mugs. Top with whipped cream and sprinkles for an extra festive touch.

Tips for Perfect Pink Hot Chocolate

  • Choose High-Quality White Chocolate: The better the chocolate, the richer the flavor.
  • Don’t Overheat: White chocolate can scorch easily, so keep the heat low.
  • Experiment with Colors: Try different shades by adjusting the amount of food coloring. You can even mix red and blue for a lavender hue!
  • Make It Vegan: Substitute regular milk with almond milk or oat milk, and use dairy-free white chocolate chips.

Nutritional Breakdown

Here’s what you’re getting in every indulgent serving of pink hot chocolate:

NutrientAmount (Per Serving)
Calories382 kcal
Carbohydrates37 g
Protein10 g
Fat22 g
Saturated Fat13 g
Cholesterol36 mg
Sodium144 mg
Potassium435 mg
Fiber1 g
Sugar38 g
Vitamin A326 IU
Vitamin C1 mg
Calcium353 mg
Iron1 mg

Creative Variations to Try

Looking to spice things up? Here are a few ideas:

  • Strawberry Pink Hot Chocolate: Add a tablespoon of strawberry syrup for extra fruity flavor.
  • Peppermint Twist: Mix in a drop of peppermint extract for a festive flair.
  • Glitter Glam: Sprinkle edible glitter on top for a magical touch.
  • Rose Pink Hot Chocolate: Add a drop of rose water for a floral note.

Frequently Asked Questions (FAQs)

1. Can I use another type of milk?

Yes! You can substitute whole milk with almond milk, oat milk, or coconut milk for a dairy-free or lighter version. Just note that the flavor and texture may change slightly.

2. What can I use instead of white chocolate chips?

White chocolate bars chopped into small pieces work just as well. Look for high-quality brands for the best taste.

3. How do I make it less sweet?

Reduce the amount of white chocolate or mix in a pinch of salt to balance the sweetness.

4. Can I make pink hot chocolate ahead of time?

Yes! Prepare the hot chocolate and refrigerate it for up to 2 days. Reheat gently on the stovetop before serving.

5. What occasions are perfect for pink hot chocolate?

This drink is ideal for Valentine’s Day, baby showers, winter gatherings, or even a cozy movie night at home.

6. Is pink hot chocolate safe for kids?

Absolutely! This recipe is kid-friendly and contains no harmful ingredients.

Bring Some Fun to Your Cup Today!

Pink hot chocolate isn’t just a drink—it’s an experience. It’s the perfect way to add a little joy, color, and sweetness to your day. Whether you’re sipping it on a cold winter night or serving it at a party, this recipe is guaranteed to impress.

So, what are you waiting for? Grab your ingredients, whip up a batch, and share the magic of pink hot chocolate with your loved ones.

PAUL

Pink Hot Chocolate: A Delicious, Sweet Treat You’ll Love

Pink hot chocolate is a creamy, sweet drink that feels like a warm hug in a cup. Perfect for Valentine’s Day, winter evenings, or any occasion that needs a touch of whimsy, this pastel pink treat combines the richness of white chocolate with a playful pop of color. Easy to make and irresistibly delightful, it’s a favorite for kids and adults alike.
Prep Time 5 minutes
Cook Time 5 minutes
Total Time 10 minutes
Servings: 2 servings
Course: Beverages
Cuisine: Mexican

Ingredients
  

  • 3/4 cup evaporated milk
  • 2 cups whole milk
  • 1 cup white chocolate chips
  • 2 drops red food coloring
  • Whipped cream optional, for garnish
  • Sprinkles optional, for garnish

Method
 

  1. Heat the Milk: In a medium saucepan, combine the evaporated milk and whole milk. Heat over medium heat, stirring occasionally, until it just begins to simmer. Avoid letting it boil.
  2. Melt the White Chocolate: Remove the saucepan from heat. Stir in the white chocolate chips until fully melted and the mixture is smooth and creamy.
  3. Add Food Coloring: Add the red food coloring one drop at a time, stirring well after each drop, until the desired pink hue is achieved.
  4. Serve & Garnish: Pour the pink hot chocolate into mugs. Top with whipped cream and sprinkles for a festive touch, if desired.

Notes

  • For a vegan version, use almond milk or oat milk and dairy-free white chocolate chips.
  • Adjust the pink color to your preference by varying the amount of food coloring.
  • To make it less sweet, reduce the amount of white chocolate or add a pinch of salt.

Oven Baked Chicken and Rice: A One-Pan Comfort Food Classic

Description:
Tender, flavorful chicken and fluffy, buttery rice baked together in one pan—Oven Baked Chicken and Rice is the ultimate comfort food. With simple ingredients and easy prep, this dish is perfect for weeknight dinners or when you’re feeding a crowd.

Why Oven Baked Chicken and Rice Feels Like Home

Do you know those meals that remind you of cozy evenings at home, where the kitchen smells heavenly, and the first bite feels like a warm hug? Oven Baked Chicken and Rice is exactly that kind of dish.

The combination of juicy chicken thighs and perfectly cooked rice infused with rich flavors creates a meal that’s hearty, satisfying, and full of love. Whether you’re cooking for your family or preparing a meal to impress guests, this recipe is guaranteed to deliver a smile with every bite.

Why You’ll Love This Recipe

  • One-Pan Wonder: Minimal dishes and clean-up required.
  • Simple Ingredients: Uses pantry staples you likely already have.
  • Bursting with Flavor: Each bite of rice is infused with the juices from the chicken and a perfectly balanced seasoning blend.
  • Versatile: Great as-is or served with a side salad, vegetables, or a quick gravy.
  • Beginner-Friendly: Perfect for anyone, regardless of cooking experience.

Ingredients for Oven Baked Chicken and Rice

Here’s a detailed list of what you’ll need to make this delicious dish:

For the Chicken and Rice

IngredientQuantityNotes
Bone-in chicken thigh fillets5Skin removed for a healthier option.
Onion1, choppedUse brown, white, or yellow onions.
Garlic2 large cloves, mincedAdds depth to the dish.
Butter2 tbsp (30g)Can be substituted with olive oil.
Uncooked white rice1½ cups (270g)Long-grain white rice works best (Note 3).
Chicken broth/stock1½ cups (375 ml)Use hot broth for faster cooking.
Water1¼ cups (315 ml)Use hot water for consistent results.

For the Chicken Rub

IngredientQuantityNotes
Paprika powder1 tspAdds color and flavor to the chicken.
Dried thyme1 tspEnhances the dish with an earthy aroma.
Garlic powder½ tspInfuses more garlic flavor into the chicken.
Onion powder½ tspAdds a subtle sweetness to the rub.
Salt¾ tspBalances the flavors perfectly.
Black pepperTo tasteFor a mild kick of spice.

Optional Garnishes

  • Oil spray for a golden finish
  • Fresh thyme leaves or parsley, finely chopped

How to Make Oven Baked Chicken and Rice

Step 1: Preheat the Oven

  • Preheat your oven to 180°C (350°F).

Step 2: Prepare the Baking Dish

  1. Scatter the chopped onion and minced garlic evenly in a large baking dish (about 10 x 15 inches / 25 x 35 cm).
  2. Place 2 tablespoons of butter in the center of the dish.
  3. Bake for 15 minutes, checking at the 12-minute mark to stir if the edges start browning too quickly.

Step 3: Season the Chicken

  1. While the dish is in the oven, prepare the Chicken Rub by mixing together the paprika, thyme, garlic powder, onion powder, salt, and black pepper in a small bowl.
  2. Sprinkle the rub generously on both sides of the chicken thighs.

Step 4: Add the Rice

  1. Remove the baking dish from the oven and add 1½ cups of uncooked white rice. Mix the rice into the onions and garlic evenly.
  2. Spread the rice mixture out in an even layer.

Step 5: Arrange the Chicken and Add Liquid

  1. Place the seasoned chicken thighs on top of the rice.
  2. Carefully pour the hot chicken broth and hot water around the chicken (not over it, to preserve the seasoning).

Step 6: Bake Covered

  1. Cover the dish tightly with foil.
  2. Bake in the preheated oven for 30 minutes.

Step 7: Uncover and Finish Baking

  1. Remove the foil and spray the chicken with oil (optional) for a golden finish.
  2. Bake uncovered for an additional 20 minutes, or until the liquid is absorbed and the rice is tender.

Step 8: Rest, Garnish, and Serve

  1. Let the dish rest for 5 minutes after removing it from the oven.
  2. Remove the chicken thighs and fluff the rice with a fork.
  3. Garnish with freshly chopped parsley or thyme, if desired. Serve and enjoy!

Tips for the Best Oven Baked Chicken and Rice

  1. Use Bone-In Chicken Thighs: The bone helps retain moisture and adds extra flavor to the dish.
  2. Don’t Rinse the Rice: Washing the rice removes starch that helps it cook evenly in the dish.
  3. Hot Broth is Key: Adding hot broth and water helps the rice cook properly and avoids uneven textures.
  4. Customize the Rub: Add a pinch of cayenne for a spicy kick or replace thyme with rosemary for a different flavor profile.
  5. Check for Doneness: Ensure the rice is fully cooked and the chicken has an internal temperature of 165°F (74°C) before serving.

Serving Suggestions

Oven Baked Chicken and Rice is a complete meal on its own, but you can elevate it further by pairing it with:

  • Steamed Vegetables: Broccoli, green beans, or carrots complement the dish beautifully.
  • Side Salad: A fresh salad with a lemon vinaigrette balances the richness of the chicken and rice.
  • Gravy: Drizzle a quick gravy over the dish for an extra layer of flavor.

Nutritional Information

Here’s an approximate breakdown of the nutrition per serving (based on 5 servings):

NutrientPer Serving
Calories~430 kcal
Protein28g
Fat15g
Carbohydrates45g
Fiber2g
Sodium700mg

Creative Variations of Oven Baked Chicken and Rice

  1. Spicy Cajun Twist: Replace the Chicken Rub with a Cajun seasoning blend for a spicy kick.
  2. Mediterranean Style: Use oregano and lemon juice in the rub and add olives and sun-dried tomatoes to the rice.
  3. Vegetarian Option: Replace chicken with large roasted vegetables like zucchini or eggplant, and use vegetable broth instead of chicken broth.
  4. Cheesy Finish: Sprinkle shredded cheese over the rice during the last 10 minutes of baking for a creamy, cheesy twist.
  5. Herb Explosion: Add fresh rosemary, parsley, and thyme directly into the rice for an aromatic boost.

FAQ About Oven Baked Chicken and Rice

1. Can I use boneless chicken thighs or breasts?

Yes, but boneless pieces may cook faster, so reduce the baking time by 5–10 minutes to avoid overcooking.

2. Can I use brown rice instead of white rice?

Yes, but brown rice requires more liquid and a longer cooking time. Add an extra ½ cup of broth and bake for an additional 20 minutes.

3. Can I freeze this dish?

Absolutely! Cool the dish completely, then store it in an airtight container in the freezer for up to 3 months. Reheat in the oven or microwave before serving.

4. What other seasonings can I use?

You can try Italian seasoning, smoked paprika, curry powder, or even a BBQ rub for different flavor profiles.

5. How do I keep the chicken moist?

Covering the dish with foil during the first part of baking helps lock in moisture, keeping the chicken juicy and tender.

6. Can I add vegetables to the dish?

Yes! You can add chopped vegetables like bell peppers, zucchini, or peas directly to the rice before baking.

Time to Make Oven Baked Chicken and Rice!

Now that you’ve got all the steps and tips, it’s time to put on your apron and create this incredible Oven Baked Chicken and Rice. With its tender chicken, perfectly cooked rice, and bold flavors, this one-pan meal is sure to become a family favorite.

Ready to make your kitchen smell amazing? Gather your ingredients, preheat the oven, and get cooking!

PAUL

Oven Baked Chicken and Rice: A One-Pan Comfort Food Classic

Oven Baked Chicken and Rice is a comforting one-pan dish where tender chicken thighs bake over perfectly seasoned, fluffy rice. Easy to make and bursting with flavor, this hearty recipe is perfect for weeknight dinners or family gatherings.  
Prep Time 15 minutes
Cook Time 50 minutes
Total Time 1 hour 5 minutes
Servings: 5 servings
Course: Main Course
Cuisine: Comfort Food

Ingredients
  

For the Chicken and Rice:
  • 5 bone-in chicken thigh fillets skin removed
  • 1 onion chopped
  • 2 large garlic cloves minced
  • 2 tbsp 30g butter
  • cups uncooked long-grain white rice
  • cups hot chicken broth
  • cups hot water
For the Chicken Rub:
  • 1 tsp paprika
  • 1 tsp dried thyme
  • ½ tsp garlic powder
  • ½ tsp onion powder
  • ¾ tsp salt
  • Black pepper to taste
Optional Garnishes:
  • Spray oil for a golden finish
  • Fresh thyme or parsley finely chopped

Method
 

Preheat the Oven:
  1. Preheat your oven to 350°F (180°C).
Prepare the Baking Dish:
  1. Scatter the chopped onion and minced garlic evenly in a large baking dish (about 10 x 15 inches).
  2. Place 2 tablespoons of butter in the center.
  3. Bake for 15 minutes, stirring halfway through to prevent burning.
Season the Chicken:
  1. In a small bowl, mix together the paprika, dried thyme, garlic powder, onion powder, salt, and black pepper.
  2. Rub the seasoning generously onto both sides of the chicken thighs.
Prepare the Rice Base:
  1. Remove the baking dish from the oven and stir in the uncooked rice, mixing it with the onions and garlic. Spread the mixture into an even layer.
Add the Chicken and Liquid:
  1. Arrange the seasoned chicken thighs on top of the rice.
  2. Carefully pour the hot chicken broth and hot water around the chicken (avoid pouring directly over the chicken to preserve the seasoning).
Bake Covered:
  1. Cover the baking dish tightly with foil to trap the moisture.
  2. Bake for 30 minutes.
Uncover and Finish Baking:
  1. Remove the foil and lightly spray the chicken with oil for a golden finish.
  2. Bake uncovered for another 20 minutes, or until the rice is tender, the liquid is absorbed, and the chicken is fully cooked (165°F internal temperature).
Rest, Garnish, and Serve:
  1. Remove the dish from the oven and let it rest for 5 minutes.
  2. Fluff the rice with a fork and garnish with fresh parsley or thyme, if desired.
  3. Serve hot and enjoy!

Notes

  • Use bone-in chicken thighs for extra flavor and juiciness.
  • Hot broth and water ensure the rice cooks evenly.
  • Add vegetables like peas, bell peppers, or zucchini for a complete meal in one pan.
  • For a spicier kick, add a pinch of cayenne to the chicken rub.

Chocolate Covered Strawberry Cookies: The Perfect Sweet Treat

Description:
Soft, chewy, and topped with rich chocolate, Chocolate Covered Strawberry Cookies combine the flavors of fresh strawberries and decadent chocolate into a single irresistible dessert. They’re easy to make, visually stunning, and perfect for any occasion!

Why Chocolate Covered Strawberry Cookies Are Pure Magic

There’s something undeniably special about the combination of strawberries and chocolate. It’s a pairing that screams elegance and indulgence. Now, imagine capturing that luxurious flavor in the form of a cookie—soft, sweet, and kissed with a drizzle of melted chocolate.

Whether you’re looking for a fun baking activity, a unique Valentine’s Day treat, or a dessert that impresses everyone, Chocolate Covered Strawberry Cookies deliver on all fronts. Plus, they’re so simple to make that even beginners can achieve bakery-quality results.

Why You’ll Love This Recipe

  • Simple Ingredients: Made with a strawberry cake mix, this recipe is as straightforward as it gets.
  • Burst of Flavor: The strawberry and chocolate combination is a guaranteed hit.
  • Customizable: Add sprinkles, chocolate chips, or drizzles to make these cookies your own.
  • Quick to Make: From start to finish, you’ll have these cookies ready in under an hour.
  • Perfect for Special Occasions: Ideal for Valentine’s Day, birthdays, or just because.

Ingredients for Chocolate Covered Strawberry Cookies

Here’s what you’ll need to bake these delightful cookies:

IngredientQuantityNotes
Strawberry cake mix1 box (about 15 oz)The base of the cookie dough.
Vegetable oil⅓ cupKeeps the cookies soft and moist.
Vanilla extract1 tspEnhances the overall flavor.
Eggs2 largeBinds the ingredients together.
Chocolate chips or candy melts1 cupFor dipping or drizzling over the cookies.
Sprinkles (optional)As desiredAdds a festive and decorative touch.

How to Make Chocolate Covered Strawberry Cookies

Step 1: Preheat the Oven

  • Preheat your oven to 350°F (or 325°F if using a dark or nonstick pan).

Step 2: Make the Cookie Dough

  1. In a large bowl, combine the strawberry cake mix, vegetable oil, vanilla extract, and eggs.
  2. Mix with a spoon until the dough comes together.
  3. Refrigerate the dough for 15–30 minutes to make it easier to handle.

Step 3: Shape the Dough

  • Once the dough has chilled, scoop and shape it into 1-inch balls.

Step 4: Arrange on Baking Sheets

  • Place the dough balls on ungreased cookie sheets, leaving about 2 inches of space between each one.

Step 5: Bake the Cookies

  • Bake for 9–12 minutes or until the tops look dry and the bottoms are just beginning to turn golden.

Step 6: Cool the Cookies

  1. Remove the cookies from the oven and let them cool on the baking sheet for 1 minute.
  2. Transfer them to a cooling rack and allow them to cool completely (about 30 minutes).

Step 7: Add the Chocolate Coating

  1. Melt the chocolate chips or candy melts according to package instructions.
  2. Dip one side of each cookie into the melted chocolate or drizzle the chocolate over the top.
  3. While the chocolate is still wet, add sprinkles if desired.

Step 8: Let the Chocolate Set

  • Place the cookies on a parchment-lined tray and let the chocolate harden completely before serving.

Tips for Perfect Chocolate Covered Strawberry Cookies

  1. Chill the Dough: Refrigerating the dough ensures the cookies hold their shape while baking.
  2. Don’t Overbake: Keep an eye on the cookies—they should remain soft and slightly underbaked in the center for the best texture.
  3. Customize the Chocolate: Use white chocolate, dark chocolate, or even a combination for added variety.
  4. Sprinkles for Fun: Sprinkles add a festive touch and make the cookies more visually appealing, especially for holidays like Valentine’s Day.
  5. Use a Cooling Rack: Allowing the cookies to cool on a wire rack prevents the bottoms from becoming soggy.

Creative Variations of Chocolate Covered Strawberry Cookies

  1. Double Chocolate: Mix chocolate chips directly into the dough for extra chocolatey cookies.
  2. Add a Filling: Flatten the dough balls and stuff them with Nutella or cream cheese before baking for a gooey surprise.
  3. Marbled Chocolate: Drizzle white and dark chocolate together for a marbled effect.
  4. Gluten-Free Option: Use a gluten-free strawberry cake mix to make this recipe gluten-free.
  5. Heart Shaped Cookies: Shape the dough into hearts for a fun and festive twist.

Nutritional Information

Here’s an approximate breakdown of the nutrition per cookie (based on a batch of 24 cookies):

NutrientPer Cookie
Calories~130 kcal
Protein1g
Fat6g
Carbohydrates18g
Sugar12g
Sodium115mg

Serving Suggestions

  • With Coffee or Tea: These cookies pair wonderfully with a hot beverage.
  • Gift Wrap Them: Place the cookies in a decorative box or bag for a thoughtful homemade gift.
  • As a Party Treat: Add them to your dessert table for birthdays, baby showers, or Valentine’s Day.
  • With Ice Cream: Serve alongside a scoop of vanilla ice cream for an extra indulgent dessert.

FAQ About Chocolate Covered Strawberry Cookies

1. Can I use a different flavor of cake mix?

Absolutely! While strawberry is the star here, you can experiment with chocolate, vanilla, or lemon cake mixes for unique flavors.

2. How do I store these cookies?

Store the cookies in an airtight container at room temperature for up to 3 days or in the refrigerator for up to 5 days.

3. Can I freeze the cookie dough?

Yes! Shape the dough into balls, freeze them on a baking sheet, and transfer them to a freezer-safe bag. Bake from frozen, adding an extra minute or two to the bake time.

4. How do I melt the chocolate?

You can melt the chocolate in a microwave-safe bowl in 20-second increments, stirring after each interval, or use a double boiler for even melting.

5. Can I make these cookies vegan?

To make these cookies vegan, use a vegan-friendly cake mix, replace the eggs with flax eggs (1 tbsp flaxseed + 2.5 tbsp water per egg), and use dairy-free chocolate.

6. Can I skip refrigerating the dough?

While it’s not mandatory, chilling the dough makes it easier to handle and prevents the cookies from spreading too much while baking.

Time to Bake Your Chocolate Covered Strawberry Cookies!

Now that you know all the tips, tricks, and variations, it’s time to get baking! Chocolate Covered Strawberry Cookies are an easy, delicious, and fun treat that’s perfect for any occasion. Whether you’re making them for a loved one, a party, or simply to treat yourself, these cookies are guaranteed to bring smiles all around.

So grab your ingredients, preheat your oven, and get ready to fill your kitchen with the irresistible aroma of freshly baked cookies. Once you take that first bite, you’ll understand why these cookies are such a crowd-pleaser.

PAUL

Chocolate Covered Strawberry Cookies: The Perfect Sweet Treat

Chocolate Covered Strawberry Cookies combine the sweet, fruity flavor of strawberries with rich, velvety chocolate for a dessert that’s as delicious as it is beautiful. These soft, chewy cookies are quick to make and perfect for any occasion, from Valentine’s Day to simple weekday indulgences.  
Prep Time 15 minutes
Cook Time 10 minutes
Total Time 40 minutes
Servings: 24 Cooking
Course: Dessert
Cuisine: American

Ingredients
  

  • 1 box 15 oz strawberry cake mix
  • cup vegetable oil
  • 2 large eggs
  • 1 tsp vanilla extract
  • 1 cup chocolate chips or candy melts for dipping or drizzling
  • Sprinkles optional, for decoration

Method
 

Preheat the Oven:
  1. Preheat your oven to 350°F (175°C). Line a baking sheet with parchment paper and set it aside.
Mix the Dough:
  1. In a large mixing bowl, combine the strawberry cake mix, vegetable oil, vanilla extract, and eggs. Stir until a soft dough forms.
  2. Refrigerate the dough for 15–30 minutes to make it easier to handle.
Shape the Dough:
  1. Scoop 1-inch balls of dough and place them on the prepared baking sheet, leaving about 2 inches of space between each cookie.
Bake the Cookies:
  1. Bake the cookies for 9–12 minutes, or until the tops look set and slightly dry. Avoid overbaking to keep them soft.
Cool the Cookies:
  1. Let the cookies cool on the baking sheet for 1–2 minutes, then transfer them to a wire rack to cool completely.
Melt the Chocolate:
  1. Melt the chocolate chips or candy melts according to the package instructions. Use a microwave in 20-second intervals, stirring after each, or a double boiler for even melting.
Decorate the Cookies:
  1. Dip one side of each cooled cookie into the melted chocolate or drizzle the chocolate over the tops. If desired, add sprinkles while the chocolate is still wet.
Set the Chocolate:
  1. Place the decorated cookies on a parchment-lined tray and let the chocolate harden completely before serving.

Notes

  • Chill the Dough: Refrigerating the dough prevents the cookies from spreading too much during baking.
  • Customize the Chocolate: Use dark, white, or a mix of chocolates for variety.
  • Storage: Store cookies in an airtight container at room temperature for up to 3 days or in the refrigerator for up to 5 days.
  • Freezing: Freeze unbaked cookie dough balls for up to 3 months and bake directly from frozen, adding an extra minute to the bake time.

Heart Shaped Chocolate Chip Cookies: A Sweet Way to Show You Care

Description:
Soft, chewy, and full of melty chocolate chips, Heart Shaped Chocolate Chip Cookies are the perfect treat to spread love and joy. Learn how to bake these adorable cookies for any special occasion or just because!

A Cookie That Says “I Love You”

Have you ever thought about how a simple cookie can brighten someone’s day? Now imagine that cookie shaped like a heart—how special would that feel? Whether it’s for Valentine’s Day, a birthday, an anniversary, or just a random Tuesday, Heart Shaped Chocolate Chip Cookies are a delightful way to show someone you care.

There’s something magical about the buttery aroma filling your kitchen as these cookies bake, the golden edges, and the gooey chocolate chips. But the best part? Cutting them into hearts makes them more than just cookies—they become a sweet gesture of love.

Why You’ll Love This Recipe

  • Simple Ingredients: You probably already have everything you need in your pantry.
  • Fun and Festive: Perfect for holidays, gifts, or special surprises.
  • Kid-Friendly: A fun activity to do with kids, from mixing the dough to cutting the hearts.
  • Delicious and Chewy: These cookies have the perfect balance of crisp edges and soft centers.
  • Customizable: Add sprinkles, chocolate chunks, or a drizzle of melted chocolate to make them your own.

Ingredients for Heart Shaped Chocolate Chip Cookies

Here’s a breakdown of what you’ll need to create these delicious cookies:

IngredientQuantityNotes
All-purpose flour2¼ cupsGives the cookies their structure.
Baking soda1 tspHelps the cookies rise and spread evenly.
Salt¾ tspEnhances the flavor of the cookies.
Unsalted butter1 cupBring it to room temperature for easy mixing.
Light brown sugar½ cupAdds moisture and a hint of caramel flavor.
Granulated sugar½ cupBalances the sweetness perfectly.
Vanilla extract2 tspAdds depth and warmth to the flavor.
Eggs2 largeAt room temperature for better mixing.
Semisweet chocolate chips1½ cupsUse a mix of regular and mini chips for variety.

How to Make Heart Shaped Chocolate Chip Cookies

Step 1: Preheat the Oven

  • Start by preheating your oven to 350°F (180°C). Line a baking sheet with parchment paper and set it aside.

Step 2: Combine the Dry Ingredients

  • In a medium bowl, whisk together the all-purpose flour, baking soda, and salt. Set this mixture aside.

Step 3: Cream the Butter and Sugars

  • In a large bowl, use an electric mixer to cream together the unsalted butter, light brown sugar, and granulated sugar.
  • Beat on medium speed for 1–2 minutes, or until the mixture becomes light and fluffy.

Step 4: Add Eggs and Vanilla

  • Mix in the eggs, one at a time, until fully incorporated. Then, add the vanilla extract and blend until just combined.

Step 5: Incorporate the Dry Ingredients

  • Gradually add the dry ingredient mixture to the wet ingredients.
  • Mix on low speed until there are no visible streaks of flour. Be careful not to overmix, as this can make the cookies tough.

Step 6: Fold in the Chocolate Chips

  • Using a spatula, gently fold in the semisweet chocolate chips.

Step 7: Scoop and Shape the Dough

  • Scoop about 2 tablespoons of dough for each cookie and place it on the prepared baking sheet. Leave 2–3 inches of space between each scoop to allow for spreading.

Step 8: Bake the Cookies

  • Bake the cookies for 9–11 minutes, or until the edges are golden brown, but the centers are still slightly underdone.

Step 9: Cut Into Heart Shapes

  • While the cookies are still warm, use a heart-shaped cookie cutter to carefully cut each cookie into a heart. Be gentle, as the cookies will be soft and hot!
  • Remove any excess scraps (save them for snacking!) and let the cookies cool on the baking sheet for 5–7 minutes.

Step 10: Cool Completely

  • Transfer the heart-shaped cookies to a wire rack and let them cool completely before serving or decorating.

Tips for Perfect Heart Shaped Chocolate Chip Cookies

  1. Room Temperature Ingredients: Make sure your butter and eggs are at room temperature to ensure smooth mixing and even baking.
  2. Don’t Overmix: Overmixing can lead to dense cookies. Mix just until the ingredients are combined.
  3. Work Quickly: Use the heart-shaped cookie cutter while the cookies are still warm and soft. This makes cutting easier and keeps the shape intact.
  4. Save the Scraps: The leftover cookie scraps are perfect for snacking or topping ice cream.
  5. Customize the Toppings: Add sprinkles, drizzle melted chocolate, or press extra chocolate chips onto the tops of the cookies before baking.

Creative Variations for Heart Shaped Chocolate Chip Cookies

  1. Add Sprinkles: Press colorful sprinkles onto the cookies before baking for a festive look.
  2. Drizzle Chocolate: Once the cookies are cooled, drizzle melted white or dark chocolate on top for a decorative touch.
  3. Stuffed Cookies: Place a piece of chocolate or caramel in the center of the dough before baking for a gooey surprise.
  4. Use Different Chips: Try white chocolate, peanut butter, or dark chocolate chips for variety.
  5. Gluten-Free Version: Swap the all-purpose flour for a 1:1 gluten-free flour blend to make these cookies gluten-free.

Nutritional Information

Here’s a quick look at the approximate nutrition per cookie (based on 24 cookies):

NutrientPer Cookie
Calories~150 kcal
Protein2g
Fat8g
Carbohydrates18g
Fiber1g
Sugar12g
Sodium95mg

Serving Suggestions

  • With Milk: A cold glass of milk is the ultimate pairing for these cookies.
  • As a Gift: Wrap them in a cute box or bag for a thoughtful homemade gift.
  • On a Dessert Platter: Add them to a platter with brownies, macarons, and truffles for a show-stopping dessert spread.
  • With Ice Cream: Sandwich a scoop of ice cream between two cookies for a delicious treat.

FAQ About Heart Shaped Chocolate Chip Cookies

1. Can I use salted butter instead of unsalted?

Yes, but reduce the amount of salt in the recipe to ½ teaspoon.

2. Can I freeze the cookie dough?

Absolutely! Scoop the dough onto a baking sheet, freeze until solid, then transfer to a freezer-safe bag. Bake from frozen, adding 1–2 extra minutes to the bake time.

3. Do I need to chill the dough?

No, this recipe doesn’t require chilling, but chilling the dough for 30 minutes can prevent the cookies from spreading too much.

4. Can I make these cookies without a heart-shaped cutter?

Yes! Simply bake them as regular round cookies or shape the dough into hearts before baking.

5. What if I don’t have parchment paper?

You can grease the baking sheet lightly with cooking spray, but parchment paper ensures even baking and prevents sticking.

6. Can I use dark chocolate instead of semisweet?

Definitely! Dark chocolate adds a richer, more intense flavor to the cookies.

Time to Bake Your Heart Shaped Chocolate Chip Cookies!

There’s nothing quite like baking a batch of Heart Shaped Chocolate Chip Cookies to show someone how much you care. They’re sweet, fun, and perfect for any occasion—whether you’re making them for a loved one, a party, or just yourself.

So grab your ingredients, preheat your oven, and get ready to fill your kitchen with the irresistible aroma of freshly baked cookies. Once you take that first bite, you’ll know it was worth every second!

PAUL

Heart Shaped Chocolate Chip Cookies: A Sweet Way to Show You Care

Soft, chewy, and brimming with chocolatey goodness, Heart Shaped Chocolate Chip Cookies are a delightful way to show someone you care. Perfect for Valentine’s Day, anniversaries, or any special occasion, these cookies are both festive and irresistibly delicious.  
Prep Time 15 minutes
Cook Time 10 minutes
Total Time 25 minutes
Servings: 24 cookies
Course: Dessert
Cuisine: American

Ingredients
  

  • cups all-purpose flour
  • 1 tsp baking soda
  • ¾ tsp salt
  • 1 cup unsalted butter softened
  • ½ cup light brown sugar packed
  • ½ cup granulated sugar
  • 2 tsp vanilla extract
  • 2 large eggs room temperature
  • cups semisweet chocolate chips

Method
 

Preheat the Oven:
  1. Preheat your oven to 350°F (180°C) and line a baking sheet with parchment paper.
Mix Dry Ingredients:
  1. In a medium bowl, whisk together the all-purpose flour, baking soda, and salt. Set aside.
Cream Butter and Sugars:
  1. In a large bowl, use an electric mixer to cream together the butter, light brown sugar, and granulated sugar. Beat on medium speed for 1–2 minutes until light and fluffy.
Add Eggs and Vanilla:
  1. Add the eggs one at a time, beating until fully incorporated. Stir in the vanilla extract.
Incorporate Dry Ingredients:
  1. Gradually mix the dry ingredients into the wet mixture. Use low speed to avoid overmixing.
Add Chocolate Chips:
  1. Fold in the semisweet chocolate chips using a spatula until evenly distributed.
Scoop and Bake:
  1. Scoop about 2 tablespoons of dough for each cookie and place on the prepared baking sheet, leaving 2–3 inches of space between each scoop. Bake for 9–11 minutes, or until the edges are golden brown and the centers are slightly underdone.
Shape Into Hearts:
  1. While the cookies are still warm and soft, gently press a heart-shaped cookie cutter into each cookie to cut out the shape. Remove the excess scraps (great for snacking or toppings) and let the cookies cool on the baking sheet for 5–7 minutes.
Cool Completely:
  1. Transfer the heart-shaped cookies to a wire rack and allow them to cool completely before serving or decorating.

Notes

  • Ensure butter and eggs are at room temperature for smoother mixing.
  • Work quickly with the cookie cutter while the cookies are warm for best results.
  • Leftover scraps can be enjoyed as-is or used as a topping for ice cream or yogurt.
  • Customize with white chocolate chips, sprinkles, or a drizzle of melted chocolate for a festive touch.

Vegan Split Pea Soup: A Wholesome Bowl of Comfort

Description:
Rich, hearty, and packed with nutrients, Vegan Split Pea Soup is the ultimate comfort food for chilly days. Made with wholesome ingredients like split peas, barley, and fresh vegetables, this soup is as nourishing as it is delicious.

Why Vegan Split Pea Soup Feels Like a Hug in a Bowl

Imagine curling up on your couch with a warm, steaming bowl of soup in your hands. The aroma of garlic, herbs, and slow-simmered peas fills the air, and with each spoonful, you feel an incredible sense of warmth and comfort.

That’s the magic of Vegan Split Pea Soup. This hearty and satisfying dish isn’t just food—it’s self-care in a bowl. It’s the kind of meal that leaves you feeling full, energized, and nourished. Whether you’re cooking for your family, meal-prepping for the week, or just craving something cozy, this soup is the answer.

Why You’ll Love This Recipe

  • Plant-Based Protein: Split peas and barley provide a filling, protein-packed meal.
  • Budget-Friendly: Uses affordable, everyday pantry staples.
  • Nutritious and Delicious: Packed with fiber, vitamins, and minerals from fresh veggies and legumes.
  • Family-Friendly: Even picky eaters will enjoy this flavorful and creamy soup.
  • Great for Meal Prep: Tastes even better the next day and freezes beautifully.

Ingredients for Vegan Split Pea Soup

This recipe uses simple ingredients you likely already have in your pantry and fridge.

IngredientQuantityNotes
Vegetable oil1 tbspOlive oil works great as an alternative.
Onion1, choppedAdds sweetness and depth of flavor.
Garlic cloves3, mincedFresh garlic gives the best flavor.
Bay leaf1Adds subtle, earthy undertones to the broth.
Water7 ½ cupsAdjust the amount for your desired consistency.
Dried split peas2 cupsGreen split peas are the traditional choice.
Barley½ cupProvides texture and extra heartiness.
Salt1 ½ tspEnhances all the flavors in the soup.
Potatoes3, dicedYukon Gold or Russet potatoes work best.
Carrots3, choppedAdds natural sweetness and vibrant color.
Celery3 stalks, choppedProvides a fresh, crisp flavor.
Parsley½ cup, choppedFor a burst of freshness at the end.
Dried basil½ tspAdds a warm, herby aroma.
Dried thyme½ tspComplements the earthiness of the split peas.
Ground black pepper½ tspAdjust to taste for a hint of spice.

How to Make Vegan Split Pea Soup

Step 1: Gather Your Ingredients

Before starting, make sure all your vegetables are washed, peeled, and chopped. Prepping everything beforehand makes the cooking process seamless and stress-free.

Step 2: Sauté the Aromatics

  1. Heat 1 tablespoon of vegetable oil in a large pot over medium-high heat.
  2. Add the chopped onion, minced garlic, and bay leaf.
  3. Sauté for about 5 minutes, stirring occasionally, until the onions become translucent and fragrant.

Step 3: Add Split Peas, Barley, and Water

  1. Stir in the 2 cups of dried split peas, ½ cup of barley, and 7 ½ cups of water.
  2. Add 1 ½ teaspoons of salt and mix well.
  3. Bring the soup to a boil, then reduce the heat to low and let it simmer for 2 hours, stirring occasionally to prevent sticking.

Step 4: Add Vegetables and Herbs

  1. After the soup has simmered, add the diced potatoes, chopped carrots, and celery to the pot.
  2. Stir in the parsley, dried basil, dried thyme, and ground black pepper.
  3. Continue simmering the soup for an additional 1 hour, or until the peas and vegetables are tender.

Step 5: Adjust the Consistency

  1. If you prefer a thicker soup, use an immersion blender to partially blend the soup while leaving some chunks for texture.
  2. If it’s too thick, add more water until you reach your desired consistency.

Step 6: Serve and Garnish

  1. Remove the bay leaf before serving.
  2. Ladle the soup into bowls and garnish with extra chopped parsley for a pop of color and freshness.
  3. Serve hot with crusty bread, crackers, or a side salad.

Tips for Making the Best Vegan Split Pea Soup

  1. Rinse the Split Peas: Rinse your split peas thoroughly under cold water to remove any debris or dust before cooking.
  2. Low and Slow: Simmering the soup slowly ensures the split peas break down and create a creamy, rich texture.
  3. Use Fresh Herbs: While dried herbs work, fresh parsley, thyme, or basil elevate the soup’s flavor.
  4. Customize the Vegetables: Add other veggies like zucchini, leeks, or spinach to make the soup even more nutritious.
  5. Meal Prep: This soup freezes well, so make a big batch and portion it out for future meals.

Nutritional Information

NutrientPer Serving (1 bowl)
Calories~250 kcal
Protein12g
Fat3g
Carbohydrates43g
Fiber15g
Sodium450mg
Vitamin A70% of daily value
Vitamin C25% of daily value

Creative Variations of Vegan Split Pea Soup

  1. Smoky Flavor: Add a dash of smoked paprika or liquid smoke for a smoky twist.
  2. Spicy Kick: Stir in red chili flakes or cayenne pepper for some heat.
  3. Coconut Cream: For extra creaminess, swirl in a few tablespoons of coconut cream before serving.
  4. Herb Lover’s Version: Double the amount of fresh parsley and add rosemary or sage for an herb-forward soup.
  5. Gluten-Free Option: Omit the barley and use quinoa or rice instead.

Serving Suggestions

  • Bread: Pair with a warm slice of sourdough, baguette, or garlic bread for dipping.
  • Salad: A simple side salad with a zesty vinaigrette complements the heartiness of the soup.
  • Grain Bowl: Serve over a bed of cooked quinoa or brown rice for a complete meal.
  • Toppings: Garnish with croutons, roasted chickpeas, or a sprinkle of nutritional yeast for added flavor and crunch.

FAQ About Vegan Split Pea Soup

1. Can I use yellow split peas instead of green?

Yes! Yellow split peas have a slightly milder flavor but work perfectly in this recipe.

2. Can I make this soup in a slow cooker?

Absolutely. Combine all ingredients in your slow cooker and cook on low for 6–8 hours or high for 3–4 hours.

3. How long does the soup last in the fridge?

This soup will stay fresh for up to 5 days when stored in an airtight container in the refrigerator.

4. Can I freeze Vegan Split Pea Soup?

Yes! Allow the soup to cool completely, then freeze it in individual portions for up to 3 months. Reheat on the stovetop or in the microwave.

5. What if my soup is too thick?

Simply add more water or vegetable broth while reheating until the soup reaches your desired consistency.

6. Can I skip the barley?

Of course. If you’re avoiding gluten or prefer a lighter soup, omit the barley or replace it with quinoa or rice.

Time to Make Vegan Split Pea Soup!

Now that you know how to make Vegan Split Pea Soup, it’s time to roll up your sleeves and start cooking. This recipe is not only delicious and comforting but also incredibly nutritious and easy to make. Whether you’re feeding your family, meal prepping, or just craving something cozy, this soup is sure to be a hit.

Grab your ingredients, get your pot ready, and enjoy the process of creating a wholesome, homemade meal that warms both your body and your soul.

PAUL

Vegan Split Pea Soup: A Wholesome Bowl of Comfort

Rich, hearty, and packed with nutrients, this Vegan Split Pea Soup is a comforting bowl of plant-based goodness. Loaded with split peas, barley, and fresh vegetables, it’s a budget-friendly and nourishing meal perfect for any day of the week.  
Prep Time 15 minutes
Cook Time 3 hours
Total Time 3 hours 15 minutes
Servings: 6 servings
Course: Soup
Cuisine: Vegan

Ingredients
  

  • 1 tbsp vegetable oil or olive oil
  • 1 onion chopped
  • 3 garlic cloves minced
  • 1 bay leaf
  • 7 ½ cups water
  • 2 cups dried split peas rinsed and sorted
  • ½ cup barley or substitute with quinoa or rice for gluten-free
  • 1 ½ tsp salt
  • 3 potatoes diced (Yukon Gold or Russet work best)
  • 3 carrots chopped
  • 3 celery stalks chopped
  • ½ cup chopped parsley plus extra for garnish
  • ½ tsp dried basil
  • ½ tsp dried thyme
  • ½ tsp ground black pepper or to taste

Method
 

Prepare Ingredients:
  1. Wash and chop all vegetables. Rinse split peas under cold water and set aside.
Sauté Aromatics:
  1. Heat vegetable oil in a large pot over medium-high heat.
  2. Add chopped onion, minced garlic, and the bay leaf. Sauté for 5 minutes, stirring occasionally, until the onion is translucent and fragrant.
Add Split Peas, Barley, and Water:
  1. Stir in the split peas and barley. Add water and salt, and mix well.
  2. Bring the mixture to a boil, then reduce the heat to low and let it simmer for 2 hours, stirring occasionally to prevent sticking.
Add Vegetables and Herbs:
  1. Once the split peas are partially broken down, add the potatoes, carrots, and celery to the pot.
  2. Stir in parsley, dried basil, dried thyme, and black pepper.
  3. Simmer for another hour, or until the vegetables are tender and the soup reaches a creamy consistency.
Adjust Consistency:
  1. For a thicker soup, use an immersion blender to partially blend the soup while keeping some chunks for texture.
  2. If the soup is too thick, add more water until it reaches your desired consistency.
Serve and Garnish:
  1. Remove the bay leaf before serving.
  2. Ladle the soup into bowls and garnish with extra parsley for a fresh, vibrant finish.
  3. Serve hot with crusty bread or crackers.

Notes

  • Rinse the split peas thoroughly to remove debris and enhance texture.
  • Simmer the soup on low heat to ensure the peas break down and create a creamy base.
  • For added smokiness, stir in a dash of smoked paprika or liquid smoke.
  • Customize by adding vegetables like zucchini, leeks, or spinach for extra nutrients.

Creamy Broccoli Soup: A Delicious and Nutritious Comfort Food

Description:
Warm, velvety, and packed with flavor, Creamy Broccoli Soup is the perfect recipe to satisfy your taste buds and nourish your body. This easy-to-make soup combines tender broccoli, creamy milk, and Cheddar cheese for a meal that’s as wholesome as it is delicious.

Why a Bowl of Creamy Broccoli Soup Feels Like Home

Picture this: it’s a chilly evening, and you’re craving something warm and comforting. You take your first spoonful of a rich, creamy soup, and immediately, it feels like a hug in a bowl. Creamy Broccoli Soup has a way of soothing not just your hunger, but your soul, too.

This recipe is a wonderful balance of creamy indulgence and healthy ingredients. Whether you’re making it for a family dinner or meal prepping for the week, it’s the kind of dish that leaves everyone at the table asking for seconds. Plus, it’s quick to whip up with just a handful of ingredients!

Why You’ll Love This Recipe

  • Easy to Make: With just a few simple steps, you’ll have a delicious homemade soup in under 30 minutes.
  • Healthy and Wholesome: Broccoli is loaded with vitamins, minerals, and antioxidants.
  • Versatile: Enjoy it as a main dish with bread or as a side for a larger meal.
  • Family-Friendly: Even picky eaters love this creamy, cheesy soup.
  • Budget-Friendly: Uses affordable, everyday ingredients.

Ingredients for Creamy Broccoli Soup

Here’s a complete list of the ingredients you’ll need to make this comforting soup:

IngredientQuantityNotes
Chicken broth2 cupsVegetable broth works as a vegetarian option.
Fresh broccoli2 ½ cupsCut into small florets for quicker cooking.
Onion¼ cup, choppedAdds depth and sweetness to the soup.
Milk1 cupWhole milk for creaminess; substitute plant-based milk if needed.
All-purpose flour2 tbspThickens the soup.
Cheddar cheese1 cup, shreddedOptional, but adds a rich, cheesy flavor.
Dried oregano½ tspFor a subtle herby aroma.
Salt and pepperTo tasteEnhances the flavors of the soup.

How to Make Creamy Broccoli Soup

Step 1: Cook the Broccoli and Onion

  • In a large pot, bring 2 cups of chicken broth to a boil.
  • Add 2 ½ cups of fresh broccoli florets and ¼ cup of chopped onion to the pot.
  • Reduce the heat to medium and let it simmer for about 5 minutes, or until the broccoli is tender.

Step 2: Prepare the Milk Mixture

  • While the broccoli is cooking, whisk 1 cup of milk and 2 tablespoons of all-purpose flour together in a small bowl. Make sure there are no lumps for a smooth soup.

Step 3: Thicken the Soup

  • Slowly stir the milk mixture into the pot with the broth, broccoli, and onion.
  • Cook the soup over medium heat, stirring constantly, until it becomes thick and bubbly. This should take about 3–5 minutes.

Step 4: Add Cheese and Seasoning

  • Once the soup has thickened, stir in 1 cup of shredded Cheddar cheese (optional) until it’s fully melted and incorporated.
  • Season the soup with ½ teaspoon of dried oregano, salt, and pepper to taste.

Step 5: Blend the Soup (Optional)

  • For a smooth, creamy texture, use an immersion blender directly in the pot to blend the soup. Alternatively, transfer the soup in batches to a regular blender and blend until smooth.
  • If you prefer a chunkier texture, skip this step and enjoy the soup as is.

Step 6: Serve and Enjoy

  • Ladle the soup into bowls and garnish with extra shredded cheese, a sprinkle of oregano, or a drizzle of olive oil.
  • Serve hot with crusty bread or a fresh salad for a complete meal.

Tips for the Best Creamy Broccoli Soup

  1. Use Fresh Broccoli: Fresh broccoli gives the soup a vibrant color and better flavor. However, frozen broccoli can be used in a pinch.
  2. Don’t Skip the Flour: The flour helps thicken the soup. For a gluten-free version, you can substitute with cornstarch or gluten-free flour.
  3. Blend to Your Liking: If you love a silky-smooth soup, blend it well. For a chunkier texture, blend only half the soup or leave it unblended.
  4. Cheese Options: Cheddar is classic, but Parmesan, Gouda, or even cream cheese can add a unique twist.
  5. Add a Protein: For a heartier meal, stir in cooked shredded chicken or crispy bacon bits before serving.

Serving Suggestions

Pair your Creamy Broccoli Soup with these delicious sides for a complete meal:

  • Bread: Serve with warm garlic bread, a baguette, or dinner rolls for dipping.
  • Salad: A light side salad with a tangy vinaigrette balances the richness of the soup.
  • Grilled Cheese Sandwich: A classic pairing for creamy soups.
  • Roasted Vegetables: Oven-roasted asparagus or carrots make a flavorful side.

Nutritional Information

Here’s a quick look at the approximate nutrition per serving (based on a recipe yielding 4 servings):

NutrientAmount Per Serving
Calories~220 kcal
Protein10g
Fat11g
Carbohydrates20g
Fiber3g
Sodium500mg
Vitamin C70% of daily value

Creative Variations of Creamy Broccoli Soup

  1. Vegan Option: Use vegetable broth, plant-based milk (like almond or oat milk), and nutritional yeast instead of cheese.
  2. Add Potatoes: For a heartier soup, add diced potatoes along with the broccoli and onion.
  3. Spicy Kick: Stir in red chili flakes or a dash of hot sauce for a spicy twist.
  4. Broccoli Cheddar Twist: Increase the cheese to 1 ½ cups for a richer, cheesier soup.
  5. Herb Lovers: Add fresh thyme, rosemary, or parsley for a fresh herbal flavor.

FAQ About Creamy Broccoli Soup

1. Can I use frozen broccoli?

Yes! Frozen broccoli works well for this recipe. Just add it directly to the broth and adjust the cooking time slightly.

2. How do I store leftovers?

Store leftover soup in an airtight container in the refrigerator for up to 3 days. Reheat on the stove over medium heat, stirring occasionally.

3. Can I freeze this soup?

Yes, you can freeze it, but if you’ve added cheese, it may separate upon reheating. To prevent this, freeze the soup without the cheese and add it after reheating.

4. What if my soup is too thick?

If your soup becomes too thick, thin it out with a splash of milk or broth until it reaches your desired consistency.

5. Can I make this soup in advance?

Absolutely! This soup tastes even better the next day as the flavors meld together. Just reheat and enjoy.

6. Can I double the recipe?

Yes, this recipe can easily be doubled to feed a larger group. Just ensure your pot is large enough to accommodate the extra ingredients.

Time to Make Creamy Broccoli Soup!

There’s no better time than now to try this comforting and delicious Creamy Broccoli Soup. It’s the ultimate combination of rich flavors and nourishing ingredients, perfect for a family meal or a cozy night in.

Grab your broccoli, dust off your soup pot, and get ready to fill your kitchen with the irresistible aroma of homemade goodness. You’ll love how easy and satisfying this recipe is to make!


PAUL

Creamy Broccoli Soup: A Delicious and Nutritious Comfort Food

Warm, creamy, and bursting with flavor, Creamy Broccoli Soup is the ultimate comfort food. Made with fresh broccoli, creamy milk, and Cheddar cheese, this easy-to-make soup is perfect for a cozy family dinner or a quick lunch.  
Prep Time 10 minutes
Cook Time 20 minutes
Total Time 30 minutes
Servings: 4 servings
Course: Soup
Cuisine: American

Ingredients
  

  • 2 cups chicken broth or vegetable broth for a vegetarian option
  • 2 ½ cups fresh broccoli florets cut into small pieces for faster cooking
  • ¼ cup chopped onion
  • 1 cup whole milk or substitute with plant-based milk for dairy-free
  • 2 tbsp all-purpose flour or cornstarch for a gluten-free option
  • 1 cup shredded Cheddar cheese optional, for a rich, cheesy flavor
  • ½ tsp dried oregano
  • Salt and pepper to taste

Method
 

Cook the Broccoli and Onion:
  1. In a large pot, bring the chicken broth to a boil.
  2. Add the broccoli florets and chopped onion. Reduce the heat to medium and let it simmer for about 5 minutes, or until the broccoli is tender.
Prepare the Milk Mixture:
  1. In a small bowl, whisk the milk and flour together until smooth and lump-free.
Thicken the Soup:
  1. Slowly pour the milk mixture into the pot while stirring continuously.
  2. Cook the soup over medium heat, stirring frequently, until it thickens and becomes bubbly. This should take about 3–5 minutes.
Add Cheese and Seasoning:
  1. Stir in the shredded Cheddar cheese (if using) until fully melted and incorporated.
  2. Add the dried oregano and season with salt and pepper to taste.
Blend the Soup (Optional):
  1. For a smooth texture, use an immersion blender directly in the pot to blend the soup until creamy. Alternatively, transfer the soup in batches to a blender and blend until smooth.
  2. If you prefer a chunkier texture, skip this step and enjoy the soup as is.
Serve:
  1. Ladle the soup into bowls and garnish with extra shredded cheese, a sprinkle of oregano, or a drizzle of olive oil.
  2. Serve hot with crusty bread or a fresh salad on the side.

Notes

  • Use fresh broccoli for vibrant color and flavor, but frozen broccoli works well too.
  • For a thicker soup, increase the amount of flour or blend the soup until smooth.
  • Customize the cheese: Parmesan, Gouda, or cream cheese are great alternatives to Cheddar.
  • Add diced potatoes for extra heartiness, or stir in crispy bacon bits for a smoky twist.

Vegan Black Bean Soup: A Hearty and Healthy Comfort Food

There’s something magical about a warm bowl of soup. It’s comforting, filling, and brings people together around the table. Vegan Black Bean Soup is no exception. Packed with protein-rich black beans, wholesome vegetables, and flavorful spices, it’s a dish that satisfies your hunger and nourishes your body.

Whether you’re looking for a quick weeknight dinner, a meal prep option, or a cozy way to warm up on a chilly day, this soup has you covered. Plus, it’s entirely plant-based, making it perfect for vegans and non-vegans alike. Let’s dive into how you can make this delicious and nutritious recipe in your own kitchen.

Why You’ll Love Vegan Black Bean Soup

Here’s why this recipe will quickly become a staple in your household:

  • Quick and easy: It comes together in under an hour with simple steps.
  • Nutrient-packed: Loaded with fiber, protein, and vitamins, this soup is as healthy as it is delicious.
  • Affordable ingredients: Using pantry staples like canned black beans and tomatoes, this dish is budget-friendly.
  • Customizable: You can adjust the spice level or add your favorite toppings to make it your own.
  • Great for meal prep: It reheats beautifully, so you can enjoy it all week long.

Ingredients for Vegan Black Bean Soup

Here’s what you’ll need to make this hearty soup:

Main Ingredients

IngredientQuantityNotes
Olive oil1 tablespoonFor sautéing the vegetables.
Onion1 large, choppedAdds depth and sweetness to the soup.
Carrots2, choppedProvides natural sweetness and texture.
Celery1 rib, choppedAdds a fresh, earthy flavor.
Garlic4 cloves, choppedInfuses the soup with rich flavor.
Chili powder2 tablespoonsFor a warm, spicy kick.
Ground cumin1 tablespoonAdds earthy, smoky notes.
Black pepper1 pinchEnhances the overall flavor.
Vegetable broth4 cupsForms the flavorful base of the soup.
Black beans4 (15 oz) cans, dividedProvides protein and a creamy texture.
Whole kernel corn1 (15 oz) canAdds a touch of sweetness and crunch.
Crushed tomatoes1 (14.5 oz) canBrings richness and acidity to the dish.

Step-by-Step Instructions for Vegan Black Bean Soup

1. Sauté the Vegetables

2. Add the Spices

  • Sprinkle the vegetables with 2 tablespoons of chili powder, 1 tablespoon of ground cumin, and a pinch of black pepper.
  • Stir well to coat the vegetables in the spices and let the flavors bloom for about 1 minute.

3. Add the Broth and Beans

  • Pour in 4 cups of vegetable broth and bring the mixture to a simmer.
  • Add 2 cans of black beans (undrained), the can of crushed tomatoes, and the can of whole kernel corn. Stir everything together until well combined.

4. Blend for a Creamy Texture

  • Using an immersion blender, blend the soup slightly to create a creamy base while still leaving some texture. Alternatively, transfer about 2 cups of the soup to a countertop blender, blend until smooth, and return it to the pot.

5. Add the Remaining Beans

  • Stir in the remaining 2 cans of black beans (undrained). This will add texture and ensure the soup is hearty and filling.

6. Simmer and Serve

  • Let the soup simmer over medium heat for another 15-20 minutes to allow the flavors to meld together.
  • Taste and adjust the seasoning with more salt, pepper, or spices as needed.

7. Garnish and Enjoy

  • Ladle the soup into bowls and top with your favorite garnishes, such as chopped cilantro, avocado slices, a dollop of vegan sour cream, or tortilla chips.

Nutritional Information

Here’s an approximate breakdown of the nutritional values per serving (based on six servings):

NutrientAmount per Serving
Calories~220
Protein12g
Carbohydrates38g
Total Fat3g
Fiber12g
Sodium720mg

Note: Nutritional values may vary based on the exact brands and quantities of ingredients used.

Tips for Perfect Vegan Black Bean Soup

1. Use Fresh Vegetables

Fresh onions, carrots, and celery will create the best base flavor for your soup.

2. Adjust the Spices

If you prefer a milder soup, reduce the chili powder. For more heat, add a pinch of cayenne pepper or red pepper flakes.

3. Blend to Your Liking

You control the texture! Blend more for a smoother soup or less for a chunkier, rustic version.

4. Try Homemade Broth

If you have time, use homemade vegetable broth for an extra layer of flavor.

5. Make It Your Own

This soup is incredibly versatile—feel free to add other vegetables, beans, or even cooked quinoa for variety.

Serving Suggestions

This hearty soup pairs wonderfully with a variety of sides and toppings. Here are some ideas:

  • With bread: Serve with warm crusty bread or cornbread to soak up the flavorful broth.
  • Over rice: Spoon the soup over cooked rice for a heartier meal.
  • Topped with avocado: Add slices of creamy avocado for a rich and satisfying topping.
  • With tortilla chips: Crush some tortilla chips on top for added crunch.

Variations to Try

  • Spicy Black Bean Soup: Add diced jalapeños or hot sauce for extra heat.
  • Southwest Twist: Stir in a teaspoon of smoked paprika and garnish with lime wedges.
  • Creamy Vegan Black Bean Soup: Add a splash of coconut milk or cashew cream for a silky finish.
  • Protein Boost: Add cooked quinoa or tofu for extra protein.
  • Mexican-Inspired: Top with pico de gallo, vegan cheese, or guacamole.

Frequently Asked Questions

1. Can I make this soup ahead of time?

Yes! This soup tastes even better the next day as the flavors deepen. Store it in an airtight container in the refrigerator for up to 5 days.

2. Can I freeze vegan black bean soup?

Absolutely. Let the soup cool completely, then store it in freezer-safe containers for up to 3 months. Thaw in the refrigerator overnight before reheating.

3. Do I have to use canned black beans?

No, you can use dried black beans. Just soak them overnight, cook them until tender, and then add them to the soup.

4. How can I make this soup less spicy?

Reduce the amount of chili powder or omit it entirely. You can also add a little sugar or more broth to balance the flavors.

5. Can I make this soup oil-free?

Yes! Sauté the vegetables in a few tablespoons of vegetable broth instead of olive oil.

6. What can I use instead of crushed tomatoes?

You can substitute crushed tomatoes with diced tomatoes or fresh tomatoes blended into a puree.

Final Thoughts: Make Vegan Black Bean Soup Tonight!

Vegan Black Bean Soup is the ultimate comfort food that’s not only delicious but also incredibly nourishing. It’s a dish that brings warmth and flavor to your table, all while being easy on your wallet and simple to prepare.

So, what are you waiting for? Grab your ingredients, follow the steps, and treat yourself and your loved ones to this hearty, satisfying soup. Once you try it, it’s sure to become a regular in your meal rotation!

PAUL

Vegan Black Bean Soup: A Hearty and Healthy Comfort Food

Warm, hearty, and bursting with flavor, this Vegan Black Bean Soup is the perfect comfort food. Packed with protein-rich black beans, vegetables, and warming spices, it’s a healthy and satisfying dish that’s easy to make. Perfect for a quick dinner, meal prep, or a cozy night in, this soup will quickly become a family favorite!  
Prep Time 10 minutes
Cook Time 30 minutes
Total Time 40 minutes
Servings: 6 servings
Course: Soup
Cuisine: Mexican-inspired, Vegan

Ingredients
  

  • 1 tablespoon olive oil
  • 1 large onion chopped
  • 2 carrots chopped
  • 1 celery rib chopped
  • 4 cloves garlic chopped
  • 2 tablespoons chili powder
  • 1 tablespoon ground cumin
  • Pinch of black pepper
  • 4 cups vegetable broth
  • 4 15 oz cans black beans, divided (2 undrained, 2 drained and rinsed)
  • 1 15 oz can whole kernel corn, drained
  • 1 14.5 oz can crushed tomatoes

Method
 

Sauté the Vegetables:
  1. Heat olive oil in a large pot over medium heat.
  2. Add chopped onion, carrots, and celery. Cook for 5 minutes, stirring occasionally, until the vegetables soften.
  3. Stir in garlic and cook for 1-2 minutes until fragrant.
Add Spices:
  1. Sprinkle chili powder, cumin, and a pinch of black pepper over the sautéed vegetables.
  2. Stir to coat the vegetables in the spices, letting the flavors bloom for about 1 minute.
Add Broth and Beans:
  1. Pour in the vegetable broth and stir.
  2. Add 2 cans of black beans (undrained), crushed tomatoes, and the drained can of corn. Stir to combine.
Blend for Creaminess:
  1. Use an immersion blender to blend the soup partially, leaving some chunks for texture.
  2. Alternatively, transfer 2 cups of the soup to a blender, blend until smooth, and return to the pot.
Add Remaining Beans:
  1. Stir in the remaining 2 cans of black beans (drained and rinsed) to give the soup additional texture and heartiness.
Simmer and Serve:
  1. Let the soup simmer over medium heat for 15-20 minutes, allowing the flavors to meld.
  2. Taste and adjust seasoning as needed with more salt, pepper, or chili powder.
Garnish and Enjoy:
  1. Ladle the soup into bowls and garnish with chopped cilantro, avocado slices, vegan sour cream, or crushed tortilla chips.

Notes

  • Blend to Your Liking: Control the texture by blending more for a creamy soup or less for a chunkier version.
  • Customize the Heat: Add cayenne pepper or red pepper flakes for a spicier soup, or reduce the chili powder for a milder flavor.
  • Use Fresh Ingredients: Fresh garlic, onion, and celery enhance the flavor.
  • Homemade Broth: If you have time, homemade vegetable broth will take this soup to the next level.

Garlic Butter Chicken Meatballs: A Delicious and Easy Recipe

There’s nothing quite like the combination of tender, flavorful meatballs bathed in a rich, buttery garlic sauce. Garlic Butter Chicken Meatballs offer a comforting, restaurant-quality dish you can easily whip up at home. Whether you’re making dinner for your family, meal prepping for the week, or hosting a dinner party, these juicy chicken meatballs are bound to impress.

Imagine biting into a perfectly cooked meatball, bursting with zesty lemon, fresh parsley, and hints of garlic. Add a luscious garlic butter sauce, and you’ve got a dish that’s equal parts comforting and sophisticated. Best of all, it’s easy to make and uses simple ingredients you probably already have in your kitchen.

Let’s dive into this flavorful recipe and learn how to make Garlic Butter Chicken Meatballs step by step.

Why You’ll Love Garlic Butter Chicken Meatballs

There’s a reason this recipe will quickly become a favorite in your kitchen:

  • Quick and easy: You can make this dish in under an hour, making it perfect for busy weeknights.
  • Rich, flavorful sauce: The garlic butter sauce is irresistible, with a perfect balance of lemony brightness and savory richness.
  • Healthy twist: Using ground chicken instead of beef or pork keeps the dish leaner without sacrificing flavor.
  • Family-friendly: Kids and adults alike will love these tender, juicy meatballs.
  • Versatile: Pair them with pasta, rice, mashed potatoes, or roasted vegetables for a complete meal.

Ingredients for Garlic Butter Chicken Meatballs

To make these mouthwatering meatballs, you’ll need the following ingredients:

Meatball Ingredients

IngredientQuantityNotes
Ground chicken1 ½ poundsThe base for the meatballs.
Panko breadcrumbs½ cupProvides structure and keeps the meatballs tender.
Fresh parsley, finely chopped½ cupAdds freshness and flavor.
Lemon zest1 ½ teaspoonsUse fresh lemon zest for the best flavor.
Minced garlic1 ½ teaspoonsInfuses the meatballs with garlic goodness.
Egg1 largeBinds the meatball mixture together.
Kosher salt1 ¼ teaspoonsEnhances the flavor of the meatballs.
Dried oregano½ teaspoonAdds a hint of earthiness.
Black pepper¼ teaspoonFor a mild, peppery kick.

Garlic Butter Sauce Ingredients

IngredientQuantityNotes
Unsalted butter4 tablespoons (divided)Forms the base of the sauce.
Minced garlic1 ½ teaspoonsAdds a punch of garlicky flavor.
All-purpose flour2 tablespoonsHelps thicken the sauce.
Dry white wine¼ cupAdds depth and richness to the sauce.
Chicken broth (low-sodium)1 cupCreates a flavorful base for the sauce.
Lemon juice2 tablespoonsBrightens the sauce with zesty freshness.
Red pepper flakesPinch (optional)Adds a touch of heat, if desired.

Step-by-Step Instructions for Garlic Butter Chicken Meatballs

1. Make the Meatball Mixture

  • In a large mixing bowl, combine the lemon zest, parsley, panko breadcrumbs, minced garlic, egg, kosher salt, oregano, and black pepper.
  • Mix the ingredients until well combined.
  • Add the ground chicken to the bowl and gently mix until everything is evenly incorporated. Be careful not to overmix, as this can make the meatballs tough.

2. Form the Meatballs

  • Scoop out the meatball mixture in heaping 2-tablespoon portions (you should get about 20 meatballs).
  • Roll each portion between damp hands to form smooth, even balls.

3. Cook the Meatballs

  • Heat 2 tablespoons of unsalted butter in a 12-inch skillet or frying pan over medium-high heat.
  • Add the meatballs in a single layer and cook, turning occasionally, for about 12 minutes, or until browned on all sides and fully cooked. The internal temperature should reach 165°F.
  • Transfer the cooked meatballs to a clean plate and set them aside.

4. Make the Garlic Butter Sauce

  • Reduce the heat to medium and melt the remaining 2 tablespoons of butter in the same skillet.
  • Add the remaining minced garlic and a pinch of red pepper flakes (if using). Sauté for about 30 seconds, or until fragrant.
  • Sprinkle in the flour and cook, stirring constantly, for another 30 seconds to eliminate the raw flour taste.

5. Deglaze the Pan

  • Whisk in the white wine, scraping up any browned bits from the bottom of the skillet.
  • Cook for about 1 minute, or until the wine reduces by half.

6. Finish the Sauce

  • Whisk in the chicken broth, lemon juice, and the remaining salt.
  • Bring the mixture to a boil, then reduce the heat to a simmer. Let the sauce cook for 2-4 minutes, or until it thickens slightly.

7. Toss the Meatballs in the Sauce

  • Return the meatballs to the skillet and toss to coat them evenly in the sauce.
  • Cook for another 2 minutes to ensure the meatballs are heated through.

8. Serve and Garnish

  • Sprinkle the meatballs with additional chopped parsley for a burst of freshness.
  • Serve warm, either on their own or with your favorite sides.

Serving Suggestions

Garlic Butter Chicken Meatballs pair beautifully with a variety of dishes. Here are some ideas:

  • Over pasta: Serve them on a bed of fettuccine or spaghetti for a classic pairing.
  • With mashed potatoes: Spoon the meatballs and sauce over creamy mashed potatoes for a comforting meal.
  • On rice or quinoa: A great option for a lighter, gluten-free base.
  • With roasted vegetables: Pair them with roasted asparagus, broccoli, or zucchini for a healthy side.

Nutritional Information

Here’s an approximate breakdown of the nutritional values per serving (based on four servings):

NutrientAmount per Serving
Calories~320
Protein28g
Total Fat18g
Carbohydrates10g
Sodium670mg

Note: Nutritional values may vary depending on specific brands and ingredient quantities used.

Tips for Perfect Garlic Butter Chicken Meatballs

1. Don’t Overmix the Meatball Mixture

Overmixing can make the meatballs dense and tough. Mix just until the ingredients are combined.

2. Use Fresh Lemon and Parsley

Fresh lemon zest and parsley add brightness and elevate the overall flavor of the dish.

3. Keep the Meatballs Uniform in Size

Use a cookie scoop to ensure all the meatballs are the same size. This helps them cook evenly.

4. Deglaze the Pan Properly

Scraping up the browned bits from the skillet while adding wine adds depth and flavor to the sauce.

5. Adjust the Sauce Consistency

If the sauce is too thick, add a splash of chicken broth. If it’s too thin, simmer it a bit longer.

Frequently Asked Questions

1. Can I make these meatballs ahead of time?

Yes! You can prepare the meatballs and refrigerate them (raw) for up to 24 hours before cooking.

2. Can I freeze garlic butter chicken meatballs?

Absolutely! Freeze the cooked meatballs in an airtight container for up to 3 months. Reheat in the sauce for best results.

3. Can I use ground turkey instead of chicken?

Yes, ground turkey is a great substitute and works well in this recipe.

4. What can I use instead of white wine?

You can substitute the white wine with chicken broth or a splash of white vinegar for acidity.

5. How can I make this dish gluten-free?

Use gluten-free breadcrumbs and replace all-purpose flour with a gluten-free alternative like cornstarch.

6. Can I make this dish dairy-free?

Yes! Replace the butter with a dairy-free alternative, such as olive oil or vegan butter, and use coconut milk in place of half-and-half.

Final Thoughts: Try Garlic Butter Chicken Meatballs Today!

These Garlic Butter Chicken Meatballs are packed with flavor and incredibly versatile. Whether you’re serving them over pasta, with mashed potatoes, or as an appetizer, they’re guaranteed to please your taste buds and impress your guests.

So, what are you waiting for? Gather your ingredients, follow these simple steps, and treat yourself and your loved ones to this delicious and comforting dish.


PAUL

Garlic Butter Chicken Meatballs: A Delicious and Easy Recipe

Tender and juicy chicken meatballs tossed in a luscious garlic butter sauce, these Garlic Butter Chicken Meatballs are a flavor-packed dish perfect for any occasion. With bright lemon, fresh parsley, and a buttery garlic finish, this recipe is versatile, comforting, and easy to prepare.  
Prep Time 15 minutes
Cook Time 25 minutes
Total Time 40 minutes
Servings: 4 servings (about 20 meatballs)
Course: Main Dish
Cuisine: American

Ingredients
  

For the Meatballs:
  • 1 ½ pounds ground chicken
  • ½ cup panko breadcrumbs
  • ½ cup fresh parsley finely chopped
  • 1 ½ teaspoons lemon zest
  • 1 ½ teaspoons minced garlic
  • 1 large egg
  • 1 ¼ teaspoons kosher salt
  • ½ teaspoon dried oregano
  • ¼ teaspoon black pepper
For the Garlic Butter Sauce:
  • 4 tablespoons unsalted butter divided
  • 1 ½ teaspoons minced garlic
  • 2 tablespoons all-purpose flour
  • ¼ cup dry white wine or chicken broth
  • 1 cup chicken broth low-sodium
  • 2 tablespoons fresh lemon juice
  • Pinch of red pepper flakes optional

Method
 

Prepare the Meatball Mixture:
  1. In a large mixing bowl, combine panko breadcrumbs, parsley, lemon zest, garlic, egg, salt, oregano, and pepper.
  2. Add ground chicken and gently mix until evenly combined. Avoid overmixing to keep the meatballs tender.
Shape the Meatballs:
  1. Scoop 2-tablespoon portions of the mixture and roll into smooth balls. Damp hands can help prevent sticking.
  2. You should yield approximately 20 meatballs.
Cook the Meatballs:
  1. Heat 2 tablespoons of butter in a large skillet over medium-high heat.
  2. Add the meatballs in a single layer and cook, turning occasionally, for 12 minutes, or until browned on all sides and the internal temperature reaches 165°F.
  3. Transfer the cooked meatballs to a plate and set aside.
Prepare the Garlic Butter Sauce:
  1. Reduce the heat to medium and melt the remaining 2 tablespoons of butter in the skillet.
  2. Add minced garlic and red pepper flakes (if using). Sauté for 30 seconds until fragrant.
  3. Sprinkle in the flour and whisk for 30 seconds to eliminate the raw flour taste.
Deglaze and Build the Sauce:
  1. Slowly pour in the white wine, whisking to scrape up browned bits from the pan. Let it reduce for 1 minute.
  2. Stir in chicken broth and lemon juice, whisking to combine. Bring to a simmer and cook for 2-4 minutes, until slightly thickened.
Combine Meatballs and Sauce:
  1. Return the meatballs to the skillet, tossing them gently to coat in the sauce.
  2. Simmer for 2 minutes to heat through.
Serve and Garnish:
  1. Garnish with additional fresh parsley for a burst of freshness.
  2. Serve warm with your favorite side dishes.

Notes

  • Use fresh lemon and parsley for the best flavor.
  • Avoid overmixing the meatball mixture to ensure a tender texture.
  • Deglaze the skillet properly with wine or broth to incorporate all the flavor.
  • If the sauce is too thick, add a splash of chicken broth to adjust the consistency.

Valentine’s Day Caramel Pretzel Bites: A Sweet and Salty Treat Everyone Will Love

Valentine’s Day is a time to show love and appreciation, and what better way to do that than with a homemade treat? Valentine’s Day Caramel Pretzel Bites are the perfect combination of sweet, salty, and crunchy. These adorable bite-sized snacks are made with just a few simple ingredients, but they pack a big punch of flavor.

Imagine surprising your loved ones with these festive treats, their hearts melting with the gooey caramel and chocolate in every bite. Whether you’re sharing these pretzel bites with friends, coworkers, or family, they’re guaranteed to spread some Valentine’s Day joy. Plus, they’re so easy to make that you can involve kids in the fun!

Let’s dive into the recipe and learn how to make these irresistible caramel pretzel bites.

Why You’ll Love Valentine’s Day Caramel Pretzel Bites

These caramel pretzel bites are the ultimate holiday treat, and here’s why:

  • Sweet and salty perfection: The combination of caramel, chocolate, and pretzels creates an addictive flavor.
  • Easy to make: With just a few ingredients and steps, you don’t need to be a professional baker to create these treats.
  • Festive and colorful: The Valentine’s Day M&M’s and sprinkles make them perfect for the holiday.
  • Great for gifting: Package them in decorative bags or boxes for a thoughtful homemade gift.
  • Customizable: You can change the toppings or use different-colored candies for any occasion.

Ingredients for Valentine’s Day Caramel Pretzel Bites

Here’s everything you’ll need to make these delicious treats:

Main Ingredients

IngredientQuantityNotes
Pretzel Snaps60Use square-shaped pretzels for the best results.
Rolo candies60, unwrappedSoft caramel-filled chocolates.
Valentine’s Mix M&M’s60Pink, red, and white candies add a festive touch.

Optional Toppings

IngredientQuantityNotes
Heart-shaped sprinklesAs neededAdds extra decoration.
Valentine’s Day-colored sprinklesAs neededOptional but fun and festive.

Step-by-Step Instructions for Valentine’s Day Caramel Pretzel Bites

1. Prep Your Ingredients and Equipment

  • Preheat your oven to 250°F (120°C).
  • Line a cookie sheet with parchment paper, a Silpat liner, or tin foil to prevent sticking.

2. Arrange the Pretzels and Rolos

  • Lay the pretzel snaps in a single layer on the prepared baking sheet.
  • Place an unwrapped Rolo candy in the center of each pretzel.

3. Melt the Rolos in the Oven

  • Bake the pretzel and Rolo assembly in the preheated oven for 4-5 minutes.
  • You’ll know the Rolos are ready when the chocolate looks glossy but still holds its shape. Be careful not to overbake, as the caramel could spill out.

4. Add the M&M’s and Sprinkles

  • As soon as you remove the baking sheet from the oven, place a Valentine’s Day M&M on top of each Rolo.
  • Gently press down on the M&M to slightly flatten the Rolo and spread the caramel.
  • Immediately sprinkle the warm chocolate with heart-shaped or Valentine’s Day-colored sprinkles.
  • Tip: Work one row at a time so the chocolate stays warm and the sprinkles stick properly.

5. Let the Pretzel Bites Cool

  • Allow the pretzel bites to cool at room temperature for about 2 hours so the chocolate can set.
  • If you’re short on time, you can place the baking sheet in the refrigerator for 20-30 minutes to speed up the cooling process.

6. Store and Serve

  • Once the pretzel bites are completely cooled, transfer them to an airtight container.
  • Store them at room temperature and enjoy them within 5-7 days for the best flavor and texture.

Nutritional Information

Here’s a general breakdown of the nutritional values for one caramel pretzel bite (yields approximately 60 bites):

NutrientAmount per Bite
Calories~50
Total Fat2g
Carbohydrates8g
Protein0.5g
Sugar5g

Note: Nutritional values may vary depending on the brands and quantities of ingredients used.

Tips for Perfect Valentine’s Day Caramel Pretzel Bites

1. Use Fresh Ingredients

Make sure your Rolos, M&M’s, and pretzels are fresh to ensure the best flavor and texture.

2. Don’t Overbake the Rolos

Keep a close eye on the Rolos in the oven. You want them soft enough to press down but not so melted that they lose their shape.

3. Work Quickly

When adding the M&M’s and sprinkles, work row by row so the chocolate stays warm and everything sticks properly.

4. Customize the Toppings

If you don’t have Valentine’s Day M&M’s, use regular M&M’s, heart-shaped candies, or even mini chocolate chips.

5. Double the Recipe

These treats are so addictive that they’ll disappear fast! Double the recipe if you’re serving a crowd or making them for gifts.

Serving Suggestions

Valentine’s Day Caramel Pretzel Bites are versatile and perfect for many occasions. Here are some ideas:

  • Gift bags: Package them in clear cellophane bags tied with red or pink ribbons for a festive Valentine’s Day gift.
  • Party trays: Arrange them on a decorative platter for a holiday party or classroom event.
  • Dessert boards: Add them to a Valentine’s-themed dessert board alongside cookies, chocolates, and strawberries.

Variations to Try

  • Peanut Butter Twist: Replace the Rolos with Reese’s Miniature Cups for a chocolate-peanut butter combo.
  • Dark Chocolate Lovers: Use dark chocolate Rolos and dark chocolate M&M’s for a richer flavor.
  • Themed Pretzel Bites: Swap the Valentine’s colors for other holiday-themed M&M’s and sprinkles (e.g., green and red for Christmas, pastels for Easter).
  • Add Nuts: Sprinkle crushed pecans or walnuts over the warm chocolate for added crunch.

Frequently Asked Questions

1. Can I use regular pretzels instead of pretzel snaps?

Yes, you can use regular pretzels or even pretzel rods, but the square-shaped pretzel snaps provide the perfect base for the Rolo candies.

2. How long do these treats stay fresh?

Stored in an airtight container at room temperature, they’ll stay fresh for about 5-7 days.

3. Can I freeze caramel pretzel bites?

While you can freeze them, the chocolate may develop a white coating due to temperature changes. For the best texture and appearance, it’s better to enjoy them fresh.

4. What if I don’t have Rolos?

You can substitute Rolos with other soft-centered chocolates like Hershey’s Kisses or caramel squares.

5. How can I make these gluten-free?

Use gluten-free pretzels, and double-check that your other ingredients are gluten-free.

6. Can I make these ahead of time?

Absolutely! These treats are perfect for making ahead, as they store well at room temperature.

Final Thoughts: Try Valentine’s Day Caramel Pretzel Bites Today!

Valentine’s Day Caramel Pretzel Bites are the ultimate sweet-and-salty treat to share with the people you love. They’re easy to make, incredibly festive, and sure to bring a smile to anyone’s face. Whether you’re making them for a party, a gift, or a fun family activity, these bite-sized snacks are guaranteed to be a hit.

So why wait? Gather your ingredients, preheat your oven, and start creating these adorable treats today. Your friends, family, or coworkers will thank you!

PAUL

Valentine’s Day Caramel Pretzel Bites: A Sweet and Salty Treat Everyone Will Love

Celebrate love with these irresistibly sweet and salty Valentine’s Day Caramel Pretzel Bites! With gooey caramel, crunchy pretzels, and festive decorations, these bite-sized treats are perfect for gifting, sharing, or indulging in yourself. Quick and easy to make, they’ll bring joy to every bite!  
Prep Time 10 minutes
Cook Time 5 minutes
Total Time 2 hours
Course: Dessert, Snack
Cuisine: American

Ingredients
  

Main Ingredients:
  • 60 pretzel snaps square-shaped pretzels
  • 60 Rolo candies unwrapped
  • 60 Valentine’s Mix M&M’s pink, red, and white
Optional Toppings:
  • Heart-shaped sprinkles as needed
  • Valentine’s Day-colored sprinkles as needed

Method
 

Prepare Your Equipment:
  1. Preheat your oven to 250°F (120°C).
  2. Line a cookie sheet with parchment paper, a Silpat liner, or tin foil to prevent sticking.
Assemble the Base:
  1. Arrange the pretzel snaps in a single layer on the prepared baking sheet.
  2. Place an unwrapped Rolo candy in the center of each pretzel.
Melt the Rolos:
  1. Bake in the preheated oven for 4-5 minutes, or until the Rolos are soft but still hold their shape. Be careful not to overbake to prevent the caramel from spilling.
Add Toppings:
  1. Immediately after removing the baking sheet from the oven, press a Valentine’s Mix M&M onto the center of each Rolo to flatten it slightly.
  2. Sprinkle heart-shaped or Valentine’s Day-colored sprinkles on top of the melted chocolate while still warm.
Cool the Pretzel Bites:
  1. Let the pretzel bites cool at room temperature for about 2 hours until the chocolate is fully set.
  2. To speed up the process, place the baking sheet in the refrigerator for 20-30 minutes.
Store and Serve:
  1. Once completely cooled, transfer the pretzel bites to an airtight container.
  2. Store them at room temperature and enjoy within 5-7 days for the best flavor and texture.

Notes

  • Use fresh pretzels and candies for the best flavor and crunch.
  • Don’t overbake the Rolos; they should be soft enough to press but not fully melted.
  • Work quickly when adding M&M’s and sprinkles to ensure they stick to the warm chocolate.
  • Customize the toppings to match other holidays or personal preferences.
 

Valentine’s Day Kitchen Sink Cookies: A Sweet and Salty Treat for Your Loved Ones

Valentine’s Day is a time to celebrate love, and what better way to show your affection than with Valentine’s Day Kitchen Sink Cookies? These cookies are a delightful mix of sweet, salty, crunchy, and chewy—truly the best of all worlds. They’re packed with festive Valentine’s Day M&M’s, potato chips, pretzels, white chocolate chips, and sprinkles, making every bite a party for your taste buds.

Imagine presenting these colorful cookies to your friends, family, or special someone. They’ll love the thoughtfulness, and you’ll enjoy the satisfaction of making something homemade and heartfelt. These cookies are fun to make and even more fun to eat!

Let’s dive into everything you need to know to create these irresistibly delicious cookies.

Why You’ll Love Valentine’s Day Kitchen Sink Cookies

Here’s why this recipe will become your go-to Valentine’s Day treat:

  • Festive and fun: The vibrant colors of Valentine’s Day M&M’s and sprinkles make these cookies perfect for the occasion.
  • Sweet and salty combo: The mix of chocolate, potato chips, and pretzels creates an addictive balance of flavors.
  • Simple to make: With easy-to-follow instructions, these cookies are beginner-friendly.
  • Customizable: You can swap out ingredients or add your favorite mix-ins to make them your own.
  • Perfect for sharing: These cookies are great for gifting or bringing to a Valentine’s Day party.

Ingredients for Valentine’s Day Kitchen Sink Cookies

Here’s everything you’ll need to make these sweet and salty cookies:

Wet Ingredients

IngredientQuantityNotes
Unsalted butter¾ cup (softened)Provides richness and helps create a soft texture.
Dark brown sugar¾ cupAdds moisture and a deep, caramel-like flavor.
White sugar¼ cupBalances the sweetness.
Egg yolks2 (room temperature)Helps bind the dough and adds richness.
Vanilla extract2 tablespoonsEnhances the flavor of the cookies.

Dry Ingredients

IngredientQuantityNotes
All-purpose flour1 ½ cupsThe foundation of the cookie dough.
Baking soda½ teaspoonHelps the cookies spread slightly.
Baking powder¼ teaspoonAdds a little lift to the cookies.
Salt¼ teaspoonBalances the sweetness.

Mix-Ins and Toppings

IngredientQuantityNotes
Potato chips⅓ cupCrushed for a salty, crunchy texture.
Pretzel pieces⅓ cupAdds another salty, crunchy element.
Valentine’s Day M&M’s½ cupFestive and colorful chocolate candies.
White chocolate chips¼ cupSweet and creamy mix-in for extra indulgence.
Valentine’s Day sprinkles2 tablespoonsOptional, but adds a festive touch.

Step-by-Step Instructions for Valentine’s Day Kitchen Sink Cookies

1. Prep Your Ingredients and Equipment

  • Preheat your oven to 350°F (175°C).
  • Line two baking sheets with parchment paper and set them aside.
  • Measure and prepare all your ingredients so everything is ready to go.

2. Cream the Butter and Sugars

  • In a large mixing bowl, add the softened unsalted butter, dark brown sugar, and white sugar.
  • Using an electric mixer on medium speed, cream the ingredients together for 2 minutes, until light and fluffy.

3. Add the Wet Ingredients

  • Mix in the egg yolks and vanilla extract, beating on medium speed for about 2 minutes until the mixture is pale and fluffy.

4. Incorporate the Dry Ingredients

  • In a separate bowl, whisk together the flour, baking soda, baking powder, and salt.
  • Gradually add the dry ingredients to the wet mixture, mixing on low speed until just combined. Make sure there are no streaks of flour left.

5. Fold in the Mix-Ins

  • Now comes the fun part! Gently fold in the potato chips, pretzel pieces, Valentine’s Day M&M’s, white chocolate chips, and sprinkles with a spatula. Be careful not to overmix, as you want the add-ins evenly distributed without breaking them down too much.

6. Shape the Cookies

  • Use a cookie scoop or tablespoon to portion out the dough into 1 ½ tablespoon-sized balls. Place the dough balls on the prepared baking sheets, leaving about 2 inches of space between each cookie to allow for spreading.

7. Bake the Cookies

  • Place the baking sheets in the preheated oven and bake for 10-12 minutes, or until the edges are lightly golden brown.
  • If the cookies don’t flatten as desired, remove them from the oven at 10 minutes, gently press down on each cookie with the bottom of a glass, and bake for an additional 2-3 minutes.

8. Make Perfect Circles (Optional)

  • For bakery-style round cookies, use a circular glass to lightly swirl around each cookie while it’s still warm.

9. Cool and Enjoy

  • Let the cookies cool on the baking sheets for 5 minutes, then transfer them to a wire rack to cool completely.
  • Add extra toppings like sprinkles or M&M’s on top for an extra festive touch, and enjoy!

Nutritional Information

Here’s an approximate breakdown of the nutritional values per cookie (yields about 24 cookies):

NutrientAmount per Cookie
Calories~150
Total Fat8g
Carbohydrates18g
Protein2g
Sugar12g

Note: Values may vary based on specific brands and ingredient substitutions.

Tips for Perfect Valentine’s Day Kitchen Sink Cookies

  • Use room-temperature ingredients: This helps the dough come together smoothly and ensures even baking.
  • Don’t overmix the dough: Overmixing can make the cookies tough instead of tender. Mix just until everything is combined.
  • Chill the dough if needed: If your dough feels too soft, refrigerate it for 15-20 minutes before baking.
  • Customize the mix-ins: Swap out M&M’s for chocolate chips or pretzels for nuts—get creative!
  • Store them properly: Keep cookies in an airtight container at room temperature for up to 5 days.

Serving Suggestions

These cookies are versatile and perfect for any occasion. Here are some ideas:

  • Gift them: Package them in a decorative box or cellophane bag tied with a ribbon for a thoughtful Valentine’s Day gift.
  • Serve at parties: These cookies are great for Valentine’s Day celebrations, potlucks, or school events.
  • Pair with a drink: Enjoy them with a glass of milk, a cup of coffee, or hot cocoa for the ultimate treat.

Variations to Try

  • Gluten-free: Substitute all-purpose flour with a gluten-free flour blend.
  • Dark chocolate twist: Replace white chocolate chips with dark chocolate for a richer flavor.
  • Nutty crunch: Add chopped almonds, pecans, or walnuts to the mix.
  • Holiday swaps: Use seasonal M&M’s and sprinkles to make these cookies for other holidays like Christmas or Easter.

Frequently Asked Questions

1. Can I make the dough ahead of time?

Yes! You can refrigerate the dough for up to 2 days. Let it sit at room temperature for 15 minutes before baking.

2. What’s the best way to store these cookies?

Store them in an airtight container at room temperature for up to 5 days. You can also freeze baked cookies for up to 3 months.

3. Can I freeze the dough?

Absolutely. Scoop the dough into balls, place them on a baking sheet to freeze, then transfer them to a freezer bag. Bake from frozen, adding 1-2 extra minutes.

4. Can I make these cookies without M&M’s?

Yes, you can skip the M&M’s or replace them with chocolate chips, dried fruit, or nuts.

5. Why didn’t my cookies spread?

If your cookies didn’t spread, your dough might have been too cold or you added too much flour. Press them down slightly before baking to help them flatten.

6. How do I make these cookies even more festive?

Add extra sprinkles or use heart-shaped decorations for an extra Valentine’s Day touch.

Final Thoughts: Bake Valentine’s Day Kitchen Sink Cookies Today!

Valentine’s Day Kitchen Sink Cookies are a perfect way to celebrate love, friendship, or just your love for delicious desserts. With their sweet and salty combination and colorful mix-ins, these cookies are bound to put a smile on anyone’s face.

So gather your ingredients, preheat your oven, and have fun baking these festive treats. Don’t forget to share them with your loved ones—they’ll appreciate the thought and effort!

PAUL

Valentine’s Day Kitchen Sink Cookies: A Sweet and Salty Treat for Your Loved Ones

Celebrate love with these colorful and festive Valentine’s Day Kitchen Sink Cookies! Packed with sweet M&M’s, salty potato chips, crunchy pretzels, and creamy white chocolate chips, these cookies are a delightful mix of flavors and textures. Perfect for sharing, gifting, or enjoying with loved ones, they’re as fun to make as they are to eat!  
Prep Time 15 minutes
Cook Time 12 minutes
Total Time 27 minutes
Course: Dessert
Cuisine: American

Ingredients
  

Wet Ingredients:
  • Unsalted butter ¾ cup (softened)
  • Dark brown sugar ¾ cup
  • White sugar ¼ cup
  • Egg yolks 2 (room temperature)
  • Vanilla extract 2 tablespoons
Dry Ingredients:
  • All-purpose flour 1 ½ cups
  • Baking soda ½ teaspoon
  • Baking powder ¼ teaspoon
  • Salt ¼ teaspoon
Mix-Ins and Toppings:
  • Potato chips ⅓ cup (crushed)
  • Pretzel pieces ⅓ cup
  • Valentine’s Day M&M’s ½ cup
  • White chocolate chips ¼ cup
  • Valentine’s Day sprinkles 2 tablespoons (optional)

Method
 

Prepare Your Equipment:
  1. Preheat your oven to 350°F (175°C).
  2. Line two baking sheets with parchment paper.
Cream the Butter and Sugars:
  1. In a large mixing bowl, beat softened butter, dark brown sugar, and white sugar with an electric mixer on medium speed until light and fluffy (about 2 minutes).
Add the Wet Ingredients:
  1. Mix in the egg yolks and vanilla extract. Beat until the mixture is pale and smooth, about 2 minutes.
Combine the Dry Ingredients:
  1. In a separate bowl, whisk together the flour, baking soda, baking powder, and salt.
  2. Gradually add the dry mixture to the wet mixture, mixing on low speed until just combined.
Incorporate the Mix-Ins:
  1. Gently fold in the potato chips, pretzel pieces, M&M’s, white chocolate chips, and sprinkles using a spatula. Avoid overmixing to keep the mix-ins intact.
Shape the Cookies:
  1. Scoop 1 ½ tablespoon-sized portions of dough and roll them into balls.
  2. Place the dough balls on the prepared baking sheets, leaving 2 inches of space between each cookie.
Bake the Cookies:
  1. Bake in the preheated oven for 10-12 minutes, or until the edges are lightly golden.
  2. If the cookies don’t spread enough, remove them from the oven after 10 minutes, press down gently with the bottom of a glass, and bake for an additional 2-3 minutes.
Cool and Decorate:
  1. Let the cookies cool on the baking sheets for 5 minutes, then transfer them to a wire rack to cool completely.
  2. For extra flair, press a few additional M&M’s or sprinkles onto the cookies while they’re still warm.

Notes

  • Use room-temperature ingredients for smooth dough and even baking.
  • Refrigerate the dough for 15-20 minutes if it feels too soft.
  • Don’t overbake—remove the cookies once the edges are golden to keep them soft and chewy.
  • Customize the mix-ins to suit your taste or occasion.