The Ultimate Guide to Instant Pot Beef Tips & Gravy: A Comfort Food Classic

There’s something magical about comfort food, isn’t there? It takes you back to warm memories, cozy kitchens, and flavors that feel like a hug. If you’ve ever craved a hearty, flavorful meal that’s easy to make, Instant Pot Beef Tips & Gravy is the answer. Whether you’re new to the Instant Pot or a seasoned pro, this dish promises melt-in-your-mouth beef smothered in a rich, savory gravy. With the right ingredients and tips, you’ll have a meal worthy of any family dinner or special occasion.

Ingredients for Instant Pot Beef Tips & Gravy

A successful dish starts with the right ingredients. Here’s what you’ll need to create this culinary masterpiece:

IngredientQuantity
Oil (vegetable or olive)3 tablespoons
Stew meat (or cubed chuck)2 pounds
Salt and pepperTo taste
Sweet onion (finely diced)1
Garlic (minced)4 cloves
Beef broth2 cups
Worcestershire sauce2 tablespoons
Bay leaf1
Italian seasoning1 teaspoon
Fresh thyme (or dried)1 sprig (or 1 tsp)
Cornstarch + water3 tablespoons each
Cooked rice or egg noodlesAs needed (optional)
Fresh parsley (for garnish)As desired

Why You’ll Love This Recipe

  • Quick and Easy: The Instant Pot does all the hard work, saving you hours of cooking time.
  • Flavorful: The blend of Italian seasoning, Worcestershire sauce, and garlic creates a gravy that’s bursting with flavor.
  • Versatile: Serve it over rice, egg noodles, or mashed potatoes for a complete meal.

Step-by-Step Instructions

1. Prepare Your Ingredients

Start by dicing the onion, mincing the garlic, and cubing the beef if not already done. This will make the cooking process seamless.

2. Sear the Beef

  • Set your Instant Pot to the sauté setting.
  • Add the oil and let it heat until shimmering.
  • Season the beef with salt and pepper, then sear it in batches until browned. This step locks in the juices.

3. Sauté the Aromatics

  • After removing the beef, add the diced onion to the pot.
  • Sauté for 2–3 minutes until translucent, then stir in the minced garlic for an additional 30 seconds.

4. Deglaze the Pot

  • Pour in a splash of beef broth to deglaze the pot, scraping up any browned bits stuck to the bottom.
  • This adds depth of flavor and prevents burning during pressure cooking.

5. Combine Ingredients

  • Return the beef to the pot.
  • Add the beef broth, Worcestershire sauce, bay leaf, Italian seasoning, and thyme. Stir to combine.

6. Pressure Cook

  • Secure the Instant Pot lid and set the valve to sealing.
  • Cook on high pressure for 35 minutes, followed by a 10-minute natural release.

7. Thicken the Gravy

  • Switch the Instant Pot back to sauté mode.
  • Mix the cornstarch with water to create a slurry, then stir it into the pot.
  • Let the gravy simmer for 3–5 minutes until thickened.

8. Serve and Garnish

  • Remove the bay leaf and thyme sprig.
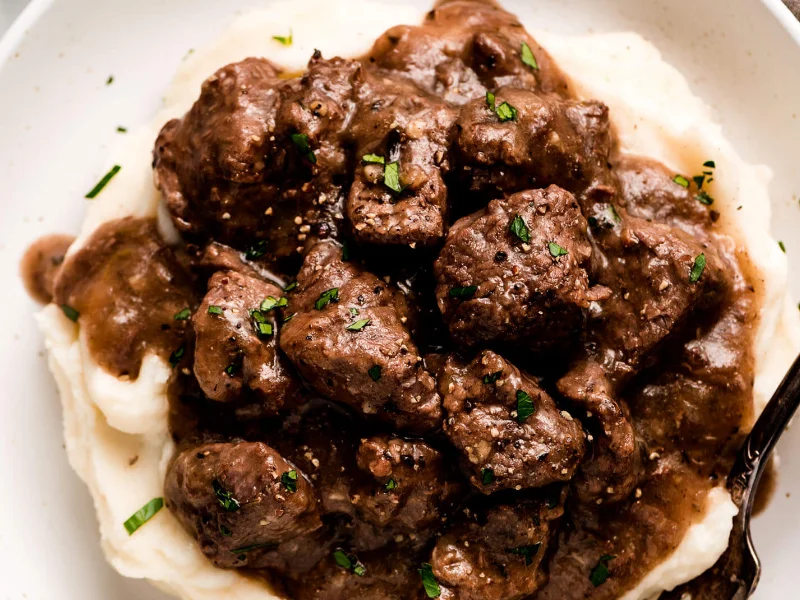
  • Serve the beef tips and gravy over rice, egg noodles, or mashed potatoes.
  • Garnish with fresh parsley for a touch of color and freshness.

Pro Tips for Perfect Beef Tips & Gravy

  • Choose the Right Cut: Use chuck or stew meat for tender, flavorful beef.
  • Don’t Skip the Searing: This step adds a caramelized depth to the beef.
  • Adjust Seasonings: Taste the gravy before serving and adjust salt, pepper, or Worcestershire sauce as needed.
  • Storage: Store leftovers in an airtight container for up to 3 days or freeze for up to 3 months.

Nutritional Information

NutrientAmount (Per Serving)
Calories~320
Protein28g
Carbohydrates10g
Fat18g
Fiber2g
Sodium680mg

FAQs About Instant Pot Beef Tips & Gravy

1. Can I use a different cut of meat?
Absolutely! Short ribs or sirloin tips work well if you don’t have chuck or stew meat.

2. How can I make this gluten-free?
Substitute cornstarch for flour to thicken the gravy and ensure all seasonings used are gluten-free.

3. Can I add vegetables to the recipe?
Yes! Mushrooms, carrots, or peas can be added during the last 10 minutes of pressure cooking for a heartier dish.

4. What if I don’t have Worcestershire sauce?
You can use soy sauce as an alternative, though it will slightly change the flavor profile.

5. How do I reheat leftovers?
Reheat gently on the stovetop or in the microwave, adding a splash of beef broth to loosen the gravy if needed.

6. Can I make this recipe in a slow cooker?
Yes! Follow the searing and sautéing steps, then transfer everything to a slow cooker. Cook on low for 6–8 hours.

Conclusion: Bring Comfort to Your Table

There’s nothing quite like the satisfaction of a home-cooked meal, and Instant Pot Beef Tips & Gravy delivers on every level. With its tender beef, rich gravy, and simple preparation, this dish is perfect for both busy weeknights and leisurely weekends. Now it’s your turn to create this delicious comfort food. Gather your ingredients, fire up your Instant Pot, and enjoy the magic of a dish that brings warmth and joy to every bite.

Instant Pot Beef Tips & Gravy

Comfort food at its finest! This Instant Pot Beef Tips & Gravy recipe delivers tender beef smothered in a savory, rich gravy. Perfect for weeknight dinners or special family meals, this dish comes together quickly in the Instant Pot and pairs beautifully with rice, noodles, or mashed potatoes.
Prep Time 10 minutes
Cook Time 50 minutes
Total Time 1 hour
Servings: 6 servings
Course: Main Course
Cuisine: American

Ingredients
  

  • 3 tablespoons oil vegetable or olive
  • 2 pounds stew meat or cubed chuck
  • Salt and pepper to taste
  • 1 sweet onion finely diced
  • 4 cloves garlic minced
  • 2 cups beef broth
  • 2 tablespoons Worcestershire sauce
  • 1 bay leaf
  • 1 teaspoon Italian seasoning
  • 1 sprig fresh thyme or 1 teaspoon dried
  • 3 tablespoons cornstarch + 3 tablespoons water for slurry
  • Cooked rice egg noodles, or mashed potatoes (optional, for serving)

Equipment

  • Pressure cooker

Method
 

  1. Prepare Ingredients:
  2. Dice onion, mince garlic, and cube beef (if needed).
  3. Sear the Beef:
  4. Set Instant Pot to sauté mode.
  5. Heat oil until shimmering, season beef with salt and pepper, and sear in batches until browned. Remove beef and set aside.
  6. Sauté Aromatics:
  7. Add diced onion to the pot and sauté for 2–3 minutes until translucent.
  8. Stir in minced garlic and cook for 30 seconds.
  9. Deglaze Pot:
  10. Pour in a splash of beef broth and scrape the bottom of the pot to release browned bits.
  11. Combine Ingredients:
  12. Return beef to the pot. Add beef broth, Worcestershire sauce, bay leaf, Italian seasoning, and thyme. Stir to combine.
  13. Pressure Cook:
  14. Secure lid and set valve to sealing. Cook on high pressure for 35 minutes, followed by a 10-minute natural release.
  15. Thicken Gravy:
  16. Switch to sauté mode. Mix cornstarch with water to make a slurry, then stir into the pot. Simmer for 3–5 minutes until gravy thickens.
  17. Serve and Garnish:
  18. Remove bay leaf and thyme sprig. Serve beef tips and gravy over rice, noodles, or potatoes. Garnish with fresh parsley.

Notes

Tips:
Searing the beef adds flavor; don’t skip this step!
Adjust seasonings as needed for taste.
Store leftovers in the fridge for up to 3 days or freeze for up to 3 months.

Chicken Minestrone Soup: A Hearty Comfort Dish for Every Season

Cooking a homemade soup like Chicken Minestrone is more than just preparing a meal—it’s about creating warmth, nourishment, and comfort in every spoonful. Whether you’re battling a cold day or simply looking for a wholesome meal, this recipe offers everything you need. Let’s dive into crafting the perfect pot of Chicken Minestrone Soup using fresh ingredients and simple techniques.

Why You’ll Love Chicken Minestrone Soup

Chicken Minestrone Soup is the perfect blend of flavors, textures, and nutrients. The tender chicken, vibrant vegetables, and perfectly cooked pasta create a symphony of deliciousness. It’s a recipe that’s not only easy to prepare but also versatile, allowing you to tweak it to suit your preferences.

Ingredients You’ll Need

Here’s a list of ingredients to gather before starting:

IngredientQuantity
Olive oil2 tablespoons
Yellow onion, diced2 cups (about 1 onion)
Carrots, diced1 cup (about 2 carrots)
Celery, diced1 cup (about 3 celery ribs)
Green beans, cut into 1-inch pieces1 cup
Garlic, minced1 tablespoon (about 3 cloves)
Low-sodium chicken or vegetable broth6 cups
Petite diced tomatoes (do not drain)2 (14.5 oz) cans
Great northern beans, rinsed and drained1 (15.5 oz) can
Bay leaves2 leaves
Dried oregano1 teaspoon
Dried thyme1 teaspoon
Kosher salt½ teaspoon
Black pepper¼ teaspoon
Boneless, skinless chicken breasts2 (about 1 pound)
Dry ditalini pasta (or other small pasta)¾ cup
Fresh parsley, chopped½ cup

Nutritional Benefits of Chicken Minestrone Soup

This soup isn’t just flavorful—it’s packed with nutrients. The combination of lean chicken, beans, and fresh vegetables provides a balanced dose of protein, fiber, vitamins, and minerals. Here’s a quick breakdown:

NutrientSourceBenefit
ProteinChicken, beansSupports muscle repair and growth
FiberVegetables, beansAids digestion and promotes fullness
Vitamin CParsley, tomatoesBoosts immunity and skin health
IronBeans, parsleyHelps maintain energy and oxygen levels

Step-by-Step Guide to Making Chicken Minestrone Soup

1. Prepare Your Ingredients

Start by washing, peeling, and dicing your vegetables. This includes the onion, carrots, celery, and green beans. Rinse the beans thoroughly and set everything aside.

2. Sauté the Aromatics

In a large soup pot, heat the olive oil over medium heat. Add the diced onions, carrots, and celery. Sauté them for about 5–7 minutes until they soften and the onions become translucent. Stir in the minced garlic and cook for another minute until fragrant.

3. Build the Base

Pour in the chicken or vegetable broth, and add the diced tomatoes (with their juices), great northern beans, bay leaves, dried oregano, thyme, salt, and pepper. Stir everything well to combine the flavors.

4. Add the Chicken

Place the chicken breasts directly into the soup. Ensure they are submerged in the liquid. Bring the soup to a gentle boil, then reduce the heat to low, cover the pot, and simmer for 20–25 minutes.

5. Shred the Chicken

Once the chicken is fully cooked, remove it from the pot and use two forks to shred it into bite-sized pieces. Return the shredded chicken to the soup.

6. Cook the Pasta

Add the dry ditalini pasta to the pot and let it cook for about 8–10 minutes, or until it’s al dente. Stir occasionally to prevent the pasta from sticking to the bottom.

7. Finish with Fresh Parsley

Remove the bay leaves from the pot and stir in the chopped fresh parsley. Adjust the seasoning with additional salt and pepper if needed.

8. Serve and Enjoy

Ladle the Chicken Minestrone Soup into bowls and serve it warm with crusty bread or a side salad for a complete meal.

Tips and Tricks for the Perfect Chicken Minestrone Soup

Customize Your Vegetables

Feel free to swap in zucchini, spinach, or kale for extra greens. Seasonal vegetables can also be added to keep the recipe fresh year-round.

Use Leftover Chicken

If you have leftover roasted chicken or a rotisserie chicken, you can shred it and add it in step 5 to save time.

Go Gluten-Free

Substitute the ditalini pasta with gluten-free pasta or rice to make this recipe suitable for gluten-sensitive individuals.

Storage and Reheating

Store leftovers in an airtight container in the refrigerator for up to 4 days. Reheat gently on the stove or in the microwave, adding a splash of broth to adjust the consistency.

Frequently Asked Questions (FAQs)

1. Can I freeze Chicken Minestrone Soup?

Yes, you can freeze this soup! However, it’s best to freeze it without the pasta, as pasta can become mushy when reheated. Add freshly cooked pasta after reheating.

2. What can I use instead of chicken?

If you prefer a vegetarian option, skip the chicken and add more beans, such as kidney or cannellini beans, for extra protein.

3. How do I make this soup spicier?

Add a pinch of red pepper flakes or a diced jalapeño while sautéing the vegetables to give the soup a spicy kick.

4. Is there a low-carb version of this soup?

Replace the pasta with zucchini noodles or cauliflower rice to make it low-carb.

5. What type of broth is best?

Low-sodium chicken broth is ideal for a balanced flavor, but vegetable broth works well for a vegetarian version.

6. Can I use canned chicken?

Yes, canned chicken can be used in a pinch. Add it towards the end of the cooking process to prevent it from becoming overly dry.

Conclusion: Bring Comfort to Your Table

Chicken Minestrone Soup is more than just a meal—it’s a tradition of comfort, flavor, and nourishment. By following this recipe, you’ll create a dish that’s not only delicious but also wholesome and satisfying for the whole family. So grab your ingredients, set aside an hour, and treat yourself to a warm bowl of homemade goodness.

Start cooking today, and bring joy to your kitchen one pot at a time!

Chicken Minestrone Recipe

Chicken Minestrone Soup is a hearty, comforting dish filled with tender chicken, vibrant vegetables, and perfectly cooked pasta. It’s a symphony of flavors and textures that’s both wholesome and satisfying, perfect for any season.
Prep Time 15 minutes
Cook Time 40 minutes
Total Time 55 minutes
Servings: 6 servings
Course: Soup
Cuisine: Italian-American

Ingredients
  

  • 2 tablespoons olive oil
  • 2 cups yellow onion diced (about 1 onion)
  • 1 cup carrots diced (about 2 carrots)
  • 1 cup celery diced (about 3 ribs)
  • 1 cup green beans cut into 1-inch pieces
  • 1 tablespoon garlic minced (about 3 cloves)
  • 6 cups low-sodium chicken or vegetable broth
  • 2 14.5 oz cans petite diced tomatoes (do not drain)
  • 1 15.5 oz can great northern beans, rinsed and drained
  • 2 bay leaves
  • 1 teaspoon dried oregano
  • 1 teaspoon dried thyme
  • ½ teaspoon kosher salt
  • ¼ teaspoon black pepper
  • 2 boneless skinless chicken breasts (about 1 pound)
  • ¾ cup dry ditalini pasta or other small pasta
  • ½ cup fresh parsley chopped

Method
 

  1. Prepare the Vegetables: Wash, peel, and dice the onion, carrots, celery, and green beans. Rinse the beans and set aside.
    Sauté Aromatics: Heat olive oil in a large soup pot over medium heat. Add onions, carrots, and celery, and sauté for 5-7 minutes until softened. Stir in garlic and cook for 1 more minute.
    Build the Base: Pour in the broth, diced tomatoes (with juices), beans, bay leaves, oregano, thyme, salt, and pepper. Stir well.
    Cook the Chicken: Submerge the chicken breasts in the soup. Bring to a gentle boil, reduce heat to low, cover, and simmer for 20-25 minutes.
    Shred the Chicken: Remove the cooked chicken, shred it with two forks, and return it to the pot.
    Cook the Pasta: Add pasta and cook for 8-10 minutes, stirring occasionally.
    Finish with Parsley: Remove bay leaves and stir in fresh parsley. Adjust seasoning if needed.
    Serve: Ladle into bowls and enjoy warm with crusty bread or a side salad.

Notes

Customizable Veggies: Add zucchini, spinach, or kale for variety.
Gluten-Free Option: Use gluten-free pasta or substitute with rice.
Storage: Store in an airtight container in the refrigerator for up to 4 days. Add a splash of broth when reheating.

5-Ingredient Honey Garlic Glazed Salmon: A Perfect Recipe for Any Occasion

When it comes to quick, healthy, and utterly delicious meals, 5-Ingredient Honey Garlic Glazed Salmon takes the crown. Imagine tender salmon fillets coated in a sweet and savory glaze that caramelizes beautifully in just minutes. Whether you’re cooking for yourself or hosting a dinner, this dish promises to impress with minimal effort.

Salmon isn’t just a tasty treat—it’s a powerhouse of nutrition. Paired with a glaze made from pantry staples, it’s the ultimate recipe to save time without sacrificing flavor. So, roll up your sleeves and get ready to create magic in the kitchen!

Why You’ll Love This Recipe

  1. Minimal Ingredients: You only need five main ingredients, plus a couple of optional garnishes.
  2. Fast Prep Time: From start to finish, this recipe is ready in under 30 minutes.
  3. Customizable: Adjust sweetness, tanginess, or saltiness to suit your taste.
  4. Healthy and Nutritious: Packed with omega-3 fatty acids, protein, and essential nutrients.
  5. Crowd-Pleaser: A restaurant-quality dish that’s perfect for weeknights or special occasions.

Ingredients You’ll Need

Here’s everything required to make 5-Ingredient Honey Garlic Glazed Salmon, all simple and easily accessible:

IngredientQuantity
Salmon fillets (skin-on)4 (6-ounce pieces)
Kosher salt1 1/4 teaspoons
Lemon1/2 medium
Honey1/4 cup
Soy sauce or tamari2 tablespoons
Garlic4 cloves (minced)
Olive oil1 tablespoon
Scallions (optional)Thinly sliced

Ingredient Notes

  • Salmon: Choose fresh, high-quality fillets for the best results. Wild-caught salmon is a fantastic option for its robust flavor.
  • Honey: Provides the natural sweetness that balances the savory notes.
  • Soy Sauce: Tamari works perfectly if you’re gluten-free.
  • Garlic: Freshly minced garlic enhances the aroma and flavor.

Step-by-Step Instructions

1. Prep the Salmon

  • Pat the salmon fillets dry with a paper towel. Sprinkle 1 teaspoon of kosher salt evenly over the fillets and let them rest for a few minutes to absorb the seasoning.

2. Prepare the Glaze

  • In a small bowl, whisk together honey, soy sauce, minced garlic, and the juice from half a lemon. This combination creates a perfect balance of sweet, savory, and tangy flavors.

3. Sear the Salmon

  • Heat 1 tablespoon of olive oil in a large skillet over medium-high heat. Once the oil shimmers, place the salmon fillets skin-side down in the skillet. Cook for 3–4 minutes until the skin is crispy and golden brown.

4. Add the Glaze

  • Flip the salmon fillets gently and pour the honey-garlic mixture into the skillet. Reduce the heat to medium-low and let the glaze simmer for 2–3 minutes, basting the salmon with the sauce to ensure it’s fully coated.

5. Finish and Serve

  • Remove the skillet from the heat. Plate the salmon fillets, drizzle with extra glaze, and garnish with thinly sliced scallions if desired. Serve immediately.

Pro Tips for the Best Honey Garlic Glazed Salmon

1. Use Skin-On Fillets

The skin helps the salmon retain its moisture during cooking. Plus, crispy skin adds a delightful texture!

2. Don’t Overcook

Salmon is best when it’s slightly opaque in the center. Overcooking can lead to a dry texture.

3. Adjust the Glaze

If you like a sweeter glaze, add a bit more honey. For extra tang, squeeze in more lemon juice.

Nutritional Information

NutrientAmount (per serving)
Calories320
Protein28g
Fat12g
Carbohydrates22g
Omega-3 Fatty AcidsHigh
Sodium580mg

What to Serve with Honey Garlic Glazed Salmon

Pair your salmon with sides that complement its bold flavors. Here are some ideas:

  • Rice or Quinoa: Perfect for soaking up the glaze.
  • Steamed Vegetables: Broccoli, asparagus, or green beans work beautifully.
  • Crispy Roasted Potatoes: Add a crunchy contrast to the soft salmon.

Common Mistakes to Avoid

1. Skipping the Skin

Leaving the skin on enhances the salmon’s flavor and keeps it intact while cooking.

2. Using Too Much Heat

High heat can burn the honey in the glaze, leading to bitterness. Always reduce the heat once the glaze is added.

3. Overcrowding the Pan

Cook the fillets in batches if necessary to ensure even cooking.

FAQs

1. Can I use frozen salmon?

Yes, but make sure to thaw it completely and pat it dry before cooking for the best texture and flavor.

2. Is there a substitute for honey?

Maple syrup or agave nectar are great alternatives, but they may slightly alter the flavor.

3. How do I know when the salmon is done?

The salmon is done when it flakes easily with a fork and is opaque in the center.

4. Can I bake this recipe instead of pan-searing?

Absolutely! Bake at 375°F (190°C) for 12–15 minutes, basting with the glaze halfway through.

5. Is this recipe gluten-free?

Yes, if you use tamari instead of regular soy sauce.

6. How long does leftover salmon last?

Store leftovers in an airtight container in the refrigerator for up to 3 days.

Conclusion: Your New Favorite Salmon Recipe

With just five ingredients and a few simple steps, 5-Ingredient Honey Garlic Glazed Salmon is destined to become your go-to recipe. It’s healthy, flavorful, and versatile enough for any occasion. Whether you’re a novice cook or a seasoned chef, this dish is guaranteed to impress.

Ready to create a memorable meal? Grab your ingredients, follow these steps, and savor the deliciousness of honey garlic glazed salmon tonight!

Honey Garlic Salmon Recipe

This 5-Ingredient Honey Garlic Glazed Salmon recipe is the ultimate quick, healthy, and flavorful meal! Tender salmon fillets are coated in a perfectly balanced sweet and savory glaze, caramelized to perfection in just minutes. Perfect for busy weeknights or special dinners!
Prep Time 5 minutes
Cook Time 20 minutes
Total Time 25 minutes
Servings: 4 servings
Course: Main Course
Cuisine: American

Ingredients
  

Salmon fillets (skin-on): 4 (6-ounce pieces)Kosher salt: 1 1/4 teaspoonsLemon: 1/2 medium (juiced)Honey: 1/4 cupSoy sauce or tamari: 2 tablespoonsGarlic: 4 cloves (minced)Olive oil: 1 tablespoonScallions (optional): Thinly sliced

Method
 

  1. Prep the SalmonPat the salmon fillets dry with a paper towel. Sprinkle 1 teaspoon of kosher salt over the fillets and let them rest for a few minutes.
    Prepare the GlazeIn a small bowl, whisk together honey, soy sauce, minced garlic, and lemon juice.
    Sear the SalmonHeat olive oil in a large skillet over medium-high heat. Place salmon fillets skin-side down and cook for 3–4 minutes until the skin is crispy.
    Add the GlazeFlip the salmon, pour the glaze into the skillet, and reduce the heat to medium-low. Let the glaze simmer for 2–3 minutes, basting the salmon.
    Finish and ServeRemove from heat, plate the salmon, drizzle with extra glaze, and garnish with scallions if desired. Serve immediately.

Notes

Salmon Selection: Wild-caught salmon offers the best flavor.
Adjust Glaze: Add more honey for sweetness or lemon juice for tanginess.
Cooking Tip: Salmon is perfectly cooked when it’s slightly opaque and flakes easily with a fork.

Roasted Broccoli With Parmesan: Your Guide to a Delicious and Nutritious Side Dish

Broccoli might not have been your favorite vegetable growing up, but roasted broccoli with Parmesan could easily change your mind. With its crispy edges, nutty flavor, and cheesy finish, it transforms a humble veggie into a dish you’ll want to make on repeat. Plus, it’s so simple, you won’t believe the flavor that comes from just a few pantry staples. Whether you’re looking to elevate your weeknight dinners or impress guests with a healthy yet indulgent side, this dish is the answer.

Let’s dive into everything you need to know about making roasted broccoli with Parmesan, from ingredients to techniques, and even some frequently asked questions.

Ingredients for Roasted Broccoli With Parmesan

Here’s everything you need to make this crowd-pleaser:

IngredientQuantityNotes
Broccoli1 ½ pounds (680g)About 2 medium crowns, cut into florets of even size
Extra virgin olive oil3–4 tablespoonsFor roasting and adding richness
Lemon juice1 tablespoon (½ lemon)Adds brightness
Kosher saltTo tasteEnhances flavor
Garlic2–3 cloves, mincedFor a savory kick
Freshly ground black pepperTo tasteBalances the flavors
Parmesan cheese¼ cup, grated (or to taste)Provides a cheesy, savory finish

Why You’ll Love Roasted Broccoli With Parmesan

Roasted broccoli is more than just a side dish. It’s an experience that engages all your senses.

  1. Flavorful: Roasting enhances broccoli’s natural sweetness and nuttiness.
  2. Texture: The crisp-tender bite and caramelized edges are irresistible.
  3. Healthy: Packed with vitamins, minerals, and antioxidants.
  4. Quick and Easy: Minimal prep and cleanup make it perfect for busy nights.

How to Prepare Your Ingredients

  1. Choose the Right Broccoli: Look for vibrant green crowns with firm stems. Avoid any with yellowing florets or soft spots.
  2. Cut Evenly: Cut the broccoli into evenly sized florets to ensure uniform roasting.
  3. Prep the Garlic: Mince the garlic finely to evenly distribute its bold flavor.
  4. Measure Parmesan: Grate fresh Parmesan for the best taste. Pre-grated versions may contain additives that affect melting.

The Step-by-Step Recipe

1. Preheat Your Oven

Set your oven to 425°F (220°C). This high temperature ensures crispy, caramelized broccoli.

2. Prepare the Baking Sheet

Line a large baking sheet with parchment paper or foil for easy cleanup.

3. Toss the Broccoli

In a large bowl, combine the broccoli florets with olive oil, lemon juice, garlic, salt, and pepper. Toss well to coat each piece.

4. Arrange and Roast

Spread the broccoli in a single layer on the prepared baking sheet. Don’t overcrowd, or the broccoli will steam instead of roast.

5. Roast to Perfection

Roast for 20–25 minutes, turning the florets halfway through for even browning.

6. Add Parmesan

Sprinkle the grated Parmesan over the broccoli during the last 5 minutes of roasting. This allows the cheese to melt slightly without burning.

Pro Tips for the Best Roasted Broccoli

  1. Don’t Skimp on Oil: Olive oil helps achieve those crispy edges and adds richness.
  2. Add Zest: For extra brightness, sprinkle lemon zest over the broccoli before serving.
  3. Experiment with Cheese: Try Pecorino Romano or Asiago for a different flavor profile.
  4. Mix in Nuts: Toasted almonds or pine nuts add a delightful crunch.
  5. Spice It Up: Add a pinch of red pepper flakes for a spicy kick.

Nutritional Benefits of Broccoli

Roasted broccoli isn’t just delicious—it’s also incredibly healthy.

NutrientBenefits
Vitamin CBoosts immunity and promotes healthy skin.
FiberSupports digestion and heart health.
IronHelps carry oxygen through the body.
AntioxidantsProtect cells from damage.

Ways to Serve Roasted Broccoli With Parmesan

  • As a Side Dish: Perfect with roasted chicken, grilled steak, or baked salmon.
  • On Pasta: Toss with cooked pasta, olive oil, and extra Parmesan for a quick meal.
  • In Salads: Add to grain bowls or mixed greens for a hearty salad.
  • On Pizza: Use as a topping for a cheesy veggie pizza.

Common Mistakes to Avoid

  1. Overcrowding the Pan: Leads to steaming instead of roasting.
  2. Skipping the Flip: Forgetting to turn the broccoli results in uneven browning.
  3. Using Too Little Oil: Without enough oil, the broccoli won’t crisp up.
  4. Adding Parmesan Too Early: The cheese can burn if added too soon.

Storage and Reheating Tips

  • Storage: Store leftover broccoli in an airtight container in the refrigerator for up to 3 days.
  • Reheating: Reheat in a 375°F (190°C) oven for 5–7 minutes to restore crispiness. Avoid microwaving, as it can make the broccoli soggy.

Frequently Asked Questions

1. Can I use frozen broccoli?

Yes, but be sure to thaw and dry it thoroughly before roasting to prevent sogginess.

2. What other cheeses can I use?

Cheddar, feta, or goat cheese can all work as substitutes for Parmesan.

3. Is roasted broccoli suitable for meal prep?

Absolutely! It stores well and can be reheated for lunches or quick dinners.

4. How do I make it vegan?

Omit the Parmesan and sprinkle nutritional yeast for a cheesy, plant-based alternative.

5. Can I add other vegetables?

Yes! Try adding cauliflower, carrots, or Brussels sprouts for a mixed veggie medley.

6. What’s the best way to ensure crispy edges?

Ensure the broccoli is completely dry after washing, use enough oil, and avoid overcrowding the pan.

Why Roasted Broccoli With Parmesan Is a Must-Try

Roasted broccoli with Parmesan is a game-changer in the kitchen. It’s simple, versatile, and packed with flavor and nutrition. Once you try it, you’ll find yourself reaching for this recipe time and again.

Ready to Transform Your Meals?

Gather your ingredients, preheat your oven, and start roasting. Whether you’re cooking for your family or hosting a dinner party, this dish is guaranteed to impress. Give it a try tonight and discover why roasted broccoli with Parmesan is a culinary favorite!

Roasted Broccoli With Parmesan Recipe

A quick and easy recipe that turns humble broccoli into a crispy, cheesy delight. Perfect as a side dish or a star in any meal.
Prep Time 10 minutes
Cook Time 25 minutes
Total Time 35 minutes
Servings: 4 serving
Course: Side Dish
Cuisine: American

Ingredients
  

1/2 pounds broccoli, cut into florets

Equipment

  • oven

Method
 

  1. Preheat the oven: Set oven to 425°F (220°C).
    Prepare the baking sheet: Line a large baking sheet with parchment paper or foil.
    Toss the broccoli: In a bowl, combine broccoli, olive oil, lemon juice, garlic, salt, and pepper. Toss until evenly coated.
    Arrange and roast: Spread broccoli in a single layer on the baking sheet. Roast for 20–25 minutes, flipping halfway through for even browning.
    Add Parmesan: Sprinkle Parmesan over the broccoli during the last 5 minutes of roasting. Let it melt slightly without burning.
    Serve: Enjoy immediately as a side dish or incorporate into salads, pastas, or pizzas.

Notes

Pro Tip: For extra brightness, add lemon zest before serving.
Variations: Substitute Parmesan with Pecorino Romano or nutritional yeast for a vegan option.
Storage: Keep leftovers in an airtight container for up to 3 days. Reheat in a 375°F oven for 5–7 minutes.

Beef Ramen Noodle Soup: A Flavorful 30-Minute Recipe!

Ah, the comforting embrace of a warm bowl of Beef Ramen Noodle Soup—it’s like a hug in a bowl, especially on those hectic days when time seems to slip through our fingers. As a busy mom or professional, finding a recipe that’s both quick and delicious can feel like striking gold. This flavorful dish is your ticket to a satisfying meal without the fuss. Imagine tender beef mingling with fresh veggies in a savory broth, all ready in just 30 minutes. It’s the perfect solution for a busy day or a delightful way to impress your loved ones.

Why You’ll Love This Beef Ramen Noodle Soup

This Beef Ramen Noodle Soup is a lifesaver for those whirlwind days. It’s quick, taking just 30 minutes from start to finish, and oh-so-easy to whip up. The rich, savory broth paired with tender beef and fresh veggies creates a symphony of flavors that dance on your taste buds. Plus, it’s versatile enough to please even the pickiest eaters in your family. What’s not to love?

Ingredients for Beef Ramen Noodle Soup

Creating this delightful Beef Ramen Noodle Soup is a breeze with a handful of simple ingredients. You’ll need some vegetable oil to start things off, perfect for browning the beef sirloin, which adds a rich, meaty flavor. Beef broth and water form the savory base of the soup, while instant ramen noodles bring that classic texture we all love.

Mushrooms add an earthy depth, and baby spinach offers a pop of color and nutrients. Green onions provide a fresh, zesty finish, and garlic and ginger infuse the broth with aromatic warmth. A splash of soy sauce and sesame oil ties everything together with a hint of umami.

For those who like a little extra flair, soft-boiled eggs make a luxurious topping. And if you’re feeling adventurous, a dash of chili paste or sriracha can spice things up. Remember, you can always swap the beef for chicken or tofu if you prefer. For exact measurements, scroll down to the bottom of the article where you can print the full recipe.

How to Make Beef Ramen Noodle Soup

Sauté the Beef

Start by heating vegetable oil in a large pot over medium-high heat. Once the oil shimmers, add the thinly sliced beef sirloin. Sauté until the beef is browned and cooked through, which should take about 3-4 minutes. This step locks in the beef’s flavor, making it tender and juicy. Remove the beef from the pot and set it aside for later.

Prepare the Aromatics

In the same pot, add minced garlic and grated ginger. Sauté them for about a minute until their fragrance fills the kitchen. This aromatic duo is the heart of your broth, infusing it with warmth and depth. Be careful not to let them burn, as that can turn the flavor bitter.

Simmer the Broth

Pour in the beef broth and water, then bring the mixture to a gentle boil. This is where the magic begins. Add sliced mushrooms and a splash of soy sauce. Let it simmer for about 5 minutes, allowing the flavors to meld together beautifully. The mushrooms will soak up the broth, adding an earthy richness to your soup.

Cook the Noodles

Now, it’s time for the instant ramen noodles. Stir them into the simmering broth and cook according to the package instructions, usually around 3-4 minutes. The noodles will absorb the savory broth, becoming tender and flavorful. Keep an eye on them to avoid overcooking.

Combine and Serve

Return the cooked beef to the pot, along with the baby spinach. Stir gently and cook for an additional 2 minutes until the spinach wilts. Drizzle with sesame oil and season with salt and pepper to taste. Serve your Beef Ramen Noodle Soup hot, garnished with chopped green onions and a soft-boiled egg if desired. Enjoy the symphony of flavors in every comforting spoonful!

Tips for Success

  • Use a sharp knife to slice the beef thinly for even cooking.
  • Don’t skip sautéing the aromatics; it builds a flavorful base.
  • Keep an eye on the noodles to prevent them from becoming mushy.
  • Adjust the seasoning to your taste; a little soy sauce goes a long way.
  • For a richer broth, simmer longer if time allows.

Equipment Needed

  • Large pot: Essential for cooking the soup; a Dutch oven works well too.
  • Sharp knife: For slicing beef and chopping vegetables.
  • Cutting board: A sturdy surface for prepping ingredients.
  • Wooden spoon: Ideal for stirring without scratching your pot.
  • Ladle: For serving the soup with ease.

Variations

  • Spicy Kick: Add a teaspoon of chili paste or sriracha for a fiery twist.
  • Vegetarian Delight: Swap beef for tofu and use vegetable broth instead.
  • Chicken Ramen: Substitute beef with chicken breast for a lighter option.
  • Seafood Twist: Add shrimp or scallops for a seafood-inspired ramen.
  • Gluten-Free: Use rice noodles and tamari instead of soy sauce.
  • Extra Veggies: Toss in bell peppers or bok choy for added crunch.

Serving Suggestions

  • Pair with a crisp cucumber salad for a refreshing contrast.
  • Serve with a side of steamed edamame sprinkled with sea salt.
  • Enjoy with a chilled glass of green tea or sake.
  • Garnish with sesame seeds for an extra nutty flavor.
  • Use colorful bowls to enhance the visual appeal of your soup.

FAQs about Beef Ramen Noodle Soup

Can I make this Beef Ramen Noodle Soup ahead of time?

Absolutely! You can prepare the broth and beef in advance, storing them separately in the fridge. When you’re ready to serve, simply reheat the broth, add the noodles, and combine everything. This way, the noodles stay perfectly al dente.

What can I use instead of beef sirloin?

If you don’t have beef sirloin on hand, flank steak or even ground beef can be great alternatives. Just ensure they’re cooked thoroughly for the best flavor and texture in your ramen soup.

How can I make the soup spicier?

For those who love a bit of heat, adding a teaspoon of chili paste or a splash of sriracha to the broth will do the trick. You can also sprinkle some red pepper flakes for an extra kick.

Is there a way to make this soup gluten-free?

Yes, you can easily make this soup gluten-free by using rice noodles instead of ramen and substituting soy sauce with tamari. This way, you can enjoy all the flavors without the gluten.

Can I freeze the leftovers?

While the broth and beef freeze well, the noodles can become mushy when thawed. If you plan to freeze, it’s best to store the broth and beef separately and add fresh noodles when reheating.

Final Thoughts

There’s something truly magical about a bowl of Beef Ramen Noodle Soup that warms the soul and satisfies the senses. It’s more than just a meal; it’s a culinary journey that brings comfort and joy to your table. Whether you’re a busy mom juggling a million tasks or a professional seeking a quick yet delightful dinner, this recipe is your go-to. The harmony of tender beef, vibrant veggies, and savory broth creates a symphony of flavors that dance on your palate. So, gather your loved ones, share a bowl, and savor the simple pleasures of life.

Beef Ramen Noodle Soup
Paul

Beef Ramen Noodle Soup: A Flavorful 30-Minute Recipe!

A quick and flavorful Beef Ramen Noodle Soup that can be prepared in just 30 minutes, featuring tender beef, fresh vegetables, and savory broth.
Prep Time 10 minutes
Cook Time 20 minutes
Total Time 30 minutes
Servings: 4 servings
Course: Soup
Cuisine: Asian
Calories: 450

Ingredients
  

  • 2 tablespoons vegetable oil
  • 1 pound beef sirloin thinly sliced
  • 4 cups beef broth
  • 2 cups water
  • 3 packages 3 ounces each instant ramen noodles (discard seasoning packets)
  • 1 cup sliced mushrooms
  • 1 cup baby spinach
  • 2 green onions chopped
  • 2 cloves garlic minced
  • 1 tablespoon soy sauce
  • 1 tablespoon sesame oil
  • 1 teaspoon ginger grated
  • Salt and pepper to taste
  • Soft-boiled eggs optional, for serving

Method
 

  1. In a large pot, heat the vegetable oil over medium-high heat. Add the sliced beef and cook until browned, about 3-4 minutes. Remove the beef from the pot and set aside.
  2. In the same pot, add the minced garlic and grated ginger. Sauté for about 1 minute until fragrant.
  3. Pour in the beef broth and water, bringing the mixture to a boil.
  4. Add the sliced mushrooms and soy sauce to the pot. Reduce heat and let simmer for 5 minutes.
  5. Stir in the instant ramen noodles and cook according to package instructions, usually about 3-4 minutes.
  6. Add the cooked beef back into the pot along with the baby spinach. Cook for an additional 2 minutes until the spinach is wilted.
  7. Drizzle with sesame oil and season with salt and pepper to taste.
  8. Serve hot, garnished with chopped green onions and a soft-boiled egg if desired.

Notes

  • For a spicier kick, add a teaspoon of chili paste or sriracha to the broth.
  • You can substitute the beef with chicken or tofu for a different protein option.

Seafood Gumbo: A Bold and Flavorful Southern Classic

There’s something truly magical about a warm, hearty bowl of seafood gumbo. Each bite is a celebration of bold flavors, rich history, and comforting textures. Originating in Louisiana, gumbo is more than just a dish—it’s a tradition that brings people together. With its complex blend of spices, fresh seafood, and a rich roux, gumbo has become a beloved staple in Southern cuisine.

Making seafood gumbo at home may seem intimidating, but with a little patience and the right ingredients, you can create an authentic dish that rivals any restaurant. Whether you’re cooking for family, hosting a dinner party, or simply treating yourself, this seafood gumbo recipe will leave everyone asking for seconds.

Why You’ll Love Seafood Gumbo

  • Flavor Explosion: The combination of shrimp, crab, and oysters in a spiced broth creates layers of unforgettable flavor.
  • Heartwarming Comfort: Perfect for cold nights or when you need a cozy, satisfying meal.
  • Rich in Tradition: A true taste of Louisiana that brings Southern culture to your table.
  • Customizable: Easily adapt the recipe to include your favorite seafood or adjust the spice level to your liking.

Ingredients for Seafood Gumbo

Below is everything you’ll need to make this rich and flavorful seafood gumbo.

CategoryIngredientQuantity
For the RouxAvocado oil¾ cup + 1 tablespoon
Cassava flour¾ cup
For the Holy TrinityGreen bell pepper (diced)1 cup (about 1 medium pepper)
Yellow onion (diced)1 cup (about ½ large onion)
Celery (diced)1 cup (about 2 stalks)
Garlic (minced)3 cloves
For the Gumbo BaseSeafood stock4 cups
Dried thyme½ teaspoon
Dried oregano½ teaspoon
Cayenne pepper½ teaspoon
Kosher salt1 teaspoon (plus more to taste)
White pepper (or black pepper)½ teaspoon
Bay leaf1
Frozen cut okra1 cup
For the ProteinFully cooked andouille sausage or kielbasa12 ounces (thinly sliced)
Peeled and deveined shrimp1 pound
Lump crab meat8 ounces
Small oysters (in their liquor)8 ounces
Optional GarnishFresh parsley leaves (chopped)For serving

How to Make Seafood Gumbo

1. Prepare the Roux

  • Start by heating the avocado oil in a large heavy-bottomed pot or Dutch oven over medium heat.
  • Gradually add the cassava flour, whisking constantly to combine. Cook the roux for about 10-12 minutes, or until it reaches a rich, golden-brown color. Be patient—this step is key to creating the deep flavor gumbo is known for.

2. Sauté the Holy Trinity

  • Once the roux is ready, stir in the diced green bell pepper, yellow onion, and celery. Cook for 5-7 minutes until the vegetables are softened and fragrant.
  • Add the minced garlic and cook for another minute.

3. Build the Gumbo Base

  • Slowly pour in the seafood stock, stirring constantly to prevent lumps.
  • Add the dried thyme, oregano, cayenne pepper, kosher salt, white pepper, and the bay leaf. Stir well to combine.

4. Add the Okra

  • Stir in the frozen cut okra. Simmer the gumbo over medium-low heat for about 15 minutes, allowing the flavors to meld together and the broth to thicken slightly.

5. Incorporate the Sausage

  • Add the thinly sliced andouille sausage to the pot. Simmer for another 10 minutes to let the sausage release its smoky, savory flavors into the gumbo.

6. Add the Seafood

  • Gently stir in the peeled and deveined shrimp, lump crab meat, and oysters (along with their liquor). Simmer for 5-7 minutes, or until the shrimp are pink and fully cooked, and the oysters are tender.

7. Adjust Seasoning

  • Taste the gumbo and adjust the seasoning as needed, adding more salt, cayenne, or pepper to suit your preferences.

8. Serve and Garnish

  • Ladle the gumbo into bowls and garnish with freshly chopped parsley if desired. Serve hot with steamed rice or crusty bread for the ultimate Southern meal.

Tips for the Best Seafood Gumbo

  • Perfect the Roux: The roux is the heart of gumbo. Take your time and stir constantly to achieve a deep, nutty flavor without burning it.
  • Use Quality Seafood: Fresh shrimp, crab, and oysters make a big difference in the taste of the gumbo.
  • Layer the Flavors: Add the ingredients in stages to ensure each component has time to release its flavors into the broth.
  • Adjust the Spice: Start with less cayenne and add more as needed if you prefer a milder gumbo.
  • Serve Fresh: Gumbo tastes best freshly made, but leftovers can be stored and reheated for a second round of deliciousness.

Nutritional Information

Here’s an approximate nutritional breakdown per serving (serves 6):

NutrientAmount
Calories420
Protein32g
Carbohydrates12g
Fat28g
Sodium920mg

FAQs About Seafood Gumbo

1. Can I use chicken stock instead of seafood stock?

Yes, chicken stock is a good alternative, though seafood stock enhances the flavor of the seafood in the gumbo.

2. What can I use instead of cassava flour?

You can substitute cassava flour with all-purpose flour or gluten-free flour, depending on your preference.

3. Is okra necessary?

Okra helps thicken the gumbo and adds a unique flavor, but you can leave it out or substitute with filé powder if preferred.

4. Can I make gumbo ahead of time?

Absolutely! Gumbo tastes even better the next day as the flavors have more time to develop. Simply reheat it gently on the stove before serving.

5. What can I serve with gumbo?

Steamed white rice, crusty French bread, or even cornbread are excellent pairings for gumbo.

6. How do I store leftovers?

Store leftover gumbo in an airtight container in the refrigerator for up to 3 days, or freeze it for up to 3 months.

Make-Ahead and Storage Tips

  • Make the Roux in Advance: You can prepare the roux ahead of time and store it in the refrigerator for up to a week.
  • Refrigerate Leftovers: Store cooled gumbo in an airtight container in the fridge. Reheat gently on the stove to maintain its texture and flavor.

Serving Ideas

Seafood gumbo is delicious on its own, but here are a few ways to make it a complete meal:

  • Steamed Rice: Spoon the gumbo over white rice for a traditional pairing.
  • Cornbread: Sweet cornbread is a perfect complement to the spicy gumbo.
  • Potato Salad: A Southern classic, potato salad provides a creamy, cool contrast to the bold flavors of gumbo.

Your Turn to Cook Authentic Seafood Gumb

With its rich roux, perfectly spiced broth, and tender seafood, seafood gumbo is a dish that’s sure to impress. Whether you’re cooking for a special occasion or just craving something hearty and flavorful, this recipe will transport you straight to the heart of Louisiana.

So grab your ingredients, roll up your sleeves, and start cooking! Once you taste your homemade seafood gumbo, you’ll understand why it’s a Southern favorite that’s been cherished for generations. Enjoy!

Seafood Gumbo: A Bold and Flavorful Southern Classic

Seafood gumbo is a hearty, flavorful dish rooted in Louisiana tradition. With its rich roux, spiced seafood stock, and layers of shrimp, crab, and andouille sausage, this gumbo is both comforting and impressive.
Prep Time 15 minutes
Cook Time 1 hour
Total Time 1 hour 15 minutes
Servings: 6
Course: Main Course
Cuisine: Southern-inspired
Calories: 420

Ingredients
  

For the Roux
  • ¾ cup + 1 tablespoon avocado oil
  • ¾ cup cassava flour
For the Holy Trinity
  • 1 cup diced green bell pepper about 1 medium pepper
  • 1 cup diced yellow onion about ½ large onion
  • 1 cup diced celery about 2 stalks
  • 3 cloves garlic minced
For the Gumbo Base
  • 4 cups seafood stock
  • ½ teaspoon dried thyme
  • ½ teaspoon dried oregano
  • ½ teaspoon cayenne pepper
  • 1 teaspoon kosher salt plus more to taste
  • ½ teaspoon white pepper or black pepper
  • 1 bay leaf
  • 1 cup frozen cut okra
For the Protein
  • 12 ounces fully cooked andouille sausage or kielbasa thinly sliced
  • 1 pound peeled and deveined shrimp
  • 8 ounces lump crab meat
  • 8 ounces small oysters in their liquor
Optional Garnish
  • Fresh parsley leaves chopped

Method
 

Prepare the Roux
  1. Heat avocado oil in a heavy-bottomed pot or Dutch oven over medium heat.
  2. Slowly whisk in cassava flour, stirring constantly to avoid burning. Cook for 10-12 minutes until the roux turns golden brown.
Sauté the Holy Trinity
  1. Add the diced bell pepper, onion, and celery to the roux. Cook for 5-7 minutes until softened and aromatic.
  2. Stir in the minced garlic and cook for an additional minute.
Build the Gumbo Base
  1. Gradually pour in the seafood stock while stirring to avoid lumps.
  2. Add thyme, oregano, cayenne, salt, white pepper, and bay leaf. Stir well and bring to a simmer.
Incorporate the Okra
  1. Add the frozen cut okra to the gumbo base. Let it simmer for 15 minutes to thicken the broth and meld the flavors.
Add the Sausage
  1. Stir in the sliced andouille sausage. Simmer for 10 minutes to allow the smoky flavor to infuse the gumbo.
Add the Seafood
  1. Add shrimp, lump crab meat, and oysters (including their liquor). Cook for 5-7 minutes until the shrimp turn pink and the oysters are tender.
Adjust the Seasoning
  1. Taste the gumbo and adjust the salt, cayenne, or pepper to your preference.
Serve and Garnish
  1. Ladle the gumbo into bowls and garnish with chopped parsley. Serve hot with steamed rice or crusty bread.

Philly Cheesesteaks: The Ultimate Comfort Food

There’s something magical about biting into a perfectly made Philly Cheesesteak. The combination of thinly sliced beef, gooey melted cheese, and a soft hoagie roll makes this sandwich an iconic comfort food. Whether you’ve had it in Philadelphia or you’re recreating it at home, the Philly Cheesesteak is a timeless classic that everyone can enjoy.

Making an authentic Philly Cheesesteak at home is easier than you think. With the right ingredients and a few helpful tips, you can enjoy this legendary sandwich in your own kitchen. Ready to bring a slice of Philadelphia to your table? Let’s dive in!

Why You’ll Love Philly Cheesesteaks

  • Mouthwatering Flavor: Juicy steak, caramelized onions, and gooey cheese create the perfect flavor combination.
  • Customizable: Choose your favorite cheese, add toppings, or even switch up the bread.
  • Quick and Easy: With just a few ingredients and steps, you’ll have a restaurant-quality meal in under 30 minutes.
  • Perfect for Any Occasion: Whether it’s game day, dinner, or a family gathering, Philly Cheesesteaks are always a hit.

Ingredients for Philly Cheesesteaks

Here’s what you’ll need to make two mouthwatering Philly Cheesesteaks.

CategoryIngredientQuantity
For the SteakBoneless rib eye steak, skirt steak, or pre-sliced rib eye1 pound (454g)
Kosher salt1 teaspoon
Freshly ground black pepper1/8 teaspoon
Vegetable oil1 tablespoon (15ml)
For the OnionsYellow onion (diced into 1/4-inch pieces)1/2 medium (4 ounces; 114g)
For the CheeseProvolone cheese (thinly sliced)8 slices (6 ounces; 160g)
Parmigiano-Reggiano cheese (optional)2 tablespoons, grated
For the RollsItalian hoagie/sub rolls (split lengthwise but left attached)2 (7 to 8 inches long)

How to Make Philly Cheesesteaks

1. Choose and Prepare Your Steak

  • Start with high-quality boneless rib eye steak, skirt steak, or pre-sliced rib eye.
  • For whole steak, freeze it for 15-20 minutes to make slicing easier. Use a sharp knife to cut the steak into very thin strips or bite-sized pieces.

2. Season the Steak

  • Toss the sliced steak with kosher salt and freshly ground black pepper. Let it rest for a few minutes while you prepare the other ingredients.

3. Prepare the Onions

  • Dice half a medium yellow onion into small 1/4-inch pieces.
  • Heat 1 tablespoon of vegetable oil in a large skillet over medium heat. Add the onions and sauté for 5-7 minutes until softened and caramelized. Remove and set aside.

4. Cook the Steak

  • In the same skillet, increase the heat to medium-high. Add the seasoned steak and cook for 2-3 minutes, stirring occasionally. The steak should be browned on the outside but still tender.

5. Add the Cheese

  • Once the steak is cooked, lower the heat to medium.
  • Spread the steak evenly in the skillet and layer 4 torn slices of provolone cheese over the top. Let it melt slightly before mixing everything together.

6. Toast the Rolls

  • Split the hoagie rolls lengthwise, leaving one side attached. Toast the inside of the rolls in the skillet or oven until lightly crispy.

7. Assemble the Sandwiches

  • Spoon the cheesy steak mixture onto the toasted hoagie rolls. Add caramelized onions on top and layer 1-2 slices of whole provolone cheese over each sandwich.
  • Place the assembled sandwiches under the broiler for 1-2 minutes to melt the cheese and crisp the edges.

8. Serve and Enjoy

  • Serve the sandwiches immediately while the cheese is gooey and the bread is warm. Garnish with a sprinkle of Parmigiano-Reggiano if desired.

Tips for the Best Philly Cheesesteaks

  • Use Thinly Sliced Steak: Freezing the steak briefly makes it easier to slice thinly, which is key for a tender and authentic Philly Cheesesteak.
  • Caramelize the Onions: Take your time with the onions to develop their sweetness and flavor.
  • Cheese Options: While provolone is traditional, you can also use American cheese or Cheez Whiz for a different twist.
  • Don’t Overcook the Steak: Cook it just until browned to keep it tender and juicy.

What Makes a Philly Cheesesteak Authentic?

An authentic Philly Cheesesteak is all about simplicity and quality ingredients. The sandwich typically features thinly sliced rib eye steak, provolone cheese (or Cheez Whiz), caramelized onions, and a soft hoagie roll. Variations may include mushrooms, peppers, or additional toppings, but the focus remains on the steak and cheese.

Nutritional Information

Here’s an approximate nutritional breakdown per sandwich (serves 2):

NutrientAmount
Calories680
Protein45g
Carbohydrates40g
Fat35g
Sodium1020mg

FAQs About Philly Cheesesteaks

1. Can I use a different type of meat?

Yes! While rib eye is traditional, skirt steak or even thinly sliced sirloin can be used as a substitute.

2. What type of bread works best?

Italian hoagie rolls are ideal, but you can also use French baguettes or ciabatta if needed.

3. Can I add mushrooms or peppers?

Absolutely! Sautéed mushrooms or bell peppers are popular additions and add extra flavor.

4. What cheese can I use if I don’t have provolone?

American cheese, Cheez Whiz, or mozzarella are great substitutes.

5. How do I reheat leftovers?

Reheat the steak and cheese mixture in a skillet over low heat. Toast fresh rolls before assembling the sandwiches.

6. Can I make Philly Cheesesteaks in advance?

While best enjoyed fresh, you can prepare the steak and onions ahead of time and reheat them when ready to serve.

Make-Ahead and Storage Tips

  • Prepare in Advance: Slice the steak and dice the onions ahead of time for quicker assembly.
  • Refrigeration: Store cooked steak, onions, and cheese mixture in an airtight container in the refrigerator for up to 3 days.
  • Reheating: Warm the steak and onions in a skillet over medium heat, then assemble fresh sandwiches.

Serving Ideas

Philly Cheesesteaks are filling on their own, but pairing them with simple sides can elevate your meal:

  • French Fries: Crispy fries are the ultimate companion.
  • Coleslaw: A tangy coleslaw provides a refreshing contrast.
  • Pickles: Add some crunch and acidity to balance the rich flavors.

Your Turn to Master Philly Cheesesteaks

Now that you know how to make the perfect Philly Cheesesteak, it’s time to put your skills to the test. With its juicy steak, melted cheese, and crispy toasted bread, this sandwich is sure to become a favorite in your household.

Gather your ingredients, fire up your skillet, and recreate this iconic dish right in your kitchen. Once you’ve taken your first bite, you’ll see why Philly Cheesesteaks have been beloved for generations. Enjoy!

Philly Cheesesteaks: The Ultimate Comfort Food

A Philly Cheesesteak is a classic, comforting sandwich made with thinly sliced rib eye steak, gooey provolone cheese, caramelized onions, and soft toasted hoagie rolls. It’s flavorful, satisfying, and surprisingly easy to recreate at home.
Prep Time 10 minutes
Cook Time 15 minutes
Total Time 25 minutes
Servings: 2
Course: Main Course
Cuisine: American
Calories: 680

Ingredients
  

For the Steak
  • 1 pound 454g boneless rib eye steak, skirt steak, or pre-sliced rib eye
  • 1 teaspoon kosher salt
  • 1/8 teaspoon freshly ground black pepper
  • 1 tablespoon 15ml vegetable oil
For the Onions
  • 1/2 medium yellow onion 4 ounces; 114g, diced into 1/4-inch pieces
For the Cheese
  • 8 thin slices provolone cheese 6 ounces; 160g
  • 2 tablespoons grated Parmigiano-Reggiano cheese optional
For the Rolls
  • 2 Italian hoagie/sub rolls 7-8 inches long, split lengthwise but left attached

Method
 

  1. Prepare the Steak: Slice the steak very thin (partially freezing it for 15-20 minutes helps) and season with salt and pepper.
  2. Cook the Onions: Sauté the diced onions in 1 tablespoon of vegetable oil over medium heat until caramelized, about 5-7 minutes. Remove and set aside.
  3. Cook the Steak: In the same skillet, cook the steak over medium-high heat for 2-3 minutes, stirring occasionally until browned but tender.
  4. Add the Cheese: Lower the heat, spread the steak in the skillet, and top with 4 torn slices of provolone cheese. Let it melt, then stir to combine.
  5. Toast the Rolls: Lightly toast the hoagie rolls in the oven or skillet until the inside is crisp.
  6. Assemble the Sandwiches: Fill the rolls with the steak and cheese mixture, top with caramelized onions, and place a slice of provolone over each sandwich.
  7. Broil (Optional): Place the sandwiches under a broiler for 1-2 minutes to melt the cheese and crisp the edges. Serve hot and enjoy!

Reuben Sandwich: A Timeless Classic

Imagine biting into a perfectly golden, buttery sandwich packed with savory corned beef, melty Swiss cheese, tangy sauerkraut, and creamy Russian dressing. A Reuben sandwich isn’t just a meal—it’s an experience. Whether you’re enjoying it at a deli, whipping it up at home, or sharing it with friends, the Reuben stands as one of the most iconic sandwiches ever created.

The combination of flavors and textures in a Reuben is truly unmatched. It’s savory, tangy, crispy, and creamy all in one bite. Best of all, it’s surprisingly easy to make in your own kitchen. Ready to create this delicious classic? Let’s dive in!

Why You’ll Love the Reuben Sandwich

  • Iconic Flavor: A perfect blend of salty corned beef, creamy dressing, tangy sauerkraut, and nutty Swiss cheese.
  • Golden, Buttery Bread: Each bite begins with the satisfying crunch of toasted marble rye.
  • Simple Yet Sophisticated: It’s a dish that feels indulgent without being overly complicated.
  • Customizable: Whether you prefer extra cheese, more dressing, or less sauerkraut, the Reuben is easy to tailor to your taste.

Ingredients for the Reuben Sandwich

Here’s everything you need to make the ultimate Reuben, along with a simple recipe for herbed butter to take your sandwich to the next level.

CategoryIngredientQuantity
For the Herbed ButterButter (softened)¼ cup (½ stick, 57 g)
Dried minced garlic½ teaspoon
Dried minced onion½ teaspoon
Sesame seeds½ teaspoon
Poppy seeds¼ teaspoon
Sea salt½ teaspoon
For the Reuben SandwichDeli corned beef1 pound
Marble rye bread1 loaf
Russian dressing1 cup (245 g)
Sauerkraut8 ounces
Swiss cheese12 slices

How to Make a Reuben Sandwich

1. Prepare the Herbed Butter

  • In a small bowl, mix together the softened butter, dried minced garlic, minced onion, sesame seeds, poppy seeds, and sea salt.
  • Stir until well combined. This flavorful butter will give your Reuben sandwich a perfectly golden and crunchy crust.

2. Prep the Ingredients

  • Lay out your marble rye bread slices, corned beef, Swiss cheese, Russian dressing, and sauerkraut.
  • If the sauerkraut is very wet, drain and gently pat it dry with a paper towel. This prevents the bread from getting soggy.

3. Butter the Bread

  • Spread a generous layer of the herbed butter on one side of each slice of bread. This side will be toasted for that irresistible crunch.

4. Assemble the Sandwich

  • On the unbuttered side of the bread, spread about 1 tablespoon of Russian dressing.
  • Layer 2 slices of Swiss cheese, followed by a generous portion of corned beef, about 2 tablespoons of sauerkraut, and another slice of Swiss cheese.
  • Top with another slice of bread, buttered side facing out.

5. Grill the Sandwich

  • Heat a skillet or griddle over medium heat. Place the sandwich in the skillet and cook for 3-4 minutes on each side, or until the bread is golden and crispy, and the cheese is melted.
  • Press the sandwich lightly with a spatula to ensure even cooking and crispiness.

6. Slice and Serve

  • Remove the sandwich from the skillet and let it rest for 1-2 minutes. Slice it in half diagonally and serve warm.
  • Enjoy with pickles, chips, or a side of coleslaw for a complete meal.

Tips for the Perfect Reuben Sandwich

  • Choose High-Quality Corned Beef: Visit your local deli for freshly sliced corned beef, as it makes a huge difference in flavor and texture.
  • Drain the Sauerkraut: Excess liquid can make your sandwich soggy, so make sure to drain and dry the sauerkraut before using.
  • Don’t Skimp on Butter: The herbed butter adds incredible flavor and ensures the bread gets perfectly crispy.
  • Low and Slow: Cook the sandwich over medium heat to ensure the cheese melts without burning the bread.

What is Russian Dressing?

Russian dressing is a tangy, creamy sauce made with mayonnaise, ketchup, horseradish, and spices. It’s the classic choice for a Reuben sandwich, and its slight sweetness balances the saltiness of the corned beef and the tang of the sauerkraut. If you can’t find Russian dressing, Thousand Island dressing makes a good substitute.

Nutritional Information

Here’s an approximate nutritional breakdown per sandwich (serves 4):

NutrientAmount
Calories610
Protein32g
Carbohydrates41g
Fat36g
Sodium1450mg

FAQs About the Reuben Sandwich

1. Can I use a different type of bread?

Yes! While marble rye is traditional, you can use regular rye, sourdough, or even whole-grain bread.

2. Can I make a vegetarian version?

Absolutely. Swap the corned beef for roasted vegetables, tempeh, or a vegetarian deli meat alternative.

3. What’s the difference between Russian dressing and Thousand Island?

Thousand Island is sweeter and includes pickle relish, while Russian dressing has a tangier and spicier flavor profile.

4. Can I toast the sandwich in the oven?

Yes! Assemble the sandwich and bake it at 375°F (190°C) for about 10 minutes, flipping halfway through.

5. How do I keep the bread from burning?

Cook the sandwich on medium heat and check frequently. You can also lower the heat slightly if the bread is browning too quickly.

6. Can I use a panini press?

Definitely! A panini press works great for making Reuben sandwiches and ensures an even, crispy texture.

Make-Ahead and Storage Tips

  • Herbed Butter: Prepare the herbed butter in advance and store it in the refrigerator for up to a week.
  • Russian Dressing: Homemade dressing can be stored in the fridge for up to 5 days.
  • Leftovers: If you have leftover sandwiches, store them in an airtight container in the fridge and reheat in a skillet to maintain crispiness.

Serving Ideas

The Reuben sandwich is hearty on its own, but you can pair it with a variety of sides to create a well-rounded meal:

  • Pickles: Add a crunchy, tangy element to your plate.
  • Potato Chips: The crispiness pairs well with the melty sandwich.
  • Coleslaw: The creamy, tangy flavors complement the Reuben beautifully.
  • Tomato Soup: For a comforting and warm combination.

Your Turn to Master the Reuben Sandwich

Now that you know how to make the perfect Reuben sandwich, it’s time to bring this deli classic into your own kitchen. With its crispy herbed butter crust, savory corned beef, and melty cheese, this sandwich is sure to become a family favorite.

So, grab your ingredients, fire up your skillet, and get ready to create a masterpiece. Once you take your first bite, you’ll understand why the Reuben sandwich has been loved for generations!

Reuben Sandwich: A Timeless Classic

The Reuben sandwich is a delicious classic made with savory corned beef, melty Swiss cheese, tangy sauerkraut, and creamy Russian dressing, all toasted to golden perfection on buttery marble rye bread. It’s a hearty, flavorful meal that’s easy to make and perfect for any occasion.
Prep Time 10 minutes
Cook Time 10 minutes
Total Time 20 minutes
Servings: 4
Course: Main Course
Cuisine: American
Calories: 610

Ingredients
  

For the Herbed Butter
  • ¼ cup ½ stick, 57 g butter, softened
  • ½ tsp dried minced garlic
  • ½ tsp dried minced onion
  • ½ tsp sesame seeds
  • ¼ tsp poppy seeds
  • ½ tsp sea salt
For the Reuben Sandwich
  • 1 pound deli corned beef
  • 1 loaf marble rye bread
  • 1 cup 245 g Russian dressing
  • 8 ounces sauerkraut drained
  • 12 slices Swiss cheese

Method
 

  1. Make the Herbed Butter: Mix softened butter, minced garlic, onion, sesame seeds, poppy seeds, and sea salt in a small bowl until combined.
  2. Prep Ingredients: Lay out bread slices, corned beef, cheese, Russian dressing, and sauerkraut. Drain sauerkraut to avoid soggy bread.
  3. Butter the Bread: Spread herbed butter on one side of each slice of bread. This will be the toasted side.
  4. Assemble the Sandwich: Spread Russian dressing on the unbuttered side of the bread. Add 2 slices of Swiss cheese, corned beef, sauerkraut, and another slice of cheese. Top with another slice of bread, buttered side out.
  5. Grill the Sandwich: Heat a skillet over medium heat. Grill the sandwich for 3-4 minutes on each side until the bread is golden and the cheese is melted.
  6. Serve: Let the sandwich rest for a minute, slice in half, and enjoy with your favorite sides.

General Tso’s Chicken: A Sweet, Spicy, and Crispy Delight

Have you ever craved a dish that’s crispy, sweet, spicy, and packed with flavor? General Tso’s Chicken is exactly that—a Chinese-American classic loved by millions. This dish is all about crispy chicken coated in a bold, tangy sauce with just the right amount of heat. Whether it’s your favorite takeout or a recipe you’ve been eager to try, making General Tso’s Chicken at home is easier than you think and just as delicious.

With this recipe, you’ll master the art of creating tender chicken bites, a perfectly balanced sauce, and the kind of dish that will leave everyone asking for seconds. Let’s get started!

Why You’ll Love General Tso’s Chicken

  • Perfectly Crispy: Coated in cornstarch and fried to golden perfection.
  • Flavor-Packed Sauce: Sweet, spicy, savory, and tangy all in one bite.
  • Adjustable Heat: Control the spice level to suit your taste.
  • Homemade Better Than Takeout: Fresh, flavorful, and guilt-free.

Ingredients for General Tso’s Chicken

CategoryIngredientQuantity
For the Crispy ChickenDried red chiles10
Hot water (to soak chiles)As needed
Boneless, skinless chicken thighs (diced)10 ½ oz (300 g)
Cornstarch (seasoned with ¼ tsp salt & pepper)1 ¾ cups (210 g)
Fresh ginger (peeled, finely sliced)½ thumb-sized piece
Garlic (finely sliced)2 cloves
Scallions (finely sliced)2
Mild vegetable oil (for frying)As needed
For the General Tso SauceGranulated sugar2 tablespoons
Sriracha sauce1 teaspoon
Sweet chili sauce1 tablespoon
Oyster sauce1 tablespoon
Black rice vinegar½ tablespoon
Light soy sauce1 tablespoon
Dark soy sauce½ teaspoon
Water¼ cup (60 ml)
For the MarinadeSesame oil1 teaspoon
Granulated sugar½ teaspoon
Light soy sauce1 tablespoon
Egg (lightly beaten)1 large
To ServeSliced red chileOptional
Sliced scallionsOptional
Steamed riceAs desired
Flash-fried green vegetablesOptional

How to Make General Tso’s Chicken

1. Soak the Chiles

Place the dried red chiles in hot water and let them soak for 10 minutes to soften. Drain and set aside.

2. Marinate the Chicken

In a bowl, combine sesame oil, granulated sugar, light soy sauce, and the beaten egg. Add the diced chicken thighs, ensuring each piece is coated evenly. Let the chicken marinate for at least 20 minutes.

3. Coat the Chicken

In a shallow dish, mix the seasoned cornstarch with salt and pepper. Dredge the marinated chicken pieces in the cornstarch mixture, ensuring they are fully coated.

4. Fry the Chicken

Heat vegetable oil in a wok or deep skillet over medium-high heat. Fry the coated chicken pieces in small batches for 4-5 minutes, or until golden and crispy. Remove and drain on paper towels.

5. Prepare the Sauce

In a small bowl, mix together sugar, Sriracha, sweet chili sauce, oyster sauce, black rice vinegar, light soy sauce, dark soy sauce, and water. Set aside.

6. Sauté the Aromatics

Remove excess oil from the skillet, leaving about 1 tablespoon. Add the ginger, garlic, and softened red chiles, and sauté for 1-2 minutes until fragrant.

7. Combine Chicken and Sauce

Add the fried chicken back into the skillet and pour the sauce over it. Stir well, ensuring each piece is coated in the sauce. Simmer for 2-3 minutes until the sauce thickens slightly and clings to the chicken.

8. Garnish and Serve

Transfer the chicken to a serving dish, garnish with sliced red chiles and scallions, and serve immediately with steamed rice and green vegetables if desired.

Tips for Success

  • Double-Fry for Extra Crunch: For even crispier chicken, fry the pieces once, let them cool, and fry them a second time.
  • Use Chicken Thighs: These are juicier and more flavorful than chicken breasts.
  • Adjust the Heat: Add more dried chiles or Sriracha if you like it spicier, or reduce them for a milder dish.
  • Serve Fresh: General Tso’s Chicken tastes best when served immediately to preserve its crispy texture.

Nutritional Information

NutrientAmount
Calories420
Protein25g
Carbohydrates40g
Fat16g
Sodium860mg

FAQs About General Tso’s Chicken

1. Can I use chicken breasts instead of thighs?

Yes, you can substitute chicken breasts, but thighs offer better flavor and tenderness.

2. What can I serve with General Tso’s Chicken?

Steamed jasmine rice, fried rice, or stir-fried vegetables pair beautifully with this dish.

3. Can I make this gluten-free?

Absolutely! Replace soy sauce with gluten-free tamari or coconut aminos, and ensure your cornstarch is gluten-free.

4. Can I bake or air-fry the chicken instead of deep-frying?

Yes, you can bake the chicken at 400°F (200°C) for 20-25 minutes or air-fry at 375°F (190°C) for 12-15 minutes.

5. How do I store leftovers?

Store in an airtight container in the refrigerator for up to 2 days. Reheat in a skillet to regain some crispiness.

6. Can I make the sauce ahead of time?

Yes, you can mix the sauce ingredients in advance and refrigerate for up to 3 days.

Your New Favorite Takeout Classic

Making General Tso’s Chicken at home is easier than you might think and so much more satisfying than takeout. This recipe delivers everything you love about the dish—crispy chicken, a bold and flavorful sauce, and the perfect balance of sweet and spicy.

So why wait? Gather your ingredients, heat up your wok, and create this irresistible dish in your own kitchen. Whether it’s a family dinner or a meal to impress friends, General Tso’s Chicken is guaranteed to be a hit!

General Tso’s Chicken: A Sweet, Spicy, and Crispy Delight

General Tso’s Chicken is a Chinese-American favorite featuring crispy chicken coated in a sweet, tangy, and slightly spicy sauce. Perfectly balanced with bold flavors, it’s easy to make at home and is better than takeout.
Prep Time 20 minutes
Cook Time 20 minutes
Total Time 40 minutes
Servings: 4
Course: Main Course
Cuisine: Chinese-American
Calories: 420

Ingredients
  

For the Crispy Chicken
  • 10 dried red chiles
  • Hot water to soak chiles
  • 10 ½ oz 300 g boneless, skinless chicken thighs, diced into 1-inch pieces
  • 1 ¾ cups 210 g cornstarch, seasoned with ¼ tsp salt and pepper
  • ½ thumb-sized piece fresh ginger finely sliced
  • 2 garlic cloves finely sliced
  • 2 scallions finely sliced
  • Mild vegetable oil for frying
For the General Tso Sauce
  • 2 tbsp granulated sugar
  • 1 tsp Sriracha sauce
  • 1 tbsp sweet chili sauce
  • 1 tbsp oyster sauce
  • ½ tbsp black rice vinegar
  • 1 tbsp light soy sauce
  • ½ tsp dark soy sauce
  • ¼ cup 60 ml water
  • For the Marinade
  • 1 tsp sesame oil
  • ½ tsp granulated sugar
  • 1 tbsp light soy sauce
  • 1 large egg lightly beaten
To Serve
  • Sliced red chile
  • Sliced scallions
  • Steamed rice
  • Flash-fried green vegetables optional

Method
 

Soak the Chiles
  1. Place the dried red chiles in hot water for 10 minutes to soften. Drain and set aside.
Marinate the Chicken
  1. Combine sesame oil, sugar, light soy sauce, and the beaten egg in a bowl. Add diced chicken thighs, ensuring they are evenly coated, and let marinate for 20 minutes.
Coat the Chicken
  1. Mix the seasoned cornstarch with salt and pepper. Dredge the marinated chicken pieces in the mixture, ensuring full coverage.
Fry the Chicken
  1. Heat vegetable oil in a wok or skillet over medium-high heat. Fry the coated chicken in batches for 4-5 minutes, or until golden and crispy. Drain on paper towels.
Make the Sauce
  1. In a small bowl, mix sugar, Sriracha, sweet chili sauce, oyster sauce, black rice vinegar, light soy sauce, dark soy sauce, and water. Set aside.
Sauté the Aromatics
  1. Remove excess oil from the skillet, leaving about 1 tablespoon. Add ginger, garlic, and softened red chiles, and sauté for 1-2 minutes until fragrant.
Toss Chicken in Sauce
  1. Return the fried chicken to the skillet and pour the prepared sauce over it. Stir until every piece is evenly coated, then let it simmer for 2-3 minutes.
Garnish and Serve
  1. Garnish with sliced scallions and red chiles. Serve immediately with steamed rice and vegetables if desired.

Mushroom Risotto: A Creamy and Delicious Italian Classic

Picture this: a cold evening, your favorite music playing softly in the background, and the comforting aroma of creamy mushroom risotto wafting through your kitchen. There’s something magical about this dish that feels both luxurious and comforting at the same time. Whether you’re cooking for yourself, your family, or hosting a dinner party, mushroom risotto is always a crowd-pleaser.

This creamy Italian rice dish, infused with earthy mushrooms and a splash of wine, is deceptively simple to make. And the best part? You don’t need to be a professional chef to nail this recipe. With a little patience and a few key ingredients, you can create a restaurant-quality dish right at home.

Why You’ll Love Mushroom Risotto

  • Rich and Creamy: Perfectly cooked rice with a velvety texture makes this dish incredibly satisfying.
  • Customizable: Swap ingredients to suit your tastes, such as using different mushrooms or a vegetarian broth.
  • Elegant Yet Simple: Mushroom risotto feels fancy enough for special occasions but is simple enough for a cozy weeknight meal.
  • One-Pan Wonder: Minimal cleanup is required since everything is cooked in a single pot or pan.

Ingredients for Mushroom Risotto

Here’s what you’ll need to make this creamy and flavorful dish:

IngredientQuantity
Chicken stock (or vegetable stock)5 to 6 cups
Butter2 tablespoons
Mushrooms (shiitake, chanterelle, or oyster)2 cups (cleaned, trimmed, cut)
Minced shallot or yellow onion1/3 cup
Risotto rice (e.g., Arborio)1 3/4 cups
Brandy, vermouth, or dry white wine2/3 cup
Parmesan cheese (freshly grated)1/3 cup
Fresh thyme leaves (chopped)1 teaspoon
Kosher salt and freshly ground black pepperTo taste
Fresh parsley or chives (chopped)2 tablespoons

How to Make Mushroom Risotto

1. Gather Your Ingredients

Before you begin, measure and prepare all your ingredients. Chop the mushrooms, mince the shallots or onion, and have your stock warming on the stovetop. Warm broth is crucial for achieving the perfect risotto texture.

2. Sauté the Mushrooms

  • Heat 1 tablespoon of butter in a large skillet or heavy-bottomed pot over medium heat.
  • Add the mushrooms and cook for 5-7 minutes until softened and slightly browned. Season with a pinch of salt and pepper.
  • Remove the mushrooms from the pan and set them aside.

3. Sauté the Shallots

  • In the same pan, melt the remaining tablespoon of butter. Add the minced shallots or onion and sauté for 2-3 minutes until they become translucent and fragrant.

4. Toast the Rice

  • Add the risotto rice to the pan and stir to coat it with the butter and shallots.
  • Cook the rice for 1-2 minutes, stirring frequently, until the edges of the grains become translucent. This step helps the rice absorb the liquid more effectively.

5. Deglaze with Wine

  • Pour in the brandy, vermouth, or dry white wine. Stir constantly until the liquid is mostly absorbed by the rice. This step adds depth and flavor to the dish.

6. Add the Stock Gradually

  • Begin adding the warm stock, one ladleful at a time, stirring frequently. Allow the rice to absorb most of the liquid before adding the next ladle.
  • Continue this process for about 18-20 minutes, or until the rice is tender but still has a slight bite (al dente).

7. Stir in the Mushrooms and Cheese

  • When the rice is cooked, stir the sautéed mushrooms back into the pot.
  • Add the freshly grated Parmesan cheese and chopped thyme leaves. Stir well to combine and melt the cheese.

8. Season to Taste

  • Season the risotto with kosher salt and freshly ground black pepper. Taste and adjust as needed.

9. Garnish and Serve

  • Garnish the risotto with chopped fresh parsley or chives for a pop of color and freshness. Serve immediately while it’s hot and creamy.

Tips for Perfect Mushroom Risotto

  • Use the Right Rice: Arborio, Carnaroli, or Vialone Nano rice varieties work best for risotto because of their high starch content, which creates the creamy texture.
  • Warm the Stock: Always use warm stock to keep the cooking process consistent and avoid cooling the rice.
  • Stir Frequently: Regular stirring helps release the starch from the rice, which creates the creamy texture.
  • Don’t Rush: Risotto requires patience. Add the stock gradually and let the rice absorb it fully before adding more.
  • Fresh Ingredients: Freshly grated Parmesan and high-quality mushrooms make a big difference in flavor.

Nutritional Information

Here’s an approximate nutritional breakdown per serving (serves 4):

NutrientAmount
Calories400
Protein12g
Carbohydrates48g
Fat15g
Sodium650mg

Make-Ahead and Storage Instructions

Make-Ahead Tips

  • While risotto is best served fresh, you can prepare the mushrooms and stock ahead of time. Store them separately in airtight containers in the fridge until ready to use.

Storage

  • Store leftover risotto in an airtight container in the refrigerator for up to 3 days.

Reheating

  • Reheat risotto in a skillet over low heat, adding a splash of stock or water to revive its creamy texture.

Creative Variations of Mushroom Risotto

  • Truffle Risotto: Drizzle truffle oil over the risotto just before serving for an indulgent twist.
  • Vegetable Risotto: Add cooked peas, asparagus, or spinach for added nutrition and flavor.
  • Seafood Risotto: Stir in cooked shrimp or scallops for a luxurious main course.
  • Vegan Option: Use vegetable stock, skip the Parmesan, and add nutritional yeast for a cheesy flavor.

FAQs About Mushroom Risotto

1. Can I make risotto without wine?

Yes! You can skip the wine and substitute an equal amount of additional stock or water. While wine adds depth, the dish will still be delicious without it.

2. What type of mushrooms should I use?

Flavorful mushrooms like shiitake, chanterelle, or oyster work best, but you can also use cremini or portobello mushrooms.

3. How do I prevent risotto from sticking to the pan?

Stir frequently and make sure the pan is well-lubricated with butter or olive oil at the start of cooking.

4. Can I make risotto in advance for a dinner party?

Risotto is best served fresh, but you can cook it 80% of the way, refrigerate it, and finish cooking with stock just before serving.

5. What can I serve with mushroom risotto?

Mushroom risotto pairs well with a fresh green salad, crusty bread, or roasted vegetables. For a protein, try grilled chicken or seared salmon.

6. Is risotto gluten-free?

Yes, risotto rice is naturally gluten-free. Just ensure that your stock and other ingredients are also gluten-free.

Your New Favorite Comfort Dish

Making mushroom risotto at home is more than just cooking—it’s about creating a warm, comforting meal that brings people together. Whether you’re preparing it for a quiet night in or a special gathering, this creamy, flavorful dish will never fail to impress.

So what are you waiting for? Grab your favorite mushrooms, a bottle of wine, and let the magic of risotto-making begin. Your taste buds (and your guests) will thank you for it!

A Creamy and Delicious Italian Classic

This mushroom risotto is the perfect combination of creamy, comforting, and luxurious. Made with tender risotto rice, earthy mushrooms, and a hint of wine, this Italian classic is perfect for any occasion—from weeknight dinners to special gatherings.
Prep Time 10 minutes
Cook Time 30 minutes
Total Time 40 minutes
Servings: 4
Course: Main Course
Cuisine: Italian
Calories: 350

Ingredients
  

  • 5 to 6 cups chicken stock or vegetable stock for a vegetarian option
  • 2 tablespoons butter
  • 2 cups mushrooms shiitake, chanterelle, or oyster, cleaned and cut into pieces
  • 1/3 cup minced shallot or yellow onion
  • 1 3/4 cups Arborio or other risotto rice
  • 2/3 cup brandy vermouth, or dry white wine
  • 1/3 cup freshly grated Parmesan cheese
  • 1 teaspoon fresh thyme chopped
  • Kosher salt and freshly ground black pepper to taste
  • 2 tablespoons fresh parsley or chives chopped

Method
 

  1. Warm the Stock: Heat the chicken or vegetable stock in a pot and keep it warm on low heat throughout the cooking process.
  2. Cook the Mushrooms: Melt 1 tablespoon of butter in a large skillet over medium heat. Add the mushrooms, season with a pinch of salt, and cook for 5-7 minutes until browned. Remove and set aside.
  3. Sauté Shallots: In the same pan, melt the remaining tablespoon of butter. Add the minced shallots or onions and sauté for 2-3 minutes until translucent.
  4. Toast the Rice: Stir the risotto rice into the shallots, coating it with the butter. Cook for 1-2 minutes until the edges of the grains are translucent.
  5. Deglaze with Wine: Pour in the wine, stirring constantly until it is mostly absorbed by the rice.
  6. Add Stock Gradually: Add one ladle of warm stock to the rice, stirring frequently. Let the liquid absorb before adding the next ladle. Repeat this process for about 18-20 minutes, until the rice is tender but still slightly firm (al dente).
  7. Combine Mushrooms and Cheese: Stir the cooked mushrooms back into the risotto. Add the grated Parmesan cheese and thyme, mixing well until the cheese melts.
  8. Season and Serve: Season with salt and freshly ground black pepper to taste. Garnish with parsley or chives and serve immediately.