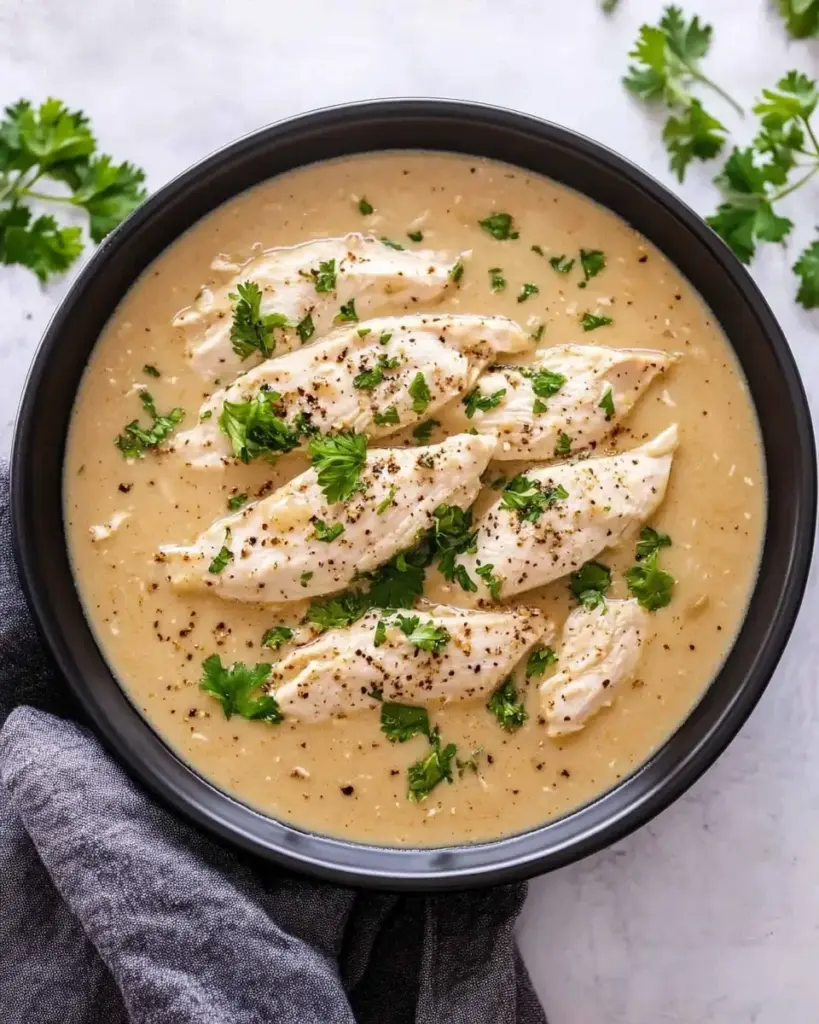
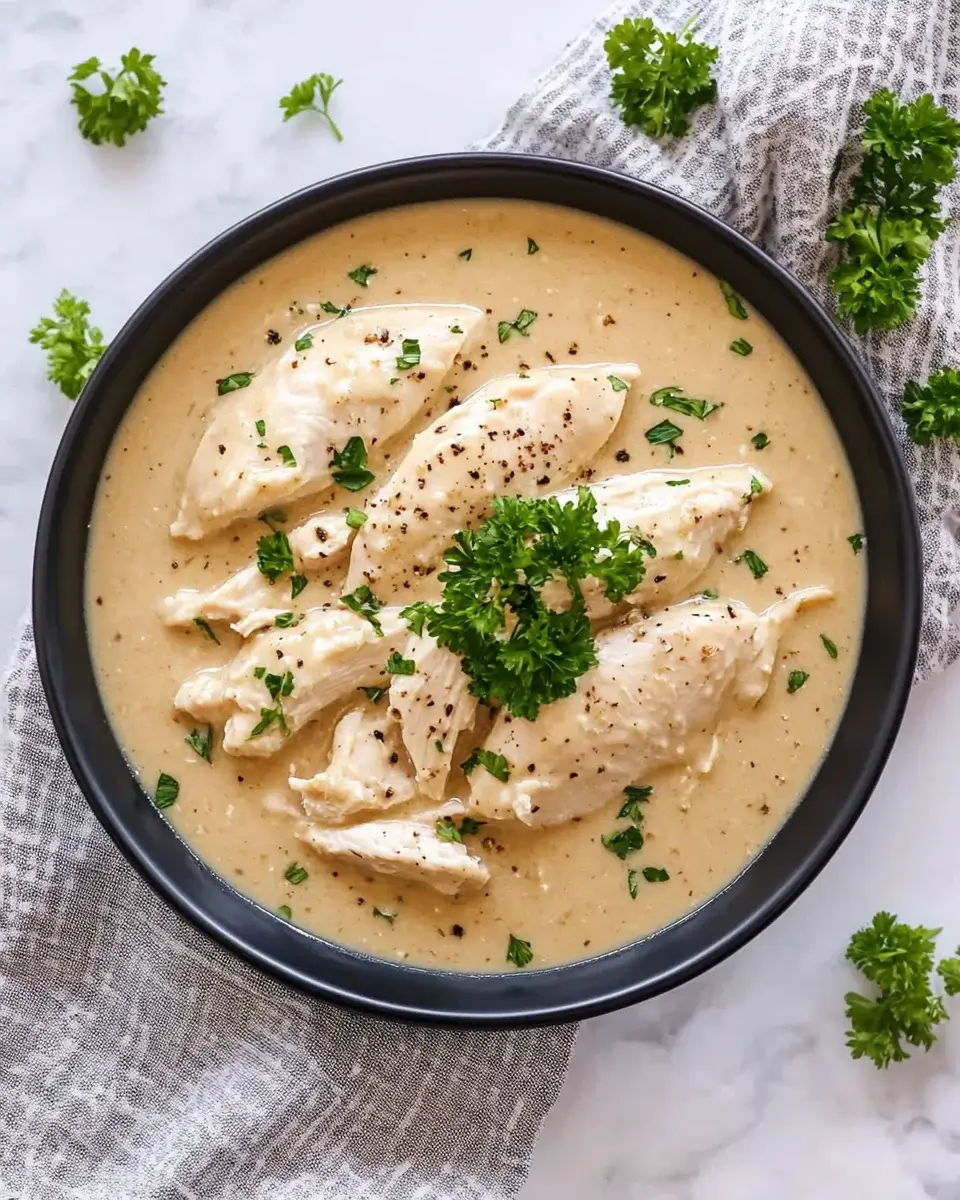
Slow Cooker Chicken Breasts with Gravy Recipe is easy!

Slow Cooker Chicken Breasts with Gravy Recipe is a fantastic choice. This dish is not only simple to prepare, but it also fills your home with a warm, inviting aroma as it cooks. Imagine coming home after a long day to a tender, flavorful chicken dinner waiting for you!

This recipe is perfect for busy weeknights or lazy weekends. With just a few ingredients, you can create a hearty meal that is both satisfying and nutritious. The slow cooker does all the work, allowing you to spend more time with your loved ones. Plus, the gravy is rich and creamy, making it a delightful addition to the chicken.

Whether you’re a seasoned cook or a beginner in the kitchen, this recipe is easy to follow. You can customize it to suit your taste by adding your favorite vegetables or spices. So, grab your slow cooker and let’s dive into this mouthwatering recipe that will surely become a family favorite!

Ingredients for Slow Cooker Chicken Breasts with Gravy Recipe

Slow Cooker Chicken Breasts with Gravy Recipe, you’ll need a handful of simple ingredients. Each one plays a vital role in building flavor and ensuring your dish turns out delicious. Here’s what you’ll need:

  • 4 boneless, skinless chicken breasts (about 1.5 pounds)
  • 1 teaspoon salt
  • 1 teaspoon black pepper
  • 1 teaspoon garlic powder
  • 1 teaspoon onion powder
  • 1 can (10.5 ounces) cream of chicken soup
  • 1 cup chicken broth
  • 1 tablespoon Worcestershire sauce
  • 1 tablespoon olive oil
  • 1 cup sliced mushrooms (optional)
  • 1 cup chopped onions (optional)
  • 1 cup frozen peas (optional)

These ingredients come together to create a savory gravy that perfectly complements the tender chicken. The optional ingredients, like mushrooms and onions, add extra depth and flavor. Feel free to mix and match based on your preferences. For instance, you can add carrots or bell peppers for a colorful twist!

Gather these ingredients, and you’re ready to start cooking. The next step is to prepare the chicken, which will set the stage for a delightful meal.

Step-by-Step Preparation of Slow Cooker Chicken Breasts with Gravy Recipe

Slow Cooker Chicken Breasts with Gravy Recipe. This process is straightforward and will guide you through each stage, ensuring a delicious outcome. Let’s get started!

Step 1: Preparing the Chicken

First, take your boneless, skinless chicken breasts and place them on a clean cutting board. Sprinkle salt, black pepper, garlic powder, and onion powder evenly on both sides. This seasoning will enhance the chicken’s flavor, making it more delicious. Once seasoned, set the chicken aside for a few minutes to let the flavors soak in.

Step 2: Making the Gravy Mixture

Next, grab a medium-sized bowl. In this bowl, combine the cream of chicken soup, chicken broth, and Worcestershire sauce. Stir the mixture well until it’s smooth and creamy. This gravy will be the star of the dish, adding richness to the chicken. If you want a thicker gravy, you can adjust the amount of chicken broth to your liking.

Step 3: Combining Ingredients in the Slow Cooker

Now, it’s time to bring everything together! If you’re using optional ingredients like sliced mushrooms and chopped onions, add them to the bottom of the slow cooker. Then, pour the gravy mixture over the vegetables. Finally, place the seasoned chicken breasts on top of the gravy. This layering helps the chicken absorb all the delicious flavors as it cooks.

Step 4: Cooking the Chicken Breasts

Cover the slow cooker with its lid and set it to cook. You can choose to cook on low for 6-7 hours or on high for 3-4 hours. The slow cooking process allows the chicken to become tender and juicy. As it cooks, the chicken will soak up the gravy, making it even more flavorful. It’s a great time to relax or tackle other tasks around the house!

Step 5: Shredding and Serving the Chicken

Once the cooking time is up, carefully remove the lid. The chicken should be cooked through and tender. Using two forks, shred the chicken right in the slow cooker. Mix it well with the gravy to ensure every bite is packed with flavor. Serve the chicken hot, and enjoy the delightful meal you’ve created!

Variations of Slow Cooker Chicken Breasts with Gravy Recipe

Slow Cooker Chicken Breasts with Gravy Recipe is versatile and can be customized to suit your taste. By adding different ingredients or flavors, you can create a unique dish every time. Let’s explore some exciting variations that will keep your meals fresh and delicious!

Adding Vegetables to the Slow Cooker

One of the easiest ways to enhance your slow cooker chicken is by adding vegetables. Not only do they add flavor, but they also boost the nutritional value of your meal. Here are some great options:

  • Carrots: Slice them into rounds or sticks. They add a natural sweetness and pair well with the gravy.
  • Bell Peppers: Chop them into bite-sized pieces. They bring a pop of color and a slight crunch.
  • Green Beans: Add fresh or frozen green beans for a crisp texture and vibrant color.
  • Potatoes: Cut them into cubes for a hearty addition. They soak up the gravy beautifully!

Feel free to mix and match these vegetables based on what you have on hand. Just remember to add them to the slow cooker before the chicken, so they cook evenly. This way, you’ll have a complete meal in one pot!

Different Gravy Flavors for Slow Cooker Chicken Breasts

If you want to switch up the flavor profile of your gravy, there are plenty of options to explore. Here are some ideas to inspire you:

  • Herb-Infused Gravy: Add dried herbs like thyme, rosemary, or oregano to the gravy mixture for a fragrant twist.
  • Spicy Gravy: Mix in a teaspoon of red pepper flakes or a dash of hot sauce for a kick of heat.
  • BBQ Gravy: Substitute some of the chicken broth with your favorite barbecue sauce for a smoky flavor.
  • Mushroom Gravy: Use cream of mushroom soup instead of cream of chicken for a rich, earthy taste.

Slow Cooker Chicken Breasts with Gravy Recipe feel new and exciting. Don’t hesitate to get creative and find the combinations that your family loves best!

Cooking Note for Slow Cooker Chicken Breasts with Gravy Recipe

Slow Cooker Chicken Breasts with Gravy Recipe, there are a few important cooking notes to keep in mind. These tips will help ensure that your dish turns out perfectly every time. Let’s take a closer look!

First, always use boneless, skinless chicken breasts for this recipe. They cook evenly and stay tender throughout the slow cooking process. If you prefer, you can also use chicken thighs, which are slightly richer in flavor and can add a different texture to the dish.

Next, searing the chicken before placing it in the slow cooker is a crucial step. This process locks in the juices and adds a beautiful golden color. It also enhances the overall flavor of the chicken. Make sure your skillet is hot enough before adding the chicken to achieve that perfect sear.

Another important note is to avoid overcooking the chicken. While slow cooking is forgiving, leaving the chicken in for too long can lead to dry meat. Always check for doneness around the end of the cooking time. The chicken should reach an internal temperature of 165°F (75°C) to be safe for consumption.

Lastly, if you want to make the gravy even richer, consider adding a splash of heavy cream or sour cream just before serving. This addition will create a creamier texture and enhance the flavor profile of the dish.

By following these cooking notes, you’ll be well on your way to creating a delicious and satisfying meal that your family will love. Enjoy the process and the delightful aroma that fills your kitchen!

Serving Suggestions for Slow Cooker Chicken Breasts with Gravy Recipe

Slow Cooker Chicken Breasts with Gravy Recipe is ready, it’s time to think about how to serve this delicious dish. The right sides can elevate your meal and create a well-rounded dining experience. Here are some fantastic serving suggestions that pair beautifully with the savory chicken and gravy.

  • Mashed Potatoes: Creamy mashed potatoes are a classic choice. They soak up the rich gravy perfectly, making each bite delightful.
  • Rice: Serve the chicken over a bed of fluffy white or brown rice. The rice will absorb the gravy, adding flavor to every spoonful.
  • Egg Noodles: Cooked egg noodles are another great option. They provide a comforting base for the chicken and gravy.
  • Steamed Vegetables: For a healthier side, consider steamed broccoli, green beans, or carrots. They add color and nutrition to your plate.
  • Crusty Bread: A slice of warm, crusty bread is perfect for dipping into the gravy. It adds a satisfying crunch to your meal.

Don’t forget to garnish your dish! A sprinkle of fresh parsley or chives can add a pop of color and freshness. This simple touch makes your meal look even more appetizing.

Slow Cooker Chicken Breasts with Gravy Recipe!
Tips for Perfect Slow Cooker Chicken Breasts with Gravy Recipe

Slow Cooker Chicken Breasts with Gravy Recipe turns out perfectly every time, here are some helpful tips. These suggestions will enhance the flavor and texture of your dish, making it a family favorite!

First, always start with high-quality chicken. Fresh, boneless, skinless chicken breasts will yield the best results. If possible, choose organic or free-range chicken for a richer flavor. This small change can make a big difference in your dish.

Next, don’t skip the seasoning! Properly seasoning the chicken before cooking is crucial. The blend of salt, pepper, garlic powder, and onion powder creates a flavorful base. Feel free to adjust the seasonings to match your taste preferences. A little extra garlic or a pinch of paprika can add a delightful twist!

Another tip is to layer your ingredients wisely. Place the vegetables at the bottom of the slow cooker, followed by the gravy mixture, and then the chicken on top. This layering allows the chicken to absorb all the flavors while keeping the veggies tender. It’s a simple trick that enhances the overall taste.

When it comes to cooking time, be mindful of your slow cooker settings. If you’re short on time, cooking on high for 3-4 hours is perfectly fine. However, for the best flavor and tenderness, cooking on low for 6-7 hours is ideal. The longer cooking time allows the chicken to become incredibly tender and soak up the gravy.

Lastly, don’t forget to taste and adjust! Before serving, give the gravy a quick taste. If it needs a little more flavor, consider adding a splash of soy sauce or a dash of lemon juice. These small adjustments can elevate your dish to new heights.

Slow Cooker Chicken Breasts with Gravy Recipe that your family will love. Enjoy the cooking process and the delightful meal that awaits you!

Breakdown of Time for Slow Cooker Chicken Breasts with Gravy Recipe

Slow Cooker Chicken Breasts with Gravy Recipe is essential for planning your meal. Here’s a simple breakdown of the time involved in preparing and cooking this delicious dish. Knowing these times will help you manage your schedule and ensure everything is ready when you want to eat!

Prep Time

The prep time for this recipe is quite short, making it perfect for busy days. You’ll need about 15-20 minutes to gather your ingredients and prepare the chicken. This includes seasoning the chicken breasts and mixing the gravy ingredients. It’s a quick process that allows you to get everything ready without much hassle!

Cooking Time

Once you’ve prepped your ingredients, the cooking time is where the magic happens. You can choose to cook the chicken on low for 6-7 hours or on high for 3-4 hours. The slow cooking method ensures that the chicken becomes tender and flavorful. It’s a great way to let the flavors meld together while you go about your day!

Total Time

In total, you’re looking at about 6 hours and 15 minutes to 7 hours and 20 minutes from start to finish, depending on your cooking method. This includes both the prep and cooking times. With such a minimal hands-on time, you can enjoy a delicious meal without spending all day in the kitchen!

Slow Cooker Chicken Breasts with Gravy Recipe into your busy schedule. It’s a fantastic way to enjoy a home-cooked meal with minimal effort!

Nutritional Information for Slow Cooker Chicken Breasts with Gravy Recipe

Slow Cooker Chicken Breasts with Gravy Recipe not only offers great taste but also provides a balanced meal option. Let’s break down the nutritional information to help you understand what’s in this delicious dish.

Calories

Slow Cooker Chicken Breasts with Gravy Recipe contains approximately 320 calories. This makes it a satisfying yet light option for dinner. The calorie count is reasonable, especially considering the rich flavors and comforting nature of the dish. It’s a great choice for those looking to enjoy a hearty meal without overindulging.

Protein

One of the standout features of this recipe is its high protein content. Each serving provides about 30 grams of protein. Chicken breasts are an excellent source of lean protein, which is essential for muscle repair and overall health. Including protein in your meals can help keep you feeling full and satisfied, making this dish a smart choice for any diet.

Sodium

The sodium content in this recipe is approximately 800 milligrams per serving. While this is a reasonable amount for a savory dish, it’s always good to be mindful of sodium intake, especially for those watching their salt consumption. You can reduce the sodium level by using low-sodium chicken broth and cream of chicken soup. This simple adjustment allows you to enjoy the flavors without compromising your health goals.

Slow Cooker Chicken Breasts with Gravy Recipe is a nutritious option that balances calories, protein, and sodium. It’s a meal that not only tastes great but also supports a healthy lifestyle. Enjoy this comforting dish knowing it’s good for you too!

FAQs about Slow Cooker Chicken Breasts with Gravy Recipe

Can I use frozen chicken breasts for this recipe?

Slow Cooker Chicken Breasts with Gravy Recipe. However, it’s important to note that cooking times will vary. If you start with frozen chicken, you should cook it on high for about 4-5 hours instead of the usual 3-4 hours. Always ensure the chicken reaches an internal temperature of 165°F (75°C) for safe consumption. Using frozen chicken can be a convenient option, especially when you forget to thaw your meat ahead of time!

How can I thicken the gravy for Slow Cooker Chicken Breasts?

If you prefer a thicker gravy, there are a few easy methods to achieve that. One option is to mix a tablespoon of cornstarch with a tablespoon of cold water to create a slurry. Stir this mixture into the gravy during the last 30 minutes of cooking. Another method is to remove some of the gravy, let it cool slightly, and whisk in a bit of flour or cornstarch before returning it to the slow cooker. This will help thicken the gravy without clumping. You can also let the gravy simmer uncovered for a bit to reduce it and thicken naturally!

What sides pair well with Slow Cooker Chicken Breasts with Gravy?

Slow Cooker Chicken Breasts with Gravy Recipe. Here are some great options:

  • Mashed Potatoes: Creamy mashed potatoes are a classic pairing, soaking up the rich gravy.
  • Rice: Fluffy white or brown rice makes a great base for the chicken and gravy.
  • Egg Noodles: Tender egg noodles provide a comforting texture that pairs well with the dish.
  • Steamed Vegetables: Fresh steamed broccoli or green beans add color and nutrition to your plate.
  • Crusty Bread: A slice of warm bread is perfect for dipping into the savory gravy.

These sides not only enhance the meal but also create a well-rounded dining experience!

Can I make this recipe ahead of time?

Slow Cooker Chicken Breasts with Gravy Recipe is perfect for meal prep. You can prepare the ingredients the night before and store them in the refrigerator. In the morning, simply transfer everything to the slow cooker and set it to cook. If you want to make it even easier, you can cook the chicken and gravy ahead of time, then store it in an airtight container in the fridge for up to 3 days. Reheat it on the stove or in the microwave before serving. This makes it a convenient option for busy weeknights!

Conclusion on Slow Cooker Chicken Breasts with Gravy Recipe

Slow Cooker Chicken Breasts with Gravy Recipe is a delightful and easy meal that brings comfort to your dinner table. With its simple preparation and rich flavors, it’s no wonder this dish has become a family favorite. The slow cooker does all the hard work, allowing you to enjoy a tender, juicy chicken dish without spending hours in the kitchen.

This recipe is not only versatile but also customizable. You can add your favorite vegetables or experiment with different gravy flavors to suit your taste. Whether you prefer a classic creamy gravy or a spicy twist, the possibilities are endless. Plus, the nutritional benefits make it a smart choice for anyone looking to maintain a balanced diet.

As you gather around the table to enjoy this meal, you’ll appreciate the warmth and love that comes from home-cooked food. The aroma of the chicken and gravy will fill your home, creating a cozy atmosphere that invites everyone to sit down and share a meal together. So, don’t hesitate to try this recipe and make it your own!

Slow Cooker Chicken Breasts with Gravy Recipe.
Paul

Slow Cooker Chicken Breasts with Gravy Recipe is easy!

Creamy, comforting, and effortless—this Slow Cooker Chicken and Gravy is the ultimate cozy meal. Tender chicken simmers low and slow in a rich, savory gravy that’s finished with a touch of sour cream for a velvety texture. Serve it over mashed potatoes, rice, or buttered noodles for pure comfort food bliss.
Prep Time 5 minutes
Cook Time 4 hours
Total Time 4 hours 5 minutes
Servings: 4 servings
Course: Main Course
Cuisine: American Comfort Food

Ingredients
  

  • cups water or chicken broth for more flavor
  • 2 packets chicken gravy mix
  • cups condensed cream of chicken soup do not dilute
  • 1 teaspoon garlic powder
  • ½ teaspoon kosher salt
  • ½ teaspoon paprika
  • ¼ teaspoon coarse ground black pepper
  • 3 boneless skinless chicken breasts (about 1 pound total)
  • ½ cup sour cream

Method
 

  1. Season the chicken breasts on both sides with garlic powder, salt, and black pepper.
  2. In the slow cooker, whisk together the water (or broth), gravy mix, cream of chicken soup, garlic powder, paprika, and remaining salt and pepper until smooth.
  3. Place the seasoned chicken into the slow cooker and flip to fully coat with the gravy mixture.
  4. Cover and cook on low for 4 to 5 hours, or until the chicken is cooked through and tender.
  5. Remove the chicken and shred or slice it as preferred.
  6. Stir the sour cream into the gravy in the slow cooker until smooth and creamy.
  7. Return the chicken to the slow cooker or serve the gravy spooned over the chicken.
  8. Serve hot over mashed potatoes, rice, noodles, or even thick-cut toast.

Notes

    • Using chicken broth instead of water enhances the savory depth of the gravy.
    • For extra richness, add a tablespoon of butter when whisking the gravy base.
    • Leftovers reheat beautifully and make a great next-day sandwich or wrap.
    • You can swap chicken breasts for thighs if you prefer darker meat.
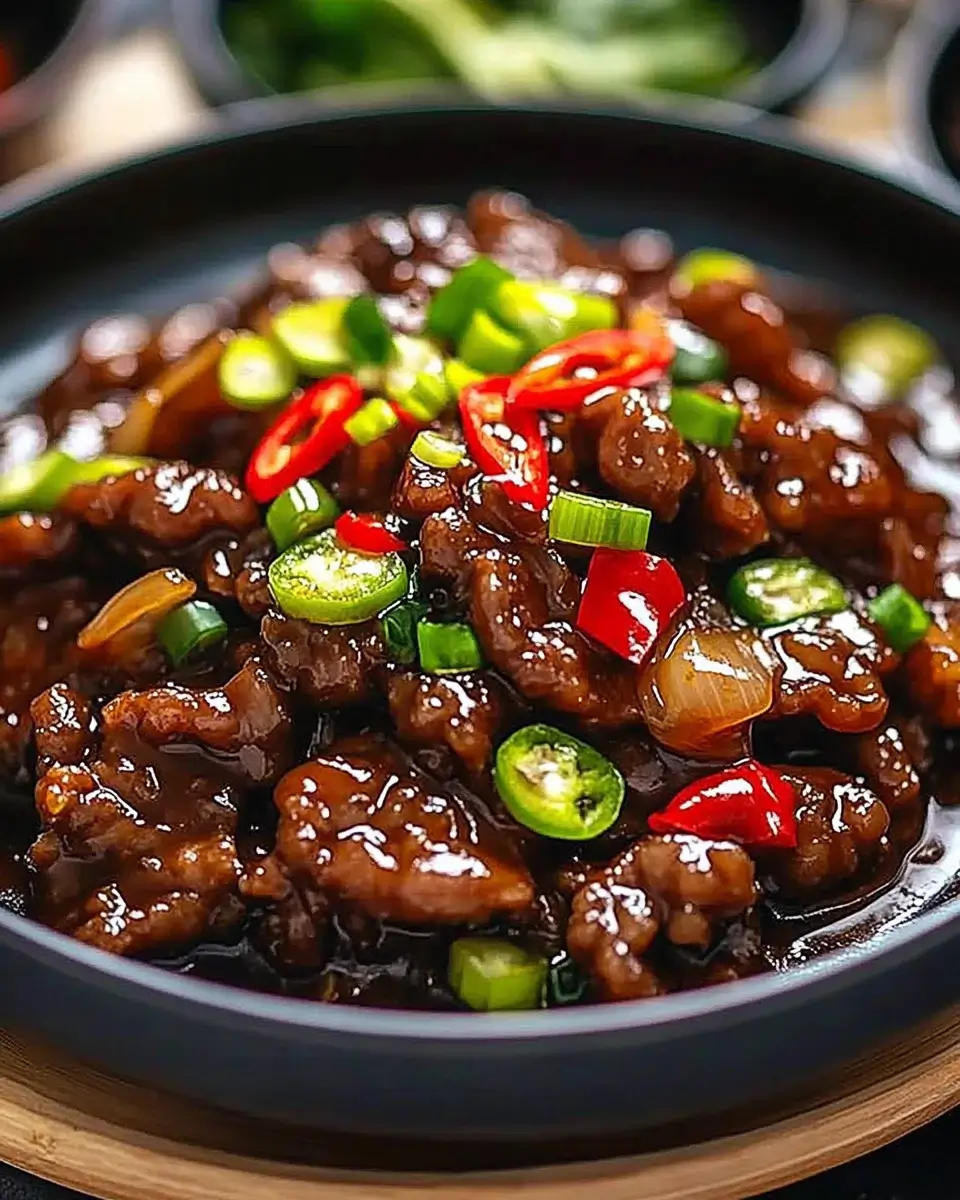
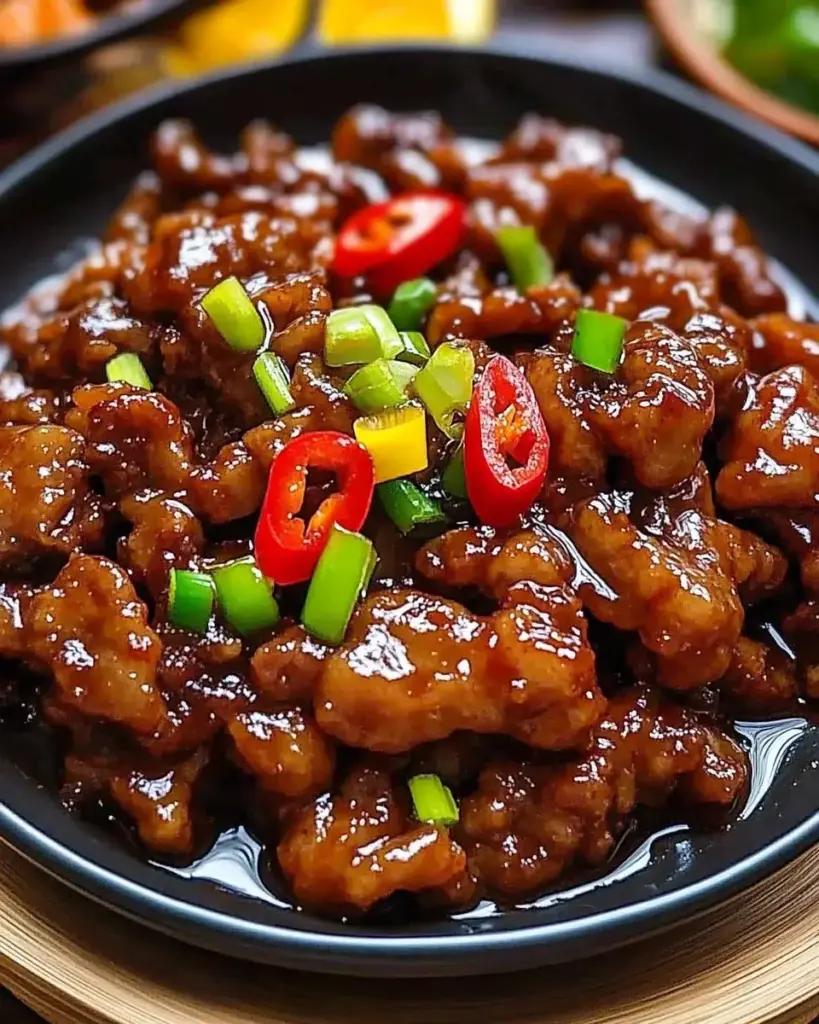
Crispy Chili Beef Recipe is a must-try dish!

Welcome to the delightful world of Crispy Chili Beef! This dish is not just a meal; it’s an experience that tantalizes your taste buds. Imagine tender beef, perfectly crispy on the outside, coated in a savory and slightly spicy sauce. It’s a dish that brings together the best of textures and flavors, making it a favorite for many.

What Makes the Crispy Chili Beef Recipe Special?

What sets this Crispy Chili Beef Recipe apart? First, it’s all about the crunch! The beef is coated in a special blend of cornstarch and flour, which creates a crispy exterior when fried. This crunchiness contrasts beautifully with the tender meat inside. Moreover, the sauce is a harmonious blend of sweet, salty, and spicy flavors. The combination of soy sauce, rice vinegar, and chili paste creates a mouthwatering glaze that clings to each piece of beef.

Another reason this recipe shines is its versatility. You can easily adjust the spice level to suit your taste. Whether you prefer a mild kick or a fiery punch, this recipe can accommodate your preferences. Plus, it’s quick to prepare, making it perfect for busy weeknights or special occasions.

In addition, this dish can be customized with various vegetables, adding nutrition and color. Bell peppers, broccoli, or snap peas can be tossed in for a delightful crunch and extra vitamins. This way, you can enjoy a balanced meal that satisfies your cravings.

So, whether you’re cooking for family or hosting friends, this Crispy Chili Beef Recipe is sure to impress. Let’s dive into the ingredients and get started on this culinary adventure!

Ingredients for Crispy Chili Beef Recipe

To create the perfect Crispy Chili Beef, you’ll need a selection of fresh ingredients that come together to make this dish truly special. Here’s what you’ll need:

  • 1 pound flank steak: Thinly sliced against the grain for tenderness.
  • 1/2 cup cornstarch: This is key for achieving that crispy texture.
  • 1/4 cup all-purpose flour: Helps to bind the coating and adds crunch.
  • 1 teaspoon salt: Enhances the flavor of the beef.
  • 1/2 teaspoon black pepper: Adds a mild kick.
  • 1/2 teaspoon garlic powder: For a hint of garlic flavor.
  • 1/2 teaspoon onion powder: Complements the garlic and adds depth.
  • 1/4 cup vegetable oil: Essential for frying the beef to golden perfection.

For the sauce, gather the following ingredients:

  • 1/4 cup soy sauce: Provides a savory base.
  • 2 tablespoons rice vinegar: Adds a tangy flavor.
  • 2 tablespoons brown sugar: Balances the saltiness with sweetness.
  • 1 tablespoon chili paste: Adjust this to control the heat level.
  • 1 tablespoon sesame oil: Adds a nutty aroma.
  • 1 teaspoon grated fresh ginger: For a zesty kick.
  • 2 cloves garlic, minced: Fresh garlic enhances the sauce.
  • 1/4 cup green onions, chopped: For garnish and freshness.
  • 1 tablespoon sesame seeds (optional): Adds a nice crunch and visual appeal.

With these ingredients on hand, you’re ready to embark on your cooking journey. Each component plays a vital role in creating the delicious flavors and textures that make this Crispy Chili Beef Recipe a standout dish. Now, let’s move on to the step-by-step preparation!

Step-by-Step Preparation of Crispy Chili Beef Recipe

Now that you have all your ingredients ready, it’s time to dive into the step-by-step preparation of this mouthwatering Crispy Chili Beef Recipe. Follow these simple steps to create a dish that will leave everyone asking for seconds!

Step 1: Preparing the Beef

Start by taking your flank steak and slicing it thinly against the grain. This technique ensures that the meat remains tender and easy to chew. Aim for slices about 1/4 inch thick. Once sliced, place the beef in a large bowl. This is where the magic begins!

Step 2: Marinating the Beef

While marinating isn’t a must for this recipe, it can enhance the flavor. If you choose to marinate, add a splash of soy sauce and a sprinkle of black pepper to the beef. Let it sit for about 15-30 minutes. This step allows the flavors to penetrate the meat, making it even more delicious.

Step 3: Coating the Beef

Next, it’s time to coat the beef. In a large bowl, combine the cornstarch, all-purpose flour, salt, black pepper, garlic powder, and onion powder. Mix well. Then, take each slice of beef and toss it in the mixture until it’s fully coated. This coating is what gives the beef its signature crunch!

Step 4: Frying the Beef

Heat the vegetable oil in a large skillet or wok over medium-high heat. Once the oil is hot, carefully add the coated beef in batches. Fry each batch for about 3-4 minutes, or until golden brown and crispy. Remember not to overcrowd the pan, as this can lower the oil temperature and affect the crispiness. Once done, remove the beef and let it drain on paper towels.

Step 5: Making the Chili Sauce

In a separate bowl, whisk together the soy sauce, rice vinegar, brown sugar, chili paste, sesame oil, grated ginger, and minced garlic. This sauce is the heart of the dish, bringing all the flavors together. Pour the sauce into the same skillet over medium heat and bring it to a gentle simmer. The aroma will be irresistible!

Step 6: Combining Beef and Sauce

Finally, add the crispy beef back into the skillet with the sauce. Toss everything together, ensuring that each piece of beef is evenly coated. Cook for an additional 2-3 minutes until everything is heated through. The sauce will cling beautifully to the crispy beef, creating a delightful dish.

And there you have it! Your Crispy Chili Beef is ready to be served. The combination of crispy beef and flavorful sauce is sure to impress anyone who tries it. Let’s move on to some variations you can try!

Variations of Crispy Chili Beef Recipe

While the classic Crispy Chili Beef Recipe is a hit on its own, there are many ways to switch things up! Whether you want to try different proteins or explore vegetarian options, these variations will keep your meals exciting and delicious.

Alternative Proteins

If you’re looking to change the protein in your Crispy Chili Beef, there are several tasty alternatives. Here are a few options:

  • Chicken: Thinly sliced chicken breast or thighs can be used instead of beef. The cooking method remains the same, and you’ll still achieve that crispy texture.
  • Pork: Pork tenderloin is another great choice. Slice it thinly and follow the same steps for coating and frying. The flavor pairs wonderfully with the chili sauce.
  • Tofu: For a plant-based option, firm tofu works well. Press the tofu to remove excess moisture, then slice and coat it just like the beef. Fry until golden and crispy for a delightful crunch.

These alternative proteins not only provide variety but also allow you to cater to different dietary preferences. Each option brings its unique flavor, making your Crispy Chili dish versatile and fun!

Vegetarian Options

If you’re looking for a vegetarian twist on the Crispy Chili Beef Recipe, you can easily create a delicious meat-free version. Here are some ideas:

  • Cauliflower: Cauliflower florets can be coated and fried just like the beef. The texture becomes crispy, and it absorbs the flavors of the sauce beautifully.
  • Seitan: This wheat-based protein mimics the texture of meat. Slice it thinly, coat it, and fry it for a satisfying vegetarian alternative.
  • Mushrooms: Use portobello or shiitake mushrooms for a rich, umami flavor. Slice them, coat, and fry until crispy. They add a wonderful depth to the dish.

These vegetarian options not only make the dish accessible to more people but also add a delightful twist to the traditional recipe. You can enjoy the same crispy texture and flavorful sauce while keeping it meat-free!

With these variations, you can customize your Crispy Chili Beef Recipe to suit your taste and dietary needs. Now, let’s explore some cooking notes to ensure your dish turns out perfectly every time!

Cooking Note for Crispy Chili Beef Recipe

Cooking the perfect Crispy Chili Beef requires attention to detail and a few helpful tips. These notes will guide you through the process, ensuring that your dish turns out delicious every time. Let’s dive into some essential cooking notes!

First, the choice of meat is crucial. Flank steak is ideal for this recipe due to its tenderness and flavor. However, if you can’t find flank steak, you can substitute it with sirloin or ribeye. Just remember to slice against the grain for the best texture.

Next, the coating is key to achieving that crispy exterior. Make sure to coat each piece of beef evenly in the cornstarch and flour mixture. This step is vital for creating a crunchy texture. If you find the coating isn’t sticking well, you can lightly dampen the beef with water before tossing it in the mixture.

When frying, ensure the oil is hot enough. A good test is to drop a small piece of the coated beef into the oil. If it sizzles immediately, you’re ready to go! Frying in batches is important; overcrowding the pan can lower the oil temperature, resulting in soggy beef instead of crispy perfection.

After frying, let the beef drain on paper towels. This step helps remove excess oil, keeping your dish light and crispy. If you prefer a healthier option, consider air frying the beef. It can still achieve a delightful crunch with less oil.

Lastly, when combining the beef with the sauce, be gentle. Toss the beef carefully to avoid breaking the crispy coating. The goal is to coat each piece without losing that satisfying crunch. Serve immediately for the best experience, as the crispy texture is most enjoyable fresh.

By following these cooking notes, you’ll be well on your way to mastering the Crispy Chili Beef Recipe. Each tip is designed to enhance your cooking experience and ensure a delicious outcome. Now, let’s move on to some serving suggestions to elevate your meal even further!

Serving Suggestions for Crispy Chili Beef Recipe

Now that your Crispy Chili Beef is ready, it’s time to think about how to serve it! The way you present this dish can enhance the overall dining experience. Here are some delightful serving suggestions that will make your meal even more enjoyable.

First, consider serving your Crispy Chili Beef over a bed of fluffy rice. Steamed white rice or jasmine rice works wonderfully, as it absorbs the flavorful sauce. For a healthier option, brown rice or cauliflower rice can be used. This combination not only adds texture but also balances the dish with a wholesome base.

Another great option is to pair the beef with stir-fried vegetables. Colorful bell peppers, snap peas, and broccoli not only add nutrition but also create a vibrant plate. Simply sauté the vegetables in a bit of oil and season with salt and pepper. This adds a fresh crunch that complements the crispy beef perfectly.

If you’re looking for a fun twist, consider serving the Crispy Chili Beef in lettuce wraps. Use large lettuce leaves, such as romaine or butter lettuce, to create a fresh and crunchy wrap. Fill each leaf with the beef and top with chopped green onions and sesame seeds. This makes for a light and interactive meal that everyone will love!

For those who enjoy a bit of heat, serve the dish with extra chili paste or hot sauce on the side. This allows guests to customize their spice level, making it a hit for everyone at the table. You can also offer a side of pickled vegetables for a tangy contrast to the rich flavors of the beef.

Lastly, don’t forget about garnishing! A sprinkle of chopped green onions and sesame seeds adds a beautiful finishing touch. Not only does it enhance the visual appeal, but it also adds a burst of flavor and texture. Serve your Crispy Chili Beef hot and fresh for the best experience.

With these serving suggestions, you can elevate your Crispy Chili Beef Recipe into a memorable meal. Whether you choose rice, vegetables, or creative wraps, each option brings something special to the table. Now, let’s explore some tips for perfecting your Crispy Chili Beef Recipe!

Tips for Perfecting Your Crispy Chili Beef Recipe

To truly master the Crispy Chili Beef Recipe, a few tips can make all the difference. These suggestions will help you achieve that perfect balance of flavor and texture, ensuring your dish is a hit every time. Let’s explore some essential tips for perfecting your cooking!

First, always slice the beef against the grain. This technique is crucial for tenderness. When you cut against the grain, you shorten the muscle fibers, making the beef easier to chew. Aim for thin slices, about 1/4 inch thick, for the best results.

Next, don’t skip the coating process. The combination of cornstarch and flour is what gives the beef its signature crunch. Make sure each piece is evenly coated. If you find the coating isn’t sticking well, you can lightly dampen the beef with water before tossing it in the mixture. This helps the coating adhere better.

When frying, ensure the oil is at the right temperature. If the oil is too cool, the beef will absorb excess oil and become greasy. A good test is to drop a small piece of the coated beef into the oil. If it sizzles immediately, you’re ready to fry! Fry in small batches to maintain the oil temperature and achieve that crispy texture.

After frying, let the beef drain on paper towels. This step is essential for removing excess oil, keeping your dish light and crispy. If you prefer a healthier option, consider air frying the beef. It can still achieve a delightful crunch with less oil, making it a great alternative.

When combining the beef with the sauce, be gentle. Toss the beef carefully to avoid breaking the crispy coating. The goal is to coat each piece without losing that satisfying crunch. Serve immediately for the best experience, as the crispy texture is most enjoyable fresh.

Lastly, feel free to experiment with the sauce. Adjust the chili paste to suit your spice preference. You can also add a splash of lime juice for a zesty kick or a dash of hoisin sauce for extra sweetness. These small tweaks can elevate the flavor profile of your dish.

By following these tips, you’ll be well on your way to perfecting your Crispy Chili Beef Recipe. Each suggestion is designed to enhance your cooking experience and ensure a delicious outcome. Now, let’s break down the time needed for this delightful dish!

Breakdown of Time for Crispy Chili Beef Recipe

Understanding the time required for each step of the Crispy Chili Beef Recipe can help you plan your cooking efficiently. Here’s a breakdown of the time you’ll need for preparation and cooking, ensuring you can enjoy this delicious dish without any rush!

Prep Time

The prep time for this Crispy Chili Beef Recipe is approximately 30 minutes. This includes:

  • Slicing the flank steak (about 10 minutes).
  • Marinating the beef (optional, about 15-30 minutes).
  • Coating the beef with the cornstarch and flour mixture (about 5 minutes).

Keep in mind that if you choose to marinate the beef, the total prep time may extend slightly. However, this step can enhance the flavor, making it worth the wait!

Cooking Time

The cooking time for the Crispy Chili Beef is around 15-20 minutes. This includes:

  • Frying the beef in batches (about 10-12 minutes).
  • Making the chili sauce (about 5 minutes).
  • Combining the beef with the sauce (about 2-3 minutes).

Frying in batches is essential to achieve that perfect crispiness, so be patient and allow each batch to cook thoroughly.

Total Time

In total, you can expect the entire process to take about 45-50 minutes, including both prep and cooking time. This makes the Crispy Chili Beef Recipe a quick and satisfying option for dinner, especially when you want something delicious without spending hours in the kitchen.

With this time breakdown, you can easily plan your cooking session and enjoy a delightful meal with family or friends. Now that you know how to manage your time, let’s take a look at the nutritional information for this tasty dish!

Nutritional Information for Crispy Chili Beef Recipe

Understanding the nutritional content of your meals is essential for maintaining a balanced diet. The Crispy Chili Beef Recipe not only satisfies your taste buds but also provides valuable nutrients. Here’s a breakdown of the nutritional information per serving, so you can enjoy this dish while keeping your health in mind.

Calories

Each serving of Crispy Chili Beef contains approximately 350 calories. This calorie count includes the crispy beef, the flavorful sauce, and any optional garnishes. While this dish is rich in flavor, it’s important to enjoy it in moderation, especially if you’re watching your calorie intake. Pairing it with a side of vegetables or rice can help create a more balanced meal.

Protein

Protein is a vital nutrient for building and repairing tissues, and this Crispy Chili Beef Recipe delivers! Each serving provides about 25 grams of protein. The flank steak is an excellent source of high-quality protein, making this dish a great option for those looking to increase their protein intake. Whether you’re an athlete or just someone who wants to maintain muscle health, this recipe can help you meet your protein needs.

Sodium

When it comes to sodium, each serving of Crispy Chili Beef contains around 800 milligrams. This amount can vary based on the soy sauce used and any additional seasonings you might add. While sodium is necessary for bodily functions, it’s essential to monitor your intake, especially if you have dietary restrictions. To reduce sodium levels, consider using low-sodium soy sauce or adjusting the amount of sauce you use in the recipe.

In summary, the Crispy Chili Beef Recipe offers a delicious balance of calories, protein, and sodium. By being mindful of portion sizes and pairing it with healthy sides, you can enjoy this dish as part of a nutritious meal plan. Now, let’s address some frequently asked questions about this delightful recipe!

FAQs about Crispy Chili Beef Recipe

Can I make the Crispy Chili Beef Recipe ahead of time?

Yes, you can prepare some components of the Crispy Chili Beef Recipe ahead of time! You can slice and marinate the beef a few hours in advance. However, for the best texture, it’s recommended to fry the beef just before serving. If you fry it ahead of time, the beef may lose its crispiness. To keep it fresh, store the fried beef in an airtight container and reheat it in the oven to regain some crunch.

What can I serve with Crispy Chili Beef?

There are many delicious options to serve alongside your Crispy Chili Beef! A bed of steamed rice, whether white, brown, or cauliflower rice, makes a great base. You can also pair it with stir-fried vegetables like bell peppers, broccoli, or snap peas for added nutrition. For a fun twist, consider serving it in lettuce wraps, allowing everyone to create their own fresh and crunchy bites!

How do I store leftovers of Crispy Chili Beef Recipe?

To store leftovers of your Crispy Chili Beef, place it in an airtight container and refrigerate. It’s best to consume the leftovers within 2-3 days for optimal freshness. When reheating, use an oven or air fryer to help restore some of the crispiness. Avoid using a microwave, as it can make the beef soggy.

Can I adjust the spiciness of the Crispy Chili Beef Recipe?

Absolutely! You can easily adjust the spiciness of the Crispy Chili Beef Recipe to suit your taste. If you prefer a milder flavor, reduce the amount of chili paste in the sauce. Alternatively, if you enjoy a spicier kick, feel free to add more chili paste or even some crushed red pepper flakes. Taste the sauce as you go to find the perfect balance for your palate!

Conclusion on Crispy Chili Beef Recipe

In conclusion, the Crispy Chili Beef Recipe is a delightful dish that combines flavor, texture, and versatility. With its crispy exterior and savory sauce, it’s no wonder this recipe has become a favorite for many home cooks. Whether you’re preparing it for a family dinner or a special gathering, this dish is sure to impress.

Throughout this article, we’ve explored the essential ingredients, step-by-step preparation, and various ways to customize the recipe. From alternative proteins to vegetarian options, there’s something for everyone. Plus, the cooking notes and tips provided will help you achieve that perfect crunch every time you make it.

As you serve your Crispy Chili Beef, remember to pair it with delicious sides like rice or stir-fried vegetables. These accompaniments not only enhance the meal but also add nutritional value. Don’t forget to garnish with fresh green onions and sesame seeds for that extra touch of flavor and presentation.

So, gather your ingredients, follow the steps, and enjoy the process of creating this mouthwatering dish. With a little practice, you’ll master the Crispy Chili Beef Recipe and make it a staple in your kitchen. Happy cooking!

Paul

Crispy Chili Beef Recipe is a must-try dish!

This Crispy Chilli Beef is a flavor-packed Chinese takeaway classic made at home! Thin strips of beef are coated, fried until golden and crunchy, then tossed in a sticky, sweet-spicy sauce. It’s the perfect combo of crispy, saucy, and irresistibly bold.
Prep Time 20 minutes
Cook Time 20 minutes
Total Time 40 minutes
Servings: 4 servings
Course: Main Dish
Cuisine: Chinese-Inspired

Ingredients
  

For the Beef:
  • ¾ lb sirloin steak thinly sliced against the grain
  • 1 small egg
  • 4 tablespoons cornflour cornstarch
  • ¼ teaspoon salt
  • ¼ teaspoon black pepper
  • teaspoon white pepper
  • tablespoons sunflower oil divided
For the Sauce:
  • 1 medium onion thinly sliced
  • 1 red chili finely sliced (deseed for less heat)
  • 1 teaspoon minced ginger
  • 3 garlic cloves minced
  • 2 tablespoons rice vinegar
  • 3 tablespoons dark soy sauce
  • 2 tablespoons tomato puree
  • 6 tablespoons caster sugar
  • 2 tablespoons tomato ketchup
  • 2 tablespoons sweet chili sauce

Method
 

  1. Place the steak in the freezer for 30 minutes to make slicing easier. Then cut into thin ¼-inch strips.
  2. In a bowl, beat the egg and mix it with the sliced beef. Add cornflour, salt, black pepper, and white pepper. Toss until the beef is well coated.
  3. Heat 3 tablespoons of sunflower oil in a large wok or frying pan over high heat. Fry half the beef for 5–6 minutes until dark brown and crispy. Do not stir constantly—let it crisp. Remove and drain on paper towels.
  4. Repeat with the second batch of beef using 1 tablespoon of oil.
  5. Add the remaining ½ tablespoon of oil to the pan. Lower heat to medium and sauté the onion for 2 minutes.
  6. Stir in the sliced chili, minced garlic, and ginger. Cook for 30 seconds until fragrant.
  7. Add rice vinegar, dark soy sauce, tomato puree, caster sugar, ketchup, and sweet chili sauce. Stir and simmer until the sauce thickens slightly, about 1–2 minutes.
  8. Return the crispy beef to the pan and toss to coat evenly in the sauce. Heat through for 1–2 minutes.
  9. Serve immediately with rice or noodles.

Notes

  • Partially freezing the beef makes it easier to slice thinly and evenly.
  • For extra crispy beef, avoid overcrowding the pan while frying.
  • Want it hotter? Add extra red chili or a splash of sriracha.
  • This dish is best served fresh to preserve the crunch.

Raspberry Chocolate Chip Cookies Recipe is a must-try!

Introduction to Raspberry Chocolate Chip Cookies Recipe

Raspberry Chocolate Chip Cookies Recipe is not just a treat; it’s an experience that brings joy to any occasion. Whether you’re celebrating a birthday, hosting a gathering, or simply indulging in a sweet craving, these cookies are sure to impress.

The Perfect Treat for Any Occasion

Imagine biting into a warm cookie, where the gooey chocolate chips melt in your mouth, and the burst of raspberry flavor dances on your taste buds. Sounds heavenly, right? These cookies are perfect for sharing with friends and family or enjoying all by yourself. They are easy to make and require simple ingredients that you likely already have in your kitchen.

Raspberry Chocolate Chip Cookies Recipe is a must-try!

Let’s get started on this delicious journey. Gather your ingredients, and prepare to create a batch of cookies that will leave everyone asking for more!

Ingredients for Raspberry Chocolate Chip Cookies Recipe

Raspberry Chocolate Chip Cookies Recipe. Having everything ready will make your baking experience smooth and enjoyable. Here’s what you’ll need:

  • 1 cup unsalted butter, softened
  • 1 cup granulated sugar
  • 1 cup packed brown sugar
  • 2 large eggs
  • 2 teaspoons vanilla extract
  • 3 cups all-purpose flour
  • 1 teaspoon baking soda
  • 1/2 teaspoon salt
  • 1 cup semi-sweet chocolate chips
  • 1 cup fresh raspberries, gently mashed

These ingredients come together to create a delightful cookie that balances sweetness and tartness perfectly. The unsalted butter adds richness, while the sugars provide that classic cookie sweetness. Eggs and vanilla extract contribute to the overall flavor and texture, making the cookies soft and chewy.

The all-purpose flour, baking soda, and salt form the base of the dough, ensuring the cookies rise beautifully. Finally, the star ingredients—chocolate chips and fresh raspberries—bring the whole recipe to life. The chocolate chips melt into gooey pockets of sweetness, while the raspberries add a refreshing burst of flavor.

Now that you have your ingredients ready, let’s move on to the next step of preparing these delicious cookies!

Step-by-Step Preparation of Raspberry Chocolate Chip Cookies Recipe

Raspberry Chocolate Chip Cookies Recipe. Follow these simple steps to ensure your cookies turn out perfectly every time!

Step 1: Preheat the Oven

First things first, preheat your oven to 350°F (175°C). This step is crucial as it ensures that your cookies bake evenly. A properly preheated oven helps achieve that golden-brown color and soft texture we all love. While the oven heats up, you can move on to the next step.

Step 2: Prepare the Dough

In a large mixing bowl, cream together the softened butter, granulated sugar, and brown sugar. Use an electric mixer or a sturdy wooden spoon to mix until the mixture is light and fluffy. This process usually takes about 2-3 minutes. Next, add the eggs one at a time, mixing well after each addition. Then, stir in the vanilla extract. This will add a lovely aroma to your cookie dough!

In a separate bowl, whisk together the all-purpose flour, baking soda, and salt. Gradually add this dry mixture to the wet ingredients. Mix until just combined. Be careful not to overmix, as this can lead to tough cookies.

Step 3: Fold in the Chocolate Chips and Raspberries

Now comes the fun part! Gently fold in the semi-sweet chocolate chips and the gently mashed raspberries. Use a spatula to combine everything, ensuring the chocolate and raspberries are evenly distributed throughout the dough. Remember, the key is to be gentle to keep the raspberries intact and avoid turning the dough pink!

Step 4: Scoop and Shape the Cookies

Using a tablespoon or a cookie scoop, drop rounded tablespoons of dough onto ungreased baking sheets. Make sure to space them about 2 inches apart. This spacing allows the cookies to spread while baking without merging into one another. If you like, you can slightly flatten the tops for a more uniform shape.

Step 5: Bake the Cookies

It’s time to bake! Place the baking sheets in the preheated oven and bake for 10-12 minutes. Keep an eye on them; you want the edges to be lightly golden while the centers remain soft. Once done, remove the cookies from the oven and let them cool on the baking sheets for about 5 minutes. After that, transfer them to wire racks to cool completely. This cooling time helps them set perfectly!

Raspberry Chocolate Chip Cookies Recipe is now ready to be enjoyed. The combination of chocolate and raspberry is sure to delight your taste buds!

Variations of Raspberry Chocolate Chip Cookies Recipe

Raspberry Chocolate Chip Cookies Recipe but have specific dietary needs, don’t worry! There are plenty of variations you can try. Whether you’re looking for a gluten-free option or a vegan adaptation, these tweaks will ensure everyone can enjoy these delicious cookies.

Gluten-Free Option

For those who need to avoid gluten, making gluten-free raspberry chocolate chip cookies is simple! Just substitute the all-purpose flour with a gluten-free flour blend. Many brands offer a 1:1 gluten-free flour that works perfectly in cookie recipes. Additionally, make sure your baking soda is gluten-free, as some brands may contain traces of gluten.

When using gluten-free flour, the texture may vary slightly. To enhance the chewiness, consider adding a tablespoon of cornstarch to the mix. This will help mimic the texture of traditional cookies. Follow the same steps in the original recipe, and you’ll have a delightful batch of gluten-free cookies that everyone can enjoy!

Vegan Adaptation

Raspberry Chocolate Chip Cookies Recipe, it’s quite easy to make! Start by replacing the eggs with flax eggs. To make a flax egg, mix 1 tablespoon of ground flaxseed with 2.5 tablespoons of water. Let it sit for about 5 minutes until it thickens. This will act as a binding agent in your cookie dough.

Next, swap the unsalted butter for a plant-based butter or coconut oil. Ensure that the chocolate chips you use are dairy-free to keep the recipe vegan-friendly. Follow the same preparation steps, and you’ll have a batch of vegan cookies that are just as delicious as the original!

These variations allow everyone to enjoy the delightful taste of raspberry and chocolate in cookie form. No matter your dietary preference, these adaptations ensure that the joy of baking and sharing cookies remains accessible to all!

Cooking Note for Raspberry Chocolate Chip Cookies Recipe

Raspberry Chocolate Chip Cookies Recipe. Here are some essential cooking notes to keep in mind:

  • Ingredient Temperature: Make sure your butter is softened but not melted. This helps create a light and fluffy texture. If you forget to take it out of the fridge, you can cut it into small pieces and let it sit at room temperature for about 15 minutes.
  • Measuring Flour: For the best results, spoon the flour into your measuring cup and level it off with a knife. Avoid scooping directly from the bag, as this can pack the flour and lead to dry cookies.
  • Mixing Technique: When combining the wet and dry ingredients, mix until just combined. Overmixing can lead to tough cookies. A few flour streaks are okay; they will incorporate as you fold in the chocolate chips and raspberries.
  • Cooling Time: Allowing the cookies to cool on the baking sheet for a few minutes is crucial. This helps them set and makes them easier to transfer to wire racks without breaking.
  • Storage: If you have leftovers (which is rare!), store the cookies in an airtight container at room temperature. They will stay fresh for up to a week. You can also freeze them for longer storage; just make sure to separate layers with parchment paper.

Raspberry Chocolate Chip Cookies Recipe turns out perfectly every time. Happy baking!

Serving Suggestions for Raspberry Chocolate Chip Cookies Recipe

Raspberry Chocolate Chip Cookies, it’s time to think about how to serve them! These cookies are not only tasty but also versatile. Here are some delightful serving suggestions to elevate your cookie experience:

  • With a Glass of Milk: There’s nothing quite like enjoying warm cookies with a cold glass of milk. The creamy texture of milk complements the rich chocolate and tart raspberry flavors perfectly.
  • Ice Cream Sandwiches: For a fun twist, use two cookies to create an ice cream sandwich. Choose your favorite ice cream flavor, like vanilla or raspberry sorbet, and scoop it between two cookies. This makes for a refreshing treat, especially on warm days!
  • On a Dessert Platter: Arrange your cookies on a beautiful dessert platter alongside other treats. Pair them with brownies, fruit tarts, or mini cheesecakes for a delightful dessert spread at parties or gatherings.
  • With Fresh Berries: Serve your cookies with a side of fresh berries. The additional fruit enhances the raspberry flavor and adds a pop of color to your plate. Strawberries, blueberries, or even more raspberries work wonderfully!
  • Drizzled with Chocolate: For an extra touch of indulgence, melt some chocolate and drizzle it over the cookies. This adds a beautiful finish and enhances the chocolate flavor, making them even more irresistible.

Raspberry Chocolate Chip Cookies Recipe more enjoyable but also impress your guests. Whether you’re hosting a gathering or simply treating yourself, these ideas will elevate your cookie experience to new heights!

Tips for Perfect Raspberry Chocolate Chip Cookies Recipe

Raspberry Chocolate Chip Cookies Recipe turns out perfectly every time, here are some handy tips to keep in mind. These simple tricks can elevate your baking game and help you create cookies that are not only delicious but also visually appealing.

  • Use Fresh Ingredients: Always use fresh raspberries and high-quality chocolate chips. Fresh ingredients enhance the flavor and texture of your cookies. Check the expiration dates on your baking soda and flour to ensure they are still effective.
  • Chill the Dough: For chewier cookies, consider chilling the dough for at least 30 minutes before baking. This helps the flavors meld together and prevents the cookies from spreading too much in the oven.
  • Don’t Overmix: When combining the wet and dry ingredients, mix until just combined. Overmixing can lead to tough cookies. A few lumps are perfectly fine; they will smooth out as you fold in the chocolate chips and raspberries.
  • Experiment with Add-Ins: Feel free to get creative! You can add nuts, like chopped walnuts or pecans, for extra crunch. Alternatively, try using white chocolate chips or even a sprinkle of sea salt on top before baking for a sweet and salty contrast.
  • Watch the Baking Time: Keep a close eye on your cookies as they bake. Every oven is different, so start checking them at the 10-minute mark. You want the edges to be golden while the centers remain soft. They will continue to cook slightly after being removed from the oven.
  • Let Them Cool: Allow the cookies to cool on the baking sheet for a few minutes before transferring them to wire racks. This cooling time helps them set and makes them easier to handle without breaking.
  • Store Properly: To keep your cookies fresh, store them in an airtight container at room temperature. If you want to keep them longer, consider freezing them. Just make sure to separate layers with parchment paper to prevent sticking.

Raspberry Chocolate Chip Cookies Recipe. Enjoy the process, and happy baking!

Breakdown of Time for Raspberry Chocolate Chip Cookies Recipe

Raspberry Chocolate Chip Cookies Recipe can help you plan your baking session better. Here’s a simple breakdown of the time required for preparation and cooking:

Prep Time

The prep time for this delightful cookie recipe is approximately 15-20 minutes. This includes gathering your ingredients, creaming the butter and sugars, mixing in the eggs and vanilla, and preparing the dough. If you choose to chill the dough for a chewier texture, add an additional 30 minutes to this time.

Cooking Time

The cooking time for the cookies is about 10-12 minutes. Keep an eye on them as they bake, ensuring the edges turn lightly golden while the centers remain soft. Remember, every oven is different, so it’s wise to check them a minute or two before the timer goes off.

Total Time

Raspberry Chocolate Chip Cookies Recipe a quick and easy treat to whip up, perfect for any occasion!

Nutritional Information for Raspberry Chocolate Chip Cookies Recipe

Raspberry Chocolate Chip Cookies Recipe can help you enjoy them in moderation. Here’s a breakdown of the key nutritional information for each cookie, based on the recipe provided. This will give you a clearer picture of what you’re indulging in!

Calories

Each cookie contains approximately 180 calories. This makes them a delightful treat without being overly indulgent. Enjoying one or two cookies can satisfy your sweet tooth while keeping your calorie intake in check. Pair them with a healthy snack or a glass of milk for a balanced treat!

Protein

In terms of protein, each cookie offers about 2 grams. While this isn’t a high protein snack, it does contribute to your daily intake. The eggs and chocolate chips provide some protein, making these cookies a tasty option when you need a little energy boost.

Sodium

Each cookie contains roughly 100 mg of sodium. This amount is relatively low, especially considering the average daily recommended intake for adults is around 2,300 mg. Keeping an eye on sodium levels is important, but these cookies can fit into a balanced diet without worry.

Raspberry Chocolate Chip Cookies Recipe offers a delightful balance of flavors and nutrition. Enjoy them as a treat, and remember that moderation is key to enjoying your favorite sweets!

FAQs about Raspberry Chocolate Chip Cookies Recipe

Can I use frozen raspberries in the Raspberry Chocolate Chip Cookies Recipe?

Raspberry Chocolate Chip Cookies Recipe. However, there are a few things to keep in mind. First, make sure to thaw the raspberries and gently pat them dry with a paper towel. This helps prevent excess moisture from making your cookie dough too wet. Also, be aware that frozen raspberries may break apart more easily, so handle them gently when folding into the dough. The flavor will still be delicious, and your cookies will turn out great!

How do I store leftover Raspberry Chocolate Chip Cookies?

Raspberry Chocolate Chip Cookies fresh, store them in an airtight container at room temperature. This will help maintain their soft texture and flavor. If you want to keep them for a longer period, consider freezing them. To freeze, place the cookies in a single layer on a baking sheet and freeze until solid. Then, transfer them to a freezer-safe bag or container, separating layers with parchment paper. They can be stored in the freezer for up to three months. When you’re ready to enjoy them, simply thaw at room temperature or warm them in the oven for a few minutes!

Can I substitute chocolate chips with other types of chocolate in the Raspberry Chocolate Chip Cookies Recipe?

Raspberry Chocolate Chip Cookies Recipe. For a different flavor profile, try using white chocolate chips, which pair wonderfully with raspberries. You can also use dark chocolate chips for a richer taste. If you’re feeling adventurous, consider adding chopped chocolate bars or even a mix of different chocolates for a unique twist. Just remember to adjust the amount based on your preference, and enjoy experimenting with flavors!

Conclusion on Raspberry Chocolate Chip Cookies Recipe

Raspberry Chocolate Chip Cookies Recipe is a delightful treat that combines the sweetness of chocolate with the tartness of fresh raspberries. This recipe is not only easy to follow but also allows for creativity with variations to suit different dietary needs. Whether you choose to make them gluten-free or vegan, the essence of these cookies remains the same—deliciousness!

As you bake these cookies, remember that the joy of cooking comes from sharing your creations with others. The vibrant colors and mouthwatering flavors make these cookies a perfect addition to any gathering or a sweet surprise for yourself. Plus, with the tips and variations provided, you can customize your cookies to make them uniquely yours.

Raspberry Chocolate Chip Cookies, and happy baking!

Paul

Raspberry Chocolate Chip Cookies Recipe is a must-try!

These Raspberry Chocolate Chip Cookies are buttery, sweet, and bursting with juicy raspberries and gooey chocolate chips. The perfect balance of rich and fruity, they’re soft in the middle with golden edges—a bakery-style treat made right at home!
Prep Time 15 minutes
Cook Time 12 minutes
Total Time 27 minutes
Course: Dessert
Cuisine: American

Ingredients
  

  • 1 cup unsalted butter softened (2 sticks)
  • 1 cup granulated sugar
  • ½ cup packed brown sugar
  • 2 large eggs
  • 1 teaspoon pure vanilla extract
  • 3 cups all-purpose flour
  • ½ teaspoon baking soda
  • ¼ teaspoon salt
  • 1 cup fresh raspberries chopped
  • cups semi-sweet chocolate chips

Method
 

  1. Preheat the Oven:Preheat oven to 350°F (175°C). Line two baking sheets with parchment paper.
  2. Cream the Butter and Sugars:In a large mixing bowl, beat together the softened butter, granulated sugar, and brown sugar until light and fluffy.
  3. Add Eggs and Vanilla:Mix in the eggs one at a time, then stir in the vanilla extract.
  4. Mix Dry Ingredients:In a separate bowl, whisk together the flour, baking soda, and salt.
  5. Combine Wet and Dry:Gradually stir the dry ingredients into the butter mixture just until combined.
  6. Add the Goodies:Gently fold in the chopped raspberries and chocolate chips. Be careful not to mash the berries.
  7. Scoop and Space:Scoop dough onto the prepared baking sheets, leaving about 2 inches between cookies.
  8. Bake to Perfection:Bake for 10–12 minutes, or until the edges are lightly golden and the centers are just set.
  9. Cool and Enjoy:Let cookies cool on the baking sheet for a few minutes before transferring to a wire rack to finish cooling.

Notes

  • Chill the dough for 30 minutes before baking if you want a thicker, chewier cookie.
  • Use fresh raspberries, not frozen—they release less moisture and won’t make the dough soggy.
  • Add a light sprinkle of sea salt on top before baking for a delicious contrast of flavors.
  • These cookies are best enjoyed the same day but can be stored in an airtight container for 2–3 days.

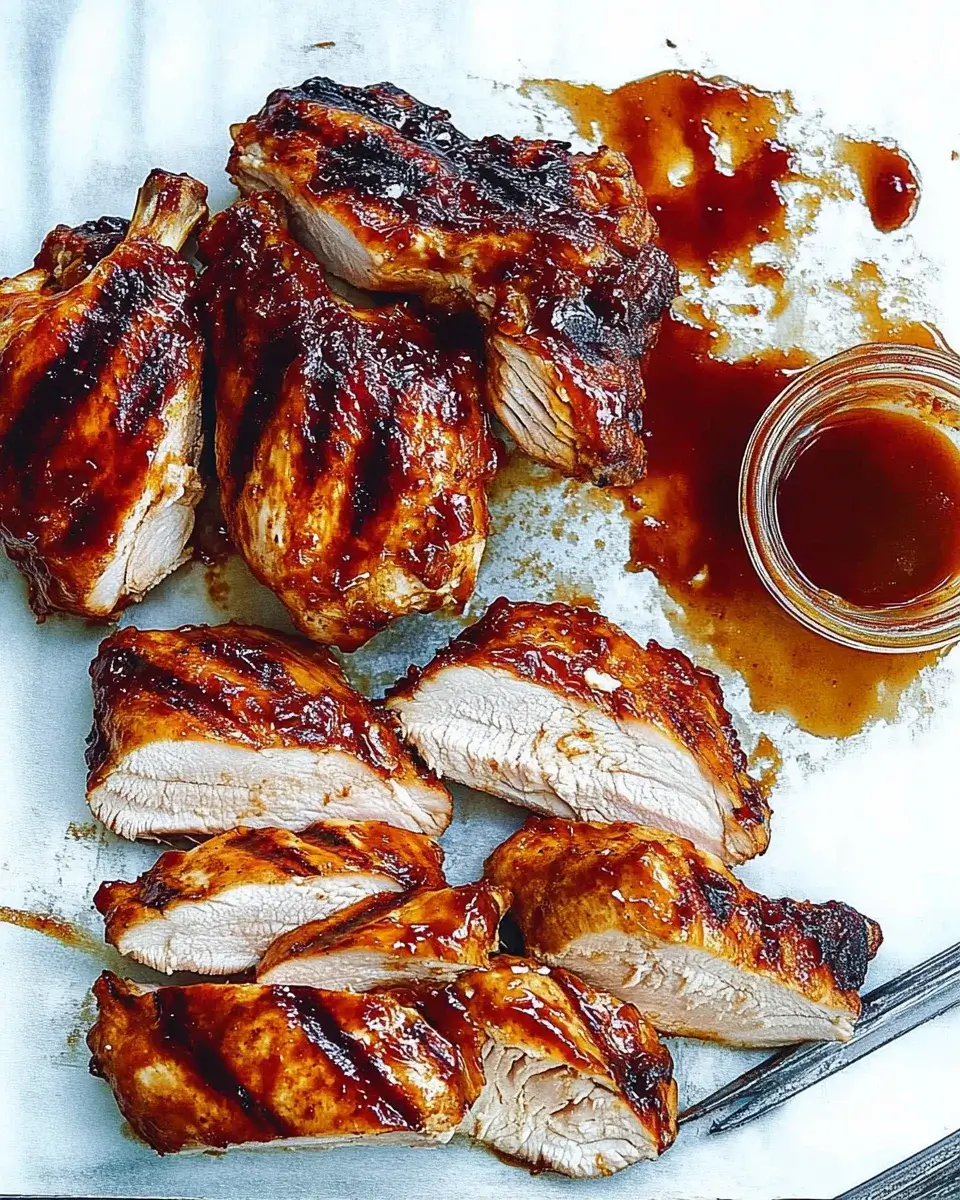
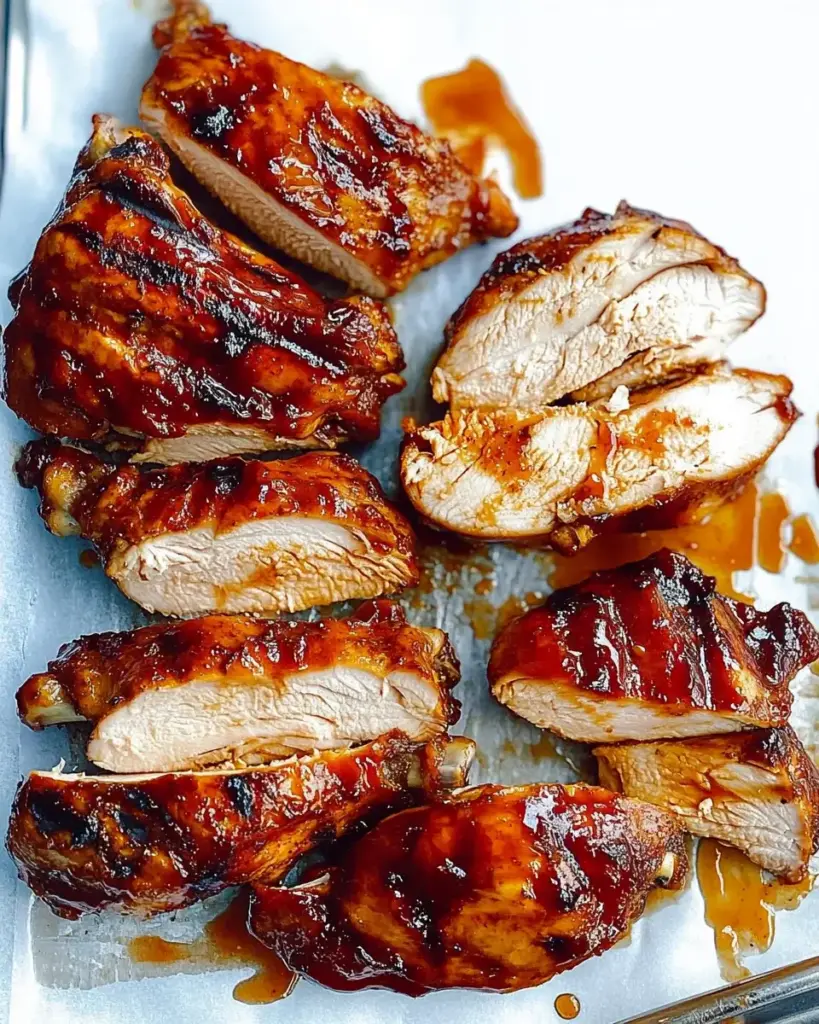
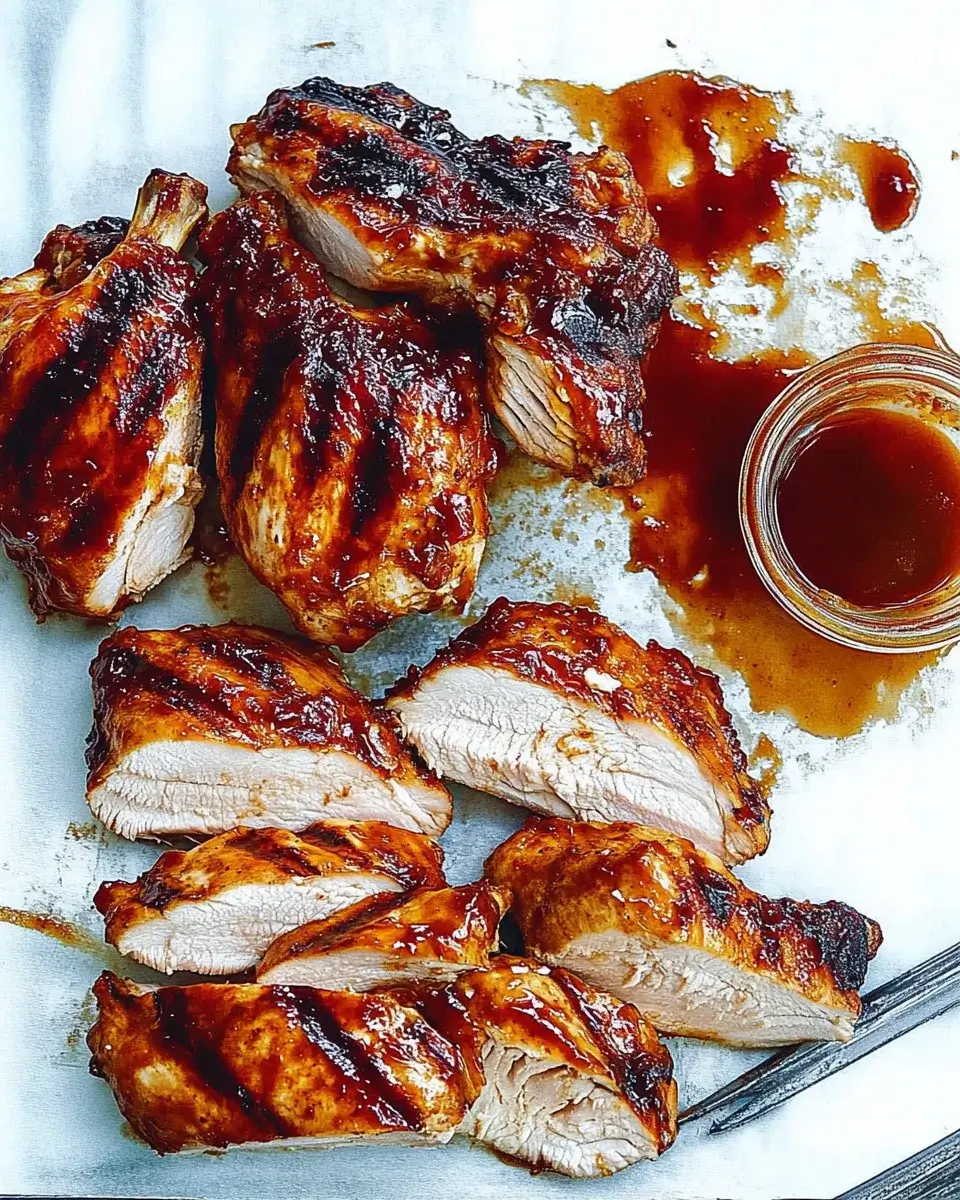
Honey Garlic BBQ Chicken is a must-try recipe!

Are you ready to elevate your grilling game? Honey Garlic BBQ Chicken is a delightful dish that combines sweet and savory flavors, making it a favorite for many. This recipe is not just about cooking chicken; it’s about creating a memorable meal that brings family and friends together. The combination of honey, garlic, and barbecue sauce creates a mouthwatering glaze that caramelizes beautifully on the grill.

What Makes Honey Garlic BBQ Chicken Special?

What sets Honey Garlic BBQ Chicken apart from other grilled chicken recipes? First, the unique blend of ingredients. Honey adds a natural sweetness, while garlic provides a robust flavor that enhances the overall taste. The barbecue sauce ties everything together, creating a sticky, delicious coating that you can’t resist.

Moreover, this dish is incredibly versatile. You can easily adjust the sweetness or spice level to suit your taste. Whether you prefer a mild flavor or a spicy kick, this recipe can accommodate your preferences. Plus, it’s perfect for any occasion, from casual family dinners to summer barbecues.

Another reason to love Honey Garlic BBQ Chicken is its simplicity. With just a few ingredients and straightforward steps, you can whip up a fantastic meal in no time. This makes it an excellent choice for busy weeknights or last-minute gatherings.

In summary, Honey Garlic BBQ Chicken is not just a meal; it’s an experience. The delightful flavors, ease of preparation, and versatility make it a must-try for anyone who enjoys good food. So, let’s dive into the ingredients and get started on this delicious journey!

Ingredients for Honey Garlic BBQ Chicken

To create the perfect Honey Garlic BBQ Chicken, you’ll need a few key ingredients. Each one plays a vital role in building the rich flavors that make this dish so special. Here’s what you’ll need:

  • 2 pounds bone-in, skin-on chicken thighs: These provide juicy meat and crispy skin, perfect for grilling.
  • 1 cup barbecue sauce: Choose your favorite brand or homemade version for the best flavor.
  • 2 tablespoons honey: This adds a natural sweetness that balances the savory elements.
  • 3 cloves garlic, minced: Fresh garlic gives a robust flavor that enhances the dish.
  • 1 teaspoon smoked paprika: This adds a subtle smokiness that complements the barbecue sauce.
  • 1 teaspoon salt: Essential for bringing out the flavors in the chicken.
  • 1/2 teaspoon black pepper: A touch of spice to elevate the taste.
  • 1 tablespoon olive oil: Helps to keep the chicken moist while grilling.
  • 1 tablespoon apple cider vinegar: Adds a tangy note that brightens the overall flavor.
  • 1 teaspoon Worcestershire sauce: This adds depth and umami to the marinade.

These ingredients come together to create a delicious marinade that infuses the chicken with flavor. Feel free to experiment with different barbecue sauces or add spices to suit your taste. The beauty of Honey Garlic BBQ Chicken lies in its adaptability, allowing you to make it your own!

Preparation of Honey Garlic BBQ Chicken

Now that you have all the ingredients ready, it’s time to prepare your Honey Garlic BBQ Chicken. This process is simple and straightforward, ensuring that you can enjoy a delicious meal without any hassle. Let’s break it down into easy steps.

Step 1: Marinating the Chicken

Marinating the chicken is a crucial step that enhances the flavor. Start by patting the chicken thighs dry with paper towels. This helps the marinade stick better. Next, place the chicken in a large bowl. Pour half of the prepared barbecue mixture over the chicken, making sure each piece is well coated. This will infuse the chicken with all those wonderful flavors.

For the best results, let the chicken marinate for at least one hour. If you have more time, marinating overnight in the refrigerator is even better. This allows the flavors to penetrate deeply into the meat, making it even tastier.

Step 2: Preparing the Honey Garlic Sauce

While the chicken is marinating, you can prepare the honey garlic sauce. In a small bowl, whisk together the remaining barbecue mixture. This will be used for basting the chicken while it cooks. Make sure it’s well combined, so every bite of chicken is packed with flavor. Set it aside until you’re ready to grill.

Step 3: Grilling the Chicken

Once the chicken has marinated, it’s time to fire up the grill! Preheat your grill to medium-high heat, around 375°F to 400°F. If you’re using a charcoal grill, prepare the coals for direct grilling. When the grill is hot, place the chicken thighs skin-side down. Grill them for about 5-7 minutes. This will help achieve that crispy skin we all love.

After the first side is nicely browned, flip the chicken and grill for another 5-7 minutes. Keep an eye on the chicken to prevent burning. The goal is to get a beautiful char while keeping the inside juicy.

Step 4: Basting and Finishing Touches

Now comes the fun part—basting! Brush the reserved honey garlic sauce over the chicken. This adds an extra layer of flavor and helps create a sticky glaze. Continue grilling for an additional 10-15 minutes, turning the chicken occasionally. You want to ensure it cooks evenly and reaches an internal temperature of 165°F.

Once done, remove the chicken from the grill and let it rest for about 5 minutes. This resting period allows the juices to redistribute, making each bite tender and juicy. Now, you’re ready to serve your delicious Honey Garlic BBQ Chicken!

Variation of Honey Garlic BBQ Chicken

While the classic Honey Garlic BBQ Chicken recipe is a hit, there are many ways to switch things up. Variations can enhance flavors and cater to different dietary preferences. Let’s explore some alternative ingredients and cooking methods that can make this dish even more exciting!

Alternative Ingredients for Different Flavors

One of the best things about Honey Garlic BBQ Chicken is its versatility. You can easily swap out ingredients to create new flavor profiles. Here are some ideas:

  • Different Cuts of Chicken: While thighs are juicy, you can use chicken breasts for a leaner option. Just remember to adjust the cooking time, as breasts cook faster.
  • Spicy Kick: If you love heat, add some cayenne pepper or hot sauce to the marinade. This will give your chicken a fiery twist!
  • Herbs and Spices: Fresh herbs like rosemary or thyme can add a fragrant touch. You can also experiment with different spices like cumin or chili powder for a unique flavor.
  • Fruit Additions: For a fruity twist, consider adding pineapple or peach slices to the grill. They caramelize beautifully and pair well with the honey garlic sauce.

These alternatives allow you to customize your Honey Garlic BBQ Chicken to suit your taste buds. Feel free to get creative and make it your own!

Cooking Methods: Oven vs. Grill

While grilling is a popular method for cooking Honey Garlic BBQ Chicken, you can also achieve delicious results in the oven. Here’s a quick comparison of both methods:

  • Grilling: This method gives the chicken a smoky flavor and crispy skin. It’s perfect for outdoor gatherings and summer barbecues. Just keep an eye on the temperature to avoid overcooking.
  • Oven Baking: If the weather isn’t suitable for grilling, baking is a great alternative. Preheat your oven to 400°F. Place the marinated chicken on a baking sheet lined with parchment paper. Bake for about 30-35 minutes, basting halfway through. This method ensures juicy chicken with less hands-on time.

Both methods yield tasty results, so choose the one that fits your situation best. Whether you grill or bake, your Honey Garlic BBQ Chicken will be a crowd-pleaser!

Cooking Note for Honey Garlic BBQ Chicken

When preparing Honey Garlic BBQ Chicken, a few cooking notes can help ensure your dish turns out perfectly every time. These tips will guide you through the process, making it easier to achieve that delicious, mouthwatering flavor.

First, always check the freshness of your ingredients. Fresh chicken and high-quality barbecue sauce can significantly enhance the taste of your dish. If possible, opt for organic or free-range chicken for better flavor and texture.

Next, marinating is key. As mentioned earlier, letting the chicken sit in the marinade for at least an hour is essential. However, if you can plan ahead, marinating overnight will yield even better results. This allows the flavors to penetrate deeply into the meat, making it more flavorful and tender.

Temperature control is crucial when grilling. Make sure your grill is preheated to the right temperature before placing the chicken on it. This helps to sear the chicken quickly, locking in the juices and creating that crispy skin we all love. Use a meat thermometer to check the internal temperature, ensuring it reaches 165°F for safe consumption.

Lastly, don’t rush the resting period after grilling. Allowing the chicken to rest for about 5 minutes before serving is vital. This step helps the juices redistribute throughout the meat, resulting in a juicier and more flavorful bite.

By following these cooking notes, you’ll be well on your way to mastering Honey Garlic BBQ Chicken. Enjoy the process, and don’t forget to share your delicious creation with family and friends!

Serving Suggestions for Honey Garlic BBQ Chicken

Once your Honey Garlic BBQ Chicken is grilled to perfection, it’s time to think about how to serve it. The right side dishes and presentation can elevate your meal, making it even more enjoyable. Let’s explore some delicious side dishes that pair well with this flavorful chicken and some tips for presenting your dish beautifully.

Side Dishes that Pair Well

Choosing the right side dishes can enhance the overall dining experience. Here are some tasty options that complement Honey Garlic BBQ Chicken:

  • Coleslaw: A refreshing coleslaw adds crunch and balances the sweetness of the chicken. You can make a classic cabbage slaw or try a fruity version with apples or pineapple.
  • Grilled Vegetables: Seasonal vegetables like zucchini, bell peppers, and corn are perfect for grilling. Toss them in olive oil and seasonings for a colorful and healthy side.
  • Rice or Quinoa: A side of fluffy rice or quinoa can soak up the delicious barbecue sauce. Consider adding herbs or spices to the grains for extra flavor.
  • Potato Salad: Creamy potato salad is a classic barbecue side. It’s filling and pairs well with the sweet and savory notes of the chicken.
  • Baked Beans: Sweet and smoky baked beans are a hearty option that complements the flavors of Honey Garlic BBQ Chicken beautifully.

These side dishes not only taste great but also add variety to your meal. Feel free to mix and match based on your preferences and what you have on hand!

Presentation Tips for Serving

Presentation is key when serving your Honey Garlic BBQ Chicken. A well-presented dish can make your meal feel special. Here are some tips to make your chicken shine:

  • Use a Platter: Serve the chicken on a large platter to create an inviting display. Arrange the pieces neatly, and consider garnishing with fresh herbs like parsley or cilantro for a pop of color.
  • Drizzle with Sauce: Before serving, drizzle some of the reserved honey garlic sauce over the chicken. This adds a glossy finish and highlights the flavors.
  • Accompany with Sides: Arrange your chosen side dishes around the chicken on the platter. This creates a beautiful spread that encourages sharing.
  • Use Colorful Dishes: If you’re serving individual plates, use colorful dishes to make the meal visually appealing. Bright colors can enhance the overall dining experience.
  • Garnish with Lemon or Lime: Adding lemon or lime wedges to the platter not only looks great but also offers a fresh squeeze of citrus for those who enjoy a tangy kick.

By following these presentation tips, you’ll create a stunning meal that’s sure to impress your guests. Enjoy your Honey Garlic BBQ Chicken with pride, knowing you’ve put together a delicious and visually appealing feast!

Tips for Perfect Honey Garlic BBQ Chicken

To ensure your Honey Garlic BBQ Chicken turns out perfectly every time, it’s essential to keep a few tips in mind. These pointers will help you avoid common pitfalls and enhance the flavor of your dish. Let’s dive into some common mistakes to avoid and how to achieve the best flavor.

Common Mistakes to Avoid

Even the best cooks can make mistakes. Here are some common errors to watch out for when preparing Honey Garlic BBQ Chicken:

  • Skipping the Marinade: One of the biggest mistakes is not marinating the chicken long enough. Marinating for at least one hour is crucial for flavor. If you can, let it sit overnight for the best results.
  • Overcooking the Chicken: Cooking chicken for too long can lead to dry meat. Always use a meat thermometer to check for doneness. The internal temperature should reach 165°F for safe consumption.
  • Not Preheating the Grill: Placing chicken on a cold grill can result in uneven cooking. Always preheat your grill to the right temperature before adding the chicken.
  • Using Too Much Sauce Too Early: Applying all the sauce at the beginning can cause it to burn. Reserve some for basting and serving to keep the flavors fresh and vibrant.
  • Ignoring Resting Time: Cutting into the chicken right after grilling can cause juices to escape. Letting it rest for about 5 minutes allows the juices to redistribute, ensuring a juicy bite.

How to Achieve the Best Flavor

Flavor is key to a delicious Honey Garlic BBQ Chicken. Here are some tips to enhance the taste:

  • Use Fresh Ingredients: Fresh garlic and high-quality barbecue sauce can make a significant difference. Opt for organic or homemade sauces when possible.
  • Experiment with Spices: Don’t hesitate to add your favorite spices to the marinade. A pinch of cayenne or a dash of chili powder can elevate the flavor profile.
  • Incorporate Fresh Herbs: Adding fresh herbs like rosemary or thyme to the marinade can introduce a delightful aroma and taste. They pair beautifully with the sweetness of honey.
  • Try Different Barbecue Sauces: Different brands or homemade sauces can change the flavor dramatically. Experiment to find your favorite combination.
  • Consider Wood Chips for Smoking: If you’re using a grill, adding wood chips can infuse a smoky flavor into the chicken. Soak the chips in water for 30 minutes before placing them on the grill.

By avoiding common mistakes and following these flavor-enhancing tips, you’ll be well on your way to creating the perfect Honey Garlic BBQ Chicken. Enjoy the process and the delicious results!

Breakdown of Time for Honey Garlic BBQ Chicken

Understanding the time required for each step in preparing Honey Garlic BBQ Chicken can help you plan your cooking efficiently. Here’s a breakdown of the time you’ll need for preparation, cooking, and the total time involved in making this delicious dish.

Prep Time

The prep time for Honey Garlic BBQ Chicken is relatively short. You’ll need about 15-20 minutes to gather your ingredients and prepare the marinade. This includes:

  • Measuring and mixing the ingredients for the marinade.
  • Patting the chicken dry and placing it in a bowl.
  • Coating the chicken with the marinade.

Additionally, if you choose to marinate the chicken for at least one hour or overnight, this will add to the overall time but is essential for flavor.

Cooking Time

The cooking time for Honey Garlic BBQ Chicken on the grill is approximately 25-30 minutes. Here’s how it breaks down:

  • Grilling the chicken thighs skin-side down for 5-7 minutes.
  • Flipping the chicken and grilling for another 5-7 minutes.
  • Basting with the reserved sauce and grilling for an additional 10-15 minutes until fully cooked.

Always ensure the internal temperature reaches 165°F for safe consumption.

Total Time

When you combine the prep time and cooking time, the total time for making Honey Garlic BBQ Chicken is about 40-50 minutes, not including marinating time. If you opt for marinating overnight, the total time will extend to the next day, but the hands-on time remains the same.

In summary, you can enjoy a flavorful and satisfying meal in under an hour, making Honey Garlic BBQ Chicken a fantastic choice for busy weeknights or weekend gatherings!

Nutritional Information for Honey Garlic BBQ Chicken

Understanding the nutritional content of your meals is essential for maintaining a balanced diet. Honey Garlic BBQ Chicken not only satisfies your taste buds but also provides valuable nutrients. Let’s break down the nutritional information for this delicious dish.

Calories

Each serving of Honey Garlic BBQ Chicken contains approximately 350 calories. This makes it a hearty option for dinner without being overly heavy. The combination of chicken and the flavorful marinade contributes to the calorie count, ensuring you enjoy a fulfilling meal.

Protein Content

Protein is vital for muscle repair and overall health. In each serving of Honey Garlic BBQ Chicken, you’ll find about 25 grams of protein. This high protein content makes it an excellent choice for those looking to build muscle or maintain a healthy diet. Chicken thighs are particularly rich in protein, making this dish both nutritious and satisfying.

Sodium Levels

When it comes to sodium, each serving contains around 800 milligrams. While this is a reasonable amount for a flavorful dish, it’s essential to be mindful of your overall sodium intake throughout the day. If you’re watching your sodium levels, consider using low-sodium barbecue sauce or adjusting the salt in the marinade to suit your dietary needs.

In summary, Honey Garlic BBQ Chicken is a delicious and nutritious option for your meals. With a good balance of calories, protein, and sodium, it can fit well into a healthy eating plan. Enjoy this dish knowing you’re treating yourself to something both tasty and beneficial!

FAQs about Honey Garlic BBQ Chicken

Can I use chicken thighs instead of breasts?

Absolutely! Chicken thighs are a fantastic choice for Honey Garlic BBQ Chicken. They are juicy and flavorful, making them perfect for grilling. If you prefer a leaner option, you can use chicken breasts. Just keep in mind that breasts cook faster, so adjust your grilling time accordingly to avoid drying them out.

How long should I marinate the chicken?

For the best flavor, marinate the chicken for at least one hour. However, if you have the time, letting it sit overnight in the refrigerator is even better. This allows the marinade to penetrate the meat deeply, resulting in a more flavorful and tender chicken. Just remember to keep it covered in the fridge!

What can I substitute for honey in the recipe?

If you need a substitute for honey, there are several options you can try. Maple syrup is a great alternative that provides a similar sweetness. Agave nectar is another option that works well. If you prefer a sugar-free option, consider using a sugar substitute like stevia or erythritol. Just keep in mind that the flavor may vary slightly with these substitutes.

Is Honey Garlic BBQ Chicken suitable for meal prep?

Yes, Honey Garlic BBQ Chicken is perfect for meal prep! You can marinate the chicken ahead of time and store it in the refrigerator for up to 24 hours. After grilling, you can portion the chicken into containers for easy lunches or dinners throughout the week. It reheats well, making it a convenient and delicious option for busy days!

Conclusion on Honey Garlic BBQ Chicken

In conclusion, Honey Garlic BBQ Chicken is a delightful dish that brings together sweet and savory flavors in a way that is sure to please everyone at your table. With its simple preparation and versatile ingredients, this recipe is perfect for both novice cooks and seasoned chefs alike. Whether you’re hosting a summer barbecue or enjoying a cozy family dinner, this dish is bound to impress.

By following the steps outlined in this article, you can create a mouthwatering meal that not only tastes great but also nourishes your body. The combination of juicy chicken thighs, a flavorful marinade, and the smoky essence from the grill makes for an unforgettable dining experience. Plus, with the option to customize the recipe to suit your taste, the possibilities are endless!

Remember to take your time with the marinating process, as it is key to achieving that deep, rich flavor. Don’t forget to experiment with different side dishes and presentation styles to make your meal even more enjoyable. With a little creativity, you can turn a simple recipe into a culinary masterpiece.

So, gather your ingredients, fire up the grill, and get ready to savor the deliciousness of Honey Garlic BBQ Chicken. Your taste buds will thank you, and your family and friends will be asking for seconds. Happy cooking!

Paul

Honey Garlic BBQ Chicken is a must-try recipe!

This juicy grilled BBQ chicken is a backyard classic made easy. With just a few pantry staples and your favorite BBQ sauce, these flame-kissed chicken breasts turn out tender, smoky, and packed with flavor—perfect for summer cookouts or weeknight dinners alike!
Prep Time 5 minutes
Cook Time 15 minutes
Total Time 20 minutes
Course: Main Dish
Cuisine: American

Ingredients
  

  • 4 boneless skinless chicken breasts
  • Extra virgin olive oil for drizzling
  • Kosher salt to taste
  • Freshly ground black pepper to taste
  • ½ cup BBQ sauce your favorite brand – Sweet Baby Ray’s and Stubbs are great options

Method
 

Grill Method (Recommended):
  1. Preheat your grill to high (around 450°F) and clean the grates well.
  2. Drizzle chicken breasts with olive oil, rub it in, and season both sides with salt and pepper.
  3. Place chicken on the hot grill, cover, and cook for 5–6 minutes until they naturally release from the grates.
  4. Flip and cook for another 4–5 minutes on the other side.
  5. Brush one side with BBQ sauce, flip, and grill for 2 minutes. Repeat on the other side with more sauce.
  6. Grill until internal temperature reaches 160°F. Remove from heat and let rest for 5 minutes—chicken will rise to a safe 165°F as it rests.
  7. Serve with additional BBQ sauce if desired.
Oven Method (Alternative):
  1. Preheat oven to 450°F.
  2. Drizzle chicken with olive oil, season with salt and pepper, and place on a foil-lined baking sheet.
  3. Bake for 15 minutes, then brush tops with BBQ sauce.
  4. Return to oven and bake an additional 5–8 minutes, until sauce is bubbly and internal temp reaches 160°F.
  5. Let rest for 5 minutes before serving.

Notes

  • For juicier chicken, lightly pound the breasts to even thickness before grilling.
  • Want more flavor? Marinate the chicken in BBQ sauce and olive oil for 30 minutes before cooking.
  • Use a meat thermometer for perfect doneness—overcooked chicken dries out fast!
  • Pair with grilled corn, coleslaw, or potato salad for a full BBQ feast.

Cheesy Beef Enchilada Tortellini is a must-try dish!

Cheesy Beef Enchilada Tortellini Recipe is a delightful dish that brings together the rich flavors of enchiladas and the comforting texture of cheese tortellini. This recipe is perfect for busy weeknights or cozy family dinners. With just a few simple ingredients, you can create a meal that everyone will love.

What Makes This Recipe Unique?

This recipe stands out because it combines traditional Mexican flavors with Italian pasta. The use of cheese tortellini adds a fun twist to the classic enchilada dish. The creamy, cheesy goodness melts in your mouth, while the enchilada sauce gives it a zesty kick. Plus, it’s a one-pan meal, which means less cleanup for you! The combination of ground beef, spices, and cheese creates a hearty dish that is both satisfying and comforting.

Why You Should Try Cheesy Beef Enchilada Tortellini

Cheesy Beef Enchilada Tortellini Recipe. First, it’s quick and easy to prepare, making it perfect for those busy evenings. Second, it’s a crowd-pleaser! Whether you’re cooking for your family or hosting friends, this dish is sure to impress. Lastly, it’s versatile. You can easily customize it to suit your taste preferences. Want it spicier? Add jalapeños! Prefer it vegetarian? Swap the beef for black beans. The possibilities are endless!

So, gather your ingredients and get ready to enjoy a delicious meal that’s sure to become a favorite in your household!

Ingredients for Cheesy Beef Enchilada Tortellini Recipe

Cheesy Beef Enchilada Tortellini Recipe, you’ll need a few key ingredients. Each component plays a vital role in delivering that rich, cheesy flavor combined with a hint of spice. Here’s what you’ll need:

  • 1 pound ground beef: This is the main protein source, providing a hearty base for the dish.
  • 1 small onion, diced: Onions add sweetness and depth to the flavor.
  • 2 cloves garlic, minced: Garlic brings a wonderful aroma and taste.
  • 1 (15-ounce) can enchilada sauce: This sauce is the star of the show, giving the dish its signature flavor.
  • 1 (14-ounce) can diced tomatoes with green chilies: These add a nice kick and texture.
  • 1 (9-ounce) package refrigerated cheese tortellini: The tortellini adds a delightful cheesy element.
  • 1 cup shredded cheddar cheese: Cheddar provides a sharp, tangy flavor.
  • 1 cup shredded Monterey Jack cheese: This cheese melts beautifully, adding creaminess.
  • 1 teaspoon chili powder: Chili powder enhances the dish with a warm spice.
  • 1 teaspoon cumin: Cumin adds an earthy flavor that complements the other spices.
  • Salt and pepper to taste: These seasonings help balance the flavors.
  • Fresh cilantro for garnish (optional): Cilantro adds a fresh touch and brightens the dish.

With these ingredients on hand, you’re ready to whip up a delicious meal that’s sure to satisfy your taste buds. The combination of flavors and textures will make this dish a hit at your dinner table!

Step-by-Step Preparation of Cheesy Beef Enchilada Tortellini Recipe

Cheesy Beef Enchilada Tortellini Recipe. Each step is designed to ensure that your dish turns out perfectly delicious.

Step 1: Preparing the Beef

Start by heating a large skillet over medium heat. Once hot, add the ground beef and diced onion. Cook them together for about 5-7 minutes. You want the beef to brown nicely and the onion to become soft. Stir occasionally to break up the beef and ensure even cooking. If there’s excess fat, drain it off to keep your dish from becoming greasy. This step is crucial as it builds the foundation of flavor for your meal.

Step 2: Cooking the Tortellini

While the beef is cooking, bring a pot of salted water to a boil. Add the cheese tortellini and cook according to the package instructions, usually around 3-5 minutes. Once they are tender, drain the tortellini and set them aside. This step is important because the tortellini will soak up the delicious flavors of the sauce later on.

Step 3: Combining Ingredients

After the beef is cooked and the tortellini is ready, it’s time to combine everything. Add the minced garlic, chili powder, cumin, salt, and pepper to the skillet with the beef. Stir and cook for an additional 1-2 minutes until the garlic is fragrant. Then, pour in the enchilada sauce and the can of diced tomatoes with green chilies. Stir well to combine all the ingredients. Let this mixture simmer for about 5 minutes. This allows the flavors to meld beautifully.

Step 4: Baking the Dish

Now, gently fold the cooked tortellini into the beef mixture. Make sure every piece is well coated with the sauce. Next, sprinkle the shredded cheddar and Monterey Jack cheeses over the top. Cover the skillet with a lid and let it cook for another 5 minutes. This will melt the cheese and create a bubbly, cheesy topping. Once the cheese is melted and gooey, remove the skillet from heat. If you like, garnish with fresh cilantro for a pop of color and flavor.

Cheesy Beef Enchilada Tortellini Recipe is ready to be served. Enjoy the delightful blend of flavors and textures in every bite!

Variations of Cheesy Beef Enchilada Tortellini Recipe

Cheesy Beef Enchilada Tortellini Recipe is its versatility. You can easily adapt it to suit different dietary preferences and taste buds. Here are some exciting variations to consider:

Vegetarian Options

If you want to make this dish vegetarian, it’s simple! Swap out the ground beef for black beans or lentils. Both options provide a hearty texture and are packed with protein. You can also use a mix of sautéed vegetables like bell peppers, zucchini, or mushrooms for added flavor and nutrition. Just remember to use vegetable broth instead of enchilada sauce to keep it vegetarian-friendly. This way, you can enjoy the same delicious flavors without the meat!

Different Cheese Choices

Cheesy Beef Enchilada Tortellini Recipe to suit your taste. While cheddar and Monterey Jack are classic choices, feel free to experiment. Try using pepper jack for a spicy kick or mozzarella for a milder flavor. You can even mix in some crumbled feta or goat cheese for a unique twist. The cheese you choose will change the flavor profile, making each version special!

Spicy Additions

Cheesy Beef Enchilada Tortellini Recipe and make it even more exciting!

With these variations, you can create a dish that fits your preferences perfectly. Whether you’re cooking for a crowd or just for yourself, the possibilities are endless!

Cooking Note for Cheesy Beef Enchilada Tortellini Recipe

Cheesy Beef Enchilada Tortellini Recipe, there are a few important cooking notes to keep in mind. These tips will help ensure that your dish turns out perfectly every time.

First, always use fresh ingredients. Fresh vegetables and high-quality cheese can significantly enhance the flavor of your dish. If possible, opt for freshly made tortellini from a local store or market. This will add a delightful texture and taste that dried pasta simply can’t match.

Next, be mindful of the cooking times. Overcooking the tortellini can lead to a mushy texture. Make sure to follow the package instructions closely. Remember, the tortellini will continue to cook slightly when mixed with the hot beef and sauce, so it’s best to undercook them by a minute or two.

Additionally, when combining the ingredients, be gentle. You want to ensure that the tortellini remains intact and doesn’t break apart. Stir carefully to coat the pasta without causing it to become mushy.

Lastly, feel free to adjust the seasoning to your taste. Everyone has different preferences when it comes to spice levels. If you like it spicier, add more chili powder or jalapeños. If you prefer a milder flavor, reduce the spices accordingly. Taste as you go to find the perfect balance for your palate.

Cheesy Beef Enchilada Tortellini Recipe that is sure to impress your family and friends. Happy cooking!

Serving Suggestions for Cheesy Beef Enchilada Tortellini Recipe

Cheesy Beef Enchilada Tortellini Recipe is ready, it’s time to think about how to serve it. The right sides and garnishes can elevate your meal and make it even more enjoyable. Here are some great serving suggestions to consider.

Pairing with Sides

To complement the rich flavors of your cheesy dish, consider serving it with some tasty sides. Here are a few ideas:

  • Mexican Rice: A side of fluffy Mexican rice pairs perfectly with the enchilada flavors. The rice absorbs the sauce and adds a nice texture.
  • Refried Beans: Creamy refried beans are a classic side that adds protein and fiber. They also enhance the overall Mexican theme of the meal.
  • Fresh Salad: A light salad with lettuce, tomatoes, and avocado can balance the richness of the tortellini. Drizzle with a lime vinaigrette for a refreshing touch.
  • Grilled Vegetables: Grilled zucchini, bell peppers, and corn can add a smoky flavor and colorful presentation to your plate.

These sides not only enhance the meal but also provide a variety of flavors and textures that everyone will enjoy!

Garnishing Ideas

Cheesy Beef Enchilada Tortellini Recipe can make it look even more appetizing. Here are some fun ideas:

  • Fresh Cilantro: A sprinkle of chopped cilantro adds a burst of color and a fresh flavor that brightens the dish.
  • Sour Cream: A dollop of sour cream on top can add creaminess and a tangy contrast to the spicy flavors.
  • Avocado Slices: Creamy avocado slices not only look beautiful but also add a rich texture that complements the dish.
  • Chopped Green Onions: Sliced green onions can add a mild onion flavor and a pop of color.

These garnishes will not only enhance the visual appeal of your dish but also add layers of flavor that everyone will love. Enjoy your meal!

Tips for Perfecting Your Cheesy Beef Enchilada Tortellini Recipe

Cheesy Beef Enchilada Tortellini Recipe truly shine, consider these helpful tips. They will guide you in creating a dish that is not only delicious but also visually appealing and satisfying.

First, always taste as you go. This is key to achieving the perfect balance of flavors. After adding spices, take a moment to sample the mixture. Adjust the seasoning if needed. A little extra salt or spice can make a big difference!

Cheesy Beef Enchilada Tortellini Recipe.

When it comes to the cheese, consider mixing different types for a more complex flavor. Combining sharp cheddar with creamy Monterey Jack creates a delightful contrast. You can even add a sprinkle of Parmesan for an extra cheesy kick!

Another tip is to let the dish sit for a few minutes after cooking. This allows the flavors to meld together, making each bite even more delicious. Plus, it gives the cheese a moment to set, making serving easier.

Lastly, don’t be afraid to get creative! Add your favorite vegetables to the mix. Spinach, bell peppers, or corn can add color and nutrition. This not only enhances the flavor but also makes your dish more visually appealing.

Cheesy Beef Enchilada Tortellini Recipe that is sure to impress. Enjoy the process and happy cooking!

Breakdown of Time for Cheesy Beef Enchilada Tortellini Recipe

Cheesy Beef Enchilada Tortellini Recipe can help you plan your cooking efficiently. Here’s a simple breakdown of the time required for preparation and cooking.

Prep Time

The prep time for this delicious dish is quite short. You’ll need about 10-15 minutes to gather and prepare your ingredients. This includes dicing the onion, mincing the garlic, and measuring out your spices and sauces. Having everything ready before you start cooking will make the process smoother and more enjoyable.

Cooking Time

Once you start cooking, the total cooking time is approximately 20-25 minutes. This includes browning the beef and onions, simmering the sauce, and cooking the tortellini. Each step is quick, allowing you to have a hearty meal on the table in no time!

Total Time

Cheesy Beef Enchilada Tortellini Recipe a fantastic option for busy weeknights when you want something delicious without spending hours in the kitchen. With this quick and easy recipe, you’ll have a satisfying meal ready to enjoy in no time!

Breakdown of Time for Cheesy Beef Enchilada Tortellini Recipe

Cheesy Beef Enchilada Tortellini Recipe can help you plan your cooking efficiently. Here’s a simple breakdown of the time required for preparation and cooking.

Prep Time

The prep time for this delicious dish is quite short. You’ll need about 10-15 minutes to gather and prepare your ingredients. This includes dicing the onion, mincing the garlic, and measuring out your spices and sauces. Having everything ready before you start cooking will make the process smoother and more enjoyable.

Cooking Time

Once you start cooking, the total cooking time is approximately 20-25 minutes. This includes browning the beef and onions, simmering the sauce, and cooking the tortellini. Each step is quick, allowing you to have a hearty meal on the table in no time!

Total Time

Cheesy Beef Enchilada Tortellini Recipe a fantastic option for busy weeknights when you want something delicious without spending hours in the kitchen. With this quick and easy recipe, you’ll have a satisfying meal ready to enjoy in no time!

Nutritional Information for Cheesy Beef Enchilada Tortellini Recipe

Cheesy Beef Enchilada Tortellini Recipe not only satisfies your taste buds but also provides valuable nutrients. Here’s a breakdown of the key nutritional information for this delicious dish.

Calories

Cheesy Beef Enchilada Tortellini Recipe contains approximately 550 calories. This makes it a hearty meal that can keep you full and satisfied. The combination of ground beef, cheese, and tortellini contributes to the calorie count, providing energy for your day.

Protein

Protein is an essential nutrient for building and repairing tissues. This recipe packs a punch with about 35 grams of protein per serving. The ground beef and cheese are excellent sources of protein, making this dish a great option for those looking to increase their protein intake.

Sodium

Cheesy Beef Enchilada Tortellini Recipe contains around 800 milligrams of sodium. This is primarily due to the enchilada sauce and canned tomatoes. If you’re watching your sodium levels, consider using low-sodium versions of these ingredients to help reduce the overall sodium content.

Cheesy Beef Enchilada Tortellini Recipe while being aware of its health benefits. It’s a delicious way to fuel your body with essential nutrients!

FAQs about Cheesy Beef Enchilada Tortellini Recipe

Can I make Cheesy Beef Enchilada Tortellini ahead of time?

Cheesy Beef Enchilada Tortellini Recipe ahead of time. Simply follow the steps up to the point of combining the ingredients. After mixing everything together, let it cool completely. Then, transfer it to an airtight container and store it in the refrigerator for up to 2 days. When you’re ready to serve, just reheat it on the stove over medium heat until warmed through. You may need to add a splash of water or broth to loosen the sauce if it thickens while stored.

What can I substitute for tortellini in this recipe?

Cheesy Beef Enchilada Tortellini Recipe without compromising on taste!

How do I store leftovers of Cheesy Beef Enchilada Tortellini?

Cheesy Beef Enchilada Tortellini to cool down to room temperature. Then, place it in an airtight container and store it in the refrigerator. It will stay fresh for about 3-4 days. When you’re ready to enjoy it again, reheat it on the stove or in the microwave until it’s heated through. If you find the sauce has thickened, adding a little water or broth can help restore its creamy consistency. Enjoy your delicious leftovers!

Conclusion on Cheesy Beef Enchilada Tortellini Recipe

Cheesy Beef Enchilada Tortellini Recipe is a delightful fusion of flavors that brings together the best of Mexican and Italian cuisines. This dish is not only easy to prepare but also incredibly satisfying, making it a perfect choice for busy weeknights or family gatherings. With its rich, cheesy goodness and zesty enchilada sauce, it’s sure to become a favorite in your household.

Whether you choose to stick to the classic recipe or explore the various adaptations, such as vegetarian options or spicy additions, the possibilities are endless. Each variation allows you to tailor the dish to your taste preferences, ensuring that everyone at the table can enjoy it. Plus, with the tips and serving suggestions provided, you can elevate your meal to new heights.

Cheesy Beef Enchilada Tortellini Recipe that will impress your family and friends. Enjoy the process of cooking and the joy of sharing a hearty meal together. Happy cooking!

Paul

Cheesy Beef Enchilada Tortellini is a must-try dish!

This one-skillet meal is where Tex-Mex meets Italian comfort food! Cheesy tortellini meets saucy enchilada-style ground beef for a fast and flavor-packed dinner. Melty cheese, bold spices, and a creamy finish make this fusion dish a weeknight win for the whole family.
Prep Time 10 minutes
Cook Time 20 minutes
Total Time 30 minutes
Servings: 4 servings
Course: Main Dish
Cuisine: Fusion (Tex-Mex & Italian)

Ingredients
  

Pasta and Protein:
  • 9 oz cheese tortellini refrigerated
  • 1 lb ground beef 80/20 recommended for flavor
Vegetables and Aromatics:
  • 1 small yellow onion chopped
  • 2 cloves garlic minced
Spices:
  • 1 tablespoon chili powder
  • 1 teaspoon ground cumin
  • 1 teaspoon paprika
  • ½ teaspoon salt
  • ½ teaspoon black pepper
Sauce and Cheese:
  • 1 10 oz can enchilada sauce (red or green)
  • 1 cup shredded mozzarella cheese
  • 1 cup shredded cheddar cheese
  • ¼ cup sour cream
Optional Garnish:
  • Fresh cilantro chopped

Method
 

  1. Cook the Tortellini:Boil the tortellini according to the package directions. Drain and set aside.
  2. Brown the Beef:In a large skillet over medium heat, cook the ground beef until browned and fully cooked, breaking it up as it cooks. Drain any excess grease.
  3. Add Aromatics:Stir in chopped onion and minced garlic. Sauté for 2–3 minutes until soft and fragrant.
  4. Spice It Up:Add chili powder, cumin, paprika, salt, and black pepper. Cook for another minute to toast the spices.
  5. Add Sauce and Pasta:Pour in the enchilada sauce and simmer for 5 minutes. Add the cooked tortellini and stir until well coated in the sauce.
  6. Melt the Cheese:Top the skillet with mozzarella and cheddar. Cover and let sit over low heat for 2–3 minutes, until the cheese is melted and gooey.
  7. Creamy Finish:Remove from heat, stir in the sour cream for added creaminess, and sprinkle with chopped cilantro if desired.

Notes

  • Choose red enchilada sauce for a bold, smoky flavor or green sauce for a tangy twist.
  • Ground turkey or plant-based meat can be substituted for the beef.
  • Add black beans or corn for more texture and nutrition.
  • Leftovers reheat best with a splash of milk or broth to refresh the sauce.

Southern-Style Crispy Fried Chicken is a must-try dish.

Southern-Style Crispy Fried Chicken is more than just a meal; it’s a beloved tradition. This dish has roots that stretch deep into the heart of Southern culture. It brings families together and creates memories around the dinner table. The crispy, golden-brown exterior and juicy, tender meat make it a favorite for many. Whether served at a family gathering or a casual weeknight dinner, this dish never fails to impress.

The History of Southern-Style Crispy Fried Chicken

The history of Southern-Style Crispy Fried Chicken is rich and fascinating. It dates back to the 18th century when Scottish immigrants brought their frying techniques to America. They used lard to fry chicken, creating a crispy texture that was hard to resist. Over time, African American cooks added their own spices and flavors, transforming the dish into what we know today.

By the 19th century, fried chicken became a staple in Southern cuisine. It was often served during special occasions and gatherings. The dish symbolizes hospitality and warmth, making it a cherished part of Southern culture. Today, Southern-Style Crispy Fried Chicken is enjoyed all over the world, but its roots remain firmly planted in the South.

Why Southern-Style Crispy Fried Chicken is a Favorite

There are many reasons why Southern-Style Crispy Fried Chicken is a favorite among food lovers. First, the flavor is simply irresistible. The combination of spices creates a mouthwatering taste that keeps people coming back for more. Second, the texture is a delight. The crispy coating contrasts beautifully with the juicy chicken inside, making each bite a satisfying experience.

Moreover, this dish is versatile. It can be served with a variety of sides, from creamy coleslaw to fluffy biscuits. It’s perfect for any occasion, whether it’s a picnic, a holiday feast, or a casual dinner. The warmth and comfort that Southern-Style Crispy Fried Chicken brings to the table make it a timeless classic that will always hold a special place in our hearts.

Ingredients for Southern-Style Crispy Fried Chicken

To create the perfect Southern-Style Crispy Fried Chicken, you need a few key ingredients. Each component plays a vital role in achieving that delicious flavor and crispy texture. Here’s what you’ll need:

  • 2 pounds chicken pieces: You can use legs, thighs, breasts, or wings. Choose your favorite cuts for the best results.
  • 1 cup all-purpose flour: This is essential for creating the crispy coating that everyone loves.
  • 1 teaspoon paprika: Adds a subtle smokiness and beautiful color to the chicken.
  • 1 teaspoon garlic powder: Provides a savory depth of flavor that enhances the overall taste.
  • 1 teaspoon onion powder: Complements the garlic and adds a hint of sweetness.
  • 1 teaspoon salt: Essential for seasoning the chicken and bringing out its natural flavors.
  • 1/2 teaspoon black pepper: Adds a mild heat and enhances the dish’s overall flavor profile.
  • 1/2 teaspoon cayenne pepper: This is optional but recommended for those who enjoy a little kick in their fried chicken.
  • 1 cup milk: Used for marinating the chicken, it helps tenderize the meat and adds moisture.
  • 1 large egg: This binds the milk and chicken together, ensuring the flour coating sticks well.
  • Vegetable oil: For frying, it’s important to use oil with a high smoke point to achieve that perfect crispiness.

Gathering these ingredients is the first step toward making a delicious Southern-Style Crispy Fried Chicken. Each item contributes to the dish’s unique flavor and texture, making it a beloved favorite in many households.

Preparation of Southern-Style Crispy Fried Chicken

Preparing Southern-Style Crispy Fried Chicken is a delightful process. Each step is essential to ensure that your chicken turns out perfectly crispy and flavorful. Let’s dive into the preparation steps that will lead you to fried chicken perfection.

Step 1: Marinating the Chicken

Marinating the chicken is a crucial first step. Start by whisking together the milk and egg in a large bowl. This mixture not only adds flavor but also helps tenderize the chicken. Once combined, add the chicken pieces, making sure they are fully submerged. Cover the bowl and let it marinate in the refrigerator for at least 30 minutes. This allows the flavors to penetrate the meat, resulting in juicy chicken.

Step 2: Preparing the Coating

While the chicken is marinating, it’s time to prepare the coating. In another bowl, combine the all-purpose flour, paprika, garlic powder, onion powder, salt, black pepper, and cayenne pepper. Mix these ingredients well to ensure an even distribution of spices. This flavorful coating is what gives Southern-Style Crispy Fried Chicken its signature crunch and taste.

Step 3: Dredging the Chicken

After marinating, it’s time to dredge the chicken. Remove each piece from the milk mixture, allowing any excess liquid to drip off. Then, take each piece and coat it in the flour mixture. Press lightly to ensure the coating sticks well. This step is vital for achieving that crispy exterior. Shake off any excess flour before moving on to the next step.

Step 4: Heating the Oil

Next, heat about 1 inch of vegetable oil in a large skillet over medium-high heat. Use a thermometer to check the oil temperature, aiming for around 350°F. This temperature is perfect for frying, as it ensures the chicken cooks evenly while developing a golden-brown crust. Be patient; heating the oil properly is key to crispy fried chicken.

Step 5: Frying the Chicken

Once the oil is hot, carefully place the coated chicken pieces into the skillet. Be sure not to overcrowd the pan, as this can lower the oil temperature and result in soggy chicken. Fry the chicken in batches if necessary. Cook each piece for about 12-15 minutes per side, or until it reaches a golden brown color and an internal temperature of 165°F. Adjust the heat as needed to maintain the oil temperature throughout the frying process.

Step 6: Draining and Resting

After frying, it’s important to drain the chicken properly. Transfer the cooked pieces to a plate lined with paper towels. This will help absorb any excess oil, keeping your chicken crispy. Allow the chicken to rest for a few minutes before serving. This resting period helps the juices redistribute, ensuring each bite is tender and flavorful.

Variation of Southern-Style Crispy Fried Chicken

Southern-Style Crispy Fried Chicken is a classic dish, but there are many ways to put a twist on it. Whether you like a little heat or prefer a healthier option, these variations will keep your taste buds excited. Let’s explore two popular variations: Spicy Southern-Style Crispy Fried Chicken and Baked Southern-Style Crispy Fried Chicken.

Spicy Southern-Style Crispy Fried Chicken

If you love a kick of heat, then Spicy Southern-Style Crispy Fried Chicken is for you! To make this variation, simply add more cayenne pepper to the flour mixture. You can also include other spices like crushed red pepper flakes or hot sauce in the milk marinade. This will infuse the chicken with a fiery flavor that’s sure to please spice lovers.

For an extra layer of flavor, consider marinating the chicken overnight. This allows the spices to penetrate deeper into the meat, resulting in a more intense taste. When frying, keep an eye on the oil temperature, as spicy coatings can sometimes brown faster. Enjoy this spicy twist with your favorite cooling side dishes, like coleslaw or ranch dressing!

Baked Southern-Style Crispy Fried Chicken

If you’re looking for a healthier alternative, Baked Southern-Style Crispy Fried Chicken is a fantastic option. Instead of frying, you can achieve a crispy texture by baking the chicken in the oven. Start by following the same marinating and coating steps as the traditional recipe.

Once coated, place the chicken pieces on a baking sheet lined with parchment paper. For added crispiness, spray the chicken lightly with cooking oil. Bake in a preheated oven at 425°F for about 30-40 minutes, flipping halfway through. The high temperature will help create a golden-brown crust while keeping the chicken juicy inside.

This baked version is not only healthier but also easier to prepare for larger gatherings. Serve it with your favorite dipping sauces and sides for a delicious meal that everyone will love!

Cooking Note for Southern-Style Crispy Fried Chicken

Cooking Southern-Style Crispy Fried Chicken requires attention to detail and a few important notes to ensure success. Here are some key points to keep in mind while preparing this delicious dish:

First, always choose high-quality chicken. Fresh chicken will yield the best flavor and texture. If possible, opt for organic or free-range chicken, as it tends to be more flavorful and tender. Additionally, consider the size of the chicken pieces. Uniform sizes will help them cook evenly, preventing some pieces from being overcooked while others remain undercooked.

Next, temperature control is crucial. Maintaining the oil temperature at around 350°F is essential for achieving that perfect crispy coating. If the oil is too hot, the outside may burn before the inside cooks through. Conversely, if the oil is too cool, the chicken will absorb more oil, resulting in a greasy texture. Use a thermometer to monitor the oil temperature throughout the frying process.

Another important note is to avoid overcrowding the skillet. Frying too many pieces at once can lower the oil temperature, leading to soggy chicken. Instead, fry in batches, allowing enough space for each piece to cook properly. This will ensure that every piece gets that golden-brown crust we all love.

Lastly, let the chicken rest after frying. This step is often overlooked but is vital for juicy chicken. Resting allows the juices to redistribute throughout the meat, ensuring each bite is tender and flavorful. So, be patient and let your fried chicken rest for a few minutes before serving.

By following these cooking notes, you’ll be well on your way to creating the ultimate Southern-Style Crispy Fried Chicken that will impress family and friends alike!

Serving Suggestions for Southern-Style Crispy Fried Chicken

Once you’ve perfected your Southern-Style Crispy Fried Chicken, it’s time to think about how to serve it. This dish is incredibly versatile and pairs wonderfully with a variety of side dishes and sauces. Let’s explore some delicious options that will elevate your meal and make it even more enjoyable.

Side Dishes that Pair Well

When it comes to side dishes, Southern-Style Crispy Fried Chicken shines alongside classic accompaniments. Here are some popular options:

  • Coleslaw: This crunchy, tangy salad adds a refreshing contrast to the rich flavors of fried chicken. The creaminess of coleslaw complements the crispy texture perfectly.
  • Mashed Potatoes: Creamy mashed potatoes are a comforting side that pairs beautifully with fried chicken. Add some gravy for an extra touch of flavor!
  • Biscuits: Fluffy, buttery biscuits are a Southern staple. They’re perfect for soaking up any leftover juices from the chicken.
  • Green Beans: Steamed or sautéed green beans add a pop of color and a healthy touch to your plate. Their crispness balances the richness of the chicken.
  • Macaroni and Cheese: This cheesy, creamy dish is a favorite among many. It adds a delightful richness that pairs well with the crispy chicken.

These side dishes not only enhance the meal but also bring a taste of Southern hospitality to your table. Feel free to mix and match based on your preferences and the occasion!

Sauces and Dips to Enhance Flavor

To take your Southern-Style Crispy Fried Chicken to the next level, consider serving it with a variety of sauces and dips. Here are some tasty options:

  • Honey: Drizzling honey over your fried chicken adds a sweet touch that contrasts beautifully with the savory flavors.
  • Hot Sauce: For those who love heat, a splash of hot sauce can elevate the dish. It adds a spicy kick that many enjoy.
  • Ranch Dressing: This creamy dressing is a classic dip for fried chicken. Its coolness balances the crispy, hot chicken perfectly.
  • Barbecue Sauce: Smoky and tangy barbecue sauce is another great option. It adds a rich flavor that complements the chicken’s spices.
  • Gravy: A rich, homemade gravy can be poured over the chicken or served on the side for dipping. It adds a comforting touch to the meal.

These sauces and dips not only enhance the flavor of your Southern-Style Crispy Fried Chicken but also allow guests to customize their experience. Whether you prefer sweet, spicy, or savory, there’s a perfect pairing for everyone!

Tips for Perfecting Southern-Style Crispy Fried Chicken

Perfecting Southern-Style Crispy Fried Chicken takes practice and attention to detail. Here are some essential tips to help you achieve that crispy, flavorful chicken every time you cook. From selecting the right chicken to managing the cooking temperature, these tips will guide you on your culinary journey.

Choosing the Right Chicken

The first step to delicious Southern-Style Crispy Fried Chicken is choosing the right chicken. Opt for fresh, high-quality chicken pieces. Organic or free-range chicken is often more flavorful and tender, making it a great choice for frying. When selecting your chicken, consider the size of the pieces. Uniform sizes ensure even cooking, preventing some pieces from being overcooked while others remain undercooked.

Additionally, bone-in chicken pieces, like thighs and drumsticks, tend to stay juicier during frying. They also provide a richer flavor compared to boneless cuts. If you prefer white meat, chicken breasts can work well too, but be cautious not to overcook them, as they can dry out quickly. Ultimately, the right chicken will set the foundation for your Southern-Style Crispy Fried Chicken.

Importance of Temperature Control

Temperature control is crucial when frying chicken. Maintaining the oil temperature at around 350°F is essential for achieving that perfect crispy coating. If the oil is too hot, the chicken may burn on the outside while remaining raw inside. Conversely, if the oil is too cool, the chicken will absorb more oil, resulting in a greasy texture.

To monitor the oil temperature accurately, use a thermometer. This will help you keep the oil at the right heat throughout the frying process. If you notice the temperature dropping, adjust the heat accordingly. Frying in small batches can also help maintain the oil temperature, ensuring that each piece cooks evenly and develops that golden-brown crust we all love.

By following these tips on choosing the right chicken and managing temperature control, you’ll be well on your way to creating the ultimate Southern-Style Crispy Fried Chicken. Your family and friends will be impressed with your culinary skills, and you’ll enjoy every delicious bite!

Breakdown of Time for Southern-Style Crispy Fried Chicken

Understanding the time required for each step in making Southern-Style Crispy Fried Chicken is essential for planning your meal. Here’s a detailed breakdown of the time you’ll need for preparation and cooking.

Prep Time

The prep time for Southern-Style Crispy Fried Chicken is approximately 40 minutes. This includes:

  • Marinating the Chicken: 30 minutes in the refrigerator.
  • Preparing the Coating: 10 minutes to mix the flour and spices.

While the chicken marinates, you can use this time to gather your ingredients and set up your cooking area. This will help streamline the process and make everything more efficient.

Cooking Time

The cooking time for Southern-Style Crispy Fried Chicken is about 30 minutes. This includes:

  • Heating the Oil: 5-10 minutes to reach the right temperature.
  • Frying the Chicken: 24-30 minutes, depending on the size of the chicken pieces and how many batches you fry.

Make sure to monitor the oil temperature closely during frying. This ensures that your chicken cooks evenly and achieves that perfect crispy texture.

Total Time

In total, you can expect to spend about 1 hour and 10 minutes to 1 hour and 15 minutes from start to finish. This includes both prep and cooking time. Here’s a quick summary:

  • Prep Time: 40 minutes
  • Cooking Time: 30 minutes
  • Total Time: 1 hour and 10-15 minutes

By planning your time effectively, you can enjoy a delicious meal of Southern-Style Crispy Fried Chicken without feeling rushed. This dish is worth every minute spent in the kitchen!

Nutritional Information for Southern-Style Crispy Fried Chicken

Understanding the nutritional information of Southern-Style Crispy Fried Chicken is important for those who are mindful of their diet. This delicious dish can be enjoyed in moderation, and knowing its nutritional content can help you make informed choices. Here’s a breakdown of the key nutritional components per serving:

Calories

Each serving of Southern-Style Crispy Fried Chicken contains approximately 450 calories. This calorie count includes the chicken, the coating, and the oil used for frying. While it’s a hearty meal, it’s essential to balance it with lighter sides or salads to maintain a well-rounded diet.

Protein

One of the highlights of Southern-Style Crispy Fried Chicken is its protein content. Each serving provides about 30 grams of protein. This makes it a great option for those looking to increase their protein intake, whether for muscle building or overall health. Protein is vital for repairing tissues and keeping you feeling full longer.

Sodium

In terms of sodium, Southern-Style Crispy Fried Chicken contains around 800 milligrams per serving. This amount can vary based on the seasoning used and whether any additional sauces are added. It’s wise to be cautious with sodium intake, especially for those with dietary restrictions. Pairing the chicken with low-sodium sides can help balance the meal.

By being aware of the nutritional information, you can enjoy Southern-Style Crispy Fried Chicken as part of a balanced diet. Remember, moderation is key, and this dish can be a delightful treat when enjoyed alongside healthy accompaniments.

FAQs about Southern-Style Crispy Fried Chicken

What is the secret to crispy fried chicken?

The secret to achieving perfectly crispy fried chicken lies in a few key techniques. First, marinating the chicken in a milk and egg mixture helps tenderize the meat while adding moisture. This step is crucial for flavor and juiciness. Next, the coating is essential. A well-seasoned flour mixture, combined with proper dredging, ensures that the coating adheres well to the chicken. Pressing the flour onto the chicken helps create that desired crunch.

Another important factor is maintaining the right oil temperature. Frying at around 350°F allows the chicken to cook evenly while developing a golden-brown crust. Lastly, letting the chicken rest after frying allows the juices to redistribute, keeping it moist and flavorful. By following these tips, you can enjoy crispy fried chicken every time!

Can I make Southern-Style Crispy Fried Chicken in an air fryer?

Yes, you can make Southern-Style Crispy Fried Chicken in an air fryer! This method is a healthier alternative to traditional frying. To do this, follow the same marinating and coating steps as the original recipe. Once coated, place the chicken pieces in the air fryer basket in a single layer, ensuring they are not overcrowded.

Set the air fryer to 375°F and cook for about 25-30 minutes, flipping halfway through. The air fryer circulates hot air, creating a crispy texture without the need for excessive oil. Keep an eye on the chicken to ensure it reaches an internal temperature of 165°F. Enjoy your air-fried chicken with the same delicious sides and sauces!

How do I store leftover Southern-Style Crispy Fried Chicken?

Storing leftover Southern-Style Crispy Fried Chicken is simple. First, allow the chicken to cool completely at room temperature. Once cooled, place the chicken in an airtight container. You can also wrap it tightly in aluminum foil or plastic wrap. Store the chicken in the refrigerator for up to 3-4 days.

If you want to keep it longer, consider freezing the chicken. Wrap each piece in plastic wrap and then place them in a freezer-safe bag. This will help prevent freezer burn. When you’re ready to enjoy it again, thaw the chicken in the refrigerator overnight. Reheat in the oven at 350°F for about 15-20 minutes to restore its crispy texture.

What sides go best with Southern-Style Crispy Fried Chicken?

Southern-Style Crispy Fried Chicken pairs wonderfully with a variety of side dishes. Some classic options include:

  • Coleslaw: The crunchy, tangy salad complements the rich flavors of the chicken.
  • Mashed Potatoes: Creamy mashed potatoes with gravy are a comforting choice.
  • Biscuits: Fluffy biscuits are perfect for soaking up juices.
  • Green Beans: Steamed or sautéed green beans add a healthy touch.
  • Macaroni and Cheese: This cheesy dish is a favorite among many.

These sides not only enhance the meal but also bring a taste of Southern hospitality to your table. Feel free to mix and match based on your preferences and the occasion!

Conclusion on Southern-Style Crispy Fried Chicken

Southern-Style Crispy Fried Chicken is more than just a dish; it’s a celebration of flavor, tradition, and togetherness. From its rich history to its mouthwatering taste, this beloved recipe has earned its place in kitchens across the globe. Whether you’re preparing it for a family gathering or a cozy dinner at home, the joy of serving crispy fried chicken is unmatched.

As you embark on your culinary journey to create this dish, remember the importance of each step. From marinating the chicken to achieving that perfect golden crust, every detail matters. With the right ingredients and techniques, you can create a meal that not only satisfies hunger but also warms the heart.

Don’t hesitate to experiment with variations, whether it’s adding a spicy kick or opting for a healthier baked version. The beauty of Southern-Style Crispy Fried Chicken lies in its versatility. Pair it with your favorite sides and sauces to create a meal that reflects your personal taste.

In conclusion, Southern-Style Crispy Fried Chicken is a timeless classic that brings people together. It’s a dish that tells a story, evokes memories, and creates new ones around the dinner table. So, roll up your sleeves, gather your loved ones, and enjoy the delightful experience of making and sharing this iconic dish. Happy cooking!

Paul

Southern-Style Crispy Fried Chicken is a must-try dish.

This fried chicken delivers everything you love—crispy coating, juicy interior, and loads of flavor—without the need for buttermilk. A simple egg and seasoned flour dredge is all it takes to create golden, crunchy perfection. Perfect for a comforting dinner or crowd-pleasing weekend treat.
Prep Time 15 minutes
Cook Time 20 minutes
Total Time 35 minutes
Course: Main Dish
Cuisine: American

Ingredients
  

  • 1.5 lbs chicken drumsticks or substitute with thighs, wings, or legs; skin-on for best results
  • 2 large eggs
  • 1 cup all-purpose flour
  • Salt to taste
  • Black pepper to taste
  • 1 teaspoon paprika powder
  • ½ teaspoon onion powder
  • ½ teaspoon dried thyme
  • ½ teaspoon dried rosemary
  • ¼ teaspoon cayenne pepper
  • Oil for frying vegetable, canola, or peanut oil work well

Method
 

  1. Season the Chicken:Pat chicken dry and season generously with salt and pepper.
  2. Prepare the Coatings:In one bowl, beat the eggs.In another bowl, combine flour with paprika, onion powder, thyme, rosemary, cayenne pepper, and a few extra pinches of salt and black pepper.
  3. Double Dredge:Coat each chicken piece in the seasoned flour mixture, then dip into the egg wash, and return once more to the flour for a second coat. Press the flour on firmly to help it stick.
  4. Heat the Oil:In a deep skillet or heavy-bottomed pot, heat about 2 inches of oil over medium-high heat until it reaches 350°F (175°C).
  5. Fry the Chicken:Working in batches, fry chicken pieces for about 5 minutes per side or until deeply golden and cooked through (internal temperature should reach 165°F/74°C).
  6. Drain and Serve:Transfer fried chicken to a wire rack to drain excess oil. Serve hot with your favorite sides like mashed potatoes, coleslaw, or biscuits.

Notes

  • No thermometer? Drop a bit of flour into the oil—if it sizzles immediately, it’s ready.
  • Don’t overcrowd the pan; it drops the oil temp and causes soggy coating.
  • Want extra crunch? Add 1 tablespoon of cornstarch to the flour mixture.
  • For a spicy kick, increase the cayenne or add chili powder.

Creamy Steak Alfredo Recipe is a must-try dish!

Welcome to the delightful world of Creamy Steak Alfredo! This dish is a perfect blend of rich flavors and comforting textures. It combines tender flank steak with creamy Alfredo sauce, all served over fettuccine pasta. Whether you’re cooking for a special occasion or just a cozy dinner at home, this recipe is sure to impress.

What Makes Creamy Steak Alfredo Special?

What sets Creamy Steak Alfredo apart from other pasta dishes? First, it’s the combination of high-quality ingredients. The flank steak is juicy and flavorful, while the heavy cream creates a luscious sauce that clings to the pasta. The addition of garlic and Parmesan cheese elevates the dish, giving it a savory depth that is hard to resist.

Moreover, this recipe is versatile. You can easily customize it to suit your taste. Want to add some greens? Toss in some steamed broccoli or spinach! Prefer a lighter version? Substitute half-and-half for the heavy cream. The possibilities are endless, making it a favorite for many home cooks.

In just a few simple steps, you can create a restaurant-quality meal right in your kitchen. So, roll up your sleeves and get ready to enjoy a delicious plate of Creamy Steak Alfredo!

Ingredients for Creamy Steak Alfredo Recipe

To create a mouthwatering Creamy Steak Alfredo, you’ll need a selection of fresh and flavorful ingredients. Each component plays a vital role in achieving that perfect balance of taste and texture. Here’s what you’ll need:

  • 1 pound fettuccine pasta: This classic pasta shape is ideal for holding onto the creamy sauce.
  • 1 pound flank steak: A tender cut of beef that cooks quickly and adds rich flavor.
  • 2 tablespoons olive oil: Used for cooking the steak, it adds a nice depth of flavor.
  • Salt and pepper to taste: Essential for seasoning the steak and enhancing all the flavors.
  • 4 cloves garlic, minced: Fresh garlic adds a wonderful aroma and taste to the sauce.
  • 1 cup heavy cream: This is the star of the sauce, making it rich and creamy.
  • 1 cup grated Parmesan cheese: Adds a savory, cheesy flavor that complements the cream.
  • 1 teaspoon Italian seasoning: A blend of herbs that brings a touch of warmth and earthiness.
  • Fresh parsley, chopped (for garnish): Adds a pop of color and freshness to the finished dish.

Gathering these ingredients is the first step toward creating your delicious Creamy Steak Alfredo. Make sure to choose high-quality products for the best results. Fresh ingredients not only enhance the flavor but also make your dish visually appealing. Now that you have everything ready, let’s move on to the next step in preparing this delightful meal!

Step-by-Step Preparation of Creamy Steak Alfredo Recipe

Now that you have all your ingredients ready, it’s time to dive into the step-by-step preparation of your Creamy Steak Alfredo. This process is straightforward and will guide you to create a delicious meal that everyone will love. Let’s get started!

Step 1: Preparing the Steak

First, you need to prepare the flank steak. Start by taking the steak out of the refrigerator and letting it sit at room temperature for about 15 minutes. This helps it cook evenly. Next, season both sides generously with salt and pepper. The seasoning enhances the natural flavors of the meat.

Heat 2 tablespoons of olive oil in a large skillet over medium-high heat. Once the oil is hot, carefully place the steak in the skillet. Cook it for about 4-5 minutes on each side, depending on how well-done you like your steak. For medium-rare, aim for an internal temperature of 135°F. After cooking, remove the steak from the skillet and let it rest for 5 minutes. This resting period allows the juices to redistribute, making the steak tender and juicy.

Step 2: Cooking the Pasta

While the steak is resting, it’s time to cook the fettuccine pasta. Bring a large pot of salted water to a boil. Add the fettuccine and cook according to the package instructions until it’s al dente, which usually takes about 8-10 minutes. Stir occasionally to prevent sticking. Once cooked, drain the pasta in a colander, but remember to reserve ½ cup of the pasta water. This starchy water will help adjust the sauce’s consistency later.

Step 3: Making the Alfredo Sauce

Now, let’s make the creamy Alfredo sauce! In the same skillet you used for the steak, add the minced garlic. Sauté it over medium heat for about 1 minute until it becomes fragrant. Be careful not to burn the garlic, as it can turn bitter.

Next, pour in 1 cup of heavy cream and bring it to a gentle simmer. Stir the cream continuously to prevent it from scorching. Once it’s simmering, add 1 cup of grated Parmesan cheese and 1 teaspoon of Italian seasoning. Mix everything together until the cheese melts and the sauce becomes smooth and creamy. If the sauce is too thick, gradually add the reserved pasta water until you reach your desired consistency.

Step 4: Combining Ingredients

With the sauce ready, it’s time to bring everything together! Slice the rested flank steak into thin strips. Add the cooked fettuccine and sliced steak to the skillet with the Alfredo sauce. Toss everything together gently, ensuring that the pasta and steak are well-coated in the creamy sauce. This step is crucial for flavor, as it allows the pasta to absorb the delicious sauce.

Step 5: Final Touches

Your Creamy Steak Alfredo is almost ready! To finish, serve the dish immediately on warm plates. Garnish with freshly chopped parsley for a pop of color and added freshness. This final touch not only enhances the presentation but also adds a delightful herbal note to the dish.

Now, sit back and enjoy your homemade Creamy Steak Alfredo! It’s a comforting meal that’s sure to impress your family and friends.

Variations of Creamy Steak Alfredo Recipe

While the classic Creamy Steak Alfredo is a delicious dish on its own, there are many ways to customize it to suit your taste or dietary preferences. Here are some exciting variations that can elevate your meal even further!

Adding Vegetables

Incorporating vegetables into your Creamy Steak Alfredo not only boosts its nutritional value but also adds vibrant colors and textures. Here are a few great options:

  • Broccoli: Steamed broccoli florets add a nice crunch and a pop of green. Simply steam them while the pasta cooks and toss them in with the fettuccine.
  • Spinach: Fresh spinach wilts beautifully in the warm sauce. Stir in a couple of handfuls just before serving for a nutritious boost.
  • Mushrooms: Sauté sliced mushrooms in the skillet after cooking the steak. They add an earthy flavor that complements the creamy sauce.
  • Bell Peppers: Colorful bell peppers can be sautéed along with the garlic for a sweet and crunchy addition.

Feel free to mix and match these vegetables based on what you have on hand or your personal preferences. Adding veggies not only enhances the dish but also makes it more filling!

Alternative Proteins

If you’re looking to switch things up, consider using different proteins in your Creamy Steak Alfredo. Here are some tasty alternatives:

  • Chicken: Grilled or sautéed chicken breast is a fantastic substitute. Season it well and cook it until golden brown for a delicious twist.
  • Shrimp: For a seafood variation, sauté shrimp in the skillet until they turn pink and tender. They pair wonderfully with the creamy sauce.
  • Tofu: For a vegetarian option, use firm tofu. Press and cube it, then sauté until golden. It absorbs flavors well and adds protein.
  • Turkey: Ground turkey can be used as a leaner alternative. Cook it in the skillet until browned, then proceed with the sauce.

These alternative proteins can bring new flavors and textures to your Creamy Steak Alfredo, making it a versatile dish that everyone can enjoy!

Cooking Note for Creamy Steak Alfredo Recipe

When preparing your Creamy Steak Alfredo, a few cooking notes can help ensure your dish turns out perfectly every time. Here are some essential tips to keep in mind:

  • Choosing the Right Steak: Flank steak is a great choice for this recipe due to its flavor and tenderness. However, you can also use sirloin or ribeye if you prefer. Just remember to adjust cooking times based on the thickness of the steak.
  • Don’t Overcook the Steak: Overcooking can lead to tough meat. Use a meat thermometer to check for doneness. Aim for 135°F for medium-rare and 145°F for medium.
  • Reserve Pasta Water: Always save some pasta water before draining. This starchy water is a secret weapon for adjusting the sauce’s consistency. It helps the sauce cling to the pasta better.
  • Fresh Ingredients Matter: Using fresh garlic and high-quality Parmesan cheese can significantly enhance the flavor of your sauce. Fresh ingredients make a noticeable difference in taste.
  • Adjusting Sauce Thickness: If your sauce is too thick, gradually add the reserved pasta water until you reach the desired creaminess. If it’s too thin, let it simmer a bit longer to thicken.
  • Serving Temperature: Serve your Creamy Steak Alfredo immediately after combining the ingredients. The sauce is best enjoyed warm and creamy, so don’t let it sit too long before serving.

By following these cooking notes, you can create a delicious and satisfying Creamy Steak Alfredo that will impress your family and friends. Happy cooking!

Serving Suggestions for Creamy Steak Alfredo Recipe

Once you’ve prepared your delicious Creamy Steak Alfredo, it’s time to think about how to serve it. The right sides and beverages can elevate your meal, making it even more enjoyable. Here are some fantastic serving suggestions to complement your dish!

Pairing with Sides

When it comes to sides, you want to choose options that balance the richness of the Creamy Steak Alfredo. Here are some delightful pairings:

  • Garlic Bread: A classic choice! The crispy, buttery garlic bread is perfect for soaking up the creamy sauce.
  • Caesar Salad: A fresh Caesar salad adds a crunchy texture and a tangy flavor that contrasts beautifully with the creamy pasta.
  • Steamed Vegetables: Lightly steamed vegetables like green beans or asparagus provide a healthy and colorful addition to your meal.
  • Roasted Brussels Sprouts: These add a nutty flavor and crispy texture, making them a great side dish to complement the pasta.
  • Caprese Salad: Fresh tomatoes, mozzarella, and basil drizzled with balsamic glaze offer a refreshing taste that pairs well with the richness of the Alfredo.

These sides not only enhance the meal but also add variety to your dining experience. Choose one or two to serve alongside your Creamy Steak Alfredo for a well-rounded dinner!

Wine Pairings

To elevate your dining experience even further, consider pairing your Creamy Steak Alfredo with the right wine. Here are some excellent options:

  • Chardonnay: A full-bodied Chardonnay complements the creamy sauce beautifully. Look for one with a hint of oak for added depth.
  • Sauvignon Blanc: This wine’s crisp acidity cuts through the richness of the Alfredo, making it a refreshing choice.
  • Pinot Noir: If you prefer red wine, a light-bodied Pinot Noir works well with steak. Its fruity notes balance the savory flavors of the dish.
  • Prosecco: For a sparkling option, Prosecco adds a fun and bubbly touch. Its lightness pairs nicely with the creamy pasta.

Choosing the right wine can enhance the flavors of your Creamy Steak Alfredo, making your meal feel even more special. So, pour a glass and enjoy your delightful dinner!

Tips for Perfecting Your Creamy Steak Alfredo Recipe

Creating the perfect Creamy Steak Alfredo is all about attention to detail. With a few helpful tips, you can elevate your dish to restaurant-quality status. Here are some essential tips to ensure your Alfredo is creamy, flavorful, and utterly delicious!

  • Use Fresh Ingredients: Fresh garlic, high-quality Parmesan cheese, and good olive oil make a significant difference in flavor. Always opt for fresh over pre-packaged ingredients when possible.
  • Don’t Rush the Cooking: Take your time when cooking the steak and sauce. Allowing the steak to rest after cooking ensures it remains juicy. Similarly, simmer the sauce gently to develop rich flavors.
  • Adjust Seasoning: Taste your sauce before serving. You may want to add more salt, pepper, or Italian seasoning to enhance the flavors. Remember, seasoning is key!
  • Perfect Pasta Cooking: Cook the fettuccine until it’s al dente. This means it should be firm to the bite. Overcooked pasta can become mushy and won’t hold the sauce well.
  • Reserve Pasta Water: Always save some pasta water before draining. This starchy water is a secret weapon for adjusting the sauce’s consistency. It helps the sauce cling to the pasta better.
  • Experiment with Cheese: While Parmesan is traditional, feel free to mix in other cheeses like Pecorino Romano or Asiago for a unique flavor twist.
  • Garnish Wisely: A sprinkle of fresh parsley not only adds color but also a fresh taste. Consider adding a squeeze of lemon juice for brightness just before serving.
  • Serve Immediately: Creamy Steak Alfredo is best enjoyed fresh. Serve it right after combining the ingredients to keep the sauce creamy and the pasta warm.

By following these tips, you can create a Creamy Steak Alfredo that is not only delicious but also visually appealing. Enjoy the process and savor every bite of your homemade masterpiece!

Breakdown of Time for Creamy Steak Alfredo Recipe

Understanding the time needed for each step in your Creamy Steak Alfredo recipe can help you plan your cooking efficiently. Here’s a breakdown of the time required for preparation and cooking, so you can enjoy your meal without any rush!

Prep Time

The prep time for your Creamy Steak Alfredo is approximately 15-20 minutes. This includes gathering all your ingredients, seasoning the steak, and chopping the garlic and parsley. Taking a little time to prepare will make the cooking process smoother and more enjoyable.

Cooking Time

Once you start cooking, the total cooking time is about 20-25 minutes. This includes:

  • Cooking the flank steak (about 8-10 minutes)
  • Cooking the fettuccine pasta (8-10 minutes, can be done simultaneously with the steak)
  • Making the Alfredo sauce (5-7 minutes)
  • Combining everything together (2-3 minutes)

By managing your time well, you can have everything ready to serve in no time!

Total Time

In total, you can expect to spend around 35-45 minutes from start to finish. This includes both prep and cooking time. With this quick and easy timeline, you can whip up a delicious Creamy Steak Alfredo that will impress your family and friends without spending all evening in the kitchen!

Nutritional Information for Creamy Steak Alfredo Recipe

Understanding the nutritional content of your Creamy Steak Alfredo is essential for making informed choices about your meals. This dish is not only delicious but also provides a good balance of macronutrients. Here’s a breakdown of the nutritional information per serving:

Calories

Each serving of Creamy Steak Alfredo contains approximately 650 calories. This calorie count comes from the combination of pasta, steak, cream, and cheese, making it a hearty meal. While it’s a bit higher in calories, it’s packed with flavor and satisfaction, perfect for a special dinner.

Protein

Protein is an essential nutrient, and this recipe delivers! Each serving provides about 40 grams of protein. The flank steak is a significant contributor to this protein content, making it a great choice for those looking to increase their protein intake. This makes Creamy Steak Alfredo not only tasty but also a filling option for dinner.

Sodium

When it comes to sodium, each serving contains around 800 milligrams. This amount can vary based on the specific ingredients you use, especially if you add salt during cooking. While sodium is necessary for our bodies, it’s important to monitor your intake. If you’re watching your sodium levels, consider using low-sodium broth or cheese alternatives.

Overall, Creamy Steak Alfredo is a delicious and satisfying meal that can fit into a balanced diet. Enjoy it as an occasional treat, and feel free to adjust the ingredients to suit your nutritional needs!

FAQs about Creamy Steak Alfredo Recipe

Can I use chicken instead of steak in the Creamy Steak Alfredo Recipe?

Absolutely! You can easily substitute chicken for steak in your Creamy Steak Alfredo. Chicken breast or thighs work well. Just season and cook the chicken until it’s golden brown and fully cooked through. Slice it thinly, just like you would with the steak, and toss it into the creamy sauce. This variation is just as delicious and offers a lighter option for those who prefer poultry.

How can I make the sauce thicker in the Creamy Steak Alfredo Recipe?

If you want a thicker sauce for your Creamy Steak Alfredo, there are a few tricks you can use. First, let the sauce simmer a bit longer without adding any pasta water. This allows it to reduce and thicken naturally. You can also add a bit more grated Parmesan cheese, as it will melt and help thicken the sauce. Lastly, if you prefer, you can mix a teaspoon of cornstarch with a tablespoon of cold water to create a slurry. Stir this into the sauce while it simmers, and it will thicken up nicely!

What type of pasta is best for Creamy Steak Alfredo Recipe?

Fettuccine is the traditional pasta choice for Creamy Steak Alfredo. Its flat shape holds onto the creamy sauce beautifully. However, you can also use other pasta types like linguine, tagliatelle, or even penne if you prefer. The key is to choose a pasta that can capture the sauce well, ensuring every bite is flavorful and satisfying.

Can I make Creamy Steak Alfredo Recipe ahead of time?

While it’s best to enjoy Creamy Steak Alfredo fresh, you can prepare some components ahead of time. You can cook the steak and pasta in advance, then store them separately in the refrigerator. When you’re ready to serve, simply reheat them in a skillet, make the sauce, and combine everything. However, keep in mind that the sauce may thicken as it cools, so you might need to add a splash of cream or reserved pasta water to achieve the desired consistency when reheating.

Conclusion on Creamy Steak Alfredo Recipe

In conclusion, the Creamy Steak Alfredo recipe is a delightful dish that brings together rich flavors and comforting textures. With its tender flank steak, creamy sauce, and perfectly cooked fettuccine, this meal is sure to impress anyone at your dinner table. Whether you’re celebrating a special occasion or simply enjoying a cozy night in, this recipe is a fantastic choice.

Not only is it easy to prepare, but it also allows for plenty of customization. You can add vegetables for extra nutrition or swap out the steak for chicken or shrimp, making it versatile for any palate. Plus, with the tips and variations provided, you can easily adapt the recipe to suit your preferences.

As you gather your ingredients and follow the steps, remember to enjoy the cooking process. The aroma of garlic and cream filling your kitchen is just the beginning of the delicious experience that awaits. So, roll up your sleeves, get cooking, and savor every bite of your homemade Creamy Steak Alfredo!

We hope this recipe inspires you to create a memorable meal that you and your loved ones will cherish. Happy cooking!

Paul

Creamy Steak Alfredo Recipe is a must-try dish!

A luxurious twist on a comfort food classic! Tender, seasoned steak slices meet creamy, garlicky Alfredo sauce and rotini pasta in this decadent dish. Perfect for steak night or when you’re craving something indulgent and satisfying—all in one skillet.
Prep Time 10 minutes
Cook Time 20 minutes
Total Time 30 minutes
Servings: 4 servings
Course: Main Course
Cuisine: American

Ingredients
  

  • 12 oz rotini noodles uncooked
  • 1 lb eye of round steaks or your preferred steak cut
  • 1 tablespoon olive oil or vegetable oil
  • 1 tablespoon Montreal steak spice or your favorite steak seasoning blend
  • ¼ cup butter
  • 3 tablespoons garlic puree
  • cups heavy cream
  • ½ teaspoon salt
  • ½ teaspoon black pepper
  • cup shredded parmesan cheese

Method
 

  1. Cook the Pasta:Bring a large pot of salted water to a boil. Cook rotini according to package directions. Drain and set aside.
  2. Season and Prep the Steak:Brush both sides of the steaks with oil and sprinkle evenly with steak spice or seasoning.
  3. Sear the Steak:Heat a non-stick skillet over medium-high heat. Sear the steaks for a few minutes per side until they reach your desired doneness (130–135°F for medium-rare). Remove from the pan and let rest under foil.
  4. Make the Alfredo Sauce:Wipe out the skillet and lower the heat to medium. Melt butter, then stir in the garlic puree and cook for 1–2 minutes until fragrant.
  5. Add the Cream and Seasoning:Pour in the heavy cream. Add salt and pepper. Stir well and bring to a gentle boil, letting the sauce thicken for 3–4 minutes.
  6. Toss the Pasta:Reduce heat to low. Add the cooked pasta into the sauce and stir to coat evenly. Mix in the parmesan cheese until melted and the sauce is creamy.
  7. Plate and Serve:Slice the rested steak and serve it over the creamy Alfredo pasta. Garnish with additional parmesan or fresh parsley if desired.

Notes

  • You can substitute ribeye, striploin, or sirloin for the eye of round steak if you prefer a more tender cut.
  • For extra flavor, finish the dish with a sprinkle of crushed red pepper flakes or a drizzle of truffle oil.
  • Garlic puree can be swapped with minced garlic (about 3 cloves).
  • Leftovers reheat well—add a splash of cream or milk when reheating to loosen the sauce.

High-Protein Banana Bread Oatmeal is a nutritious delight.

Introduction to High-Protein Banana Bread Oatmeal

Are you looking for a delicious and nutritious breakfast option? Look no further than High-Protein Banana Bread Oatmeal! This delightful dish combines the comforting flavors of banana bread with the wholesome goodness of oatmeal. It’s perfect for busy mornings or a cozy weekend brunch. Not only is it easy to make, but it also packs a protein punch to keep you energized throughout the day.

What Makes High-Protein Banana Bread Oatmeal Special?

High-Protein Banana Bread Oatmeal stands out for several reasons. First, it combines rolled oats and bananas, both of which are rich in nutrients. Oats are a fantastic source of fiber, which helps keep you full longer. Bananas add natural sweetness and provide essential vitamins and minerals. Moreover, the addition of eggs and milk boosts the protein content, making this dish a satisfying choice for breakfast or a snack.

Another special aspect is its versatility. You can easily customize it to suit your taste. Whether you prefer nuts, chocolate chips, or even a hint of spice, this recipe allows for endless variations. Plus, it’s a great way to use up overripe bananas, reducing food waste while creating something delicious!

Benefits of High-Protein Banana Bread Oatmeal

There are numerous benefits to enjoying High-Protein Banana Bread Oatmeal. First and foremost, it provides a balanced meal that includes carbohydrates, protein, and healthy fats. This balance helps stabilize blood sugar levels, keeping energy levels steady throughout the morning.

Additionally, the high protein content supports muscle repair and growth, making it an excellent choice for those who lead active lifestyles. The fiber from oats and bananas aids digestion, promoting gut health. Plus, it’s a quick and easy recipe that can be prepared in under an hour, making it perfect for anyone with a busy schedule.

In summary, High-Protein Banana Bread Oatmeal is not just a tasty treat; it’s a nutritious powerhouse that can help you start your day on the right foot. So, let’s dive into the ingredients and get cooking!

Ingredients for High-Protein Banana Bread Oatmeal

To create your own High-Protein Banana Bread Oatmeal, you’ll need a few simple ingredients. Each component plays a vital role in delivering flavor and nutrition. Here’s what you’ll need:

  • 2 cups rolled oats: These are the base of your dish, providing fiber and energy.
  • 1 teaspoon baking powder: This helps the oatmeal rise and become fluffy.
  • 1 teaspoon cinnamon: A warm spice that adds a delightful flavor.
  • 1/2 teaspoon salt: Enhances the overall taste of the dish.
  • 2 ripe bananas, mashed: They add natural sweetness and moisture.
  • 2 large eggs: These boost the protein content and help bind the ingredients.
  • 1 cup milk (dairy or non-dairy): Adds creaminess and additional protein.
  • 1/4 cup honey or maple syrup: A natural sweetener to enhance flavor.
  • 1 teaspoon vanilla extract: Adds a lovely aroma and taste.
  • 1/2 cup chopped walnuts or pecans (optional): For added crunch and healthy fats.
  • 1/2 cup chocolate chips (optional): A sweet treat that makes it even more enjoyable.

These ingredients come together to create a delicious and nutritious breakfast option. Feel free to adjust the quantities or substitute ingredients based on your preferences or dietary needs. Now that you have everything you need, let’s move on to the preparation steps!

Step-by-Step Preparation of High-Protein Banana Bread Oatmeal

Now that you have all your ingredients ready, it’s time to dive into the preparation of your High-Protein Banana Bread Oatmeal. This step-by-step guide will help you create a delicious and nutritious dish with ease. Let’s get started!

Step 1: Gather Your Ingredients

Before you begin, make sure you have all your ingredients on hand. This will make the cooking process smoother and more enjoyable. Gather your rolled oats, baking powder, cinnamon, salt, ripe bananas, eggs, milk, honey or maple syrup, vanilla extract, and any optional ingredients like nuts or chocolate chips. Having everything ready will save you time and keep your kitchen organized.

Step 2: Prepare the Oats

In a large mixing bowl, combine the rolled oats, baking powder, cinnamon, and salt. Stir these dry ingredients together until they are well mixed. This step is important because it ensures that the baking powder and spices are evenly distributed throughout the oats. A good mix will help your High-Protein Banana Bread Oatmeal rise and taste great!

Step 3: Mash the Bananas

Next, take your ripe bananas and place them in a separate bowl. Use a fork to mash them until they are smooth. The riper the bananas, the sweeter your oatmeal will be! This natural sweetness is one of the highlights of the dish. Once mashed, set the bananas aside for the next step.

Step 4: Combine Ingredients

In the bowl with the mashed bananas, add the eggs, milk, honey or maple syrup, and vanilla extract. Mix these wet ingredients together until they are smooth and well combined. Then, pour this mixture into the bowl with the dry ingredients. Stir everything together gently until just combined. If you’re using nuts or chocolate chips, fold them in at this stage. Be careful not to overmix; a few lumps are perfectly fine!

Step 5: Cook the Mixture

Now it’s time to bake! Preheat your oven to 350°F (175°C) and lightly grease a 9×9-inch baking dish. Pour the combined mixture into the prepared dish, spreading it evenly. Bake for 25-30 minutes, or until the top is golden brown and a toothpick inserted in the center comes out clean. The aroma of baking banana bread will fill your kitchen, making it hard to wait!

Step 6: Serve and Enjoy

Once your High-Protein Banana Bread Oatmeal is done baking, allow it to cool for a few minutes. Then, slice it into squares and serve warm or at room temperature. This dish is perfect for breakfast, a snack, or even dessert! Enjoy it on its own or with your favorite toppings. You’ve just created a delicious and healthy meal that everyone will love!

Variations of High-Protein Banana Bread Oatmeal

One of the best things about High-Protein Banana Bread Oatmeal is its versatility. You can easily modify the recipe to suit your dietary needs or personal preferences. Here are some exciting variations to consider!

Nut-Free Options

If you or someone in your family has a nut allergy, you can still enjoy this delicious dish. Simply omit the nuts from the recipe. Instead, consider adding seeds like sunflower or pumpkin seeds for a crunchy texture. These seeds are packed with nutrients and will still give you that satisfying bite without the risk of allergens. You can also increase the amount of chocolate chips for a sweeter treat!

Vegan Alternatives

For those following a vegan lifestyle, making High-Protein Banana Bread Oatmeal is easy! Replace the eggs with flaxseed meal or chia seeds. To do this, mix 1 tablespoon of flaxseed meal or chia seeds with 2.5 tablespoons of water for each egg. Let it sit for a few minutes until it thickens. Additionally, use plant-based milk, such as almond or oat milk, instead of dairy milk. This way, you can enjoy a delicious vegan version without sacrificing flavor!

Flavor Enhancements

Want to spice things up? There are many ways to enhance the flavor of your High-Protein Banana Bread Oatmeal. Consider adding a teaspoon of nutmeg or a tablespoon of chia seeds for extra nutrition. You can also mix in dried fruits like raisins or cranberries for a chewy texture. If you love chocolate, try using dark chocolate chips or cocoa powder for a rich, indulgent twist. The possibilities are endless, so feel free to get creative!

With these variations, you can customize your High-Protein Banana Bread Oatmeal to fit your taste and dietary needs. Enjoy experimenting with different ingredients to find your perfect combination!

Cooking Note for High-Protein Banana Bread Oatmeal

When preparing your High-Protein Banana Bread Oatmeal, there are a few cooking notes to keep in mind. These tips will help ensure that your dish turns out perfectly every time. Let’s explore some important points to consider!

First, make sure your bananas are ripe. The riper the bananas, the sweeter and more flavorful your oatmeal will be. Look for bananas with brown spots, as they are ideal for mashing. If you have frozen bananas, they can work too! Just thaw them and mash them well before adding to the mixture.

Next, pay attention to the baking time. Ovens can vary, so keep an eye on your oatmeal as it bakes. Start checking for doneness around the 25-minute mark. You want the top to be golden brown, and a toothpick inserted in the center should come out clean. If it’s still wet, give it a few more minutes in the oven.

Additionally, consider the texture you prefer. If you like a softer oatmeal, you can reduce the baking time slightly. For a firmer texture, bake it a bit longer. This flexibility allows you to customize the dish to your liking.

Lastly, let your High-Protein Banana Bread Oatmeal cool for a few minutes before slicing. This will help it set and make it easier to cut into squares. Enjoying it warm is delightful, but it also tastes great at room temperature, making it a perfect grab-and-go option!

By following these cooking notes, you’ll create a delicious and satisfying High-Protein Banana Bread Oatmeal that everyone will love. Happy baking!

Serving Suggestions for High-Protein Banana Bread Oatmeal

Now that you’ve baked your delicious High-Protein Banana Bread Oatmeal, it’s time to think about how to serve it! This dish is not only tasty on its own, but it also pairs wonderfully with various toppings and side dishes. Here are some serving suggestions to elevate your breakfast experience.

Toppings to Consider

Adding toppings can enhance the flavor and texture of your High-Protein Banana Bread Oatmeal. Here are some delightful options:

  • Fresh Fruits: Sliced strawberries, blueberries, or raspberries add a burst of freshness. They also provide extra vitamins and antioxidants.
  • Nut Butter: A dollop of almond or peanut butter can add creaminess and healthy fats. It’s a great way to boost the protein content even more!
  • Yogurt: A spoonful of Greek yogurt on top adds creaminess and a tangy flavor. It’s also a fantastic source of protein.
  • Maple Syrup or Honey: Drizzling a little extra maple syrup or honey can enhance the sweetness, making it even more indulgent.
  • Chia Seeds or Flaxseeds: Sprinkling these seeds on top adds a nutritious crunch and boosts the fiber content.

Feel free to mix and match these toppings to create your perfect bowl of High-Protein Banana Bread Oatmeal!

Pairing Ideas

To make your breakfast even more satisfying, consider pairing your High-Protein Banana Bread Oatmeal with other delicious items. Here are some ideas:

  • Smoothies: A refreshing fruit smoothie can complement your oatmeal perfectly. Try a banana and spinach smoothie for a nutritious boost!
  • Scrambled Eggs: For a savory option, serve your oatmeal alongside scrambled eggs. This adds extra protein and makes for a hearty meal.
  • Herbal Tea or Coffee: A warm cup of herbal tea or coffee can be a comforting addition to your breakfast spread.
  • Granola: A sprinkle of granola on top adds crunch and additional flavors, making your meal even more enjoyable.

These pairing ideas can help you create a well-rounded breakfast that keeps you full and satisfied. Enjoy your High-Protein Banana Bread Oatmeal with these delicious additions!

Tips for Perfecting High-Protein Banana Bread Oatmeal

To ensure your High-Protein Banana Bread Oatmeal turns out perfectly every time, consider these helpful tips. They will enhance the flavor, texture, and overall experience of this delightful dish.

First, always use ripe bananas. The riper the bananas, the sweeter and more flavorful your oatmeal will be. Look for bananas with brown spots, as they indicate peak ripeness. If you have overripe bananas, this is the perfect recipe to use them up!

Next, don’t skip the mixing step. When combining the dry and wet ingredients, mix until just combined. Overmixing can lead to a dense texture. A few lumps are okay! This will help keep your High-Protein Banana Bread Oatmeal light and fluffy.

Also, consider adding a pinch of salt. While the recipe includes salt, a little extra can enhance the flavors. Salt balances sweetness and brings out the natural flavors of the bananas and oats.

For an extra protein boost, try adding a scoop of protein powder. This is especially useful if you’re looking to increase your protein intake. Just be sure to adjust the liquid ingredients slightly to maintain the right consistency.

When baking, keep an eye on the time. Ovens can vary, so check your oatmeal a few minutes before the suggested baking time. You want it to be golden brown on top and firm in the center. A toothpick should come out clean when inserted.

Lastly, let your High-Protein Banana Bread Oatmeal cool for a few minutes before slicing. This helps it set and makes it easier to cut into squares. Enjoy it warm or at room temperature, and don’t forget to experiment with different toppings!

By following these tips, you’ll create a delicious and satisfying High-Protein Banana Bread Oatmeal that everyone will love. Happy baking!

Breakdown of Time for High-Protein Banana Bread Oatmeal

Understanding the time required for each step in making High-Protein Banana Bread Oatmeal can help you plan your cooking better. Here’s a simple breakdown of the time you’ll need for preparation and cooking.

Prep Time

The prep time for High-Protein Banana Bread Oatmeal is quite short. You can expect to spend about 10-15 minutes gathering your ingredients and preparing them. This includes mashing the bananas, mixing the dry ingredients, and combining everything together. If you have your ingredients ready, you might even finish in under 10 minutes!

Cooking Time

Once your mixture is ready, the cooking time is straightforward. Preheat your oven to 350°F (175°C) and bake the oatmeal for 25-30 minutes. Keep an eye on it as it bakes. You want the top to be golden brown and a toothpick inserted in the center to come out clean. This step is crucial for achieving the perfect texture!

Total Time

In total, you’ll need about 35-45 minutes to make High-Protein Banana Bread Oatmeal from start to finish. This includes both prep and cooking time. It’s a quick and easy recipe that fits perfectly into a busy morning routine. Plus, you’ll have a delicious and nutritious breakfast ready to enjoy!

Nutritional Information for High-Protein Banana Bread Oatmeal

Understanding the nutritional content of your meals is essential for maintaining a balanced diet. High-Protein Banana Bread Oatmeal not only tastes great but also offers a variety of nutrients that can benefit your health. Let’s break down the key nutritional components of this delicious dish.

Calories

Each serving of High-Protein Banana Bread Oatmeal contains approximately 210 calories. This makes it a satisfying yet light option for breakfast or a snack. The calorie count comes from wholesome ingredients like oats, bananas, and eggs, which provide energy to kickstart your day. With this moderate calorie content, you can enjoy a hearty meal without feeling overly full.

Protein Content

One of the standout features of High-Protein Banana Bread Oatmeal is its protein content. Each serving provides about 6 grams of protein. This protein comes from eggs and milk, which are excellent sources of high-quality protein. Protein is vital for muscle repair and growth, making this dish a great choice for active individuals or anyone looking to maintain a healthy lifestyle.

Sodium Levels

In terms of sodium, High-Protein Banana Bread Oatmeal contains approximately 200 milligrams per serving. This level is relatively low, especially considering the recommended daily intake for adults is around 2,300 milligrams. Keeping sodium levels in check is important for heart health, and this recipe allows you to enjoy a flavorful meal without excessive salt. You can further reduce sodium by using low-sodium milk or omitting added salt if desired.

In summary, High-Protein Banana Bread Oatmeal is not only delicious but also packed with essential nutrients. With a balanced mix of calories, protein, and low sodium, it’s a fantastic choice for anyone looking to enjoy a healthy breakfast or snack. Now that you know the nutritional benefits, let’s move on to some frequently asked questions about this delightful dish!

FAQs about High-Protein Banana Bread Oatmeal

Can I use frozen bananas for High-Protein Banana Bread Oatmeal?

Absolutely! Frozen bananas work wonderfully in High-Protein Banana Bread Oatmeal. Just make sure to thaw them first. Once thawed, mash them well before adding to your mixture. Frozen bananas can actually enhance the sweetness and moisture of your oatmeal, making it even more delicious. So, if you have some ripe bananas in your freezer, don’t hesitate to use them!

How can I make High-Protein Banana Bread Oatmeal gluten-free?

Making High-Protein Banana Bread Oatmeal gluten-free is simple! Just ensure you use certified gluten-free rolled oats. Many brands offer gluten-free oats that are processed in facilities free from gluten contamination. This way, you can enjoy your oatmeal without any worries. The rest of the ingredients in the recipe are naturally gluten-free, so you’re all set!

What are the best toppings for High-Protein Banana Bread Oatmeal?

The best toppings for High-Protein Banana Bread Oatmeal depend on your personal taste! Some popular options include:

  • Fresh fruits: Sliced strawberries, blueberries, or bananas add freshness.
  • Nut butter: Almond or peanut butter adds creaminess and healthy fats.
  • Yogurt: A dollop of Greek yogurt boosts protein and adds creaminess.
  • Maple syrup or honey: A drizzle can enhance sweetness.
  • Chia seeds or flaxseeds: These add crunch and extra nutrition.

Feel free to mix and match these toppings to create your perfect bowl!

How long can I store High-Protein Banana Bread Oatmeal?

You can store High-Protein Banana Bread Oatmeal in an airtight container in the refrigerator for up to 5 days. This makes it a great option for meal prep! Just reheat individual portions in the microwave or oven before serving. If you want to keep it longer, consider freezing it. Cut the oatmeal into squares, wrap them tightly, and freeze for up to 3 months. This way, you’ll have a quick and nutritious breakfast ready whenever you need it!

Conclusion on High-Protein Banana Bread Oatmeal

In conclusion, High-Protein Banana Bread Oatmeal is a fantastic addition to your breakfast repertoire. This delightful dish combines the comforting flavors of banana bread with the wholesome goodness of oatmeal, making it both delicious and nutritious. With its simple ingredients and easy preparation, it’s perfect for busy mornings or leisurely weekends.

Not only does this recipe provide a balanced meal rich in protein, fiber, and essential nutrients, but it also offers endless possibilities for customization. Whether you prefer it nut-free, vegan, or with added flavors, you can easily adapt it to suit your taste and dietary needs. Plus, it’s a great way to use up overripe bananas, reducing food waste while creating something delightful.

As you enjoy your High-Protein Banana Bread Oatmeal, remember the various serving suggestions and toppings that can elevate your experience. From fresh fruits to nut butters, the options are limitless. This dish is not just a meal; it’s a canvas for your creativity in the kitchen!

So, why not give High-Protein Banana Bread Oatmeal a try? With its delicious taste and numerous health benefits, it’s sure to become a favorite in your household. Happy cooking, and enjoy every bite of this nutritious treat!

Paul

High-Protein Banana Bread Oatmeal is a nutritious delight.

This High-Protein Banana Bread Baked Oatmeal is a hearty, wholesome breakfast that tastes like dessert but fuels you like a champ. Packed with protein, fiber, and healthy fats, it’s the perfect make-ahead meal for busy mornings or post-workout recovery.
Prep Time 10 minutes
Cook Time 30 minutes
Total Time 40 minutes
Servings: 8 servings
Course: Breakfast, Meal Prep
Cuisine: American

Ingredients
  

Dry Ingredients:
  • 2 cups rolled oats not quick oats
  • 1/3 cup unflavored or vanilla protein powder
  • 2 teaspoons ground cinnamon
Wet Ingredients:
  • 2 medium ripe bananas
  • 2 large eggs
  • 1 cup milk dairy or soy preferred for extra protein
  • 1/4 cup maple syrup
  • 2 teaspoons vanilla extract
Add-Ins:
  • 1/3 cup hemp seeds
  • 1/3 cup chocolate chips plus more for topping, optional

Method
 

  1. Preheat the Oven:Set your oven to 350°F (175°C) and line a 9×13-inch baking dish with parchment paper.
  2. Mix the Dry Ingredients:In a large mixing bowl, combine the rolled oats, protein powder, and cinnamon. Stir well.
  3. Combine the Wet Ingredients:In another bowl, mash the bananas. Add in the eggs, milk, maple syrup, and vanilla extract. Whisk until smooth.
  4. Bring It All Together:Pour the wet ingredients into the dry and mix until fully combined.
  5. Fold in Add-Ins:Gently stir in the hemp seeds and chocolate chips.
  6. Bake:Pour the mixture into the prepared baking dish and spread it out evenly. Top with additional chocolate chips or banana slices if desired.
  7. Bake to Perfection:Bake for 30 minutes, or until the top is golden brown and a toothpick inserted into the center comes out clean.
  8. Cool and Serve:Allow the baked oatmeal to cool for at least 20 minutes before slicing. Serve warm or store for later.
  9. Serving Suggestions:Serve with a drizzle of maple syrup, splash of milk, or a dollop of yogurt or nut butter for extra indulgence.

Notes

  • Use vanilla protein powder if you prefer a sweeter base without extra syrup.
  • This baked oatmeal stores well in the fridge for up to 5 days—perfect for meal prep.
  • Swap chocolate chips with chopped nuts or dried fruit for a different twist.
  • Freezes well in slices—wrap individually and thaw as needed for quick breakfasts.

Lobster Linguine is a must-try gourmet dish today!

What Makes Lobster Linguine Special?

Lobster linguine is not just a meal; it’s an experience. This dish combines the rich, sweet flavor of lobster with the delicate texture of linguine pasta. The creamy sauce, infused with garlic and fresh tomatoes, elevates the dish to a gourmet level. Each bite is a delightful blend of flavors that dance on your palate. Plus, it’s perfect for special occasions or a cozy dinner at home. The vibrant colors and enticing aroma make it a feast for the senses, ensuring that it stands out on any dinner table.

A Brief History of Lobster Linguine

The origins of lobster linguine can be traced back to the coastal regions of Italy, where seafood is a staple in many traditional dishes. Linguine, a flat pasta, pairs beautifully with various sauces, making it a popular choice for seafood recipes. Lobster, once considered a food for the poor, has transformed into a luxurious ingredient over the years. As culinary trends evolved, chefs began to combine these two elements, creating the beloved lobster linguine we enjoy today. This dish reflects the rich maritime culture of Italy, showcasing the bounty of the sea in a simple yet elegant way.

Ingredients for Lobster Linguine Recipe

Essential Ingredients

To create a delicious lobster linguine, you need a few key ingredients. These essentials will ensure your dish is flavorful and satisfying. Here’s what you’ll need:

  • 8 ounces linguine pasta: This is the base of your dish. Linguine’s flat shape holds the sauce well.
  • 2 tablespoons olive oil: Olive oil adds richness and helps sauté the garlic.
  • 2 cloves garlic, minced: Garlic brings a wonderful aroma and flavor to the dish.
  • 1 cup cherry tomatoes, halved: These sweet tomatoes add freshness and color.
  • 1 cup cooked lobster meat, chopped: The star of the dish! Fresh or frozen lobster works well.
  • 1/2 cup heavy cream: This creates a creamy sauce that binds all the flavors together.
  • 1/2 cup grated Parmesan cheese: Parmesan adds a savory depth to the sauce.
  • Salt and pepper to taste: Essential for seasoning your dish perfectly.
  • Fresh basil leaves for garnish: Basil adds a pop of color and a fresh taste.

Optional Ingredients for Extra Flavor

While the essential ingredients create a fantastic lobster linguine, you can enhance the dish with a few optional ingredients. These additions can elevate the flavors even more:

  • 1/2 teaspoon red pepper flakes: If you enjoy a bit of heat, add these to the garlic while sautéing.
  • A splash of white wine: Adding wine after the garlic can deepen the flavor profile.
  • Low-fat milk or non-dairy alternatives: For a lighter version, substitute half of the heavy cream.
  • Fresh lemon juice: A squeeze of lemon can brighten the dish and enhance the seafood flavor.

With these ingredients, you’re well on your way to making a delightful lobster linguine that will impress your family and friends!

Step-by-Step Preparation of Lobster Linguine Recipe

Step 1: Preparing the Lobster

Before diving into the cooking process, it’s essential to prepare the lobster. If you’re using fresh lobster, start by boiling it in salted water for about 8-10 minutes. Once cooked, let it cool before removing the meat from the shell. Chop the lobster into bite-sized pieces. If you’re using pre-cooked lobster, simply chop it into pieces and set it aside. This step ensures that your lobster is ready to shine in the dish!

Step 2: Cooking the Linguine

Next, it’s time to cook the linguine. Bring a large pot of salted water to a rolling boil. Add the linguine and cook according to the package instructions until it’s al dente. This usually takes about 8-10 minutes. Remember to stir occasionally to prevent sticking. Once cooked, reserve 1/2 cup of the pasta water, then drain the linguine and set it aside. This water will help adjust the sauce later if needed.

Step 3: Making the Sauce

Now, let’s create the delicious sauce! In a large skillet, heat 2 tablespoons of olive oil over medium heat. Add the minced garlic and, if you like a bit of spice, the red pepper flakes. Sauté for about 1 minute until the garlic is fragrant but not browned. Next, toss in the halved cherry tomatoes and cook for 3-4 minutes until they soften. This step adds a burst of flavor and color to your sauce.

Step 4: Combining Ingredients

Once the tomatoes are ready, it’s time to add the star of the dish: the lobster! Stir in the chopped lobster meat and cook for an additional 2 minutes. This allows the lobster to absorb the flavors of the garlic and tomatoes. Then, pour in the heavy cream and bring the mixture to a gentle simmer. Stir in the grated Parmesan cheese until the sauce is smooth. If the sauce seems too thick, add a bit of the reserved pasta water to reach your desired consistency.

Step 5: Final Touches

Finally, it’s time to bring everything together! Season the sauce with salt and pepper to taste. Add the cooked linguine to the skillet and toss gently to coat the pasta evenly with the creamy sauce. Make sure every strand of linguine is covered in that delicious mixture. Serve immediately, garnished with fresh basil leaves for a pop of color and flavor. Enjoy your homemade lobster linguine!

Variations of Lobster Linguine Recipe

Spicy Lobster Linguine

If you love a kick of heat, try making a spicy lobster linguine. Simply add more red pepper flakes or even a dash of hot sauce to the sauce. This variation will give your dish an exciting twist, making it perfect for those who enjoy bold flavors. The heat from the spices complements the sweetness of the lobster beautifully, creating a delightful contrast.

Creamy Lobster Linguine

For a richer experience, you can enhance the creaminess of your lobster linguine. Consider using a combination of heavy cream and mascarpone cheese. This will create an ultra-creamy sauce that clings to the pasta. You can also add a touch of garlic powder for an extra flavor boost. This variation is perfect for special occasions when you want to impress your guests with a luxurious dish.

Vegetarian Alternatives

If you’re looking for a vegetarian option, you can easily adapt the lobster linguine recipe. Instead of lobster, use sautéed mushrooms or grilled zucchini for a hearty texture. You can also add spinach or kale for a pop of color and nutrition. The creamy sauce will still shine through, making this a satisfying dish for everyone at the table.

Cooking Note for Lobster Linguine Recipe

Tips for Cooking Lobster Perfectly

Cooking lobster can seem intimidating, but it’s quite simple! If using live lobster, ensure it’s fresh and lively before cooking. Boil it in salted water for the best flavor. For frozen lobster, thaw it overnight in the fridge before cooking. This helps maintain its texture. Always check for doneness; the meat should be opaque and firm. Following these tips will ensure your lobster is perfectly cooked and ready to shine in your linguine!

Common Mistakes to Avoid

When making lobster linguine, there are a few common mistakes to watch out for. First, avoid overcooking the lobster, as it can become tough. Second, don’t skip reserving pasta water; it’s essential for adjusting the sauce’s consistency. Lastly, be careful not to rush the sauce-making process. Allowing the flavors to meld is key to a delicious dish. By avoiding these pitfalls, you’ll create a lobster linguine that’s sure to impress!

Serving Suggestions for Lobster Linguine Recipe

Ideal Pairings with Lobster Linguine

When serving lobster linguine, consider pairing it with a crisp white wine, such as Sauvignon Blanc or Chardonnay. These wines complement the richness of the dish beautifully. For a non-alcoholic option, a sparkling water with a slice of lemon can refresh the palate. Additionally, a light salad with a vinaigrette can balance the meal, making it a complete dining experience.

Presentation Tips

Presentation is key when serving lobster linguine. Use a large, shallow bowl to showcase the pasta. Twirl the linguine into a nest shape for an elegant look. Garnish with fresh basil leaves and a sprinkle of extra Parmesan cheese for a pop of color. A lemon wedge on the side adds a touch of brightness. These simple tips will elevate your dish, making it visually appealing and inviting!

Variations of Lobster Linguine Recipe

Spicy Lobster Linguine

If you love a kick of heat, try making a spicy lobster linguine. Simply add more red pepper flakes or even a dash of hot sauce to the sauce. This variation will give your dish an exciting twist, making it perfect for those who enjoy bold flavors. The heat from the spices complements the sweetness of the lobster beautifully, creating a delightful contrast. You can also consider adding sliced jalapeños for an extra layer of spice. Just remember to adjust the amount to suit your taste!

Creamy Lobster Linguine

For a richer experience, you can enhance the creaminess of your lobster linguine. Consider using a combination of heavy cream and mascarpone cheese. This will create an ultra-creamy sauce that clings to the pasta. You can also add a touch of garlic powder for an extra flavor boost. This variation is perfect for special occasions when you want to impress your guests with a luxurious dish. Additionally, a sprinkle of nutmeg can add a warm, aromatic note to the sauce, making it even more indulgent.

Vegetarian Alternatives

If you’re looking for a vegetarian option, you can easily adapt the lobster linguine recipe. Instead of lobster, use sautéed mushrooms or grilled zucchini for a hearty texture. You can also add spinach or kale for a pop of color and nutrition. The creamy sauce will still shine through, making this a satisfying dish for everyone at the table. For a seafood-like flavor, consider adding seaweed or a splash of vegan fish sauce. This way, you can enjoy a delicious meal that caters to different dietary preferences!

Cooking Note for Lobster Linguine Recipe

Tips for Cooking Lobster Perfectly

Cooking lobster can seem a bit daunting, but with the right tips, you can master it! First, always choose fresh lobster. If you’re using live lobster, it should be lively and active. Boil it in salted water for the best flavor. A good rule of thumb is to cook it for about 8-10 minutes per pound. If you’re using frozen lobster, make sure to thaw it overnight in the fridge. This helps maintain its texture and flavor. When cooked, the meat should be opaque and firm. Following these tips will ensure your lobster is perfectly cooked and ready to shine in your linguine!

Common Mistakes to Avoid

When making lobster linguine, there are a few common mistakes to watch out for. First, avoid overcooking the lobster, as it can become tough and rubbery. Second, don’t skip reserving pasta water; it’s essential for adjusting the sauce’s consistency. This starchy water helps the sauce cling to the pasta better. Lastly, be careful not to rush the sauce-making process. Allowing the flavors to meld is key to a delicious dish. By avoiding these pitfalls, you’ll create a lobster linguine that’s sure to impress your family and friends!

Serving Suggestions for Lobster Linguine Recipe

Ideal Pairings with Lobster Linguine

When it comes to serving lobster linguine, the right pairings can enhance your dining experience. A crisp white wine, such as Sauvignon Blanc or Chardonnay, complements the richness of the dish beautifully. These wines have a refreshing acidity that balances the creamy sauce. If you prefer a non-alcoholic option, consider serving sparkling water with a slice of lemon. This adds a refreshing touch that cleanses the palate between bites.

Additionally, a light salad can be a perfect accompaniment. A simple mixed greens salad with a vinaigrette dressing provides a nice contrast to the richness of the lobster linguine. You might also consider adding a side of garlic bread. The crunchy texture and buttery flavor of garlic bread make it a delightful addition to your meal. These pairings will create a well-rounded dining experience that everyone will enjoy!

Presentation Tips

Presentation is key when serving lobster linguine. To make your dish visually appealing, use a large, shallow bowl. This allows the pasta to spread out, showcasing its beautiful colors. Twirl the linguine into a nest shape for an elegant look. Garnish with fresh basil leaves for a pop of color and a sprinkle of extra Parmesan cheese to add a touch of sophistication.

For an extra touch, consider adding a lemon wedge on the side. This not only enhances the presentation but also allows guests to add a squeeze of lemon for brightness. You can also drizzle a bit of olive oil over the top for a glossy finish. These simple presentation tips will elevate your lobster linguine, making it a feast for the eyes as well as the palate!

Tips for Perfecting Your Lobster Linguine Recipe

Ingredient Substitutions

When making lobster linguine, you might find yourself in need of ingredient substitutions. Don’t worry! There are plenty of options to keep your dish delicious. For instance, if you can’t find linguine, spaghetti or fettuccine works just as well. Both types of pasta will hold the sauce nicely.

If you’re looking for a lighter option, consider using half-and-half instead of heavy cream. This will reduce the richness while still providing a creamy texture. For those who prefer a dairy-free version, coconut milk or cashew cream can be excellent alternatives. They add a unique flavor while keeping the dish creamy.

When it comes to lobster, if fresh isn’t available, frozen lobster meat is a great substitute. Just ensure it’s thawed properly before cooking. If you want to skip the seafood altogether, try using sautéed mushrooms or artichoke hearts for a vegetarian twist. These ingredients will still provide a satisfying texture and flavor.

Storage and Reheating Tips

After enjoying your lobster linguine, you may have leftovers. Proper storage is key to keeping your dish fresh. Allow the pasta to cool completely before transferring it to an airtight container. Store it in the refrigerator for up to 2 days. If you want to keep it longer, consider freezing it. However, be aware that the texture may change slightly upon reheating.

When reheating, it’s best to do so gently. You can use a microwave, but be sure to cover the dish to prevent it from drying out. Alternatively, reheat it in a skillet over low heat. Add a splash of reserved pasta water or a bit of cream to help revive the sauce. Stir frequently until heated through. This will ensure your lobster linguine remains creamy and delicious, just like when it was freshly made!

Breakdown of Time for Lobster Linguine Recipe

Prep Time

Preparing your lobster linguine is a breeze! The prep time typically takes about 15-20 minutes. This includes gathering your ingredients, chopping the lobster, and mincing the garlic. If you’re using fresh lobster, you may need a bit more time to cook and cool it before chopping. However, if you have pre-cooked lobster, you can save some time here. Overall, with a little organization, you’ll be ready to start cooking in no time!

Cooking Time

The cooking time for lobster linguine is around 20-25 minutes. This includes boiling the linguine, sautéing the garlic and tomatoes, and making the creamy sauce. The key is to keep an eye on the pasta to ensure it reaches that perfect al dente texture. Once everything is combined, you’ll have a delicious meal ready to serve in just a short while!

Total Time

In total, you can expect to spend about 35-45 minutes from start to finish. This includes both prep and cooking time. It’s a quick yet impressive dish that’s perfect for a weeknight dinner or a special occasion. With this time breakdown, you can easily plan your cooking session and enjoy a delightful lobster linguine without feeling rushed!

Nutritional Information for Lobster Linguine Recipe

Calories and Macronutrients

Understanding the nutritional content of your lobster linguine is essential for maintaining a balanced diet. Each serving of this delightful dish contains approximately 550 calories. Here’s a breakdown of the macronutrients:

  • Net Carbs: 45g
  • Protein: 30g
  • Fat: 30g

This combination of macronutrients makes lobster linguine a satisfying meal. The protein from the lobster and cheese helps build and repair tissues, while the carbohydrates from the linguine provide energy. The healthy fats from olive oil and cream contribute to satiety, keeping you full longer. Enjoying this dish in moderation can fit well into a balanced diet!

Health Benefits of Lobster

Lobster is not only a delicious seafood option but also offers several health benefits. Here are some reasons to love this crustacean:

  • Rich in Protein: Lobster is an excellent source of high-quality protein, which is essential for muscle growth and repair.
  • Low in Calories: Compared to other meats, lobster is relatively low in calories, making it a great choice for those watching their weight.
  • Omega-3 Fatty Acids: Lobster contains omega-3 fatty acids, which are beneficial for heart health and can help reduce inflammation.
  • Vitamins and Minerals: Lobster is packed with essential vitamins and minerals, including vitamin B12, zinc, and selenium, which support various bodily functions.

Incorporating lobster into your diet can provide these health benefits while also treating your taste buds to a delightful meal. So, enjoy your lobster linguine knowing that it’s not just delicious but also nutritious!

FAQs about Lobster Linguine Recipe

Can I use frozen lobster for this recipe?

Absolutely! Frozen lobster is a great option for making lobster linguine. Just make sure to thaw it properly before using. You can do this by placing it in the refrigerator overnight. This helps maintain its texture and flavor. Once thawed, chop the lobster into bite-sized pieces and follow the recipe as usual. Using frozen lobster can save you time and still deliver a delicious dish!

What type of linguine is best for lobster linguine?

When it comes to choosing linguine for your lobster dish, traditional wheat-based linguine is the best choice. Its flat shape allows the creamy sauce to cling beautifully, enhancing each bite. However, if you have dietary restrictions, you can opt for gluten-free linguine made from rice or corn. These alternatives will still provide a satisfying texture and work well with the sauce. Ultimately, the best type of linguine is the one that suits your taste and dietary needs!

How can I make lobster linguine ahead of time?

Making lobster linguine ahead of time is possible, but there are a few tips to keep in mind. You can prepare the sauce and cook the linguine separately. Store them in airtight containers in the refrigerator. When you’re ready to serve, simply reheat the sauce in a skillet over low heat. Add the cooked linguine and toss to combine. If the sauce has thickened, add a splash of reserved pasta water to loosen it up. This way, you can enjoy a delicious meal without the last-minute rush!

What wine pairs well with lobster linguine?

Pairing wine with lobster linguine can elevate your dining experience. A crisp white wine, such as Sauvignon Blanc or Chardonnay, complements the richness of the dish beautifully. These wines have a refreshing acidity that balances the creamy sauce. If you prefer something sparkling, a nice Prosecco can also work well. For a non-alcoholic option, consider serving sparkling water with a slice of lemon. This adds a refreshing touch that cleanses the palate between bites!

Conclusion on Lobster Linguine Recipe

Recap of Key Points

In summary, lobster linguine is a delightful dish that combines the sweet, tender meat of lobster with the comforting texture of linguine pasta. The creamy sauce, enriched with garlic and fresh tomatoes, creates a symphony of flavors that is sure to impress. We explored the essential ingredients needed to make this dish, along with optional additions that can enhance its taste. The step-by-step preparation guide ensures that even novice cooks can create a restaurant-quality meal at home.

We also discussed various variations, such as spicy and creamy lobster linguine, catering to different taste preferences. Additionally, we provided tips for cooking lobster perfectly and avoiding common mistakes. Serving suggestions and presentation tips were shared to help you create a memorable dining experience. Finally, we highlighted the nutritional benefits of lobster, making this dish not only delicious but also a healthy choice.

Encouragement to Try the Recipe

Now that you have all the tools and knowledge to make lobster linguine, it’s time to roll up your sleeves and give it a try! Whether you’re cooking for a special occasion or simply want to treat yourself, this recipe is sure to impress. Don’t hesitate to experiment with the variations and make it your own. Remember, cooking is all about creativity and enjoyment. So gather your ingredients, invite some friends or family, and enjoy the process of making this exquisite dish. Happy cooking!

Paul

Lobster Linguine is a must-try gourmet dish today!

Indulge in a luxurious yet surprisingly simple seafood dish with this Elegant Lobster Pasta Delight. Tender pasta is tossed with buttery lobster, garlic, white wine, and herbs for a decadent dinner that brings the taste of the sea right to your table.
Prep Time 10 minutes
Cook Time 15 minutes
Total Time 25 minutes
Servings: 2 servings
Course: Main Course
Cuisine: Italian-inspired, Seafood

Ingredients
  

  • 8 oz pasta preferably 100% durum wheat semolina, such as Di Martino
  • 6 oz cooked lobster meat chopped into bite-sized pieces
  • 2 oz butter
  • 2 tablespoons extra virgin olive oil
  • 1 to 2 cloves garlic minced
  • 1 tablespoon chopped Italian parsley fresh or frozen
  • 2 tablespoons dry white wine or use reserved pasta water as a substitute
  • 1 teaspoon sea salt
  • Optional: freshly ground black pepper a squeeze of fresh lemon juice

Method
 

  1. Cook the Pasta:Bring a large pot of salted water to a boil. Cook pasta according to package directions until al dente. Reserve a bit of the pasta water before draining.
  2. Prepare the Lobster Sauce:In a large skillet or cast iron pan, melt the butter with olive oil over medium heat.Add the minced garlic and sauté briefly until fragrant.Stir in the chopped parsley and cook for about one minute.
  3. Add the Lobster:Raise the heat to medium-high. Add the cooked lobster meat and stir gently to combine.Pour in the white wine (or a splash of pasta water) and let it warm through for about one minute.Turn off the heat.
  4. Toss with Pasta:Add the drained pasta to the skillet with the lobster mixture. Toss gently to coat, adding a bit of reserved pasta water if the sauce seems too thick.
  5. Final Touches and Serve:Reheat briefly over low heat if needed—do not overcook.Finish with a sprinkle of black pepper, more parsley, and a squeeze of lemon juice if desired.Serve immediately.

Notes

  • For the best flavor, use high-quality pasta and fresh lobster if available.
  • If you prefer a more saucy finish, double the butter and olive oil or reserve extra pasta water.
  • This dish pairs beautifully with a crisp white wine like Pinot Grigio or Chardonnay.
  • Don’t skip the lemon juice—it adds brightness that complements the richness of the lobster.

Sausage Potato Casserole is a comforting family favorite.

Welcome to the delightful world of Sausage Potato Casserole! This dish is a comforting blend of flavors that warms the heart and satisfies the appetite. Imagine tender potatoes mingling with savory sausage, all enveloped in a creamy sauce. It’s a meal that brings family and friends together, perfect for any occasion.

Whether you’re hosting a cozy dinner or looking for a quick weeknight meal, this casserole is a fantastic choice. It’s not only easy to prepare but also versatile. You can customize it with your favorite ingredients, making it a go-to recipe for many. Plus, it’s a one-pot wonder, which means less cleanup for you!

In this article, we’ll guide you through the ingredients, preparation steps, and variations of this delicious dish. You’ll learn how to create a Sausage Potato Casserole that’s not only tasty but also nutritious. So, roll up your sleeves and get ready to impress your loved ones with this hearty meal!

Ingredients for Sausage Potato Casserole

To create a mouthwatering Sausage Potato Casserole, you’ll need a selection of fresh and flavorful ingredients. Each component plays a vital role in building the rich taste and creamy texture of this dish. Here’s what you’ll need:

  • 2 tablespoons olive oil: This will help sauté the sausage and vegetables, adding a lovely flavor.
  • 1 pound smoked sausage, sliced: Choose your favorite type, such as kielbasa or andouille, for a smoky taste.
  • 1 medium onion, diced: Onions add sweetness and depth to the casserole.
  • 2 cloves garlic, minced: Garlic brings a wonderful aroma and enhances the overall flavor.
  • 4 cups potatoes, diced: About 4 medium potatoes will provide the hearty base for the dish.
  • 1 cup chicken broth: This adds moisture and richness to the casserole.
  • 1 cup shredded cheddar cheese: Cheese gives a creamy texture and a delicious topping.
  • 1 teaspoon dried thyme: Thyme adds an earthy flavor that complements the sausage.
  • 1 teaspoon paprika: This spice adds a hint of warmth and color.
  • Salt and pepper to taste: Essential for seasoning and enhancing all the flavors.
  • 1 cup heavy cream: This makes the casserole rich and creamy.
  • 2 cups fresh spinach (optional): Spinach adds a pop of color and extra nutrition.

Gather these ingredients, and you’re ready to embark on your cooking adventure! Each item contributes to the delightful experience of enjoying a warm, comforting Sausage Potato Casserole. Let’s move on to the preparation steps to bring this dish to life!

Preparation of Sausage Potato Casserole

Now that you have all your ingredients ready, it’s time to dive into the preparation of your Sausage Potato Casserole. This process is straightforward and enjoyable. Follow these steps to create a delicious meal that everyone will love!

Step 1: Prepping the Ingredients

Start by washing and peeling the potatoes. Then, dice them into small, even pieces. This ensures they cook evenly. Next, dice the onion and mince the garlic. Having everything prepped and ready will make the cooking process smooth and efficient. Remember, the key to a great casserole is in the preparation!

Step 2: Cooking the Sausage

In a large skillet, heat the olive oil over medium heat. Once the oil is hot, add the sliced smoked sausage. Cook it for about 5-7 minutes, or until it’s nicely browned. This step adds a wonderful flavor to your casserole. After browning, remove the sausage from the skillet and set it aside. You’ll add it back later, so don’t worry!

Step 3: Assembling the Casserole

Using the same skillet, add the diced onion and minced garlic. Sauté them for about 3-4 minutes until the onion becomes translucent. This step enhances the flavors of your casserole. Now, grab your slow cooker. Combine the diced potatoes, cooked sausage, sautéed onion, and garlic. Pour in the chicken broth, and sprinkle in the dried thyme, paprika, salt, and pepper. Stir everything together until well mixed.

Step 4: Baking the Sausage Potato Casserole

Cover the slow cooker and set it to cook on low for 6-7 hours or on high for 3-4 hours. The goal is to have the potatoes tender and the flavors melded together. About 30 minutes before serving, stir in the heavy cream and fresh spinach, if you’re using it. Top the casserole with shredded cheddar cheese, cover, and let it cook until the cheese is melted and bubbly. Your Sausage Potato Casserole is almost ready to be enjoyed!

Variation of Sausage Potato Casserole

One of the best things about Sausage Potato Casserole is its versatility. You can easily switch up ingredients or cooking methods to suit your taste or dietary needs. Let’s explore some alternative ingredients and different cooking methods that can elevate your casserole experience!

Alternative Ingredients for Sausage Potato Casserole

While the classic recipe is delicious, you might want to try some variations. Here are a few alternative ingredients to consider:

  • Turkey or Chicken Sausage: For a lighter option, swap out the smoked sausage for turkey or chicken sausage. This change reduces fat while still providing great flavor.
  • Sweet Potatoes: Instead of regular potatoes, use sweet potatoes for a hint of sweetness and added nutrients. They pair wonderfully with the savory sausage.
  • Mixed Vegetables: Add bell peppers, carrots, or zucchini for extra color and nutrition. These veggies will enhance the flavor and texture of your casserole.
  • Different Cheeses: Experiment with different types of cheese, like mozzarella or pepper jack, for a unique twist. Each cheese brings its own flavor profile to the dish.
  • Herbs and Spices: Feel free to mix in other herbs like rosemary or oregano. You can also add a pinch of red pepper flakes for a spicy kick!

These alternative ingredients can make your Sausage Potato Casserole even more exciting and tailored to your preferences. Don’t hesitate to get creative!

Different Cooking Methods for Sausage Potato Casserole

Besides using a slow cooker, there are other cooking methods you can try for your Sausage Potato Casserole. Here are a few options:

  • Oven-Baked: Preheat your oven to 350°F (175°C). After assembling the casserole in a baking dish, cover it with foil and bake for about 1 hour. Remove the foil, add cheese, and bake for an additional 15-20 minutes until bubbly and golden.
  • Instant Pot: For a quicker option, use an Instant Pot. Sauté the sausage, onion, and garlic using the sauté function. Then, add the potatoes, broth, and seasonings. Seal the lid and cook on high pressure for 10 minutes. Quick-release the pressure, stir in cream and cheese, and let it sit for a few minutes before serving.
  • Stovetop: If you prefer a quicker method, you can make a stovetop version. Sauté the sausage, onion, and garlic in a large pot. Add the diced potatoes and broth, cover, and simmer until the potatoes are tender. Stir in cream and cheese before serving.

These different cooking methods can save you time or simply offer a new way to enjoy your Sausage Potato Casserole. Choose the one that fits your schedule and enjoy a delicious meal!

Cooking Note for Sausage Potato Casserole

When preparing your Sausage Potato Casserole, there are a few important cooking notes to keep in mind. These tips will help ensure that your dish turns out perfectly every time, making it a delightful experience for you and your guests.

First, always choose high-quality ingredients. Fresh vegetables and good-quality sausage can significantly enhance the flavor of your casserole. If possible, opt for organic potatoes and fresh herbs. This small change can make a big difference in taste.

Next, consider the size of your potato pieces. Dicing them into uniform sizes helps them cook evenly. If some pieces are larger than others, they may not become tender at the same time, leading to an inconsistent texture in your casserole.

Another tip is to adjust the seasoning to your taste. Everyone has different preferences, so feel free to add more salt, pepper, or spices as you see fit. Tasting the mixture before cooking can help you find the perfect balance of flavors.

Additionally, if you’re using a slow cooker, avoid lifting the lid too often. Each time you open it, heat escapes, which can extend the cooking time. Trust the process and let it cook undisturbed for the best results.

Lastly, don’t forget to let your casserole rest for a few minutes after cooking. This allows the flavors to meld together and makes serving easier. Enjoy your delicious Sausage Potato Casserole with family and friends!

Serving Suggestions for Sausage Potato Casserole

Once your Sausage Potato Casserole is ready, it’s time to think about how to serve it. This dish is not only hearty but also visually appealing, making it a great centerpiece for any meal. Here are some delightful serving suggestions to enhance your dining experience:

  • Garnish with Fresh Herbs: A sprinkle of fresh parsley or chives on top adds a pop of color and freshness. It also enhances the flavor, making each bite even more enjoyable.
  • Pair with a Side Salad: A light, crisp salad complements the richness of the casserole. Consider a simple green salad with a vinaigrette dressing to balance the flavors.
  • Serve with Crusty Bread: A slice of warm, crusty bread is perfect for soaking up the creamy sauce. It adds a nice texture and makes the meal feel complete.
  • Offer a Variety of Condiments: Set out condiments like hot sauce or mustard for those who enjoy a little extra kick. This allows guests to customize their plates to their liking.
  • Include Seasonal Vegetables: Roasted or steamed seasonal vegetables can be a great addition to the meal. They provide a colorful contrast and boost the nutritional value of your dinner.

These serving suggestions can elevate your Sausage Potato Casserole experience. Whether it’s a family dinner or a gathering with friends, these ideas will help create a memorable meal. Enjoy every bite of your delicious creation!

Tips for Perfecting Your Sausage Potato Casserole

Creating the perfect Sausage Potato Casserole is all about attention to detail and a few helpful tips. With these suggestions, you can elevate your dish and impress your family and friends. Let’s dive into some essential tips that will help you achieve a delicious and satisfying casserole!

  • Choose the Right Sausage: The type of sausage you use can greatly affect the flavor of your casserole. Opt for smoked sausage for a rich, deep flavor. If you prefer a milder taste, chicken or turkey sausage works well too. Experiment with different varieties to find your favorite!
  • Don’t Skip the Browning: Browning the sausage before adding it to the casserole is crucial. This step enhances the flavor and adds a nice texture. Make sure to get a good sear on the sausage for the best results.
  • Layer Your Ingredients: When assembling your casserole, layer the ingredients instead of mixing them all together. This allows the flavors to meld beautifully as they cook. Start with potatoes, then add sausage, followed by onions and garlic, and finish with the broth and seasonings.
  • Adjust Cooking Time: Keep an eye on the cooking time, especially if you’re using different types of potatoes. Some varieties cook faster than others. Test the potatoes for tenderness before serving to ensure they’re perfectly cooked.
  • Let It Rest: After cooking, let your casserole sit for about 10 minutes before serving. This resting time allows the flavors to settle and makes it easier to serve. Plus, it helps the casserole hold its shape!
  • Experiment with Toppings: While cheddar cheese is a classic topping, don’t hesitate to get creative! Try adding breadcrumbs for a crunchy texture or a sprinkle of parmesan for an extra cheesy flavor. You can even mix in some herbs for a fresh touch.
  • Store Leftovers Properly: If you have leftovers, store them in an airtight container in the refrigerator. They can last for up to 3-4 days. Reheat in the oven or microwave, adding a splash of cream to keep it creamy and delicious.

By following these tips, you’ll be well on your way to perfecting your Sausage Potato Casserole. Each suggestion helps enhance the flavors and textures, making your dish a hit at any gathering. Enjoy the process and savor the delightful results!

Breakdown of Time for Sausage Potato Casserole

Understanding the time required for each step in making your Sausage Potato Casserole can help you plan your cooking better. Here’s a simple breakdown of the time you’ll need for preparation and cooking. This way, you can enjoy the process without feeling rushed!

Prep Time

The prep time for your Sausage Potato Casserole is approximately 20-30 minutes. This includes washing, peeling, and dicing the potatoes, as well as chopping the onion and mincing the garlic. Taking your time during this step ensures that all ingredients are ready for cooking, leading to a smoother cooking experience.

Cooking Time

Once everything is prepped, the cooking time varies depending on the method you choose. If you’re using a slow cooker, it will take about 6-7 hours on low or 3-4 hours on high. If you opt for the oven-baked method, expect around 1 hour for the casserole to cook through. The Instant Pot method is the quickest, taking only about 10 minutes under high pressure, plus some time for sautéing.

Total Time

In total, you can expect to spend about 1 hour and 30 minutes to 2 hours from start to finish, depending on your cooking method. This includes both prep and cooking time. With a little planning, you can have a delicious Sausage Potato Casserole ready to serve in no time!

Nutritional Information for Sausage Potato Casserole

Understanding the nutritional content of your Sausage Potato Casserole is essential for making informed choices about your meals. This dish is not only delicious but also provides a good balance of nutrients. Here’s a breakdown of the key nutritional information per serving:

Calories

400 calories. This makes it a hearty meal that can keep you satisfied without being overly heavy. The combination of sausage, potatoes, and cream contributes to the calorie count, providing energy for your day.

Protein

20 grams of protein per serving. The smoked sausage is a significant source of protein, which is essential for muscle repair and overall health. Including protein in your meals helps keep you feeling full longer, making this casserole a great option for lunch or dinner.

Sodium

800 milligrams. This amount can vary based on the type of sausage and chicken broth you use. If you’re watching your sodium intake, consider using low-sodium broth and sausage options. Balancing your meals with fresh vegetables can also help offset the sodium levels.

Overall, the Sausage Potato Casserole is a nutritious option that offers a good mix of calories, protein, and flavor. Enjoying it as part of a balanced diet can make for a satisfying and wholesome meal!

FAQs about Sausage Potato Casserole

Can I make Sausage Potato Casserole ahead of time?

Absolutely! Making your Sausage Potato Casserole ahead of time is a great idea. You can prepare it a day in advance and store it in the refrigerator. Just assemble the casserole without adding the cream and cheese. When you’re ready to cook, add those ingredients and bake as directed. This method allows the flavors to meld beautifully, making it even tastier!

What type of sausage is best for Sausage Potato Casserole?

The best type of sausage for your Sausage Potato Casserole depends on your taste preferences. Smoked sausage, like kielbasa or andouille, adds a rich, smoky flavor. If you prefer a lighter option, turkey or chicken sausage works well too. Feel free to experiment with different varieties to find the one that suits your palate best!

Can I use frozen potatoes in Sausage Potato Casserole?

Yes, you can use frozen potatoes in your Sausage Potato Casserole! However, keep in mind that frozen potatoes may release more moisture during cooking. This can make your casserole a bit soupy. To counter this, you might want to reduce the amount of chicken broth slightly. Just ensure the potatoes are cooked through before serving!

How do I store leftovers of Sausage Potato Casserole?

Storing leftovers of your Sausage Potato Casserole is easy! Allow the casserole to cool completely, then transfer it to an airtight container. It can be stored in the refrigerator for up to 3-4 days. When you’re ready to enjoy it again, simply reheat in the oven or microwave. Adding a splash of cream can help restore its creamy texture!

Conclusion on Sausage Potato Casserole

In conclusion, the Sausage Potato Casserole is a delightful dish that combines comfort and flavor in every bite. Its rich, creamy texture and savory ingredients make it a favorite among families and friends alike. Whether you’re preparing it for a special occasion or a simple weeknight dinner, this casserole is sure to impress.

With its versatility, you can easily adapt the recipe to suit your taste preferences or dietary needs. From swapping out the sausage to adding extra vegetables, the possibilities are endless. Plus, the various cooking methods allow you to choose the one that best fits your schedule, making it a convenient option for any busy cook.

As you gather around the table to enjoy this hearty meal, you’ll create lasting memories with your loved ones. The warmth of the casserole, combined with the laughter and conversation, makes for a truly special dining experience. So, don’t hesitate to try your hand at this delicious Sausage Potato Casserole!

We hope this article has inspired you to whip up your own version of this comforting dish. Remember, cooking is all about creativity and enjoyment. So, roll up your sleeves, gather your ingredients, and get ready to savor the delightful flavors of your homemade Sausage Potato Casserole!

Paul

Sausage Potato Casserole is a comforting family favorite.

This Slow Cooker Sausage and Potato Casserole is the ultimate comfort food—easy, hearty, and packed with cheesy goodness. Tender hash browns, smoky kielbasa, and a creamy, flavorful sauce all come together in the slow cooker for a fuss-free family dinner that practically makes itself!
Prep Time 10 minutes
Servings: 6 servings
Course: Casserole, Main Course
Cuisine: American

Ingredients
  

  • 32 oz frozen diced hash brown potatoes or substitute fresh diced potatoes
  • 14 oz kielbasa sausage sliced or cut into small pieces
  • 1 small onion diced
  • 2 1/2 cups shredded cheddar cheese
  • 10.5 oz can cream of mushroom soup
  • 1/2 cup sour cream
  • 1 teaspoon Creole seasoning or your favorite seasoning blend
  • Salt and pepper to taste

Method
 

Slow Cooker Method:
  1. Mix the Base:Lightly grease the inside of your slow cooker. Add the hash brown potatoes, kielbasa, diced onion, and 2 cups of the shredded cheddar cheese.
  2. Make the Creamy Mixture:In a separate bowl, whisk together the cream of mushroom soup, sour cream, Creole seasoning, salt, and pepper.
  3. Combine Everything:Pour the creamy mixture over the contents in the slow cooker. Gently stir until everything is well coated.
Top and Cook:Sprinkle the remaining 1/2 cup of shredded cheese on top.Cover and cook:
  1. On LOW for 6 hours, or
  2. On HIGH for 4 hoursThe casserole is ready when the potatoes are tender and the cheese is bubbly.
Optional Oven Method:
  1. Preheat oven to 350°F (175°C).
  2. Combine all ingredients in a large bowl and mix thoroughly.
  3. Transfer mixture to a greased 9×13-inch casserole dish.
  4. Bake uncovered for 30 minutes, or until bubbly and golden on top.

Notes

  • Sautéing the sausage and onions before adding to the slow cooker can enhance the depth of flavor.
  • Fresh potatoes can be used instead of frozen, but they may require a slightly longer cooking time.
  • Add diced bell peppers or peas for extra color and texture.
  • Leftovers reheat beautifully the next day!