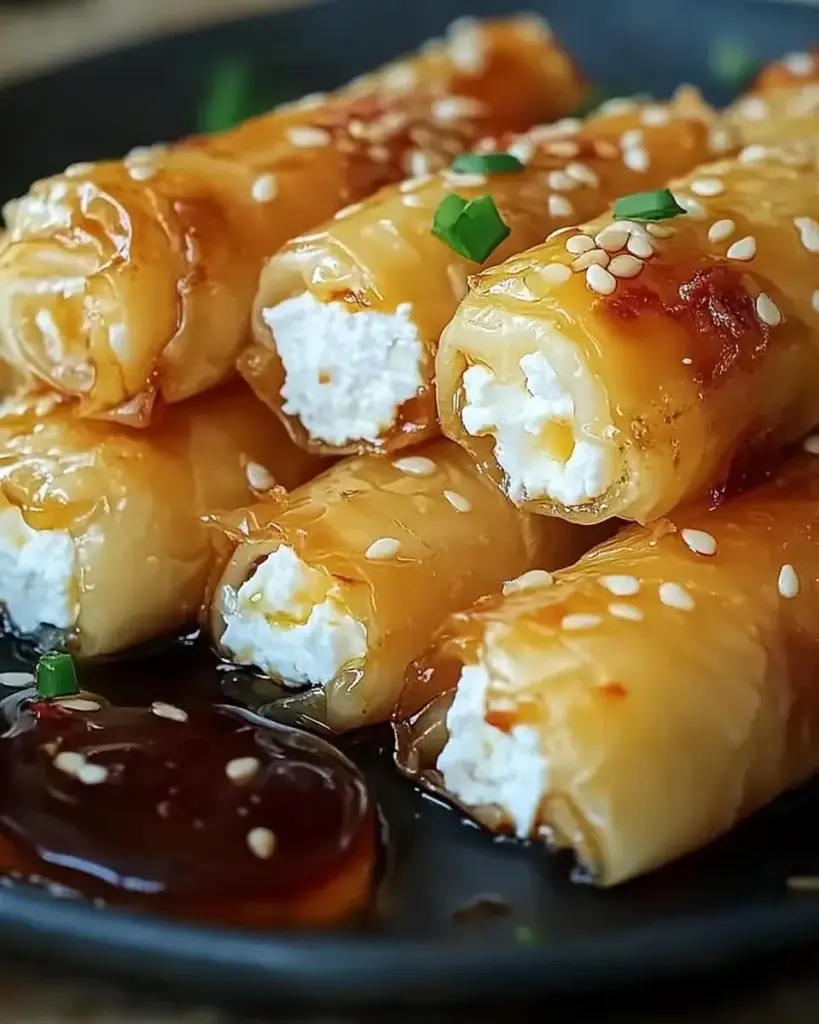
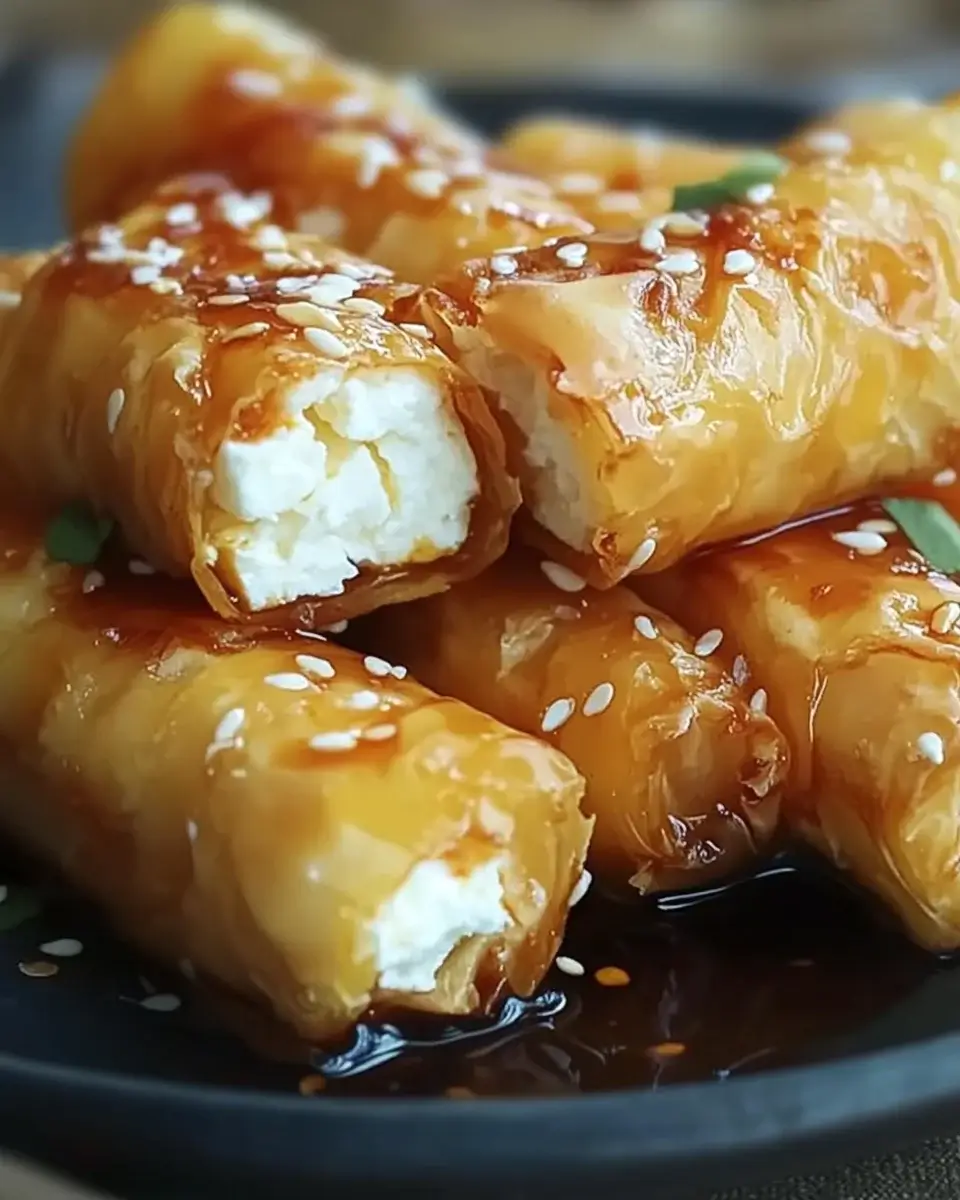
Crispy Oven-Fried Feta Rolls with Chili Honey are irresistible!

Crispy Oven-Fried Feta Rolls with Chili Honey. This delightful dish combines the creamy goodness of feta and ricotta cheeses with the flaky texture of phyllo dough. The result? A crispy, golden treat that’s perfect for any occasion.

Imagine biting into a warm roll, where the savory cheese filling meets a hint of spice from the chili honey drizzle. It’s a flavor explosion that will leave your taste buds dancing! Whether you’re hosting a party, enjoying a family dinner, or simply craving a snack, these rolls are sure to impress.

Not only are they delicious, but they are also easy to make. With just a few simple ingredients and steps, you can whip up a batch in no time. Plus, they are versatile! You can customize the filling and spice level to suit your preferences. So, gather your ingredients and get ready to indulge in these crispy, cheesy delights!

Ingredients for Crispy Oven-Fried Feta Rolls with Chili Honey

Crispy Oven-Fried Feta Rolls with Chili Honey, you’ll need a handful of simple yet flavorful ingredients. Here’s what you’ll need:

  • 8 ounces feta cheese, crumbled
  • 1 cup ricotta cheese
  • 1 teaspoon dried oregano
  • 1 teaspoon garlic powder
  • 1/2 teaspoon black pepper
  • 1 package (8 ounces) phyllo dough, thawed
  • 1/4 cup unsalted butter, melted
  • 1/4 cup honey
  • 1 teaspoon red chili flakes
  • Fresh parsley, chopped (for garnish)

These ingredients come together to create a delightful blend of flavors and textures. The creamy feta and ricotta provide a rich filling, while the phyllo dough adds a satisfying crunch. The honey and chili flakes bring a sweet and spicy kick that perfectly complements the cheese.

Feel free to experiment with the ingredients! You can swap out the feta for goat cheese for a tangy twist or add more spices to the filling for an extra flavor boost. The possibilities are endless, making this recipe a fun and creative cooking experience!

Preparation of Crispy Oven-Fried Feta Rolls with Chili Honey

Crispy Oven-Fried Feta Rolls with Chili Honey. Follow these simple steps to create a delicious appetizer that will wow your guests!

Step 1: Preparing the Feta Cheese

Start by preparing the cheese mixture. In a mixing bowl, combine the crumbled feta cheese and ricotta cheese. The feta adds a salty flavor, while the ricotta brings creaminess. Next, sprinkle in the dried oregano, garlic powder, and black pepper. These spices will enhance the overall taste of the filling. Mix everything together until well combined. You want a smooth, creamy texture that will be easy to spread.

Step 2: Assembling the Rolls

Once your cheese mixture is ready, it’s time to assemble the rolls. Lay one sheet of phyllo dough on a clean surface. Brush it lightly with melted butter to add flavor and help it crisp up. Place another sheet on top and brush it with butter again. This layering creates a flaky texture that is simply irresistible. Now, cut the stacked phyllo sheets into four equal strips. At one end of each strip, place about two tablespoons of the cheese mixture. Be careful not to overfill, as this can make rolling difficult.

Step 3: Coating the Rolls

Next, fold the sides of the phyllo over the filling. This step is crucial as it keeps the cheese mixture secure inside. Now, roll it up tightly from the filled end to form a log. Make sure the seam is on the bottom to prevent the rolls from opening during baking. Once all the rolls are assembled, brush the tops with more melted butter. This will give them a beautiful golden color and extra crunch when baked.

Step 4: Baking the Rolls

Now, it’s time to bake! Preheat your oven to 400°F (200°C) and line a baking sheet with parchment paper. Place the rolls seam-side down on the prepared baking sheet. Bake them in the preheated oven for 15-20 minutes. Keep an eye on them, as you want them to turn golden brown and crispy. The aroma of baking phyllo will fill your kitchen, making it hard to wait!

Crispy Oven-Fried Feta Rolls with Chili Honey are now ready to be enjoyed!

Variation of Crispy Oven-Fried Feta Rolls with Chili Honey

Crispy Oven-Fried Feta Rolls with Chili Honey are a hit, there’s always room for creativity in the kitchen! You can easily switch things up with alternative fillings and different coating options. Let’s explore some exciting variations that will keep your taste buds guessing!

Alternative Fillings for Feta Rolls

One of the best parts about making these rolls is the flexibility in fillings. Here are some tasty alternatives to consider:

  • Spinach and Feta: Add fresh or sautéed spinach to the cheese mixture for a nutritious twist. The spinach adds a lovely color and flavor.
  • Herbed Cream Cheese: Swap out the ricotta for herbed cream cheese. This will give your rolls a creamy texture with a burst of flavor.
  • Sun-Dried Tomatoes: Mix in chopped sun-dried tomatoes for a tangy and slightly sweet addition. They pair beautifully with the feta.
  • Mushroom and Thyme: Sautéed mushrooms with fresh thyme can create an earthy filling that complements the cheese perfectly.

Feel free to mix and match these ingredients! The key is to maintain a balance of flavors and textures that will make each bite delightful.

Different Coating Options

Crispy Oven-Fried Feta Rolls with Chili Honey. Here are some ideas:

  • Olive Oil: For a lighter option, use olive oil instead of butter. It adds a nice flavor and is a healthier alternative.
  • Garlic Butter: Mix minced garlic into the melted butter for an extra punch of flavor. This will make your rolls even more aromatic.
  • Parmesan Cheese: Sprinkle grated Parmesan on top of the rolls before baking. This will create a cheesy crust that’s irresistible.
  • Sesame Seeds: For a nutty crunch, sprinkle sesame seeds on top of the buttered rolls before baking. They add a delightful texture.

Crispy Oven-Fried Feta Rolls with Chili Honey your own!

Cooking Note for Crispy Oven-Fried Feta Rolls with Chili Honey

Crispy Oven-Fried Feta Rolls with Chili Honey, there are a few important cooking notes to keep in mind. These tips will help ensure that your rolls turn out perfectly crispy and delicious every time.

First, make sure your phyllo dough is completely thawed before you start. If it’s still frozen, it can become brittle and difficult to work with. Thaw it in the refrigerator overnight or at room temperature for a few hours. This will make it easier to layer and roll without tearing.

Next, when brushing the phyllo with melted butter, be generous but not excessive. A light coating is enough to achieve that golden, crispy texture. Too much butter can make the rolls soggy instead of crispy. If you prefer a healthier option, consider using olive oil as a substitute.

Also, keep an eye on the baking time. Ovens can vary, so check your rolls a few minutes before the suggested time. You want them to be golden brown and crispy, but not burnt. If they are browning too quickly, you can cover them loosely with aluminum foil to prevent over-browning while they finish baking.

Lastly, let the rolls cool for a few minutes after baking. This will help the filling set slightly, making them easier to handle. Drizzling the chili honey while they are still warm will allow it to soak in a bit, enhancing the flavor. Enjoy your crispy, cheesy rolls fresh out of the oven for the best experience!

Serving Suggestions for Crispy Oven-Fried Feta Rolls with Chili Honey

Crispy Oven-Fried Feta Rolls with Chili Honey, it’s time to think about how to serve them. These rolls are not only delicious on their own, but they can also be paired with various sides and dips to create a delightful spread. Here are some serving suggestions to elevate your appetizer experience:

  • Fresh Salad: Serve your rolls alongside a light, refreshing salad. A simple mix of greens, cherry tomatoes, and a lemon vinaigrette complements the richness of the rolls beautifully.
  • Yogurt Dip: A cool yogurt dip can balance the heat from the chili honey. Mix plain yogurt with a squeeze of lemon juice, chopped cucumber, and fresh dill for a refreshing side.
  • Olive Tapenade: A savory olive tapenade adds a burst of flavor. Spread it on a plate and arrange the rolls around it for a beautiful presentation.
  • Roasted Vegetables: Pair your rolls with a side of roasted vegetables. The earthy flavors of roasted bell peppers, zucchini, and eggplant will enhance the overall meal.
  • Charcuterie Board: Include your crispy rolls on a charcuterie board. Add cured meats, cheeses, nuts, and fruits for a delightful mix of flavors and textures.

Crispy Oven-Fried Feta Rolls with Chili Honey but also create a visually appealing spread. Whether you’re hosting a gathering or enjoying a cozy night in, these pairings will impress your guests and make your meal memorable!
Tips for Perfect Crispy Oven-Fried Feta Rolls with Chili Honey

Crispy Oven-Fried Feta Rolls with Chili Honey turn out perfectly every time, here are some handy tips to keep in mind. These suggestions will help you achieve that ideal crunch and flavor balance that makes these rolls so irresistible.

  • Use Fresh Ingredients: Always opt for fresh feta and ricotta cheese. Fresh ingredients enhance the flavor and texture of your rolls, making them taste even better.
  • Keep Phyllo Dough Covered: Phyllo dough dries out quickly. Keep the unused sheets covered with a damp cloth while you work. This prevents them from becoming brittle and difficult to handle.
  • Don’t Overfill: When adding the cheese mixture to the phyllo strips, be careful not to overfill. A little goes a long way! Overfilling can lead to messy rolls that may burst open during baking.
  • Brush Generously: Don’t skimp on the melted butter or olive oil when brushing the phyllo. A generous coating helps achieve that golden, crispy finish. Just remember, moderation is key to avoid sogginess.
  • Experiment with Spices: Feel free to add your favorite spices to the cheese mixture. A pinch of cayenne pepper or smoked paprika can add an exciting twist to the flavor profile.
  • Serve Immediately: For the best experience, serve the rolls right after baking. They are at their crispiest and most delicious when fresh out of the oven.
  • Pair with Dips: Enhance your rolls by serving them with a variety of dips. A tangy tzatziki or a spicy harissa can complement the flavors beautifully.
  • Store Properly: If you have leftovers, store them in an airtight container in the fridge. Reheat in the oven to restore their crispiness before serving again.

Crispy Oven-Fried Feta Rolls with Chili Honey. Enjoy the process and have fun experimenting with flavors!

Breakdown of Time for Crispy Oven-Fried Feta Rolls with Chili Honey

Crispy Oven-Fried Feta Rolls with Chili Honey can help you plan your cooking better. Here’s a simple breakdown of the time required for each step, so you can enjoy these delicious rolls without any stress!

Prep Time

The prep time for these tasty rolls is about 20 minutes. This includes gathering your ingredients, preparing the cheese mixture, and assembling the rolls. Make sure to take your time while working with the phyllo dough, as it can be delicate. Enjoy the process of creating your filling and rolling the dough!

Cooking Time

Once your rolls are assembled, the cooking time is approximately 15-20 minutes. Preheat your oven to 400°F (200°C) and bake the rolls until they are golden brown and crispy. Keep an eye on them during the last few minutes to ensure they don’t over-bake. The aroma will be irresistible!

Total Time

In total, you can expect to spend around 35-40 minutes from start to finish. This includes both prep and cooking time. With just a little bit of effort, you’ll have a delightful appetizer ready to impress your family and friends. So, gather your ingredients and get cooking!

Nutritional Information for Crispy Oven-Fried Feta Rolls with Chili Honey

Crispy Oven-Fried Feta Rolls with Chili Honey. This section will provide you with key nutritional information to help you make informed choices while enjoying this tasty treat.

Calories

Each serving of these delightful rolls contains approximately 320 calories. This makes them a satisfying option for an appetizer or snack. The combination of creamy cheeses and crispy phyllo dough contributes to the calorie count, but the flavors are well worth it!

Protein

In terms of protein, each serving offers about 10 grams. The feta and ricotta cheeses are excellent sources of protein, which is essential for muscle repair and overall health. Enjoying these rolls can help you meet your daily protein needs while indulging in a delicious treat.

Sodium

When it comes to sodium, each serving contains around 600 milligrams. This is something to keep in mind, especially if you are watching your sodium intake. The feta cheese, known for its salty flavor, contributes significantly to the sodium content. However, you can always adjust the amount of feta used or choose a lower-sodium option if desired.

Crispy Oven-Fried Feta Rolls with Chili Honey provide a delightful balance of flavors and nutrients. They can be enjoyed as part of a balanced diet, especially when paired with fresh salads or vegetables. So, savor every bite while being mindful of your nutritional goals!

FAQs about Crispy Oven-Fried Feta Rolls with Chili Honey

Can I make Crispy Oven-Fried Feta Rolls with Chili Honey ahead of time?

Crispy Oven-Fried Feta Rolls with Chili Honey ahead of time. Simply assemble the rolls and place them on a baking sheet. Cover them with plastic wrap and refrigerate for up to 24 hours before baking. When you’re ready to enjoy them, just pop them in the oven as directed. This makes them a great option for parties or gatherings, allowing you to save time on the day of your event!

What can I serve with Crispy Oven-Fried Feta Rolls with Chili Honey?

These delicious rolls pair wonderfully with a variety of sides and dips. Consider serving them with:

  • Fresh Salad: A light salad with mixed greens and a tangy vinaigrette complements the richness of the rolls.
  • Yogurt Dip: A cool yogurt dip with herbs can balance the heat from the chili honey.
  • Olive Tapenade: This savory spread adds a burst of flavor and makes for a beautiful presentation.
  • Roasted Vegetables: A side of roasted veggies enhances the meal with earthy flavors.
  • Charcuterie Board: Include the rolls on a charcuterie board with meats, cheeses, and fruits for a delightful mix.

Crispy Oven-Fried Feta Rolls with Chili Honey but also create a visually appealing spread for your guests!

How do I store leftover Crispy Oven-Fried Feta Rolls with Chili Honey?

Crispy Oven-Fried Feta Rolls with Chili Honey in an airtight container. They can be stored in the refrigerator for up to 3 days. When you’re ready to enjoy them again, reheat the rolls in the oven at 350°F (175°C) for about 10-15 minutes. This will help restore their crispy texture. Avoid using the microwave, as it can make the phyllo dough soggy. Enjoy your tasty leftovers!

Conclusion on Crispy Oven-Fried Feta Rolls with Chili Honey

Crispy Oven-Fried Feta Rolls with Chili Honey are a delightful addition to any meal or gathering. Their unique combination of creamy cheeses, flaky phyllo dough, and a sweet-spicy drizzle makes them a standout dish. Whether you’re serving them as an appetizer at a party or enjoying them as a snack, these rolls are sure to impress.

Not only are they easy to prepare, but they also offer endless possibilities for customization. You can experiment with different fillings and coatings to suit your taste. This versatility allows you to create a dish that reflects your culinary style and preferences.

Moreover, the nutritional benefits of the ingredients make these rolls a satisfying choice. With a good balance of protein and flavor, they can fit into a healthy diet while still being indulgent. Remember to serve them fresh out of the oven for the best experience, and don’t hesitate to pair them with your favorite dips and sides.

So, gather your ingredients, follow the steps, and enjoy the process of making these crispy, cheesy delights. Your taste buds will thank you, and your guests will be asking for seconds. Happy cooking!
Paul

Crispy Oven-Fried Feta Rolls with Chili Honey are irresistible!

Golden, crispy phyllo rolls filled with creamy feta and ricotta, baked to perfection and finished with a drizzle of spicy-sweet chili honey. These savory-sweet bites are the perfect appetizer or snack with a fiery twist.
Prep Time 15 minutes
Cook Time 20 minutes
Total Time 35 minutes
Servings: 12 rolls
Course: Appetizer, Snack
Cuisine: Mediterranean-Inspired

Ingredients
  

For the Rolls:
  • 8 oz feta cheese crumbled
  • 1 cup ricotta cheese
  • 1 teaspoon fresh thyme leaves optional
  • 6 sheets phyllo pastry thawed and cut lengthwise into 12 strips
  • 1/4 cup melted butter or olive oil
For the Chili Honey Drizzle:
  • 1/4 cup honey
  • 1/2 teaspoon red chili flakes adjust to taste

Method
 

  1. Prepare the Cheese Filling:In a mixing bowl, combine the crumbled feta, ricotta, and fresh thyme if using. Mix until well blended and creamy.
  2. Handle the Phyllo Pastry:Keep the phyllo covered with a damp towel while you work to prevent drying. Cut each sheet in half lengthwise to create 12 strips total.
  3. Assemble the Rolls:Preheat your oven to 400°F (200°C).Lay out one strip of phyllo, brush it lightly with melted butter or olive oil.Place 1 tablespoon of cheese filling at the end, fold in the sides, and roll up tightly like a mini burrito.Place the roll seam-side down on a parchment-lined baking sheet.Repeat for all remaining strips and filling.
  4. Bake to Crispiness:Brush the tops of each roll with more butter or oil.Bake for 15–20 minutes, or until golden brown and crisp.
  5. Make the Chili Honey:While the rolls are baking, warm the honey in a small saucepan over low heat.Stir in chili flakes and simmer gently for 1–2 minutes. Remove from heat.
  6. Serve with a Fiery Finish:Let the rolls cool slightly, then drizzle with the warm chili honey or serve it on the side for dipping.Garnish with extra thyme if desired and enjoy warm.

Notes

  • You can swap ricotta for cream cheese for a richer filling.
  • Adjust chili flakes to your spice preference, or use hot honey for a shortcut.
  • Leftovers can be reheated in an air fryer or oven to retain crispiness.
  • Best enjoyed fresh, but can be assembled ahead and baked just before serving.
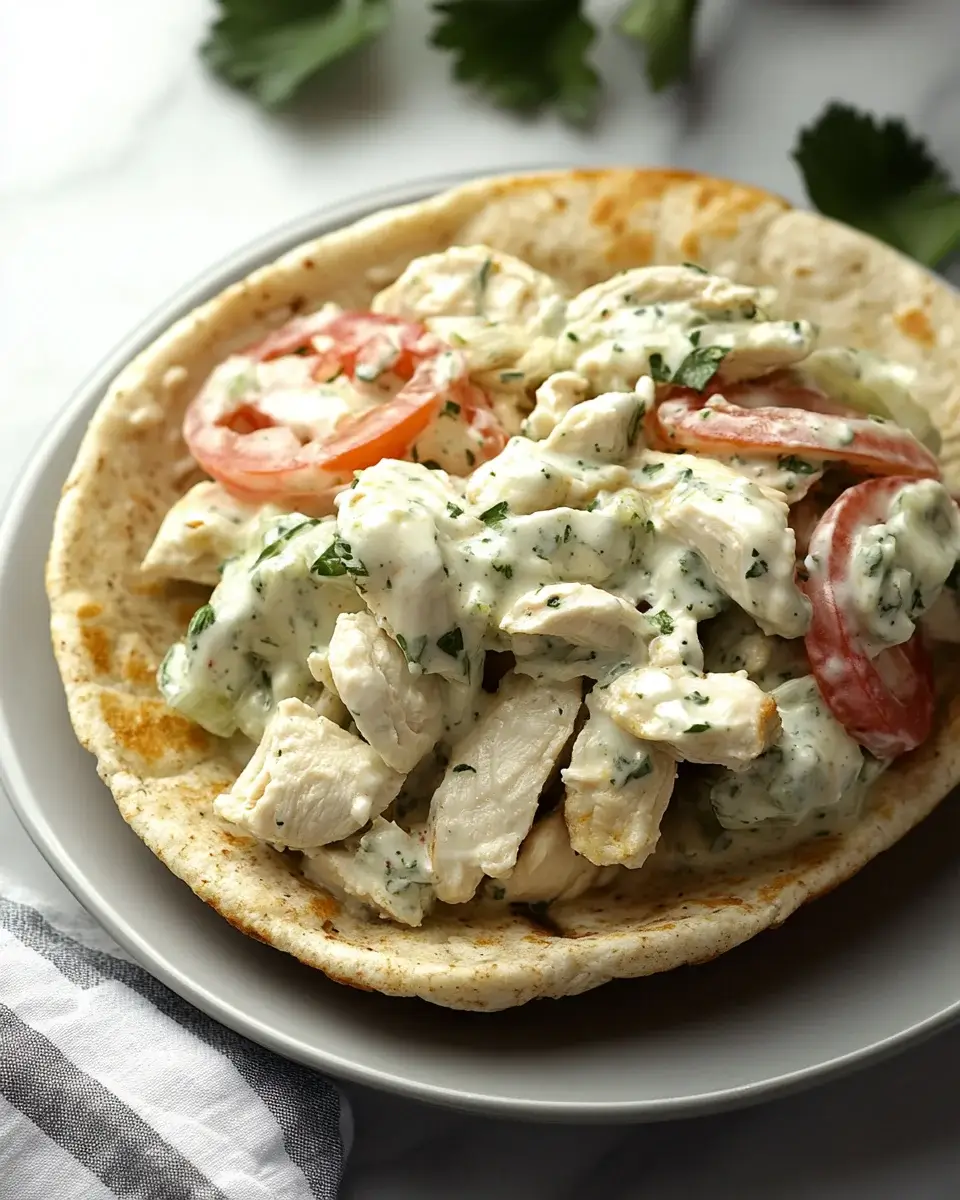
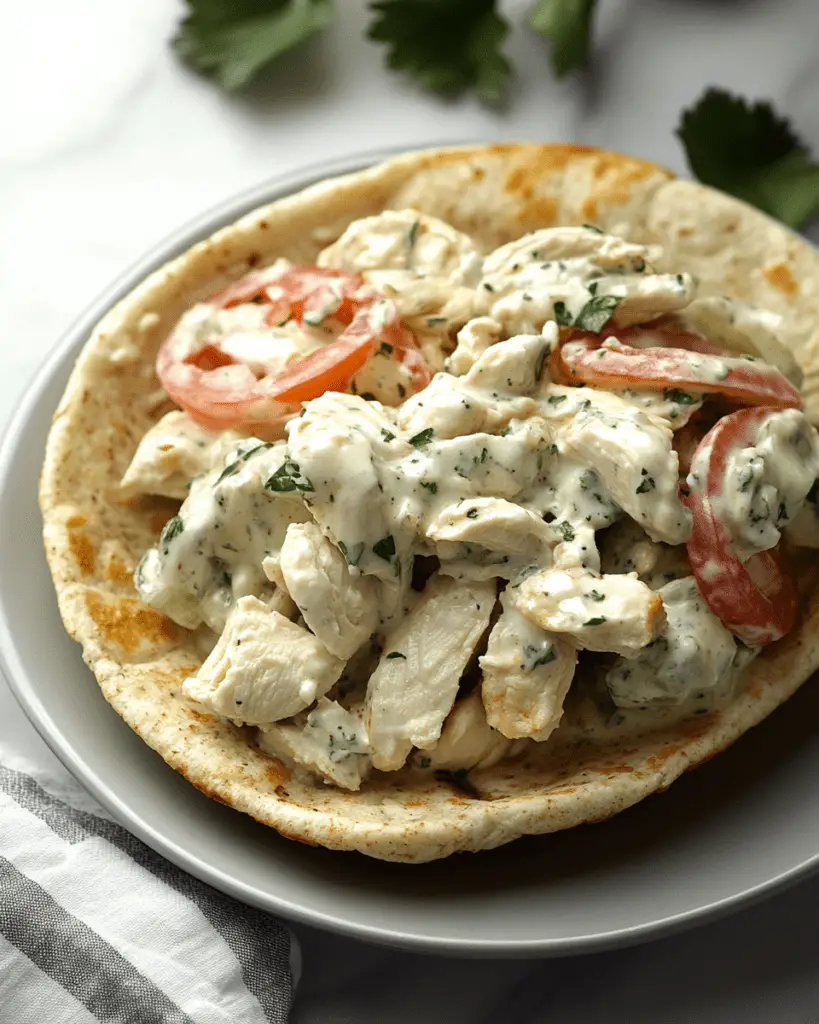
Tzatziki Chicken Salad Recipe is a must-try dish!

What is Tzatziki Chicken Salad?

Tzatziki Chicken Salad is a refreshing and flavorful dish that combines tender chicken with a creamy tzatziki sauce. This sauce is made from Greek yogurt, cucumbers, garlic, and herbs, giving it a cool and tangy taste. The salad is not only delicious but also packed with nutrients, making it a perfect choice for a light lunch or dinner. With its vibrant colors and textures, this salad is sure to please everyone at the table.

Why You Should Try This Recipe

There are many reasons to try the Tzatziki Chicken Salad Recipe. First, it’s incredibly easy to make, requiring just a few simple ingredients. Second, it’s a healthy option that is low in carbs and high in protein, making it ideal for those watching their diet. Additionally, the combination of flavors is delightful, with the creamy tzatziki dressing perfectly complementing the chicken and fresh vegetables. Whether you’re hosting a gathering or just looking for a quick meal, this salad is a fantastic choice that everyone will enjoy!

Ingredients for Tzatziki Chicken Salad Recipe

To create a delicious Tzatziki Chicken Salad, you will need the following ingredients. Each component plays a vital role in building flavor and texture, ensuring a delightful meal. Here’s what you’ll need:

  • 2 cups cooked chicken, shredded or diced
  • 1 cup Greek yogurt
  • 1 medium cucumber, grated and excess moisture squeezed out
  • 2 cloves garlic, minced
  • 1 tablespoon fresh dill, chopped (or 1 teaspoon dried dill)
  • 1 tablespoon lemon juice
  • 1 teaspoon olive oil
  • Salt and pepper to taste
  • 1 cup cherry tomatoes, halved
  • 1/4 red onion, thinly sliced
  • 4 cups mixed greens or lettuce

These ingredients come together to create a refreshing and satisfying dish. The Greek yogurt serves as a creamy base, while the cucumber adds a crisp texture. The garlic and dill provide aromatic flavors, and the lemon juice gives a zesty kick. With the addition of cherry tomatoes and red onion, this salad is not only nutritious but also visually appealing. Gather these ingredients, and you’re ready to start making your Tzatziki Chicken Salad!

Step-by-Step Preparation of Tzatziki Chicken Salad Recipe

Step 1: Preparing the Chicken

To start, you need to prepare the chicken. If you have leftover cooked chicken, that’s perfect! Simply shred or dice it into bite-sized pieces. If you’re cooking chicken specifically for this salad, you can boil, grill, or bake it. Make sure the chicken is fully cooked and tender. Once it’s ready, let it cool for a few minutes before adding it to the salad. This step ensures that the chicken remains juicy and flavorful.

Step 2: Making the Tzatziki Sauce

Next, it’s time to whip up the tzatziki sauce. In a large bowl, combine the Greek yogurt, grated cucumber, minced garlic, chopped dill, lemon juice, and olive oil. Mix everything together until it’s well blended. This creamy sauce is the star of the dish, so make sure to taste it! You can adjust the seasoning with salt and pepper according to your preference. The tzatziki should be refreshing and tangy, perfectly complementing the chicken.

Step 3: Combining Ingredients

Now, it’s time to bring everything together. Add the prepared chicken to the bowl with the tzatziki sauce. Stir gently until the chicken is evenly coated with the sauce. Then, fold in the halved cherry tomatoes and thinly sliced red onion. This adds a burst of color and flavor to your salad. Be careful not to overmix, as you want to keep the ingredients intact for a lovely presentation.

Step 4: Chilling the Salad

For the best flavor, it’s important to chill the salad. Cover the bowl with plastic wrap or a lid and place it in the refrigerator for at least 30 minutes. This allows the flavors to meld together beautifully. When you’re ready to serve, take the salad out and give it a gentle stir. Serve it over a bed of mixed greens or lettuce for a fresh and vibrant meal. Enjoy your delicious Tzatziki Chicken Salad!

Variations of Tzatziki Chicken Salad Recipe

Adding Different Vegetables

One of the best things about the Tzatziki Chicken Salad Recipe is its versatility. You can easily customize it by adding different vegetables. For a delightful crunch, consider including diced bell peppers or sliced radishes. These additions not only enhance the texture but also bring vibrant colors to your salad. You might also try adding shredded carrots for a touch of sweetness or even some avocado for creaminess. Each vegetable adds its unique flavor, making your salad even more exciting and nutritious!

Alternative Protein Options

If you’re looking for a change from chicken, there are plenty of alternative protein options to consider. For a vegetarian twist, chickpeas are a fantastic substitute. They provide a hearty texture and are packed with protein. Simply rinse and drain a can of chickpeas, then mix them into the tzatziki dressing just like you would with chicken. Another option is to use grilled shrimp or tofu for a different flavor profile. Both options are delicious and will keep your Tzatziki Chicken Salad fresh and interesting!

Cooking Note for Tzatziki Chicken Salad Recipe

When preparing the Tzatziki Chicken Salad, there are a few cooking notes to keep in mind to ensure the best results. First, always use fresh ingredients. Fresh cucumbers, herbs, and chicken will enhance the flavor of your salad significantly. If possible, opt for organic produce to maximize taste and nutrition.

Next, consider the texture of your chicken. If you prefer a more tender bite, poaching the chicken is an excellent method. Simply simmer the chicken in water or broth until fully cooked. This method keeps the chicken moist and flavorful. Alternatively, grilling the chicken adds a smoky flavor that can elevate your salad.

Another important note is to squeeze out excess moisture from the grated cucumber. This step prevents the tzatziki sauce from becoming watery, ensuring a creamy consistency. You can do this by placing the grated cucumber in a clean kitchen towel and twisting it to remove the liquid.

Lastly, don’t rush the chilling process. Allowing the salad to chill for at least 30 minutes helps the flavors meld together beautifully. If you have time, chilling it for a few hours or even overnight can enhance the taste even more. Enjoy your cooking experience, and savor the delightful flavors of your Tzatziki Chicken Salad!

Serving Suggestions for Tzatziki Chicken Salad Recipe

Best Pairings

When it comes to serving your Tzatziki Chicken Salad, there are several delicious pairings that can enhance your meal. This salad is perfect on its own, but you can elevate it with some tasty sides. Consider serving it with warm pita bread or whole-grain wraps. These options are great for scooping up the salad and add a delightful texture.

For a complete meal, pair the salad with a side of roasted vegetables. Roasted bell peppers, zucchini, or asparagus complement the flavors of the tzatziki beautifully. You might also enjoy a light soup, such as a refreshing cucumber or tomato soup, which can balance the richness of the salad.

If you’re looking for a drink to accompany your meal, a glass of iced tea or sparkling water with lemon is a refreshing choice. These beverages will cleanse your palate and keep the meal light and enjoyable. With these pairings, your Tzatziki Chicken Salad will shine as the star of the table!

Presentation Tips

Presentation is key when serving your Tzatziki Chicken Salad. A beautiful presentation can make your dish even more appetizing. Start by choosing a large, shallow bowl or a platter to serve the salad. This allows the vibrant colors of the ingredients to stand out.

To create an appealing look, layer the mixed greens or lettuce at the bottom of the bowl. Then, spoon the chicken salad mixture on top, allowing the colorful cherry tomatoes and red onion to peek through. For an extra touch, garnish with a sprinkle of fresh dill or a few cucumber slices on top. This adds a pop of color and freshness.

Additionally, consider serving the salad in individual bowls for a more elegant touch. This way, each guest can enjoy their own portion, making it feel special. With these simple presentation tips, your Tzatziki Chicken Salad will not only taste great but also look stunning on the table!

Tips for Perfecting Your Tzatziki Chicken Salad Recipe

Ingredient Substitutions

When making the Tzatziki Chicken Salad, you might find yourself in need of ingredient substitutions. Luckily, this recipe is quite flexible! If you don’t have Greek yogurt, regular plain yogurt works just fine. It will still give you that creamy texture, though it may be slightly less thick.

For the cucumber, if you can’t find a fresh one, you can use pickles for a tangy twist. Just chop them finely and mix them into the tzatziki sauce. If you’re out of dill, fresh parsley or mint can be great alternatives, adding a different but delightful flavor.

In case you want to reduce calories, consider using low-fat yogurt instead of full-fat Greek yogurt. This will still keep your salad creamy while cutting down on fat content. If you’re looking for a dairy-free option, try using coconut yogurt or a plant-based yogurt alternative. These substitutions will help you customize the salad to fit your dietary needs while keeping it delicious!

Storage Tips

Storing your Tzatziki Chicken Salad properly is essential for maintaining its freshness. If you have leftovers, place them in an airtight container and store them in the refrigerator. The salad can last for up to three days, but it’s best enjoyed within the first two days for optimal flavor and texture.

To keep the salad fresh, consider storing the tzatziki dressing separately from the chicken and vegetables. This way, the ingredients won’t become soggy. When you’re ready to eat, simply combine them again. If you notice any excess moisture in the salad, you can drain it before serving to keep it light and refreshing.

For meal prep, you can prepare the chicken and tzatziki sauce in advance. Just mix them together right before serving. This will save you time and ensure that your salad tastes fresh. With these storage tips, you can enjoy your Tzatziki Chicken Salad throughout the week!

Breakdown of Time for Tzatziki Chicken Salad Recipe

Prep Time

The prep time for the Tzatziki Chicken Salad Recipe is quite minimal. You can expect to spend about 15 to 20 minutes gathering your ingredients and preparing them. This includes shredding or dicing the cooked chicken, grating the cucumber, and chopping the herbs and vegetables. If you have everything ready, you’ll be amazed at how quickly this salad comes together!

Cooking Time

Since this recipe uses cooked chicken, there’s no actual cooking time involved. However, if you need to cook the chicken from scratch, you might want to allocate an additional 20 to 30 minutes for that. Boiling or grilling the chicken will take the most time, but it’s worth it for the flavor. Once the chicken is cooked, you can proceed with the salad preparation without any further cooking required.

Total Time

In total, you can expect the entire process of making the Tzatziki Chicken Salad to take around 30 to 50 minutes. This includes the time spent on prep and cooking if necessary. If you choose to chill the salad for the best flavor, remember to add an extra 30 minutes to your total time. This chilling step is crucial for allowing the flavors to meld together beautifully, making your salad even more delicious!

Nutritional Information for Tzatziki Chicken Salad Recipe

Calories

When it comes to enjoying a healthy meal, knowing the calorie content is essential. Each serving of Tzatziki Chicken Salad contains approximately 290 calories. This makes it a great option for those looking to maintain a balanced diet without sacrificing flavor. The combination of chicken, Greek yogurt, and fresh vegetables provides a satisfying meal that won’t weigh you down.

Protein Content

Protein is a vital nutrient for our bodies, and this salad delivers! Each serving boasts about 30 grams of protein. The cooked chicken and Greek yogurt are excellent sources of protein, helping to keep you full and energized throughout the day. Including protein in your meals is important for muscle repair and overall health, making this salad a smart choice for lunch or dinner.

Sodium Levels

Monitoring sodium intake is important for maintaining heart health. The Tzatziki Chicken Salad contains around 500 milligrams of sodium per serving. This level is reasonable for a meal, especially considering the fresh ingredients used. To keep sodium levels in check, you can adjust the amount of salt added to the dressing. Opting for low-sodium chicken or broth when cooking can also help reduce overall sodium content.

FAQs about Tzatziki Chicken Salad Recipe

Can I make Tzatziki Chicken Salad ahead of time?

Absolutely! Making Tzatziki Chicken Salad ahead of time is a great idea. In fact, chilling the salad for a few hours or overnight allows the flavors to blend beautifully. Just prepare the salad as directed, cover it tightly, and store it in the refrigerator. This makes it perfect for meal prep or for serving at gatherings. Just remember to give it a gentle stir before serving to refresh the ingredients!

What can I substitute for yogurt in the tzatziki?

If you need a substitute for yogurt in the tzatziki, there are several options. You can use sour cream for a similar creamy texture and tangy flavor. For a dairy-free option, try coconut yogurt or almond yogurt. These alternatives will still provide a delicious base for your tzatziki sauce. Just keep in mind that the flavor may vary slightly, but it will still be tasty!

Is Tzatziki Chicken Salad Recipe suitable for meal prep?

Yes, the Tzatziki Chicken Salad Recipe is perfect for meal prep! You can prepare the chicken and tzatziki sauce in advance and store them separately. This way, the salad stays fresh and crunchy. When you’re ready to eat, simply combine the ingredients. It’s a quick and healthy option for busy days, making it easy to enjoy a nutritious meal anytime!

How long does Tzatziki Chicken Salad last in the fridge?

When stored properly, Tzatziki Chicken Salad can last in the fridge for up to three days. To keep it fresh, place it in an airtight container. However, for the best taste and texture, it’s recommended to enjoy it within the first two days. If you notice any excess moisture, you can drain it before serving to maintain that delightful crunch!

Conclusion on Tzatziki Chicken Salad Recipe

In conclusion, the Tzatziki Chicken Salad Recipe is a delightful and nutritious dish that brings together the best of fresh ingredients and bold flavors. With its creamy tzatziki dressing, tender chicken, and vibrant vegetables, this salad is not only easy to prepare but also a feast for the eyes and palate. Whether you’re looking for a quick lunch, a light dinner, or a dish to impress your guests, this recipe fits the bill perfectly.

Moreover, the versatility of the Tzatziki Chicken Salad allows you to customize it to your liking. You can add different vegetables, swap proteins, or even adjust the dressing to suit your taste. This adaptability makes it a fantastic option for any occasion, from casual family meals to elegant gatherings.

As you prepare this salad, remember to take your time with each step. From selecting fresh ingredients to allowing the flavors to meld in the refrigerator, every detail contributes to the final result. With just a little effort, you can create a dish that is not only healthy but also bursting with flavor.

So, gather your ingredients, follow the steps, and enjoy the deliciousness of Tzatziki Chicken Salad. It’s a meal that promises satisfaction and joy, making it a must-try for anyone who loves fresh, wholesome food. Happy cooking!

Paul

Tzatziki Chicken Salad Recipe is a must-try dish!

This Tzatziki Chicken Salad is cool, creamy, and loaded with Mediterranean flavor. Shredded rotisserie chicken is tossed in a refreshing homemade tzatziki sauce made with Greek yogurt, cucumbers, lemon, garlic, and dill. It’s light, protein-packed, and perfect for wraps, sandwiches, or eating straight from the bowl!
Prep Time 15 minutes
Total Time 15 minutes
Servings: 4 servings
Course: Dinner, Lunch, Salad
Cuisine: Mediterranean

Ingredients
  

  • 1 medium cucumber finely grated
  • ¾ cup plain Greek yogurt unsweetened
  • 2 tablespoons fresh dill chopped (or ⅔ teaspoon dried dill)
  • 1 tablespoon lemon juice or red wine vinegar
  • 1 clove garlic minced
  • ½ teaspoon salt
  • ¼ teaspoon black pepper
  • 1 cooked rotisserie chicken shredded (or 16 oz cooked/canned chicken)
  • ½ red onion diced

Method
 

  1. Prepare the cucumberWrap the grated cucumber in a clean towel and squeeze out the excess moisture.
  2. Mix the tzatziki sauceIn a large mixing bowl, combine Greek yogurt, dill, lemon juice, minced garlic, salt, pepper, and the squeezed cucumber. Stir until well blended.
  3. Add the chicken and onionShred the rotisserie chicken and add it to the bowl along with the diced red onion. Mix until everything is evenly coated with the sauce.
  4. ServeServe immediately in pita bread, on toast, with crackers, over a salad, or wrapped in lettuce leaves.
  5. StoreKeep leftovers in an airtight container in the fridge for up to 5 days. Do not leave out for more than 2 hours.

Notes

  • For extra flavor, let the salad chill for 30 minutes before serving.
  • Use a food processor to finely grate cucumber and chop herbs quickly.
  • This salad is naturally gluten-free and low carb.
  • Great for meal prep—portion it into containers for grab-and-go lunches.
  • Add chopped cherry tomatoes or olives for extra Mediterranean flair.

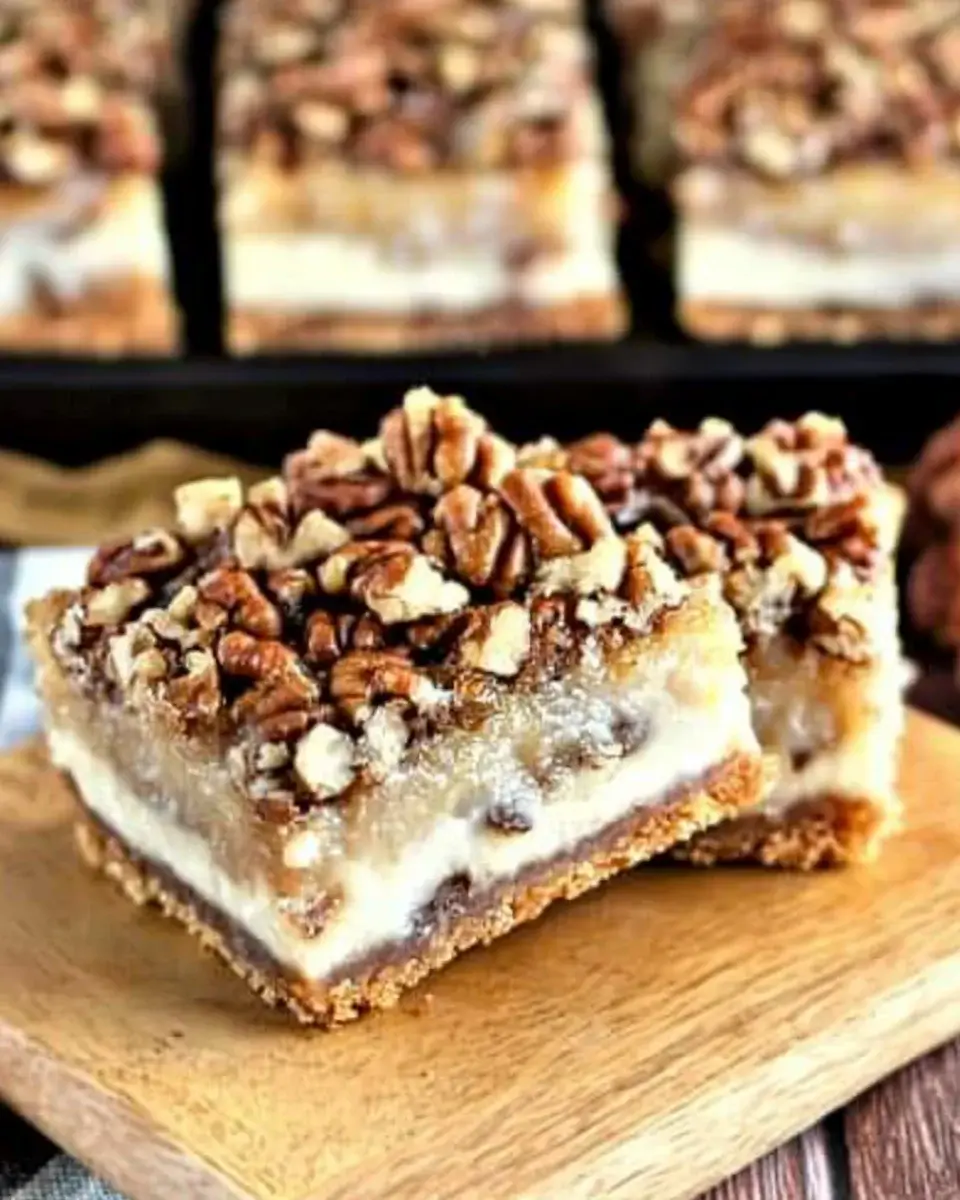
Pecan Pie Cheesecake Bars Recipe is a must-try dessert!

Introduction to Pecan Pie Cheesecake Bars Recipe

Pecan Pie Cheesecake Bars Recipe is a delightful treat that will impress your family and friends. These bars are perfect for any occasion, whether it’s a holiday gathering, a birthday party, or just a cozy night in.

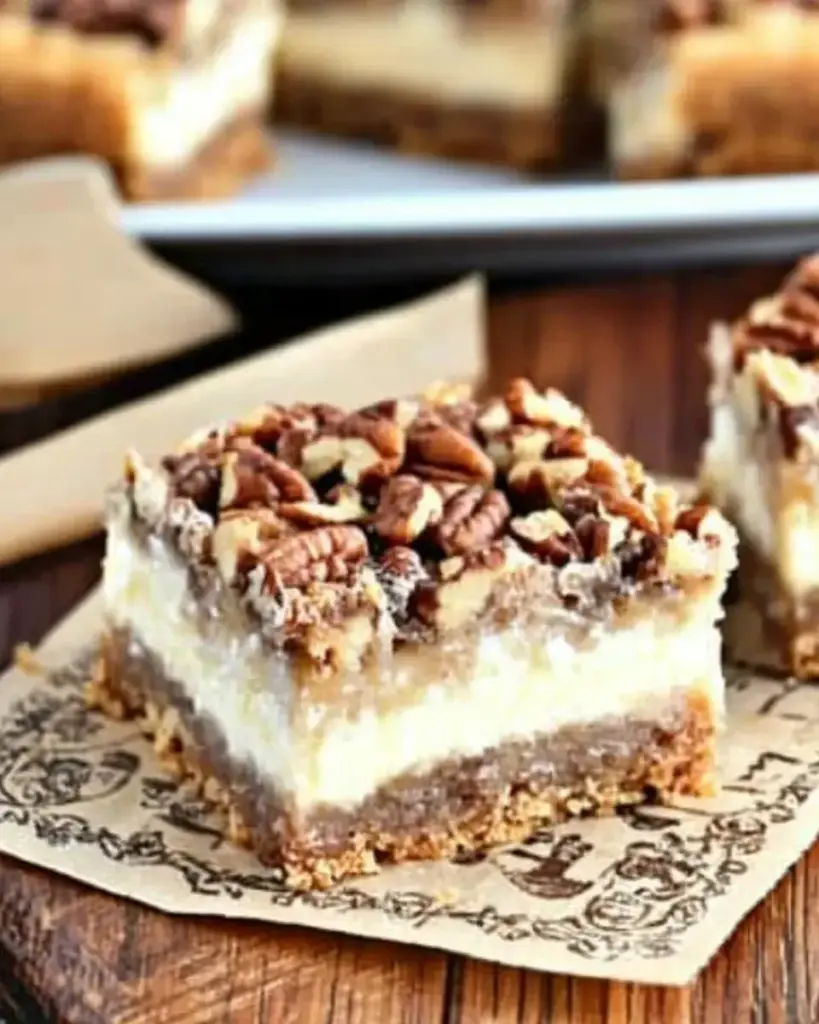
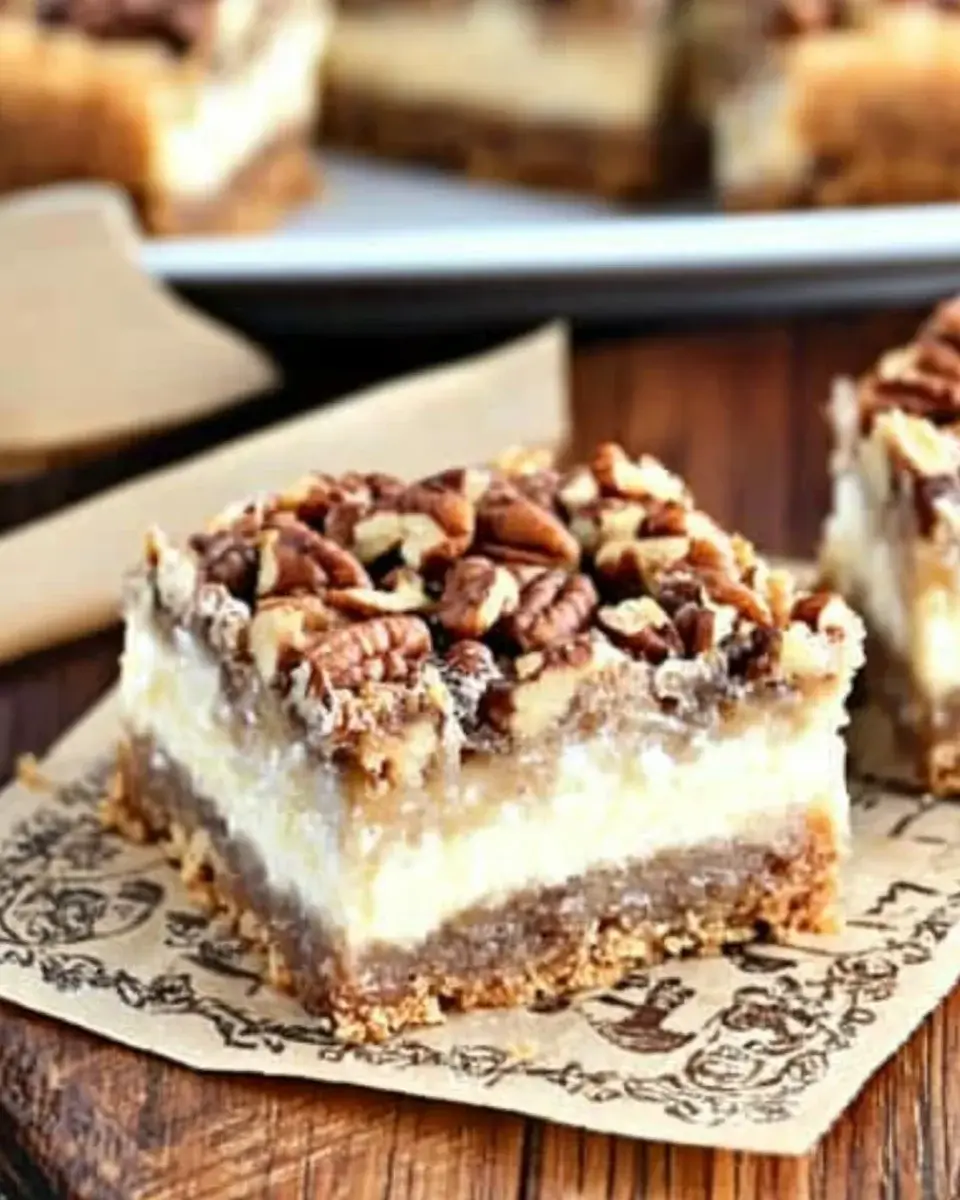
Imagine a buttery graham cracker crust topped with a smooth cheesecake layer, all crowned with a sweet and crunchy pecan topping. Each bite is a harmonious blend of textures and flavors that will leave you wanting more. Plus, they are easy to make, which means you can whip them up without spending hours in the kitchen.

In this article, we will guide you through the ingredients, preparation steps, and even some variations to make this recipe your own. Whether you’re a seasoned baker or a beginner, you’ll find this recipe straightforward and enjoyable. So, let’s dive into the world of pecan pie cheesecake bars and discover how to create this scrumptious dessert!

Ingredients for Pecan Pie Cheesecake Bars Recipe

Pecan Pie Cheesecake Bars Recipe, you will need a selection of simple yet flavorful ingredients. Each component plays a vital role in achieving that perfect balance of sweetness and creaminess. Here’s what you’ll need:

  • 1 ½ cups graham cracker crumbs
  • ½ cup unsalted butter, melted
  • ¼ cup granulated sugar
  • 2 (8-ounce) packages cream cheese, softened
  • 1 cup brown sugar, packed
  • 2 large eggs
  • 1 teaspoon vanilla extract
  • 1 cup sour cream
  • 1 ½ cups pecans, chopped
  • ¼ cup corn syrup
  • ¼ teaspoon salt

These ingredients come together to create a rich and satisfying dessert. The graham cracker crumbs form a crunchy base, while the cream cheese and sour cream provide a creamy filling. The pecans add a delightful crunch and nutty flavor, making each bite a treat. Don’t forget to gather everything before you start baking, as it will make the process smoother and more enjoyable!

Preparation of Pecan Pie Cheesecake Bars Recipe

Pecan Pie Cheesecake Bars Recipe. This process is simple and fun, allowing you to create a delicious dessert that everyone will love. Follow these steps carefully to ensure your bars turn out perfectly!

Step 1: Prepare the Crust

Start by preheating your oven to 350°F. This step is crucial as it ensures your crust bakes evenly. Next, take a medium bowl and combine the graham cracker crumbs, melted butter, and granulated sugar. Mix them well until the crumbs are fully coated with butter. This mixture will form the base of your cheesecake bars.

Once combined, press the mixture firmly into the bottom of a greased 9×13-inch baking dish. Make sure to spread it evenly to create a solid crust. Bake this crust in the preheated oven for about 10 minutes. After baking, remove it from the oven and let it cool slightly while you prepare the filling.

Step 2: Make the Cheesecake Filling

In a large mixing bowl, beat the softened cream cheese and brown sugar together. Use an electric mixer for a smooth and creamy texture. Mix until there are no lumps left. Then, add the eggs one at a time, mixing well after each addition. This step is important for achieving a light and fluffy filling.

Next, stir in the vanilla extract and sour cream until everything is fully combined. The sour cream adds a nice tanginess that balances the sweetness of the brown sugar. Once your filling is ready, it’s time to pour it over the cooled crust. Spread it evenly to ensure every bite is delicious!

Step 3: Prepare the Pecan Topping

In a separate bowl, mix the chopped pecans, corn syrup, and salt. Stir until the pecans are well coated with the syrup. This mixture will create a sweet and crunchy topping that complements the creamy cheesecake layer beautifully. Make sure the pecans are evenly coated for the best flavor.

Step 4: Assemble the Pecan Pie Cheesecake Bars

Now that you have your crust, filling, and topping ready, it’s time to assemble your bars. Carefully spoon the pecan mixture over the cheesecake layer. Spread it out gently to cover the entire surface. This will create a lovely topping that adds both texture and flavor to your dessert.

Step 5: Bake the Pecan Pie Cheesecake Bars

Place the assembled dish back into the oven and bake for an additional 30-35 minutes. Keep an eye on it! You want the center to be set and the edges to turn a light golden color. Once baked, remove the dish from the oven and let it cool to room temperature. After cooling, refrigerate the bars for at least 2 hours before cutting them into squares. This chilling time helps the flavors meld together and makes cutting easier.

Pecan Pie Cheesecake Bars Recipe is now ready to be enjoyed. These bars are sure to be a hit at any gathering!

Variation of Pecan Pie Cheesecake Bars Recipe

Pecan Pie Cheesecake Bars Recipe is already a delightful treat, you can easily customize it to suit your taste or dietary needs. Here are some fun variations to consider, ensuring that everyone can enjoy these delicious bars!

Alternative Ingredients for Different Flavors

To switch things up, try incorporating alternative ingredients that can add unique flavors to your cheesecake bars. Here are a few ideas:

  • Chocolate Lovers: Add ½ cup of chocolate chips to the cheesecake filling for a rich chocolate flavor. You can also drizzle melted chocolate on top before serving.
  • Spiced Up: Mix in 1 teaspoon of cinnamon or nutmeg into the cheesecake filling for a warm, spiced flavor that’s perfect for fall.
  • Fruit Infusion: Fold in 1 cup of fresh blueberries or raspberries into the cheesecake layer for a fruity twist. This adds a refreshing taste and a pop of color!
  • Caramel Delight: Drizzle caramel sauce over the pecan topping before baking for an extra layer of sweetness.

Pecan Pie Cheesecake Bars Recipe into something new and exciting, making it a versatile dessert for any occasion!

Gluten-Free Options for Pecan Pie Cheesecake Bars Recipe

Pecan Pie Cheesecake Bars Recipe gluten-free:

  • Graham Cracker Substitution: Use gluten-free graham cracker crumbs or crushed gluten-free cookies as a base for the crust. There are many options available that taste just as good!
  • Check Ingredients: Ensure that all other ingredients, like the cream cheese and sour cream, are labeled gluten-free. Most brands are, but it’s always good to double-check.

Pecan Pie Cheesecake Bars Recipe that everyone can enjoy without worry!

Cooking Note for Pecan Pie Cheesecake Bars Recipe

Pecan Pie Cheesecake Bars Recipe, there are a few cooking notes to keep in mind to ensure your dessert turns out perfectly every time. These tips will help you navigate the baking process smoothly and achieve the best results.

First, make sure all your ingredients are at room temperature before you start. This includes the cream cheese and eggs. Room temperature ingredients blend more easily, resulting in a smoother filling. If you forget to take them out ahead of time, you can place the cream cheese in a microwave for about 10-15 seconds to soften it quickly.

Next, be careful not to overmix the cheesecake filling. While you want everything to be well combined, overmixing can introduce too much air into the batter. This can lead to cracks in your cheesecake bars as they bake. Mix just until smooth and creamy, and you’ll be on the right track!

When baking, keep an eye on the edges of your bars. They should be lightly golden, while the center may still have a slight jiggle. This is normal! The bars will continue to set as they cool. If you bake them too long, they may become dry, so it’s better to err on the side of caution.

Lastly, patience is key when it comes to cooling and chilling. Allow your bars to cool completely at room temperature before refrigerating. Chilling them for at least two hours helps the flavors meld and makes cutting easier. If you can, let them chill overnight for the best texture and taste.

Pecan Pie Cheesecake Bars that everyone will love!

Serving Suggestions for Pecan Pie Cheesecake Bars Recipe

Pecan Pie Cheesecake Bars Recipe has chilled and is ready to serve, it’s time to think about how to present this delightful dessert. The way you serve your bars can enhance the overall experience and make them even more enjoyable. Here are some creative serving suggestions to consider:

  • Classic Presentation: Cut the bars into neat squares and place them on a decorative platter. This simple presentation allows the beautiful layers to shine through, showcasing the creamy cheesecake and crunchy pecan topping.
  • With Whipped Cream: Serve each bar with a dollop of freshly whipped cream on top. The light and airy texture of the whipped cream complements the richness of the cheesecake, creating a delightful contrast.
  • Drizzle with Caramel: For an extra touch of sweetness, drizzle warm caramel sauce over the bars just before serving. This adds a beautiful shine and enhances the flavor profile, making each bite even more indulgent.
  • Garnish with Pecans: Sprinkle some extra chopped pecans on top of the whipped cream or caramel drizzle. This not only adds a nice crunch but also makes the dessert look more appealing.
  • Pair with Ice Cream: Serve the bars alongside a scoop of vanilla or caramel ice cream. The cold ice cream pairs wonderfully with the warm flavors of the pecan pie cheesecake, creating a delightful dessert experience.
  • Festive Touch: For special occasions, consider adding seasonal decorations. Use edible flowers or a sprinkle of cinnamon to give your bars a festive flair.

Pecan Pie Cheesecake Bars Recipe and impress your guests. Whether it’s a casual family dinner or a festive celebration, these bars are sure to be a hit!

Tips for Perfecting Your Pecan Pie Cheesecake Bars Recipe

Pecan Pie Cheesecake Bars Recipe turns out perfectly every time, consider these helpful tips. They will guide you through the baking process and help you achieve the best flavor and texture.

  • Use Quality Ingredients: The quality of your ingredients can make a big difference. Opt for fresh cream cheese and real vanilla extract for the best flavor. Fresh pecans will also enhance the taste and crunch of your topping.
  • Don’t Skip the Cooling Time: Allow your cheesecake bars to cool completely at room temperature before refrigerating. This step is crucial for setting the bars properly and enhancing the flavors.
  • Check for Doneness: When baking, gently shake the pan. If the center has a slight jiggle but the edges are set, it’s done. Overbaking can lead to dry bars, so keep an eye on them!
  • Chill Overnight: For the best texture, let your bars chill overnight. This allows the flavors to meld beautifully and makes cutting easier.
  • Use a Sharp Knife: When cutting your bars, use a sharp knife for clean edges. Wipe the knife with a damp cloth between cuts to keep the pieces looking neat.
  • Experiment with Toppings: Feel free to get creative with toppings! Try adding chocolate shavings, a sprinkle of cinnamon, or even a drizzle of peanut butter for a unique twist.
  • Serve at Room Temperature: For the best flavor, serve your cheesecake bars at room temperature. This enhances the creamy texture and makes them even more enjoyable.

Pecan Pie Cheesecake Bars Recipe. Each bite will be a delightful experience that your family and friends will love!

Breakdown of Time for Pecan Pie Cheesecake Bars Recipe

Pecan Pie Cheesecake Bars Recipe is essential for planning your baking session. Here’s a detailed breakdown of the time you’ll need to prepare, cook, and chill these delicious bars.

Prep Time

Pecan Pie Cheesecake Bars Recipe is approximately 20-25 minutes. This includes gathering your ingredients, preparing the crust, and mixing the cheesecake filling. Make sure to have everything ready before you start, as it will make the process smoother and more enjoyable!

Cooking Time

Once you’ve prepped your ingredients, the cooking time is about 40-45 minutes. This consists of 10 minutes for baking the crust and an additional 30-35 minutes for baking the assembled cheesecake bars. Keep an eye on them to ensure they don’t overbake!

Total Time

Pecan Pie Cheesecake Bars Recipe. However, don’t forget to factor in the chilling time of at least 2 hours after baking. This step is crucial for the flavors to meld and for the bars to set properly. If you can, let them chill overnight for the best results!

By understanding the time breakdown, you can plan your baking session effectively and enjoy the process of creating these delightful cheesecake bars!

Nutritional Information for Pecan Pie Cheesecake Bars Recipe

Pecan Pie Cheesecake Bars Recipe, it’s helpful to know the nutritional information. This way, you can enjoy your dessert while being mindful of your dietary choices. Here’s a breakdown of the key nutritional components per serving:

Calories

Each serving of these delightful cheesecake bars contains approximately 320 calories. This calorie count includes the rich ingredients like cream cheese, butter, and pecans, which contribute to the overall flavor and texture. While they are a treat, enjoying them in moderation is key to maintaining a balanced diet.

Protein

In terms of protein, each bar provides about 5 grams. The protein comes mainly from the cream cheese and eggs used in the recipe. This protein content helps to keep you feeling satisfied after enjoying a piece, making it a delightful dessert option.

Sodium

The sodium content in each serving is approximately 200 milligrams. This amount is relatively moderate, but if you are watching your sodium intake, it’s good to be aware. The sodium primarily comes from the butter and cream cheese, which are essential for achieving that creamy texture and rich flavor.

Pecan Pie Cheesecake Bars Recipe offers a delicious balance of flavors and textures while providing some nutritional benefits. Enjoying these bars as an occasional treat can fit nicely into a well-rounded diet!

FAQs about Pecan Pie Cheesecake Bars Recipe

Can I make Pecan Pie Cheesecake Bars ahead of time?

Pecan Pie Cheesecake Bars Recipe is perfect for making ahead of time. In fact, they taste even better after chilling in the refrigerator for a few hours or overnight. This allows the flavors to meld beautifully. You can prepare the bars a day or two in advance, making them an excellent choice for parties or gatherings. Just remember to store them in an airtight container to keep them fresh!

How do I store leftover Pecan Pie Cheesecake Bars?

Pecan Pie Cheesecake Bars is simple! Once they have cooled and set, cut them into squares and place them in an airtight container. You can keep them in the refrigerator for up to 5 days. If you want to keep them longer, consider freezing them. Just make sure to separate the layers with parchment paper to prevent sticking. This way, you can enjoy a sweet treat whenever you like!

Can I freeze Pecan Pie Cheesecake Bars?

Pecan Pie Cheesecake Bars Recipe! To freeze, first, let the bars cool completely. Then, cut them into squares and wrap each piece tightly in plastic wrap. Place the wrapped bars in a freezer-safe container or bag. They can be frozen for up to 3 months. When you’re ready to enjoy them, simply thaw them in the refrigerator overnight. This way, you’ll have a delicious dessert ready to go whenever you need it!

What can I substitute for cream cheese in the recipe?

Pecan Pie Cheesecake Bars Recipe, there are a few options. You can use mascarpone cheese for a similar creamy texture and flavor. Another option is to use Greek yogurt, which will add a tangy taste. If you prefer a dairy-free option, consider using a vegan cream cheese alternative. Just keep in mind that the flavor and texture may vary slightly, but you’ll still end up with a delicious dessert!

Conclusion on Pecan Pie Cheesecake Bars Recipe

Pecan Pie Cheesecake Bars Recipe is a delightful dessert that beautifully combines the rich flavors of pecan pie with the creamy texture of cheesecake. This recipe is not only easy to follow but also allows for plenty of creativity and customization. Whether you choose to stick with the classic version or experiment with different flavors, these bars are sure to impress your family and friends.

With a buttery graham cracker crust, a smooth cheesecake filling, and a crunchy pecan topping, each bite offers a wonderful blend of textures and tastes. Plus, the ability to make them ahead of time makes them a perfect choice for gatherings, holidays, or simply a sweet treat at home.

Pecan Pie Cheesecake Bars that everyone will love. So, gather your ingredients, preheat your oven, and get ready to enjoy a dessert that is not only delicious but also brings joy to any occasion!

Happy baking!

Paul

Pecan Pie Cheesecake Bars Recipe is a must-try dessert!

These Pecan Pie Cheesecake Bars are the ultimate indulgent dessert mashup—think rich and creamy cheesecake layered over a buttery graham cracker crust, topped with a gooey, caramelized pecan pie topping. A decadent treat perfect for holidays, potlucks, or anytime you want to impress with a bite-sized showstopper!
Prep Time 25 minutes
Cook Time 35 minutes
Total Time 5 hours
Servings: 24 bars
Course: Dessert
Cuisine: American

Ingredients
  

For the Graham Cracker Crust:
  • 2 ½ cups graham cracker crumbs about 18 full-size crackers
  • ¼ cup granulated sugar
  • ½ cup unsalted butter melted
For the Cheesecake Layer:
  • 2 packages 8 oz each cream cheese, softened
  • ¾ cup granulated sugar
  • 2 large eggs
  • 1 teaspoon vanilla extract
For the Pecan Pie Topping:
  • 1 cup packed light brown sugar
  • ½ cup light corn syrup
  • ½ cup heavy whipping cream
  • ¼ cup unsalted butter
  • ½ teaspoon kosher salt
  • 1 teaspoon vanilla extract
  • 2 cups chopped pecans

Method
 

  1. Prepare the CrustPreheat oven to 350°F (175°C). Line a 13×9-inch baking dish with parchment paper. In a food processor, pulse graham crackers and sugar until finely ground. Add melted butter and blend. Press mixture firmly into the prepared dish to form an even crust.
  2. Make the Cheesecake LayerIn a large mixing bowl, beat the softened cream cheese with sugar, eggs, and vanilla extract until smooth and fluffy, about 3–5 minutes. Pour over the crust and spread evenly.
  3. Prepare the Pecan ToppingIn a saucepan over medium heat, combine brown sugar, corn syrup, cream, butter, and salt. Stir constantly and bring to a gentle boil for 1 minute. Remove from heat and stir in vanilla and chopped pecans. Let the topping cool slightly.
  4. Assemble and BakeCarefully spoon the pecan mixture over the cheesecake layer, spreading it evenly. Bake for 35 minutes or until set. Allow to cool at room temperature.
  5. Chill and SliceRefrigerate for at least 4 hours, or overnight for best results. Lift out using parchment, slice into bars, and serve chilled.

Notes

  • Make Ahead: These bars are perfect for prepping a day in advance—flavors develop beautifully overnight.
  • Storage: Store in an airtight container in the refrigerator for up to 5 days.
  • Crust Variations: Swap graham crackers for vanilla wafers or gingersnaps for a fun twist.
  • Serving Tip: For clean cuts, dip your knife in hot water and wipe clean between slices.

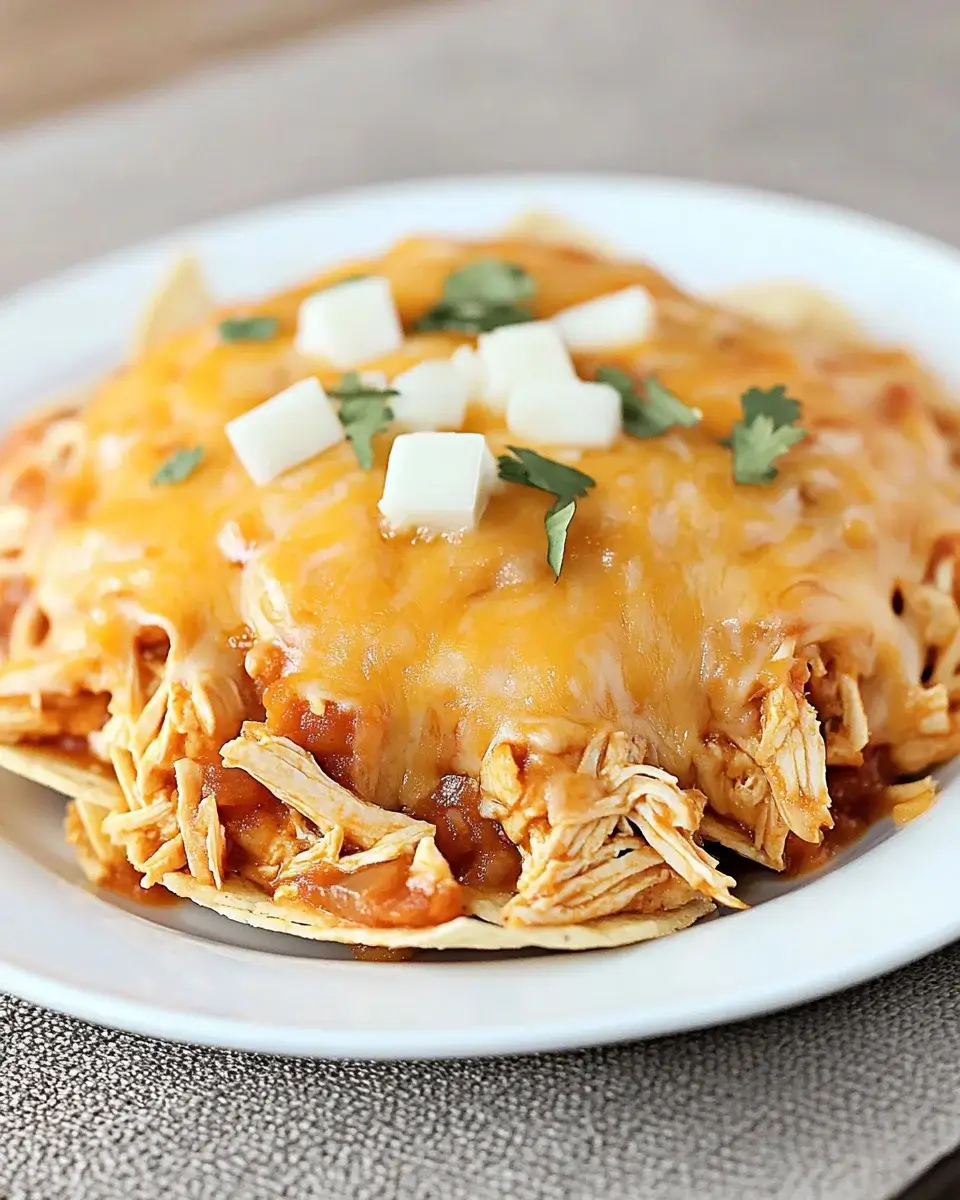
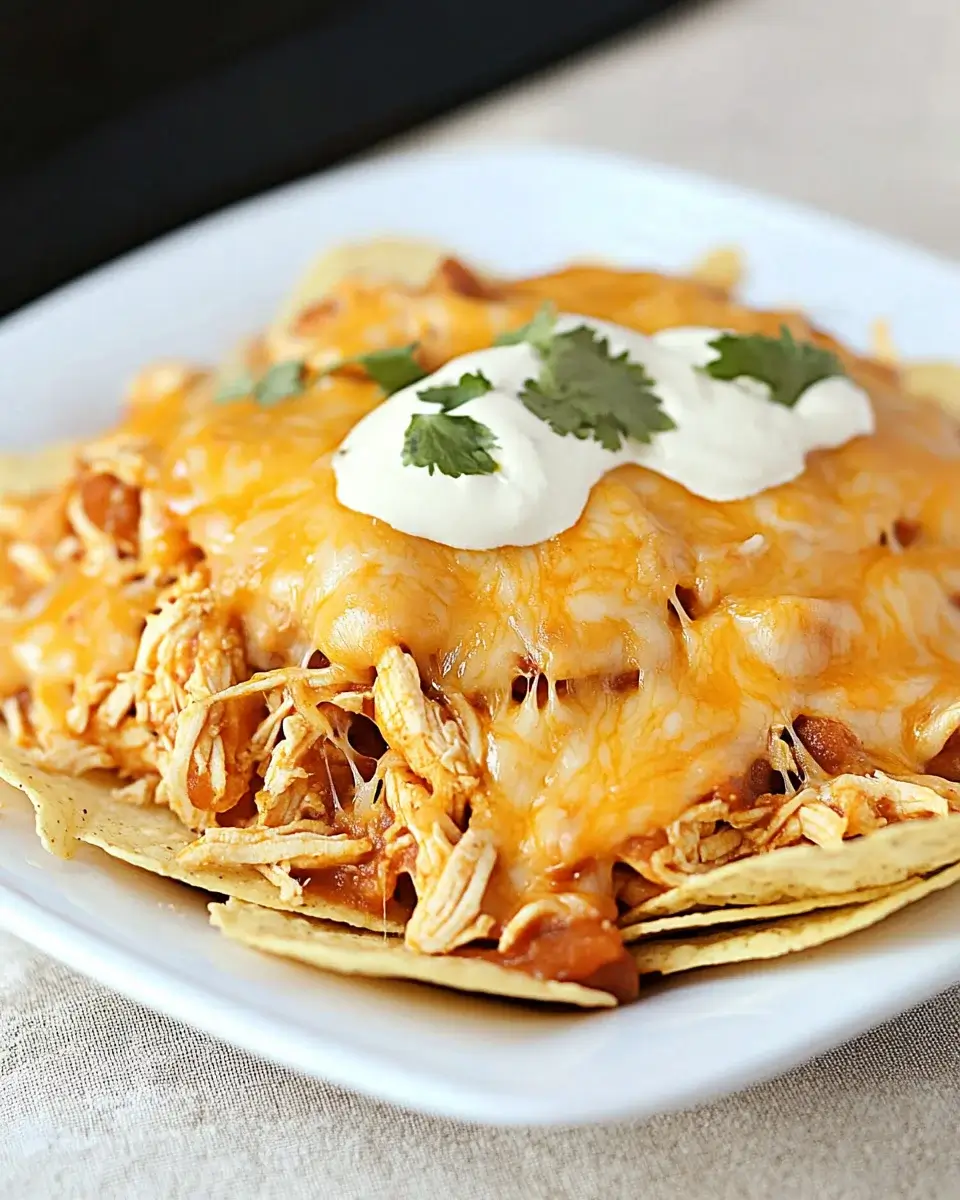
Crockpot Chicken Nachos Recipe is a must-try dish!

What Makes This Recipe Special?

Crockpot Chicken Nachos are not just any nachos; they are a delightful blend of flavors and textures that make them truly special. First, the use of shredded chicken adds a hearty protein element, making these nachos filling and satisfying. The combination of spices like chili powder, cumin, and garlic powder infuses the chicken with a rich, savory taste. Plus, the addition of black beans and corn brings a burst of color and nutrition. This recipe is perfect for gatherings, game days, or a cozy family dinner. Everyone loves nachos, and this version takes them to a whole new level!

Why Use a Crockpot for Nachos?

Using a crockpot for nachos is a game-changer. It allows the flavors to meld beautifully while keeping the chicken moist and tender. The slow cooking process means you can set it and forget it, freeing up your time for other tasks. Plus, the crockpot keeps everything warm until you’re ready to serve. This method also ensures that the chicken is infused with the salsa and spices, creating a deliciously rich base for your nachos. So, whether you’re hosting a party or just enjoying a quiet night in, the crockpot makes preparing these nachos easy and stress-free!

Ingredients for Crockpot Chicken Nachos Recipe

Essential Ingredients

To create the perfect Crockpot Chicken Nachos, you’ll need a few essential ingredients. These ingredients work together to deliver a delicious and satisfying dish. Here’s what you’ll need:

  • 2 cups cooked, shredded chicken
  • 1 cup salsa
  • 1 teaspoon chili powder
  • 1 teaspoon cumin
  • 1 teaspoon garlic powder
  • 1 bag (12 ounces) tortilla chips
  • 2 cups shredded cheddar cheese
  • 1 cup black beans, drained and rinsed
  • 1 cup corn, drained (canned or frozen)

These ingredients form the base of your nachos. The shredded chicken provides protein, while the salsa adds moisture and flavor. The spices enhance the overall taste, making every bite a delight. The tortilla chips serve as the crunchy foundation, and the cheese melts beautifully, creating a gooey topping that everyone loves.

Optional Toppings and Add-Ins

While the essential ingredients are fantastic on their own, you can elevate your nachos with some optional toppings and add-ins. Here are some ideas to consider:

  • 1 jalapeño, sliced (for a spicy kick)
  • 1 avocado, diced (for creaminess)
  • 1/2 cup sour cream (for a tangy finish)
  • 1/4 cup chopped fresh cilantro (for garnish)
  • Diced green chilies (for extra heat)
  • Substitute cheddar cheese with pepper jack (for a zesty flavor)

These toppings not only add flavor but also enhance the visual appeal of your nachos. Feel free to mix and match based on your preferences. The beauty of this recipe is its versatility, allowing you to customize it to suit your taste!

Step-by-Step Preparation of Crockpot Chicken Nachos Recipe

Step 1: Prepare the Chicken

To start, gather your cooked, shredded chicken. If you don’t have any on hand, you can easily cook some chicken breasts in advance. Simply boil or bake them until fully cooked, then shred them using two forks. Once your chicken is ready, place it in the crockpot. Next, add the salsa, chili powder, cumin, and garlic powder. Stir everything together until the chicken is well-coated with the spices and salsa. This step is crucial as it infuses the chicken with flavor, making your nachos delicious!

Step 2: Layer the Ingredients

After preparing the chicken mixture, it’s time to layer the ingredients for your nachos. Preheat your oven to 350°F. On a large baking sheet, spread a generous layer of tortilla chips. Make sure to cover the sheet evenly, as this will be the base of your nachos. Then, spoon the chicken mixture over the chips, ensuring that each chip gets a taste of that flavorful chicken. Next, sprinkle the black beans and corn evenly over the top. Finally, add the shredded cheddar cheese, which will melt beautifully in the oven.

Step 3: Cook in the Crockpot

Now that your ingredients are layered, it’s time to cook them in the crockpot. Cover the crockpot with its lid and set it to cook on low for 4 hours or high for 2 hours. This slow cooking process allows the flavors to meld together, creating a rich and savory dish. The chicken will remain moist, and the spices will permeate every bite. If you’re short on time, the high setting is a great option, but the low setting is ideal for maximum flavor.

Step 4: Assemble the Nachos

Once the cooking time is up, it’s time to assemble your nachos! Carefully remove the crockpot lid and give the chicken mixture a gentle stir. Then, take the baking sheet with the layered ingredients from the oven. Pour the hot chicken mixture over the tortilla chips, black beans, corn, and cheese. If you like a little heat, now is the time to add sliced jalapeños on top. Return the baking sheet to the oven and bake for 10-15 minutes, or until the cheese is melted and bubbly. When it’s done, remove it from the oven and let it cool for a minute before serving. Top with diced avocado, sour cream, and chopped cilantro for a fresh finish!

Variations of Crockpot Chicken Nachos Recipe

Vegetarian Options

If you’re looking for a vegetarian twist on the classic Crockpot Chicken Nachos Recipe, you’re in luck! You can easily swap out the chicken for a variety of delicious plant-based ingredients. Consider using black beans or pinto beans as your protein source. They are not only filling but also packed with nutrients. You can also add sautéed bell peppers, mushrooms, or zucchini for extra flavor and texture. Another great option is to use a meat substitute, like shredded jackfruit or tofu, seasoned with the same spices. This way, you can enjoy the same savory taste without the meat!

Spicy Additions

If you love a little heat, there are plenty of ways to spice up your Crockpot Chicken Nachos Recipe. Start by adding diced green chilies to the chicken mixture before cooking. This will give your nachos a nice kick. You can also use spicy salsa instead of regular salsa for an extra layer of flavor. For those who really enjoy heat, consider topping your nachos with sliced jalapeños or even a drizzle of hot sauce right before serving. These spicy additions will surely satisfy your cravings for something zesty!

Different Cheese Choices

Cheese is a key ingredient in any nacho recipe, and there are many options to choose from! While cheddar cheese is a classic choice, you can experiment with different types of cheese to enhance the flavor of your nachos. Pepper jack cheese adds a spicy twist, while Monterey Jack offers a creamy texture. For a gourmet touch, try crumbled feta or goat cheese. Mixing different cheeses can also create a delightful flavor profile. Just remember to use cheese that melts well for that gooey, delicious topping!

Cooking Note for Crockpot Chicken Nachos Recipe

Tips for Perfectly Cooked Chicken

Getting perfectly cooked chicken is essential for your Crockpot Chicken Nachos Recipe. Here are some helpful tips to ensure your chicken turns out tender and flavorful:

  • Use Boneless Chicken: Boneless chicken breasts or thighs work best. They cook evenly and stay moist.
  • Shred After Cooking: Always shred the chicken after it’s cooked. This allows it to soak up the flavors of the salsa and spices.
  • Don’t Overcook: Keep an eye on the cooking time. Overcooked chicken can become dry. Aim for the recommended times of 4 hours on low or 2 hours on high.
  • Check for Doneness: If you’re unsure, use a meat thermometer. The internal temperature should reach 165°F for safe consumption.

By following these tips, you’ll ensure that your chicken is perfectly cooked, making your nachos even more delicious!

Adjusting Cooking Times

Cooking times can vary based on your crockpot model and the amount of chicken used. Here are some adjustments to consider:

  • More Chicken: If you’re using more than 2 cups of chicken, you may need to increase the cooking time by 30 minutes to an hour.
  • Less Chicken: If you’re using less chicken, reduce the cooking time by about 30 minutes.
  • High Altitude Cooking: If you live at a high altitude, you may need to cook your nachos a bit longer due to lower boiling points.
  • Check Periodically: If you’re unsure, check the chicken periodically. It’s better to check early than to overcook!

Adjusting the cooking times based on these factors will help you achieve the best results for your nachos. Enjoy the process and the delicious outcome!

Serving Suggestions for Crockpot Chicken Nachos Recipe

Best Sides to Pair

When serving your Crockpot Chicken Nachos, consider adding some delightful sides to enhance the meal. Here are a few great options:

  • Mexican Rice: A side of fluffy Mexican rice complements the nachos perfectly. The flavors blend well, making for a satisfying meal.
  • Refried Beans: Creamy refried beans add a rich texture and flavor. They can be served on the side or even spooned over the nachos.
  • Guacamole: Fresh guacamole is a must-have! Its creamy texture and zesty flavor pair wonderfully with the crunchy nachos.
  • Fresh Salad: A light salad with lettuce, tomatoes, and a lime vinaigrette can balance the richness of the nachos.
  • Fruit Salsa: For a sweet twist, serve a fruit salsa made with diced mango or pineapple. It adds a refreshing contrast to the savory nachos.

These sides not only enhance the flavor but also add variety to your meal. They make your nacho night even more enjoyable!

Creative Serving Ideas

Serving your Crockpot Chicken Nachos can be fun and creative! Here are some ideas to make your presentation stand out:

  • Individual Portions: Serve nachos in small bowls or on individual plates. This makes it easy for guests to enjoy their own servings.
  • Nacho Bar: Set up a nacho bar with all the toppings and sides. Let everyone customize their nachos with their favorite ingredients!
  • Skewers: For a fun twist, thread tortilla chips, chicken, and toppings onto skewers. This makes for a unique and easy-to-eat appetizer.
  • Layered Dip: Create a layered dip using the same ingredients. Layer the chicken, beans, cheese, and toppings in a clear dish for a beautiful presentation.
  • Serve with Dipping Sauces: Offer a variety of dipping sauces, like ranch or spicy salsa, for an extra flavor boost.

These creative serving ideas will impress your guests and make your nacho night memorable. Enjoy the deliciousness of your Crockpot Chicken Nachos!

Paul

Crockpot Chicken Nachos Recipe is a must-try dish!

Turn your crockpot into a fiesta machine with these cheesy, saucy Slow Cooker Chicken Nachos! Tender shredded chicken is slow-cooked in salsa and queso, then spooned over crunchy tortilla chips and topped with melty Mexican cheese. Perfect for game day, parties, or an easy weeknight treat.
Prep Time 5 minutes
Cook Time 4 hours
Total Time 4 hours 5 minutes
Servings: 6 servings
Course: Appetizer, Main Dish
Cuisine: American-Mexican Fusion

Ingredients
  

  • 2 boneless skinless chicken breasts
  • 1 cup mild salsa or medium/hot for more heat
  • 3 tablespoons taco seasoning
  • ½ cup chicken broth preferably low-sodium
  • 1 cup Salsa Con Queso Taco Bell brand recommended
  • ½ bag tortilla chips about 5–6 oz
  • 1 8 oz bag shredded Mexican blend cheese

Method
 

  1. Set the BasePlace chicken breasts into the slow cooker. Pour in chicken broth and sprinkle taco seasoning evenly over the top.
  2. Start CookingCover and cook on high for 1 hour.
  3. Add the SalsaAfter the first hour, add half of the salsa to the crockpot. Stir gently, cover again, and cook on low for 2 hours, stirring occasionally.
  4. Shred the ChickenUse two forks to shred the cooked chicken directly in the slow cooker.
  5. Make It CreamyStir in the remaining salsa and the Salsa Con Queso until well combined.
  6. Simmer to PerfectionContinue cooking on low for 30–45 minutes. If the mixture is too runny, increase to high heat in 10-minute increments, stirring occasionally until thickened to your liking.
  7. Build Your NachosOn individual plates or a serving platter, lay out 10–15 tortilla chips. Spoon the hot cheesy chicken mixture over the chips.
  8. Top It OffSprinkle with shredded Mexican blend cheese. For gooier nachos, microwave each plate for 30–35 seconds until the cheese is melted.

Notes

  • All-Day Option: Combine all ingredients in the slow cooker and cook on low for 6–8 hours, then shred and stir before serving.
  • Topping Ideas: Add sour cream, sliced jalapeños, diced tomatoes, or guacamole for extra flavor.
  • Make It a Meal: Serve over rice or in a tortilla bowl for a complete dinner.
  • Storage: Leftovers keep well refrigerated for up to 3 days. Reheat gently before serving.

Tips for Making the Best Crockpot Chicken Nachos Recipe

Ingredient Substitutions

Making the perfect Crockpot Chicken Nachos is all about flexibility. If you find yourself missing an ingredient, don’t worry! Here are some easy substitutions you can make:

  • Chicken: If you don’t have cooked chicken, you can use rotisserie chicken for convenience. Alternatively, shredded turkey works well too!
  • Salsa: If you’re out of salsa, try using diced tomatoes with green chilies or even a homemade tomato sauce with spices.
  • Beans: Black beans are great, but you can also use kidney beans or chickpeas for a different flavor and texture.
  • Cheese: While cheddar is a classic, feel free to use mozzarella or a blend of cheeses for a unique taste.
  • Spices: If you don’t have chili powder or cumin, taco seasoning can be a quick alternative. It adds a nice flavor without extra measuring!

These substitutions can help you whip up a delicious batch of nachos, even if you’re low on certain ingredients. Get creative and enjoy the process!

Storage and Reheating Tips

After enjoying your Crockpot Chicken Nachos, you might have some leftovers. Here’s how to store and reheat them properly:

  • Storage: Allow the nachos to cool completely before storing. Place them in an airtight container and refrigerate for up to 3 days. If you have leftover chicken mixture, store it separately to keep the chips crunchy.
  • Reheating: To reheat, preheat your oven to 350°F. Spread the nachos on a baking sheet and warm them for about 10 minutes, or until heated through. This helps maintain the crunchiness of the chips.
  • Microwave Option: If you’re in a hurry, you can microwave the nachos for about 1-2 minutes. However, this may make the chips a bit soggy, so it’s best to use the oven when possible.
  • Fresh Toppings: When reheating, consider adding fresh toppings like avocado or cilantro afterward. This keeps them vibrant and flavorful!

By following these storage and reheating tips, you can enjoy your delicious nachos even after the main event. They make for a great snack or quick meal!

Breakdown of Time for Crockpot Chicken Nachos Recipe

Prep Time

The prep time for your Crockpot Chicken Nachos Recipe is quite minimal. You’ll spend about 15-20 minutes gathering your ingredients and preparing the chicken mixture. This includes shredding the chicken, measuring out the spices, and mixing everything in the crockpot. It’s a quick and easy process that allows you to get started on your delicious nachos without much hassle!

Cooking Time

Once you’ve prepped your ingredients, the cooking time is where the magic happens. If you set your crockpot to low, it will take about 4 hours for the chicken to cook thoroughly and absorb all the flavors. If you’re short on time, you can switch to the high setting, which will cook the chicken in about 2 hours. Either way, the slow cooking ensures that your nachos will be packed with flavor!

Total Time

In total, you’re looking at around 4 hours and 20 minutes if you choose the low setting, or about 2 hours and 20 minutes if you opt for high. This includes both prep and cooking time. The best part? You can set it and forget it, allowing you to enjoy your day while your delicious nachos cook away. When it’s time to serve, you’ll have a mouthwatering dish ready to impress your family and friends!

Nutritional Information for Crockpot Chicken Nachos Recipe

Calories and Macronutrients

Understanding the nutritional content of your Crockpot Chicken Nachos Recipe is essential for making informed choices. Each serving of these delicious nachos contains approximately 450 calories. This makes them a satisfying option for a meal or snack. Here’s a breakdown of the macronutrients per serving:

  • Calories: 450
  • Protein: 30g
  • Fat: 20g
  • Net Carbohydrates: 35g

The protein content comes mainly from the shredded chicken and black beans, making these nachos a filling choice. The fat primarily comes from the cheese and any added toppings like avocado or sour cream. The net carbohydrates are mainly from the tortilla chips and corn, providing a good source of energy. This balance of macronutrients makes the dish enjoyable while still being mindful of your dietary needs.

Sodium Content

When enjoying your Crockpot Chicken Nachos, it’s also important to consider the sodium content. Each serving contains about 800mg of sodium. This amount can vary based on the specific brands of salsa, cheese, and tortilla chips you use. If you’re watching your sodium intake, here are a few tips to help manage it:

  • Choose Low-Sodium Options: Look for low-sodium salsa and cheese to reduce the overall sodium content.
  • Rinse Canned Ingredients: Rinsing black beans and corn can help remove some of the sodium they contain.
  • Limit Added Salt: Avoid adding extra salt to the chicken mixture or toppings.

By being mindful of sodium levels, you can enjoy your nachos while keeping your health in check. Remember, moderation is key, and these nachos can be part of a balanced diet!

FAQs About Crockpot Chicken Nachos Recipe

Can I use frozen chicken in this recipe?

Yes, you can use frozen chicken in your Crockpot Chicken Nachos Recipe! However, it’s important to ensure that the chicken cooks thoroughly. If you start with frozen chicken, set your crockpot to cook on high for about 4-5 hours. This will give the chicken enough time to thaw and cook properly. Just remember to check that the internal temperature reaches 165°F for safe consumption. Using frozen chicken can be a convenient option, especially if you’re short on time!

How do I make nachos crispy in the crockpot?

Making crispy nachos in the crockpot can be a bit tricky, as the moisture from the chicken and salsa can make the chips soggy. To keep your nachos crispy, consider these tips:

  • Layer Wisely: Place the tortilla chips on the bottom of the baking sheet and add the toppings sparingly. This helps prevent the chips from getting too wet.
  • Use the Oven: After cooking in the crockpot, transfer the nachos to the oven for a few minutes. Baking them at 350°F for 10-15 minutes will help crisp them up.
  • Serve Immediately: Serve the nachos right after baking. The longer they sit, the soggier they can become.

By following these tips, you can enjoy deliciously crispy nachos that everyone will love!

What are some good toppings for nachos?

When it comes to toppings, the options are endless! Here are some popular and tasty toppings to consider for your Crockpot Chicken Nachos:

  • Fresh Guacamole: Creamy and flavorful, guacamole adds a delicious touch.
  • Sour Cream: A dollop of sour cream provides a tangy contrast to the spicy flavors.
  • Chopped Tomatoes: Fresh diced tomatoes add a burst of freshness and color.
  • Green Onions: Sliced green onions give a nice crunch and mild onion flavor.
  • Olives: Sliced black or green olives add a briny flavor that complements the nachos.
  • Hot Sauce: For those who love heat, a drizzle of hot sauce can elevate the flavor.

Feel free to mix and match these toppings based on your preferences. The beauty of nachos is that you can customize them to suit your taste!

Conclusion on Crockpot Chicken Nachos Recipe

Recap of Key Points

In summary, the Crockpot Chicken Nachos Recipe is a fantastic dish that combines convenience with delicious flavors. You start with tender, shredded chicken mixed with zesty salsa and spices, creating a savory base. Layering tortilla chips, black beans, corn, and cheese on top makes for a delightful crunch. The slow cooking process in the crockpot ensures that every bite is packed with flavor. Plus, the optional toppings like jalapeños, avocado, and sour cream add freshness and variety. Whether you’re hosting a party or enjoying a cozy night in, this recipe is sure to impress!

Encouragement to Try the Recipe

Now that you have all the details, it’s time to roll up your sleeves and give this Crockpot Chicken Nachos Recipe a try! With its simple preparation and mouthwatering results, you’ll find it’s a hit with family and friends. Don’t hesitate to customize it with your favorite toppings or variations. Remember, cooking should be fun and creative! So gather your ingredients, set your crockpot, and enjoy the deliciousness that awaits. Happy cooking!

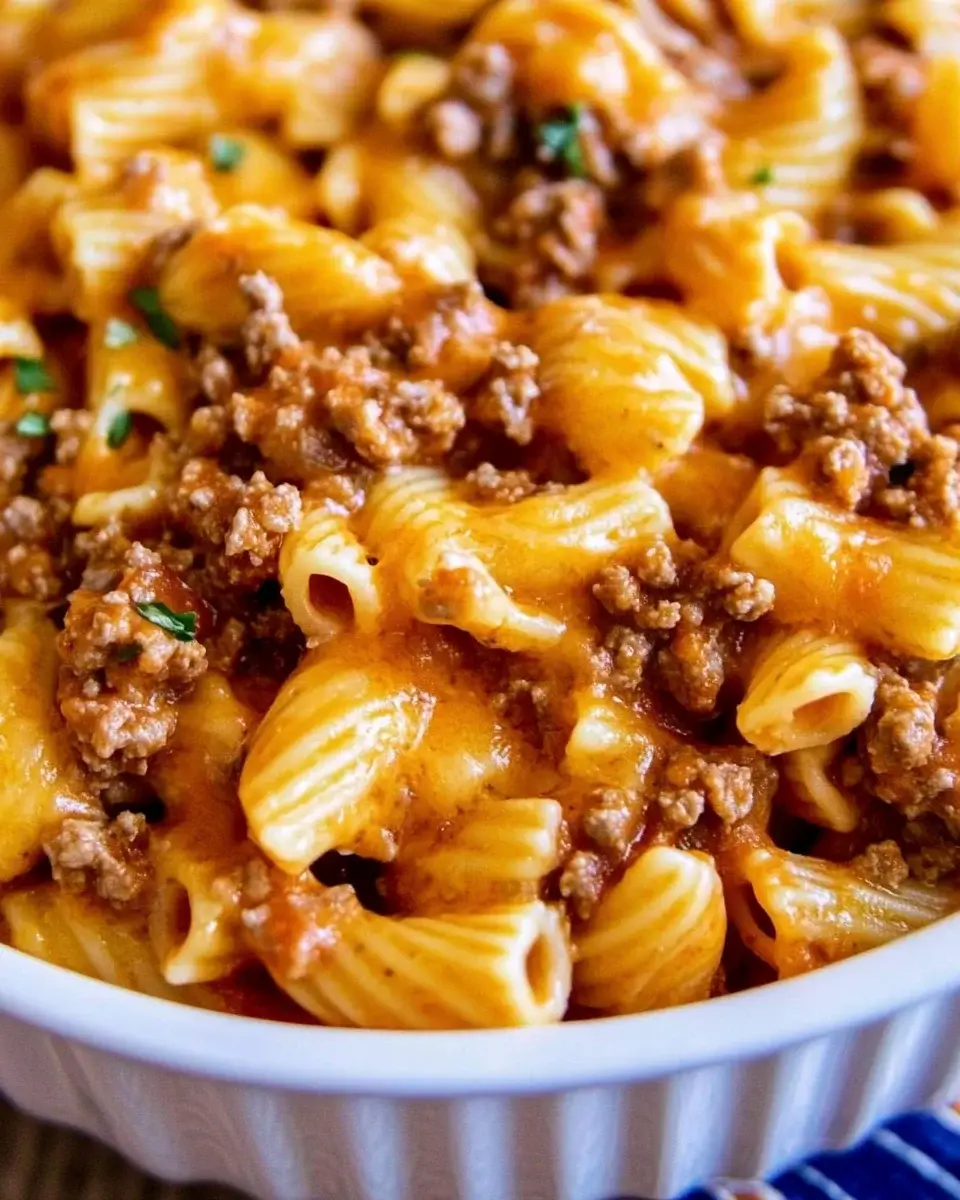
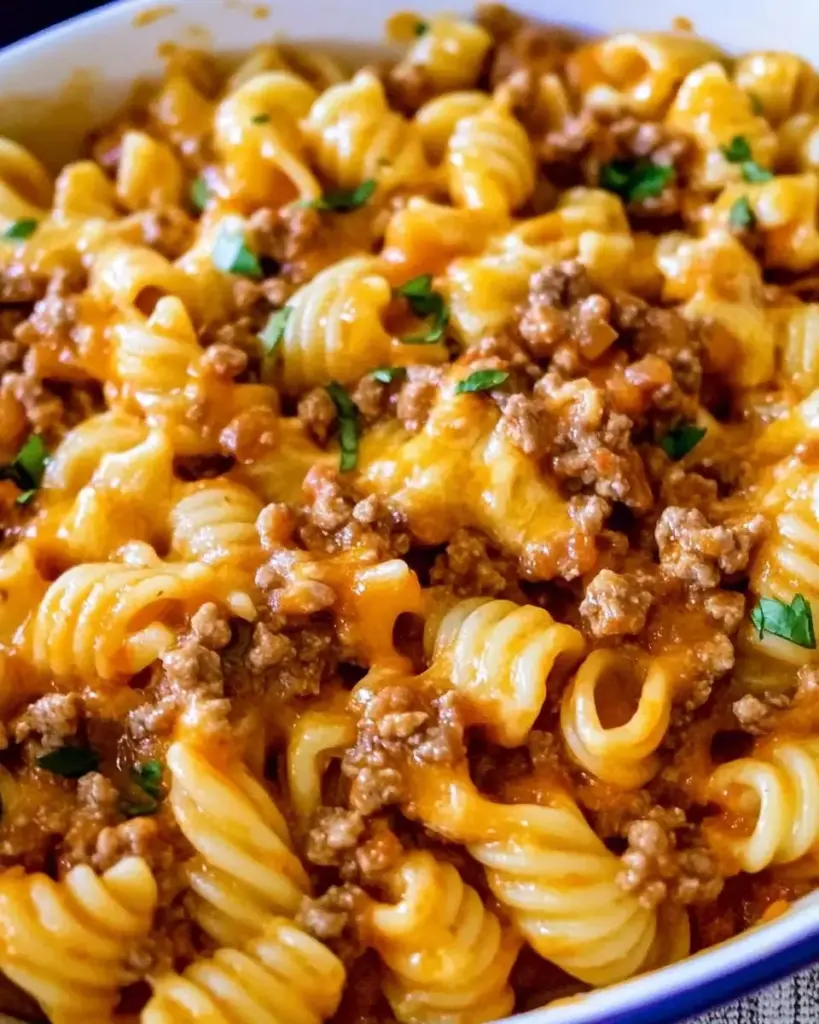
Cheesy Taco Pasta Recipe is a family favorite dish!

Cheesy Taco Pasta Recipe combines the comforting flavors of pasta with the zesty taste of tacos. This dish is not only quick to prepare but also packed with cheesy goodness and hearty ingredients. It’s perfect for busy weeknights or casual gatherings with friends.

Imagine a creamy, cheesy pasta dish that brings together the best of both worlds: the classic appeal of macaroni and cheese and the bold flavors of taco night. With just a few simple ingredients, you can whip up a satisfying meal that will have everyone asking for seconds. Plus, it’s versatile! You can easily customize it to suit your taste preferences or dietary needs.

Cheesy Taco Pasta Recipe is sure to become a favorite in your household. So, let’s dive in and get cooking!

Ingredients for Cheesy Taco Pasta Recipe

Cheesy Taco Pasta Recipe, you’ll need a handful of simple ingredients. These items are easy to find at your local grocery store, making this dish both accessible and convenient. Here’s what you’ll need:

  • 8 ounces elbow macaroni
  • 1 pound ground beef
  • 1 tablespoon taco seasoning
  • 1 can (10 ounces) diced tomatoes with green chilies
  • 1 cup beef broth
  • 1 cup shredded cheddar cheese
  • 1 cup shredded Monterey Jack cheese
  • 1/2 cup sour cream
  • Salt and pepper to taste
  • Chopped green onions for garnish

These ingredients come together to create a creamy, cheesy delight that’s bursting with flavor. The combination of ground beef and taco seasoning gives it that classic taco taste, while the cheeses and sour cream add a rich creaminess. Don’t forget the diced tomatoes with green chilies, which bring a nice kick to the dish!

Cheesy Taco Pasta Recipe is all about making it your own!

Step-by-Step Preparation of Cheesy Taco Pasta Recipe

Cheesy Taco Pasta Recipe is simple and straightforward, making it perfect for cooks of all skill levels. Follow these easy steps to create a delicious meal that your family will love.

Step 1: Gather Your Ingredients

Before you start cooking, make sure you have everything you need. Gather all the ingredients listed above. Having everything in one place will make the cooking process smoother and more enjoyable. Plus, it helps to avoid any last-minute trips to the store!

Step 2: Cook the Pasta

Begin by cooking the elbow macaroni. Bring a large pot of salted water to a boil. Add the macaroni and cook according to the package instructions until it’s al dente. This usually takes about 7-8 minutes. Once cooked, drain the pasta in a colander and set it aside. Remember, you want it firm enough to hold up in the creamy sauce!

Step 3: Prepare the Taco Meat

Next, heat a large skillet over medium heat. Add the ground beef and cook until it’s browned and fully cooked, which should take about 5-7 minutes. Make sure to break up the meat with a spatula as it cooks. Once done, drain any excess fat to keep the dish from becoming greasy. Now, stir in the taco seasoning, diced tomatoes with green chilies, and beef broth. Bring this mixture to a simmer, allowing the flavors to meld together beautifully.

Step 4: Combine Pasta and Taco Mixture

Once your taco meat is ready, it’s time to combine it with the pasta. Add the cooked elbow macaroni to the skillet with the taco mixture. Stir everything together until the pasta is well coated with the flavorful sauce. This step is crucial as it ensures every bite is packed with deliciousness!

Step 5: Add Cheese and Bake

Cheesy Taco Pasta Recipe gets its rich, comforting texture. Once everything is well combined, you can serve it hot, garnished with chopped green onions for a fresh touch.

And there you have it! A delightful, cheesy dish that’s sure to please everyone at the table. Enjoy your cooking adventure!

Variations of Cheesy Taco Pasta Recipe

Cheesy Taco Pasta Recipe is incredibly versatile, allowing you to customize it to suit your taste or dietary needs. Whether you’re looking for a vegetarian option or want to spice things up, there are plenty of variations to explore. Let’s take a look at two popular alternatives that can add a unique twist to this delicious dish.

Vegetarian Cheesy Taco Pasta Recipe

Cheesy Taco Pasta Recipe is a fantastic choice. Instead of ground beef, you can use black beans or lentils. These ingredients provide a hearty texture and are packed with protein. Here’s how to make it:

  • Replace the 1 pound of ground beef with 1 can of black beans (drained and rinsed) or 1 cup of cooked lentils.
  • Use vegetable broth instead of beef broth to keep it vegetarian-friendly.
  • Follow the same steps for cooking the pasta and combining the ingredients.

Cheesy Taco Pasta Recipe without meat!

Spicy Cheesy Taco Pasta Recipe

Cheesy Taco Pasta Recipe will be right up your alley! Adding some spice can elevate the dish and give it an exciting kick. Here’s how to make it spicy:

  • Add sliced jalapeños to the taco meat while it simmers. You can adjust the amount based on your heat preference.
  • Incorporate a dash of hot sauce or a sprinkle of crushed red pepper flakes when mixing in the cheese.
  • For an extra layer of flavor, consider using pepper jack cheese instead of Monterey Jack.

Cheesy Taco Pasta Recipe can be tailored to fit your cravings!

Cooking Note for Cheesy Taco Pasta Recipe

Cheesy Taco Pasta Recipe, there are a few important cooking notes to keep in mind. These tips will help ensure that your dish turns out perfectly every time, making your cooking experience enjoyable and stress-free.

First, always taste as you go! This is key to achieving the right balance of flavors. After adding the taco seasoning, take a moment to taste the mixture. If you feel it needs more seasoning, don’t hesitate to add a pinch of salt or pepper. Remember, everyone’s taste buds are different, so adjust according to your preference.

Next, be mindful of the cooking time for the pasta. Cooking it until it’s al dente is crucial. If the pasta is overcooked, it can become mushy when mixed with the creamy sauce. Keep an eye on the clock and follow the package instructions closely. A little firmness will help the pasta hold up in the dish.

Additionally, when combining the cheese and sour cream, make sure to stir gently. This will help create a smooth and creamy texture without clumping. If you find the mixture too thick, you can add a splash of beef broth or water to loosen it up. This will ensure that every bite is rich and creamy.

Lastly, don’t forget about the garnishes! Chopped green onions not only add a pop of color but also a fresh flavor that complements the richness of the cheese. You can also consider adding a dollop of sour cream on top when serving for an extra creamy touch.

Cheesy Taco Pasta Recipe that your family will love. Happy cooking!

Serving Suggestions for Cheesy Taco Pasta Recipe

Cheesy Taco Pasta Recipe, it’s time to think about how to serve it! Presentation can elevate your meal, making it even more enjoyable. Here are some fantastic serving suggestions to enhance your dining experience:

  • Garnish with Fresh Ingredients: After plating, sprinkle chopped green onions on top for a burst of color and flavor. You can also add fresh cilantro or parsley for an extra touch of freshness.
  • Pair with a Side Salad: A light side salad can balance the richness of the cheesy pasta. Consider a simple green salad with lettuce, tomatoes, and a tangy vinaigrette. This adds a refreshing contrast to the creamy dish.
  • Serve with Tortilla Chips: For a fun twist, serve your Cheesy Taco Pasta Recipe with crispy tortilla chips on the side. They can be used for scooping up the pasta or enjoyed as a crunchy snack alongside.
  • Offer Additional Toppings: Set up a toppings bar with options like sliced jalapeños, diced avocados, or extra cheese. This allows everyone to customize their dish to their liking, making it interactive and fun!
  • Accompany with a Beverage: Pair your meal with a refreshing drink. A cold soda, iced tea, or even a light beer can complement the flavors of the dish beautifully. For a non-alcoholic option, consider a fruity mocktail.

Cheesy Taco Pasta Recipe but also create a delightful dining experience for you and your guests. Enjoy your meal and the smiles it brings to the table!

Tips for Perfecting Your Cheesy Taco Pasta Recipe

Cheesy Taco Pasta Recipe truly shine, consider these helpful tips. They will guide you in creating a dish that’s not only delicious but also visually appealing and satisfying. Let’s explore some key pointers to elevate your cooking experience!

  • Use Quality Ingredients: The flavor of your Cheesy Taco Pasta Recipe starts with the ingredients. Opt for high-quality ground beef and fresh cheeses. Fresh ingredients can make a noticeable difference in taste.
  • Don’t Rush the Simmer: When you add the taco seasoning and broth, allow the mixture to simmer for a few minutes. This step helps the flavors meld together, creating a richer taste. Patience pays off!
  • Experiment with Cheese: While cheddar and Monterey Jack are classic choices, feel free to mix in other cheeses. Try adding gouda for a smoky flavor or cream cheese for extra creaminess. The cheese blend can enhance the overall taste.
  • Adjust the Spice Level: If you’re cooking for kids or those who prefer milder flavors, adjust the taco seasoning accordingly. You can start with half the amount and add more to taste. This way, everyone can enjoy the dish!
  • Make it Ahead: If you’re short on time, consider preparing the taco meat and pasta ahead of time. Store them separately in the fridge. When you’re ready to eat, simply combine and heat. This makes weeknight dinners a breeze!
  • Top with Crunch: For added texture, consider topping your Cheesy Taco Pasta Recipe with crushed tortilla chips or crispy bacon bits. This contrast can make each bite even more enjoyable.
  • Store Leftovers Properly: If you have leftovers, store them in an airtight container in the fridge. Reheat gently on the stove or in the microwave, adding a splash of broth to keep it creamy.

Cheesy Taco Pasta Recipe. Each suggestion is designed to enhance your cooking process and ensure a delightful meal every time. Happy cooking!

Breakdown of Time for Cheesy Taco Pasta Recipe

Cheesy Taco Pasta Recipe can help you plan your cooking efficiently. Whether you’re preparing this dish for a busy weeknight or a casual gathering, knowing the time breakdown will make your cooking experience smoother. Here’s a detailed look at the time required for each part of the process:

Prep Time

Cheesy Taco Pasta Recipe is approximately 10-15 minutes. During this time, you’ll gather all your ingredients, measure them out, and chop any fresh items like green onions. Having everything ready before you start cooking will make the process much easier and more enjoyable.

Cooking Time

The cooking time for this dish is about 20-25 minutes. This includes:

  • Cooking the elbow macaroni (7-8 minutes)
  • Browning the ground beef (5-7 minutes)
  • Simmering the taco mixture (5-10 minutes)
  • Combining the pasta and cheese (3-5 minutes)

Each step is quick, allowing you to have a delicious meal ready in no time!

Total Time

Cheesy Taco Pasta Recipe to take about 30-40 minutes from start to finish. This makes it a fantastic option for a weeknight dinner when you want something hearty and satisfying without spending hours in the kitchen. With this time breakdown, you can easily fit this recipe into your busy schedule!

Nutritional Information for Cheesy Taco Pasta Recipe

Cheesy Taco Pasta Recipe is not only delicious but also provides a good mix of nutrients. Here’s a breakdown of the nutritional information per serving, so you can enjoy this dish while being mindful of your dietary needs.

Calories

Cheesy Taco Pasta Recipe contains approximately 550 calories. This makes it a hearty meal that can keep you satisfied for hours. The combination of pasta, beef, and cheese contributes to the calorie count, providing energy for your day. If you’re looking to reduce calories, consider adjusting portion sizes or using leaner meat options.

Protein

One of the standout features of this recipe is its protein content. Each serving offers about 30 grams of protein. This is primarily from the ground beef and cheese, making it a great choice for those looking to increase their protein intake. Protein is essential for muscle repair and growth, making this dish a good option for active individuals.

Sodium

Cheesy Taco Pasta Recipe is approximately 800 milligrams per serving. This amount can vary based on the specific brands of ingredients used, especially the taco seasoning and beef broth. If you’re watching your sodium intake, consider using low-sodium broth and seasoning to help manage the overall salt content. Balancing sodium with fresh ingredients can also enhance the dish without compromising flavor.

Cheesy Taco Pasta Recipe while making informed choices about your diet. Whether you’re cooking for yourself or a family, this dish offers a satisfying blend of flavors and nutrients that everyone will love!

FAQs about Cheesy Taco Pasta Recipe

Can I make Cheesy Taco Pasta Recipe ahead of time?

Cheesy Taco Pasta Recipe can be made ahead of time, making it a great option for busy days. You can prepare the taco meat and pasta separately, then store them in airtight containers in the refrigerator. When you’re ready to eat, simply combine them in a skillet, add the cheese and sour cream, and heat until warm. This way, you can enjoy a delicious meal without the hassle of cooking from scratch every time!

What can I substitute for cheese in Cheesy Taco Pasta Recipe?

Cheesy Taco Pasta Recipe, there are several options. For a dairy-free alternative, you can use vegan cheese or nutritional yeast, which adds a cheesy flavor without the dairy. If you’re simply out of cheese, consider using cream cheese for a creamy texture or a mix of cottage cheese and a bit of shredded cheese for flavor. Just remember that the taste and texture may vary slightly, but it will still be delicious!

How can I make Cheesy Taco Pasta Recipe spicier?

Cheesy Taco Pasta Recipe, there are a few easy ways to spice things up! You can add sliced jalapeños or diced green chilies to the taco meat while it simmers. Another option is to mix in a few dashes of hot sauce or crushed red pepper flakes when combining the cheese. If you want an extra kick, consider using pepper jack cheese instead of Monterey Jack. These additions will give your dish a delightful spicy twist!

Is Cheesy Taco Pasta Recipe suitable for meal prep?

Cheesy Taco Pasta Recipe is perfect for meal prep! It stores well in the refrigerator for up to 3-4 days. You can portion it out into individual containers for easy grab-and-go meals throughout the week. Just reheat in the microwave or on the stove, adding a splash of broth if needed to keep it creamy. This makes it a convenient and satisfying option for lunches or quick dinners!

Conclusion on Cheesy Taco Pasta Recipe

Cheesy Taco Pasta Recipe is a delightful dish that brings together the comforting elements of pasta and the bold flavors of tacos. It’s not only easy to prepare but also offers a variety of options to suit different tastes and dietary needs. Whether you choose to stick with the classic recipe or explore the vegetarian or spicy variations, this dish is sure to please everyone at the table.

Cheesy Taco Pasta Recipe is perfect for busy weeknights or casual gatherings with friends and family. The combination of simple ingredients makes it accessible for cooks of all skill levels, allowing you to create a satisfying meal in no time. Plus, the ability to customize the recipe means you can make it your own, adding your favorite ingredients or adjusting the spice level to fit your preferences.

Cheesy Taco Pasta Recipe. Your family and friends will surely appreciate the effort, and you might just find this dish becoming a staple in your home. Happy cooking!

Paul

Cheesy Taco Pasta Recipe is a family favorite dish!

This Cheesy Taco Pasta is the perfect mashup of taco night and pasta night—boldly seasoned ground beef, tangy salsa, tender shells, and melty cheese all come together in one skillet for a creamy, comforting, and totally crave-worthy dinner the whole family will love!
Prep Time 5 minutes
Cook Time 20 minutes
Total Time 25 minutes
Servings: 6 servings
Course: Main Course
Cuisine: American-Mexican Fusion

Ingredients
  

  • 1 pound ground beef 85/15 for best flavor
  • 2 tablespoons taco seasoning use store-bought or homemade
  • ¾ cup water
  • 1 cup jarred salsa
  • 8 ounces pasta medium shells are ideal
  • 1 cup shredded cheddar cheese
  • ½ cup shredded mozzarella cheese

Method
 

  1. Cook the BeefIn a large skillet over medium-high heat, brown the ground beef until no longer pink. Drain any excess fat.
  2. Season the MeatAdd the taco seasoning and water to the beef. Stir and simmer for 3–4 minutes until the sauce thickens slightly.
  3. Add SalsaStir in the salsa and reduce the heat to low. Let the mixture simmer gently while you cook the pasta.
  4. Boil the PastaIn a separate pot, cook the pasta shells according to package directions until al dente. Drain the pasta.
  5. Combine and MeltAdd the cooked pasta to the skillet with the beef mixture. Sprinkle in the cheddar and mozzarella cheeses. Stir until the cheese melts and the pasta is coated in a creamy, cheesy taco sauce.
  6. ServeSpoon into bowls and serve warm. Garnish with fresh herbs, extra cheese, or your favorite taco toppings if desired.

Notes

  • Customize It: Add in corn, black beans, or bell peppers for a veggie boost.
  • Spice Level: Use hot salsa or add a pinch of chili flakes for more heat.
  • Cheese Variations: Pepper jack or a Mexican blend can be used for extra flavor.
  • Leftovers: Reheat gently with a splash of milk or water to keep the pasta creamy.

Korean Braised Short Ribs Recipe is a must-try!

Korean Braised Short Ribs, known as “Galbi Jjim,” is a dish that brings warmth and comfort to any table. This recipe is not just about cooking; it’s about creating a delightful experience that combines rich flavors and tender meat. The unique blend of ingredients makes this dish stand out, offering a taste of Korea right in your kitchen.

What Makes Korean Braised Short Ribs Unique?

What sets Korean Braised Short Ribs apart is the harmonious balance of sweet, savory, and umami flavors. The use of soy sauce, brown sugar, and sesame oil creates a rich sauce that perfectly complements the beef. The slow braising process allows the meat to absorb these flavors, resulting in tender, fall-off-the-bone ribs. Additionally, the inclusion of garlic and ginger adds a fragrant touch, enhancing the overall taste. This dish is not only delicious but also visually appealing, especially when garnished with green onions and sesame seeds.

The Cultural Significance of Short Ribs in Korean Cuisine

Short ribs hold a special place in Korean culture. They are often served during celebrations and family gatherings, symbolizing abundance and togetherness. Traditionally, Galbi Jjim is enjoyed during holidays like Chuseok (Korean Thanksgiving) and Seollal (Lunar New Year). The dish represents love and care, as families come together to share a meal. By preparing this recipe, you’re not just cooking; you’re participating in a rich cultural tradition that has been passed down through generations. Enjoying Korean Braised Short Ribs is a way to connect with the heart of Korean cuisine and its values.

Ingredients for Korean Braised Short Ribs Recipe

Essential Ingredients

To create the perfect Korean Braised Short Ribs, you need a few essential ingredients. These components work together to build the rich flavors that make this dish so special. Here’s what you’ll need:

  • Beef Short Ribs: 3 pounds of bone-in beef short ribs are the star of the dish. They provide the rich, meaty flavor that is essential for this recipe.
  • Vegetable Oil: 1 tablespoon is needed for searing the ribs. This helps to lock in the juices and adds a nice crust.
  • Onion: A medium onion, chopped, adds sweetness and depth to the sauce.
  • Garlic: 4 cloves of minced garlic bring a wonderful aroma and flavor.
  • Ginger: A 1-inch piece of grated ginger adds a warm, spicy note that complements the beef.
  • Soy Sauce: 1 cup of soy sauce provides the salty, umami flavor that is key to the dish.
  • Brown Sugar: 1 cup of brown sugar balances the saltiness with sweetness.
  • Rice Wine or Mirin: 1/2 cup adds a touch of acidity and sweetness.
  • Sesame Oil: 1/4 cup gives a nutty flavor that enhances the overall taste.
  • Beef Broth: 1 cup of beef broth adds moisture and richness to the braising liquid.

Optional Ingredients for Enhanced Flavor

While the essential ingredients are crucial, you can also add optional ingredients to elevate the dish even further. Here are some ideas:

  • Gochujang: A tablespoon of this Korean chili paste can add a spicy kick to the sauce, perfect for those who enjoy heat.
  • Carrots: Adding sliced carrots can introduce a natural sweetness and color to the dish.
  • Mushrooms: Adding shiitake or button mushrooms can enhance the umami flavor and add texture.
  • Sesame Seeds: For garnish, sesame seeds not only add a nice crunch but also a nutty flavor.
  • Green Onions: Sliced green onions make for a fresh and vibrant garnish, adding a pop of color.

With these ingredients, you’re well on your way to creating a delicious Korean Braised Short Ribs dish that will impress your family and friends. The combination of flavors and textures will surely make this meal a memorable one!

Step-by-Step Preparation of Korean Braised Short Ribs Recipe

Step 1: Preparing the Short Ribs

First, you need to prepare the short ribs. Start by rinsing them under cold water. This helps remove any excess blood and impurities. Next, pat them dry with paper towels. This step is important because it helps achieve a nice sear later. After drying, season the ribs generously with salt and pepper. This simple seasoning enhances the natural flavor of the beef.

Step 2: Marinating the Ribs

While marinating is not mandatory, it can add extra flavor. If you have time, consider marinating the short ribs for at least 30 minutes. You can use a mixture of soy sauce, brown sugar, and sesame oil for this. Place the ribs in a large bowl, pour the marinade over them, and cover. Let them sit in the refrigerator. This allows the flavors to penetrate the meat, making it even tastier.

Step 3: Searing the Ribs

Now, it’s time to sear the ribs. Heat 1 tablespoon of vegetable oil in a large Dutch oven over medium-high heat. Once the oil is hot, add the short ribs. Sear them for about 3-4 minutes on each side until they are nicely browned. This step locks in the juices and adds a beautiful crust. After searing, remove the ribs from the pot and set them aside. This will help build layers of flavor in the dish.

Step 4: Braising the Ribs

In the same pot, add the chopped onion, minced garlic, and grated ginger. Sauté these ingredients for about 3-4 minutes until the onion becomes translucent. This step releases their wonderful aromas. Next, stir in the soy sauce, brown sugar, rice wine, sesame oil, and beef broth. Bring this mixture to a gentle simmer. Once simmering, return the short ribs to the pot, ensuring they are submerged in the sauce. Cover the pot with a lid and transfer it to your preheated oven. Braise the ribs for 2.5 to 3 hours. The long cooking time allows the meat to become tender and flavorful.

Step 5: Final Touches and Serving

After braising, carefully remove the pot from the oven. Let it cool slightly before skimming off any excess fat from the surface of the sauce. This will help create a cleaner taste. To serve, place the short ribs over a bed of rice or noodles. Drizzle the rich sauce over the top. Finally, garnish with sliced green onions and sesame seeds for a beautiful presentation. Enjoy your delicious Korean Braised Short Ribs with family and friends!

Variation of Korean Braised Short Ribs Recipe

Alternative Ingredients for Different Flavors

While the traditional Korean Braised Short Ribs recipe is delightful as is, you can easily customize it to suit your taste. Here are some alternative ingredients that can add unique flavors:

  • Fruit Juices: Consider adding a splash of orange or apple juice to the braising liquid. This will introduce a subtle sweetness and acidity that brightens the dish.
  • Spices: Experiment with spices like star anise or cinnamon. These spices can add warmth and depth, creating a more complex flavor profile.
  • Vegetables: Besides carrots, you can add potatoes or parsnips. These vegetables absorb the sauce’s flavors and add heartiness to the meal.
  • Herbs: Fresh herbs like cilantro or parsley can be sprinkled on top before serving. They add a fresh note that contrasts beautifully with the rich sauce.
  • Different Sauces: If you want a twist, try using teriyaki sauce instead of soy sauce. This will give the dish a sweeter, more Asian-inspired flavor.

These alternative ingredients can help you create a version of Korean Braised Short Ribs that is uniquely yours. Feel free to mix and match based on what you have on hand or what flavors you enjoy!

Cooking Methods: Slow Cooker vs. Instant Pot

When it comes to cooking Korean Braised Short Ribs, you have options! Both the slow cooker and Instant Pot can yield delicious results, but they do so in different ways.

Slow Cooker: Using a slow cooker is perfect for those who want to set it and forget it. Simply follow the initial steps of searing the ribs and sautéing the aromatics. Then, transfer everything to the slow cooker. Cook on low for 6-8 hours or on high for 4-5 hours. This method allows the flavors to meld beautifully over time, resulting in tender, flavorful ribs.

Instant Pot: If you’re short on time, the Instant Pot is your best friend. After searing the ribs and sautéing the aromatics, add the remaining ingredients to the pot. Seal the lid and cook on high pressure for about 45 minutes. Allow for a natural release for 10-15 minutes before opening. This method significantly reduces cooking time while still producing tender, juicy ribs.

Both methods have their advantages, so choose the one that fits your schedule best. No matter how you cook them, your Korean Braised Short Ribs will be a hit!

Cooking Note for Korean Braised Short Ribs Recipe

Tips for Achieving the Perfect Texture

Getting the texture just right is key to enjoying Korean Braised Short Ribs. Here are some helpful tips to ensure your ribs turn out perfectly tender:

  • Choose the Right Cut: Always opt for bone-in beef short ribs. The bones add flavor and moisture during cooking, making the meat more tender.
  • Low and Slow: Braising at a low temperature for a long time is essential. This method breaks down the tough connective tissues in the meat, resulting in a melt-in-your-mouth texture.
  • Don’t Rush the Searing: Take your time when searing the ribs. A good sear creates a flavorful crust that enhances the overall taste of the dish.
  • Check for Doneness: The ribs are done when they are fork-tender and the meat easily pulls away from the bone. If they’re not there yet, give them more time.
  • Rest Before Serving: Allow the ribs to rest for a few minutes after cooking. This helps the juices redistribute, ensuring each bite is juicy and flavorful.

Common Mistakes to Avoid

Even the best cooks can make mistakes! Here are some common pitfalls to avoid when making Korean Braised Short Ribs:

  • Skipping the Sear: Don’t skip the searing step. It’s crucial for building flavor. Searing locks in juices and adds depth to the dish.
  • Overcrowding the Pot: If you have too many ribs in the pot, they won’t brown properly. Cook in batches if necessary to ensure even cooking.
  • Not Enough Liquid: Make sure there’s enough braising liquid to cover the ribs. This helps them cook evenly and prevents them from drying out.
  • Ignoring the Fat: While some fat is good for flavor, too much can make the dish greasy. Skim off excess fat after cooking for a cleaner taste.
  • Rushing the Cooking Time: Patience is key! Rushing the cooking time can lead to tough meat. Stick to the recommended braising time for the best results.

By following these tips and avoiding common mistakes, you’ll be well on your way to creating a delicious and satisfying Korean Braised Short Ribs dish that everyone will love!

Serving Suggestions for Korean Braised Short Ribs Recipe

Best Side Dishes to Pair with Short Ribs

When serving Korean Braised Short Ribs, choosing the right side dishes can elevate your meal. Here are some fantastic options that complement the rich flavors of the ribs:

  • Steamed Rice: A classic choice, steamed white or brown rice absorbs the delicious sauce, making each bite even more satisfying.
  • Kimchi: This traditional Korean side dish adds a spicy and tangy contrast to the savory ribs. The fermented flavors of kimchi enhance the overall meal.
  • Pickled Vegetables: Quick-pickled cucumbers or radishes provide a refreshing crunch that balances the richness of the short ribs.
  • Stir-Fried Vegetables: A mix of colorful vegetables like bell peppers, broccoli, and carrots stir-fried in sesame oil adds both nutrition and flavor.
  • Potato Salad: A creamy potato salad can offer a comforting side that pairs well with the tender meat.

These side dishes not only complement the Korean Braised Short Ribs but also create a well-rounded meal that your family and friends will love!

Wine and Beverage Pairings

Choosing the right beverage can enhance your dining experience. Here are some excellent wine and beverage pairings for Korean Braised Short Ribs:

  • Red Wine: A medium-bodied red wine, like Merlot or Pinot Noir, pairs beautifully with the rich flavors of the ribs. The fruitiness of these wines complements the sweetness of the sauce.
  • White Wine: If you prefer white wine, try a dry Riesling. Its acidity and slight sweetness can balance the savory elements of the dish.
  • Korean Soju: This traditional Korean spirit is a great match. Its clean taste and smooth finish make it a popular choice with hearty dishes.
  • Beer: A light lager or a wheat beer can also work well. The crispness of the beer cuts through the richness of the meat.
  • Non-Alcoholic Options: For a refreshing non-alcoholic choice, consider iced green tea or a sparkling water with a slice of lemon. These drinks cleanse the palate and enhance the meal.

With these serving suggestions, you can create a delightful dining experience that showcases the deliciousness of your Korean Braised Short Ribs. Enjoy your meal with family and friends!

Tips for Perfecting Your Korean Braised Short Ribs Recipe

Storage and Reheating Tips

Storing your Korean Braised Short Ribs properly ensures they stay delicious for later enjoyment. Here are some helpful tips:

  • Cool Before Storing: Allow the short ribs to cool to room temperature before storing. This prevents condensation, which can make the meat soggy.
  • Use Airtight Containers: Place the ribs and sauce in airtight containers. This helps maintain freshness and prevents odors from other foods in the fridge.
  • Refrigeration: Store the short ribs in the refrigerator for up to 3 days. If you want to keep them longer, consider freezing.
  • Freezing: For longer storage, freeze the ribs in a freezer-safe container. They can last up to 3 months in the freezer. Just make sure to label the container with the date.
  • Reheating: To reheat, thaw the ribs in the refrigerator overnight if frozen. Then, gently reheat them in a saucepan over low heat. You can also use the microwave, but be careful not to overcook them.

Following these storage and reheating tips will help you enjoy your Korean Braised Short Ribs even after the initial meal!

How to Adjust Spice Levels

Adjusting the spice levels in your Korean Braised Short Ribs can make the dish perfect for your taste. Here’s how to do it:

  • Start Mild: If you’re unsure about spice levels, start with a small amount of gochujang or other spicy ingredients. You can always add more later!
  • Balance with Sweetness: If the dish becomes too spicy, add a bit more brown sugar or honey. This will help balance the heat with sweetness.
  • Use Fresh Ingredients: Fresh ginger and garlic can add flavor without too much heat. Adjust the amounts based on your preference.
  • Serve with Sides: If the ribs are spicier than expected, serve them with cooling sides like cucumber salad or plain rice. This can help tone down the heat.
  • Experiment: Don’t be afraid to experiment with different spices. You can try adding a pinch of black pepper or chili flakes for a different flavor profile.

By following these tips, you can easily customize the spice levels in your Korean Braised Short Ribs, making them just right for you and your guests!

Breakdown of Time for Korean Braised Short Ribs Recipe

Prep Time

Preparing Korean Braised Short Ribs is a delightful process that requires some time. The prep time for this recipe is approximately 30 minutes. This includes rinsing and drying the short ribs, chopping the vegetables, and measuring out the ingredients. If you choose to marinate the ribs, you may want to add an additional 30 minutes to 1 hour for that step. Marinating enhances the flavor, making the dish even more delicious!

Cooking Time

The cooking time for Korean Braised Short Ribs is where the magic happens! Once you have seared the ribs and sautéed the aromatics, the braising process takes about 2.5 to 3 hours in the oven. This slow cooking allows the meat to become tender and soak up all the rich flavors from the sauce. If you opt for a slow cooker, the cooking time will be around 6-8 hours on low or 4-5 hours on high. For those using an Instant Pot, the cooking time is significantly reduced to about 45 minutes under high pressure.

Total Time

When you combine the prep time and cooking time, the total time for making Korean Braised Short Ribs is approximately 3 to 4 hours, depending on your cooking method. If you include marinating time, it could extend to about 4 to 5 hours. However, most of this time is hands-off, allowing you to enjoy other activities while the ribs cook to perfection. The end result is a comforting and flavorful dish that is well worth the wait!

Nutritional Information for Korean Braised Short Ribs Recipe

Calories and Macronutrients

Understanding the nutritional content of your meals is essential for maintaining a balanced diet. Each serving of Korean Braised Short Ribs offers a satisfying combination of flavors and nutrients. Here’s a breakdown of the calories and macronutrients per serving:

  • Calories: 450
  • Net Carbohydrates: 10g
  • Protein: 35g
  • Fat: 30g

This dish is rich in protein, making it a great option for those looking to build muscle or maintain a healthy weight. The fat content comes primarily from the beef, which contributes to the dish’s rich flavor and satisfying texture. The low net carbohydrate count makes it suitable for various dietary preferences, including low-carb diets.

Health Benefits of Short Ribs

Beef short ribs not only provide delicious flavor but also come with several health benefits. Here are some reasons to enjoy this dish:

  • High in Protein: Short ribs are an excellent source of protein, which is essential for muscle repair and growth. Protein also helps keep you feeling full and satisfied.
  • Rich in Iron: Beef is a great source of heme iron, which is easily absorbed by the body. Iron is crucial for transporting oxygen in the blood and preventing anemia.
  • Contains Essential Vitamins: Short ribs provide important vitamins such as B12, which supports nerve function and energy production, and zinc, which is vital for immune health.
  • Healthy Fats: While short ribs do contain fat, they also provide healthy fats that can support heart health when consumed in moderation. The fat helps with the absorption of fat-soluble vitamins.

Incorporating Korean Braised Short Ribs into your meal plan can be a delicious way to enjoy the benefits of beef while savoring a traditional dish. Just remember to balance your plate with plenty of vegetables and whole grains for a well-rounded meal!

FAQs about Korean Braised Short Ribs Recipe

Can I use a different cut of meat for this recipe?

Yes, you can use different cuts of meat if you prefer! While beef short ribs are traditional, you might consider using chuck roast or brisket. These cuts also become tender when braised. However, keep in mind that the flavor and texture may vary. Short ribs are known for their rich taste and marbling, which adds to the dish’s overall appeal. If you choose another cut, adjust the cooking time accordingly, as some cuts may require less or more time to become tender.

How do I know when the short ribs are done?

Knowing when your short ribs are done is key to achieving that melt-in-your-mouth texture. The best way to check is by using a fork. When the meat is fork-tender, it means it’s ready to enjoy! The meat should easily pull away from the bone without much effort. If it still feels tough, give it more time in the oven. Remember, patience is essential for this dish, as the longer cooking time allows the flavors to develop and the meat to become tender.

Can I make Korean Braised Short Ribs ahead of time?

Absolutely! Making Korean Braised Short Ribs ahead of time is a great idea. In fact, the flavors often improve after sitting for a day. To do this, prepare the dish as directed, then let it cool completely before storing it in the refrigerator. You can keep it for up to three days. When you’re ready to serve, simply reheat it gently on the stovetop or in the oven. Just be sure to add a splash of beef broth or water to keep it moist while reheating.

What can I substitute for soy sauce in this recipe?

If you need a substitute for soy sauce, there are several options available. For a gluten-free alternative, you can use tamari, which has a similar flavor profile. Another option is coconut aminos, which is a soy-free sauce made from coconut sap. It has a slightly sweeter taste but works well in this recipe. If you’re looking for a low-sodium option, consider using low-sodium soy sauce or diluting regular soy sauce with water. Each substitute will bring its unique flavor, so feel free to experiment!

Conclusion on Korean Braised Short Ribs Recipe

Recap of Key Points

Korean Braised Short Ribs, or Galbi Jjim, is a dish that beautifully combines rich flavors and tender meat. Throughout this article, we explored the essential ingredients, step-by-step preparation, and various cooking methods. We also discussed how to enhance the dish with optional ingredients and provided tips for achieving the perfect texture. Additionally, we highlighted the importance of serving suggestions and how to adjust spice levels to suit your taste. With its cultural significance and delightful taste, this recipe is sure to impress anyone who tries it.

Encouragement to Try the Recipe

Now that you have all the information you need, it’s time to roll up your sleeves and try making Korean Braised Short Ribs! Whether you’re cooking for a special occasion or just a cozy family dinner, this dish is bound to be a hit. Don’t be afraid to experiment with flavors and make it your own. Remember, cooking is all about enjoying the process and sharing delicious meals with loved ones. So gather your ingredients, follow the steps, and savor the delightful experience of creating this traditional Korean dish. Happy cooking!

Paul

Korean Braised Short Ribs Recipe is a must-try!

This comforting Korean classic brings fall-apart tender short ribs simmered in a savory, slightly sweet, and garlicky sauce. Perfectly braised with aromatic ginger, scallions, and a hint of chili, it’s a soul-warming dish ideal for a cozy dinner or special occasion.
Prep Time 20 minutes
Cook Time 2 hours 30 minutes
Total Time 2 hours 50 minutes
Servings: 4 servings
Course: Main Course
Cuisine: Korean

Ingredients
  

For the Sauce:
  • 2 tablespoons chili garlic sauce
  • teaspoons sesame oil
  • ¼ cup low-sodium soy sauce or Tamari for gluten-free
  • ¼ cup brown sugar
  • 4 teaspoons rice vinegar
For the Short Ribs:
  • 6 garlic cloves minced
  • 8 scallions or ½ onion chopped
  • 1 inch fresh ginger peeled and grated
  • 3 tablespoons olive oil divided
  • 1½ to 2 pounds boneless beef short ribs
  • ¼ cup flour or gluten-free flour blend
  • 2 cups beef broth divided
  • ¼ teaspoon kosher salt
  • ¼ teaspoon black pepper

Method
 

  1. Preheat OvenPreheat your oven to 350°F (175°C).
  2. Prepare the SauceIn a bowl, whisk together the chili garlic sauce, sesame oil, soy sauce, brown sugar, and rice vinegar. Set aside.
  3. Coat the RibsLightly toss the boneless beef short ribs in flour until evenly coated.
  4. Sear the RibsHeat 1½ tablespoons olive oil in a Dutch oven over medium-high heat. Sear half of the ribs for about 3–4 minutes per side until browned. Repeat with the remaining ribs using another 1½ tablespoons of olive oil. Season both batches with salt and pepper.
  5. Sauté the AromaticsLower the heat to medium. Add garlic, scallions (or onion), and grated ginger to the Dutch oven. Sauté for 2–3 minutes until fragrant.
  6. Build the BraiseReturn the seared ribs to the pot. Pour in the prepared sauce and 1 cup of beef broth. Stir to combine, ensuring the ribs are mostly submerged.
  7. Oven-BraiseCover the Dutch oven and transfer it to the oven. Bake for 1 hour. After the first hour, pour in the remaining 1 cup of beef broth, cover again, and continue baking for another hour. Then uncover and bake for an additional 30 minutes.
  8. ServeWhen the ribs are fork-tender and the sauce has thickened slightly, remove from the oven. Serve hot with rice or mashed potatoes. Garnish with chopped scallions, sesame seeds, or a squeeze of lime if desired.

Notes

  • Make Ahead: This dish can be made a day in advance; the flavors deepen beautifully overnight. Just reheat gently on the stove or in the oven.
  • Cut Options: Boneless ribs are easier to serve, but bone-in short ribs offer extra flavor if you prefer.
  • Serving Ideas: Serve with steamed rice, kimchi, or sautéed greens for a full Korean-inspired meal.

Hibachi Chicken with Vegetables is a must-try dish!

Hibachi chicken with vegetables is a delightful dish that brings the flavors of Japanese cuisine right to your kitchen. This meal is not only delicious but also colorful and nutritious. Imagine tender pieces of chicken, perfectly cooked with a medley of fresh vegetables, all tossed together in a savory sauce. It’s a feast for both the eyes and the taste buds!

Originating from Japan, hibachi cooking is known for its quick preparation and vibrant presentation. The word “hibachi” refers to a traditional Japanese grill, but in many places, it has come to represent a style of cooking that involves grilling meats and vegetables on a flat surface. This method allows for high heat cooking, which seals in flavors and creates a satisfying texture.

In this recipe, we’ll guide you through making hibachi chicken with vegetables that serves four people. It’s perfect for a family dinner or a gathering with friends. Plus, it’s easy to customize based on your preferences. Whether you’re a fan of broccoli, zucchini, or bell peppers, you can mix and match your favorite veggies.

Not only is this dish tasty, but it also packs a nutritional punch. With lean protein from the chicken and a variety of vitamins from the vegetables, it’s a wholesome choice for any meal. So, let’s dive into the ingredients and preparation steps to create this mouthwatering hibachi chicken with vegetables!

Ingredients for Hibachi Chicken with Vegetables

To create a delicious hibachi chicken with vegetables, you’ll need a few simple ingredients. These items are easy to find and can be adjusted based on your taste. Here’s what you’ll need:

  • 2 boneless, skinless chicken breasts (about 1 pound), cut into bite-sized pieces
  • 2 tablespoons vegetable oil
  • 1 cup broccoli florets
  • 1 cup sliced zucchini
  • 1 cup sliced bell peppers (any color)
  • 1 cup sliced mushrooms
  • 3 cloves garlic, minced
  • 1 tablespoon soy sauce
  • 1 tablespoon teriyaki sauce
  • 1 teaspoon sesame oil
  • Salt and pepper to taste
  • Cooked white or brown rice, for serving

These ingredients come together to create a flavorful dish that is both satisfying and healthy. The chicken provides lean protein, while the vegetables add essential vitamins and minerals. The sauces bring a savory depth to the dish, making it a favorite for many. Feel free to experiment with different vegetables or sauces to make this hibachi chicken with vegetables your own!

Preparation of Hibachi Chicken with Vegetables

Now that you have gathered all the ingredients, it’s time to prepare your hibachi chicken with vegetables. This process is straightforward and will have your kitchen smelling amazing in no time. Let’s break it down into easy steps!

Step 1: Marinating the Chicken for Hibachi Chicken with Vegetables

To enhance the flavor of your chicken, marinating is a great first step. In a bowl, combine 1 tablespoon of soy sauce, 1 tablespoon of teriyaki sauce, and a pinch of salt and pepper. Add the bite-sized chicken pieces to the bowl and mix well. Cover the bowl and let it marinate for at least 30 minutes. This allows the chicken to absorb the flavors, making it even tastier when cooked.

Step 2: Preparing the Vegetables for Hibachi Chicken with Vegetables

While the chicken is marinating, it’s time to prepare the vegetables. Wash and chop the broccoli into small florets. Slice the zucchini, bell peppers, and mushrooms into thin pieces. Having everything ready will make the cooking process smoother. Remember, the key to a great hibachi dish is to have your vegetables cut evenly so they cook at the same rate.

Step 3: Cooking the Hibachi Chicken with Vegetables

Once the chicken has marinated, heat a large skillet or wok over medium-high heat. Add 2 tablespoons of vegetable oil and let it get hot. Carefully add the marinated chicken to the skillet. Cook for about 5-7 minutes, stirring occasionally, until the chicken is golden brown and cooked through. Once done, remove the chicken from the skillet and set it aside.

In the same skillet, add the prepared vegetables. Stir-fry them for about 4-5 minutes until they are tender-crisp. Then, add 3 cloves of minced garlic and stir for about 30 seconds until fragrant. This step adds a wonderful aroma to your dish!

Step 4: Final Touches for Hibachi Chicken with Vegetables

Now it’s time to bring everything together! Return the cooked chicken to the skillet with the vegetables. Pour in the remaining soy sauce, teriyaki sauce, and 1 teaspoon of sesame oil. Stir well to combine all the ingredients. Heat everything through for another 2-3 minutes. This final step ensures that all the flavors meld together beautifully.

Your hibachi chicken with vegetables is now ready to be served! Enjoy it over a bed of cooked white or brown rice for a complete meal.

Variation of Hibachi Chicken with Vegetables

While the classic hibachi chicken with vegetables is a favorite, there are many ways to switch things up! You can explore alternative proteins and different vegetable combinations to create a dish that suits your taste. Let’s take a look at some exciting variations!

Alternative Proteins for Hibachi Chicken with Vegetables

If you want to try something different, consider using alternative proteins. Here are a few options:

  • Beef: Thinly sliced beef, such as sirloin or flank steak, can be a delicious substitute. Just marinate it the same way as the chicken for great flavor.
  • Shrimp: Shrimp cooks quickly and adds a lovely seafood twist. Use peeled and deveined shrimp, and sauté them for about 3-4 minutes until they turn pink.
  • Tofu: For a vegetarian option, firm tofu is perfect. Press it to remove excess moisture, then cut it into cubes and sauté until golden brown.
  • Pork: Thinly sliced pork tenderloin can also work well. It has a nice flavor and pairs beautifully with the vegetables.

These alternative proteins can bring new flavors and textures to your hibachi dish. Feel free to experiment and find your favorite!

Different Vegetable Combinations for Hibachi Chicken with Vegetables

Another way to customize your hibachi chicken with vegetables is by changing up the vegetable mix. Here are some tasty options:

  • Carrots: Sliced carrots add a sweet crunch. They can be added alongside the other vegetables for a pop of color.
  • Snap Peas: These sweet and crunchy peas are a great addition. Toss them in during the last few minutes of cooking for a fresh taste.
  • Onions: Sliced onions can add a savory depth. Use red or yellow onions for a different flavor profile.
  • Asparagus: Cut asparagus into bite-sized pieces for a unique twist. They cook quickly and add a lovely texture.

Mixing and matching vegetables not only enhances the flavor but also boosts the nutritional value of your meal. So, feel free to get creative and make this hibachi chicken with vegetables your own!

Cooking Note for Hibachi Chicken with Vegetables

When preparing hibachi chicken with vegetables, there are a few cooking notes to keep in mind. These tips will help you achieve the best results and ensure your dish is both delicious and visually appealing.

First, using a large skillet or wok is essential. This allows for even cooking and gives you enough space to stir-fry the ingredients without overcrowding. If the pan is too crowded, the chicken and vegetables may steam instead of sear, which can affect the texture and flavor.

Next, make sure your skillet is hot before adding the oil. A hot pan helps to sear the chicken quickly, locking in moisture and flavor. You can test the heat by sprinkling a few drops of water into the pan; if they sizzle and evaporate quickly, it’s ready for cooking.

Also, remember to cut your chicken and vegetables into uniform sizes. This ensures that everything cooks evenly. For instance, if you cut the chicken into larger pieces, they may take longer to cook than smaller vegetable pieces, leading to uneven doneness.

When stir-frying, keep the ingredients moving. Stirring frequently helps to prevent burning and allows for even cooking. Use a spatula or wooden spoon to toss the ingredients gently but quickly.

Lastly, don’t skip the marinating step! Marinating the chicken not only enhances its flavor but also helps to tenderize the meat. If you have time, marinate it longer for an even richer taste.

By following these cooking notes, you’ll create a hibachi chicken with vegetables that is not only tasty but also beautifully presented. Enjoy the process and the delightful aromas that fill your kitchen!

Serving Suggestions for Hibachi Chicken with Vegetables

Once your hibachi chicken with vegetables is ready, it’s time to think about how to serve it. Presentation can elevate your meal, making it even more enjoyable. Here are some delightful serving suggestions to enhance your dining experience:

  • Over Rice: Serve the hibachi chicken and vegetables over a generous scoop of cooked white or brown rice. The rice acts as a perfect base, soaking up the delicious sauces.
  • With Noodles: For a different twist, try serving the dish over cooked noodles. Soba or udon noodles work well and add a nice texture.
  • Garnish: Add a sprinkle of sesame seeds or chopped green onions on top for a pop of color and extra flavor. This simple touch can make your dish look restaurant-quality.
  • Side Salad: Pair your hibachi chicken with a fresh side salad. A simple mix of greens, cucumbers, and a light vinaigrette can balance the meal nicely.
  • Pickled Vegetables: Serve with a side of pickled vegetables for a tangy contrast. This can enhance the overall flavor profile and add a crunchy texture.
  • Egg Fried Rice: For a more traditional hibachi experience, consider serving it with egg fried rice. The flavors complement each other beautifully.

These serving suggestions not only enhance the visual appeal of your meal but also add variety to your dining experience. Whether you’re hosting a dinner party or enjoying a family meal, these ideas will surely impress your guests and make your hibachi chicken with vegetables a memorable dish!

Tips for Perfect Hibachi Chicken with Vegetables

Creating the perfect hibachi chicken with vegetables is all about attention to detail and a few helpful tips. With these suggestions, you can elevate your dish and impress your family and friends. Let’s explore some essential tips for achieving hibachi perfection!

First, always start with fresh ingredients. Fresh chicken and vibrant vegetables not only taste better but also enhance the overall presentation of your dish. Look for bright colors and firm textures when selecting your produce.

Next, don’t rush the marinating process. Allowing the chicken to marinate for at least 30 minutes is crucial. If you have more time, consider marinating it for a few hours or even overnight. This extra time allows the flavors to penetrate deeply, resulting in a more flavorful chicken.

When cooking, ensure your skillet or wok is preheated properly. A hot pan is key to achieving that delicious sear on the chicken. If the pan isn’t hot enough, the chicken will steam instead of brown, which can lead to a less appealing texture.

Another important tip is to cook in batches if necessary. If you have a lot of chicken or vegetables, cooking them in smaller batches can help maintain the right cooking temperature. This prevents overcrowding, which can lead to uneven cooking.

Don’t forget to season your vegetables! A pinch of salt and pepper can enhance their natural flavors. You can also add a splash of soy sauce or teriyaki sauce while stir-frying for an extra burst of flavor.

Lastly, let your dish rest for a few minutes before serving. This allows the flavors to settle and makes for a more enjoyable eating experience. Plus, it gives you time to prepare your serving dishes and garnishes!

By following these tips, you’ll create a hibachi chicken with vegetables that is not only delicious but also visually stunning. Enjoy the cooking process and the delightful meal that awaits!

Breakdown of Time for Hibachi Chicken with Vegetables

Understanding the time needed for each step in preparing hibachi chicken with vegetables can help you plan your cooking efficiently. Here’s a breakdown of the time required for preparation and cooking, ensuring you can enjoy this delicious meal without any rush!

Prep Time for Hibachi Chicken with Vegetables

The prep time for hibachi chicken with vegetables is approximately 15-20 minutes. This includes:

  • Gathering all your ingredients and tools.
  • Marinating the chicken, which takes about 30 minutes (but can be done ahead of time).
  • Washing and chopping the vegetables into bite-sized pieces.

While the chicken marinates, you can efficiently prepare the vegetables, making the most of your time.

Cooking Time for Hibachi Chicken with Vegetables

The cooking time for hibachi chicken with vegetables is around 15-20 minutes. This includes:

  • Cooking the marinated chicken for about 5-7 minutes until golden brown.
  • Stir-frying the vegetables for 4-5 minutes until they are tender-crisp.
  • Combining everything and heating through for an additional 2-3 minutes.

This quick cooking process ensures that your meal is ready in no time, allowing you to enjoy a fresh and flavorful dish!

Total Time for Hibachi Chicken with Vegetables

In total, the time required to prepare and cook hibachi chicken with vegetables is approximately 45-50 minutes. This includes:

  • 15-20 minutes for prep (including marinating time).
  • 15-20 minutes for cooking.

With this breakdown, you can easily plan your cooking session. Whether you’re making this dish for a weeknight dinner or a special occasion, knowing the time involved helps you stay organized and enjoy the process!

Nutritional Information for Hibachi Chicken with Vegetables

Understanding the nutritional content of your meals is essential for maintaining a balanced diet. Hibachi chicken with vegetables is not only delicious but also offers a variety of nutrients. Let’s break down the key nutritional components of this dish!

Calories in Hibachi Chicken with Vegetables

Each serving of hibachi chicken with vegetables contains approximately 320 calories. This makes it a relatively low-calorie option for a satisfying meal. The combination of chicken and vegetables provides a hearty dish without excessive calories, making it suitable for those watching their intake.

Protein Content in Hibachi Chicken with Vegetables

One of the standout features of hibachi chicken with vegetables is its protein content. Each serving provides about 30 grams of protein. This high protein level is beneficial for muscle repair and growth, making it an excellent choice for active individuals or anyone looking to maintain a healthy diet.

Sodium Levels in Hibachi Chicken with Vegetables

When it comes to sodium, hibachi chicken with vegetables contains around 600 milligrams per serving. While this is a moderate amount, it’s important to be mindful of sodium intake, especially for those with dietary restrictions. You can reduce sodium levels by using low-sodium soy sauce or teriyaki sauce, ensuring a healthier meal without sacrificing flavor.

Overall, hibachi chicken with vegetables is a nutritious option that balances calories, protein, and sodium. It’s a great choice for a wholesome meal that supports your health goals while satisfying your taste buds!

FAQs about Hibachi Chicken with Vegetables

What is Hibachi Chicken with Vegetables?

Hibachi chicken with vegetables is a popular dish that features tender chicken pieces stir-fried with a colorful mix of vegetables. This dish is typically cooked in a hot skillet or wok, allowing the ingredients to sear quickly while retaining their flavors and textures. The chicken is often marinated in savory sauces like soy sauce and teriyaki, which adds depth to the dish. It’s a delightful meal that combines protein and veggies, making it both satisfying and nutritious.

How can I make Hibachi Chicken with Vegetables healthier?

Making hibachi chicken with vegetables healthier is easy! Here are a few tips:

  • Use leaner cuts: Opt for skinless chicken breasts or thighs to reduce fat content.
  • Choose low-sodium sauces: Select low-sodium soy sauce and teriyaki sauce to cut down on sodium levels.
  • Add more vegetables: Increase the variety and quantity of vegetables to boost fiber and nutrient content.
  • Serve with whole grains: Pair the dish with brown rice or quinoa instead of white rice for added nutrients.
  • Limit oil: Use less oil when cooking or try a non-stick skillet to reduce fat intake.

By making these simple adjustments, you can enjoy a healthier version of hibachi chicken with vegetables without sacrificing flavor!

Can I use frozen vegetables for Hibachi Chicken with Vegetables?

Yes, you can definitely use frozen vegetables for hibachi chicken with vegetables! Frozen veggies are convenient and can save you time in the kitchen. They are often flash-frozen at their peak freshness, which helps retain their nutrients. Just be sure to thaw them before cooking to ensure even cooking. You may need to adjust the cooking time slightly, as frozen vegetables can release moisture. Stir-fry them until they are heated through and tender-crisp for the best results.

What sides pair well with Hibachi Chicken with Vegetables?

Hibachi chicken with vegetables is versatile and pairs well with various sides. Here are some great options:

  • Steamed Rice: White or brown rice is a classic choice that complements the flavors of the dish.
  • Fried Rice: Egg fried rice adds a delicious twist and enhances the hibachi experience.
  • Salad: A fresh garden salad with a light dressing can balance the meal nicely.
  • Spring Rolls: Crispy spring rolls make for a tasty appetizer or side dish.
  • Edamame: Steamed edamame is a healthy and protein-rich side that pairs well with the main dish.

These sides not only enhance the meal but also add variety to your dining experience. Enjoy experimenting with different combinations!

Conclusion on Hibachi Chicken with Vegetables

In conclusion, hibachi chicken with vegetables is a delightful dish that brings the vibrant flavors of Japanese cuisine right to your table. This recipe is not only easy to prepare but also offers a wonderful balance of protein and nutrients, making it a fantastic choice for any meal. With its colorful presentation and savory taste, it’s sure to impress family and friends alike.

By following the steps outlined in this article, you can create a delicious hibachi chicken with vegetables that is both satisfying and healthy. The versatility of this dish allows you to customize it to your liking, whether by choosing different proteins or experimenting with various vegetables. Plus, the cooking tips and serving suggestions provided will help you elevate your dining experience.

As you enjoy your hibachi chicken with vegetables, remember that cooking is not just about the food; it’s also about the joy of sharing a meal with loved ones. So gather around the table, savor the flavors, and create lasting memories with this delightful dish. Happy cooking!

Paul

Hibachi Chicken with Vegetables is a must-try dish!

Bring the sizzle of your favorite Japanese steakhouse to your own kitchen with this flavorful Hibachi Chicken! Juicy marinated chicken, stir-fried veggies, and a creamy-spicy yum yum sauce come together for a delicious and satisfying meal you can whip up at home.
Prep Time 20 minutes
Cook Time 20 minutes
Total Time 40 minutes
Servings: 4 servings
Course: Main Dish
Cuisine: Japanese-American

Ingredients
  

For the Chicken Marinade:
  • lbs boneless skinless chicken breasts, cubed
  • ¼ cup coconut aminos or soy sauce
  • ½ teaspoon ground ginger
  • 2 tablespoons rice vinegar
  • 3 –4 garlic cloves minced
For the Vegetable Stir-Fry:
  • 1 tablespoon toasted sesame oil
  • 1 large onion sliced
  • ¾ cup carrot chips halved or quartered
  • 1 cup button mushrooms whole or sliced
  • 1 –2 medium zucchini chopped
  • 2 tablespoons coconut aminos or soy sauce
  • 1 tablespoon rice vinegar
  • Sesame seeds for garnish
For the Yum Yum Sauce:
  • ½ cup mayonnaise or Greek yogurt or dairy-free alternative
  • 2 teaspoons coconut aminos or soy sauce
  • ½ teaspoon garlic powder
  • tablespoons sriracha sauce
  • 1 teaspoon rice vinegar
Optional for Serving:
  • Cooked rice or cauliflower rice
  • Chopped green onions

Method
 

  1. Marinate the ChickenIn a bowl, mix together coconut aminos, ground ginger, rice vinegar, and minced garlic. Add the cubed chicken and toss to coat. Cover and refrigerate for at least 15–30 minutes, or overnight for deeper flavor.
  2. Cook the ChickenHeat a large skillet or wok over medium-high heat. Add sesame oil and cook the marinated chicken for about 10 minutes, until golden brown and cooked through (internal temp of 165°F). Remove and set aside.
  3. Stir-Fry the VegetablesIn the same skillet, add a bit more oil if needed. Stir-fry the onions, carrots, mushrooms, and zucchini until tender but still slightly crisp.
  4. Combine Chicken and VeggiesReturn the chicken to the skillet with the veggies. Add 2 tablespoons of coconut aminos and 1 tablespoon of rice vinegar. Stir to combine and heat for another 2–3 minutes.
  5. Prepare the Yum Yum SauceIn a small bowl, whisk together mayonnaise, coconut aminos, garlic powder, sriracha, and rice vinegar until smooth.
  6. ServePlate the chicken and veggies over rice or cauliflower rice. Drizzle generously with yum yum sauce and sprinkle with sesame seeds. Garnish with green onions if desired.

Notes

  • Make Ahead Tip: The chicken can be marinated the night before for even more flavor.
  • Veggie Swap: Feel free to use bell peppers, broccoli, or snap peas depending on what you have.
  • Heat Level: Adjust the sriracha in the sauce to taste if you prefer it milder or spicier.
  • Gluten-Free: Use coconut aminos or tamari instead of soy sauce for a gluten-free version.

Strawberry Cheesecake Recipe: A Delightful Dessert Guide

Introduction to Strawberry Cheesecake Recipe

strawberry cheesecake recipe is just what you need. This classic dessert is loved by many for its smooth texture and delicious taste. It’s perfect for any occasion, whether it’s a birthday party, a family gathering, or just a cozy night in.

Imagine a buttery graham cracker crust, topped with a velvety cheesecake filling, and finished off with luscious strawberries. Each bite is a heavenly experience that brings joy to your taste buds. Plus, making this cheesecake is easier than you might think! With simple ingredients and straightforward steps, you can create a dessert that looks and tastes like it came from a fancy bakery.

In this article, we will guide you through the entire process of making your very own strawberry cheesecake. From gathering the ingredients to serving it up, we’ll cover everything you need to know. So, roll up your sleeves and get ready to impress your friends and family with this delightful strawberry cheesecake recipe!

Ingredients for Strawberry Cheesecake Recipe

strawberry cheesecake recipe requires a mix of sweet and creamy components that come together to create a delightful dessert. Here’s what you’ll need:

  • 1 ½ cups graham cracker crumbs
  • ⅓ cup granulated sugar
  • ½ cup unsalted butter, melted
  • 16 ounces cream cheese, softened
  • 1 cup powdered sugar
  • 1 teaspoon vanilla extract
  • 1 cup sour cream
  • 2 cups fresh strawberries, hulled and sliced
  • 1 tablespoon lemon juice
  • 1 tablespoon cornstarch
  • 1 cup heavy whipping cream
  • 2 tablespoons granulated sugar (for whipped cream)

These ingredients are easy to find at your local grocery store. The graham cracker crumbs will form a delicious crust, while the cream cheese and sour cream create a rich filling. Fresh strawberries add a burst of flavor and color, making this cheesecake not only tasty but also visually appealing.

Once you have everything ready, you’ll be all set to start making your strawberry cheesecake. The combination of these ingredients will ensure that your dessert is creamy, sweet, and utterly delightful. So, let’s move on to the next step and prepare for the fun of baking!

Step-by-Step Preparation of Strawberry Cheesecake Recipe

strawberry cheesecake recipe. Follow these simple steps to create a delicious dessert that will impress everyone!

Step 1: Preparing the Crust

Start by making the crust, which is the foundation of your cheesecake. In a medium bowl, combine the graham cracker crumbs, ⅓ cup of granulated sugar, and melted butter. Mix everything together until it resembles wet sand. This mixture should hold together when pressed.

Next, take a 9-inch springform pan and firmly press the crumb mixture into the bottom. Make sure it’s even and compact. This will help create a sturdy base for your cheesecake. Once done, bake the crust in a preheated oven at 325°F for about 10 minutes. After baking, remove it from the oven and let it cool completely.

Step 2: Making the Cheesecake Filling

While the crust cools, it’s time to prepare the creamy filling. In a large mixing bowl, beat the softened cream cheese using an electric mixer. Mix until it’s smooth and free of lumps. Gradually add in the powdered sugar and vanilla extract, continuing to mix until everything is well combined.

Next, add the sour cream, lemon juice, and cornstarch to the bowl. Mix again until the filling is creamy and smooth. This mixture will be rich and delicious, making your cheesecake irresistible!

Step 3: Preparing the Strawberry Topping

Now, let’s get the strawberries ready! Take your fresh strawberries and hull them, removing the green tops. Then, slice them into thin pieces. You can toss the sliced strawberries with a tablespoon of lemon juice to enhance their flavor and prevent browning. Set them aside while you finish the cheesecake.

Step 4: Assembling the Strawberry Cheesecake

With the crust cooled and the filling ready, it’s time to assemble your cheesecake. Pour the cream cheese mixture over the cooled crust. Use a spatula to spread it evenly across the top. This will create a smooth layer that will hold the strawberries beautifully.

Once the filling is spread out, gently place the sliced strawberries on top. You can arrange them in a decorative pattern or simply scatter them for a more casual look. Either way, they will add a pop of color and flavor to your cheesecake!

Step 5: Baking the Cheesecake

Now, it’s time to bake your cheesecake! Place the assembled cheesecake in the oven and bake for 50-60 minutes. You want the center to be set but still slightly jiggly. This ensures a creamy texture. Once baked, turn off the oven and leave the cheesecake inside for an additional hour. This gradual cooling helps prevent cracks on the surface.

Step 6: Cooling and Chilling

After the hour is up, remove the cheesecake from the oven and let it cool completely at room temperature. Once cooled, cover it with plastic wrap and refrigerate for at least 4 hours, or overnight if you can wait! Chilling allows the flavors to meld together and makes slicing easier.

And there you have it! You’ve successfully prepared your strawberry cheesecake. The next steps will be to whip up some cream and serve it, but first, let’s explore some variations you can try!

Variation of Strawberry Cheesecake Recipe

strawberry cheesecake recipe is a favorite for many, there are exciting variations you can try! These alternatives allow you to enjoy the same delicious flavors while catering to different preferences or dietary needs. Let’s explore two popular variations: the no-bake strawberry cheesecake and the gluten-free strawberry cheesecake.

No-Bake Strawberry Cheesecake Variation

If you’re looking for a quicker and easier option, the no-bake strawberry cheesecake is perfect for you! This version skips the oven, making it a great choice for hot days or when you want to save time.

To make a no-bake cheesecake, start with the same graham cracker crust. However, instead of baking it, simply chill it in the refrigerator for about 30 minutes to firm up. For the filling, beat together softened cream cheese, powdered sugar, and vanilla extract until smooth. Then, fold in whipped cream instead of sour cream. This will give your cheesecake a light and airy texture.

Once your filling is ready, pour it over the chilled crust. Top with sliced strawberries and refrigerate for at least 4 hours, or until set. This no-bake version is just as creamy and delicious, with the added benefit of being super simple to prepare!

Gluten-Free Strawberry Cheesecake Variation

For those who need to avoid gluten, making a gluten-free strawberry cheesecake is easy and just as tasty! The key is to use gluten-free graham crackers or almond flour for the crust.

To create the crust, crush gluten-free graham crackers or mix almond flour with melted butter and a bit of sugar. Press this mixture into the bottom of your springform pan, just like in the original recipe. Bake it for about 10 minutes, or chill it if you’re making the no-bake version.

For the filling, you can use the same ingredients as the classic recipe. Just ensure that your cream cheese and other components are gluten-free. Once assembled, bake or chill as directed. This gluten-free variation allows everyone to enjoy a slice of delicious strawberry cheesecake without worry!

These variations not only cater to different dietary needs but also add a fun twist to the traditional recipe. Whether you choose to bake or go for a no-bake option, your strawberry cheesecake will surely be a hit!

Cooking Note for Strawberry Cheesecake Recipe

strawberry cheesecake recipe, a few cooking notes can help ensure your dessert turns out perfectly every time. Here are some important tips to keep in mind:

  • Room Temperature Ingredients: Make sure your cream cheese and sour cream are at room temperature before mixing. This helps create a smooth and creamy filling without lumps.
  • Don’t Overmix: While mixing the filling, avoid overmixing once you add the eggs (if using). Overmixing can incorporate too much air, leading to cracks in your cheesecake.
  • Water Bath Method: For an even creamier texture, consider using a water bath. Wrap the bottom of your springform pan in aluminum foil and place it in a larger pan filled with hot water. This helps regulate the temperature while baking.
  • Check for Doneness: Keep an eye on your cheesecake as it bakes. The edges should be set, while the center remains slightly jiggly. This ensures a creamy texture once cooled.
  • Cooling Gradually: Allow your cheesecake to cool gradually in the oven after baking. This step helps prevent cracks from forming on the surface.
  • Chill Time: Be patient! Chilling your cheesecake for at least 4 hours, or overnight, allows the flavors to meld and the texture to firm up.
  • Fresh Toppings: For the best flavor, use fresh strawberries for the topping. They add a burst of sweetness and color that enhances the overall dessert.

By following these cooking notes, you’ll be well on your way to creating a stunning and delicious strawberry cheesecake. Each step is crucial in achieving that perfect balance of flavors and textures. So, get ready to impress your family and friends with your baking skills!

Serving Suggestions for Strawberry Cheesecake Recipe

strawberry cheesecake recipe, it’s time to think about how to serve it! Presentation can elevate your dessert, making it even more appealing. Here are some delightful serving suggestions to consider:

  • Classic Slice: Serve a generous slice of cheesecake on a dessert plate. Add a dollop of whipped cream on top and a few fresh strawberry slices for a classic look.
  • Chocolate Drizzle: For chocolate lovers, drizzle some melted chocolate or chocolate ganache over the cheesecake before serving. This adds a rich flavor that pairs wonderfully with strawberries.
  • Berry Compote: Create a quick berry compote by simmering mixed berries with a bit of sugar and lemon juice. Spoon this warm mixture over each slice for an extra fruity kick.
  • Garnish with Mint: Fresh mint leaves can add a pop of color and a refreshing taste. Place a sprig on top of each slice for a beautiful presentation.
  • Mini Cheesecakes: For a fun twist, consider making mini cheesecakes in muffin tins. This way, everyone can enjoy their own individual serving!
  • Pair with Beverages: Serve your cheesecake with a side of coffee, tea, or even a glass of dessert wine. These beverages complement the rich flavors of the cheesecake beautifully.

These serving suggestions not only enhance the visual appeal of your strawberry cheesecake but also add exciting flavors and textures. Whether you keep it simple or get creative, your cheesecake will surely impress your guests. Enjoy every delicious bite!

Tips for Perfecting Your Strawberry Cheesecake Recipe

strawberry cheesecake recipe can be a delightful journey. With a few helpful tips, you can elevate your cheesecake to a whole new level. Here are some expert suggestions to ensure your dessert turns out beautifully every time:

  • Use Quality Ingredients: The flavor of your cheesecake greatly depends on the quality of your ingredients. Opt for high-quality cream cheese and fresh strawberries. This will enhance the overall taste and texture of your cheesecake.
  • Don’t Skip the Chilling: Chilling your cheesecake is crucial. Allow it to set in the refrigerator for at least 4 hours, or overnight if possible. This helps the flavors meld and gives the cheesecake a firmer texture.
  • Experiment with Flavors: While strawberries are delicious, don’t hesitate to experiment! Try adding a hint of almond extract or a splash of orange zest to the filling for a unique twist.
  • Check Your Oven Temperature: Ovens can vary in temperature. Use an oven thermometer to ensure your cheesecake bakes at the correct temperature. This helps prevent overbaking or underbaking.
  • Let It Rest: After baking, let your cheesecake rest in the oven with the door slightly ajar. This gradual cooling helps prevent cracks and keeps the texture creamy.
  • Use a Sharp Knife: When slicing your cheesecake, use a sharp knife dipped in hot water. Wipe the knife clean between cuts for neat, beautiful slices.
  • Top with Fresh Ingredients: For the best presentation, top your cheesecake with fresh strawberries just before serving. This keeps them vibrant and juicy, adding a fresh touch to each slice.

By following these tips, you’ll be well on your way to mastering the art of making a delicious strawberry cheesecake. Each step is important in creating a dessert that not only looks stunning but also tastes incredible. So, gather your ingredients and get ready to impress everyone with your baking skills!

Breakdown of Time for Strawberry Cheesecake Recipe

strawberry cheesecake recipe is essential for planning. This way, you can ensure everything runs smoothly and your dessert is ready when you want it. Here’s a breakdown of the time involved in making this delightful cheesecake:

Prep Time

The prep time for your strawberry cheesecake is approximately 30 minutes. This includes gathering all your ingredients, preparing the crust, and mixing the cheesecake filling. Make sure to have everything ready before you start, as this will make the process much easier and more enjoyable!

Cooking Time

Once you’ve prepped your ingredients, the cooking time is about 60-70 minutes. This includes baking the crust for 10 minutes and then baking the cheesecake for 50-60 minutes. Remember, the cheesecake should be slightly jiggly in the center when you take it out of the oven. This ensures a creamy texture once it cools.

Total Time

In total, you should plan for about 4 hours and 30 minutes to complete your strawberry cheesecake. This includes the prep time, cooking time, and the minimum chilling time of 4 hours. If you can, letting it chill overnight will enhance the flavors even more. So, be patient and enjoy the anticipation of your delicious creation!

Nutritional Information for Strawberry Cheesecake Recipe

strawberry cheesecake recipe is important, especially if you’re mindful of your diet. This delicious dessert can be enjoyed in moderation, and knowing its nutritional content can help you make informed choices. Here’s a breakdown of the key nutritional components per serving:

Calories

Each serving of this delightful strawberry cheesecake contains approximately 350 calories. This calorie count includes the rich ingredients like cream cheese and heavy whipping cream, which contribute to its creamy texture and delicious flavor. While it’s a treat, enjoying it in moderation is key to maintaining a balanced diet.

Protein

In terms of protein, each slice provides about 6 grams. The protein comes mainly from the cream cheese and sour cream used in the filling. Protein is essential for your body, helping with muscle repair and growth, making this cheesecake not just a sweet indulgence but also a source of beneficial nutrients.

Sodium

The sodium content in each serving is approximately 250 milligrams. This amount is relatively moderate, but if you’re watching your sodium intake, it’s good to be aware. Most of the sodium comes from the cream cheese and butter used in the recipe. Pairing this cheesecake with fresh fruits can help balance out the flavors and add more nutrients to your dessert.

By keeping these nutritional facts in mind, you can enjoy your strawberry cheesecake while being aware of its impact on your diet. Remember, it’s all about balance and enjoying treats in moderation!

FAQs about Strawberry Cheesecake Recipe

Can I use frozen strawberries for the topping?

strawberry cheesecake recipe. However, keep in mind that frozen strawberries may release more moisture when thawed. To prevent a soggy topping, drain any excess liquid before using them. You can also consider cooking the frozen strawberries briefly to create a compote, which adds a delicious flavor and helps thicken the topping.

How do I store leftover strawberry cheesecake?

To store leftover strawberry cheesecake, cover it tightly with plastic wrap or aluminum foil. You can also place it in an airtight container. Store it in the refrigerator for up to 5 days. If you want to keep it longer, consider freezing it. Wrap individual slices in plastic wrap and then place them in a freezer-safe container. This way, you can enjoy a slice whenever you crave it!

Can I make strawberry cheesecake ahead of time?

strawberry cheesecake recipe ahead of time is a great idea. It allows the flavors to meld together and improves the texture. You can prepare the cheesecake a day or two in advance. Just remember to chill it in the refrigerator for at least 4 hours or overnight before serving. This will ensure it’s perfectly set and ready to impress your guests!

What can I substitute for cream cheese in the recipe?

If you’re looking for a substitute for cream cheese, there are a few options you can try. For a lighter version, you can use Greek yogurt or mascarpone cheese. Both will provide a creamy texture, though the flavor may vary slightly. If you need a dairy-free option, consider using cashew cream or a store-bought vegan cream cheese. Just keep in mind that the taste and texture may differ from the traditional cheesecake.

Conclusion on Strawberry Cheesecake Recipe

strawberry cheesecake recipe is a delightful dessert that brings together the best of creamy and fruity flavors. Whether you’re celebrating a special occasion or simply treating yourself, this cheesecake is sure to impress. With its buttery graham cracker crust, smooth cream cheese filling, and fresh strawberry topping, each bite is a taste of heaven.

Throughout this article, we’ve explored the ingredients, preparation steps, and even some fun variations to suit different tastes. From the classic baked version to no-bake and gluten-free options, there’s a strawberry cheesecake for everyone. Plus, with the helpful tips and serving suggestions provided, you can elevate your dessert to new heights.

Remember, the key to a perfect cheesecake lies in the quality of your ingredients and the patience you show during the chilling process. Allowing your cheesecake to set properly will ensure a creamy texture and rich flavor that everyone will love. So, gather your ingredients, follow the steps, and get ready to enjoy a slice of this delicious treat!

We hope you feel inspired to try making your own strawberry cheesecake. It’s a rewarding experience that not only fills your kitchen with delightful aromas but also creates sweet memories with family and friends. Happy baking!

Paul

Strawberry Cheesecake Recipe: A Delightful Dessert Guide

This Strawberry Cheesecake is the perfect fusion of creamy, tangy filling and a sweet, buttery biscuit crust, swirled with fresh strawberries and finished with a vibrant strawberry sauce. Elegant yet easy, it’s a fruity twist on a classic dessert that’s sure to impress.
Prep Time 20 minutes
Cook Time 1 hour
Servings: 12 slices
Course: Dessert
Cuisine: German / European

Ingredients
  

For the Biscuit Base:
  • 200 grams butter biscuits e.g., tea biscuits
  • 100 grams melted butter
  • 50 grams ground almonds
For the Cheesecake Filling:
  • 600 grams cream cheese
  • 250 grams quark or Greek yogurt as a substitute
  • 180 grams sugar
  • 3 tablespoons cornstarch
  • 200 milliliters cream
  • 1 egg
  • 1 tablespoon lemon juice
  • 100 grams strawberries for swirling into the filling
For the Strawberry Sauce:
  • 100 grams strawberries pureed, to serve on top

Method
 

  1. Preheat oven to 180°C (356°F), using top and bottom heat.
  2. Prepare the crust: Crush the butter biscuits until fine. Mix with melted butter and ground almonds. Press into the base of a greased 26 cm (10-inch) springform pan. Pre-bake the crust for 10 minutes.
  3. Make the filling: In a large bowl, beat together cream cheese, quark (or Greek yogurt), sugar, and cornstarch until smooth. Add cream and lemon juice, and stir until well incorporated. Fold in the egg last.
  4. Create the swirl: Puree 100 grams of strawberries. Pour the cheesecake filling over the pre-baked crust. Drop spoonfuls of strawberry puree over the surface and use a skewer or knife to gently swirl for a marbled effect.
  5. Bake the cheesecake: Lower the oven temperature to 160°C (320°F) and bake for 50 minutes. After baking, turn off the oven and let the cheesecake sit inside for 15 minutes. Crack the oven door slightly and allow it to cool gradually.
  6. Finish with sauce: Puree an additional 100 grams of strawberries. Once the cheesecake is completely cooled, pour the strawberry sauce over the top just before serving.

Notes

  • No quark? Substitute with full-fat Greek yogurt or mascarpone for a similar texture.
  • Swirl technique tip: Avoid over-mixing the puree into the filling for a clear marble effect.
  • Room temp ingredients: Ensure cream cheese and egg are at room temperature for a smooth filling.
  • Make ahead: Best made a day in advance for easier slicing and flavor development.
  • Serving idea: Top with fresh strawberries or mint for added flair.

Mini Chicken Sheet Pan Tostadas are a family favorite!

Are you looking for a quick and delicious meal that the whole family will love? Look no further! Mini Chicken Tostadas on a Sheet Pan are the perfect solution. These tasty bites combine the flavors of seasoned chicken, creamy refried beans, and melty cheese, all piled high on crispy corn tortillas. Plus, they’re easy to make and require minimal cleanup, making them ideal for busy weeknights.

Imagine a colorful platter of mini tostadas, each one bursting with flavor and topped with fresh ingredients. Not only are they visually appealing, but they also pack a punch in terms of taste. The combination of spices used to season the chicken creates a savory base that pairs perfectly with the toppings. Whether you’re hosting a casual get-together or simply enjoying a family dinner, these tostadas are sure to impress.

What’s more, this recipe is versatile! You can easily customize it to suit your taste preferences. Want to add a little heat? Toss in some jalapeños. Prefer a vegetarian option? Swap the chicken for black beans or grilled veggies. The possibilities are endless!

In this article, we’ll guide you through the ingredients, preparation steps, and even some variations to try. So, roll up your sleeves and get ready to create a delightful dish that everyone will rave about. Let’s dive into the world of Mini Chicken Tostadas on a Sheet Pan!

Ingredients for Mini Chicken Tostadas on a Sheet Pan

To create your delicious Mini Chicken Tostadas on a Sheet Pan, you’ll need a few simple ingredients. Each component plays a vital role in building flavor and texture. Here’s what you’ll need:

  • 1 pound boneless, skinless chicken breasts: This is the star of the dish! Chicken breasts are lean and cook quickly, making them perfect for this recipe.
  • 1 tablespoon olive oil: Olive oil helps to keep the chicken moist and adds a rich flavor.
  • 1 teaspoon chili powder: This spice gives the chicken a warm, smoky flavor.
  • 1 teaspoon cumin: Cumin adds an earthy taste that complements the other spices.
  • 1 teaspoon garlic powder: Garlic powder enhances the overall flavor profile.
  • 1/2 teaspoon onion powder: This adds a subtle sweetness and depth to the dish.
  • 1/2 teaspoon salt: Salt is essential for bringing out the flavors in the chicken.
  • 1/4 teaspoon black pepper: A little black pepper adds a hint of heat.
  • 8 small corn tortillas: These serve as the base for your tostadas, providing a crispy texture.
  • 1 cup refried beans: Creamy refried beans add richness and help hold the toppings in place.
  • 1 cup shredded cheese: Choose cheddar or a Mexican blend for that gooey, melty goodness.
  • 1 cup diced tomatoes: Fresh tomatoes add a burst of color and freshness.
  • 1/2 cup sliced black olives: Olives provide a briny contrast to the other flavors.
  • 1 avocado, diced: Creamy avocado adds a delightful texture and flavor.
  • 1/4 cup fresh cilantro, chopped: Cilantro brings a fresh, herbal note to the dish.
  • Lime wedges for serving: A squeeze of lime brightens up the flavors.

With these ingredients on hand, you’re ready to create a mouthwatering meal that’s sure to please everyone at the table. Let’s move on to the preparation steps to bring these Mini Chicken Tostadas on a Sheet Pan to life!

Preparation of Mini Chicken Tostadas on a Sheet Pan

Now that you have all your ingredients ready, it’s time to prepare your Mini Chicken Tostadas on a Sheet Pan. This process is straightforward and fun! Follow these steps to create a delicious meal that everyone will enjoy.

Step 1: Preheat the Oven

First things first, preheat your oven to 400°F. This temperature is perfect for cooking the chicken and crisping up the tortillas. While the oven heats up, you can move on to the next step.

Step 2: Prepare the Chicken

In a medium bowl, combine the olive oil, chili powder, cumin, garlic powder, onion powder, salt, and black pepper. This spice mixture is what makes the chicken so flavorful! Next, add the boneless, skinless chicken breasts to the bowl. Make sure to coat them evenly with the spice mixture. This step is crucial for ensuring that every bite is packed with flavor.

Once the chicken is well-coated, place it on a lined baking sheet. This will make cleanup easier later on. Bake the chicken for 20-25 minutes, or until it reaches an internal temperature of 165°F. After baking, let the chicken rest for about 5 minutes before shredding it. This resting time helps keep the chicken juicy.

Step 3: Assemble the Tostadas

While the chicken is resting, it’s time to warm the corn tortillas. Heat a dry skillet over medium heat and warm each tortilla for about 30 seconds on each side. This will make them pliable and easier to work with.

Now, it’s time to assemble your tostadas! Spread a layer of refried beans on each tortilla. Then, top them with the shredded chicken, followed by a generous sprinkle of shredded cheese, diced tomatoes, and sliced black olives. Make sure to distribute the toppings evenly for a balanced flavor in every bite.

Step 4: Bake the Tostadas

Once your tostadas are assembled, return them to the oven. Bake for an additional 5-7 minutes, or until the cheese is melted and bubbly. This step is where the magic happens! The cheese will become gooey, and the tortillas will get a nice crisp.

Step 5: Add Toppings

After baking, remove the tostadas from the oven. Now comes the fun part—adding the fresh toppings! Top each tostada with diced avocado and a sprinkle of fresh cilantro. These toppings add a burst of freshness and flavor that perfectly complements the warm, cheesy base. Serve with lime wedges on the side for an extra zing!

And there you have it! Your Mini Chicken Tostadas on a Sheet Pan are ready to be enjoyed. They’re perfect for sharing or for a cozy family dinner. Let’s explore some variations to keep things exciting!

Variation of Mini Chicken Tostadas on a Sheet Pan

One of the best things about Mini Chicken Tostadas on a Sheet Pan is their versatility. You can easily switch up the ingredients to cater to different tastes and dietary preferences. Here are a couple of exciting variations to try!

Vegetarian Option

If you’re looking for a meat-free alternative, consider making a vegetarian version of these tasty tostadas. Instead of chicken, you can use black beans or pinto beans as the base protein. Simply mash the beans with a fork and season them with cumin, garlic powder, and a pinch of salt for added flavor.

Next, layer the mashed beans on the corn tortillas just like you would with the refried beans. Top them with your favorite vegetables, such as sautéed bell peppers, zucchini, or corn. Don’t forget to add the shredded cheese, diced tomatoes, and black olives. Bake as directed, and finish with avocado and cilantro. This vegetarian option is not only delicious but also packed with nutrients!

Spicy Twist

If you love a little heat, why not add a spicy twist to your Mini Chicken Tostadas on a Sheet Pan? Start by mixing sliced jalapeños into the spice mixture for the chicken. This will infuse the chicken with a delightful kick. You can also sprinkle some crushed red pepper flakes over the assembled tostadas before baking.

For an extra layer of spice, consider using pepper jack cheese instead of regular cheddar or Mexican blend cheese. This cheese melts beautifully and adds a creamy, spicy flavor. After baking, top your tostadas with a drizzle of hot sauce or a dollop of spicy salsa. This variation is sure to satisfy those who crave a bit of heat in their meals!

With these variations, you can enjoy Mini Chicken Tostadas on a Sheet Pan in new and exciting ways. Whether you choose the vegetarian option or the spicy twist, you’re in for a treat that’s bursting with flavor!

Cooking Note for Mini Chicken Tostadas on a Sheet Pan

When preparing Mini Chicken Tostadas on a Sheet Pan, there are a few cooking notes to keep in mind. These tips will help ensure that your tostadas turn out perfectly every time. Let’s dive into some essential points to consider!

First, always check the freshness of your ingredients. Fresh chicken, vegetables, and tortillas will enhance the overall flavor of your dish. If possible, opt for organic or locally sourced ingredients. This not only supports local farmers but also ensures you’re using the best quality products.

Next, when seasoning the chicken, feel free to adjust the spice levels to suit your taste. If you prefer a milder flavor, reduce the amount of chili powder or cumin. Conversely, if you love bold flavors, don’t hesitate to add more spices or even a pinch of cayenne pepper for an extra kick.

Another important note is to keep an eye on the cooking time. Ovens can vary, so it’s wise to check the chicken a few minutes before the suggested cooking time. Use a meat thermometer to ensure the chicken reaches an internal temperature of 165°F. This guarantees that the chicken is safe to eat and perfectly cooked.

When assembling the tostadas, make sure not to overload them with toppings. While it’s tempting to pile on all the delicious ingredients, too many toppings can make the tortillas soggy. Aim for a balanced layer of beans, chicken, and cheese to maintain that delightful crunch.

Lastly, let your tostadas cool for a minute or two after baking. This brief resting period allows the cheese to set slightly, making them easier to serve and eat. Plus, it helps prevent burns from hot cheese and toppings!

By keeping these cooking notes in mind, you’ll be well on your way to creating Mini Chicken Tostadas on a Sheet Pan that are not only delicious but also visually appealing. Happy cooking!

Serving Suggestions for Mini Chicken Tostadas on a Sheet Pan

Once your Mini Chicken Tostadas on a Sheet Pan are ready, it’s time to think about how to serve them. Presentation can elevate your meal, making it even more enjoyable. Here are some delightful serving suggestions to consider:

  • Family Style: Serve the tostadas on a large platter, allowing everyone to help themselves. This creates a fun, communal dining experience.
  • Individual Plates: For a more formal setting, plate each tostada individually. Add a side of lime wedges and a small bowl of salsa for dipping.
  • Garnish: Enhance the visual appeal by garnishing with extra cilantro or a sprinkle of queso fresco. This adds a pop of color and flavor.
  • Side Dishes: Pair your tostadas with a fresh salad, such as a simple green salad or a corn and black bean salad. This adds a refreshing contrast to the warm, cheesy tostadas.
  • Drinks: Complement your meal with refreshing beverages. Consider serving iced tea, lemonade, or even a light beer for adults. These drinks balance the flavors of the tostadas.

These serving suggestions will not only enhance the dining experience but also make your Mini Chicken Tostadas on a Sheet Pan a hit at any gathering. Enjoy the delicious flavors and the smiles they bring to your table!

Tips for Perfect Mini Chicken Tostadas on a Sheet Pan

To ensure your Mini Chicken Tostadas on a Sheet Pan turn out perfectly every time, consider these helpful tips. They will enhance both the flavor and presentation of your dish, making it a delightful experience for everyone at the table.

  • Use Fresh Ingredients: Fresh ingredients make a big difference in flavor. Choose high-quality chicken, fresh vegetables, and soft tortillas for the best results.
  • Don’t Overcrowd the Baking Sheet: Give each tostada enough space on the baking sheet. This allows for even cooking and helps the tortillas stay crispy.
  • Experiment with Cheese: While cheddar and Mexican blend cheese are great, try using different cheeses like Monterey Jack or queso fresco for a unique twist.
  • Adjust Spice Levels: If you prefer milder flavors, reduce the amount of chili powder or cumin. For those who love heat, add more spices or fresh jalapeños.
  • Let Them Cool Slightly: After baking, let the tostadas cool for a minute. This helps the cheese set and makes them easier to handle.
  • Serve with Dipping Sauces: Offer a variety of dipping sauces, such as salsa, guacamole, or sour cream. This adds extra flavor and fun to the meal.

By following these tips, you’ll create Mini Chicken Tostadas on a Sheet Pan that are not only delicious but also visually appealing. Enjoy the process and the tasty results!

Breakdown of Time for Mini Chicken Tostadas on a Sheet Pan

When preparing Mini Chicken Tostadas on a Sheet Pan, it’s helpful to know how much time each step will take. This way, you can plan your cooking efficiently and enjoy your meal sooner. Here’s a breakdown of the time needed for each part of the process:

Prep Time

Getting everything ready is the first step. This includes gathering your ingredients, seasoning the chicken, and warming the tortillas. Expect to spend about 15-20 minutes on prep. This time allows you to chop, measure, and mix everything without feeling rushed.

Cooking Time

Cooking the chicken and baking the assembled tostadas takes a bit longer. The chicken will need 20-25 minutes in the oven. After that, the assembled tostadas will bake for an additional 5-7 minutes. In total, you should plan for about 30-35 minutes of cooking time.

Total Time

When you combine both prep and cooking times, you’re looking at a total of around 45-55 minutes from start to finish. This makes Mini Chicken Tostadas on a Sheet Pan a quick and satisfying meal option for busy weeknights or casual gatherings.

With this time breakdown, you can easily fit this delicious dish into your schedule. Now that you know how to manage your time, let’s move on to the nutritional information for these tasty tostadas!

Breakdown of Time for Mini Chicken Tostadas on a Sheet Pan

When preparing Mini Chicken Tostadas on a Sheet Pan, it’s helpful to know how much time each step will take. This way, you can plan your cooking efficiently and enjoy your meal sooner. Here’s a breakdown of the time needed for each part of the process:

Prep Time

Getting everything ready is the first step. This includes gathering your ingredients, seasoning the chicken, and warming the tortillas. Expect to spend about 15-20 minutes on prep. This time allows you to chop, measure, and mix everything without feeling rushed. Having everything organized will make the cooking process smoother and more enjoyable.

Cooking Time

Cooking the chicken and baking the assembled tostadas takes a bit longer. The chicken will need 20-25 minutes in the oven. After that, the assembled tostadas will bake for an additional 5-7 minutes. In total, you should plan for about 30-35 minutes of cooking time. This ensures that the chicken is perfectly cooked and the cheese is melted to perfection.

Total Time

When you combine both prep and cooking times, you’re looking at a total of around 45-55 minutes from start to finish. This makes Mini Chicken Tostadas on a Sheet Pan a quick and satisfying meal option for busy weeknights or casual gatherings. With this time breakdown, you can easily fit this delicious dish into your schedule. Now that you know how to manage your time, let’s move on to the nutritional information for these tasty tostadas!

Nutritional Information for Mini Chicken Tostadas on a Sheet Pan

Understanding the nutritional content of your meals is essential for maintaining a balanced diet. Mini Chicken Tostadas on a Sheet Pan not only taste great but also provide a good mix of nutrients. Here’s a closer look at the nutritional information for this delicious dish:

Calories

Each serving of Mini Chicken Tostadas on a Sheet Pan contains approximately 420 calories. This makes it a satisfying meal option without being overly heavy. The combination of chicken, beans, and cheese provides a hearty base that keeps you feeling full and energized.

Protein

Protein is vital for muscle repair and overall health. Each serving offers about 30 grams of protein. The chicken and refried beans contribute significantly to this protein content, making these tostadas a great choice for those looking to increase their protein intake.

Sodium

While enjoying your Mini Chicken Tostadas, it’s important to be mindful of sodium intake. Each serving contains around 800 milligrams of sodium. This amount is reasonable for a flavorful dish, but if you’re watching your sodium levels, consider using low-sodium beans and cheese. This small adjustment can help you enjoy the same great taste while keeping your sodium in check.

By being aware of the nutritional information, you can make informed choices about your meals. Mini Chicken Tostadas on a Sheet Pan are not only delicious but also provide a balanced mix of calories, protein, and sodium, making them a fantastic option for any meal!

FAQs about Mini Chicken Tostadas on a Sheet Pan

Can I use a different protein for Mini Chicken Tostadas on a Sheet Pan?

Absolutely! If chicken isn’t your thing, you can easily swap it out for other proteins. Shredded rotisserie chicken is a fantastic option for a quicker meal. You can also use ground turkey, beef, or even shrimp. For a vegetarian twist, consider using black beans, pinto beans, or grilled vegetables. Each protein brings its own unique flavor, so feel free to experiment!

How do I store leftovers of Mini Chicken Tostadas on a Sheet Pan?

Storing leftovers is simple! Allow the tostadas to cool completely before placing them in an airtight container. They can be stored in the refrigerator for up to 3 days. When you’re ready to enjoy them again, reheat in the oven at 350°F for about 10-15 minutes, or until heated through. This will help maintain the crispiness of the tortillas and the melty cheese.

Can I make Mini Chicken Tostadas on a Sheet Pan ahead of time?

Yes, you can prepare some components ahead of time! You can season and cook the chicken a day in advance. Just store it in the refrigerator until you’re ready to assemble the tostadas. You can also warm the tortillas and prepare the toppings ahead of time. When you’re ready to eat, simply assemble and bake them for a quick and delicious meal!

Conclusion on Mini Chicken Tostadas on a Sheet Pan

In conclusion, Mini Chicken Tostadas on a Sheet Pan are a delightful and versatile dish that brings joy to any meal. With their crispy tortillas, flavorful chicken, and fresh toppings, they are sure to please everyone at the table. Whether you’re preparing a quick weeknight dinner or hosting a casual gathering, these tostadas are a fantastic choice.

Not only are they easy to make, but they also allow for endless customization. You can adjust the spices, swap proteins, or even create vegetarian versions to suit your preferences. The combination of textures and flavors makes each bite a delicious experience. Plus, the minimal cleanup required makes them even more appealing!

As you explore this recipe, remember to have fun with it. Cooking is all about creativity and enjoying the process. So, gather your ingredients, invite your loved ones, and dive into the world of Mini Chicken Tostadas on a Sheet Pan. You’ll be amazed at how something so simple can bring so much happiness to your dining table.

We hope you enjoy making and sharing this dish as much as we do. Happy cooking!

Paul

Mini Chicken Sheet Pan Tostadas are a family favorite!

These crispy, cheesy Mini Chicken Tostadas are the perfect bite-sized Tex-Mex treat! Baked, not fried, and piled high with refried beans, rotisserie chicken, and melty cheese, they’re a fun and flavorful option for dinner, parties, or game-day snacking—customizable with all your favorite toppings.
Prep Time 10 minutes
Cook Time 15 minutes
Total Time 25 minutes
Servings: 12 mini tostadas
Course: Appetizer, Main Dish
Cuisine: Tex-Mex

Ingredients
  

For the Tostadas:
  • 12 street taco-size corn tortillas about 4 inches
  • 3 tablespoons vegetable or canola oil or as needed
  • 1 16 oz can traditional refried beans (use just shy of the full can)
  • 2 cups shredded rotisserie chicken breast
  • 2 cups shredded cheese sharp cheddar and Monterey Jack blend recommended
Optional Garnishes:
  • cup sour cream
  • ¼ cup finely diced red onion
  • ¼ cup chopped or torn fresh cilantro
  • 6 cherry or grape tomatoes chopped small
  • Hot sauce such as Cholula
  • Optional extras: guacamole salsa, pico de gallo

Method
 

  1. Preheat oven to 450°F (232°C). Line a large baking sheet with foil for easy cleanup.
  2. Bake tortillas: Lightly brush both sides of the corn tortillas with oil and arrange them snugly on the baking sheet. Bake for 9 to 10 minutes, until the tortillas are firm but not browned. Let cool for about 5 minutes.
  3. Flip and layer: Flip tortillas over and spread each with refried beans. Add shredded rotisserie chicken and top with shredded cheese.
  4. Return to oven: Bake again for 5 to 6 minutes, until the cheese is melted and everything is heated through.
  5. Add toppings: Garnish each tostada with your choice of sour cream, red onion, cilantro, tomatoes, hot sauce, and any other favorite toppings. Serve immediately.

Notes

  • Use leftover chicken: Rotisserie chicken makes this recipe super quick, but any cooked and shredded chicken works.
  • Make it vegetarian: Skip the chicken and load up on seasoned beans and veggies instead.
  • Batch-friendly: This recipe easily doubles or triples for parties and gatherings.
  • Customize toppings: Add shredded lettuce, jalapeños, avocado slices, or a drizzle of lime crema for variety.
  • Reheating tip: For best results, reheat leftovers in the oven or air fryer to maintain crispiness.

Ritz Chicken Rice Casserole is a family favorite dish.

Ritz Chicken Rice Casserole. This casserole is not just a meal; it’s a warm hug on a plate. Perfect for busy weeknights or family gatherings, it combines tender chicken, creamy goodness, and a crunchy topping that everyone loves.

Imagine coming home after a long day, and the aroma of a bubbling casserole fills your kitchen. The Ritz Chicken Rice Casserole is easy to prepare, making it a go-to recipe for both novice cooks and seasoned chefs. With just a few simple ingredients, you can create a dish that is both satisfying and delicious.

This casserole is versatile, too! You can customize it with your favorite vegetables or add extra ingredients like bacon for a savory twist. Plus, it’s a great way to use up leftover chicken, making it a practical choice for any household.

In this article, we will guide you through the ingredients, preparation steps, and even some tips to make your casserole shine. So, let’s dive into the wonderful world of Ritz Chicken Rice Casserole and discover how to make this delightful dish that will surely become a family favorite!

Ingredients for Ritz Chicken Rice Casserole

Ritz Chicken Rice Casserole, you’ll need a handful of simple ingredients. Each component plays a vital role in bringing flavor and texture to this comforting dish. Here’s what you’ll need:

  • 3 cups cooked chicken, shredded
  • 1 cup long-grain white rice, uncooked
  • 1 can (10.5 oz) cream of chicken soup
  • 1 can (10.5 oz) chicken broth
  • 1 cup sour cream
  • 1 cup frozen mixed vegetables (peas, carrots, corn)
  • 1 teaspoon garlic powder
  • 1 teaspoon onion powder
  • 1/2 teaspoon black pepper
  • 1/2 teaspoon salt
  • 1 1/2 cups crushed Ritz crackers
  • 1/2 cup shredded cheddar cheese
  • 1/4 cup butter, melted

These ingredients come together to create a creamy, savory base, topped with a crunchy layer of Ritz crackers. The combination of chicken, rice, and vegetables makes this casserole not only hearty but also nutritious. Feel free to adjust the ingredients based on your preferences or what you have on hand. For instance, you can swap out the mixed vegetables for your favorites, or even add some cooked bacon for an extra flavor boost!

Now that you have your ingredients ready, let’s move on to the preparation steps to bring this delightful dish to life!

Preparation of Ritz Chicken Rice Casserole

Ritz Chicken Rice Casserole. This process is straightforward and fun! Follow these steps to create a delicious meal that your family will love.

Step 1: Preheat the Oven

First things first, preheat your oven to 350°F (175°C). This ensures that your casserole cooks evenly and comes out perfectly golden brown. While the oven heats up, you can focus on the other steps.

Step 2: Prepare the Chicken

If you haven’t done so already, shred your cooked chicken. You can use leftover chicken or rotisserie chicken for convenience. Shredding the chicken into bite-sized pieces helps it mix well with the other ingredients, making every bite flavorful.

Step 3: Cook the Rice

Next, you’ll need to measure out one cup of long-grain white rice. Since this rice will cook in the oven, there’s no need to pre-cook it. Just make sure it’s ready to go into the casserole dish!

Step 4: Mix the Ingredients

In a large mixing bowl, combine the shredded chicken, uncooked rice, cream of chicken soup, chicken broth, sour cream, and frozen mixed vegetables. Add the garlic powder, onion powder, black pepper, and salt. Mix everything together until well combined. This creamy mixture is the heart of your casserole!

Step 5: Assemble the Casserole

Now, pour the chicken and rice mixture into your greased 9×13-inch baking dish. Spread it evenly across the bottom of the dish. This ensures that every part of the casserole cooks evenly and absorbs all the delicious flavors.

Step 6: Top with Ritz Crackers

In a separate bowl, combine the crushed Ritz crackers, shredded cheddar cheese, and melted butter. Mix until the crackers are well coated. This mixture will create a crunchy topping that contrasts beautifully with the creamy filling. Sprinkle it evenly over the top of the casserole.

Step 7: Bake the Casserole

Cover the baking dish with aluminum foil and place it in the preheated oven. Bake for 30 minutes. After that, remove the foil and bake for an additional 15-20 minutes. You want the top to be golden brown and the casserole to be bubbly. Once done, take it out and let it cool for about 5 minutes before serving.

Ritz Chicken Rice Casserole is ready to be enjoyed. This dish is not only easy to make but also a crowd-pleaser. Let’s move on to some variations you can try to make this recipe even more exciting!

Variation of Ritz Chicken Rice Casserole

Ritz Chicken Rice Casserole is a hit on its own, there are many ways to switch things up! Whether you want to try different ingredients or explore various cooking methods, these variations will keep your meals exciting and flavorful.

Alternative Ingredients

One of the best things about casseroles is their versatility. You can easily swap out ingredients to suit your taste or what you have on hand. Here are some alternative ingredients you might consider:

  • Protein Options: Instead of chicken, you can use turkey, cooked ham, or even tofu for a vegetarian option.
  • Vegetable Choices: Feel free to replace the mixed vegetables with fresh or frozen options like broccoli, green beans, or bell peppers. Each will add a unique flavor and texture.
  • Cheese Varieties: While cheddar cheese is delicious, you can experiment with mozzarella, pepper jack, or even a blend of cheeses for a different taste.
  • Soup Alternatives: If you want to change the flavor profile, try using cream of mushroom soup or a cheese soup instead of cream of chicken.

These alternative ingredients can help you create a new twist on the classic casserole, making it a fun dish to prepare time and again!

Different Cooking Methods

Ritz Chicken Rice Casserole. Here are a couple of options:

  • Slow Cooker: For a hands-off approach, you can make this casserole in a slow cooker. Combine all the ingredients in the slow cooker and cook on low for 4-6 hours. Just be sure to add the Ritz cracker topping during the last 30 minutes of cooking.
  • Instant Pot: If you’re short on time, the Instant Pot is a great option. Use the sauté function to cook the chicken and vegetables first, then add the rice and liquids. Seal the lid and cook on high pressure for 10 minutes. After releasing the pressure, top with crushed crackers and cheese, then use the broil function to crisp the top.

Ritz Chicken Rice Casserole in different ways. So, whether you’re in a hurry or want to take it slow, there’s a method for you!

Cooking Note for Ritz Chicken Rice Casserole

Ritz Chicken Rice Casserole, there are a few important cooking notes to keep in mind. These tips will help ensure that your casserole turns out perfectly every time, making it a delightful dish for any occasion.

First, it’s essential to use cooked chicken. You can use leftover chicken, rotisserie chicken, or even poach your chicken before shredding it. This not only saves time but also adds flavor to your casserole. If you opt for raw chicken, be sure to cook it thoroughly before mixing it with the other ingredients.

Next, the rice in this recipe is uncooked when added to the casserole. It will absorb the liquid from the soup and broth as it bakes, cooking perfectly in the process. However, make sure to use long-grain white rice, as other types may not yield the same results. Brown rice, for example, requires a longer cooking time and may not cook through in the casserole.

Another important note is to keep an eye on the baking time. Ovens can vary, so it’s wise to check your casserole a few minutes before the suggested time. You want the top to be golden brown and the casserole to be bubbly. If the top browns too quickly, you can cover it with foil to prevent burning while the inside continues to cook.

Lastly, let the casserole cool for about 5 minutes before serving. This allows the flavors to meld together and makes it easier to serve. Plus, it helps prevent anyone from burning their mouth on the hot filling!

Ritz Chicken Rice Casserole that is sure to impress your family and friends. Enjoy the process and the wonderful aromas that fill your kitchen as you bake this comforting dish!

Serving Suggestions for Ritz Chicken Rice Casserole

Ritz Chicken Rice Casserole is baked to perfection, it’s time to serve it up! This dish is not only delicious but also versatile, making it a great centerpiece for any meal. Here are some serving suggestions to enhance your dining experience:

  • Garnish with Fresh Herbs: A sprinkle of fresh parsley or chives on top of the casserole adds a pop of color and a burst of flavor. Fresh herbs can elevate the dish and make it look even more appetizing.
  • Pair with a Side Salad: Serve your casserole alongside a crisp green salad. A simple mix of lettuce, tomatoes, and cucumbers with a light vinaigrette complements the richness of the casserole beautifully.
  • Include Bread Rolls: Soft dinner rolls or garlic bread are perfect for soaking up the creamy sauce. They add a comforting touch and make the meal feel more complete.
  • Offer a Variety of Condiments: Consider providing condiments like hot sauce or a tangy barbecue sauce on the side. This allows guests to customize their plates according to their taste preferences.
  • Serve with Steamed Vegetables: For a well-rounded meal, add a side of steamed vegetables. Broccoli, green beans, or carrots can provide a nutritious balance to the rich casserole.

Ritz Chicken Rice Casserole but also create a delightful dining experience for you and your guests. Whether it’s a family dinner or a gathering with friends, this dish is sure to be a hit!

Tips for Making the Perfect Ritz Chicken Rice Casserole

Ritz Chicken Rice Casserole is all about attention to detail and a few helpful tips. With these suggestions, you can elevate your casserole to new heights, ensuring it’s a hit every time you serve it!

  • Use Quality Ingredients: Start with fresh, high-quality ingredients. Fresh chicken, good-quality cream of chicken soup, and flavorful broth will make a noticeable difference in taste.
  • Don’t Skip the Seasoning: Seasoning is key! Make sure to add enough garlic powder, onion powder, salt, and pepper. You can also experiment with herbs like thyme or rosemary for added flavor.
  • Mix Thoroughly: When combining the ingredients, mix them well. This ensures that every bite is packed with flavor and that the rice cooks evenly throughout the casserole.
  • Check for Doneness: Ovens can vary, so keep an eye on your casserole as it bakes. The top should be golden brown, and the filling should be bubbly. If it’s not quite there, give it a few extra minutes.
  • Let It Rest: After baking, let the casserole sit for about 5 minutes before serving. This resting time allows the flavors to meld and makes it easier to serve.
  • Customize to Your Taste: Feel free to add your favorite ingredients! Whether it’s extra veggies, different cheeses, or even spices, customizing the casserole can make it uniquely yours.
  • Store Leftovers Properly: If you have leftovers, store them in an airtight container in the fridge. They can last for up to 3-4 days. Reheat in the oven or microwave for a quick meal!

Ritz Chicken Rice Casserole that your family and friends will love. Enjoy the process and the wonderful flavors that come together in this comforting dish!

Breakdown of Time for Ritz Chicken Rice Casserole

Ritz Chicken Rice Casserole can help you plan your meal better. Here’s a simple breakdown of the time involved in making this delicious dish.

Prep Time

Ritz Chicken Rice Casserole is approximately 15-20 minutes. This includes gathering your ingredients, shredding the chicken, measuring the rice, and mixing everything together. If you have leftover chicken ready to go, this time can be even shorter!

Cooking Time

Once your casserole is assembled, the cooking time is about 45-50 minutes. You’ll bake it covered for the first 30 minutes, allowing the rice to absorb the flavors. Then, you’ll uncover it for an additional 15-20 minutes to achieve that golden, crispy topping.

Total Time

In total, you can expect to spend about 1 hour to 1 hour and 10 minutes from start to finish. This includes both prep and cooking time. It’s a manageable timeframe for a comforting meal that serves six people, making it perfect for family dinners or gatherings!

Ritz Chicken Rice Casserole into your busy schedule. Enjoy the process and the delicious results!

Nutritional Information for Ritz Chicken Rice Casserole

Ritz Chicken Rice Casserole is not only delicious but also provides a good mix of nutrients. Here’s a closer look at the nutritional information per serving:

Calories

Ritz Chicken Rice Casserole contains approximately 350 calories. This makes it a hearty option for dinner without being overly heavy. The combination of chicken, rice, and vegetables contributes to a satisfying meal that can keep you full for hours.

Protein

With about 22 grams of protein per serving, this casserole is a great source of this essential nutrient. The shredded chicken is the primary contributor, providing the building blocks your body needs for muscle repair and growth. Including protein in your meals can help you feel fuller longer, making it a smart choice for those watching their appetite.

Sodium

Each serving contains around 800 mg of sodium. While sodium is necessary for bodily functions, it’s important to monitor your intake. If you’re watching your sodium levels, consider using low-sodium chicken broth and soup. This small adjustment can help reduce the overall sodium content while still keeping the casserole flavorful.

Ritz Chicken Rice Casserole offers a balanced mix of calories, protein, and sodium, making it a nutritious option for family meals. By being mindful of ingredient choices, you can further enhance its health benefits while enjoying this comforting dish!

FAQs about Ritz Chicken Rice Casserole

Can I use leftover chicken for Ritz Chicken Rice Casserole?

Ritz Chicken Rice Casserole even more convenient to prepare!

What can I substitute for rice in Ritz Chicken Rice Casserole?

Ritz Chicken Rice Casserole a unique twist!

How long can I store Ritz Chicken Rice Casserole in the fridge?

Ritz Chicken Rice Casserole can be stored in the fridge for up to 3-4 days. Make sure to place it in an airtight container to keep it fresh. When you’re ready to enjoy it again, simply reheat in the oven or microwave until warmed through. This makes it a great option for meal prep or leftovers!

Can I freeze Ritz Chicken Rice Casserole?

Ritz Chicken Rice Casserole for later enjoyment! To do this, let it cool completely, then cover it tightly with plastic wrap and aluminum foil. It can be stored in the freezer for up to 2-3 months. When you’re ready to eat it, thaw it in the fridge overnight and reheat in the oven until hot. This makes for a quick and easy meal on busy days!

Conclusion on Ritz Chicken Rice Casserole

Ritz Chicken Rice Casserole is a delightful dish that brings comfort and satisfaction to any meal. Its creamy texture, combined with the crunch of Ritz crackers, creates a perfect harmony of flavors and textures. This casserole is not only easy to prepare but also versatile, allowing you to customize it to your taste and dietary needs.

Whether you’re using leftover chicken, experimenting with different vegetables, or trying out various cooking methods, this recipe offers endless possibilities. It’s a fantastic option for busy weeknights, family gatherings, or even potlucks. Plus, with its balanced nutritional profile, you can feel good about serving it to your loved ones.

Ritz Chicken Rice Casserole, remember to enjoy the process. Cooking is not just about the end result; it’s about the love and care you put into each dish. So gather your ingredients, follow the steps, and savor the delicious aroma that fills your kitchen.

Ritz Chicken Rice Casserole is sure to become a staple in your home. Happy cooking!

Paul

Ritz Chicken Rice Casserole is a family favorite dish.

This Ritz Chicken and Rice Casserole is creamy, comforting, and crowned with a buttery Ritz cracker crunch that’s downright irresistible. It’s a cozy, crowd-pleasing dish that comes together fast using pantry staples and rotisserie chicken—perfect for busy weeknights or family gatherings.
Prep Time 15 minutes
Cook Time 25 minutes
Total Time 40 minutes
Servings: 6 servings
Course: Casserole, Main Dish
Cuisine: American

Ingredients
  

For the Casserole Base:
  • 3 cups cooked cubed chicken
  • 1 6.9 oz box Chicken Rice-A-Roni, prepared according to package directions
  • 1 cup sour cream
  • 1 10.5 oz can cream of chicken soup
  • ½ teaspoon garlic powder
  • 1 teaspoon onion powder
  • 1 teaspoon salt
  • ¼ teaspoon black pepper
For the Topping:
  • 6 tablespoons butter melted
  • 1 sleeve Ritz crackers crushed
  • 1 cup shredded cheddar cheese

Method
 

  1. Preheat the oven to 350°F (175°C). Lightly grease a 9×13-inch baking dish with non-stick spray.
  2. Prepare the rice: Cook the Chicken Rice-A-Roni as directed on the box. Set aside.
  3. Make the filling: In a large mixing bowl, whisk together the sour cream, cream of chicken soup, garlic powder, onion powder, salt, and pepper until smooth. Stir in the cooked chicken and prepared rice.
  4. Assemble the casserole: Spread the chicken and rice mixture evenly into the prepared baking dish.
  5. Make the topping: In a small bowl, combine the melted butter and crushed Ritz crackers. Stir in the shredded cheddar cheese. Sprinkle the mixture evenly over the casserole.
  6. Bake: Bake for 25 minutes, then broil for 2–3 minutes until the top is golden and crispy.
  7. Serve: Let cool slightly before serving. Enjoy the creamy filling with a crunchy topping in every bite.

Notes

  • Time-saver tip: Use rotisserie chicken to cut down on prep time.
  • Rice swap: You can use plain cooked rice with added seasoning if you don’t have Rice-A-Roni.
  • Make it ahead: Assemble the casserole in advance, refrigerate, and bake when ready (add 5–10 extra minutes of bake time).
  • Freezer-friendly: This dish freezes well—just thaw overnight and bake as usual.