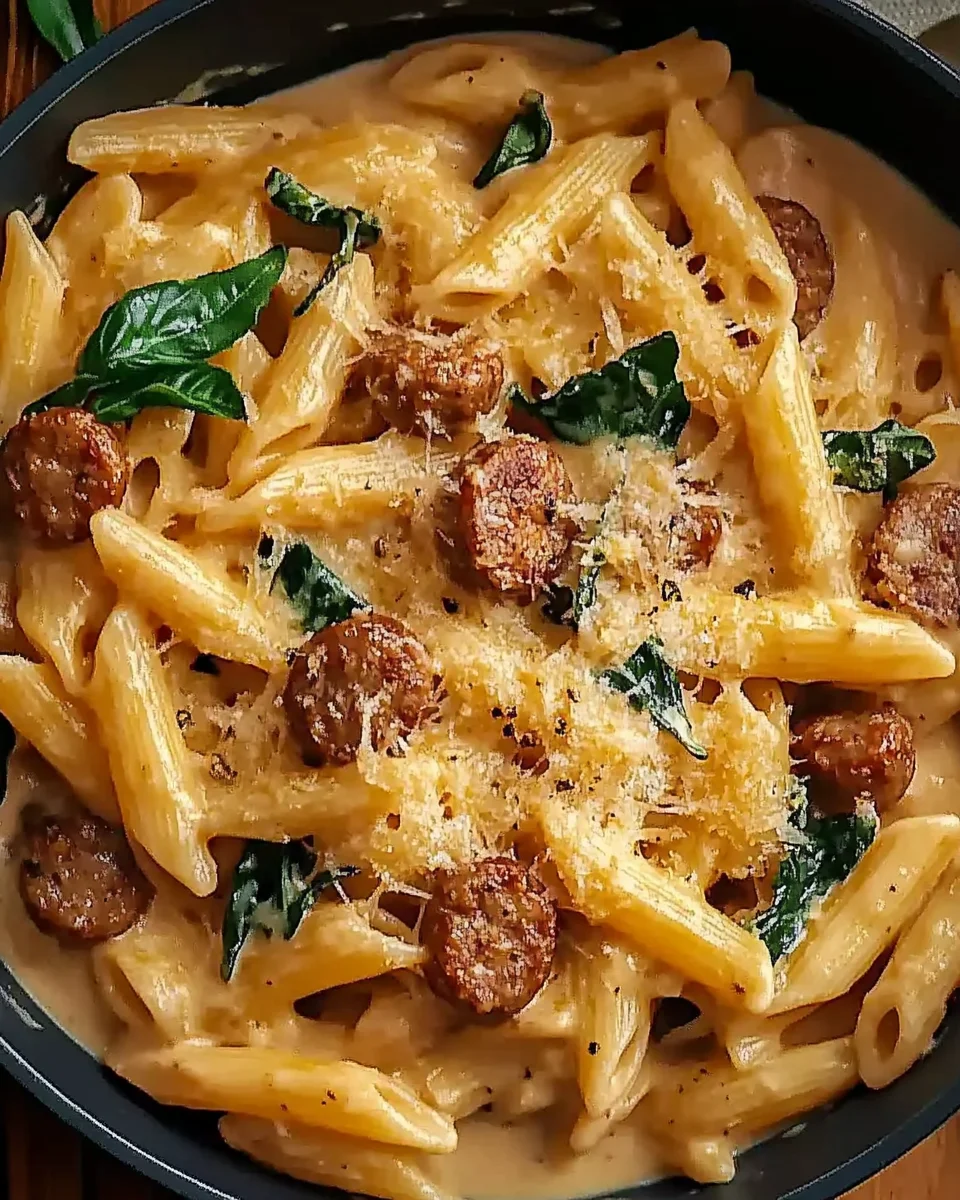
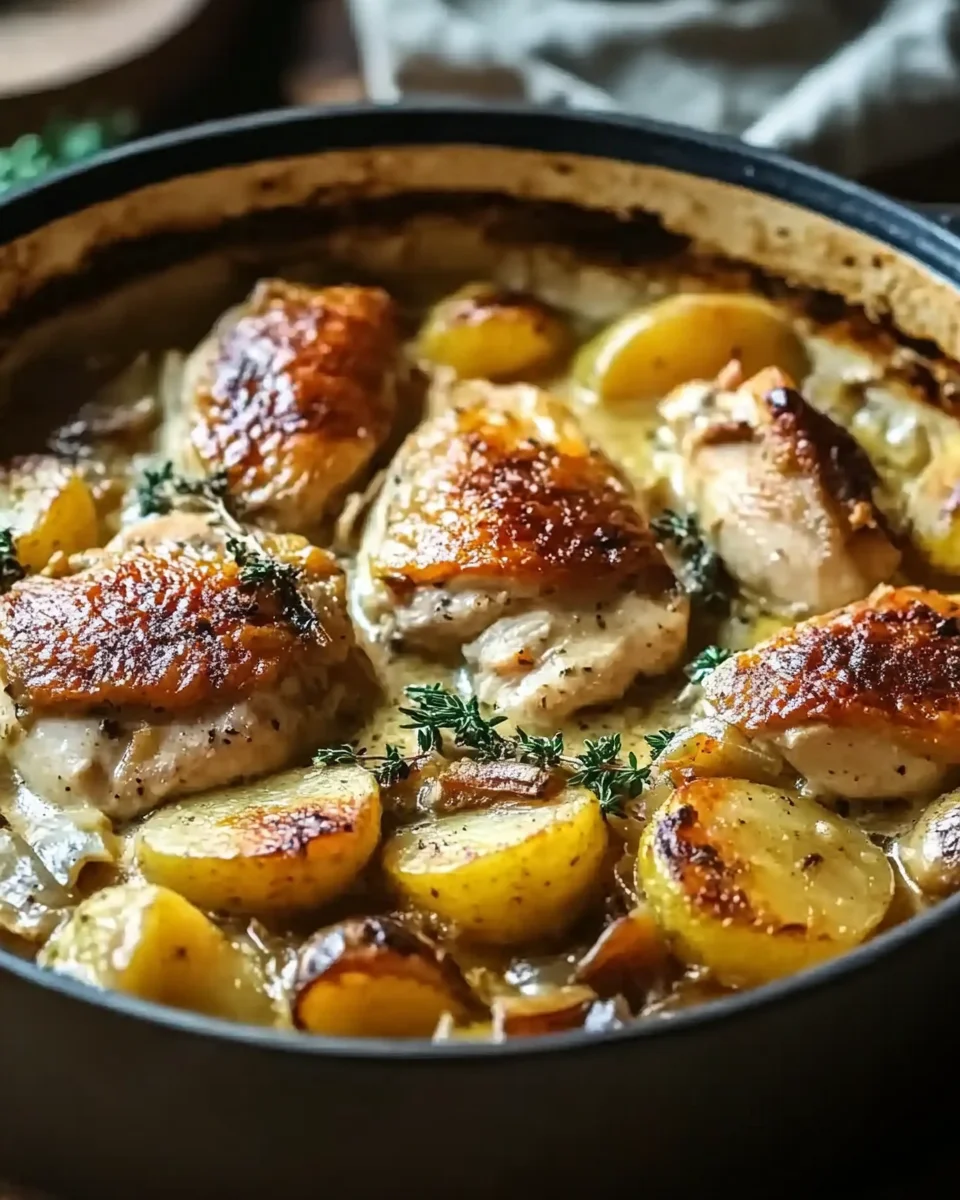
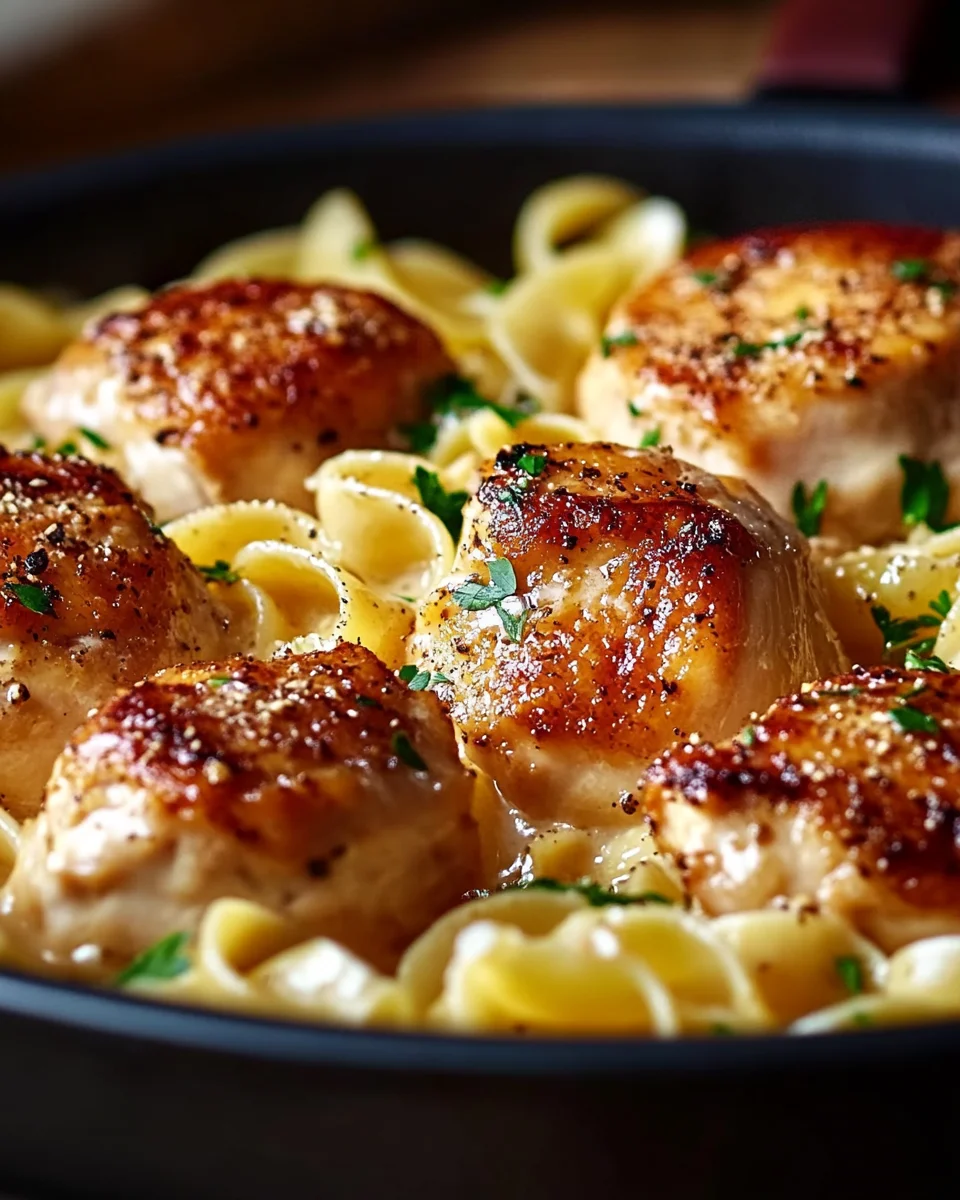
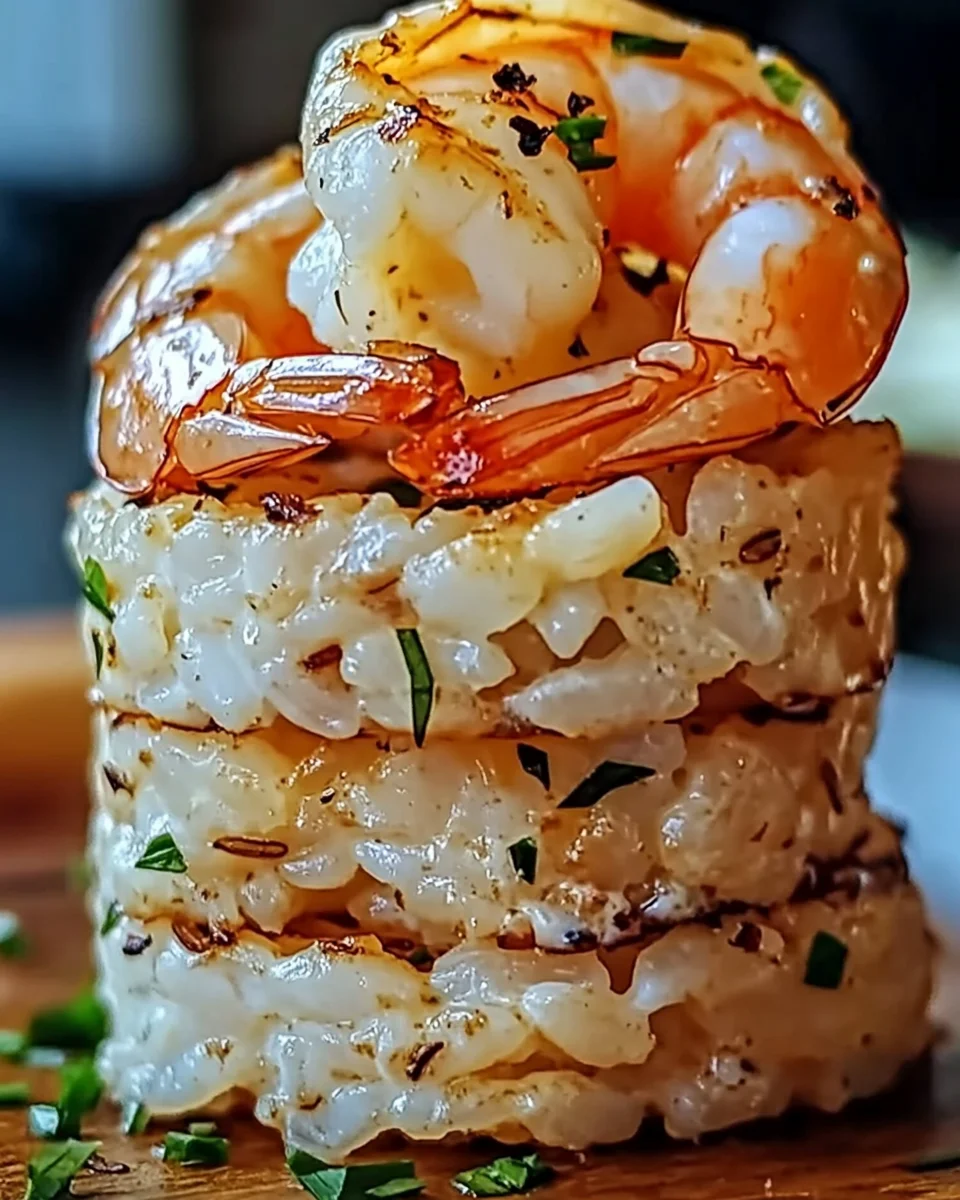
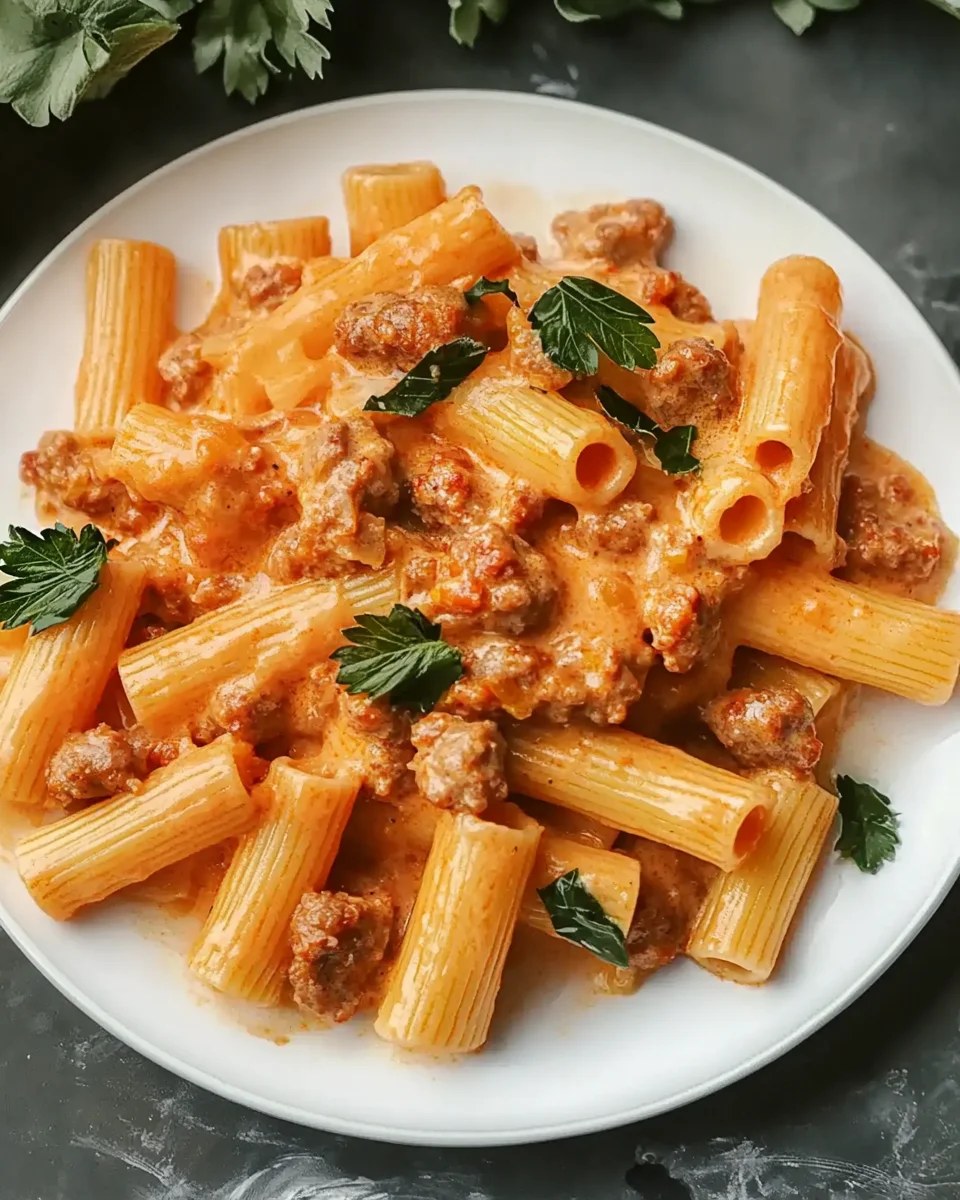
Creamy Sausage Rigatoni: A Flavorful and Comforting Dinner

There’s something undeniably comforting about a warm bowl of pasta coated in a rich, creamy sauce. This Creamy Sausage Rigatoni is the perfect dish for busy weeknights or special family dinners. It’s packed with bold Italian flavors, hearty rigatoni, and fresh spinach, making it a meal that’s as delicious as it is satisfying.

Why You’ll Love Creamy Sausage Rigatoni

  • Rich and Creamy Sauce: The combination of heavy cream and tomato sauce creates an irresistible texture and flavor.
  • Hearty and Filling: Rigatoni and sausage make this a satisfying one-pot meal.
  • Simple and Quick: With just one skillet and about 30 minutes, dinner is ready.
  • Customizable: Add vegetables, adjust spices, or swap ingredients to suit your taste.

Ingredients for Creamy Sausage Rigatoni

Core Ingredients

IngredientAmount
Olive oil1 tbsp
Italian sausage (crumbled)15 oz
Rigatoni (uncooked)8 oz
Chicken broth1 cup
Heavy cream1 cup
Garlic (minced)4 cloves
Italian seasoning1 tsp
Tomato sauce15 oz
Fresh spinach5 oz
SaltTo taste
Black pepper (coarsely ground)To taste
Red pepper flakes (optional)¼ tsp

Step-by-Step Instructions

1. Cook the Sausage

  • Heat olive oil in a large, high-sided skillet over medium heat.
  • Add the crumbled Italian sausage, cooking for about 5 minutes until browned. Break it into smaller pieces as it cooks.
  • Drain excess grease to prevent the sauce from becoming too oily.

2. Combine Key Ingredients

  • To the same skillet, add uncooked rigatoni, chicken broth, heavy cream, minced garlic, Italian seasoning, and tomato sauce.
  • Stir everything well to coat the pasta evenly.

3. Simmer and Cook

  • Bring the mixture to a gentle boil over medium heat. Stir occasionally to prevent the pasta from sticking.
  • Cover the skillet with a lid and let the rigatoni cook for 10–15 minutes, until it reaches an “al dente” texture and absorbs the creamy tomato sauce.

4. Add Fresh Spinach

  • Once the pasta is cooked, add the spinach to the skillet.
  • Stir over medium heat until the spinach wilts. Alternatively, remove the skillet from the heat, cover with a lid, and let residual heat wilt the spinach for about 4 minutes.

5. Adjust the Consistency

  • If you prefer a thicker sauce, let the dish cook uncovered for a couple of additional minutes, stirring occasionally to prevent burning.

6. Season and Serve

  • Remove the skillet from heat. Season with salt, black pepper, and a pinch of red pepper flakes if you like some extra spice.
  • Serve hot, garnished with Parmesan cheese or fresh basil for a burst of flavor.

Why This Recipe Works

1. Bold and Balanced Flavors

The spicy, savory sausage pairs perfectly with the creamy tomato sauce, creating a dish that’s both comforting and flavorful.

2. One-Pot Convenience

Cooking everything in one pot minimizes cleanup and allows the pasta to absorb the sauce’s rich flavors.

3. Versatility

From adding extra veggies to adjusting spice levels, this recipe is easy to customize.

Nutritional Information

NutrientPer Serving (Approx.)
Calories420
Protein22g
Carbohydrates32g
Fat24g
Fiber3g
Sodium780mg

Tips for Making the Best Creamy Sausage Rigatoni

1. Choose High-Quality Sausage

  • Opt for fresh Italian sausage—sweet or spicy depending on your preference.

2. Don’t Overcook the Pasta

  • Cooking the rigatoni until “al dente” ensures it holds its shape and absorbs the sauce perfectly.

3. Use Fresh Spinach

  • Fresh spinach wilts beautifully in the sauce, adding both nutrition and vibrant color.

4. Adjust the Spice

  • Add cayenne pepper or extra red pepper flakes for a spicier dish.

Variations to Try

1. Veggie-Packed Version

  • Add mushrooms, zucchini, or bell peppers for extra vegetables.

2. Cheesy Twist

  • Stir in shredded mozzarella or fontina cheese for a gooey, cheesy texture.

3. Gluten-Free Option

  • Use gluten-free pasta to make this dish suitable for those with dietary restrictions.

4. Seafood Spin

  • Replace the sausage with shrimp or scallops for a seafood twist.

Serving Suggestions

  • Garlic Bread: A slice of warm garlic bread is perfect for soaking up the creamy sauce.
  • Side Salad: Pair with a crisp Caesar salad for a balanced meal.
  • Roasted Vegetables: Serve alongside roasted asparagus or broccoli for added nutrients.

FAQ: Your Questions About Creamy Sausage Rigatoni Answered

1. Can I make this recipe ahead of time?

Yes! Store the pasta in an airtight container in the fridge for up to 3 days. Reheat on the stovetop with a splash of chicken broth or cream to refresh the sauce.

2. Can I use a different type of pasta?

Absolutely! Penne, ziti, or even bowtie pasta work well with this creamy sauce.

3. How do I make it less spicy?

Use sweet Italian sausage and skip the red pepper flakes for a milder version.

4. Can I freeze leftovers?

While the pasta is best fresh, you can freeze it for up to 2 months. Thaw in the fridge overnight and reheat gently.

5. What’s the best way to thicken the sauce?

Cook the dish uncovered for a few minutes, stirring frequently, until the sauce reaches your desired consistency.

6. Can I make this dish dairy-free?

Use coconut cream instead of heavy cream and dairy-free cheese for a creamy, dairy-free alternative.

Final Thoughts and Call to Action

This Creamy Sausage Rigatoni is everything you want in a comforting meal: rich, satisfying, and full of flavor. It’s quick to make, customizable to your taste, and perfect for feeding a crowd or enjoying as leftovers.

Ready to try this delicious recipe? Gather your ingredients, follow these simple steps, and create a pasta dish that everyone will rave about. Don’t forget to share your creation and inspire others to enjoy this creamy, one-pot wonder!
ating

Creamy Sausage Rigatoni: A Flavorful and Comforting Dinner

Core Ingredients:
  • Olive oil – 1 tbsp
  • Italian sausage (crumbled) – 15 oz
  • Rigatoni (uncooked) – 8 oz
  • Chicken broth – 1 cup
  • Heavy cream – 1 cup
  • Garlic (minced) – 4 cloves
  • Italian seasoning – 1 tsp
  • Tomato sauce – 15 oz
  • Fresh spinach – 5 oz
  • Salt – To taste
  • Black pepper (coarsely ground) – To taste
  • Red pepper flakes (optional) – ¼ tsp
Prep Time 10 minutes
Cook Time 20 minutes
Total Time 30 minutes
Servings: 4 servings
Course: Main Course
Cuisine: Italian-inspired

Ingredients
  

Core Ingredients:
  • Olive oil – 1 tbsp
  • Italian sausage crumbled – 15 oz
  • Rigatoni uncooked – 8 oz
  • Chicken broth – 1 cup
  • Heavy cream – 1 cup
  • Garlic minced – 4 cloves
  • Italian seasoning – 1 tsp
  • Tomato sauce – 15 oz
  • Fresh spinach – 5 oz
  • Salt – To taste
  • Black pepper coarsely ground – To taste
  • Red pepper flakes optional – ¼ tsp

Method
 

Cook the Sausage:
  1. Heat olive oil in a large skillet over medium heat.
  2. Add the crumbled Italian sausage and cook for 5 minutes until browned, breaking it into smaller pieces.
  3. Drain any excess grease to keep the sauce from becoming too oily.
Combine Key Ingredients:
  1. To the same skillet, add uncooked rigatoni, chicken broth, heavy cream, minced garlic, Italian seasoning, and tomato sauce.
  2. Stir well to ensure the pasta is coated evenly in the mixture.
Simmer and Cook:
  1. Bring the mixture to a gentle boil over medium heat.
  2. Cover the skillet with a lid and cook for 10–15 minutes, stirring occasionally, until the rigatoni is al dente and the sauce has thickened.
Add Fresh Spinach:
  1. Stir in the fresh spinach and let it wilt over medium heat. Alternatively, remove the skillet from the heat, cover, and let the spinach wilt with residual heat for about 4 minutes.
Adjust the Sauce Consistency:
  1. If the sauce is too thick, add a splash of chicken broth or cream to loosen it. For a thicker sauce, cook uncovered for a few minutes, stirring frequently.
Season and Serve:
  1. Remove the skillet from heat and season the dish with salt, black pepper, and red pepper flakes (if desired).
  2. Serve hot, garnished with Parmesan cheese or fresh basil for an extra burst of flavor.

Notes

  • Use fresh spinach for the best flavor and texture.
  • For a lighter version, substitute heavy cream with half-and-half.
  • Make it spicier by adding cayenne pepper or using hot Italian sausage.

Pepperoni Pizza Minis: Bite-Sized Fun for Every Occasion

When it comes to snacks or party foods, nothing beats the crowd-pleasing flavor of pizza. Pepperoni Pizza Minis take all the deliciousness of a classic pepperoni pizza and pack it into bite-sized, easy-to-make treats. Perfect for parties, lunchboxes, or quick snacks, these minis are as versatile as they are tasty.

Why Pepperoni Pizza Minis Are a Must-Try

  • Quick and Easy: Ready in just 30 minutes, these mini pizzas fit perfectly into your busy schedule.
  • Mess-Free: The handheld size means no messy slices or cleanup.
  • Customizable: Add your favorite toppings or try a veggie version to suit your taste.
  • Perfect for Any Occasion: Great for kids, parties, or as a unique appetizer for gatherings.

Ingredients for Pepperoni Pizza Minis

Here’s what you’ll need to whip up these flavorful treats:

Core Ingredients

IngredientAmount
All-purpose flour¾ cup
Baking powder2 tsp
Salt½ tsp
Milk½ cup
Large egg1
Melted butter¼ cup
Shredded mozzarella cheese½ cup
Mini pepperoni slices½ cup
Marinara sauce½ cup
Fresh basil (chopped)For garnish

Step-by-Step Instructions

1. Preheat Your Oven

  • Set your oven to 375°F (190°C).
  • Grease a muffin tin to ensure your minis don’t stick.

2. Combine the Dry Ingredients

  • In a medium bowl, mix the all-purpose flour, baking powder, and salt.
  • Stir until well combined.

3. Whisk the Wet Ingredients

  • In a separate bowl, whisk together the milk, egg, and melted butter until smooth.

4. Mix the Batter

  • Gradually add the dry ingredients to the wet mixture, stirring until just combined.
  • Fold in half of the shredded mozzarella cheese.

5. Assemble the Minis

  • Add a spoonful of batter to each muffin cup.
  • Drop a small dollop of marinara sauce into the center, followed by a few mini pepperoni slices.
  • Cover with another spoonful of batter, then top with the remaining mozzarella cheese and more mini pepperoni slices.

6. Bake to Perfection

  • Place the muffin tin in the oven and bake for 20 minutes, or until the tops are golden brown and a toothpick comes out clean.

7. Garnish and Serve

  • Let the minis cool slightly before removing them from the tin.
  • Garnish with freshly chopped basil for a burst of flavor and color.
  • Serve warm and enjoy!

Why These Pepperoni Pizza Minis Are So Good

1. Irresistible Flavors

The classic combination of pepperoni, mozzarella, and marinara sauce delivers a taste that everyone loves.

2. Perfectly Portion-Controlled

These mini pizzas are great for snacking without overindulging.

3. Kid-Friendly

Their size and fun presentation make them an instant hit with kids.

Nutritional Information

NutrientPer Serving (Approx.)
Calories140
Protein6g
Carbohydrates10g
Fat8g
Fiber1g
Sodium310mg

Tips for the Best Pepperoni Pizza Minis

1. Use Fresh Ingredients

  • Fresh basil and good-quality marinara sauce can elevate the flavor of your minis.

2. Don’t Overfill the Cups

  • Leave a little room in each muffin cup for the batter to rise as it bakes.

3. Get Creative with Toppings

  • Add diced bell peppers, mushrooms, or olives for a veggie-packed version.

4. Make It Cheesy

  • Mix in different cheeses like Parmesan or cheddar for added depth.

Variations to Try

1. Veggie Lovers’ Minis

  • Swap pepperoni for chopped vegetables like zucchini, spinach, or cherry tomatoes.

2. Spicy Pepperoni Minis

  • Sprinkle red pepper flakes over the top before baking for an extra kick.

3. Gluten-Free Option

  • Use a gluten-free flour blend to make these minis suitable for gluten-sensitive eaters.

4. Hawaiian Style

  • Add diced ham and pineapple for a sweet-and-savory twist.

Serving Suggestions

  • Side Salad: Pair with a crisp green salad for a balanced meal.
  • Dipping Sauce: Serve with ranch, garlic butter, or extra marinara for dipping.
  • Party Platter: Include these minis on an appetizer tray with veggies and cheese.

FAQ: Your Questions About Pepperoni Pizza Minis Answered

1. Can I make these minis ahead of time?

Yes! Prepare and bake them ahead of time, then store in an airtight container. Reheat in the oven for a few minutes before serving.

2. Can I freeze Pepperoni Pizza Minis?

Absolutely. Freeze them in a single layer on a baking sheet, then transfer to a freezer bag. Reheat in the oven straight from frozen.

3. Can I use regular-sized pepperoni?

Yes! Simply cut the slices into quarters to fit them into the minis.

4. How do I prevent them from sticking?

Grease the muffin tin thoroughly or use non-stick cooking spray for easy removal.

5. Can I use a different type of cheese?

Definitely. Mozzarella works best, but cheddar, Monterey Jack, or a blend of Italian cheeses would also taste great.

6. How long do leftovers last?

Store leftovers in the refrigerator for up to 3 days. Reheat in the oven or microwave before serving.

Final Thoughts and Call to Action

Pepperoni Pizza Minis are the ultimate crowd-pleaser. Their bite-sized convenience, bold flavors, and easy preparation make them a go-to recipe for any occasion. Whether you’re hosting a party or looking for a quick snack, these minis deliver big on flavor with minimal effort.

Ready to try them yourself? Gather your ingredients, follow the steps, and enjoy the irresistible taste of homemade pizza in mini form. Don’t forget to share your creations and inspire others to get cooking!

ating

Pepperoni Pizza Minis: Bite-Sized Fun for Every Occasion

Bring the flavors of a classic pepperoni pizza into fun, bite-sized treats with these Pepperoni Pizza Minis! Perfect for parties, snacks, or lunchbox surprises, these mini pizzas are easy to make and packed with cheesy, saucy goodness. They’re sure to be a hit with both kids and adults!
Prep Time 10 minutes
Cook Time 20 minutes
Total Time 30 minutes
Servings: 12 mini pizzas
Course: Appetizer, Snack
Cuisine: Italian-American

Ingredients
  

Core Ingredients:
  • ¾ cup all-purpose flour
  • 2 tsp baking powder
  • ½ tsp salt
  • ½ cup milk
  • 1 large egg
  • ¼ cup melted butter
  • ½ cup shredded mozzarella cheese
  • ½ cup mini pepperoni slices
  • ½ cup marinara sauce
  • Fresh basil chopped (for garnish)

Method
 

Preheat Your Oven:
  1. Set your oven to 375°F (190°C).
  2. Grease a muffin tin thoroughly to prevent sticking.
Combine Dry Ingredients:
  1. In a medium bowl, mix the flour, baking powder, and salt.
Prepare the Wet Ingredients:
  1. In another bowl, whisk together the milk, egg, and melted butter until smooth.
Mix the Batter:
  1. Gradually add the dry ingredients to the wet mixture, stirring until just combined.
  2. Fold in half of the shredded mozzarella cheese.
Assemble the Minis:
  1. Add a spoonful of batter to each muffin cup.
  2. Place a dollop of marinara sauce in the center, followed by a few mini pepperoni slices.
  3. Cover with another spoonful of batter, then top with the remaining mozzarella cheese and additional mini pepperoni slices.
Bake:
  1. Place the muffin tin in the preheated oven and bake for 20 minutes, or until the tops are golden brown and a toothpick inserted in the center comes out clean.
Garnish and Serve:
  1. Let the minis cool slightly before removing them from the muffin tin.
  2. Garnish with freshly chopped basil for added flavor and serve warm.

Notes

  • For extra flavor, sprinkle Italian seasoning over the batter before baking.
  • Avoid overfilling the muffin cups to allow room for the batter to rise.
  • Store leftovers in the fridge for up to 3 days or freeze for longer storage.

One Pot Creamy Cajun Sausage Pasta: A Flavor-Packed Weeknight Dinner

If you’re looking for a meal that’s bursting with bold flavors, creamy textures, and hearty ingredients, One Pot Creamy Cajun Sausage Pasta is the answer. This recipe combines smoky sausage, vibrant vegetables, and perfectly cooked pasta in a rich, Cajun-spiced sauce. The best part? It’s all made in one pot, so cleanup is a breeze!

Why You’ll Love This Recipe

  • Bold Cajun Flavor: The combination of Cajun seasoning and a creamy sauce delivers an irresistible taste.
  • One-Pot Convenience: Minimal dishes and maximum flavor make this a perfect weeknight dinner.
  • Customizable: You can easily adjust the spice level and swap in your favorite vegetables or proteins.
  • Family-Friendly: Even picky eaters will love this comforting, flavorful dish.

Ingredients for One Pot Creamy Cajun Sausage Pasta

Core Ingredients

IngredientAmount
Smoked sausage (Andouille or kielbasa)12 oz
Pasta (penne or rigatoni)8 oz
Cajun seasoning2 tbsp
Olive oil1 tbsp
Bell peppers (mixed colors, diced)1 cup
Onion (diced)½ cup
Chicken broth1 ½ cups
Heavy cream1 cup
Shredded Parmesan cheese1 cup
Garlic powder½ tsp
Cayenne pepper (optional)¼ tsp
Fresh spinach (optional)1 cup
Salt and pepperTo taste
Chopped parsley (for garnish)1 tbsp

Step-by-Step Instructions

1. Prep Your Ingredients

  • Slice the smoked sausage into thin rounds.
  • Dice the bell peppers and onion.
  • Measure out Cajun seasoning, heavy cream, Parmesan cheese, and chicken broth.

2. Cook the Sausage and Veggies

  • Heat olive oil in a large skillet or pot over medium-high heat.
  • Add the sliced sausage and sauté until browned, about 4–5 minutes. Remove the sausage and set it aside.
  • In the same pot, add the diced bell peppers and onion. Sauté until softened, about 3–4 minutes.

3. Create the Base

  • Sprinkle Cajun seasoning over the sautéed vegetables, stirring to coat them evenly.
  • Pour in the chicken broth and stir well, scraping any browned bits from the bottom of the pot.
  • Bring the mixture to a simmer.

4. Cook the Pasta

  • Add the pasta directly to the pot, ensuring it’s submerged in the liquid.
  • Cover and cook on medium heat until the pasta is al dente, about 10–12 minutes. Stir occasionally to prevent sticking.

5. Make the Creamy Sauce

  • Reduce the heat to low and stir in the heavy cream and shredded Parmesan cheese.
  • Mix until the cheese is fully melted and the sauce becomes creamy.

6. Return the Sausage to the Pot

  • Add the cooked sausage back to the pot and stir well to combine.
  • If using, add fresh spinach and cook for an additional 1–2 minutes until wilted.

7. Serve and Garnish

  • Taste and adjust the seasoning with salt and pepper as needed.
  • Serve hot, garnished with chopped parsley for a fresh, vibrant finish.

Why This Recipe Works

1. Balanced Flavors

The smoky sausage pairs perfectly with the creamy sauce, while the Cajun seasoning adds a zesty kick.

2. One-Pot Efficiency

Cooking everything in one pot means fewer dishes and a faster cleanup.

3. Versatile Ingredients

You can customize the recipe with different vegetables, proteins, or pasta shapes to suit your preferences.

Nutritional Information

NutrientPer Serving (Approx.)
Calories450
Protein20g
Carbohydrates35g
Fat25g
Fiber3g
Sodium700mg

Tips for Perfect One Pot Creamy Cajun Sausage Pasta

1. Use High-Quality Sausage

  • Andouille sausage brings authentic Cajun flavor, but kielbasa or your favorite smoked sausage works just as well.

2. Choose the Right Pasta

  • Penne or rigatoni holds the creamy sauce well, but feel free to experiment with other shapes.

3. Control the Spice Level

  • Add cayenne pepper for extra heat or reduce the Cajun seasoning for a milder dish.

4. Stir Frequently

  • Stir the pasta occasionally during cooking to prevent it from sticking to the pot.

Variations to Try

1. Shrimp Cajun Pasta

  • Swap the sausage for shrimp, adding it during the last 5 minutes of cooking.

2. Vegetarian Version

  • Skip the sausage and add mushrooms, zucchini, or broccoli for a plant-based option.

3. Extra Cheesy Twist

  • Mix in mozzarella or cheddar for an even cheesier sauce.

4. Low-Carb Option

  • Replace pasta with zucchini noodles or cauliflower rice for a low-carb alternative.

Serving Suggestions

  • Side Salad: Pair with a fresh green salad for a balanced meal.
  • Garlic Bread: Perfect for scooping up the creamy sauce.
  • Steamed Vegetables: Add a side of broccoli or green beans for extra nutrition.

FAQ: Your Questions About One Pot Creamy Cajun Sausage Pasta

1. Can I make this dish ahead of time?

Yes! This pasta reheats well. Store it in an airtight container in the refrigerator for up to 3 days.

2. Can I freeze leftovers?

Yes, but the creamy sauce may separate slightly upon thawing. Reheat gently on the stovetop and stir well to recombine.

3. How do I make it less spicy?

Reduce the amount of Cajun seasoning and skip the cayenne pepper for a milder flavor.

4. What’s the best way to reheat this dish?

Reheat in a skillet over low heat, adding a splash of chicken broth or cream to refresh the sauce.

5. Can I use dairy-free alternatives?

Absolutely! Substitute the heavy cream with coconut cream and use a dairy-free cheese alternative.

6. What other proteins can I use?

Chicken, turkey sausage, or tofu are great alternatives to smoked sausage.

Final Thoughts and Call to Action

One Pot Creamy Cajun Sausage Pasta is the ultimate comfort food. It’s quick, flavorful, and incredibly satisfying, making it a fantastic choice for busy weeknights or casual entertaining.

Ready to try this delicious recipe? Gather your ingredients, follow these simple steps, and enjoy a bowl of creamy, spicy goodness. Don’t forget to share your creation and inspire others to make this one-pot wonder!

ating

One Pot Creamy Cajun Sausage Pasta: A Flavor-Packed Weeknight Dinner

Get ready to spice up your dinner routine with this One Pot Creamy Cajun Sausage Pasta! Smoky sausage, vibrant veggies, and perfectly cooked pasta come together in a rich, creamy Cajun-spiced sauce—all made in one pot for ultimate convenience. It’s a flavorful, hearty meal your whole family will love.
Prep Time 10 minutes
Cook Time 20 minutes
Total Time 40 minutes
Servings: 4 servings
Course: Dinner
Cuisine: Cajun/Creole

Ingredients
  

Core Ingredients:
  • 12 oz smoked sausage Andouille or kielbasa, sliced into rounds
  • 8 oz pasta penne or rigatoni
  • 2 tbsp Cajun seasoning
  • 1 tbsp olive oil
  • 1 cup mixed bell peppers diced
  • ½ cup onion diced
  • 1 ½ cups chicken broth
  • 1 cup heavy cream
  • 1 cup shredded Parmesan cheese
  • ½ tsp garlic powder
  • ¼ tsp cayenne pepper optional
  • 1 cup fresh spinach optional
  • Salt and pepper to taste
  • 1 tbsp parsley chopped (for garnish)

Method
 

Prepare Your Ingredients:
  1. Slice the sausage into rounds and dice the bell peppers and onion.
  2. Measure out Cajun seasoning, chicken broth, heavy cream, and Parmesan cheese.
Cook the Sausage and Veggies:
  1. Heat olive oil in a large skillet or pot over medium-high heat.
  2. Add the sliced sausage and cook for 4–5 minutes until browned. Remove the sausage and set it aside.
  3. In the same pot, sauté the diced bell peppers and onion until softened, about 3–4 minutes.
Build the Base:
  1. Sprinkle Cajun seasoning over the sautéed vegetables, stirring to coat evenly.
  2. Pour in the chicken broth, scraping the bottom of the pot to release any browned bits. Bring to a simmer.
Cook the Pasta:
  1. Add the pasta to the pot, ensuring it’s submerged in the liquid.
  2. Cover and cook on medium heat for 10–12 minutes, stirring occasionally to prevent sticking, until the pasta is al dente.
Create the Creamy Sauce:
  1. Reduce the heat to low and stir in the heavy cream and shredded Parmesan cheese. Mix until the cheese is melted and the sauce is smooth.
Combine and Finish:
  1. Return the cooked sausage to the pot and stir to combine.
  2. If using fresh spinach, add it now and cook for 1–2 minutes until wilted.
Serve and Garnish:
  1. Taste and adjust seasoning with salt and pepper as needed.
  2. Serve hot, garnished with chopped parsley for a vibrant finish.

Notes

  • Adjust the spice level by adding more or less Cajun seasoning or cayenne pepper.
  • Stir the pasta frequently to ensure even cooking and prevent sticking.
  • For extra creaminess, add a splash of milk or an additional handful of Parmesan cheese.

Garlic Parmesan Chicken and Potatoes: A One-Pan Wonder

When you’re craving a wholesome, hearty dinner that’s both flavorful and easy to make, Garlic Parmesan Chicken and Potatoes is the answer. This one-pan meal combines juicy, seasoned chicken breasts with crispy, golden potatoes, all coated in savory garlic and Parmesan goodness. Whether you’re feeding your family or hosting a casual dinner, this recipe is sure to be a hit.

Why You’ll Love This Recipe

  • One-Pan Simplicity: Fewer dishes to wash without sacrificing flavor.
  • Bold and Savory Flavors: Garlic and Parmesan take this dish to the next level.
  • Perfectly Balanced Meal: Protein-packed chicken and nutrient-rich potatoes make it wholesome and satisfying.
  • Customizable: Adjust the seasoning or add veggies to suit your taste.

Ingredients for Garlic Parmesan Chicken and Potatoes

For the Chicken

IngredientAmount
Boneless, skinless chicken breasts (or thighs)4
Italian seasoning1 tsp
Smoked paprika½ tsp
Salt½ tsp
Black pepper¼ tsp
Olive oil1 tbsp

For the Potatoes

IngredientAmount
Baby Yukon Gold or red potatoes (halved)1.5 lbs
Olive oil3 tbsp
Garlic (minced)4 cloves
Grated Parmesan cheese⅓ cup
Salt½ tsp
Black pepper¼ tsp

Optional Garnish

IngredientAmount
Fresh parsley (chopped)1 tbsp

Step-by-Step Instructions

1. Preheat the Oven

  • Set your oven to 400°F (200°C).
  • Line a large baking sheet with parchment paper or lightly grease it to prevent sticking.

2. Prepare the Chicken

  • Pat the chicken dry using paper towels. This step helps the seasoning stick and ensures even cooking.
  • In a small bowl, mix Italian seasoning, smoked paprika, salt, and black pepper.
  • Rub olive oil over the chicken, then coat it evenly with the seasoning mixture.

3. Season the Potatoes

  • In a large bowl, toss the halved potatoes with olive oil, minced garlic, grated Parmesan cheese, salt, and pepper.
  • Mix until the potatoes are fully coated with the flavorful mixture.

4. Assemble Everything on the Pan

  • Place the seasoned chicken on one side of the prepared baking sheet.
  • Spread the potatoes evenly on the other side, ensuring they’re in a single layer for even cooking.

5. Bake

  • Roast the chicken and potatoes in the preheated oven for 25–30 minutes.
  • Flip the potatoes halfway through cooking for even crisping.
  • Use a meat thermometer to check that the chicken reaches an internal temperature of 165°F (74°C).

6. Optional Finishing Touch

  • In the last 5 minutes of cooking, sprinkle extra Parmesan over the chicken and potatoes.
  • Switch the oven to broil for a golden, crispy finish.

7. Garnish and Serve

  • Remove the baking sheet from the oven and sprinkle fresh parsley over the chicken and potatoes.
  • Serve hot and enjoy this comforting, flavorful meal!

Why This Recipe Works

1. Perfectly Balanced Flavors

The garlic and Parmesan create a savory coating that enhances the natural flavors of the chicken and potatoes.

2. Crispy and Juicy

Roasting ensures crispy potatoes and juicy chicken without the need for extra pans or complicated steps.

3. Customizable to Your Taste

You can easily add vegetables like broccoli, carrots, or green beans to make this dish even more nutritious.

Nutritional Information

NutrientPer Serving (Approx.)
Calories380
Protein35g
Carbohydrates25g
Fat16g
Fiber3g
Sodium480mg

Tips for Making the Best Garlic Parmesan Chicken and Potatoes

1. Use Even-Sized Chicken Pieces

  • Uniformly sized chicken breasts or thighs ensure even cooking.

2. Don’t Crowd the Pan

  • Give the chicken and potatoes enough space to crisp up properly. Overcrowding can cause them to steam instead of roast.

3. Experiment with Flavors

  • Add a squeeze of lemon juice over the chicken before serving for a zesty kick.

4. Adjust Cooking Time for Chicken Thighs

  • If using thighs instead of breasts, adjust the cooking time as thighs may take slightly longer.

Variations to Try

1. Add Vegetables

  • Toss in vegetables like asparagus, zucchini, or bell peppers for a more colorful and nutritious meal.

2. Spicy Kick

  • Sprinkle red pepper flakes over the chicken and potatoes for a hint of heat.

3. Herbaceous Twist

  • Swap Italian seasoning for fresh rosemary or thyme for an earthy flavor.

4. Cheese Lovers’ Delight

  • Mix mozzarella with Parmesan for an extra cheesy topping.

Serving Suggestions

  • Green Salad: A crisp side salad with vinaigrette balances the richness of the dish.
  • Garlic Bread: Perfect for scooping up every bit of the flavorful Parmesan crust.
  • Steamed Vegetables: Serve with steamed green beans or broccoli for added freshness.

FAQ: Your Questions About Garlic Parmesan Chicken and Potatoes

1. Can I use bone-in chicken?

Yes! Bone-in chicken works beautifully but may require slightly longer cooking times.

2. Can I use sweet potatoes instead of Yukon Gold?

Absolutely! Sweet potatoes add a delightful sweetness that pairs well with the garlic Parmesan flavors.

3. How do I store leftovers?

Store leftovers in an airtight container in the fridge for up to 3 days. Reheat in the oven or air fryer for the best texture.

4. Can I freeze this dish?

Yes, but it’s best to freeze the chicken and potatoes separately to maintain their texture.

5. What’s the best way to check if the chicken is done?

Use a meat thermometer to ensure the chicken reaches an internal temperature of 165°F (74°C).

6. Can I make this recipe dairy-free?

Yes! Replace Parmesan with a dairy-free alternative and use olive oil instead of butter.

Final Thoughts and Call to Action

Garlic Parmesan Chicken and Potatoes is a dish that combines convenience, flavor, and nutrition in one pan. Its rich, savory flavors and crispy textures make it a go-to recipe for weeknights or special occasions.

Ready to elevate your dinner game? Gather your ingredients, follow these easy steps, and enjoy a meal that’s guaranteed to impress. Don’t forget to share your creation and inspire others to try this delicious recipe!

ATING

Garlic Parmesan Chicken and Potatoes: A One-Pan Wonder

Elevate your dinner with this Garlic Parmesan Chicken and Potatoes! Juicy, flavorful chicken and golden, crispy potatoes come together in one pan for a hearty, delicious meal. Packed with savory garlic and Parmesan, it’s a perfect weeknight favorite or crowd-pleasing dish for any occasion.
Prep Time 10 minutes
Cook Time 30 minutes
Total Time 40 minutes
Servings: 4 servings
Course: Dinner
Cuisine: American

Ingredients
  

For the Chicken:
  • 4 boneless skinless chicken breasts (or thighs)
  • 1 tsp Italian seasoning
  • ½ tsp smoked paprika
  • ½ tsp salt
  • ¼ tsp black pepper
  • 1 tbsp olive oil
For the Potatoes:
  • 1.5 lbs baby Yukon Gold or red potatoes halved
  • 3 tbsp olive oil
  • 4 cloves garlic minced
  • ⅓ cup grated Parmesan cheese
  • ½ tsp salt
  • ¼ tsp black pepper
Optional Garnish:
  • 1 tbsp fresh parsley chopped

Method
 

Preheat the Oven:
  1. Preheat your oven to 400°F (200°C).
  2. Line a large baking sheet with parchment paper or lightly grease it.
Prepare the Chicken:
  1. Pat the chicken dry with paper towels to help the seasoning stick.
  2. In a small bowl, mix Italian seasoning, smoked paprika, salt, and black pepper.
  3. Rub olive oil over the chicken and coat evenly with the seasoning mixture.
Season the Potatoes:
  1. In a large bowl, toss the halved potatoes with olive oil, minced garlic, grated Parmesan cheese, salt, and pepper.
  2. Ensure the potatoes are fully coated with the mixture.
Assemble on the Pan:
  1. Place the seasoned chicken on one side of the prepared baking sheet.
  2. Spread the potatoes in a single layer on the other side, leaving space between them for even roasting.
Bake:
  1. Roast in the preheated oven for 25–30 minutes. Flip the potatoes halfway through for even crisping.
  2. Use a meat thermometer to check that the chicken reaches an internal temperature of 165°F (74°C).
Optional Finishing Touch:
  1. In the last 5 minutes of cooking, sprinkle extra Parmesan over the chicken and potatoes.
  2. Switch the oven to broil for a golden, crispy finish.
Serve and Garnish:
  1. Remove the baking sheet from the oven and sprinkle fresh parsley over the chicken and potatoes.
  2. Serve hot and enjoy!

Notes

  • Use evenly sized chicken breasts or thighs to ensure uniform cooking.
  • Avoid overcrowding the pan to achieve crispy potatoes and properly roasted chicken.
  • If using bone-in chicken, adjust the cooking time accordingly.

Slow Cooker Crack Chicken Soup: A Comforting and Easy Recipe

There’s nothing quite like coming home to the warm, inviting aroma of a meal that’s been cooking all day. This Slow Cooker Crack Chicken Soup is the perfect solution for busy days when you want something hearty, creamy, and downright delicious. With its rich flavors, tender chicken, and comforting texture, it’s a recipe that will quickly become a family favorite.

Why You’ll Love This Recipe

  • Effortless Cooking: Minimal prep time with the magic of a slow cooker doing all the work.
  • Packed with Flavor: Cream cheese, cheddar, bacon, and ranch seasoning create a taste explosion.
  • Nutritious Additions: Fresh kale or spinach adds a healthy twist to this indulgent dish.
  • Perfect for Any Occasion: Whether it’s a cozy weeknight dinner or a dish to impress guests, this soup fits the bill.

Ingredients for Slow Cooker Crack Chicken Soup

Here’s what you’ll need to create this mouthwatering meal:

Core Ingredients

IngredientAmount
Boneless, skinless chicken breasts1 lb
Chicken broth4 cups
Ranch dressing mix1 packet (1 oz)
Cream cheese8 oz
Shredded cheddar cheese1 cup
Cooked bacon (crumbled)6 slices
Fresh kale or spinach2 cups (chopped)
Green onions (sliced)½ cup
Salt and pepperTo taste

How Much Time Will You Need?

This slow cooker recipe requires just 15 minutes of prep time and then 6–7 hours on low or 3–4 hours on high. It’s as simple as setting it and forgetting it!

Step-by-Step Instructions

1. Prepare the Chicken

  • Place the boneless, skinless chicken breasts into the slow cooker. This will be the foundation of your soup, so ensure the chicken is fresh and high-quality.

2. Add the Broth and Seasoning

  • Pour in the chicken broth to create a flavorful base.
  • Sprinkle the ranch dressing mix over the chicken to infuse the soup with its signature tangy, herby taste.

3. Add the Cream Cheese

  • Place the cream cheese directly into the slow cooker. Submerging it in the broth will help it melt smoothly, giving your soup its rich, creamy texture.

4. Let It Cook

  • Cover the slow cooker with its lid and set it to low for 6–7 hours or high for 3–4 hours. This gives the chicken enough time to become tender and absorb the flavors of the broth and seasoning.

5. Shred the Chicken

  • Once the chicken is fully cooked, use two forks to shred it directly in the slow cooker. The meat will be so tender that it should fall apart effortlessly.

6. Mix in the Goodies

  • Add the shredded cheddar cheese, crumbled bacon, chopped kale or spinach, and sliced green onions to the soup.
  • Stir everything together until the cheese is melted and the ingredients are well incorporated.

7. Season to Taste

  • Give the soup a quick taste and season with salt and pepper as needed. Adjust the seasoning to suit your preferences.

8. Serve and Enjoy

  • Ladle the hot, creamy soup into bowls. Garnish with extra bacon, cheese, or green onions if you like.
  • Serve it with a side of crusty bread for dipping or enjoy it on its own.

Why This Recipe Works

1. A Slow Cooker Classic

The slow cooker ensures the chicken becomes incredibly tender while allowing the flavors to meld perfectly.

2. Balanced and Hearty

The combination of creamy cheese, smoky bacon, and vibrant greens creates a well-rounded and satisfying meal.

3. Family-Friendly

With its crowd-pleasing flavors, even picky eaters will ask for seconds.

Nutritional Information

NutrientPer Serving (Approx.)
Calories320
Protein28g
Carbohydrates6g
Fat20g
Fiber1g
Sodium600mg

Tips for Making the Best Slow Cooker Crack Chicken Soup

1. Use Fresh Ingredients

  • Fresh kale, spinach, and high-quality chicken make a big difference in flavor and texture.

2. Don’t Skip the Bacon

  • The crispy, smoky bacon adds a depth of flavor that complements the creamy soup perfectly.

3. Adjust the Consistency

  • If you prefer a thinner soup, add more chicken broth. For a thicker consistency, mix in a cornstarch slurry (1 tbsp cornstarch + 2 tbsp water).

4. Add Veggies

  • Boost the nutrition by adding carrots, celery, or even mushrooms.

Variations to Try

1. Low-Carb Option

  • Skip the ranch mix and use a homemade blend of garlic powder, onion powder, dill, and parsley to control sodium and carbs.

2. Spicy Kick

  • Add a pinch of cayenne pepper or red pepper flakes for a touch of heat.

3. Vegetarian Twist

  • Substitute the chicken with canned chickpeas or cubed tofu for a vegetarian-friendly version.

4. Dairy-Free Adaptation

  • Use a dairy-free cream cheese alternative and coconut cream instead of heavy cream.

Serving Suggestions

  • Crusty Bread: A warm baguette or dinner rolls are perfect for soaking up the creamy broth.
  • Side Salad: A crisp green salad adds freshness and balance to the rich soup.
  • Mashed Potatoes: Serve the soup over mashed potatoes for a comforting twist.

FAQ: Your Questions About Slow Cooker Crack Chicken Soup Answered

1. Can I use frozen chicken?

Yes, but ensure it’s fully thawed before adding it to the slow cooker to ensure even cooking.

2. How do I store leftovers?

Store the soup in an airtight container in the refrigerator for up to 3 days. Reheat on the stovetop or in the microwave.

3. Can I freeze this soup?

Yes! Allow the soup to cool completely before transferring it to a freezer-safe container. Freeze for up to 3 months and thaw overnight in the fridge before reheating.

4. What can I use instead of ranch dressing mix?

Make your own by combining garlic powder, onion powder, dried dill, parsley, and a touch of salt.

5. Can I use pre-cooked chicken?

Absolutely. Add shredded rotisserie chicken during the last hour of cooking to save time.

6. Can I make this on the stovetop?

Yes, simmer the soup in a large pot over medium heat until the chicken is cooked through. Shred the chicken and follow the remaining steps.

Final Thoughts and Call to Action

This Slow Cooker Crack Chicken Soup is the ultimate combination of flavor, ease, and comfort. Whether you’re feeding a crowd or prepping for a cozy night in, this recipe delivers every time. Its creamy texture, rich taste, and nourishing ingredients make it a meal you’ll want to make again and again.

Ready to try this irresistible soup? Gather your ingredients, set up your slow cooker, and let the magic happen. Don’t forget to share your creation and spread the word about this amazing dish!

ATING

Slow Cooker Crack Chicken Soup: A Comforting and Easy Recipe

This Slow Cooker Crack Chicken Soup is the ultimate cozy comfort food. With tender chicken, smoky bacon, and a creamy ranch-infused broth, this dish is packed with flavor and perfect for busy days. Let your slow cooker do the work while you enjoy the warm, hearty results!
Prep Time 15 minutes
Total Time 6 hours 15 minutes
Servings: 6 servings
Course: Soup
Cuisine: American

Ingredients
  

Core Ingredients:
  • 1 lb boneless skinless chicken breasts
  • 4 cups chicken broth
  • 1 packet 1 oz ranch dressing mix
  • 8 oz cream cheese
  • 1 cup shredded cheddar cheese
  • 6 slices cooked bacon crumbled
  • 2 cups fresh kale or spinach chopped
  • ½ cup green onions sliced
  • Salt and pepper to taste

Method
 

Prepare the Chicken:
  1. Place the chicken breasts into the slow cooker.
Add Broth and Seasoning:
  1. Pour in the chicken broth and sprinkle the ranch dressing mix over the chicken.
Add Cream Cheese:
  1. Place the cream cheese directly into the slow cooker. Submerge it slightly in the broth to help it melt.
Let It Cook:
  1. Cover the slow cooker with the lid. Cook on low for 6–7 hours or high for 3–4 hours until the chicken is tender and fully cooked.
Shred the Chicken:
  1. Use two forks to shred the chicken directly in the slow cooker.
Mix in the Toppings:
  1. Stir in the shredded cheddar cheese, crumbled bacon, chopped kale or spinach, and sliced green onions. Mix well until the cheese is melted and the greens are wilted.
Season and Serve:
  1. Taste the soup and adjust with salt and pepper if needed.
  2. Ladle into bowls, garnish with extra bacon, cheddar cheese, or green onions, and serve hot.

Notes

  • Adjust the Consistency: For a thinner soup, add more chicken broth. For a thicker soup, mix 1 tablespoon cornstarch with 2 tablespoons water and stir into the soup during the last 30 minutes of cooking.
  • Fresh Greens: Add the kale or spinach just before serving to keep it vibrant and fresh.
  • Extra Garnish: Top with sour cream for added creaminess.

French Chicken Casserole a la Normande: A Rustic Delight

Imagine the comforting aroma of tender chicken simmering with creamy apple cider sauce, crispy bacon, and caramelized apples. This French Chicken Casserole a la Normande is a classic dish that brings the rich flavors of Normandy straight to your kitchen. Whether you’re cooking for a special occasion or simply want to elevate your dinner game, this casserole is the perfect choice.

Why You’ll Love This Recipe

  • Rich and Comforting: The creamy cider-based sauce is a delicious blend of savory and sweet.
  • Elegant Yet Simple: This dish has the sophistication of French cuisine but is surprisingly easy to prepare.
  • Versatile: Serve it with rice, potatoes, or crusty bread for a complete meal.
  • Perfect for Sharing: Ideal for family dinners or entertaining guests.

Ingredients for French Chicken Casserole a la Normande

Here’s a breakdown of what you’ll need:

Core Ingredients

IngredientAmount
Olive oil1 tbsp
Chicken thighs and legs2 lbs
SaltTo taste
Shallots (diced) or onion4 shallots or 1 medium
Celery (diced)1 rib
Thyme sprigs4-5
Garlic (minced)2 cloves
Bacon lardons (or chopped bacon)4 oz or 6 strips
Brandy or whiskey2 tbsp
Flour2 tbsp
Chicken stock⅓ cup (85 ml)
Hard dry apple cider1 ½ cups (400 ml)
Apples (peeled, cored, sliced)2
Heavy cream½ cup (125 ml)

Step-by-Step Instructions

1. Prepare the Chicken

  • Preheat your oven to 350°F (180°C).
  • Pat the chicken thighs and legs dry with a paper towel and season with salt. This step helps the chicken brown evenly, enhancing its flavor.

2. Brown the Chicken

  • Heat olive oil in a large casserole dish over medium-high heat.
  • Sear the chicken on all sides until golden brown. Remove the chicken from the pan and set it aside on a plate.

3. Cook the Bacon

  • In the same pan, cook the bacon lardons over medium heat until crispy.
  • Remove the bacon and add it to the plate with the chicken. Discard any excess fat or reserve it for frying the apples later.

4. Sauté the Vegetables

  • Add the diced shallots, celery, and thyme sprigs to the pan.
  • Sauté over low heat for 5–7 minutes until softened but not browned.
  • Stir in the minced garlic and cook for an additional 30 seconds until fragrant.

5. Deglaze with Brandy

  • Pour the brandy into the pan and scrape the bottom to loosen any caramelized bits.
  • Let the alcohol burn off as you stir, leaving behind its rich, deep flavor.

6. Create the Sauce

  • Sprinkle the flour into the pan and stir to form a paste. Gradually add the chicken stock, whisking to create a thick, smooth gravy.
  • Pour in the hard apple cider and mix until combined.

7. Assemble the Casserole

  • Place the browned chicken and crispy bacon back into the casserole dish.
  • Add a few sprigs of thyme and bring the mixture to a boil.

8. Bake in the Oven

  • Cover the casserole dish with a lid and bake in the preheated oven for 30 minutes.
  • Remove the lid and bake uncovered for an additional 30 minutes to deepen the flavors and thicken the sauce.

9. Fry the Apple Wedges

  • While the casserole bakes, heat 2 tablespoons of reserved chicken fat or butter in a pan.
  • Fry the apple wedges over medium heat until golden and caramelized, being careful not to burn them.

10. Add Cream and Finish Cooking

  • Remove the casserole from the oven and stir in the heavy cream.
  • Return the dish to the oven, uncovered, for another 20 minutes to allow the sauce to thicken and flavors to meld.

11. Serve and Enjoy

  • Add the caramelized apple wedges to the casserole and give it a gentle stir.
  • Serve hot with potatoes, rice, or crusty bread.

What Makes This Recipe Special?

1. Authentic Normandy Flavors

The combination of apple cider, cream, and thyme pays homage to the culinary traditions of Normandy, France.

2. Perfect Balance of Sweet and Savory

Caramelized apples and smoky bacon create a delightful contrast that elevates the dish.

3. One-Pot Convenience

Everything comes together in a single dish, making cleanup easy and efficient.

Nutritional Information

NutrientPer Serving (Approx.)
Calories420
Protein30g
Carbohydrates10g
Fat28g
Fiber2g
Sodium620mg

Tips for Perfect French Chicken Casserole a la Normande

1. Use Bone-In Chicken

Bone-in chicken thighs and legs provide richer flavor and remain juicy during cooking.

2. Choose Quality Cider

Opt for a hard dry apple cider for authentic Normandy flavor. Sweet ciders may overpower the dish.

3. Don’t Skip the Brandy

While optional, brandy adds depth and complexity to the sauce.

4. Adjust Thickness

If the sauce is too thick, add a splash of chicken stock to thin it out.

Variations to Try

1. Vegetarian Twist

Substitute chicken with mushrooms and vegetable stock for a hearty meatless version.

2. Gluten-Free Option

Use cornstarch or a gluten-free flour blend instead of regular flour.

3. Wine-Infused Sauce

Replace the cider with a dry white wine for a more robust flavor profile.

Serving Suggestions

  • Mashed Potatoes: The creamy sauce pairs beautifully with buttery mashed potatoes.
  • Steamed Vegetables: Add a side of green beans or asparagus for freshness.
  • Crusty Bread: Use it to soak up every drop of the rich sauce.

FAQ: Your French Chicken Casserole Questions Answered

1. Can I make this dish ahead of time?

Yes! This casserole tastes even better the next day. Simply reheat it in the oven before serving.

2. What’s the best way to store leftovers?

Store leftovers in an airtight container in the refrigerator for up to 3 days.

3. Can I freeze this casserole?

Yes, but leave out the cream until reheating to prevent separation.

4. What can I use instead of bacon?

For a non-pork option, use turkey bacon or omit it altogether.

5. Can I use chicken breasts instead of thighs and legs?

You can, but chicken breasts may not stay as moist. Adjust the cooking time to avoid overcooking.

6. What type of apples work best?

Firm varieties like Granny Smith or Honeycrisp hold their shape and provide a balanced sweetness.

Final Thoughts and Call to Action

This French Chicken Casserole a la Normande is the epitome of rustic comfort. Its tender chicken, creamy apple cider sauce, and crispy bacon create a dish that’s as satisfying as it is elegant.

Ready to bring a taste of Normandy to your table? Gather your ingredients, follow these simple steps, and enjoy a meal that’s sure to impress. Don’t forget to share your creation and inspire others to try this delicious recipe!

ating

French Chicken Casserole a la Normande: A Rustic Delight

Experience the flavors of Normandy with this French Chicken Casserole a la Normande! Featuring tender chicken, smoky bacon, creamy apple cider sauce, and caramelized apples, this dish combines elegance with rustic comfort for an unforgettable meal.  
Prep Time 20 minutes
Cook Time 1 hour 30 minutes
Total Time 1 hour 50 minutes
Servings: 4 servings
Course: Dinner
Cuisine: French

Ingredients
  

Core Ingredients:
  • 1 tbsp olive oil
  • 2 lbs chicken thighs and legs
  • Salt to taste
  • 4 shallots or 1 medium onion, diced
  • 1 rib celery diced
  • 4 –5 sprigs fresh thyme
  • 2 cloves garlic minced
  • 4 oz bacon lardons or 6 strips chopped bacon
  • 2 tbsp brandy or whiskey
  • 2 tbsp flour
  • ⅓ cup 85 ml chicken stock
  • 1 ½ cups 400 ml hard dry apple cider
  • 2 apples peeled, cored, and sliced
  • ½ cup 125 ml heavy cream

Method
 

Prepare the Chicken:
  1. Preheat oven to 350°F (180°C).
  2. Pat the chicken dry with a paper towel and season with salt.
Brown the Chicken:
  1. Heat olive oil in a large casserole dish over medium-high heat.
  2. Sear chicken on all sides until golden brown, about 5–7 minutes. Remove and set aside.
Cook the Bacon:
  1. In the same pan, cook bacon over medium heat until crispy.
  2. Remove bacon and set aside, discarding excess fat or reserving 2 tablespoons for frying apples later.
Sauté the Vegetables:
  1. Add diced shallots, celery, and thyme to the pan.
  2. Sauté for 5–7 minutes over low heat until softened but not browned.
  3. Stir in minced garlic and cook for another 30 seconds.
Deglaze the Pan:
  1. Pour in brandy and scrape the bottom of the pan to release caramelized bits.
  2. Allow the alcohol to burn off, leaving behind rich flavor.
Create the Sauce:
  1. Sprinkle flour over the vegetables, stirring to form a paste.
  2. Gradually whisk in chicken stock until smooth.
  3. Add hard cider and mix well, forming a rich sauce.
Assemble the Casserole:
  1. Return the browned chicken and crispy bacon to the dish.
  2. Add a few sprigs of thyme and bring the mixture to a gentle boil.
Bake the Casserole:
  1. Cover with a lid and bake in the preheated oven for 30 minutes.
  2. Remove the lid and bake uncovered for another 30 minutes to deepen the flavors.
Fry the Apples:
  1. Heat reserved chicken fat or butter in a skillet over medium heat.
  2. Fry apple slices until golden and caramelized, about 3–4 minutes per side.
Finish the Dish:
  1. Remove casserole from the oven and stir in heavy cream.
  2. Return to the oven, uncovered, for 20 minutes to thicken the sauce.
Serve and Garnish:
  1. Add caramelized apples to the casserole and gently stir.
  2. Serve hot with mashed potatoes, rice, or crusty bread.

Notes

  • Use bone-in chicken thighs and legs for richer flavor and moisture.
  • Choose firm apples like Granny Smith or Honeycrisp for the best texture.
  • If the sauce is too thick, add a splash of chicken stock to thin it out.

Strawberry Crunch Cake Recipe: A Sweet Treat Everyone Will Love

When was the last time you treated yourself to a dessert that was not only delicious but also stunningly beautiful? This Strawberry Crunch Cake Recipe is just that—a show-stopping dessert packed with layers of strawberry flavor, a cool and creamy topping, and a delightful crunchy crumble. Whether it’s for a birthday, holiday, or weekend indulgence, this cake is guaranteed to wow your family and friends.

Why You’ll Love This Recipe

  • Easy to Make: No advanced baking skills required—just simple, straightforward steps.
  • Bursting with Strawberry Flavor: From the cake to the topping, strawberries take center stage.
  • Irresistible Texture: The crunchy topping perfectly complements the soft cake and creamy layers.
  • Visually Stunning: Topped with fresh strawberries and vibrant crumble, it’s as beautiful as it is delicious.

Ingredients for Strawberry Crunch Cake

Here’s everything you’ll need to create this delicious masterpiece:

Core Ingredients

IngredientAmount
Strawberry cake mix1 box
Eggs and vegetable oilAs per cake mix
Strawberry gelatin (jello)2 (3 oz) packages
Boiling water1 cup
Cool Whip8 oz
Golden Oreo cookies20 cookies
Butter (melted)¼ cup
Fresh strawberries20

Step-by-Step Instructions

1. Prepare the Cake Base

  • Preheat your oven and prepare the strawberry cake mix according to the package instructions. Use a 9×13-inch cake pan for the best results.
  • Bake the cake until a toothpick inserted into the center comes out clean.

2. Poke Holes in the Cake

  • Immediately after removing the cake from the oven, use a skewer or the back end of a wooden spoon to poke holes all over the top. This step ensures the jello mixture soaks in, creating a moist and flavorful cake.

3. Add the Strawberry Jello

  • In a small bowl, dissolve one package of strawberry jello in 1 cup of boiling water.
  • Spoon the jello mixture evenly over the warm cake, allowing it to seep into the holes.
  • Refrigerate the cake for at least 4 hours, or overnight, to let the jello set completely.

4. Make the Strawberry Crumble Topping

  • Place the Golden Oreo cookies in a ziplock bag and crush them using a rolling pin. Ensure the crumbs are fine, with no large chunks remaining.
  • In a mixing bowl, combine the crushed cookies with the second package of strawberry jello and melted butter. Mix lightly to create a crumble.

5. Add the Cool Whip Layer

  • Once the cake is fully cooled, spread the Cool Whip evenly over the top. This creamy layer adds a delightful contrast to the cake and topping.

6. Sprinkle the Crumble

  • Generously sprinkle the strawberry crumble mixture over the Cool Whip layer, ensuring even coverage.

7. Garnish with Fresh Strawberries

  • Top the cake with halved or whole fresh strawberries for a stunning presentation.

8. Serve and Enjoy

  • Slice the cake into squares and serve. Watch as your guests marvel at the vibrant colors and delicious layers!

Why This Recipe Works So Well

1. Moist and Flavorful Cake

The jello seeped into the cake adds incredible moisture and bursts of strawberry flavor in every bite.

2. Irresistible Crunch

The Golden Oreo crumble brings a delightful contrast of texture to the soft cake and creamy Cool Whip.

3. Easy to Assemble

With simple steps and accessible ingredients, this recipe is foolproof even for beginner bakers.

Nutritional Information

NutrientPer Serving (Approx.)
Calories280
Protein3g
Carbohydrates35g
Fat14g
Fiber1g
Sugar22g

Tips for Perfect Strawberry Crunch Cake

1. Use Fresh Strawberries

Fresh strawberries not only enhance the cake’s flavor but also add a pop of color.

2. Crush Cookies Thoroughly

Fine crumbs make it easier to spread the topping evenly and ensure a uniform crunch.

3. Cool Completely Before Assembling

Allow the cake to cool fully before adding the Cool Whip to prevent it from melting.

4. Customize the Flavor

Experiment with different jello flavors or add a hint of lemon zest to the crumble for a unique twist.

Variations to Try

1. Lemon Strawberry Crunch Cake

Add lemon zest to the cake mix and a drizzle of lemon glaze over the Cool Whip layer.

2. Chocolate Strawberry Twist

Replace the Golden Oreos with chocolate sandwich cookies for a richer flavor.

3. Vegan-Friendly Version

Use a vegan cake mix, plant-based whipped topping, and dairy-free butter to make it vegan-friendly.

Serving Suggestions

  • Pair with Vanilla Ice Cream: Add a scoop of ice cream for a refreshing complement to the cake’s sweetness.
  • Drizzle with Strawberry Sauce: Enhance the presentation and flavor with a drizzle of strawberry sauce or glaze.
  • Serve with Coffee or Tea: This cake pairs wonderfully with a warm beverage, making it ideal for brunch or afternoon tea.

FAQ: Your Strawberry Crunch Cake Questions Answered

1. Can I make this cake ahead of time?

Yes! This cake is perfect for making a day in advance. Store it in the fridge and add the crumble and fresh strawberries just before serving.

2. Can I use other types of cookies?

Absolutely. If you don’t have Golden Oreos, try graham crackers or shortbread cookies for the crumble.

3. What if I don’t have Cool Whip?

You can substitute whipped cream or use a stabilized whipped topping for a similar effect.

4. How long does this cake last?

Store the cake in an airtight container in the refrigerator for up to 3 days.

5. Can I freeze this cake?

It’s best to freeze the cake before adding the Cool Whip and crumble. Thaw the cake and add the toppings when ready to serve.

6. Can I use sugar-free jello?

Yes! Sugar-free jello is a great option if you’re looking to reduce the sugar content.

Final Thoughts and Call to Action

This Strawberry Crunch Cake Recipe is more than just a dessert—it’s a centerpiece that brings joy and flavor to any occasion. From its vibrant colors to its irresistible textures, it’s a treat you’ll find yourself making again and again.

Why wait? Gather your ingredients and try this recipe today. Your taste buds—and your guests—will thank you!

ating

Strawberry Crunch Cake Recipe: A Sweet Treat Everyone Will Love

Transform a simple dessert into a show-stopping treat with this Strawberry Crunch Cake! Featuring layers of moist strawberry cake, creamy Cool Whip, and a delightful crunchy crumble, this vibrant dessert is perfect for any celebration or casual indulgence.  
Prep Time 10 minutes
Cook Time 20 minutes
Total Time 4 hours 50 minutes
Servings: 12 servings
Course: Dessert
Cuisine: American

Ingredients
  

For the Cake:
  • 1 box strawberry cake mix
  • Eggs and vegetable oil as directed on the cake mix box
For the Jello Layer:
  • 1 package 3 oz strawberry gelatin (jello)
  • 1 cup boiling water
For the Topping:
  • 20 Golden Oreo cookies
  • 1 package 3 oz strawberry gelatin (jello)
  • ¼ cup butter melted
For Assembly:
  • 8 oz Cool Whip
  • 20 fresh strawberries

Method
 

Prepare the Cake Base:
  1. Preheat your oven according to the cake mix instructions.
  2. Prepare the strawberry cake mix as directed on the box. Pour the batter into a greased 9×13-inch cake pan.
  3. Bake the cake until a toothpick inserted into the center comes out clean.
Add the Jello Layer:
  1. Immediately after removing the cake from the oven, poke holes all over the top using a skewer or the back of a wooden spoon.
  2. Dissolve one package of strawberry gelatin in 1 cup of boiling water.
  3. Pour the dissolved gelatin evenly over the warm cake, ensuring it seeps into the holes.
  4. Refrigerate the cake for at least 4 hours or overnight to allow the jello to set completely.
Make the Strawberry Crumble Topping:
  1. Place the Golden Oreo cookies in a ziplock bag and crush them into fine crumbs using a rolling pin.
  2. In a mixing bowl, combine the crushed cookies, the second package of strawberry gelatin, and melted butter. Stir lightly to create a crumbly mixture.
Assemble the Cake:
  1. Spread the Cool Whip evenly over the chilled cake, creating a creamy layer.
  2. Sprinkle the strawberry crumble generously over the Cool Whip, ensuring even coverage.
Garnish and Serve:
  1. Top the cake with halved or whole fresh strawberries for a stunning presentation.
  2. Slice the cake into squares and serve.

Notes

  • Use fresh strawberries for the best flavor and presentation.
  • Allow the cake to cool completely before adding the Cool Whip to prevent melting.
  • For a finer crumble, pulse the Golden Oreos in a food processor.

One-Pan Chicken with Buttered Noodles: A Simple and Delicious Dinner

Picture this: tender, golden chicken served over buttery, creamy noodles—all made in one pan for easy cleanup. One-Pan Chicken with Buttered Noodles is the ultimate comfort food that combines rich flavors, hearty textures, and the convenience of minimal prep. It’s perfect for weeknights when you want a homemade meal without a pile of dishes to wash afterward.

Why You’ll Love This Recipe

  • Quick and Easy: Ready in under 30 minutes, making it ideal for busy nights.
  • One-Pan Wonder: Everything cooks in a single skillet, saving you time and effort.
  • Family-Friendly: A dish that everyone, from picky eaters to foodies, will adore.
  • Rich and Creamy: The Parmesan cheese and butter add luxurious creaminess to the noodles.

Ingredients for One-Pan Chicken with Buttered Noodles

Here’s everything you need to create this delicious dish:

Core Ingredients

IngredientAmount
Boneless, skinless chicken breasts4
Olive oil2 tbsp
Garlic (minced)3 cloves
Chicken broth2 cups
Heavy cream1 cup
Egg noodles8 oz
Butter3 tbsp
Grated Parmesan cheese¼ cup
Salt and pepperTo taste
Fresh parsley (optional)For garnish

Step-by-Step Instructions

1. Cook the Chicken

  • Heat olive oil in a large skillet over medium heat.
  • Season the chicken breasts with salt and pepper.
  • Place the chicken in the skillet and cook for 5–6 minutes on each side until golden and fully cooked. Remove the chicken from the skillet and set it aside.

2. Prepare the Noodles

  • In the same skillet, add the minced garlic and sauté until fragrant, about 1–2 minutes.
  • Pour in the chicken broth and heavy cream, stirring to combine.
  • Bring the mixture to a gentle simmer. Add the egg noodles, cover, and cook for 8–10 minutes until the noodles are tender. Stir occasionally to prevent sticking.

3. Combine and Finish

  • Once the noodles are cooked, stir in the butter and Parmesan cheese. Mix until the sauce is creamy and the butter is fully melted.
  • Return the cooked chicken to the skillet and spoon some sauce over it. Heat for an additional 2–3 minutes until everything is warmed through.

4. Serve and Garnish

  • Transfer the chicken and noodles to plates.
  • Garnish with freshly chopped parsley and serve warm.

What Makes This Recipe Special?

1. Balanced Flavors

The savory chicken, buttery noodles, and hint of garlic create a harmonious combination.

2. Minimal Cleanup

With everything made in one pan, you won’t have to spend time scrubbing multiple pots and pans.

3. Versatility

This dish can easily be customized with different proteins, vegetables, or spices to suit your taste.

Nutritional Information

NutrientPer Serving (Approx.)
Calories430
Protein32g
Carbohydrates22g
Fat22g
Fiber1g
Sodium520mg

Tips for Making Perfect One-Pan Chicken with Buttered Noodles

1. Don’t Overcook the Chicken

  • Cook the chicken until it reaches an internal temperature of 165°F (74°C) to ensure it’s juicy and tender.

2. Stir the Noodles Occasionally

  • This prevents the noodles from sticking to the bottom of the pan while they cook.

3. Use Fresh Ingredients

  • Fresh garlic and Parmesan cheese elevate the dish’s flavor.

4. Add a Veggie Boost

  • Toss in spinach, broccoli, or peas during the last few minutes of cooking for added nutrition.

Variations to Try

1. Spicy Garlic Butter Noodles

  • Add red pepper flakes or a dash of cayenne pepper for a spicy kick.

2. Creamy Mushroom and Chicken

  • Sauté sliced mushrooms along with the garlic for an earthy addition.

3. Lemon Herb Twist

  • Stir in a splash of lemon juice and fresh thyme for a bright and zesty flavor.

4. Gluten-Free Version

  • Use gluten-free egg noodles or substitute with rice noodles.

Serving Suggestions

  • Side Salad: Pair with a fresh green salad drizzled with balsamic vinaigrette for a light contrast.
  • Garlic Bread: Serve with warm, crusty garlic bread to soak up the creamy sauce.
  • Steamed Vegetables: Add a side of steamed green beans or asparagus for a complete meal.

FAQ: Your Questions About One-Pan Chicken with Buttered Noodles Answered

1. Can I use chicken thighs instead of chicken breasts?

Yes, chicken thighs work well and often stay juicier. Adjust the cooking time as needed.

2. Can I make this recipe ahead of time?

While best served fresh, you can store leftovers in the fridge for up to 3 days. Reheat gently on the stovetop with a splash of chicken broth to refresh the sauce.

3. Can I freeze this dish?

This dish is not ideal for freezing due to the creamy sauce, which may separate upon thawing.

4. What can I substitute for heavy cream?

You can use half-and-half or a mixture of milk and cream cheese for a lighter alternative.

5. How do I prevent the noodles from sticking?

Stir the noodles occasionally and make sure there’s enough liquid in the pan while cooking.

6. Can I use a different type of pasta?

Absolutely! Penne, fettuccine, or even rotini can work as substitutes for egg noodles.

Final Thoughts and Call to Action

One-Pan Chicken with Buttered Noodles is the ultimate comfort food that brings together simplicity and flavor in one delightful dish. Whether you’re cooking for your family or treating yourself to a cozy night in, this recipe is a guaranteed crowd-pleaser.

Ready to give it a try? Gather your ingredients, follow these easy steps, and enjoy a meal that’s as comforting as it is delicious. Don’t forget to share your creations and inspire others to enjoy this one-pan wonder!

ating

One-Pan Chicken with Buttered Noodles: A Simple and Delicious Dinner

Indulge in the ultimate comfort meal with this One-Pan Chicken with Buttered Noodles. Featuring juicy, golden chicken and creamy, buttery noodles, this dish is quick, delicious, and perfect for busy weeknights.  
Prep Time 10 minutes
Cook Time 20 minutes
Total Time 30 minutes
Servings: 4 servings
Course: Dinner
Cuisine: American

Ingredients
  

Core Ingredients:
  • 4 boneless skinless chicken breasts
  • 2 tbsp olive oil
  • 3 cloves garlic minced
  • 2 cups chicken broth
  • 1 cup heavy cream
  • 8 oz egg noodles
  • 3 tbsp butter
  • ¼ cup grated Parmesan cheese
  • Salt and pepper to taste
  • Fresh parsley optional, for garnish

Method
 

Cook the Chicken:
  1. Heat olive oil in a large skillet over medium heat.
  2. Season the chicken breasts with salt and pepper.
  3. Add the chicken to the skillet and cook for 5–6 minutes per side until golden brown and fully cooked.
  4. Remove the chicken from the skillet and set it aside.
Prepare the Noodles:
  1. In the same skillet, add minced garlic and sauté for 1–2 minutes until fragrant.
  2. Pour in chicken broth and heavy cream, stirring to combine.
  3. Bring the mixture to a gentle simmer. Add the egg noodles, cover, and cook for 8–10 minutes, stirring occasionally, until the noodles are tender.
Combine and Finish:
  1. Once the noodles are cooked, stir in butter and Parmesan cheese. Mix until the sauce is creamy and the butter is fully melted.
  2. Return the cooked chicken to the skillet and spoon some sauce over it. Heat for an additional 2–3 minutes until warmed through.
Serve and Garnish:
  1. Plate the chicken and noodles. Garnish with freshly chopped parsley if desired. Serve warm and enjoy!

Notes

  • Don’t Overcook the Chicken: Ensure the internal temperature reaches 165°F (74°C) to keep the chicken juicy.
  • Stir the Noodles: Stir occasionally to prevent the noodles from sticking or clumping.
  • Fresh Parmesan: Use freshly grated Parmesan cheese for the best flavor and texture.

Garlic Butter Shrimp and Rice Stack: A Fancy Yet Easy Dish You’ll Love

If you’ve ever wanted to bring restaurant-style elegance to your dinner table without the hassle, this Garlic Butter Shrimp and Rice Stack is your answer. It’s a stunning combination of tender shrimp, fragrant garlic butter sauce, and fluffy rice, stacked beautifully for a presentation that will wow your family and friends. Whether you’re hosting a dinner party or treating yourself to a fancy night in, this dish is a surefire winner.

Why You’ll Adore This Recipe

  • Quick and Easy: Ready in under 30 minutes, making it perfect for weeknights.
  • Elegant Presentation: The stacked format turns a simple meal into a showstopper.
  • Bursting with Flavor: Garlic, butter, and lemon create a rich and zesty profile.
  • Customizable: Use jasmine rice, brown rice, or even cauliflower rice to make it your own.

Ingredients for Garlic Butter Shrimp and Rice Stack

Here’s what you’ll need for this delicious recipe:

Main Ingredients

IngredientAmount
Large shrimp (peeled, deveined)1 lb
Butter2 tbsp
Garlic (minced)4 cloves
Olive oil1 tbsp
Crushed red pepper flakes (optional)½ tsp
Lemon juice1 tbsp
Cooked white rice (or jasmine rice)2 cups
Fresh parsley (chopped)¼ cup
Salt and pepperTo taste
Lemon wedges (for serving)Optional

Step-by-Step Instructions

1. Cook the Shrimp

  • Heat 1 tablespoon of butter and olive oil in a large skillet over medium-high heat.
  • Season the shrimp with salt and pepper, then add them to the skillet.
  • Cook for 2–3 minutes on each side, or until the shrimp turn pink and opaque.
  • Remove the shrimp from the skillet and set them aside.

2. Make the Garlic Butter Sauce

  • In the same skillet, melt the remaining tablespoon of butter over medium heat.
  • Add the minced garlic and sauté for 1–2 minutes until fragrant. Be careful not to burn it.
  • Stir in the crushed red pepper flakes (if using) and lemon juice. Mix well and cook for another minute.

3. Assemble the Rice Stack

  • Divide the cooked rice into four portions.
  • Use a small bowl or round mold to shape each portion into a compact stack.
  • Carefully remove the rice stack from the mold and place it on a serving plate.

4. Add the Shrimp

  • Top each rice stack with a generous portion of cooked shrimp.
  • Spoon the garlic butter sauce over the shrimp and rice for added flavor.

5. Garnish and Serve

  • Sprinkle chopped parsley over the shrimp and rice stacks.
  • Serve with lemon wedges on the side for an extra burst of citrus.

What Makes This Recipe Special?

1. Sophisticated Presentation

The stacked format transforms this simple dish into a restaurant-quality meal.

2. Bold Flavors

The combination of garlic butter and lemon creates a sauce that perfectly complements the shrimp.

3. Easy to Make

Despite its fancy appearance, this recipe is straightforward and beginner-friendly.

Nutritional Information

NutrientPer Serving (Approx.)
Calories320
Protein28g
Carbohydrates22g
Fat12g
Fiber1g
Sodium510mg

Tips for Perfect Garlic Butter Shrimp and Rice Stacks

1. Choose Quality Shrimp

  • Opt for large, fresh shrimp for the best flavor and texture. If using frozen shrimp, thaw them completely before cooking.

2. Use Fresh Garlic

  • Freshly minced garlic gives the sauce a more robust and aromatic flavor compared to pre-minced garlic.

3. Don’t Overcook the Shrimp

  • Overcooked shrimp can become rubbery. Remove them from heat as soon as they turn pink and opaque.

4. Add Extra Veggies

  • Toss in spinach, zucchini, or cherry tomatoes for added color and nutrition.

Variations to Try

1. Spicy Cajun Shrimp Stack

  • Add Cajun seasoning to the shrimp and sauce for a spicy twist.

2. Asian-Inspired Version

  • Use sesame oil instead of olive oil and soy sauce instead of lemon juice for an umami-packed alternative.

3. Creamy Garlic Butter Sauce

  • Stir in a splash of heavy cream to the garlic butter sauce for a richer flavor.

4. Brown Rice or Quinoa

  • Substitute white rice with brown rice or quinoa for a healthier base.

Serving Suggestions

  • Side Salad: Pair with a fresh green salad for a balanced meal.
  • Garlic Bread: Perfect for soaking up any leftover garlic butter sauce.
  • Grilled Vegetables: Serve alongside grilled asparagus, bell peppers, or zucchini for extra flavor.

FAQ: Your Questions About Garlic Butter Shrimp and Rice Stack Answered

1. Can I use frozen shrimp?

Yes, frozen shrimp work well. Just make sure to thaw them completely before cooking for even results.

2. What’s the best rice to use?

Jasmine rice is ideal for its fragrant aroma, but white, brown, or even cauliflower rice are great alternatives.

3. Can I make this dish ahead of time?

You can cook the shrimp and prepare the rice in advance. Store them separately in the fridge and reheat before assembling.

4. How do I store leftovers?

Store any leftovers in an airtight container in the refrigerator for up to 3 days. Reheat gently on the stovetop or in the microwave.

5. Can I make it dairy-free?

Yes! Replace the butter with a plant-based alternative like vegan butter or olive oil.

6. How can I make it spicier?

Increase the amount of crushed red pepper flakes or add a dash of hot sauce to the garlic butter sauce.

Final Thoughts and Call to Action

This Garlic Butter Shrimp and Rice Stack is the perfect blend of elegance and simplicity. Whether you’re looking to impress guests or treat yourself, this dish delivers on flavor, presentation, and ease of preparation.

Ready to elevate your dinner game? Gather your ingredients, follow these steps, and enjoy the satisfaction of creating a restaurant-quality meal at home. Don’t forget to share your creations and tag your photos online!

ating

Garlic Butter Shrimp and Rice Stack: A Fancy Yet Easy Dish You’ll Love

Elevate your dinner game with this Garlic Butter Shrimp and Rice Stack! Featuring succulent shrimp in a rich garlic butter sauce atop fluffy rice, this dish combines elegance and simplicity for a meal that’s both impressive and easy to make.  
Prep Time 10 minutes
Cook Time 15 minutes
Total Time 25 minutes
Servings: 4 servings
Course: Dinner
Cuisine: American

Ingredients
  

Main Ingredients:
  • 1 lb large shrimp peeled and deveined
  • 2 tbsp butter divided
  • 4 cloves garlic minced
  • 1 tbsp olive oil
  • ½ tsp crushed red pepper flakes optional
  • 1 tbsp lemon juice
  • 2 cups cooked white rice or jasmine rice
  • ¼ cup fresh parsley chopped
  • Salt and pepper to taste
  • Lemon wedges optional, for serving

Method
 

Cook the Shrimp:
  1. Heat 1 tablespoon of butter and olive oil in a large skillet over medium-high heat.
  2. Season shrimp with salt and pepper, then add to the skillet.
  3. Cook for 2–3 minutes per side, or until the shrimp turn pink and opaque. Remove shrimp and set aside.
Make the Garlic Butter Sauce:
  1. In the same skillet, melt the remaining tablespoon of butter over medium heat.
  2. Add minced garlic and sauté for 1–2 minutes until fragrant, being careful not to burn it.
  3. Stir in crushed red pepper flakes (if using) and lemon juice. Cook for another minute, mixing well.
Assemble the Rice Stack:
  1. Divide the cooked rice into four portions.
  2. Use a small bowl or round mold to shape each portion into a compact stack.
  3. Carefully remove the rice stack from the mold and place it on a serving plate.
Add the Shrimp:
  1. Top each rice stack with a generous portion of the cooked shrimp.
  2. Spoon the garlic butter sauce over the shrimp and rice for extra flavor.
Garnish and Serve:
  1. Sprinkle chopped parsley over the shrimp and rice stacks.
  2. Serve with lemon wedges on the side for an added citrusy kick.

Notes

  • Use fresh garlic for the best flavor; it makes the sauce aromatic and robust.
  • Don’t overcook the shrimp to keep them tender and juicy.
  • Adjust the spice level by increasing or omitting the red pepper flakes.

Broccoli Potato Cheese Soup Recipe: A Warm and Comforting Classic

There’s nothing quite like a steaming bowl of soup on a chilly day, especially when it’s as creamy and satisfying as this Broccoli Potato Cheese Soup Recipe. Combining the earthy flavors of broccoli, the heartiness of potatoes, and the rich creaminess of cheddar cheese, this recipe is a go-to for anyone craving a wholesome and indulgent meal. Whether it’s a quick lunch or a cozy dinner, this soup has you covered.

Why You’ll Love This Recipe

  • Easy to Make: A simple recipe with straightforward steps.
  • Nutritious and Delicious: Packed with veggies and protein-rich cheese.
  • Family-Friendly: Even picky eaters will enjoy this comforting dish.
  • Customizable: Adjust the flavors and ingredients to suit your taste.

Ingredients for Broccoli Potato Cheese Soup

Here’s a detailed list of what you’ll need:

Core Ingredients

IngredientAmount
Butter1–2 tbsp
Onion (diced)1
Carrots (diced)2 medium
Garlic (minced)3 cloves
Chicken stock4 cups
Cornstarch¼ cup
Milk1 cup
Potatoes (cubed)2 large
Broccoli florets16 oz
Shredded sharp cheddar1 ½ cups
Salt½ tsp
Ground pepper¼ tsp

Step-by-Step Instructions

1. Sauté the Vegetables

  • Melt 1–2 tablespoons of butter in a skillet over medium-high heat.
  • Add the diced onion and sauté for about 3 minutes until it softens.
  • Stir in the diced carrots, salt, and pepper, and cook for another 3–4 minutes.
  • Add the minced garlic and sauté for 30 seconds until fragrant.

2. Simmer the Potatoes

  • Pour in the chicken stock and add the cubed potatoes.
  • Cover the pot and bring the mixture to a simmer.
  • Simmer for about 10 minutes, or until the potatoes begin to soften.

3. Add the Broccoli

  • Stir in the broccoli florets.
  • Continue simmering for another 10 minutes until the broccoli and potatoes are fork-tender.

4. Thicken the Soup

  • In a small bowl, whisk the cornstarch into the milk until smooth.
  • Gradually stir this mixture into the hot soup, allowing it to thicken as it heats.

5. Add the Cheese

  • Remove the soup from heat and slowly stir in the shredded cheddar cheese.
  • Continue stirring until the cheese is completely melted and the soup is creamy.

6. Serve and Enjoy

  • Ladle the soup into bowls and serve warm.
  • Garnish with extra shredded cheese or fresh parsley for a finishing touch.

What Makes This Recipe Special?

1. Balanced Flavors

The savory cheddar, tender vegetables, and hint of garlic create a perfectly balanced soup.

2. Creamy Yet Light

The combination of cornstarch and milk thickens the soup without making it overly heavy.

3. One-Pot Wonder

This recipe comes together in a single pot, making cleanup a breeze.

Nutritional Information

NutrientPer Serving (Approx.)
Calories280
Protein12g
Carbohydrates30g
Fat13g
Fiber4g
Sodium450mg

Tips for the Best Broccoli Potato Cheese Soup

1. Use Fresh Ingredients

  • Fresh broccoli and sharp cheddar cheese provide the best flavor.

2. Cut Evenly

  • Dice the potatoes and carrots into uniform sizes to ensure even cooking.

3. Don’t Overcook

  • Avoid overcooking the broccoli to maintain its vibrant green color and texture.

4. Adjust Consistency

  • If the soup is too thick, add more chicken stock to thin it out.

Variations to Try

1. Add Protein

  • Include cooked chicken or bacon bits for extra protein and flavor.

2. Make It Vegetarian

  • Use vegetable stock instead of chicken stock to create a vegetarian version.

3. Spice It Up

  • Add a pinch of red pepper flakes or cayenne for a bit of heat.

4. Swap the Cheese

  • Experiment with different cheeses like Gruyere, Monterey Jack, or Parmesan for a unique twist.

Serving Suggestions

  • Crusty Bread: Perfect for dipping into the creamy soup.
  • Side Salad: A fresh green salad balances the richness of the soup.
  • Baked Potatoes: Pair with baked potatoes for an extra hearty meal.

FAQ: Your Broccoli Potato Cheese Soup Questions Answered

1. Can I use frozen broccoli?

Yes! Frozen broccoli works just as well. Simply add it straight to the pot without thawing.

2. Can I make this soup ahead of time?

Absolutely. This soup can be stored in an airtight container in the fridge for up to 3 days. Reheat gently on the stovetop.

3. Can I freeze this soup?

While you can freeze it, the texture of the potatoes and cheese may change slightly. For best results, freeze before adding the cheese and stir it in when reheating.

4. What’s the best way to reheat leftovers?

Reheat on low heat on the stovetop, stirring occasionally. Add a splash of milk or stock to refresh the consistency.

5. Can I make it dairy-free?

Yes! Use a plant-based milk and dairy-free cheese. Coconut milk can also add creaminess.

6. How do I prevent the cheese from clumping?

Add the cheese off the heat and stir slowly to melt it evenly. Using freshly shredded cheese helps, as pre-shredded cheese often contains anti-caking agents.

Final Thoughts and Call to Action

This Broccoli Potato Cheese Soup Recipe is a must-try for anyone who loves a hearty, creamy meal. With its simple ingredients and easy preparation, it’s perfect for any night of the week. Whether you’re cooking for your family or just yourself, this soup will warm your heart and satisfy your cravings.

So why wait? Gather your ingredients and give this recipe a try tonight. Don’t forget to share your results and spread the joy of homemade comfort food!

ating

Broccoli Potato Cheese Soup Recipe: A Warm and Comforting Classic

Warm, creamy, and packed with flavor, this Broccoli Potato Cheese Soup is the ultimate comfort food. Tender potatoes, fresh broccoli, and sharp cheddar cheese come together in a velvety soup that’s perfect for chilly nights or cozy family meals.  
Prep Time 10 minutes
Cook Time 25 minutes
Total Time 35 minutes
Servings: 4 servings
Course: Soup
Cuisine: American

Ingredients
  

Core Ingredients:
  • 1 –2 tbsp butter
  • 1 onion diced
  • 2 medium carrots diced
  • 3 garlic cloves minced
  • 4 cups chicken stock
  • 2 large potatoes cubed
  • 16 oz broccoli florets
  • ¼ cup cornstarch
  • 1 cup milk
  • 1 ½ cups shredded sharp cheddar cheese
  • ½ tsp salt
  • ¼ tsp ground pepper

Method
 

Sauté the Vegetables:
  1. Melt butter in a large pot over medium heat.
  2. Add diced onion and sauté for 3 minutes until softened.
  3. Stir in carrots, salt, and pepper, and cook for another 3–4 minutes.
  4. Add minced garlic and sauté for 30 seconds until fragrant.
Simmer the Potatoes:
  1. Pour in chicken stock and add cubed potatoes.
  2. Bring to a simmer, cover, and cook for about 10 minutes, or until the potatoes start to soften.
Add the Broccoli:
  1. Stir in broccoli florets and continue simmering for another 10 minutes until the broccoli and potatoes are fork-tender.
Thicken the Soup:
  1. In a small bowl, whisk cornstarch into the milk until smooth.
  2. Gradually stir this mixture into the soup, allowing it to thicken as it heats.
Add the Cheese:
  1. Remove the pot from heat and slowly stir in the shredded cheddar cheese.
  2. Mix until the cheese is completely melted and the soup is creamy.
Serve and Enjoy:
  1. Ladle the soup into bowls and serve warm.
  2. Garnish with extra shredded cheese or fresh parsley for a finishing touch.

Notes

  • Use freshly shredded cheese for a smoother texture; pre-shredded cheese may clump due to anti-caking agents.
  • If the soup is too thick, thin it with additional chicken stock or milk.
  • Avoid overcooking the broccoli to maintain its vibrant color and texture.

Stay Connected

Get recipes via email: