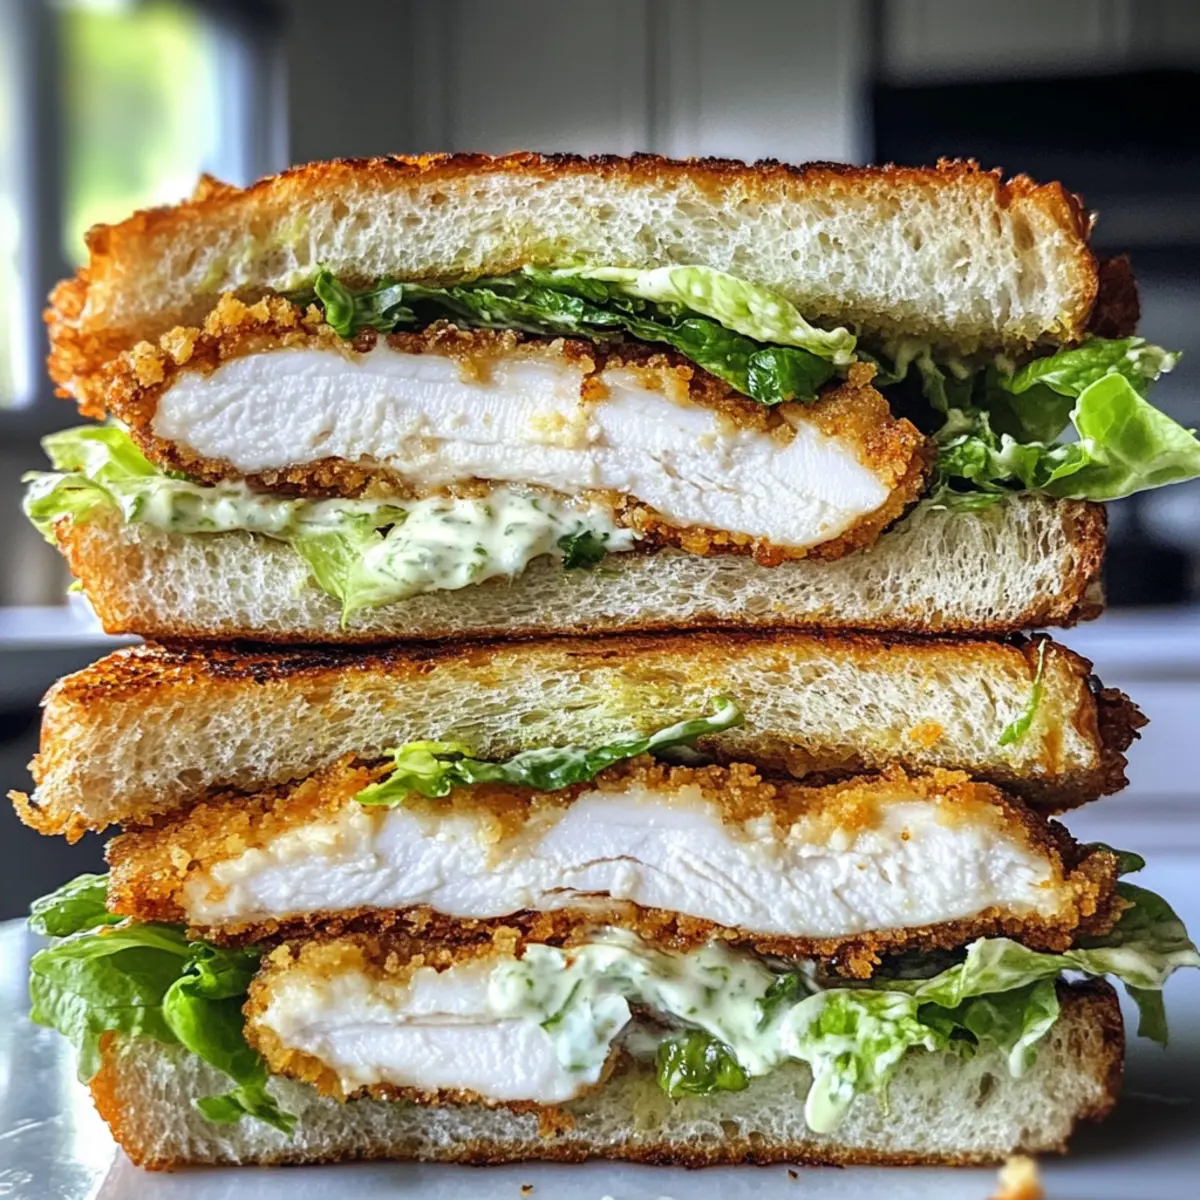
As I stood in my kitchen, the aroma of sizzling chicken filled the air, bringing back memories of cozy lunches shared with friends and family. These Crispy Chicken Caesar Sandwiches are a delightful, hearty meal that perfectly balances crunchy goodness with a creamy twist. In under 30 minutes, you can whip up this flavorful sandwich, making it ideal for a busy weekday lunch or a casual dinner. The combination of well-seasoned chicken, fresh Caesar salad, and garlicky toasted bread transforms a simple meal into something special. Whether you’re in need of a quick fix or looking to impress, these sandwiches are a satisfying solution. Ready to elevate your lunchtime experience with a taste of homemade comfort? Let’s dive into how to create this delicious dish!
Why are these Chicken Caesar Sandwiches a must-try?
Quick and Easy: You’ll adore how simple it is to pull this meal together in under 30 minutes. Perfect for those busy days when you crave something homemade!
Crispy and Hearty: The well-seasoned chicken delivers a crispy exterior while maintaining a juicy interior, ensuring each bite is satisfying.
Creamy Flavor Explosion: With a rich Caesar dressing and fresh Parmesan, you’ll find layers of flavor that will leave your taste buds dancing!
Customizable Delight: Feel free to swap proteins or dressings, adapting this recipe to fit your dietary needs or preference. For a lighter spin, try it with Savory Chicken Cheesy roasted!
Perfect for Sharing: Whether hosting friends or enjoying a family dinner, these sandwiches are sure to wow your guests and make mealtimes memorable. Enjoy them with some sweet potato fries for a complete experience!
Chicken Caesar Sandwiches Ingredients
• Discover the perfect blend of flavors and textures!
For the Chicken
- Chicken Breasts – The main protein source; for a quicker option, use pre-cooked or rotisserie chicken.
- Egg (whisked with milk) – Binds the breadcrumbs to chicken, creating a crispy coating; aquafaba can be used as an egg replacement for binding.
- Garlic Powder, Salt, Pepper – Essential for flavor enhancement; adjust seasoning to your taste.
- Breadcrumbs & Panko – Provides a crispy exterior for frying; use gluten-free breadcrumbs for a gluten-free version.
- Vegetable Oil – Necessary for frying the chicken to achieve the perfect crispiness; avocado oil can be a healthier substitute.
For the Garlic Butter Bread
- Salted Butter – Adds richness to the garlic butter; unsalted butter can be used with added salt to taste.
- Minced Garlic & Fresh Parsley – Infuses fresh flavor into the garlic butter; dried garlic and parsley can be substituted if needed.
For the Caesar Dressing
- Mayonnaise – A creamy base for the dressing; Greek yogurt can lighten it up with a healthier twist.
- Parmesan Cheese (grated) – Jack of all trades for flavor; swap for vegan Parmesan to go dairy-free.
- Sour Cream or Greek Yogurt – Adds tang and creaminess to the dressing; coconut yogurt works as a dairy-free option.
- Lemon Juice, Dijon Mustard, Anchovy Paste, Worcestershire Sauce – Essential for tang and umami flavor; omit anchovy paste for a vegetarian version.
For the Freshness
- Romaine Lettuce – Provides a crunchy texture and freshness; kale or mixed greens work well too.
Step‑by‑Step Instructions for Chicken Caesar Sandwiches
Step 1: Prepare Chicken Cutlets
Start by slicing the chicken breasts into 4-6 thin cutlets to ensure they cook evenly and quickly. In a bowl, whisk an egg with a splash of milk to create a binding mixture. Dip each chicken cutlet into the egg mixture, then coat them thoroughly with a blend of breadcrumbs and panko to achieve that perfect crispy exterior for your Chicken Caesar Sandwiches.
Step 2: Fry Chicken
Heat vegetable oil in a large skillet over medium heat until it reaches 350°F (175°C). Carefully lay the breaded chicken cutlets in the hot oil, frying them for about 5 minutes on each side or until they turn golden brown and crispy. Use a slotted spatula to remove the chicken from the oil and place them on paper towels to drain excess oil while you prepare the bread.
Step 3: Make Garlic Butter Bread
In a small bowl, mix together softened salted butter, minced garlic, and chopped fresh parsley until well combined. Spread this fragrant garlic butter generously onto slices of your chosen bread. Preheat your oven to 450°F (230°C) and place the buttered bread on a baking sheet, toasting it for about 3-4 minutes, or until it becomes golden and crispy, adding a delicious layer to your Chicken Caesar Sandwiches.
Step 4: Whisk Dressing
In a mixing bowl, whisk together mayonnaise, sour cream or Greek yogurt, freshly squeezed lemon juice, Dijon mustard, anchovy paste, Worcestershire sauce, and minced garlic. Season the Caesar dressing with salt and pepper to taste. Blend these ingredients until smooth, producing a creamy dressing that will elevate the flavors of your Chicken Caesar Sandwiches.
Step 5: Assemble Sandwiches
Now it’s time to put your Chicken Caesar Sandwiches together! Start with a slice of the garlic butter toasted bread, then layer on the crispy chicken cutlets. Top the chicken with the freshly dressed romaine lettuce and sprinkle additional grated Parmesan cheese for an extra kick of flavor. Place another slice of toasted bread on top, and enjoy your delicious, homemade sandwich for a hearty meal!

Make Ahead Options
These Chicken Caesar Sandwiches are the ultimate solution for meal prep enthusiasts! You can prepare the chicken cutlets and garlic butter bread up to 24 hours in advance—simply store the cutlets in an airtight container in the refrigerator and keep the bread wrapped to maintain freshness. When you’re ready to serve, just reheat the cutlets in a skillet or oven until warmed through, which keeps them crispy, then toast the garlic butter bread just before assembly. For best flavor, mix the Caesar dressing a day ahead and store it in the fridge. By prepping these components, you can enjoy delicious, homemade Chicken Caesar Sandwiches on even the busiest days!
What to Serve with Chicken Caesar Sandwiches
Elevate your meal experience with these delightful pairings that perfectly complement the crispy, savory goodness of your sandwich.
-
Sweet Potato Fries: Crispy on the outside and fluffy inside, they bring a fun twist that balances the creaminess of the sandwich.
-
Classic Potato Chips: Their satisfying crunch adds texture, while the salty flavor enhances the savory notes of the Chicken Caesar Sandwiches.
-
Garlic Roasted Brussels Sprouts: The caramelized edges offer a delicious roasted flavor that pairs beautifully with the Caesar dressing and enhances the overall meal.
-
Caesar Salad: Keeping it classic, a side salad with crunchy romaine and creamy dressing mirrors the sandwich, creating a cohesive dining experience.
-
Coleslaw: The tangy sweetness and crispy cabbage provide a refreshing contrast, cutting through the richness of the sandwich.
-
Iced Lemonade: This refreshing drink offers a zesty counterpoint, brightening the meal with its citrusy flair and balancing flavors.
-
Wine Spritzer: A light and bubbly spritzer can wonderfully complement the sandwich, adding a touch of fun without overwhelming flavors.
-
Chocolate Chip Cookies: End on a sweet note! The warm, gooey cookies provide a comforting finish that delights after the savory meal.
-
Fruit Salad: A fresh mix of seasonal fruits provides a light and refreshing side, adding color and a natural sweetness to your plate.
Chicken Caesar Sandwiches Variations
Feel the freedom to mix things up with these delightful variations that will take your Chicken Caesar Sandwiches to the next level!
-
Grilled Shrimp: Swap chicken for grilled shrimp for a seafood twist that adds a fresh, zesty flavor. Perfect for summer gatherings!
-
Tofu Magic: Use crispy tofu instead of chicken for a vegetarian option that’s equally satisfying and full of flavor. The tofu soaks up the dressing beautifully!
-
Whole Grain Bread: Choose whole grain or seeded bread for added texture and nutrition, making your sandwiches even more heart-healthy.
-
Dairy-Free Dream: Transform the sandwich into a dairy-free delight by using vegan mayonnaise and dairy-free Parmesan. You won’t miss the creaminess!
-
Kickin’ Heat: Add sliced jalapeños or a dash of hot sauce to the dressing for a spicy kick. This simple addition brings a new level of excitement to each bite.
-
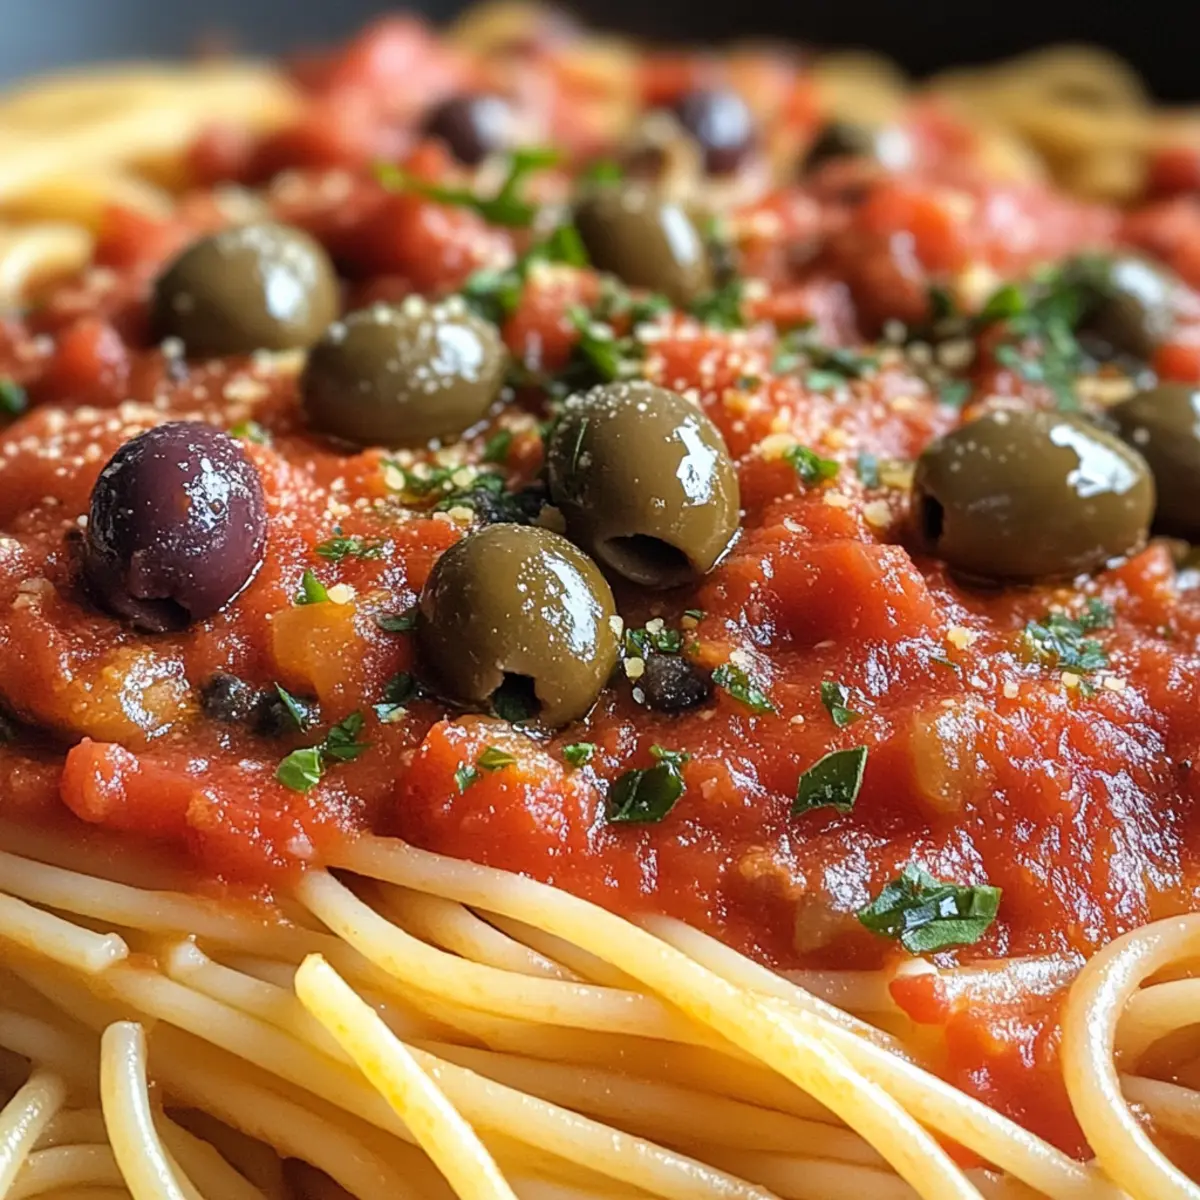
Mediterranean Spin: Incorporate olives and feta cheese into your Caesar dressing for a Mediterranean flair. The olives add a beautiful briny flavor that complements the creamy dressing perfectly.
-
Savory Twist: Craving extra flavor? Try adding fresh herbs like basil or dill to your dressing for an aromatic flourish. Each bite will transport you to summer gardens!
-
Crunchy Veggie Delight: Stack on extra veggies, like sliced bell peppers or cucumbers, for a refreshing crunch. These additions not only enhance texture but also boost nutrition.
Feel inspired? You might also enjoy pairing your sandwiches with some sweet potato fries or a fresh salad to round out your meal! And if you’re looking for more chicken flavor, check out my Honey Chili Chicken that will make your dinner table shine!
Expert Tips for Chicken Caesar Sandwiches
-
Frying Benefits: Keep the oil at 350°F for that perfect crispy texture. If the temperature drops, the chicken may absorb excess oil, leading to sogginess.
-
Breadcrumb Coating: Let your chicken cutlets sit in the breadcrumb mixture for a few minutes before frying. This helps the coating adhere better, ensuring a crunchy finish for your Chicken Caesar Sandwiches.
-
Dressing Balance: Taste your dressing and adjust ingredients gradually. Adding lemon juice or Worcestershire sauce in small increments allows you to achieve the perfect tanginess without overpowering your dish.
-
Fresh Ingredients: For optimal flavor, always use fresh garlic and parsley in the garlic butter. Don’t overlook this step, as using dried herbs can dull the overall taste.
-
Alternatives Galore: Experiment with different proteins or breads to keep things interesting. Grilled shrimp or a vegan substitute can offer new flavors while catering to dietary preferences!
How to Store and Freeze Chicken Caesar Sandwiches
Fridge: Store leftover Chicken Caesar Sandwiches in an airtight container for up to 3 days. Keep the chicken, salad, and bread separate to maintain freshness and texture.
Freezer: If you want to freeze the chicken cutlets, wrap them tightly in plastic wrap and then in foil. They can be frozen for up to 2 months. Reheat directly from frozen for a quick meal!
Reheating: To reheat, place the chicken cutlets in a preheated oven at 350°F for about 10-15 minutes until heated through. Toast the garlic butter bread just before serving to recreate the crispy texture.
Assembling Freshly: For the best flavor experience, assemble your Chicken Caesar Sandwiches fresh right before serving, especially if you’re using lettuce that may wilt over time.

Chicken Caesar Sandwiches Recipe FAQs
What type of chicken is best for these sandwiches?
Absolutely! Fresh chicken breasts work best as they can be sliced into thin cutlets to achieve perfect crispiness. If you’re short on time, feel free to use pre-cooked or rotisserie chicken for a quick fix!
How should I store leftover Chicken Caesar Sandwiches?
To keep your leftovers fresh, store them in an airtight container in the fridge for up to 3 days. However, I recommend keeping the chicken, salad, and bread separate to maintain maximum crispiness and freshness.
Can I freeze the chicken cutlets, and how?
Yes, you can freeze the chicken cutlets! Wrap them tightly in plastic wrap, followed by aluminum foil. They will stay good in the freezer for up to 2 months. When you’re ready to enjoy, simply reheat directly from frozen in a 350°F oven for about 10-15 minutes.
Why are my chicken cutlets soggy?
Very! This can happen if the oil temperature drops when frying. Always maintain the oil at 350°F to achieve that perfect crispy coating. Additionally, try not to let the breaded chicken sit too long before frying, as this might cause some moisture buildup.
Can I make this recipe dairy-free?
Absolutely! You can easily make these Chicken Caesar Sandwiches dairy-free by substituting regular mayonnaise with a dairy-free alternative and using vegan Parmesan cheese. Additionally, swap sour cream for coconut yogurt for a delicious twist!
Can my pets enjoy any of the leftover sandwich ingredients?
The grilled chicken can be a tasty treat for pets, but do ensure it’s unseasoned. Avoid giving them any garlic, onions, or seasoned parts of the sandwich, as those can be harmful to pets!

Delicious Chicken Caesar Sandwiches Ready in 30 Minutes
Ingredients
Equipment
Method
- Prepare Chicken Cutlets by slicing chicken breasts into 4-6 thin cutlets. Whisk an egg with a splash of milk, dip each cutlet into the mixture, then coat with breadcrumbs and panko.
- Fry Chicken in heated vegetable oil at 350°F, frying each side for about 5 minutes until golden brown and crispy. Drain on paper towels.
- Make Garlic Butter Bread by mixing butter, minced garlic, and parsley. Spread on slices of bread and toast in an oven at 450°F for 3-4 minutes.
- Whisk Dressing ingredients together in a bowl until smooth, season with salt and pepper to taste.
- Assemble Sandwiches by layering toasted bread, crispy chicken, dressed romaine, and additional Parmesan, topping with another slice of bread.