Sweet and Savory Pineapple Chicken Sandwiches delightfully combine flavors.

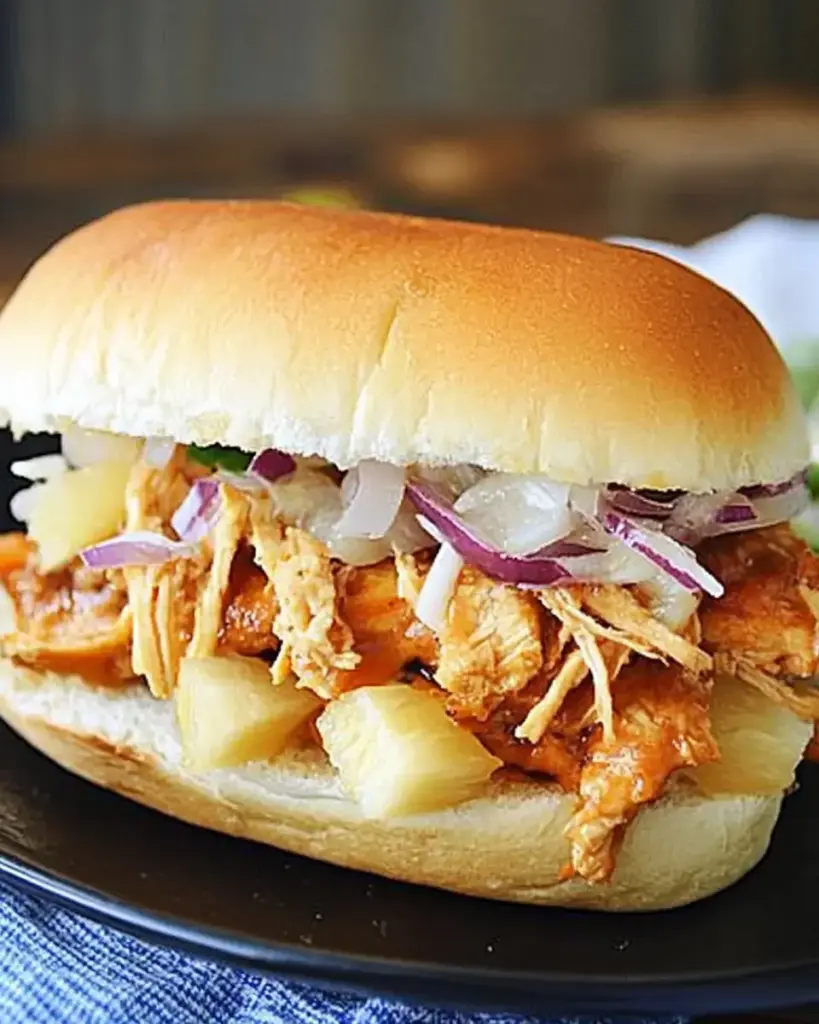
Introduction to Sweet Savory Pineapple Chicken Sandwiches

Are you ready to tantalize your taste buds? Sweet Savory Pineapple Chicken Sandwiches are a delightful blend of flavors that will make your meal unforgettable. This dish combines the juicy tenderness of chicken with the tropical sweetness of pineapple, all wrapped in a soft bun. It’s perfect for family gatherings, picnics, or a cozy dinner at home.

Imagine biting into a sandwich where the savory barbecue sauce meets the refreshing taste of pineapple juice. Each bite is a burst of flavor that dances on your palate. Not only is this recipe delicious, but it’s also easy to prepare. With just a few simple ingredients and a slow cooker, you can create a meal that impresses everyone.

Whether you’re a seasoned cook or a beginner, this recipe is straightforward and fun. Plus, it serves eight people, making it ideal for sharing. So, gather your friends and family, and let’s dive into the world of Sweet Savory Pineapple Chicken Sandwiches!

In the following sections, we will explore the ingredients, preparation steps, and some exciting variations to make this dish your own. Get ready to enjoy a meal that’s not just food, but an experience!

Ingredients for Sweet Savory Pineapple Chicken Sandwiches

To create the mouthwatering Sweet Savory Pineapple Chicken Sandwiches, you’ll need a handful of simple yet flavorful ingredients. Each component plays a vital role in bringing this dish to life. Here’s what you’ll need:

  • 2 pounds boneless, skinless chicken breasts: This is the star of the show! Choose fresh chicken for the best flavor and texture.
  • 1 cup pineapple juice: This adds a sweet and tangy flavor that perfectly complements the chicken.
  • 1 cup barbecue sauce: Opt for your favorite brand or homemade sauce to enhance the savory aspect of the dish.
  • 1 teaspoon garlic powder: Garlic powder brings a warm, aromatic flavor that elevates the overall taste.
  • 1 teaspoon onion powder: This adds a subtle sweetness and depth to the dish.
  • 1/2 teaspoon black pepper: A little kick of spice to balance the sweetness.
  • 1/2 teaspoon salt: Essential for enhancing all the flavors in the dish.
  • 8 hamburger buns: Choose soft, fresh buns to hold all the delicious fillings.
  • 1 cup shredded lettuce: This adds a refreshing crunch to each bite.
  • 1 cup sliced red onion: The sharpness of red onion complements the sweetness of the pineapple.
  • 1 cup sliced cucumbers (optional): For an extra layer of freshness, add cucumbers if you like.

With these ingredients, you’re all set to create a delightful meal that everyone will love. The combination of sweet and savory flavors makes these sandwiches a hit at any gathering. So, gather your ingredients and get ready to cook up something special!

Preparation of Sweet Savory Pineapple Chicken Sandwiches

Now that you have all your ingredients ready, it’s time to prepare your Sweet Savory Pineapple Chicken Sandwiches. This process is simple and enjoyable. Follow these steps to create a delicious meal that will impress everyone!

Step 1: Marinating the Chicken

Start by marinating the chicken. This step is crucial for infusing flavor into the meat. Place the boneless, skinless chicken breasts in a large bowl. Pour the pineapple juice over the chicken, ensuring each piece is well-coated. Then, sprinkle in the garlic powder, onion powder, black pepper, and salt. Mix everything together gently, making sure the chicken is evenly covered with the marinade. Cover the bowl with plastic wrap and let it marinate in the refrigerator for at least 30 minutes. If you have more time, marinating for a few hours will enhance the flavor even more!

Step 2: Preparing the Pineapple Topping

While the chicken is marinating, you can prepare the pineapple topping. This topping adds a fresh and fruity element to your sandwiches. If you’re using fresh pineapple, peel and core it, then cut it into small chunks. If you prefer canned pineapple, simply drain it and chop it into bite-sized pieces. Set the pineapple aside for later. This will be a delightful addition to your sandwiches, adding sweetness and texture.

Step 3: Cooking the Chicken

Once the chicken has marinated, it’s time to cook it. Place the marinated chicken breasts in a slow cooker. Pour the remaining marinade over the chicken, ensuring it’s well-covered. Cover the slow cooker and set it to low for 6-8 hours or high for 3-4 hours. The chicken will become tender and flavorful as it cooks. When it’s done, use two forks to shred the chicken right in the slow cooker. Mix it with the sauce to ensure every bite is packed with flavor.

Step 4: Assembling the Sandwiches

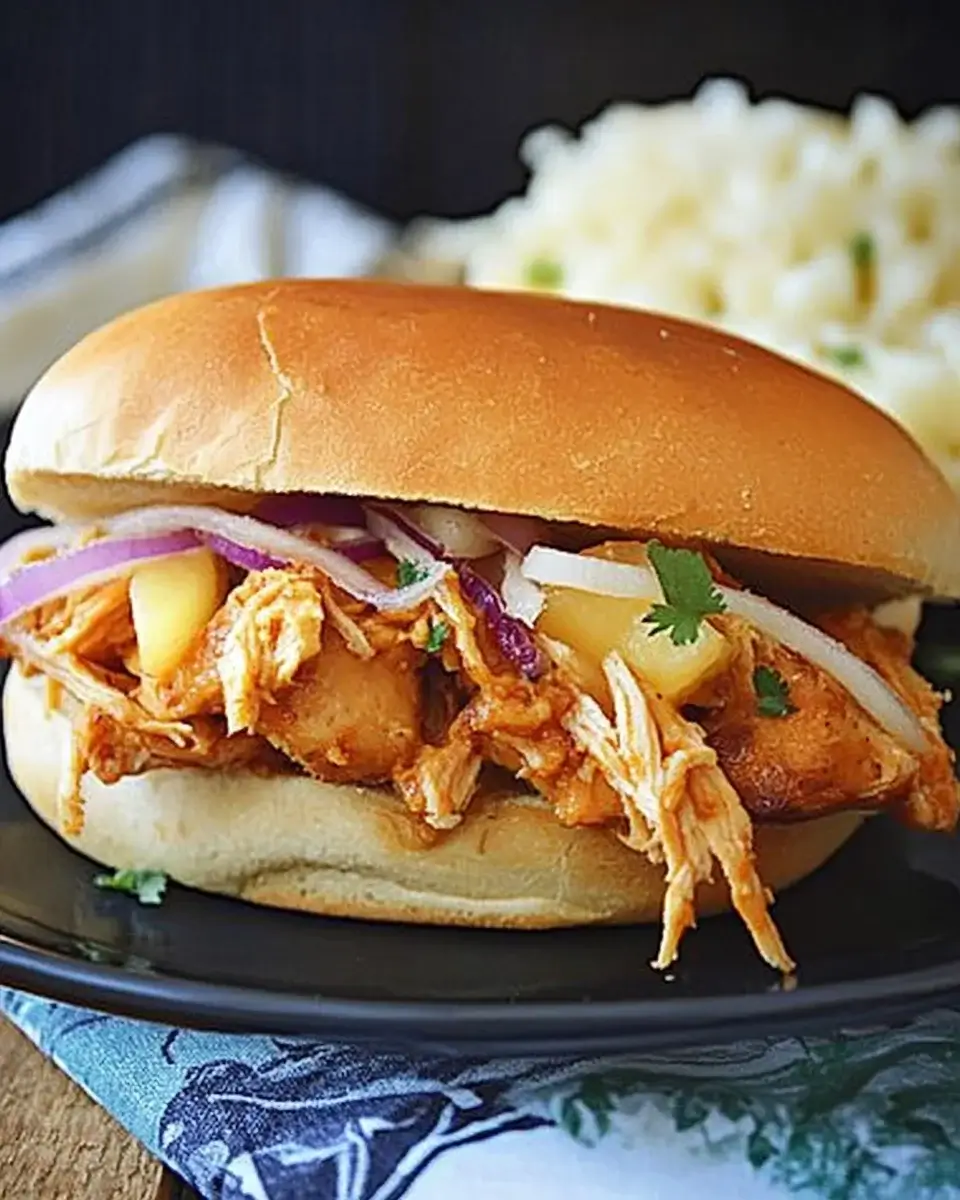
Now comes the fun part—assembling your sandwiches! Start by toasting the hamburger buns lightly if you prefer a bit of crunch. On the bottom half of each bun, place a generous portion of the shredded pineapple chicken. Top it off with a handful of shredded lettuce, a few slices of red onion, and cucumbers if you’re using them. Finally, place the top half of the bun on each sandwich. Serve them warm and enjoy the delightful combination of sweet and savory flavors!

Variation of Sweet Savory Pineapple Chicken Sandwiches

While the classic Sweet Savory Pineapple Chicken Sandwiches are delicious as they are, there’s always room for creativity! You can easily customize this recipe to suit your taste or dietary preferences. Let’s explore some alternative ingredients and different cooking methods that can elevate your sandwich experience.

Alternative Ingredients for Sweet Savory Pineapple Chicken Sandwiches

Switching up ingredients can bring new flavors to your Sweet Savory Pineapple Chicken Sandwiches. Here are some ideas:

  • Different Proteins: Instead of chicken, try using turkey or pork. Both options will absorb the marinade well and provide a unique taste.
  • Fruit Variations: Add diced mango or peach for a tropical twist. These fruits pair beautifully with the barbecue sauce and chicken.
  • Spicy Elements: For those who love heat, consider adding jalapeños or a spicy barbecue sauce. This will give your sandwiches a delightful kick!
  • Cheese: A slice of pepper jack or cheddar cheese can add creaminess and richness to your sandwich. Melt it on top of the chicken for an extra treat.
  • Greens: Instead of lettuce, try arugula or spinach for a peppery flavor. These greens can add a fresh touch to your sandwiches.

Feel free to mix and match these ingredients to create your perfect sandwich. The possibilities are endless!

Different Cooking Methods for Sweet Savory Pineapple Chicken Sandwiches

While the slow cooker method is convenient, you can also prepare Sweet Savory Pineapple Chicken Sandwiches using other cooking techniques. Here are a few alternatives:

  • Grilling: For a smoky flavor, grill the marinated chicken on a barbecue. Cook until it’s charred and juicy, then shred it and mix with the sauce.
  • Oven-Baking: Preheat your oven to 375°F (190°C). Place the marinated chicken in a baking dish and cover it with foil. Bake for 25-30 minutes or until cooked through. Shred and mix with the sauce afterward.
  • Instant Pot: If you’re short on time, use an Instant Pot. Cook the marinated chicken on high pressure for about 10 minutes, then shred and mix with the sauce.

Each cooking method brings its own unique flavor and texture to the dish. Choose the one that fits your schedule and taste preferences!

Cooking Note for Sweet Savory Pineapple Chicken Sandwiches

When preparing Sweet Savory Pineapple Chicken Sandwiches, a few cooking notes can help ensure your dish turns out perfectly every time. These tips will guide you through the process, making it easier and more enjoyable.

First, always choose high-quality chicken. Fresh, boneless, skinless chicken breasts will yield the best flavor and texture. If you can, opt for organic or free-range chicken for a healthier option.

Next, marinating the chicken is essential. The longer you marinate, the more flavorful your chicken will be. If you have time, let it sit overnight in the refrigerator. This allows the flavors to penetrate deeply, resulting in a juicier and tastier sandwich.

When cooking in a slow cooker, avoid lifting the lid too often. Each time you open it, heat escapes, which can increase cooking time. Trust the process and let the slow cooker do its job!

For those who prefer a bit of crunch, toasting the buns is a great idea. It adds texture and prevents the buns from getting soggy from the sauce. You can toast them in a toaster or on a skillet for a few minutes until golden brown.

Lastly, don’t hesitate to experiment with the toppings. While lettuce, red onion, and cucumbers are delicious, you can also add avocado, pickles, or even coleslaw for a different twist. The key is to balance the sweet and savory flavors while adding your personal touch.

By following these cooking notes, you’ll create Sweet Savory Pineapple Chicken Sandwiches that are not only delicious but also memorable. Enjoy the process and the delightful meal that awaits!

Serving Suggestions for Sweet Savory Pineapple Chicken Sandwiches

Once you’ve prepared your Sweet Savory Pineapple Chicken Sandwiches, it’s time to think about how to serve them. Presentation can elevate your meal, making it even more enjoyable. Here are some delightful serving suggestions to enhance your dining experience:

  • Side Dishes: Pair your sandwiches with classic sides like coleslaw or potato salad. These dishes add a refreshing crunch and complement the flavors of the chicken. You can also serve them with sweet potato fries or regular fries for a satisfying crunch.
  • Fresh Fruit: A fruit salad or slices of fresh pineapple can brighten up your plate. The sweetness of the fruit will harmonize beautifully with the savory chicken, creating a balanced meal.
  • Condiments: Offer a variety of condiments on the side. Consider adding extra barbecue sauce, hot sauce, or even a tangy mustard. This allows guests to customize their sandwiches to their liking.
  • Drinks: Serve your sandwiches with refreshing beverages. Iced tea, lemonade, or a fruity mocktail can be perfect companions. For adults, consider pairing with a light beer or a fruity wine.
  • Garnishes: Add a touch of color and flavor with garnishes. Fresh herbs like cilantro or parsley can brighten up the plate. A sprinkle of sesame seeds or crushed nuts can add an interesting texture.

By incorporating these serving suggestions, you’ll create a delightful dining experience that everyone will love. Whether it’s a casual family dinner or a festive gathering, these Sweet Savory Pineapple Chicken Sandwiches will surely impress your guests!

Tips for Perfecting Sweet Savory Pineapple Chicken Sandwiches

Creating the perfect Sweet Savory Pineapple Chicken Sandwiches is all about attention to detail. With a few helpful tips, you can elevate your dish and impress your family and friends. Here are some essential tips to ensure your sandwiches turn out delicious every time:

  • Choose the Right Chicken: Always opt for fresh, high-quality chicken breasts. Organic or free-range options are often more flavorful and healthier. This choice will make a noticeable difference in your sandwiches.
  • Marinate Longer: If time allows, marinate the chicken overnight. This extra time allows the flavors to penetrate deeply, resulting in a juicier and more flavorful chicken.
  • Adjust the Sauce: Feel free to tweak the barbecue sauce to your liking. If you prefer a sweeter sauce, add a bit of honey or brown sugar. For a tangy twist, mix in some apple cider vinegar.
  • Experiment with Toppings: While lettuce and onions are great, don’t hesitate to try other toppings. Avocado, jalapeños, or even a slice of grilled pineapple can add exciting flavors and textures.
  • Toast the Buns: Lightly toasting the hamburger buns can enhance the overall experience. It adds a nice crunch and prevents the buns from becoming soggy from the sauce.
  • Serve Immediately: For the best taste and texture, serve the sandwiches right after assembling. This ensures that the chicken remains warm and the toppings stay fresh and crisp.
  • Make it a Meal: Consider serving your sandwiches with a side of sweet potato fries or a fresh salad. This not only rounds out the meal but also adds variety to your dining experience.
  • Get Creative: Don’t be afraid to experiment! Try different types of bread, such as ciabatta or whole grain, to give your sandwiches a unique twist. The right bread can enhance the overall flavor.

By following these tips, you’ll be well on your way to creating Sweet Savory Pineapple Chicken Sandwiches that are not only delicious but also memorable. Enjoy the process and the delightful flavors that come together in this fantastic dish!

Breakdown of Time for Sweet Savory Pineapple Chicken Sandwiches

Understanding the time required for each step in preparing Sweet Savory Pineapple Chicken Sandwiches can help you plan your cooking efficiently. Here’s a breakdown of the time you’ll need for preparation and cooking:

Prep Time

The prep time for these delicious sandwiches is quite manageable. You’ll spend about 15-20 minutes gathering your ingredients and marinating the chicken. This includes:

  • Gathering all ingredients
  • Marinating the chicken (30 minutes minimum, but longer is better)
  • Preparing the pineapple topping and slicing vegetables

So, if you plan to marinate the chicken for a longer period, you can set aside about 15-20 minutes for the initial prep work.

Cooking Time

Cooking time varies depending on the method you choose. Here’s a quick overview:

  • Slow Cooker: 6-8 hours on low or 3-4 hours on high
  • Grilling: Approximately 15-20 minutes, depending on the thickness of the chicken
  • Oven-Baking: About 25-30 minutes at 375°F (190°C)
  • Instant Pot: Around 10 minutes on high pressure, plus time for the pressure to release

Regardless of the method, the chicken will be tender and flavorful, ready to be shredded and mixed with the sauce.

Total Time

When you combine the prep and cooking times, the total time for making Sweet Savory Pineapple Chicken Sandwiches can vary significantly based on your cooking method:

  • Slow Cooker: 6 hours 15 minutes to 8 hours 20 minutes (including marinating time)
  • Grilling: Approximately 45 minutes (including prep)
  • Oven-Baking: About 50 minutes (including prep)
  • Instant Pot: Roughly 30 minutes (including prep)

By planning ahead, you can enjoy these delightful sandwiches with minimal stress. Whether you choose the slow cooker for convenience or opt for a quicker method, your Sweet Savory Pineapple Chicken Sandwiches will be worth the wait!

Nutritional Information for Sweet Savory Pineapple Chicken Sandwiches

Understanding the nutritional content of your meals is essential for maintaining a balanced diet. Sweet Savory Pineapple Chicken Sandwiches not only taste great but also provide a good mix of nutrients. Here’s a breakdown of the nutritional information per serving:

Calories

320 calories. This makes it a satisfying meal option without being overly heavy. The combination of chicken, pineapple, and barbecue sauce contributes to the overall calorie count, while the fresh vegetables add minimal calories but plenty of nutrients.

Protein

28 grams of protein. The chicken is the primary source of protein, making these sandwiches a great choice for those looking to increase their protein intake. This high protein content helps keep you feeling full and satisfied for longer.

Sodium

600 milligrams. While this is a reasonable amount for a meal, it’s important to be mindful of your overall sodium intake throughout the day. If you’re watching your sodium levels, consider using low-sodium barbecue sauce or adjusting the salt in the recipe to suit your dietary needs.

In summary, Sweet Savory Pineapple Chicken Sandwiches offer a delicious and nutritious meal option. With a good balance of calories, protein, and sodium, they can fit well into a healthy eating plan. Enjoy these sandwiches knowing they not only satisfy your taste buds but also provide essential nutrients!

FAQs about Sweet Savory Pineapple Chicken Sandwiches

Can I use canned pineapple for Sweet Savory Pineapple Chicken Sandwiches?

Absolutely! Canned pineapple is a convenient option and works perfectly in Sweet Savory Pineapple Chicken Sandwiches. Just make sure to drain the pineapple well before adding it to your dish. This will prevent excess moisture from making your sandwiches soggy. Canned pineapple chunks or crushed pineapple can both add a delightful sweetness to your sandwiches, making them just as tasty as using fresh pineapple.

What type of bread is best for Sweet Savory Pineapple Chicken Sandwiches?

The best bread for Sweet Savory Pineapple Chicken Sandwiches is soft and fresh hamburger buns. However, you can also experiment with different types of bread to suit your taste. Whole wheat buns add a nutty flavor and extra fiber, while brioche buns offer a rich, buttery taste. Ciabatta or sourdough can also be great choices for a unique twist. Ultimately, choose a bread that you enjoy and that can hold the delicious fillings without falling apart!

How can I make Sweet Savory Pineapple Chicken Sandwiches gluten-free?

Making Sweet Savory Pineapple Chicken Sandwiches gluten-free is easy! Simply substitute regular hamburger buns with gluten-free buns. Many grocery stores offer a variety of gluten-free bread options. Additionally, ensure that the barbecue sauce you use is gluten-free, as some brands may contain gluten. With these simple swaps, you can enjoy this delicious meal without any gluten concerns!

Can I prepare Sweet Savory Pineapple Chicken Sandwiches in advance?

Yes, you can prepare Sweet Savory Pineapple Chicken Sandwiches in advance! The chicken can be cooked and shredded ahead of time. Store it in an airtight container in the refrigerator for up to three days. When you’re ready to serve, simply reheat the chicken and assemble the sandwiches with fresh toppings. This makes it a great option for meal prep or for hosting gatherings, allowing you to enjoy more time with your guests!

Conclusion on Sweet Savory Pineapple Chicken Sandwiches

In conclusion, Sweet Savory Pineapple Chicken Sandwiches are a delightful dish that brings together a perfect balance of flavors. The combination of tender chicken, sweet pineapple, and zesty barbecue sauce creates a mouthwatering experience that is sure to please everyone at the table. Whether you’re hosting a family gathering, enjoying a picnic, or simply looking for a quick weeknight meal, these sandwiches are a fantastic choice.

Not only are they easy to prepare, but they also allow for plenty of customization. With various ingredient options and cooking methods, you can make this recipe your own. From adding spicy elements to experimenting with different types of bread, the possibilities are endless. Plus, the nutritional benefits make these sandwiches a wholesome option for any meal.

As you gather your ingredients and prepare to create these delicious sandwiches, remember to enjoy the process. Cooking is not just about the end result; it’s about the joy of creating something special. So, roll up your sleeves, get your family involved, and savor the delightful flavors of Sweet Savory Pineapple Chicken Sandwiches together.

We hope this recipe inspires you to try something new in the kitchen. With its sweet and savory notes, this dish is bound to become a favorite in your household. Happy cooking!

Paul

Sweet and Savory Pineapple Chicken Sandwiches delightfully combine flavors.

These Crock Pot Pineapple BBQ Chicken Sandwiches are sweet, smoky, and tangy with melt-in-your-mouth shredded chicken and a creamy slaw topping. Let your slow cooker do the work, then build flavor-packed sandwiches perfect for busy weeknights, summer gatherings, or game day eats.
Prep Time 10 minutes
Cook Time 6 hours
Total Time 6 hours 10 minutes
Servings: 6 sandwiches
Course: Main Course
Cuisine: American

Ingredients
  

  • For the chicken:4 boneless skinless chicken breasts (about 2½ pounds)1½ cups BBQ sauce (Sweet Baby Ray’s recommended)1 cup pineapple juice1 (8 oz) can crushed pineapple (do not drain)
  • For the slaw:3 cups shredded cabbage½ cup shredded carrots½ cup mayonnaise1 tablespoon apple cider vinegar1 tablespoon sugarSalt and pepper to taste
  • For assembly:6 hamburger buns or sandwich rolls

Method
 

  1. Place the chicken breasts in the bottom of a large crock pot.
  2. Pour the BBQ sauce and pineapple juice over the chicken, then top with the crushed pineapple (do not drain).
  3. Cover and cook on low for 6–7 hours or on high for 4 hours, until the chicken is fork-tender and cooked through.
  4. Remove the chicken from the slow cooker and shred it using two forks. Return the shredded chicken to the crock pot and stir into the sauce. Let it simmer on warm for an additional 20–30 minutes to absorb flavor.
  5. While the chicken simmers, combine all slaw ingredients in a medium bowl. Stir well and refrigerate until ready to serve.
  6. Toast buns if desired. Pile each with a generous portion of BBQ pineapple chicken and top with a scoop of slaw.
  7. Serve warm and enjoy!

Notes

This chicken is also delicious over rice or in lettuce wraps.
Make it spicy by adding a few dashes of hot sauce or chili flakes to the crock pot.
Prepare the slaw up to a day in advance for even more flavor.
Leftovers can be stored in the fridge for up to 3 days or frozen for future meals.

“Summer Berry Galettes are the perfect summer dessert.”

Introduction to Summer Berry Galettes

What are Summer Berry Galettes?

Summer Berry Galettes are delightful, rustic pastries filled with fresh, juicy berries. These free-form tarts are easy to make and perfect for showcasing the vibrant flavors of summer fruits. Unlike traditional pies, galettes have a more casual appearance, allowing for a charming, homemade look. The flaky crust cradles a sweet berry filling, making each bite a burst of flavor. Whether you use strawberries, blueberries, raspberries, or blackberries, these galettes are sure to impress your family and friends.

Why You Should Make Summer Berry Galettes This Season

Summer is the ideal time to enjoy fresh berries, and what better way to celebrate than with Summer Berry Galettes? These treats are not only delicious but also simple to prepare. You can whip them up for a picnic, a family gathering, or even just a cozy night at home. Plus, they are versatile! You can customize the filling to suit your taste or use whatever berries are in season. The combination of a flaky crust and sweet, tangy berries creates a delightful dessert that everyone will love. So, roll up your sleeves and get ready to create a summer sensation that will leave your taste buds dancing!

Ingredients for Summer Berry Galettes

To create the perfect Summer Berry Galettes, you’ll need a few simple ingredients. Each component plays a vital role in achieving that delightful balance of flavors and textures. Here’s what you’ll need:

  • 2 cups mixed fresh berries: Choose from strawberries, blueberries, raspberries, or blackberries. Fresh berries are key for that juicy filling.
  • 1 tablespoon granulated sugar: This helps to sweeten the berries and enhance their natural flavors.
  • 1 teaspoon lemon juice: A splash of lemon juice adds brightness and balances the sweetness of the berries.
  • 1 teaspoon cornstarch: This thickens the berry mixture, preventing it from becoming too runny.
  • 1 tablespoon all-purpose flour: A light dusting of flour on the crust helps absorb any excess moisture from the filling.
  • 1 pre-made pie crust: You can use store-bought or homemade crust, depending on your preference and time.
  • 1 egg (beaten, for egg wash): This gives the crust a beautiful golden color when baked.
  • 1 tablespoon coarse sugar: Sprinkling this on top adds a delightful crunch and sweetness to the crust.

With these ingredients on hand, you’re ready to embark on your galette-making adventure. Feel free to experiment with different fruits or add a hint of vanilla for an extra layer of flavor. The possibilities are endless!

Step-by-Step Preparation of Summer Berry Galettes

Step 1: Prepare the Dough for Summer Berry Galettes

To start, you need to prepare the dough for your Summer Berry Galettes. If you’re using a store-bought pie crust, simply take it out of the fridge and let it sit for a few minutes. This makes it easier to roll out. If you’re making your own crust, roll it out on a lightly floured surface until it’s about 1/8-inch thick. This thickness is perfect for a flaky texture. Once rolled out, use a round cutter or a plate to cut the dough into four equal circles, each about 5 inches in diameter. Place these circles on a baking sheet lined with parchment paper. This will prevent sticking and make cleanup a breeze!

Step 2: Prepare the Berry Filling for Summer Berry Galettes

Next, it’s time to prepare the berry filling. In a medium bowl, combine your mixed fresh berries, granulated sugar, lemon juice, and cornstarch. Gently toss the berries to coat them evenly. The sugar will help draw out the juices, while the cornstarch thickens the mixture. Let this sit for about 10 minutes. This step is crucial as it allows the flavors to meld together, creating a deliciously sweet and tangy filling. Plus, it helps to prevent the galettes from becoming soggy!

Step 3: Assemble the Summer Berry Galettes

Now comes the fun part—assembling your Summer Berry Galettes! Take one of the dough circles and spoon an equal amount of the berry mixture into the center. Be sure to leave about 1 inch of space around the edges. This space is important for folding the dough over the filling. Gently fold the edges of the dough over the berries, creating pleats as you go. This rustic look adds charm to your galettes. Once you’ve folded all the edges, brush the crust with the beaten egg. This will give it a lovely golden color when baked. Finally, sprinkle coarse sugar on top for an extra touch of sweetness and crunch!

Step 4: Bake the Summer Berry Galettes

It’s time to bake your creations! Place the assembled galettes in the preheated oven at 400°F. Bake them for about 20-25 minutes, or until the crust is golden brown and the berries are bubbly. Keep an eye on them as they bake, as oven temperatures can vary. Once they’re done, remove them from the oven and let them cool slightly. This cooling time allows the filling to set a bit more, making them easier to serve. Enjoy the delightful aroma that fills your kitchen as you prepare to indulge in these delicious Summer Berry Galettes!

Variation of Summer Berry Galettes

Different Berry Combinations for Summer Berry Galettes

One of the best things about Summer Berry Galettes is their versatility. You can mix and match different berries to create your own unique flavor combinations. For instance, try using just strawberries for a classic taste, or go for a mix of blueberries and raspberries for a tangy twist. If you’re feeling adventurous, consider adding blackberries for a deeper flavor profile. You can even combine all four types of berries for a colorful and delicious medley!

Another fun idea is to incorporate seasonal fruits. Peaches and cherries make excellent substitutes for berries. Simply slice them up and toss them with sugar and lemon juice, just like you would with the berries. This way, you can enjoy the galettes all summer long, no matter what fruits are in season. The key is to balance the sweetness of the fruit with a bit of acidity, so don’t forget that splash of lemon juice!

Gluten-Free Options for Summer Berry Galettes

If you or someone you know is gluten-sensitive, don’t worry! You can still enjoy these delightful Summer Berry Galettes. Simply swap out the regular pie crust for a gluten-free version. Many stores offer pre-made gluten-free pie crusts that work just as well as traditional ones. Alternatively, you can make your own gluten-free crust using a blend of gluten-free flours, such as almond flour or rice flour.

When using gluten-free crust, be sure to follow the package instructions for rolling and baking. The texture may differ slightly, but the delicious berry filling will still shine through. With these options, everyone can savor the joy of Summer Berry Galettes, regardless of dietary restrictions!

Cooking Note for Summer Berry Galettes

When making Summer Berry Galettes, a few cooking notes can help ensure your dessert turns out perfectly every time. First, always preheat your oven. This step is crucial for achieving that golden, flaky crust. If the oven isn’t hot enough, the galettes may not bake evenly, leading to a soggy bottom.

Next, consider the size of your berries. If you’re using larger fruits like strawberries, slice them into smaller pieces. This ensures even cooking and allows the flavors to meld beautifully. On the other hand, smaller berries like blueberries and raspberries can be used whole, adding a burst of flavor with each bite.

Another important tip is to avoid overfilling your galettes. While it’s tempting to pile on the berry mixture, too much filling can cause the galettes to leak during baking. Stick to the recommended amount to keep your galettes intact and looking beautiful.

Lastly, let your galettes cool for a few minutes after baking. This cooling time allows the filling to set, making them easier to slice and serve. Plus, it gives you a moment to enjoy the delightful aroma wafting through your kitchen!

By following these cooking notes, you’ll create Summer Berry Galettes that are not only delicious but also visually stunning. Happy baking!

Serving Suggestions for Summer Berry Galettes

Pairing Summer Berry Galettes with Ice Cream

One of the best ways to enjoy your Summer Berry Galettes is by pairing them with a scoop of ice cream. The creamy texture of ice cream complements the flaky crust and juicy berry filling perfectly. Vanilla ice cream is a classic choice, as its subtle flavor allows the berries to shine. However, feel free to experiment with other flavors like strawberry, blueberry, or even a tangy lemon sorbet for a refreshing twist.

To serve, simply place a warm galette on a plate and add a generous scoop of ice cream on top. As the ice cream melts, it creates a delightful sauce that seeps into the galette, enhancing every bite. This combination is not only delicious but also visually appealing, making it a perfect dessert for gatherings or special occasions. Your guests will be impressed by this simple yet elegant presentation!

Serving Summer Berry Galettes with Whipped Cream

If you prefer a lighter topping, consider serving your Summer Berry Galettes with freshly whipped cream. The airy texture of whipped cream adds a lovely contrast to the rich flavors of the galette. To make whipped cream, simply beat heavy cream with a bit of sugar and vanilla extract until soft peaks form. This homemade touch elevates your dessert and is incredibly easy to prepare.

To serve, dollop a generous spoonful of whipped cream on top of each galette. You can also add a sprinkle of fresh berries or a drizzle of berry sauce for an extra pop of color and flavor. This simple addition makes your Summer Berry Galettes feel even more special. Whether you’re enjoying them at a summer barbecue or a cozy family dinner, this combination is sure to please everyone!

Tips for Perfect Summer Berry Galettes

Choosing the Right Berries for Summer Berry Galettes

When it comes to making Summer Berry Galettes, the choice of berries can make a big difference. Fresh, ripe berries are key to achieving that burst of flavor in every bite. Here are some tips for selecting the best berries:

  • Look for Bright Colors: Choose berries that are vibrant and colorful. Bright strawberries, deep blue blueberries, and rich red raspberries indicate freshness and ripeness.
  • Check for Firmness: Gently squeeze the berries to ensure they are firm but not hard. Soft berries may be overripe and could lead to a mushy filling.
  • Avoid Mold: Always inspect your berries for any signs of mold or spoilage. Discard any that look damaged or have an off smell.
  • Seasonal Picks: Opt for berries that are in season for the best flavor. Local farmers’ markets often have the freshest options available.

By choosing the right berries, you’ll enhance the taste and texture of your Summer Berry Galettes, making them even more delightful!

Storing Leftover Summer Berry Galettes

If you happen to have any leftover Summer Berry Galettes, storing them properly is essential to maintain their deliciousness. Here’s how to do it:

  • Cool Completely: Allow the galettes to cool completely at room temperature before storing. This prevents condensation, which can make the crust soggy.
  • Use an Airtight Container: Place the cooled galettes in an airtight container. This helps keep them fresh and prevents them from absorbing any odors from the fridge.
  • Refrigerate: Store the galettes in the refrigerator for up to 3 days. If you want to keep them longer, consider freezing them.
  • Freezing Tips: To freeze, wrap each galette tightly in plastic wrap and then place them in a freezer-safe bag. They can be frozen for up to 2 months. When ready to enjoy, simply thaw in the fridge overnight and reheat in the oven for a few minutes.

By following these storage tips, you can savor your Summer Berry Galettes even after the initial baking. Enjoy every last bite!

Breakdown of Time for Summer Berry Galettes

Prep Time for Summer Berry Galettes

Preparing your Summer Berry Galettes is a breeze! The prep time typically takes about 20-30 minutes. This includes gathering your ingredients, preparing the dough, and mixing the berry filling. If you’re using a store-bought pie crust, this will save you some time. However, if you decide to make your own crust, it may take a bit longer. Regardless, the effort is well worth it for the delicious results!

Cooking Time for Summer Berry Galettes

Once your galettes are assembled, the cooking time is around 20-25 minutes. You’ll want to bake them in a preheated oven at 400°F until the crust is golden brown and the berries are bubbly. Keep an eye on them as they bake, as oven temperatures can vary. This short cooking time allows you to enjoy your delightful dessert in no time!

Total Time for Summer Berry Galettes

In total, you can expect to spend about 40-55 minutes from start to finish when making Summer Berry Galettes. This includes both prep and cooking time. With such a quick turnaround, you can easily whip up these tasty treats for a last-minute gathering or a cozy night in. So, gather your ingredients and get ready to enjoy a delicious dessert that celebrates the flavors of summer!

Nutritional Information for Summer Berry Galettes

Calories in Summer Berry Galettes

When indulging in Summer Berry Galettes, it’s good to know what you’re consuming. Each serving contains approximately 210 calories. This makes them a delightful treat without being overly heavy. The combination of fresh berries and a flaky crust provides a satisfying dessert that won’t derail your healthy eating goals. Enjoying these galettes in moderation allows you to savor their deliciousness while keeping your calorie intake in check.

Protein Content in Summer Berry Galettes

In terms of protein, each serving of Summer Berry Galettes offers about 2 grams. While this may not seem like a lot, it contributes to the overall nutritional profile of the dessert. The protein comes mainly from the pie crust and the egg wash used for brushing. Although these galettes are not a significant source of protein, they can be enjoyed as part of a balanced diet when paired with other protein-rich foods, such as yogurt or ice cream.

Sodium Levels in Summer Berry Galettes

When it comes to sodium, Summer Berry Galettes are relatively low. Each serving contains around 150 milligrams of sodium. This level is quite manageable, especially when compared to many other desserts. The sodium primarily comes from the pie crust. If you’re watching your sodium intake, you can easily adjust the recipe by using a low-sodium crust or making your own from scratch. This way, you can enjoy your galettes without worrying about excess sodium.

FAQs about Summer Berry Galettes

Can I use frozen berries for Summer Berry Galettes?

Yes, you can use frozen berries for your Summer Berry Galettes! While fresh berries are ideal, frozen ones can work just as well. Just remember to thaw them first and drain any excess liquid. This step is important to prevent your galettes from becoming soggy. You may also want to increase the cornstarch slightly to help thicken the filling. With this simple adjustment, you can enjoy delicious galettes any time of the year!

How do I know when my Summer Berry Galettes are done baking?

Knowing when your Summer Berry Galettes are done baking is key to achieving that perfect golden crust. Look for a few signs: the crust should be a lovely golden brown, and the berry filling should be bubbly. If you see juices bubbling up around the edges, that’s a great indicator that they’re ready! Typically, this takes about 20-25 minutes in a preheated oven at 400°F. Keep an eye on them, as oven temperatures can vary. Once they look deliciously golden, it’s time to take them out!

Can I make the dough for Summer Berry Galettes ahead of time?

Absolutely! You can make the dough for your Summer Berry Galettes ahead of time. If you’re using homemade dough, prepare it and wrap it tightly in plastic wrap. Then, store it in the refrigerator for up to 2 days. If you want to keep it longer, consider freezing it. Just make sure to thaw it in the fridge overnight before using. This way, you can save time on the day you plan to bake your galettes, making the process even easier!

Conclusion on Summer Berry Galettes

Recap of the Delightful Experience of Making Summer Berry Galettes

In conclusion, making Summer Berry Galettes is a delightful experience that brings the flavors of summer right to your kitchen. These rustic pastries are not only easy to prepare but also allow for creativity with various berry combinations. The process of mixing fresh berries with sugar and lemon juice, then encasing them in a flaky crust, is both satisfying and rewarding.

As you bake your galettes, the sweet aroma fills your home, creating an inviting atmosphere. The golden-brown crust and bubbling berry filling are sure to impress anyone who gets a taste. Whether you serve them warm with a scoop of ice cream or a dollop of whipped cream, each bite is a celebration of summer’s bounty.

So, gather your ingredients, invite your friends or family, and enjoy the process of creating these delicious Summer Berry Galettes. They are perfect for any occasion, from casual gatherings to special celebrations. With their vibrant colors and delightful flavors, these galettes are bound to become a favorite in your dessert repertoire. Happy baking!

Paul

“Summer Berry Galettes are the perfect summer dessert.”

These Summer Berry Mini Galettes are the ultimate rustic dessert—flaky, golden crusts wrapped around a sweet-tart filling of blueberries and strawberries. With a buttery base and sparkling sugar crust, they’re simple, elegant, and bursting with fresh summer flavor.
Prep Time 30 minutes
Cook Time 30 minutes
Total Time 1 hour
Servings: 6 mini galettes
Course: Dessert
Cuisine: American / Rustic

Ingredients
  

  • For the pie crust makes 6 mini galettes:1¼ cups all-purpose flour1 tablespoon granulated sugar½ teaspoon kosher salt½ cup salted butter, cold and cubed3 tablespoons ice cold water
  • For the berry filling:1 cup fresh blueberries1 cup fresh strawberries chopped¼ cup granulated sugar2 tablespoons all-purpose flour1 tablespoon lemon juice1 teaspoon lemon zest1 tablespoon salted butter, cut into 6 cubes
  • To finish:1 large egg for egg wash2 to 3 tablespoons coarse sugar (for crust edges)

Method
 

  1. In a large bowl, whisk together flour, sugar, and salt. Cut in cold butter using a pastry cutter or your fingers until the mixture resembles coarse crumbs. Add cold water gradually, mixing until the dough just holds together. Form into a disc, wrap in plastic wrap, and chill for at least 1 hour.
  2. Roll the dough out to about a 12-inch circle. Using a 4-inch round cutter or bowl, cut out 6 smaller circles, re-rolling scraps as needed. Chill cut crusts for 15–20 minutes.
  3. In a medium bowl, gently toss blueberries, strawberries, sugar, flour, lemon juice, and zest until evenly coated.
  4. Place dough circles on a parchment-lined baking sheet. Spoon fruit filling into the center of each, leaving about a ½-inch border around the edges. Fold the edges over the filling to create a rustic pleated edge.
  5. Place a cube of butter on top of the filling in each galette. Brush crust edges with beaten egg and sprinkle with coarse sugar.
  6. Bake at 350°F (177°C) for 30 minutes or until the crusts are golden brown and the filling is bubbling. Let cool on the baking sheet for 10 minutes, then transfer to a wire rack to cool completely.

Notes

Keep dough and butter as cold as possible for the flakiest results.
You can swap in other fresh berries like raspberries or blackberries.
For added shine, brush the finished crusts with a touch of warm honey.
These are best enjoyed the same day but can be stored at room temperature for 1–2 days.

“Crack Corn Salad Recipe: A Refreshing Delight!”

Introduction to Crack Corn Salad Recipe

What is Crack Corn Salad?

Crack Corn Salad is a delightful and colorful dish that combines fresh ingredients to create a refreshing salad. This recipe features sweet corn, juicy cherry tomatoes, crunchy cucumbers, and tangy feta cheese, all tossed together in a creamy dressing. The combination of flavors and textures makes it a perfect side dish for any meal. Whether you’re hosting a barbecue or enjoying a quiet dinner at home, this salad is sure to impress your guests and family alike.

Why You Should Try This Crack Corn Salad Recipe

There are many reasons to try this Crack Corn Salad Recipe. First, it’s incredibly easy to make, requiring minimal cooking skills. With just a few simple steps, you can whip up a delicious salad that everyone will love. Second, it’s versatile! You can serve it as a side dish, a light lunch, or even as a topping for tacos. Plus, it’s packed with nutrients, making it a healthy choice for any occasion.

Moreover, the vibrant colors of the ingredients make this salad visually appealing. It’s a feast for the eyes as well as the palate! The creamy dressing adds a rich flavor that complements the fresh vegetables perfectly. So, if you’re looking for a dish that’s not only tasty but also nutritious, this Crack Corn Salad is a must-try!

Ingredients for Crack Corn Salad Recipe

To create a delicious Crack Corn Salad, you’ll need a variety of fresh ingredients. Here’s a complete list to help you gather everything you need:

  • 2 cups frozen corn, thawed
  • 1 cup cherry tomatoes, halved
  • 1 cup diced cucumber
  • 1/2 cup red onion, finely chopped
  • 1/2 cup crumbled feta cheese
  • 1/4 cup mayonnaise
  • 1/4 cup sour cream
  • 1 tablespoon lime juice
  • 1 teaspoon garlic powder
  • 1 teaspoon chili powder
  • Salt and pepper to taste
  • 1/4 cup fresh cilantro, chopped (optional)

These ingredients come together to create a salad that is not only tasty but also packed with nutrients. The corn provides sweetness, while the tomatoes and cucumbers add freshness. The red onion gives a nice crunch, and the feta cheese brings a creamy, tangy flavor. The dressing, made with mayonnaise and sour cream, ties everything together beautifully.

Feel free to customize the ingredients based on your preferences. For instance, you can swap out the feta cheese for shredded cheddar or pepper jack for a different taste. The addition of fresh herbs like cilantro can elevate the flavor even more. With this simple list, you’re on your way to making a delightful Crack Corn Salad that everyone will enjoy!

Step-by-Step Preparation of Crack Corn Salad Recipe

Step 1: Preparing the Corn

To start, you need to prepare the corn. If you’re using frozen corn, simply take 2 cups and let it thaw. You can speed up the process by placing the corn in a colander and running it under warm water for a few minutes. Once thawed, drain any excess water. This step is crucial because it prevents the salad from becoming watery. Fresh corn can also be used if you prefer. Just cook it briefly in boiling water, then cool it down before adding it to the salad.

Step 2: Mixing the Ingredients

Next, grab a large mixing bowl. In this bowl, combine the prepared corn, halved cherry tomatoes, diced cucumber, finely chopped red onion, and crumbled feta cheese. Make sure to mix these ingredients gently. You want to keep the tomatoes intact while ensuring everything is evenly distributed. This colorful mix not only looks great but also adds a variety of flavors and textures to your salad.

Step 3: Adding the Dressing

Now it’s time to make the dressing! In a separate bowl, whisk together the mayonnaise, sour cream, lime juice, garlic powder, chili powder, salt, and pepper. Whisk until the mixture is smooth and creamy. Once your dressing is ready, pour it over the corn mixture. Gently toss everything together until all the ingredients are well coated. This dressing adds a rich flavor that enhances the freshness of the vegetables.

Step 4: Chilling the Salad

After mixing, cover the salad with plastic wrap or a lid. Place it in the refrigerator for at least 30 minutes. Chilling allows the flavors to meld together beautifully. If you can wait longer, letting it sit for a few hours will make it even tastier! When you’re ready to serve, you can enjoy it chilled or at room temperature. This step is essential for a refreshing salad experience!

Variations of Crack Corn Salad Recipe

Adding Protein to Your Crack Corn Salad

If you want to make your Crack Corn Salad more filling, consider adding protein. This can turn your salad into a complete meal! Grilled chicken, shrimp, or even canned tuna are excellent choices. Simply chop the protein into bite-sized pieces and mix it in with the other ingredients. For a vegetarian option, try adding chickpeas or black beans. These legumes not only boost the protein content but also add a nice texture. You can also sprinkle some cooked bacon bits for a smoky flavor. The addition of protein makes the salad heartier and perfect for lunch or dinner.

Vegetarian Options for Crack Corn Salad Recipe

For those who prefer a vegetarian version of the Crack Corn Salad, there are plenty of options to explore. You can replace the feta cheese with a plant-based cheese alternative. This keeps the creamy texture while making it suitable for vegans. Additionally, consider adding more vegetables like bell peppers, avocados, or even roasted zucchini. These ingredients not only enhance the flavor but also add more nutrients. You can also toss in some nuts or seeds, like sunflower seeds or walnuts, for a delightful crunch. These variations ensure that everyone can enjoy this delicious salad, regardless of their dietary preferences!

Cooking Note for Crack Corn Salad Recipe

When preparing your Crack Corn Salad, there are a few cooking notes to keep in mind to ensure the best results. First, always use fresh ingredients whenever possible. Fresh vegetables not only taste better but also provide more nutrients. If you can, opt for organic produce to enhance the flavor and quality of your salad.

Next, consider the texture of your ingredients. For instance, when chopping the cucumbers and red onions, aim for uniform sizes. This helps the salad look appealing and ensures that every bite is balanced. If you prefer a milder onion flavor, soak the chopped red onion in cold water for about 10 minutes before adding it to the salad. This simple trick can help reduce the sharpness of the onion.

Additionally, feel free to adjust the seasoning to your taste. If you love a bit of heat, increase the chili powder or add some diced jalapeños. On the other hand, if you prefer a milder flavor, you can reduce the amount of garlic powder. The beauty of this Crack Corn Salad Recipe lies in its flexibility, allowing you to customize it to suit your palate.

Lastly, remember that the salad can be made ahead of time. Preparing it a few hours or even a day in advance allows the flavors to develop further. Just be sure to give it a good stir before serving, as some ingredients may settle. With these cooking notes in mind, you’re all set to create a delicious and satisfying Crack Corn Salad that everyone will love!

Serving Suggestions for Crack Corn Salad Recipe

Best Pairings with Crack Corn Salad

Crack Corn Salad is a versatile dish that pairs wonderfully with a variety of meals. Its fresh and creamy flavors complement many main courses. For a delightful summer meal, serve it alongside grilled chicken or fish. The lightness of the salad balances the richness of grilled meats perfectly.

If you’re hosting a barbecue, this salad is an excellent side dish for burgers or hot dogs. The sweetness of the corn and the tanginess of the dressing provide a refreshing contrast to the savory flavors of grilled foods. Additionally, it works well with tacos or burritos, adding a crunchy texture and vibrant color to your plate.

For a vegetarian option, enjoy Crack Corn Salad with quinoa or a hearty grain bowl. The salad adds a burst of flavor and nutrients, making your meal more satisfying. You can also serve it as a side for a light pasta dish, enhancing the overall dining experience. No matter what you choose, this salad is sure to elevate your meal!

Creative Ways to Serve Crack Corn Salad

When it comes to serving Crack Corn Salad, think outside the bowl! One creative way is to use it as a topping for nachos. Simply layer tortilla chips with the salad and some melted cheese for a fun twist on a classic snack. This combination is perfect for game day or movie night!

Another idea is to serve the salad in lettuce cups. This not only makes for a beautiful presentation but also adds a crunchy element. Just scoop some salad into large lettuce leaves and enjoy them as a handheld treat. It’s a great way to make the dish more interactive and fun for guests.

For a more elegant touch, consider serving Crack Corn Salad in small mason jars. This makes for a charming appetizer at parties or gatherings. Each guest can have their own jar, making it easy to serve and enjoy. Plus, it adds a rustic flair to your table setting!

Lastly, you can incorporate Crack Corn Salad into a wrap. Spread the salad onto a tortilla, add some protein like grilled chicken or beans, and roll it up for a delicious lunch option. This makes for a quick and easy meal that’s packed with flavor. With these creative serving ideas, you can enjoy your Crack Corn Salad in many delightful ways!

Tips for Making the Perfect Crack Corn Salad Recipe

Creating the perfect Crack Corn Salad is all about attention to detail and a few handy tips. Here are some suggestions to elevate your salad and ensure it’s a hit at your next gathering!

First, always start with high-quality ingredients. Fresh vegetables make a significant difference in flavor and texture. When selecting corn, look for bright yellow kernels, whether frozen or fresh. For tomatoes, choose plump, ripe cherry tomatoes that burst with sweetness. Fresh cucumbers should be firm and crisp, adding that satisfying crunch to your salad.

Next, consider the balance of flavors. The creamy dressing should complement the sweetness of the corn and the tanginess of the feta cheese. If you find the dressing too rich, add a splash more lime juice for brightness. On the other hand, if you prefer a creamier texture, feel free to increase the mayonnaise or sour cream slightly.

Don’t forget about seasoning! Taste your salad before serving and adjust the salt and pepper as needed. A pinch of salt can enhance the flavors of the vegetables, making them pop. If you enjoy a bit of heat, consider adding more chili powder or even a dash of hot sauce to the dressing.

Another tip is to let the salad chill for longer than 30 minutes if possible. Allowing it to sit in the refrigerator for a few hours or overnight helps the flavors meld beautifully. This resting time is essential for a well-rounded taste experience.

Lastly, when serving, consider garnishing your salad with extra cilantro or a sprinkle of feta cheese on top. This not only adds visual appeal but also enhances the flavor. With these tips, you’ll be well on your way to making a delicious and memorable Crack Corn Salad that everyone will love!

Breakdown of Time for Crack Corn Salad Recipe

Prep Time

The prep time for this Crack Corn Salad Recipe is quite minimal. You can expect to spend about 15 to 20 minutes gathering your ingredients and preparing them. This includes thawing the corn, chopping the vegetables, and mixing the dressing. With a little organization, you can have everything ready in no time!

Cooking Time

Interestingly, there is no actual cooking time involved in this salad. The only heat you might use is to thaw the corn if you choose to run it under warm water. Otherwise, all the ingredients are fresh and ready to be combined. This makes the Crack Corn Salad a fantastic option for those busy days when you want something quick and easy!

Total Time

In total, you should plan for about 30 to 40 minutes to make this salad. This includes the prep time and the chilling time. While the salad can be served immediately after mixing, allowing it to chill for at least 30 minutes enhances the flavors. So, if you can wait, it’s worth it! Overall, this salad is a quick and delightful dish that fits perfectly into any meal plan.

Nutritional Information for Crack Corn Salad Recipe

Calories in Crack Corn Salad Recipe

When it comes to enjoying a delicious salad, knowing the calorie content is essential. Each serving of this Crack Corn Salad contains approximately 180 calories. This makes it a great option for those looking to maintain a balanced diet without sacrificing flavor. The combination of fresh vegetables and creamy dressing provides a satisfying meal without overwhelming your calorie intake. So, you can enjoy this salad guilt-free!

Protein Content in Crack Corn Salad Recipe

Protein is an important part of any meal, and this Crack Corn Salad offers a decent amount. Each serving contains about 5 grams of protein. While this may not seem high, it’s a great addition to the overall nutritional profile of the salad. If you want to boost the protein content, consider adding grilled chicken, beans, or chickpeas. These additions will not only enhance the flavor but also make the salad more filling and nutritious.

Sodium Levels in Crack Corn Salad Recipe

Monitoring sodium intake is crucial for many people. In this Crack Corn Salad, the sodium levels can vary based on the ingredients used. On average, each serving contains around 300 milligrams of sodium. This amount is reasonable for a salad, especially considering the flavor it brings. If you’re watching your sodium intake, you can reduce the amount of salt added to the dressing or opt for low-sodium feta cheese. This way, you can enjoy the salad while keeping your sodium levels in check!

FAQs about Crack Corn Salad Recipe

Can I make Crack Corn Salad ahead of time?

Absolutely! Making Crack Corn Salad ahead of time is a great idea. In fact, it often tastes even better after sitting in the fridge for a while. Preparing it a few hours or even a day in advance allows the flavors to meld beautifully. Just be sure to cover it tightly with plastic wrap or a lid to keep it fresh. When you’re ready to serve, give it a gentle stir to mix everything back together. This makes it a perfect dish for busy days or gatherings!

What can I substitute for mayonnaise in Crack Corn Salad Recipe?

If you’re looking for a substitute for mayonnaise, there are several options! Greek yogurt is a popular choice, as it adds creaminess and a bit of tang. You can also use avocado for a healthier, creamy alternative. If you prefer a dairy-free option, try using vegan mayonnaise or a cashew cream. Each of these substitutes will give your salad a unique flavor while keeping it delicious. Feel free to experiment and find the one that suits your taste best!

How long does Crack Corn Salad last in the fridge?

Crack Corn Salad can last in the fridge for about 3 to 5 days when stored properly. Make sure to keep it in an airtight container to maintain its freshness. However, the texture of the vegetables may change slightly over time. To enjoy the best flavor and crunch, it’s recommended to eat it within the first couple of days. If you notice any changes in smell or appearance, it’s best to discard it. Enjoy your salad while it’s fresh!

Is Crack Corn Salad Recipe suitable for potlucks?

Yes, Crack Corn Salad is an excellent choice for potlucks! Its vibrant colors and delicious flavors make it a crowd-pleaser. Plus, it’s easy to transport and can be served chilled or at room temperature. Just be sure to bring a large serving spoon for easy serving. If you want to make it even more appealing, consider garnishing it with extra cilantro or feta cheese before serving. Your friends and family will love this tasty addition to the potluck spread!

Conclusion on Crack Corn Salad Recipe

In conclusion, the Crack Corn Salad Recipe is a delightful dish that brings together fresh ingredients and vibrant flavors. It’s not only easy to prepare but also versatile enough to suit various occasions. Whether you’re hosting a summer barbecue, attending a potluck, or simply looking for a healthy side dish, this salad fits the bill perfectly.

The combination of sweet corn, juicy tomatoes, crunchy cucumbers, and creamy feta creates a satisfying experience for your taste buds. Plus, the creamy dressing ties everything together, making each bite a burst of flavor. With the option to customize the ingredients, you can make this salad your own by adding proteins or experimenting with different cheeses and spices.

Moreover, the nutritional benefits of this salad make it a smart choice for anyone looking to maintain a balanced diet. With its low calorie count and decent protein content, you can enjoy it guilt-free. Remember, the key to a great Crack Corn Salad lies in using fresh ingredients and allowing the flavors to meld together through chilling.

So, why not give this Crack Corn Salad Recipe a try? It’s a dish that’s sure to impress your family and friends while providing a healthy and delicious option for any meal. Enjoy the process of making it, and savor the delightful flavors that come together in this refreshing salad!

Paul

“Crack Corn Salad Recipe: A Refreshing Delight!”

This Crack Corn Salad is an irresistible blend of sweet corn, crispy bacon, sharp cheddar, and creamy ranch with a zesty kick from jalapeño and lime. It’s the ultimate crowd-pleasing side dish—cool, crunchy, and bursting with bold flavor in every bite!
Prep Time 15 minutes
Total Time 15 minutes
Servings: 6 servings
Course: Side Dish
Cuisine: American

Ingredients
  

  • 4 cups sweet corn fresh, canned, or thawed frozen12 slices cooked bacon, finely chopped¼ cup green onions, chopped1 jalapeño, finely diced½ cup Ranch salad dressing (store-bought or homemade)1 cup cheddar cheese, shreddedJuice of 1 lime1 teaspoon garlic powderKosher salt, to tasteFreshly ground black pepper, to taste
  • For homemade ranch dressing optional:1½ cups mayonnaise½ cup sour cream⅓ cup whole milk¼ cup buttermilk¼ teaspoon onion powder2 garlic cloves, minced2 tablespoons lemon juice1 teaspoon fresh dillSalt and pepper, to taste

Method
 

  1. If making homemade ranch dressing, whisk together mayonnaise, sour cream, milk, buttermilk, onion powder, garlic, lemon juice, dill, salt, and pepper until smooth. Set aside or refrigerate.
  2. In a large bowl, combine sweet corn, bacon, green onions, jalapeño, cheddar cheese, garlic powder, lime juice, salt, and pepper.
  3. Add ½ cup of ranch dressing to the mixture and stir until everything is well coated. Add more dressing if a creamier texture is desired.
  4. Optional: Chill for 30 minutes before serving to allow flavors to meld. Garnish with fresh herbs like parsley or dill if desired.

Notes

You can use fresh grilled corn for a smoky depth of flavor.
Adjust spice level by using more or less jalapeño—or substitute with bell pepper for a milder version.
Great for BBQs, potlucks, or as a make-ahead side for any gathering.

Strawberry Rhubarb Pie Recipe: A Delicious Classic Delight

Introduction to Strawberry Rhubarb Pie Recipe

The History of Strawberry Rhubarb Pie

Strawberry rhubarb pie has a rich history that dates back to the early 19th century. This delightful dessert combines the tartness of rhubarb with the sweetness of strawberries, creating a perfect balance of flavors. Rhubarb, often called “pie plant,” was first cultivated in China over 2,000 years ago. It made its way to Europe in the 1600s, where it quickly became popular in various dishes.

As strawberries became widely available in North America, the combination of these two ingredients emerged. The first recorded strawberry rhubarb pie recipe appeared in American cookbooks in the 1800s. Since then, it has become a beloved staple in many households, especially during the spring and summer months when both fruits are in season. This pie not only represents a delicious dessert but also a connection to our culinary heritage.

Why You Should Try This Strawberry Rhubarb Pie Recipe

If you’re looking for a dessert that’s both easy to make and bursting with flavor, this strawberry rhubarb pie recipe is for you! The combination of sweet strawberries and tangy rhubarb creates a unique taste that’s hard to resist. Plus, it’s a great way to use fresh, seasonal ingredients.

This pie is perfect for family gatherings, picnics, or simply enjoying at home. It’s a crowd-pleaser that appeals to both kids and adults alike. The flaky crust, combined with the juicy filling, makes every bite a delightful experience. Not to mention, serving it warm with a scoop of vanilla ice cream elevates it to a whole new level of deliciousness!

So, roll up your sleeves and get ready to create a dessert that will impress your friends and family. With just a few simple ingredients and steps, you can whip up a homemade strawberry rhubarb pie that’s sure to become a favorite in your recipe collection.

Ingredients for Strawberry Rhubarb Pie Recipe

To create a delicious strawberry rhubarb pie, you’ll need a few simple ingredients. Each component plays a vital role in achieving that perfect balance of sweet and tart flavors. Here’s what you’ll need:

  • 2 cups fresh strawberries, hulled and sliced
  • 2 cups rhubarb, chopped into 1/2-inch pieces
  • 1 cup granulated sugar
  • 1/4 cup all-purpose flour
  • 1/4 teaspoon salt
  • 1 teaspoon vanilla extract
  • 1 tablespoon lemon juice
  • 1 tablespoon butter, cut into small pieces
  • 1 package (14.1 ounces) refrigerated pie crusts (2 crusts)
  • 1 egg, beaten (for egg wash)
  • 1 tablespoon sugar (for topping)

These ingredients are easy to find at your local grocery store. Fresh strawberries and rhubarb are best when they are in season, typically during spring and early summer. Using fresh produce not only enhances the flavor but also adds a vibrant color to your pie.

For those who want to experiment, consider adding a teaspoon of cinnamon to the fruit mixture. This will give your pie a warm, comforting flavor. You can also swap out half of the strawberries for blueberries to create a delightful mixed berry pie. The possibilities are endless!

Step-by-Step Preparation of Strawberry Rhubarb Pie Recipe

Step 1: Preparing the Pie Crust

To start, you need to prepare the pie crust. If you’re using refrigerated pie crusts, take them out of the fridge and let them sit for about 10 minutes. This makes them easier to roll out. Next, roll out one pie crust on a lightly floured surface. Aim for a circle that’s about 12 inches in diameter. This will fit perfectly into your 9-inch pie pan.

Once rolled out, gently place the crust into the pie pan. Make sure it covers the bottom and sides well. Trim any excess crust hanging over the edges, leaving about an inch. This will help you crimp the edges later. If you prefer a homemade crust, you can make one using flour, butter, and water. Just remember to chill it before rolling!

Step 2: Preparing the Strawberry and Rhubarb Filling

Now, let’s move on to the filling. In a large mixing bowl, combine the fresh strawberries and chopped rhubarb. Add the granulated sugar, flour, salt, vanilla extract, and lemon juice. Toss everything together gently until the fruit is well coated. This step is crucial as it helps to balance the flavors.

After mixing, let the filling sit for about 15 minutes. This allows the juices to develop, making your pie even more delicious. You’ll notice the mixture becoming syrupy, which is exactly what you want for a juicy filling!

Step 3: Assembling the Strawberry Rhubarb Pie

With your crust and filling ready, it’s time to assemble the pie. Pour the strawberry and rhubarb mixture into the prepared pie crust. Spread it out evenly to ensure every slice has a good amount of filling. Next, dot the top of the filling with small pieces of butter. This adds richness and flavor to your pie.

Now, roll out the second pie crust. Place it over the filling, making sure to cover it completely. Trim any excess crust, then crimp the edges to seal the pie. This not only looks nice but also keeps the filling from bubbling out. Don’t forget to cut several slits in the top crust. This allows steam to escape while baking, preventing a soggy pie.

Step 4: Baking the Strawberry Rhubarb Pie

It’s time to bake your pie! Preheat your oven to 425°F (220°C). Place the assembled pie in the oven and bake for 15 minutes. This initial high temperature helps to set the crust. After 15 minutes, reduce the temperature to 350°F (175°C) and continue baking for another 30-35 minutes.

Keep an eye on the pie as it bakes. You want the filling to be bubbly and the crust to turn a lovely golden brown. Once done, remove the pie from the oven and let it cool for at least 2 hours. This cooling time allows the filling to set, making it easier to slice. Enjoy the delightful aroma that fills your kitchen as you wait!

Variation of Strawberry Rhubarb Pie Recipe

Alternative Ingredients for Strawberry Rhubarb Pie

While the classic strawberry rhubarb pie recipe is delicious, there are many ways to switch things up! You can experiment with different fruits and flavors to create your own unique version. For instance, consider using peaches or cherries in place of some of the strawberries. These fruits add a different sweetness and can complement the tartness of rhubarb beautifully.

If you want to add a bit of spice, try incorporating a teaspoon of ground ginger or nutmeg into the filling. This will give your pie a warm, aromatic flavor that’s perfect for cozy gatherings. Additionally, you can use brown sugar instead of granulated sugar for a deeper, caramel-like sweetness.

For a gluten-free option, substitute the all-purpose flour with a gluten-free flour blend. This allows everyone to enjoy the pie without worrying about gluten sensitivities. Just make sure to check that your pie crust is also gluten-free!

Different Serving Styles for Strawberry Rhubarb Pie

When it comes to serving your strawberry rhubarb pie, the possibilities are endless! You can serve it warm or cold, depending on your preference. A warm slice straight from the oven, topped with a scoop of vanilla ice cream, is a classic choice. The melting ice cream creates a delightful contrast with the warm pie.

For a refreshing twist, try serving the pie with whipped cream or a dollop of Greek yogurt. This adds a creamy texture that balances the tartness of the filling. You can also sprinkle some fresh mint leaves on top for a pop of color and flavor.

If you’re feeling adventurous, consider turning your pie into individual servings. Use small ramekins or tart pans to create mini strawberry rhubarb pies. These are perfect for parties and make for a charming presentation. Plus, they’re easy to serve and enjoy!

Whichever way you choose to serve your strawberry rhubarb pie, it’s sure to be a hit. The combination of flavors and textures will leave everyone wanting more!

Cooking Note for Strawberry Rhubarb Pie Recipe

When making your strawberry rhubarb pie, there are a few important cooking notes to keep in mind. These tips will help ensure that your pie turns out perfectly every time. First, always use fresh ingredients when possible. Fresh strawberries and rhubarb not only enhance the flavor but also contribute to the pie’s overall texture.

Another key point is to let the filling sit for a while after mixing. This step allows the sugar to draw out the juices from the fruit, creating a delicious syrup. If you skip this step, your pie may end up too dry or not have enough flavor. Additionally, be mindful of the thickness of your filling. If it seems too runny, you can add a bit more flour to help thicken it up.

When it comes to baking, keep an eye on the pie as it cooks. Ovens can vary in temperature, so it’s essential to check for doneness. Look for a golden-brown crust and bubbling filling. If the edges of the crust start to brown too quickly, you can cover them with strips of aluminum foil to prevent burning.

Lastly, patience is key! Allow the pie to cool for at least two hours before slicing. This cooling time helps the filling set, making it easier to cut clean slices. If you can resist the temptation, letting it cool overnight will enhance the flavors even more. Enjoy your baking adventure, and remember that practice makes perfect!

Serving Suggestions for Strawberry Rhubarb Pie Recipe

Serving your strawberry rhubarb pie can be just as delightful as making it! There are many ways to present this delicious dessert that will impress your family and friends. Here are some tasty serving suggestions to elevate your pie experience:

  • Classic à la Mode: Serve a warm slice of pie with a generous scoop of vanilla ice cream on top. The creamy ice cream melts into the warm filling, creating a heavenly combination.
  • Whipped Cream Delight: Top your pie with freshly whipped cream. This adds a light and airy texture that complements the tartness of the rhubarb beautifully.
  • Greek Yogurt Twist: For a healthier option, consider using Greek yogurt instead of ice cream. It adds a creamy richness while keeping the dessert lighter.
  • Mint Garnish: Add a few fresh mint leaves on top of each slice for a pop of color and a refreshing flavor. This simple touch can make your pie look even more appealing.
  • Fruit Compote: Serve the pie with a side of mixed berry compote. The extra fruitiness enhances the flavors and adds a lovely presentation.
  • Cheese Pairing: For a unique twist, try serving your pie with a slice of sharp cheddar cheese. The savory flavor of the cheese pairs surprisingly well with the sweet and tart pie.
  • Mini Pies: For gatherings, consider making mini strawberry rhubarb pies in ramekins. They are easy to serve and perfect for individual portions.

Whichever way you choose to serve your strawberry rhubarb pie, it’s sure to be a hit! The combination of flavors and textures will leave everyone wanting more. Enjoy sharing this delightful dessert with your loved ones!

Tips for Perfecting Your Strawberry Rhubarb Pie Recipe

Creating the perfect strawberry rhubarb pie is an art that can be mastered with a few helpful tips. Whether you’re a seasoned baker or a beginner, these suggestions will ensure your pie turns out delicious every time. Let’s dive into some essential tips for perfecting your strawberry rhubarb pie recipe!

Use Fresh Ingredients

Always opt for fresh strawberries and rhubarb when making your pie. Fresh produce not only enhances the flavor but also contributes to the pie’s texture. Look for strawberries that are bright red and firm, while rhubarb should be crisp and vibrant. If you can, visit a local farmer’s market for the best quality!

Let the Filling Rest

After mixing your fruit with sugar and other ingredients, let the filling sit for about 15 minutes. This resting period allows the sugar to draw out the juices from the fruit, creating a delicious syrup. Skipping this step may result in a dry pie, so be patient!

Thicken the Filling

If your filling seems too runny, don’t hesitate to add a bit more flour. This will help thicken the mixture and prevent a soggy bottom crust. Aim for a filling that is syrupy but not overly liquid. A well-thickened filling will hold its shape when sliced.

Watch the Baking Time

Ovens can vary in temperature, so keep an eye on your pie as it bakes. Look for a golden-brown crust and bubbling filling. If the edges of the crust start to brown too quickly, cover them with strips of aluminum foil to prevent burning. This will help ensure an evenly baked pie.

Cool Before Slicing

Patience is key! Allow your pie to cool for at least two hours before slicing. This cooling time helps the filling set, making it easier to cut clean slices. If you can resist the temptation, letting it cool overnight will enhance the flavors even more.

Experiment with Flavors

Don’t be afraid to get creative! Try adding spices like cinnamon or nutmeg to the filling for extra warmth. You can also mix in other fruits, such as blueberries or peaches, to create a unique flavor profile. The possibilities are endless!

By following these tips, you’ll be well on your way to mastering the art of making a perfect strawberry rhubarb pie. Enjoy the process, and most importantly, have fun baking!

Breakdown of Time for Strawberry Rhubarb Pie Recipe

Prep Time for Strawberry Rhubarb Pie Recipe

Preparing your strawberry rhubarb pie is a fun and engaging process! The prep time for this recipe is approximately 30 minutes. This includes gathering your ingredients, preparing the pie crust, and mixing the delicious filling. Make sure to take your time during this stage. Enjoy the vibrant colors and fresh scents of the strawberries and rhubarb as you work!

Cooking Time for Strawberry Rhubarb Pie Recipe

Once your pie is assembled, it’s time to bake! The cooking time for the strawberry rhubarb pie is about 45-50 minutes. Start by baking at a high temperature of 425°F (220°C) for the first 15 minutes. Then, lower the temperature to 350°F (175°C) and continue baking for another 30-35 minutes. Keep an eye on the pie to ensure the crust turns golden brown and the filling bubbles beautifully.

Total Time for Strawberry Rhubarb Pie Recipe

In total, you can expect to spend about 1 hour and 20 minutes from start to finish. This includes both prep and cooking time. However, don’t forget to factor in the cooling time! Allow your pie to cool for at least 2 hours before slicing. This waiting period is essential for the filling to set properly. So, while the total time may seem lengthy, the delicious reward is well worth it!

Nutritional Information for Strawberry Rhubarb Pie Recipe

Calories in Strawberry Rhubarb Pie Recipe

When indulging in a slice of strawberry rhubarb pie, it’s good to know what you’re consuming. Each serving of this delightful pie contains approximately 280 calories. This makes it a satisfying dessert option without being overly heavy. The combination of fresh strawberries and rhubarb not only provides flavor but also adds some nutritional benefits. Enjoying a slice occasionally can be a delightful treat in your dessert rotation!

Protein Content in Strawberry Rhubarb Pie Recipe

In terms of protein, each slice of strawberry rhubarb pie offers about 2 grams. While this may not seem like a lot, it contributes to your overall daily intake. The protein comes mainly from the pie crust and any eggs used in the recipe. If you’re looking to boost the protein content, consider serving the pie with a dollop of Greek yogurt or a scoop of ice cream, which can add extra protein while enhancing the flavor!

Sodium Levels in Strawberry Rhubarb Pie Recipe

As for sodium, this pie contains approximately 150 milligrams per serving. This level is relatively low, making it a suitable dessert for most diets. However, if you’re watching your sodium intake, be mindful of the ingredients you choose. For instance, using unsalted butter can help keep the sodium levels down. Overall, this strawberry rhubarb pie can fit nicely into a balanced diet when enjoyed in moderation.

FAQs about Strawberry Rhubarb Pie Recipe

Can I use frozen rhubarb for the Strawberry Rhubarb Pie Recipe?

Yes, you can absolutely use frozen rhubarb for your strawberry rhubarb pie recipe! Frozen rhubarb is a great alternative, especially if fresh rhubarb is out of season. Just make sure to thaw the rhubarb completely and drain any excess liquid before mixing it with the strawberries. This will help prevent your pie from becoming too watery. Keep in mind that frozen rhubarb may take a little longer to cook, so adjust your baking time accordingly. Enjoy the convenience of frozen fruit while still creating a delicious pie!

How do I know when my Strawberry Rhubarb Pie is done?

Knowing when your strawberry rhubarb pie is done is key to achieving that perfect texture. Look for a few signs to determine doneness. First, the crust should be a beautiful golden brown. Second, the filling should be bubbling through the slits in the top crust. This bubbling indicates that the fruit has cooked down and the juices have thickened. If the crust is browning too quickly, you can cover the edges with aluminum foil to prevent burning. Once you see these signs, your pie is ready to come out of the oven!

Can I make the Strawberry Rhubarb Pie ahead of time?

Absolutely! Making your strawberry rhubarb pie ahead of time is a great idea, especially for gatherings or special occasions. You can prepare the pie and store it in the refrigerator for up to two days before baking. Just cover it tightly with plastic wrap to keep it fresh. If you want to make it even further in advance, consider baking the pie and then cooling it completely. Once cooled, store it in the fridge for up to three days. When you’re ready to serve, simply reheat individual slices in the oven or microwave. This way, you can enjoy the delicious flavors of your pie without the last-minute rush!

Conclusion on Strawberry Rhubarb Pie Recipe

In conclusion, the strawberry rhubarb pie recipe is a delightful way to celebrate the flavors of spring and summer. This classic dessert combines the sweet juiciness of strawberries with the tartness of rhubarb, creating a perfect balance that is sure to please everyone. Whether you’re a seasoned baker or just starting out, this recipe is simple and rewarding.

As you’ve learned, the key to a successful pie lies in using fresh ingredients, allowing the filling to rest, and being patient during the cooling process. With just a few steps, you can create a beautiful pie that not only tastes amazing but also looks impressive on any table. Plus, the variations and serving suggestions allow you to customize the pie to suit your taste and occasion.

So, gather your ingredients, roll up your sleeves, and get ready to bake! Your homemade strawberry rhubarb pie will surely become a cherished recipe in your collection. Enjoy sharing this delicious dessert with family and friends, and watch as it brings smiles and satisfaction to everyone who takes a bite. Happy baking!

Paul

Strawberry Rhubarb Pie Recipe: A Delicious Classic Delight

This Strawberry Rhubarb Pie is the ultimate spring dessert, combining sweet strawberries and tart rhubarb in a buttery, flaky crust. The fruit filling is thick, juicy, and perfectly spiced—making each slice a celebration of seasonal flavor and nostalgic comfort.
Prep Time 20 minutes
Cook Time 45 minutes
Total Time 1 hour 5 minutes
Servings: 8 servings
Course: Dessert
Cuisine: American

Ingredients
  

  • 1 9-inch unbaked pie crust4 cups sliced strawberries3 cups chopped rhubarb1 cup granulated sugar¼ cup all-purpose flour1 tablespoon cornstarch¼ teaspoon ground cinnamon¼ teaspoon salt¼ cup water1 tablespoon lemon juice1 tablespoon butter, cut into small pieces

Method
 

  1. Preheat your oven to 425°F (220°C).
  2. In a large bowl, combine strawberries, rhubarb, sugar, flour, cornstarch, cinnamon, salt, water, and lemon juice. Mix until well coated.
  3. Pour the fruit mixture into the unbaked pie crust. Dot the top with the small butter pieces.
  4. Bake at 425°F for 15 minutes. Then reduce the oven temperature to 375°F (190°C) and continue baking for 30–45 minutes, or until the crust is golden and the filling is bubbly and thickened.
  5. Let the pie cool completely on a wire rack before slicing to allow the filling to set.

Notes

For a crispier crust, brush the top with egg wash before baking.
Allowing the pie to cool fully helps the filling thicken and slice cleanly.
Serve with whipped cream or vanilla ice cream for a classic pairing.
You can use a lattice or crumb topping for a decorative finish.

Cowboy Butter for Corn elevates your summer meals.

Cowboy Butter for Corn is a delightful and flavorful spread that elevates the taste of fresh corn. This rich butter blend combines herbs, spices, and a hint of citrus, creating a mouthwatering topping. When slathered on warm corn, it transforms a simple side dish into a star attraction at any meal. The creamy texture and zesty flavor make it perfect for summer barbecues, picnics, or family dinners. Plus, it’s easy to make and can be customized to suit your taste preferences.

The Origin of Cowboy Butter

The term “Cowboy Butter” is believed to have originated from the rustic cooking traditions of the American West. Cowboys, known for their hearty appetites, often used simple ingredients to create flavorful meals. This butter blend reflects that spirit, combining easy-to-find ingredients with bold flavors. Over time, it has gained popularity beyond the ranch, becoming a favorite among home cooks and food enthusiasts alike. Today, Cowboy Butter is not just for corn; it can be used on grilled meats, vegetables, and even bread, making it a versatile addition to any kitchen.

Ingredients for Cowboy Butter for Corn

To create the perfect Cowboy Butter for Corn, you’ll need a few simple ingredients. Each component plays a vital role in building the rich flavor profile that makes this butter so special. Here’s what you’ll need:

  • 4 ears of fresh corn: Husked and cleaned, these will be the star of the dish.
  • 1/2 cup unsalted butter: Softened to room temperature for easy mixing.
  • 2 tablespoons fresh parsley: Chopped finely to add a fresh, herbal note.
  • 1 tablespoon fresh chives: Chopped to bring a mild onion flavor.
  • 1 teaspoon garlic powder: For a savory depth.
  • 1 teaspoon onion powder: To enhance the overall flavor.
  • 1 teaspoon smoked paprika: This adds a subtle smokiness.
  • 1/2 teaspoon salt: To balance the flavors.
  • 1/4 teaspoon black pepper: For a touch of heat.
  • 1/4 teaspoon cayenne pepper: Optional, for those who like it spicy.
  • Juice of 1/2 lemon: This brightens the butter and adds a zesty kick.

These ingredients come together to create a delicious Cowboy Butter that perfectly complements the sweetness of the corn. Feel free to adjust the herbs and spices to match your personal taste. Now that you have your ingredients ready, let’s move on to the preparation!

Step-by-Step Preparation of Cowboy Butter for Corn

Step 1: Gather Your Ingredients

Before you start cooking, it’s essential to gather all your ingredients. This makes the process smoother and more enjoyable. You’ll need fresh corn, unsalted butter, herbs, spices, and lemon juice. Make sure everything is ready to go. Having everything at hand will help you create the Cowboy Butter for Corn without any interruptions.

Step 2: Prepare the Base for Cowboy Butter

Next, take your softened unsalted butter and place it in a medium-sized bowl. The butter should be at room temperature, making it easy to mix. This creamy base is the heart of your Cowboy Butter. It will hold all the flavors together, so make sure it’s nice and soft. If your butter is too hard, you can microwave it for a few seconds, but be careful not to melt it!

Step 3: Mix in the Flavorful Additions

Now, it’s time to add the fun stuff! Into the bowl with the butter, add the chopped parsley, chives, garlic powder, onion powder, smoked paprika, salt, black pepper, and cayenne pepper if you want some heat. Finally, squeeze in the juice of half a lemon. Use a fork or a spatula to mix everything together until it’s well combined. The colors and aromas will be delightful, and you’ll know you’re on the right track to making delicious Cowboy Butter for Corn!

Step 4: Chill the Cowboy Butter

Once your Cowboy Butter mixture is ready, it’s a good idea to chill it for about 30 minutes. This helps the flavors meld together beautifully. You can cover the bowl with plastic wrap or transfer the butter to a small container. Chilling also makes it easier to spread on the warm corn later. While the butter is chilling, you can prepare your grill for the corn.

Step 5: Prepare the Corn for Serving

While your Cowboy Butter is chilling, it’s time to get the corn ready. Husk the corn and remove all the silk. Rinse the ears under cold water to clean them. Once your grill is preheated to medium-high heat, place the corn directly on the grill. Cook for about 10-15 minutes, turning occasionally until the corn is tender and has beautiful grill marks. After grilling, let the corn cool for a minute before spreading the Cowboy Butter generously over each ear. Enjoy the burst of flavors!

Variations of Cowboy Butter for Corn

Spicy Cowboy Butter for Corn

If you love a little kick in your food, then Spicy Cowboy Butter for Corn is the perfect choice for you! To create this fiery version, simply add more cayenne pepper to the original recipe. You can also include a teaspoon of hot sauce or a dash of chili powder for an extra layer of heat. This spicy blend will not only enhance the flavor of the corn but also make your taste buds dance with excitement. Just imagine biting into that sweet corn, only to be greeted by a delightful spicy surprise!

Herb-Infused Cowboy Butter for Corn

For those who prefer a more aromatic experience, try making Herb-Infused Cowboy Butter for Corn. You can easily customize the herbs to your liking. Consider adding fresh basil, dill, or even cilantro to the mix. Each herb brings its unique flavor, making the butter even more vibrant. To prepare this version, simply chop your chosen herbs finely and mix them into the butter along with the other ingredients. This herbaceous twist will elevate your corn dish, making it a refreshing and fragrant delight at any gathering.

Cooking Note for Cowboy Butter for Corn

When preparing Cowboy Butter for Corn, there are a few cooking notes to keep in mind to ensure the best results. First, always use fresh corn when possible. Fresh corn has a natural sweetness that pairs beautifully with the rich flavors of the Cowboy Butter. If you can, buy corn from a local farmer’s market or grocery store that sells fresh produce.

Next, pay attention to the grilling process. Preheating your grill to medium-high heat is crucial. This temperature allows the corn to cook evenly while developing those lovely char marks. If the grill is too hot, the corn may burn on the outside while remaining raw inside. Conversely, if it’s not hot enough, the corn will take longer to cook and may become mushy.

Additionally, consider wrapping the corn in aluminum foil if you prefer a softer texture. This method traps steam, making the corn tender while still allowing the Cowboy Butter to melt into every crevice. Just remember to remove the foil for the last few minutes of grilling to achieve that perfect char.

Lastly, don’t rush the butter application! Once the corn is off the grill, let it cool for a minute before spreading the Cowboy Butter. This allows the butter to melt slightly, creating a deliciously creamy coating. Enjoy your Cowboy Butter for Corn as a side dish or a tasty snack, and watch as it becomes a favorite at your gatherings!

Serving Suggestions for Cowboy Butter for Corn

Best Corn Types to Pair with Cowboy Butter

When it comes to choosing the best corn for your Cowboy Butter, fresh sweet corn is the top pick. Look for varieties like Silver Queen or Sugar Buns, known for their sweetness and tenderness. These types of corn are perfect for grilling and will soak up the flavors of the Cowboy Butter beautifully. If you want to try something different, consider using bi-color corn, which combines yellow and white kernels for a visually appealing dish. The sweetness of these corn types pairs perfectly with the rich, herby Cowboy Butter, making every bite a delightful experience.

Creative Serving Ideas

Serving Cowboy Butter for Corn can be as fun and creative as you want! Here are some ideas to elevate your dish:

  • Corn on the Cob Bar: Set up a corn on the cob bar at your next gathering. Offer different types of Cowboy Butter, like spicy or herb-infused, along with toppings like grated cheese, chopped bacon, or crushed nuts. Guests can customize their corn to their liking!
  • Grilled Corn Salad: Cut the grilled corn off the cob and mix it into a fresh salad. Combine it with diced tomatoes, avocado, and a squeeze of lime for a refreshing side dish. Drizzle some extra Cowboy Butter over the top for added flavor.
  • Wrap It Up: Use grilled corn with Cowboy Butter as a filling for tacos or burritos. Add some grilled chicken or shrimp, fresh veggies, and a drizzle of lime juice for a delicious meal.
  • Party Platter: Serve the corn alongside other grilled vegetables, meats, and dips. This creates a colorful and inviting platter that’s perfect for summer barbecues.

With these serving suggestions, your Cowboy Butter for Corn will not only taste amazing but also look fantastic on the table. Enjoy the burst of flavors and the smiles it brings to your family and friends!

Tips for Making the Best Cowboy Butter for Corn

Creating the perfect Cowboy Butter for Corn is all about attention to detail and a few handy tips. Here are some suggestions to ensure your Cowboy Butter is a hit every time:

  • Use Quality Ingredients: The flavor of your Cowboy Butter largely depends on the quality of the ingredients. Opt for fresh herbs and high-quality unsalted butter. Fresh corn is essential, as it brings natural sweetness that enhances the overall taste.
  • Adjust to Your Taste: Don’t hesitate to tweak the recipe! If you love garlic, add a bit more garlic powder. Prefer a tangy flavor? A splash of vinegar can do wonders. Experimenting with the ingredients allows you to create a Cowboy Butter that suits your palate perfectly.
  • Mix Thoroughly: When combining the ingredients, ensure everything is mixed well. This helps distribute the flavors evenly throughout the butter. A well-mixed Cowboy Butter will provide a consistent taste with every bite.
  • Let It Chill: Chilling the Cowboy Butter not only melds the flavors but also makes it easier to spread. If you’re short on time, even a quick 15-minute chill in the fridge can help.
  • Grill with Care: Keep an eye on the corn while it’s grilling. Turning it occasionally ensures even cooking and prevents burning. You want that perfect char without losing the corn’s tenderness.
  • Serve Warm: For the best experience, serve the Cowboy Butter on warm corn. The heat from the corn will melt the butter, creating a deliciously creamy topping that enhances the flavor.
  • Store Properly: If you have leftover Cowboy Butter, store it in an airtight container in the fridge. It can last up to a week. You can also freeze it for longer storage. Just scoop it into ice cube trays for easy portioning later!

By following these tips, you’ll be well on your way to making the best Cowboy Butter for Corn. Each bite will be bursting with flavor, making your dish a standout at any meal!

Breakdown of Time for Cowboy Butter for Corn

Prep Time

Preparing Cowboy Butter for Corn is quick and easy! The prep time typically takes about 15 minutes. This includes gathering your ingredients, husking the corn, and mixing the flavorful butter. If you have everything ready, you can whip it up even faster. Just remember to let the butter chill for a bit to enhance the flavors!

Cooking Time

The cooking time for grilling the corn is around 10-15 minutes. You’ll want to keep an eye on the corn as it cooks, turning it occasionally. This ensures that it gets that perfect char while remaining tender. The grilling process is simple and adds a delicious smoky flavor to the corn.

Total Time

In total, you can expect to spend about 30-40 minutes from start to finish. This includes the prep time, chilling the butter, and grilling the corn. It’s a quick and rewarding process that results in a delightful dish. Whether you’re serving it at a barbecue or a family dinner, the time spent is well worth it!

Nutritional Information for Cowboy Butter for Corn

Calories in Cowboy Butter for Corn

When enjoying Cowboy Butter for Corn, it’s essential to be aware of the calories in each serving. Each ear of corn topped with this delicious butter contains approximately 210 calories. This makes it a satisfying side dish that can fit into various meal plans. The combination of fresh corn and flavorful butter creates a delightful treat that is both tasty and fulfilling.

Protein Content

In terms of protein, Cowboy Butter for Corn offers about 2 grams per serving. While this may not seem like a lot, it contributes to the overall nutritional value of the dish. Corn itself is a source of plant-based protein, and when paired with the butter, it provides a small boost. This makes it a great addition to a balanced meal, especially when served alongside protein-rich foods like grilled chicken or fish.

Sodium Levels

When it comes to sodium, each serving of Cowboy Butter for Corn contains around 200 milligrams. This level is reasonable for a flavorful dish, especially considering the use of salt in the butter mixture. If you’re watching your sodium intake, you can easily adjust the amount of salt used in the recipe. Opting for low-sodium butter or skipping the added salt can help you enjoy this dish while keeping your sodium levels in check.

FAQs about Cowboy Butter for Corn

Can I use Cowboy Butter for other vegetables?

Absolutely! Cowboy Butter is incredibly versatile and can be used on a variety of vegetables. Grilled zucchini, bell peppers, and asparagus all benefit from the rich flavors of Cowboy Butter. Simply brush the vegetables with the butter before grilling or serve it on the side for dipping. This delicious spread enhances the taste of any grilled veggie, making it a fantastic addition to your meals.

How long can I store Cowboy Butter?

You can store Cowboy Butter in an airtight container in the refrigerator for up to one week. If you want to keep it longer, consider freezing it. Pour the butter into ice cube trays for easy portioning. Once frozen, transfer the cubes to a freezer bag. This way, you can enjoy Cowboy Butter anytime you want, just by thawing a cube or two for your next meal!

Is Cowboy Butter suitable for a vegan diet?

Traditional Cowboy Butter is not vegan, as it contains butter, which is a dairy product. However, you can easily make a vegan version by substituting the unsalted butter with a plant-based alternative, like vegan butter or coconut oil. Just ensure that the other ingredients, like herbs and spices, are also vegan-friendly. This way, you can enjoy the delightful flavors of Cowboy Butter while sticking to a vegan diet!

Conclusion on Cowboy Butter for Corn

Cowboy Butter for Corn is more than just a tasty topping; it’s a celebration of flavors that brings joy to any meal. With its rich blend of herbs, spices, and a hint of citrus, this butter transforms simple corn into a delightful dish that everyone will love. Whether you’re grilling for a summer barbecue or enjoying a cozy family dinner, Cowboy Butter adds a special touch that elevates your dining experience.

As you explore the various ways to prepare and serve Cowboy Butter, remember that the key is to have fun and experiment with flavors. From spicy variations to herb-infused delights, there’s a version of Cowboy Butter for everyone. Plus, it’s not just limited to corn; feel free to spread it on grilled vegetables, meats, or even bread for a delicious twist.

So, gather your ingredients, fire up the grill, and get ready to impress your family and friends with this mouthwatering dish. With its easy preparation and delightful taste, Cowboy Butter for Corn is sure to become a favorite in your kitchen. Enjoy the burst of flavors and the smiles it brings to your table!

Paul

Cowboy Butter for Corn elevates your summer meals.

This Cowboy Butter Roasted Corn is smoky, buttery, and bursting with bold flavor from a zesty herb-packed cowboy butter. Whether roasted in the oven or crisped up in the air fryer, these juicy corn bites are the ultimate sidekick for BBQs, potlucks, or weeknight dinners that need a little Western flair.
Prep Time 10 minutes
Servings: 4 servings
Course: Side Dish
Cuisine: American

Ingredients
  

  • 4 ears of corn husked and cut into 1½-inch sections1 batch cowboy butter, meltedFresh parsley, chopped (for garnish)

Method
 

Oven Method:
  1. Preheat oven to 425°F (218°C).
  2. Line a large baking sheet with foil, leaving extra at the ends to wrap into a packet.
  3. Brush all sides of the corn pieces with melted cowboy butter and place them on the sheet.
  4. Wrap the foil around the corn to form a sealed packet.
  5. Bake for 25–30 minutes.
  6. Unwrap the foil and broil for 8–10 minutes, rotating halfway, until golden brown.
  7. Brush with more cowboy butter before serving.
  8. Garnish with chopped parsley and serve warm.
Air Fryer Method:
  1. Brush corn with melted cowboy butter.
  2. Place in a single layer in the air fryer basket.
  3. Air fry at 400°F (204°C) for 10–12 minutes.
  4. Brush with more cowboy butter and garnish before serving.

Notes

Make the cowboy butter ahead of time—it’s a compound butter with garlic, herbs, lemon juice, Dijon, and a kick of cayenne and red pepper flakes.
Great for pairing with grilled meats or served as a party-friendly side dish.
To reheat, warm in foil in the oven at 350°F for 10 minutes or microwave briefly, covered.

Pineapple Ginger Beer Mocktail Recipe is a must-try!

Introduction to Pineapple Ginger Beer Mocktail Recipe

What is a Mocktail?

A mocktail is a delightful drink that mimics the flavors and presentation of a cocktail but without any alcohol. These beverages are perfect for those who want to enjoy a festive drink without the effects of alcohol. Mocktails are often made with fresh juices, flavored sodas, herbs, and other tasty ingredients. They are not only refreshing but also suitable for all ages, making them a great choice for family gatherings, parties, or simply a relaxing evening at home.

The Appeal of Pineapple Ginger Beer Mocktail

The Pineapple Ginger Beer Mocktail is a vibrant and refreshing drink that combines the tropical sweetness of pineapple with the spicy kick of ginger beer. This mocktail is perfect for warm days, as it offers a burst of flavor that can instantly uplift your mood. The addition of lime juice adds a zesty twist, while fresh mint leaves provide a fragrant garnish that enhances the drink’s appeal.

Not only is this mocktail delicious, but it is also easy to prepare. With just a few simple ingredients, you can create a drink that looks and tastes like a fancy cocktail. Whether you’re hosting a summer barbecue or enjoying a quiet evening, the Pineapple Ginger Beer Mocktail is sure to impress your guests and satisfy your taste buds. Plus, it’s a healthier alternative to sugary sodas and alcoholic beverages, making it a win-win for everyone!

Ingredients for Pineapple Ginger Beer Mocktail Recipe

Creating the perfect Pineapple Ginger Beer Mocktail starts with gathering the right ingredients. Each component plays a vital role in delivering that refreshing taste. Here’s what you’ll need:

  • 2 cups fresh pineapple juice: This is the star of the show! Fresh juice provides a natural sweetness and vibrant flavor.
  • 1 cup ginger beer: Choose a good quality ginger beer for that spicy kick. It adds fizz and depth to the drink.
  • 1 tablespoon lime juice: Fresh lime juice adds a zesty brightness that balances the sweetness of the pineapple.
  • 1 tablespoon honey (optional): If you prefer a sweeter drink, honey can enhance the flavor. Adjust to your taste!
  • Fresh mint leaves for garnish: Mint not only looks beautiful but also adds a refreshing aroma.
  • Ice cubes: Essential for serving your mocktail chilled and refreshing.

These ingredients come together to create a delightful drink that’s perfect for any occasion. Feel free to experiment with the quantities to suit your taste. The Pineapple Ginger Beer Mocktail is versatile, allowing you to adjust flavors as you like!

Step-by-Step Preparation of Pineapple Ginger Beer Mocktail Recipe

Step 1: Gather Your Ingredients

Before you start making your Pineapple Ginger Beer Mocktail, it’s important to gather all your ingredients. This will make the process smooth and enjoyable. Make sure you have:

  • 2 cups of fresh pineapple juice
  • 1 cup of ginger beer
  • 1 tablespoon of lime juice
  • 1 tablespoon of honey (if desired)
  • Fresh mint leaves for garnish
  • Ice cubes

Having everything ready will help you create this refreshing drink without any hassle. Plus, it’s always fun to see all the colorful ingredients laid out!

Step 2: Prepare the Pineapple

If you’re using fresh pineapple, you’ll need to prepare it first. Start by cutting off the top and bottom of the pineapple. Then, stand it upright and slice off the skin, making sure to remove any eyes. Cut the pineapple into chunks and blend them until smooth. Strain the juice through a fine mesh sieve to get rid of any pulp. This fresh juice will be the base of your mocktail, giving it a deliciously sweet flavor.

Step 3: Mix the Ingredients

Now that you have your fresh pineapple juice ready, it’s time to mix everything together. In a large pitcher, combine the pineapple juice, ginger beer, lime juice, and honey if you’re using it. Stir gently to mix the ingredients. Be careful not to stir too hard, as you want to keep the fizz from the ginger beer. This step is crucial for achieving that bubbly texture that makes the mocktail so enjoyable!

Step 4: Serve and Garnish

Once your mixture is ready, it’s time to serve! Fill each glass with ice cubes to keep your drink nice and cold. Pour the pineapple ginger mixture over the ice, filling each glass to the brim. Finally, garnish each drink with fresh mint leaves. This not only adds a pop of color but also enhances the aroma. Serve immediately and enjoy your refreshing Pineapple Ginger Beer Mocktail!

Variations of Pineapple Ginger Beer Mocktail Recipe

Tropical Twist Variations

If you’re looking to add a little flair to your Pineapple Ginger Beer Mocktail, consider trying some tropical twist variations. One popular option is to substitute the fresh pineapple juice with mango juice. This change brings a different sweetness and a unique flavor profile that pairs beautifully with ginger beer. You can also mix in other tropical juices like passion fruit or coconut water for an even more exotic taste.

Another fun idea is to add a splash of coconut cream. This will give your mocktail a creamy texture and a hint of coconut flavor, making it feel like a mini vacation in a glass. You can also experiment with adding fresh fruit slices, such as kiwi or strawberries, to enhance the visual appeal and flavor. These variations not only make your drink more exciting but also allow you to customize it to your liking!

Spice It Up: Adding More Ginger

If you love the spicy kick of ginger, why not amp it up? You can add a few slices of fresh ginger to the pitcher before mixing the ingredients. This will infuse the drink with a stronger ginger flavor, making it even more refreshing. For those who enjoy a bit of heat, consider adding a pinch of cayenne pepper or a dash of hot sauce. This will create a delightful contrast with the sweetness of the pineapple juice.

Another option is to use ginger syrup instead of ginger beer. This will give you more control over the ginger flavor and sweetness. Just remember to adjust the amount of lime juice to balance the flavors. These spicy variations will surely impress your guests and make your Pineapple Ginger Beer Mocktail stand out at any gathering!

Cooking Note for Pineapple Ginger Beer Mocktail Recipe

When preparing your Pineapple Ginger Beer Mocktail, there are a few cooking notes to keep in mind to ensure the best results. First, always opt for fresh ingredients whenever possible. Fresh pineapple juice not only tastes better but also provides essential nutrients. If you can, avoid using canned juice, as it often contains added sugars and preservatives that can alter the flavor.

Next, consider the temperature of your ingredients. For a truly refreshing mocktail, chill your ginger beer and pineapple juice in advance. This will help maintain the drink’s coolness and enhance the overall experience. Additionally, using ice cubes made from pineapple juice can add an extra layer of flavor as they melt.

Another important note is to mix your ingredients gently. As mentioned earlier, stirring too vigorously can cause the ginger beer to lose its fizz. Instead, use a gentle folding motion to combine the ingredients. This will help preserve the bubbles, making your mocktail light and effervescent.

Lastly, feel free to adjust the sweetness and spice levels to your liking. If you prefer a sweeter drink, add more honey or use a sweeter ginger beer. On the other hand, if you enjoy a spicier kick, don’t hesitate to add more fresh ginger or even a dash of cayenne pepper. The beauty of this mocktail lies in its versatility, allowing you to create a drink that perfectly suits your taste!

Serving Suggestions for Pineapple Ginger Beer Mocktail Recipe

Ideal Occasions for Serving

The Pineapple Ginger Beer Mocktail is a versatile drink that fits perfectly into various occasions. Whether you’re hosting a summer barbecue, a birthday party, or a casual get-together, this mocktail is sure to impress your guests. Its vibrant colors and refreshing taste make it an ideal choice for warm weather events.

Additionally, this mocktail is great for family gatherings, especially when children are present. Everyone can enjoy a delicious drink without the alcohol. It’s also a fantastic option for baby showers, bridal showers, or any celebration where you want to offer a festive beverage that everyone can enjoy.

Don’t forget about cozy evenings at home! The Pineapple Ginger Beer Mocktail can be a delightful treat while watching a movie or relaxing after a long day. Its tropical flavors can transport you to a sunny beach, making it a perfect escape, even if you’re just in your living room.

Glassware Recommendations

When it comes to serving your Pineapple Ginger Beer Mocktail, the right glassware can enhance the experience. For a classic look, consider using tall glasses or highball glasses. These types of glasses allow you to showcase the beautiful colors of the drink while providing ample space for ice and garnishes.

If you want to add a touch of elegance, opt for stemless wine glasses or even cocktail glasses. These options can elevate the presentation, making your mocktail feel more special. For a fun twist, you could also use mason jars, which add a rustic charm to your gathering.

Don’t forget to include a straw or a stirrer for easy sipping! This small detail can make your mocktail feel even more festive. Whatever glassware you choose, make sure it complements the vibrant and refreshing nature of the Pineapple Ginger Beer Mocktail.

Tips for Perfecting Your Pineapple Ginger Beer Mocktail Recipe

Choosing the Right Ingredients

To create the best Pineapple Ginger Beer Mocktail, selecting high-quality ingredients is essential. Start with fresh pineapple juice. If possible, juice a ripe pineapple yourself. This ensures maximum flavor and sweetness. Fresh juice is always better than store-bought options, which may contain preservatives or added sugars.

Next, choose a ginger beer that suits your taste. There are many brands available, each with different levels of sweetness and spice. Some ginger beers are more robust, while others are milder. Taste a few to find the one you love best. This choice will significantly impact the overall flavor of your mocktail.

When it comes to lime juice, always opt for fresh limes. Bottled lime juice can lack the bright flavor that fresh juice provides. Squeeze the limes just before mixing to capture their zesty essence. Lastly, if you decide to use honey, consider using raw honey for a more natural sweetness. This can enhance the drink’s flavor profile and add a touch of healthiness!

Adjusting Sweetness and Spice

One of the best parts of making your Pineapple Ginger Beer Mocktail is the ability to customize it to your liking. If you prefer a sweeter drink, feel free to add more honey or use a sweeter ginger beer. Start with a small amount and taste as you go. This way, you can find the perfect balance without overwhelming the drink.

On the other hand, if you enjoy a spicier kick, consider adding more fresh ginger or even a dash of cayenne pepper. Remember, a little goes a long way! You can also experiment with ginger syrup for a more intense ginger flavor. Just be sure to adjust the lime juice accordingly to maintain a balanced taste.

Ultimately, the goal is to create a mocktail that you love. Don’t hesitate to play around with the ingredients until you find your perfect blend. The Pineapple Ginger Beer Mocktail is all about enjoying the process and savoring the delightful flavors!

Breakdown of Time for Pineapple Ginger Beer Mocktail Recipe

Prep Time

Preparing your Pineapple Ginger Beer Mocktail is quick and easy! The prep time typically takes about 10 to 15 minutes. This includes gathering your ingredients, cutting the pineapple, and juicing it if you’re using fresh fruit. If you have everything ready, you can whip up this refreshing drink in no time!

Cooking Time

Interestingly, there’s no actual cooking involved in this mocktail recipe. The only time you’ll spend is mixing the ingredients together. This step takes just a few minutes, as you’ll want to combine everything gently to keep the fizz from the ginger beer. So, you can consider the cooking time to be minimal—around 2 to 3 minutes!

Total Time

In total, you can expect to spend about 15 to 20 minutes from start to finish when making your Pineapple Ginger Beer Mocktail. This includes both the prep and mixing time. With such a short time commitment, you can easily make this delightful drink for any occasion, whether it’s a casual gathering or a special celebration!

Nutritional Information for Pineapple Ginger Beer Mocktail Recipe

Calories

When enjoying a Pineapple Ginger Beer Mocktail, it’s good to know what you’re consuming. Each serving of this refreshing drink contains approximately 90 calories. This makes it a light and guilt-free option for those looking to indulge in a tasty beverage without worrying about excessive calorie intake. The natural sweetness from the pineapple juice contributes to the calorie count, but it also provides essential vitamins and minerals.

Protein

In terms of protein, the Pineapple Ginger Beer Mocktail is quite low, with each serving containing 0 grams of protein. While this drink is not a source of protein, it is packed with flavor and hydration. If you’re looking to boost your protein intake, consider pairing this mocktail with a protein-rich snack or meal. This way, you can enjoy the refreshing drink while still meeting your nutritional needs.

Sodium

The sodium content in the Pineapple Ginger Beer Mocktail is also minimal, making it a heart-healthy choice. Each serving contains less than 5 milligrams of sodium. This low sodium level is beneficial for those monitoring their salt intake. The natural ingredients in this mocktail contribute to its overall healthiness, allowing you to enjoy a delicious drink without the worry of added preservatives or excessive sodium.

FAQs about Pineapple Ginger Beer Mocktail Recipe

Can I make Pineapple Ginger Beer Mocktail Recipe ahead of time?

Yes, you can prepare the Pineapple Ginger Beer Mocktail ahead of time! However, it’s best to mix the ingredients just before serving. You can juice the pineapple and combine it with lime juice and honey in advance. Store this mixture in the refrigerator for up to a few hours. When you’re ready to serve, simply add the ginger beer and ice. This way, you’ll keep the fizz and freshness intact, ensuring a delightful drink for your guests!

What can I substitute for ginger beer in the Pineapple Ginger Beer Mocktail Recipe?

If you don’t have ginger beer on hand, there are several substitutes you can use. One option is to use ginger ale, which is sweeter and less spicy than ginger beer. You can also mix club soda with a splash of ginger syrup for a similar flavor. If you prefer a non-carbonated option, consider using a ginger-infused tea or a homemade ginger lemonade. Just remember that these alternatives may alter the taste slightly, so adjust the sweetness and spice levels accordingly!

Is the Pineapple Ginger Beer Mocktail Recipe suitable for kids?

Absolutely! The Pineapple Ginger Beer Mocktail is a fantastic choice for kids. It’s non-alcoholic and packed with fruity flavors that children love. The natural sweetness from the pineapple juice makes it appealing, while the ginger adds a fun twist. Just be mindful of the ginger beer’s spiciness; if your kids are sensitive to spice, you might want to use ginger ale or a milder ginger drink instead. This mocktail is perfect for family gatherings, birthday parties, or any occasion where kids are present!

Conclusion on Pineapple Ginger Beer Mocktail Recipe

In conclusion, the Pineapple Ginger Beer Mocktail is a delightful and refreshing drink that brings together the tropical sweetness of pineapple and the spicy zing of ginger beer. This mocktail is not only easy to prepare but also offers a fun and festive option for any occasion. Whether you’re hosting a summer party, celebrating a special event, or simply enjoying a quiet evening at home, this drink is sure to impress.

With its vibrant colors and delicious flavors, the Pineapple Ginger Beer Mocktail is a crowd-pleaser that everyone can enjoy. Plus, it’s a healthier alternative to sugary sodas and alcoholic beverages, making it a great choice for all ages. The versatility of this recipe allows you to customize it to your taste, whether you prefer it sweeter, spicier, or with a tropical twist.

So, gather your ingredients, follow the simple steps, and treat yourself and your loved ones to this refreshing mocktail. Cheers to good times and great flavors with the Pineapple Ginger Beer Mocktail!

Paul

Pineapple Ginger Beer Mocktail Recipe is a must-try!

This Pineapple Ginger Beer Mocktail is a tropical, zesty refresher made with fresh pineapple, grated ginger, and bubbly ginger beer. Sweetened naturally with honey or agave and finished with a sparkling kick, it’s the ultimate alcohol-free drink that’s equal parts bold and refreshing—perfect for hot days, brunches, or festive gatherings.
Prep Time 10 minutes
Total Time 10 minutes
Servings: 2 servings
Course: Drink
Cuisine: Tropical / Fusion

Ingredients
  

  • 1 cup fresh pineapple chunks1-inch piece fresh ginger peeled and grated2 tablespoons honey or agave syrup½ cup waterIce2 cups ginger beer (regular or sugar-free)Fresh mint leaves, for garnishPineapple wedges, for garnish

Method
 

  1. In a blender, combine pineapple chunks, grated ginger, honey or agave, and water. Blend until smooth.
  2. Strain the blended mixture through a fine-mesh sieve into a pitcher to remove pulp and ginger bits.
  3. Fill two glasses with ice. Pour the pineapple-ginger mixture into each glass, filling about one-third of the way.
  4. Top each glass with ginger beer.
  5. Stir gently to combine. Garnish with fresh mint leaves and pineapple wedges.
  6. Serve immediately and enjoy cold.

Notes

For a vegan version, use agave syrup instead of honey.
Use sugar-free ginger beer if you prefer a lighter option.
You can store the pineapple-ginger base in the refrigerator for up to 24 hours and mix with ginger beer just before serving.
Add lime juice or zest for an extra citrusy layer of flavor.

Strawberry Spinach Salad with Poppy Seed Dressing Recipe is delicious!

Introduction to Strawberry Spinach Salad with Poppy Seed Dressing Recipe

The Appeal of Strawberry Spinach Salad

Strawberry Spinach Salad is a delightful dish that brings together vibrant flavors and textures. The combination of fresh baby spinach and sweet strawberries creates a refreshing experience. This salad is not only visually appealing but also packed with nutrients. Spinach is rich in vitamins A and C, while strawberries provide antioxidants and fiber. Together, they make a perfect duo for a healthy meal or side dish.

Moreover, the crunch of toasted pecans adds a satisfying texture. The creamy feta cheese enhances the flavor profile, making each bite a burst of deliciousness. Whether you’re hosting a summer barbecue or looking for a light lunch, this salad is sure to impress. It’s easy to prepare and can be enjoyed by everyone, making it a versatile choice for any occasion.

Why Poppy Seed Dressing Complements This Salad

Poppy seed dressing is the perfect finishing touch for this salad. Its sweet and tangy flavor beautifully complements the strawberries and spinach. The dressing is light yet flavorful, enhancing the overall taste without overpowering the fresh ingredients. Made with simple ingredients like honey and apple cider vinegar, it adds a delightful zing to the salad.

Additionally, the poppy seeds provide a unique crunch that ties the dish together. This dressing is not only easy to make but also elevates the salad to a new level. With its creamy texture and vibrant taste, poppy seed dressing makes every bite enjoyable. It’s a wonderful way to bring out the best in your Strawberry Spinach Salad, making it a must-try recipe for any salad lover.

Ingredients for Strawberry Spinach Salad with Poppy Seed Dressing Recipe

Fresh Ingredients for the Salad

To create a delicious Strawberry Spinach Salad, you need fresh and high-quality ingredients. Start with 4 cups of fresh baby spinach. Make sure it’s washed and dried thoroughly to maintain its crispness. Next, you’ll need 2 cups of strawberries. Choose ripe, juicy strawberries, hulled and sliced for the best flavor. Their natural sweetness will enhance the salad’s overall taste.

Additionally, include 1/2 cup of red onion, thinly sliced. The onion adds a sharp contrast to the sweetness of the strawberries. For a creamy touch, use 1/2 cup of feta cheese, crumbled. This cheese brings a rich flavor that pairs wonderfully with the other ingredients. Finally, add 1/2 cup of toasted pecans. Toasting the pecans enhances their nutty flavor and adds a delightful crunch to the salad.

Essential Ingredients for Poppy Seed Dressing

The poppy seed dressing is a key component of this salad. To make it, gather the following ingredients: 1/4 cup of vegetable oil, which serves as the base of the dressing. You’ll also need 2 tablespoons of apple cider vinegar for a tangy kick. Adding 1 tablespoon of honey provides a touch of sweetness that balances the acidity of the vinegar.

Next, include 1 teaspoon of Dijon mustard. This ingredient adds depth and a slight spiciness to the dressing. Don’t forget 1 teaspoon of poppy seeds, which not only contribute to the flavor but also add a lovely visual appeal. Finally, season with salt and pepper to taste. These simple ingredients come together to create a dressing that perfectly complements the fresh flavors of the salad.

Preparation of Strawberry Spinach Salad with Poppy Seed Dressing Recipe

Step 1: Preparing the Spinach

First, let’s prepare the spinach. Start by rinsing 4 cups of fresh baby spinach under cold water. This step is crucial to remove any dirt or grit. After washing, gently dry the spinach using a salad spinner or by patting it with a clean kitchen towel. It’s important to ensure the spinach is dry to prevent the salad from becoming soggy. Once dried, place the spinach in a large salad bowl, ready for the other ingredients.

Step 2: Slicing the Strawberries

Next, it’s time to slice the strawberries. Take 2 cups of ripe strawberries and hull them carefully. This means removing the green tops and the white core. After hulling, slice the strawberries into thin pieces. Aim for uniform slices to ensure even distribution in the salad. The sweetness of the strawberries will shine through, adding a burst of flavor to each bite. Once sliced, set them aside for the next step.

Step 3: Making the Poppy Seed Dressing

Now, let’s whip up the poppy seed dressing. In a small bowl, combine 1/4 cup of vegetable oil, 2 tablespoons of apple cider vinegar, and 1 tablespoon of honey. Then, add 1 teaspoon of Dijon mustard and 1 teaspoon of poppy seeds. Using a whisk, mix all the ingredients together until they are well blended. Taste the dressing and season with salt and pepper according to your preference. This dressing is light, tangy, and sweet, making it the perfect complement to your salad.

Step 4: Assembling the Salad

With all the components ready, it’s time to assemble the salad. In the large bowl with the spinach, add the sliced strawberries, 1/2 cup of thinly sliced red onion, and 1/2 cup of crumbled feta cheese. The combination of these ingredients creates a colorful and appetizing salad. Finally, sprinkle 1/2 cup of toasted pecans over the top. The pecans will add a delightful crunch and nutty flavor to the mix.

Step 5: Tossing the Salad with Dressing

To finish, drizzle the prepared poppy seed dressing over the assembled salad. Using salad tongs or two large spoons, gently toss the salad to ensure all ingredients are evenly coated with the dressing. Be careful not to crush the strawberries or feta cheese while tossing. Once everything is well mixed, your Strawberry Spinach Salad with Poppy Seed Dressing is ready to serve. Enjoy it immediately for the freshest taste, or chill it in the refrigerator for up to 30 minutes to enhance the flavors.

Variations of Strawberry Spinach Salad with Poppy Seed Dressing Recipe

Adding Nuts for Crunch

One of the best ways to elevate your Strawberry Spinach Salad is by adding different nuts for extra crunch. While pecans are a fantastic choice, you can also experiment with walnuts or almonds. Walnuts have a rich, earthy flavor that pairs well with the sweetness of strawberries. On the other hand, almonds offer a delightful crunch and a slightly sweet taste. Simply toast the nuts in a dry skillet for a few minutes to enhance their flavor before adding them to the salad. This small step can make a big difference in taste and texture, making your salad even more enjoyable.

Incorporating Cheese for Creaminess

Cheese can add a creamy element to your Strawberry Spinach Salad, enhancing its overall flavor. While feta cheese is a popular choice, you can also try goat cheese or blue cheese for a different twist. Goat cheese has a tangy flavor that complements the sweetness of the strawberries beautifully. If you prefer a stronger taste, blue cheese can add a bold flavor that contrasts nicely with the salad’s fresh ingredients. Crumble your chosen cheese over the top of the salad just before serving. This will not only add creaminess but also create a visually appealing dish that is sure to impress your guests.

Cooking Note for Strawberry Spinach Salad with Poppy Seed Dressing Recipe

Tips for Freshness and Flavor

To ensure your Strawberry Spinach Salad with Poppy Seed Dressing is as fresh and flavorful as possible, consider these helpful tips. First, always use fresh ingredients. When selecting spinach, look for vibrant green leaves without any wilting or browning. Fresh strawberries should be bright red and firm, indicating ripeness. Avoid any that are mushy or have dark spots, as these can affect the overall taste of your salad.

Next, prepare the salad just before serving. This helps maintain the crispness of the spinach and the juiciness of the strawberries. If you need to make it ahead of time, keep the dressing separate until you’re ready to serve. This prevents the salad from becoming soggy and ensures that every bite is delightful.

Additionally, consider adding a squeeze of fresh lemon juice over the salad just before serving. This simple step can brighten the flavors and enhance the overall taste. The acidity from the lemon complements the sweetness of the strawberries and the creaminess of the feta cheese beautifully.

Lastly, if you have leftover salad, store it in an airtight container in the refrigerator. However, keep in mind that the salad is best enjoyed fresh. If you notice any ingredients wilting or losing their texture, it’s a sign to enjoy it sooner rather than later. By following these tips, you can create a Strawberry Spinach Salad that is not only delicious but also visually appealing and full of fresh flavors.

Serving Suggestions for Strawberry Spinach Salad with Poppy Seed Dressing Recipe

Ideal Pairings for This Salad

Strawberry Spinach Salad with Poppy Seed Dressing is a versatile dish that pairs wonderfully with various meals. For a light lunch, serve it alongside grilled chicken or fish. The protein complements the salad’s fresh flavors, making it a satisfying meal. If you’re hosting a gathering, this salad is an excellent side dish for barbecued meats or roasted vegetables. The sweetness of the strawberries balances the savory notes of grilled foods.

Additionally, consider serving this salad with a warm quiche or a hearty soup. The contrast between the warm and cold dishes creates a delightful dining experience. For a vegetarian option, pair it with a chickpea salad or a quinoa bowl. These options add protein and make the meal more filling. No matter how you choose to serve it, this salad is sure to be a hit!

Presentation Tips for Serving

Presentation plays a key role in making your Strawberry Spinach Salad visually appealing. Start by using a large, shallow bowl to showcase the vibrant colors of the ingredients. Arrange the spinach as a base, then artfully layer the strawberries, red onion, feta cheese, and pecans on top. This creates a beautiful contrast that is sure to catch the eye.

For an extra touch, consider garnishing the salad with a few whole strawberries or a sprinkle of additional poppy seeds. This adds a pop of color and makes the dish look even more inviting. If you’re serving the salad at a gathering, individual servings in clear cups or jars can create a fun and elegant presentation. This way, guests can easily enjoy their salad while mingling.

Lastly, don’t forget to serve the poppy seed dressing on the side. This allows guests to add as much or as little dressing as they prefer, keeping the salad fresh and crisp. With these presentation tips, your Strawberry Spinach Salad will not only taste amazing but also look stunning on the table!

Tips for Making the Best Strawberry Spinach Salad with Poppy Seed Dressing Recipe

Choosing the Right Strawberries

When it comes to making a delicious Strawberry Spinach Salad, selecting the right strawberries is crucial. Look for strawberries that are bright red and firm to the touch. These qualities indicate ripeness and sweetness. Avoid any strawberries that are dull in color or have dark spots, as these may be overripe or spoiled.

For the best flavor, try to buy strawberries that are in season. In many regions, strawberries are at their peak from late spring to early summer. During this time, they are more likely to be juicy and flavorful. If possible, consider visiting a local farmer’s market. Freshly picked strawberries from local farms often taste better than those that have been shipped long distances.

Additionally, if you can, smell the strawberries before purchasing. A sweet, fragrant aroma is a good sign of ripeness. Once you have selected your strawberries, store them in the refrigerator. Keep them in their original container or a breathable container to prevent moisture buildup. This will help maintain their freshness until you are ready to use them in your salad.

Storing Leftovers Properly

After enjoying your Strawberry Spinach Salad, you may have some leftovers. To keep them fresh, it’s important to store them properly. First, if you have any leftover salad, avoid mixing the dressing with the salad until you are ready to eat it again. This will help prevent the spinach from wilting and the strawberries from becoming mushy.

Place any leftover salad in an airtight container. If you have already added the dressing, try to consume it within a day for the best taste and texture. If the salad is undressed, it can last in the refrigerator for up to two days. However, keep in mind that the quality may decline over time.

When you’re ready to enjoy the leftovers, give the salad a gentle toss to redistribute the ingredients. If it seems a bit dry, you can add a splash of fresh dressing or a squeeze of lemon juice to brighten the flavors. By following these storage tips, you can enjoy your Strawberry Spinach Salad with Poppy Seed Dressing even after the initial serving!

Breakdown of Time for Strawberry Spinach Salad with Poppy Seed Dressing Recipe

Prep Time

The prep time for the Strawberry Spinach Salad with Poppy Seed Dressing is quite short. You can expect to spend about 15 minutes gathering and preparing all the ingredients. This includes washing the spinach, hulling and slicing the strawberries, and slicing the red onion. Additionally, you’ll need a few minutes to make the poppy seed dressing. Overall, this salad is quick to prepare, making it perfect for busy days or last-minute gatherings.

Cooking Time

Interestingly, there is no actual cooking time involved in this recipe. The only heat required is for toasting the pecans, which takes about 5 minutes. Simply place the pecans in a dry skillet over medium heat and stir them until they are fragrant and lightly browned. This step enhances their flavor and adds a delightful crunch to the salad. Other than that, all the ingredients are fresh and ready to eat, making this salad a no-cook option!

Total Time

In total, you can expect to spend around 20 minutes preparing the Strawberry Spinach Salad with Poppy Seed Dressing. This includes the 15 minutes of prep time and the 5 minutes for toasting the pecans. With such a quick preparation time, this salad is an excellent choice for a healthy meal or side dish that doesn’t require much effort. You can easily whip it up for lunch, dinner, or even a picnic!

Nutritional Information for Strawberry Spinach Salad with Poppy Seed Dressing Recipe

Calories and Macronutrients

Understanding the nutritional content of your meals is essential for maintaining a balanced diet. Each serving of the Strawberry Spinach Salad with Poppy Seed Dressing contains approximately 220 calories. This makes it a light yet satisfying option for lunch or dinner. The macronutrient breakdown is as follows:

  • Net Carbohydrates: 10g
  • Protein: 6g
  • Fat: 18g

This salad is low in carbohydrates, making it suitable for those watching their carb intake. The healthy fats from the pecans and dressing provide energy and help keep you feeling full. Additionally, the protein content from the feta cheese and spinach contributes to muscle health and overall well-being.

Health Benefits of Ingredients

The ingredients in this salad not only taste great but also offer numerous health benefits. Spinach is a powerhouse of nutrients, rich in vitamins A, C, and K. These vitamins support eye health, boost the immune system, and promote healthy bones. Strawberries are loaded with antioxidants, which help fight inflammation and protect your cells from damage.

Feta cheese adds calcium and protein, essential for strong bones and muscle function. Pecans are a great source of healthy fats, fiber, and protein, which can help lower cholesterol levels and improve heart health. The poppy seed dressing, made with apple cider vinegar and honey, provides additional antioxidants and can aid digestion.

Incorporating this Strawberry Spinach Salad into your diet can contribute to overall health and wellness. It’s a delicious way to enjoy a variety of nutrients while keeping your meals light and refreshing. So, whether you’re looking for a healthy side dish or a main course, this salad is a fantastic choice!

FAQs about Strawberry Spinach Salad with Poppy Seed Dressing Recipe

Can I make the dressing ahead of time?

Absolutely! You can make the poppy seed dressing ahead of time. In fact, preparing it a few hours or even a day in advance can enhance the flavors. Just store the dressing in an airtight container in the refrigerator. When you’re ready to serve the salad, give it a good shake or stir to mix everything well. This way, you can save time when preparing your meal!

What other fruits can I add to this salad?

Feel free to get creative with your fruit choices! Besides strawberries, you can add other fruits like blueberries, raspberries, or even sliced peaches. Each fruit brings its unique flavor and texture, making the salad even more delightful. Mixing different fruits not only enhances the taste but also adds a pop of color, making your salad visually appealing.

Is this salad suitable for meal prep?

Yes, this salad is great for meal prep! However, it’s best to keep the dressing separate until you’re ready to eat. This helps maintain the freshness of the spinach and prevents it from wilting. You can prepare the salad ingredients and store them in individual containers. When it’s time to enjoy your meal, simply add the dressing and toss everything together. This way, you can enjoy a fresh and healthy salad throughout the week!

How long does the salad last in the fridge?

If stored properly, the Strawberry Spinach Salad can last in the fridge for about 1 to 2 days. However, it’s important to note that the quality may decline over time. If you’ve added the dressing, try to consume it within a day for the best taste. If the salad is undressed, it can last a bit longer. Always check for any signs of wilting or spoilage before eating. Enjoy your salad while it’s fresh for the best experience!

Conclusion on Strawberry Spinach Salad with Poppy Seed Dressing Recipe

Recap of the Recipe’s Highlights

In summary, the Strawberry Spinach Salad with Poppy Seed Dressing is a delightful dish that combines fresh ingredients and vibrant flavors. With its mix of baby spinach, sweet strawberries, and crunchy pecans, this salad is not only visually appealing but also packed with nutrients. The creamy feta cheese adds richness, while the poppy seed dressing ties everything together with its sweet and tangy notes. This recipe is quick to prepare, making it perfect for busy days or special occasions.

Moreover, the versatility of this salad allows for various adaptations. You can easily add different nuts or cheeses to suit your taste. Whether you’re serving it as a light lunch or a side dish at a gathering, this salad is sure to impress your guests. Plus, with its health benefits, you can enjoy it guilt-free!

Encouragement to Try the Recipe

We encourage you to try making the Strawberry Spinach Salad with Poppy Seed Dressing for yourself. It’s a simple yet delicious way to incorporate more fresh produce into your diet. The combination of flavors and textures will surely delight your taste buds. Don’t hesitate to experiment with different fruits and nuts to make it your own!

So, gather your ingredients, whip up this refreshing salad, and enjoy a burst of flavor in every bite. Whether for a family meal or a gathering with friends, this salad is bound to be a hit. Happy cooking!

Paul

Strawberry Spinach Salad with Poppy Seed Dressing Recipe is delicious!

Bright, refreshing, and full of flavor, this Strawberry Spinach Salad is a celebration of sweet berries, creamy feta, and crunchy pecans, all brought together with a rich homemade balsamic glaze. Perfect for summer lunches, garden parties, or as a vibrant side dish!
Prep Time 10 minutes
Cook Time 10 minutes
Total Time 20 minutes
Servings: 6 servings
Course: Salad
Cuisine: American

Ingredients
  

  • For the salad:6 cups fresh baby spinach1 cup strawberries sliced½ cup blueberries½ cup crumbled feta cheese½ cup toasted pecans (some whole, some chopped)
  • For the balsamic glaze dressing:1 cup balsamic vinegar¼ cup honey or brown sugar

Method
 

  1. Make the balsamic glaze:In a small saucepan, combine the balsamic vinegar and honey (or brown sugar). Bring to a gentle boil over medium heat, then reduce to a simmer. Cook for about 10 minutes, stirring occasionally, until the mixture reduces by half and becomes syrupy. Remove from heat and let cool.
  2. Assemble the salad:In a large bowl, combine baby spinach, sliced strawberries, blueberries, and crumbled feta cheese. Toss gently to mix.
  3. Plate and finish:Divide the salad into individual serving bowls or arrange on a platter. Top with whole and chopped toasted pecans. Drizzle each serving with the cooled balsamic glaze just before serving.

Notes

For a heartier version, top the salad with grilled chicken or shrimp. You can also prep the balsamic glaze ahead of time and store it in the fridge for up to one week. Make sure it’s completely cooled before drizzling to avoid wilting the spinach.

Rhubarb Scones with Vanilla Glaze Recipe are delightful!

Introduction to Rhubarb Scones with Vanilla Glaze Recipe

Welcome to the delightful world of baking! Today, we’re diving into a scrumptious treat that combines the tartness of rhubarb with the sweetness of a vanilla glaze. Rhubarb scones with vanilla glaze are not just any ordinary scones; they are a perfect blend of flavors and textures that will make your taste buds dance with joy. Whether you’re enjoying them for breakfast, brunch, or as an afternoon snack, these scones are sure to impress.

What Makes Rhubarb Scones Special?

Rhubarb scones stand out for several reasons. First, rhubarb itself is a unique ingredient. Its tangy flavor adds a refreshing twist to the traditional scone. This contrasts beautifully with the sweetness of the vanilla glaze, creating a delightful balance. Additionally, the texture of these scones is light and flaky, making each bite a pleasure.

Moreover, rhubarb is a seasonal fruit, often associated with spring and early summer. This makes rhubarb scones a wonderful way to celebrate the changing seasons. They are perfect for gatherings, picnics, or simply enjoying at home with a cup of tea or coffee. The vibrant color of rhubarb also adds visual appeal, making these scones not only tasty but also beautiful.

In summary, rhubarb scones with vanilla glaze are special because they combine unique flavors, seasonal ingredients, and a delightful texture. They are a treat that brings joy to any occasion. So, let’s get started on this delicious journey of baking!

Ingredients for Rhubarb Scones with Vanilla Glaze Recipe

To create these delightful rhubarb scones with vanilla glaze, you’ll need a few simple ingredients. Each component plays a vital role in achieving the perfect balance of flavors and textures. Here’s what you’ll need:

  • 2 cups all-purpose flour
  • 1/3 cup granulated sugar
  • 1 tablespoon baking powder
  • 1/2 teaspoon salt
  • 1/2 cup unsalted butter, cold and cubed
  • 1 cup fresh rhubarb, diced
  • 1/2 cup heavy cream
  • 1 large egg
  • 1 teaspoon vanilla extract

For the glaze, you will need:

  • 1 cup powdered sugar
  • 2 tablespoons heavy cream
  • 1/2 teaspoon vanilla extract

These ingredients come together to create a deliciously sweet and tangy treat. The fresh rhubarb adds a unique flavor, while the vanilla glaze provides a lovely finish. Make sure to gather everything before you start baking, as this will help streamline the process and ensure you don’t miss any key components!

Step-by-Step Preparation of Rhubarb Scones with Vanilla Glaze Recipe

Now that you have all your ingredients ready, it’s time to dive into the step-by-step preparation of these delightful rhubarb scones with vanilla glaze. Following these steps will ensure that your scones turn out perfectly every time. Let’s get started!

Step 1: Preheat the Oven

400°F (200°C). This is an important step because a hot oven helps the scones rise and become fluffy. While the oven is heating, you can prepare the rest of your ingredients.

Step 2: Prepare the Rhubarb

1 cup of diced rhubarb. Set it aside for now, as it will be added to the dough later.

Step 3: Mix Dry Ingredients

2 cups of all-purpose flour, 1/3 cup of granulated sugar, 1 tablespoon of baking powder, and 1/2 teaspoon of salt. Use a whisk to mix these dry ingredients well. This ensures that the baking powder and salt are evenly distributed throughout the flour.

Step 4: Combine Wet Ingredients

1/2 cup of heavy cream, 1 large egg, and 1 teaspoon of vanilla extract. Make sure these ingredients are well combined. This mixture will add moisture and flavor to your scone dough.

Step 5: Form the Scone Dough

Now, it’s time to bring everything together! Add the cold, cubed butter to the dry ingredients. Using a pastry cutter or your fingers, blend the butter into the flour mixture until it resembles coarse crumbs. Then, gently fold in the diced rhubarb. Finally, pour the wet ingredients into the dry mixture and stir until just combined. Be careful not to overmix, as this can make the scones tough.

Step 6: Cut and Shape the Scones

1-inch thick. You can use a knife to cut it into wedges or a biscuit cutter to create round scones. The choice is yours! Just make sure they are evenly shaped for even baking.

Step 7: Bake the Scones

15-20 minutes or until they are golden brown. Keep an eye on them, as oven temperatures can vary. You want them to be perfectly baked and slightly firm to the touch.

Step 8: Prepare the Vanilla Glaze

1 cup of powdered sugar, 2 tablespoons of heavy cream, and 1/2 teaspoon of vanilla extract until smooth. This glaze will add a sweet finish to your scones once they cool down.

And there you have it! You’re now ready to enjoy your freshly baked rhubarb scones with vanilla glaze. The aroma in your kitchen will be irresistible!

Variation of Rhubarb Scones with Vanilla Glaze Recipe

While the classic rhubarb scones with vanilla glaze are delicious on their own, there are many ways to switch things up! You can easily customize this recipe to suit your taste or to use what you have on hand. Let’s explore some alternative ingredients and flavor enhancements that can take your scones to the next level.

Alternative Ingredients to Consider

If you want to experiment with different flavors, consider these alternative ingredients:

  • Fruits: Instead of rhubarb, try using fresh strawberries, blueberries, or raspberries. Each fruit brings its own unique sweetness and flavor.
  • Nuts: Adding chopped nuts like walnuts or pecans can give your scones a delightful crunch. Just fold them in with the rhubarb.
  • Spices: A pinch of cinnamon or nutmeg can add warmth and depth to your scones. Sprinkle a little into the dry ingredients for a cozy flavor.
  • Herbs: Fresh herbs like rosemary or thyme can create a savory twist. Use them sparingly to avoid overpowering the sweetness.

These alternatives can help you create a unique scone that suits your preferences or the season. Feel free to mix and match!

Flavor Enhancements for Your Scones

To elevate the flavor of your rhubarb scones, consider these enhancements:

  • Citrus Zest: Adding the zest of a lemon or orange can brighten the flavor. Just a teaspoon will do!
  • Chocolate Chips: For a sweet twist, fold in some chocolate chips. They pair wonderfully with the tartness of rhubarb.
  • Vanilla Bean: Instead of vanilla extract, use the seeds from a vanilla bean for a richer flavor.
  • Glaze Variations: Experiment with different glazes, such as a lemon glaze or a maple syrup glaze, to complement the scones.

These flavor enhancements can make your scones even more delightful. Don’t hesitate to get creative and make this recipe your own!

Cooking Note for Rhubarb Scones with Vanilla Glaze Recipe

When it comes to baking rhubarb scones with vanilla glaze, a few cooking notes can help ensure your scones turn out perfectly every time. Here are some important tips to keep in mind:

  • Use Cold Ingredients: Make sure your butter and heavy cream are cold. This helps create a flaky texture in the scones. Cold butter will not melt into the dough too quickly, allowing for those lovely layers.
  • Don’t Overmix: When combining the wet and dry ingredients, mix just until combined. Overmixing can lead to tough scones. A few lumps are perfectly fine!
  • Chill the Dough: If you have time, consider chilling the dough for about 30 minutes before baking. This can enhance the texture and flavor of your scones.
  • Check for Doneness: Keep an eye on your scones while they bake. They should be golden brown on top and firm to the touch. If they are browning too quickly, you can cover them loosely with aluminum foil.
  • Let Them Cool: Allow the scones to cool for a few minutes on the baking sheet before transferring them to a wire rack. This helps them set and makes them easier to glaze.

By following these cooking notes, you’ll be well on your way to baking delicious rhubarb scones with vanilla glaze that everyone will love. Happy baking!

Serving Suggestions for Rhubarb Scones with Vanilla Glaze Recipe

Now that your rhubarb scones with vanilla glaze are baked to perfection, it’s time to think about how to serve them! These delightful treats can be enjoyed in various ways, making them perfect for any occasion. Here are some serving suggestions to enhance your scone experience.

Best Pairings for Your Scones

Rhubarb scones with vanilla glaze are versatile and can be paired with a variety of accompaniments. Here are some ideas to consider:

  • Tea: A warm cup of tea is a classic pairing. Choose a light herbal tea or a fragrant Earl Grey to complement the flavors of the scones.
  • Coffee: For coffee lovers, a freshly brewed cup of coffee or a latte can enhance the enjoyment of your scones. The rich flavors of coffee balance the sweetness of the glaze.
  • Fresh Fruit: Serve your scones with a side of fresh fruit, such as strawberries or blueberries. This adds a refreshing touch and enhances the fruity notes of the rhubarb.
  • Whipped Cream: A dollop of whipped cream can elevate your scone experience. It adds a creamy texture that pairs beautifully with the tartness of rhubarb.
  • Jam: Consider serving your scones with a spread of fruit jam, like strawberry or raspberry. The sweetness of the jam complements the tangy rhubarb perfectly.

These pairings not only enhance the flavors of your rhubarb scones but also create a delightful presentation. Whether you’re hosting a brunch or enjoying a quiet afternoon treat, these suggestions will make your scone experience even more enjoyable!

Tips for Perfect Rhubarb Scones with Vanilla Glaze Recipe

To ensure your rhubarb scones with vanilla glaze turn out perfectly every time, here are some helpful tips to keep in mind. These simple suggestions can make a big difference in the texture and flavor of your scones.

  • Measure Ingredients Accurately: Use a kitchen scale or measuring cups to ensure you have the right amounts. Accurate measurements are key to achieving the perfect scone texture.
  • Use Fresh Rhubarb: Fresh rhubarb will provide the best flavor and texture. Look for firm, vibrant stalks without any blemishes. If you can, choose rhubarb that is in season for the best taste.
  • Keep Butter Cold: Cold butter is essential for flaky scones. If your kitchen is warm, consider chilling the butter in the freezer for a few minutes before cutting it into the flour mixture.
  • Don’t Overwork the Dough: When mixing the dough, be gentle. Overworking can lead to tough scones. Mix just until the ingredients are combined, and don’t worry about a few lumps.
  • Use a Light Touch: When shaping the dough, use a light touch to avoid compressing it. This helps maintain the airiness of the scones, resulting in a fluffy texture.
  • Brush with Cream: For a golden finish, brush the tops of the scones with a little heavy cream before baking. This adds a lovely sheen and enhances the color.
  • Cool Before Glazing: Allow the scones to cool slightly before drizzling with glaze. This prevents the glaze from melting and ensures a beautiful finish.
  • Store Properly: If you have leftovers, store them in an airtight container at room temperature. They are best enjoyed within a couple of days, but you can also freeze them for later enjoyment.

By following these tips, you’ll be well on your way to baking perfect rhubarb scones with vanilla glaze that everyone will love. Enjoy the process and happy baking!

Breakdown of Time for Rhubarb Scones with Vanilla Glaze Recipe

Understanding the time needed for each step in the rhubarb scones with vanilla glaze recipe can help you plan your baking session better. Here’s a breakdown of the time you’ll need for preparation and cooking.

Prep Time

20 minutes. This includes gathering your ingredients, preheating the oven, and preparing the dough. Make sure to take your time during this stage to ensure everything is measured accurately and mixed well. A little patience here will pay off in the final product!

Cooking Time

15-20 minutes. Keep an eye on them as they bake, looking for that lovely golden brown color. The aroma wafting through your kitchen will be a delightful indicator that they are almost ready!

Total Time

35-40 minutes from start to finish. This includes both prep and cooking time. It’s a quick and rewarding process that results in delicious rhubarb scones with vanilla glaze. Perfect for a busy morning or a spontaneous afternoon treat!

Nutritional Information for Rhubarb Scones with Vanilla Glaze Recipe

Understanding the nutritional content of your rhubarb scones with vanilla glaze is essential for making informed choices. This section will provide you with key nutritional information per serving, helping you enjoy these delightful treats while keeping track of your dietary needs.

Calories

210 calories. This makes them a satisfying yet moderate option for breakfast or a snack. The combination of ingredients contributes to the overall calorie count, with the butter and heavy cream providing richness and flavor.

Protein

3 grams. While this isn’t a high-protein snack, it does contribute to your daily intake. Pairing your scone with a protein-rich beverage, like a glass of milk or a yogurt, can help balance your meal.

Sodium

200 milligrams. This is a moderate amount, making these scones a reasonable choice for most diets. However, if you are watching your sodium intake, consider enjoying them in moderation or adjusting the salt in the recipe.

Overall, rhubarb scones with vanilla glaze can fit nicely into a balanced diet. They provide a delightful treat without excessive calories, making them perfect for special occasions or a cozy afternoon snack. Enjoy them guilt-free, knowing you’re indulging in a delicious and relatively nutritious option!

FAQs about Rhubarb Scones with Vanilla Glaze Recipe

Can I use frozen rhubarb for this recipe?

Yes, you can use frozen rhubarb for this recipe! Just make sure to thaw it completely and drain any excess moisture before adding it to the dough. This will help prevent your scones from becoming too wet. Frozen rhubarb can still provide that lovely tart flavor, making your scones just as delicious!

How do I store leftover scones?

To store leftover rhubarb scones with vanilla glaze, place them in an airtight container at room temperature. They are best enjoyed within a couple of days. If you want to keep them longer, you can freeze them. Just wrap each scone tightly in plastic wrap and place them in a freezer bag. When you’re ready to enjoy, simply thaw them at room temperature or warm them in the oven for a few minutes.

Can I make the dough ahead of time?

Absolutely! You can make the scone dough ahead of time. After mixing the ingredients, wrap the dough tightly in plastic wrap and refrigerate it for up to 24 hours. When you’re ready to bake, simply roll it out and cut it into your desired shapes. This is a great way to save time on busy mornings!

What can I substitute for vanilla in the glaze?

If you don’t have vanilla extract on hand, there are several substitutes you can use in the glaze. Almond extract is a popular choice and adds a lovely flavor. You can also use maple syrup for a different sweetness. Just remember to adjust the amount to taste, as these alternatives can be stronger than vanilla.

Conclusion on Rhubarb Scones with Vanilla Glaze Recipe

In conclusion, rhubarb scones with vanilla glaze are a delightful treat that brings together the unique tartness of rhubarb and the sweet creaminess of vanilla. This recipe is not only easy to follow but also allows for creativity with various flavor enhancements and ingredient substitutions. Whether you’re baking for a special occasion or simply indulging in a cozy afternoon snack, these scones are sure to impress.

As you embark on your baking journey, remember the tips and variations shared throughout this article. They will help you achieve the perfect texture and flavor every time. The joy of baking is not just in the final product but also in the process itself. So, gather your ingredients, preheat your oven, and enjoy the wonderful aroma that fills your kitchen as your scones bake to golden perfection.

Don’t forget to share your delicious creations with family and friends! These rhubarb scones with vanilla glaze are perfect for gatherings, brunches, or simply as a sweet treat to brighten someone’s day. Happy baking, and may your scones always be fluffy and flavorful!

Paul

Rhubarb Scones with Vanilla Glaze Recipe are delightful!

Celebrate the season with these tender and buttery rhubarb scones—perfect for breakfast or brunch. Each scone bursts with tart rhubarb balanced by just the right touch of sweetness. Easy to make and even easier to enjoy warm with butter or jam!
Prep Time 15 minutes
Cook Time 20 minutes
Total Time 35 minutes
Servings: 8 scones
Course: Breakfast/Snack
Cuisine: American

Ingredients
  

  • 1 cup chopped rhubarb about 1 to 3 stalks½ cup granulated sugar2¼ cups all-purpose flour1 tablespoon baking powder½ teaspoon salt1 teaspoon vanilla extract (or almond extract for variation)8 tablespoons unsalted cold butter, cut into small pieces½ cup cold buttermilk or half-and-half (plus more if needed)

Method
 

  1. Preheat the oven to 375°F (190°C) and line a baking sheet with parchment paper.
  2. In a food processor, pulse the flour, sugar, baking powder, and salt until combined.
  3. Add cold butter and pulse 20 to 25 times until the mixture resembles coarse crumbs.
  4. Transfer the mixture to a large bowl. Stir in buttermilk and vanilla extract until a dough begins to form—add a splash more liquid if too dry.
  5. Gently fold in the chopped rhubarb.
  6. Turn dough onto a floured surface, knead briefly, and shape into a rectangle. Cut into rounds with a 3-inch biscuit cutter or slice into squares.
  7. Place scones 2 inches apart on the baking sheet.
  8. Bake for 18 to 22 minutes or until lightly golden on top. Remove and let cool slightly before serving.

Notes

Use fresh, crisp rhubarb for the best texture. If your rhubarb is particularly tart, you can sprinkle a little extra sugar on top before baking. These scones are best enjoyed the same day but can be stored in an airtight container for up to 2 days.

Tropical Sunrise Mocktail Recipe for Refreshing Fun!

Introduction to the Tropical Sunrise Mocktail Recipe

What is a Tropical Sunrise Mocktail?

The Tropical Sunrise Mocktail is a delightful non-alcoholic beverage that brings the essence of a sunny beach right to your glass. This vibrant drink combines the refreshing flavors of orange and pineapple juices, topped with a splash of grenadine syrup. The result is a beautiful layered effect that resembles a stunning sunrise. Perfect for any occasion, this mocktail is not only visually appealing but also bursting with tropical flavors that can transport you to a paradise getaway.

Why Choose a Mocktail?

Choosing a mocktail like the Tropical Sunrise Mocktail is a fantastic option for many reasons. First, it allows everyone to enjoy a festive drink without the effects of alcohol. This makes it suitable for all ages, including kids and those who prefer to avoid alcohol for health or personal reasons. Additionally, mocktails are often lower in calories and sugar compared to their alcoholic counterparts, making them a healthier choice. They also provide a fun and creative way to experiment with flavors and ingredients, ensuring that everyone can find a drink they love. So, whether you’re hosting a party or just enjoying a quiet evening at home, a mocktail can add a splash of joy to your day!

Ingredients for the Tropical Sunrise Mocktail Recipe

To create the perfect Tropical Sunrise Mocktail, you’ll need a few simple ingredients. Each one plays a vital role in delivering that refreshing tropical taste. Here’s what you’ll need:

  • 1 cup orange juice: Freshly squeezed is best for a vibrant flavor.
  • 1/2 cup pineapple juice: This adds a sweet and tangy twist.
  • 1/4 cup grenadine syrup: This syrup gives the drink its beautiful color and sweetness.
  • 1/2 cup club soda: For a fizzy finish that lightens the drink.
  • Ice cubes: Essential for keeping your mocktail chilled.
  • Orange slices and maraschino cherries: These are perfect for garnishing and adding a pop of color.

These ingredients come together to create a delightful drink that is not only tasty but also visually stunning. The combination of orange and pineapple juices provides a refreshing base, while the grenadine syrup adds a touch of sweetness and a beautiful gradient effect. The club soda gives it a bubbly finish, making it a perfect choice for any gathering or celebration.

Step-by-Step Preparation of the Tropical Sunrise Mocktail Recipe

Step 1: Gather Your Ingredients

Before you start making your Tropical Sunrise Mocktail, it’s important to gather all your ingredients. This will make the process smooth and enjoyable. You’ll need:

  • 1 cup of orange juice
  • 1/2 cup of pineapple juice
  • 1/4 cup of grenadine syrup
  • 1/2 cup of club soda
  • Ice cubes
  • Orange slices and maraschino cherries for garnish

Having everything ready will help you create this delicious drink without any interruptions. Plus, it’s always fun to see all the colorful ingredients laid out!

Step 2: Prepare the Fruit Juices

Next, it’s time to prepare your fruit juices. If you’re using freshly squeezed orange juice, make sure to strain it to remove any pulp. This will give your mocktail a smooth texture. For the pineapple juice, you can use store-bought or fresh, depending on your preference. Just make sure it’s chilled for the best taste!

Once your juices are ready, you can move on to the mixing stage. The combination of these two juices is what makes the Tropical Sunrise Mocktail so refreshing and delicious.

Step 3: Mix the Ingredients

Now comes the fun part! Take a tall glass and fill it with ice cubes. This will keep your drink nice and cold. Pour the orange juice and pineapple juice into the glass, filling it about halfway. The vibrant colors of the juices will start to blend beautifully.

Next, slowly pour the grenadine syrup into the glass. Watch as it sinks to the bottom, creating a stunning layered effect that resembles a sunrise. Finally, top off your drink with club soda. This adds a fizzy finish that makes the mocktail even more enjoyable!

Step 4: Garnish and Serve

To make your Tropical Sunrise Mocktail even more appealing, it’s time to garnish! Place an orange slice on the rim of the glass and add a maraschino cherry on top. These garnishes not only look great but also add a hint of extra flavor.

Now, your Tropical Sunrise Mocktail is ready to be served! Enjoy this refreshing drink on a hot day or at your next gathering. It’s sure to impress your guests and bring a taste of the tropics to any occasion!

Variations of the Tropical Sunrise Mocktail Recipe

Adding Different Fruits

One of the best things about the Tropical Sunrise Mocktail is its versatility. You can easily customize it by adding different fruits to enhance the flavor. For instance, consider incorporating mango juice for a sweeter taste or passion fruit juice for a tangy twist. Both options will give your mocktail a unique flair.

Another fun idea is to blend in some fresh fruit pieces. Chunks of ripe strawberries or diced kiwi can add a delightful texture and burst of flavor. Simply muddle the fruit at the bottom of the glass before adding the juices. This not only makes your drink more colorful but also adds a refreshing taste that complements the tropical theme.

Feel free to experiment with other fruit juices as well. Guava, papaya, or even a splash of coconut water can elevate your Tropical Sunrise Mocktail to new heights. The key is to mix and match until you find the perfect combination that suits your taste buds!

Alcoholic Twist: Making it a Cocktail

If you’re looking to turn your Tropical Sunrise Mocktail into a cocktail, it’s quite simple! Just add a splash of your favorite rum or vodka to the mix. This will give your drink an adult twist while still keeping the refreshing tropical flavors intact.

For a classic tropical cocktail, consider using light rum. It blends beautifully with the orange and pineapple juices, enhancing the overall flavor. If you prefer a stronger drink, vodka is a great option as it won’t overpower the fruity taste.

To make it even more exciting, try adding a dash of coconut cream or flavored liqueurs like peach schnapps. This will create a rich and creamy texture that pairs perfectly with the fruity base. Just remember to adjust the amount of grenadine syrup to balance the sweetness.

Whether you stick with the mocktail version or opt for the cocktail twist, the Tropical Sunrise drink is sure to be a hit at any gathering!

Cooking Note for the Tropical Sunrise Mocktail Recipe

When preparing the Tropical Sunrise Mocktail, there are a few important cooking notes to keep in mind. These tips will help you achieve the best flavor and presentation for your drink.

First, always use fresh ingredients whenever possible. Freshly squeezed orange juice and ripe pineapples will enhance the overall taste of your mocktail. If you can, opt for organic fruits to avoid any unwanted chemicals. Fresh ingredients not only taste better but also provide a vibrant color that makes your drink visually appealing.

Next, consider chilling your glasses before serving. This simple step can make a big difference in keeping your mocktail cold and refreshing. Just pop your glasses in the freezer for about 10 minutes before you start mixing. A chilled glass will help maintain the temperature of your drink longer, ensuring that every sip is as delightful as the first.

Another tip is to pour the grenadine syrup slowly and gently. This will help create that beautiful layered effect that resembles a sunrise. If you pour too quickly, the colors may mix, and you won’t achieve the stunning gradient look. Patience is key here!

Lastly, feel free to adjust the sweetness of your mocktail. If you prefer a less sweet drink, you can reduce the amount of grenadine syrup. Alternatively, if you like it sweeter, add a little more syrup or even a splash of simple syrup. The beauty of this recipe is that it can be tailored to your taste.

By following these cooking notes, you’ll ensure that your Tropical Sunrise Mocktail is not only delicious but also a feast for the eyes. Enjoy the process and have fun experimenting with flavors!

Serving Suggestions for the Tropical Sunrise Mocktail Recipe

Ideal Occasions for Serving

The Tropical Sunrise Mocktail is perfect for a variety of occasions. Its vibrant colors and refreshing taste make it an excellent choice for summer parties, barbecues, and beach outings. Imagine sipping this delightful drink while lounging by the pool or enjoying a picnic in the park. It’s sure to bring a smile to everyone’s face!

This mocktail is also a fantastic option for family gatherings and celebrations. Whether it’s a birthday party, baby shower, or holiday get-together, the Tropical Sunrise Mocktail adds a festive touch. Kids and adults alike will appreciate its fruity flavors and beautiful presentation. Plus, it’s a great way to include everyone in the fun, as it’s alcohol-free!

Don’t forget about brunch! Serve the Tropical Sunrise Mocktail alongside your favorite breakfast dishes. Its bright flavors pair wonderfully with pancakes, waffles, or fresh fruit platters. It’s a refreshing alternative to traditional brunch beverages like mimosas or bellinis.

Pairing with Snacks and Appetizers

When it comes to pairing snacks and appetizers with your Tropical Sunrise Mocktail, the options are endless! The fruity and refreshing nature of this drink complements a wide range of foods. Here are some tasty ideas:

  • Fresh Fruit Skewers: Combine chunks of pineapple, strawberries, and melon on skewers for a colorful and healthy snack.
  • Cheese Platter: Serve a variety of cheeses, such as brie, cheddar, and goat cheese, alongside crackers and nuts. The creaminess of the cheese pairs well with the fruity mocktail.
  • Spring Rolls: Fresh vegetable spring rolls with a light dipping sauce make for a refreshing appetizer that complements the tropical flavors.
  • Guacamole and Chips: The creamy texture of guacamole and the crunch of tortilla chips create a delightful contrast to the mocktail.
  • Mini Tacos: Small tacos filled with fresh ingredients like fish, chicken, or veggies can be a fun and flavorful pairing.

These snacks not only enhance the overall experience but also make your gathering more enjoyable. The Tropical Sunrise Mocktail, with its vibrant colors and refreshing taste, will surely be the star of the show!

Tips for Perfecting Your Tropical Sunrise Mocktail Recipe

Choosing the Right Glassware

The glassware you choose can elevate your Tropical Sunrise Mocktail experience. A tall, clear glass is ideal for showcasing the beautiful layers of color in your drink. Look for glasses that hold at least 12 ounces to accommodate the ice and ingredients. A highball or hurricane glass works wonderfully, as they allow for a generous pour and a stunning presentation.

For a fun twist, consider using mason jars or colorful tumblers. These options add a casual vibe, perfect for outdoor gatherings or beach parties. Just remember, the clearer the glass, the more your mocktail will shine! A well-chosen glass not only enhances the visual appeal but also makes sipping your drink even more enjoyable.

Enhancing Flavor with Herbs and Spices

To take your Tropical Sunrise Mocktail to the next level, think about adding herbs and spices. Fresh mint leaves can add a refreshing twist. Simply muddle a few leaves at the bottom of your glass before adding the juices. This will infuse your drink with a delightful minty flavor that pairs beautifully with the tropical fruits.

Another great option is to sprinkle a pinch of cinnamon or nutmeg on top of your mocktail. These spices can add warmth and depth to the drink, making it even more inviting. If you’re feeling adventurous, try adding a splash of ginger ale for a zesty kick. The combination of flavors will create a unique and memorable mocktail experience.

Don’t hesitate to experiment! The beauty of the Tropical Sunrise Mocktail is its versatility. By incorporating herbs and spices, you can create a drink that reflects your personal taste and impresses your guests.

Breakdown of Time for the Tropical Sunrise Mocktail Recipe

Prep Time

Preparing the Tropical Sunrise Mocktail is quick and easy! You’ll need about 10 minutes to gather your ingredients and prepare the fruit juices. If you’re using fresh oranges and pineapples, squeezing and juicing them may take a little longer, but it’s well worth the effort for that fresh taste. Overall, the prep time is minimal, making this mocktail a great choice for any occasion.

Cooking Time

Interestingly, there’s no actual cooking involved in this recipe! The Tropical Sunrise Mocktail is all about mixing and layering the ingredients. Once you have your juices ready, mixing them with grenadine and club soda takes just a few minutes. So, you can whip up this refreshing drink in no time!

Total Time

In total, you can expect to spend around 10 to 15 minutes from start to finish. This includes gathering your ingredients, preparing the juices, mixing everything together, and garnishing your drink. With such a quick preparation time, the Tropical Sunrise Mocktail is perfect for last-minute gatherings or a refreshing treat on a sunny day!

Nutritional Information for the Tropical Sunrise Mocktail Recipe

Calories

When enjoying the Tropical Sunrise Mocktail, you can feel good about its calorie content. Each serving contains approximately 130 calories. This makes it a light and refreshing option for those looking to indulge without overdoing it. The combination of fruit juices provides natural sweetness, which helps keep the calorie count lower compared to many sugary drinks. So, you can sip on this delightful mocktail without any guilt!

Protein

In terms of protein, the Tropical Sunrise Mocktail offers about 1 gram per serving. While this isn’t a significant source of protein, it’s important to remember that this drink is primarily a refreshing beverage rather than a meal replacement. The small amount of protein comes from the fruit juices used in the recipe. If you’re looking to boost your protein intake, consider pairing your mocktail with a protein-rich snack, like nuts or cheese, for a balanced treat.

Sodium

The sodium content in the Tropical Sunrise Mocktail is quite low, making it a heart-healthy choice. Each serving contains less than 10 milligrams of sodium. This is great news for those watching their sodium intake. The natural ingredients in this mocktail contribute to its low sodium level, allowing you to enjoy a flavorful drink without worrying about excess salt. Staying hydrated and refreshed has never been easier!

FAQs about the Tropical Sunrise Mocktail Recipe

Can I make the Tropical Sunrise Mocktail Recipe ahead of time?

Yes, you can prepare some elements of the Tropical Sunrise Mocktail ahead of time! For instance, you can juice the oranges and pineapples and store them in the refrigerator. This will save you time when you’re ready to serve. However, it’s best to mix the drink just before serving to maintain its fizzy texture and beautiful layered effect. If you mix it too early, the grenadine may blend with the juices, losing that stunning sunrise look. So, prepare the juices in advance, but wait to combine everything until you’re ready to enjoy!

What fruits work best in the Tropical Sunrise Mocktail Recipe?

The Tropical Sunrise Mocktail is versatile, and you can use a variety of fruits to enhance its flavor. Besides the classic orange and pineapple juices, consider adding mango, passion fruit, or guava for a unique twist. Fresh fruit pieces like strawberries, kiwi, or even diced peaches can also be muddled into the drink for added texture and flavor. The key is to choose fruits that complement the tropical theme and create a refreshing taste. Feel free to experiment and find your favorite combination!

Is the Tropical Sunrise Mocktail Recipe suitable for kids?

Absolutely! The Tropical Sunrise Mocktail is a fantastic choice for kids. It’s a fun, colorful drink that is completely alcohol-free, making it safe for all ages. The fruity flavors and fizzy club soda are sure to delight young taste buds. Plus, the vibrant presentation with garnishes like orange slices and cherries makes it feel special. Whether it’s a birthday party or a family gathering, kids will love sipping on this refreshing mocktail!

Conclusion on the Tropical Sunrise Mocktail Recipe

In conclusion, the Tropical Sunrise Mocktail is a delightful and refreshing drink that brings a taste of the tropics to any occasion. With its vibrant colors and fruity flavors, this mocktail is perfect for summer gatherings, family celebrations, or simply enjoying a sunny day at home. The combination of orange and pineapple juices, along with the sweet touch of grenadine, creates a beautiful layered effect that is sure to impress your guests.

Not only is this mocktail visually stunning, but it is also a healthier alternative to traditional sugary drinks. With only 130 calories per serving and a low sodium content, you can indulge without guilt. Plus, the versatility of the recipe allows you to customize it with different fruits or even turn it into a cocktail for adult gatherings.

Whether you’re serving it at a brunch, a birthday party, or just as a refreshing treat, the Tropical Sunrise Mocktail is sure to be a hit. So, gather your ingredients, follow the simple steps, and enjoy this delightful drink with family and friends. Cheers to a tropical escape in every sip!

Paul

Tropical Sunrise Mocktail Recipe for Refreshing Fun!

Start your day—or brighten your evening—with this stunning and refreshing Sunrise Mocktail. With a perfect balance of sweet grenadine and citrusy orange juice, this non-alcoholic drink looks like a sunrise in a glass and tastes like pure sunshine. It’s easy, elegant, and a guaranteed crowd-pleaser for brunches or festive gatherings.
Prep Time 5 minutes
Total Time 5 minutes
Servings: 1 serving
Course: Drink
Cuisine: American

Ingredients
  

  • 8 ounces 1 cup orange juice, preferably pulp-free1 ounce (2 tablespoons) grenadineOrange slice, for garnish (optional)Maraschino cherry, for garnish (optional)Ice cubes

Method
 

  1. Fill a highball glass with ice to keep the drink chilled.
  2. Pour in the orange juice, leaving a little room at the top.
  3. Slowly add grenadine by pouring it gently over the back of a spoon or directly into the center of the glass. It will settle at the bottom, creating a beautiful sunrise gradient.
  4. Garnish with an orange slice and a maraschino cherry, if desired.
  5. Serve immediately without stirring to maintain the layered effect.

Notes

For the best presentation, use clear glasses to showcase the layered colors. To make it more tropical, substitute part of the orange juice with pineapple juice. You can also turn it into a cocktail by adding a splash of vodka or rum.

Crumbly Walnut Chocolate Cookies are a must-try treat!

Introduction to Crumbly Walnut Chocolate Cookies

Crumbly Walnut Chocolate Cookies. These cookies are not just a treat; they are a celebration of flavors and textures. Imagine biting into a soft, chocolatey cookie that crumbles just right, revealing the rich taste of walnuts and chocolate chips. It’s a perfect combination that will surely satisfy your sweet tooth.

Whether you’re baking for a special occasion or just want to indulge yourself, these cookies are a fantastic choice. They are easy to make and require simple ingredients that you probably already have in your kitchen. Plus, the aroma of freshly baked cookies wafting through your home is simply irresistible!

Crumbly Walnut Chocolate Cookies stand out is their unique texture. The walnuts add a delightful crunch, while the chocolate chips melt in your mouth, creating a heavenly experience. Each bite is a perfect balance of sweetness and nuttiness, making them a favorite among cookie lovers.

So, roll up your sleeves and get ready to bake! In the following sections, we’ll guide you through the ingredients, preparation steps, and even some variations to try. Let’s embark on this delicious journey together!

Ingredients for Crumbly Walnut Chocolate Cookies

Crumbly Walnut Chocolate Cookies. Having everything ready will make your baking experience smooth and enjoyable. Here’s what you’ll need:

  • 1 cup all-purpose flour
  • 1/2 cup unsweetened cocoa powder
  • 1/2 teaspoon baking powder
  • 1/4 teaspoon salt
  • 1/2 cup unsalted butter, softened
  • 1/2 cup granulated sugar
  • 1/4 cup brown sugar, packed
  • 1 large egg
  • 1 teaspoon vanilla extract
  • 1 cup chopped walnuts
  • 1/2 cup chocolate chips

These ingredients come together to create a cookie that is both rich and satisfying. The all-purpose flour and cocoa powder form the base, while the butter adds a creamy texture. The sugars provide sweetness, and the egg helps bind everything together. Don’t forget the walnuts and chocolate chips, as they are the stars of this recipe!

For those looking to experiment, consider adding a pinch of espresso powder to enhance the chocolate flavor. You can also swap out walnuts for pecans if you prefer a different nutty taste. The possibilities are endless, and that’s what makes baking so much fun!

Now that we have our ingredients ready, let’s move on to the preparation steps to create these delightful cookies!

Preparation of Crumbly Walnut Chocolate Cookies

Crumbly Walnut Chocolate Cookies is straightforward and fun. Follow these steps to create your delicious cookies.

Step 1: Preheat the Oven

First things first, preheat your oven to 350°F (175°C). This step is crucial as it ensures that your cookies bake evenly. While the oven heats up, you can prepare the rest of your ingredients. It’s a great way to save time!

Step 2: Mix the Dry Ingredients

In a medium bowl, whisk together the all-purpose flour, unsweetened cocoa powder, baking powder, and salt. Mixing these dry ingredients first helps to evenly distribute the baking powder and salt throughout the flour. Set this bowl aside for now; we’ll come back to it shortly.

Step 3: Cream the Butter and Sugar

Next, take a large bowl and cream together the softened unsalted butter, granulated sugar, and brown sugar. Use an electric mixer or a whisk to beat them together until the mixture is light and fluffy. This process usually takes about 3-4 minutes. The fluffiness is key to achieving that perfect cookie texture!

Step 4: Combine Wet and Dry Ingredients

Once your butter and sugar are well combined, it’s time to add the egg and vanilla extract. Beat them in until everything is mixed well. Now, gradually add the dry ingredients to the wet mixture. Mix until just combined; be careful not to overmix, as this can make your cookies tough.

Step 5: Fold in the Walnuts and Chocolate

Now comes the fun part! Gently fold in the chopped walnuts and chocolate chips. This step ensures that every cookie has a delightful crunch from the walnuts and a burst of chocolate in every bite. Make sure they are evenly distributed throughout the dough.

Step 6: Shape the Cookies

Using a tablespoon or a cookie scoop, drop rounded balls of dough onto your prepared baking sheet. Make sure to space them about 2 inches apart. This spacing allows the cookies to spread while baking without sticking together. You want them to have room to grow!

Step 7: Bake the Cookies

Finally, it’s time to bake! Place the baking sheet in the preheated oven and bake for 10-12 minutes. You’ll know they’re ready when the edges are set but the centers are still soft. This will give you that perfect crumbly texture. Once baked, allow the cookies to cool on the baking sheet for about 5 minutes before transferring them to a wire rack to cool completely.

Crumbly Walnut Chocolate Cookies are now ready to be enjoyed. The preparation is simple, and the results are absolutely delicious. Let’s move on to some variations you can try to make these cookies even more exciting!

Variation of Crumbly Walnut Chocolate Cookies

Crumbly Walnut Chocolate Cookies are delightful on their own, there’s always room for creativity in the kitchen! Let’s explore some alternative ingredients and a gluten-free version to cater to different tastes and dietary needs. These variations will keep your cookie game exciting and delicious!

Alternative Ingredients for Different Flavors

Crumbly Walnut Chocolate Cookies:

  • Pecans: Swap out walnuts for pecans for a sweeter, buttery flavor. Pecans add a unique twist while still providing that satisfying crunch.
  • Peanut Butter: For a nutty kick, mix in 1/4 cup of creamy peanut butter with the butter and sugars. This will give your cookies a rich, peanut buttery taste.
  • Mint Extract: Add a teaspoon of mint extract to the wet ingredients for a refreshing mint chocolate cookie. This is perfect for those who love minty treats!
  • White Chocolate Chips: Replace regular chocolate chips with white chocolate chips for a sweeter, creamier cookie. The contrast with the cocoa powder is delightful.
  • Dried Fruits: Consider adding 1/2 cup of dried cranberries or cherries for a fruity twist. They add a chewy texture and a burst of flavor.

These alternatives not only change the flavor but also make your cookies unique. Feel free to mix and match to find your favorite combination!

Gluten-Free Version of Crumbly Walnut Chocolate Cookies

Crumbly Walnut Chocolate Cookies:

  • Gluten-Free Flour Blend: Substitute the all-purpose flour with a gluten-free flour blend. Make sure it’s a 1:1 ratio blend that includes xanthan gum for the best results.
  • Oats: You can also use ground oats (oat flour) as a gluten-free alternative. Just blend rolled oats in a food processor until they reach a fine flour consistency.
  • Check Labels: Ensure that all other ingredients, like baking powder and chocolate chips, are labeled gluten-free. This is important to avoid any cross-contamination.

Crumbly Walnut Chocolate Cookies that everyone can enjoy. Baking is all about experimenting, so don’t hesitate to try new things!

Cooking Note for Crumbly Walnut Chocolate Cookies

Crumbly Walnut Chocolate Cookies, a few cooking notes can help ensure your cookies turn out perfectly every time. These tips will guide you through the process and enhance your baking experience.

First, always use room temperature ingredients. This means letting your butter and egg sit out for about 30 minutes before you start. Room temperature butter creams better with sugar, leading to a lighter cookie. Similarly, a room temperature egg mixes more easily into the batter.

Next, be mindful of your mixing technique. When combining the wet and dry ingredients, mix until just combined. Overmixing can lead to tough cookies, which is not what we want! A gentle hand will keep your cookies soft and crumbly.

Another important note is to keep an eye on your baking time. Ovens can vary, so check your cookies a minute or two before the suggested baking time. You want the edges to be set while the centers remain soft. This will give you that delightful crumbly texture.

Lastly, let your cookies cool on the baking sheet for a few minutes before transferring them to a wire rack. This step allows them to firm up slightly, making them easier to move without breaking. Patience is key here!

Crumbly Walnut Chocolate Cookies ever. Happy baking!

Serving Suggestions for Crumbly Walnut Chocolate Cookies

Crumbly Walnut Chocolate Cookies are baked to perfection, it’s time to think about how to serve them! These cookies are not only delicious on their own but can also be paired with various treats and beverages to enhance your snacking experience. Here are some delightful serving suggestions:

  • With a Glass of Milk: There’s nothing quite like enjoying cookies with a cold glass of milk. The creamy texture of milk complements the rich chocolate and nutty flavors of the cookies perfectly.
  • Ice Cream Sandwiches: For a fun twist, sandwich a scoop of your favorite ice cream between two cookies. This creates a delightful dessert that’s perfect for warm days!
  • With Coffee or Tea: Pair your cookies with a hot cup of coffee or tea. The warmth of the beverage enhances the chocolatey goodness and makes for a cozy treat.
  • On a Dessert Platter: Arrange your cookies on a beautiful platter alongside other treats like brownies, mini cupcakes, or fruit. This makes for an impressive dessert spread at parties or gatherings.
  • With Whipped Cream: Top your cookies with a dollop of whipped cream for an extra indulgent treat. You can even drizzle some chocolate sauce on top for added sweetness!

Crumbly Walnut Chocolate Cookies experience, making them even more enjoyable. Whether you’re sharing with friends or savoring them alone, these cookies are sure to bring a smile to your face. So, gather your loved ones, serve up these delightful treats, and enjoy every crumb!

Tips for Perfect Crumbly Walnut Chocolate Cookies

Crumbly Walnut Chocolate Cookies turn out perfectly every time, here are some handy tips to keep in mind. These simple tricks can make a big difference in the texture and flavor of your cookies, helping you achieve that ideal crumbly goodness.

  • Measure Ingredients Accurately: Use measuring cups and spoons for precise measurements. Too much flour can make your cookies dry, while too little can lead to spreading. For best results, spoon flour into the measuring cup and level it off with a knife.
  • Chill the Dough: If you have time, chill the cookie dough for about 30 minutes before baking. This helps the cookies maintain their shape and prevents them from spreading too much in the oven.
  • Use Quality Ingredients: The quality of your ingredients matters! Use fresh cocoa powder, good-quality chocolate chips, and fresh walnuts. This will enhance the overall flavor of your cookies.
  • Don’t Overbake: Keep a close eye on your cookies as they bake. Remove them from the oven when the edges are set but the centers are still soft. They will continue to cook slightly as they cool on the baking sheet.
  • Experiment with Add-Ins: Feel free to get creative! Add a pinch of sea salt on top before baking for a sweet and salty contrast. You can also mix in different types of chocolate chips or nuts for a unique twist.
  • Store Properly: To keep your cookies fresh, store them in an airtight container at room temperature. You can also freeze them for later enjoyment. Just make sure to separate layers with parchment paper to prevent sticking.

Crumbly Walnut Chocolate Cookies that everyone will love. Happy baking!

Breakdown of Time for Crumbly Walnut Chocolate Cookies

Crumbly Walnut Chocolate Cookies can help you plan your baking session better. Here’s a simple breakdown of the time you’ll need for preparation, cooking, and the total time involved in making these delicious cookies.

Prep Time

Crumbly Walnut Chocolate Cookies is approximately 15-20 minutes. This includes gathering your ingredients, measuring them out, and mixing everything together. It’s a quick process, especially once you get the hang of it!

Cooking Time

Once your cookie dough is ready, the cooking time is about 10-12 minutes. Keep an eye on your cookies as they bake. You want the edges to be set while the centers remain soft for that perfect crumbly texture.

Total Time

In total, you can expect to spend around 30-35 minutes from start to finish. This includes both prep and cooking time. It’s a small investment for a batch of delightful cookies that will surely impress your family and friends!

Crumbly Walnut Chocolate Cookies!

Nutritional Information for Crumbly Walnut Chocolate Cookies

Crumbly Walnut Chocolate Cookies can help you enjoy them mindfully. While these cookies are a delightful treat, knowing their nutritional values allows you to balance your diet. Here’s a breakdown of the key nutritional information for each cookie:

Calories

Crumbly Walnut Chocolate Cookie contains approximately 180 calories. This makes them a satisfying snack without being overly indulgent. Enjoying one or two cookies can fit nicely into a balanced diet, especially when paired with a healthy meal or snack.

Protein

These cookies provide about 3 grams of protein per cookie. While they are not a primary source of protein, the addition of walnuts contributes to this value. Nuts are a great way to add some protein and healthy fats to your diet, making these cookies a more nutritious option compared to many other sweet treats.

Sodium

Each cookie contains roughly 100 milligrams of sodium. This is a moderate amount, especially considering that most people consume more sodium than necessary in their daily diets. Keeping an eye on sodium intake is important, but enjoying these cookies in moderation can be part of a healthy lifestyle.

Crumbly Walnut Chocolate Cookies are a delicious treat, they also offer some nutritional benefits. With a balance of calories, protein, and sodium, you can enjoy these cookies as part of a varied diet. Remember, moderation is key, and these cookies can be a delightful addition to your dessert repertoire!

FAQs about Crumbly Walnut Chocolate Cookies

Can I use other nuts instead of walnuts?

Crumbly Walnut Chocolate Cookies. Pecans are a great alternative, offering a sweeter flavor. Almonds or hazelnuts can also work well, adding a unique twist to your cookies. Just make sure to chop them into small pieces for even distribution throughout the dough. Feel free to experiment and find your favorite nut combination!

How do I store Crumbly Walnut Chocolate Cookies?

Crumbly Walnut Chocolate Cookies fresh, store them in an airtight container at room temperature. This will help maintain their crumbly texture and prevent them from becoming stale. If you want to keep them for a longer period, you can freeze the cookies. Just make sure to separate layers with parchment paper to avoid sticking. When you’re ready to enjoy them, simply thaw at room temperature or warm them in the oven for a few minutes.

Can I freeze Crumbly Walnut Chocolate Cookies?

Crumbly Walnut Chocolate Cookies! To do this, allow the cookies to cool completely after baking. Then, place them in a single layer on a baking sheet and freeze until solid. Once frozen, transfer them to an airtight container or a freezer bag. They can be stored in the freezer for up to three months. When you’re ready to enjoy, just thaw them at room temperature or warm them in the oven for a delightful treat!

What can I serve with Crumbly Walnut Chocolate Cookies?

Crumbly Walnut Chocolate Cookies. A classic choice is a glass of cold milk, which pairs perfectly with the rich chocolate flavor. You can also serve them with coffee or tea for a cozy afternoon snack. For a fun twist, try making ice cream sandwiches by placing a scoop of your favorite ice cream between two cookies. Additionally, they can be served on a dessert platter alongside other treats for a festive gathering. The possibilities are endless!

Conclusion on Crumbly Walnut Chocolate Cookies

Crumbly Walnut Chocolate Cookies are a delightful treat that brings joy to any occasion. Their rich chocolate flavor, combined with the satisfying crunch of walnuts, creates a cookie experience that is hard to resist. Whether you’re baking for a special event or simply indulging yourself, these cookies are sure to impress.

Throughout this article, we’ve explored the ingredients, preparation steps, and various ways to customize your cookies. From alternative ingredients to gluten-free options, the versatility of this recipe allows you to cater to different tastes and dietary needs. Plus, with the tips and serving suggestions provided, you can elevate your cookie game to new heights!

Crumbly Walnut Chocolate Cookies that will leave everyone asking for more.

As you embark on your baking journey, don’t hesitate to experiment and make this recipe your own. With each batch, you’ll discover new flavors and textures that will keep your cookie cravings satisfied. Happy baking, and may your kitchen be filled with the sweet aroma of freshly baked cookies!

Paul

Crumbly Walnut Chocolate Cookies are a must-try treat!

These irresistible walnut-studded cookies are soft, buttery, and dipped in silky milk chocolate, with an elegant dark chocolate drizzle and extra crunch from toasted walnuts. They melt in your mouth and make the perfect indulgent treat for gifting, holiday platters, or cozy moments with coffee or tea.
Prep Time 25 minutes
Cook Time 12 minutes
Total Time 1 hour
Course: Dessert
Cuisine: European

Ingredients
  

  • For the Cookie Dough135 g butter melted and cooled8 g vanilla sugar100 g granulated sugar200 g walnuts, finely chopped100 g milk chocolate, finely chopped200 g all-purpose flour3 g baking powder
  • For the Coating300 g milk chocolate20 ml sunflower oil
  • For the GarnishChopped walnutsMelted dark chocolate for drizzling

Method
 

  1. Melt the butter gently over low heat and allow it to cool completely before using.
  2. Use a food processor to finely chop the walnuts and milk chocolate.
  3. In a large bowl, mix the cooled butter with vanilla sugar and granulated sugar. Add the chopped walnuts, chocolate, flour, and baking powder. Knead the mixture into a smooth dough.
  4. Roll dough into 14-gram portions and shape into balls. Place on a baking sheet lined with parchment paper.
  5. Preheat the oven to 200°C (400°F). Bake the cookies for 10 to 12 minutes. Let them cool completely on a wire rack before moving to the next step.
  6. In a double boiler, melt the milk chocolate with sunflower oil. Dip each cooled cookie halfway or fully into the chocolate and place them on parchment to set.
  7. Drizzle with melted dark chocolate and sprinkle with additional chopped walnuts. Allow the cookies to rest until the chocolate has fully set.

Notes

Let the butter cool completely before mixing to prevent overly soft dough.
Toast walnuts in a dry pan for 2 to 3 minutes to intensify their flavor.
If dough feels too soft, chill it in the fridge for 15 to 20 minutes.
Store finished cookies in an airtight container in a cool place for up to one week.

Stay Connected

Get recipes via email: