Blueberry Cinnamon Rolls [55 Minutes]: A Sweet and Fluffy Treat

A Perfectly Sweet Start to Your Day

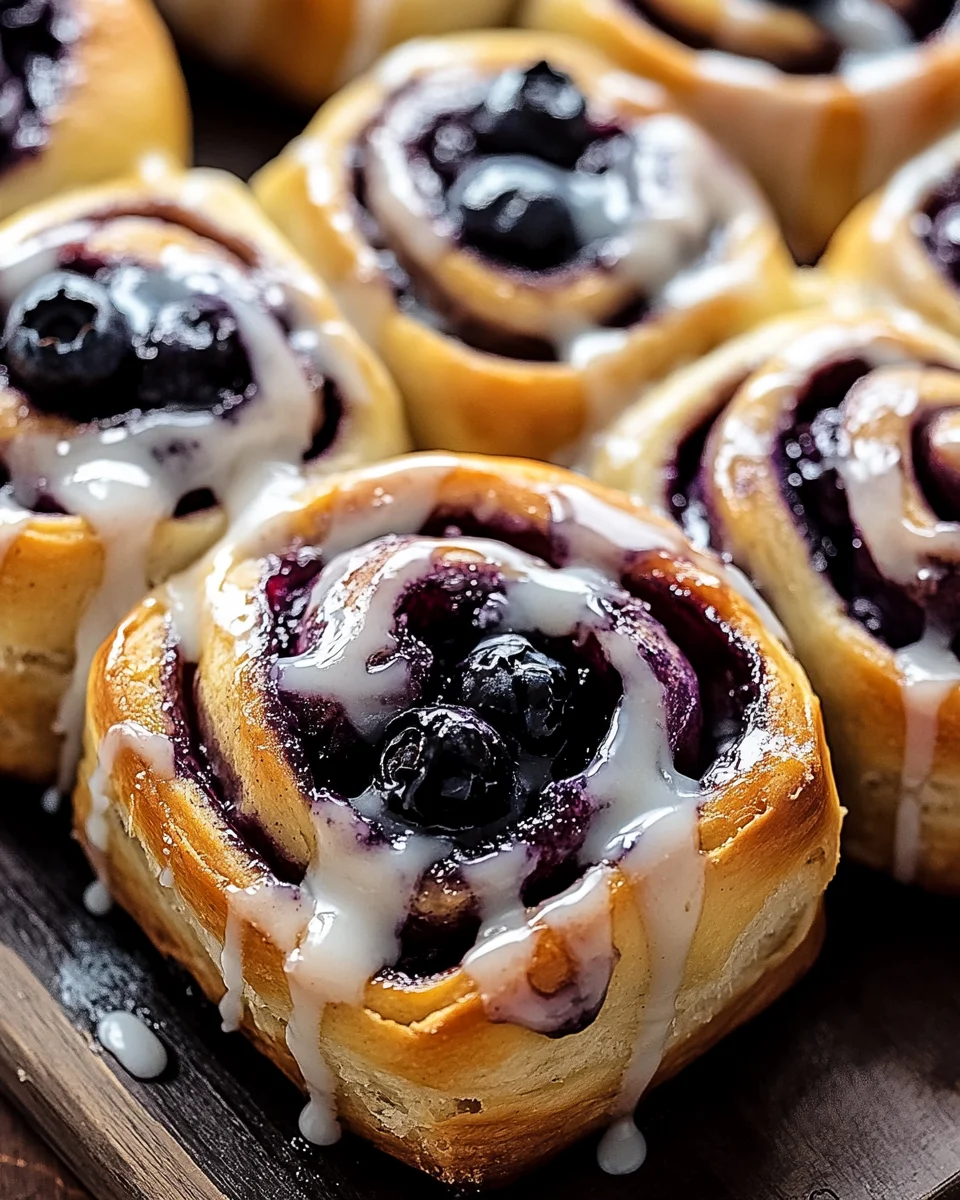
Imagine pulling a warm tray of Blueberry Cinnamon Rolls out of the oven. The smell of cinnamon, butter, and sweet blueberries fills your kitchen, making it impossible to resist taking a bite. Each roll is soft, fluffy, and packed with juicy blueberries, swirled with a rich cinnamon-sugar filling, and topped with a creamy vanilla cream cheese frosting.

Whether you’re making these for a weekend brunch, holiday gathering, or a special breakfast treat, this quick 55-minute recipe ensures that you don’t have to wait too long to enjoy homemade cinnamon rolls.

Let’s dive into how you can make these Blueberry Cinnamon Rolls from scratch, with easy-to-follow steps and expert tips to guarantee success.

Why You’ll Love This Recipe

✔️ Quick & Easy – Ready in just 55 minutes, perfect for a spontaneous treat.
✔️ Soft & Fluffy – A perfectly light and pillowy texture.
✔️ Loaded with Blueberries – Juicy bursts of flavor in every bite.
✔️ Perfectly Sweet & Spiced – The cinnamon and brown sugar filling balances beautifully with the blueberries.
✔️ Topped with Creamy Frosting – A rich, vanilla cream cheese glaze makes these irresistible.

Ingredients You’ll Need

Here’s everything you need to make Blueberry Cinnamon Rolls from scratch.

Dough Ingredients

IngredientQuantity
Warm milk1 cup
Active dry yeast2 ¼ teaspoons (1 packet)
Granulated sugar¼ cup
Melted butter¼ cup
Salt1 teaspoon
Eggs2
All-purpose flour4 cups

Filling Ingredients

IngredientQuantity
Fresh blueberries1 cup
Brown sugar½ cup
Ground cinnamon2 tablespoons
Melted butter2 tablespoons

Cream Cheese Frosting

IngredientQuantity
Cream cheese (softened)4 ounces
Butter (softened)¼ cup
Powdered sugar1 cup
Vanilla extract1 teaspoon

Essential Kitchen Tools

To make these Blueberry Cinnamon Rolls, you’ll need:

  • Large mixing bowl – To prepare the dough.
  • Rolling pin – For rolling out the dough evenly.
  • Baking dish – A 9×13-inch pan works best.
  • Small saucepan – To melt butter.
  • Measuring cups & spoons – For accuracy.
  • Electric mixer – To make smooth frosting.

Step-by-Step Guide to Making Blueberry Cinnamon Rolls

1. Activate the Yeast

  • Warm the milk to 110°F (45°C).
  • Stir in sugar and yeast and let it sit for 5-10 minutes until it becomes foamy.

2. Prepare the Dough

  • In a large bowl, whisk together melted butter, eggs, and salt.
  • Add the yeast mixture and gradually mix in the flour, one cup at a time.
  • Knead for 5-7 minutes until the dough is soft and elastic.

3. Roll Out the Dough

  • Lightly flour a clean surface and roll the dough into a 12×16-inch rectangle.

4. Add the Filling

  • Brush the rolled-out dough with melted butter.
  • Sprinkle brown sugar and cinnamon evenly across the surface.
  • Scatter blueberries on top.

5. Roll & Cut the Dough

  • Roll the dough tightly into a log from the long side.
  • Cut into 12 equal rolls and place them in a greased baking dish.

6. Bake the Rolls

  • Preheat the oven to 375°F (190°C).
  • Cover the rolls and let them rise for 15 minutes.
  • Bake for 18-20 minutes, until golden brown.

7. Make the Frosting

  • Beat cream cheese, butter, powdered sugar, and vanilla until smooth.

8. Frost & Serve

  • Spread frosting over warm rolls and enjoy!

The Secret to Soft and Fluffy Cinnamon Rolls

✔️ Use warm (not hot) milk – Helps the yeast activate properly.
✔️ Let the dough rise fully – This ensures soft and airy rolls.
✔️ Don’t overbake – Remove from the oven when lightly golden.

Ingredient Substitutions and Variations

IngredientSubstitutes
All-purpose flourBread flour for extra chewiness
Fresh blueberriesFrozen blueberries (do not thaw)
Brown sugarCoconut sugar for a healthier alternative
Cream cheese frostingVanilla glaze or honey drizzle

How to Store and Reheat Leftovers

  • Refrigeration: Store in an airtight container for up to 3 days.
  • Freezing: Wrap individually and freeze for up to 2 months.
  • Reheating: Warm in the oven at 325°F (160°C) for 5 minutes or microwave for 30 seconds.

Best Drinks and Sides to Serve with Blueberry Cinnamon Rolls

Coffee or Latte – Balances the sweetness.
🍵 Chai Tea – A warm and spiced complement.
🍓 Fresh Fruit Salad – Adds a refreshing contrast.

Health Benefits of Blueberries in Baking

✔️ Rich in Antioxidants – Supports heart health.
✔️ Boosts Brain Function – Improves memory and focus.
✔️ Low in Calories – Naturally sweet without too much sugar.

Nutritional Information Breakdown

NutrientAmount per Serving
Calories~320
Protein6g
Carbohydrates45g
Fat12g

Frequently Asked Questions

1. Can I make these rolls ahead of time?

Yes! Prepare them the night before, refrigerate, and bake fresh in the morning.

2. Can I use a different fruit?

Absolutely! Try raspberries, blackberries, or chopped strawberries.

3. Do I need to use yeast?

Yes, yeast helps the dough rise and gives it a fluffy texture.

Final Thoughts and Call to Action

Now that you know how to make Blueberry Cinnamon Rolls, it’s time to bake a batch! These sweet, fluffy rolls are perfect for breakfast, brunch, or a weekend treat.

ating

Blueberry Cinnamon Rolls [55 Minutes]: A Sweet and Fluffy Treat

Enjoy a sweet and fluffy treat with these homemade Blueberry Cinnamon Rolls. Each roll is packed with juicy blueberries, a warm cinnamon-sugar filling, and topped with a creamy vanilla cream cheese frosting. Perfect for breakfast, brunch, or any special occasion!
 
Prep Time 15 minutes
Cook Time 20 minutes
Total Time 55 minutes
Servings: 12 Rolls
Course: Breakfast/Brunch
Cuisine: American

Ingredients
  

Dough:
  • 1 cup warm milk
  • 2 1/4 teaspoons 1 packet active dry yeast
  • 1/4 cup granulated sugar
  • 1/4 cup melted butter
  • 1 teaspoon salt
  • 2 eggs
  • 4 cups all-purpose flour
Filling:
  • 1 cup fresh blueberries
  • 1/2 cup brown sugar
  • 2 tablespoons ground cinnamon
  • 2 tablespoons melted butter
Cream Cheese Frosting:
  • 4 ounces cream cheese softened
  • 1/4 cup butter softened
  • 1 cup powdered sugar
  • 1 teaspoon vanilla extract

Method
 

Activate the Yeast:
  1. Warm the milk to 110°F (45°C).
  2. Stir in sugar and yeast and let sit for 5-10 minutes until foamy.
Prepare the Dough:
  1. In a large bowl, whisk together melted butter, eggs, and salt.
  2. Add the yeast mixture and gradually mix in the flour, one cup at a time.
  3. Knead for 5-7 minutes until the dough is soft and elastic.
Roll Out the Dough:
  1. Lightly flour a clean surface and roll the dough into a 12×16-inch rectangle.
Add the Filling:
  1. Brush the rolled-out dough with melted butter.
  2. Sprinkle brown sugar and cinnamon evenly across the surface.
  3. Scatter blueberries on top.
Roll & Cut the Dough:
  1. Roll the dough tightly into a log from the long side.
  2. Cut into 12 equal rolls and place them in a greased baking dish.
Bake the Rolls:
  1. Preheat oven to 375°F (190°C).
  2. Cover the rolls and let them rise for 15 minutes.
  3. Bake for 18-20 minutes, until golden brown.
Make the Frosting:
  1. Beat cream cheese, butter, powdered sugar, and vanilla until smooth.
Frost & Serve:
  1. Spread frosting over warm rolls and enjoy!

Notes

  • Use warm (not hot) milk to properly activate the yeast.
  • Let the dough rise fully for soft and airy rolls.
  • Avoid overbaking to keep the rolls moist and fluffy.

Baked Ham and Cheese Croissants: A Buttery, Cheesy Delight

A Warm and Comforting Breakfast Favorite

Imagine biting into a warm, buttery croissant, filled with savory ham and gooey melted cheddar cheese, topped with a lightly sweet and tangy glaze. The golden, flaky exterior and the rich, cheesy interior create a perfect balance of textures and flavors. Whether you’re making these for breakfast, brunch, or a quick snack, Baked Ham and Cheese Croissants are a guaranteed crowd-pleaser.

These croissants are incredibly easy to prepare, making them perfect for busy mornings or weekend family gatherings. With a simple honey-mustard butter glaze and a sprinkle of poppy seeds, this dish transforms a classic ham and cheese sandwich into a deliciously warm and indulgent treat.

Let’s explore how to make the best Baked Ham and Cheese Croissants step by step!

Why You’ll Love This Recipe

✔️ Quick and Easy – Ready in 30 minutes with minimal prep.
✔️ Perfect for Any Occasion – Great for breakfast, brunch, or parties.
✔️ Savory and Sweet Balance – The honey-mustard butter glaze adds a delicious twist.
✔️ Kid-Friendly – A hit with both kids and adults!
✔️ Customizable – Swap ingredients to match your preferences.

Ingredients You’ll Need

Here’s everything you need to make Baked Ham and Cheese Croissants:

Main Ingredients

IngredientQuantity
Mini croissants8
Smoked cheddar cheese (or regular cheddar), halved4 slices
Deli-cut ham¾ pound

For the Honey-Mustard Butter Glaze

IngredientQuantity
Unsalted butter (softened)3 tablespoons
Yellow mustard2 tablespoons
Honey1 tablespoon
Worcestershire sauce½ to 1 teaspoon

For Topping

IngredientQuantity
Egg white1 large
Poppy seedsFor sprinkling

Essential Kitchen Tools

To make these croissants, you’ll need:

  • Baking sheet – For even baking.
  • Small bowl – To mix the glaze.
  • Pastry brush – For applying the glaze.
  • Knife & cutting board – To slice cheese and croissants.
  • Aluminum foil – To prevent over-browning if needed.

Step-by-Step Guide to Making Baked Ham and Cheese Croissants

1. Preheat Your Oven

  • Set your oven to 375°F (190°C).
  • Line a baking sheet with parchment paper.

2. Slice and Fill the Croissants

  • Slice each mini croissant in half lengthwise.
  • Place a half slice of cheddar cheese on the bottom half.
  • Add a few slices of deli ham, then top with another half slice of cheese.
  • Cover with the top half of the croissant.

3. Prepare the Honey-Mustard Butter Glaze

  • In a small bowl, mix together butter, yellow mustard, honey, and Worcestershire sauce.
  • Stir until smooth and well combined.

4. Brush the Croissants with Glaze

  • Use a pastry brush to coat the tops of the croissants with the glaze.
  • Lightly whisk one egg white and brush it over the tops for a golden crust.
  • Sprinkle with poppy seeds for extra texture and flavor.

5. Bake Until Golden

  • Place the croissants on the baking sheet.
  • Bake for 12-15 minutes, or until golden brown and cheese is melted.
  • If they start browning too quickly, cover loosely with foil.

6. Serve and Enjoy!

  • Let the croissants cool for a few minutes before serving.
  • Enjoy warm with your favorite side dishes or dipping sauces.

The Secret to Perfectly Baked Croissants

✔️ Use fresh, high-quality croissants for the best texture.
✔️ Don’t overbake – Keep an eye on them to prevent burning.
✔️ Layer cheese both under and over the ham for ultimate meltiness.
✔️ Brush with egg white for a glossy, golden finish.

Ingredient Substitutions and Variations

IngredientSubstitutes
Cheddar cheeseSwiss, provolone, or brie
HamTurkey or roast beef
Yellow mustardDijon or honey mustard
Poppy seedsSesame seeds

How to Store and Reheat Leftovers

  • Refrigeration: Store in an airtight container for up to 3 days.
  • Freezing: Wrap individually in foil and freeze for up to 2 months.
  • Reheating:
    • Oven: Warm at 325°F (160°C) for 8-10 minutes.
    • Microwave: Heat for 30-45 seconds, but note it may soften.

Best Side Dishes to Serve with Baked Ham and Cheese Croissants

🥗 Fresh Fruit Salad – Adds a refreshing contrast.
🥣 Tomato Soup – A warm, comforting side.
🥗 Mixed Green Salad – A light and healthy addition.

Health Benefits of This Dish

✔️ Protein-Rich – Ham and cheese provide essential protein.
✔️ Balanced Carbs & Fats – Croissants offer energy while cheese provides healthy fats.
✔️ Customizable – Adjust ingredients for a healthier version.

Nutritional Information Breakdown

NutrientAmount per Serving
Calories~350
Protein15g
Carbohydrates25g
Fat20g

Frequently Asked Questions

1. Can I make these croissants ahead of time?

Yes! Assemble them a few hours ahead and bake when ready.

2. What’s the best cheese for this recipe?

Smoked cheddar, Swiss, or brie work beautifully.

3. Can I use large croissants?

Yes! Just adjust baking time to 15-18 minutes.

Final Thoughts and Call to Action

Now that you know how to make Baked Ham and Cheese Croissants, it’s time to try them! These flaky, cheesy, and buttery croissants are perfect for any occasion.

ating

These Baked Ham and Cheese Croissants are a buttery, cheesy delight, perfect for breakfast, brunch, or a quick snack. Flaky croissants filled with savory ham and melted cheddar cheese, topped with a honey-mustard butter glaze, create an irresistible treat that’s easy to make and loved by all.
Prep Time 10 minutes
Cook Time 15 minutes
Total Time 25 minutes
Servings: 8 servings
Course: Breakfast/Brunch
Cuisine: French-American

Ingredients
  

Main Ingredients:
  • 8 mini croissants
  • 4 slices smoked cheddar cheese or regular cheddar, halved
  • 3/4 pound deli-cut ham
For the Honey-Mustard Butter Glaze:
  • 3 tablespoons unsalted butter softened
  • 2 tablespoons yellow mustard
  • 1 tablespoon honey
  • 1/2 to 1 teaspoon Worcestershire sauce
For Topping:
  • 1 large egg white
  • Poppy seeds for sprinkling

Method
 

Preheat Your Oven:
  1. Set oven to 375°F (190°C) and line a baking sheet with parchment paper.
Slice and Fill the Croissants:
  1. Slice each mini croissant in half lengthwise.
  2. Place a half slice of cheddar cheese on the bottom half.
  3. Add a few slices of deli ham, then top with another half slice of cheese.
  4. Cover with the top half of the croissant.
Prepare the Honey-Mustard Butter Glaze:
  1. In a small bowl, mix together butter, yellow mustard, honey, and Worcestershire sauce.
  2. Stir until smooth and well combined.
Brush the Croissants with Glaze:
  1. Use a pastry brush to coat the tops of the croissants with the glaze.
  2. Lightly whisk the egg white and brush it over the tops for a golden crust.
  3. Sprinkle with poppy seeds for extra texture and flavor.
Bake Until Golden:
  1. Place the croissants on the prepared baking sheet.
  2. Bake for 12-15 minutes, or until golden brown and cheese is melted.
  3. If browning too quickly, cover loosely with foil.
  4. Serve and Enjoy!
  5. Let the croissants cool for a few minutes before serving.
  6. Enjoy warm with your favorite side dishes or dipping sauces.

Notes

  • Use fresh, high-quality croissants for the best texture.
  • Keep an eye on the baking time to prevent over-browning.
  • Layer cheese both under and over the ham for ultimate meltiness.
  • Brush with egg white for a glossy, golden finish.

Spaghetti with Meat Sauce: A Classic, Hearty, and Flavorful Dish

The Ultimate Comfort Food

Imagine sitting down to a warm plate of Spaghetti with Meat Sauce, the rich aroma of garlic and tomatoes filling the air. The tender noodles coated in a savory, slow-simmered meat sauce make every bite comforting and delicious. Whether you’re cooking for your family, meal prepping for the week, or just craving a satisfying homemade dinner, this dish is a timeless favorite that never disappoints.

This recipe is simple yet full of rich flavors. The combination of ground beef (or Italian sausage), onion, tomato sauce, and classic Italian seasonings creates a sauce that is both hearty and deeply satisfying.

Let’s dive into everything you need to know to make the best homemade Spaghetti with Meat Sauce!

Why You’ll Love This Recipe

✔️ Classic & Comforting – A timeless dish that everyone loves.
✔️ Easy to Make – Simple ingredients and minimal prep.
✔️ Rich & Flavorful – Slow-simmered sauce enhances the taste.
✔️ Budget-Friendly – Uses affordable pantry staples.
✔️ Meal Prep Friendly – Stores well for leftovers.

Ingredients You’ll Need

This recipe uses simple, pantry-friendly ingredients that come together for a rich and flavorful dish.

Main Ingredients

IngredientQuantity
Ground beef (or mix of beef & Italian sausage)1 lb
Onion (chopped)1 medium
Tomato sauce2 cups
Tomato paste2 tablespoons
Italian seasoning1 teaspoon
Worcestershire sauce1 tablespoon
Sugar1 teaspoon
Spaghetti noodles12 oz
Olive oil (for sautéing)1 tablespoon
Salt & black pepperTo taste
Garlic (minced)2 cloves (optional)

Optional Garnishes & Toppings

ToppingPurpose
Parmesan cheeseAdds richness
Fresh basilEnhances freshness
Red pepper flakesAdds heat

Essential Kitchen Tools

To make this Spaghetti with Meat Sauce, you’ll need:

  • Large skillet or saucepan – For cooking the meat sauce.
  • Large pot – For boiling the spaghetti.
  • Wooden spoon or spatula – For stirring the sauce.
  • Strainer – To drain the pasta.
  • Measuring cups & spoons – For accuracy in seasoning.

How to Make Spaghetti with Meat Sauce

1. Cook the Meat

  • Heat 1 tablespoon of olive oil in a large skillet over medium-high heat.
  • Add ground beef (or Italian sausage) and cook until browned.
  • Drain excess grease and add chopped onions.
  • Sauté for 3-4 minutes, then stir in minced garlic (if using).

2. Prepare the Sauce

  • Stir in tomato sauce, tomato paste, Worcestershire sauce, sugar, Italian seasoning, salt, and black pepper.
  • Reduce heat to low and let it simmer for 20-30 minutes, stirring occasionally.

3. Cook the Spaghetti

  • Bring a large pot of salted water to a boil.
  • Add spaghetti and cook according to package instructions.
  • Drain the noodles and set aside.

4. Combine and Serve

  • Add the cooked spaghetti to the meat sauce and toss to coat evenly.
  • Serve hot, garnished with Parmesan cheese and fresh basil.

The Secret to a Rich and Flavorful Meat Sauce

✔️ Use a mix of ground beef and Italian sausage for extra depth of flavor.
✔️ Simmer the sauce for at least 20 minutes to enhance richness.
✔️ Add a splash of pasta water to the sauce for a silkier texture.
✔️ Let the flavors meld overnight—it tastes even better the next day!

Ingredient Substitutions and Variations

IngredientSubstitutes
Ground beefGround turkey or chicken
Tomato sauceCrushed tomatoes
Italian seasoningBasil, oregano, thyme mix
Worcestershire sauceBalsamic vinegar

How to Cook Spaghetti Noodles Perfectly

  • Use plenty of water – Prevents sticking.
  • Salt the water generously – Enhances flavor.
  • Stir occasionally – Keeps noodles from clumping.
  • Don’t overcook – Aim for al dente texture.

Best Side Dishes to Serve with Spaghetti

🍞 Garlic Bread – Crispy, buttery, and perfect for dipping.
🥗 Caesar Salad – Light and refreshing contrast.
🧄 Roasted Vegetables – Adds extra nutrition.

How to Store and Reheat Leftovers

  • Refrigeration: Store in an airtight container for up to 4 days.
  • Freezing: Freeze sauce separately for up to 3 months.
  • Reheating: Warm on the stovetop over medium heat, adding a splash of water.

Nutritional Information Breakdown

NutrientAmount per Serving
Calories~450
Protein30g
Carbohydrates50g
Fat15g

Frequently Asked Questions

1. Can I make this recipe ahead of time?

Yes! The sauce tastes even better the next day.

2. Can I use fresh tomatoes instead of canned?

Absolutely! Use blanched and pureed fresh tomatoes for a homemade touch.

3. What’s the best way to thicken the sauce?

Simmer uncovered for a few extra minutes, or add more tomato paste.

4. Can I make this dish gluten-free?

Yes! Use gluten-free spaghetti noodles.

Final Thoughts and Call to Action

Now that you know how to make Spaghetti with Meat Sauce, it’s time to give it a try! This classic, comforting meal is perfect for any occasion.

ating

Spaghetti with Meat Sauce: A Classic, Hearty, and Flavorful Dish

This classic Spaghetti with Meat Sauce is rich, hearty, and packed with flavor. With a slow-simmered meat sauce made from ground beef, tomato sauce, and Italian seasonings, this dish is comforting, satisfying, and perfect for any occasion.
Prep Time 10 minutes
Cook Time 30 minutes
Total Time 40 minutes
Servings: 4 -6 servings
Course: Main Dish
Cuisine: Italian

Ingredients
  

For the Meat Sauce:
  • 1 lb ground beef or mix of beef & Italian sausage
  • 1 medium onion chopped
  • 2 cups tomato sauce
  • 2 tablespoons tomato paste
  • 1 teaspoon Italian seasoning
  • 1 tablespoon Worcestershire sauce
  • 1 teaspoon sugar
  • 1 tablespoon olive oil for sautéing
  • Salt & black pepper to taste
  • 2 cloves garlic minced (optional)
For the Pasta:
  • 12 oz spaghetti noodles
  • Water for boiling
  • Salt for seasoning pasta water
Optional Garnishes & Toppings:
  • Parmesan cheese
  • Fresh basil
  • Red pepper flakes

Method
 

Cook the Meat:
  1. Heat olive oil in a large skillet over medium-high heat.
  2. Add ground beef (or Italian sausage) and cook until browned.
  3. Drain excess grease and add chopped onions.
  4. Sauté for 3-4 minutes, then stir in minced garlic (if using).
Prepare the Sauce:
  1. Stir in tomato sauce, tomato paste, Worcestershire sauce, sugar, Italian seasoning, salt, and black pepper.
  2. Reduce heat to low and let it simmer for 20-30 minutes, stirring occasionally.
Cook the Spaghetti:
  1. Bring a large pot of salted water to a boil.
  2. Add spaghetti and cook according to package instructions until al dente.
  3. Drain the noodles and set aside.
Combine and Serve:
  1. Add the cooked spaghetti to the meat sauce and toss to coat evenly.
  2. Serve hot, garnished with Parmesan cheese and fresh basil.

Notes

  • For extra depth of flavor, use a mix of ground beef and Italian sausage.
  • Simmer the sauce for at least 20 minutes to enhance richness.
  • Adding a splash of pasta water to the sauce creates a silkier texture.
  • The sauce tastes even better the next day after flavors meld together.

Salmon Rice Bowls: A Flavor-Packed, Nutritious Meal for Any Occasion

A Perfect Balance of Taste and Nutrition

Imagine a bowl filled with tender, flaky salmon glazed in a savory-sweet soy sauce, spicy mayo drizzled on top, and fresh, crunchy vegetables served over a warm bed of jasmine rice. This isn’t just a meal—it’s an experience.

Salmon Rice Bowls are easy to make, packed with nutrients, and full of bold flavors that come together in perfect harmony. Whether you’re looking for a quick weeknight dinner, a meal-prep option, or a healthy and satisfying lunch, this dish is the perfect choice.

Let’s dive into everything you need to know to make Salmon Rice Bowls at home!

Why You’ll Love This Recipe

✔️ Easy to Make – Simple ingredients and quick prep time.
✔️ Packed with Protein & Healthy Fats – Great for a balanced diet.
✔️ Full of Bold Flavors – A mix of umami, heat, and freshness.
✔️ Customizable – Swap ingredients based on your preferences.
✔️ Perfect for Meal Prep – Enjoy fresh, flavorful meals throughout the week.

Ingredients You’ll Need

Here’s what you need to make Salmon Rice Bowls:

For the Salmon

IngredientQuantity
Center-cut salmon filet (skin removed)1 ½ lbs
Soy sauce (or tamari for gluten-free)¼ cup
Honey2 tablespoons
Sriracha or chili garlic paste1 tablespoon
Garlic cloves (grated)2
Grated ginger2 teaspoons

For the Spicy Mayo

IngredientQuantity
Kewpie mayonnaise (or regular mayo)⅓ cup
Sriracha1 tablespoon
Grated ginger1 teaspoon
Toasted sesame oil1 teaspoon
Soy sauce1 tablespoon

For the Bowls

IngredientQuantity
Steamed jasmine rice (or rice of choice)4 cups
Persian cucumbers (sliced into half-moons)2
Avocado (sliced)1
Steamed edamame1 cup
Sesame seeds (for garnish)To taste
Nori sheets (for serving)Optional

Essential Kitchen Tools

To make these Salmon Rice Bowls, you’ll need:

  • Mixing bowls – For marinating the salmon and preparing the spicy mayo.
  • Baking sheet or skillet – To cook the salmon.
  • Rice cooker or saucepan – For steaming rice.
  • Sharp knife & cutting board – For slicing veggies and salmon.
  • Whisk or spoon – To mix sauces and marinades.

How to Make Salmon Rice Bowls

1. Marinate the Salmon

  • In a mixing bowl, whisk together soy sauce, honey, sriracha, garlic, and ginger.
  • Cut the salmon into bite-sized cubes and coat them with the marinade.
  • Let the salmon marinate for 15-30 minutes in the fridge.

2. Cook the Salmon

  • Oven Method:
    • Preheat oven to 400°F (200°C).
    • Line a baking sheet with parchment paper.
    • Bake for 10-12 minutes or until the salmon flakes easily with a fork.
  • Skillet Method:
    • Heat 1 tablespoon of oil in a skillet over medium heat.
    • Sear the salmon for 3-4 minutes per side until caramelized and cooked through.

3. Prepare the Spicy Mayo

  • In a small bowl, mix together kewpie mayo, sriracha, ginger, sesame oil, and soy sauce.
  • Stir until smooth and set aside.

4. Assemble the Bowls

  • In each bowl, add a base of steamed rice.
  • Top with salmon, sliced cucumbers, avocado, and edamame.
  • Drizzle with spicy mayo and sprinkle with sesame seeds.
  • Serve with nori sheets on the side for extra flavor.

The Secret to Perfectly Cooked Salmon

✔️ Use fresh, high-quality salmon for the best taste.
✔️ Don’t overcook – Salmon should be flaky but still moist inside.
✔️ Marinate for at least 15 minutes to enhance flavor.
✔️ Let the salmon rest for a few minutes before serving.

Ingredient Substitutions and Variations

IngredientSubstitutes
SalmonShrimp, tofu, or chicken
Jasmine riceBrown rice, quinoa, or cauliflower rice
Soy sauceTamari or coconut aminos
Kewpie mayoRegular mayo or Greek yogurt

Health Benefits of Salmon Rice Bowls

✔️ High in Omega-3s – Salmon supports brain and heart health.
✔️ Rich in Protein – Keeps you full and energized.
✔️ Packed with Vitamins & Antioxidants – From fresh vegetables.
✔️ Balanced Carbs & Healthy Fats – Ideal for maintaining energy levels.

How to Store and Meal Prep Salmon Rice Bowls

  • Refrigeration: Store components separately for up to 3 days.
  • Freezing: Not recommended, as salmon and fresh veggies lose texture.
  • Reheating: Warm the salmon gently in a skillet or microwave.

Nutritional Information Breakdown

NutrientAmount per Serving
Calories~500
Protein45g
Carbohydrates50g
Fat18g

Frequently Asked Questions

1. Can I use canned salmon?

Yes, but fresh or frozen salmon has better texture and flavor.

2. What’s the best rice for this dish?

Jasmine rice is best, but brown rice or quinoa work too.

3. Can I make this dish spicy?

Add extra sriracha or red pepper flakes for more heat.

4. Can I meal prep this for the week?

Yes! Store ingredients separately and assemble fresh.

Final Thoughts and Call to Action

Now that you know how to make Salmon Rice Bowls, it’s time to give them a try! This recipe is healthy, easy, and packed with flavor—perfect for any meal.

ating

Salmon Rice Bowls: A Flavor-Packed, Nutritious Meal for Any Occasion

Enjoy a delicious and nutritious meal with these Salmon Rice Bowls, featuring tender, flaky salmon glazed in a savory-sweet soy sauce, fresh vegetables, and a spicy mayo drizzle. Perfect for a quick dinner, meal prep, or a satisfying lunch!
 
Prep Time 15 minutes
Cook Time 12 minutes
Total Time 27 minutes
Servings: 4 servings
Course: Main Dish
Cuisine: Asian-inspired

Ingredients
  

For the Salmon:
  • 1 1/2 lbs center-cut salmon filet skin removed
  • 1/4 cup soy sauce or tamari for gluten-free
  • 2 tablespoons honey
  • 1 tablespoon sriracha or chili garlic paste
  • 2 garlic cloves grated
  • 2 teaspoons grated ginger
For the Spicy Mayo:
  • 1/3 cup kewpie mayonnaise or regular mayo
  • 1 tablespoon sriracha
  • 1 teaspoon grated ginger
  • 1 teaspoon toasted sesame oil
  • 1 tablespoon soy sauce
For the Bowls:
  • 4 cups steamed jasmine rice or rice of choice
  • 2 Persian cucumbers sliced into half-moons
  • 1 avocado sliced
  • 1 cup steamed edamame
  • Sesame seeds for garnish
  • Nori sheets optional, for serving

Method
 

Marinate the Salmon:
  1. In a mixing bowl, whisk together soy sauce, honey, sriracha, garlic, and ginger.
  2. Cut the salmon into bite-sized cubes and coat with the marinade.
  3. Refrigerate for 15-30 minutes.
Cook the Salmon: Oven Method:
  1. Preheat oven to 400°F (200°C) and line a baking sheet with parchment paper.
  2. Bake for 10-12 minutes or until the salmon flakes easily with a fork.
Skillet Method:
  1. Heat 1 tablespoon of oil in a skillet over medium heat.
  2. Sear the salmon for 3-4 minutes per side until caramelized and cooked through.
Prepare the Spicy Mayo:
  1. In a small bowl, mix together kewpie mayo, sriracha, ginger, sesame oil, and soy sauce.
  2. Stir until smooth and set aside.
Assemble the Bowls:
  1. In each bowl, add a base of steamed rice.
  2. Top with salmon, sliced cucumbers, avocado, and edamame.
  3. Drizzle with spicy mayo and sprinkle with sesame seeds.
  4. Serve with nori sheets if desired.

Notes

  • Use fresh, high-quality salmon for the best taste.
  • Avoid overcooking; salmon should be flaky but still moist inside.
  • Marinate for at least 15 minutes to enhance flavor.
  • Store components separately for meal prep and assemble fresh.

Crispy Cauliflower: A Deliciously Crunchy and Healthy Snack

The Ultimate Healthy and Flavorful Snack

Imagine biting into a piece of crispy cauliflower, perfectly golden on the outside and tender on the inside. The subtle sweetness of maple syrup, the warmth of curry powder, and the crunch of toasted almonds make every bite a flavor explosion.

If you’re looking for a nutritious, easy-to-make, and incredibly delicious side dish or snack, this Crispy Cauliflower recipe is for you. Whether you’re enjoying it as a healthy alternative to fries, a crunchy topping for bowls, or a flavorful side dish, this recipe will become a go-to favorite in your kitchen.

Let’s explore how to make the crispiest cauliflower using simple ingredients and easy techniques.

Why You’ll Love This Recipe

✔️ Crispy and Flavorful – Perfectly roasted with a delicious spice blend.
✔️ Healthy & Nutritious – Low in calories, high in fiber, and full of vitamins.
✔️ Easy to Make – Just a few simple steps and minimal prep time.
✔️ Versatile – Enjoy as a snack, side dish, or salad topping.
✔️ Naturally Vegan & Gluten-Free – Suitable for most diets.

Ingredients You’ll Need

This recipe requires just a few pantry staples to create a crispy, flavorful cauliflower dish.

Main Ingredients

IngredientQuantity
Large head of cauliflower (cut into florets)1
Avocado oil2-3 tablespoons
Sea salt1 teaspoon
Curry powder1 tablespoon
Maple syrup (optional)½ teaspoon

Optional Garnishes

GarnishPurpose
Fresh cilantroAdds freshness
Toasted almondsProvides crunch
Tahini drizzleAdds creaminess

Essential Kitchen Tools

To make Crispy Cauliflower, you’ll need:

  • Baking sheet – For even roasting.
  • Mixing bowl – To coat the cauliflower with seasoning.
  • Sharp knife – For cutting the cauliflower into florets.
  • Tongs or spatula – To toss and flip during baking.

How to Make Crispy Cauliflower

1. Preheat Your Oven

  • Set your oven to 425°F (220°C).
  • Line a baking sheet with parchment paper for easy cleanup.

2. Prepare the Cauliflower

  • Wash and cut the cauliflower into bite-sized florets.
  • Pat dry with a paper towel to remove excess moisture (this helps crispiness).

3. Season the Cauliflower

  • In a large mixing bowl, toss the cauliflower with:
    • Avocado oil (ensures even roasting)
    • Sea salt and curry powder (adds flavor)
    • Maple syrup (optional) for a touch of sweetness

4. Spread on a Baking Sheet

  • Arrange the cauliflower in a single layer on the baking sheet.
  • Ensure the florets are not overcrowded (this prevents steaming).

5. Bake Until Golden and Crispy

  • Roast for 25-30 minutes, flipping halfway through.
  • The cauliflower should be golden brown and crispy on the edges.

6. Add Optional Garnishes & Serve

  • Sprinkle with toasted almonds, fresh cilantro, and tahini drizzle for extra flavor.
  • Serve immediately and enjoy!

The Secret to Extra Crispy Cauliflower

✔️ Use high heat (425°F/220°C) – Helps achieve crispy edges.
✔️ Don’t overcrowd the pan – Spread florets evenly for better roasting.
✔️ Dry the cauliflower thoroughly – Excess moisture leads to steaming, not crisping.
✔️ Toss halfway through baking – Ensures even browning.

Ingredient Substitutions and Variations

IngredientSubstitutes
Avocado oilOlive oil or melted coconut oil
Curry powderSmoked paprika, cumin, or Italian seasoning
Maple syrupHoney or agave syrup
CauliflowerBroccoli or Brussels sprouts

Health Benefits of Cauliflower

✔️ Low in Calories – Great for weight management.
✔️ High in Fiber – Aids digestion and gut health.
✔️ Rich in Antioxidants – Supports overall health.
✔️ Gluten-Free & Vegan – Suitable for most dietary needs.

Best Sauces and Dips for Crispy Cauliflower

🌿 Tahini Sauce – Creamy and nutty.
🌶 Spicy Sriracha Mayo – Adds a kick.
🍋 Garlic Lemon Yogurt Dip – Light and tangy.
🥑 Guacamole – Pairs perfectly with roasted veggies.

How to Store and Reheat Crispy Cauliflower

  • Refrigeration: Store leftovers in an airtight container for up to 4 days.
  • Freezing: Not recommended, as cauliflower loses crispiness.
  • Reheating:
    • Oven: Bake at 375°F (190°C) for 5-7 minutes.
    • Air Fryer: Reheat at 350°F (175°C) for 3-5 minutes.

Nutritional Information Breakdown

NutrientAmount per Serving
Calories~120
Protein3g
Carbohydrates10g
Fat7g

Frequently Asked Questions

1. Can I air-fry the cauliflower instead of baking?

Yes! Air-fry at 400°F (200°C) for 15 minutes, shaking the basket halfway through.

2. How do I make this dish spicier?

Add cayenne pepper or chili flakes to the seasoning mix.

3. Can I use frozen cauliflower?

Fresh cauliflower is best for crispiness, but if using frozen, roast at a higher temperature and pat dry before seasoning.

4. What can I serve with crispy cauliflower?

It pairs well with rice bowls, salads, wraps, or hummus dips.

5. How do I make this recipe oil-free?

Toss the cauliflower in aquafaba (chickpea water) instead of oil for a crispy texture.

6. Can I prep the cauliflower ahead of time?

Yes! Cut and season the cauliflower up to 24 hours in advance, then roast when ready.

Final Thoughts and Call to Action

Now that you know how to make Crispy Cauliflower, it’s time to give it a try! Whether you enjoy it as a snack, a side dish, or a healthy alternative to fries, this recipe is guaranteed to become a favorite.

ating

Crispy Cauliflower: A Deliciously Crunchy and Healthy Snack

Enjoy a deliciously crunchy and healthy snack with this Crispy Cauliflower recipe. Perfectly golden on the outside and tender on the inside, this dish is easy to make and packed with flavor. Whether served as a snack, side dish, or salad topping, this crispy cauliflower will quickly become a favorite.
Prep Time 10 minutes
Cook Time 30 minutes
Total Time 40 minutes
Servings: 4 servings
Course: Snack/Side Dish
Cuisine: Mediterranean/Healthy

Ingredients
  

  • 1 large head of cauliflower cut into florets
  • 2-3 tablespoons avocado oil
  • 1 teaspoon sea salt
  • 1 tablespoon curry powder
  • 1/2 teaspoon maple syrup optional
Optional Garnishes:
  • Fresh cilantro
  • Toasted almonds
  • Tahini drizzle
  •  

Method
 

  1. Preheat Oven: Set oven to 425°F (220°C) and line a baking sheet with parchment paper.
  2. Prepare Cauliflower: Wash and cut the cauliflower into bite-sized florets. Pat dry to remove excess moisture.
  3. Season Cauliflower: In a large bowl, toss cauliflower with avocado oil, sea salt, curry powder, and maple syrup (if using).
  4. Spread on Baking Sheet: Arrange in a single layer, ensuring florets are not overcrowded.
  5. Bake Until Crispy: Roast for 25-30 minutes, flipping halfway through, until golden brown and crispy on the edges.
  6. Garnish and Serve: Sprinkle with toasted almonds, fresh cilantro, and a tahini drizzle. Serve immediately and enjoy!

Notes

  • Use high heat (425°F/220°C) to achieve extra crispiness.
  • Avoid overcrowding the baking sheet to allow proper roasting.
  • Dry cauliflower thoroughly before seasoning to prevent steaming.
  • Flip florets halfway through for even browning.

Healthy Greek Chicken Bowls: A Fresh & Flavorful Meal

A Taste of the Mediterranean in Every Bite

Imagine sitting at a sunlit café in Greece, enjoying a bowl filled with tender marinated chicken, crisp cucumbers, juicy tomatoes, fluffy rice, and a creamy homemade tzatziki sauce. That’s exactly what you get with this Healthy Greek Chicken Bowls recipe—a delicious, wholesome meal that’s easy to prepare and bursting with Mediterranean flavors.

Not only is this dish high in protein, packed with fresh vegetables, and full of vibrant herbs and spices, but it’s also meal-prep friendly and highly customizable. Whether you’re looking for a quick lunch, a nutritious dinner, or a meal prep option, this Greek-inspired bowl is the perfect choice!

Let’s dive into everything you need to know to create this Healthy Greek Chicken Bowls masterpiece.

Why You’ll Love This Recipe

✔️ Nutritious & Balanced – Packed with lean protein, fiber, and healthy fats.
✔️ Meal Prep Friendly – Make ahead and enjoy throughout the week.
✔️ Bursting with Flavor – Fresh herbs, citrus, and garlic combine beautifully.
✔️ Customizable – Swap ingredients to match your preferences.
✔️ Perfect for Any Meal – Great for lunch, dinner, or even a post-workout meal.

Ingredients You’ll Need

This dish uses fresh, wholesome ingredients to create a balanced and satisfying meal.

Marinated Greek Chicken

IngredientQuantity
Small chicken breasts1 ¼ lb (4 pieces)
Olive oil¼ cup
Honey2 tablespoons
Lemon juice2 tablespoons
Lemon zest1 tablespoon
Dried oregano1 ½ teaspoons
Dried basil1 ½ teaspoons
Garlic powder1 teaspoon
Salt1 teaspoon
Red pepper flakes (optional)½ teaspoon
Black pepper¼ teaspoon

Bowl Filling

IngredientQuantity
Romaine lettuce (shredded)4 cups
Cherry tomatoes (halved)2 cups
Cucumber (diced)2 cups
Cooked white rice2 cups
Red onion (thinly sliced)1 cup
Feta cheese (optional)½ cup

Tzatziki Sauce

IngredientQuantity
Plain Greek yogurt (or low-fat sour cream)1 cup
Cucumber (grated)½ cup
Fresh dill (finely chopped)1 tablespoon
Olive oil1 tablespoon
Lemon juice1 tablespoon
Minced garlic1 teaspoon
Salt¼ teaspoon

Necessary Kitchen Tools

To make this Healthy Greek Chicken Bowls recipe, you’ll need:

  • Large mixing bowl – For marinating the chicken.
  • Knife & cutting board – To chop vegetables.
  • Grill pan or skillet – For cooking the chicken.
  • Grater – For shredding cucumber for tzatziki sauce.
  • Whisk – To mix the marinade and sauce.

How to Make Healthy Greek Chicken Bowls

1. Marinate the Chicken

  • In a large bowl, whisk together olive oil, honey, lemon juice, lemon zest, oregano, basil, garlic powder, salt, red pepper flakes, and black pepper.
  • Add the chicken breasts, making sure they’re fully coated.
  • Cover and refrigerate for at least 30 minutes (or up to 4 hours for deeper flavor).

2. Cook the Chicken

  • Heat a grill pan or skillet over medium-high heat.
  • Cook the chicken for 5-7 minutes per side until golden brown and cooked through (internal temperature 165°F / 75°C).
  • Let rest for 5 minutes, then slice into strips.

3. Prepare the Tzatziki Sauce

  • In a small bowl, mix Greek yogurt, grated cucumber, fresh dill, olive oil, lemon juice, minced garlic, and salt.
  • Stir until well combined and refrigerate until serving.

4. Assemble the Bowls

  • In each serving bowl, layer cooked rice, romaine lettuce, cherry tomatoes, cucumber, and red onion.
  • Add sliced chicken on top.
  • Drizzle with tzatziki sauce and sprinkle feta cheese if using.
  • Serve with extra lemon wedges.

Pro Tips for the Best Greek Chicken

✔️ Marinate Longer – The longer the chicken marinates, the more flavorful it becomes.
✔️ Don’t Overcook – Use a meat thermometer to ensure juicy chicken.
✔️ Use Fresh Ingredients – Fresh lemon, garlic, and herbs make a big difference.

Tzatziki Sauce: The Perfect Creamy Addition

Tzatziki adds a refreshing, tangy balance to the bold flavors of Greek chicken. If you prefer a thicker sauce, drain excess liquid from the grated cucumber before mixing.

Ingredient Substitutions and Variations

IngredientSubstitutes
Chicken breastsChicken thighs, shrimp, or tofu
White riceBrown rice, quinoa, or cauliflower rice
Greek yogurtLow-fat sour cream or dairy-free yogurt
Feta cheeseGoat cheese or mozzarella

Health Benefits of Greek Chicken Bowls

✔️ High in Protein – Supports muscle growth and keeps you full longer.
✔️ Rich in Fiber – Veggies and rice aid digestion.
✔️ Good Fats – Olive oil and feta provide healthy fats.

How to Store and Meal Prep Greek Chicken Bowls

  • Refrigeration: Store in separate containers for up to 4 days.
  • Freezing: Freeze grilled chicken for up to 3 months.
  • Reheating: Warm chicken in a skillet over medium heat.

Nutritional Information Breakdown

NutrientAmount per Serving
Calories~450
Protein40g
Carbohydrates38g
Fat15g

Frequently Asked Questions

1. Can I use store-bought tzatziki?

Yes! But homemade tastes fresher and has no preservatives.

2. What’s the best way to cook the chicken?

Grilling gives the best flavor, but you can also bake or pan-fry.

Final Thoughts and Call to Action

Now that you know how to make Healthy Greek Chicken Bowls, it’s time to give them a try!

ating

Healthy Greek Chicken Bowls: A Fresh & Flavorful Meal

Enjoy a fresh and flavorful Mediterranean-inspired meal with these Healthy Greek Chicken Bowls. Juicy marinated chicken, crisp veggies, fluffy rice, and a creamy homemade tzatziki sauce come together for a nutritious and delicious meal-prep-friendly dish.
Prep Time 15 minutes
Cook Time 15 minutes
Total Time 30 minutes
Servings: 4 servings
Course: Main Dish
Cuisine: American

Ingredients
  

Marinated Greek Chicken:
  • 1 1/4 lb small chicken breasts 4 pieces
  • 1/4 cup olive oil
  • 2 tablespoons honey
  • 2 tablespoons lemon juice
  • 1 tablespoon lemon zest
  • 1 1/2 teaspoons dried oregano
  • 1 1/2 teaspoons dried basil
  • 1 teaspoon garlic powder
  • 1 teaspoon salt
  • 1/2 teaspoon red pepper flakes optional
  • 1/4 teaspoon black pepper
Bowl Filling:
  • 4 cups romaine lettuce shredded
  • 2 cups cherry tomatoes halved
  • 2 cups cucumber diced
  • 2 cups cooked white rice
  • 1 cup red onion thinly sliced
  • 1/2 cup feta cheese optional
Tzatziki Sauce:
  • 1 cup plain Greek yogurt or low-fat sour cream
  • 1/2 cup cucumber grated
  • 1 tablespoon fresh dill finely chopped
  • 1 tablespoon olive oil
  • 1 tablespoon lemon juice
  • 1 teaspoon minced garlic
  • 1/4 teaspoon salt
  •  

Method
 

Marinate the Chicken:
  1. In a large bowl, whisk together olive oil, honey, lemon juice, lemon zest, oregano, basil, garlic powder, salt, red pepper flakes, and black pepper.
  2. Add chicken breasts, coating them fully.
  3. Cover and refrigerate for at least 30 minutes (up to 4 hours for deeper flavor).
Cook the Chicken:
  1. Heat a grill pan or skillet over medium-high heat.
  2. Cook chicken for 5-7 minutes per side until golden brown and cooked through (internal temperature of 165°F / 75°C).
  3. Let rest for 5 minutes, then slice into strips.
Prepare the Tzatziki Sauce:
  1. In a small bowl, mix Greek yogurt, grated cucumber, fresh dill, olive oil, lemon juice, minced garlic, and salt.
  2. Stir well and refrigerate until serving.
Assemble the Bowls:
  1. In each serving bowl, layer cooked rice, romaine lettuce, cherry tomatoes, cucumber, and red onion.
  2. Add sliced chicken on top.
  3. Drizzle with tzatziki sauce and sprinkle feta cheese if using.
  4. Serve with extra lemon wedges.

Notes

  • Marinating the chicken longer enhances its flavor.
  • Use a meat thermometer to avoid overcooking the chicken.
  • Drain grated cucumber for a thicker tzatziki sauce.
  • Customize with brown rice, quinoa, or cauliflower rice.
 

Creamy Sausage Rigatoni: A Flavorful and Comforting Dinner

There’s something undeniably comforting about a warm bowl of pasta coated in a rich, creamy sauce. This Creamy Sausage Rigatoni is the perfect dish for busy weeknights or special family dinners. It’s packed with bold Italian flavors, hearty rigatoni, and fresh spinach, making it a meal that’s as delicious as it is satisfying.

Why You’ll Love Creamy Sausage Rigatoni

  • Rich and Creamy Sauce: The combination of heavy cream and tomato sauce creates an irresistible texture and flavor.
  • Hearty and Filling: Rigatoni and sausage make this a satisfying one-pot meal.
  • Simple and Quick: With just one skillet and about 30 minutes, dinner is ready.
  • Customizable: Add vegetables, adjust spices, or swap ingredients to suit your taste.

Ingredients for Creamy Sausage Rigatoni

Core Ingredients

IngredientAmount
Olive oil1 tbsp
Italian sausage (crumbled)15 oz
Rigatoni (uncooked)8 oz
Chicken broth1 cup
Heavy cream1 cup
Garlic (minced)4 cloves
Italian seasoning1 tsp
Tomato sauce15 oz
Fresh spinach5 oz
SaltTo taste
Black pepper (coarsely ground)To taste
Red pepper flakes (optional)¼ tsp

Step-by-Step Instructions

1. Cook the Sausage

  • Heat olive oil in a large, high-sided skillet over medium heat.
  • Add the crumbled Italian sausage, cooking for about 5 minutes until browned. Break it into smaller pieces as it cooks.
  • Drain excess grease to prevent the sauce from becoming too oily.

2. Combine Key Ingredients

  • To the same skillet, add uncooked rigatoni, chicken broth, heavy cream, minced garlic, Italian seasoning, and tomato sauce.
  • Stir everything well to coat the pasta evenly.

3. Simmer and Cook

  • Bring the mixture to a gentle boil over medium heat. Stir occasionally to prevent the pasta from sticking.
  • Cover the skillet with a lid and let the rigatoni cook for 10–15 minutes, until it reaches an “al dente” texture and absorbs the creamy tomato sauce.

4. Add Fresh Spinach

  • Once the pasta is cooked, add the spinach to the skillet.
  • Stir over medium heat until the spinach wilts. Alternatively, remove the skillet from the heat, cover with a lid, and let residual heat wilt the spinach for about 4 minutes.

5. Adjust the Consistency

  • If you prefer a thicker sauce, let the dish cook uncovered for a couple of additional minutes, stirring occasionally to prevent burning.

6. Season and Serve

  • Remove the skillet from heat. Season with salt, black pepper, and a pinch of red pepper flakes if you like some extra spice.
  • Serve hot, garnished with Parmesan cheese or fresh basil for a burst of flavor.

Why This Recipe Works

1. Bold and Balanced Flavors

The spicy, savory sausage pairs perfectly with the creamy tomato sauce, creating a dish that’s both comforting and flavorful.

2. One-Pot Convenience

Cooking everything in one pot minimizes cleanup and allows the pasta to absorb the sauce’s rich flavors.

3. Versatility

From adding extra veggies to adjusting spice levels, this recipe is easy to customize.

Nutritional Information

NutrientPer Serving (Approx.)
Calories420
Protein22g
Carbohydrates32g
Fat24g
Fiber3g
Sodium780mg

Tips for Making the Best Creamy Sausage Rigatoni

1. Choose High-Quality Sausage

  • Opt for fresh Italian sausage—sweet or spicy depending on your preference.

2. Don’t Overcook the Pasta

  • Cooking the rigatoni until “al dente” ensures it holds its shape and absorbs the sauce perfectly.

3. Use Fresh Spinach

  • Fresh spinach wilts beautifully in the sauce, adding both nutrition and vibrant color.

4. Adjust the Spice

  • Add cayenne pepper or extra red pepper flakes for a spicier dish.

Variations to Try

1. Veggie-Packed Version

  • Add mushrooms, zucchini, or bell peppers for extra vegetables.

2. Cheesy Twist

  • Stir in shredded mozzarella or fontina cheese for a gooey, cheesy texture.

3. Gluten-Free Option

  • Use gluten-free pasta to make this dish suitable for those with dietary restrictions.

4. Seafood Spin

  • Replace the sausage with shrimp or scallops for a seafood twist.

Serving Suggestions

  • Garlic Bread: A slice of warm garlic bread is perfect for soaking up the creamy sauce.
  • Side Salad: Pair with a crisp Caesar salad for a balanced meal.
  • Roasted Vegetables: Serve alongside roasted asparagus or broccoli for added nutrients.

FAQ: Your Questions About Creamy Sausage Rigatoni Answered

1. Can I make this recipe ahead of time?

Yes! Store the pasta in an airtight container in the fridge for up to 3 days. Reheat on the stovetop with a splash of chicken broth or cream to refresh the sauce.

2. Can I use a different type of pasta?

Absolutely! Penne, ziti, or even bowtie pasta work well with this creamy sauce.

3. How do I make it less spicy?

Use sweet Italian sausage and skip the red pepper flakes for a milder version.

4. Can I freeze leftovers?

While the pasta is best fresh, you can freeze it for up to 2 months. Thaw in the fridge overnight and reheat gently.

5. What’s the best way to thicken the sauce?

Cook the dish uncovered for a few minutes, stirring frequently, until the sauce reaches your desired consistency.

6. Can I make this dish dairy-free?

Use coconut cream instead of heavy cream and dairy-free cheese for a creamy, dairy-free alternative.

Final Thoughts and Call to Action

This Creamy Sausage Rigatoni is everything you want in a comforting meal: rich, satisfying, and full of flavor. It’s quick to make, customizable to your taste, and perfect for feeding a crowd or enjoying as leftovers.

Ready to try this delicious recipe? Gather your ingredients, follow these simple steps, and create a pasta dish that everyone will rave about. Don’t forget to share your creation and inspire others to enjoy this creamy, one-pot wonder!

ating

Creamy Sausage Rigatoni: A Flavorful and Comforting Dinner

Core Ingredients:
  • Olive oil – 1 tbsp
  • Italian sausage (crumbled) – 15 oz
  • Rigatoni (uncooked) – 8 oz
  • Chicken broth – 1 cup
  • Heavy cream – 1 cup
  • Garlic (minced) – 4 cloves
  • Italian seasoning – 1 tsp
  • Tomato sauce – 15 oz
  • Fresh spinach – 5 oz
  • Salt – To taste
  • Black pepper (coarsely ground) – To taste
  • Red pepper flakes (optional) – ¼ tsp
Prep Time 10 minutes
Cook Time 20 minutes
Total Time 30 minutes
Servings: 4 servings
Course: Main Course
Cuisine: Italian-inspired

Ingredients
  

Core Ingredients:
  • Olive oil – 1 tbsp
  • Italian sausage crumbled – 15 oz
  • Rigatoni uncooked – 8 oz
  • Chicken broth – 1 cup
  • Heavy cream – 1 cup
  • Garlic minced – 4 cloves
  • Italian seasoning – 1 tsp
  • Tomato sauce – 15 oz
  • Fresh spinach – 5 oz
  • Salt – To taste
  • Black pepper coarsely ground – To taste
  • Red pepper flakes optional – ¼ tsp

Method
 

Cook the Sausage:
  1. Heat olive oil in a large skillet over medium heat.
  2. Add the crumbled Italian sausage and cook for 5 minutes until browned, breaking it into smaller pieces.
  3. Drain any excess grease to keep the sauce from becoming too oily.
Combine Key Ingredients:
  1. To the same skillet, add uncooked rigatoni, chicken broth, heavy cream, minced garlic, Italian seasoning, and tomato sauce.
  2. Stir well to ensure the pasta is coated evenly in the mixture.
Simmer and Cook:
  1. Bring the mixture to a gentle boil over medium heat.
  2. Cover the skillet with a lid and cook for 10–15 minutes, stirring occasionally, until the rigatoni is al dente and the sauce has thickened.
Add Fresh Spinach:
  1. Stir in the fresh spinach and let it wilt over medium heat. Alternatively, remove the skillet from the heat, cover, and let the spinach wilt with residual heat for about 4 minutes.
Adjust the Sauce Consistency:
  1. If the sauce is too thick, add a splash of chicken broth or cream to loosen it. For a thicker sauce, cook uncovered for a few minutes, stirring frequently.
Season and Serve:
  1. Remove the skillet from heat and season the dish with salt, black pepper, and red pepper flakes (if desired).
  2. Serve hot, garnished with Parmesan cheese or fresh basil for an extra burst of flavor.

Notes

  • Use fresh spinach for the best flavor and texture.
  • For a lighter version, substitute heavy cream with half-and-half.
  • Make it spicier by adding cayenne pepper or using hot Italian sausage.

Pepperoni Pizza Minis: Bite-Sized Fun for Every Occasion

When it comes to snacks or party foods, nothing beats the crowd-pleasing flavor of pizza. Pepperoni Pizza Minis take all the deliciousness of a classic pepperoni pizza and pack it into bite-sized, easy-to-make treats. Perfect for parties, lunchboxes, or quick snacks, these minis are as versatile as they are tasty.

Why Pepperoni Pizza Minis Are a Must-Try

  • Quick and Easy: Ready in just 30 minutes, these mini pizzas fit perfectly into your busy schedule.
  • Mess-Free: The handheld size means no messy slices or cleanup.
  • Customizable: Add your favorite toppings or try a veggie version to suit your taste.
  • Perfect for Any Occasion: Great for kids, parties, or as a unique appetizer for gatherings.

Ingredients for Pepperoni Pizza Minis

Here’s what you’ll need to whip up these flavorful treats:

Core Ingredients

IngredientAmount
All-purpose flour¾ cup
Baking powder2 tsp
Salt½ tsp
Milk½ cup
Large egg1
Melted butter¼ cup
Shredded mozzarella cheese½ cup
Mini pepperoni slices½ cup
Marinara sauce½ cup
Fresh basil (chopped)For garnish

Step-by-Step Instructions

1. Preheat Your Oven

  • Set your oven to 375°F (190°C).
  • Grease a muffin tin to ensure your minis don’t stick.

2. Combine the Dry Ingredients

  • In a medium bowl, mix the all-purpose flour, baking powder, and salt.
  • Stir until well combined.

3. Whisk the Wet Ingredients

  • In a separate bowl, whisk together the milk, egg, and melted butter until smooth.

4. Mix the Batter

  • Gradually add the dry ingredients to the wet mixture, stirring until just combined.
  • Fold in half of the shredded mozzarella cheese.

5. Assemble the Minis

  • Add a spoonful of batter to each muffin cup.
  • Drop a small dollop of marinara sauce into the center, followed by a few mini pepperoni slices.
  • Cover with another spoonful of batter, then top with the remaining mozzarella cheese and more mini pepperoni slices.

6. Bake to Perfection

  • Place the muffin tin in the oven and bake for 20 minutes, or until the tops are golden brown and a toothpick comes out clean.

7. Garnish and Serve

  • Let the minis cool slightly before removing them from the tin.
  • Garnish with freshly chopped basil for a burst of flavor and color.
  • Serve warm and enjoy!

Why These Pepperoni Pizza Minis Are So Good

1. Irresistible Flavors

The classic combination of pepperoni, mozzarella, and marinara sauce delivers a taste that everyone loves.

2. Perfectly Portion-Controlled

These mini pizzas are great for snacking without overindulging.

3. Kid-Friendly

Their size and fun presentation make them an instant hit with kids.

Nutritional Information

NutrientPer Serving (Approx.)
Calories140
Protein6g
Carbohydrates10g
Fat8g
Fiber1g
Sodium310mg

Tips for the Best Pepperoni Pizza Minis

1. Use Fresh Ingredients

  • Fresh basil and good-quality marinara sauce can elevate the flavor of your minis.

2. Don’t Overfill the Cups

  • Leave a little room in each muffin cup for the batter to rise as it bakes.

3. Get Creative with Toppings

  • Add diced bell peppers, mushrooms, or olives for a veggie-packed version.

4. Make It Cheesy

  • Mix in different cheeses like Parmesan or cheddar for added depth.

Variations to Try

1. Veggie Lovers’ Minis

  • Swap pepperoni for chopped vegetables like zucchini, spinach, or cherry tomatoes.

2. Spicy Pepperoni Minis

  • Sprinkle red pepper flakes over the top before baking for an extra kick.

3. Gluten-Free Option

  • Use a gluten-free flour blend to make these minis suitable for gluten-sensitive eaters.

4. Hawaiian Style

  • Add diced ham and pineapple for a sweet-and-savory twist.

Serving Suggestions

  • Side Salad: Pair with a crisp green salad for a balanced meal.
  • Dipping Sauce: Serve with ranch, garlic butter, or extra marinara for dipping.
  • Party Platter: Include these minis on an appetizer tray with veggies and cheese.

FAQ: Your Questions About Pepperoni Pizza Minis Answered

1. Can I make these minis ahead of time?

Yes! Prepare and bake them ahead of time, then store in an airtight container. Reheat in the oven for a few minutes before serving.

2. Can I freeze Pepperoni Pizza Minis?

Absolutely. Freeze them in a single layer on a baking sheet, then transfer to a freezer bag. Reheat in the oven straight from frozen.

3. Can I use regular-sized pepperoni?

Yes! Simply cut the slices into quarters to fit them into the minis.

4. How do I prevent them from sticking?

Grease the muffin tin thoroughly or use non-stick cooking spray for easy removal.

5. Can I use a different type of cheese?

Definitely. Mozzarella works best, but cheddar, Monterey Jack, or a blend of Italian cheeses would also taste great.

6. How long do leftovers last?

Store leftovers in the refrigerator for up to 3 days. Reheat in the oven or microwave before serving.

Final Thoughts and Call to Action

Pepperoni Pizza Minis are the ultimate crowd-pleaser. Their bite-sized convenience, bold flavors, and easy preparation make them a go-to recipe for any occasion. Whether you’re hosting a party or looking for a quick snack, these minis deliver big on flavor with minimal effort.

Ready to try them yourself? Gather your ingredients, follow the steps, and enjoy the irresistible taste of homemade pizza in mini form. Don’t forget to share your creations and inspire others to get cooking!

ating

Pepperoni Pizza Minis: Bite-Sized Fun for Every Occasion

Bring the flavors of a classic pepperoni pizza into fun, bite-sized treats with these Pepperoni Pizza Minis! Perfect for parties, snacks, or lunchbox surprises, these mini pizzas are easy to make and packed with cheesy, saucy goodness. They’re sure to be a hit with both kids and adults!
Prep Time 10 minutes
Cook Time 20 minutes
Total Time 30 minutes
Servings: 12 mini pizzas
Course: Appetizer, Snack
Cuisine: Italian-American

Ingredients
  

Core Ingredients:
  • ¾ cup all-purpose flour
  • 2 tsp baking powder
  • ½ tsp salt
  • ½ cup milk
  • 1 large egg
  • ¼ cup melted butter
  • ½ cup shredded mozzarella cheese
  • ½ cup mini pepperoni slices
  • ½ cup marinara sauce
  • Fresh basil chopped (for garnish)

Method
 

Preheat Your Oven:
  1. Set your oven to 375°F (190°C).
  2. Grease a muffin tin thoroughly to prevent sticking.
Combine Dry Ingredients:
  1. In a medium bowl, mix the flour, baking powder, and salt.
Prepare the Wet Ingredients:
  1. In another bowl, whisk together the milk, egg, and melted butter until smooth.
Mix the Batter:
  1. Gradually add the dry ingredients to the wet mixture, stirring until just combined.
  2. Fold in half of the shredded mozzarella cheese.
Assemble the Minis:
  1. Add a spoonful of batter to each muffin cup.
  2. Place a dollop of marinara sauce in the center, followed by a few mini pepperoni slices.
  3. Cover with another spoonful of batter, then top with the remaining mozzarella cheese and additional mini pepperoni slices.
Bake:
  1. Place the muffin tin in the preheated oven and bake for 20 minutes, or until the tops are golden brown and a toothpick inserted in the center comes out clean.
Garnish and Serve:
  1. Let the minis cool slightly before removing them from the muffin tin.
  2. Garnish with freshly chopped basil for added flavor and serve warm.

Notes

  • For extra flavor, sprinkle Italian seasoning over the batter before baking.
  • Avoid overfilling the muffin cups to allow room for the batter to rise.
  • Store leftovers in the fridge for up to 3 days or freeze for longer storage.

One Pot Creamy Cajun Sausage Pasta: A Flavor-Packed Weeknight Dinner

If you’re looking for a meal that’s bursting with bold flavors, creamy textures, and hearty ingredients, One Pot Creamy Cajun Sausage Pasta is the answer. This recipe combines smoky sausage, vibrant vegetables, and perfectly cooked pasta in a rich, Cajun-spiced sauce. The best part? It’s all made in one pot, so cleanup is a breeze!

Why You’ll Love This Recipe

  • Bold Cajun Flavor: The combination of Cajun seasoning and a creamy sauce delivers an irresistible taste.
  • One-Pot Convenience: Minimal dishes and maximum flavor make this a perfect weeknight dinner.
  • Customizable: You can easily adjust the spice level and swap in your favorite vegetables or proteins.
  • Family-Friendly: Even picky eaters will love this comforting, flavorful dish.

Ingredients for One Pot Creamy Cajun Sausage Pasta

Core Ingredients

IngredientAmount
Smoked sausage (Andouille or kielbasa)12 oz
Pasta (penne or rigatoni)8 oz
Cajun seasoning2 tbsp
Olive oil1 tbsp
Bell peppers (mixed colors, diced)1 cup
Onion (diced)½ cup
Chicken broth1 ½ cups
Heavy cream1 cup
Shredded Parmesan cheese1 cup
Garlic powder½ tsp
Cayenne pepper (optional)¼ tsp
Fresh spinach (optional)1 cup
Salt and pepperTo taste
Chopped parsley (for garnish)1 tbsp

Step-by-Step Instructions

1. Prep Your Ingredients

  • Slice the smoked sausage into thin rounds.
  • Dice the bell peppers and onion.
  • Measure out Cajun seasoning, heavy cream, Parmesan cheese, and chicken broth.

2. Cook the Sausage and Veggies

  • Heat olive oil in a large skillet or pot over medium-high heat.
  • Add the sliced sausage and sauté until browned, about 4–5 minutes. Remove the sausage and set it aside.
  • In the same pot, add the diced bell peppers and onion. Sauté until softened, about 3–4 minutes.

3. Create the Base

  • Sprinkle Cajun seasoning over the sautéed vegetables, stirring to coat them evenly.
  • Pour in the chicken broth and stir well, scraping any browned bits from the bottom of the pot.
  • Bring the mixture to a simmer.

4. Cook the Pasta

  • Add the pasta directly to the pot, ensuring it’s submerged in the liquid.
  • Cover and cook on medium heat until the pasta is al dente, about 10–12 minutes. Stir occasionally to prevent sticking.

5. Make the Creamy Sauce

  • Reduce the heat to low and stir in the heavy cream and shredded Parmesan cheese.
  • Mix until the cheese is fully melted and the sauce becomes creamy.

6. Return the Sausage to the Pot

  • Add the cooked sausage back to the pot and stir well to combine.
  • If using, add fresh spinach and cook for an additional 1–2 minutes until wilted.

7. Serve and Garnish

  • Taste and adjust the seasoning with salt and pepper as needed.
  • Serve hot, garnished with chopped parsley for a fresh, vibrant finish.

Why This Recipe Works

1. Balanced Flavors

The smoky sausage pairs perfectly with the creamy sauce, while the Cajun seasoning adds a zesty kick.

2. One-Pot Efficiency

Cooking everything in one pot means fewer dishes and a faster cleanup.

3. Versatile Ingredients

You can customize the recipe with different vegetables, proteins, or pasta shapes to suit your preferences.

Nutritional Information

NutrientPer Serving (Approx.)
Calories450
Protein20g
Carbohydrates35g
Fat25g
Fiber3g
Sodium700mg

Tips for Perfect One Pot Creamy Cajun Sausage Pasta

1. Use High-Quality Sausage

  • Andouille sausage brings authentic Cajun flavor, but kielbasa or your favorite smoked sausage works just as well.

2. Choose the Right Pasta

  • Penne or rigatoni holds the creamy sauce well, but feel free to experiment with other shapes.

3. Control the Spice Level

  • Add cayenne pepper for extra heat or reduce the Cajun seasoning for a milder dish.

4. Stir Frequently

  • Stir the pasta occasionally during cooking to prevent it from sticking to the pot.

Variations to Try

1. Shrimp Cajun Pasta

  • Swap the sausage for shrimp, adding it during the last 5 minutes of cooking.

2. Vegetarian Version

  • Skip the sausage and add mushrooms, zucchini, or broccoli for a plant-based option.

3. Extra Cheesy Twist

  • Mix in mozzarella or cheddar for an even cheesier sauce.

4. Low-Carb Option

  • Replace pasta with zucchini noodles or cauliflower rice for a low-carb alternative.

Serving Suggestions

  • Side Salad: Pair with a fresh green salad for a balanced meal.
  • Garlic Bread: Perfect for scooping up the creamy sauce.
  • Steamed Vegetables: Add a side of broccoli or green beans for extra nutrition.

FAQ: Your Questions About One Pot Creamy Cajun Sausage Pasta

1. Can I make this dish ahead of time?

Yes! This pasta reheats well. Store it in an airtight container in the refrigerator for up to 3 days.

2. Can I freeze leftovers?

Yes, but the creamy sauce may separate slightly upon thawing. Reheat gently on the stovetop and stir well to recombine.

3. How do I make it less spicy?

Reduce the amount of Cajun seasoning and skip the cayenne pepper for a milder flavor.

4. What’s the best way to reheat this dish?

Reheat in a skillet over low heat, adding a splash of chicken broth or cream to refresh the sauce.

5. Can I use dairy-free alternatives?

Absolutely! Substitute the heavy cream with coconut cream and use a dairy-free cheese alternative.

6. What other proteins can I use?

Chicken, turkey sausage, or tofu are great alternatives to smoked sausage.

Final Thoughts and Call to Action

One Pot Creamy Cajun Sausage Pasta is the ultimate comfort food. It’s quick, flavorful, and incredibly satisfying, making it a fantastic choice for busy weeknights or casual entertaining.

Ready to try this delicious recipe? Gather your ingredients, follow these simple steps, and enjoy a bowl of creamy, spicy goodness. Don’t forget to share your creation and inspire others to make this one-pot wonder!

ating

One Pot Creamy Cajun Sausage Pasta: A Flavor-Packed Weeknight Dinner

Get ready to spice up your dinner routine with this One Pot Creamy Cajun Sausage Pasta! Smoky sausage, vibrant veggies, and perfectly cooked pasta come together in a rich, creamy Cajun-spiced sauce—all made in one pot for ultimate convenience. It’s a flavorful, hearty meal your whole family will love.
Prep Time 10 minutes
Cook Time 20 minutes
Total Time 40 minutes
Servings: 4 servings
Course: Dinner
Cuisine: Cajun/Creole

Ingredients
  

Core Ingredients:
  • 12 oz smoked sausage Andouille or kielbasa, sliced into rounds
  • 8 oz pasta penne or rigatoni
  • 2 tbsp Cajun seasoning
  • 1 tbsp olive oil
  • 1 cup mixed bell peppers diced
  • ½ cup onion diced
  • 1 ½ cups chicken broth
  • 1 cup heavy cream
  • 1 cup shredded Parmesan cheese
  • ½ tsp garlic powder
  • ¼ tsp cayenne pepper optional
  • 1 cup fresh spinach optional
  • Salt and pepper to taste
  • 1 tbsp parsley chopped (for garnish)

Method
 

Prepare Your Ingredients:
  1. Slice the sausage into rounds and dice the bell peppers and onion.
  2. Measure out Cajun seasoning, chicken broth, heavy cream, and Parmesan cheese.
Cook the Sausage and Veggies:
  1. Heat olive oil in a large skillet or pot over medium-high heat.
  2. Add the sliced sausage and cook for 4–5 minutes until browned. Remove the sausage and set it aside.
  3. In the same pot, sauté the diced bell peppers and onion until softened, about 3–4 minutes.
Build the Base:
  1. Sprinkle Cajun seasoning over the sautéed vegetables, stirring to coat evenly.
  2. Pour in the chicken broth, scraping the bottom of the pot to release any browned bits. Bring to a simmer.
Cook the Pasta:
  1. Add the pasta to the pot, ensuring it’s submerged in the liquid.
  2. Cover and cook on medium heat for 10–12 minutes, stirring occasionally to prevent sticking, until the pasta is al dente.
Create the Creamy Sauce:
  1. Reduce the heat to low and stir in the heavy cream and shredded Parmesan cheese. Mix until the cheese is melted and the sauce is smooth.
Combine and Finish:
  1. Return the cooked sausage to the pot and stir to combine.
  2. If using fresh spinach, add it now and cook for 1–2 minutes until wilted.
Serve and Garnish:
  1. Taste and adjust seasoning with salt and pepper as needed.
  2. Serve hot, garnished with chopped parsley for a vibrant finish.

Notes

  • Adjust the spice level by adding more or less Cajun seasoning or cayenne pepper.
  • Stir the pasta frequently to ensure even cooking and prevent sticking.
  • For extra creaminess, add a splash of milk or an additional handful of Parmesan cheese.

Garlic Parmesan Chicken and Potatoes: A One-Pan Wonder

When you’re craving a wholesome, hearty dinner that’s both flavorful and easy to make, Garlic Parmesan Chicken and Potatoes is the answer. This one-pan meal combines juicy, seasoned chicken breasts with crispy, golden potatoes, all coated in savory garlic and Parmesan goodness. Whether you’re feeding your family or hosting a casual dinner, this recipe is sure to be a hit.

Why You’ll Love This Recipe

  • One-Pan Simplicity: Fewer dishes to wash without sacrificing flavor.
  • Bold and Savory Flavors: Garlic and Parmesan take this dish to the next level.
  • Perfectly Balanced Meal: Protein-packed chicken and nutrient-rich potatoes make it wholesome and satisfying.
  • Customizable: Adjust the seasoning or add veggies to suit your taste.

Ingredients for Garlic Parmesan Chicken and Potatoes

For the Chicken

IngredientAmount
Boneless, skinless chicken breasts (or thighs)4
Italian seasoning1 tsp
Smoked paprika½ tsp
Salt½ tsp
Black pepper¼ tsp
Olive oil1 tbsp

For the Potatoes

IngredientAmount
Baby Yukon Gold or red potatoes (halved)1.5 lbs
Olive oil3 tbsp
Garlic (minced)4 cloves
Grated Parmesan cheese⅓ cup
Salt½ tsp
Black pepper¼ tsp

Optional Garnish

IngredientAmount
Fresh parsley (chopped)1 tbsp

Step-by-Step Instructions

1. Preheat the Oven

  • Set your oven to 400°F (200°C).
  • Line a large baking sheet with parchment paper or lightly grease it to prevent sticking.

2. Prepare the Chicken

  • Pat the chicken dry using paper towels. This step helps the seasoning stick and ensures even cooking.
  • In a small bowl, mix Italian seasoning, smoked paprika, salt, and black pepper.
  • Rub olive oil over the chicken, then coat it evenly with the seasoning mixture.

3. Season the Potatoes

  • In a large bowl, toss the halved potatoes with olive oil, minced garlic, grated Parmesan cheese, salt, and pepper.
  • Mix until the potatoes are fully coated with the flavorful mixture.

4. Assemble Everything on the Pan

  • Place the seasoned chicken on one side of the prepared baking sheet.
  • Spread the potatoes evenly on the other side, ensuring they’re in a single layer for even cooking.

5. Bake

  • Roast the chicken and potatoes in the preheated oven for 25–30 minutes.
  • Flip the potatoes halfway through cooking for even crisping.
  • Use a meat thermometer to check that the chicken reaches an internal temperature of 165°F (74°C).

6. Optional Finishing Touch

  • In the last 5 minutes of cooking, sprinkle extra Parmesan over the chicken and potatoes.
  • Switch the oven to broil for a golden, crispy finish.

7. Garnish and Serve

  • Remove the baking sheet from the oven and sprinkle fresh parsley over the chicken and potatoes.
  • Serve hot and enjoy this comforting, flavorful meal!

Why This Recipe Works

1. Perfectly Balanced Flavors

The garlic and Parmesan create a savory coating that enhances the natural flavors of the chicken and potatoes.

2. Crispy and Juicy

Roasting ensures crispy potatoes and juicy chicken without the need for extra pans or complicated steps.

3. Customizable to Your Taste

You can easily add vegetables like broccoli, carrots, or green beans to make this dish even more nutritious.

Nutritional Information

NutrientPer Serving (Approx.)
Calories380
Protein35g
Carbohydrates25g
Fat16g
Fiber3g
Sodium480mg

Tips for Making the Best Garlic Parmesan Chicken and Potatoes

1. Use Even-Sized Chicken Pieces

  • Uniformly sized chicken breasts or thighs ensure even cooking.

2. Don’t Crowd the Pan

  • Give the chicken and potatoes enough space to crisp up properly. Overcrowding can cause them to steam instead of roast.

3. Experiment with Flavors

  • Add a squeeze of lemon juice over the chicken before serving for a zesty kick.

4. Adjust Cooking Time for Chicken Thighs

  • If using thighs instead of breasts, adjust the cooking time as thighs may take slightly longer.

Variations to Try

1. Add Vegetables

  • Toss in vegetables like asparagus, zucchini, or bell peppers for a more colorful and nutritious meal.

2. Spicy Kick

  • Sprinkle red pepper flakes over the chicken and potatoes for a hint of heat.

3. Herbaceous Twist

  • Swap Italian seasoning for fresh rosemary or thyme for an earthy flavor.

4. Cheese Lovers’ Delight

  • Mix mozzarella with Parmesan for an extra cheesy topping.

Serving Suggestions

  • Green Salad: A crisp side salad with vinaigrette balances the richness of the dish.
  • Garlic Bread: Perfect for scooping up every bit of the flavorful Parmesan crust.
  • Steamed Vegetables: Serve with steamed green beans or broccoli for added freshness.

FAQ: Your Questions About Garlic Parmesan Chicken and Potatoes

1. Can I use bone-in chicken?

Yes! Bone-in chicken works beautifully but may require slightly longer cooking times.

2. Can I use sweet potatoes instead of Yukon Gold?

Absolutely! Sweet potatoes add a delightful sweetness that pairs well with the garlic Parmesan flavors.

3. How do I store leftovers?

Store leftovers in an airtight container in the fridge for up to 3 days. Reheat in the oven or air fryer for the best texture.

4. Can I freeze this dish?

Yes, but it’s best to freeze the chicken and potatoes separately to maintain their texture.

5. What’s the best way to check if the chicken is done?

Use a meat thermometer to ensure the chicken reaches an internal temperature of 165°F (74°C).

6. Can I make this recipe dairy-free?

Yes! Replace Parmesan with a dairy-free alternative and use olive oil instead of butter.

Final Thoughts and Call to Action

Garlic Parmesan Chicken and Potatoes is a dish that combines convenience, flavor, and nutrition in one pan. Its rich, savory flavors and crispy textures make it a go-to recipe for weeknights or special occasions.

Ready to elevate your dinner game? Gather your ingredients, follow these easy steps, and enjoy a meal that’s guaranteed to impress. Don’t forget to share your creation and inspire others to try this delicious recipe!

ATING

Garlic Parmesan Chicken and Potatoes: A One-Pan Wonder

Elevate your dinner with this Garlic Parmesan Chicken and Potatoes! Juicy, flavorful chicken and golden, crispy potatoes come together in one pan for a hearty, delicious meal. Packed with savory garlic and Parmesan, it’s a perfect weeknight favorite or crowd-pleasing dish for any occasion.
Prep Time 10 minutes
Cook Time 30 minutes
Total Time 40 minutes
Servings: 4 servings
Course: Dinner
Cuisine: American

Ingredients
  

For the Chicken:
  • 4 boneless skinless chicken breasts (or thighs)
  • 1 tsp Italian seasoning
  • ½ tsp smoked paprika
  • ½ tsp salt
  • ¼ tsp black pepper
  • 1 tbsp olive oil
For the Potatoes:
  • 1.5 lbs baby Yukon Gold or red potatoes halved
  • 3 tbsp olive oil
  • 4 cloves garlic minced
  • cup grated Parmesan cheese
  • ½ tsp salt
  • ¼ tsp black pepper
Optional Garnish:
  • 1 tbsp fresh parsley chopped

Method
 

Preheat the Oven:
  1. Preheat your oven to 400°F (200°C).
  2. Line a large baking sheet with parchment paper or lightly grease it.
Prepare the Chicken:
  1. Pat the chicken dry with paper towels to help the seasoning stick.
  2. In a small bowl, mix Italian seasoning, smoked paprika, salt, and black pepper.
  3. Rub olive oil over the chicken and coat evenly with the seasoning mixture.
Season the Potatoes:
  1. In a large bowl, toss the halved potatoes with olive oil, minced garlic, grated Parmesan cheese, salt, and pepper.
  2. Ensure the potatoes are fully coated with the mixture.
Assemble on the Pan:
  1. Place the seasoned chicken on one side of the prepared baking sheet.
  2. Spread the potatoes in a single layer on the other side, leaving space between them for even roasting.
Bake:
  1. Roast in the preheated oven for 25–30 minutes. Flip the potatoes halfway through for even crisping.
  2. Use a meat thermometer to check that the chicken reaches an internal temperature of 165°F (74°C).
Optional Finishing Touch:
  1. In the last 5 minutes of cooking, sprinkle extra Parmesan over the chicken and potatoes.
  2. Switch the oven to broil for a golden, crispy finish.
Serve and Garnish:
  1. Remove the baking sheet from the oven and sprinkle fresh parsley over the chicken and potatoes.
  2. Serve hot and enjoy!

Notes

  • Use evenly sized chicken breasts or thighs to ensure uniform cooking.
  • Avoid overcrowding the pan to achieve crispy potatoes and properly roasted chicken.
  • If using bone-in chicken, adjust the cooking time accordingly.