Crispy BBQ Salmon Tacos: A Flavor-Packed Delight!

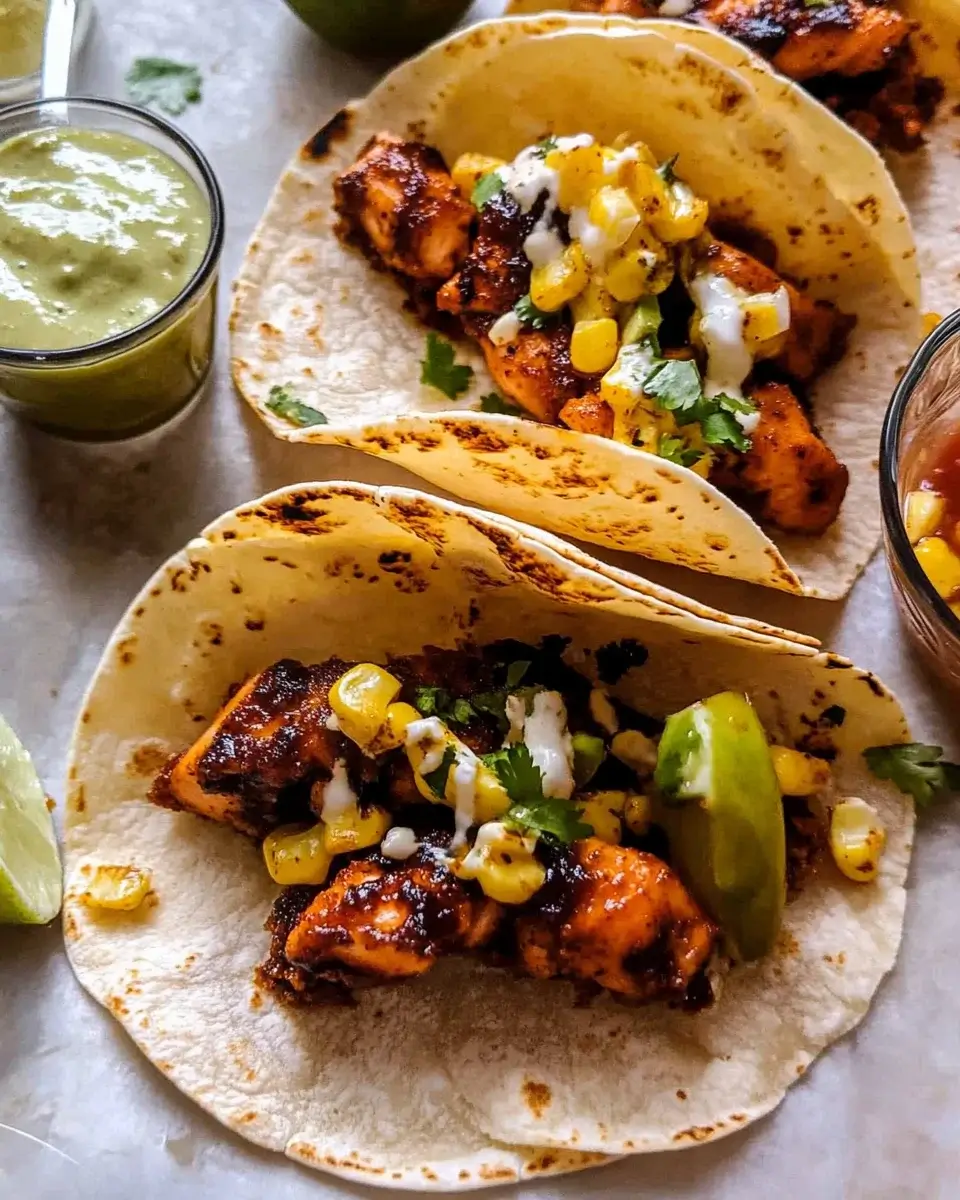
Introduction to Crispy BBQ Salmon Tacos

There’s something magical about a taco night, isn’t there? The sizzle of ingredients, the vibrant colors, and the tantalizing aromas wafting through the kitchen. Crispy BBQ Salmon Tacos bring that magic right to your table.

This dish is not just a meal; it’s a quick solution for those busy weeknights when you want something delicious without spending hours in the kitchen. With tender salmon, zesty BBQ sauce, and fresh toppings, these tacos are sure to impress your loved ones. Trust me, once you try them, they’ll become a staple in your home!

Why You’ll Love This Crispy BBQ Salmon Tacos

Crispy BBQ Salmon Tacos are a game-changer for your dinner routine.

They come together in just 25 minutes, making them perfect for busy evenings.

The combination of smoky spices and sweet BBQ sauce creates a flavor explosion that will have everyone asking for seconds.

Plus, they’re versatile! You can easily customize them with your favorite toppings.

These tacos are not just a meal; they’re a celebration of flavor and convenience!

Ingredients for Crispy BBQ Salmon Tacos

Creating Crispy BBQ Salmon Tacos is a breeze with the right ingredients. Here’s what you’ll need to whip up this flavorful dish:

  • Salmon fillets: Fresh salmon is the star of the show, providing a rich, buttery flavor that pairs perfectly with BBQ sauce.
  • Smoked paprika: This spice adds a delightful smokiness, enhancing the overall flavor profile of the tacos.
  • Garlic powder: A must-have for that savory kick, garlic powder elevates the taste without overpowering the dish.
  • Onion powder: It complements the garlic and adds depth to the seasoning mix.
  • Salt: Essential for bringing out the natural flavors of the salmon and spices.
  • Black pepper: A dash of black pepper adds a subtle heat and balances the sweetness of the BBQ sauce.
  • BBQ sauce: Choose your favorite brand or homemade version for that sweet and tangy glaze that makes these tacos irresistible.
  • Corn tortillas: Soft, warm corn tortillas are perfect for holding all the delicious fillings together.
  • Shredded cabbage: This adds a crunchy texture and freshness, balancing the richness of the salmon.
  • Avocado: Sliced avocado brings creaminess and a hint of healthy fats to the mix.
  • Fresh cilantro: A sprinkle of cilantro adds a burst of freshness and a pop of color.
  • Lime: Lime wedges are essential for squeezing over the tacos, brightening the flavors with a zesty finish.

Feel free to get creative! For a spicier kick, consider adding sliced jalapeños or a drizzle of hot sauce. If you’re looking for alternatives, grilled shrimp or chicken can also work beautifully in this recipe.

You can find the exact quantities for each ingredient at the bottom of the article, ready for printing!

How to Make Crispy BBQ Salmon Tacos

Making Crispy BBQ Salmon Tacos is a straightforward process that anyone can master.

Follow these simple steps, and you’ll have a delicious meal ready in no time!

Step 1: Preheat the Oven

Start by preheating your oven to 400°F.

This step is crucial because it ensures even cooking.

While the oven heats up, line a baking sheet with parchment paper.

This will prevent the salmon from sticking and make cleanup a breeze.

Step 2: Prepare the Spice Mixture

In a small bowl, combine smoked paprika, garlic powder, onion powder, salt, and black pepper.

Mix them well to create a flavorful spice blend.

These spices will infuse the salmon with a smoky, savory taste that pairs perfectly with the BBQ sauce.

Step 3: Season the Salmon

Pat the salmon fillets dry with paper towels.

This helps the spices stick better and ensures a crispy texture.

Rub the spice mixture evenly over both sides of the fillets.

Make sure every inch is coated for maximum flavor!

Step 4: Bake the Salmon

Place the seasoned salmon on the prepared baking sheet.

Bake for 12-15 minutes, or until the salmon flakes easily with a fork.

To check for doneness, gently poke the thickest part with a fork.

If it flakes apart, it’s ready to come out!

Step 5: Add BBQ Sauce

During the last 5 minutes of baking, brush the salmon with your favorite BBQ sauce.

This adds a sweet and tangy glaze that elevates the dish.

Be generous, but don’t drown the salmon; you want to enhance, not overpower, the flavor.

Step 6: Warm the Tortillas

While the salmon is baking, heat the corn tortillas in a dry skillet over medium heat.

Warm them for about 30 seconds on each side until they’re pliable.

This step enhances their texture and makes them easier to fold.

Step 7: Flake the Salmon

Once the salmon is done, remove it from the oven and let it cool for a minute.

Using a fork, gently flake the salmon into bite-sized pieces.

This makes it easier to fill the tacos and ensures everyone gets a taste of that delicious salmon.

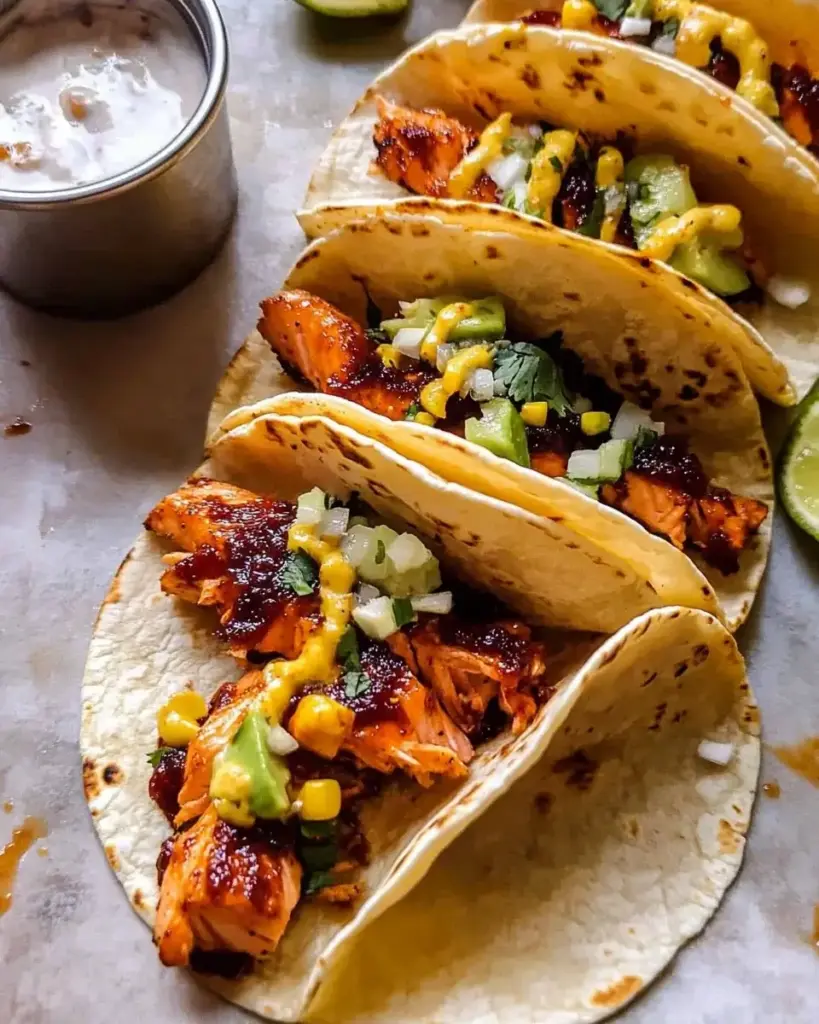
Step 8: Assemble the Tacos

Now it’s time to build your tacos!

Start with a generous amount of shredded cabbage on each tortilla.

Add the flaked salmon on top, followed by avocado slices and a sprinkle of fresh cilantro.

Layering these ingredients not only looks great but also balances the flavors beautifully.

Step 9: Serve with Lime

Don’t forget the lime wedges!

Serving your tacos with lime is essential.

A squeeze of fresh lime juice brightens the flavors and adds a zesty finish.

Trust me, it takes these tacos to the next level!

Tips for Success

  • Always pat the salmon dry before seasoning for a crispier texture.
  • Experiment with different BBQ sauces to find your favorite flavor profile.
  • Warm the tortillas just before serving to keep them soft and pliable.
  • Don’t skip the lime; it’s the secret ingredient that brightens everything up!
  • Feel free to prep the ingredients ahead of time for a quicker assembly.

Equipment Needed

  • Baking sheet: A standard baking sheet works well, but a cast-iron skillet can add extra crispiness.
  • Parchment paper: Use this for easy cleanup; aluminum foil is a good alternative.
  • Mixing bowl: Any bowl will do for mixing spices; a small one is ideal.
  • Fork: Essential for flaking the salmon; a fish spatula can also work.
  • Skillet: A non-stick skillet is perfect for warming tortillas; a griddle is another option.

Variations

  • Spicy Kick: Add sliced jalapeños or a drizzle of your favorite hot sauce for an extra layer of heat.
  • Seafood Swap: Substitute salmon with grilled shrimp or even flaky white fish for a different seafood experience.
  • Vegetarian Option: Replace the salmon with grilled portobello mushrooms or roasted cauliflower for a hearty, plant-based taco.
  • Gluten-Free: Ensure your BBQ sauce is gluten-free and use corn tortillas to keep this dish suitable for gluten-sensitive diets.
  • Extra Creamy: Top with a dollop of sour cream or Greek yogurt for a rich, creamy texture that complements the flavors.

Serving Suggestions

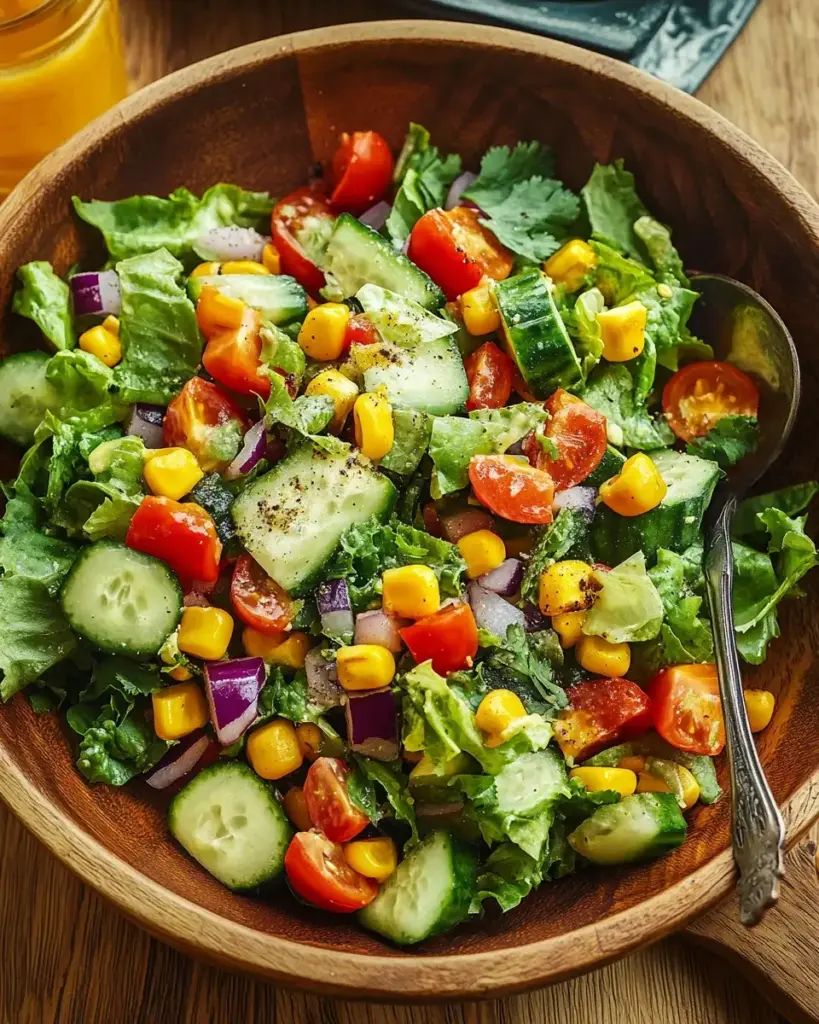
  • Side Salad: Pair your tacos with a refreshing cucumber and tomato salad for a light crunch.
  • Chips and Salsa: Serve with tortilla chips and your favorite salsa for a classic touch.
  • Drink Pairing: A cold beer or a zesty margarita complements the flavors beautifully.
  • Presentation: Serve on a colorful platter with lime wedges and cilantro for a vibrant display.

FAQs about Crispy BBQ Salmon Tacos

Can I use frozen salmon for this recipe?

Absolutely! Just make sure to thaw the salmon completely before seasoning and baking. Frozen salmon can still yield delicious results, especially when coated with that flavorful spice mix.

What type of BBQ sauce works best?

It really depends on your taste! A sweet and tangy sauce complements the salmon beautifully. However, if you prefer a smoky or spicy BBQ sauce, go for it! The key is to choose one that you enjoy.

Can I make these tacos ahead of time?

Yes, you can prep the ingredients in advance! Season the salmon and chop the veggies ahead of time. Just assemble the tacos right before serving for the freshest taste.

What can I serve with Crispy BBQ Salmon Tacos?

These tacos pair wonderfully with a side of chips and salsa, a light salad, or even some grilled corn. A refreshing drink like a margarita or a cold beer also complements the flavors perfectly!

Are these tacos gluten-free?

Yes! As long as you use gluten-free BBQ sauce and corn tortillas, these Crispy BBQ Salmon Tacos are a great option for those avoiding gluten.

Final Thoughts

Crispy BBQ Salmon Tacos are more than just a meal; they’re an experience that brings joy to the table.

The combination of smoky spices, tender salmon, and fresh toppings creates a symphony of flavors that dance on your palate.

Whether you’re enjoying a casual weeknight dinner or impressing friends at a gathering, these tacos are sure to be a hit.

Plus, the ease of preparation means you can focus on what really matters—sharing good food and great moments with loved ones.

So, roll up your sleeves and dive into this delicious adventure!

Paul

Crispy BBQ Salmon Tacos: A Flavor-Packed Delight!

Crispy BBQ Salmon Tacos are a delicious and flavorful dish featuring baked salmon fillets topped with fresh ingredients and served in warm corn tortillas.
Prep Time 10 minutes
Cook Time 15 minutes
Total Time 25 minutes
Servings: 4 servings
Course: Main Course
Cuisine: Mexican
Calories: 320

Ingredients
  

  • 2 6-ounce salmon fillets
  • 1 teaspoon smoked paprika
  • 1 teaspoon garlic powder
  • 1 teaspoon onion powder
  • 1 teaspoon salt
  • 1/2 teaspoon black pepper
  • 1/2 cup BBQ sauce
  • 8 small corn tortillas
  • 1 cup shredded cabbage
  • 1 avocado sliced
  • 1/4 cup fresh cilantro chopped
  • 1 lime cut into wedges

Method
 

  1. Preheat the oven to 400°F. Line a baking sheet with parchment paper.
  2. In a small bowl, mix together the smoked paprika, garlic powder, onion powder, salt, and black pepper.
  3. Pat the salmon fillets dry with paper towels and rub the spice mixture evenly over both sides of the fillets.
  4. Place the salmon on the prepared baking sheet and bake for 12-15 minutes, or until the salmon flakes easily with a fork.
  5. During the last 5 minutes of baking, brush the salmon with BBQ sauce.
  6. While the salmon is baking, heat the corn tortillas in a dry skillet over medium heat for about 30 seconds on each side, until warm and pliable.
  7. Once the salmon is done, remove it from the oven and let it cool for a minute. Flake the salmon into bite-sized pieces with a fork.
  8. Assemble the tacos by placing a generous amount of shredded cabbage on each tortilla, followed by the flaked salmon, avocado slices, and a sprinkle of fresh cilantro.
  9. Serve with lime wedges on the side for squeezing over the tacos.

Notes

  • For a spicier kick, add sliced jalapeños or a drizzle of hot sauce on top of the tacos.
  • You can also substitute the salmon with grilled shrimp or chicken for a different flavor.
  • If you prefer a creamier texture, add a dollop of sour cream or Greek yogurt on top before serving.

Turkish Meatballs with Yogurt Sauce: A Tasty Twist!

Introduction to Turkish Meatballs with Yogurt Sauce

There’s something magical about the aroma of Turkish meatballs with yogurt sauce wafting through the kitchen. It takes me back to family gatherings, where laughter and delicious food filled the air. This recipe is not just a meal; it’s a quick solution for those busy weeknights or a dish to impress your loved ones on special occasions. With tender meatballs and a creamy yogurt sauce, it’s a delightful combination that’s both comforting and flavorful. Trust me, once you try this, it’ll become a staple in your home cooking repertoire!

Why You’ll Love This Turkish Meatballs with Yogurt Sauce

These Turkish meatballs with yogurt sauce are a game-changer for any home cook. They come together in just 30 minutes, making them perfect for busy weeknights. The flavors are bold yet comforting, and the creamy yogurt sauce adds a refreshing twist. Plus, they’re versatile enough to please picky eaters and adventurous palates alike. You’ll find yourself making this dish again and again, and your family will thank you for it!

Ingredients for Turkish Meatballs with Yogurt Sauce

Gathering the right ingredients is the first step to creating these delicious Turkish meatballs with yogurt sauce. Here’s what you’ll need:

  • Ground beef or lamb: The star of the dish, providing rich flavor and texture. Choose lean meat for a healthier option.
  • Onion: Finely grated for sweetness and moisture, it enhances the meatballs’ overall flavor.
  • Garlic: Minced to add a punch of flavor. Fresh garlic is always best for that aromatic kick.
  • Fresh parsley: Chopped for a burst of color and freshness. It brightens up the dish.
  • Breadcrumbs: These help bind the meatballs together while keeping them tender. You can use gluten-free breadcrumbs if needed.
  • Egg: Acts as a binder, ensuring your meatballs hold their shape during cooking.
  • Ground cumin: Adds a warm, earthy flavor that’s essential in Turkish cuisine.
  • Paprika: For a hint of smokiness and color. You can use sweet or smoked paprika based on your preference.
  • Salt and black pepper: Essential seasonings that enhance all the flavors in the meatballs.
  • Red pepper flakes: Optional, but they add a nice kick if you like a bit of heat.
  • Olive oil: Used for frying the meatballs, giving them a crispy exterior.
  • Plain Greek yogurt: The creamy base for the sauce, providing a tangy contrast to the meatballs.
  • Lemon juice: Brightens the yogurt sauce and adds a refreshing zing.
  • Additional garlic: Minced for the yogurt sauce, enhancing its flavor.
  • Salt to taste: Adjust according to your preference for the sauce.
  • Fresh parsley for garnish: A final touch that adds color and freshness when serving.

For exact measurements, check the bottom of the article where you can find everything listed for easy printing. Happy cooking!

How to Make Turkish Meatballs with Yogurt Sauce

Step 1: Prepare the Meatball Mixture

Start by grabbing a large bowl. Combine the ground beef or lamb, grated onion, minced garlic, chopped parsley, breadcrumbs, egg, cumin, paprika, salt, black pepper, and red pepper flakes if you’re feeling adventurous. Mix everything together with your hands or a spoon until well combined. The mixture should feel slightly sticky but hold together well. This is where the magic begins!

Step 2: Shape the Meatballs

Now, it’s time to shape the mixture into meatballs. Aim for about 1 inch in diameter—think of the size of a golf ball. This size ensures they cook evenly and stay juicy. Place them on a plate as you go, ready for the skillet.

Step 3: Cook the Meatballs

Heat the olive oil in a large skillet over medium heat. Once the oil is shimmering, add the meatballs in batches. Avoid overcrowding the pan; this helps them brown nicely. Cook for about 5-7 minutes, turning occasionally. You want them golden brown on all sides and cooked through. The aroma will be irresistible, trust me!

Step 4: Make the Yogurt Sauce

While the meatballs are sizzling away, prepare the yogurt sauce. In a small bowl, mix the plain Greek yogurt, lemon juice, minced garlic, and a pinch of salt. Stir until smooth and creamy. This sauce is the perfect complement to the meatballs, adding a refreshing tang.

Step 5: Serve and Garnish

Once the meatballs are cooked, remove them from the skillet and let them drain on paper towels. Serve them warm, drizzled generously with the yogurt sauce. Don’t forget to sprinkle fresh parsley on top for that pop of color and flavor. Enjoy every bite!

Tips for Success

  • Use lean ground meat for a healthier option without sacrificing flavor.
  • Don’t skip the resting time for the meatballs; it helps them hold their shape.
  • Experiment with spices! Add more cumin or paprika for a bolder taste.
  • For extra moisture, consider adding a splash of beef broth to the mixture.
  • Serve with warm pita bread to soak up the delicious yogurt sauce.

Equipment Needed

  • Large bowl: For mixing the meatball ingredients. A mixing bowl works just as well.
  • Skillet: A non-stick skillet is ideal for frying. You can also use a cast-iron skillet for a nice sear.
  • Measuring cups and spoons: Essential for accurate ingredient measurements.
  • Spatula: To turn the meatballs while cooking. A wooden spoon can do the trick too.

Variations

  • Herbed Meatballs: Add fresh herbs like mint or dill to the meat mixture for a fragrant twist.
  • Spicy Meatballs: Increase the red pepper flakes or add chopped jalapeños for a fiery kick.
  • Vegetarian Option: Substitute ground meat with lentils or chickpeas, and add grated zucchini for moisture.
  • Cheesy Delight: Mix in crumbled feta cheese for a creamy, tangy flavor that pairs beautifully with the yogurt sauce.
  • Gluten-Free: Use gluten-free breadcrumbs or oats to keep the recipe suitable for gluten-sensitive diets.

Serving Suggestions

  • Pair the meatballs with warm pita bread for a delightful scoop of yogurt sauce.
  • Serve alongside a fresh cucumber and tomato salad for a refreshing crunch.
  • A glass of chilled ayran (yogurt drink) complements the meal perfectly.
  • Garnish with lemon wedges for an extra zing.

FAQs about Turkish Meatballs with Yogurt Sauce

Can I use ground turkey instead of beef or lamb?

Absolutely! Ground turkey is a great alternative for a leaner option. Just keep in mind that it may require a bit more seasoning to enhance the flavor.

How can I make the yogurt sauce spicier?

If you’re looking to add some heat, consider mixing in a pinch of cayenne pepper or a dash of hot sauce. This will give your yogurt sauce a nice kick that pairs well with the meatballs.

Can I prepare the meatballs in advance?

Yes! You can shape the meatballs ahead of time and store them in the fridge for up to 24 hours. Just cook them when you’re ready for a quick meal.

What can I serve with Turkish meatballs?

These meatballs are fantastic with warm pita bread, a fresh salad, or even over rice. The creamy yogurt sauce complements any side beautifully!

Are Turkish meatballs gluten-free?

They can be! Just use gluten-free breadcrumbs or oats in the meatball mixture. This way, everyone can enjoy this delicious dish without worry.

Final Thoughts

Cooking Turkish meatballs with yogurt sauce is more than just preparing a meal; it’s about creating memories. The blend of spices and the creamy sauce brings warmth to the table, making every bite a celebration of flavors. Whether you’re sharing this dish with family or enjoying it solo after a long day, it’s sure to bring a smile. Plus, the ease of preparation means you can whip it up anytime. So, roll up your sleeves, embrace the process, and let the delightful aromas fill your kitchen. You’ll find joy in every savory morsel!

Paul

Turkish Meatballs with Yogurt Sauce: A Tasty Twist!

A delicious recipe for Turkish meatballs served with a creamy yogurt sauce, perfect for a flavorful meal.
Prep Time 15 minutes
Cook Time 15 minutes
Total Time 30 minutes
Servings: 4 servings
Course: Main Course
Cuisine: Turkish
Calories: 350

Ingredients
  

  • 1 pound ground beef or lamb
  • 1 small onion finely grated
  • 2 cloves garlic minced
  • 1/4 cup fresh parsley chopped
  • 1/4 cup breadcrumbs
  • 1 large egg
  • 1 teaspoon ground cumin
  • 1 teaspoon paprika
  • 1/2 teaspoon salt
  • 1/4 teaspoon black pepper
  • 1/4 teaspoon red pepper flakes optional
  • 2 tablespoons olive oil for frying
  • 1 cup plain Greek yogurt for the sauce
  • 1 tablespoon lemon juice
  • 1 clove garlic minced (for the sauce)
  • Salt to taste for the sauce
  • Fresh parsley for garnish

Method
 

  1. In a large bowl, combine the ground meat, grated onion, minced garlic, chopped parsley, breadcrumbs, egg, cumin, paprika, salt, black pepper, and red pepper flakes (if using). Mix until well combined.
  2. Shape the mixture into small meatballs, about 1 inch in diameter. You should have approximately 20 meatballs.
  3. Heat the olive oil in a large skillet over medium heat. Add the meatballs in batches, being careful not to overcrowd the pan. Cook for about 5-7 minutes, turning occasionally, until browned on all sides and cooked through.
  4. While the meatballs are cooking, prepare the yogurt sauce by combining the Greek yogurt, lemon juice, minced garlic, and salt in a small bowl. Mix well and set aside.
  5. Once the meatballs are cooked, remove them from the skillet and drain on paper towels.
  6. Serve the meatballs warm, drizzled with the yogurt sauce and garnished with fresh parsley.

Notes

  • For a spicier kick, add more red pepper flakes or a dash of hot sauce to the meat mixture.
  • Serve the meatballs with pita bread and a side salad for a complete meal.

Strawberry Cottage Cheese Mousse: A Deliciously Unique Treat!

Introduction to Strawberry Cottage Cheese Mousse

There’s something magical about dessert that feels light yet indulgent, and that’s exactly what you get with Strawberry Cottage Cheese Mousse. This delightful treat is not just a feast for the eyes; it’s a quick solution for those busy days when you want to impress without the fuss. I remember the first time I whipped this up for friends; their faces lit up with surprise and delight. With fresh strawberries and creamy cottage cheese, it’s a guilt-free way to satisfy your sweet tooth. Let’s dive into this deliciously unique treat that’s sure to become a favorite!

Why You’ll Love This Strawberry Cottage Cheese Mousse

This Strawberry Cottage Cheese Mousse is a game-changer for dessert lovers. It’s incredibly easy to make, taking just 15 minutes of prep time. The combination of fresh strawberries and creamy cottage cheese creates a taste that’s both refreshing and satisfying. Plus, it’s a healthier option compared to traditional desserts, making it perfect for those who want to indulge without the guilt. Trust me, your taste buds will thank you!

Ingredients for Strawberry Cottage Cheese Mousse

Gathering the right ingredients is the first step to creating this delightful Strawberry Cottage Cheese Mousse. Here’s what you’ll need:

  • Cottage cheese: The star of the show! It adds creaminess and protein, making this dessert both satisfying and nutritious.
  • Fresh strawberries: Sweet and juicy, they bring a burst of flavor and vibrant color to the mousse.
  • Honey or maple syrup: A natural sweetener that enhances the flavors without overpowering them. Choose based on your preference!
  • Vanilla extract: This adds a warm, aromatic note that complements the strawberries beautifully.
  • Lemon juice: Just a splash brightens the flavors and balances the sweetness.
  • Heavy whipping cream: For that light, airy texture, it’s essential to whip this into soft peaks before folding it in.
  • Fresh strawberries and mint leaves: These are for garnish, adding a touch of elegance and freshness to your presentation.

For those looking for alternatives, you can substitute cottage cheese with silken tofu for a dairy-free option. Coconut cream can replace heavy whipping cream, giving it a tropical twist. If you want to boost the nutrition, consider adding a tablespoon of chia seeds for extra texture. Just let the mousse sit for an additional 15 minutes to thicken.

Exact quantities for each ingredient are available at the bottom of the article for easy printing!

How to Make Strawberry Cottage Cheese Mousse

Creating this Strawberry Cottage Cheese Mousse is a breeze! Follow these simple steps, and you’ll have a delightful dessert ready in no time. Let’s get started!

Step 1: Blend the Base

First, grab your blender or food processor. Toss in the cottage cheese, sliced strawberries, honey or maple syrup, vanilla extract, and lemon juice. Blend everything until it’s smooth and creamy. This is where the magic begins! The strawberries will turn the mixture into a beautiful pink hue, making it even more inviting.

Step 2: Whip the Cream

Next, take a separate bowl and pour in the heavy whipping cream. Using a hand mixer or a whisk, whip the cream until soft peaks form. This step is crucial for achieving that light, airy texture in your mousse. Don’t rush it; take your time to get it just right!

Step 3: Combine Mixtures

Now, gently fold the whipped cream into the strawberry cottage cheese mixture. Use a spatula and be careful not to deflate the whipped cream. You want to keep that fluffy texture! This is where the mousse starts to come together, creating a delightful blend of flavors and textures.

Step 4: Chill the Mousse

Once combined, spoon the mousse into serving dishes or glasses. Cover them with plastic wrap and pop them in the refrigerator for at least one hour. This chilling time allows the flavors to meld and the mousse to set. Trust me, the wait will be worth it!

Step 5: Garnish and Serve

Finally, it’s time to serve! Before you dig in, garnish each serving with fresh strawberries and a sprig of mint. This adds a pop of color and a refreshing touch. Now, sit back and enjoy your delicious Strawberry Cottage Cheese Mousse. It’s a treat that’s sure to impress!

Tips for Success

  • Use ripe strawberries for the best flavor; they should be sweet and fragrant.
  • Don’t overmix when folding in the whipped cream; gentle is key to keeping it airy.
  • Chill the mousse longer if you prefer a firmer texture.
  • Experiment with different sweeteners like agave or stevia for a unique twist.
  • For a fun presentation, layer the mousse with extra strawberries in clear glasses.

Equipment Needed

  • Blender or food processor: Essential for creating a smooth base. A hand mixer can work in a pinch.
  • Mixing bowls: Use two—one for the mousse and one for whipping cream.
  • Spatula: Perfect for folding in the whipped cream gently.
  • Serving dishes or glasses: Choose clear ones to showcase the beautiful layers.

Variations

  • Berry Medley: Swap out strawberries for a mix of berries like blueberries, raspberries, or blackberries for a colorful twist.
  • Chocolate Delight: Add a tablespoon of cocoa powder to the base for a chocolatey version that’s sure to satisfy any sweet tooth.
  • Nutty Crunch: Fold in some chopped nuts like almonds or walnuts for added texture and a nutty flavor.
  • Minty Fresh: Incorporate fresh mint leaves into the blend for a refreshing herbal note that complements the strawberries.
  • Spiced Up: Add a pinch of cinnamon or nutmeg to the mixture for a warm, cozy flavor that’s perfect for fall.

Serving Suggestions

  • Pair the mousse with a light, crisp salad for a refreshing contrast.
  • Serve alongside a glass of sparkling water or a fruity iced tea to enhance the flavors.
  • For a stunning presentation, layer the mousse with extra strawberries in clear glasses.
  • Top with a dollop of whipped cream for added indulgence.

FAQs about Strawberry Cottage Cheese Mousse

Can I make Strawberry Cottage Cheese Mousse ahead of time?

Absolutely! This mousse can be made a day in advance. Just store it in the refrigerator, covered, until you’re ready to serve. The flavors will meld beautifully, making it even more delicious!

Is Strawberry Cottage Cheese Mousse suitable for a healthy diet?

Yes! This dessert is a healthier alternative to traditional mousse. With protein from cottage cheese and natural sweetness from strawberries, it’s a guilt-free treat that fits well into a balanced diet.

Can I use frozen strawberries instead of fresh?

While fresh strawberries are ideal for flavor and texture, you can use frozen ones in a pinch. Just make sure to thaw and drain them well to avoid excess moisture in your mousse.

How can I make this mousse dairy-free?

For a dairy-free version, substitute cottage cheese with silken tofu and use coconut cream instead of heavy whipping cream. This will still give you a creamy texture while keeping it plant-based!

What can I do if my mousse is too runny?

If your mousse turns out runny, try adding a tablespoon of chia seeds and letting it sit for an additional 15 minutes. This will help thicken it up and add a nice texture!

Final Thoughts

Creating Strawberry Cottage Cheese Mousse is more than just whipping up a dessert; it’s about crafting a moment of joy. Each spoonful is a delightful blend of creamy and fruity goodness that brings a smile to your face. Whether you’re serving it at a gathering or enjoying it solo after a long day, this mousse is a reminder that simple ingredients can create something truly special. Plus, it’s a healthier option that doesn’t skimp on flavor. So, roll up your sleeves, gather your ingredients, and let this deliciously unique treat brighten your day!

Paul

Strawberry Cottage Cheese Mousse: A Deliciously Unique Treat!

A deliciously unique treat made with cottage cheese and fresh strawberries, perfect for a light dessert.
Prep Time 15 minutes
Total Time 1 hour 15 minutes
Servings: 4 servings
Course: Dessert
Cuisine: American
Calories: 150

Ingredients
  

  • 1 cup cottage cheese
  • 1 cup fresh strawberries hulled and sliced
  • 1/4 cup honey or maple syrup
  • 1 teaspoon vanilla extract
  • 1/2 teaspoon lemon juice
  • 1/2 cup heavy whipping cream
  • Fresh strawberries and mint leaves for garnish

Method
 

  1. In a blender or food processor, combine the cottage cheese, sliced strawberries, honey (or maple syrup), vanilla extract, and lemon juice. Blend until smooth and creamy.
  2. In a separate bowl, whip the heavy cream until soft peaks form.
  3. Gently fold the whipped cream into the strawberry cottage cheese mixture until well combined. Be careful not to deflate the whipped cream.
  4. Spoon the mousse into serving dishes or glasses and refrigerate for at least 1 hour to chill and set.
  5. Before serving, garnish with additional fresh strawberries and mint leaves.

Notes

  • For a dairy-free option, substitute cottage cheese with silken tofu and use coconut cream instead of heavy whipping cream.
  • Add a tablespoon of chia seeds for extra texture and nutrition, allowing the mousse to sit for an additional 15 minutes to thicken.

Savory Satay Beef Noodle Soup: A Flavorful Delight Awaiting!

Introduction to Savory Satay Beef Noodle Soup

There’s something magical about a steaming bowl of Savory Satay Beef Noodle Soup that instantly warms the soul.

I remember the first time I tried a similar dish at a bustling street market. The aroma of spices and sizzling beef filled the air, drawing me in like a moth to a flame.

This recipe is perfect for those busy weeknights when you crave comfort but don’t have hours to spare.

With tender beef, vibrant veggies, and a rich broth, it’s a delightful way to impress your loved ones or simply treat yourself after a long day.

Why You’ll Love This Savory Satay Beef Noodle Soup

This Savory Satay Beef Noodle Soup is a game-changer for your dinner routine.

It’s quick to whip up, taking just 40 minutes from start to finish.

The rich flavors will transport your taste buds straight to Asia, while the tender beef and fresh veggies make it a hearty meal.

Plus, it’s a one-pot wonder, meaning less cleanup and more time to enjoy with family or friends.

Ingredients for Savory Satay Beef Noodle Soup

Gathering the right ingredients is the first step to creating this delightful dish.

Here’s what you’ll need:

  • Beef sirloin: Tender and flavorful, it’s the star of the show. Thinly sliced for quick cooking.
  • Vegetable oil: A neutral oil that helps sauté the aromatics and beef without overpowering the flavors.
  • Onion: Chopped to add sweetness and depth to the broth.
  • Garlic: Minced for that aromatic punch that elevates any dish.
  • Fresh ginger: Adds a warm, spicy note that complements the beef beautifully.
  • Beef broth: The base of your soup, providing richness and depth. Homemade or store-bought works well.
  • Soy sauce: A splash of umami goodness that enhances the overall flavor.
  • Peanut butter: This creamy ingredient adds a nutty richness, making the broth extra satisfying.
  • Red curry paste: A blend of spices that brings heat and complexity to the soup.
  • Rice noodles: These delicate noodles soak up the broth and provide a comforting texture.
  • Bean sprouts: Fresh and crunchy, they add a delightful contrast to the tender beef.
  • Red bell pepper: Sliced for sweetness and color, making the dish visually appealing.
  • Fresh cilantro: Chopped for a burst of freshness that brightens every bite.
  • Green onions: Sliced for a mild onion flavor and a pop of color on top.
  • Lime juice: A squeeze at the end adds a zesty kick that balances the richness.
  • Salt and pepper: Essential for seasoning to taste, ensuring every flavor shines.

For those looking to spice things up, consider adding sliced jalapeños or a dash of sriracha.

If you prefer a different protein, chicken or tofu can be great substitutes.

Exact quantities for each ingredient can be found at the bottom of the article, ready for printing!

How to Make Savory Satay Beef Noodle Soup

Creating this Savory Satay Beef Noodle Soup is a straightforward process that will have your kitchen smelling divine.

Let’s dive into the steps!

Step 1: Sauté the Aromatics

Start by heating the vegetable oil in a large pot over medium heat.

Add the chopped onion and sauté until it turns translucent, about 5 minutes.

The aroma will start to fill your kitchen, making your mouth water.

Next, stir in the minced garlic and ginger, cooking for an additional minute until fragrant.

This step lays the foundation for a flavor-packed broth.

Step 2: Brown the Beef

Now, it’s time to add the sliced beef sirloin to the pot.

Cook it until browned, which should take about 3-4 minutes.

Don’t forget to season with salt and pepper.

This step is crucial; browning the beef enhances its flavor and gives the soup a rich depth.

Step 3: Create the Flavorful Broth

Pour in the beef broth, soy sauce, peanut butter, and red curry paste.

Stir well to combine all the ingredients.

Bring the mixture to a simmer and let it cook for 10 minutes.

This allows the flavors to meld beautifully, creating a savory base for your soup.

Step 4: Cook the Noodles

While the broth simmers, cook the rice noodles according to the package instructions.

Once cooked, drain them and set aside.

These noodles will soak up the delicious broth, making each bite comforting and satisfying.

Step 5: Add Vegetables

After the broth has simmered, add the sliced red bell pepper and bean sprouts.

Cook for another 3-4 minutes until the vegetables are tender but still crisp.

This adds a lovely crunch and freshness to your Savory Satay Beef Noodle Soup.

Step 6: Serve and Garnish

To serve, divide the cooked rice noodles among bowls.

Ladle the hot soup over the noodles, ensuring each bowl is filled with beef and veggies.

Top with fresh cilantro, sliced green onions, and a squeeze of lime juice.

This final touch brightens the dish and adds a burst of flavor that’s simply irresistible.

Tips for Success

  • Prep all your ingredients before starting to cook. It makes the process smoother.
  • Don’t rush the browning of the beef; it adds depth to the flavor.
  • Adjust the spice level by adding more or less red curry paste to suit your taste.
  • For a creamier broth, blend in a bit more peanut butter.
  • Garnish generously with cilantro and lime for a fresh finish.

Equipment Needed

  • Large pot: A sturdy pot is essential for simmering the soup. A Dutch oven works great too.
  • Cutting board: A solid surface for chopping your ingredients.
  • Sharp knife: For slicing the beef and vegetables with ease.
  • Measuring spoons: Handy for precise ingredient measurements.
  • Colander: Useful for draining the cooked rice noodles.

Variations

  • Spicy Satay Beef Noodle Soup: Add sliced jalapeños or a dash of sriracha for an extra kick.
  • Vegetarian Option: Substitute beef with tofu or tempeh for a plant-based twist.
  • Gluten-Free Version: Use gluten-free soy sauce and ensure your rice noodles are certified gluten-free.
  • Extra Veggies: Toss in additional vegetables like bok choy, mushrooms, or snap peas for more nutrition.
  • Coconut Milk Addition: Stir in a can of coconut milk for a creamier, richer broth.

Serving Suggestions

  • Side Salad: A light cucumber and carrot salad pairs perfectly, adding crunch and freshness.
  • Drink Pairing: Enjoy with a cold Asian lager or a refreshing iced tea.
  • Presentation: Serve in deep bowls, garnished with extra cilantro and lime wedges for a vibrant look.

FAQs about Savory Satay Beef Noodle Soup

Can I make Savory Satay Beef Noodle Soup ahead of time?

Absolutely! This soup can be made ahead and stored in the fridge for up to three days. Just keep the noodles separate until you’re ready to serve to prevent them from getting mushy.

What can I substitute for beef in this recipe?

If you’re looking for alternatives, chicken or tofu work wonderfully. Both options will absorb the flavors of the broth beautifully, making for a delicious meal.

Is Savory Satay Beef Noodle Soup spicy?

The spice level can be adjusted to your liking. The red curry paste adds a mild heat, but you can always add more or include jalapeños for an extra kick!

Can I freeze the leftovers?

Yes, you can freeze the soup! Just remember to store the noodles separately. When you’re ready to enjoy it again, thaw and reheat on the stove.

What are some good sides to serve with this soup?

A light cucumber salad or spring rolls make excellent sides. They add a refreshing contrast to the rich flavors of the Savory Satay Beef Noodle Soup.

Final Thoughts

Cooking Savory Satay Beef Noodle Soup is more than just preparing a meal; it’s about creating a moment of joy.

The rich aromas wafting through your kitchen will draw everyone in, sparking conversations and laughter.

Each bowl is a warm hug, filled with tender beef, vibrant veggies, and a broth that dances on your taste buds.

Whether you’re sharing it with family or enjoying a quiet night in, this dish brings comfort and satisfaction.

So, roll up your sleeves, embrace the process, and let this delightful soup become a cherished part of your culinary repertoire.

Paul

Savory Satay Beef Noodle Soup: A Flavorful Delight Awaiting!

Savory Satay Beef Noodle Soup is a flavorful and hearty dish that combines tender beef, aromatic spices, and fresh vegetables in a rich broth, served over rice noodles.
Prep Time 15 minutes
Cook Time 25 minutes
Total Time 40 minutes
Servings: 4 servings
Course: Soup
Cuisine: Asian
Calories: 380

Ingredients
  

  • 1 pound beef sirloin thinly sliced
  • 2 tablespoons vegetable oil
  • 1 medium onion chopped
  • 3 cloves garlic minced
  • 1 tablespoon fresh ginger minced
  • 4 cups beef broth
  • 1 tablespoon soy sauce
  • 1 tablespoon peanut butter
  • 1 tablespoon red curry paste
  • 8 ounces rice noodles
  • 1 cup bean sprouts
  • 1 red bell pepper sliced
  • 1 cup fresh cilantro chopped
  • 2 green onions sliced
  • Juice of 1 lime
  • Salt and pepper to taste

Method
 

  1. In a large pot, heat the vegetable oil over medium heat. Add the chopped onion and sauté until translucent, about 5 minutes. Stir in the minced garlic and ginger, cooking for an additional minute until fragrant.
  2. Add the sliced beef to the pot and cook until browned, about 3-4 minutes. Season with salt and pepper.
  3. Pour in the beef broth, soy sauce, peanut butter, and red curry paste. Stir well to combine and bring to a simmer. Let it cook for 10 minutes to allow the flavors to meld.
  4. Meanwhile, cook the rice noodles according to package instructions. Drain and set aside.
  5. Add the sliced red bell pepper and bean sprouts to the soup, cooking for another 3-4 minutes until the vegetables are tender but still crisp.
  6. To serve, divide the cooked rice noodles among bowls. Ladle the hot soup over the noodles. Top with fresh cilantro, green onions, and a squeeze of lime juice.

Notes

  • For a spicier kick, add sliced jalapeños or a dash of sriracha to the soup.
  • Substitute chicken or tofu for the beef for a different protein option.

La Scala Chopped Salad: Discover the Perfect Recipe!

Introduction to La Scala Chopped Salad

When I think of summer gatherings, the vibrant colors and fresh flavors of La Scala Chopped Salad come to mind. This dish is more than just a salad; it’s a celebration of fresh ingredients that come together in a delightful medley.

Perfect for a quick lunch or a light dinner, this salad is a go-to for busy days when you want something satisfying yet healthy.

With its mix of crunchy vegetables, savory salami, and tangy dressing, it’s sure to impress your loved ones. Trust me, once you try it, you’ll be hooked!

Why You’ll Love This La Scala Chopped Salad

This La Scala Chopped Salad is a game-changer for anyone looking to whip up a delicious meal in no time.

With just 15 minutes of prep, you can enjoy a refreshing dish that’s packed with flavor and nutrients.

The combination of crisp veggies, hearty salami, and zesty dressing makes every bite a delight.

Plus, it’s versatile enough to serve as a main dish or a side, making it perfect for any occasion!

Ingredients for La Scala Chopped Salad

Creating the perfect La Scala Chopped Salad starts with fresh, vibrant ingredients. Here’s what you’ll need:

  • Romaine lettuce: This adds a crisp texture and a refreshing crunch.
  • Iceberg lettuce: Known for its mild flavor, it complements the romaine beautifully.
  • Cherry tomatoes: Sweet and juicy, they bring a burst of color and flavor.
  • Cucumber: Adds a cool crunch that balances the richness of the other ingredients.
  • Red onion: A touch of sharpness that enhances the overall taste.
  • Kalamata olives: These bring a briny depth, perfect for an Italian flair.
  • Garbanzo beans: Packed with protein, they add heartiness to the salad.
  • Provolone cheese: Creamy and slightly tangy, it elevates the flavor profile.
  • Salami: Adds a savory, meaty element that makes the salad satisfying.
  • Pepperoncini: For a hint of heat and tang, these little peppers are a must.
  • Italian dressing: The finishing touch that ties all the flavors together.
  • Salt and pepper: Essential for seasoning to taste.

Feel free to get creative! If you want a vegetarian option, simply skip the salami and cheese. You can add extra chickpeas or even some creamy avocado for a delightful twist.

For a burst of freshness, toss in a handful of herbs like parsley or basil.

You’ll find the exact quantities for each ingredient at the bottom of the article, ready for printing!

How to Make La Scala Chopped Salad

Making La Scala Chopped Salad is as easy as pie, and trust me, it’s just as satisfying!

Follow these simple steps, and you’ll have a delicious salad ready in no time.

Step 1: Prepare the Vegetables

Start by washing all your fresh veggies.

Chop the romaine and iceberg lettuce into bite-sized pieces.

Halve the cherry tomatoes and dice the cucumber.

For the red onion, slice it thinly to avoid overpowering the salad.

Finally, slice the Kalamata olives and pepperoncini.

The key here is to keep everything uniform in size for a balanced bite!

Step 2: Combine Ingredients

In a large mixing bowl, toss together the chopped romaine, iceberg lettuce, cherry tomatoes, cucumber, and red onion.

Add in the sliced Kalamata olives, garbanzo beans, diced provolone cheese, salami, and pepperoncini.

Mixing these ingredients creates a colorful and hearty base for your salad.

Don’t be shy—get in there and give it a good toss!

Step 3: Dress the Salad

Now it’s time to bring it all together with the Italian dressing.

Drizzle it generously over the salad.

Using tongs or a large spoon, gently toss everything until the dressing coats all the ingredients evenly.

This step is crucial; it’s where the magic happens!

Step 4: Season and Serve

Before serving, sprinkle a little salt and pepper to taste.

For the best flavor, let the salad sit for about 10 minutes.

This allows the flavors to meld beautifully.

You can serve it chilled or at room temperature, depending on your preference.

Enjoy every bite of this refreshing La Scala Chopped Salad!

Tips for Success

  • Use fresh, high-quality ingredients for the best flavor.
  • Chill your salad bowl beforehand for an extra refreshing touch.
  • Don’t skip the resting time; it enhances the flavors.
  • Experiment with different dressings to find your favorite twist.
  • Make it ahead of time for easy meal prep; just add dressing before serving.

Equipment Needed

  • Large mixing bowl: Essential for combining all your ingredients. A salad spinner can double as a bowl!
  • Cutting board: A sturdy surface for chopping veggies. Any flat surface will do in a pinch.
  • Sharp knife: For precise chopping. A good pair of kitchen scissors can work for herbs.
  • Tongs or large spoon: Perfect for tossing the salad. A spatula can also do the trick!

Variations of La Scala Chopped Salad

  • Vegetarian Delight: Omit the salami and provolone cheese. Add extra garbanzo beans or creamy avocado for a satisfying texture.
  • Protein-Packed: Toss in grilled chicken or shrimp for a heartier meal that’s still light and refreshing.
  • Spicy Kick: Add sliced jalapeños or a dash of hot sauce to the dressing for those who love a little heat.
  • Herb Infusion: Mix in fresh herbs like dill, cilantro, or mint for a burst of flavor that brightens the salad.
  • Grain Boost: Incorporate cooked quinoa or farro for added fiber and a nutty flavor that complements the salad.

Serving Suggestions for La Scala Chopped Salad

  • Pair with crusty garlic bread for a satisfying meal.
  • Serve alongside grilled chicken or fish for a complete dinner.
  • Enjoy with a chilled glass of white wine or sparkling water.
  • Garnish with fresh herbs for a beautiful presentation.
  • Use a colorful platter to showcase the vibrant ingredients.

FAQs about La Scala Chopped Salad

Can I make La Scala Chopped Salad ahead of time?

Absolutely! You can prepare the salad a few hours in advance. Just keep the dressing separate until you’re ready to serve. This way, the veggies stay crisp and fresh.

What can I substitute for salami in this salad?

If you’re looking for alternatives, try diced turkey or chicken for a lighter option. For a vegetarian twist, consider adding extra garbanzo beans or some smoked tofu.

Is La Scala Chopped Salad gluten-free?

Yes, this salad is naturally gluten-free! Just ensure that your Italian dressing is also gluten-free, as some brands may contain gluten.

How can I make this salad more filling?

To amp up the heartiness, add cooked quinoa, farro, or even some roasted vegetables. These additions will make it a satisfying main dish.

What’s the best way to store leftovers?

Store any leftovers in an airtight container in the fridge. It’s best enjoyed within a day or two for optimal freshness. Just remember to add dressing right before eating!

Final Thoughts

Creating La Scala Chopped Salad is more than just preparing a meal; it’s about bringing people together.

Each bite bursts with flavor, reminding me of sunny days spent with family and friends.

This salad is a canvas for creativity, allowing you to customize it to your taste.

Whether you’re enjoying it as a light lunch or serving it at a gathering, it never fails to impress.

So, roll up your sleeves, gather your ingredients, and dive into this refreshing dish.

Trust me, once you experience the joy of La Scala Chopped Salad, it will become a staple in your kitchen!

Paul

La Scala Chopped Salad: Discover the Perfect Recipe!

A refreshing and hearty salad featuring a mix of fresh vegetables, olives, cheese, and salami, perfect for a light meal or side dish.
Prep Time 15 minutes
Total Time 15 minutes
Servings: 4 servings
Course: Salad
Cuisine: Italian
Calories: 250

Ingredients
  

  • 1 cup romaine lettuce chopped
  • 1 cup iceberg lettuce chopped
  • 1/2 cup cherry tomatoes halved
  • 1/2 cup cucumber diced
  • 1/4 cup red onion finely chopped
  • 1/4 cup Kalamata olives pitted and sliced
  • 1/4 cup garbanzo beans drained and rinsed
  • 1/4 cup provolone cheese diced
  • 1/4 cup salami diced
  • 1/4 cup pepperoncini sliced
  • 1/4 cup Italian dressing
  • Salt and pepper to taste

Method
 

  1. In a large bowl, combine the romaine lettuce, iceberg lettuce, cherry tomatoes, cucumber, red onion, Kalamata olives, garbanzo beans, provolone cheese, salami, and pepperoncini.
  2. Drizzle the Italian dressing over the salad and toss gently until all ingredients are well coated.
  3. Season with salt and pepper to taste.
  4. For best flavor, let the salad sit for about 10 minutes before serving to allow the flavors to meld.
  5. Serve chilled or at room temperature.

Notes

  • For a vegetarian option, omit the salami and provolone cheese and add extra chickpeas or avocado for creaminess.
  • Add a handful of fresh herbs like parsley or basil for an extra burst of flavor.

Cottage Cheese Microwave Brownie: Quick, Delicious Treat!

Introduction to Cottage Cheese Microwave Brownie

There’s something magical about a warm brownie, isn’t there? The rich, fudgy texture and the sweet aroma wafting through the kitchen can instantly lift your spirits.

Now, imagine whipping up a delicious Cottage Cheese Microwave Brownie in just a few minutes.

This recipe is a game-changer for those busy days when you crave something sweet but don’t have the time or energy to bake.

With simple ingredients and a quick microwave method, you can impress your loved ones or treat yourself without the fuss.

Let’s dive into this delightful dessert that’s as easy as it is satisfying!

Why You’ll Love This Cottage Cheese Microwave Brownie

This Cottage Cheese Microwave Brownie is a lifesaver for anyone juggling a busy schedule.

In just six and a half minutes, you can indulge in a warm, gooey treat that satisfies your sweet tooth.

The best part? It’s packed with protein from the cottage cheese, making it a guilt-free dessert option.

Quick, easy, and delicious—what’s not to love? This brownie is your new go-to for a sweet escape!

Ingredients for Cottage Cheese Microwave Brownie

Creating a Cottage Cheese Microwave Brownie is simple, and the ingredients are likely already in your kitchen.

Here’s what you’ll need:

  • Cottage Cheese: The star of the show! It adds moisture and protein, making the brownie rich and satisfying.
  • Unsweetened Cocoa Powder: This gives the brownie its deep chocolate flavor without added sugars.
  • Granulated Sugar: A touch of sweetness to balance the cocoa and enhance the overall flavor.
  • All-Purpose Flour: This helps bind the ingredients together, giving the brownie structure.
  • Baking Powder: A little leavening agent to ensure your brownie rises just right.
  • Salt: A pinch of salt enhances the sweetness and rounds out the flavors.
  • Vanilla Extract: This adds a warm, aromatic note that complements the chocolate beautifully.
  • Large Egg: Acts as a binder and adds richness to the brownie.
  • Chocolate Chips (Optional): For those who want an extra chocolatey kick, fold in some chocolate chips for added indulgence.

Feel free to get creative! You can substitute half of the cottage cheese with Greek yogurt for a tangy twist.

Or, if you’re feeling adventurous, add a tablespoon of peanut butter or almond butter for a nutty flavor.

Exact measurements are at the bottom of the article, ready for you to print and use!

How to Make Cottage Cheese Microwave Brownie

Making a Cottage Cheese Microwave Brownie is as easy as pie—well, easier actually!

Follow these simple steps, and you’ll have a delicious treat ready in no time.

Step 1: Combine Ingredients

Start by grabbing a microwave-safe bowl.

Add the cottage cheese, unsweetened cocoa powder, granulated sugar, all-purpose flour, baking powder, salt, vanilla extract, and the large egg.

Mix everything together until it’s smooth and well combined.

You want a nice, thick batter that’s free of lumps.

This is where the magic begins!

Step 2: Add Chocolate Chips (Optional)

If you’re a chocolate lover like me, now’s the time to fold in those chocolate chips.

They’ll melt into the brownie, creating pockets of gooey goodness.

But if you prefer a more classic brownie, feel free to skip this step.

Either way, you’re in for a treat!

Step 3: Prepare for Microwave

Next, pour your brownie batter into a greased microwave-safe mug or small bowl.

Make sure it’s greased well to prevent sticking.

You want to leave a little room at the top, as the brownie will rise while cooking.

Trust me, you don’t want a messy microwave!

Step 4: Microwave the Brownie

Now, it’s time to microwave your creation!

Set your microwave to high and cook the brownie for 1 to 1.5 minutes.

Keep an eye on it—microwave times can vary.

You’re looking for a brownie that’s set but still moist in the center.

A toothpick inserted should come out with a few moist crumbs, not wet batter.

Step 5: Cool and Enjoy

Once it’s done, let your brownie cool for about a minute.

This is the hardest part, I know!

But trust me, it’s worth the wait.

Dig in with a spoon, and enjoy your warm, gooey Cottage Cheese Microwave Brownie.

You’ve earned it!

Tips for Success

  • Use full-fat cottage cheese for a creamier texture.
  • Don’t overmix the batter; a few lumps are okay!
  • Check your microwave’s wattage; adjust cooking time if needed.
  • Let the brownie cool slightly before digging in for the best texture.
  • Experiment with different mix-ins like nuts or dried fruit for variety.

Equipment Needed

  • Microwave-safe bowl: Any bowl that can withstand microwave heat will do.
  • Measuring cups: Essential for accurate ingredient portions; you can use a kitchen scale if you prefer.
  • Spoon or spatula: For mixing the batter; a fork works in a pinch!
  • Microwave: The star of the show, of course!

Variations

  • Nutty Delight: Add a tablespoon of almond or peanut butter for a rich, nutty flavor.
  • Fruit Fusion: Mix in some chopped bananas or berries for a fruity twist.
  • Spicy Kick: Sprinkle in a pinch of cinnamon or cayenne pepper for a surprising flavor boost.
  • Vegan Option: Substitute the egg with a flax egg (1 tablespoon ground flaxseed mixed with 2.5 tablespoons water) and use a plant-based yogurt instead of cottage cheese.
  • Gluten-Free: Swap the all-purpose flour with almond flour or a gluten-free flour blend for a gluten-free treat.

Serving Suggestions

  • Ice Cream: A scoop of vanilla or chocolate ice cream on top makes for a decadent pairing.
  • Fresh Berries: Serve with a side of strawberries or raspberries for a refreshing contrast.
  • Whipped Cream: A dollop of whipped cream adds a light, airy touch.
  • Espresso: Enjoy with a shot of espresso for a delightful coffee break.

FAQs about Cottage Cheese Microwave Brownie

Can I use low-fat cottage cheese for this recipe?

Absolutely! Low-fat cottage cheese works just fine. It may slightly alter the texture, but your brownie will still be delicious.

How do I know when my brownie is done?

Check for doneness by inserting a toothpick into the center. It should come out with a few moist crumbs, not wet batter. If it’s too wet, microwave for an additional 10-15 seconds.

Can I make this brownie in advance?

While it’s best enjoyed fresh, you can prepare the batter ahead of time and store it in the fridge. Just microwave it when you’re ready for a treat!

What can I substitute for the egg?

If you’re looking for an egg substitute, try using a flax egg. Mix 1 tablespoon of ground flaxseed with 2.5 tablespoons of water and let it sit for a few minutes until it thickens.

Is this brownie suitable for a gluten-free diet?

Yes! Simply swap the all-purpose flour with almond flour or a gluten-free flour blend, and you’ll have a tasty gluten-free Cottage Cheese Microwave Brownie.

Final Thoughts

There’s something incredibly satisfying about creating a Cottage Cheese Microwave Brownie in just minutes.

It’s not just a dessert; it’s a moment of joy in a busy day.

The rich chocolate flavor combined with the protein-packed cottage cheese makes it a treat you can feel good about.

Whether you’re indulging after a long day or surprising a friend, this brownie is sure to bring smiles.

So, grab your ingredients and let the microwave work its magic.

You deserve this sweet escape, and trust me, it’s worth every bite!

Paul

Cottage Cheese Microwave Brownie: Quick, Delicious Treat!

A quick and delicious brownie made in the microwave using cottage cheese for a unique twist.
Prep Time 5 minutes
Servings: 1 serving
Course: Dessert
Cuisine: American
Calories: 280

Ingredients
  

  • 1 cup cottage cheese
  • 1/4 cup unsweetened cocoa powder
  • 1/4 cup granulated sugar
  • 1/4 cup all-purpose flour
  • 1/4 teaspoon baking powder
  • 1/4 teaspoon salt
  • 1/2 teaspoon vanilla extract
  • 1 large egg
  • 2 tablespoons chocolate chips optional

Method
 

  1. In a microwave-safe bowl, combine the cottage cheese, cocoa powder, sugar, flour, baking powder, salt, vanilla extract, and egg. Mix well until smooth and fully combined.
  2. If desired, fold in the chocolate chips for added richness.
  3. Pour the mixture into a greased microwave-safe mug or small bowl.
  4. Microwave on high for 1 to 1.5 minutes, checking for doneness. The brownie should be set but still moist in the center.
  5. Let it cool for a minute before enjoying.

Notes

  • For a richer flavor, substitute half of the cottage cheese with Greek yogurt.
  • Add a tablespoon of peanut butter or almond butter to the mixture for a nutty twist.

Blackberry Cottage Cheese Chicken Salad: A Refreshing Delight!

Introduction to Blackberry Cottage Cheese Chicken Salad

When I think of summer meals, the vibrant colors and fresh flavors of a Blackberry Cottage Cheese Chicken Salad come to mind.

This dish is not just a salad; it’s a celebration of simplicity and nutrition.

Perfect for those busy days when you want something light yet satisfying, this salad combines shredded chicken, creamy cottage cheese, and juicy blackberries.

It’s a quick solution for a healthy lunch or a delightful dinner that will impress your loved ones.

Trust me, once you try it, you’ll find yourself making it again and again!

Why You’ll Love This Blackberry Cottage Cheese Chicken Salad

This Blackberry Cottage Cheese Chicken Salad is a game-changer for anyone seeking a quick, nutritious meal.

It’s incredibly easy to whip up, taking just 15 minutes of prep time.

The combination of creamy cottage cheese and sweet blackberries creates a delightful contrast that dances on your palate.

Plus, it’s packed with protein, making it a satisfying option for lunch or dinner.

You’ll love how it keeps you energized without weighing you down!

Ingredients for Blackberry Cottage Cheese Chicken Salad

Creating a delicious Blackberry Cottage Cheese Chicken Salad starts with gathering the right ingredients.

Here’s what you’ll need:

  • Cooked chicken: Shredded chicken is the star of this salad, providing a hearty base. You can use rotisserie chicken for convenience or grill your own for a smoky flavor.
  • Cottage cheese: This creamy ingredient adds a rich texture and boosts the protein content. Opt for low-fat or full-fat based on your preference.
  • Fresh blackberries: Sweet and juicy, these berries bring a burst of flavor. If blackberries aren’t available, feel free to swap in blueberries or diced apples for a different twist.
  • Celery: Finely chopped celery adds a satisfying crunch and a hint of freshness. It’s a great way to incorporate some veggies into your meal.
  • Red onion: A little bit of finely chopped red onion gives a zesty kick. If you prefer a milder taste, you can use green onions instead.
  • Mayonnaise: This creamy dressing binds everything together. You can use Greek yogurt for a lighter option or even a vegan mayo if you’re looking for a plant-based alternative.
  • Lemon juice: A splash of lemon juice brightens the flavors and adds a refreshing zing. Freshly squeezed is best, but bottled works in a pinch.
  • Garlic powder: This adds a subtle depth of flavor without overpowering the dish. Fresh minced garlic can be used if you prefer.
  • Salt and pepper: Essential for seasoning, these staples enhance all the flavors in the salad.
  • Fresh parsley (optional): Chopped parsley adds a pop of color and a fresh herbal note. It’s optional but highly recommended for that extra flair.

For exact measurements, check the bottom of the article where you can find everything listed for easy printing.

With these ingredients, you’re well on your way to creating a refreshing and nutritious salad that’s sure to impress!

How to Make Blackberry Cottage Cheese Chicken Salad

Making a Blackberry Cottage Cheese Chicken Salad is as easy as pie, and trust me, it’s just as satisfying!

Follow these simple steps, and you’ll have a delicious meal ready in no time.

Step 1: Combine the Base Ingredients

Start by grabbing a large mixing bowl.

In it, combine the shredded chicken, cottage cheese, halved blackberries, finely chopped celery, and red onion.

Gently fold these ingredients together.

You want to keep the blackberries intact for that burst of flavor in every bite.

This base is where the magic begins!

Step 2: Prepare the Dressing

In a separate small bowl, whisk together the mayonnaise, lemon juice, garlic powder, salt, and pepper.

Make sure it’s smooth and well combined.

This dressing is the secret sauce that ties everything together.

If you’re feeling adventurous, add a pinch of your favorite herbs for an extra kick!

Step 3: Mix Everything Together

Pour the dressing over the chicken mixture.

Gently fold it in until everything is coated evenly.

Be careful not to mash the blackberries; we want them to stay whole for that delightful texture.

If you’re using parsley, now’s the time to fold it in for that fresh touch.

Step 4: Chill and Serve

Cover the bowl with plastic wrap and pop it in the refrigerator.

Let it chill for at least 30 minutes.

This allows the flavors to meld beautifully.

When you’re ready to serve, dish it out on a bed of greens or in crisp lettuce wraps.

Enjoy your refreshing Blackberry Cottage Cheese Chicken Salad!

Tips for Success

  • Use leftover chicken or rotisserie chicken to save time.
  • For a creamier texture, opt for full-fat cottage cheese.
  • Chill the salad longer for enhanced flavor; overnight is even better!
  • Experiment with different fruits like peaches or strawberries for variety.
  • Adjust the seasoning to your taste; don’t be afraid to add more lemon juice or garlic!

Equipment Needed

  • Mixing bowl: A large bowl for combining ingredients. A glass or stainless steel bowl works great.
  • Whisk: Essential for mixing the dressing. A fork can also do the job in a pinch.
  • Measuring cups: Handy for precise ingredient amounts, though you can eyeball it if you’re confident.
  • Plastic wrap: To cover the salad while it chills. A lid works too!

Variations

  • Nutty Crunch: Add 1/4 cup of chopped walnuts or pecans for an extra crunch and healthy fats.
  • Fruit Swap: Substitute blackberries with blueberries, diced apples, or even sliced strawberries for a different flavor profile.
  • Herb Infusion: Experiment with fresh herbs like dill or basil to give the salad a unique twist.
  • Spicy Kick: Add a dash of cayenne pepper or a few slices of jalapeño for a spicy version.
  • Vegan Option: Use chickpeas instead of chicken and swap mayonnaise for a vegan alternative to make it plant-based.

Serving Suggestions

  • Serve the salad on a bed of mixed greens for a colorful presentation.
  • Pair it with whole-grain crackers or toasted baguette slices for added crunch.
  • Enjoy with a refreshing iced tea or sparkling water to complement the flavors.
  • For a heartier meal, add a side of quinoa or brown rice.

FAQs about Blackberry Cottage Cheese Chicken Salad

Can I make this salad ahead of time?

Absolutely! This Blackberry Cottage Cheese Chicken Salad tastes even better after chilling for a few hours or overnight. Just keep it covered in the fridge until you’re ready to serve.

What can I substitute for chicken?

If you’re looking for a vegetarian option, chickpeas or shredded tofu work great. They provide protein and a satisfying texture, making your salad just as hearty.

How long does this salad last in the fridge?

Stored in an airtight container, this salad can last up to three days in the fridge. Just give it a good stir before serving again!

Can I use frozen blackberries?

While fresh blackberries are ideal, you can use frozen ones. Just thaw them first and drain any excess liquid to avoid a soggy salad.

Is this salad suitable for meal prep?

Definitely! This Blackberry Cottage Cheese Chicken Salad is perfect for meal prep. Portion it out in containers for quick lunches throughout the week.

Final Thoughts

Creating a Blackberry Cottage Cheese Chicken Salad is more than just preparing a meal; it’s about embracing the joy of fresh ingredients and simple flavors.

Each bite is a delightful mix of creamy, sweet, and savory that brings a smile to your face.

Whether you’re enjoying it on a sunny afternoon or sharing it with friends at a gathering, this salad is sure to impress.

It’s a reminder that healthy eating doesn’t have to be boring.

So, roll up your sleeves, gather your ingredients, and let this refreshing salad become a staple in your kitchen!

Paul

Blackberry Cottage Cheese Chicken Salad: A Refreshing Delight!

A refreshing and nutritious salad featuring shredded chicken, cottage cheese, and fresh blackberries, perfect for a light meal.
Prep Time 15 minutes
Total Time 45 minutes
Servings: 4 servings
Course: Salad
Cuisine: American
Calories: 220

Ingredients
  

  • 2 cups cooked chicken shredded
  • 1 cup cottage cheese
  • 1 cup fresh blackberries halved
  • 1/4 cup celery finely chopped
  • 1/4 cup red onion finely chopped
  • 2 tablespoons mayonnaise
  • 1 tablespoon lemon juice
  • 1 teaspoon garlic powder
  • Salt and pepper to taste
  • 1/4 cup chopped fresh parsley optional

Method
 

  1. In a large mixing bowl, combine the shredded chicken, cottage cheese, blackberries, celery, and red onion.
  2. In a separate small bowl, whisk together the mayonnaise, lemon juice, garlic powder, salt, and pepper until smooth.
  3. Pour the dressing over the chicken mixture and gently fold until everything is well combined.
  4. If using, fold in the chopped parsley for added flavor and color.
  5. Chill the salad in the refrigerator for at least 30 minutes before serving to allow the flavors to meld.
  6. Serve the salad on a bed of greens or in lettuce wraps for a refreshing meal.

Notes

  • For a crunchier texture, add 1/4 cup of chopped walnuts or pecans.
  • Substitute the blackberries with blueberries or diced apples for a different flavor profile.

Mexican Chopped Salad: Discover This Fresh Recipe!

Introduction to Mexican Chopped Salad

There’s something magical about a vibrant salad that can brighten up any meal. The Mexican Chopped Salad is just that—a colorful, refreshing dish that’s as easy to whip up as it is delightful to eat. Whether you’re looking for a quick solution for a busy day or a dish to impress your loved ones, this salad fits the bill perfectly. Packed with fresh vegetables and a zesty dressing, it’s a celebration of flavors that will leave you feeling satisfied and energized. Let’s dive into this culinary adventure together!

Why You’ll Love This Mexican Chopped Salad

This Mexican Chopped Salad is a game-changer for anyone who craves flavor without the fuss. It comes together in just 15 minutes, making it perfect for those hectic weeknights. The combination of fresh veggies and zesty dressing creates a taste explosion that’s both satisfying and healthy. Plus, it’s versatile enough to serve as a side or a main dish, ensuring everyone at the table will love it!

Ingredients for Mexican Chopped Salad

Gathering fresh ingredients is the first step to creating a delicious Mexican Chopped Salad. Here’s what you’ll need:

  • Romaine lettuce: This crunchy base adds a refreshing crunch and is packed with nutrients.
  • Cherry tomatoes: Their sweetness and vibrant color brighten up the salad.
  • Cucumber: Cool and crisp, cucumbers provide a refreshing contrast to the other ingredients.
  • Bell pepper: Any color works! They add sweetness and a pop of color.
  • Corn: Canned or frozen, corn brings a touch of sweetness and texture.
  • Black beans: Rinsed and drained, they add protein and heartiness to the salad.
  • Avocado: Creamy and rich, avocado elevates the salad’s flavor and texture.
  • Red onion: Finely chopped, it adds a sharp bite that balances the other flavors.
  • Cilantro: Fresh cilantro brings a burst of herbal brightness that’s quintessentially Mexican.
  • Shredded cheese: Cheddar or a Mexican blend adds a savory finish to the dish.
  • Lime juice: This zesty dressing component brightens the flavors and adds acidity.
  • Olive oil: A drizzle of olive oil helps to bring everything together and adds richness.
  • Chili powder: For a hint of spice, chili powder enhances the salad’s flavor profile.
  • Salt and pepper: Essential for seasoning, they help to elevate all the flavors.

Feel free to customize your salad! You can add grilled chicken or shrimp for extra protein, or toss in some diced jalapeños for a spicy kick. For exact measurements, check the bottom of the article where you can find everything available for printing.

How to Make Mexican Chopped Salad

Creating a Mexican Chopped Salad is a breeze! Follow these simple steps, and you’ll have a fresh, colorful dish ready in no time. Let’s get started!

Step 1: Prepare the Vegetables

Begin by washing all your vegetables thoroughly. Freshness is key! Chop the romaine lettuce into bite-sized pieces, and slice the cherry tomatoes in half. Dice the cucumber and bell pepper into small cubes. The more colorful your salad, the more appealing it will be. Don’t forget to rinse the black beans and drain them well. Each ingredient adds its own unique flavor and texture, making your salad a delightful medley.

Step 2: Mix the Ingredients

In a large bowl, combine all the chopped vegetables: romaine, tomatoes, cucumber, bell pepper, corn, black beans, avocado, red onion, and cilantro. Toss them gently to ensure everything is evenly distributed. This is where the magic happens! The vibrant colors and fresh aromas will make your kitchen feel alive. Take a moment to appreciate the beauty of your creation.

Step 3: Whisk the Dressing

In a separate small bowl, whisk together the lime juice, olive oil, chili powder, salt, and pepper. This zesty dressing is what ties the salad together. Make sure to taste it as you go! You want a balance of tangy and savory flavors. If you like it spicier, feel free to add a pinch more chili powder or a splash of hot sauce. The dressing should be bright and invigorating, just like the salad itself.

Step 4: Combine Salad and Dressing

Now, pour the dressing over the salad mixture. Toss everything together gently, ensuring that each piece of vegetable is coated in that delicious dressing. This step is crucial! It’s where all the flavors meld together, creating a harmonious dish. If you’re feeling adventurous, you can even let it sit for a few minutes to allow the flavors to deepen.

Step 5: Add Finishing Touches

Finally, sprinkle the shredded cheese on top of your salad. This adds a creamy, savory finish that complements the freshness of the vegetables. If you want to elevate your salad even further, consider adding some tortilla strips or crushed tortilla chips for an extra crunch. Serve immediately, or refrigerate for up to 30 minutes to let the flavors meld. Enjoy your vibrant Mexican Chopped Salad!

Tips for Success

  • Use fresh, high-quality ingredients for the best flavor.
  • Chill your salad bowl in the fridge before mixing for extra crispness.
  • Adjust the dressing to your taste; don’t be afraid to experiment!
  • For meal prep, keep the dressing separate until serving to maintain freshness.
  • Try adding seasonal vegetables for a unique twist each time.

Equipment Needed

  • Large mixing bowl: A sturdy bowl for combining all your ingredients.
  • Cutting board: Essential for chopping vegetables safely.
  • Sharp knife: A good knife makes prep quick and easy.
  • Whisk: For mixing the dressing; a fork works in a pinch.
  • Measuring cups: Helpful for precise ingredient amounts.

Variations

  • Protein Boost: Add grilled chicken, shrimp, or tofu for a heartier meal.
  • Spicy Kick: Toss in diced jalapeños or a splash of your favorite hot sauce for extra heat.
  • Vegan Option: Omit cheese and use a plant-based dressing to keep it vegan-friendly.
  • Grain Addition: Mix in cooked quinoa or brown rice for added texture and nutrition.
  • Seasonal Twist: Incorporate seasonal vegetables like zucchini or radishes for a fresh spin.

Serving Suggestions

  • Pair your Mexican Chopped Salad with grilled chicken or fish for a complete meal.
  • Serve with tortilla chips and salsa for a fun appetizer.
  • Complement with a refreshing margarita or iced tea.
  • For presentation, serve in a colorful bowl to highlight the vibrant ingredients.

FAQs about Mexican Chopped Salad

Can I make Mexican Chopped Salad ahead of time?

Absolutely! You can prepare the salad a few hours in advance. Just keep the dressing separate until you’re ready to serve. This way, the veggies stay crisp and fresh, and the flavors remain vibrant.

What can I substitute for black beans?

If black beans aren’t your thing, feel free to swap them out for kidney beans, chickpeas, or even diced grilled chicken for a protein boost. Each option brings its own unique flavor to the Mexican Chopped Salad.

Is this salad suitable for meal prep?

Yes! This salad is perfect for meal prep. Just store the ingredients in separate containers and mix them together when you’re ready to eat. It’s a great way to enjoy a healthy lunch throughout the week.

How can I make this salad spicier?

For a spicy kick, add diced jalapeños or a few dashes of hot sauce to the dressing. You can also sprinkle some crushed red pepper flakes on top before serving. Spice it up to suit your taste!

What’s the best way to store leftovers?

Store any leftover Mexican Chopped Salad in an airtight container in the fridge. It’s best enjoyed within a day or two, but the flavors will still be delicious for up to three days. Just remember to keep the dressing separate if possible!

Final Thoughts

Creating a Mexican Chopped Salad is more than just preparing a meal; it’s about embracing the joy of fresh ingredients and vibrant flavors. Each bite is a celebration of color and crunch, reminding us that healthy eating can be both satisfying and delicious. Whether you’re enjoying it solo or sharing it with friends and family, this salad brings a sense of togetherness and joy to the table. So, roll up your sleeves, gather your ingredients, and let this delightful dish become a staple in your kitchen. Trust me, once you try it, you’ll be hooked!

Paul

Mexican Chopped Salad: Discover This Fresh Recipe!

A refreshing and colorful Mexican Chopped Salad packed with fresh vegetables and a zesty dressing.
Prep Time 15 minutes
Total Time 15 minutes
Servings: 6 servings
Course: Salad
Cuisine: Mexican
Calories: 220

Ingredients
  

  • 2 cups romaine lettuce chopped
  • 1 cup cherry tomatoes halved
  • 1 cup cucumber diced
  • 1 cup bell pepper any color, diced
  • 1 cup corn canned or frozen, thawed
  • 1 can 15 ounces black beans, rinsed and drained
  • 1 avocado diced
  • 1/4 cup red onion finely chopped
  • 1/4 cup fresh cilantro chopped
  • 1/2 cup shredded cheese cheddar or Mexican blend
  • 1/4 cup lime juice
  • 1/4 cup olive oil
  • 1 teaspoon chili powder
  • Salt and pepper to taste

Method
 

  1. In a large bowl, combine the romaine lettuce, cherry tomatoes, cucumber, bell pepper, corn, black beans, avocado, red onion, and cilantro. Toss gently to mix the ingredients evenly.
  2. In a separate small bowl, whisk together the lime juice, olive oil, chili powder, salt, and pepper until well combined.
  3. Pour the dressing over the salad and toss again to coat all the ingredients evenly.
  4. Sprinkle the shredded cheese on top before serving.
  5. Serve immediately or refrigerate for up to 30 minutes to allow the flavors to meld.

Notes

  • For added crunch, consider topping the salad with tortilla strips or crushed tortilla chips.
  • You can customize the salad by adding grilled chicken or shrimp for extra protein.
  • For a spicier kick, add diced jalapeños or a splash of hot sauce to the dressing.

Marry Me Chicken Chopped Salad Sandwich Recipe Revealed!

Introduction to Marry Me Chicken Chopped Salad Sandwich

There’s something magical about a meal that brings people together, and the Marry Me Chicken Chopped Salad Sandwich does just that.

Picture this: a busy weeknight, and you need a quick solution that doesn’t skimp on flavor.

This sandwich is your answer.

With tender chicken, crisp veggies, and a creamy dressing, it’s a delightful combination that’s sure to impress your loved ones.

Whether you’re feeding a family or just treating yourself, this recipe is a breeze to whip up.

Let’s dive into the deliciousness that awaits you!

Why You’ll Love This Marry Me Chicken Chopped Salad Sandwich

This Marry Me Chicken Chopped Salad Sandwich is a game-changer for busy days.

It’s quick to prepare, taking just 15 minutes from start to finish.

The flavors are vibrant, with a perfect balance of creamy and crunchy.

Plus, it’s versatile enough to satisfy picky eaters and adventurous palates alike.

You’ll find yourself reaching for this recipe again and again, making it a staple in your kitchen!

Ingredients for Marry Me Chicken Chopped Salad Sandwich

Creating the Marry Me Chicken Chopped Salad Sandwich is a delightful experience, and it all starts with the right ingredients.

Here’s what you’ll need:

  • Cooked chicken: Shredded chicken is the star of this dish. Use rotisserie chicken for convenience or grill your own for a fresh touch.
  • Romaine lettuce: This adds a crisp texture and a refreshing crunch. Feel free to swap it with spinach or mixed greens if you prefer.
  • Cherry tomatoes: Halved for sweetness, they bring a burst of color and flavor. Any small tomato variety works well here.
  • Red onion: Finely chopped, it adds a zesty kick. If you find it too strong, soak it in cold water for a milder taste.
  • Cucumber: Diced for crunch, it balances the creaminess of the dressing. You can use English cucumbers for fewer seeds.
  • Shredded mozzarella cheese: This creamy cheese melts in your mouth. Substitute with cheddar or feta for a different flavor profile.
  • Mayonnaise: The base of the dressing, it adds creaminess. For a lighter option, Greek yogurt is a fantastic substitute.
  • Dijon mustard: This brings a tangy depth to the dressing. If you’re not a fan, yellow mustard can work in a pinch.
  • Lemon juice: Freshly squeezed is best, adding brightness to the dish. Bottled lemon juice can be used if you’re short on time.
  • Salt and pepper: Essential for seasoning, adjust to your taste for the perfect balance.
  • Whole grain sandwich rolls: These provide a hearty base. Feel free to use any bread you love, like ciabatta or sourdough.
  • Fresh basil leaves: For garnish, they add a fragrant touch. You can also use parsley or arugula if basil isn’t available.

For exact measurements, check the bottom of the article where you can find everything available for printing.

Gather these ingredients, and you’re on your way to creating a sandwich that’s not just a meal, but a moment to savor!

How to Make Marry Me Chicken Chopped Salad Sandwich

Step 1: Prepare the Chicken and Vegetables

In a large mixing bowl, combine the shredded chicken, romaine lettuce, cherry tomatoes, red onion, cucumber, and mozzarella cheese.

This colorful medley not only looks appealing but also packs a punch of flavor.

Make sure to mix everything gently to keep the veggies crisp.

The combination of textures will make each bite a delightful experience!

Step 2: Make the Dressing

In a separate small bowl, whisk together the mayonnaise, Dijon mustard, lemon juice, salt, and pepper until smooth.

This creamy dressing is the secret to tying all the flavors together.

Feel free to adjust the seasoning to your liking.

A little extra lemon juice can brighten it up even more!

Step 3: Combine and Toss

Pour the dressing over the chicken mixture and toss gently until everything is well coated.

Take your time here; you want every piece to be enveloped in that creamy goodness.

This step is crucial for ensuring that each bite is bursting with flavor!

Step 4: Prepare the Sandwich Rolls

Slice the sandwich rolls in half and lightly toast them if desired.

Toasting adds a nice crunch and warmth to the rolls.

It’s a simple step that elevates the entire sandwich experience!

Step 5: Assemble the Sandwich

Spoon the chicken salad mixture onto the bottom half of each roll and top with fresh basil leaves.

The basil adds a fragrant touch that complements the dish beautifully.

Don’t be shy—load it up for maximum flavor!

Step 6: Serve and Enjoy

Place the top half of the roll on the sandwich and serve immediately.

This is the moment you’ve been waiting for!

Dig in and savor every delicious bite of your Marry Me Chicken Chopped Salad Sandwich.

Tips for Success

  • Use leftover chicken or rotisserie chicken to save time.
  • Chill the salad mixture for 30 minutes for enhanced flavors.
  • Experiment with different cheeses like feta or pepper jack for a twist.
  • Don’t skip the toasting step; it adds a delightful crunch.
  • For extra flavor, add a splash of hot sauce to the dressing.

Equipment Needed

  • Mixing bowl: A large bowl for combining ingredients. Any size will do, but a sturdy one is best.
  • Whisk: Essential for mixing the dressing. A fork can work in a pinch!
  • Knife: For chopping veggies and slicing rolls. A sharp one makes the job easier.
  • Cutting board: Protects your countertops while prepping ingredients.
  • Serving spoon: Perfect for scooping the chicken salad onto the rolls.

Variations

  • Spicy Kick: Add diced jalapeños or a dash of hot sauce to the chicken mixture for a fiery twist.
  • Herb Infusion: Mix in fresh herbs like dill or cilantro for an aromatic flavor boost.
  • Vegan Option: Substitute chicken with chickpeas or tofu and use vegan mayo for a plant-based delight.
  • Crunchy Add-ins: Toss in sunflower seeds or chopped nuts for an extra crunch and nutty flavor.
  • Fruit Fusion: Add diced apples or grapes for a sweet contrast to the savory ingredients.

Serving Suggestions

  • Side Salad: Pair your sandwich with a light side salad for a refreshing contrast.
  • Chips: Serve with crunchy potato chips or pita chips for added texture.
  • Drink: A cold iced tea or lemonade complements the flavors perfectly.
  • Presentation: Serve on a wooden board for a rustic touch that impresses.

FAQs about Marry Me Chicken Chopped Salad Sandwich

Can I use leftover chicken for this sandwich?

Absolutely! Leftover chicken or rotisserie chicken works perfectly. It saves time and adds great flavor.

How can I make this sandwich healthier?

For a lighter version, substitute Greek yogurt for mayonnaise. You can also add more veggies or use whole grain rolls.

What can I serve with the Marry Me Chicken Chopped Salad Sandwich?

This sandwich pairs well with a side salad, chips, or even a refreshing drink like iced tea or lemonade.

Can I prepare the salad mixture in advance?

Yes! You can make the chicken salad mixture a few hours ahead. Just keep it chilled until you’re ready to assemble the sandwiches.

Is this sandwich suitable for meal prep?

Definitely! It’s a great option for meal prep. Just store the chicken salad and rolls separately to keep everything fresh.

Final Thoughts

Creating the Marry Me Chicken Chopped Salad Sandwich is more than just making a meal; it’s about crafting a moment of joy.

Each bite is a delightful blend of flavors and textures that can brighten even the busiest of days.

Whether you’re enjoying it solo or sharing it with loved ones, this sandwich has a way of bringing smiles to the table.

It’s quick, satisfying, and oh-so-delicious, making it a perfect addition to your culinary repertoire.

So, roll up your sleeves and dive into this recipe—your taste buds will thank you!

Paul

Marry Me Chicken Chopped Salad Sandwich Recipe Revealed!

A delicious and hearty Marry Me Chicken Chopped Salad Sandwich, perfect for a quick meal.
Prep Time 15 minutes
Total Time 15 minutes
Course: Sandwich
Cuisine: American
Calories: 360

Ingredients
  

  • 2 cups cooked chicken shredded
  • 1 cup romaine lettuce chopped
  • 1/2 cup cherry tomatoes halved
  • 1/4 cup red onion finely chopped
  • 1/4 cup cucumber diced
  • 1/2 cup shredded mozzarella cheese
  • 1/4 cup mayonnaise
  • 2 tablespoons Dijon mustard
  • 1 tablespoon lemon juice
  • Salt and pepper to taste
  • 4 whole grain sandwich rolls
  • Fresh basil leaves for garnish

Method
 

  1. In a large mixing bowl, combine the shredded chicken, romaine lettuce, cherry tomatoes, red onion, cucumber, and mozzarella cheese.
  2. In a separate small bowl, whisk together the mayonnaise, Dijon mustard, lemon juice, salt, and pepper until smooth.
  3. Pour the dressing over the chicken mixture and toss gently until everything is well coated.
  4. Slice the sandwich rolls in half and lightly toast them if desired.
  5. Spoon the chicken salad mixture onto the bottom half of each roll and top with fresh basil leaves.
  6. Place the top half of the roll on the sandwich and serve immediately.

Notes

  • For a lighter version, substitute Greek yogurt for mayonnaise.
  • Add avocado slices or bacon bits for extra flavor and texture.

Baked Prosciutto and Egg Breakfast Tart Recipe Delight!

Introduction to Baked Prosciutto and Egg Breakfast Tart

There’s something magical about breakfast that can set the tone for the entire day.

The Baked Prosciutto and Egg Breakfast Tart is not just a meal; it’s a delightful experience that combines rich flavors and textures.

Whether you’re rushing out the door or enjoying a leisurely weekend brunch, this dish is a quick solution that impresses.

With layers of savory prosciutto, fresh spinach, and gooey mozzarella, topped with perfectly baked eggs, it’s a breakfast that feels special without the fuss.

Trust me, your taste buds will thank you for this one!

Why You’ll Love This Baked Prosciutto and Egg Breakfast Tart

This Baked Prosciutto and Egg Breakfast Tart is a game-changer for busy mornings.

It’s incredibly easy to whip up, taking just 40 minutes from start to finish.

The combination of crispy pastry, savory prosciutto, and creamy eggs creates a flavor explosion that will have everyone asking for seconds.

Plus, it’s versatile enough to adapt to your taste, making it a perfect go-to for any breakfast occasion!

Ingredients for Baked Prosciutto and Egg Breakfast Tart

Creating this Baked Prosciutto and Egg Breakfast Tart is a breeze with the right ingredients.

Here’s what you’ll need:

  • Puff Pastry: The star of the show! This flaky pastry forms the base, providing a delightful crunch.
  • Prosciutto: Thinly sliced, this Italian ham adds a savory depth that pairs beautifully with the eggs.
  • Eggs: The heart of the dish! They bring richness and protein, making this tart satisfying.
  • Shredded Mozzarella Cheese: Melty and gooey, mozzarella adds creaminess and a mild flavor that complements the prosciutto.
  • Baby Spinach: Fresh and vibrant, spinach not only adds color but also a nutritious boost.
  • Olive Oil: A drizzle enhances the flavor of the eggs and helps achieve that golden finish.
  • Salt and Pepper: Essential seasonings to elevate the taste of your tart.
  • Fresh Herbs: Chives or parsley make for a lovely garnish, adding a pop of freshness.

Feel free to get creative!

For a twist, consider adding sautéed mushrooms or bell peppers for extra flavor.

If you’re in the mood for something tangy, swap out the mozzarella for feta cheese.

All ingredient quantities are listed at the bottom of the article for easy reference and printing.

How to Make Baked Prosciutto and Egg Breakfast Tart

Making this Baked Prosciutto and Egg Breakfast Tart is a straightforward process that anyone can master.

Follow these simple steps, and you’ll have a delicious breakfast ready in no time!

Step 1: Preheat the Oven

Start by preheating your oven to 400°F.

This step is crucial because it ensures that the pastry cooks evenly and becomes beautifully golden.

A hot oven helps achieve that perfect flaky texture we all love!

Step 2: Prepare the Puff Pastry

Next, roll out the thawed puff pastry on a lightly floured surface.

You want it to be thin enough to fit a 9-inch tart pan.

Once rolled, gently place the pastry into the pan, pressing it into the corners.

Trim any excess pastry hanging over the edges.

This will create a lovely crust for your tart!

Step 3: Layer the Ingredients

Now it’s time to build your masterpiece!

Start by layering the prosciutto evenly over the pastry.

This savory ham will infuse the tart with flavor.

Next, sprinkle the chopped spinach on top, followed by the shredded mozzarella cheese.

Make sure to cover the surface well; each bite should be packed with goodness!

Step 4: Add the Eggs

Using a spoon, create four small wells in the cheese layer.

These will hold your eggs perfectly.

Crack an egg into each well, being careful not to break the yolk.

Drizzle a little olive oil over the eggs and season with salt and pepper.

This will enhance the flavor and help the eggs cook beautifully.

Step 5: Bake the Tart

Place the tart in your preheated oven and bake for 20-25 minutes.

Keep an eye on it!

You want the pastry to be golden brown and the eggs set to your liking.

If you prefer runny yolks, check around the 20-minute mark.

Step 6: Garnish and Serve

Once baked, remove the tart from the oven and let it cool for a few minutes.

This cooling time allows the flavors to settle.

Garnish with fresh herbs like chives or parsley for a pop of color and freshness.

Slice it up and serve warm.

Enjoy your delicious Baked Prosciutto and Egg Breakfast Tart!

Tips for Success

  • Make sure your puff pastry is fully thawed for easy handling.
  • Use a sharp knife to trim the pastry for a clean edge.
  • Don’t skip the olive oil drizzle; it adds flavor and helps the eggs cook perfectly.
  • Experiment with different cheeses for unique flavor profiles.
  • Let the tart cool slightly before slicing to prevent the filling from spilling out.

Equipment Needed

  • Tart Pan: A 9-inch tart pan is ideal, but a pie dish works too.
  • Rolling Pin: Essential for rolling out puff pastry; a wine bottle can substitute in a pinch.
  • Mixing Bowl: For combining ingredients; any large bowl will do.
  • Sharp Knife: Perfect for trimming pastry edges and slicing the tart.

Variations

  • Vegetarian Delight: Swap the prosciutto for roasted red peppers or artichoke hearts for a meat-free option.
  • Spicy Kick: Add sliced jalapeños or a sprinkle of red pepper flakes for a bit of heat.
  • Herbed Twist: Incorporate fresh herbs like basil or thyme into the spinach for an aromatic boost.
  • Cheese Lovers: Mix in a blend of cheeses, such as goat cheese or cheddar, for a richer flavor.
  • Gluten-Free Option: Use a gluten-free pastry or a crust made from almond flour for a gluten-free version.

Serving Suggestions

  • Fresh Fruit Salad: A light and refreshing side that complements the richness of the tart.
  • Coffee or Tea: Pair with a strong cup of coffee or herbal tea for a delightful breakfast experience.
  • Presentation: Serve on a wooden board, garnished with extra herbs for a rustic touch.

FAQs about Baked Prosciutto and Egg Breakfast Tart

Can I make the Baked Prosciutto and Egg Breakfast Tart ahead of time?

Absolutely! You can prepare the tart up to the baking stage, cover it, and refrigerate it for a few hours. Just pop it in the oven when you’re ready to enjoy a warm breakfast.

What can I substitute for prosciutto?

If prosciutto isn’t your thing, try using cooked bacon or ham. Both will add a delicious savory flavor to your tart.

How do I store leftovers?

Store any leftover tart in an airtight container in the fridge for up to three days. Reheat in the oven for the best texture.

Can I freeze the Baked Prosciutto and Egg Breakfast Tart?

Yes, you can freeze it! Just make sure to wrap it tightly in plastic wrap and foil. It can be frozen for up to a month. Thaw in the fridge before reheating.

What other ingredients can I add to the tart?

Feel free to get creative! You can add sautéed mushrooms, bell peppers, or even different cheeses like feta or goat cheese for a unique twist on this breakfast tart.

Final Thoughts

Creating a Baked Prosciutto and Egg Breakfast Tart is more than just cooking; it’s about crafting a moment of joy.

The aroma wafting through your kitchen as it bakes is enough to make anyone’s mouth water.

Each slice offers a delightful combination of flavors and textures that can brighten even the busiest mornings.

Whether you’re sharing it with family or savoring it solo, this tart brings a touch of elegance to breakfast.

So, roll up your sleeves, embrace the process, and enjoy the delicious rewards of your culinary adventure!

Paul

Baked Prosciutto and Egg Breakfast Tart Recipe Delight!

A delicious Baked Prosciutto and Egg Breakfast Tart featuring layers of prosciutto, spinach, and mozzarella cheese topped with eggs.
Prep Time 15 minutes
Cook Time 25 minutes
Total Time 40 minutes
Servings: 4 servings
Course: Breakfast
Cuisine: Italian
Calories: 320

Ingredients
  

  • 1 sheet puff pastry thawed
  • 4 ounces prosciutto sliced
  • 4 large eggs
  • 1 cup shredded mozzarella cheese
  • 1 cup baby spinach chopped
  • 1 tablespoon olive oil
  • Salt and pepper to taste
  • Fresh herbs such as chives or parsley for garnish

Method
 

  1. Preheat the oven to 400°F.
  2. Roll out the puff pastry on a lightly floured surface to fit a 9-inch tart pan. Place the pastry in the pan and trim any excess.
  3. Layer the prosciutto evenly over the pastry, followed by the chopped spinach and shredded mozzarella cheese.
  4. Create four small wells in the cheese layer and crack an egg into each well. Drizzle olive oil over the eggs and season with salt and pepper.
  5. Bake in the preheated oven for 20-25 minutes, or until the pastry is golden brown and the eggs are set to your liking.
  6. Remove from the oven and let cool for a few minutes. Garnish with fresh herbs before slicing and serving.

Notes

  • For a twist, try adding sautéed mushrooms or bell peppers for extra flavor.
  • You can also substitute the mozzarella with feta cheese for a tangy taste.