Robin’s Egg Easter Cupcakes: A Sweet Taste of Springtime Joy

A Nostalgic Easter Tradition

Every spring, when the days start getting warmer and the scent of blooming flowers fills the air, I’m reminded of Easter mornings from my childhood. My siblings and I would wake up early, giddy with excitement, rushing outside to hunt for brightly colored eggs hidden in the dew-kissed grass. But what I remember most vividly wasn’t just the hunt—it was the moment we gathered around the kitchen table afterward, nibbling on sweet treats our mother had lovingly prepared.

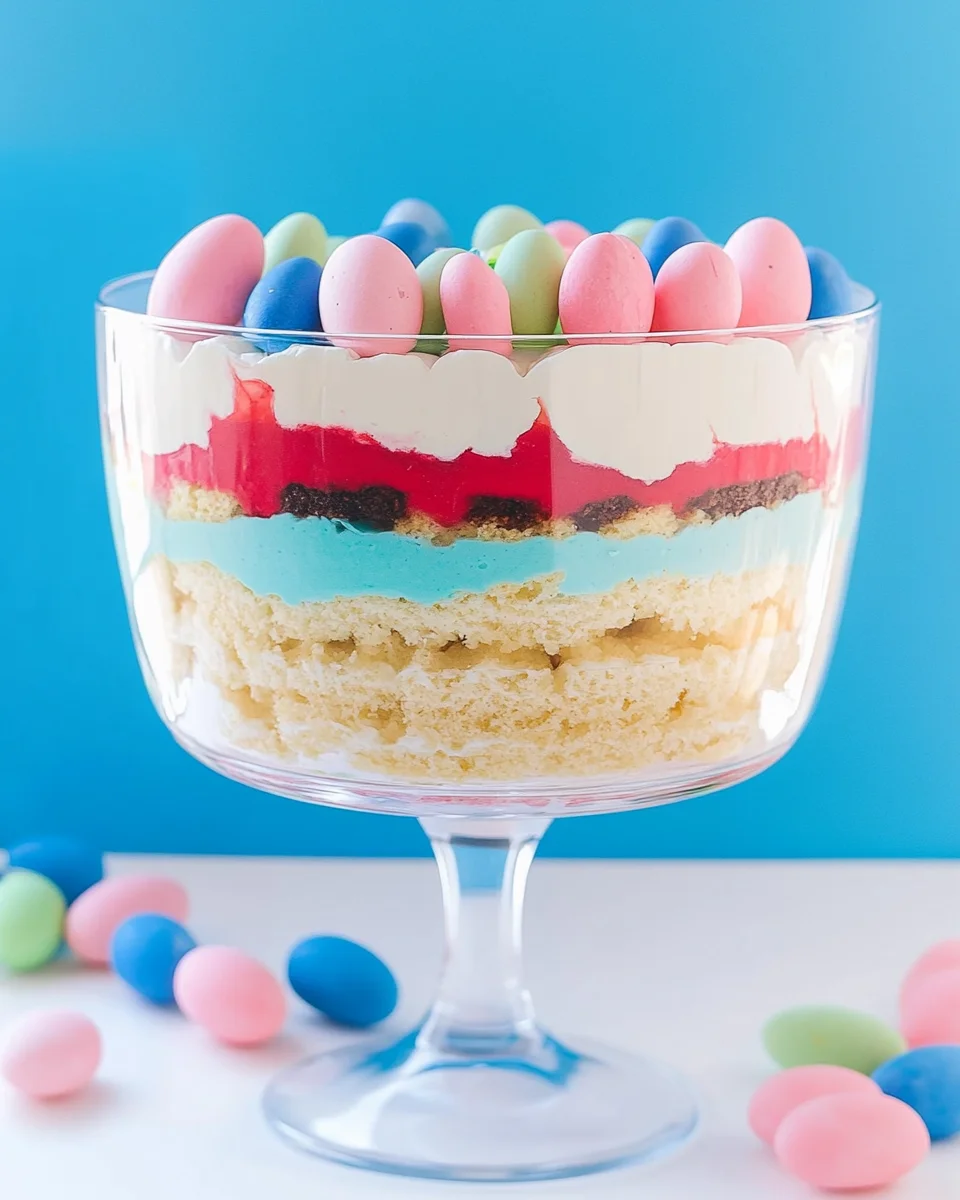
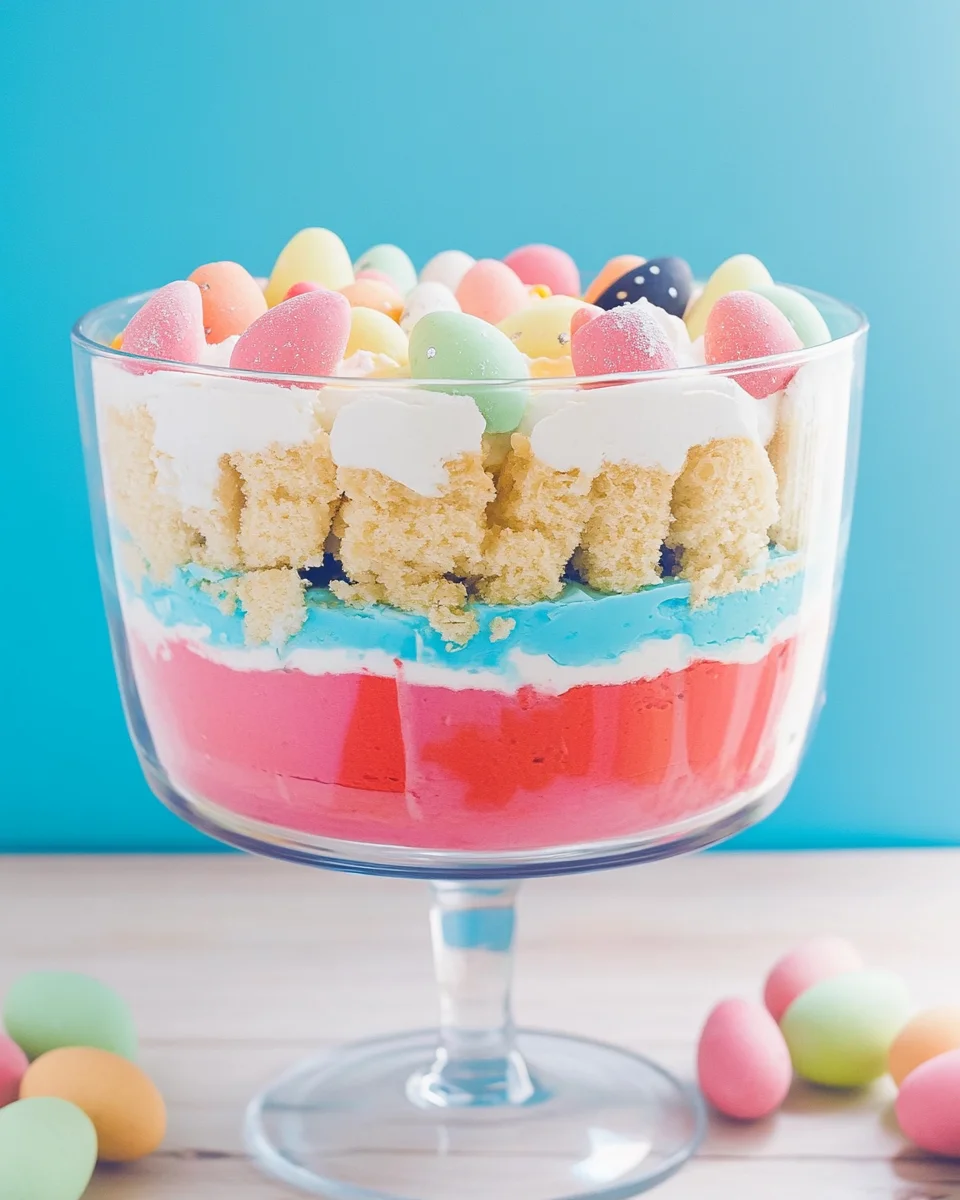
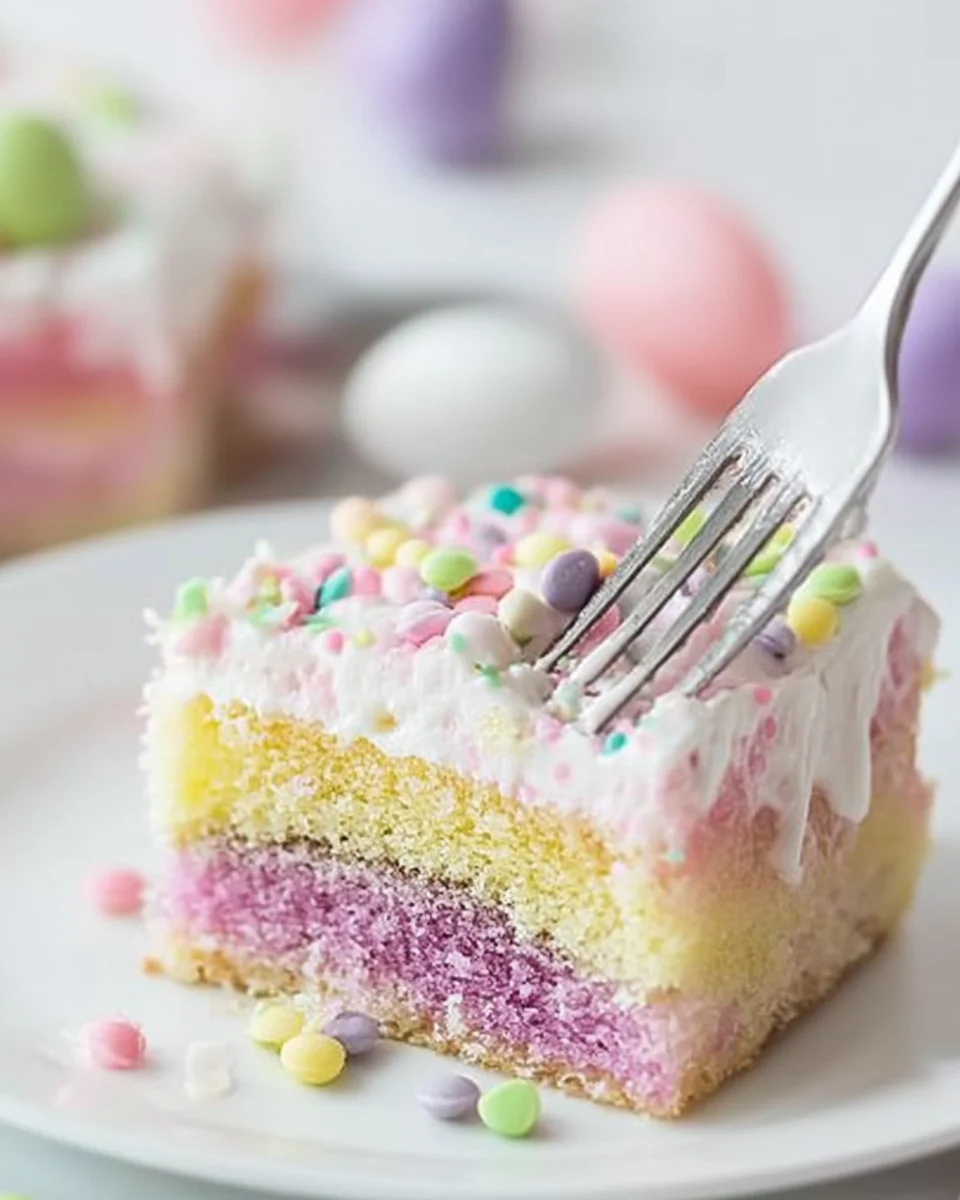
Among the homemade delights, there was always something special, something that embodied the essence of spring itself—soft, pastel-colored cupcakes that looked just like the robin’s eggs we had just collected from the garden. These cupcakes, adorned with speckled frosting and topped with candy eggs, felt like edible pieces of Easter magic.

Now, as an adult, I love recreating that same magic for my own family. Robin’s Egg Easter Cupcakes have become a staple in our home, a symbol of joy, renewal, and the simple pleasures of baking. They are more than just a dessert; they are a reminder of cherished traditions, the laughter of loved ones, and the delight that comes from making something beautiful with your own hands.

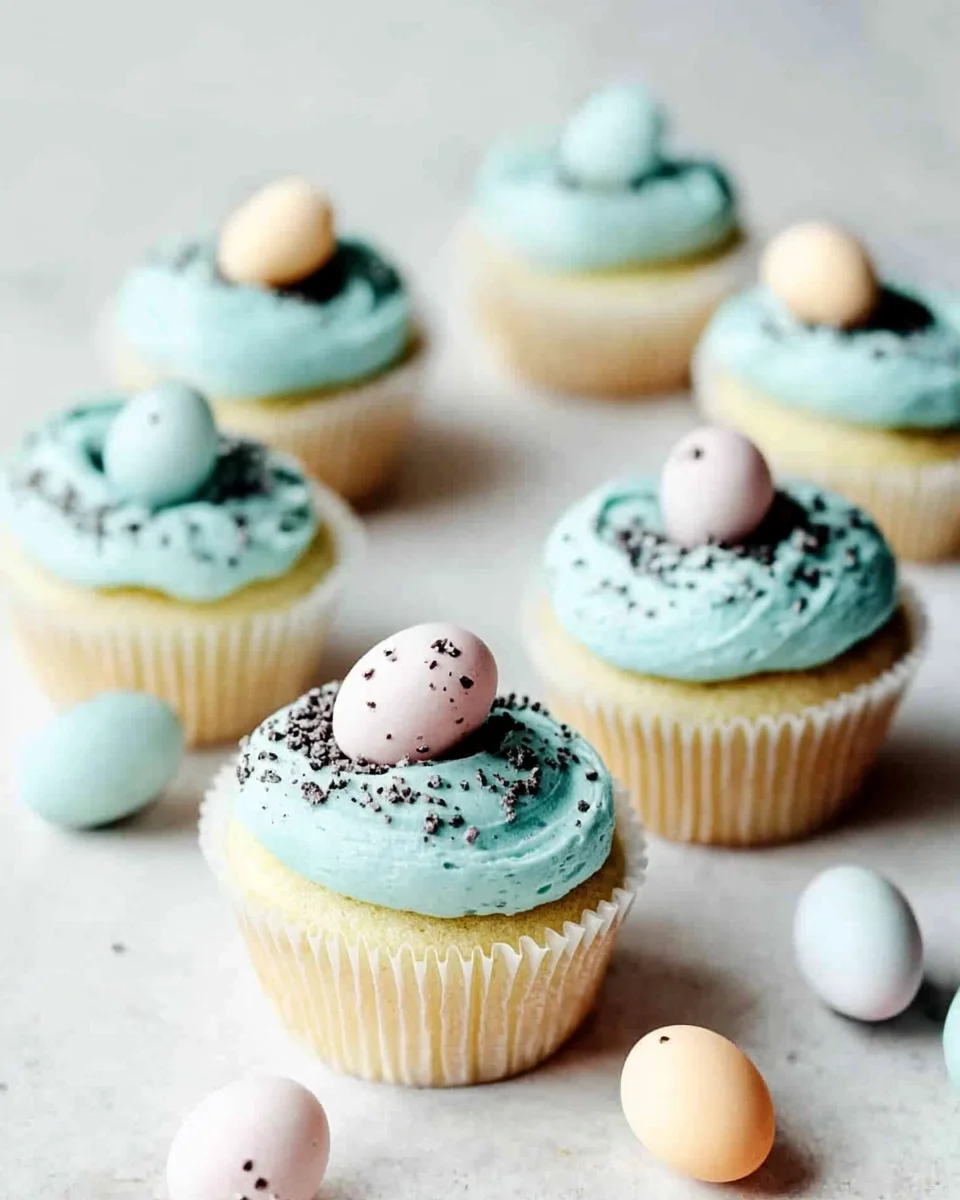
If you’re looking for the perfect Easter treat, these cupcakes are it. They are light, fluffy, and infused with rich vanilla flavor, while the buttercream frosting—tinted a delicate robin’s egg blue—is both creamy and dreamy. The speckled design adds a touch of whimsy, making them almost too pretty to eat. Almost.

What Makes These Cupcakes Special?

There are plenty of cupcake recipes out there, but these Robin’s Egg Easter Cupcakes stand out for a few reasons:

  • Homemade Goodness: Unlike store-bought cupcakes or cake mixes, these are made completely from scratch, giving them a richer, more authentic flavor.
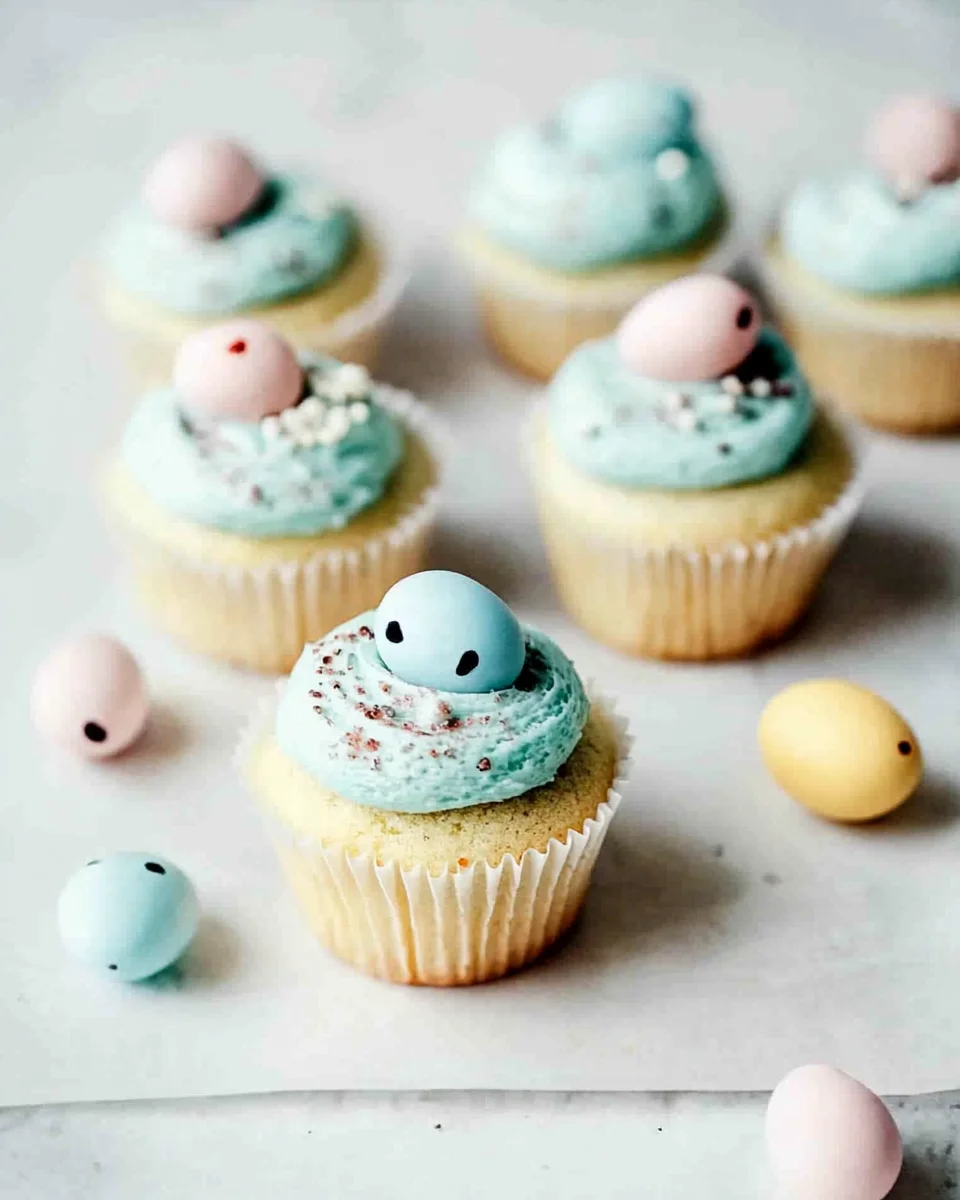
  • The Perfect Spring Aesthetic: The pastel blue frosting and speckled cocoa splatter make these cupcakes almost look like real robin’s eggs—ideal for Easter and spring celebrations.
  • A Fun Decorating Experience: If you love DIY projects, you’ll appreciate the creative process of flicking cocoa paint onto the frosting. It’s a bit messy but so much fun!
  • A Kid-Friendly Activity: If you have children, let them help with the decorating! They’ll love placing the mini eggs on top and creating their own unique speckled designs.

Whether you’re hosting an Easter brunch, bringing dessert to a spring picnic, or simply indulging in some festive baking, these cupcakes are guaranteed to be a hit.

Expert Tips for Perfect Easter Cupcakes

To ensure your cupcakes turn out light, fluffy, and picture-perfect, keep these baking tips in mind:

Use Room Temperature Ingredients

Cold ingredients don’t mix as well, which can lead to dense cupcakes. Allow your butter, eggs, sour cream, and milk to come to room temperature before you start baking.

Don’t Overmix the Batter

Overmixing activates the gluten in the flour, which can make your cupcakes tough instead of soft and airy. Mix just until the ingredients are combined.

Bake at the Right Temperature

Make sure your oven is fully preheated before placing your cupcakes inside. Baking at 350°F ensures even cooking and a golden, slightly domed top.

Let the Cupcakes Cool Completely Before Frosting

If you frost warm cupcakes, the buttercream will melt and slide off. Be patient and wait until they are completely cool before decorating.

Go Easy on the Food Coloring

A little goes a long way when tinting the frosting. Start with just a drop or two of blue food coloring, mix well, and add more if needed. You want a soft, pastel hue rather than an intense blue.

Control the Cocoa Splatter

The speckling effect can get messy. To keep your kitchen from looking like a cocoa crime scene, place a baking sheet behind your workspace to catch the splatter. You can also do this step outdoors for easy cleanup.

Whimsical Ingredients for a Spring Delight

For the Cupcakes:

  • 1 ½ cups all-purpose flour
  • ¼ cup cornstarch
  • 1 teaspoon baking powder
  • ¼ teaspoon baking soda
  • ¼ teaspoon salt
  • ½ cup salted butter (room temperature)
  • 1 cup granulated sugar
  • 3 egg whites (room temperature)
  • 3 teaspoons vanilla extract or vanilla bean paste
  • ½ teaspoon almond extract (optional)
  • ½ cup sour cream (room temperature)
  • ½ cup whole milk (room temperature)

For the Frosting:

  • 1 cup salted butter (room temperature)
  • 4 cups powdered sugar
  • 2-3 tablespoons heavy cream
  • 2 teaspoons vanilla extract
  • ½ teaspoon coconut extract (optional)
  • Pinch of salt
  • Blue food coloring

For the Speckled Decoration:

  • 1 tablespoon cocoa powder
  • 3-4 teaspoons vanilla extract
  • Cadbury mini eggs

Step-by-Step Magic: Crafting Your Cupcakes

1. Baking the Cupcakes:

  • Preheat the oven to 350°F and line muffin pans with cupcake liners.
  • In a large bowl, whisk together flour, cornstarch, baking powder, baking soda, and salt.
  • Using a stand or hand mixer, beat butter on high speed for 1 minute until creamy. Add sugar and beat for another 2 minutes.
  • Mix in egg whites, vanilla, and almond extract, then fold in sour cream.
  • Add the dry ingredients and mix on low speed. Gradually pour in milk while mixing until just combined.
  • Fill cupcake liners about ⅔ full and bake for 19-22 minutes, or until a toothpick comes out clean. Let them cool completely before frosting.

2. Whipping Up the Frosting:

  • Beat butter for 2-3 minutes until light and fluffy.
  • Add half of the powdered sugar, mix well, then add the remaining sugar and beat again.
  • Pour in heavy cream, vanilla, coconut extract (if using), and a pinch of salt, beating until smooth.
  • Mix in blue food coloring until you achieve a soft robin’s egg shade.
  • Transfer frosting to a piping bag and swirl onto cooled cupcakes.

3. Decorating with a Speckled Touch:

  • Arrange three Cadbury mini eggs on top of each frosted cupcake.
  • In a small bowl, whisk together cocoa powder and vanilla extract to create “speckle paint.”
  • Dip a stiff pastry brush (or a new paintbrush) into the cocoa mixture and flick speckles onto each cupcake for a natural egg effect.

Nutritional Breakdown Per Cupcake

  • Calories: 461 kcal
  • Carbohydrates: 62g
  • Protein: 3g
  • Fat: 23g
  • Saturated Fat: 14g
  • Cholesterol: 60mg
  • Sodium: 288mg
  • Sugar: 49g
  • Calcium: 47mg
  • Iron: 1mg

These festive cupcakes are perfect for Easter gatherings and can be stored for a few days or frozen for future celebrations!

FAQs: Everything You Need to Know

1. Can I Make These Cupcakes Ahead of Time?

Absolutely! You can bake the cupcakes a day or two in advance and store them in an airtight container at room temperature. If you need to store them longer, unfrosted cupcakes can be frozen for up to two months. Just thaw them overnight in the fridge before decorating.

2. How Long Do These Cupcakes Stay Fresh?

Once frosted and decorated, they will stay fresh at room temperature for 2-3 days. If you refrigerate them, they’ll last up to 5 days. Just let them come to room temperature before serving for the best flavor and texture.

3. Can I Use a Cake Mix Instead of Making Them from Scratch?

Yes, you can, but the homemade version has a superior taste and texture. If you do use a cake mix, consider adding a teaspoon of vanilla extract and a bit of sour cream to enhance the flavor.

4. What Other Flavors Work for These Cupcakes?

While the classic vanilla base is always a winner, you can experiment with different flavors like coconut, lemon, almond, or even a light chocolate cupcake. Just make sure the frosting remains a soft pastel blue to keep the robin’s egg look.

5. Can I Use Store-Bought Frosting?

Technically, yes, but homemade buttercream is much richer and creamier. Store-bought frosting tends to be overly sweet and lacks the fluffy texture that makes these cupcakes truly special.

6. What If I Don’t Have a Piping Bag for the Frosting?

No worries! You can simply spread the frosting on with a knife or use a heavy-duty plastic bag with a corner snipped off. The smooth, rounded frosting look works best for this design.

7. What’s the Best Way to Get the Speckled Effect?

Use a stiff pastry brush or a clean paintbrush to flick the cocoa and vanilla mixture onto the cupcakes. Practice on a plate first to get a feel for the technique before moving to your cupcakes.

8. Can I Make These Gluten-Free?

Yes! Substitute the all-purpose flour with a 1:1 gluten-free flour blend. Just be sure to check that your other ingredients are also gluten-free.

9. How Can I Make These Even More Festive?

Try adding shredded coconut on top for a “nest” effect before placing the mini eggs. You can also mix up the egg colors or use different pastel shades for the frosting.

10. Can I Use a Different Type of Mini Eggs?

Cadbury Mini Eggs are the classic choice, but you can use any pastel-colored chocolate eggs or even jelly beans for a unique twist.

A Sweet Ending: More Than Just a Cupcake

There’s something truly magical about baking during the holidays. It’s not just about the ingredients or the final product—it’s about the memories we create along the way. These Robin’s Egg Easter Cupcakes capture the joy of spring, the excitement of Easter, and the warmth of time spent with loved ones.

So whether you’re making them for a family gathering, a school bake sale, or simply as a treat for yourself, know that you’re baking more than just a dessert. You’re creating a little piece of happiness, a delicious tradition, and a sweet reminder that the simplest things in life—like a perfectly frosted cupcake—can bring the biggest smiles.

aiting

Robin’s Egg Easter Cupcakes: A Sweet Taste of Springtime Joy

Celebrate spring with these adorable Robin’s Egg Easter Cupcakes! Light and fluffy vanilla cupcakes are topped with a luscious buttercream frosting, speckled for a festive touch, and finished with Cadbury mini eggs. These treats are perfect for Easter gatherings and springtime celebrations!
Prep Time 20 minutes
Cook Time 25 minutes
Total Time 45 minutes
Servings: 12 cupcakes
Course: Dessert
Cuisine: American

Ingredients
  

For the Cupcakes:
  • 1 ½ cups all-purpose flour
  • ¼ cup cornstarch
  • 1 teaspoon baking powder
  • ¼ teaspoon baking soda
  • ¼ teaspoon salt
  • ½ cup salted butter room temperature
  • 1 cup granulated sugar
  • 3 egg whites room temperature
  • 3 teaspoons vanilla extract or vanilla bean paste
  • ½ teaspoon almond extract optional
  • ½ cup sour cream room temperature
  • ½ cup whole milk room temperature
For the Frosting:
  • 1 cup salted butter room temperature
  • 4 cups powdered sugar
  • 2-3 tablespoons heavy cream
  • 2 teaspoons vanilla extract
  • ½ teaspoon coconut extract optional
  • Pinch of salt
  • Blue food coloring
For the Speckled Decoration:
  • 1 tablespoon cocoa powder
  • 3-4 teaspoons vanilla extract
  • Cadbury mini eggs

Method
 

  1. Step 1: Baking the Cupcakes
  2. Preheat the oven to 350°F and line muffin pans with cupcake liners.
  3. In a large bowl, whisk together flour, cornstarch, baking powder, baking soda, and salt.
  4. Using a stand or hand mixer, beat butter on high speed for 1 minute until creamy. Add sugar and beat for another 2 minutes.
  5. Mix in egg whites, vanilla, and almond extract, then fold in sour cream.
  6. Add the dry ingredients and mix on low speed. Gradually pour in milk while mixing until just combined.
  7. Fill cupcake liners about ⅔ full and bake for 19-22 minutes, or until a toothpick comes out clean.
  8. Let them cool completely before frosting.
Step 2: Whipping Up the Frosting
  1. Beat butter for 2-3 minutes until light and fluffy.
  2. Add half of the powdered sugar, mix well, then add the remaining sugar and beat again.
  3. Pour in heavy cream, vanilla, coconut extract (if using), and a pinch of salt, beating until smooth.
  4. Mix in blue food coloring until you achieve a soft robin’s egg shade.
  5. Transfer frosting to a piping bag and swirl onto cooled cupcakes.
Step 3: Decorating with a Speckled Touch
  1. Arrange three Cadbury mini eggs on top of each frosted cupcake.
  2. In a small bowl, whisk together cocoa powder and vanilla extract to create “speckle paint.”
  3. Dip a stiff pastry brush (or a new paintbrush) into the cocoa mixture and flick speckles onto each cupcake for a natural egg effect.
  4.  

Notes

  • If you don’t have almond extract, simply use extra vanilla extract.
  • For a richer cupcake, substitute sour cream with Greek yogurt.
  • Store in an airtight container at room temperature for 2 days or in the fridge for up to 5 days.
  • Cupcakes can be frozen without frosting for up to 3 months.

Brooklyn Blackout Cake: A Nostalgic Journey into Chocolate Indulgence

A Taste of Memory: The First Bite That Changed Everything

There are some desserts that transcend time, wrapping themselves around memories and emotions in a way that makes them more than just a sweet treat. The Brooklyn Blackout Cake is one of them.

I remember the first time I tasted it—an old-fashioned bakery in Brooklyn, its display case filled with pastries that looked like they belonged in a different era. The air smelled of cocoa, sugar, and something almost electric, like the hum of a city that never sleeps. I had heard about this legendary cake, a dessert that carried the weight of history and indulgence in every forkful.

The moment I took that first bite, I understood. The rich chocolate layers were impossibly moist, soaked in deep cocoa flavors. The pudding filling was velvety and decadent, each spoonful melting into the cake like it had always belonged there. And the frosting—dark, glossy, and slightly sticky—sealed the whole masterpiece together. It wasn’t just a dessert; it was an experience.

That first bite was more than a flavor; it was a glimpse into the past, a taste of something that felt both historic and personal. The Brooklyn Blackout Cake is more than just chocolate; it’s a story of resilience, celebration, and the kind of indulgence that makes life sweeter.

The History Behind the Legend

The Brooklyn Blackout Cake didn’t just appear out of nowhere. It was born in the 1940s at Ebinger’s Bakery, a beloved Brooklyn institution that had been serving up pastries since 1898. The cake was created during World War II, inspired by the blackout drills that took place across New York City to protect the city from potential air raids. As lights dimmed and windows were covered to keep the city hidden in the dark, Ebinger’s introduced a cake so dark and rich it seemed fitting for the occasion.

For decades, Brooklynites lined up outside Ebinger’s for a taste of the famous Blackout Cake. It was a bakery staple, a cake that symbolized indulgence, community, and history. But when Ebinger’s closed its doors in 1972, the original recipe was lost. What remains today are recreations—variations passed down through families, whispered among bakers, and reimagined by chocolate lovers everywhere.

Even though the original bakery is gone, the Brooklyn Blackout Cake has lived on, its legacy continuing in home kitchens, bakeries, and cafes determined to keep its story alive.

What Makes This Cake So Special?

There are chocolate cakes, and then there’s Brooklyn Blackout Cake. What sets it apart from other chocolate cakes isn’t just its intensity—it’s the layering of textures and flavors that creates something extraordinary.

  • Triple Chocolate Indulgence – The cake itself is rich with cocoa, but it doesn’t stop there. A thick chocolate pudding filling adds an extra layer of creamy decadence, while the frosting ties everything together with a deep, velvety finish.
  • Crumb Coating Tradition – One of the signature elements of a Brooklyn Blackout Cake is the outer layer of cake crumbs pressed onto the frosting. This technique isn’t just for looks—it adds a delicate crunch and enhances the overall chocolate experience.
  • Perfect Balance of Sweetness and Depth – Unlike some chocolate cakes that rely on overwhelming sweetness, this one balances dark cocoa with just the right amount of sugar, coffee, and buttermilk to create a flavor that’s deep, complex, and utterly satisfying.

Tips for Making the Best Brooklyn Blackout Cake

Use Quality Cocoa for Maximum Flavor

Since chocolate is the star of this cake, don’t skimp on quality. Dutch-processed cocoa gives the cake its signature dark color and deep flavor. It’s smoother and less acidic than natural cocoa, making it ideal for this recipe.

Brew Some Strong Coffee

A secret ingredient in many great chocolate cakes is coffee. It doesn’t make the cake taste like coffee; instead, it enhances the richness of the chocolate, making every bite even more intense.

Let the Pudding Chill

One of the biggest mistakes when making a Brooklyn Blackout Cake is assembling it before the pudding filling has had time to fully cool and set. If it’s still warm, it can make the cake layers unstable and cause them to slide. Refrigerate the pudding for at least an hour before assembling the cake.

Refrigerate Before Serving

While you might be tempted to dig in right away, letting the cake chill in the refrigerator for a couple of hours allows the flavors to meld and makes slicing much easier. The pudding sets more firmly, and the frosting holds its shape better.

Ingredients: The Chocolate Symphony

For the Cake:

  • 1 ½ cups all-purpose flour
  • 2 teaspoons baking powder
  • ½ teaspoon baking soda
  • ½ teaspoon salt
  • ½ cup unsalted butter, cubed
  • ¾ cup Dutch-processed cocoa
  • 1 cup granulated sugar
  • 1 cup packed brown sugar
  • 1 cup buttermilk
  • 1 cup strong brewed coffee
  • 1 teaspoon vanilla extract
  • 2 large eggs

For the Pudding Filling:

  • ½ cup granulated sugar
  • 2 tablespoons cornstarch
  • ¼ teaspoon salt
  • 1 ½ cups whole milk
  • 3 ounces semisweet chocolate, chopped
  • 1 teaspoon vanilla extract

For the Frosting:

  • 8 ounces semisweet chocolate, chopped
  • ½ cup unsalted butter, cubed
  • ⅓ cup hot water
  • 2 teaspoons light corn syrup
  • 2 teaspoons vanilla extract

Directions: Crafting the Ultimate Chocolate Indulgenc

1. Prep the Cake Batter

  • Preheat the oven to 325°F. Grease two 8-inch round cake pans and line them with parchment paper.
  • In a bowl, whisk together flour, baking powder, baking soda, and salt.
  • Melt butter in a saucepan, then stir in cocoa, granulated sugar, and brown sugar.
  • Remove from heat and mix in buttermilk, coffee, and vanilla.
  • Whisk in eggs one at a time.
  • Stir in the flour mixture until just combined.

2. Bake the Cake

  • Pour the batter evenly into the prepared pans.
  • Bake for 35-40 minutes or until a toothpick inserted in the center comes out clean.
  • Cool in pans for 10 minutes, then transfer to wire racks.

3. Prepare the Chocolate Pudding

  • In a saucepan, whisk together sugar, cornstarch, and salt.
  • Gradually add milk, stirring constantly.
  • Cook over medium heat until thickened.
  • Remove from heat and stir in chopped chocolate and vanilla.
  • Refrigerate until cold.

4. Make the Frosting

  • Melt chocolate and butter in a double boiler.
  • Remove from heat and whisk in hot water, corn syrup, and vanilla.
  • Refrigerate for 25-30 minutes or until spreadable.

5. Assemble the Cake

  • Slice each cake horizontally to create four layers.
  • Set one layer aside to be crumbled later.
  • Place one cake layer on a serving plate and spread half the pudding on top.
  • Repeat with the second layer and remaining pudding.
  • Top with the third cake layer.

6. Frost and Finish

  • Frost the entire cake with the chocolate frosting.
  • Crumble the reserved cake layer and press the crumbs onto the top and sides of the cake.
  • Refrigerate before serving.

Nutritional Breakdown: A Slice of Decadence

(Approximate values per serving, assuming 12 servings)

  • Calories: ~500 kcal
  • Carbohydrates: ~65g
  • Protein: ~6g
  • Fat: ~25g
  • Saturated Fat: ~15g
  • Sugar: ~45g
  • Fiber: ~4g
  • Sodium: ~250mg

Enjoy this rich, nostalgic Brooklyn Blackout Cake—pure chocolate bliss in every bite!

FAQs: Everything You Need to Know About Brooklyn Blackout Cake

1. Is Brooklyn Blackout Cake the same as a regular chocolate cake?

No, this cake is much richer and more complex. The addition of chocolate pudding as a filling gives it an ultra-moist texture, and the crumb coating sets it apart from a traditional chocolate layer cake.

2. Can I make this cake in advance?

Yes! In fact, Brooklyn Blackout Cake tastes even better the next day. You can bake the cake layers a day ahead and store them tightly wrapped at room temperature. The pudding and frosting can be made in advance and stored in the refrigerator. Assemble the cake a few hours before serving for the best results.

3. Can I freeze Brooklyn Blackout Cake?

Absolutely. To freeze, wrap the fully assembled cake in plastic wrap, then in aluminum foil. It can be frozen for up to three months. To serve, let it thaw overnight in the refrigerator.

4. Do I have to use cake crumbs on the outside?

Traditionally, yes. The cake crumbs not only add a unique texture but also help keep the frosting from being too overwhelming. However, if you prefer a smooth-frosted cake, you can skip this step.

5. What’s the best way to store leftovers?

Keep the cake in an airtight container in the refrigerator for up to a week. Before serving, let it sit at room temperature for 15–20 minutes for the best texture.

6. Can I use a different type of chocolate for the pudding and frosting?

You can experiment with dark, milk, or even white chocolate, but semisweet chocolate gives the best balance of sweetness and intensity.

Why This Cake Matters: More Than Just Dessert

Brooklyn Blackout Cake is more than just a rich, chocolate-filled indulgence. It’s a tribute to a bygone era, a nod to the resilience of a city, and a reminder that sometimes, the most delicious things in life come with a story.

Whether you’re making it for a birthday, a holiday, or simply to satisfy a deep chocolate craving, this cake is an experience worth savoring. Each slice carries history, tradition, and an irresistible depth of flavor that makes it unforgettable.

So the next time you take a bite, close your eyes for a moment. Let the chocolate melt on your tongue, feel the creamy pudding coat your taste buds, and imagine the bustling streets of Brooklyn in the 1940s. Because this isn’t just cake—it’s a piece of history, lovingly preserved, one delicious forkful at a time.

aiting

Brooklyn Blackout Cake: A Nostalgic Journey into Chocolate Indulgence

Indulge in the ultimate chocolate experience with this Brooklyn Blackout Cake. With rich, moist layers of chocolate cake, silky pudding filling, and a decadent frosting, this nostalgic dessert is pure bliss for chocolate lovers!
Prep Time 30 minutes
Cook Time 40 minutes
Total Time 2 hours
Servings: 12 servings
Course: Dessert
Cuisine: American

Ingredients
  

For the Cake:
  • 1 ½ cups all-purpose flour
  • 2 teaspoons baking powder
  • ½ teaspoon baking soda
  • ½ teaspoon salt
  • ½ cup unsalted butter cubed
  • ¾ cup Dutch-processed cocoa
  • 1 cup granulated sugar
  • 1 cup packed brown sugar
  • 1 cup buttermilk
  • 1 cup strong brewed coffee
  • 1 teaspoon vanilla extract
  • 2 large eggs
For the Pudding Filling:
  • ½ cup granulated sugar
  • 2 tablespoons cornstarch
  • ¼ teaspoon salt
  • 1 ½ cups whole milk
  • 3 ounces semisweet chocolate chopped
  • 1 teaspoon vanilla extract
For the Frosting:
  • 8 ounces semisweet chocolate chopped
  • ½ cup unsalted butter cubed
  • cup hot water
  • 2 teaspoons light corn syrup
  • 2 teaspoons vanilla extract
  •  

Method
 

  1. Step 1: Prep the Cake Batter
  2. Preheat oven to 325°F. Grease two 8-inch round cake pans and line with parchment paper.
  3. In a bowl, whisk together flour, baking powder, baking soda, and salt.
  4. Melt butter in a saucepan, then stir in cocoa, granulated sugar, and brown sugar.
  5. Remove from heat and mix in buttermilk, coffee, and vanilla.
  6. Whisk in eggs one at a time.
  7. Stir in the flour mixture until just combined.
Step 2: Bake the Cake
  1. Pour batter evenly into prepared pans.
  2. Bake for 35-40 minutes or until a toothpick inserted in the center comes out clean.
  3. Cool in pans for 10 minutes, then transfer to wire racks to cool completely.
Step 3: Prepare the Chocolate Pudding
  1. In a saucepan, whisk together sugar, cornstarch, and salt.
  2. Gradually add milk, stirring constantly.
  3. Cook over medium heat until thickened.
  4. Remove from heat and stir in chopped chocolate and vanilla.
  5. Refrigerate until cold.
Step 4: Make the Frosting
  1. Melt chocolate and butter in a double boiler.
  2. Remove from heat and whisk in hot water, corn syrup, and vanilla.
  3. Refrigerate for 25-30 minutes or until spreadable.
Step 5: Assemble the Cake
  1. Slice each cake horizontally to create four layers.
  2. Set one layer aside to be crumbled later.
  3. Place one cake layer on a serving plate and spread half the pudding on top.
  4. Repeat with the second layer and remaining pudding.
  5. Top with the third cake layer.
Step 6: Frost and Finish
  1. Frost the entire cake with chocolate frosting.
  2. Crumble the reserved cake layer and press crumbs onto the top and sides of the cake.
  3. Refrigerate before serving.

Notes

  • Use high-quality cocoa and chocolate for the best flavor.
  • Let the cake chill for a few hours before serving for the best texture.
  • Store leftovers in the refrigerator for up to 3 days.

Chicken Pot Pie Pasta: A Hearty Twist on a Classic Comfort Dish

A Bowl of Memories: How This Dish Became a Family Favorite

Growing up, chicken pot pie was more than just a meal in our house—it was a tradition. My grandmother would spend hours in the kitchen, rolling out the perfect buttery crust, slow-cooking the filling, and filling the entire house with a warm, savory aroma that made my mouth water. But as much as I loved those nights, I also remember the long wait, the delicate balancing act of getting the crust just right, and the inevitable mess of flour-dusted countertops.

Fast forward to adulthood, where time is a luxury and patience is sometimes in short supply. One evening, as I was craving that same comforting taste but had no energy for pastry-making, inspiration struck. What if I could capture the essence of chicken pot pie without the fuss? That’s when Chicken Pot Pie Pasta was born.

This dish is a tribute to those childhood memories, but with a modern, weeknight-friendly twist. It delivers all the rich, creamy flavors of traditional chicken pot pie but skips the time-consuming crust in favor of tender, buttery egg noodles. The result? A soul-soothing, hearty meal that’s ready in under 30 minutes and satisfies every bit as much as the classic.

Whether you’re making this for a busy family dinner, a cozy date night, or simply a comforting solo meal, this dish brings nostalgia and convenience together in a way that makes every bite feel like home.

Why You’ll Love This Chicken Pot Pie Pasta

1. A Shortcut to Comfort

Traditional chicken pot pie is a labor of love, but let’s be honest—not everyone has the time (or desire) to make a homemade crust on a hectic weeknight. This pasta version eliminates that step without sacrificing the essence of the dish.

2. Rich, Creamy, and Incredibly Satisfying

The heart of any good chicken pot pie is its filling—a thick, velvety sauce infused with herbs, tender chunks of chicken, and vibrant veggies. This pasta dish recreates that same magic with a luscious cream sauce that clings to every noodle.

3. Perfect for Leftovers

Like a fine stew, this dish only gets better as it sits. The noodles absorb even more of the savory flavors overnight, making next-day leftovers an absolute treat.

4. Customizable for Every Taste

Whether you want to add bacon, swap the chicken for turkey, or toss in some mushrooms for an umami boost, this recipe is incredibly flexible. It’s also easy to make lighter by swapping heavy cream for a lower-fat alternative or using whole wheat pasta.

5. A Hit with Kids and Adults Alike

Some comfort foods are purely nostalgic for adults, but this one bridges the generational gap. Kids love the creamy sauce and tender noodles, while grown-ups appreciate the rich depth of flavor.

Pro Tips for the Best Chicken Pot Pie Pasta

Even though this dish is quick and simple, a few small tweaks can take it from good to unforgettable.

1. Use Rotisserie Chicken for Convenience

If you don’t have time to cook chicken from scratch, a store-bought rotisserie chicken is a lifesaver. It’s already seasoned, tender, and shreds beautifully into the sauce.

2. Don’t Overcook the Pasta

Since the noodles will continue to absorb sauce after being mixed in, it’s best to cook them slightly under al dente. This keeps them from turning mushy as they sit.

3. Toast the Flour for a Deeper Flavor

When making the roux (butter and flour mixture), cook it for an extra minute or two before adding the broth. This removes any raw flour taste and creates a more flavorful, nutty base for the sauce.

4. Adjust the Consistency as Needed

If the sauce thickens too much while sitting, a splash of milk, broth, or reserved pasta water will loosen it back up without diluting the flavor.

5. Add a Crispy Topping for a True Pot Pie Feel

Missing that signature flaky crust? Try sprinkling crushed Ritz crackers, breadcrumbs, or even crispy fried onions on top for a delicious crunch.

Gather Your Ingredients

  • Base:
    • 12 ounces egg noodles
  • The Magic Begins with Butter:
    • 3 tablespoons unsalted butter, divided
  • Flavor Builders:
    • 1 medium yellow onion, diced
    • 3 cloves garlic, minced
  • Veggie Goodness:
    • 1 ½ cups frozen mixed vegetables (peas, carrots, corn), thawed
  • Aromatic Touch:
    • 1 teaspoon salt
    • 1 teaspoon dried thyme
    • ½ teaspoon dried rosemary
    • ½ teaspoon black pepper
  • Creamy Dreamy Sauce:
    • 3 tablespoons all-purpose flour
    • 1 ½ cups chicken broth
    • 1 cup heavy cream
  • Protein Power:
    • 2 cups cooked chicken breast, shredded or diced
  • Finishing Touches:
    • ¼ cup fresh parsley, chopped (for garnish)
    • 1 cup crushed Ritz crackers or breadcrumbs

Simple Steps to Cozy Goodness

  1. Boil the Pasta: Cook the egg noodles until just before al dente. Drain and set aside.
  2. Sauté the Base: Melt 2 tablespoons of butter in a large skillet over medium heat. Add the onion and mixed vegetables, cooking until the onion turns translucent.
  3. Herb & Spice Infusion: Stir in garlic, salt, thyme, rosemary, and black pepper for deep flavor.
  4. Make It Velvety: Add the remaining butter and sprinkle in the flour, mixing until it becomes a paste.
  5. Build the Sauce: Gradually pour in the chicken broth while stirring to prevent lumps. Then, add heavy cream and simmer for 3–5 minutes until thick.
  6. Bring It All Together: Toss in the cooked noodles and shredded chicken, ensuring they are fully coated in the creamy sauce.
  7. The Grand Finale: Serve hot, topped with fresh parsley and crushed Ritz crackers for a crispy, pie-like touch. Enjoy!

A Bite of Nutrition

  • Calories: 440 kcal
  • Fat: 21g (Saturated Fat: 11g)
  • Cholesterol: 107mg
  • Sodium: 582mg
  • Carbohydrates: 44g (Fiber: 3g, Sugar: 3g)
  • Protein: 18g
  • Calcium: 73mg
  • Iron: 2mg

This dish brings all the nostalgia of a classic pot pie but in an easy, pasta-based form—no crust required!

FAQs About Chicken Pot Pie Pasta

1. Can I Make This Recipe Ahead of Time?

Yes! This dish actually tastes better the next day because the flavors have more time to meld together. Store it in an airtight container in the fridge and reheat with a splash of milk or broth to bring back the creamy texture.

2. Can I Freeze Chicken Pot Pie Pasta?

This dish is best enjoyed fresh or refrigerated for a few days. Freezing is not recommended because the cream sauce can separate, and the pasta may become too soft upon thawing.

3. What Type of Pasta Works Best?

Egg noodles are the classic choice because their wide, flat shape holds the creamy sauce beautifully. However, you can also use penne, rotini, or even fettuccine for a slightly different texture.

4. How Can I Make This Dish Healthier?

To lighten up this dish, you can:

  • Use whole wheat or chickpea pasta for extra fiber and protein.
  • Substitute half-and-half or evaporated milk for the heavy cream.
  • Increase the vegetable portion and slightly reduce the pasta.

5. Can I Make This Dish Dairy-Free?

Absolutely! Swap the butter for dairy-free margarine, use a plant-based heavy cream alternative, and ensure your crackers or breadcrumbs are dairy-free. The dish will still be rich and flavorful.

Pairing Ideas: What to Serve with Chicken Pot Pie Pasta

Since this dish is rich and creamy, pairing it with something light and fresh can help balance the meal. Here are some great side options:

  • Crisp Side Salad: A simple salad with a tangy vinaigrette helps cut through the richness.
  • Roasted Vegetables: Brussels sprouts, green beans, or asparagus roasted with a little olive oil and garlic complement this dish beautifully.
  • Garlic Bread or Dinner Rolls: Because extra sauce deserves to be soaked up with something delicious.
  • Corn on the Cob: A sweet, buttery contrast to the savory flavors of the pasta.

Why This Dish Will Become a Staple in Your Home

Chicken Pot Pie Pasta isn’t just a recipe—it’s an experience. It’s the kind of dish that wraps you in warmth after a long day, that brings people together around the dinner table, and that turns leftovers into something you look forward to.

Maybe you’re a busy parent looking for an easy yet comforting meal. Maybe you’re someone who craves nostalgia but doesn’t have the time for a full-blown pie. Or maybe you’re just a lover of all things creamy, hearty, and satisfying.

No matter the reason, this dish is one you’ll find yourself making again and again. And with every bite, you’ll taste a little bit of that home-cooked love—no pie crust required.

aiting

Chicken Pot Pie Pasta: A Hearty Twist on a Classic Comfort Dish

Enjoy the comforting flavors of a classic chicken pot pie in an easy, pasta-based dish! This creamy, hearty meal is packed with tender chicken, wholesome vegetables, and a rich, velvety sauce, all topped with a crispy, buttery crunch.
 
Prep Time 10 minutes
Cook Time 20 minutes
Total Time 30 minutes
Servings: 6 servings
Course: Main Course
Cuisine: American

Ingredients
  

For the Base:
  • 12 ounces egg noodles
For the Butter Base:
  • 3 tablespoons unsalted butter divided
For the Flavor Builders:
  • 1 medium yellow onion diced
  • 3 cloves garlic minced
For the Veggies:
  • 1 ½ cups frozen mixed vegetables peas, carrots, corn, thawed
For the Seasoning:
  • 1 teaspoon salt
  • 1 teaspoon dried thyme
  • ½ teaspoon dried rosemary
  • ½ teaspoon black pepper
For the Creamy Sauce:
  • 3 tablespoons all-purpose flour
  • 1 ½ cups chicken broth
  • 1 cup heavy cream
For the Protein:
  • 2 cups cooked chicken breast shredded or diced
For the Finishing Touches:
  • ¼ cup fresh parsley chopped (for garnish)
  • 1 cup crushed Ritz crackers or breadcrumbs

Method
 

  1. Step 1: Boil the Pasta
  2. Cook the egg noodles according to package instructions until just before al dente.
  3. Drain and set aside.
Step 2: Sauté the Base
  1. Melt 2 tablespoons of butter in a large skillet over medium heat.
  2. Add the onion and mixed vegetables, cooking until the onion turns translucent.
Step 3: Herb & Spice Infusion
  1. Stir in garlic, salt, thyme, rosemary, and black pepper for deep flavor.
Step 4: Make It Velvety
  1. Add the remaining butter and sprinkle in the flour, mixing until it forms a paste.
Step 5: Build the Sauce
  1. Gradually pour in the chicken broth while stirring to prevent lumps.
  2. Add heavy cream and simmer for 3–5 minutes until thickened.
Step 6: Bring It All Together
  1. Toss in the cooked noodles and shredded chicken, ensuring they are fully coated in the creamy sauce.
Step 7: The Grand Finale
  1. Serve hot, topped with fresh parsley and crushed Ritz crackers for a crispy, pie-like touch.
  2. Enjoy!

Notes

  • For extra richness, swap half of the heavy cream for whole milk.
  • Use rotisserie chicken for added convenience and flavor.
  • Add mushrooms or bell peppers for more depth and texture.
  • Leftovers reheat well, but add a splash of broth or milk to maintain creaminess.

Slow Cooker Beef and Broccoli: A Comforting Classic for Busy Days

A Dish That Brings Families Together

There’s something truly special about a home-cooked meal that fills your kitchen with rich, savory aromas. For me, slow cooker beef and broccoli is more than just a recipe—it’s a connection to the simple joys of family dinners, where everyone gathers around the table after a long day.

I remember the first time I made this dish. It was a chaotic week, filled with deadlines, errands, and the ever-growing list of responsibilities that come with adulthood. I needed something effortless, yet delicious enough to feel like a homemade treat. Enter the slow cooker—a lifesaver in times of busyness. As the hours passed, the scent of garlic, soy sauce, and sesame oil slowly infused the air, making the house feel warm and inviting.

By dinnertime, the beef was melt-in-your-mouth tender, the broccoli perfectly crisp-tender, and the sauce thick and savory, clinging to every bite. As my family dug in, the stress of the day melted away, replaced by the comfort of a meal that felt just as good as it tasted. From that moment, this dish became a staple in our home—a go-to for when we needed something easy, flavorful, and nourishing.

Why Slow Cooker Beef and Broccoli is a Must-Try

1. A Healthier Take on Takeout

Ordering Chinese takeout is tempting, but homemade versions often taste better and are healthier. This slow cooker beef and broccoli allows you to control the ingredients, reducing excess sodium, sugar, and preservatives. You can swap in lower-sodium soy sauce, use lean cuts of beef, and adjust the sweetness to suit your preference.

2. Minimal Effort, Maximum Flavor

The beauty of a slow cooker meal lies in its simplicity. With just a few minutes of prep, the slow cooker does the rest of the work for you. There’s no need for constant stirring or watching over the stove—just set it and forget it.

3. A Versatile Dish for Any Occasion

Whether it’s a quick weeknight dinner, a meal prep staple, or a comforting dish for guests, slow cooker beef and broccoli fits the bill. Pair it with rice, quinoa, or even cauliflower rice for a low-carb option.

Gather Your Ingredients

  • 2 lbs sirloin steak – sliced into thin, 4-inch-long strips
  • Salt and black pepper – to taste
  • 1 cup soy sauce – regular or low-sodium
  • 1 cup beef broth – or beef stock for a richer flavor
  • ¼ cup oyster sauce – for depth and umami
  • ⅓ cup brown sugar – light or dark
  • 1 tbsp sesame oil – adds a nutty aroma
  • 1 tsp garlic – minced (fresh or jarred)
  • 3 tbsp cornstarch – thickens the sauce
  • 1 head of broccoli – cut into florets
  • Sesame seeds – for garnish

How to Bring This Dish to Life

1. Prep the Beef
Place the sliced sirloin steak at the bottom of a 7-quart slow cooker. Season with salt and black pepper to taste.

2. Mix the Sauce
In a bowl, whisk together soy sauce, beef broth, oyster sauce, brown sugar, sesame oil, and garlic. Add cornstarch and whisk until smooth with no lumps.

3. Let the Magic Happen
Pour the sauce over the beef, ensuring even coverage. Cover and cook:

  • Low heat: 5–6 hours
  • High heat: 3.5–5 hours
    Stir occasionally for even cooking.

4. Add the Broccoli
Thirty minutes before serving, toss in the broccoli florets. Stir occasionally to coat them in the sauce and let them steam until tender.

5. Serve and Savor
Using tongs, serve the beef and broccoli over steamed white rice, brown rice, or jasmine rice. Garnish with sesame seeds (and sliced green onions if desired).

Nutritional Breakdown (Per Serving)

  • Calories: 353 kcal
  • Carbohydrates: 26g
  • Protein: 41g
  • Fat: 10g (Saturated: 3g)
  • Cholesterol: 92mg
  • Sodium: 2696mg
  • Potassium: 964mg
  • Fiber: 3g
  • Sugar: 14g
  • Vitamin A: 631 IU
  • Vitamin C: 91mg
  • Calcium: 114mg
  • Iron: 4mg

Enjoy your homemade slow cooker beef and broccoli—a dish packed with bold flavors, tender beef, and vibrant broccoli!

FAQs: Everything You Need to Know About Slow Cooker Beef and Broccoli

What Type of Beef Works Best?

The key to tender beef in a slow cooker is choosing the right cut. Sirloin steak, flank steak, or chuck roast are excellent choices. Sirloin and flank steak are leaner options that cook up tender, while chuck roast has more marbling, adding a richer flavor.

Can I Use Frozen Beef?

Yes, but it’s best to thaw the beef beforehand to ensure even cooking. If you must use frozen beef, extend the cooking time and ensure the internal temperature reaches at least 165°F.

How Can I Make the Sauce Thicker?

The sauce thickens naturally with cornstarch, but if you prefer an even thicker consistency, try these tips:

  • Remove some of the sauce and whisk in additional cornstarch before adding it back.
  • Let the sauce simmer uncovered in the slow cooker for the last 30 minutes.

Can I Use Frozen Broccoli?

Fresh broccoli is ideal because it holds its texture better, but if you’re in a pinch, frozen broccoli can work. Add it in during the last few minutes of cooking to prevent it from becoming mushy.

Is This Recipe Gluten-Free?

It can be! Simply swap regular soy sauce for tamari or coconut aminos, which are both gluten-free alternatives. Make sure your oyster sauce is also labeled gluten-free.

What Other Vegetables Can I Add?

Feel free to customize this dish by adding bell peppers, snap peas, mushrooms, or carrots. Just ensure they are added at the right time to prevent overcooking.

How Long Does It Keep?

  • Refrigerator: Store leftovers in an airtight container for up to 4 days.
  • Freezer: This dish freezes well for up to 3 months. Thaw overnight in the fridge before reheating.

Can I Cook This on the Stovetop Instead?

Absolutely! If you don’t have time for slow cooking, you can make this dish on the stovetop. Simply brown the beef in a pan, add the sauce ingredients, and simmer until the beef is tender. Add the broccoli at the end, just as you would in the slow cooker method.

Tips for the Best Slow Cooker Beef and Broccoli

1. Slice the Beef Thinly

Thin strips of beef cook more evenly and absorb the sauce better. If you struggle with slicing, try freezing the beef for about 15 minutes before cutting—it makes the process much easier.

2. Don’t Overcook the Broccoli

Adding the broccoli too early can result in a mushy texture. Always add it in the last 30 minutes to preserve its vibrant color and slight crunch.

3. Balance the Sweet and Savory Flavors

Taste the sauce before adding it to the slow cooker. If you prefer a sweeter profile, add a little more brown sugar. For a more savory kick, increase the soy sauce or add a splash of rice vinegar.

4. Garnish for Extra Flavor

A sprinkle of sesame seeds and sliced green onions enhances both the taste and presentation of the dish. You can also drizzle a little extra sesame oil for added depth.

Why This Recipe Deserves a Spot in Your Rotation

Slow cooker beef and broccoli is more than just an easy meal—it’s a dish that delivers comfort, nutrition, and restaurant-quality flavor without the hassle. Whether you’re cooking for your family, meal-prepping for the week, or simply craving a satisfying dinner, this recipe is sure to become a favorite.

Every time I make it, I’m reminded of the simple joy that comes with a warm, home-cooked meal after a long day. It’s a reminder that good food doesn’t have to be complicated—sometimes, the best dishes are the ones that let time and patience do the work for you.

So the next time you’re looking for a stress-free, crowd-pleasing dinner, give this slow cooker beef and broccoli a try. It just might become your new go-to comfort meal.

aiting

Slow Cooker Beef and Broccoli: A Comforting Classic for Busy Days

This slow cooker beef and broccoli is a fuss-free, flavorful dish that delivers tender beef, crisp broccoli, and a rich, savory sauce. Perfect for busy days, this dish pairs beautifully with steamed rice for a complete meal!
 
Prep Time 10 minutes
Cook Time 5 hours
Total Time 5 hours 10 minutes
Servings: 6 servings
Course: Main Course
Cuisine: Asian-inspired

Ingredients
  

  • 2 lbs sirloin steak – sliced into thin 4-inch-long strips
  • Salt and black pepper – to taste
  • 1 cup soy sauce – regular or low-sodium
  • 1 cup beef broth – or beef stock for a richer flavor
  • ¼ cup oyster sauce – for depth and umami
  • cup brown sugar – light or dark
  • 1 tbsp sesame oil – adds a nutty aroma
  • 1 tsp garlic – minced fresh or jarred
  • 3 tbsp cornstarch – thickens the sauce
  • 1 head of broccoli – cut into florets
  • Sesame seeds – for garnish

Method
 

  1. Step 1: Prep the Beef
  2. Place the sliced sirloin steak at the bottom of a 7-quart slow cooker.
  3. Season with salt and black pepper to taste.
Step 2: Mix the Sauce
  1. In a bowl, whisk together soy sauce, beef broth, oyster sauce, brown sugar, sesame oil, and garlic.
  2. Add cornstarch and whisk until smooth with no lumps.
Step 3: Let the Magic Happen
  1. Pour the sauce over the beef, ensuring even coverage.
Cover and cook:
  1. Low heat: 5–6 hours
  2. High heat: 3.5–5 hours
  3. Stir occasionally for even cooking.
Step 4: Add the Broccoli
  1. Thirty minutes before serving, toss in the broccoli florets.
  2. Stir occasionally to coat them in the sauce and let them steam until tender.
Step 5: Serve and Savor
  1. Using tongs, serve the beef and broccoli over steamed white rice, brown rice, or jasmine rice.
  2. Garnish with sesame seeds (and sliced green onions if desired).

Notes

  • If you prefer extra tender beef, marinate it in 1 tablespoon of cornstarch mixed with a bit of soy sauce before adding it to the slow cooker.
  • For a thicker sauce, remove ½ cup of the cooking liquid, mix with an additional 1 tbsp cornstarch, and stir it back into the slow cooker 15 minutes before serving.
  • Serve with extra oyster sauce or soy sauce for added richness.

Chocolate Almond Macarons: Irresistibly Easy Recipe!

Ah, the sweet allure of Chocolate Almond Macarons! Just saying the name makes my taste buds dance with anticipation. These delightful treats are like little bites of heaven, perfect for those moments when you need a quick pick-me-up or want to impress your loved ones with a homemade dessert. As a busy mom myself, I know how precious time can be, and this recipe is a lifesaver. It’s simple, yet sophisticated, and the combination of rich chocolate and nutty almond is simply irresistible. Let’s dive into this culinary adventure together!

Why You’ll Love This Chocolate Almond Macarons

These Chocolate Almond Macarons are a dream come true for any dessert lover. They’re not just delicious; they’re a breeze to make, even on a hectic day. The crispy shell paired with a luscious chocolate ganache filling is a match made in heaven. Plus, they’re gluten-free, making them a delightful treat for everyone. Trust me, once you try them, you’ll be hooked!

Ingredients Chocolate Almond Macarons

Creating these Chocolate Almond Macarons is a delightful journey, and it all starts with the right ingredients. Here’s what you’ll need:

  • Almond Flour: This gives the macarons their signature nutty flavor and smooth texture. You can make your own by grinding blanched almonds.
  • Powdered Sugar: Essential for that melt-in-your-mouth sweetness and smoothness. It blends seamlessly with almond flour.
  • Cocoa Powder: Adds a rich chocolatey depth. Opt for unsweetened for the best balance.
  • Egg Whites: The backbone of the macaron shell. Ensure they’re at room temperature for optimal whipping.
  • Granulated Sugar: Helps stabilize the meringue, giving the macarons their structure.
  • Vanilla Extract: A hint of vanilla enhances the overall flavor profile. Feel free to experiment with other extracts.
  • Pinch of Salt: Balances the sweetness and enhances the chocolate flavor.
  • Chocolate Ganache: The luscious filling that ties everything together. You can use store-bought or homemade.

For exact quantities, scroll to the bottom of the article where you can print the full recipe. Happy baking!

How to Make Chocolate Almond Macarons

Preparing the Dry Ingredients

First things first, let’s get those dry ingredients ready. Sift together the almond flour, powdered sugar, and cocoa powder into a bowl. This step is crucial for achieving that smooth, delicate texture we all love in macarons. Trust me, you don’t want any lumps sneaking into your batter!

Whipping the Egg Whites

Now, onto the egg whites. In a separate bowl, beat the egg whites with a pinch of salt until they become foamy. Gradually add the granulated sugar, a little at a time, while continuing to beat. You’re aiming for stiff peaks here, which should take about 5-7 minutes. This is where the magic happens, as the meringue gives the macarons their structure.

Combining Ingredients

With your meringue ready, it’s time to gently fold in the dry ingredients. Do this in three additions, being careful not to deflate the mixture. The batter should flow like lava and form a ribbon when lifted. This consistency is key to perfect macarons, so take your time and be gentle.

Piping the Macarons

Transfer the batter to a piping bag fitted with a round tip. Pipe small circles, about 1.5 inches in diameter, onto parchment-lined baking sheets. Leave some space between each macaron to allow for spreading. Once piped, tap the baking sheets firmly on the counter to release any air bubbles. Let them sit at room temperature for 30-60 minutes until a skin forms on the surface.

Baking and Cooling

Preheat your oven to 300°F (150°C). Bake the macarons for 15-20 minutes, rotating the sheets halfway through. You’ll know they’re done when they’ve risen and formed a ‘foot.’ Allow them to cool completely on the baking sheets before gently removing them. Patience is key here, as removing them too soon can lead to breakage.

Filling the Macarons

Once cooled, it’s time to fill these beauties. Pair the macarons by size and fill them with chocolate ganache. Press them together gently to avoid cracking. The ganache acts as the glue, holding the macarons together and adding that luscious, chocolatey goodness. And there you have it, your homemade Chocolate Almond Macarons are ready to enjoy!

Tips for Success

  • Ensure your egg whites are at room temperature for better volume.
  • Sift dry ingredients twice to avoid lumps in the batter.
  • Use a kitchen scale for precise measurements.
  • Let piped macarons rest until a skin forms to prevent cracking.
  • Rotate baking sheets halfway through for even baking.
  • Practice patience; macarons improve with practice!

Equipment Needed

  • Mixing Bowls: Essential for combining ingredients. Use any size that fits your needs.
  • Electric Mixer: A hand or stand mixer works for whipping egg whites.
  • Sifter: Ensures a smooth batter by removing lumps.
  • Piping Bag: A ziplock bag with a snipped corner can substitute.
  • Baking Sheets: Line with parchment paper for easy removal.
  • Oven Thermometer: Ensures accurate baking temperature.

Variations

  • Flavor Twist: Add a teaspoon of almond or peppermint extract to the meringue for a unique flavor profile.
  • Colorful Macarons: Use gel food coloring to tint the batter for festive occasions.
  • Nut-Free Option: Substitute almond flour with sunflower seed flour for a nut-free version.
  • Vegan Macarons: Replace egg whites with aquafaba (chickpea brine) for a plant-based treat.
  • Different Fillings: Try fruit preserves, flavored buttercream, or caramel for a delightful surprise.

Serving Suggestions

  • Tea Time Delight: Pair these macarons with a cup of Earl Grey or chamomile tea for a soothing afternoon treat.
  • Elegant Presentation: Arrange on a tiered dessert stand for a sophisticated touch at gatherings.
  • Wine Pairing: Enjoy with a glass of sweet dessert wine like Moscato for a luxurious experience.
  • Fruit Garnish: Serve alongside fresh berries to complement the rich chocolate flavor.

FAQs about Chocolate Almond Macarons

How do I prevent my macarons from cracking?

Cracking can be a common issue, but it’s easily avoidable. Ensure your piped macarons rest until a skin forms on the surface before baking. This step is crucial as it helps prevent cracking. Also, check your oven temperature with an oven thermometer to ensure it’s accurate, as too high a temperature can cause cracks.

Can I make Chocolate Almond Macarons without almond flour?

Yes, you can substitute almond flour with sunflower seed flour for a nut-free version. The texture and flavor will be slightly different, but it’s a great alternative for those with nut allergies. Just make sure to sift the sunflower seed flour well to avoid any lumps.

Why are my macarons hollow?

Hollow macarons can result from overmixing the batter or baking at too high a temperature. Aim for a batter that flows like lava and forms a ribbon when lifted. Also, ensure your oven is at the correct temperature by using an oven thermometer. Rotating the baking sheets halfway through can also help achieve even baking.

How long can I store Chocolate Almond Macarons?

These delightful treats can be stored in an airtight container in the refrigerator for up to a week. For longer storage, freeze them for up to three months. Just make sure to bring them to room temperature before serving to enjoy their full flavor and texture.

Can I use different fillings for my macarons?

Absolutely! While chocolate ganache is a classic choice, feel free to experiment with other fillings like fruit preserves, flavored buttercream, or caramel. Each filling offers a unique twist, making your macarons even more delightful and versatile.

Final Thoughts

Embarking on the journey of making Chocolate Almond Macarons is like crafting little pieces of edible art. Each step, from whipping the egg whites to piping the batter, is a dance of precision and creativity. The joy of biting into that first macaron, with its delicate shell and rich ganache, is truly unparalleled. These treats are more than just a dessert; they’re a testament to the magic of baking. Whether you’re sharing them with loved ones or savoring them solo, these macarons are sure to bring a smile to your face and warmth to your heart. Happy baking!

Chocolate Almond Macarons
Paul

Chocolate Almond Macarons: Irresistibly Easy Recipe!

These Chocolate Almond Macarons are a delightful treat, combining the rich flavors of chocolate and almond in a delicate, crispy shell filled with luscious chocolate ganache.
Prep Time 30 minutes
Cook Time 20 minutes
Total Time 1 hour 30 minutes
Servings: 24 macarons (12 filled pairs)
Course: Dessert
Cuisine: French
Calories: 150

Ingredients
  

  • 1 ½ cups almond flour
  • 1 ½ cups powdered sugar
  • ½ cup cocoa powder
  • 4 large egg whites room temperature
  • 1 cup granulated sugar
  • ½ teaspoon vanilla extract
  • Pinch of salt
  • Chocolate ganache for filling

Method
 

  1. Preheat your oven to 300°F (150°C) and line two baking sheets with parchment paper.
  2. In a bowl, sift together the almond flour, powdered sugar, and cocoa powder. Set aside.
  3. In a separate bowl, beat the egg whites with a pinch of salt until foamy. Gradually add the granulated sugar while continuing to beat until stiff peaks form. This should take about 5-7 minutes.
  4. Gently fold the dry ingredients into the meringue in three additions, being careful not to deflate the mixture. The batter should flow like lava and form a ribbon when lifted.
  5. Transfer the batter to a piping bag fitted with a round tip. Pipe small circles (about 1.5 inches in diameter) onto the prepared baking sheets, leaving space between each macaron.
  6. Tap the baking sheets firmly on the counter to release any air bubbles. Let the macarons sit at room temperature for 30-60 minutes until a skin forms on the surface.
  7. Bake in the preheated oven for 15-20 minutes, rotating the sheets halfway through. The macarons are done when they have risen and formed a ‘foot.’
  8. Allow the macarons to cool completely on the baking sheets before gently removing them.
  9. Once cooled, pair the macarons and fill them with chocolate ganache. Press them together gently.

Notes

  • For a flavored macaron, add 1 teaspoon of your favorite extract (like almond or peppermint) to the meringue before folding in the dry ingredients.
  • Experiment with different fillings such as fruit preserves, buttercream, or flavored ganaches to create a variety of macarons.

Easter Memories and the Magic of Rice Krispie Treat Eggs

Easter has always been a time of joy, renewal, and, of course, sweet treats. I vividly remember waking up on Easter morning as a child, running down the stairs, and finding a basket brimming with colorful candies, chocolate bunnies, and—my absolute favorite—homemade Rice Krispie treats shaped like Easter eggs. My grandmother made them every year, pressing the warm, gooey marshmallow mixture into egg-shaped molds with her flour-dusted hands. She would let me help, my tiny fingers sticking together as I eagerly packed the mixture into plastic eggs, impatiently waiting for them to set.

The best part? Biting into one and discovering a hidden surprise inside—a little chocolate candy or a peanut butter filling that made each bite even more special. These weren’t just desserts; they were edible memories, infused with love, tradition, and the simple pleasure of creating something beautiful.

Now, I carry on that tradition with my own family, making these Rice Krispie Treat Easter Eggs every year. The process is simple, but the result is magical—crispy, chewy, and bursting with pastel colors that brighten up any Easter table. Whether you’re making them for your kids, a holiday gathering, or just to relive childhood nostalgia, these treats bring a sense of warmth and togetherness that only homemade desserts can provide.

Why Rice Krispie Treat Easter Eggs Are a Must-Try

Easter is filled with classic treats, from chocolate eggs to sugar-dusted marshmallow Peeps. But there’s something uniquely delightful about Rice Krispie Treat Easter Eggs. Here’s why they deserve a spot in your Easter traditions:

1. A Fun and Festive Twist on a Classic

Traditional Rice Krispie treats are delicious on their own, but shaping them into eggs adds a playful touch. The bright colors make them eye-catching, and their soft, chewy texture pairs perfectly with a light crunch. They’re great for Easter baskets, dessert tables, or even as a fun activity for kids.

2. Quick and Easy to Make

Unlike baked goods that require precise measurements and oven time, these treats come together in under an hour. A few ingredients, a microwave, and a little molding, and you’ve got a batch of festive Easter goodies.

3. Customizable for Every Taste

One of the best parts of this recipe is its versatility. You can change up the colors, add mix-ins, drizzle with melted chocolate, or even hide small candies inside. The possibilities are endless, allowing you to make them as simple or extravagant as you like.

4. Perfect for Kids and Family Bonding

Easter is all about family, and this recipe is a wonderful way to get kids involved in the kitchen. They’ll love mixing the colors, shaping the eggs, and—of course—eating them! Plus, since the recipe doesn’t involve an oven or sharp tools, it’s a safe and fun activity for little hands.

5. A Nostalgic Treat That Brings Back Memories

For many of us, Rice Krispie treats are tied to childhood. Whether they remind you of school bake sales, sleepovers, or holiday gatherings, they carry a sense of nostalgia. Making them in the shape of Easter eggs adds another layer of sentimental value, making them a wonderful tradition to pass down through generations.

Creative Variations to Try

While the classic Rice Krispie Treat Easter Eggs are delicious on their own, here are some creative ways to take them up a notch:

Chocolate-Dipped Krispie Eggs

Leave the crispy eggs uncolored and dip half of each one in melted chocolate or colored candy melts. Sprinkle with crushed nuts, coconut flakes, or festive sprinkles for added texture and flavor.

Stuffed Surprise Eggs

Before sealing the plastic eggs, press a small chocolate candy, mini marshmallow, or even a peanut butter cup into the center. When someone takes a bite, they’ll get a sweet surprise inside!

Speckled Egg Design

For a more natural look, mix in a tiny amount of cocoa powder or black gel food coloring with a toothbrush to “speckle” the eggs. This creates a beautiful, pastel speckled effect similar to real Easter eggs.

Marbled Easter Eggs

Instead of fully mixing in the food coloring, lightly swirl multiple colors together before pressing the mixture into the molds. This will create a marbled effect that looks artistic and unique.

Cereal Mix-Ins

Experiment with different types of cereals—fruity-flavored rice cereal for a burst of flavor, or even a chocolate version for a richer taste.

Drizzle and Decorate

Once the eggs have set, drizzle them with white or dark chocolate and top with crushed candies, edible glitter, or shredded coconut for a decorative touch.

Ingredients – The Magic Mix

  • Butter – 6 tablespoons, divided
  • Marshmallows – 5 cups, divided (mini works best)
  • Rice Krispie Cereal – 6 cups, divided
  • Gel Food Coloring – Neon pink, neon green, purple, and yellow
  • Plastic Easter Eggs – For shaping the treats
  • Non-Stick Spray – To prevent sticking

Directions – Crafting the Crispy Eggs

  1. Melt the Marshmallow Magic
    • In a microwave-safe bowl, melt 1 ½ tablespoons of butter with 1 ¼ cups of marshmallows for 45 seconds.
    • Stir until smooth, then add 3 drops of your chosen gel food coloring and mix well.
  2. Coat the Crunch
    • Stir 1 ½ cups of Rice Krispie cereal into the marshmallow mixture until fully coated.
  3. Shape the Eggs
    • Lightly spray the plastic Easter eggs with non-stick spray.
    • Tightly pack the coated cereal into each side of the egg mold, close it, and let it sit for 10 minutes.
  4. Unveil the Treats
    • Gently remove the treats from the plastic eggs and set them aside.
  5. Repeat and Customize
    • Repeat steps 1-4 for each color variation.

Nutritional Breakdown – A Sweet Indulgence (Per batch total)

  • Calories: 2435 kcal
  • Carbohydrates: 448g
  • Protein: 19g
  • Fat: 72g
  • Saturated Fat: 44g
  • Trans Fat: 3g
  • Cholesterol: 181mg
  • Sodium: 1785mg
  • Potassium: 249mg
  • Fiber: 1g
  • Sugar: 232g
  • Vitamin A: 13275 IU
  • Vitamin C: 106mg
  • Calcium: 40mg
  • Iron: 52mg

These colorful, crispy Easter eggs are an easy and fun treat that adds a festive touch to any celebration!

Frequently Asked Questions (FAQs)

Can I make these treats without plastic eggs?

Yes! If you don’t have plastic Easter eggs, simply grease your hands with butter or non-stick spray and shape the treats into eggs by hand. You can also use silicone molds for a more uniform shape.

How do I prevent the marshmallow mixture from sticking?

The key is to lightly coat your hands and any molds with non-stick cooking spray or butter before handling the mixture. This prevents it from sticking and makes shaping much easier.

Can I make these ahead of time?

Absolutely! These treats stay fresh for up to 3 days when stored in an airtight container at room temperature. If you need them to last longer, refrigerate them, but be sure to let them sit at room temperature for a few minutes before serving to soften.

Can I use regular marshmallows instead of mini marshmallows?

Yes, but they may take longer to melt. If using large marshmallows, cut them into smaller pieces for easier melting.

How do I make them extra gooey?

For softer, extra-gooey treats, slightly increase the amount of marshmallows and butter in the recipe. This will make them more chewy and less firm.

Are these treats gluten-free?

Rice Krispie cereal is often made with malt flavoring, which contains gluten. However, there are gluten-free rice cereals available that can be used as a substitute. Always check ingredient labels if making these for someone with dietary restrictions.

Can I add different flavors?

Yes! A few drops of vanilla extract, almond extract, or even a pinch of cinnamon can enhance the flavor. If you’re a chocolate lover, mix in cocoa powder or chocolate chips for a richer taste.

What’s the best way to store leftovers?

Keep them in an airtight container at room temperature for up to three days. If stacking them, place a sheet of wax paper between layers to prevent sticking. Avoid refrigerating for long periods, as they can become too hard.

Conclusion – A Treat That Creates Lasting Memories

Easter is a time of celebration, and what better way to make it extra special than with homemade Rice Krispie Treat Easter Eggs? They’re more than just a dessert; they’re a symbol of creativity, tradition, and family bonding. Whether you’re making them with your children, surprising a loved one, or simply indulging in a nostalgic treat, these crispy, marshmallowy delights are guaranteed to bring smiles.

So gather your ingredients, put on some festive music, and start shaping your own batch of colorful Easter eggs. And who knows? Maybe years from now, someone in your family will be carrying on this same tradition, remembering the joy of making these sweet treats together.

aiting

Easter Memories and the Magic of Rice Krispie Treat Eggs

These Festive Rice Krispie Easter Eggs are a fun and colorful twist on the classic treat! Shaped like Easter eggs and made with marshmallows, crispy rice cereal, and vibrant gel food coloring, they bring a pop of springtime cheer to any celebration. Perfect for kids and adults alike, these no-bake treats are easy to make and great for Easter gatherings!
Prep Time 10 minutes
Cook Time 5 minutes
Total Time 15 minutes
Servings: 12 Easter egg treats
Course: Dessert
Cuisine: American

Ingredients
  

  • 6 tablespoons butter divided
  • 5 cups marshmallows divided (mini marshmallows work best)
  • 6 cups Rice Krispie cereal divided
  • Neon gel food coloring pink, green, purple, yellow
  • Plastic Easter eggs for shaping the treats
  • Non-stick spray to prevent sticking

Method
 

  1. Melt the Marshmallow Magic
  2. In a microwave-safe bowl, melt 1 ½ tablespoons of butter with 1 ¼ cups of marshmallows for 45 seconds.
  3. Stir until smooth, then add 3 drops of your chosen gel food coloring and mix well.
  4. Coat the Crunch
  5. Stir 1 ½ cups of Rice Krispie cereal into the marshmallow mixture until fully coated.
  6. Shape the Eggs
  7. Lightly spray the plastic Easter eggs with non-stick spray.
  8. Tightly pack the coated cereal into each side of the egg mold, close it, and let it sit for 10 minutes.
  9. Unveil the Treats
  10. Gently remove the treats from the plastic eggs and set them aside.
  11. Repeat and Customize
  12. Repeat steps 1-4 for each color variation.

Notes

  • For extra fun, drizzle melted chocolate or sprinkles over the finished eggs.
  • If you don’t have plastic eggs, shape the treats by hand using buttered hands or silicone molds.
  • Store in an airtight container at room temperature for up to 3 days.
  • Mix and match colors for a vibrant Easter display!

Easter Trifle: A Show-Stopping Dessert for Spring Celebrations

A Sweet Tradition That Brings Back Memories

Growing up, Easter was always one of the most magical times of the year. It wasn’t just about the egg hunts, the pastel-colored dresses, or the joyful gatherings—it was about the food, the traditions, and the moments we shared as a family. My grandmother, the heart of our holiday celebrations, had a way of making every dish feel like it had a story. Among all the treats on the dessert table, her layered trifle always stole the show.

She never followed a written recipe; instead, she built it layer by layer, improvising as she went. One year, she let me help, showing me how to carefully place each ingredient to create a perfect balance of flavors and textures. The cake was always light and fluffy, the pudding rich and creamy, and the whipped topping soft as a cloud. But what made it truly special was the final touch—tiny chocolate eggs nestled into edible candy grass, turning the trifle into a festive centerpiece.

This Easter Trifle recipe is inspired by those cherished memories. It’s not just a dessert; it’s an experience, a tradition waiting to be passed down. Whether you’re making it for a large family gathering or a small intimate brunch, this dessert will bring color, joy, and nostalgia to your Easter table.

Why You’ll Love This Easter Trifle

Trifles are one of the easiest yet most visually stunning desserts you can make. They require minimal effort but deliver maximum impact, making them a perfect addition to any holiday spread. Here’s why this Easter Trifle will become a favorite in your home:

  • Beautiful Presentation: The layers of pastel-colored pudding, fluffy whipped topping, and cake cubes make this dessert look like a work of art.
  • Simple and Quick to Assemble: After baking the cake, the assembly takes just minutes. No complicated techniques required.
  • Customizable: This recipe can be easily adapted for different flavors, colors, and occasions.
  • Great for Make-Ahead Prep: Since it needs time to chill, it’s an ideal dessert to prepare in advance, freeing up time on the day of your celebration.
  • Loved by All Ages: Kids and adults alike will be drawn to the fun, colorful layers and the whimsical candy nests on top.

Ingredients – A Symphony of Sweetness

  • Cake Layer:
    • 1 box Funfetti or Rainbow Chip cake mix (prepared according to package directions)
    • 1 cup water
    • ½ cup vegetable oil
    • 3 eggs
  • Creamy Pudding Layers:
    • 2 (3.4-ounce) packages vanilla instant pudding mix
    • 4 cups whole milk
    • Blue & pink food coloring
  • Whipped Topping:
    • 1 (16-ounce) container Cool Whip (thawed)
  • Festive Decorations:
    • Edible candy grass (green, pink, and blue)
    • Easter egg candies (Whoppers Robin Eggs, Cadbury Eggs, large jellybeans, or similar)

Directions – Crafting a Show-Stopping Dessert

Step 1: Bake and Cut the Cake

  • Bake the cake according to package instructions, using parchment paper for easy removal.
  • Let it cool for 10 minutes, then transfer to a cooling rack.
  • Once fully cooled, cut into 1-inch cubes.

Step 2: Prepare the Pudding

  • Make the pudding following package directions, keeping each batch in a separate bowl.
  • Add a few drops of blue food coloring to one bowl and pink to the other, adjusting for desired pastel shades.

Step 3: Assemble the Layers

  • Place half of the cake cubes at the bottom of a trifle dish, filling gaps tightly.
  • Spoon the blue pudding over the cake, then add 2 cups of whipped topping.
  • Repeat the layers with the remaining cake, pink pudding, and the rest of the whipped topping.
  • Refrigerate for at least 4 hours.

Step 4: Create the Candy Bird Nests

  • Roll small bundles of edible candy grass tightly into nest shapes (2 of each color).
  • Before serving, place 6 nests on top of the trifle, adding 3 candy eggs in each.

Step 5: Serve and Enjoy!

  • Keep refrigerated until ready to serve. Best enjoyed within 3 days.

Nutritional Breakdown – A Sweet Treat in Every Bite

  • Calories: 210 per serving
  • Carbohydrates: 33g
  • Protein: 5g
  • Fat: 6g (Saturated Fat: 3g)
  • Sugar: 23g
  • Cholesterol: 49mg
  • Sodium: 285mg
  • Calcium: 113mg

This Easter Trifle is as delightful to look at as it is to eat—layered with vibrant colors, fluffy textures, and a whimsical nest topping. Perfect for spring celebrations!

Frequently Asked Questions

1. Can I Make This Trifle Ahead of Time?

Yes! In fact, it’s best to assemble it at least four hours in advance so the flavors can meld together. If you’re short on time, you can bake the cake and make the pudding a day before, then assemble the trifle the next day.

2. How Do I Keep the Layers Clean and Defined?

To ensure your layers stay distinct and visually appealing:

  • Pack the cake pieces tightly in each layer to prevent the pudding from seeping through.
  • Spread each pudding and whipped topping layer evenly with a spoon or spatula before adding the next layer.
  • Chill the trifle for a few hours before serving to help set the layers.

3. Can I Make Mini Trifles Instead of One Large Dish?

Absolutely! Mini trifles are a great option for individual servings. Use small dessert glasses or mason jars and layer the ingredients just as you would in a larger trifle dish.

4. What Other Cake Flavors Can I Use?

While Funfetti or Rainbow Chip cake adds a festive touch, you can substitute it with other light-colored cakes such as:

  • Lemon Cake – Adds a bright, citrusy contrast.
  • White Cake or Vanilla Cake – A neutral base that lets the pastel pudding shine.
  • Angel Food Cake – A light and airy option that absorbs the flavors beautifully.

5. What Other Pudding Flavors Can I Try?

Vanilla pudding is a great base for adding food coloring, but you can also use:

  • White Chocolate Pudding – For an even creamier texture and more vibrant colors.
  • Banana Pudding – Adds a subtle fruitiness.
  • Lemon Pudding – Pairs wonderfully with a lemon cake base.

6. Can I Use Homemade Whipped Cream Instead of Store-Bought?

Yes! If you prefer homemade, whip 1 cup of heavy whipping cream with ⅓ cup powdered sugar and 1 teaspoon of vanilla extract until stiff peaks form. Keep it refrigerated until ready to use.

7. What Are Some Fun Variations for Other Holidays?

One of the best things about trifles is their versatility. You can switch up the colors and decorations to match different holidays:

  • Christmas: Use red and green pudding layers and decorate with holiday sprinkles.
  • Fourth of July: Try red and blue pudding with white whipped topping and fresh berries.
  • Halloween: Use orange and purple pudding and top with candy pumpkins or spooky sprinkles.

Pro Tips for the Perfect Easter Trifle

  • Chill Before Serving: This allows the flavors to blend and makes the trifle easier to scoop without falling apart.
  • Use a Serrated Knife to Cut the Cake: This helps maintain clean edges and prevents the cake from crumbling too much.
  • Keep the Cake Cubed, Not Crumbled: Cubes hold their shape better and make the trifle more structured.
  • Tightly Roll the Candy Grass Nests: If they’re too loose, they might not hold their shape. Use the whipped topping to help secure them in place.
  • Store Properly: Keep the trifle covered in the refrigerator. It’s best enjoyed within three days.

Making It a Family Tradition

What makes this Easter Trifle truly special isn’t just its appearance or taste—it’s the experience of making it together. If you have little ones at home, let them join in the fun! Kids love helping mix the pudding, layering the ingredients, and, of course, decorating with candy eggs.

Growing up, my siblings and I always argued over who got to place the final candy eggs on top. It was a small, simple moment, but looking back, those are the memories that stand out. Now, as I make this trifle with my own family, I see the same excitement in my children’s eyes. The best part is, no matter how you layer it, no matter if a little pudding spills over or a nest isn’t perfectly shaped, the joy of making it together is what truly matters.

Final Thoughts

Easter is a time of renewal, celebration, and togetherness, and nothing brings people together quite like a beautiful, delicious dessert. This Easter Trifle is more than just a sweet treat—it’s a tradition waiting to be created. With its vibrant layers, whimsical candy nests, and rich flavors, it’s bound to become a staple on your holiday table.

So, as you gather with loved ones this Easter, take a moment to savor not just the flavors but the memories being made. Whether you’re sharing stories, laughing over an egg hunt, or simply enjoying a quiet moment with a spoonful of trifle, these are the moments that make holidays truly special.

aiting

Easter Trifle: A Show-Stopping Dessert for Spring Celebrations

This Easter Trifle Delight is a stunning and festive dessert layered with pastel-colored vanilla pudding, fluffy cake cubes, and creamy whipped topping. Topped with edible candy grass and Easter egg candies, this whimsical treat is as fun to make as it is to eat. Perfect for spring celebrations and guaranteed to be a showstopper at your Easter gathering!
Prep Time 20 minutes
Cook Time 25 minutes
Total Time 4 hours 45 minutes
Servings: 12 servings
Course: Dessert
Cuisine: American

Ingredients
  

Cake Layer:
  • 1 box Funfetti or Rainbow Chip cake mix prepared according to package directions
  • 1 cup water
  • ½ cup vegetable oil
  • 3 eggs
Creamy Pudding Layers:
  • 2 3.4-ounce packages vanilla instant pudding mix
  • 4 cups whole milk
  • Blue & pink food coloring
Whipped Topping:
  • 1 16-ounce container Cool Whip (thawed)
Festive Decorations:
  • Edible candy grass green, pink, and blue
  • Easter egg candies Whoppers Robin Eggs, Cadbury Eggs, large jellybeans, or similar

Method
 

  1. Bake and Cut the Cake
  2. Bake the cake according to package instructions, using parchment paper for easy removal.
  3. Let it cool for 10 minutes, then transfer to a cooling rack.
  4. Once fully cooled, cut into 1-inch cubes.
  5. Prepare the Pudding
  6. Make the pudding following package directions, keeping each batch in a separate bowl.
  7. Add a few drops of blue food coloring to one bowl and pink food coloring to the other, adjusting for desired pastel shades.
  8. Assemble the Layers
  9. Place half of the cake cubes at the bottom of a trifle dish, filling gaps tightly.
  10. Spoon the blue pudding over the cake, then add 2 cups of whipped topping.
  11. Repeat the layers with the remaining cake, pink pudding, and the rest of the whipped topping.
  12. Refrigerate for at least 4 hours to allow flavors to meld.
  13. Create the Candy Bird Nests
  14. Roll small bundles of edible candy grass tightly into nest shapes (2 of each color).
  15. Before serving, place 6 nests on top of the trifle, adding 3 candy eggs in each.
  16. Serve and Enjoy!
  17. Keep refrigerated until ready to serve. Best enjoyed within 3 days.

Notes

  • Make it ahead! This trifle tastes even better after a full day in the fridge.
  • Switch up the colors! Try pastel yellow or lavender pudding for variety.
  • Use homemade whipped cream instead of Cool Whip for a fresher taste.
  • Swap cake flavors – white cake, yellow cake, or even chocolate cake work well!

Beef Skillet Enchiladas: A Comforting, One-Pan Dinner for Busy Nights

A Taste of Home in Every Bite

There’s something about a home-cooked meal that brings a sense of warmth and comfort, especially after a long, exhausting day. For me, skillet enchiladas have always been a symbol of togetherness. I still remember coming home from school to the aroma of sizzling ground beef, rich spices, and melted cheese filling our kitchen. My mother, always short on time but never short on creativity, would throw together a dish using whatever ingredients we had on hand. This dish wasn’t just food; it was love served in a pan.

Now, as an adult balancing work, family, and the chaos of daily life, I find myself reaching for that same simplicity. This Beef Skillet Enchilada recipe is one of my go-to meals when I need something delicious but don’t have the energy for complicated steps. It has all the flavors of traditional enchiladas—savory, cheesy, and slightly spicy—without the fuss of rolling tortillas or baking multiple dishes. It’s the kind of meal that makes you slow down, savor the moment, and appreciate the magic of good food.

If you’re looking for a meal that will bring your family together while keeping your cooking time minimal, this dish is for you.

Why This Recipe Works for Everyone

One-Pan Simplicity

Who doesn’t love a meal that comes together in just one pan? Traditional enchiladas require multiple steps, including filling, rolling, and baking tortillas. This recipe eliminates the extra work while keeping all the incredible flavors intact. Everything cooks in a single skillet, making both preparation and cleanup a breeze.

Packed with Wholesome Ingredients

Despite its indulgent taste, this recipe is well-balanced with lean protein, fiber-rich beans, and fresh vegetables. The combination of bell peppers, zucchini, and corn adds a nutritious boost while enhancing the texture of the dish. Plus, the use of corn tortillas keeps it naturally gluten-free.

Crowd-Pleasing Comfort Food

This dish is a guaranteed hit with both adults and kids. The cheesy, saucy goodness is hard to resist, and the ability to customize toppings—like avocado, sour cream, and jalapeños—makes it perfect for different tastes.

Great for Meal Prepping

Leftovers reheat beautifully, making this a fantastic meal to prepare ahead of time. Whether you enjoy it for lunch the next day or freeze portions for future meals, it remains just as flavorful and satisfying.

The Flavor-Packed Cast: Ingredients

  • Cooking Essentials: Cooking spray, ½ tsp olive oil
  • Protein Power: 1 lb lean ground beef
  • Vibrant Veggies: 1 small red bell pepper (diced), 1 medium zucchini (diced), 6 green onions (thinly sliced, white/light green and dark green parts separated)
  • Bold Seasonings: 1 tsp chili powder, 1 tsp ground cumin, ½ tsp garlic powder, ½ tsp dried oregano
  • Saucy Goodness: 2 cups (15-16 oz) jarred or canned red enchilada sauce
  • Hearty Additions: 1 (15 oz) can black beans (rinsed and drained), 1 cup frozen corn
  • Tortilla Magic: 8 (6-inch) corn tortillas (cut into 6 wedges, about 8 oz total)
  • Cheesy Indulgence: 1 ½ cups shredded Mexican blend cheese, divided
  • Toppings Galore: Green onion tops, fresh cilantro, sour cream, diced tomatoes, diced or sliced avocado

Sizzling Simplicity: Directions

  1. Preheat & Prep – Heat oven to 425°F. Place a large oven-safe skillet over medium-high heat, spray with cooking spray, and add olive oil.
  2. Sauté & Brown – Add ground beef, bell pepper, zucchini, and white/light green parts of green onions. Cook for about 8 minutes, breaking up the beef, until the meat is browned and the zucchini is tender.
  3. Spice It Up – Turn off the heat and stir in chili powder, garlic powder, oregano, enchilada sauce, black beans, corn, and ½ cup of shredded cheese.
  4. Tortilla Toss – Gently fold in the tortilla wedges, making sure they are evenly coated in the sauce.
  5. Cheese, Please! – Sprinkle the remaining 1 cup of shredded cheese over the top.
  6. Bake to Perfection – Place the skillet in the oven and bake for 10-15 minutes until the cheese is melted and bubbly.
  7. The Grand Finale – Remove from the oven and garnish with green onion tops, cilantro, diced tomatoes, and avocado. Serve with sour cream if desired.

Nutritional Breakdown: The Healthy Scoop

  • Serving Size: 1 ½ cups
  • Calories: 371
  • Fat: 12g (Saturated Fat: 5g)
  • Sodium: 882mg
  • Carbohydrates: 39g (Fiber: 8g, Sugar: 5g)
  • Protein: 31g
  • Cholesterol: 62mg

This one-pan wonder is packed with bold flavors, wholesome ingredients, and easy clean-up—perfect for busy weeknights!

Common Questions About Beef Skillet Enchiladas

Can I use a different type of meat?

Absolutely! While this recipe calls for lean ground beef, you can easily substitute ground turkey, chicken, or even a plant-based alternative for a vegetarian version. If using turkey or chicken, consider adding a bit more seasoning to enhance the depth of flavor.

What’s the best way to store leftovers?

Once cooled, store leftovers in an airtight container in the refrigerator for up to 5 days. To reheat, simply warm the enchiladas in a skillet over medium heat or in the microwave until heated through.

Can I freeze this dish?

Yes! This recipe freezes well. Store it in a freezer-safe container for up to three months. When ready to eat, thaw it overnight in the refrigerator and reheat in the oven or on the stovetop.

Can I make this recipe dairy-free?

Yes! Simply swap the shredded cheese for a dairy-free alternative or omit it altogether. You can also use dairy-free sour cream or avocado as a creamy topping.

Are there any low-carb options?

If you’re watching your carb intake, consider using low-carb tortillas or reducing the number of tortillas in the recipe. You could also serve the beef mixture over cauliflower rice for a lower-carb alternative.

What can I serve with skillet enchiladas?

This dish is satisfying on its own, but if you want to round out the meal, consider serving it with:

  • A side salad with a tangy lime vinaigrette
  • Spanish or cilantro-lime rice
  • Guacamole and chips
  • Roasted vegetables for extra fiber and nutrients

Tips for Making the Best Skillet Enchiladas

Use Fresh Ingredients

While this recipe is flexible, fresh vegetables and high-quality enchilada sauce make a huge difference in the final taste. If time allows, try making homemade enchilada sauce for a richer, more authentic flavor.

Layer the Flavors

To get the best depth of flavor, let the spices toast slightly in the pan before adding the sauce. This simple trick enhances the warmth and complexity of the dish.

Don’t Overload the Skillet

It can be tempting to add extra tortillas or cheese, but balance is key. Too many tortillas can absorb too much sauce, leaving the dish dry. Stick to the recommended amount for the best texture.

Make It Your Own

One of the best things about this recipe is its versatility. Customize it by:

  • Adding sautéed mushrooms or spinach for extra veggies
  • Mixing in a little chorizo for a smoky, spicy kick
  • Using green enchilada sauce instead of red for a different flavor profile

The Heart of the Dish: A Story in Every Bite

Food has an incredible way of bringing people together. Whether it’s a casual weeknight dinner or a cozy weekend meal, this Beef Skillet Enchiladas recipe is a reminder that great meals don’t have to be complicated.

For me, this dish carries memories of laughter around the dinner table, late-night leftovers after movie marathons, and the simple joy of watching my loved ones savor each bite. It’s proof that sometimes, the most comforting meals come from the easiest recipes.

So, the next time you find yourself craving something hearty and delicious, let this skillet enchilada recipe be your go-to. It’s a dish that doesn’t just feed your body but warms your soul—one skillet, one bite, and one memory at a time.

aiting

Beef Skillet Enchiladas: A Comforting, One-Pan Dinner for Busy Nights

This one-pan beef skillet enchiladas dish is a game-changer for busy weeknights! Packed with bold Mexican flavors, lean ground beef, vibrant veggies, and gooey cheese, this skillet meal delivers comfort and convenience in every bite. With just one pan and 30 minutes, you can enjoy a wholesome, satisfying meal that’s perfect for the whole family.
Prep Time 10 minutes
Cook Time 20 minutes
Total Time 30 minutes
Servings: 4 servings
Course: Main Dish
Cuisine: Mexican-inspired

Ingredients
  

Cooking Essentials:
  • Cooking spray
  • ½ tsp olive oil
Protein Power:
  • 1 lb lean ground beef
Vibrant Veggies:
  • 1 small red bell pepper diced
  • 1 medium zucchini diced
  • 6 green onions thinly sliced (white/light green and dark green parts separated)
Bold Seasonings:
  • 1 tsp chili powder
  • 1 tsp ground cumin
  • ½ tsp garlic powder
  • ½ tsp dried oregano
Saucy Goodness:
  • 2 cups 15-16 oz jarred or canned red enchilada sauce
Hearty Additions:
  • 1 15 oz can black beans, rinsed and drained
  • 1 cup frozen corn
Tortilla Magic:
  • 8 6-inch corn tortillas, cut into 6 wedges (about 8 oz total)
Cheesy Indulgence:
  • 1 ½ cups shredded Mexican blend cheese divided
Toppings Galore:
  • Green onion tops
  • Fresh cilantro
  • Sour cream
  • Diced tomatoes
  • Diced or sliced avocado

Method
 

  1. Preheat & Prep – Heat oven to 425°F. Place a large oven-safe skillet over medium-high heat, spray with cooking spray, and add olive oil.
  2. Sauté & Brown – Add ground beef, bell pepper, zucchini, and white/light green parts of green onions. Cook for about 8 minutes, breaking up the beef, until the meat is browned and the zucchini is tender.
  3. Spice It Up – Turn off the heat and stir in chili powder, garlic powder, oregano, enchilada sauce, black beans, corn, and ½ cup of shredded cheese.
  4. Tortilla Toss – Gently fold in the tortilla wedges, making sure they are evenly coated in the sauce.
  5. Cheese, Please! – Sprinkle the remaining 1 cup of shredded cheese over the top.
  6. Bake to Perfection – Place the skillet in the oven and bake for 10-15 minutes until the cheese is melted and bubbly.
  7. The Grand Finale – Remove from the oven and garnish with green onion tops, cilantro, diced tomatoes, and avocado. Serve with sour cream if desired.

Notes

  • For a spicier kick, add chopped jalapeños or a pinch of cayenne.
  • Swap ground beef for ground turkey or shredded chicken for a lighter version.
  • Leftovers store well! Keep in an airtight container in the fridge for up to 3 days.
  • Pair with a side of rice, refried beans, or a crisp salad.

No-Bake Chocolate Éclair Cake: A Timeless Dessert for Every Occasion

A Sweet Memory in Every Bite

There’s something magical about certain desserts—they don’t just satisfy your sweet tooth, but they take you on a nostalgic journey. For me, the first time I had No-Bake Chocolate Éclair Cake was at a summer family gathering. My grandmother, who always had a knack for whipping up the most indulgent treats, placed a chilled dish on the table, covered in a glossy layer of chocolate frosting. I remember the way the first forkful melted in my mouth—the creamy vanilla pudding, the softened graham crackers, the rich chocolate topping—it was perfection.

Years later, as I searched for simple yet impressive desserts to make for my own family, this no-bake wonder resurfaced. It wasn’t just about the taste; it was about the feeling. The ease of preparation, the anticipation of waiting for it to set, and the joy of sharing it with loved ones made it an instant favorite in my household.

This cake is proof that you don’t need fancy techniques or complicated ingredients to create something extraordinary. Whether you’re making it for a potluck, a birthday, or just a quiet night in, it’s a dessert that never disappoints.

Why This Cake Stands Out

No Oven? No Problem!
The beauty of this dessert lies in its simplicity. No baking, no complicated steps—just a few ingredients layered together and left to chill. Whether you’re a seasoned baker or someone who avoids the oven altogether, this recipe is effortlessly achievable.

Layers of Flavor and Texture
Each layer plays a crucial role in making this cake a masterpiece. The graham crackers soften into a cake-like consistency, the vanilla pudding brings creaminess, and the rich chocolate frosting ties everything together with a decadent finish.

A Dessert for Any Season
While this cake is a summer staple due to its refreshing chilled texture, it’s also a hit during the holidays. No matter the occasion, it fits right in—a light yet satisfying treat after a heavy meal or a fun alternative to traditional cakes.

Tips for the Perfect No-Bake Éclair Cake

Choose Quality Ingredients
Since this recipe has only a handful of ingredients, their quality matters. Opt for good-quality instant pudding, fresh milk, and real butter for the frosting. If possible, use homemade whipped cream instead of store-bought whipped topping for an even richer taste.

Let It Chill Completely
Patience is key. The longer the cake sits in the refrigerator, the better the graham crackers absorb the pudding, creating a soft, cake-like texture. Overnight chilling is ideal for the best results.

Enhance the Flavor

  • Add a teaspoon of espresso powder to the chocolate frosting for a deeper, bolder chocolate taste.
  • Sprinkle crushed nuts on top for a bit of crunch.
  • Swap vanilla pudding for chocolate or banana-flavored pudding for a fun twist.

Serving Suggestions

  • Pair It With Fresh Fruits: Serve with fresh strawberries, raspberries, or bananas for a refreshing contrast.
  • Garnish with Style: A drizzle of caramel sauce, a dusting of cocoa powder, or chocolate shavings can take this cake to the next level.
  • Serve It Frozen: For a firmer, ice cream-like consistency, pop the cake in the freezer for an hour before serving.

Ingredients

For the Pudding Layer:

  • 2 (3.4 oz) boxes instant vanilla pudding mix
  • 3 cups cold milk
  • 1 (8 oz) container whipped topping, thawed
  • 1 box graham crackers

For the Chocolate Frosting:

  • 1/3 cup unsweetened cocoa powder
  • 1 cup powdered sugar
  • 2 tablespoons unsalted butter, melted
  • 3 tablespoons milk
  • 1 teaspoon vanilla extract

Directions

1. Whip Up the Creamy Pudding:

  • In a large bowl, whisk together the vanilla pudding mix and cold milk until smooth and thick.
  • Gently fold in the whipped topping to create a luscious, creamy mixture.

2. Build the Layers of Goodness:

  • In a 9×13-inch baking dish, arrange a single layer of graham crackers to cover the bottom.
  • Spread half of the pudding mixture evenly over the graham crackers.
  • Add another layer of graham crackers, followed by the remaining pudding mixture.
  • Finish with a final layer of graham crackers on top.

3. Create the Chocolatey Crown:

  • In a medium bowl, whisk together cocoa powder and powdered sugar.
  • Stir in melted butter, milk, and vanilla extract until smooth. Add more milk if needed for spreadability.

4. Bring It All Together:

  • Spread the chocolate frosting evenly over the top layer of graham crackers.
  • Cover and refrigerate for at least 4 hours, preferably overnight, to allow the layers to set.

5. Slice and Savor:

  • Once chilled, cut into 12 servings and enjoy this effortless, decadent dessert.

Nutritional Breakdown (Per Serving)

  • Calories: ~250-300
  • Carbohydrates: ~40g
  • Protein: ~3g
  • Fat: ~10g
  • Sugar: ~25g
  • Fiber: ~1g

This no-bake delight is perfect for any occasion—easy to make, rich in flavor, and guaranteed to impress!

Frequently Asked Questions

Can I Make This Cake Ahead of Time?
Yes! In fact, making it a day in advance is recommended. The extra time allows the layers to set properly, making it even more delicious.

How Long Does It Last in the Fridge?
If stored in an airtight container, this cake can last up to 4 days in the refrigerator. However, it’s best enjoyed within the first 48 hours when the texture is at its peak.

Can I Freeze It?
Yes, you can freeze it for up to two months. Just wrap it tightly with plastic wrap and aluminum foil to prevent freezer burn. Thaw in the refrigerator overnight before serving.

What If I Don’t Have Graham Crackers?
You can substitute graham crackers with digestive biscuits, vanilla wafers, or even ladyfingers. Each alternative will give the cake a slightly different texture but will work just as well.

Can I Make It Dairy-Free?
Absolutely! Swap out the milk for almond, oat, or coconut milk, and use a dairy-free whipped topping. For the frosting, choose a dairy-free butter alternative.

How Can I Make It Less Sweet?
If you prefer a less sweet dessert, reduce the powdered sugar in the frosting or use unsweetened cocoa powder to balance the sweetness. You can also opt for sugar-free pudding mix and graham crackers.

Can I Add Other Flavors?
Yes! A layer of sliced bananas or strawberries between the pudding layers adds freshness. A drizzle of peanut butter or caramel sauce between the layers can make it even more indulgent.

A Dessert That Feels Like Home

There’s something about No-Bake Chocolate Éclair Cake that makes it more than just a dessert—it’s a reminder of childhood treats, family gatherings, and the joy of sharing good food with loved ones.

Its simplicity is its charm, proving that some of the best desserts don’t require hours in the kitchen. Whether you’re serving it at a party or enjoying a slice with a cup of coffee on a quiet afternoon, this cake has a way of making any moment feel special.

So the next time you need a dessert that’s both easy and unforgettable, let this no-bake delight take center stage. After all, the best recipes aren’t just about taste—they’re about the memories they create.

aiting

No-Bake Chocolate Éclair Cake: A Timeless Dessert for Every Occasion

This No-Bake Chocolate Eclair Cake is the ultimate easy-to-make, crowd-pleasing dessert! Layers of creamy vanilla pudding, buttery graham crackers, and rich chocolate frosting come together effortlessly in this decadent treat. With no oven required, this is the perfect make-ahead dessert for potlucks, holidays, or whenever you’re craving something sweet!
Prep Time 15 minutes
Total Time 4 hours 15 minutes
Servings: 12 servings
Course: Dessert
Cuisine: American

Ingredients
  

For the Pudding Layer:
  • 2 3.4 oz boxes instant vanilla pudding mix
  • 3 cups cold milk
  • 1 8 oz container whipped topping, thawed
  • 1 box graham crackers
For the Chocolate Frosting:
  • 1/3 cup unsweetened cocoa powder
  • 1 cup powdered sugar
  • 2 tablespoons unsalted butter melted
  • 3 tablespoons milk
  • 1 teaspoon vanilla extract
  •  

Method
 

Whip Up the Creamy Pudding:
  1. In a large bowl, whisk together the vanilla pudding mix and cold milk until smooth and thick.
  2. Gently fold in the whipped topping to create a luscious, creamy mixture.
Build the Layers of Goodness:
  1. In a 9×13-inch baking dish, arrange a single layer of graham crackers to cover the bottom.
  2. Spread half of the pudding mixture evenly over the graham crackers.
  3. Add another layer of graham crackers, followed by the remaining pudding mixture.
  4. Finish with a final layer of graham crackers on top.
Create the Chocolatey Crown:
  1. In a medium bowl, whisk together cocoa powder and powdered sugar.
  2. Stir in melted butter, milk, and vanilla extract until smooth. Add more milk if needed for spreadability.
Bring It All Together:
  1. Spread the chocolate frosting evenly over the top layer of graham crackers.
  2. Cover and refrigerate for at least 4 hours, preferably overnight, to allow the layers to set.
Slice and Savor:
  1. Once chilled, cut into 12 servings and enjoy this effortless, decadent dessert.

Notes

  • For a twist, swap vanilla pudding for chocolate or butterscotch pudding.
  • Chilling overnight enhances the texture and flavor, making it even more delicious.
  • Store leftovers in the fridge for up to 3 days.
  • Try adding a sprinkle of crushed nuts or mini chocolate chips on top for extra texture!

Easter Magic Poke Cake: A Colorful Tradition for Sweet Memories

A Family Tradition Baked with Love

Easter has always been a special time in our family, a season that brings warmth, laughter, and a table filled with delightful treats. Growing up, my grandmother made sure Easter dessert was as vibrant as the holiday itself. One of her most cherished creations was a colorful poke cake, a dessert that felt like pure joy on a plate. I remember standing on my tiptoes, watching her pour pudding into tiny holes in the cake, mesmerized by how the rich vanilla filling would seep into the fluffy layers.

The best part? Cutting into the cake and seeing the beautiful swirl of pastel colors hidden inside. It felt like discovering an Easter egg within the dessert itself! Now, years later, I carry on the tradition with my own family, adding my twist by using neon-colored batter and a luscious whipped topping. This Easter poke cake is more than just a dessert—it’s a symbol of togetherness, a dish that gathers everyone around the table, sharing stories and making memories.

If you’re looking for a show-stopping, yet simple, Easter dessert that brings smiles to both kids and adults, this cake is the perfect choice. It’s a fun and festive way to celebrate, and I can promise you—once you make it, it will become a tradition in your home, too.

Why This Cake is a Must for Easter

Easter desserts come in all forms, from chocolate bunnies to homemade pies, but few treats capture the joy of the holiday quite like this Easter poke cake. Here’s why it deserves a spot on your dessert table:

  • Visually Stunning – The colorful marbled cake makes every slice look like a piece of edible art.
  • Easy to Make – Using a boxed cake mix saves time, while a few simple tricks make it taste like it’s made from scratch.
  • Moist and Flavorful – The pudding filling keeps the cake incredibly moist, ensuring every bite is rich and delicious.
  • Crowd-Pleaser – Whether serving kids or adults, everyone will love the light, fluffy texture and creamy topping.
  • Customizable – You can easily switch up the colors, flavors, or decorations to make it uniquely yours.

If you want a dessert that’s just as fun to make as it is to eat, this is the one!

Easter Magic Poke Cake Recipe

A colorful and creamy Easter dessert that will be the highlight of your celebration! This poke cake combines a marbled vanilla cake, rich pudding, and a fluffy whipped topping for a treat that’s as fun to make as it is to eat.

Ingredients: The Essentials for Sweet Success

  • 1 box Betty Crocker French Vanilla Cake Mix
  • 3 eggs
  • 1 cup water
  • ½ cup vegetable oil
  • 1 (3.4 oz) box Jello Instant Vanilla or French Vanilla Pudding
  • 3 cups milk
  • 1 carton Cool Whip
  • 1 box McCormick Neon Colors Food Coloring (pink, purple, and green)

Directions: Step Into Dessert Delight

  1. Prepare the Batter – In a large bowl, mix the cake mix, eggs, water, and vegetable oil until smooth.
  2. Divide & Color – Separate the batter into three bowls and color each with pink, purple, and green food coloring.
  3. Marble the Cake – Transfer each colored batter into separate Ziploc bags, snip the ends, and squeeze them into a greased 9×13 pan, rotating colors for a marbled effect.
  4. Bake to Perfection – Bake at 350°F for about 30 minutes or until a toothpick inserted in the center comes out clean.
  5. Poke & Fill – Using the back of a wooden spoon, poke holes in the cake about every 1½ inches.
  6. Mix the Pudding – In a separate bowl, whisk the milk and instant pudding mix for about 5 minutes until it begins to set.
  7. Soak the Cake – Pour the pudding mixture over the cake, ensuring it fills the holes.
  8. Top it Off – Spread Cool Whip evenly over the cake and decorate with Easter sprinkles (optional).
  9. Chill & Serve – Refrigerate for at least an hour before serving to let the flavors meld.

Nutritional Highlights (Per Serving Estimate)

  • Calories: ~250-300
  • Carbohydrates: ~40g
  • Fat: ~10g
  • Protein: ~4g
  • Sugar: ~30g

Enjoy this festive, creamy, and colorful Easter treat with your loved ones!

FAQs: Everything You Need to Know About Easter Poke Cake

1. What is a poke cake?

A poke cake is a classic dessert where holes are poked into a freshly baked cake, allowing a filling—such as pudding, gelatin, or sweetened condensed milk—to seep into the cake, creating a moist and flavorful texture. This technique infuses extra flavor while also giving the cake a unique look when sliced.

2. Can I make this cake from scratch instead of using a box mix?

Absolutely! If you prefer a homemade vanilla cake, you can substitute your favorite from-scratch recipe. Just make sure the batter yields enough for a standard 9×13-inch pan, and follow the same steps for baking and poking holes.

3. What food coloring works best for vibrant colors?

Gel food coloring is highly recommended because it provides bold colors without affecting the texture of the cake. Brands like McCormick Neon Gels work great for achieving bright Easter shades. If you only have liquid food coloring, you may need to use a bit more to achieve the same effect.

4. Does the cake need to be refrigerated?

Yes! Because this cake contains pudding and whipped topping, it must be stored in the refrigerator. Keep it chilled until ready to serve, and store leftovers in an airtight container for up to four days.

5. Can I prepare this cake in advance?

Definitely! In fact, making it a day ahead can enhance the flavors as the pudding has more time to soak into the cake. Simply prepare the cake, cover it tightly, and refrigerate until serving time. Just add sprinkles or decorations right before serving to keep them fresh.

6. Can I use different flavors of pudding?

Yes! While vanilla pudding is classic, you can experiment with other flavors like white chocolate, cheesecake, or even lemon pudding for a tangy twist. Each one will bring a slightly different taste while maintaining the same creamy texture.

7. What toppings can I add?

This cake is delicious as-is, but if you want to enhance it, consider adding:

  • Toasted coconut flakes for a tropical touch.
  • Crushed pastel candies for extra crunch.
  • Drizzled white chocolate for an elegant finish.
  • Fresh berries to add a burst of natural sweetness.

8. Can I make this into cupcakes instead of a sheet cake?

Yes! Simply divide the batter into cupcake liners and bake as directed for cupcakes. After baking, poke small holes into each cupcake and fill them with pudding before topping with whipped cream.

How to Make It Your Own

One of the best things about this Easter poke cake is how easily it can be customized. Here are a few creative ways to make it uniquely yours:

1. Try a Different Cake Base

Instead of vanilla cake, try using:

  • Lemon cake for a citrusy, refreshing flavor.
  • Strawberry cake to add a fruity touch.
  • Chocolate cake for a colorful take on a classic combination.

2. Create a Surprise Inside

For an extra fun touch, hide small candies inside the cake! After poking the holes, place mini chocolate eggs or crushed cookies inside before adding the pudding. This creates a fun surprise when slicing into the cake.

3. Add a Drizzle

For added decadence, drizzle caramel, white chocolate, or even a berry sauce over the top before serving. It enhances both flavor and presentation.

4. Go All-Out with Decorations

Easter is all about bright colors, so don’t hold back when decorating! Try using pastel M&Ms, bunny-shaped candies, or even edible gold dust for a magical touch.

Conclusion: A Dessert to Remember

Easter isn’t just about the candy-filled baskets or the festive egg hunts—it’s about creating moments that last a lifetime. This Easter poke cake is more than just a dessert; it’s a tradition in the making. From the moment you mix the colorful batter to the first delicious bite, this cake is a celebration of joy, family, and the simple pleasures that bring us together.

Whether you’re making it for a gathering, a special treat for your kids, or simply to indulge in something sweet, this cake promises to be the highlight of your Easter celebration. Give it a try, and you just might find yourself starting a new family tradition, one slice at a time.

aiting

Easter Magic Poke Cake: A Colorful Tradition for Sweet Memories

A colorful and creamy Easter dessert that will be the highlight of your celebration! This poke cake combines a marbled vanilla cake, rich pudding, and a fluffy whipped topping for a treat that’s as fun to make as it is to eat.
Prep Time 15 minutes
Cook Time 1 hour
Total Time 1 hour 45 minutes
Servings: 12 servings
Course: Dessert
Cuisine: American

Ingredients
  

  • 1 box Betty Crocker French Vanilla Cake Mix
  • 3 eggs
  • 1 cup water
  • ½ cup vegetable oil
  • 1 3.4 oz box Jello Instant Vanilla or French Vanilla Pudding
  • 3 cups milk
  • 1 carton Cool Whip
  • 1 box McCormick Neon Colors Food Coloring pink, purple, and green

Method
 

  1. Step 1: Prepare the Batter
  2. In a large bowl, mix the cake mix, eggs, water, and vegetable oil until smooth.
Step 2: Divide & Color
  1. Separate the batter into three bowls and color each with pink, purple, and green food coloring.
Step 3: Marble the Cake
  1. Transfer each colored batter into separate Ziploc bags, snip the ends, and squeeze them into a greased 9×13 pan, rotating colors for a marbled effect.
Step 4: Bake to Perfection
  1. Bake at 350°F for about 30 minutes or until a toothpick inserted in the center comes out clean.
Step 5: Poke & Fill
  1. Using the back of a wooden spoon, poke holes in the cake about every 1½ inches.
Step 6: Mix the Pudding
  1. In a separate bowl, whisk the milk and instant pudding mix for about 5 minutes until it begins to set.
Step 7: Soak the Cake
  1. Pour the pudding mixture over the cake, ensuring it fills the holes.
Step 8: Top it Off
  1. Spread Cool Whip evenly over the cake and decorate with Easter sprinkles (optional).
Step 9: Chill & Serve
  1. Refrigerate for at least an hour before serving to let the flavors meld.

Notes

  • For a more festive touch, use pastel-colored pudding.
  • Substitute homemade whipped cream for Cool Whip if preferred.
  • Store leftovers covered in the refrigerator for up to 3 days.
A vibrant, creamy, and irresistible Easter Magic Poke Cake that’s sure to bring joy to your holiday table!