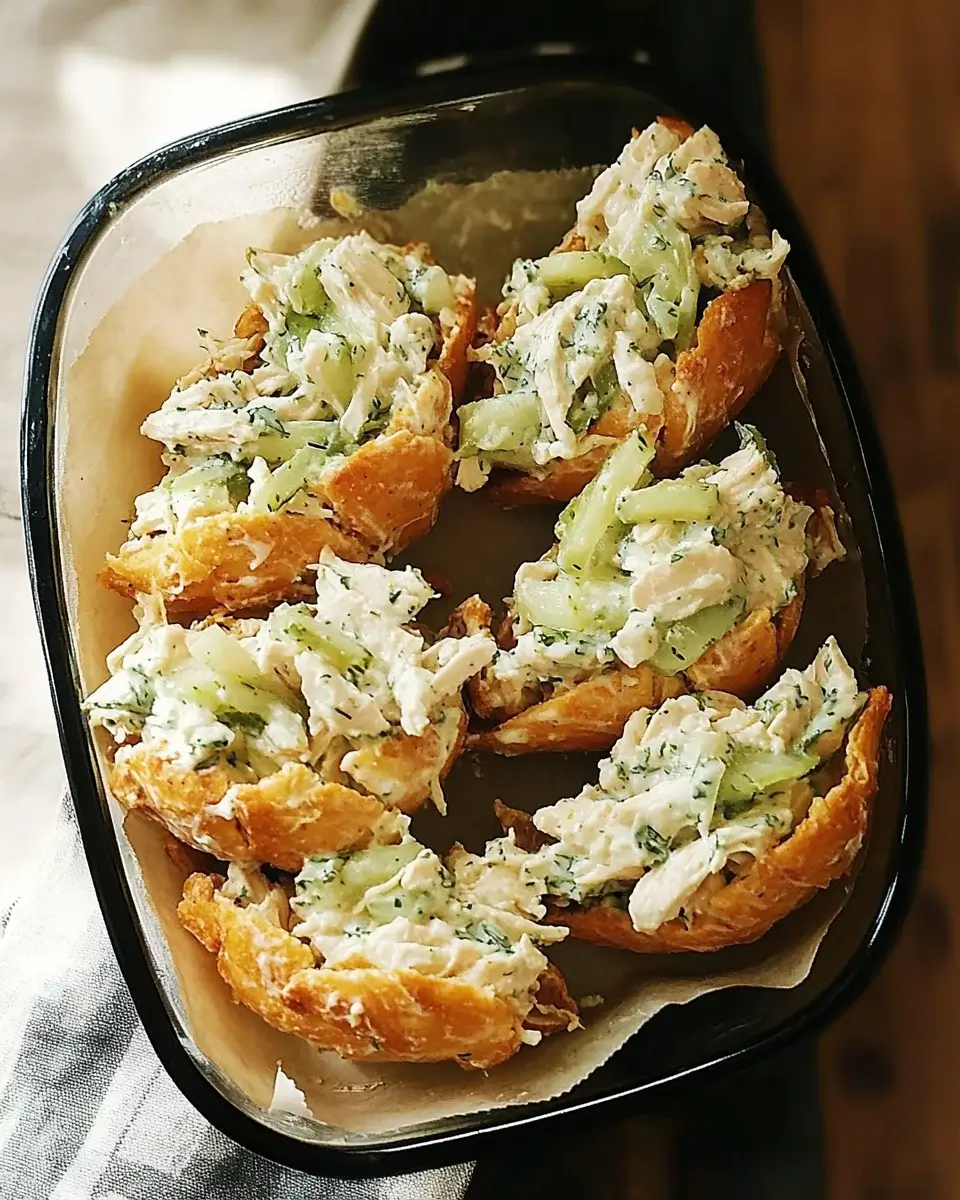
Dill Pickle Chicken Salad Recipe is a must-try dish!

Dill Pickle Chicken Salad is a delightful twist on the classic chicken salad. This recipe combines tender chicken with the tangy crunch of dill pickles, creating a dish that is both refreshing and satisfying. Whether you’re looking for a quick lunch or a tasty dinner option, this salad is sure to please. It’s easy to prepare and packed with flavor, making it a favorite among many.

What Makes Dill Pickle Chicken Salad Unique?

What sets Dill Pickle Chicken Salad apart is its unique flavor profile. The combination of creamy mayonnaise and Greek yogurt provides a rich base, while the dill pickles add a zesty crunch. This salad is not just about taste; it also offers a delightful texture that keeps each bite interesting. The addition of fresh dill enhances the overall flavor, making it a standout dish. Plus, it’s versatile! You can enjoy it on its own, in a sandwich, or even as a topping for crackers.

The Popularity of Dill Pickle Chicken Salad

Dill Pickle Chicken Salad has gained popularity for several reasons. First, it’s a great way to use leftover chicken, making it a practical choice for busy cooks. Second, the flavor combination appeals to many palates, especially those who love pickles. Social media has also played a role in its rise, with food bloggers and influencers sharing their own takes on this delicious recipe. As a result, it has become a go-to dish for picnics, potlucks, and family gatherings. People love how easy it is to prepare and how it can be customized to suit individual tastes.

Ingredients for Dill Pickle Chicken Salad Recipe

To create a delicious Dill Pickle Chicken Salad, you’ll need a few simple ingredients. Each component plays a vital role in achieving the perfect balance of flavors and textures. Here’s what you’ll need:

  • 3 cups cooked chicken: You can use shredded or diced chicken. Leftover rotisserie chicken works great!
  • 1 cup dill pickles: Diced dill pickles add that signature tangy crunch.
  • 1/2 cup mayonnaise: This creamy base helps bind the salad together.
  • 1/4 cup plain Greek yogurt: Adds creaminess and a slight tang, making the salad lighter.
  • 1 tablespoon Dijon mustard: This ingredient gives a subtle kick and depth of flavor.
  • 1 tablespoon apple cider vinegar: A splash of acidity brightens the dish.
  • 1 teaspoon garlic powder: For a hint of savory flavor.
  • 1 teaspoon onion powder: Adds a mild onion taste without overpowering the salad.
  • 1/2 teaspoon salt: Enhances all the flavors in the salad.
  • 1/4 teaspoon black pepper: A touch of spice to round out the taste.
  • 1/4 cup fresh dill (optional): Fresh herbs elevate the flavor and add a pop of color.
  • Lettuce leaves or sandwich bread: For serving, choose your favorite option!

These ingredients come together to create a delightful dish that is both satisfying and refreshing. Feel free to adjust the quantities based on your taste preferences or dietary needs. Now that you have your ingredients ready, let’s move on to the preparation steps!

Step-by-Step Preparation of Dill Pickle Chicken Salad Recipe

Now that you have gathered all your ingredients, it’s time to dive into the preparation of your Dill Pickle Chicken Salad. This step-by-step guide will help you create a delicious dish that everyone will love. Let’s get started!

Step 1: Preparing the Chicken

First, you need to prepare the chicken. If you have leftover cooked chicken, that’s perfect! Simply shred or dice it into bite-sized pieces. If you’re starting with raw chicken, you can boil or bake it until fully cooked. Once cooked, let it cool before shredding or dicing. This step is crucial because warm chicken can make the salad soggy. After preparing the chicken, set it aside in a large mixing bowl.

Step 2: Chopping the Vegetables

Next, it’s time to chop the vegetables. Take your dill pickles and dice them into small pieces. The smaller the pieces, the better they will mix with the chicken. If you’re adding any additional vegetables, like celery or bell peppers, chop those as well. This adds a nice crunch to your salad. Once everything is chopped, add the diced pickles to the bowl with the chicken.

Step 3: Mixing the Ingredients

Now, let’s mix the ingredients! In a separate bowl, combine the mayonnaise, Greek yogurt, Dijon mustard, apple cider vinegar, garlic powder, onion powder, salt, and black pepper. Whisk these ingredients together until smooth. This creamy dressing is what brings all the flavors together. Once mixed, pour the dressing over the chicken and pickles in the large bowl. Gently stir everything together until the chicken and pickles are well coated with the dressing.

Step 4: Adding the Dressing

If you’re using fresh dill, now is the time to fold it into the salad. This adds a burst of flavor and freshness. After mixing, cover the bowl with plastic wrap or a lid and place it in the refrigerator. Chilling the salad for at least 30 minutes allows the flavors to meld beautifully. This step is essential for a delicious Dill Pickle Chicken Salad!

Once chilled, your salad is ready to serve. You can enjoy it on a bed of lettuce or as a filling in a sandwich. The choice is yours!

Variations of Dill Pickle Chicken Salad Recipe

While the classic Dill Pickle Chicken Salad is delicious on its own, there are many ways to customize it. By adding different ingredients or changing the way you serve it, you can create a unique dish every time. Let’s explore some alternative ingredients and serving styles that can elevate your salad experience!

Alternative Ingredients to Consider

Experimenting with alternative ingredients can add new flavors and textures to your Dill Pickle Chicken Salad. Here are some ideas:

  • Chopped Celery: Adding 1/2 cup of chopped celery gives a satisfying crunch.
  • Bell Peppers: Diced bell peppers can add sweetness and color to your salad.
  • Hard-Boiled Eggs: Chopped hard-boiled eggs can enhance the protein content and creaminess.
  • Avocado: Diced avocado adds a creamy texture and healthy fats.
  • Hot Sauce: For those who enjoy a spicy kick, a teaspoon of hot sauce can do wonders.
  • Chopped Nuts: Walnuts or pecans can introduce a delightful crunch and nutty flavor.

Feel free to mix and match these ingredients based on your preferences. The beauty of this salad is its versatility!

Different Serving Styles

How you serve your Dill Pickle Chicken Salad can make a big difference in presentation and enjoyment. Here are some creative serving ideas:

  • On a Bed of Greens: Serve the salad on a bed of fresh lettuce or spinach for a light meal.
  • In a Wrap: Use a tortilla or lettuce wrap for a fun, portable option.
  • As a Sandwich: Spread the salad between slices of your favorite bread for a hearty sandwich.
  • With Crackers: Serve it as a dip with your favorite crackers for a tasty snack.
  • Stuffed Avocado: Hollow out an avocado and fill it with the chicken salad for a healthy twist.

These serving styles not only enhance the visual appeal but also make the meal more enjoyable. Try out different combinations to find your favorite way to enjoy this delightful dish!

Cooking Note for Dill Pickle Chicken Salad Recipe

When preparing your Dill Pickle Chicken Salad, there are a few cooking notes to keep in mind. These tips will help ensure that your salad turns out perfectly every time. Let’s take a closer look at some important aspects of the cooking process.

First, using cooked chicken is essential. You can opt for leftover chicken, rotisserie chicken, or even poached chicken. The key is to ensure that the chicken is fully cooked and cooled before mixing it with the other ingredients. Warm chicken can lead to a soggy salad, which is not what you want!

Next, the quality of your ingredients matters. Fresh dill pickles and high-quality mayonnaise will enhance the overall flavor of your salad. If you prefer a lighter option, using low-fat mayonnaise or Greek yogurt can be a great alternative. Just remember that the creaminess of the dressing is what binds the salad together, so don’t skimp on it!

Additionally, feel free to adjust the seasoning to your taste. If you love garlic, add a bit more garlic powder. If you prefer a tangier flavor, increase the amount of apple cider vinegar. Cooking is all about personal preference, so make this recipe your own!

Lastly, don’t rush the chilling process. Allowing the salad to sit in the refrigerator for at least 30 minutes is crucial. This time lets the flavors meld together, resulting in a more delicious and cohesive dish. So, be patient and let your Dill Pickle Chicken Salad shine!

Serving Suggestions for Dill Pickle Chicken Salad Recipe

Once your Dill Pickle Chicken Salad is ready, it’s time to think about how to serve it. The way you present your dish can enhance the overall experience. Here are some suggestions for the best accompaniments and creative serving ideas that will make your meal even more enjoyable!

Best Accompaniments

Pairing your Dill Pickle Chicken Salad with the right sides can elevate your meal. Here are some great accompaniments to consider:

  • Fresh Fruit: A side of sliced apples, grapes, or berries adds a sweet contrast to the savory salad.
  • Chips: Serve with potato chips or tortilla chips for a crunchy texture that complements the salad.
  • Pickles: For pickle lovers, serving extra dill pickles on the side enhances the flavor experience.
  • Vegetable Sticks: Carrot and celery sticks provide a healthy crunch and are perfect for dipping.
  • Soup: A light soup, like tomato or vegetable, pairs well for a comforting meal.

These accompaniments not only add variety but also balance the flavors of your Dill Pickle Chicken Salad. Choose what you love and enjoy a delightful meal!

Creative Serving Ideas

Serving your Dill Pickle Chicken Salad in unique ways can make it even more appealing. Here are some creative ideas to try:

  • In a Lettuce Wrap: Use large lettuce leaves to create a fresh and low-carb wrap. This is a fun and healthy option!
  • Stuffed Tomatoes: Hollow out ripe tomatoes and fill them with the chicken salad for a colorful presentation.
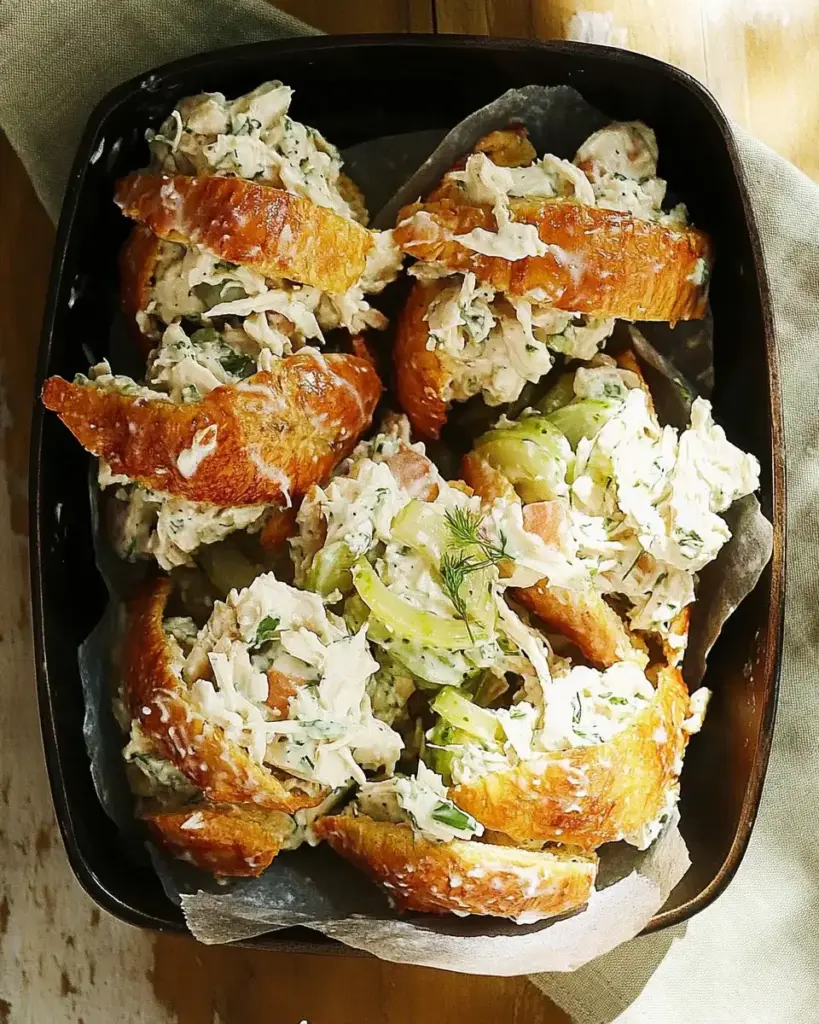
  • On a Croissant: For a touch of elegance, serve the salad in a flaky croissant for a delicious sandwich.
  • As a Dip: Serve the salad in a bowl with pita chips or veggie sticks for a fun appetizer at parties.
  • In a Mason Jar: Layer the salad in a mason jar for a portable lunch option that looks great!

These creative serving ideas not only make your meal visually appealing but also add a fun twist to the dining experience. Feel free to mix and match these suggestions to find what works best for you!
Tips for Perfecting Your Dill Pickle Chicken Salad Recipe

Storage Tips

Storing your Dill Pickle Chicken Salad properly is key to maintaining its freshness and flavor. Here are some helpful storage tips:

  • Use an Airtight Container: After preparing your salad, transfer it to an airtight container. This helps keep the salad fresh and prevents it from absorbing other odors in the fridge.
  • Refrigerate Promptly: Always refrigerate your chicken salad within two hours of making it. This helps prevent bacterial growth and keeps the salad safe to eat.
  • Consume Within 3-4 Days: For the best taste and quality, enjoy your Dill Pickle Chicken Salad within 3 to 4 days. After this time, the flavors may start to fade, and the texture can change.
  • Keep Dressing Separate: If you plan to store leftovers, consider keeping the dressing separate. This helps maintain the salad’s crunchiness and prevents it from becoming soggy.

By following these storage tips, you can enjoy your Dill Pickle Chicken Salad for several days without losing its deliciousness!

Making Ahead of Time

Making your Dill Pickle Chicken Salad ahead of time can save you effort on busy days. Here are some tips for preparing it in advance:

  • Prepare the Ingredients: You can chop the chicken and vegetables a day in advance. Store them separately in the fridge until you’re ready to mix everything together.
  • Make the Dressing Ahead: Whisk together the dressing ingredients and store them in a jar. This way, you can quickly combine everything when you’re ready to serve.
  • Chill Before Serving: If you make the salad a few hours ahead, let it chill in the refrigerator. This allows the flavors to meld beautifully, enhancing the overall taste.
  • Perfect for Meal Prep: This salad is great for meal prep! Portion it into individual containers for easy grab-and-go lunches throughout the week.

By making your Dill Pickle Chicken Salad ahead of time, you can enjoy a delicious and convenient meal whenever you need it!

Breakdown of Time for Dill Pickle Chicken Salad Recipe

Understanding the time required for each step of the Dill Pickle Chicken Salad recipe can help you plan your cooking efficiently. Here’s a breakdown of the time you’ll need for preparation, cooking, and chilling.

Prep Time

The prep time for this delightful salad is quite short. You’ll need about 15 to 20 minutes to gather your ingredients, chop the vegetables, and prepare the chicken. If you’re using leftover chicken, this time can be even less! Just make sure everything is ready before you start mixing.

Cooking Time

Since this recipe primarily uses cooked chicken, the cooking time is minimal. If you need to cook the chicken, it will take about 20 to 30 minutes, depending on your method. Boiling or baking are both great options. Once the chicken is cooked, allow it to cool before shredding or dicing.

Total Time

In total, you can expect to spend about 35 to 50 minutes on the entire process, including prep and cooking time. Don’t forget to factor in the chilling time of at least 30 minutes. This step is crucial for allowing the flavors to meld together, making your Dill Pickle Chicken Salad even more delicious!

So, in summary, if you plan ahead, you can have a tasty and refreshing Dill Pickle Chicken Salad ready in about an hour. It’s a quick and easy dish that’s perfect for any occasion!

Nutritional Information for Dill Pickle Chicken Salad Recipe

Understanding the nutritional content of your Dill Pickle Chicken Salad is essential for making informed dietary choices. This salad is not only delicious but also packed with nutrients that can benefit your health. Let’s take a closer look at the calories and macronutrients, as well as the health benefits of the ingredients used in this recipe.

Calories and Macronutrients

Each serving of Dill Pickle Chicken Salad contains approximately 320 calories. Here’s a breakdown of the macronutrients:

  • Protein: 30g – This high protein content comes primarily from the chicken, making it a great option for muscle repair and growth.
  • Fat: 20g – The healthy fats in this salad mainly come from mayonnaise and Greek yogurt, which provide creaminess and flavor.
  • Net Carbs: 3g – With low net carbs, this salad is suitable for low-carb diets, making it a great choice for those watching their carbohydrate intake.

This nutritional profile makes Dill Pickle Chicken Salad a balanced meal option. It provides a good amount of protein while keeping carbs low, which can help maintain energy levels throughout the day.

Health Benefits of Ingredients

Each ingredient in the Dill Pickle Chicken Salad contributes unique health benefits:

  • Chicken: A lean source of protein, chicken helps build and repair tissues. It’s also rich in essential vitamins and minerals, such as B vitamins and selenium.
  • Dill Pickles: These tangy treats are low in calories and high in antioxidants. They can aid digestion and provide probiotics, which are beneficial for gut health.
  • Greek Yogurt: Packed with protein and probiotics, Greek yogurt supports digestive health and can help keep you feeling full longer.
  • Mayonnaise: While it adds creaminess, choosing a healthier version can provide healthy fats that are essential for brain health.
  • Fresh Dill: This herb is not only flavorful but also contains antioxidants and has anti-inflammatory properties.

Incorporating these ingredients into your diet can contribute to overall health and well-being. The Dill Pickle Chicken Salad is not just a tasty dish; it’s also a nutritious option that can fit into a balanced diet.

FAQs about Dill Pickle Chicken Salad Recipe

Can I use rotisserie chicken for this recipe?

Absolutely! Using rotisserie chicken is a fantastic option for your Dill Pickle Chicken Salad. It saves time and adds great flavor. Just shred or dice the chicken as you would with any cooked chicken. The seasoning from the rotisserie chicken can enhance the overall taste of your salad, making it even more delicious!

How long does Dill Pickle Chicken Salad last in the fridge?

Your Dill Pickle Chicken Salad can last in the fridge for about 3 to 4 days when stored properly. Make sure to keep it in an airtight container to maintain freshness. If you notice any changes in smell or texture, it’s best to discard it. Enjoy your salad within this time frame for the best taste and quality!

Can I make Dill Pickle Chicken Salad without mayonnaise?

Yes, you can definitely make Dill Pickle Chicken Salad without mayonnaise! If you prefer a lighter option, you can use additional Greek yogurt instead. This will still provide creaminess while cutting down on calories. You can also try alternatives like avocado or a vinaigrette dressing for a different flavor profile. Feel free to experiment and find what works best for you!

What are some good substitutes for dill pickles?

If you don’t have dill pickles on hand, there are several substitutes you can use. Sweet pickles can add a different flavor, though they will make the salad sweeter. You can also use chopped cucumbers with a splash of vinegar for a fresh crunch. For a zesty kick, consider using pickled jalapeños or even relish. Each option will give your salad a unique twist!

Conclusion on Dill Pickle Chicken Salad Recipe

In conclusion, the Dill Pickle Chicken Salad is a delightful dish that combines flavor, texture, and nutrition in one bowl. Its unique blend of creamy dressing and tangy pickles makes it a standout choice for any meal. Whether you’re preparing a quick lunch or a dish for a gathering, this salad is sure to impress.

Not only is it easy to make, but it also allows for plenty of customization. You can add your favorite ingredients or adjust the seasoning to suit your taste. The versatility of this recipe means you can enjoy it in various ways, whether on a bed of greens, in a sandwich, or as a dip with crackers.

Moreover, the nutritional benefits of the ingredients make this salad a smart choice for those looking to maintain a balanced diet. With high protein content and low net carbs, it fits well into many dietary plans. Plus, the health benefits of chicken, dill pickles, and Greek yogurt contribute to your overall well-being.

So, why not give this Dill Pickle Chicken Salad a try? It’s a simple yet satisfying dish that can easily become a favorite in your household. Enjoy the refreshing flavors and the joy of sharing this delightful recipe with family and friends!
Paul

Dill Pickle Chicken Salad Recipe is a must-try dish!

Creamy, crunchy, and loaded with tangy dill flavor, this chicken salad is anything but ordinary. Whether scooped on crackers, tucked into sandwiches, or enjoyed straight from the bowl, it’s a refreshing lunch or snack that delivers big pickle energy.
Prep Time 10 minutes
Total Time 10 minutes
Servings: 4 servings
Course: Salad
Cuisine: American

Ingredients
  

  • 4 cups chopped cooked chicken rotisserie chicken works great2 ribs celery, finely diced (about ½ cup)¼ medium sweet onion, finely diced (about ⅓ cup)1 cup diced dill pickles1 tablespoon chopped fresh dill or 1 teaspoon dried dill, optional¾ cup mayonnaise (Duke’s recommended)2 tablespoons dill pickle juiceSalt and pepper, to taste

Method
 

  1. In a large mixing bowl, combine the chopped chicken, celery, onion, diced pickles, and dill (if using).
  2. In a separate small bowl, whisk together the mayonnaise and dill pickle juice until smooth.
  3. Pour the dressing over the chicken mixture. Stir everything until evenly coated and creamy.
  4. Season with salt and pepper to taste.
  5. Serve chilled on sandwiches, in lettuce wraps, with crackers, or enjoy by the spoonful.
  6. Store any leftovers in an airtight container in the refrigerator for up to 1 day. For best texture, consider stirring in the pickles just before serving if making in advance.

Notes

Use rotisserie chicken for a quick shortcut and added flavor.
Adjust the amount of pickle juice based on how tangy you like your salad.
Try serving on toasted bread, croissants, or cucumber slices for a low-carb option.
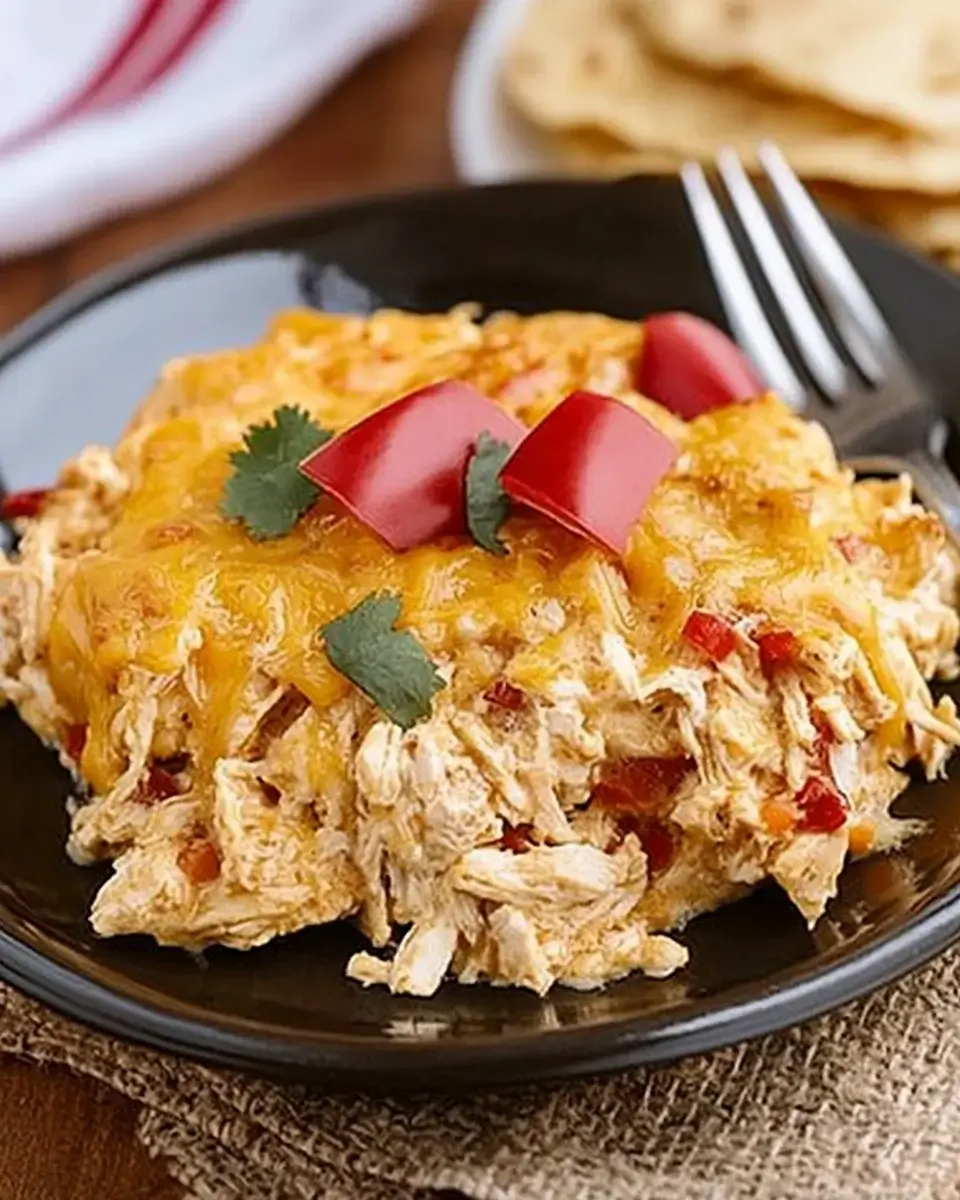

Cheesy Chicken Fajita Casserole Recipe is a must-try!

Cheesy Chicken Fajita Casserole Recipe. This dish combines tender chicken, colorful bell peppers, and zesty spices, all topped with gooey cheese. It’s a perfect blend of flavors that will make your taste buds dance with joy!

What Makes This Casserole Special?

What sets this casserole apart is its versatility. You can easily customize it to suit your family’s preferences. Whether you prefer a mild flavor or a spicy kick, this recipe can adapt to your taste. The combination of shredded chicken and fresh vegetables creates a hearty meal that is both satisfying and nutritious.

Cheesy Chicken Fajita Casserole Recipe is a one-dish wonder. This means less cleanup for you after a busy day. Just prepare, bake, and serve! Plus, it’s a great way to use up leftover chicken or veggies, making it a smart choice for meal planning.

In addition, this casserole is packed with protein and fiber, making it a filling option for lunch or dinner. With its colorful presentation and cheesy goodness, it’s sure to be a hit at your dinner table. So, gather your ingredients and get ready to enjoy a delightful meal that’s as fun to make as it is to eat!

Ingredients for Cheesy Chicken Fajita Casserole Recipe

Cheesy Chicken Fajita Casserole Recipe, you’ll need a variety of fresh ingredients. Each component adds its own unique flavor and texture, making this dish a delightful experience. Here’s what you’ll need:

  • 2 cups cooked chicken, shredded
  • 1 cup bell peppers, diced (mix of red, green, and yellow)
  • 1 cup onion, diced
  • 1 can (10 oz) diced tomatoes with green chilies, undrained
  • 1 cup corn, drained
  • 1 cup cooked rice (white or brown)
  • 1 cup shredded cheddar cheese
  • 1 cup shredded Monterey Jack cheese
  • 1 tablespoon taco seasoning
  • 1 teaspoon garlic powder
  • 1 teaspoon cumin
  • Salt and pepper to taste
  • 1 tablespoon olive oil
  • 1 cup tortilla chips, crushed (for topping)
  • Fresh cilantro, chopped (for garnish)

These ingredients come together to create a flavorful and satisfying meal. The combination of chicken, vegetables, and spices ensures that every bite is packed with taste. Plus, the melted cheese on top adds a creamy finish that everyone will love!

Cheesy Chicken Fajita Casserole Recipe is all about making it your own!

Step-by-Step Preparation of Cheesy Chicken Fajita Casserole Recipe

Cheesy Chicken Fajita Casserole Recipe. Follow these simple steps to create a delicious meal that will impress your family and friends!

Step 1: Prepping the Chicken and Vegetables

Start by gathering your cooked chicken. If you don’t have any on hand, you can quickly boil or bake some chicken breasts. Once cooked, shred the chicken into bite-sized pieces. Next, wash and dice your bell peppers and onion. Aim for small, even pieces to ensure they cook evenly. This prep work will make the cooking process smooth and enjoyable!

Step 2: Cooking the Chicken

In a large skillet, heat 1 tablespoon of olive oil over medium heat. Once the oil is hot, add the shredded chicken. Stir it around for a minute or two to warm it up. This step helps to infuse the chicken with flavor from the oil. You can also sprinkle a little salt and pepper at this stage to enhance the taste.

Step 3: Sautéing the Vegetables

Now, it’s time to add the diced bell peppers and onion to the skillet. Cook them for about 5-7 minutes, stirring occasionally. You want the vegetables to soften and become fragrant. The colors will brighten up your dish, making it visually appealing. Once they’re tender, you’re ready for the next step!

Step 4: Assembling the Casserole

Remove the skillet from heat and stir in the can of diced tomatoes, corn, cooked rice, taco seasoning, garlic powder, and cumin. Mix everything well until combined. Then, fold in half of the shredded cheddar and Monterey Jack cheeses. This cheesy goodness will melt into the mixture, creating a creamy texture. Pour the chicken mixture into your greased baking dish, spreading it evenly. Top it off with the remaining cheese and crushed tortilla chips for that delightful crunch!

Step 5: Baking the Casserole

Preheat your oven to 350°F (175°C) if you haven’t done so already. Place the assembled casserole in the oven and bake for 25-30 minutes. You’ll know it’s ready when the cheese is bubbly and golden brown. Once done, take it out and let it cool for about 5 minutes. This cooling time allows the flavors to settle, making each bite even more delicious!

Cheesy Chicken Fajita Casserole Recipe is now ready to be served. Enjoy the delightful flavors and the smiles it brings to your table!

Variations of Cheesy Chicken Fajita Casserole Recipe

Cheesy Chicken Fajita Casserole Recipe is not only delicious but also highly adaptable. You can easily modify it to suit different dietary preferences or to simply mix things up. Here are some exciting variations to consider:

Vegetarian Options

If you’re looking for a meat-free version, you can easily transform this casserole into a vegetarian delight. Start by replacing the chicken with a mix of hearty vegetables. Consider using:

  • 1 can of black beans or pinto beans for protein
  • 1 cup of zucchini, diced
  • 1 cup of mushrooms, sliced
  • 1 cup of spinach or kale, chopped

These ingredients will add flavor and texture while keeping the dish filling. You can also use extra cheese or a plant-based cheese alternative to maintain that creamy goodness. This vegetarian version is just as satisfying and perfect for those who prefer a meatless meal!

Spicy Additions

Cheesy Chicken Fajita Casserole Recipe. Here are some ideas:

  • Add sliced jalapeños or serrano peppers to the chicken mixture for a fiery kick.
  • Use spicy taco seasoning instead of the regular kind to amp up the flavor.
  • Incorporate a dash of hot sauce or a sprinkle of crushed red pepper flakes before baking.

These spicy additions will elevate the dish and make it a hit for those who enjoy bold flavors. Just remember to adjust the spice level according to your taste preferences!

Cheesy Chicken Fajita Casserole Recipe in many different ways. Whether you choose a vegetarian option or add some heat, this dish is sure to please everyone at your table!

Cooking Note for Cheesy Chicken Fajita Casserole Recipe

Cheesy Chicken Fajita Casserole Recipe, there are a few important cooking notes to keep in mind. These tips will help ensure that your casserole turns out perfectly every time!

First, using cooked chicken is key. You can use leftover rotisserie chicken, which saves time and adds great flavor. If you prefer, you can also boil or bake chicken breasts ahead of time. Just make sure to shred it into small pieces for even distribution throughout the casserole.

Next, the choice of vegetables can greatly impact the taste. Fresh bell peppers and onions add a wonderful crunch and sweetness. However, feel free to experiment with other vegetables like zucchini or corn. Just remember to chop them into small, uniform pieces to ensure they cook evenly.

Another important note is to drain the canned tomatoes and corn well. Excess liquid can make the casserole too watery. You want a nice, thick mixture that holds together when baked. If you prefer a saucier casserole, consider adding a small amount of chicken broth or salsa to enhance the flavor without making it too runny.

Lastly, don’t skip the resting time after baking. Allowing the casserole to cool for about 5 minutes helps it set. This makes it easier to serve and ensures that each slice holds its shape. Plus, it gives the flavors a chance to meld together, making every bite even more delicious!

Cheesy Chicken Fajita Casserole Recipe that’s sure to impress your family and friends. Happy cooking!

Serving Suggestions for Cheesy Chicken Fajita Casserole Recipe

Cheesy Chicken Fajita Casserole Recipe is baked to perfection, it’s time to serve it up! This dish is not only delicious but also visually appealing, making it a great centerpiece for any meal. Here are some serving suggestions to enhance your dining experience:

  • Garnish with Fresh Herbs: Sprinkle chopped fresh cilantro or parsley on top of the casserole just before serving. This adds a pop of color and a burst of freshness that complements the rich flavors.
  • Pair with a Side Salad: Serve the casserole alongside a crisp green salad. A simple mix of lettuce, tomatoes, and avocado drizzled with lime vinaigrette works wonderfully. The salad adds a refreshing contrast to the cheesy casserole.
  • Offer Toppings: Set up a toppings bar with options like sour cream, guacamole, and salsa. Guests can customize their servings, adding their favorite flavors and textures.
  • Serve with Tortillas: Warm some flour or corn tortillas on the side. This allows everyone to scoop up the casserole or make their own fajita wraps, adding a fun twist to the meal.
  • Accompany with Rice or Beans: For a heartier meal, serve the casserole with a side of Mexican rice or refried beans. These sides complement the flavors and make the meal more filling.

Cheesy Chicken Fajita Casserole Recipe and create a delightful dining experience. Whether it’s a family dinner or a gathering with friends, this dish is sure to impress!

Tips for Perfecting Your Cheesy Chicken Fajita Casserole Recipe

Cheesy Chicken Fajita Casserole Recipe truly shine, consider these helpful tips. They will ensure that every bite is bursting with flavor and that your casserole turns out perfectly every time!

First, always use fresh ingredients. Fresh bell peppers and onions not only enhance the flavor but also add vibrant colors to your dish. If possible, choose organic vegetables for the best taste and quality.

Next, don’t rush the sautéing process. Allow the bell peppers and onions to cook until they are soft and fragrant. This step is crucial as it brings out their natural sweetness, which balances the spices in the casserole.

When it comes to seasoning, taste as you go! After mixing in the taco seasoning, garlic powder, and cumin, take a moment to sample the mixture. Adjust the salt and pepper according to your preference. This simple step can make a big difference in the overall flavor.

For an extra cheesy experience, consider mixing in different types of cheese. While cheddar and Monterey Jack are delicious, you can also try pepper jack for a spicy twist or cream cheese for added creaminess. Just remember to keep the total cheese amount balanced to avoid overwhelming the dish.

Another tip is to layer the cheese. Instead of just topping the casserole with cheese, mix some into the chicken and vegetable mixture. This creates a gooey, cheesy interior that everyone will love!

Lastly, let your casserole rest after baking. This allows the flavors to meld and makes it easier to serve. If you cut into it too soon, it may fall apart. A 5-minute rest is all it needs to set up nicely.

Cheesy Chicken Fajita Casserole Recipe to new heights. Enjoy the process and the delicious results!

Breakdown of Time for Cheesy Chicken Fajita Casserole Recipe

Prep Time

Cheesy Chicken Fajita Casserole Recipe is approximately 15-20 minutes. This includes gathering all your ingredients, shredding the chicken, and chopping the vegetables. Having everything ready before you start cooking will make the process smoother and more enjoyable. So, take your time to prep, and you’ll be rewarded with a delicious meal!

Cooking Time

Once you’ve prepped your ingredients, the cooking time is about 25-30 minutes. This includes sautéing the vegetables and chicken mixture, as well as baking the casserole in the oven. The goal is to ensure that everything is heated through and the cheese is bubbly and golden brown. Keep an eye on it while it bakes to achieve that perfect cheesy top!

Total Time

Cheesy Chicken Fajita Casserole Recipe to take around 45-50 minutes from start to finish. This includes both prep and cooking time. It’s a quick and easy meal that’s perfect for busy weeknights or when you want to impress guests without spending hours in the kitchen. With this time breakdown, you can plan your cooking session effectively and enjoy a delightful dish in no time!

Nutritional Information for Cheesy Chicken Fajita Casserole Recipe

Cheesy Chicken Fajita Casserole Recipe not only satisfies your taste buds but also provides a good mix of nutrients. Here’s a breakdown of the nutritional information per serving:

Calories

Cheesy Chicken Fajita Casserole Recipe contains approximately 350 calories. This makes it a hearty yet manageable option for lunch or dinner. The calorie count comes from a combination of protein, carbohydrates, and fats, ensuring you feel full and satisfied after your meal.

Protein

With about 28 grams of protein per serving, this casserole is an excellent source of this essential nutrient. The shredded chicken and cheese contribute significantly to the protein content, making it a great choice for muscle repair and growth. Protein is vital for overall health, helping to keep you energized throughout the day.

Sodium

Cheesy Chicken Fajita Casserole Recipe is approximately 600 mg per serving. While sodium is necessary for bodily functions, it’s important to monitor your intake. To reduce sodium levels, consider using low-sodium canned tomatoes and beans, or adjust the amount of taco seasoning you add. This way, you can enjoy the flavors without compromising your health.

Cheesy Chicken Fajita Casserole Recipe is a balanced meal option that provides essential nutrients while being delicious. Enjoy it as part of a varied diet to reap the benefits of its wholesome ingredients!

FAQs about Cheesy Chicken Fajita Casserole Recipe

Can I make Cheesy Chicken Fajita Casserole ahead of time?

Cheesy Chicken Fajita Casserole Recipe is perfect for meal prep. You can prepare the casserole a day in advance and store it in the refrigerator. Just follow the steps up to the baking part, cover it tightly with plastic wrap or aluminum foil, and refrigerate. When you’re ready to bake, simply remove the cover and pop it in the oven. You may need to add a few extra minutes to the baking time since it will be cold from the fridge. This makes it a convenient option for busy weeknights or gatherings!

What can I substitute for chicken in this recipe?

Cheesy Chicken Fajita Casserole Recipe. For a vegetarian option, consider using:

  • Black beans or pinto beans: These add protein and fiber, making the dish hearty.
  • Tofu: Firm tofu can be cubed and sautéed for a protein-rich alternative.
  • Chickpeas: These can be used for a nutty flavor and added texture.
  • Vegetables: A mix of zucchini, mushrooms, and spinach can create a delicious veggie casserole.

Feel free to get creative! The key is to maintain the balance of flavors and textures that make this casserole so enjoyable.

How do I store leftovers of Cheesy Chicken Fajita Casserole?

Cheesy Chicken Fajita Casserole Recipe is easy! Allow the casserole to cool completely before transferring it to an airtight container. You can keep it in the refrigerator for up to 3-4 days. If you want to store it for a longer period, consider freezing it. Just make sure to use a freezer-safe container or wrap it tightly in plastic wrap and aluminum foil. It can last in the freezer for up to 2-3 months. When you’re ready to enjoy it again, simply thaw it in the refrigerator overnight and reheat in the oven or microwave until heated through. This way, you can savor the delicious flavors of your casserole even after a few days!

Conclusion on Cheesy Chicken Fajita Casserole Recipe

Cheesy Chicken Fajita Casserole Recipe is a delightful dish that brings together a medley of flavors and textures. It’s not just a meal; it’s an experience that can be enjoyed by everyone at the table. With its combination of tender chicken, vibrant vegetables, and gooey cheese, this casserole is sure to become a family favorite.

Whether you’re preparing it for a busy weeknight dinner or a special gathering, this recipe is both simple and satisfying. The versatility of the dish allows you to customize it to your liking, making it easy to cater to different tastes and dietary needs. From adding extra spices for heat to swapping out chicken for beans, the possibilities are endless!

Cheesy Chicken Fajita Casserole Recipe is a fantastic way to use up leftovers, making it a practical choice for meal planning. With just a few ingredients and minimal prep time, you can create a hearty meal that everyone will love. Plus, the cleanup is a breeze since it’s all made in one dish!

Cheesy Chicken Fajita Casserole Recipe bring joy and satisfaction to your dining table!

Paul

Cheesy Chicken Fajita Casserole Recipe is a must-try!

This creamy, cheesy, flavor-packed casserole is everything you love about fajitas—without the fuss! With tender chicken, bold spices, and a kick from tomatoes and peppers, this no-fuss dish is a weeknight dinner hero you’ll make on repeat.
Prep Time 10 minutes
Cook Time 45 minutes
Total Time 55 minutes
Servings: 6 servings
Course: Casserole
Cuisine: Tex-Mex

Ingredients
  

  • 4 cups shredded cooked chicken about 2 large chicken breasts2 cups instant rice1 (10.5 oz) can cream of chicken soup1 cup sour cream1 cup frozen diced onion and bell pepper blend1 (10 oz) can diced tomatoes with chilies (such as Rotel), undrained1½ cups chicken broth1 (1.12 oz) packet fajita seasoning mix (McCormick recommended)1 (8 oz) package shredded Mexican blend cheese (about 2 cups)

Method
 

  1. Preheat oven to 350°F. Lightly grease or spray a 9×13-inch baking dish.
  2. In a large mixing bowl, combine the shredded chicken, uncooked instant rice, cream of chicken soup, sour cream, frozen onion and bell pepper mix, undrained diced tomatoes with chilies, chicken broth, fajita seasoning, and half of the shredded cheese. Stir until fully mixed.
  3. Pour the mixture into the prepared baking dish and spread it out evenly. Cover tightly with aluminum foil.
  4. Bake for 35 to 45 minutes, or until the rice is tender and cooked through.
  5. Remove the foil and sprinkle the remaining cheese evenly over the top. Return the dish to the oven and bake uncovered for an additional 5 to 10 minutes, or until the cheese is melted and bubbly.
  6. Let sit for a few minutes before serving for easier slicing and serving.

Notes

You can use leftover rotisserie chicken to save time.
If you prefer more heat, opt for hot diced tomatoes with chilies or add jalapeños.
Make it ahead by mixing the casserole and refrigerating before baking—just add 10 extra minutes to the bake time if cold.

Ube Tiramisu is a must-try dessert for everyone!

Introduction to Ube Tiramisu Recipe

What is Ube Tiramisu?

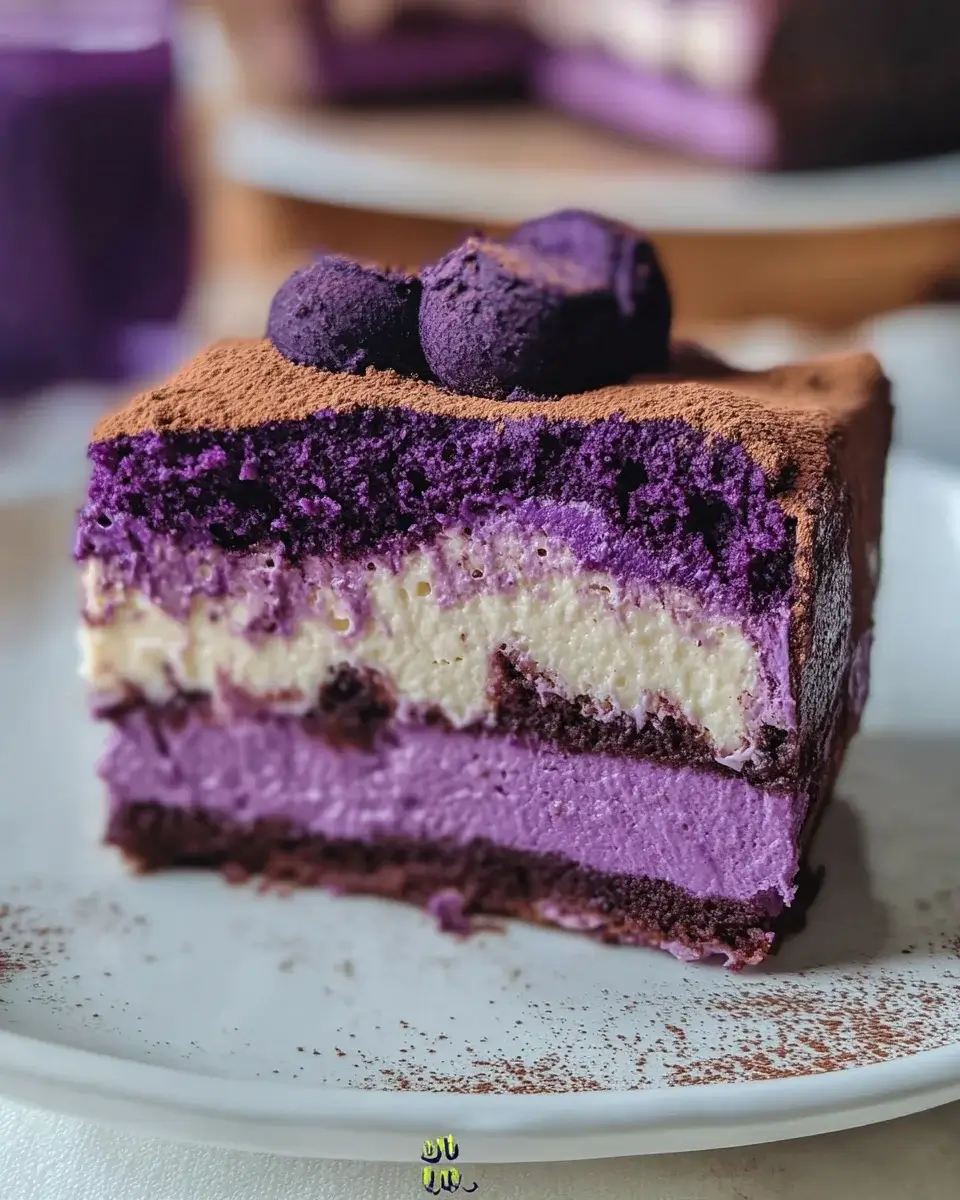
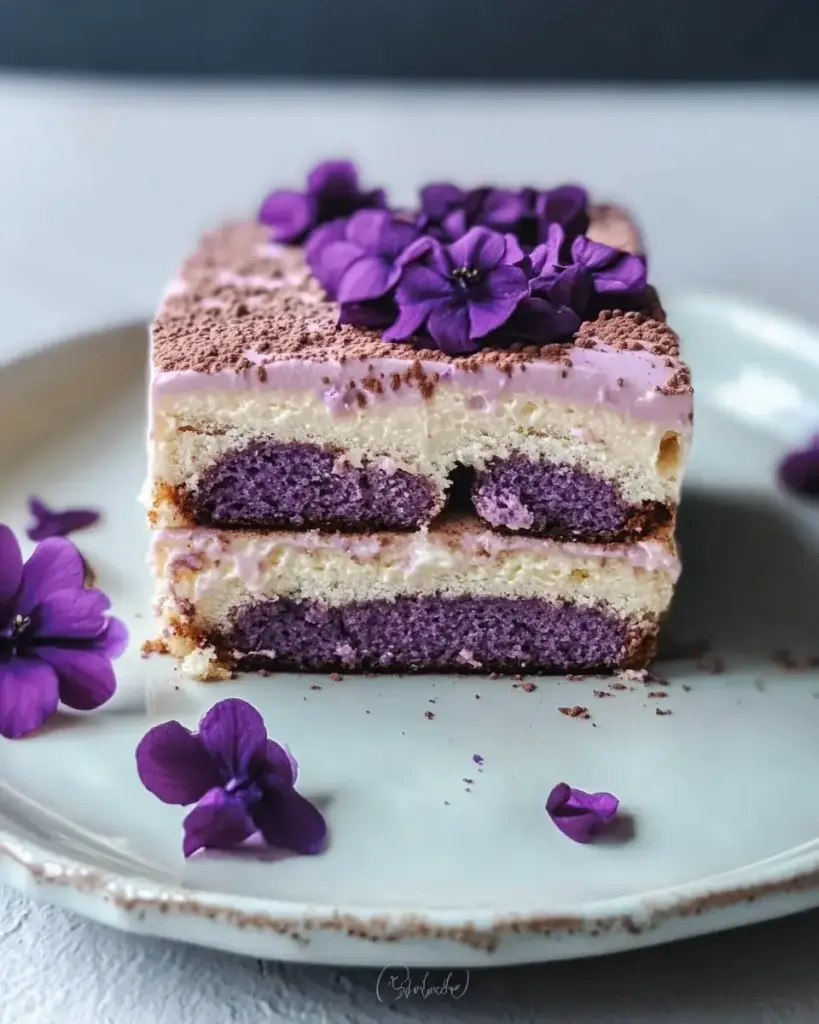
Ube Tiramisu is a delightful twist on the classic Italian dessert, tiramisu. This version incorporates ube, a vibrant purple yam popular in Filipino cuisine. The creamy layers of mascarpone cheese and whipped cream blend beautifully with the sweet, earthy flavor of ube halaya. The result is a visually stunning dessert that not only tastes amazing but also brings a unique cultural flair to the table. Each bite offers a perfect balance of sweetness and richness, making it a favorite for special occasions or simply as a treat to enjoy at home.

The Origin of Tiramisu and Ube

Tiramisu originated in Italy during the 1960s. Its name translates to “pick me up,” which reflects the energizing combination of coffee and cocoa. Traditionally, it features layers of coffee-soaked ladyfingers and a rich mascarpone cream. Over the years, this beloved dessert has inspired many variations, including the delightful Ube Tiramisu.

Ube, on the other hand, has deep roots in Filipino culture. This purple yam is not only celebrated for its striking color but also for its sweet, nutty flavor. Ube has gained popularity worldwide, especially in desserts. By combining these two culinary traditions, Ube Tiramisu creates a fusion that is both comforting and exciting. It’s a perfect example of how food can bring different cultures together, creating something new and delicious.

Ingredients for Ube Tiramisu Recipe

To create a delicious Ube Tiramisu, you’ll need a few key ingredients. Each component plays a vital role in achieving the perfect balance of flavors and textures. Here’s what you’ll need:

  • 2 cups heavy cream: This will give your tiramisu a rich and creamy texture.
  • 1 cup mascarpone cheese: A staple in traditional tiramisu, it adds a smooth and luxurious feel.
  • 1 cup powdered sugar: This sweetens the mixture without adding graininess.
  • 1 teaspoon vanilla extract: A hint of vanilla enhances the overall flavor.
  • 1 cup ube halaya: This purple yam jam is the star of the show, providing color and sweetness.
  • 1 cup brewed coffee, cooled: The coffee adds depth and a slight bitterness to balance the sweetness.
  • 1 tablespoon coffee liqueur (optional): For those who enjoy a little extra kick, this adds a delightful flavor.
  • 24 ladyfinger cookies: These light and airy cookies soak up the coffee beautifully.
  • Cocoa powder: For dusting on top, it adds a classic touch and a hint of bitterness.
  • Grated ube or purple yam (optional): This is a lovely garnish that enhances the visual appeal.

Gathering these ingredients will set you on the path to creating a stunning Ube Tiramisu. Each element contributes to the overall experience, making it a dessert that’s sure to impress your family and friends.

Step-by-Step Preparation of Ube Tiramisu Recipe

Step 1: Preparing the Ube Mixture

ube halaya and add the mascarpone cheese and vanilla extract. Use a spatula or a whisk to mix these ingredients together until they are smooth and well combined. This step is crucial as it forms the base of your Ube Tiramisu. The vibrant purple color of the ube will make your dessert visually appealing. Once mixed, set this bowl aside for the next step.

Step 2: Making the Mascarpone Cream

heavy cream. Using an electric mixer, whip the cream until soft peaks form. This means that when you lift the beaters, the cream should hold its shape but still be soft. Gradually add the powdered sugar while continuing to whip. Keep mixing until you achieve stiff peaks. This means the cream will stand tall and not droop. Gently fold this whipped cream into the ube mixture. Be careful not to deflate the cream; you want to keep it light and airy.

Step 3: Assembling the Ube Tiramisu

cooled brewed coffee and the optional coffee liqueur. Dip each ladyfinger into this coffee mixture for about 2 seconds. Make sure they are soaked but not soggy. Arrange half of the soaked ladyfingers in a single layer at the bottom of an 8×8-inch dish. Spread half of the ube mixture over the ladyfingers, smoothing it out evenly. Repeat this process with the remaining ladyfingers and ube mixture, finishing with the ube layer on top. This layering creates a beautiful contrast of colors and flavors.

Step 4: Chilling the Dessert

cocoa powder and garnish with grated ube if desired. Your Ube Tiramisu is now ready to impress!

Variations of Ube Tiramisu Recipe

Vegan Ube Tiramisu Recipe

heavy cream with coconut cream or a vegan whipped topping. Instead of mascarpone cheese, you can use a blend of soaked cashews and coconut yogurt for a rich and creamy base. Follow the same steps for preparing the ube mixture and assembling the dessert. Just remember to use vegan ladyfingers or opt for a sponge cake made without eggs. This vegan Ube Tiramisu will be a hit at any gathering!

Gluten-Free Ube Tiramisu Recipe

ladyfinger cookies with gluten-free ladyfingers or a gluten-free sponge cake. You can find these at many grocery stores or make your own using gluten-free flour. The rest of the ingredients remain the same, ensuring that you still enjoy the delightful flavors of ube and coffee. Just like the original recipe, layer the soaked gluten-free ladyfingers with the ube mixture and let it chill. This gluten-free Ube Tiramisu will allow everyone to indulge without worry!

Cooking Note for Ube Tiramisu Recipe

When preparing Ube Tiramisu, there are a few cooking notes to keep in mind. First, ensure that all your ingredients are at room temperature before you start. This helps in achieving a smooth and creamy texture. If you’re using ube halaya from a jar, give it a good stir to make it easier to mix. Also, when whipping the cream, be careful not to over-whip it. Over-whipped cream can become grainy and lose its lightness. Lastly, patience is key! Allowing the dessert to chill for the recommended time will enhance the flavors and create a delightful experience for your taste buds.

Serving Suggestions for Ube Tiramisu Recipe

Ube Tiramisu is not just a treat for the eyes; it’s also a fantastic dessert for various occasions. Here are some serving suggestions to elevate your dessert experience:

  • Garnish: Besides cocoa powder and grated ube, consider adding fresh berries or edible flowers for a pop of color.
  • Pairing: Serve with a cup of espresso or a glass of dessert wine to complement the flavors.
  • Presentation: Use individual serving glasses for a more elegant presentation. Layer the ingredients in clear cups to showcase the beautiful colors.
  • Occasions: This dessert is perfect for birthdays, holidays, or any celebration. It’s also a great way to impress guests at a dinner party.

With these serving suggestions, your Ube Tiramisu will not only taste amazing but also look stunning on the table!

Tips for Perfecting Your Ube Tiramisu Recipe

To ensure your Ube Tiramisu turns out perfectly every time, consider these helpful tips:

  • Quality Ingredients: Use high-quality mascarpone cheese and fresh ube halaya for the best flavor.
  • Soaking Time: Don’t soak the ladyfingers for too long. A quick dip is enough to absorb the coffee without becoming mushy.
  • Layering: Make sure to spread the ube mixture evenly between layers for a consistent taste in every bite.
  • Chill Time: If possible, let the Ube Tiramisu chill overnight. This allows the flavors to meld beautifully.

By following these tips, you’ll create a Ube Tiramisu that’s not only delicious but also a showstopper at any gathering!

Cooking Note for Ube Tiramisu Recipe

When preparing your Ube Tiramisu, a few cooking notes can help you achieve the best results. First, ensure all your ingredients are at room temperature before you start. This simple step helps in achieving a smooth and creamy texture, making your dessert even more delightful.

ube halaya from a jar, give it a good stir to make it easier to mix. This will help incorporate it smoothly into the mascarpone mixture. Additionally, when whipping the heavy cream, be careful not to over-whip it. Over-whipped cream can become grainy and lose its lightness, which is essential for the airy texture of your Ube Tiramisu.

ladyfingers. A quick dip in the coffee mixture is all you need. If you soak them for too long, they can become mushy, which may affect the overall texture of your dessert.

Lastly, patience is key! Allowing the dessert to chill for the recommended time will enhance the flavors and create a delightful experience for your taste buds. The longer it sits, the better the flavors meld together, resulting in a truly scrumptious Ube Tiramisu.

Serving Suggestions for Ube Tiramisu Recipe

Ube Tiramisu is not just a treat for the eyes; it’s also a fantastic dessert for various occasions. Here are some serving suggestions to elevate your dessert experience:

  • Garnish: Besides cocoa powder and grated ube, consider adding fresh berries or edible flowers for a pop of color. These additions not only enhance the visual appeal but also add a refreshing taste that complements the rich ube flavor.
  • Pairing: Serve with a cup of espresso or a glass of dessert wine to complement the flavors. The bitterness of coffee or the sweetness of wine can balance the creamy richness of the Ube Tiramisu.
  • Presentation: Use individual serving glasses for a more elegant presentation. Layer the ingredients in clear cups to showcase the beautiful colors. This way, each guest can enjoy their own portion, making it feel special.
  • Occasions: This dessert is perfect for birthdays, holidays, or any celebration. It’s also a great way to impress guests at a dinner party. The unique flavor of ube will surely be a conversation starter!

With these serving suggestions, your Ube Tiramisu will not only taste amazing but also look stunning on the table! Whether you’re hosting a gathering or enjoying a quiet evening at home, these tips will help you create a memorable dessert experience.

Tips for Perfecting Your Ube Tiramisu Recipe

To ensure your Ube Tiramisu turns out perfectly every time, consider these helpful tips:

  • Quality Ingredients: Use high-quality mascarpone cheese and fresh ube halaya for the best flavor. The quality of your ingredients can significantly impact the taste of your dessert.
  • Soaking Time: Don’t soak the ladyfingers for too long. A quick dip is enough to absorb the coffee without becoming mushy. Aim for about 2 seconds in the coffee mixture to keep them firm yet flavorful.
  • Layering: Make sure to spread the ube mixture evenly between layers for a consistent taste in every bite. This ensures that each slice of your Ube Tiramisu has the perfect balance of flavors.
  • Chill Time: If possible, let the Ube Tiramisu chill overnight. This allows the flavors to meld beautifully. The longer it sits, the more delicious it becomes, as the ingredients have time to blend.
  • Presentation: Consider using clear serving dishes to showcase the beautiful layers of your Ube Tiramisu. This not only makes it visually appealing but also adds an elegant touch to your dessert.
  • Experiment with Flavors: Feel free to add a twist to your Ube Tiramisu. You can incorporate different flavors like matcha or chocolate for a unique spin. Just remember to keep the balance of flavors in mind.

By following these tips, you’ll create a Ube Tiramisu that’s not only delicious but also a showstopper at any gathering! Your friends and family will be impressed by your culinary skills, and they’ll be asking for seconds!

Breakdown of Time for Ube Tiramisu Recipe

Prep Time

Preparing your Ube Tiramisu is a delightful process that requires some time. The prep time for this recipe is approximately 30 minutes. During this time, you will gather your ingredients, whip the cream, mix the ube and mascarpone, and assemble the layers. It’s a fun and engaging activity that sets the stage for a delicious dessert!

Cooking Time

Interestingly, there is no actual cooking involved in making Ube Tiramisu. Instead, the focus is on assembling the layers and allowing the dessert to chill. This means the cooking time is effectively zero. However, the chilling time is crucial for the flavors to meld together and for the dessert to set properly.

Total Time

When you combine the prep time and the chilling time, the total time for your Ube Tiramisu is about 4 hours and 30 minutes. This includes the 30 minutes of preparation and at least 4 hours of chilling in the refrigerator. For the best results, consider letting it chill overnight. This way, you’ll have a beautifully set dessert ready to impress your guests or family!

Nutritional Information for Ube Tiramisu Recipe

Calories

320 calories. This makes it a rich dessert, perfect for special occasions or as an occasional treat. The combination of heavy cream, mascarpone cheese, and ube halaya contributes to its calorie count, but the delightful flavors make it worth every bite!

Protein

4 grams per serving. The protein primarily comes from the mascarpone cheese and heavy cream used in the recipe. While it may not be a high-protein dessert, it does provide a small amount that can complement your overall daily intake.

Sodium

150 milligrams of sodium. This amount is relatively moderate, especially considering the rich flavors and creamy texture of the dessert. However, if you’re watching your sodium levels, it’s always a good idea to enjoy this treat in moderation.

Overall, Ube Tiramisu is a delicious dessert that balances flavor and nutrition. While it’s important to be mindful of the calories, protein, and sodium, the joy it brings to your taste buds makes it a delightful addition to any dessert table!

FAQs about Ube Tiramisu Recipe

Can I use fresh ube instead of ube extract?

Absolutely! You can use fresh ube instead of ube extract in your Ube Tiramisu. To do this, simply steam or boil the fresh ube until it’s tender. Once cooked, mash it until smooth, and then mix it with the mascarpone cheese and vanilla extract. This will give your dessert a fresh, natural flavor and a beautiful purple hue. Just keep in mind that fresh ube may have a slightly different taste and texture compared to ube halaya, but it will still be delicious!

How long can I store Ube Tiramisu?

You can store Ube Tiramisu in the refrigerator for up to 3 to 4 days. Make sure to cover it tightly with plastic wrap or a lid to keep it fresh. The flavors will continue to meld together, making it even tastier over time. However, it’s best to enjoy it within the first couple of days for optimal texture and flavor. If you notice any changes in smell or appearance, it’s best to discard it.

Can I make Ube Tiramisu in advance?

Yes, making Ube Tiramisu in advance is a great idea! In fact, it’s recommended to prepare it a day ahead of time. This allows the flavors to develop and the dessert to set properly. Just follow the recipe as usual, and once assembled, cover it and place it in the refrigerator. When you’re ready to serve, simply dust the top with cocoa powder and garnish as desired. Your guests will appreciate the convenience, and you’ll have more time to enjoy the occasion!

Conclusion on Ube Tiramisu Recipe

In conclusion, Ube Tiramisu is a delightful fusion of flavors that brings together the rich traditions of Italian and Filipino desserts. This unique twist on the classic tiramisu not only captivates the eyes with its vibrant purple hue but also enchants the palate with its creamy texture and sweet, earthy notes of ube. Whether you’re celebrating a special occasion or simply indulging in a sweet treat, this dessert is sure to impress.

By following the steps outlined in this recipe, you can create a stunning Ube Tiramisu that will be the highlight of any gathering. Remember to experiment with variations, such as vegan or gluten-free options, to cater to different dietary preferences. With a little creativity and the right ingredients, you can make this dessert your own.

As you prepare your Ube Tiramisu, keep in mind the tips for perfecting your recipe. Quality ingredients, proper soaking times, and adequate chilling will ensure that your dessert turns out beautifully every time. So, gather your loved ones, whip up this delightful treat, and enjoy the smiles it brings to the table.

So why wait? Dive into the world of Ube Tiramisu and experience the joy of creating and sharing this delicious dessert. Your taste buds will thank you, and your friends and family will be asking for seconds!

Paul

Ube Tiramisu is a must-try dessert for everyone!

This stunning Ube Tiramisu reimagines the classic Italian dessert with vibrant purple layers of ube halaya and mascarpone cream, infused with espresso and delicate hints of ube extract. It’s rich, velvety, and subtly sweet—perfect for ube lovers and anyone craving a unique twist on tiramisu.
Prep Time 25 minutes
Cook Time 5 minutes
Total Time 6 hours 30 minutes
Servings: 9 servings
Course: Dessert
Cuisine: Filipino-Inspired, Fusion

Ingredients
  

  • For the Zabaglione Ube Custard Base:3 egg yolks¼ cup white sugar
  • For the Coffee-Ube Dip:1 cup espresso or strong coffee¼ teaspoon ube extract
  • For the Mascarpone-Ube Cream:½ cup heavy cream1 cup 8 oz mascarpone cheese1 cup ube halaya (purple yam jam), slightly warmed¼ teaspoon ube extract
  • For Assembly and Finishing:1 package ladyfingers1–2 tablespoons ube powder for dusting

Method
 

  1. In a shallow bowl, combine espresso and ¼ teaspoon ube extract to create the coffee-ube dipping mixture. Set aside.
  2. In a heatproof bowl set over a pot of simmering water (without touching the water), whisk together the egg yolks and white sugar continuously for several minutes until thick, pale, and mousse-like. Remove from heat and let cool slightly.
  3. In another bowl, whip the heavy cream until soft peaks form. Gently fold in the mascarpone cheese, warmed ube halaya, and ¼ teaspoon ube extract. Mix until smooth and well-blended. Avoid overmixing.
  4. Spread a thin layer of ube halaya on the bottom of a 9×9-inch dish.
  5. Briefly dip ladyfingers one at a time into the coffee-ube mixture and layer them in the dish over the halaya.
  6. Spread half of the mascarpone-ube cream mixture evenly over the soaked ladyfingers.
  7. Repeat with another layer of dipped ladyfingers and finish with the remaining cream. Smooth the top with a spatula.
  8. Cover the dish and refrigerate for at least 6 hours or overnight to allow the flavors to meld and the dessert to set.
  9. Just before serving, dust the top with ube powder using a fine mesh sieve for a beautiful finish.

Notes

Make sure the ube halaya is slightly warm before mixing to prevent clumping.
You can substitute the espresso with decaf or use instant coffee dissolved in hot water.
Ube extract enhances both flavor and color—add more if a deeper purple hue is desired.
Store leftovers covered in the fridge for up to 3 days.

Herb Roasted Chicken with Creamy White Wine Sauce delights!

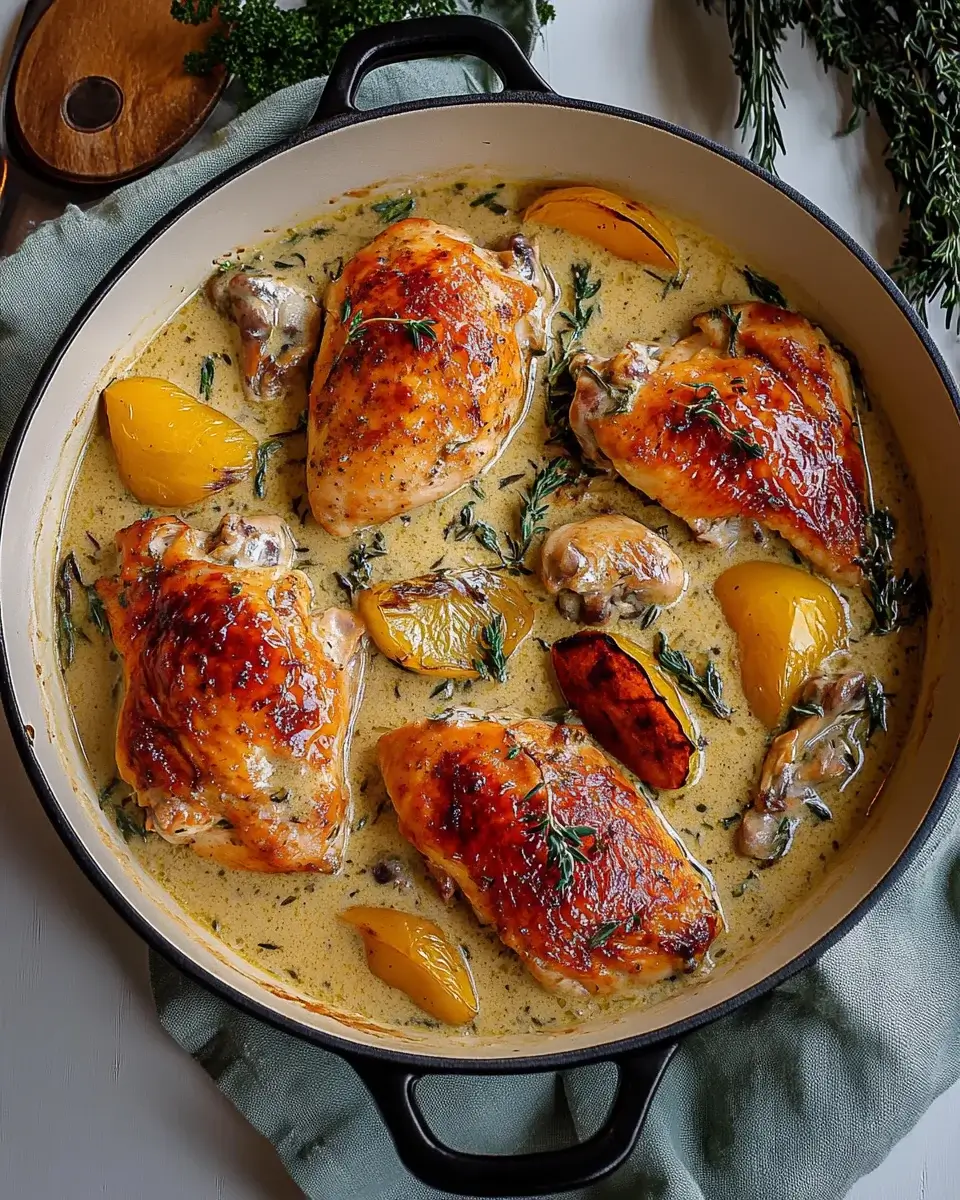
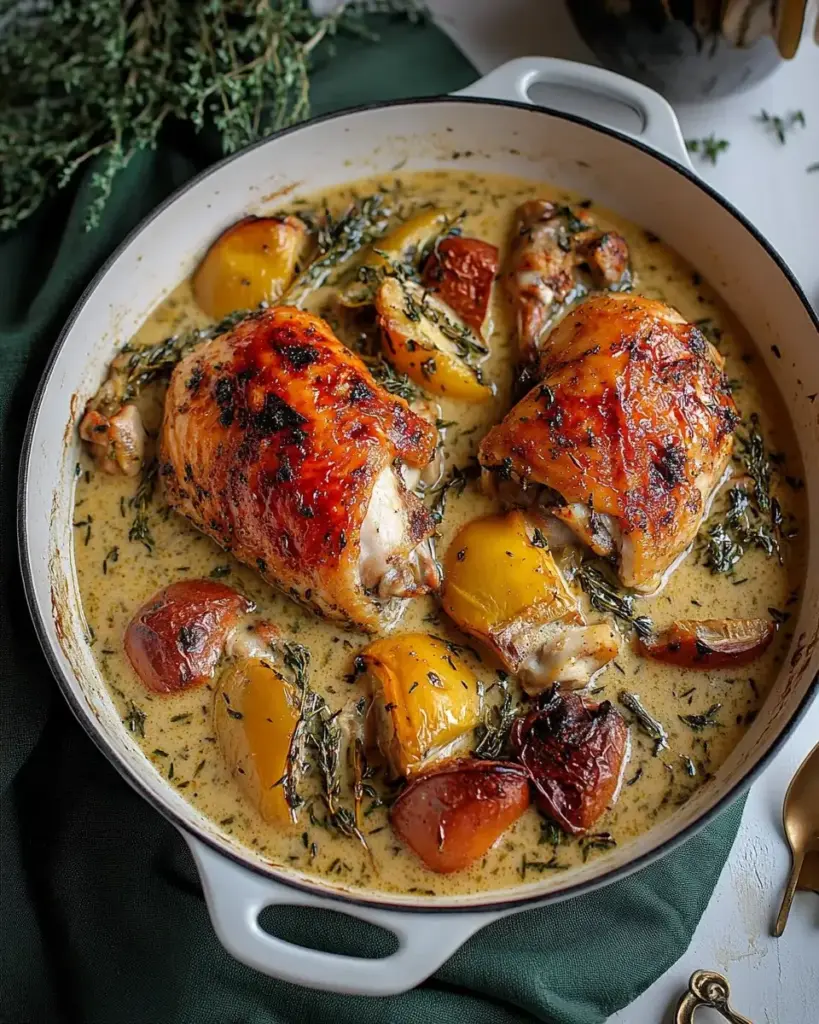
Herb Roasted Chicken with Creamy White Wine Sauce. This dish is not just a meal; it’s a celebration of flavors that will tantalize your taste buds. Imagine tender chicken thighs, perfectly roasted, and enveloped in a rich, creamy sauce that sings with the notes of white wine and fresh herbs.

Cooking can be a joyful adventure, and this recipe is perfect for both novice cooks and seasoned chefs. The combination of herbs and the luscious sauce makes this dish a standout for family dinners or special occasions. Plus, it’s simple enough to whip up on a busy weeknight!

As you prepare this dish, you’ll discover how easy it is to create a restaurant-quality meal right in your own kitchen. The aroma of the herbs and the savory scent of the chicken roasting will fill your home, inviting everyone to gather around the table. With just a few ingredients, you can create a comforting and satisfying meal that everyone will love.

Herb Roasted Chicken with Creamy White Wine Sauce. Let’s embark on this delicious journey together!

Ingredients for Herb Roasted Chicken with Creamy White Wine Sauce

Herb Roasted Chicken with Creamy White Wine Sauce, you’ll need a few simple yet flavorful ingredients. Each component plays a vital role in bringing this dish to life. Here’s what you’ll need:

  • 4 bone-in, skin-on chicken thighs (about 1.5 pounds)
  • 1 tablespoon olive oil
  • 1 teaspoon salt
  • 1/2 teaspoon black pepper
  • 1 teaspoon garlic powder
  • 1 teaspoon dried thyme
  • 1 teaspoon dried rosemary
  • 1/2 teaspoon paprika
  • 1 cup white wine (such as Sauvignon Blanc)
  • 1 cup chicken broth
  • 1/2 cup heavy cream
  • 2 tablespoons fresh parsley, chopped (for garnish)

These ingredients come together to create a dish that is not only delicious but also visually appealing. The chicken thighs provide a juicy and tender base, while the herbs and spices add depth and aroma. The white wine and chicken broth form a flavorful sauce, and the heavy cream gives it a rich, creamy texture.

Feel free to customize the recipe by adding your favorite herbs or spices. For instance, you could try adding a pinch of oregano or some fresh basil for a unique twist. The beauty of this recipe lies in its versatility, allowing you to make it your own!

Now that you have gathered all the ingredients, you’re one step closer to creating this delightful dish. Let’s move on to the preparation!

Preparation of Herb Roasted Chicken with Creamy White Wine Sauce

Herb Roasted Chicken with Creamy White Wine Sauce. This process is straightforward and enjoyable, allowing you to create a delicious meal with ease. Let’s break it down step by step!

Step 1: Preparing the Chicken

Start by rinsing the chicken thighs under cold water. Pat them dry with paper towels. This step is crucial as it helps the skin get crispy during cooking. Make sure to remove any excess moisture, as it can prevent the skin from browning properly.

Step 2: Seasoning the Chicken

Next, it’s time to season the chicken. In a small bowl, mix together the salt, black pepper, garlic powder, dried thyme, dried rosemary, and paprika. Rub this seasoning mixture all over the chicken thighs, ensuring they are evenly coated. This will infuse the chicken with flavor, making every bite delicious!

Step 3: Roasting the Chicken

Heat the olive oil in a large oven-safe skillet over medium-high heat. Once the oil is hot, carefully place the chicken thighs skin-side down in the skillet. Sear them for about 5-7 minutes until the skin turns golden brown. This step adds a lovely texture and flavor to the chicken. After that, flip the chicken and cook for an additional 3-4 minutes. Once done, remove the chicken from the skillet and set it aside.

Step 4: Making the Creamy White Wine Sauce

With the chicken set aside, it’s time to create the sauce. Pour the white wine into the same skillet, scraping up any browned bits from the bottom. These bits are packed with flavor! Add the chicken broth and bring the mixture to a simmer. Stir in the heavy cream, which will give the sauce its creamy texture. Allow it to simmer for a few minutes, letting the flavors meld together beautifully.

Step 5: Combining Chicken and Sauce

Finally, return the chicken thighs to the skillet, placing them skin-side up. This allows the skin to stay crispy while the chicken cooks through. Transfer the skillet to your preheated oven and roast for 25-30 minutes. The chicken is ready when it reaches an internal temperature of 165°F. Once done, remove it from the oven and let it rest for about 5 minutes. This resting period helps the juices redistribute, ensuring juicy chicken!

Herb Roasted Chicken with Creamy White Wine Sauce. The next step is to serve it up and enjoy!

Variation of Herb Roasted Chicken with Creamy White Wine Sauce

Herb Roasted Chicken with Creamy White Wine Sauce is a delightful dish on its own, there are many ways to add your personal touch. Variations can enhance flavors, cater to dietary preferences, or simply keep things exciting in the kitchen. Here are some creative ideas to consider:

  • Herb Substitutions: If you want to switch things up, try using fresh herbs instead of dried ones. Fresh thyme, rosemary, or even basil can elevate the dish with their vibrant flavors. Just remember to use about three times the amount of fresh herbs compared to dried.
  • Vegetable Additions: For a heartier meal, consider adding vegetables to the skillet. Carrots, bell peppers, or zucchini can roast alongside the chicken, soaking up the delicious sauce. This not only adds nutrition but also makes for a colorful presentation.
  • Different Proteins: If chicken isn’t your favorite, you can easily swap it out for other proteins. Bone-in, skin-on chicken breasts or even pork chops work wonderfully with this sauce. Just adjust the cooking time as needed to ensure they reach the proper internal temperature.
  • Spice It Up: For those who enjoy a bit of heat, add a pinch of red pepper flakes to the seasoning mix. This will give your dish a delightful kick that pairs well with the creamy sauce.
  • Wine Alternatives: While white wine is a key ingredient, you can experiment with different types. A dry rosé or even a splash of sherry can add unique flavors to the sauce. Just be mindful of the wine’s sweetness, as it can alter the overall taste.
  • Healthier Options: For a lighter version, substitute the heavy cream with Greek yogurt or coconut milk. This will still provide creaminess while reducing calories. You can also use low-sodium chicken broth to cut down on sodium content.

Herb Roasted Chicken with Creamy White Wine Sauce to suit your taste and dietary needs. Feel free to mix and match these ideas to create a dish that’s uniquely yours. The possibilities are endless, and each variation can lead to a new favorite recipe!

Cooking Note for Herb Roasted Chicken with Creamy White Wine Sauce

Herb Roasted Chicken with Creamy White Wine Sauce, there are a few important cooking notes to keep in mind. These tips will help ensure that your dish turns out perfectly every time, making your cooking experience enjoyable and stress-free.

First, always use a meat thermometer to check the internal temperature of the chicken. This is crucial for food safety. The chicken should reach an internal temperature of 165°F to be fully cooked. If you don’t have a thermometer, make sure the juices run clear when you cut into the chicken.

Next, consider the size of your chicken thighs. If they are larger or smaller than the recipe suggests, you may need to adjust the cooking time. Larger thighs will take longer to cook, while smaller ones will cook faster. Keep an eye on them to avoid overcooking or undercooking.

Another tip is to let the chicken rest after removing it from the oven. This resting period allows the juices to redistribute throughout the meat, resulting in a juicier and more flavorful dish. Aim for about 5 minutes of resting time before serving.

Additionally, if you prefer a thicker sauce, you can let the sauce simmer a bit longer before adding the chicken back in. This will help reduce the liquid and intensify the flavors. Just be careful not to let it reduce too much, as you want enough sauce to coat the chicken and serve over your side dishes.

Herb Roasted Chicken with Creamy White Wine Sauce.

By following these cooking notes, you’ll be well on your way to creating a delicious and satisfying meal that everyone will love. Happy cooking!

Serving Suggestions for Herb Roasted Chicken with Creamy White Wine Sauce

Herb Roasted Chicken with Creamy White Wine Sauce, it’s time to think about how to serve it. Presentation can elevate your meal, making it even more enjoyable. Here are some delightful serving suggestions to complement your dish:

  • Over a Bed of Rice: Serve the chicken and sauce over fluffy white rice or brown rice. The rice will soak up the creamy sauce, making each bite flavorful and satisfying.
  • With Steamed Vegetables: Pair your chicken with a side of steamed vegetables like broccoli, green beans, or asparagus. The freshness of the veggies balances the richness of the sauce, creating a well-rounded meal.
  • On a Bed of Mashed Potatoes: For a comforting option, serve the chicken on a bed of creamy mashed potatoes. The potatoes will absorb the sauce beautifully, adding a hearty touch to your plate.
  • With Crusty Bread: Offer slices of crusty bread or a baguette on the side. This is perfect for dipping into the creamy sauce, making it a delightful addition to your meal.
  • Garnished with Fresh Herbs: Enhance the visual appeal by garnishing your dish with additional fresh parsley or other herbs. This not only adds color but also a burst of fresh flavor.
  • With a Side Salad: A light salad with mixed greens, cherry tomatoes, and a simple vinaigrette can provide a refreshing contrast to the rich chicken. It’s a great way to add some crunch and freshness to your meal.

Herb Roasted Chicken with Creamy White Wine Sauce. Whether you’re hosting a dinner party or enjoying a cozy family meal, these ideas will surely impress your guests and make your dining experience memorable!

Tips for Perfecting Herb Roasted Chicken with Creamy White Wine Sauce

Herb Roasted Chicken with Creamy White Wine Sauce, a few tips can elevate your dish from good to great. These simple yet effective strategies will help you achieve the perfect balance of flavors and textures, ensuring that your chicken is juicy and your sauce is rich and creamy. Let’s explore some helpful tips!

First, always start with high-quality chicken. Fresh, organic chicken thighs will yield the best flavor and texture. If possible, choose chicken that is free from antibiotics and hormones. This small change can make a big difference in the overall taste of your dish.

Next, don’t skip the searing step! Searing the chicken skin-side down creates a beautiful golden crust that adds flavor and texture. Make sure your skillet is hot enough before adding the chicken. This will help achieve that crispy skin you desire.

When it comes to seasoning, be generous! The seasoning mix should coat the chicken evenly. If you want to enhance the flavor even more, consider marinating the chicken in the seasoning for a few hours or overnight. This allows the flavors to penetrate the meat, making it even more delicious.

Another tip is to use a combination of broth and wine for the sauce. The broth adds depth, while the wine brings acidity and brightness. If you’re concerned about the alcohol content, don’t worry! Most of it cooks off during the simmering process, leaving behind a rich flavor.

For a creamier sauce, consider adding a bit of grated Parmesan cheese. This will not only enhance the creaminess but also add a wonderful umami flavor. Just stir it in after adding the heavy cream, and let it melt into the sauce.

Lastly, don’t rush the resting period after cooking. Allowing the chicken to rest for about 5 minutes before serving helps the juices redistribute throughout the meat. This ensures that every bite is juicy and flavorful.

Herb Roasted Chicken with Creamy White Wine Sauce. Each step contributes to a dish that is not only delicious but also a joy to prepare. Happy cooking!

Breakdown of Time for Herb Roasted Chicken with Creamy White Wine Sauce

Herb Roasted Chicken with Creamy White Wine Sauce can help you plan your cooking efficiently. Here’s a simple breakdown of the time you’ll need for preparation and cooking:

Prep Time

The prep time for this delicious dish is approximately 15-20 minutes. This includes gathering your ingredients, rinsing and drying the chicken, and seasoning it. Taking your time during this step ensures that the chicken is well-prepared and flavorful.

Cooking Time

Once you’ve prepped the chicken, the cooking time is about 30-35 minutes. This includes searing the chicken for about 8-10 minutes and then roasting it in the oven for 25-30 minutes. The key is to ensure the chicken reaches an internal temperature of 165°F for safe consumption.

Total Time

In total, you can expect to spend around 45-55 minutes from start to finish. This includes both prep and cooking time. With this efficient timeline, you can have a delightful meal ready to serve in less than an hour!

Herb Roasted Chicken with Creamy White Wine Sauce that everyone will love!

Nutritional Information for Herb Roasted Chicken with Creamy White Wine Sauce

Herb Roasted Chicken with Creamy White Wine Sauce not only delights your taste buds but also provides valuable nutrients. Here’s a breakdown of the key nutritional information for this delicious dish:

Calories

Herb Roasted Chicken with Creamy White Wine Sauce contains approximately 450 calories. This makes it a satisfying option for dinner without being overly heavy. The combination of chicken, cream, and wine creates a rich flavor profile while keeping the calorie count reasonable.

Protein

Protein is an essential nutrient for building and repairing tissues, and this dish delivers! Each serving provides about 30 grams of protein. The bone-in, skin-on chicken thighs are an excellent source of high-quality protein, making this meal a great choice for those looking to increase their protein intake.

Sodium

When it comes to sodium, each serving contains around 800 milligrams. While this is a moderate amount, it’s important to be mindful of your overall sodium intake, especially if you are watching your salt consumption. You can reduce the sodium content by using low-sodium chicken broth and adjusting the salt in the seasoning mix.

Herb Roasted Chicken with Creamy White Wine Sauce is not only a flavorful dish but also a nutritious one. With a good balance of calories, protein, and sodium, it can fit well into a healthy eating plan. Enjoy this delightful meal while being mindful of your nutritional needs!

FAQs about Herb Roasted Chicken with Creamy White Wine Sauce

What can I serve with Herb Roasted Chicken with Creamy White Wine Sauce?

Herb Roasted Chicken with Creamy White Wine Sauce, there are plenty of delicious options to consider. You can serve it over a bed of fluffy rice or creamy mashed potatoes, allowing the sauce to soak in and enhance the flavors. Steamed vegetables like broccoli, green beans, or asparagus make a great side, adding freshness and color to your plate. For a heartier meal, consider pairing it with crusty bread for dipping into the rich sauce. A light salad with mixed greens can also provide a refreshing contrast to the creamy dish. The key is to choose sides that complement the flavors of the chicken and sauce!

Can I use other types of wine for the sauce?

Absolutely! While the recipe calls for white wine, you can experiment with different types to suit your taste. A dry rosé or even a splash of sherry can work well in the sauce. Just be mindful of the wine’s sweetness, as it can alter the overall flavor. If you prefer not to use wine, you can substitute it with additional chicken broth or a mixture of broth and a splash of vinegar for acidity. This will still give you a flavorful sauce without the alcohol.

How do I store leftovers of Herb Roasted Chicken with Creamy White Wine Sauce?

Herb Roasted Chicken with Creamy White Wine Sauce is easy! Allow the chicken to cool to room temperature, then transfer it to an airtight container. You can store it in the refrigerator for up to 3-4 days. If you want to keep it longer, consider freezing the chicken and sauce in a freezer-safe container. It can last for up to 3 months in the freezer. When you’re ready to enjoy it again, simply thaw it in the refrigerator overnight and reheat it gently on the stove or in the oven until warmed through.

Can I make Herb Roasted Chicken with Creamy White Wine Sauce ahead of time?

Herb Roasted Chicken with Creamy White Wine Sauce ahead of time! You can season the chicken and make the sauce a day in advance. Store them separately in the refrigerator. When you’re ready to cook, simply sear the chicken and combine it with the sauce before roasting. This can save you time on busy days and allows the flavors to meld together even more. Just remember to adjust the cooking time if the chicken is cold from the fridge!

Conclusion on Herb Roasted Chicken with Creamy White Wine Sauce

Herb Roasted Chicken with Creamy White Wine Sauce is a delightful dish that brings together rich flavors and comforting textures. This recipe is not only easy to follow but also allows for creativity in the kitchen. Whether you’re cooking for a special occasion or a cozy family dinner, this dish is sure to impress.

As you’ve learned, the combination of tender chicken thighs, aromatic herbs, and a luscious creamy sauce creates a meal that is both satisfying and memorable. The versatility of this recipe means you can adapt it to suit your taste preferences or dietary needs, making it a go-to option for any home cook.

Herb Roasted Chicken with Creamy White Wine Sauce, you’ll experience the joy of home-cooked goodness.

We hope you feel inspired to try this recipe and make it your own. Happy cooking, and may your dining table always be filled with love, laughter, and delicious food!

Paul

Herb Roasted Chicken with Creamy White Wine Sauce delights!

This rustic one-pot dish features tender roasted chicken simmered in a savory herb-infused white wine sauce with buttery potatoes and earthy mushrooms. Perfect for a cozy Sunday dinner or impressing guests with elegant, homestyle comfort food.
Prep Time 20 minutes
Cook Time 1 hour
Total Time 1 hour 20 minutes
Servings: 4 -6 servings
Course: Dinner
Cuisine: American / Rustic

Ingredients
  

  • 1 whole chicken cut into 8 pieces (or 4 skin-on chicken breasts or 6 bone-in, skin-on thighs)1 tablespoon kosher salt, divided1 teaspoon black pepper, divided3 tablespoons salted butter1 cup brown mushrooms, halved3 shallots, diced (or 1 medium yellow onion)2 medium stalks celery, chopped3 cloves garlic, minced1 tablespoon fresh or dried sage, minced2 teaspoons fresh or dried parsley, minced¼ cup all-purpose flour½ cup dry white wine (Sauvignon Blanc, Chardonnay, or Pinot Grigio)2 cups chicken stock (or vegetable stock)1 lb baby yellow potatoes, halved¼ cup cream or half & half

Method
 

  1. Preheat oven to 325°F (163°C). Pat chicken pieces dry with paper towels. Combine 2 teaspoons salt and ½ teaspoon pepper and rub over and under the chicken skin.
  2. Melt butter in a large Dutch oven over medium-high heat. Brown the chicken for 3 to 5 minutes per side until golden. Remove and set aside.
  3. In the same pot, sauté the mushrooms, shallots, celery, and garlic in the remaining butter. Once mushrooms release their juices, stir in the remaining salt, pepper, sage, and parsley.
  4. When the onions are translucent (about 7 minutes), sprinkle the flour over the vegetables and toss to coat. Add the wine and deglaze the pot, scraping up all the flavorful browned bits.
  5. Gradually stir in the chicken stock, one cup at a time, and bring to a gentle boil. Let simmer for about 5 minutes until slightly thickened.
  6. Add the halved potatoes, stir to coat in the sauce, and return the chicken pieces to the pot, skin-side up.
  7. Transfer the uncovered pot to the oven and roast for 40 to 45 minutes or until the chicken reaches an internal temperature of 165°F (74°C).
  8. Remove from the oven and stir in the cream. Cover and let rest for 10 minutes before serving for enhanced flavor and tenderness.
  9. Serve warm with sauce spooned over each portion.

Notes

Use bone-in, skin-on chicken for maximum flavor and moisture.
Dry white wine adds depth, but if avoiding alcohol, substitute with more stock and a squeeze of lemon juice.
This dish pairs beautifully with crusty bread or a crisp green salad.

Mango Chicken Stir-Fry Recipe is a quick, tasty delight!

Mango Chicken Stir-Fry Recipe is just what you need! This delightful meal combines tender chicken, vibrant vegetables, and sweet mango, creating a perfect harmony of tastes. Not only is it delicious, but it’s also quick to prepare, making it an ideal choice for busy weeknights or casual gatherings.

What Makes the Mango Chicken Stir-Fry Recipe Special?

What sets this recipe apart is its unique blend of ingredients. The juicy mango adds a tropical sweetness that beautifully contrasts with the savory soy sauce and the warmth of ginger and garlic. This combination not only tantalizes your taste buds but also provides a nutritious meal packed with protein and vitamins.

Moreover, the vibrant colors of the red and yellow bell peppers, along with the crisp snap peas, make this dish visually appealing. It’s a feast for the eyes as much as it is for the palate! Plus, the stir-frying technique ensures that the vegetables retain their crunch, adding texture to every bite.

Mango Chicken Stir-Fry Recipe is its versatility. You can easily swap out the chicken for shrimp or tofu, making it suitable for various dietary preferences. Whether you’re a meat lover or a vegetarian, this recipe can be tailored to fit your needs.

In summary, the Mango Chicken Stir-Fry is not just a meal; it’s an experience. With its delightful flavors, quick preparation, and adaptability, it’s sure to become a favorite in your household. So, let’s dive into the ingredients and get cooking!

Ingredients for Mango Chicken Stir-Fry Recipe

Mango Chicken Stir-Fry Recipe, you’ll need a variety of fresh ingredients. Each component plays a crucial role in building the dish’s flavor and texture. Here’s what you’ll need:

  • 2 tablespoons vegetable oil: This oil is perfect for stir-frying, as it has a high smoke point and allows for even cooking.
  • 1 pound boneless, skinless chicken breasts: Cut into bite-sized pieces, chicken provides a lean source of protein.
  • 1 red bell pepper: Sliced, this adds a sweet crunch and vibrant color.
  • 1 yellow bell pepper: Also sliced, it complements the red pepper and enhances the dish’s visual appeal.
  • 1 cup snap peas: Trimmed, these peas add a delightful crispness and a pop of green.
  • 1 cup mango: Diced, fresh or frozen, mango brings a tropical sweetness that balances the savory flavors.
  • 3 cloves garlic: Minced, garlic adds a fragrant aroma and depth of flavor.
  • 1 tablespoon fresh ginger: Minced, ginger provides a warm, spicy note that elevates the dish.
  • 1/4 cup soy sauce: This salty sauce is essential for seasoning and adds umami to the stir-fry.
  • 2 tablespoons honey: Honey adds a touch of sweetness that complements the soy sauce and mango.
  • 1 tablespoon rice vinegar: This tangy ingredient brightens the flavors and balances the sweetness.
  • 1 teaspoon cornstarch mixed with 1 tablespoon water: This mixture helps thicken the sauce for a glossy finish.
  • Salt and pepper: To taste, these seasonings enhance the overall flavor of the dish.
  • Cooked rice or quinoa: For serving, these grains provide a hearty base for the stir-fry.

Gathering these ingredients will set you on the path to creating a delicious Mango Chicken Stir-Fry. Each item contributes to the dish’s unique flavor profile, making it a delightful meal for any occasion. Now that you have everything ready, let’s move on to the step-by-step preparation!

Step-by-Step Preparation of Mango Chicken Stir-Fry Recipe

Mango Chicken Stir-Fry Recipe. This process is straightforward and quick, allowing you to enjoy a delicious meal in no time. Let’s get started!

Step 1: Preparing the Chicken

First, take your boneless, skinless chicken breasts and cut them into bite-sized pieces. This helps them cook evenly and makes them easy to eat. Once cut, season the chicken with salt and pepper. This simple seasoning enhances the chicken’s natural flavor, making it more delicious.

Step 2: Chopping the Vegetables

Next, it’s time to chop the vegetables. Slice the red and yellow bell peppers into thin strips. This not only adds color but also ensures they cook quickly. Trim the snap peas, removing any tough ends. Having all your vegetables prepped and ready will make the cooking process smoother.

Step 3: Making the Sauce

Now, let’s prepare the sauce. In a small bowl, combine the soy sauce, honey, and rice vinegar. This mixture will create a sweet and savory sauce that ties all the flavors together. For a thicker consistency, mix the cornstarch with water in another bowl. This will help thicken the sauce later on.

Step 4: Cooking the Chicken

Heat the vegetable oil in a large skillet or wok over medium-high heat. Once the oil is hot, add the seasoned chicken pieces. Cook them for about 5-7 minutes, stirring occasionally, until they are browned and cooked through. Once done, remove the chicken from the skillet and set it aside. This step ensures the chicken stays juicy and tender.

Step 5: Stir-Frying the Vegetables

In the same skillet, add the sliced bell peppers and snap peas. Stir-fry these vegetables for about 3-4 minutes. You want them to be tender-crisp, which means they should still have a bit of crunch. This adds a delightful texture to your stir-fry.

Step 6: Combining Ingredients

Once the vegetables are ready, add the minced garlic and ginger to the skillet. Stir-fry for an additional 1-2 minutes until fragrant. Then, return the cooked chicken to the skillet. Pour in the prepared sauce and stir everything together. This is where the magic happens, as all the flavors meld beautifully.

Step 7: Serving the Dish

Finally, add the diced mango to the skillet and cook for another 2-3 minutes until heated through. Stir in the cornstarch mixture to thicken the sauce, cooking for an additional minute. Adjust the seasoning with salt and pepper if needed. Once everything is well combined, serve your Mango Chicken Stir-Fry over cooked rice or quinoa. Enjoy your colorful and flavorful meal!

Variations of Mango Chicken Stir-Fry Recipe

Mango Chicken Stir-Fry Recipe is not only delicious but also incredibly versatile. You can easily modify it to suit your taste preferences or dietary needs. Here are some exciting variations to consider:

Alternative Proteins

If you’re looking to switch up the protein in your stir-fry, there are plenty of options! Shrimp is a fantastic alternative. It cooks quickly and pairs wonderfully with the sweet mango. Simply replace the chicken with an equal amount of shrimp, and follow the same cooking steps. Another great option is tofu. For a vegetarian twist, use firm tofu, cut into cubes. Sauté the tofu until golden brown before adding the vegetables. This will give your dish a delightful texture and flavor.

Vegetarian Options

Mango Chicken Stir-Fry Recipe can easily be made vegetarian. In addition to tofu, you can add a variety of plant-based proteins like tempeh or seitan. Both options absorb flavors well and provide a satisfying bite. You can also increase the amount of vegetables to make the dish heartier. Consider adding mushrooms, broccoli, or even zucchini for extra nutrition and flavor.

Different Vegetables to Use

The beauty of stir-frying is that you can use almost any vegetable you have on hand. While the original recipe calls for bell peppers and snap peas, feel free to experiment! Broccoli florets, carrots, and baby corn can add different textures and flavors. You can also try adding leafy greens like spinach or bok choy towards the end of cooking for a nutritious boost. The key is to choose vegetables that cook quickly, ensuring they remain crisp and vibrant.

Mango Chicken Stir-Fry Recipe that suits your taste and dietary preferences. Whether you stick with chicken or try something new, this dish is sure to impress!

Cooking Note for Mango Chicken Stir-Fry Recipe

Mango Chicken Stir-Fry Recipe, there are a few cooking notes to keep in mind to ensure your dish turns out perfectly every time. These tips will help you achieve the best flavor and texture, making your stir-fry a delightful experience.

First, make sure to use a large skillet or wok. This allows for even cooking and prevents overcrowding. When the pan is too full, the ingredients can steam instead of stir-fry, leading to a less desirable texture. If you have a lot of ingredients, consider cooking in batches.

Next, keep your ingredients prepped and ready before you start cooking. Stir-frying is a quick process, and having everything chopped and measured will make it easier to follow the steps without rushing. This way, you can focus on cooking and enjoy the process.

Also, remember to adjust the heat as needed. If you notice that the chicken or vegetables are browning too quickly, lower the heat slightly. Conversely, if they are not cooking fast enough, increase the heat. Stir-frying requires a balance of high heat and quick movements to achieve that perfect tender-crisp texture.

Lastly, don’t be afraid to taste as you go! This is a great way to ensure the flavors are just right. If you feel the dish needs more sweetness, add a bit more honey. If it’s too sweet, a splash of soy sauce can help balance it out. Cooking is all about personal preference, so feel free to adjust the seasonings to suit your taste.

Mango Chicken Stir-Fry Recipe. Enjoy the vibrant flavors and the joy of cooking!

Serving Suggestions for Mango Chicken Stir-Fry Recipe

Mango Chicken Stir-Fry Recipe, it’s time to think about how to serve it. The way you present your dish can enhance the overall dining experience. Here are some delightful serving suggestions to consider:

  • Over Rice or Quinoa: The classic way to serve stir-fry is over a bed of cooked rice or quinoa. Both options provide a hearty base that soaks up the flavorful sauce. Jasmine rice or brown rice are excellent choices, while quinoa adds a nutty flavor and extra protein.
  • With a Side Salad: Pair your stir-fry with a fresh side salad. A simple mix of greens, cucumbers, and a light vinaigrette can balance the richness of the stir-fry. This adds a refreshing crunch and extra nutrients to your meal.
  • In Lettuce Wraps: For a fun twist, serve the stir-fry in crisp lettuce leaves. This makes for a light and healthy option. Simply spoon the stir-fry into the leaves and enjoy them as wraps. It’s a great way to add a crunchy texture!
  • With Noodles: If you prefer noodles, consider serving your stir-fry over cooked rice noodles or soba noodles. The noodles will absorb the sauce beautifully, creating a satisfying dish that’s full of flavor.
  • Garnished with Fresh Herbs: To elevate the presentation, garnish your stir-fry with fresh herbs like cilantro or green onions. This adds a pop of color and a burst of fresh flavor that complements the dish perfectly.

Mango Chicken Stir-Fry Recipe but also allow you to customize your meal to suit your preferences. Whether you choose rice, noodles, or lettuce wraps, your dish is sure to impress family and friends alike!

Tips for Perfecting Your Mango Chicken Stir-Fry Recipe

Mango Chicken Stir-Fry Recipe truly shine, consider these helpful tips. They will guide you in achieving the best flavor and texture, ensuring that every bite is delicious!

  • Use Fresh Ingredients: Fresh vegetables and ripe mango will enhance the overall taste of your stir-fry. Look for vibrant colors and firm textures when selecting your produce. Fresh ingredients not only taste better but also provide more nutrients.
  • Prep Ahead: Preparing all your ingredients before you start cooking is key. Chop your vegetables, measure out sauces, and have everything ready to go. This will make the cooking process smoother and faster, allowing you to enjoy your meal sooner.
  • Don’t Overcrowd the Pan: When stir-frying, it’s important not to overcrowd the skillet. If the pan is too full, the ingredients will steam instead of fry. Cook in batches if necessary to maintain that perfect stir-fry texture.
  • Adjust Cooking Time: Keep an eye on your cooking times. Different vegetables have varying cooking times. For instance, snap peas cook quickly, while bell peppers may need a bit longer. Stir-fry until each vegetable is tender-crisp for the best results.
  • Experiment with Flavors: Feel free to adjust the sauce ingredients to suit your taste. If you prefer a sweeter dish, add more honey. For a saltier flavor, increase the soy sauce. Tasting as you go will help you find the perfect balance.
  • Garnish for Presentation: A simple garnish can elevate your dish. Consider adding chopped green onions, cilantro, or sesame seeds on top before serving. This not only adds visual appeal but also enhances the flavor.
  • Serve Immediately: Stir-fry is best enjoyed fresh and hot. Serve it right after cooking to maintain the vibrant colors and crisp textures. If you let it sit too long, the vegetables may become soggy.

Mango Chicken Stir-Fry Recipe. Each step will help you create a dish that’s not only tasty but also visually stunning. Happy cooking!

Breakdown of Time for Mango Chicken Stir-Fry Recipe

Mango Chicken Stir-Fry Recipe can help you plan your cooking efficiently. Here’s a breakdown of the time you’ll need for preparation and cooking:

Prep Time

The prep time for this delicious stir-fry is approximately 15 minutes. During this time, you will gather all your ingredients, chop the vegetables, and prepare the chicken. Having everything ready before you start cooking is essential for a smooth cooking experience. This way, you can focus on stir-frying without any interruptions!

Cooking Time

Mango Chicken Stir-Fry Recipe is about 15-20 minutes. This includes cooking the chicken until it’s perfectly browned, stir-frying the vegetables, and combining everything with the flavorful sauce. The quick cooking process ensures that the ingredients remain fresh and vibrant, making your dish not only tasty but also visually appealing.

Total Time

In total, you can expect to spend around 30-35 minutes from start to finish. This includes both prep and cooking time. With such a quick turnaround, this recipe is perfect for busy weeknights or when you want to impress guests without spending hours in the kitchen. You’ll have a delightful meal ready in no time!

Nutritional Information for Mango Chicken Stir-Fry Recipe

Mango Chicken Stir-Fry Recipe not only delights your taste buds but also provides a nutritious option for your dinner table. Here’s a breakdown of the key nutritional components per serving:

Calories

Mango Chicken Stir-Fry Recipe contains approximately 320 calories. This makes it a relatively light meal, perfect for those looking to enjoy a flavorful dish without overindulging. The combination of chicken, vegetables, and mango ensures that you’re getting a satisfying meal without excessive calories.

Protein

Protein is vital for muscle repair and overall health, and this recipe delivers! Each serving provides about 30 grams of protein. The chicken is the primary source of protein, making this dish an excellent choice for those looking to increase their protein intake. Pairing it with quinoa or rice can further enhance the protein content, making it a well-rounded meal.

Sodium

Mango Chicken Stir-Fry Recipe contains around 800 milligrams per serving. This amount is primarily from the soy sauce used in the recipe. If you’re watching your sodium intake, consider using low-sodium soy sauce as a substitute. This simple swap can help reduce the overall sodium content while still maintaining the dish’s delicious flavor.

Mango Chicken Stir-Fry Recipe is not only a feast for the senses but also a nutritious option that fits well into a balanced diet. With its low calorie count, high protein content, and manageable sodium levels, it’s a meal you can feel good about serving to your family and friends!

FAQs about Mango Chicken Stir-Fry Recipe

Can I use frozen mango for the Mango Chicken Stir-Fry Recipe?

Mango Chicken Stir-Fry Recipe. It’s convenient and often just as tasty as fresh mango. Just make sure to thaw the mango before adding it to the stir-fry. This will help it heat through quickly without making the dish watery. Frozen mango can add a delightful sweetness to your meal, making it just as delicious!

What can I serve with Mango Chicken Stir-Fry Recipe?

Mango Chicken Stir-Fry Recipe. The classic choice is to serve it over cooked rice or quinoa, which absorbs the flavorful sauce beautifully. You can also pair it with a fresh side salad for a refreshing crunch. If you’re feeling adventurous, try serving it in lettuce wraps or over noodles for a fun twist. Each option complements the stir-fry perfectly!

How can I make the Mango Chicken Stir-Fry Recipe spicier?

Mango Chicken Stir-Fry Recipe. You can add red pepper flakes or sliced jalapeños when cooking the vegetables. Another option is to include a dash of sriracha or chili sauce in the sauce mixture. Start with a small amount and adjust to your taste. This will give your dish a nice kick while still allowing the sweet mango flavor to shine through!

Can I prepare the Mango Chicken Stir-Fry Recipe in advance?

Mango Chicken Stir-Fry Recipe in advance! You can chop the vegetables and marinate the chicken ahead of time. However, it’s best to cook the stir-fry fresh to maintain the vibrant colors and crisp textures of the vegetables. If you have leftovers, they can be stored in an airtight container in the fridge for up to three days. Just reheat gently before serving!

Conclusion on Mango Chicken Stir-Fry Recipe

Mango Chicken Stir-Fry Recipe is a delightful dish that brings together a medley of flavors and textures. With its vibrant colors and delicious taste, it’s sure to become a favorite in your kitchen. This recipe not only satisfies your hunger but also provides a nutritious meal that is quick and easy to prepare.

Whether you’re cooking for yourself, family, or friends, this stir-fry is versatile enough to cater to various dietary preferences. You can easily swap out the chicken for shrimp or tofu, and experiment with different vegetables to suit your taste. The sweet mango adds a unique twist that sets this dish apart from traditional stir-fries.

Moreover, the cooking process is straightforward, making it perfect for busy weeknights or casual gatherings. With just a few simple steps, you can create a colorful and flavorful meal that will impress everyone at the table. Remember to keep your ingredients fresh and prep ahead for the best results!

Mango Chicken Stir-Fry Recipe a try? You’ll enjoy the burst of flavors and the satisfaction of creating a delicious meal in no time. Happy cooking, and may your kitchen be filled with the delightful aroma of this tropical stir-fry!

Paul

Mango Chicken Stir-Fry Recipe is a quick, tasty delight!

Sweet, spicy, and irresistibly crispy, this Chinese-style Mango Chicken Stir Fry is a vibrant fusion of tropical fruit and bold Asian flavors. Perfectly fried chicken bites are tossed in a fiery garlic chili sauce and finished with juicy mango chunks for a deliciously balanced dinner that’s better than takeout.
Prep Time 15 minutes
Cook Time 25 minutes
Total Time 40 minutes
Servings: 4 servings
Course: Main Course
Cuisine: Asian Fusion / Indo-Chinese

Ingredients
  

  • For the Crispy Chicken Bites:1 lb skinless boneless chicken breasts or thighs cubed¼ cup cornstarch¼ cup all-purpose flour1 teaspoon ginger garlic paste½ teaspoon salt¼ teaspoon ground black pepperNeutral oil, for frying
  • For the Sauce:3 tablespoons cooking oil2 tablespoons chopped garlic2 to 3 green chilies chopped1 large onion, cubed into 1-inch pieces1 cup cubed mixed bell peppers2 tablespoons dark soy sauce4 tablespoons sweet chili sauce2 tablespoons red chili paste2 tablespoons tomato ketchup1 tablespoon rice vinegar½ teaspoon salt (adjust to taste)½ teaspoon ground black pepper2 tablespoons cornstarch1 cup water1 cup ripe mango, peeled and cubedChopped spring onion greens, for garnish

Method
 

  1. Wash and pat dry the chicken. Cut into small bite-sized cubes.
  2. In a bowl, mix the cornstarch, all-purpose flour, ginger garlic paste, salt, and black pepper. Coat the chicken pieces thoroughly with the mixture.
  3. Heat oil in a deep pan over high heat. Fry the chicken in batches until golden brown and crispy. Drain on paper towels. For extra crunch, you can double-fry the chicken by refrying it after it cools slightly.
  4. Heat 3 tablespoons of oil in a large wok over high heat. Add chopped garlic and green chilies, stirring quickly for about 3–4 seconds.
  5. Add the cubed onion and bell peppers. Stir-fry for 1 minute until slightly softened but still crisp.
  6. Stir in soy sauce, sweet chili sauce, red chili paste, ketchup, vinegar, salt, and black pepper. Mix well.
  7. In a separate bowl, make a slurry by combining cornstarch and water. Add the slurry to the sauce and cook, stirring until the sauce thickens.
  8. Add the crispy fried chicken and mango cubes. Toss everything together until evenly coated and heated through.
  9. Garnish with chopped spring onions and serve hot with rice or noodles.

Notes

You can adjust the heat by reducing or increasing the amount of red chili paste or green chilies.
Use ripe but firm mango to keep the chunks intact while tossing.
For a healthier version, air-fry or bake the chicken instead of deep frying.
Leftovers reheat well and make a great lunch the next day.

Baked Salmon Meatballs Recipe is a must-try dish!

Baked salmon meatballs are a delightful twist on traditional meatballs. They are not only delicious but also packed with nutrients. This recipe is perfect for anyone looking to enjoy a healthy meal without sacrificing flavor. Salmon is rich in omega-3 fatty acids, which are great for heart health. Plus, these meatballs are easy to make and can be served in various ways.

Why Choose Baked Salmon Meatballs?

Choosing baked salmon meatballs over regular meatballs has many benefits. First, they are lighter and healthier. Baking instead of frying reduces the amount of oil used, making them a great option for those watching their fat intake. Additionally, salmon is a fantastic source of protein, which helps keep you full and satisfied.

Another reason to love this recipe is its versatility. You can easily customize the flavors to suit your taste. Whether you prefer a hint of spice or a touch of sweetness, you can adjust the ingredients accordingly. Plus, they are perfect for meal prep. You can make a batch ahead of time and enjoy them throughout the week.

Finally, baked salmon meatballs are a hit with both kids and adults. They can be served as an appetizer, a main dish, or even in a salad. With so many options, they are sure to become a family favorite. So, let’s dive into the ingredients and get started on this tasty journey!

Ingredients for Baked Salmon Meatballs Recipe

To create delicious baked salmon meatballs, you’ll need a few simple ingredients. Each component plays a vital role in enhancing the flavor and texture of the meatballs. Here’s what you’ll need:

  • 1 pound fresh salmon fillets: Make sure the skin is removed for the best texture.
  • 1/2 cup breadcrumbs: This helps bind the meatballs together. You can use regular or gluten-free breadcrumbs.
  • 1/4 cup grated Parmesan cheese: Adds a rich, savory flavor.
  • 1/4 cup fresh parsley, chopped: Fresh herbs brighten up the dish.
  • 1/4 cup green onions, chopped: These add a mild onion flavor.
  • 1 large egg: Acts as a binder to hold everything together.
  • 2 cloves garlic, minced: Garlic brings a wonderful aroma and taste.
  • 1 teaspoon lemon zest: This adds a refreshing citrus note.
  • 1 teaspoon salt: Enhances the overall flavor.
  • 1/2 teaspoon black pepper: For a little kick.
  • 1/2 teaspoon smoked paprika: Adds a subtle smokiness.
  • 1 tablespoon olive oil: Drizzled on top for moisture and flavor.

These ingredients come together to create a delightful dish that is both nutritious and satisfying. Feel free to experiment with different herbs or spices to make this recipe your own. Now that you have everything ready, let’s move on to the preparation steps!

Step-by-Step Preparation of Baked Salmon Meatballs Recipe

Now that you have gathered all the ingredients, it’s time to dive into the preparation of your baked salmon meatballs. This step-by-step guide will help you create delicious meatballs that are sure to impress. Let’s get started!

Step 1: Preparing the Salmon

First, you need to prepare the salmon. Start by placing the fresh salmon fillets on a clean cutting board. Make sure the skin is completely removed. Using a sharp knife, cut the salmon into smaller pieces. This will make it easier to process. Next, transfer the salmon pieces to a food processor. Pulse the salmon until it is finely chopped but not pureed. You want a nice texture that will hold together in meatball form. Once done, transfer the chopped salmon to a large mixing bowl.

Step 2: Mixing the Ingredients

With the salmon ready, it’s time to mix in the other ingredients. In the bowl with the chopped salmon, add the breadcrumbs, grated Parmesan cheese, chopped parsley, and green onions. Then, crack the large egg into the mixture. Next, add the minced garlic, lemon zest, salt, black pepper, and smoked paprika. Using a spatula or your hands, mix everything together until well combined. Make sure all the ingredients are evenly distributed. This will ensure that every bite is packed with flavor!

Step 3: Forming the Meatballs

Now comes the fun part—forming the meatballs! With clean hands, take a portion of the mixture and roll it into a ball, about 1 to 1.5 inches in diameter. Make sure the meatballs are uniform in size for even cooking. Place each meatball on the prepared baking sheet lined with parchment paper. Continue this process until all the mixture is used up. You should have around 16 to 20 meatballs, depending on the size you choose.

Step 4: Baking the Meatballs

Finally, it’s time to bake the meatballs! Preheat your oven to 400°F if you haven’t done so already. Once the oven is ready, drizzle the olive oil over the meatballs. This will help them stay moist and add a lovely golden color. Place the baking sheet in the oven and bake for 15-20 minutes. Keep an eye on them, and look for a golden brown color and firm texture. When they are done, remove them from the oven and let them cool slightly before serving.

And there you have it! Your baked salmon meatballs are ready to be enjoyed. They are perfect for a quick dinner or a fun appetizer. Let’s explore some variations and serving suggestions next!

Variation of Baked Salmon Meatballs Recipe

One of the best things about baked salmon meatballs is their versatility. You can easily switch up the ingredients to create different flavors. Let’s explore some alternative ingredients and cooking methods that can elevate your dish!

Alternative Ingredients for Different Flavors

To make your baked salmon meatballs even more exciting, consider these alternative ingredients:

  • Herbs and Spices: Instead of parsley, try using dill or cilantro for a fresh twist. You can also add a pinch of cayenne pepper for some heat.
  • Cheese Variations: Swap out Parmesan for feta cheese or goat cheese. These options will add a creamy texture and unique flavor.
  • Vegetable Add-ins: Finely chopped bell peppers or spinach can be mixed in for added nutrition and color.
  • Flavor Boosters: A tablespoon of Dijon mustard or a splash of soy sauce can enhance the flavor profile. These ingredients add depth and richness.

Feel free to experiment with these alternatives. Each variation can bring a new taste experience to your baked salmon meatballs!

Cooking Methods: Baking vs. Pan-Frying

While baking is a healthier option, you might wonder about pan-frying. Here’s a quick comparison:

  • Baking: This method is simple and requires less oil. It allows the meatballs to cook evenly and develop a nice crust. Plus, it’s a hands-off approach, giving you time to prepare sides or sauces.
  • Pan-Frying: If you prefer a crispy exterior, pan-frying is a great choice. Heat a little olive oil in a skillet over medium heat. Cook the meatballs for about 4-5 minutes on each side until golden brown. This method adds a delicious crunch but requires more attention.

Both methods yield tasty results, so choose the one that fits your cooking style and preference. Whether you bake or fry, your baked salmon meatballs will surely be a hit!

Cooking Note for Baked Salmon Meatballs Recipe

When preparing baked salmon meatballs, a few cooking notes can help ensure your dish turns out perfectly every time. First, always use fresh salmon for the best flavor and texture. Frozen salmon can work, but make sure to thaw it completely and drain any excess moisture before using it in the recipe.

Next, be mindful of the size of your meatballs. Uniformity is key! If you make them too large, they may not cook through properly. On the other hand, if they are too small, they might dry out. Aim for meatballs that are about 1 to 1.5 inches in diameter for even cooking.

Another important tip is to check the internal temperature of the meatballs. They should reach an internal temperature of 145°F to ensure they are fully cooked. Using a meat thermometer can help you avoid any guesswork.

Lastly, let the meatballs rest for a few minutes after baking. This allows the juices to redistribute, making them more flavorful and moist. Enjoy your delicious baked salmon meatballs with confidence, knowing you’ve followed these cooking notes for a successful dish!

Serving Suggestions for Baked Salmon Meatballs Recipe

Now that your baked salmon meatballs are ready, it’s time to think about how to serve them. These meatballs are not only delicious on their own but also pair wonderfully with various sauces and side dishes. Let’s explore some great serving suggestions to elevate your meal!

Pairing with Sauces and Dips

Choosing the right sauce can enhance the flavor of your baked salmon meatballs. Here are some tasty options:

  • Tartar Sauce: A classic pairing, tartar sauce adds a creamy and tangy flavor that complements the salmon perfectly.
  • Honey Mustard: This sweet and tangy sauce brings a delightful contrast to the savory meatballs.
  • Chimichurri: A fresh herb sauce made with parsley, garlic, and olive oil. It adds a vibrant flavor that brightens up the dish.
  • Spicy Sriracha Mayo: For those who enjoy a kick, mix mayonnaise with sriracha for a creamy and spicy dip.
  • Yogurt Sauce: A simple yogurt sauce with lemon juice and dill can provide a refreshing touch.

Feel free to mix and match these sauces based on your taste preferences. Each option adds a unique twist to your baked salmon meatballs!

Best Side Dishes to Serve

To create a complete meal, consider serving your baked salmon meatballs with some delicious side dishes. Here are a few ideas:

  • Mixed Green Salad: A fresh salad with a variety of greens, cherry tomatoes, and a light vinaigrette pairs well with the meatballs.
  • Quinoa or Brown Rice: These whole grains provide a hearty base and complement the flavors of the meatballs.
  • Roasted Vegetables: Seasonal vegetables like zucchini, bell peppers, and carrots roasted with olive oil make a colorful and nutritious side.
  • Mashed Potatoes: Creamy mashed potatoes can be a comforting addition, balancing the flavors of the dish.
  • Steamed Asparagus: Lightly steamed asparagus adds a touch of elegance and a pop of color to your plate.

These side dishes not only enhance the meal but also add nutritional value. Choose your favorites and enjoy a well-rounded dinner with your baked salmon meatballs!

Tips for Perfect Baked Salmon Meatballs Recipe

Creating the perfect baked salmon meatballs is all about attention to detail. Here are some helpful tips to ensure your meatballs turn out delicious every time:

  • Use Fresh Ingredients: Fresh salmon and herbs make a big difference in flavor. Always opt for the freshest ingredients available to enhance the taste of your meatballs.
  • Don’t Overmix: When combining the ingredients, mix just until everything is combined. Overmixing can lead to tough meatballs. You want them to be tender and light.
  • Chill the Mixture: If you have time, chill the meatball mixture in the refrigerator for about 30 minutes before forming them. This helps the flavors meld and makes the mixture easier to handle.
  • Test a Small Meatball: Before baking the entire batch, cook a small meatball in a skillet to check the seasoning. This way, you can adjust the flavors if needed.
  • Use Parchment Paper: Lining your baking sheet with parchment paper prevents sticking and makes cleanup a breeze. It also helps the meatballs cook evenly.
  • Rotate the Baking Sheet: Halfway through baking, rotate the baking sheet for even cooking. This ensures all meatballs get that lovely golden brown color.
  • Let Them Rest: After baking, let the meatballs rest for a few minutes. This allows the juices to redistribute, making them more flavorful and moist.
  • Store Properly: If you have leftovers, store them in an airtight container in the refrigerator. They can last for up to three days. Reheat gently in the oven or microwave.

By following these tips, you’ll be well on your way to making perfect baked salmon meatballs that are sure to impress your family and friends. Enjoy the process and the delicious results!

Breakdown of Time for Baked Salmon Meatballs Recipe

Understanding the time required for each step in the baked salmon meatballs recipe can help you plan your cooking efficiently. Here’s a detailed breakdown of the time you’ll need for preparation and cooking.

Prep Time

The prep time for this recipe is approximately 15-20 minutes. This includes gathering your ingredients, preparing the salmon, and mixing everything together. If you choose to chill the mixture for better flavor and texture, you might want to add an extra 30 minutes to this time. However, the actual hands-on time remains around 15-20 minutes.

Cooking Time

Once your meatballs are formed, the cooking time is about 15-20 minutes. Preheat your oven to 400°F, and then bake the meatballs until they are golden brown and cooked through. Keep an eye on them during the last few minutes to ensure they don’t overcook. The internal temperature should reach 145°F for safe consumption.

Total Time

In total, you can expect the entire process to take about 30-40 minutes, including both prep and cooking time. If you factor in the optional chilling time, the total could extend to about 1 hour. This makes baked salmon meatballs a quick and easy meal option, perfect for busy weeknights or casual gatherings!

Nutritional Information for Baked Salmon Meatballs Recipe

Understanding the nutritional content of your meals is essential for maintaining a balanced diet. Baked salmon meatballs are not only delicious but also provide a good mix of nutrients. Here’s a closer look at the nutritional information for this recipe.

Calories

Each serving of baked salmon meatballs contains approximately 250 calories. This makes them a great option for a light yet satisfying meal. The calorie count is reasonable, especially considering the health benefits of salmon, which is rich in omega-3 fatty acids.

Protein Content

One of the standout features of baked salmon meatballs is their protein content. Each serving provides about 20 grams of protein. This high protein level helps keep you feeling full and supports muscle health. Incorporating protein into your meals is vital for overall wellness, making these meatballs a smart choice.

Sodium Levels

When it comes to sodium, each serving contains around 500 milligrams. While this is a moderate amount, it’s important to be mindful of your overall sodium intake, especially if you are watching your salt consumption. You can reduce sodium levels by using low-sodium breadcrumbs or cheese if desired.

Overall, baked salmon meatballs are a nutritious option that fits well into a healthy diet. They provide a good balance of calories, protein, and essential nutrients, making them a fantastic choice for any meal. Enjoy these meatballs knowing you’re treating your body well!

FAQs about Baked Salmon Meatballs Recipe

Can I freeze baked salmon meatballs?

Yes, you can freeze baked salmon meatballs! To do this, allow the meatballs to cool completely after baking. Then, place them in an airtight container or a freezer bag. Make sure to separate layers with parchment paper to prevent sticking. They can be stored in the freezer for up to three months. When you’re ready to enjoy them, simply thaw in the refrigerator overnight and reheat in the oven or microwave until warmed through.

What can I substitute for breadcrumbs in the recipe?

If you’re looking for a substitute for breadcrumbs, there are several options available. For a gluten-free alternative, you can use crushed gluten-free crackers or almond flour. Additionally, you can try using oats or ground flaxseed for a different texture. Each of these substitutes will help bind the meatballs while adding their unique flavor.

How do I know when the salmon meatballs are done?

To check if your salmon meatballs are done, look for a golden brown color on the outside. The best way to ensure they are fully cooked is to use a meat thermometer. The internal temperature should reach 145°F. If you don’t have a thermometer, you can cut one meatball in half to check that it is opaque and flaky inside, with no raw salmon visible.

Can I use canned salmon for this recipe?

Absolutely! Canned salmon can be a convenient option for this recipe. Just make sure to drain the canned salmon well and remove any bones if desired. The texture may be slightly different, but it will still work well in the meatball mixture. Using canned salmon can save you time and make this recipe even easier!

Conclusion on Baked Salmon Meatballs Recipe

In conclusion, baked salmon meatballs are a fantastic addition to any meal plan. They are not only easy to prepare but also packed with flavor and nutrition. With their delightful taste and versatility, these meatballs can be enjoyed in various ways, whether as an appetizer, main dish, or even in a salad.

By following the steps outlined in this recipe, you can create a dish that is sure to impress your family and friends. The combination of fresh salmon, herbs, and spices results in a deliciously satisfying meal that everyone will love. Plus, with the option to customize the ingredients, you can make them uniquely yours!

Remember, the key to perfect baked salmon meatballs lies in using fresh ingredients, paying attention to cooking times, and experimenting with flavors. Whether you choose to bake or pan-fry, you’ll end up with a delightful dish that is both healthy and delicious.

So, gather your ingredients, roll up your sleeves, and get ready to enjoy a meal that is not only good for you but also bursting with flavor. Happy cooking!

Paul

Baked Salmon Meatballs Recipe is a must-try dish!

These light and flavorful salmon meatballs are baked to golden perfection and paired with a creamy, zesty avocado sauce. Packed with protein and healthy fats, this recipe is perfect for a nutritious lunch, appetizer platter, or weeknight dinner with a coastal twist.
Prep Time 15 minutes
Cook Time 15 minutes
Total Time 30 minutes
Servings: 4 servings
Course: Appetizer or Main
Cuisine: American

Ingredients
  

  • For the Salmon Meatballs:1 lb salmon fillet skin removed and finely chopped½ cup breadcrumbs (Panko preferred)1 egg, lightly beaten2 tablespoons fresh parsley, chopped1 teaspoon garlic powder½ teaspoon paprikaSalt and pepper to taste1 tablespoon olive oil, for drizzling
  • For the Creamy Avocado Sauce:1 ripe avocado¼ cup sour cream1 tablespoon lemon juice1 garlic clove mincedSalt and pepper to taste

Method
 

  1. Preheat oven to 375°F (190°C). Line a baking sheet with parchment paper and lightly grease it with oil or cooking spray.
  2. In a large mixing bowl, combine the chopped salmon, breadcrumbs, egg, parsley, garlic powder, paprika, salt, and pepper. Mix until just combined.
  3. With damp hands, form the mixture into small meatballs, about 1 tablespoon each. Arrange on the prepared baking sheet, leaving space between them.
  4. Drizzle the tops with olive oil. Bake for 12 to 15 minutes, or until the meatballs are golden and cooked through (internal temperature should reach 145°F/63°C).
  5. While the meatballs bake, prepare the avocado sauce. Blend the avocado, sour cream, lemon juice, garlic, salt, and pepper in a food processor or blender until smooth. If needed, thin the sauce with a splash of water.
  6. Serve the salmon meatballs warm with the avocado sauce drizzled over or on the side for dipping. Garnish with extra parsley if desired.

Notes

For a dairy-free version, substitute the sour cream with unsweetened coconut yogurt.
You can use canned salmon if fresh is unavailable—just make sure it’s well-drained.
These meatballs also work well in wraps, salads, or over rice bowls.

Spicy Harissa Chicken Recipe will elevate your dinner!

Spicy Harissa Chicken Recipe is here to bring excitement to your table! This dish is not only flavorful but also easy to prepare. Harissa, a North African chili paste, adds a delightful kick to the chicken, making it a perfect choice for those who enjoy bold flavors.

Imagine tender chicken thighs marinated in a rich blend of spices, then roasted to perfection. The result? Juicy, crispy-skinned chicken that bursts with flavor in every bite. Whether you’re hosting a dinner party or simply cooking for your family, this recipe is sure to impress.

In this article, we will guide you through the ingredients, preparation steps, and even some variations to suit your taste. Plus, we’ll share tips to ensure your chicken turns out perfectly every time. So, let’s dive into the world of spicy harissa chicken and discover how to create a dish that will leave everyone asking for seconds!

Ingredients for Spicy Harissa Chicken Recipe

Spicy Harissa Chicken Recipe, you’ll need a few simple ingredients. Each component plays a vital role in building the rich flavors that make this dish so special. Here’s what you’ll need:

  • 2 pounds chicken thighs, bone-in and skin-on
  • 2 tablespoons harissa paste
  • 2 tablespoons olive oil
  • 1 teaspoon garlic powder
  • 1 teaspoon onion powder
  • 1 teaspoon smoked paprika
  • 1 teaspoon salt
  • 1/2 teaspoon black pepper
  • 1 tablespoon lemon juice
  • Fresh cilantro or parsley for garnish (optional)

These ingredients come together to create a delicious marinade that infuses the chicken with flavor. The harissa paste is the star of the show, providing a spicy and aromatic kick. Olive oil helps to keep the chicken moist while adding richness. The garlic and onion powders, along with smoked paprika, enhance the overall taste, making each bite a delight.

Feel free to adjust the quantities based on your spice preference. If you like it milder, you can reduce the harissa paste or choose a milder variety. Now that you have your ingredients ready, let’s move on to the preparation steps!

Step-by-Step Preparation of Spicy Harissa Chicken Recipe

Spicy Harissa Chicken Recipe. This section will guide you through each step, ensuring your chicken turns out flavorful and juicy. Let’s get started!

Step 1: Marinating the Chicken

Marinating is a crucial step that allows the chicken to absorb all the delicious flavors. Begin by placing the chicken thighs in a large bowl. Next, add the harissa paste, olive oil, garlic powder, onion powder, smoked paprika, salt, black pepper, and lemon juice. Mix everything well until the chicken is fully coated with the marinade.

For the best results, cover the bowl with plastic wrap and let it marinate. You can leave it at room temperature for about 30 minutes or refrigerate it for up to 2 hours. The longer you marinate, the more intense the flavors will be!

Step 2: Preparing the Harissa Sauce

While the chicken is marinating, you can prepare the harissa sauce. If you want to enhance the flavor, consider adding a bit more olive oil or a splash of vinegar to the marinade. This will create a smoother sauce that clings beautifully to the chicken. Just remember, the harissa paste is already packed with flavor, so a little goes a long way!

Once the chicken is ready, you can use the leftover marinade as a sauce. Just make sure to cook it thoroughly before serving to eliminate any raw chicken juices.

Step 3: Cooking the Chicken

After marinating, it’s time to cook the chicken! Preheat your oven to 400°F (200°C). Line a baking sheet with parchment paper for easy cleanup. Place the marinated chicken thighs on the baking sheet, skin side up. This will help the skin get crispy while cooking.

Bake the chicken in the preheated oven for 35-40 minutes. You’ll know it’s done when the internal temperature reaches 165°F (75°C) and the skin is golden brown and crispy. The aroma will fill your kitchen, making it hard to wait!

Step 4: Serving the Dish

Once the chicken is cooked, remove it from the oven and let it rest for about 5 minutes. This resting period allows the juices to redistribute, keeping the chicken moist. When ready to serve, garnish with fresh cilantro or parsley for a pop of color and freshness.

Pair your spicy harissa chicken with roasted vegetables or a fresh salad for a complete meal. Enjoy the burst of flavors and the compliments from your family and friends!

Variations of Spicy Harissa Chicken Recipe

Spicy Harissa Chicken Recipe is a delightful dish on its own, there are many ways to switch things up! Whether you want to try different proteins or explore vegetarian options, these variations will keep your meals exciting and flavorful. Let’s take a look at some alternatives!

Alternative Proteins to Use

Spicy Harissa Chicken Recipe, you have several tasty options. Here are a few alternatives:

  • Chicken Breasts: For a leaner option, use boneless, skinless chicken breasts. They will cook faster, so adjust the baking time to about 25-30 minutes.
  • Pork Chops: Bone-in pork chops can be marinated and cooked in the same way. They will absorb the harissa flavors beautifully.
  • Fish: Firm fish like salmon or swordfish can also be marinated in the harissa sauce. Bake for about 15-20 minutes, depending on thickness.
  • Tofu: For a plant-based option, use extra-firm tofu. Press it to remove excess moisture, then marinate and bake for a delicious, spicy dish.

These alternatives allow you to enjoy the same bold flavors while catering to different dietary preferences. Feel free to experiment with cooking times to ensure everything is perfectly cooked!

Vegetarian Options for Spicy Harissa Chicken Recipe

Spicy Harissa Chicken Recipe, you can easily do so! Here are some ideas to consider:

  • Cauliflower Steaks: Slice a head of cauliflower into thick steaks, marinate them in the harissa sauce, and roast until tender and caramelized.
  • Chickpeas: Toss canned chickpeas in the harissa marinade and roast them for a crunchy, flavorful snack or salad topping.
  • Eggplant: Cut eggplant into thick slices, marinate, and bake until soft and flavorful. This makes a great side dish or main course.
  • Portobello Mushrooms: Marinate large portobello caps and grill or bake them for a hearty, meaty texture that pairs well with the spices.

These vegetarian options are not only delicious but also packed with nutrients. They allow everyone to enjoy the vibrant flavors of harissa, regardless of their dietary choices!

Cooking Note for Spicy Harissa Chicken Recipe

Spicy Harissa Chicken Recipe, there are a few important cooking notes to keep in mind. These tips will help you achieve the best results and ensure your chicken is flavorful and juicy.

First, always check the freshness of your ingredients. Fresh chicken and high-quality harissa paste will significantly enhance the flavor of your dish. If you can, opt for homemade harissa for a more personalized touch. You can easily make it by blending roasted red peppers, garlic, spices, and olive oil.

Next, consider the size of your chicken thighs. If they are particularly large, they may require a bit more cooking time. Always use a meat thermometer to check for doneness. The internal temperature should reach 165°F (75°C) to ensure the chicken is safe to eat.

Another tip is to let the chicken rest after baking. This step is crucial as it allows the juices to redistribute throughout the meat, resulting in a more tender and juicy bite. If you cut into the chicken too soon, you may lose those delicious juices!

Lastly, feel free to adjust the cooking time based on your oven. Every oven is different, and some may cook faster than others. Keep an eye on your chicken as it bakes, and don’t hesitate to make adjustments as needed.

Spicy Harissa Chicken Recipe that will impress everyone at your table!

Serving Suggestions for Spicy Harissa Chicken Recipe

Spicy Harissa Chicken Recipe, it’s time to think about how to serve it! The right sides can elevate your meal and create a well-rounded dining experience. Here are some fantastic serving suggestions that pair beautifully with the spicy chicken:

  • Roasted Vegetables: A medley of seasonal vegetables like bell peppers, zucchini, and carrots roasted with olive oil and herbs complements the spicy flavors of the chicken. The sweetness of the roasted veggies balances the heat perfectly.
  • Fresh Salad: A crisp salad with mixed greens, cherry tomatoes, cucumber, and a light vinaigrette adds a refreshing contrast. You can also toss in some feta cheese or avocado for extra creaminess.
  • Couscous or Quinoa: Serve the chicken over a bed of fluffy couscous or quinoa. These grains soak up the delicious juices from the chicken, making each bite flavorful. You can add herbs and lemon zest to the grains for added freshness.
  • Pita Bread: Warm pita bread is perfect for scooping up the chicken and any sauce. You can also serve it with a side of hummus or tzatziki for dipping.
  • Rice Pilaf: A fragrant rice pilaf with spices and nuts can be a delightful side. The nutty flavors of the rice will enhance the overall meal.

Spicy Harissa Chicken Recipe with these delightful sides, and watch your family and friends rave about your culinary skills!

Tips for Perfecting Your Spicy Harissa Chicken Recipe

Spicy Harissa Chicken Recipe turns out perfectly every time, consider these helpful tips. They will guide you in achieving the best flavor and texture, making your dish a standout at any meal.

  • Choose Quality Ingredients: Start with fresh, high-quality chicken thighs. The better the chicken, the more flavorful your dish will be. Look for organic or free-range options if possible.
  • Marinate Longer: While 30 minutes is sufficient, marinating for up to 2 hours or even overnight will deepen the flavors. Just remember to keep it in the refrigerator during longer marination.
  • Adjust Spice Levels: If you’re sensitive to heat, feel free to reduce the amount of harissa paste. You can also mix in some yogurt or sour cream to balance the spice if needed.
  • Use a Meat Thermometer: To avoid overcooking, use a meat thermometer to check the internal temperature. Aim for 165°F (75°C) for perfectly cooked chicken.
  • Let It Rest: After baking, let the chicken rest for about 5 minutes. This allows the juices to redistribute, ensuring each bite is juicy and tender.
  • Experiment with Garnishes: Fresh herbs like cilantro or parsley add a burst of freshness. You can also sprinkle some toasted nuts or seeds for added texture and flavor.
  • Pair with the Right Sides: As mentioned earlier, serving your chicken with complementary sides enhances the overall meal. Choose sides that balance the spice and add variety to your plate.
  • Store Leftovers Properly: If you have leftovers, store them in an airtight container in the refrigerator. They can be enjoyed cold in salads or reheated for a quick meal.

Spicy Harissa Chicken Recipe. Each time you prepare this dish, you’ll discover new ways to enhance its flavor and presentation. Enjoy the process and the delicious results!

Breakdown of Time for Spicy Harissa Chicken Recipe

Spicy Harissa Chicken Recipe can help you plan your meal better. Here’s a simple breakdown of the time required for preparation and cooking. This way, you can enjoy a delicious dinner without any stress!

Prep Time

The prep time for this recipe is approximately 10 minutes. This includes gathering your ingredients, mixing the marinade, and coating the chicken thighs. If you choose to marinate the chicken for longer, you can adjust this time accordingly. Remember, the longer you marinate, the more flavorful your chicken will be!

Cooking Time

Once your chicken is marinated, the cooking time is about 35-40 minutes. Preheating the oven takes a few minutes, but the actual baking process is straightforward. Just place the chicken in the oven and let it cook until it reaches the perfect internal temperature of 165°F (75°C). You can use this time to prepare your sides or set the table!

Total Time

Spicy Harissa Chicken Recipe to take around 45-50 minutes from start to finish, not including marination time. If you marinate for 30 minutes, the total time will be about 1 hour and 15 minutes. If you opt for a longer marination period, such as 2 hours, the total time will be around 2 hours and 10 minutes. This makes it easy to plan your meal around your schedule!

Spicy Harissa Chicken Recipe and impress your family or guests with a delicious, home-cooked meal!

Nutritional Information for Spicy Harissa Chicken Recipe

Spicy Harissa Chicken Recipe not only tantalizes your taste buds but also provides valuable nutrients. Here’s a closer look at the nutritional information per serving, so you can enjoy this dish while keeping your health in mind.

Calories

Spicy Harissa Chicken Recipe contains approximately 320 calories. This makes it a satisfying option for dinner without being overly heavy. The combination of chicken and spices provides a flavorful meal that can fit into various dietary plans.

Protein Content

Protein is a vital nutrient for building and repairing tissues, and this recipe delivers! Each serving offers about 24 grams of protein. Chicken thighs are an excellent source of protein, making this dish a great choice for those looking to increase their protein intake. Whether you’re an athlete or just trying to maintain a healthy lifestyle, this recipe supports your nutritional needs.

Sodium Levels

Spicy Harissa Chicken Recipe contains around 600 milligrams. While this is a reasonable amount for a flavorful dish, it’s essential to be mindful of your overall sodium intake throughout the day. If you’re watching your sodium levels, consider using low-sodium harissa paste or reducing the added salt in the marinade.

Spicy Harissa Chicken Recipe is not only delicious but also provides a good balance of calories, protein, and sodium. Enjoy this dish as part of a well-rounded meal, and feel good about the nutritious choices you’re making!

FAQs about Spicy Harissa Chicken Recipe

What is harissa and how is it used in cooking?

Spicy Harissa Chicken Recipe, harissa serves as the main marinade, infusing the chicken with its unique spicy and aromatic flavors. You can also use harissa in soups, dips, or as a condiment to enhance your meals.

Can I make Spicy Harissa Chicken Recipe ahead of time?

Spicy Harissa Chicken Recipe is perfect for meal prep. You can marinate the chicken thighs a day in advance and store them in the refrigerator. This allows the flavors to develop even more. When you’re ready to cook, simply bake the marinated chicken as directed. If you have leftovers, they can be stored in an airtight container in the fridge for up to three days. Reheat them in the oven or microwave for a quick and delicious meal!

What can I serve with Spicy Harissa Chicken Recipe?

Spicy Harissa Chicken Recipe. Consider pairing it with:

  • Roasted Vegetables: A mix of seasonal veggies adds color and nutrition.
  • Fresh Salad: A light salad with greens and a tangy dressing balances the spice.
  • Couscous or Quinoa: These grains soak up the flavorful juices from the chicken.
  • Pita Bread: Perfect for scooping up the chicken and sauce.
  • Rice Pilaf: A fragrant rice dish complements the bold flavors of the chicken.

These sides not only enhance the meal but also create a well-rounded dining experience!

How spicy is the Spicy Harissa Chicken Recipe?

Spicy Harissa Chicken Recipe can vary based on the type and amount of harissa paste you use. Traditional harissa can be quite spicy, but you can adjust the heat to your liking. If you prefer a milder flavor, simply reduce the amount of harissa paste or choose a milder variety. Additionally, serving the chicken with cooling sides like yogurt or a fresh salad can help balance the heat. Overall, this recipe is customizable to suit your spice tolerance!

Conclusion on Spicy Harissa Chicken Recipe

Spicy Harissa Chicken Recipe is a fantastic way to bring bold flavors to your dinner table. With its simple ingredients and straightforward preparation, this dish is perfect for both novice cooks and seasoned chefs. The combination of harissa paste, spices, and juicy chicken thighs creates a meal that is not only delicious but also satisfying.

As you’ve seen, there are numerous ways to customize this recipe. Whether you choose to experiment with different proteins or explore vegetarian options, the possibilities are endless. The versatility of harissa allows you to adapt the dish to suit your taste preferences and dietary needs.

Remember to take your time with the marination process, as it enhances the flavors significantly. And don’t forget to serve your spicy chicken with complementary sides that balance the heat and add variety to your meal. With a little creativity, you can turn this recipe into a family favorite that everyone will love.

Spicy Harissa Chicken Recipe a try? Gather your ingredients, follow the steps, and enjoy a delightful meal that’s sure to impress. Happy cooking!

Paul

Spicy Harissa Chicken Recipe will elevate your dinner!

This spicy and smoky Harissa Chicken packs bold flavor with just a few ingredients. Perfectly seasoned with North African-inspired spices and baked to juicy perfection, it’s a low-carb, high-protein dish ideal for busy weeknights or meal prep with a flavorful twist.
Prep Time 10 minutes
Cook Time 20 minutes
Total Time 30 minutes
Servings: 2 servings
Course: Main Course
Cuisine: North African-Inspired

Ingredients
  

  • 4 boneless chicken thighs2 teaspoons olive oil3 tablespoons harissa powder1 teaspoon smoked paprika½ teaspoon ground cumin¼ teaspoon cayenne pepper1 tablespoon lemon juice

Method
 

  1. In a small bowl, mix together the olive oil, harissa powder, lemon juice, smoked paprika, ground cumin, and cayenne pepper until a thick paste forms.
  2. Rub the marinade evenly over the chicken thighs or place everything in a zip-top bag or bowl and mix thoroughly to coat. Let the chicken marinate for at least 1 hour in the refrigerator for best flavor.
  3. Preheat the oven to 425°F (220°C). Line a baking sheet with parchment paper or foil.
  4. Arrange the marinated chicken thighs in a single layer on the baking sheet.
  5. Bake for 18 to 20 minutes or until the internal temperature of the chicken reaches 165°F (75°C).
  6. Remove from the oven and let rest for 5 minutes before serving to lock in the juices.

Notes

You can use bone-in thighs or drumsticks, but increase the cooking time slightly.
For even deeper flavor, marinate overnight.
Serve with a cucumber yogurt dip, cauliflower rice, or grilled vegetables for a balanced low-carb meal.

Cinnamon Roll Cake Recipe: A Delicious Baking Delight

Introduction to the Cinnamon Roll Cake Recipe

Cinnamon Roll Cake Recipe is perfect for breakfast, brunch, or even dessert. Imagine waking up to the warm aroma of cinnamon and sugar wafting through your kitchen. It’s a comforting scent that brings back memories of cozy mornings spent with family.

This cake is not only easy to make but also incredibly satisfying. With its soft, buttery texture and sweet cinnamon swirl, it’s sure to please everyone at the table. Plus, the simple glaze adds a touch of sweetness that ties everything together beautifully. Whether you’re an experienced baker or just starting out, this recipe is straightforward and fun to prepare.

Cinnamon Roll Cake Recipe stand out is its versatility. You can enjoy it as is or customize it with your favorite nuts or flavorings. It’s a great way to impress guests or treat yourself to something special. So, roll up your sleeves and let’s get started on creating this delicious cake that’s bound to become a family favorite!

Ingredients for the Cinnamon Roll Cake Recipe

Cinnamon Roll Cake Recipe. Having everything ready will make your baking experience smooth and enjoyable. Here’s what you’ll need:

  • 2 cups all-purpose flour
  • 1 cup granulated sugar
  • 1 tablespoon baking powder
  • 1/2 teaspoon salt
  • 1/2 cup unsalted butter, melted
  • 1 cup milk
  • 2 large eggs
  • 1 tablespoon vanilla extract

For the cinnamon swirl, you will need:

  • 1/2 cup brown sugar, packed
  • 1 tablespoon ground cinnamon
  • 1/4 cup unsalted butter, softened

And for the delicious glaze, gather these ingredients:

  • 1 cup powdered sugar
  • 2 tablespoons milk
  • 1/2 teaspoon vanilla extract

Cinnamon Roll Cake that will surely impress your family and friends. Remember, the quality of your ingredients can make a big difference in the final taste, so choose fresh and high-quality items whenever possible!

Step-by-Step Preparation of the Cinnamon Roll Cake Recipe

Cinnamon Roll Cake Recipe is simple and fun. Follow these steps to create a delicious cake that everyone will love.

Step 1: Preparing the Cake Batter

First, let’s make the cake batter. In a large mixing bowl, whisk together the all-purpose flour, granulated sugar, baking powder, and salt. This dry mixture is the base of your cake. Next, in another bowl, combine the melted butter, milk, eggs, and vanilla extract. Mix these wet ingredients well until they are fully blended.

Now, pour the wet ingredients into the dry ingredients. Stir gently until just combined. Be careful not to overmix; a few lumps are okay! This will help keep your cake light and fluffy.

Step 2: Making the Cinnamon Filling

While your cake batter rests, it’s time to prepare the cinnamon filling. In a small bowl, mix together the packed brown sugar and ground cinnamon. This sweet mixture will create that delightful swirl in your cake. For an extra touch, add the softened butter to the cinnamon mixture and blend it until it’s crumbly. This will help it spread evenly in the cake.

Step 3: Assembling the Cinnamon Roll Cake

Now comes the fun part—assembling your cake! Pour half of the cake batter into the greased 9×13-inch baking dish. Spread it evenly across the bottom. Next, sprinkle the cinnamon filling mixture over the batter. Make sure to cover it well, as this is where the magic happens!

After that, add dollops of the remaining softened butter on top of the cinnamon mixture. Then, pour the rest of the cake batter over everything. To create a beautiful marbled effect, gently swirl the batter with a knife. This will mix the cinnamon filling into the cake without fully blending it.

Step 4: Baking the Cinnamon Roll Cake

It’s time to bake! Place your assembled cake in the preheated oven at 350°F (175°C). Bake for 30-35 minutes. To check if it’s done, insert a toothpick into the center. If it comes out clean, your cake is ready! The aroma of cinnamon will fill your kitchen, making it hard to wait.

Step 5: Preparing the Glaze

While the cake is baking, let’s prepare the glaze. In a small bowl, whisk together the powdered sugar, milk, and vanilla extract until smooth. This glaze will add a sweet finish to your cake. Once the cake is out of the oven and has cooled for about 10 minutes, drizzle the glaze over the top. It will soak in slightly, adding even more flavor!

Cinnamon Roll Cake is now ready to be enjoyed. Serve it warm or at room temperature, and watch it disappear!

Variation of the Cinnamon Roll Cake Recipe

Cinnamon Roll Cake Recipe is its flexibility. You can easily switch up ingredients or add new flavors to make it your own. Let’s explore some alternative ingredients and flavor variations that can elevate your cake to new heights!

Alternative Ingredients for the Cinnamon Roll Cake Recipe

If you’re looking to make some changes to the original recipe, consider these alternative ingredients:

  • Whole Wheat Flour: For a healthier option, substitute half of the all-purpose flour with whole wheat flour. This adds fiber and a nutty flavor.
  • Greek Yogurt: Replace the milk with Greek yogurt for a richer texture and added protein. Just thin it out with a little water if needed.
  • Maple Syrup: Swap out granulated sugar for maple syrup. This will give your cake a unique flavor and a hint of sweetness.
  • Non-Dairy Butter: For a dairy-free version, use non-dairy butter or coconut oil in place of unsalted butter.

Cinnamon Roll Cake.

Flavor Variations for the Cinnamon Roll Cake Recipe

Want to add a twist to your cake? Here are some fun flavor variations to try:

  • Chocolate Chip: Fold in 1 cup of chocolate chips into the batter for a sweet surprise in every bite.
  • Apple Cinnamon: Add 1 cup of diced apples to the batter along with a sprinkle of nutmeg for a fruity twist.
  • Pumpkin Spice: Mix in 1 cup of pumpkin puree and 1 teaspoon of pumpkin spice for a seasonal treat.
  • Coconut: Stir in 1/2 cup of shredded coconut for a tropical flavor that pairs beautifully with cinnamon.

Cinnamon Roll Cake Recipe even more exciting. Feel free to mix and match to find your favorite combination!

Cooking Note for the Cinnamon Roll Cake Recipe

Cinnamon Roll Cake Recipe. Here are some essential cooking notes to keep in mind as you prepare this delightful treat:

  • Room Temperature Ingredients: For the best results, ensure that your eggs and milk are at room temperature. This helps the batter mix more evenly, resulting in a fluffier cake.
  • Measuring Flour: When measuring flour, use the spoon-and-level method. Spoon the flour into your measuring cup and level it off with a knife. This prevents packing, which can lead to a dense cake.
  • Don’t Overmix: As you combine the wet and dry ingredients, mix just until combined. Overmixing can develop gluten, making the cake tough instead of tender.
  • Check for Doneness: Ovens can vary in temperature. Always check your cake a few minutes before the suggested baking time. Insert a toothpick in the center; if it comes out clean or with a few crumbs, it’s done!
  • Cooling Time: Allow the cake to cool for about 10 minutes before adding the glaze. This helps the glaze adhere better and prevents it from melting away.
  • Storage Tips: If you have leftovers, store the cake in an airtight container at room temperature for up to three days. For longer storage, consider refrigerating it.

Cinnamon Roll Cake turns out perfectly every time. Happy baking!

Serving Suggestions for the Cinnamon Roll Cake Recipe

Cinnamon Roll Cake is baked and glazed, it’s time to think about how to serve this delightful treat! The way you present your cake can enhance the overall experience. Here are some serving suggestions to make your cake even more enjoyable:

  • Warm Slices: Serve the cake warm right out of the oven. The gooey cinnamon swirl and sweet glaze will melt in your mouth, making each bite a cozy delight.
  • With Fresh Fruit: Pair slices of cake with fresh fruit like strawberries, blueberries, or sliced bananas. The fruity flavors will complement the sweetness of the cake beautifully.
  • Ice Cream Topping: For a decadent dessert, add a scoop of vanilla ice cream on top of each slice. The warm cake and cold ice cream create a delightful contrast.
  • Whipped Cream: A dollop of whipped cream can add a light and airy touch to your cake. It’s a simple yet elegant addition that enhances the overall flavor.
  • Drizzle of Caramel: For an extra layer of sweetness, drizzle some caramel sauce over the top. This will add a rich flavor that pairs perfectly with cinnamon.
  • Breakfast Treat: Enjoy slices of the cake as a breakfast treat alongside a cup of coffee or tea. It’s a wonderful way to start your day with a touch of sweetness.

Cinnamon Roll Cake Recipe experience. Whether you’re hosting a brunch or enjoying a quiet afternoon treat, these ideas will surely impress your guests and satisfy your cravings!

Tips for Perfecting the Cinnamon Roll Cake Recipe

Cinnamon Roll Cake Recipe turns out perfectly every time, consider these helpful tips. They will guide you through the baking process and help you achieve a delicious, fluffy cake with a delightful cinnamon swirl.

  • Use Fresh Ingredients: Always check the expiration dates on your baking powder and baking soda. Fresh ingredients will help your cake rise properly and enhance the flavor.
  • Don’t Skip the Greasing: Greasing your baking dish is crucial. It prevents the cake from sticking and makes it easier to serve. You can use butter or non-stick spray for this step.
  • Mixing Technique: When combining the wet and dry ingredients, use a gentle folding motion. This helps keep the batter light and airy, resulting in a tender cake.
  • Swirl with Care: When creating the cinnamon swirl, don’t overdo it. A few gentle swirls with a knife will create a beautiful marbled effect without fully mixing the layers.
  • Cool Before Glazing: Allow the cake to cool for about 10 minutes before adding the glaze. This prevents the glaze from melting away and ensures it stays on top.
  • Experiment with Toppings: Feel free to get creative with toppings! Chopped nuts, chocolate chips, or even a sprinkle of sea salt can add a unique twist to your cake.
  • Adjust Baking Time: Keep an eye on your cake as it bakes. Ovens can vary, so check for doneness a few minutes before the recommended time. This will help you avoid overbaking.
  • Serve with Love: Presentation matters! Serve your cake on a beautiful platter and garnish with fresh fruit or a dusting of powdered sugar for an inviting look.

Cinnamon Roll Cake Recipe. Each bite will be a delightful experience, and your friends and family will be asking for seconds!

Breakdown of Time for the Cinnamon Roll Cake Recipe

Cinnamon Roll Cake Recipe can help you plan your baking session better. Here’s a simple breakdown of the time required for preparation, cooking, and the total time to enjoy this delicious treat!

Prep Time

Cinnamon Roll Cake Recipe is approximately 15-20 minutes. This includes gathering your ingredients, measuring them out, and mixing the batter and cinnamon filling. Taking your time during this step ensures everything is ready for a smooth baking process.

Cooking Time

Once your cake is assembled, it will need about 30-35 minutes in the oven. Keep an eye on it as it bakes, and check for doneness with a toothpick. If it comes out clean, your cake is ready to be taken out!

Total Time

In total, you can expect to spend around 50-55 minutes from start to finish. This includes both prep and cooking time. After baking, allow the cake to cool for about 10 minutes before adding the glaze. This will help the glaze stick better and enhance the overall flavor.

Cinnamon Roll Cake Recipe into your day. Whether it’s for a special occasion or just a cozy weekend treat, you’ll be enjoying this delightful cake in no time!

Nutritional Information for the Cinnamon Roll Cake Recipe

Cinnamon Roll Cake Recipe can help you enjoy it as part of a balanced diet. Here’s a breakdown of the key nutritional information per serving, which is based on a total of 12 servings:

Calories

250 calories. This makes it a satisfying treat that can fit into your daily caloric intake without feeling guilty. Enjoying a slice as part of a meal or snack can provide a delightful energy boost!

Protein

3 grams. While this isn’t a high-protein dessert, it does contribute to your daily protein needs. Pairing your cake with a protein-rich food, like yogurt or a glass of milk, can enhance the overall nutritional value of your meal.

Sodium

200 milligrams. This is a moderate amount, making it a reasonable choice for those watching their sodium intake. As always, moderation is key, and enjoying this cake as an occasional treat can be part of a healthy lifestyle.

Cinnamon Roll Cake while being aware of its contribution to your diet. Remember, it’s all about balance and enjoying your favorite foods in moderation!

FAQs about the Cinnamon Roll Cake Recipe

Can I make the Cinnamon Roll Cake Recipe ahead of time?

Cinnamon Roll Cake Recipe ahead of time. To do this, bake the cake and let it cool completely. Once cooled, cover it tightly with plastic wrap or aluminum foil. You can store it at room temperature for up to three days. If you want to keep it longer, consider refrigerating it. Just remember to add the glaze right before serving for the best flavor and texture!

How do I store leftover Cinnamon Roll Cake?

Cinnamon Roll Cake is easy! Place any uneaten slices in an airtight container. You can keep it at room temperature for up to three days. If you live in a warmer climate, it’s best to refrigerate the cake to maintain its freshness. Just make sure to let it come to room temperature before serving for the best taste!

Can I freeze the Cinnamon Roll Cake?

Cinnamon Roll Cake Recipe! To freeze, first, let the cake cool completely. Then, wrap it tightly in plastic wrap and aluminum foil to prevent freezer burn. It can be stored in the freezer for up to three months. When you’re ready to enjoy it, simply thaw it in the refrigerator overnight. You can reheat individual slices in the microwave for a warm treat!

What can I substitute for ingredients in the Cinnamon Roll Cake Recipe?

Cinnamon Roll Cake Recipe to suit your dietary needs or preferences. Here are some ideas:

  • Flour: Use gluten-free flour blend instead of all-purpose flour for a gluten-free version.
  • Butter: Substitute unsalted butter with coconut oil or a dairy-free butter for a vegan option.
  • Milk: Almond milk, soy milk, or oat milk can replace regular milk for a dairy-free cake.
  • Sugar: You can use coconut sugar or honey instead of granulated sugar for a different sweetness.

Cinnamon Roll Cake to fit your taste and dietary needs while still keeping it delicious!

Conclusion on the Cinnamon Roll Cake Recipe

Cinnamon Roll Cake Recipe is a delightful treat that brings together the comforting flavors of cinnamon rolls and the light, fluffy texture of cake. It’s perfect for any occasion, whether you’re hosting a brunch, celebrating a special event, or simply enjoying a cozy afternoon at home. The ease of preparation makes it accessible for bakers of all skill levels, allowing everyone to create a delicious dessert that’s sure to impress.

Cinnamon Roll Cake can be enjoyed time and time again without becoming repetitive.

As you embark on your baking journey, remember to have fun and enjoy the process. Baking is not just about the final product; it’s about the joy of creating something special. So gather your ingredients, follow the steps, and soon you’ll have a beautiful cake that’s perfect for sharing with family and friends. Don’t forget to savor each bite and relish the smiles it brings!

Cinnamon Roll Cake Recipe become a cherished favorite in your home!

Paul

Cinnamon Roll Cake Recipe: A Delicious Baking Delight

All the flavor of homemade cinnamon rolls in a soft, buttery cake! This Cinnamon Roll Cake is swirled with a rich brown sugar cinnamon topping and finished with a sweet vanilla glaze — the perfect cozy dessert for any occasion.
Prep Time 15 minutes
Servings: 12 servings
Course: Dessert
Cuisine: American

Ingredients
  

  • For the Cake:3 cups all-purpose flour1 1/2 cups milk1 cup white sugar2 eggs4 teaspoons baking powder2 teaspoons vanilla extract1/4 teaspoon salt1/4 cup melted butter
  • For the Cinnamon Swirl Topping:1 cup butter softened1 cup brown sugar2 tablespoons all-purpose flour1 tablespoon ground cinnamon
  • For the Glaze:2 cups confectioners’ sugar5 tablespoons milk1 teaspoon vanilla extract

Method
 

  1. Preheat the oven to 350°F (175°C). Grease a 9×13-inch baking pan.
  2. In a large bowl, mix together flour, milk, white sugar, eggs, baking powder, vanilla extract, and salt until smooth. Stir in melted butter until fully combined. Pour the batter into the prepared pan.
  3. In a separate bowl, beat together the softened butter, brown sugar, 2 tablespoons flour, and cinnamon until smooth and creamy.
  4. Drop spoonfuls of the cinnamon mixture evenly over the batter. Use a knife to swirl the topping into the cake batter to create a marbled effect.
  5. Bake for 25 to 30 minutes, or until a toothpick inserted into the center comes out with a few moist crumbs attached.
  6. In a small bowl, whisk together confectioners’ sugar, milk, and vanilla extract until smooth. Drizzle the glaze over the warm cake. Let set slightly before slicing and serving.

Notes

Do not over-swirl the cinnamon mixture into the batter to maintain distinct layers and beautiful swirls
Let the cake cool slightly before glazing to keep the glaze from melting too much
Serve warm for the best texture and flavor
Store leftovers covered at room temperature for up to 2 days, or refrigerate for up to 4 days
Great served with coffee or tea as a brunch treat or dessert

A Heartfelt Journey: How Blackened Salmon Stuffed with Spinach and Parmesan Became a Family Tradition

It all started one rainy evening when my little kitchen became the warmest place in the house. The sky outside was gloomy, but inside, the aroma of garlic, butter, and spices filled the air, wrapping the house in a blanket of comfort.
My children sat at the counter, chattering about their day, and my husband flipped through the newspaper, occasionally peeking at what I was preparing. I wanted to make something special, something that would lift our spirits and bring smiles to their faces.

That’s when I remembered a dish my grandmother used to prepare on special occasions—a tender salmon, rich with creamy filling, bold with seasoning. Inspired by her legacy and eager to create new memories, I decided to recreate and reinvent it with a personal twist: a blackened crust and a luxurious spinach-Parmesan stuffing.

Little did I know that simple decision would birth a tradition. Now, every year on the first rainy day of fall, this Blackened Salmon Stuffed with Spinach and Parmesan graces our table, reminding us that even the stormiest nights can be made magical with the right meal.

The Marvel of Stuffed Salmon: A Culinary Love Letter

This dish is more than just a meal; it’s an experience. Combining the robust flavors of blackened spices with the creamy, nutty notes of a spinach-Parmesan stuffing, every bite promises warmth, comfort, and sophistication.
It’s a perfect embodiment of how bold techniques—like blackening—can marry harmoniously with gentle, creamy elements to create something extraordinary.

Why This Recipe Works So Well:
The magic lies in contrasts. The spice rub forms a smoky, crispy crust around the salmon, locking in moisture while delivering a fiery kick. The filling, rich with cream cheese and Parmesan, softens the spice, offering a luxurious, melt-in-your-mouth experience that balances the entire dish.

Perfect for weeknight dinners or special celebrations, this recipe is proof that gourmet food doesn’t have to be complicated—or reserved for fine dining establishments.

The Silent Heroes: Flavor Profiles Behind Every Bite

When we think about a perfectly executed stuffed salmon, the first thing that jumps out is the flavor balance:

  • Salmon: Naturally rich and buttery, it provides the perfect canvas for vibrant seasoning.
  • Spinach: Adds an earthy depth, enhancing the dish’s freshness.
  • Parmesan and Cream Cheese: Bring in the richness and subtle saltiness that contrast beautifully with the smoky crust.
  • Blackened Seasoning: A powerhouse of flavor, delivering smokiness, heat, and complexity.
  • Lemon Juice: A bright burst that cuts through the richness, elevating the entire dish to new heights.

These components create a dish that’s indulgent without being overwhelming—luxurious yet approachable.

Perfect Occasions to Serve Blackened Stuffed Salmon

Some meals are versatile enough to adapt to any situation, and this one is no exception. Here are just a few occasions where this salmon truly shines:

  • Date Night at Home: Light a few candles, pour a glass of wine, and share a restaurant-quality dish without leaving your cozy living room.
  • Family Dinners: Impress your family with a healthy yet decadent meal that even picky eaters will adore.
  • Holiday Feasts: Tired of turkey or ham? Offer a sophisticated alternative for Christmas Eve or New Year’s Day.
  • Dinner Parties: Your guests will think you spent hours in the kitchen (only you’ll know how simple it really was).

This dish doesn’t just feed people—it creates moments.

Common Questions About Blackened Salmon Stuffed with Spinach and Parmesan

Q1: Can I prepare the stuffed salmon ahead of time?
Absolutely. You can stuff the salmon fillets and store them covered in the refrigerator for up to 12 hours before cooking. This makes it an excellent choice for stress-free entertaining.

Q2: What is blackened seasoning exactly?
Blackened seasoning is a blend of spices typically including paprika, garlic powder, onion powder, black pepper, and sometimes cayenne for heat. It’s designed to create a smoky, charred crust on meats when cooked over high heat.

Q3: What sides pair well with this dish?
Roasted vegetables, wild rice, quinoa, garlic mashed potatoes, or a fresh garden salad are excellent pairings. The goal is to balance richness with lighter, fresher accompaniments.

Q4: Can I use frozen salmon?
Yes, just be sure to thaw it thoroughly and pat it dry before using. Excess moisture can interfere with both stuffing and seasoning adhesion.

Q5: What if I don’t like Parmesan?
Feel free to substitute with mozzarella for a milder flavor or gouda for a slightly smoky twist. However, Parmesan’s sharpness adds a special depth that really complements the salmon.

Q6: Is it necessary to sear the salmon before baking?
Searing is highly recommended for texture and flavor—it locks in the juices and gives the salmon that irresistible crispiness. However, if you prefer, you can bake the salmon entirely for a softer crust.

Q7: How do I prevent the stuffing from leaking out during cooking?
Avoid overstuffing and make sure you leave enough of a “border” of salmon flesh around the pocket edges. Also, cooking seam-side up helps keep the filling tucked inside.

Q8: Can I make this dish dairy-free?
You can experiment with dairy-free cream cheese and nutritional yeast instead of Parmesan. While the texture might differ slightly, the flavors can still be delicious.

Q9: How spicy is the blackened seasoning?
It’s flavorful but not overwhelmingly spicy. For more heat, add cayenne pepper. For a milder version, reduce the paprika and skip any extra pepper.

Q10: How do I know when the salmon is perfectly cooked?
The salmon should flake easily with a fork and have an internal temperature of 145°F (63°C). Be careful not to overcook, as salmon can dry out quickly.

Pro Tips for the Best Blackened Stuffed Salmon

  • Pat the salmon dry: Moisture is the enemy of a good sear. Always pat your fillets dry with paper towels before seasoning.
  • Let the filling cool slightly: Warm stuffing might make the salmon harder to work with. A brief cooling helps it firm up.
  • Cook in batches if needed: Don’t overcrowd the pan. If necessary, cook the fillets in batches to ensure even heat and better searing.
  • Use a heavy-bottomed skillet: A cast-iron skillet delivers the best sear thanks to its even heat retention.

Conclusion: A Taste That Transcends the Ordinary

Blackened Salmon Stuffed with Spinach and Parmesan isn’t just a recipe—it’s a memory in the making.
It’s the dish that turns a gloomy evening into a celebration, a quiet dinner into an occasion, and a simple kitchen into a haven of warmth and love.

The richness of the salmon, the boldness of the blackened seasoning, and the luxurious creaminess of the stuffing create a masterpiece that will stay in your heart—and your recipe box—for years to come.

As you bring this dish to your table, know that you’re not just serving food. You’re offering comfort, love, and a little bit of magic—one forkful at a time.

Paul

A Heartfelt Journey: How Blackened Salmon Stuffed with Spinach and Parmesan Became a Family Tradition

Juicy salmon fillets are filled with a luscious spinach, garlic, and cream cheese mixture, then pan-seared to crispy perfection. This stuffed salmon recipe is rich, flavorful, and perfect for an impressive yet easy dinner!
Prep Time 15 minutes
Cook Time 10 minutes
Total Time 25 minutes
Servings: 4 servings
Course: Main Course
Cuisine: American

Ingredients
  

  • 4 salmon fillets 6 oz each, skin-on, boneless2 cups fresh spinach1/2 cup cream cheese, softened1/3 cup grated Parmesan cheese2 cloves garlic, minced1 tablespoon olive oil1 teaspoon paprika1/2 teaspoon garlic powder1/2 teaspoon onion powder1/2 teaspoon black pepperSalt, to tasteLemon wedges, for serving

Method
 

  1. Heat 1 tablespoon olive oil in a skillet over medium heat. Sauté the minced garlic until fragrant, about 1 minute.
  2. Add the spinach and cook until wilted, about 2 to 4 minutes.
  3. Remove from heat and stir in the cream cheese and Parmesan cheese until fully combined. Let the mixture cool slightly.
  4. Carefully cut a horizontal pocket into each salmon fillet, being careful not to slice all the way through.
  5. Stuff each salmon pocket generously with the spinach and cream cheese filling.
  6. In a small bowl, combine paprika, garlic powder, onion powder, black pepper, and salt. Rub the seasoning mixture evenly over the stuffed salmon fillets.
  7. In the same skillet, heat another drizzle of olive oil over medium-high heat.
  8. Sear the salmon fillets, skin-side down, for 3 to 4 minutes until crispy. Flip and cook for another 4 to 5 minutes, or until the salmon flakes easily with a fork.
  9. Squeeze fresh lemon juice over the salmon before serving.
  10. Serve immediately with your favorite sides like roasted vegetables, quinoa, or rice.

Notes

Make sure not to overstuff the fillets to prevent the filling from leaking out during cooking
For an extra crispy skin, ensure the skillet is hot before adding the salmon
If preferred, bake the stuffed salmon at 375°F for 15–18 minutes instead of pan-searing
Best enjoyed fresh but can be stored in an airtight container in the fridge for up to 2 days

A Taste of Comfort: How Chicken Wing Boil Brought a New Tradition to Life

There’s something magical about the way food weaves memories into the fabric of our lives. Growing up, seafood boils were a celebration—an entire neighborhood coming together, laughter filling the air, spices floating on the breeze. But life has a way of throwing curveballs. One of my closest friends, someone who had shared countless meals at my table, revealed she was allergic to seafood. For years, she sat on the sidelines, smiling as we devoured crabs, shrimp, and lobster.

One day, she stumbled upon the idea of a Chicken Wing Boil—a playful, delicious twist on the traditional seafood feast. She called me immediately, her voice brimming with excitement. “Could we try it?” she asked. I hesitated at first. Chicken wings instead of shrimp and crab? It felt almost sacrilegious. But I agreed.

What came out of that pot wasn’t just food—it was joy, inclusivity, and the birth of a brand-new tradition. That first bite of tender chicken, buttery corn, and spicy sausage changed everything. It wasn’t just a workaround for allergies—it was a whole new way to celebrate.

Now, this Chicken Wing Boil has a permanent spot on our family table, bringing us together with flavors just as bold, comforting, and memorable as any seafood boil ever did.

Why Chicken Wing Boil is the New Gathering Favorite

Chicken Wing Boil taps into everything we love about communal eating—the big pots, the bold spices, the hands-on joy of digging in. But it also opens the door for people who can’t or don’t eat seafood. It’s a reminder that tradition can be both honored and reinvented.

Instead of crab legs and shrimp, the star players here are crispy, juicy chicken wings. The same boiling technique is used to flavor sausage, corn, and potatoes, all drenched in a spicy, buttery sauce that’s dripping with seasonings. The result is hearty, satisfying, and endlessly adaptable.

And let’s be honest—while seafood prices are skyrocketing, chicken wings and sausage are a far more budget-friendly option without sacrificing any of the flavor or festivity.

The Flavor Story: What Makes This Dish Unforgettable

This recipe’s genius lies in how it layers flavors. The initial boiling water is seasoned heavily with crab boil and lemon pepper seasoning, ensuring the sausage, corn, and potatoes absorb a punchy base flavor.

The wings themselves are seasoned with a Cajun-inspired rub and coated in corn starch, then fried to golden perfection before joining the pot. The crowning glory is the homemade butter sauce: thick, rich, and fragrant, it binds all the ingredients together into a mouthwatering, messy, wonderful chaos.

Every bite delivers contrast: buttery potatoes against spicy sausage, sweet corn alongside crispy, tender chicken wings. It’s food made for digging in with both hands and not apologizing for the mess.

FAQs About Chicken Wing Boil

1. Can I make a Chicken Wing Boil in advance?

Absolutely. You can prepare the seasoned, fried wings and cooked vegetables ahead of time and store them separately. Reheat everything in a low oven (around 300°F) before tossing with freshly made butter sauce for maximum flavor.

2. How spicy is this recipe?

The default spice level is medium. However, it’s easily adjustable. Add more crab/seafood seasoning and hot sauce for extra heat, or reduce them if you prefer a milder experience. You control the spice!

3. What kind of sausage works best?

Smoked sausage is ideal. It holds up beautifully during the boil and adds a smoky depth that complements the spice blend. Andouille sausage is a fantastic choice if you want even more bold flavor.

4. Can I use boneless chicken instead of wings?

You can, but part of the charm here is the bite-sized, bone-in wings that crisp up beautifully. Boneless chicken chunks may not hold up as well during frying and sauce tossing, and you might lose some of that irresistible texture contrast.

5. Is this dish gluten-free?

With a couple of tweaks, yes. You’ll need to replace the corn starch with a certified gluten-free version and double-check that all your seasonings and sausages are gluten-free.

6. How long does it keep?

Leftovers are surprisingly good! Store them in an airtight container in the fridge for up to 3 days. Reheat in the oven to maintain texture (avoid microwaving if possible, as it can make the wings soggy).

7. What sides go well with Chicken Wing Boil?

This dish is hearty on its own, but if you want to round out the meal, try serving it with:

  • Garlic bread for dipping in the extra butter sauce
  • A crisp green salad to balance the richness
  • Sweet tea or a citrusy lemonade to cool off the heat

8. Can I bake the wings instead of frying?

You can, although you’ll lose a bit of the traditional crispiness. Bake the wings at 425°F until golden and cooked through, flipping once midway. It’s a slightly healthier alternative, and still delicious when drenched in that incredible sauce.

Making Memories Around the Table

What elevates a meal from good to unforgettable is the story behind it—the people you share it with, the laughter that echoes in the kitchen, the messy fingers and second helpings. Chicken Wing Boil isn’t just about great food; it’s about creating a welcoming space for everyone.

In a world where food allergies and dietary restrictions can often leave people feeling excluded, this dish steps up as a champion of inclusion. It doesn’t just mimic the spirit of a seafood boil—it expands it. It reminds us that innovation in the kitchen isn’t a betrayal of tradition; it’s the heart of it.

Conclusion: Why Chicken Wing Boil Deserves a Place on Your Table

The first time we made a Chicken Wing Boil, it was out of necessity. But the reason we keep making it, gathering around sheet pans piled high with spicy, buttery goodness, has nothing to do with necessity anymore. It’s about joy, creativity, and togetherness.

Every bite carries a little bit of that spirit—a reminder that some of the best traditions are the ones we invent ourselves. Whether you’re serving it at a family reunion, a birthday party, or just because you crave something bold and delicious, Chicken Wing Boil promises to turn any meal into a celebration.

So go ahead. Get messy. Laugh loudly. Pass the butter sauce. There’s a new tradition waiting for you.

ating

A Taste of Comfort: How Chicken Wing Boil Brought a New Tradition to Life

Take your seafood boil game up a notch with this hearty Chicken Wing Boil! Juicy fried chicken wings, tender corn, sausage, and potatoes are drenched in a spicy, buttery garlic sauce for a bold and unforgettable feast.
Prep Time 25 minutes
Cook Time 45 minutes
Total Time 1 hour 10 minutes
Servings: 5 -7 servings
Course: Main Course
Cuisine: Cajun Inspired, Southern

Ingredients
  

  • Main Ingredients:4 pounds chicken wings6 ears of corn on the cob1 pound sausage sliced1 pound red potatoes3 cups vegetable oil, for frying1/2 stick butter
  • Seasoning for the Boil:1/2 cup crab or seafood boil seasoning1/3 cup lemon pepper seasoning
  • Seasoning for the Wings:2 tablespoons cajun seasoning2 tablespoons onion powder2 tablespoons garlic powder2 tablespoons paprika1/2 cup corn starch
  • For the Fiery Butter Sauce:2 sticks butter3 tablespoons minced garlic2 tablespoons onion powder2 tablespoons garlic powder2 tablespoons crab or seafood boil seasoning2 tablespoons paprika2 tablespoons chili powder2 tablespoons lemon pepper seasoning5 to 6 dashes hot sauce

Method
 

  1. Fill an 8- or 12-quart pot halfway with water. Bring to a boil and add 1/2 stick butter, 1/2 cup crab or seafood boil seasoning, and 1/3 cup lemon pepper seasoning.
  2. Slice the sausage into small pieces. Add the sausage, corn, and red potatoes to the pot. Cook for 18 to 20 minutes, until the potatoes are tender.
  3. Cut the whole chicken wings into flats and drumsticks. Season the wings with cajun seasoning, garlic powder, onion powder, and paprika. Toss to coat evenly.
  4. Add 1/2 cup corn starch to the seasoned wings and coat thoroughly. Heat vegetable oil to 350°F in a deep fryer or large pot. Fry 7 to 8 wings at a time for 5 to 7 minutes until cooked through. Drain on a wire rack.
  5. Once the corn, sausage, and potatoes are cooked, transfer them to a large sheet pan along with the fried wings.
  6. To make the butter sauce, melt 2 sticks butter in a pot. Stir in minced garlic, onion powder, garlic powder, crab seasoning, paprika, chili powder, lemon pepper seasoning, and hot sauce. Mix until combined.
  7. Pour the butter sauce over the wings, corn, sausage, and potatoes. Toss gently to coat everything in the spicy, flavorful sauce.
  8. Serve immediately and enjoy your Chicken Wing Boil feast!

Notes

Adjust the amount of hot sauce for milder or spicier flavor
You can add shrimp or crab legs to the boil for even more variety
Keep the fried wings warm in a 200°F oven if needed while finishing the rest of the boil
Leftovers can be refrigerated and reheated in a skillet or oven