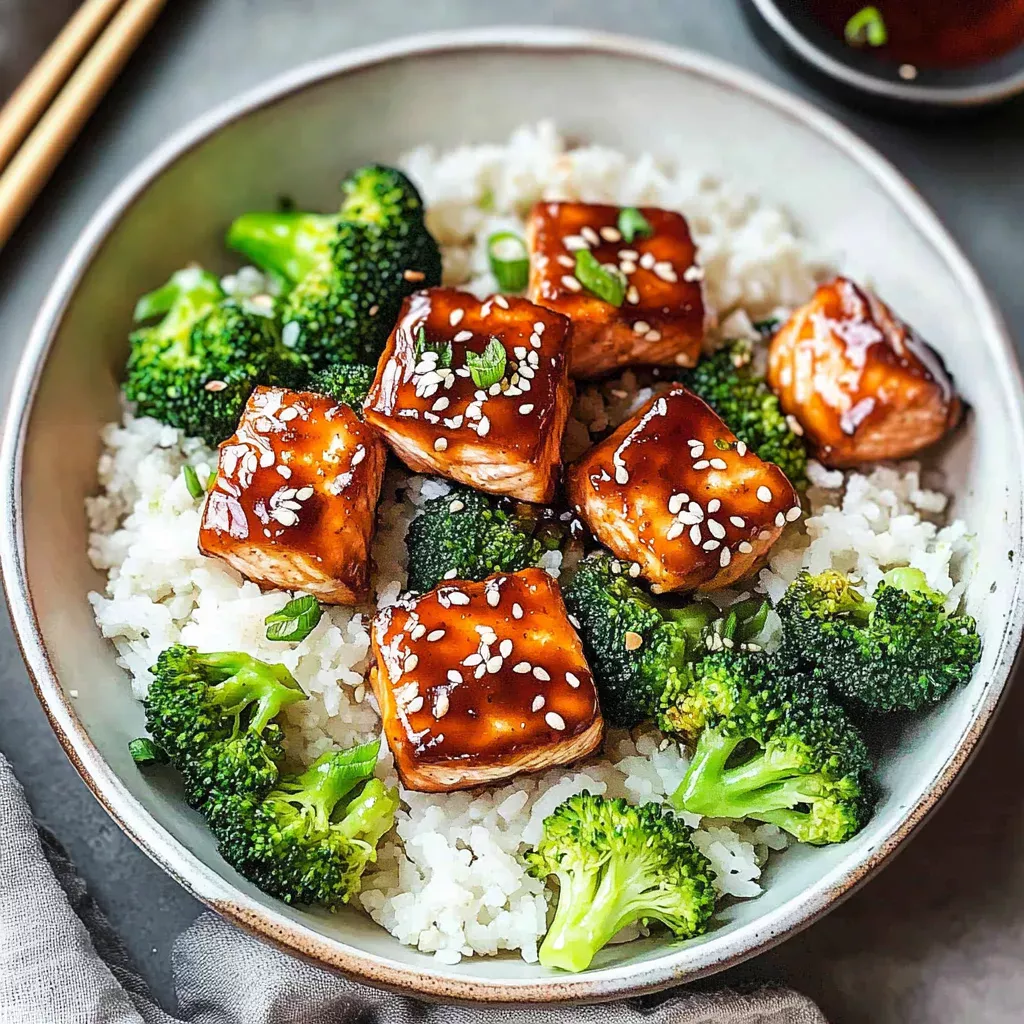
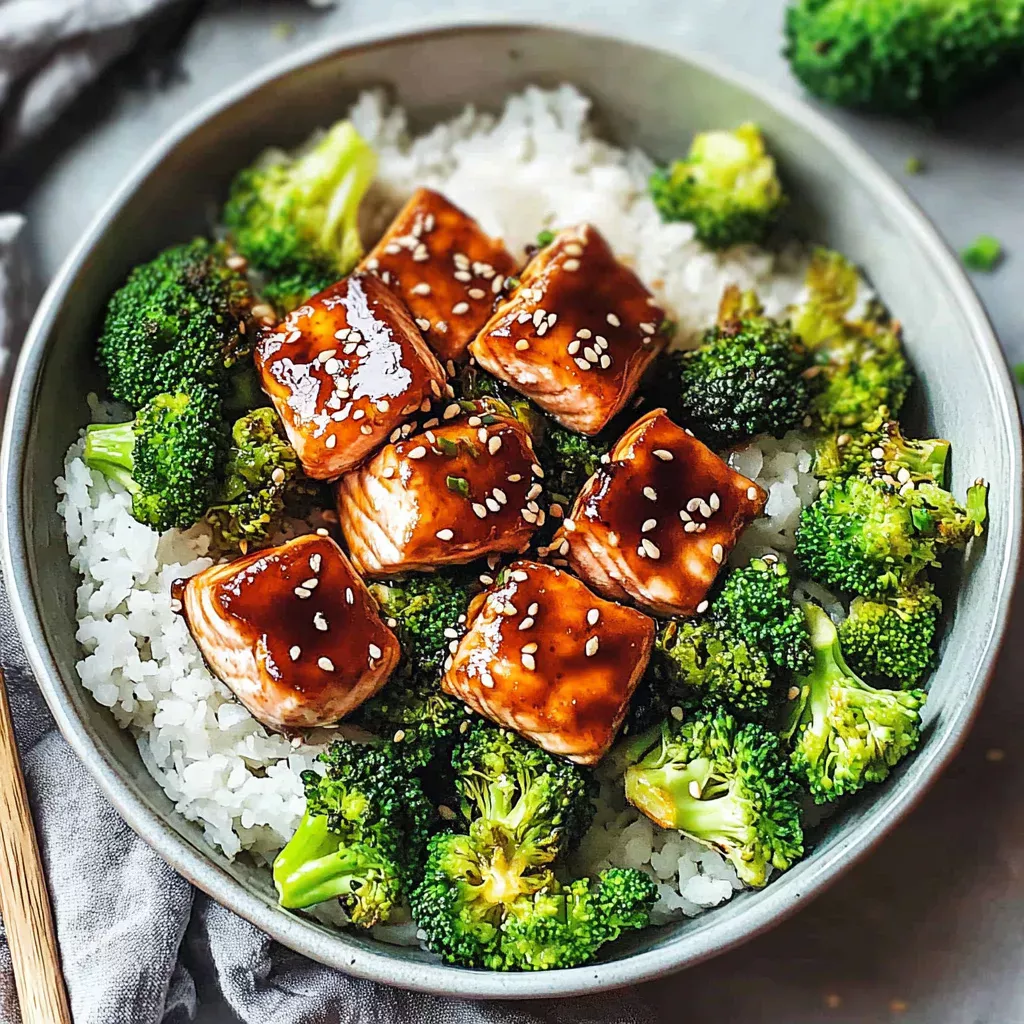
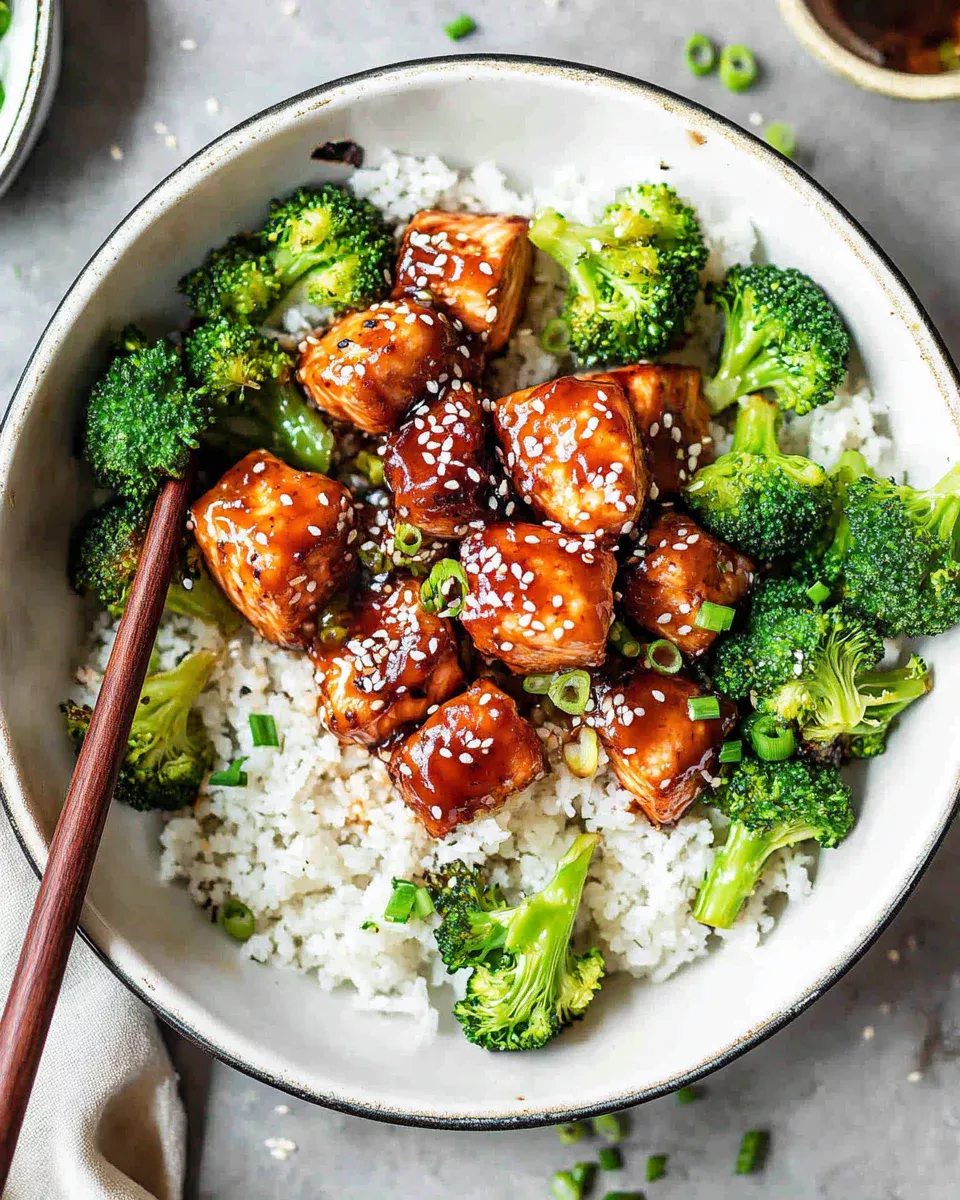
Introduction to Baked Teriyaki Salmon with Broccoli
Picture this: a busy weekday evening, and you’re craving something delicious yet simple. Enter Baked Teriyaki Salmon with Broccoli, a dish that feels like a warm hug after a long day. This recipe is a lifesaver for those of us juggling work, family, and everything in between. It’s quick, it’s easy, and it’s packed with flavor. Whether you’re looking to impress your loved ones or just need a quick solution for dinner, this dish has got you covered. Trust me, once you try it, it’ll become a staple in your kitchen.
Why You’ll Love This Baked Teriyaki Salmon with Broccoli
Imagine a meal that’s as quick to prepare as it is delightful to eat. This Baked Teriyaki Salmon with Broccoli is a dream come true for busy nights. It’s a symphony of flavors, with the savory teriyaki glaze perfectly complementing the tender salmon and crisp broccoli. Plus, it’s a healthy choice that doesn’t skimp on taste, making it a win-win for everyone at the table.
Ingredients for Baked Teriyaki Salmon with Broccoli
Let’s dive into the heart of this delightful dish. You’ll need fresh salmon fillets, which are the star of the show, bringing a rich, buttery flavor. Broccoli florets add a vibrant crunch and a pop of green, making the meal as pleasing to the eye as it is to the palate.
The teriyaki sauce is the magic potion here, infusing the salmon with a sweet and savory glaze. Olive oil helps everything cook to perfection, while garlic powder and ground ginger add a warm, aromatic depth. A sprinkle of salt and pepper ties it all together.
For a finishing touch, consider garnishing with sesame seeds and chopped green onions. These optional ingredients add a nutty crunch and a fresh, zesty note. Feel free to swap broccoli with asparagus or snap peas for a twist. Exact quantities are listed at the bottom of the article for easy reference and printing.
How to Make Baked Teriyaki Salmon with Broccoli
Preheat and Prepare
First things first, preheat your oven to 400°F (200°C). This ensures everything cooks evenly. Line a baking sheet with parchment paper. Trust me, this little step makes cleanup a breeze.
Mix the Teriyaki Sauce
In a small bowl, combine the teriyaki sauce, olive oil, garlic powder, and ground ginger. Add a pinch of salt and pepper. This mixture is your flavor powerhouse, so give it a good stir until everything is well blended.
Arrange Salmon and Broccoli
Place the salmon fillets on one side of the baking sheet. Brush them generously with the teriyaki mixture. On the other side, arrange the broccoli florets. Drizzle them with a bit of olive oil and season with salt and pepper. This setup ensures both the salmon and broccoli cook to perfection.
Bake to Perfection
Pop the baking sheet into the preheated oven. Bake for 12-15 minutes. You’ll know it’s done when the salmon flakes easily with a fork and the broccoli is tender. The aroma will be irresistible!
Optional Broiling for Crispiness
If you like a crispy finish, switch your oven to broil for an additional 2-3 minutes. Keep an eye on it to prevent burning. This step adds a delightful crunch to the salmon, making it even more delectable.
Tips for Success
Marinate the salmon in teriyaki sauce for 30 minutes for deeper flavor.
Use fresh salmon for the best taste and texture.
Cut broccoli into even-sized florets for uniform cooking.
Line the baking sheet with parchment paper to prevent sticking.
Keep an eye on the broiling step to avoid overcooking.
Equipment Needed
Baking sheet: A standard size works best, but any oven-safe tray will do.
Parchment paper: For easy cleanup and non-stick cooking.
Small mixing bowl: To blend the teriyaki sauce and spices.
Brush: A silicone brush is ideal for applying the sauce evenly.
Fork: To check the doneness of the salmon.
Variations
Swap salmon with chicken breast for a different protein option.
Use tamari instead of teriyaki sauce for a gluten-free version.
Add a splash of lemon juice for a citrusy twist.
Incorporate bell peppers or carrots for added color and nutrients.
Try a honey-soy glaze for a sweeter flavor profile.
Top with crushed peanuts for a crunchy texture.
Serving Suggestions
Pair with steamed jasmine rice for a complete meal.
Serve alongside a crisp cucumber salad for freshness.
Complement with a glass of chilled white wine, like Sauvignon Blanc.
Garnish with extra green onions for a pop of color.
Present on a large platter for a family-style dinner.
FAQs about Baked Teriyaki Salmon with Broccoli
Can I use frozen salmon for this recipe?
Absolutely! Just make sure to thaw the salmon fillets completely before cooking. This ensures even baking and allows the teriyaki sauce to penetrate the fish, enhancing the flavor.
What can I substitute for broccoli?
If broccoli isn’t your favorite, feel free to swap it with asparagus, snap peas, or even bell peppers. These alternatives will still complement the teriyaki salmon beautifully and add a delightful crunch.
How do I know when the salmon is done?
The salmon is perfectly cooked when it flakes easily with a fork. Keep an eye on it during the last few minutes of baking to avoid overcooking, which can dry out the fish.
Is there a way to make this dish gluten-free?
Yes, simply replace the teriyaki sauce with a gluten-free version or use tamari. This small change keeps the dish flavorful while accommodating dietary needs.
Can I prepare this dish ahead of time?
While it’s best enjoyed fresh, you can prepare the teriyaki sauce and marinate the salmon in advance. Store them in the fridge, and when you’re ready to cook, just follow the baking instructions for a quick meal.
Final Thoughts
There’s something truly magical about the simplicity and flavor of Baked Teriyaki Salmon with Broccoli. It’s a dish that brings joy to the table, offering a delightful balance of taste and nutrition. Whether you’re a seasoned cook or just starting your culinary journey, this recipe is a testament to how easy and rewarding home cooking can be. The combination of tender salmon and crisp broccoli, all glazed in a savory teriyaki sauce, is sure to become a family favorite. So, gather your loved ones, share a meal, and savor the moments that make life delicious.
Paul
Baked Teriyaki Salmon with Broccoli: Easy Recipe Guide
A simple and delicious recipe for Baked Teriyaki Salmon with Broccoli, perfect for a healthy and flavorful meal.
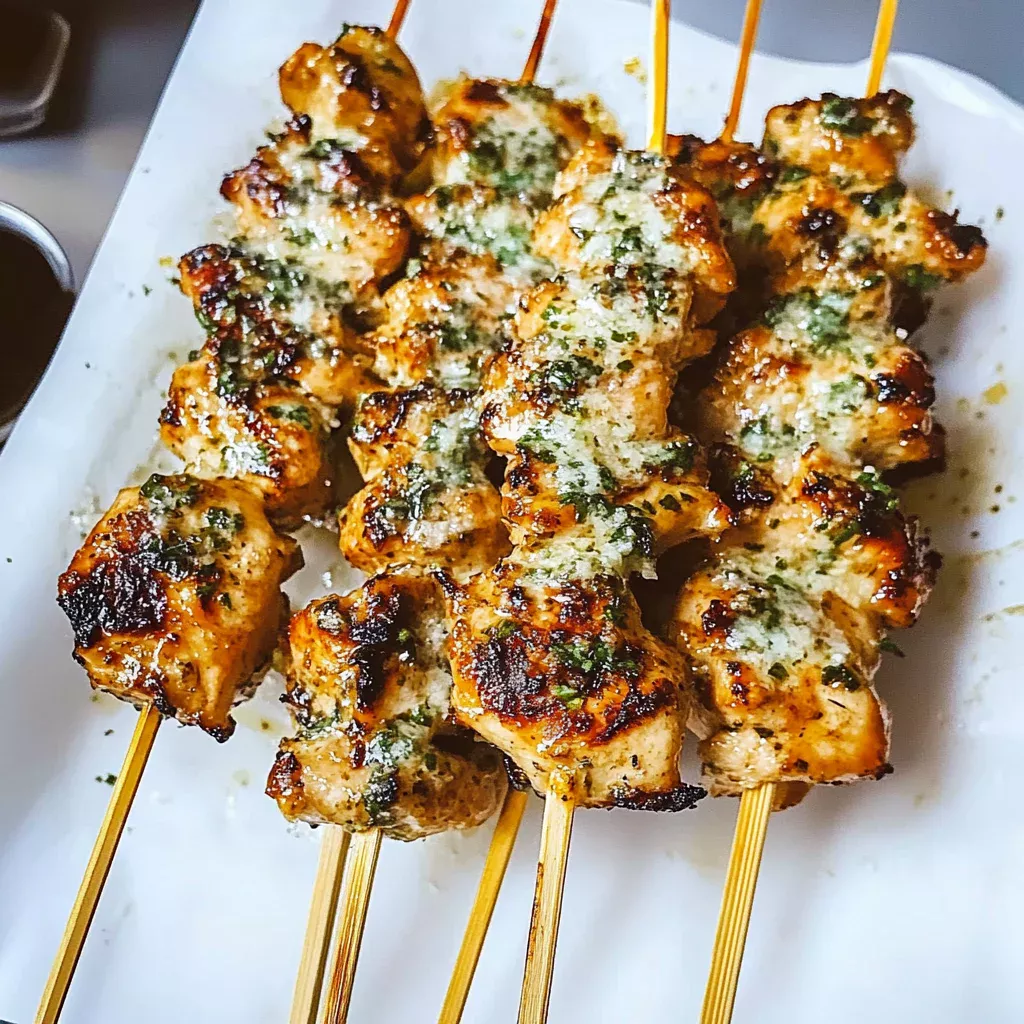
Ah, the delightful aroma of Garlic Parmesan Chicken Skewers sizzling on the grill! It’s like a warm hug for your taste buds. If you’re anything like me, juggling a busy schedule while trying to whip up something delicious can feel like a culinary tightrope walk. But fear not, these skewers are your trusty safety net. Perfect for a quick weeknight dinner or a summer barbecue, they promise to impress without the stress. With just a few simple ingredients, you can create a dish that’s both flavorful and satisfying. Let’s dive into this easy, yet impressive recipe!
Why You’ll Love This Garlic Parmesan Chicken Skewers
These Garlic Parmesan Chicken Skewers are a busy cook’s dream come true. They’re quick to prepare, bursting with flavor, and perfect for any occasion. Whether you’re hosting a summer barbecue or need a speedy weeknight meal, these skewers deliver. The savory blend of garlic and Parmesan creates a taste sensation that even the pickiest eaters will adore. Plus, they’re low-carb and guilt-free!
Ingredients for Garlic Parmesan Chicken Skewers
Let’s gather the essentials for these mouthwatering Garlic Parmesan Chicken Skewers. First up, boneless, skinless chicken breasts, the star of our show, offering lean protein and a tender bite. Olive oil adds a touch of richness and helps the marinade cling to the chicken. Minced garlic infuses the dish with its unmistakable aroma and flavor, while grated Parmesan cheese brings a savory, nutty depth.
A sprinkle of dried Italian herbs—think oregano, basil, and thyme—adds a hint of Mediterranean flair. Salt and black pepper are your trusty sidekicks, enhancing every other ingredient. Fresh parsley, chopped and sprinkled on top, provides a pop of color and freshness. Don’t forget the skewers, either wooden or metal, to hold everything together. For those who like a bit of heat, a pinch of red pepper flakes can spice things up. And if you’re feeling adventurous, swap the chicken for shrimp or tofu for a delightful twist.
Exact quantities for each ingredient are listed at the bottom of the article, ready for printing. Let’s get cooking!
How to Make Garlic Parmesan Chicken Skewers
Preparing the Marinade
First things first, let’s whip up a marinade that will make your taste buds dance. In a large bowl, combine olive oil, minced garlic, and grated Parmesan cheese. These ingredients are the backbone of our flavor profile. Add a sprinkle of dried Italian herbs—oregano, basil, and thyme—to transport your senses to a sun-drenched Mediterranean coast. Season with salt and black pepper, giving it a good mix until everything is well blended. This marinade is like a cozy blanket, ready to wrap around our chicken cubes.
Marinating the Chicken
Now, it’s time to introduce our chicken to this flavorful concoction. Toss the chicken cubes into the bowl, ensuring each piece is generously coated. This step is crucial for infusing the chicken with all those delightful flavors. Cover the bowl and let it chill in the fridge for at least 30 minutes. If you have the time, let it marinate for up to 2 hours for an even deeper flavor. This is your chance to relax, sip some iced tea, or catch up on your favorite show while the marinade works its magic.
Grilling the Skewers
With the chicken marinated to perfection, it’s time to fire up the grill. Preheat it to medium-high heat, ensuring it’s hot enough to sear the chicken beautifully. Thread the marinated chicken cubes onto skewers, leaving a little space between each piece. This allows the heat to circulate evenly, cooking the chicken to juicy perfection. Place the skewers on the grill, turning them occasionally for about 10-12 minutes. You’re aiming for those lovely grill marks and an internal temperature of 165°F. Once done, let them rest for a few minutes before serving. Garnish with fresh parsley for a burst of color and freshness. Enjoy your Garlic Parmesan Chicken Skewers, a true testament to the art of grilling!
Tips for Success
Soak wooden skewers in water for 30 minutes to prevent burning.
For even cooking, cut chicken into uniform cubes.
Don’t overcrowd the grill; give each skewer space to cook evenly.
Use a meat thermometer to ensure chicken reaches 165°F.
Let the skewers rest for a few minutes before serving to lock in juices.
Equipment Needed
Grill or grill pan – for that perfect char.
Mixing bowl – to prepare the marinade.
Wooden or metal skewers – to hold the chicken cubes.
Meat thermometer – ensures chicken is cooked to 165°F.
Tongs – for easy turning of skewers on the grill.
Variations
Spicy Twist: Add a pinch of cayenne pepper to the marinade for a fiery kick.
Herbaceous Delight: Swap Italian herbs with fresh rosemary and thyme for a fragrant touch.
Vegetarian Option: Replace chicken with firm tofu cubes, marinate, and grill for a plant-based treat.
Seafood Swap: Use shrimp instead of chicken for a quick-cooking, seafood version.
Cheesy Upgrade: Sprinkle extra Parmesan on the skewers during the last minute of grilling for a cheesy crust.
Serving Suggestions
Pair with a crisp Caesar salad for a refreshing contrast.
Serve alongside buttery garlic bread for a comforting touch.
Complement with a chilled glass of white wine or iced tea.
Present on a platter with lemon wedges for a zesty finish.
Garnish with extra parsley for a pop of color and freshness.
FAQs about Garlic Parmesan Chicken Skewers
Can I prepare the marinade in advance?
Absolutely! You can mix the marinade ingredients a day ahead and store it in the fridge. This way, when you’re ready to cook, you can simply toss the chicken in and let it soak up all those delicious flavors.
What if I don’t have a grill?
No worries! A grill pan or even a regular skillet will work just fine. Just make sure to preheat it well and cook the skewers over medium-high heat, turning occasionally for even cooking.
How do I prevent the chicken from sticking to the grill?
To avoid sticking, ensure your grill is preheated and clean. Lightly oil the grates or brush a bit of oil on the chicken before grilling. This helps achieve those beautiful grill marks without any hassle.
Can I use chicken thighs instead of breasts?
Yes, chicken thighs are a great alternative. They tend to be juicier and more forgiving if slightly overcooked. Just make sure to cut them into similar-sized cubes for even cooking.
How can I make these skewers more kid-friendly?
For a kid-friendly version, reduce the garlic and skip the red pepper flakes. You can also serve the skewers with a side of honey mustard or ranch dressing for dipping, which kids often love.
Final Thoughts
There’s something truly magical about the simplicity and flavor of Garlic Parmesan Chicken Skewers. They transform an ordinary meal into a delightful culinary experience, perfect for sharing with family and friends. Whether you’re gathered around the grill on a sunny afternoon or enjoying a cozy dinner indoors, these skewers bring a sense of joy and satisfaction. The combination of garlic, Parmesan, and herbs creates a symphony of flavors that dance on your palate. So, next time you’re in need of a quick, delicious meal, remember these skewers. They’re not just food; they’re a celebration of taste and togetherness.
Paul
Garlic Parmesan Chicken Skewers: Grill These Flavorful Treats
Garlic Parmesan Chicken Skewers are a delicious and flavorful grilled dish made with marinated chicken cubes, perfect for a summer barbecue or a quick weeknight dinner.
1poundbonelessskinless chicken breasts, cut into 1-inch cubes
1/4cupolive oil
4clovesgarlicminced
1/2cupgrated Parmesan cheese
1teaspoondried Italian herbsoregano, basil, thyme
1/2teaspoonsalt
1/4teaspoonblack pepper
1tablespoonfresh parsleychopped (for garnish)
Skewerswooden or metal
Method
If using wooden skewers, soak them in water for at least 30 minutes to prevent burning.
In a large bowl, combine olive oil, minced garlic, Parmesan cheese, Italian herbs, salt, and black pepper. Mix well to create a marinade.
Add the chicken cubes to the marinade and toss until evenly coated. Cover and refrigerate for at least 30 minutes, or up to 2 hours for more flavor.
Preheat your grill or grill pan over medium-high heat.
Thread the marinated chicken cubes onto the skewers, leaving a little space between each piece for even cooking.
Grill the skewers for about 10-12 minutes, turning occasionally, until the chicken is cooked through and has nice grill marks. The internal temperature should reach 165°F.
Remove from the grill and let rest for a few minutes. Garnish with chopped parsley before serving.
Notes
For a spicy kick, add a pinch of red pepper flakes to the marinade.
Substitute chicken with shrimp or cubed tofu for a different protein option.
Introduction to Strawberry Crunch Cheesecake Recipe
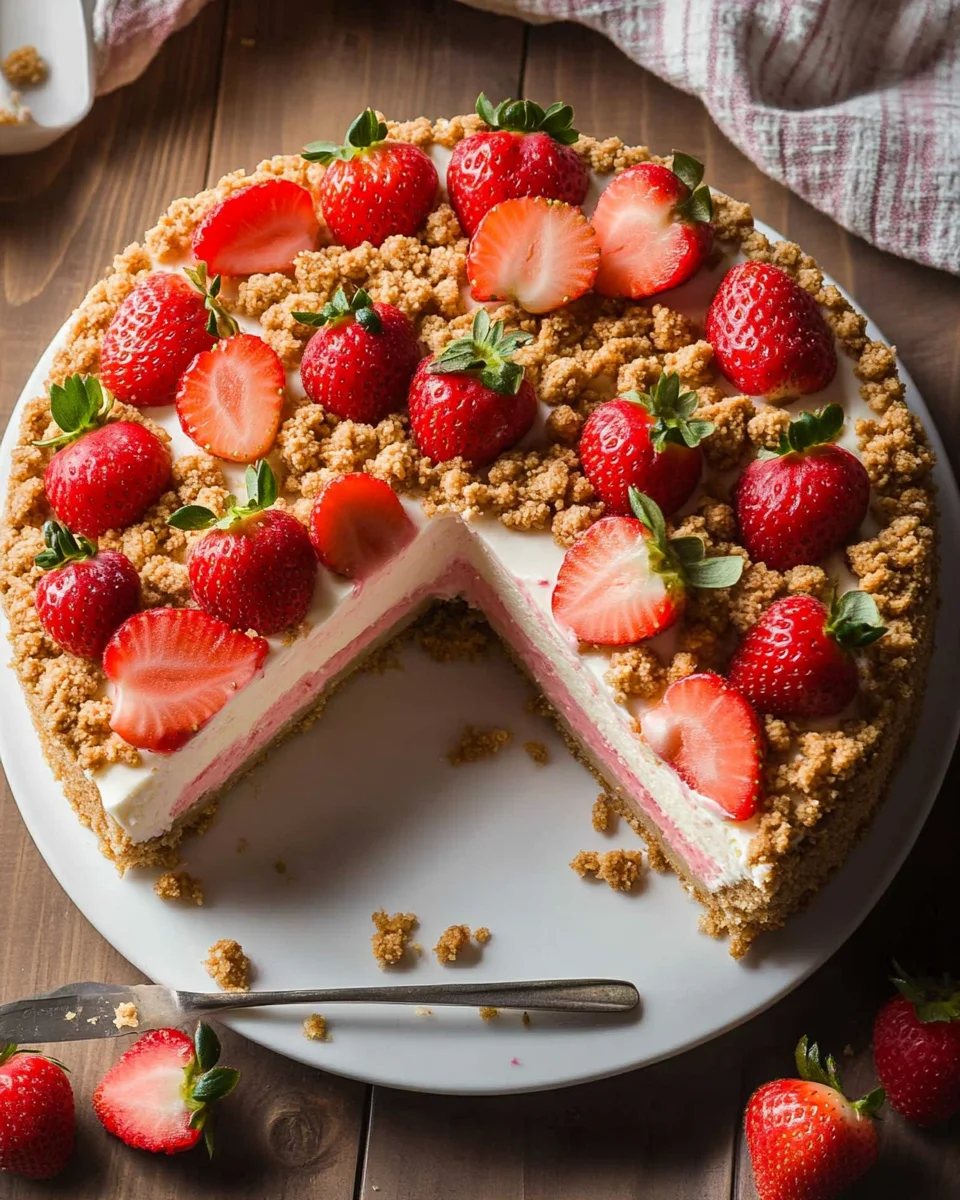
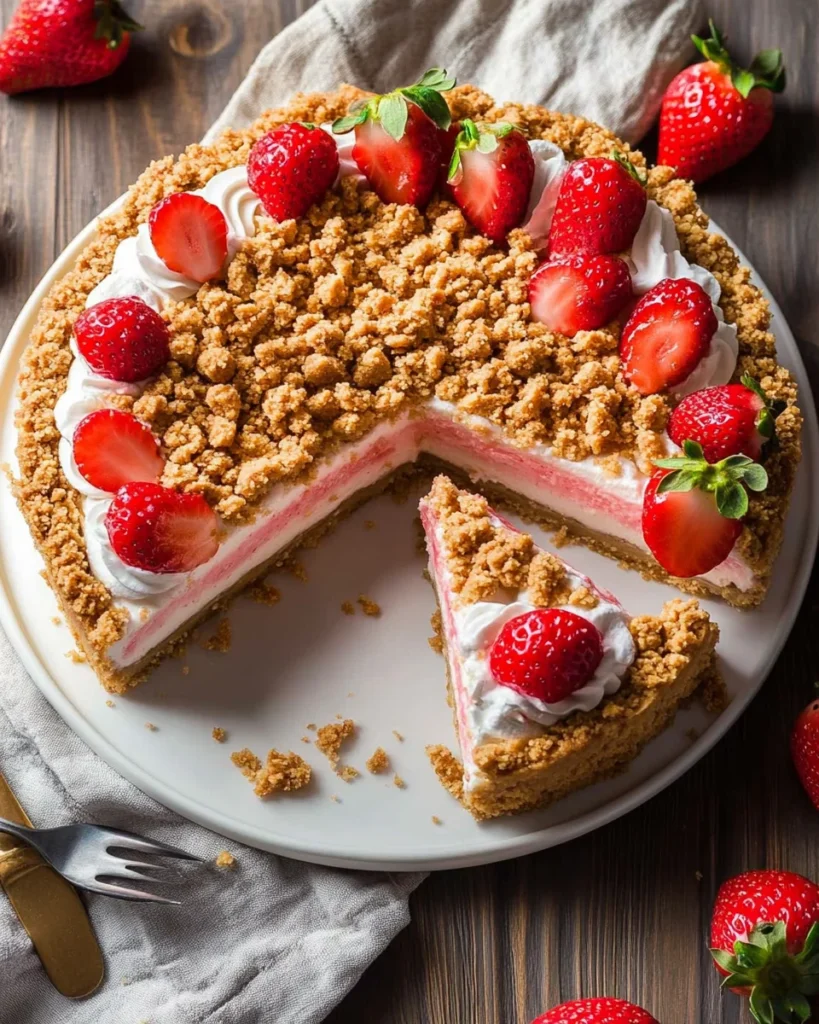
Strawberry Crunch Cheesecake Recipe is a perfect treat for any occasion. Whether it’s a birthday party, a family gathering, or just a cozy night in, this cheesecake will surely impress your guests and satisfy your sweet tooth.
This recipe is not only delicious but also easy to make. With a buttery graham cracker crust, a rich cream cheese filling, and a crunchy strawberry topping, every bite is a burst of flavor. Plus, it’s a great way to showcase fresh strawberries, making it a seasonal favorite.
In this article, we will guide you through the ingredients and steps needed to create this scrumptious cheesecake. You’ll learn how to prepare the crust, make the filling, and assemble the cheesecake to perfection. So, grab your apron and let’s get started on this delightful journey to cheesecake heaven!
Ingredients for Strawberry Crunch Cheesecake Recipe
Strawberry Crunch Cheesecake Recipe, you will need a selection of simple yet essential ingredients. Each component plays a vital role in achieving that creamy texture and delightful flavor. Here’s what you’ll need:
1 ½ cups graham cracker crumbs
½ cup unsalted butter, melted
2 tablespoons granulated sugar
2 (8-ounce) packages cream cheese, softened
1 cup powdered sugar
1 teaspoon vanilla extract
1 cup heavy whipping cream
1 cup fresh strawberries, diced
1 cup strawberry crunch topping (store-bought or homemade)
These ingredients come together to create a deliciously rich cheesecake that is both creamy and refreshing. The graham cracker crumbs form a sturdy base, while the cream cheese filling provides a smooth and luscious texture. Fresh strawberries add a burst of flavor, and the crunchy topping gives it that extra special touch.
Make sure to gather all your ingredients before you start. This will help streamline the process and ensure you don’t miss anything important. Now that you have everything ready, let’s move on to the next step of preparing your cheesecake!
Step-by-Step Preparation of Strawberry Crunch Cheesecake Recipe
Strawberry Crunch Cheesecake Recipe. Follow these simple steps to create a cheesecake that will wow your family and friends!
Step 1: Preparing the Crust
1 ½ cups of graham cracker crumbs, ½ cup of melted unsalted butter, and 2 tablespoons of granulated sugar. Mix everything together until it looks like wet sand. This mixture will form the base of your cheesecake.
9-inch springform pan. Make sure it’s even and compact. This will help the crust hold together when you slice the cheesecake. Bake the crust in a preheated oven at 350°F for about 10 minutes. Once done, take it out and let it cool completely.
Step 2: Making the Cheesecake Filling
2 packages of softened cream cheese with an electric mixer until it’s smooth and creamy. Gradually add in 1 cup of powdered sugar and 1 teaspoon of vanilla extract. Mix until everything is well combined and fluffy.
1 cup of heavy whipping cream until stiff peaks form. This means the cream should hold its shape when you lift the beaters. Gently fold the whipped cream into the cream cheese mixture. Be careful not to deflate the whipped cream; you want to keep that light and airy texture!
Step 3: Preparing the Strawberry Topping
1 cup of fresh strawberries and dice them into small pieces. You can adjust the size based on your preference. If you like bigger chunks, go for it! Set the diced strawberries aside for later.
Step 4: Assembling the Strawberry Crunch Cheesecake
With the crust cooled and the filling ready, it’s time to assemble your cheesecake. Start by spreading half of the cheesecake mixture over the cooled crust. Use a spatula to smooth it out evenly. Next, sprinkle the diced strawberries on top of this layer. Then, add the remaining cheesecake mixture on top and smooth it out again.
Make sure the top is nice and even. This will help when you add the crunchy topping later. Now, it’s time to chill the cheesecake!
Step 5: Chilling the Cheesecake
4 hours, or until it’s fully set. This step is crucial, as it allows the flavors to meld together and the cheesecake to firm up.
1 cup of strawberry crunch topping evenly over the cheesecake. This adds a delightful crunch that complements the creamy filling perfectly.
Carefully remove the sides of the springform pan and slice the cheesecake into wedges. Enjoy your delicious creation!
Variations of Strawberry Crunch Cheesecake Recipe
Strawberry Crunch Cheesecake Recipe is a delightful treat on its own, there are many ways to customize it. By making a few simple changes, you can create a cheesecake that suits your taste or the occasion. Let’s explore some fun variations!
Alternative Crust Options
If you want to switch things up, consider trying different crust options. Instead of the traditional graham cracker crust, you can use:
Chocolate Graham Crackers: For a rich, chocolatey flavor, use chocolate graham crackers instead of regular ones. This adds a delicious twist to your cheesecake.
Oreo Crust: Crush Oreo cookies and mix them with melted butter for a decadent crust. The chocolatey base pairs wonderfully with the creamy filling.
Almond Flour Crust: For a gluten-free option, use almond flour mixed with melted butter and a bit of sugar. This crust is nutty and adds a unique flavor.
Each of these crusts brings its own character to the cheesecake, making it a fun way to experiment with flavors!
Different Fruit Toppings
While strawberries are the star of this cheesecake, you can easily switch up the fruit toppings to suit your preferences. Here are some tasty alternatives:
Blueberries: Fresh blueberries add a burst of color and a sweet-tart flavor that complements the creamy filling.
Raspberries: For a tangy kick, use fresh raspberries. They provide a beautiful contrast to the sweetness of the cheesecake.
Peaches: Diced fresh peaches can add a juicy sweetness that pairs well with the creaminess of the cheesecake.
Mixed Berries: Combine strawberries, blueberries, and raspberries for a colorful and flavorful topping.
Feel free to mix and match these toppings based on what’s in season or what you enjoy most. Each fruit brings its own unique flavor, making your cheesecake even more delightful!
Strawberry Crunch Cheesecake Recipe that’s uniquely yours. Whether you choose a different crust or a new fruit topping, your cheesecake will surely impress everyone at the table!
Cooking Note for Strawberry Crunch Cheesecake Recipe
Strawberry Crunch Cheesecake Recipe, there are a few important cooking notes to keep in mind. These tips will help ensure your cheesecake turns out perfectly every time!
First, always use softened cream cheese. This is crucial for achieving a smooth and creamy filling. If your cream cheese is too cold, it can create lumps in the mixture. To soften it quickly, you can cut it into small cubes and let it sit at room temperature for about 30 minutes.
Next, be gentle when folding the whipped cream into the cream cheese mixture. This step is key to keeping the filling light and airy. Use a spatula and fold in a circular motion, being careful not to deflate the whipped cream.
4 hours (or overnight, if possible) will enhance the flavors and improve the texture. A well-chilled cheesecake is easier to slice and will hold its shape better.
Lastly, when adding the strawberry crunch topping, do this just before serving. This keeps the topping crunchy and prevents it from getting soggy. If you prepare the cheesecake ahead of time, store the topping separately and sprinkle it on right before you enjoy your dessert.
Strawberry Crunch Cheesecake Recipe that’s sure to impress your family and friends. Happy baking!
Serving Suggestions for Strawberry Crunch Cheesecake Recipe
Strawberry Crunch Cheesecake Recipe is ready, it’s time to think about how to serve it! Presentation can elevate your dessert experience, making it even more enjoyable for you and your guests. Here are some delightful serving suggestions to consider:
Garnish with Fresh Strawberries: Add a few whole or sliced fresh strawberries on top of each slice. This not only enhances the visual appeal but also adds a burst of freshness with every bite.
Drizzle with Strawberry Sauce: Create a simple strawberry sauce by blending fresh strawberries with a bit of sugar. Drizzle this sauce over each slice for an extra layer of flavor.
Serve with Whipped Cream: A dollop of freshly whipped cream on the side can make your cheesecake even more indulgent. You can sweeten the cream with a little powdered sugar and vanilla for added flavor.
Pair with Ice Cream: For a decadent treat, serve a slice of cheesecake alongside a scoop of vanilla or strawberry ice cream. The combination of creamy cheesecake and cold ice cream is simply irresistible!
Use a Decorative Plate: Present your cheesecake on a beautiful serving platter or cake stand. A lovely presentation can make your dessert feel special and inviting.
Offer Coffee or Tea: Pair your cheesecake with a warm cup of coffee or tea. The rich flavors of the cheesecake complement the warmth of the beverage, creating a delightful dessert experience.
Strawberry Crunch Cheesecake Recipe. Whether you’re hosting a gathering or enjoying a quiet evening at home, these ideas will make your cheesecake shine. So, slice it up, add your favorite garnishes, and get ready to savor every delicious bite!
Tips for Perfecting Your Strawberry Crunch Cheesecake Recipe
Strawberry Crunch Cheesecake Recipe is all about attention to detail. With a few helpful tips, you can elevate your cheesecake to a whole new level. Here are some expert suggestions to ensure your cheesecake turns out delicious every time!
Use Quality Ingredients: The flavor of your cheesecake largely depends on the quality of your ingredients. Opt for high-quality cream cheese, fresh strawberries, and real vanilla extract. These choices will enhance the overall taste of your cheesecake.
Don’t Overmix: When mixing the cream cheese and sugar, be careful not to overmix. Overmixing can incorporate too much air, leading to cracks in your cheesecake as it bakes or sets. Mix just until smooth and combined.
Room Temperature Ingredients: Ensure all your ingredients, especially the cream cheese and eggs, are at room temperature. This helps them blend more easily and creates a smoother filling.
Water Bath Method: If you’re baking your cheesecake, consider using a water bath. Wrap the springform pan in aluminum foil and place it in a larger pan filled with hot water. This method helps maintain even baking and prevents cracks.
Cool Gradually: After baking, let your cheesecake cool in the oven with the door slightly ajar. This gradual cooling process helps prevent cracks from forming due to sudden temperature changes.
Chill Overnight: For the best flavor and texture, chill your cheesecake overnight. This allows the flavors to meld beautifully and results in a firmer texture that’s easier to slice.
Experiment with Flavors: Don’t hesitate to get creative! Add a splash of lemon juice or zest to the filling for a refreshing twist. You can also mix in other flavors like almond or coconut for a unique taste.
Keep It Covered: When storing your cheesecake, cover it with plastic wrap or a lid to prevent it from absorbing any odors from the fridge. This keeps your cheesecake fresh and flavorful.
Strawberry Crunch Cheesecake Recipe. Each step you take will contribute to a delicious dessert that’s sure to impress everyone who tries it. Happy baking!
Breakdown of Time for Strawberry Crunch Cheesecake Recipe
Strawberry Crunch Cheesecake Recipe is essential for planning your baking session. Here’s a detailed breakdown of the time you’ll need to create this delicious dessert!
Prep Time
30 minutes. This includes gathering your ingredients, preparing the crust, making the cheesecake filling, and dicing the strawberries. Taking your time during this stage ensures everything is ready for the next steps.
Cooking Time
10 minutes. If you choose to bake the cheesecake, it will require additional time, but in this recipe, we focus on chilling rather than baking the filling. So, the total cooking time remains just 10 minutes.
Total Time
4 hours and 40 minutes to complete the Strawberry Crunch Cheesecake Recipe. This includes the 30 minutes of prep time and the 10 minutes of cooking time, plus the necessary chilling time of at least 4 hours for the cheesecake to set properly. If you can, chilling it overnight will enhance the flavors even more!
By keeping this time breakdown in mind, you can better manage your schedule and ensure that your cheesecake is ready to impress when it’s time to serve. Happy baking!
Nutritional Information for Strawberry Crunch Cheesecake Recipe
Strawberry Crunch Cheesecake Recipe can help you enjoy this delicious dessert while keeping track of your dietary needs. Here’s a breakdown of the key nutritional components per serving, which is based on a total of 10 servings:
Calories
350 calories. This makes it a rich treat, perfect for special occasions or when you want to indulge a little. The combination of cream cheese, heavy cream, and the buttery crust contributes to the calorie count, but it also ensures a satisfying dessert experience.
Protein
5 grams. The cream cheese and heavy whipping cream are the primary sources of protein in this cheesecake. While it may not be a high-protein dessert, it does offer a bit of nourishment along with its sweetness.
Sodium
200 milligrams. This amount is relatively moderate, making it a reasonable choice for those watching their sodium intake. The sodium primarily comes from the cream cheese and butter used in the recipe.
Strawberry Crunch Cheesecake Recipe is a delicious dessert that can fit into a balanced diet when enjoyed in moderation. By being aware of the nutritional information, you can savor each bite while keeping your health goals in mind. Enjoy your cheesecake guilt-free!
FAQs about Strawberry Crunch Cheesecake Recipe
Can I use frozen strawberries for the topping?
Strawberry Crunch Cheesecake Recipe. However, keep in mind that frozen strawberries may release more moisture when thawed. To prevent a soggy cheesecake, drain any excess liquid before adding them to your dessert. You can also consider using them in a sauce or compote to drizzle over the cheesecake for added flavor.
How long can I store the Strawberry Crunch Cheesecake?
Strawberry Crunch Cheesecake can be stored in the refrigerator for up to 5 days. Make sure to cover it with plastic wrap or a lid to keep it fresh. If you want to keep it longer, you can freeze it for up to 2 months. Just remember to wrap it tightly to prevent freezer burn. When you’re ready to enjoy it, thaw it in the refrigerator overnight.
Can I make the cheesecake ahead of time?
Strawberry Crunch Cheesecake ahead of time is a great idea. It allows the flavors to meld together beautifully. You can prepare it a day or two in advance and store it in the refrigerator. Just remember to add the strawberry crunch topping right before serving to keep it crunchy and fresh!
What can I substitute for cream cheese in the recipe?
Strawberry Crunch Cheesecake Recipe, you have a few options. You can use mascarpone cheese for a similar creamy texture. Another option is to use Greek yogurt, which will give a tangy flavor and a lighter texture. For a dairy-free alternative, consider using cashew cream or a vegan cream cheese product. Just keep in mind that the flavor and texture may vary slightly with these substitutes.
Conclusion on Strawberry Crunch Cheesecake Recipe
Strawberry Crunch Cheesecake Recipe is a delightful dessert that combines the rich creaminess of cheesecake with the fresh, fruity flavor of strawberries. This recipe is not only easy to follow but also allows for creativity with variations and toppings. Whether you’re celebrating a special occasion or simply treating yourself, this cheesecake is sure to impress.
By following the steps outlined in this article, you can create a stunning cheesecake that will be the highlight of any gathering. Remember to pay attention to the details, such as using quality ingredients and allowing the cheesecake to chill properly. These small steps can make a big difference in the final result.
As you experiment with different crusts and toppings, you’ll find that the possibilities are endless. From chocolate graham crackers to mixed berry toppings, each variation offers a unique twist on this classic dessert. So, don’t hesitate to make it your own!
Strawberry Crunch Cheesecake Recipe with your friends and family. With its creamy texture, fresh flavors, and delightful crunch, it’s bound to become a favorite in your dessert repertoire. Happy baking, and may your cheesecake adventures be sweet and satisfying!
ating
Strawberry Crunch Cheesecake Recipe is a must-try!
This Strawberry Crunch Cheesecake is the ultimate dessert mash-up—creamy vanilla cheesecake with a buttery Golden Oreo crust, topped with a nostalgic strawberry crunch layer and optional strawberry sauce drizzle. It’s the perfect balance of smooth, sweet, and crunchy!
10freeze-dried strawberries or 2 tablespoons strawberry-flavored gelatin powder
2tablespoonsunsalted buttermelted
Optional Strawberry Sauce:
1½cupsfresh or frozen strawberrieschopped
1/2cupgranulated sugar
1tablespoonlemon juice
1teaspooncornstarch mixed with 1 tablespoon water
Method
Preheat the oven:Set oven to 325°F (165°C). Grease a 9-inch springform pan and wrap the bottom in foil to prevent leaks.
Make the crust:Mix crushed Golden Oreos with melted butter. Press firmly into the bottom of the pan. Bake for 8–10 minutes. Let cool while preparing the filling.
Prepare the filling:Beat cream cheese until smooth. Add sugar and vanilla; mix until creamy. Add eggs one at a time, beating after each. Mix in sour cream, heavy cream, and flour until fully combined.
Bake the cheesecake:Pour filling over the crust. Place the pan in a water bath or set a separate pan of hot water on the oven rack to maintain moisture. Bake for 55–65 minutes, until the edges are set and the center is slightly jiggly. Turn off oven, crack the door, and let the cheesecake cool inside for 1 hour.
Chill:Remove from oven, cover, and chill in the fridge for at least 4 hours or overnight for best texture.
Make the crunch topping:In a food processor, pulse Golden Oreos and freeze-dried strawberries (or gelatin) until crumbly. Stir in melted butter. Spread evenly over the chilled cheesecake.
(Optional) Make the strawberry sauce:In a saucepan, combine strawberries, sugar, and lemon juice. Simmer for 5–7 minutes. Stir in cornstarch slurry and cook until thickened. Cool completely before serving.
Serve:Carefully release cheesecake from the springform pan. Slice and serve with a drizzle of strawberry sauce, if using.
Notes
Use a water bath or place a tray of hot water in the oven to prevent cracking.
For a stronger strawberry flavor, use gelatin powder in the crunch topping.
Store in the fridge for up to 4 days.
Freeze individual slices for up to 2 months—just skip the sauce until serving.
Introduction to Strawberry Crunch Cheesecake Recipe
Strawberry Crunch Cheesecake Recipe is a perfect treat for any occasion. Whether it’s a birthday party, a family gathering, or just a cozy night in, this cheesecake will surely impress your guests and satisfy your sweet tooth.
This recipe is not only delicious but also easy to make. With a buttery graham cracker crust, a rich cream cheese filling, and a crunchy strawberry topping, every bite is a burst of flavor. Plus, it’s a great way to showcase fresh strawberries, making it a seasonal favorite.
In this article, we will guide you through the ingredients and steps needed to create this scrumptious cheesecake. You’ll learn how to prepare the crust, make the filling, and assemble the cheesecake to perfection. So, grab your apron and let’s get started on this delightful journey to cheesecake heaven!
Ingredients for Strawberry Crunch Cheesecake Recipe
Strawberry Crunch Cheesecake Recipe, you will need a selection of simple yet essential ingredients. Each component plays a vital role in achieving that creamy texture and delightful flavor. Here’s what you’ll need:
1 ½ cups graham cracker crumbs
½ cup unsalted butter, melted
2 tablespoons granulated sugar
2 (8-ounce) packages cream cheese, softened
1 cup powdered sugar
1 teaspoon vanilla extract
1 cup heavy whipping cream
1 cup fresh strawberries, diced
1 cup strawberry crunch topping (store-bought or homemade)
These ingredients come together to create a deliciously rich cheesecake that is both creamy and refreshing. The graham cracker crumbs form a sturdy base, while the cream cheese filling provides a smooth and luscious texture. Fresh strawberries add a burst of flavor, and the crunchy topping gives it that extra special touch.
Make sure to gather all your ingredients before you start. This will help streamline the process and ensure you don’t miss anything important. Now that you have everything ready, let’s move on to the next step of preparing your cheesecake!
Step-by-Step Preparation of Strawberry Crunch Cheesecake Recipe
Strawberry Crunch Cheesecake Recipe. Follow these simple steps to create a cheesecake that will wow your family and friends!
Step 1: Preparing the Crust
1 ½ cups of graham cracker crumbs, ½ cup of melted unsalted butter, and 2 tablespoons of granulated sugar. Mix everything together until it looks like wet sand. This mixture will form the base of your cheesecake.
9-inch springform pan. Make sure it’s even and compact. This will help the crust hold together when you slice the cheesecake. Bake the crust in a preheated oven at 350°F for about 10 minutes. Once done, take it out and let it cool completely.
Step 2: Making the Cheesecake Filling
2 packages of softened cream cheese with an electric mixer until it’s smooth and creamy. Gradually add in 1 cup of powdered sugar and 1 teaspoon of vanilla extract. Mix until everything is well combined and fluffy.
1 cup of heavy whipping cream until stiff peaks form. This means the cream should hold its shape when you lift the beaters. Gently fold the whipped cream into the cream cheese mixture. Be careful not to deflate the whipped cream; you want to keep that light and airy texture!
Step 3: Preparing the Strawberry Topping
1 cup of fresh strawberries and dice them into small pieces. You can adjust the size based on your preference. If you like bigger chunks, go for it! Set the diced strawberries aside for later.
Step 4: Assembling the Strawberry Crunch Cheesecake
With the crust cooled and the filling ready, it’s time to assemble your cheesecake. Start by spreading half of the cheesecake mixture over the cooled crust. Use a spatula to smooth it out evenly. Next, sprinkle the diced strawberries on top of this layer. Then, add the remaining cheesecake mixture on top and smooth it out again.
Make sure the top is nice and even. This will help when you add the crunchy topping later. Now, it’s time to chill the cheesecake!
Step 5: Chilling the Cheesecake
4 hours, or until it’s fully set. This step is crucial, as it allows the flavors to meld together and the cheesecake to firm up.
1 cup of strawberry crunch topping evenly over the cheesecake. This adds a delightful crunch that complements the creamy filling perfectly.
Carefully remove the sides of the springform pan and slice the cheesecake into wedges. Enjoy your delicious creation!
Variations of Strawberry Crunch Cheesecake Recipe
Strawberry Crunch Cheesecake Recipe is a delightful treat on its own, there are many ways to customize it. By making a few simple changes, you can create a cheesecake that suits your taste or the occasion. Let’s explore some fun variations!
Alternative Crust Options
If you want to switch things up, consider trying different crust options. Instead of the traditional graham cracker crust, you can use:
Chocolate Graham Crackers: For a rich, chocolatey flavor, use chocolate graham crackers instead of regular ones. This adds a delicious twist to your cheesecake.
Oreo Crust: Crush Oreo cookies and mix them with melted butter for a decadent crust. The chocolatey base pairs wonderfully with the creamy filling.
Almond Flour Crust: For a gluten-free option, use almond flour mixed with melted butter and a bit of sugar. This crust is nutty and adds a unique flavor.
Each of these crusts brings its own character to the cheesecake, making it a fun way to experiment with flavors!
Different Fruit Toppings
While strawberries are the star of this cheesecake, you can easily switch up the fruit toppings to suit your preferences. Here are some tasty alternatives:
Blueberries: Fresh blueberries add a burst of color and a sweet-tart flavor that complements the creamy filling.
Raspberries: For a tangy kick, use fresh raspberries. They provide a beautiful contrast to the sweetness of the cheesecake.
Peaches: Diced fresh peaches can add a juicy sweetness that pairs well with the creaminess of the cheesecake.
Mixed Berries: Combine strawberries, blueberries, and raspberries for a colorful and flavorful topping.
Feel free to mix and match these toppings based on what’s in season or what you enjoy most. Each fruit brings its own unique flavor, making your cheesecake even more delightful!
Strawberry Crunch Cheesecake Recipe that’s uniquely yours. Whether you choose a different crust or a new fruit topping, your cheesecake will surely impress everyone at the table!
Cooking Note for Strawberry Crunch Cheesecake Recipe
Strawberry Crunch Cheesecake Recipe, there are a few important cooking notes to keep in mind. These tips will help ensure your cheesecake turns out perfectly every time!
First, always use softened cream cheese. This is crucial for achieving a smooth and creamy filling. If your cream cheese is too cold, it can create lumps in the mixture. To soften it quickly, you can cut it into small cubes and let it sit at room temperature for about 30 minutes.
Next, be gentle when folding the whipped cream into the cream cheese mixture. This step is key to keeping the filling light and airy. Use a spatula and fold in a circular motion, being careful not to deflate the whipped cream.
4 hours (or overnight, if possible) will enhance the flavors and improve the texture. A well-chilled cheesecake is easier to slice and will hold its shape better.
Lastly, when adding the strawberry crunch topping, do this just before serving. This keeps the topping crunchy and prevents it from getting soggy. If you prepare the cheesecake ahead of time, store the topping separately and sprinkle it on right before you enjoy your dessert.
Strawberry Crunch Cheesecake Recipe that’s sure to impress your family and friends. Happy baking!
Serving Suggestions for Strawberry Crunch Cheesecake Recipe
Strawberry Crunch Cheesecake Recipe is ready, it’s time to think about how to serve it! Presentation can elevate your dessert experience, making it even more enjoyable for you and your guests. Here are some delightful serving suggestions to consider:
Garnish with Fresh Strawberries: Add a few whole or sliced fresh strawberries on top of each slice. This not only enhances the visual appeal but also adds a burst of freshness with every bite.
Drizzle with Strawberry Sauce: Create a simple strawberry sauce by blending fresh strawberries with a bit of sugar. Drizzle this sauce over each slice for an extra layer of flavor.
Serve with Whipped Cream: A dollop of freshly whipped cream on the side can make your cheesecake even more indulgent. You can sweeten the cream with a little powdered sugar and vanilla for added flavor.
Pair with Ice Cream: For a decadent treat, serve a slice of cheesecake alongside a scoop of vanilla or strawberry ice cream. The combination of creamy cheesecake and cold ice cream is simply irresistible!
Use a Decorative Plate: Present your cheesecake on a beautiful serving platter or cake stand. A lovely presentation can make your dessert feel special and inviting.
Offer Coffee or Tea: Pair your cheesecake with a warm cup of coffee or tea. The rich flavors of the cheesecake complement the warmth of the beverage, creating a delightful dessert experience.
Strawberry Crunch Cheesecake Recipe. Whether you’re hosting a gathering or enjoying a quiet evening at home, these ideas will make your cheesecake shine. So, slice it up, add your favorite garnishes, and get ready to savor every delicious bite!
Tips for Perfecting Your Strawberry Crunch Cheesecake Recipe
Strawberry Crunch Cheesecake Recipe is all about attention to detail. With a few helpful tips, you can elevate your cheesecake to a whole new level. Here are some expert suggestions to ensure your cheesecake turns out delicious every time!
Use Quality Ingredients: The flavor of your cheesecake largely depends on the quality of your ingredients. Opt for high-quality cream cheese, fresh strawberries, and real vanilla extract. These choices will enhance the overall taste of your cheesecake.
Don’t Overmix: When mixing the cream cheese and sugar, be careful not to overmix. Overmixing can incorporate too much air, leading to cracks in your cheesecake as it bakes or sets. Mix just until smooth and combined.
Room Temperature Ingredients: Ensure all your ingredients, especially the cream cheese and eggs, are at room temperature. This helps them blend more easily and creates a smoother filling.
Water Bath Method: If you’re baking your cheesecake, consider using a water bath. Wrap the springform pan in aluminum foil and place it in a larger pan filled with hot water. This method helps maintain even baking and prevents cracks.
Cool Gradually: After baking, let your cheesecake cool in the oven with the door slightly ajar. This gradual cooling process helps prevent cracks from forming due to sudden temperature changes.
Chill Overnight: For the best flavor and texture, chill your cheesecake overnight. This allows the flavors to meld beautifully and results in a firmer texture that’s easier to slice.
Experiment with Flavors: Don’t hesitate to get creative! Add a splash of lemon juice or zest to the filling for a refreshing twist. You can also mix in other flavors like almond or coconut for a unique taste.
Keep It Covered: When storing your cheesecake, cover it with plastic wrap or a lid to prevent it from absorbing any odors from the fridge. This keeps your cheesecake fresh and flavorful.
Strawberry Crunch Cheesecake Recipe. Each step you take will contribute to a delicious dessert that’s sure to impress everyone who tries it. Happy baking!
Breakdown of Time for Strawberry Crunch Cheesecake Recipe
Strawberry Crunch Cheesecake Recipe is essential for planning your baking session. Here’s a detailed breakdown of the time you’ll need to create this delicious dessert!
Prep Time
30 minutes. This includes gathering your ingredients, preparing the crust, making the cheesecake filling, and dicing the strawberries. Taking your time during this stage ensures everything is ready for the next steps.
Cooking Time
10 minutes. If you choose to bake the cheesecake, it will require additional time, but in this recipe, we focus on chilling rather than baking the filling. So, the total cooking time remains just 10 minutes.
Total Time
4 hours and 40 minutes to complete the Strawberry Crunch Cheesecake Recipe. This includes the 30 minutes of prep time and the 10 minutes of cooking time, plus the necessary chilling time of at least 4 hours for the cheesecake to set properly. If you can, chilling it overnight will enhance the flavors even more!
By keeping this time breakdown in mind, you can better manage your schedule and ensure that your cheesecake is ready to impress when it’s time to serve. Happy baking!
Nutritional Information for Strawberry Crunch Cheesecake Recipe
Strawberry Crunch Cheesecake Recipe can help you enjoy this delicious dessert while keeping track of your dietary needs. Here’s a breakdown of the key nutritional components per serving, which is based on a total of 10 servings:
Calories
350 calories. This makes it a rich treat, perfect for special occasions or when you want to indulge a little. The combination of cream cheese, heavy cream, and the buttery crust contributes to the calorie count, but it also ensures a satisfying dessert experience.
Protein
5 grams. The cream cheese and heavy whipping cream are the primary sources of protein in this cheesecake. While it may not be a high-protein dessert, it does offer a bit of nourishment along with its sweetness.
Sodium
200 milligrams. This amount is relatively moderate, making it a reasonable choice for those watching their sodium intake. The sodium primarily comes from the cream cheese and butter used in the recipe.
Strawberry Crunch Cheesecake Recipe is a delicious dessert that can fit into a balanced diet when enjoyed in moderation. By being aware of the nutritional information, you can savor each bite while keeping your health goals in mind. Enjoy your cheesecake guilt-free!
FAQs about Strawberry Crunch Cheesecake Recipe
Can I use frozen strawberries for the topping?
Strawberry Crunch Cheesecake Recipe. However, keep in mind that frozen strawberries may release more moisture when thawed. To prevent a soggy cheesecake, drain any excess liquid before adding them to your dessert. You can also consider using them in a sauce or compote to drizzle over the cheesecake for added flavor.
How long can I store the Strawberry Crunch Cheesecake?
Strawberry Crunch Cheesecake can be stored in the refrigerator for up to 5 days. Make sure to cover it with plastic wrap or a lid to keep it fresh. If you want to keep it longer, you can freeze it for up to 2 months. Just remember to wrap it tightly to prevent freezer burn. When you’re ready to enjoy it, thaw it in the refrigerator overnight.
Can I make the cheesecake ahead of time?
Strawberry Crunch Cheesecake ahead of time is a great idea. It allows the flavors to meld together beautifully. You can prepare it a day or two in advance and store it in the refrigerator. Just remember to add the strawberry crunch topping right before serving to keep it crunchy and fresh!
What can I substitute for cream cheese in the recipe?
Strawberry Crunch Cheesecake Recipe, you have a few options. You can use mascarpone cheese for a similar creamy texture. Another option is to use Greek yogurt, which will give a tangy flavor and a lighter texture. For a dairy-free alternative, consider using cashew cream or a vegan cream cheese product. Just keep in mind that the flavor and texture may vary slightly with these substitutes.
Conclusion on Strawberry Crunch Cheesecake Recipe
Strawberry Crunch Cheesecake Recipe is a delightful dessert that combines the rich creaminess of cheesecake with the fresh, fruity flavor of strawberries. This recipe is not only easy to follow but also allows for creativity with variations and toppings. Whether you’re celebrating a special occasion or simply treating yourself, this cheesecake is sure to impress.
By following the steps outlined in this article, you can create a stunning cheesecake that will be the highlight of any gathering. Remember to pay attention to the details, such as using quality ingredients and allowing the cheesecake to chill properly. These small steps can make a big difference in the final result.
As you experiment with different crusts and toppings, you’ll find that the possibilities are endless. From chocolate graham crackers to mixed berry toppings, each variation offers a unique twist on this classic dessert. So, don’t hesitate to make it your own!
Strawberry Crunch Cheesecake Recipe with your friends and family. With its creamy texture, fresh flavors, and delightful crunch, it’s bound to become a favorite in your dessert repertoire. Happy baking, and may your cheesecake adventures be sweet and satisfying!
ating
Strawberry Crunch Cheesecake Recipe is a must-try!
This Strawberry Crunch Cheesecake is the ultimate dessert mash-up—creamy vanilla cheesecake with a buttery Golden Oreo crust, topped with a nostalgic strawberry crunch layer and optional strawberry sauce drizzle. It’s the perfect balance of smooth, sweet, and crunchy!
10freeze-dried strawberries or 2 tablespoons strawberry-flavored gelatin powder
2tablespoonsunsalted buttermelted
Optional Strawberry Sauce:
1½cupsfresh or frozen strawberrieschopped
1/2cupgranulated sugar
1tablespoonlemon juice
1teaspooncornstarch mixed with 1 tablespoon water
Method
Preheat the oven:Set oven to 325°F (165°C). Grease a 9-inch springform pan and wrap the bottom in foil to prevent leaks.
Make the crust:Mix crushed Golden Oreos with melted butter. Press firmly into the bottom of the pan. Bake for 8–10 minutes. Let cool while preparing the filling.
Prepare the filling:Beat cream cheese until smooth. Add sugar and vanilla; mix until creamy. Add eggs one at a time, beating after each. Mix in sour cream, heavy cream, and flour until fully combined.
Bake the cheesecake:Pour filling over the crust. Place the pan in a water bath or set a separate pan of hot water on the oven rack to maintain moisture. Bake for 55–65 minutes, until the edges are set and the center is slightly jiggly. Turn off oven, crack the door, and let the cheesecake cool inside for 1 hour.
Chill:Remove from oven, cover, and chill in the fridge for at least 4 hours or overnight for best texture.
Make the crunch topping:In a food processor, pulse Golden Oreos and freeze-dried strawberries (or gelatin) until crumbly. Stir in melted butter. Spread evenly over the chilled cheesecake.
(Optional) Make the strawberry sauce:In a saucepan, combine strawberries, sugar, and lemon juice. Simmer for 5–7 minutes. Stir in cornstarch slurry and cook until thickened. Cool completely before serving.
Serve:Carefully release cheesecake from the springform pan. Slice and serve with a drizzle of strawberry sauce, if using.
Notes
Use a water bath or place a tray of hot water in the oven to prevent cracking.
For a stronger strawberry flavor, use gelatin powder in the crunch topping.
Store in the fridge for up to 4 days.
Freeze individual slices for up to 2 months—just skip the sauce until serving.
Shrimp tempura is a delightful Japanese dish that features shrimp coated in a light, crispy batter. This dish is not just about the shrimp; it’s about the technique and the experience of enjoying perfectly fried seafood. The batter is made from a simple mixture of flour, cornstarch, and ice-cold water, which creates a unique texture. When fried, the shrimp become golden and crunchy, making them irresistible. Tempura can also include various vegetables, but shrimp remains the star of the show.
The Appeal of the Crispy Shrimp Tempura Recipe
The appeal of the crispy shrimp tempura recipe lies in its simplicity and flavor. First, it’s easy to prepare, making it a great choice for both novice and experienced cooks. The combination of the crunchy exterior and tender shrimp inside creates a delightful contrast that pleases the palate. Moreover, this dish is versatile. You can serve it as an appetizer, a main course, or even as part of a larger meal. The crispy shrimp tempura pairs wonderfully with a variety of dipping sauces, enhancing its taste even further.
Additionally, the cooking process is fun and engaging. Watching the shrimp transform into golden bites of goodness is satisfying. Plus, it’s a fantastic way to impress family and friends at gatherings. With just a few ingredients and some simple steps, you can create a restaurant-quality dish right in your kitchen. So, let’s dive into the ingredients and preparation of this delicious crispy shrimp tempura recipe!
Ingredients for Crispy Shrimp Tempura Recipe
To create the perfect crispy shrimp tempura, you’ll need a few essential ingredients. Each component plays a vital role in achieving that delightful crunch and flavor. Here’s what you’ll need:
1 pound large shrimp: Make sure they are peeled and deveined for the best results.
1 cup all-purpose flour: This forms the base of your batter, giving it structure.
1/2 cup cornstarch: This ingredient helps create a light and crispy texture.
1 teaspoon baking powder: This adds a bit of lift to the batter, making it airy.
1/2 teaspoon salt: A pinch of salt enhances the overall flavor of the dish.
1 cup ice-cold water: The cold water is crucial for a light batter; it helps keep the shrimp crispy.
Vegetable oil: You’ll need this for frying. Choose an oil with a high smoke point.
Soy sauce: This is perfect for dipping and adds a savory touch.
Lemon wedges: These are great for garnish and add a refreshing zing.
These ingredients are simple yet effective. They come together to create a dish that is not only delicious but also visually appealing. Now that you have your ingredients ready, let’s move on to the step-by-step preparation of this crispy shrimp tempura recipe!
Step-by-Step Preparation of Crispy Shrimp Tempura Recipe
Step 1: Preparing the Shrimp
First, start by preparing the shrimp. Ensure that you have one pound of large shrimp, peeled and deveined. This step is crucial as it allows the shrimp to absorb the batter better. Rinse the shrimp under cold water and pat them dry with paper towels. This helps remove excess moisture, ensuring a crispier finish. Once dried, set the shrimp aside while you prepare the batter.
Step 2: Making the Tempura Batter
Next, it’s time to make the tempura batter. In a large bowl, combine one cup of all-purpose flour, half a cup of cornstarch, one teaspoon of baking powder, and half a teaspoon of salt. Mix these dry ingredients together gently. Then, gradually add one cup of ice-cold water to the mixture. Stir carefully until just combined. Remember, it’s okay if there are a few lumps; overmixing can lead to a dense batter. The goal is to keep it light and airy for that perfect crunch.
Step 3: Heating the Oil
Now, let’s heat the oil. In a deep pot or fryer, pour in enough vegetable oil to cover the shrimp by about two inches. Heat the oil to 350°F (175°C). You can use a thermometer to check the temperature, or drop a small amount of batter into the oil. If it sizzles and rises to the surface, the oil is ready. Be cautious while handling hot oil to avoid any accidents.
Step 4: Frying the Shrimp
Once the oil is hot, it’s time to fry the shrimp. Dip each shrimp into the batter, allowing any excess to drip off. Carefully place the battered shrimp into the hot oil, making sure not to overcrowd the pot. Fry them in batches for about 2-3 minutes or until they turn golden brown and crispy. Use a slotted spoon to remove the shrimp from the oil, and let them drain on paper towels. This helps absorb any excess oil, keeping your tempura light and crispy.
Step 5: Draining and Serving
Finally, it’s time to serve your crispy shrimp tempura! Arrange the fried shrimp on a serving platter. Serve them immediately while they’re hot and crispy. Pair your tempura with soy sauce for dipping and garnish with lemon wedges for a refreshing touch. Enjoy this delightful dish with family and friends, and watch them savor every bite!
Variations of Crispy Shrimp Tempura Recipe
Vegetable Tempura Options
While crispy shrimp tempura is a star dish, you can also explore vegetable tempura options. Adding vegetables not only enhances the dish but also makes it more colorful and nutritious. Some popular choices include:
Sweet Potatoes: Slice them thinly for a sweet and crunchy addition.
Zucchini: Cut into sticks or rounds for a tender, flavorful bite.
Bell Peppers: Their vibrant colors and sweetness complement the shrimp perfectly.
Broccoli Florets: These add a nice crunch and are packed with nutrients.
To prepare vegetable tempura, simply follow the same batter and frying steps as you would for shrimp. This way, you can create a mixed tempura platter that everyone will love!
Spicy Shrimp Tempura Twist
If you’re looking to spice things up, consider a spicy shrimp tempura twist. You can add a kick to your batter by mixing in:
Chili Powder: A teaspoon can add a nice heat without overwhelming the flavor.
Hot Sauce: Mix a tablespoon into the batter for a zesty touch.
Wasabi Powder: For a unique flavor, add a pinch to the batter.
This spicy variation is perfect for those who enjoy a little heat in their dishes. Serve it with a cooling dipping sauce, like a yogurt-based sauce, to balance the flavors.
These variations not only make your crispy shrimp tempura more exciting but also allow you to cater to different tastes. Whether you stick to the classic recipe or try something new, you’re sure to impress your guests!
Cooking Note for Crispy Shrimp Tempura Recipe
When making crispy shrimp tempura, a few cooking notes can help you achieve the best results. First, always use fresh shrimp for the best flavor and texture. If you can, buy shrimp that are still in their shells, as they tend to be fresher. If you must use frozen shrimp, ensure they are completely thawed and patted dry before battering.
Another important tip is to maintain the oil temperature. If the oil is too cool, the shrimp will absorb more oil and become greasy. Conversely, if the oil is too hot, the batter may burn before the shrimp are cooked through. Using a thermometer can help you keep the oil at the perfect frying temperature of 350°F (175°C).
Lastly, consider using a deep-frying thermometer to monitor the oil temperature accurately. This will help you achieve that perfect crispy texture every time. With these tips in mind, you’re well on your way to making delicious crispy shrimp tempura!
Serving Suggestions for Crispy Shrimp Tempura Recipe
Serving crispy shrimp tempura can be just as fun as making it! Here are some great ideas to enhance your dining experience:
Dipping Sauces
Dipping sauces can elevate your crispy shrimp tempura. Here are a few popular options:
Soy Sauce: A classic choice that adds a savory flavor.
Tonkatsu Sauce: This thick, sweet sauce pairs well with tempura.
Spicy Mayo: Mix mayonnaise with sriracha for a creamy, spicy dip.
Ponzu Sauce: A citrusy soy sauce that adds a refreshing twist.
Side Dishes to Complement Tempura
To create a complete meal, consider serving your crispy shrimp tempura with some delicious side dishes. Here are a few ideas:
Steamed Rice: A simple side that balances the flavors of the tempura.
Miso Soup: This warm soup adds a comforting touch to your meal.
Salad: A light salad with a sesame dressing can provide a fresh contrast.
Pickled Vegetables: These add a tangy crunch that complements the tempura.
These serving suggestions will not only enhance the flavor of your crispy shrimp tempura but also create a delightful dining experience for you and your guests. Enjoy your meal!
Cooking Note for Crispy Shrimp Tempura Recipe
When making crispy shrimp tempura, a few cooking notes can help you achieve the best results. First, always use fresh shrimp for the best flavor and texture. If you can, buy shrimp that are still in their shells, as they tend to be fresher. If you must use frozen shrimp, ensure they are completely thawed and patted dry before battering.
Another important tip is to maintain the oil temperature. If the oil is too cool, the shrimp will absorb more oil and become greasy. Conversely, if the oil is too hot, the batter may burn before the shrimp are cooked through. Using a thermometer can help you keep the oil at the perfect frying temperature of 350°F (175°C).
Lastly, consider using a deep-frying thermometer to monitor the oil temperature accurately. This will help you achieve that perfect crispy texture every time. With these tips in mind, you’re well on your way to making delicious crispy shrimp tempura!
Serving Suggestions for Crispy Shrimp Tempura Recipe
Serving crispy shrimp tempura can be just as fun as making it! Here are some great ideas to enhance your dining experience:
Dipping Sauces
Dipping sauces can elevate your crispy shrimp tempura. Here are a few popular options:
Soy Sauce: A classic choice that adds a savory flavor. It’s simple yet delicious.
Tonkatsu Sauce: This thick, sweet sauce pairs well with tempura, adding a unique taste.
Spicy Mayo: Mix mayonnaise with sriracha for a creamy, spicy dip that adds a kick.
Ponzu Sauce: A citrusy soy sauce that adds a refreshing twist, perfect for balancing flavors.
These sauces not only enhance the flavor of your crispy shrimp tempura but also allow for a fun dipping experience. Feel free to mix and match to find your favorite combination!
Side Dishes to Complement Tempura
To create a complete meal, consider serving your crispy shrimp tempura with some delicious side dishes. Here are a few ideas:
Steamed Rice: A simple side that balances the flavors of the tempura and soaks up any extra sauce.
Miso Soup: This warm soup adds a comforting touch to your meal, making it feel more authentic.
Salad: A light salad with a sesame dressing can provide a fresh contrast to the crispy shrimp.
Pickled Vegetables: These add a tangy crunch that complements the tempura beautifully.
These serving suggestions will not only enhance the flavor of your crispy shrimp tempura but also create a delightful dining experience for you and your guests. Enjoy your meal!
Tips for Perfecting Your Crispy Shrimp Tempura Recipe
Perfecting your crispy shrimp tempura takes a bit of practice, but with these helpful tips, you’ll be frying like a pro in no time! Here are some essential pointers to ensure your tempura turns out light, crispy, and delicious every time:
Use Ice-Cold Water
One of the secrets to a light and crispy batter is using ice-cold water. The cold temperature helps create steam during frying, which contributes to that airy texture. You can even chill your mixing bowl for extra effect!
Don’t Overmix the Batter
When combining the batter ingredients, remember that less is more. Overmixing can lead to a dense batter. Stir just until the ingredients are combined, leaving a few lumps. This will help keep your tempura light and crispy.
Fry in Small Batches
Frying too many shrimp at once can lower the oil temperature, resulting in greasy tempura. Fry in small batches to maintain the oil’s heat. This ensures each shrimp gets the perfect golden color and crunch.
Monitor Oil Temperature
Keeping the oil at the right temperature is crucial. Use a thermometer to maintain the oil at 350°F (175°C). If the oil is too hot, the batter may burn. If it’s too cool, the shrimp will absorb too much oil. A consistent temperature is key!
Drain Excess Oil
After frying, place the shrimp on paper towels to drain any excess oil. This step is important for keeping your tempura crispy. Avoid stacking the shrimp, as this can trap steam and make them soggy.
Experiment with Flavors
Don’t hesitate to get creative! Add spices or herbs to your batter for extra flavor. Garlic powder, paprika, or even a hint of lemon zest can elevate your tempura. Experimenting with different seasonings can lead to delightful variations!
By following these tips, you’ll be well on your way to mastering the art of crispy shrimp tempura. Enjoy the process, and most importantly, have fun in the kitchen!
Breakdown of Time for Crispy Shrimp Tempura Recipe
Prep Time
Preparing crispy shrimp tempura is quick and straightforward. The prep time typically takes about 15-20 minutes. This includes gathering your ingredients, peeling and deveining the shrimp, and making the batter. Having everything ready before you start frying will make the process smoother and more enjoyable.
Cooking Time
The cooking time for crispy shrimp tempura is relatively short. Once the oil is heated to the right temperature, frying the shrimp takes about 2-3 minutes per batch. Depending on how many shrimp you fry at once, the total cooking time can range from 10-15 minutes. Remember to fry in small batches to ensure each shrimp gets that perfect golden crunch!
Total Time
In total, you can expect to spend around 30-35 minutes from start to finish. This includes both prep and cooking time. With this quick turnaround, you can enjoy delicious crispy shrimp tempura in no time. It’s a fantastic option for a weeknight dinner or a special occasion!
Nutritional Information for Crispy Shrimp Tempura Recipe
Calories
When enjoying crispy shrimp tempura, it’s good to be aware of the calorie content. Each serving contains approximately 320 calories. This makes it a satisfying option for a meal or snack without being overly heavy. The balance of flavors and textures in this dish makes it worth every bite!
Protein
Protein is an essential nutrient, and crispy shrimp tempura delivers a decent amount. Each serving provides about 20 grams of protein. This protein content comes primarily from the shrimp, making it a great choice for those looking to boost their protein intake while enjoying a delicious dish.
Sodium
While enjoying crispy shrimp tempura, it’s also important to consider sodium levels. Each serving contains around 600 milligrams of sodium. This amount can vary based on the dipping sauces you choose. If you’re watching your sodium intake, consider using low-sodium soy sauce or other alternatives to keep your meal balanced.
Overall, crispy shrimp tempura is a delightful dish that offers a good mix of calories, protein, and flavor. Enjoy it as part of a balanced diet, and feel free to pair it with fresh vegetables or a light salad for added nutrition!
FAQs about Crispy Shrimp Tempura Recipe
Can I use frozen shrimp for this recipe?
Yes, you can use frozen shrimp for crispy shrimp tempura! However, it’s important to thaw them completely before cooking. To do this, place the shrimp in the refrigerator overnight or run them under cold water for a quick thaw. Once thawed, make sure to pat them dry with paper towels. This step is crucial as it helps the batter adhere better and ensures a crispier finish. Using fresh shrimp is ideal, but frozen shrimp can still yield delicious results!
What type of oil is best for frying tempura?
When frying tempura, it’s best to use an oil with a high smoke point. Vegetable oil, canola oil, or peanut oil are excellent choices. These oils can withstand high temperatures without burning, which is essential for achieving that perfect crispy texture. Avoid using olive oil, as it has a lower smoke point and may impart a strong flavor to your tempura. Choosing the right oil will help you create a delightful dish that everyone will enjoy!
How can I make the batter lighter and crispier?
To achieve a lighter and crispier batter for your crispy shrimp tempura, there are a few key tips to follow. First, always use ice-cold water when mixing your batter. The cold temperature helps create steam during frying, resulting in a light texture. Additionally, avoid overmixing the batter; a few lumps are okay. This keeps the batter airy. Lastly, consider adding a bit of baking soda to the batter for extra lift. These simple adjustments can make a big difference in the final result!
Can I make tempura in advance?
While it’s best to enjoy crispy shrimp tempura fresh, you can prepare some components in advance. You can make the batter ahead of time and store it in the refrigerator for a few hours. However, it’s recommended to fry the shrimp just before serving to maintain their crispiness. If you have leftovers, you can reheat them in an oven to help restore some of their crunch. Just remember, freshly fried tempura is always the tastiest option!
Conclusion on Crispy Shrimp Tempura Recipe
In conclusion, crispy shrimp tempura is a delightful dish that brings the flavors of Japan right to your kitchen. With its light, airy batter and tender shrimp, it’s a treat that’s hard to resist. Whether you’re preparing it for a special occasion or a casual family dinner, this recipe is sure to impress.
By following the steps outlined in this article, you can create a restaurant-quality dish at home. Remember to use fresh ingredients, maintain the right oil temperature, and have fun experimenting with flavors. The versatility of crispy shrimp tempura allows you to customize it to your liking, whether you prefer classic shrimp or want to add a spicy twist.
As you serve your crispy shrimp tempura, don’t forget to pair it with delicious dipping sauces and complementary side dishes. This will enhance the overall dining experience and make your meal even more enjoyable. So gather your ingredients, invite some friends or family over, and get ready to savor every crispy bite!
Happy cooking, and may your crispy shrimp tempura always be golden and delicious!
ating
Crispy Shrimp Tempura is a must-try Japanese dish!
Light, airy, and incredibly crisp—this Shrimp Tempura recipe delivers restaurant-quality crunch right at home. Paired with soy sauce or lemon wedges, it’s perfect as an dinner, snack, or a star on your sushi night menu!
Prepare the shrimp:Pat the shrimp completely dry with paper towels to ensure a crispier fry and avoid splattering.
Make the tempura batter:In a medium bowl, whisk together flour, cornstarch, baking powder, and a pinch of salt. Slowly add the ice-cold water while stirring gently—don’t overmix; lumps are totally fine!
Heat the oil:In a deep, heavy-bottomed pot, heat about 2 inches of oil to 350°F (175°C). Use a thermometer for accuracy if available.
Fry the shrimp:Dip each shrimp into the batter, allow the excess to drip off, then carefully place into the hot oil. Fry in batches for 2–3 minutes, turning once, until golden and crispy.
Drain the shrimp:Remove with a slotted spoon and transfer to a paper towel–lined plate. Keep warm while frying the remaining shrimp.
Serve and enjoy:Serve immediately with soy sauce or traditional tempura dipping sauce. Add lemon wedges for a zesty touch.
Notes
For best texture, keep the batter very cold—chill the bowl or add ice cubes around the mixing bowl if needed.
Don’t overcrowd the pan, which can lower the oil temperature and make the tempura soggy.
Want variety? Tempura batter works well with sliced vegetables like sweet potato, zucchini, or bell pepper.
To make it gluten-free, use a gluten-free flour blend suitable for frying.
I’ve always believed that food is one of the greatest ways we pass down memories. Some recipes live in handwritten notebooks, others live in the heart—like this one. These cheesy veggie potato sticks were first made for my grandchildren during a weekend visit. I had a bowl of leftover mashed potatoes, a single carrot in the fridge, and half a block of cheese—not much, but just enough to create something special.
I didn’t want to fry anything. My goal was to make something delicious, healthy, and easy for little hands to hold. So I mixed everything together, shaped it into little sticks, and baked them. The house smelled warm and familiar. When I served them, the kids devoured every last piece. I didn’t expect them to love it so much—they even asked for more the next day.
Now it’s a recipe that lives on in our home and in theirs. It’s quick to make, gentle on ingredients, and always a hit. And every time I bake them, I remember that rainy afternoon, their laughter in the living room, and the joy of sharing something so simple yet satisfying.
Why These Baked Potato Sticks Are the Perfect Snack
1. No Frying, No Oil – Just Oven-Baked Goodness
So many potato-based snacks are deep-fried, greasy, and heavy. These sticks are baked—no frying, no oil splatters, no guilt. The texture remains crisp on the outside and soft on the inside, with all the flavor and none of the mess.
2. Kid-Friendly and Grandparent-Approved
This recipe is a wonderful way to get kids to eat veggies without fuss. The grated carrot disappears into the creamy potato mix, adding color, nutrition, and subtle sweetness. Even picky eaters enjoy them without complaint.
3. Simple Ingredients, Big Flavor
You don’t need anything fancy to make these sticks. Just potatoes, carrot, butter, cheese, herbs, and seasoning. It’s a budget-friendly recipe built from pantry staples and leftover produce.
4. Versatile and Easy to Customize
From the type of cheese to the herbs and veggies, you can tweak the ingredients to fit what you have on hand. It’s a fantastic base recipe that adapts to every season and palate.
5. Ideal for Meal Prep or Freezing
Shape and bake the sticks ahead of time, then reheat for lunchboxes, after-school snacks, or weeknight sides. They freeze well and can be popped in the oven anytime.
Ingredients
Ingredient
Amount
Potatoes
600 grams (about 4 medium)
Carrot, grated
1
Water
As needed for boiling
Butter
2 tablespoons
Parsley, chopped
To taste
Any hard cheese or mozzarella
½ cup, grated
Salt
To taste
Black pepper
To taste
Directions
Boil the Potatoes – Peel and chop the potatoes, then boil in salted water until tender. Drain and mash while still warm.
Mix the Ingredients – Add grated carrot, butter, chopped parsley, grated cheese, salt, and black pepper to the mashed potatoes. Mix until fully combined.
Shape the Sticks – Scoop portions of the mixture and shape into uniform sticks or logs.
Bake – Place the sticks on a lined baking tray and bake at 375°F (190°C) for 20–25 minutes or until lightly golden and firm on the outside.
Serve – Let cool slightly before serving. Perfect as a snack, side dish, or finger food for kids.
Nutritional Information (Per 2–3 Sticks – Approximate)
Nutrient
Amount
Calories
150–180 kcal
Carbohydrates
20–25 g
Protein
4–6 g
Fats
6–8 g
Fiber
2–3 g
Sodium
200–300 mg
Taste and Texture: What Makes Them So Addictive
The magic of these veggie potato sticks lies in their contrast of textures and comforting flavors.
Soft and creamy inside – The mashed potatoes, melted cheese, and butter create a light, tender interior that melts in your mouth.
Golden on the outside – A quick bake in the oven gives the sticks a firm, lightly crisp edge without frying.
Savory and herby – The addition of parsley or herbs like oregano or thyme balances the richness and adds freshness.
Cheesy and satisfying – You can use mozzarella for gooeyness or a hard cheese for a sharper bite. Either way, it brings warmth and depth.
They’re neutral enough to pair with dips or mains, yet flavorful enough to stand alone.
Ways to Serve These Potato Sticks
These sticks are more than just a side dish—they can play many roles on your plate. Here are a few ideas:
As a main dish – Pair them with a green salad and a yogurt-based dip for a light, satisfying lunch.
In lunchboxes – Pack a few cooled sticks with fruit and a boiled egg for a balanced school meal.
For toddlers and kids – Soft, easy to hold, and mild in flavor, they’re perfect for tiny hands and developing taste buds.
Party snacks – Serve on a platter with ketchup, hummus, sour cream, or garlic dip at family gatherings.
With soup or stew – Use them like breadsticks for dipping into warm, hearty broths.
As a post-school or late-night snack – Easy to reheat, comforting to eat.
Creative Variations to Try
Once you’ve made this recipe once, you’ll be eager to put your own spin on it. Here are some ways to elevate or change the flavor:
1. Switch Up the Cheese
Use sharp cheddar, parmesan, gouda, or even cream cheese for different levels of richness and melt.
2. Add More Vegetables
Grated zucchini (well-drained), spinach, or even mashed peas can be added to increase fiber and color.
3. Make Them Spicy
Add a pinch of chili flakes, paprika, or cumin to the mix if you want a little kick.
4. Make Them Gluten-Free
If the mixture is too soft, you can add a tablespoon of gluten-free flour or chickpea flour to help bind it.
5. Add a Crunchy Topping
Before baking, sprinkle breadcrumbs or crushed cornflakes over the sticks for a crispy top layer.
Meal Prep and Storage Tips
One of the best things about this recipe is how easy it is to prepare in advance and store for later use.
Make ahead: Prepare the mixture, shape the sticks, and refrigerate for up to 24 hours before baking.
Store leftovers: Keep baked sticks in an airtight container in the fridge for up to 3 days.
Reheat: Warm in the oven or air fryer to restore their crispy exterior.
Freeze: Lay shaped, unbaked sticks on a tray and freeze until solid. Transfer to a freezer bag and bake from frozen when needed.
Frequently Asked Questions (FAQs)
Can I use sweet potatoes instead of regular potatoes?
Yes! Sweet potatoes add a natural sweetness and are just as delicious. Keep in mind they’re softer, so the mixture might need a bit more cheese or flour for structure.
Can I make these dairy-free?
Absolutely. Use dairy-free butter and cheese alternatives. The result will still be creamy and flavorful.
How do I keep the sticks from falling apart?
Be sure to mash the potatoes thoroughly and avoid excess moisture. If needed, add a tablespoon of flour or breadcrumbs to bind everything together.
Are these good for baby-led weaning?
Yes, they’re soft, nutrient-rich, and easy for babies to grasp. Just be sure to omit salt and use a mild cheese if preparing for babies under 12 months.
Can I add protein to this recipe?
Yes. You can mix in finely shredded chicken, turkey, or tofu to make them more filling.
What dip pairs best with these?
They’re delicious with sour cream, garlic yogurt dip, ketchup, guacamole, or even tahini sauce.
Can I cook them in an air fryer?
Definitely. Air fry at 375°F (190°C) for 10–12 minutes, turning halfway, for an even crispier result without oil.
Conclusion: Simple Ingredients, Lasting Memories
These cheesy veggie potato sticks are a beautiful example of what home cooking should be—simple, nutritious, and full of love. Whether you’re cooking for kids, preparing a healthy snack for yourself, or just trying to make something tasty from what’s already in your fridge, this recipe delivers.
It brings comfort without compromise, joy without junk, and the kind of satisfaction that lingers long after the last bite. It reminds us that good food doesn’t need to be complicated—it just needs to be made with care.
So the next time you have a few potatoes and a little cheese on hand, skip the frying pan and bake these instead. Your kitchen will smell amazing, your family will be asking for more, and you’ll have a new go-to recipe that fits every occasion.
Because sometimes, the best food is the one that brings us together—stick by stick, bite by bite.
Amal
Cheesy Veggie Potato Sticks – The Healthier Comfort Snack Loved by All Ages
These soft and savory cheesy veggie potato sticks are a baked, oil-free treat the whole family will love—especially the kids! Made with mashed potatoes, grated carrots, herbs, and melty cheese, they’re the perfect snack or side dish that’s comforting, wholesome, and simple to prepare. No frying, no mess—just crispy edges and creamy centers, straight from the oven.
There was a time in my life when “snacking” meant opening a bag of something crunchy and processed. I’d reach for convenience, usually with a side of guilt. But things changed the day I discovered the magic of homemade, no-bake energy bites.
It started during a busy stretch when I was juggling work, family, and trying to make better choices in the kitchen. I wanted something quick, satisfying, and healthy—but also indulgent enough to replace the sugary treats I’d grown used to. I remembered a friend mentioning that she made “raw cookies” with dates and nuts. Curious and a little skeptical, I pulled out my food processor and got to work with what I had on hand—dates, dried apricots, walnuts, almonds, some sunflower and sesame seeds.
What came out of that spontaneous moment changed my snack game forever. The texture was soft and chewy, the flavor naturally sweet and nutty. It didn’t feel like a compromise—it felt like a reward. And unlike the granola bars I used to keep in my desk drawer, these little bites were made entirely of real, whole ingredients.
Now, these no-bake energy bites are a regular part of my routine. I prep them once a week and store them in the fridge for grab-and-go snacks, lunchbox additions, or a healthy treat after dinner. They’ve become a favorite in my house, not just because they taste good, but because they represent a shift—a better way of feeding ourselves without sacrificing flavor or satisfaction.
Why These Energy Bites Are a Must-Try
1. Naturally Sweet – No Added Sugar
One of the biggest appeals of this recipe is that it gets its sweetness from nature. Dates and dried apricots are packed with natural sugars, fiber, and antioxidants. They provide that satisfying sweetness without the need for refined sugar, honey, or syrups.
2. Nutrient-Dense and Energizing
These bites are full of healthy fats, protein, fiber, and minerals, making them an ideal snack to keep you full between meals. The combination of nuts and seeds provides lasting energy and supports heart and brain health.
3. No Baking, No Fuss
There’s no oven, no mixer, no waiting for dough to rise—just blend, roll, and chill. In under 15 minutes, you have a batch of satisfying, guilt-free snacks ready to go.
4. Portable and Kid-Friendly
They’re perfect for lunchboxes, school snacks, road trips, hikes, or office breaks. Because they’re naturally sweet and soft, even picky eaters tend to love them. You can easily shape them into bars or even press into molds for fun shapes.
5. Allergy-Friendly and Customizable
This recipe is gluten-free, and can be made dairy-free and vegan with the right ingredient choices. Need to avoid certain nuts? No problem. Want to add a superfood like chia or flaxseed? Go for it. The base is extremely flexible.
Ingredients
Ingredient
Amount
Dates
80 grams (3 ounces) / ½ cup
Dried Apricots
100 grams (3.5 ounces) / ⅔ cup
Walnuts
60 grams (2 ounces) / ½ cup
Sunflower Seeds
15 grams (0.5 ounces) / 2 tbsp
Almonds
30 grams (1 ounce) / ¼ cup
Sesame Seeds
30 grams (1 ounce) / ¼ cup
Directions
Prep the Ingredients: If your dates or apricots are too dry, soak them in warm water for 5–10 minutes and drain well.
Blend: In a food processor, add all the ingredients. Pulse until the mixture becomes sticky and starts to clump together. You want a coarse but moldable texture.
Shape: Scoop out small amounts of the mixture and roll into bite-sized balls. If it’s too sticky, lightly wet your hands or chill the mixture briefly.
Set: Refrigerate the bites for at least 30 minutes to firm up.
Store: Keep in an airtight container in the fridge for up to 1 week or freeze for longer storage.
Nutritional Information (Per 1 Energy Bite – Approximate)
Nutrient
Amount
Calories
90–100 kcal
Carbohydrates
9–11 g
Sugars (natural)
6–8 g
Protein
2–3 g
Total Fat
5–6 g
Fiber
2–3 g
What Makes These Cookies Different From Traditional Treats?
Let’s face it—most cookies and snack bars marketed as “healthy” are still packed with sugars, preservatives, or refined flours. What sets these apart is that they’re made from whole, recognizable ingredients you likely already have in your pantry.
There’s no processed flour, no white sugar, no artificial sweeteners, and no additives. Each bite is powered by fruit and nuts, the kind of ingredients your body can process naturally. That means more sustained energy, less sugar crash, and far more nutritional value.
Perfect For Any Time of Day
Here’s how these no-bake bites fit seamlessly into your daily life:
Morning energy boost: A quick bite with your coffee or tea when you don’t have time for breakfast.
Post-workout fuel: The balance of carbs, protein, and fat makes it a smart recovery snack.
Lunchbox staple: Easy for kids to grab and eat—no mess, no prep.
Afternoon pick-me-up: Way better than another trip to the vending machine.
Evening treat: A sweet ending to your day that won’t spike your blood sugar.
Storage Tips and Make-Ahead Magic
These bites are built for batch-prepping. Here’s how to store them for maximum freshness:
Refrigerator: Store in an airtight container for up to 7–10 days.
Freezer: Freeze in a single layer first, then transfer to a bag or container. They’ll keep for up to 3 months. Let them sit at room temperature for a few minutes before eating.
Meal prep tip: Make a double batch and portion into snack bags for the week ahead.
Creative Variations to Try
This base recipe is endlessly flexible. Once you’ve made it once, you’ll want to experiment. Here are some of the most popular tweaks:
1. Add Superfoods
Chia seeds for fiber and omega-3s
Hemp seeds for extra protein
Flaxseed meal for added fiber and healthy fats
2. Change the Fruits
Swap apricots with dried figs, raisins, or cranberries.
Use medjool dates for an even richer, caramel-like taste.
3. Spice It Up
Add cinnamon, cardamom, or nutmeg for a warm, cozy flavor.
Stir in a splash of vanilla extract or orange zest for brightness.
4. Boost the Protein
Add a scoop of plant-based or whey protein powder.
Mix in some peanut butter or almond butter for richness and extra texture.
5. Go Chocolate
Mix in dark chocolate chips or roll bites in cocoa powder for a healthy dessert-like option.
FAQs About No-Bake Energy Bites
Can I make these without a food processor?
You can, though it takes more effort. Soften the dried fruits first, then chop them finely and mash by hand. A blender can work in a pinch, but food processors are ideal for even texture.
Are these suitable for a vegan diet?
Yes, as long as your dried fruits and seeds are free from animal-based additives. There are no eggs, dairy, or honey in the base recipe.
Are they safe for kids?
Absolutely. They’re naturally sweet and full of nutrients. Just make sure to chop the nuts finely or pulse extra if serving to young children.
Can I make them nut-free?
Yes. Replace the walnuts and almonds with seeds like pumpkin seeds or more sunflower seeds. The taste will shift slightly, but the texture and nutrition remain strong.
Can I use fresh fruit instead of dried?
Dried fruits are essential because of their sticky, dense texture. Fresh fruit contains too much moisture and won’t hold the shape as well.
Do I need to toast the nuts and seeds first?
Not necessary, but toasting can enhance the flavor and give the bites a deeper, nuttier profile. Let them cool before mixing.
Can I turn this into bars instead of bites?
Yes! Press the mixture into a parchment-lined dish, refrigerate until firm, and slice into bars. This is a great format for lunchboxes or meal prep.
Conclusion: Real Ingredients, Real Satisfaction
In a world filled with quick fixes and processed snacks, these no-bake energy bites are a breath of fresh air. They’re proof that food can be healthy, simple, and delicious—all at the same time. Whether you’re trying to eat cleaner, fuel your workouts, or just avoid the sugar crash, these bites are your new go-to solution.
More than just a snack, they’re a reminder of how nourishing real food can be. They’re about taking control of what goes into your body and choosing something that feels good—during and after eating it.
So the next time you’re tempted to reach for a store-bought granola bar, try this instead. Roll up your sleeves, pulse a few wholesome ingredients together, and roll them into bites of pure satisfaction. You may just start a new habit that sticks.
Amal
Guilt-Free No-Bake Energy Bites – The Sweet Snack You’ll Always Feel Good About
These no-bake energy bites are the perfect blend of chewy, crunchy, and naturally sweet. Made with dried fruits, nuts, and seeds, they require zero baking, contain no flour or added sugar, and are packed with nutrition. Ideal for snacking, lunchboxes, or post-workout fuel, these healthy bites satisfy cravings while keeping your wellness goals in check.
Some of the best recipes don’t come from cookbooks. They come from moments—quiet, resourceful ones—when you’re standing in your kitchen, staring at a bowl of leftover mashed potatoes and thinking, “There has to be something more I can do with this.” That’s how I stumbled upon what quickly became a family favorite: Cheddar Bacon Potato Cakes.
I first made these out of necessity. It was a cold weeknight, and I had leftover mashed potatoes from Sunday dinner. Tired of the usual reheating routine, I wanted something warm, comforting, and just a little indulgent. I added a few staples from the fridge—shredded cheddar, crumbled bacon, eggs, and green onions—and what came out of the skillet was nothing short of magic.
Golden and crispy on the outside, soft and cheesy on the inside, these little cakes hit all the right notes. They smelled like home and tasted like a hug. And now, years later, they’re the kind of recipe I return to again and again—not just for the taste, but for the memory of that first bite and the way it instantly felt like something I’d been making my whole life.
Why You’ll Love This Recipe
This recipe is more than just a clever way to use up leftovers—it’s a dish that holds its own as a standalone meal, a snack, or a side. Here’s what makes it so irresistible:
1. It’s Comfort Food at Its Best
These potato cakes are everything you love about a good comfort meal: warm, rich, savory, and satisfying. The crispy crust gives way to a soft, fluffy center filled with melted cheese, smoky bacon, and a subtle bite from green onions or chives.
2. Incredibly Versatile
This recipe fits anywhere—serve them with a fried egg for breakfast, pair with a green salad for lunch, or plate them alongside grilled meats or soup for dinner. They also make fantastic appetizers or party snacks when shaped into mini versions.
3. A Budget-Friendly Classic
This is a frugal cook’s dream. You take one of the most common leftovers—mashed potatoes—and turn it into a completely new dish using pantry and fridge staples. No fancy ingredients, just simple food done right.
4. Quick and Easy
With minimal prep and cook time, these potato cakes are perfect for weeknights or lazy weekends. You can make the mixture ahead and fry them up when you’re ready to eat, giving you both flexibility and freshness.
Ingredients
Ingredient
Quantity
Mashed potatoes
2 cups (250 g)
All-purpose flour
1 cup (125 g)
Baking powder
1 teaspoon
Salt
1/2 teaspoon
Black pepper
1/4 teaspoon
Milk
1/2 cup (120 ml)
Olive oil or melted butter
1/4 cup (60 ml)
Eggs
2 large
Shredded cheddar cheese
1 cup (100 g)
Cooked and crumbled bacon
1/2 cup (75 g)
Chopped green onions or chives
2 tablespoons (15 g)
Directions
In a large bowl, combine the mashed potatoes, flour, baking powder, salt, and black pepper.
Mix in the milk, olive oil (or butter), and eggs until a thick, smooth batter forms.
Fold in the shredded cheese, crumbled bacon, and chopped green onions.
Heat a lightly greased non-stick skillet over medium heat.
Scoop the batter into the skillet to form small round cakes. Cook for 3–4 minutes per side, or until golden and crisp.
Transfer to a paper towel-lined plate. Serve hot with sour cream, a fried egg, or enjoy on their own.
Nutritional Information (Per Cake – Approximate)
Nutrient
Amount
Calories
180–220 kcal
Protein
6–8 g
Carbohydrates
18–22 g
Fats
10–14 g
Fiber
1–2 g
Sodium
250–350 mg
Flavor and Texture – What to Expect
The magic of these potato cakes lies in their contrast of textures and balance of flavors.
Crisp on the outside: Thanks to the light oiling of the pan and the starch in the flour and potatoes, each cake forms a beautiful golden crust that crackles slightly when cut.
Creamy inside: The mashed potatoes keep the interior moist and fluffy, while the eggs and milk bind everything together without drying it out.
Cheesy richness: Melted cheddar gives the cakes a gooey, savory edge that makes them feel indulgent.
Smoky, salty bite: The bacon brings saltiness and crisp bits of flavor that pop in every bite.
Herbaceous freshness: Chopped green onions or chives lift the dish with a subtle oniony sharpness that balances the richness.
How to Customize It Your Way
While the base recipe is perfect on its own, one of the best things about these potato cakes is how adaptable they are. Here are a few ideas to make the recipe your own:
1. Try Different Cheeses
Swap the cheddar for gouda, mozzarella, parmesan, or even blue cheese for a more robust flavor profile.
2. Add Vegetables
Finely chopped spinach, grated zucchini (squeezed dry), or corn kernels can add a nice texture and a pop of color.
3. Spice It Up
Add a dash of cayenne, smoked paprika, or chili flakes for heat. A spoonful of Dijon mustard in the batter adds a tangy depth.
4. Make It Vegetarian
Leave out the bacon and add sautéed mushrooms, caramelized onions, or sundried tomatoes for an umami boost.
5. Use Sweet Potatoes
For a twist, replace some or all of the mashed potatoes with mashed sweet potato. It adds a bit of natural sweetness and an earthy tone.
Serving Suggestions
These potato cakes are delicious all on their own, but here are some topping and pairing ideas to take them to the next level:
Sour cream and chives – Classic and always a hit.
Poached or fried egg – For a breakfast-worthy meal.
Avocado slices and salsa – Add a fresh, zesty contrast.
Garlic aioli or chipotle mayo – For a creamy, flavorful dip.
Crisp green salad or coleslaw – A crunchy contrast to the soft texture.
Tomato soup or chicken broth – Perfect for dunking on a cold night.
Make-Ahead, Storage, and Reheating Tips
One of the best things about this recipe is how well it stores and reheats:
Make Ahead: The batter can be made and refrigerated for up to 24 hours before frying.
Refrigerate Cooked Cakes: Store leftovers in an airtight container for up to 3 days.
Freeze: Cooked and cooled cakes freeze beautifully. Place them on a baking tray to freeze individually before transferring to a bag or container. Reheat from frozen in a skillet or oven.
Reheat: Warm in a non-stick pan for 2–3 minutes per side to restore their crisp texture.
FAQs – Potato Cakes 101
Can I use instant mashed potatoes?
Yes, but make sure they’re thick—not runny. Instant mashed potatoes may need a little less liquid in the batter.
Can I bake instead of fry?
You can! While the texture won’t be quite as crispy, baking at 400°F (200°C) for about 20–25 minutes on a parchment-lined tray (flipping halfway) still yields a great result.
How do I keep the cakes from falling apart?
Make sure the mashed potatoes are firm and not too creamy. The eggs and flour act as binders, so don’t skip them. Chilling the batter before cooking also helps with shaping.
What kind of pan is best?
A non-stick or well-seasoned cast-iron skillet works best to get a golden crust without sticking.
Can I make these gluten-free?
Yes! Substitute the all-purpose flour with a 1:1 gluten-free blend or even chickpea flour for a slightly nutty flavor.
Do I need to peel the potatoes?
Not necessarily. If your mashed potatoes were made with unpeeled potatoes and have a rustic texture, that can add character to the cakes.
Conclusion: A Simple, Soul-Satisfying Recipe to Keep in Your Back Pocket
These Cheddar Bacon Potato Cakes are the kind of dish that proves simple ingredients can become something extraordinary with just a little love. They’re quick, flexible, and always satisfying—whether you’re cooking for one or feeding a crowd.
They turn leftovers into magic, bring people to the table, and offer comfort in every golden, crispy bite. In a world full of complicated dinners and rushed routines, this is the kind of recipe that grounds you—a reminder that good food doesn’t have to be fancy to be unforgettable.
So next time you find yourself with a bowl of mashed potatoes and a craving for something delicious, remember this recipe. Trust me—it’s one you’ll want to make again and again.
Amal
Cheddar Bacon Potato Cakes – The Everyday Comfort Food That Steals the Show
These Cheddar Bacon Potato Cakes are golden and crispy on the outside, soft and cheesy on the inside, and packed with comforting flavor. Perfect for using up leftover mashed potatoes, this quick and easy recipe is great for breakfast, dinner, or even a snack. They’re so good, you might find yourself making mashed potatoes just to enjoy them the next day.
There are some dishes that carry more than flavor—they carry a feeling. For me, this beef and pepper skillet is one of those recipes. It’s more than a quick meal thrown together with pantry staples; it’s a reminder of bustling family dinners, of laughter echoing through the kitchen, and of moments where food did more than fill stomachs—it brought us together.
I still remember the first time my mother made a version of this dish. The aroma drifted through the open windows and had our neighbors peeking over the fence. One even joked, “Whatever you’re cooking, save me a plate!” And from that day on, this skillet earned its nickname: “The Dish That Makes the Neighbors Jealous.”
With its vibrant colors, rich aroma, and deep flavor, this skillet brings excitement to the dinner table—without stress or complicated prep. It’s built on honest, bold ingredients: juicy ground beef, sweet red and green peppers, soft onions, garlic, tomato paste, and a generous touch of paprika and cumin. The result? A dish that hits all the right notes—comforting, hearty, spicy, and just a bit smoky.
What Makes This Recipe So Special?
1. It’s Unbelievably Simple
You don’t need to be a seasoned cook to make this. There’s no complicated technique, no long list of hard-to-find ingredients. Just a hot skillet, some fresh vegetables, and ground beef. The flavor is all in the balance—tomato adds tang, garlic adds depth, and the spices bring warmth.
2. It’s Ready in 30 Minutes or Less
Whether you’re cooking for your family after a long workday or trying to impress guests with something that smells and tastes amazing, this dish delivers—fast. From chopping to plating, it’s a 30-minute journey to something deeply satisfying.
3. It’s Incredibly Versatile
This beef and pepper skillet is a base for endless variations. Serve it in soft pita or flatbread for a Mediterranean twist. Scoop it over fluffy rice or couscous. Wrap it in a tortilla. Stuff it into baked potatoes. Toss it with pasta. It can go anywhere your appetite leads.
4. It’s Made from Ingredients You Already Have
This dish was born out of necessity—built from kitchen staples. Onion, garlic, peppers, ground beef, and pantry spices come together to make something greater than the sum of its parts.
Ingredients
Ingredient
Quantity
Vegetable oil
2 tablespoons (20 ml)
Ground beef
500 g
Onion, chopped
1 medium
Green peppers, chopped
3
Red peppers, chopped
3
Garlic, minced
3 cloves
Tomato paste
1 teaspoon (20 g)
Tomato sauce
2 tablespoons (25 g)
Paprika
1 teaspoon
Black pepper
1 teaspoon
Cumin
1 teaspoon
Salt
1 teaspoon
Directions
Sauté the Aromatics Heat the vegetable oil in a large skillet over medium-high heat. Add the chopped onion and sauté until soft and translucent.
Brown the Beef Add the ground beef and cook until browned, breaking it apart with a spoon as it cooks.
Add the Peppers Stir in the chopped green and red peppers. Cook for about 5–7 minutes, until they begin to soften but still hold their shape.
Build the Flavor Add the minced garlic, tomato paste, and tomato sauce. Stir everything together until well combined.
Season and Simmer Sprinkle in the paprika, black pepper, cumin, and salt. Cook for another 5–7 minutes to let the flavors meld and the sauce thicken slightly.
Serve Hot Remove from heat and serve immediately. This filling is perfect over rice, in wraps, stuffed into bread or baked potatoes, or as a hearty topping for pasta.
Nutritional Information (Per Serving – Approximate)
Nutrient
Amount
Calories
300–350 kcal
Protein
20–25 g
Carbohydrates
10–12 g
Fat
20–22 g
Fiber
3–4 g
Sodium
400–500 mg
The Layers of Flavor
A dish like this works so well because of its carefully layered flavor profile.
Onions and garlic lay the foundation with their rich, sweet-savory aroma.
Peppers bring both sweetness and color, softening just enough to complement the beef without turning to mush.
Tomato paste and sauce provide body, tang, and umami that deepens as the dish simmers.
Spices like paprika, cumin, and black pepper elevate everything with bold, smoky, and earthy notes.
Salt brings it all together, enhancing every bite.
Each component has a role, and together, they make this dish the kind that people remember—not just for how it tastes, but for how it feels to eat it.
Creative Serving Ideas
This isn’t a one-trick skillet. It’s a foundation for creativity, and you can dress it up in dozens of ways.
1. Stuff It Into Flatbread or Pita
Scoop the warm mixture into pita pockets with a bit of yogurt or tzatziki for a hearty wrap. Add chopped cucumbers or shredded lettuce for crunch.
2. Serve It Over Rice or Grains
Perfect over basmati, jasmine, or brown rice. Or try couscous, bulgur, or quinoa for a fiber-rich base.
3. Make Loaded Baked Potatoes
Split a baked potato and fill it with the beef mixture. Top with cheese, sour cream, and chives for a comfort-food classic.
4. Turn It Into a Casserole
Layer the beef and pepper mix with cooked pasta and shredded cheese in a baking dish. Bake until bubbly for an easy weekday casserole.
5. Create a Breakfast Hash
Add diced cooked potatoes and top with a fried egg. It becomes a brunch-worthy skillet that beats anything you’ll find at a café.
Make It Your Own: Customization Ideas
Don’t be afraid to adapt this recipe to your taste or dietary needs. Some popular variations include:
Add Chickpeas or Black Beans for extra fiber and protein.
Swap Ground Beef for Ground Turkey or Chicken for a lighter option.
Add Heat with Chili Flakes or Hot Sauce if you like it spicy.
Stir in Fresh Herbs like parsley, cilantro, or dill right before serving for a fresh finish.
Top with Cheese – melted mozzarella, crumbled feta, or even cheddar.
Storage and Meal Prep Tips
This recipe is meal-prep gold. Make a big batch on Sunday and use it throughout the week.
Refrigerate in an airtight container for up to 4 days.
Freeze in freezer bags for up to 3 months.
Reheat on the stovetop or in the microwave. Add a splash of water or broth to loosen the mixture if it thickens.
Use in Multiple Meals – tacos, pasta bakes, breakfast burritos, and even quesadillas.
FAQs – Everything You Need to Know
Can I make this dish vegetarian?
Yes! Replace the ground beef with lentils, chickpeas, black beans, or even textured vegetable protein (TVP). You’ll still get a great texture and can use the same spice mix.
Can I add more vegetables?
Absolutely. Mushrooms, zucchini, spinach, and even eggplant work well here. Just be sure to cook them down so they don’t water down the sauce.
Is it spicy?
Not by default. It’s flavorful but mild. If you like heat, add chili flakes, jalapeños, or a dash of cayenne pepper.
What’s the best type of beef to use?
A lean or medium-fat ground beef works well—around 85% lean. It provides flavor without becoming greasy.
Can I double the recipe?
Yes, and it scales up beautifully. Just be sure to use a larger skillet or pot so the ingredients cook evenly.
How do I make it gluten-free?
The base recipe is naturally gluten-free. Just be cautious with what you serve it on—use rice, potatoes, or gluten-free wraps instead of bread or pasta.
Conclusion: Comfort Food That Connects Us
This beef and pepper skillet is the kind of dish that brings people together. It’s rich but not heavy, simple yet full of character, and fast enough for weeknights while still feeling like a weekend treat.
Whether you’re cooking for a family, meal prepping for the week, or making dinner for two, this dish delivers—every single time. It’s food that feels familiar and exciting all at once, with bold flavor and heartwarming nostalgia packed into every bite.
So go ahead, cook it once. Let the aromas spill out your windows. Let your neighbors peek over the fence. And when they ask, “What smells so good?”—just smile and say, “Dinner.”
Amal
Jealousy-Inducing Beef Pepper Skillet – A Flavorful Feast That Turns Heads
This bold and flavorful beef and pepper skillet is guaranteed to grab attention the moment it hits the pan. With juicy ground beef, a colorful mix of bell peppers, savory aromatics, and warm spices, it’s the ultimate weeknight dinner hero. Easy to make and endlessly versatile, this recipe is perfect for stuffing into wraps, topping rice, or enjoying straight from the skillet. It’s so good, your neighbors might come knocking.
There’s something truly special about making your own food from scratch. It’s a return to tradition, to the way things were before convenience took over our kitchens. I remember the first time I watched my grandmother make cheese at home. She didn’t use fancy equipment or expensive ingredients—just milk, vinegar, and patience.
I stood by her side, wide-eyed, as she heated the milk in a large pot. The room filled with a warm, comforting aroma, and I could sense that something magical was about to happen. When she poured in the vinegar, I expected nothing—but within seconds, the milk transformed before my eyes, separating into soft, delicate curds and translucent whey. She smiled knowingly as if revealing a centuries-old secret passed down through generations.
That moment stuck with me. In a world where most of us buy cheese wrapped in plastic, I realized that something as simple as milk and vinegar could produce a fresh, flavorful cheese in a matter of minutes. It was soft, creamy, slightly tangy, and completely natural. Since then, making homemade cheese has been a tradition in my own kitchen—a simple process that brings a deep sense of satisfaction.
This recipe isn’t just about making cheese. It’s about rediscovering the joy of creating something from scratch, something pure and wholesome. And once you taste the difference, you’ll wonder why you ever relied on store-bought cheese in the first place.
Why You Should Make Cheese at Home
Homemade cheese isn’t just about taste—it’s about control, creativity, and tradition. Here’s why you should give it a try:
1. It’s Surprisingly Simple
If you’ve ever thought that making cheese requires years of experience or specialized tools, think again. This method is so easy that even a beginner can do it with success. You don’t need rennet, cultures, or aging time—just milk, vinegar, and a few basic seasonings.
2. Pure, Natural Ingredients
When you make cheese at home, you know exactly what goes into it. There are no artificial preservatives, emulsifiers, or hidden additives—just fresh dairy and simple flavor enhancers like butter and herbs.
3. Customize It to Your Taste
Unlike store-bought cheese, which comes in pre-determined flavors, this homemade cheese is completely customizable. Want it saltier? Add more salt. Prefer a hint of garlic or fresh herbs? Stir them in. The possibilities are endless.
4. A Budget-Friendly Alternative
Good quality cheese can be expensive, but this homemade version costs a fraction of the price. With just a liter or two of milk and a splash of vinegar, you can make a fresh batch of creamy, flavorful cheese for far less than store-bought varieties.
5. A Fun and Rewarding Process
There’s something deeply satisfying about watching milk turn into cheese before your eyes. It’s almost like a science experiment happening in your own kitchen! And the best part? You get to enjoy the results immediately.
Ingredients
Ingredient
Quantity
Milk
1.5 liters (6 1/3 cups)
Salt
To taste
Apple cider vinegar
2 tablespoons (30 ml)
Melted butter
50 grams (1/4 cup)
Provencal herbs
1 tablespoon (15 ml)
Directions
Heat the Milk – Pour the milk into a saucepan and heat it over medium heat until it almost reaches a boil. Stir occasionally to prevent burning.
Add the Vinegar – Lower the heat and stir in the apple cider vinegar. The milk will begin to curdle, separating into curds and whey. Let it sit for 5–10 minutes.
Strain the Curds – Line a colander with a cheesecloth or clean kitchen towel. Carefully pour the mixture into the cloth to drain the whey, leaving behind soft cheese curds.
Add Butter and Herbs – Transfer the curds to a bowl, then mix in melted butter, salt, and Provencal herbs. Stir until well combined.
Shape and Chill – Press the cheese into a mold or a small bowl and refrigerate for at least 1 hour to allow it to firm up.
Serve and Enjoy! – Enjoy immediately or store in an airtight container in the refrigerator for up to 5 days.
Nutritional Information (Per Serving – Approximate)
Nutrient
Amount
Calories
150–180 kcal
Protein
8–10 g
Carbohydrates
5–7 g
Fats
10–12 g
Calcium
20% DV
Sodium
Varies with salt
The Science Behind Milk and Vinegar Cheese
You might be wondering—how does milk turn into cheese with just vinegar? The answer lies in curdling.
Milk is made up of proteins, fats, and water. When an acid (like vinegar) is added to heated milk, it lowers the pH level, causing the proteins to separate from the liquid and form soft, solid curds. The remaining liquid is called whey, which can be drained off, leaving you with fresh, creamy cheese.
This same principle is used in traditional cheese-making, but in this simplified version, the vinegar acts as a shortcut, eliminating the need for aging or special enzymes.
How to Use Homemade Cheese
This cheese is versatile and delicious, making it a great addition to many dishes. Here are some ideas to get you started:
1. Spread It on Bread
Fresh, warm cheese spread on crusty bread with a drizzle of olive oil is pure perfection. Add a sprinkle of sea salt or fresh herbs for even more flavor.
2. Crumble It Over Salads
The soft, slightly crumbly texture makes it a great topping for Greek salads, roasted vegetables, or grain bowls.
3. Use It in Pasta Dishes
Melt it into creamy pasta sauces or use it as a filling for ravioli, lasagna, or stuffed shells.
4. Serve It with Fruit and Honey
Pairing cheese with honey, fresh figs, or pears creates a delightful sweet-and-savory contrast.
5. Enhance Breakfast Favorites
Sprinkle it over scrambled eggs, omelets, or avocado toast for a rich, creamy addition.
Common Mistakes and How to Avoid Them
Even though this recipe is simple, there are a few things to keep in mind to ensure perfect results:
1. Why Didn’t My Milk Curdle?
Possible Cause: The milk wasn’t hot enough before adding the vinegar.
Solution: Make sure the milk is heated until steaming but not boiling before adding the acid.
2. My Cheese Is Too Dry. What Happened?
Possible Cause: Over-draining the whey.
Solution:Strain for less time or add a little cream or melted butter to restore moisture.
3. The Cheese Tastes Too Tangy. Can I Fix It?
Possible Cause: Too much vinegar.
Solution:Rinse the curds briefly in cold water before mixing in butter and seasonings.
4. Can I Use Lemon Juice Instead of Vinegar?
Yes! Lemon juice works just as well to curdle the milk, and it adds a slightly citrusy note.
5. Can I Store This Cheese?
Homemade cheese is best eaten fresh, but it can be stored in an airtight container in the refrigerator for up to 5 days.
FAQs About Homemade Cheese
1. Can I Use Any Type of Milk?
For best results, use whole milk. Skim or low-fat milk will work, but the cheese will be less creamy. Avoid ultra-pasteurized milk, as it may not curdle properly.
2. Can I Make This Cheese Vegan?
Since this recipe relies on dairy proteins, a vegan version isn’t possible using the same method. However, you can make a cashew-based cheese using blended nuts and lemon juice.
3. What Can I Do with the Leftover Whey?
Don’t throw it away! Whey is full of protein and can be used in:
Smoothies for added nutrition
Soups and stews as a broth substitute
Homemade bread for extra flavor
Conclusion: A Simple Recipe with Big Rewards
Making cheese at home is an incredibly satisfying experience that connects you to centuries of tradition. With just milk, vinegar, and a few seasonings, you can create something truly special—a fresh, creamy cheese that’s bursting with flavor.
Not only is this homemade cheese delicious, but it also saves money, reduces food waste, and gives you complete control over the ingredients. Whether you spread it on bread, mix it into pasta, or enjoy it on its own, this cheese is proof that the best things in life are often the simplest.
So the next time you’re tempted to buy cheese, try making it yourself instead. You might just discover that homemade is better than anything you can buy.
Amal
Homemade Cheese with Milk and Vinegar – A Simple and Delicious Recipe
Why buy cheese when you can make it at home with just milk and vinegar? This incredibly easy recipe creates a soft, creamy cheese that’s full of fresh flavor. Melted butter adds richness, while Provencal herbs bring a savory, aromatic touch. Perfect for spreading on bread, crumbling over salads, or enjoying by the spoonful.