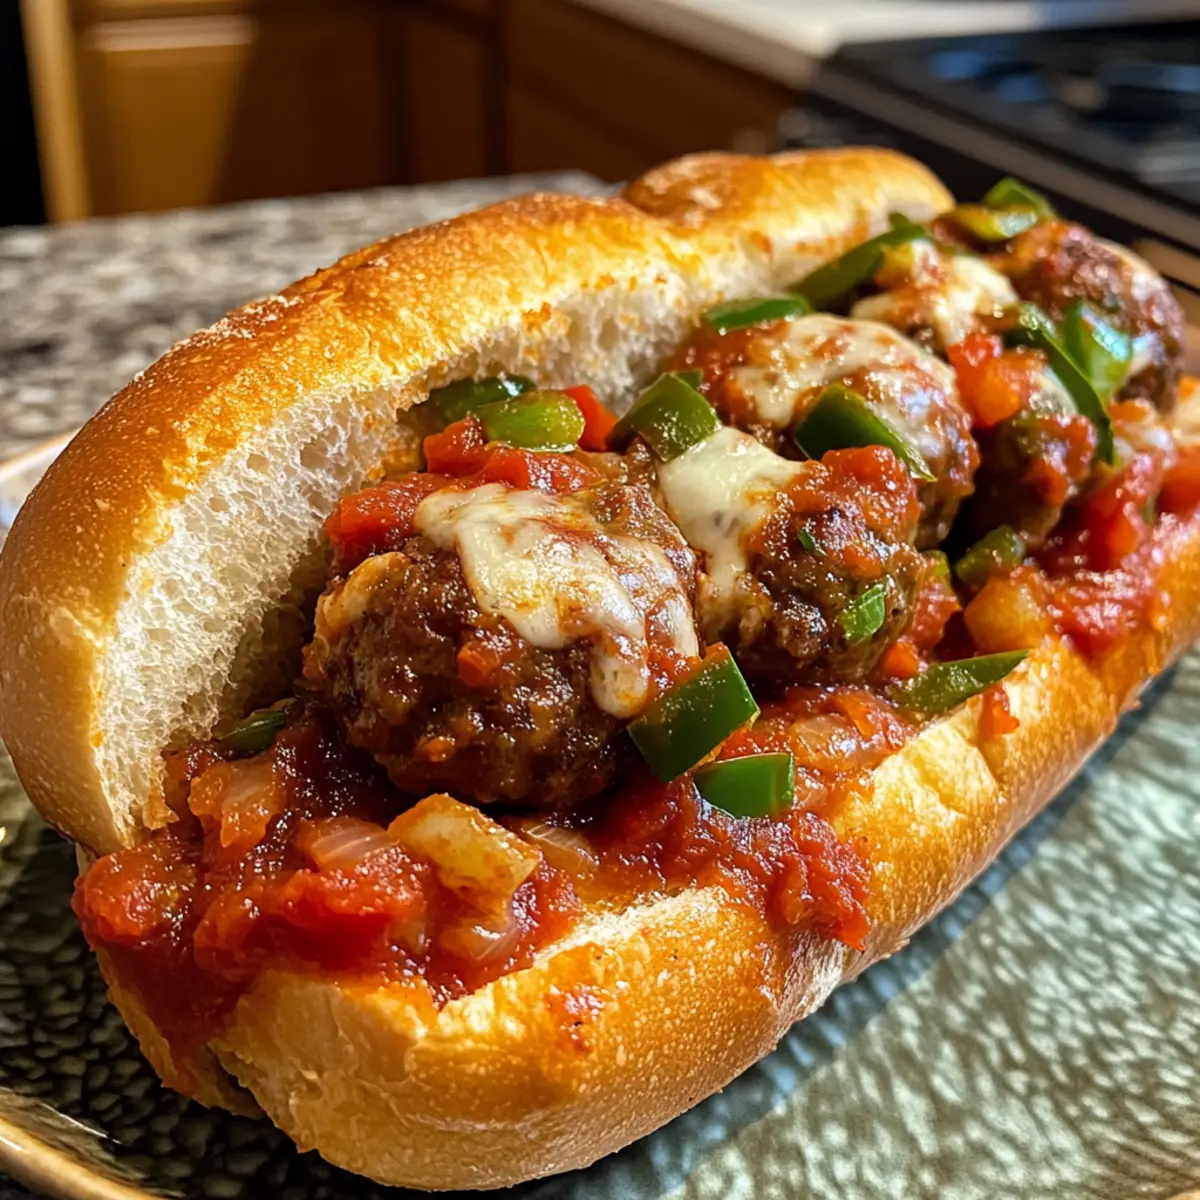
Soy Sauce Pan-Fried Noodles: A Quick, Tasty Recipe!

Introduction to Soy Sauce Pan-Fried Noodles

There’s something magical about a steaming plate of soy sauce pan-fried noodles. It takes me back to those carefree days when my mom would whip up a quick dinner after a long day. This recipe is a lifesaver for busy evenings, offering a delicious meal in just 25 minutes. With vibrant veggies and rich flavors, it’s not just a meal; it’s a way to impress your loved ones without breaking a sweat. Whether you’re cooking for yourself or hosting friends, these noodles are sure to bring smiles and satisfaction to the table.

Why You’ll Love This Soy Sauce Pan-Fried Noodles

These soy sauce pan-fried noodles are a game changer for anyone juggling a busy schedule. They come together in a flash, making them perfect for weeknight dinners. The combination of fresh vegetables and savory sauces creates a flavor explosion that’s hard to resist. Plus, you can easily customize them to suit your taste. Quick, tasty, and versatile—what’s not to love?

Ingredients for Soy Sauce Pan-Fried Noodles

Gathering the right ingredients is the first step to creating a delicious plate of soy sauce pan-fried noodles. Here’s what you’ll need:

  • Egg Noodles: These are the star of the dish, providing a chewy texture that soaks up the flavors beautifully.
  • Vegetable Oil: Essential for sautéing, it helps to achieve that perfect golden-brown finish on your veggies.
  • Garlic: Minced garlic adds a fragrant kick that elevates the entire dish.
  • Bell Pepper: Choose your favorite color for a pop of sweetness and crunch.
  • Broccoli Florets: These add a nice bite and a vibrant green color, making the dish visually appealing.
  • Carrots: Julienned carrots bring a hint of sweetness and a lovely crunch.
  • Snap Peas: These add a fresh, crisp texture that complements the other veggies perfectly.
  • Soy Sauce: The key flavoring agent, it brings that umami richness to the noodles.
  • Oyster Sauce: This adds depth and a touch of sweetness, enhancing the overall flavor profile.
  • Sesame Oil: A drizzle of this fragrant oil at the end gives the dish a nutty aroma.
  • Sugar: Just a teaspoon balances the savory flavors and rounds out the taste.
  • Green Onions: Sliced green onions add a fresh, zesty finish to the dish.
  • Sesame Seeds: Optional, but they make for a lovely garnish that adds a bit of crunch.

Feel free to mix and match with your favorite vegetables or whatever you have on hand. For exact quantities, check the bottom of the article where you can find everything available for printing!

How to Make Soy Sauce Pan-Fried Noodles

Now that you have all your ingredients ready, let’s dive into the cooking process. This is where the magic happens! Follow these simple steps to create a delicious plate of soy sauce pan-fried noodles that will impress anyone at your table.

Step 1: Cook the Noodles

Start by boiling a pot of water. Once it’s bubbling, add the egg noodles and cook them according to the package instructions. This usually takes about 5-7 minutes. You want them al dente, so they hold up well in the stir-fry. After cooking, drain the noodles and set them aside. A quick rinse under cold water can help prevent them from sticking together.

Step 2: Sauté the Garlic

In a large skillet or wok, heat the vegetable oil over medium-high heat. Once the oil is hot, toss in the minced garlic. Sauté it for about 30 seconds until it becomes fragrant. Be careful not to burn it; burnt garlic can turn bitter and ruin your dish. This step is crucial as it sets the flavor foundation for your soy sauce pan-fried noodles.

Step 3: Stir-Fry the Vegetables

Next, add the sliced bell pepper, broccoli florets, julienned carrots, and snap peas to the skillet. Stir-fry these colorful veggies for about 5-7 minutes. You want them to be tender-crisp, retaining some of their natural crunch. This not only adds texture but also makes your dish visually appealing. The vibrant colors will make your plate pop!

Step 4: Combine Noodles and Sauce

Now it’s time to bring everything together. Add the cooked noodles to the skillet along with the soy sauce, oyster sauce, sesame oil, and sugar. Toss everything together gently, ensuring the noodles are well coated in the sauces. Heat everything through for about 2-3 minutes. The noodles should soak up all those delicious flavors, creating a mouthwatering dish.

Step 5: Finish and Serve

Once everything is heated through, remove the skillet from the heat. Stir in the sliced green onions for a fresh touch. If you’re feeling fancy, sprinkle some sesame seeds on top for garnish. Serve your soy sauce pan-fried noodles hot, and watch as everyone digs in with delight. This dish is not just a meal; it’s a celebration of flavors!

Tips for Success

  • Prep all your ingredients before you start cooking. It makes the process smoother and faster.
  • Don’t overcrowd the skillet; cook in batches if necessary to ensure even cooking.
  • Adjust the soy sauce to your taste. If you prefer a saltier flavor, add a bit more.
  • For extra crunch, add some chopped nuts like cashews or peanuts at the end.
  • Experiment with different vegetables based on what’s in season or what you have on hand.

Equipment Needed

  • Large Skillet or Wok: Essential for stir-frying. A non-stick skillet works well too.
  • Pot: For boiling the noodles. Any large pot will do.
  • Colander: Useful for draining the noodles after cooking.
  • Spatula or Tongs: Great for tossing the ingredients together.

Variations

  • Protein Boost: Add cooked chicken, shrimp, or tofu for a heartier meal.
  • Spicy Kick: Toss in some red pepper flakes or sliced jalapeños for heat.
  • Gluten-Free Option: Substitute egg noodles with rice noodles or gluten-free pasta.
  • Veggie Lovers: Incorporate mushrooms, zucchini, or spinach for extra nutrition.
  • Herb Infusion: Add fresh basil or cilantro at the end for a burst of freshness.

Serving Suggestions

  • Side Dishes: Pair with crispy spring rolls or a light cucumber salad for a refreshing contrast.
  • Drinks: Enjoy with a chilled beer or a refreshing iced tea to complement the flavors.
  • Presentation: Serve in a large bowl, garnished with extra green onions and sesame seeds for a vibrant look.

FAQs about Soy Sauce Pan-Fried Noodles

Can I use different types of noodles for this recipe?

Absolutely! While egg noodles are traditional, you can swap them for rice noodles, udon, or even whole wheat pasta. Just adjust the cooking time according to the type of noodle you choose.

How can I make soy sauce pan-fried noodles vegetarian?

This recipe is already vegetarian! To enhance the protein content, consider adding tofu or tempeh. They absorb flavors beautifully and make the dish even heartier.

What can I do if I don’t have oyster sauce?

No worries! You can substitute oyster sauce with hoisin sauce or a mix of soy sauce and a bit of sugar. It won’t be exactly the same, but it will still taste delicious!

How do I store leftovers?

Store any leftovers in an airtight container in the fridge for up to three days. Reheat in a skillet over medium heat, adding a splash of water or soy sauce to keep them moist.

Can I add more vegetables to the soy sauce pan-fried noodles?

Definitely! Feel free to get creative. Broccoli, bell peppers, and snap peas are great, but you can also add mushrooms, zucchini, or even baby corn for extra flavor and nutrition.

Final Thoughts

Cooking soy sauce pan-fried noodles is more than just preparing a meal; it’s about creating a moment of joy. The vibrant colors and rich aromas fill your kitchen, inviting everyone to gather around the table. Each bite is a delightful blend of flavors and textures, reminding me of family dinners and shared laughter. This dish is a testament to how simple ingredients can come together to create something truly special. Whether you’re enjoying it solo or with loved ones, these noodles are sure to bring warmth and satisfaction to your dining experience. Dive in and savor every delicious moment!

Paul

Soy Sauce Pan-Fried Noodles: A Quick, Tasty Recipe!

A quick and tasty recipe for soy sauce pan-fried noodles, loaded with colorful vegetables and rich flavors.
Prep Time 10 minutes
Cook Time 15 minutes
Total Time 25 minutes
Servings: 4 servings
Course: Main Course
Cuisine: Asian
Calories: 320

Ingredients
  

  • 8 ounces egg noodles
  • 2 tablespoons vegetable oil
  • 3 cloves garlic minced
  • 1 cup bell pepper sliced
  • 1 cup broccoli florets
  • 1 cup carrots julienned
  • 1 cup snap peas
  • 1/4 cup soy sauce
  • 1 tablespoon oyster sauce
  • 1 tablespoon sesame oil
  • 1 teaspoon sugar
  • 2 green onions sliced
  • Sesame seeds for garnish optional

Method
 

  1. Cook the egg noodles according to package instructions. Drain and set aside.
  2. In a large skillet or wok, heat the vegetable oil over medium-high heat. Add the minced garlic and sauté for about 30 seconds until fragrant.
  3. Add the bell pepper, broccoli, carrots, and snap peas to the skillet. Stir-fry the vegetables for about 5-7 minutes until they are tender-crisp.
  4. Add the cooked noodles to the skillet along with the soy sauce, oyster sauce, sesame oil, and sugar. Toss everything together until the noodles are well coated and heated through, about 2-3 minutes.
  5. Remove from heat and stir in the sliced green onions. Serve hot, garnished with sesame seeds if desired.

Notes

  • For added protein, consider adding cooked chicken, shrimp, or tofu to the stir-fry.
  • Feel free to substitute any of the vegetables with your favorites, such as mushrooms, zucchini, or spinach, based on seasonal availability.

Key Lime Pie Dip is the Perfect Summer Treat!

Introduction to Key Lime Pie Dip

Summer days call for something refreshing, and what better way to celebrate than with a delightful Key Lime Pie Dip? This creamy, tangy treat captures the essence of traditional key lime pie, making it a perfect dessert for gatherings or a quick indulgence after a long day. I remember the first time I made this dip; it was a hit at a barbecue, and everyone kept asking for the recipe. Whether you’re looking to impress friends or simply treat yourself, this dip is an easy solution that brings a taste of sunshine to your table.

Why You’ll Love This Key Lime Pie Dip

This Key Lime Pie Dip is a game-changer for summer desserts. It’s incredibly easy to whip up, taking just 15 minutes of prep time. The creamy texture and zesty flavor will have your taste buds dancing. Plus, it’s a crowd-pleaser, perfect for parties or family gatherings. You can serve it with a variety of dippers, making it versatile and fun. Trust me, once you try it, you’ll be hooked!

Ingredients for Key Lime Pie Dip

Gathering the right ingredients is the first step to creating this delicious Key Lime Pie Dip. Here’s what you’ll need:

  • Cream Cheese: This is the base of your dip, providing a rich and creamy texture. Make sure it’s softened for easy mixing.
  • Powdered Sugar: This sweetens the dip and gives it that delightful frosting-like consistency. It blends smoothly, unlike granulated sugar.
  • Sour Cream: Adds a tangy flavor that balances the sweetness. You can substitute Greek yogurt for a lighter option.
  • Key Lime Juice: The star of the show! Fresh or bottled, it brings that signature tartness. If you can find fresh key limes, go for it!
  • Vanilla Extract: A splash of this enhances the overall flavor, adding warmth to the dip.
  • Salt: Just a pinch helps to elevate the flavors, making them pop.
  • Graham Cracker Crumbs: These are for topping, giving a nod to the classic key lime pie crust. They add a nice crunch!
  • Lime Wedges: Optional, but they make for a lovely garnish and a zesty touch when served.
  • Fresh Whipped Cream: Also optional, but who can resist a dollop of whipped cream on top?

For exact measurements, check the bottom of the article where you can find everything listed for easy printing. Happy cooking!

How to Make Key Lime Pie Dip

Creating this Key Lime Pie Dip is as easy as pie—well, almost! Follow these simple steps, and you’ll have a delicious dessert ready in no time. Let’s dive in!

Step 1: Beat the Cream Cheese

Start by placing your softened cream cheese in a large mixing bowl. Using an electric mixer, beat it until it’s smooth and creamy. This step is crucial; a well-beaten cream cheese ensures a velvety dip. Don’t rush it—take your time to get it just right!

Step 2: Add the Powdered Sugar

Next, gradually add the powdered sugar to the bowl. Mix it in until everything is well combined and fluffy. The sweetness of the sugar balances the tanginess of the key lime juice. You’ll know it’s ready when the mixture looks light and airy.

Step 3: Mix in the Sour Cream and Key Lime Juice

Now, it’s time to add the sour cream and key lime juice. Pour them in, along with the vanilla extract and a pinch of salt. Mix until everything is smooth and well incorporated. The key lime juice is what gives this dip its signature flavor, so don’t skimp on it!

Step 4: Transfer and Garnish

Once your dip is mixed, transfer it to a serving bowl. Sprinkle graham cracker crumbs on top for that classic key lime pie touch. This adds a delightful crunch and makes it look inviting. You can also add lime wedges for a pop of color!

Step 5: Chill Before Serving

For the best flavor, chill the dip in the refrigerator for at least 30 minutes. This allows the flavors to meld beautifully. Plus, it’s a refreshing treat on a hot summer day. Trust me, the wait is worth it!

Step 6: Serve with Dippers

Finally, it’s time to serve! Pair your Key Lime Pie Dip with graham crackers, fresh fruit, or even pretzels for a fun twist. The contrast of flavors and textures will have everyone coming back for more. Enjoy your creation!

Tips for Success

  • Make sure your cream cheese is at room temperature for easy mixing.
  • For a smoother dip, sift the powdered sugar before adding it.
  • Adjust the key lime juice to your taste; add more for extra tang!
  • Chill the dip longer if you can; it enhances the flavors.
  • Experiment with different dippers like cookies or fruit for variety.

Equipment Needed

  • Mixing Bowl: A large bowl is essential. If you don’t have one, any deep dish will do.
  • Electric Mixer: This makes beating the cream cheese a breeze. A whisk works too, but it’ll take longer.
  • Spatula: Perfect for scraping down the sides of the bowl and ensuring everything is mixed well.
  • Serving Bowl: Use a nice bowl to present your dip. A simple dish works just as well!

Variations

  • Chocolate Key Lime Pie Dip: Add a few tablespoons of cocoa powder or melted chocolate to the mix for a rich twist.
  • Vegan Option: Substitute cream cheese with a plant-based alternative and use coconut cream instead of sour cream for a dairy-free version.
  • Spicy Kick: Mix in a pinch of cayenne pepper or chili powder for a surprising heat that complements the tanginess.
  • Fruit-Infused: Blend in some pureed strawberries or raspberries for a fruity variation that adds color and flavor.
  • Nutty Crunch: Fold in chopped nuts like pecans or almonds for added texture and a nutty flavor.

Serving Suggestions

  • Pair your Key Lime Pie Dip with classic graham crackers for that authentic pie experience.
  • Fresh fruit like strawberries, pineapple, or apple slices add a refreshing contrast.
  • Serve with pretzels for a sweet and salty combination that’s hard to resist.
  • For drinks, consider iced tea or a light, fruity cocktail to complement the dip.
  • Present in a colorful bowl and garnish with lime wedges for a vibrant touch!

FAQs about Key Lime Pie Dip

Got questions about this delicious Key Lime Pie Dip? You’re not alone! Here are some common queries that might pop up as you whip up this summer treat.

Can I make Key Lime Pie Dip ahead of time?

Absolutely! This dip can be made a day in advance. Just store it in the refrigerator, and it’ll be ready to serve when you are. The flavors will meld beautifully overnight!

What can I use instead of graham cracker crumbs?

If you’re out of graham crackers, crushed vanilla wafers or even digestive biscuits work well. They’ll still give you that delightful crunch and sweetness.

How long does Key Lime Pie Dip last in the fridge?

This dip is best enjoyed fresh, but it can last up to 3 days in the fridge. Just make sure to cover it tightly to keep it fresh!

Can I use bottled key lime juice?

Yes, bottled key lime juice is a convenient option! Just ensure it’s 100% juice for the best flavor. Fresh is always great, but bottled works just fine.

Is this dip gluten-free?

The dip itself is gluten-free, but be cautious with your dippers. Use gluten-free graham crackers or fresh fruit to keep it safe for those with gluten sensitivities.

Final Thoughts

Creating this Key Lime Pie Dip is more than just whipping up a dessert; it’s about sharing joy and flavor with those you love. Each bite transports you to sun-soaked beaches, where the tangy zest of key lime dances on your palate. Whether you’re hosting a summer barbecue or enjoying a quiet evening at home, this dip brings a refreshing twist to any occasion. It’s simple, delicious, and sure to impress. So, gather your friends, grab some dippers, and dive into this delightful treat. Trust me, it’ll become a staple in your summer repertoire!

Paul

Key Lime Pie Dip is the Perfect Summer Treat!

Key Lime Pie Dip is a creamy and tangy dessert dip that captures the flavors of traditional key lime pie, making it a perfect summer treat.
Prep Time 15 minutes
Total Time 45 minutes
Servings: 8 servings
Course: Dessert
Cuisine: American
Calories: 180

Ingredients
  

  • 1 cup cream cheese softened
  • 1 cup powdered sugar
  • 1 cup sour cream
  • 1/2 cup key lime juice fresh or bottled
  • 1 teaspoon vanilla extract
  • 1/4 teaspoon salt
  • Graham cracker crumbs for topping
  • Lime wedges for garnish (optional)
  • Fresh whipped cream for serving (optional)

Method
 

  1. In a large mixing bowl, beat the softened cream cheese with an electric mixer until smooth and creamy.
  2. Gradually add the powdered sugar, mixing until well combined and fluffy.
  3. Add the sour cream, key lime juice, vanilla extract, and salt. Mix until the mixture is smooth and well incorporated.
  4. Transfer the dip to a serving bowl and sprinkle graham cracker crumbs on top for garnish.
  5. Chill the dip in the refrigerator for at least 30 minutes before serving to allow the flavors to meld.
  6. Serve with additional graham crackers, fruit, or pretzels for dipping. Optionally, garnish with lime wedges and a dollop of fresh whipped cream.

Notes

  • For a lighter version, substitute Greek yogurt for sour cream.
  • Add a few drops of green food coloring for a more vibrant key lime color.

Southern Spaghetti: Discover Your New Favorite Recipe!

Introduction to Southern Spaghetti

There’s something about Southern Spaghetti that feels like a warm hug on a chilly evening. This dish combines the heartiness of ground beef and Italian sausage with a rich tomato sauce, creating a meal that’s both comforting and satisfying. Whether you’re looking for a quick solution after a long day or a dish to impress your loved ones at a gathering, this recipe has you covered. It’s easy to whip up, and the flavors will have everyone coming back for seconds. Trust me, once you try this Southern Spaghetti, it might just become your new favorite!

Why You’ll Love This Southern Spaghetti

This Southern Spaghetti is a game-changer for busy weeknights. It’s quick to prepare, taking just 45 minutes from start to finish. The combination of savory meats and a rich, flavorful sauce makes it a crowd-pleaser. Plus, it’s versatile enough to adapt to your taste. Whether you’re feeding a family or hosting friends, this dish guarantees smiles all around. You’ll love how easy it is to make and how delicious it tastes!

Ingredients for Southern Spaghetti

Gathering the right ingredients is the first step to creating a delicious Southern Spaghetti. Here’s what you’ll need:

  • Ground beef: This adds a rich, meaty flavor and protein to the dish.
  • Italian sausage: A touch of spice and depth, it elevates the overall taste.
  • Onion: Diced onions bring sweetness and aroma, enhancing the sauce.
  • Green bell pepper: Adds crunch and a fresh, slightly bitter note.
  • Garlic: Minced garlic infuses the dish with a savory punch.
  • Diced tomatoes: These provide the base for the sauce, adding moisture and acidity.
  • Tomato sauce: A smooth texture that helps bind everything together.
  • Tomato paste: Concentrated flavor that thickens the sauce beautifully.
  • Sugar: Just a pinch balances the acidity of the tomatoes.
  • Italian seasoning: A blend of herbs that brings a taste of Italy to your kitchen.
  • Salt and black pepper: Essential for seasoning and enhancing flavors.
  • Red pepper flakes (optional): For those who like a little heat in their pasta.
  • Spaghetti: The classic pasta choice that holds the sauce perfectly.
  • Parmesan cheese: Grated on top, it adds a salty, nutty finish.
  • Fresh basil leaves (optional): A fragrant garnish that brightens the dish.

For those looking to mix things up, consider substituting the meat with lentils or a plant-based ground meat alternative for a vegetarian version. You can also sneak in some chopped mushrooms or zucchini for extra veggies. The exact quantities for each ingredient are available at the bottom of the article for easy printing!

How to Make Southern Spaghetti

Now that you have all your ingredients ready, let’s dive into the heart of the matter: making this delicious Southern Spaghetti. Follow these simple steps, and you’ll have a mouthwatering meal in no time!

Step 1: Brown the Meat

Start by heating a large skillet over medium heat. Add the ground beef and Italian sausage, breaking them apart with a spoon. Cook until they’re nicely browned, about 8-10 minutes. Don’t forget to drain any excess fat; we want the sauce to shine, not swim!

Step 2: Sauté the Vegetables

Once the meat is browned, toss in the diced onion, green bell pepper, and minced garlic. Sauté these veggies for about 5 minutes until they’re soft and fragrant. This step is crucial; it builds the flavor base for your sauce. Trust me, your kitchen will smell amazing!

Step 3: Prepare the Sauce

Now it’s time to bring everything together. Stir in the diced tomatoes, tomato sauce, and tomato paste. Add the sugar, Italian seasoning, salt, black pepper, and red pepper flakes if you’re feeling adventurous. Bring the mixture to a simmer and let it cook for about 20 minutes. Stir occasionally to keep things from sticking. This is where the magic happens!

Step 4: Cook the Spaghetti

While your sauce is simmering, bring a large pot of salted water to a boil. Add the spaghetti and cook according to the package instructions until it’s al dente. This usually takes around 8-10 minutes. Once done, drain the spaghetti and set it aside. You want it to be firm enough to hold up against that rich sauce.

Step 5: Combine and Serve

Finally, it’s time to combine! Add the cooked spaghetti to the skillet with the sauce. Toss everything together until the pasta is well-coated. Serve hot, topped with a generous sprinkle of grated Parmesan cheese and fresh basil leaves if you like. Enjoy your Southern Spaghetti with a side of garlic bread or a fresh salad for a complete meal!

Tips for Success

  • Always taste your sauce as it simmers; adjust seasoning to your preference.
  • For extra flavor, let the sauce sit for a few hours or overnight in the fridge.
  • Don’t overcook the spaghetti; it should be al dente for the best texture.
  • Use fresh herbs for garnish to elevate the dish’s presentation and flavor.
  • Consider making a double batch; Southern Spaghetti freezes well for future meals!

Equipment Needed

  • Large skillet: A non-stick skillet works wonders for browning meat and sautéing veggies.
  • Pot: A large pot for boiling spaghetti; a Dutch oven can also do the trick.
  • Wooden spoon: Perfect for stirring and breaking up the meat.
  • Colander: Essential for draining the spaghetti after cooking.

Variations

  • Vegetarian Southern Spaghetti: Swap the ground beef and Italian sausage for lentils or a plant-based meat alternative. It’s just as hearty and satisfying!
  • Spicy Kick: Add more red pepper flakes or a splash of hot sauce to the sauce for an extra layer of heat.
  • Extra Veggies: Toss in chopped mushrooms, zucchini, or spinach to boost the nutritional value and add more flavor.
  • Cheesy Delight: Mix in some ricotta or mozzarella cheese into the sauce for a creamy texture that will make your taste buds dance.
  • Herb Infusion: Experiment with fresh herbs like oregano, thyme, or parsley for a fresh twist on the classic flavor profile.

Serving Suggestions

  • Garlic Bread: A warm, buttery garlic bread pairs perfectly with Southern Spaghetti, perfect for soaking up that delicious sauce.
  • Fresh Salad: A crisp green salad with a tangy vinaigrette adds a refreshing contrast to the hearty pasta.
  • Wine Pairing: A glass of Chianti or a light Pinot Noir complements the flavors beautifully.
  • Presentation: Serve in a large bowl, garnished with fresh basil and a sprinkle of Parmesan for a restaurant-style touch.

FAQs about Southern Spaghetti

Can I make Southern Spaghetti ahead of time?

Absolutely! You can prepare the sauce a day in advance and store it in the fridge. Just reheat it when you’re ready to serve, and cook the spaghetti fresh for the best texture.

Is Southern Spaghetti gluten-free?

Yes, if you use gluten-free spaghetti, this dish can easily fit into a gluten-free diet. Just check the labels on your pasta to ensure it meets your needs.

Can I freeze Southern Spaghetti?

Definitely! This dish freezes well. Just store the sauce and spaghetti separately in airtight containers. When you’re ready to enjoy it, thaw and reheat for a quick meal.

What can I serve with Southern Spaghetti?

Southern Spaghetti pairs wonderfully with garlic bread, a fresh salad, or even some roasted vegetables. These sides complement the hearty flavors of the dish perfectly.

How can I adjust the spice level in Southern Spaghetti?

If you prefer a milder dish, simply omit the red pepper flakes. For more heat, feel free to add extra flakes or a dash of hot sauce to the sauce while it simmers.

Final Thoughts

Cooking Southern Spaghetti is more than just preparing a meal; it’s about creating memories around the dinner table. The rich flavors and comforting aroma fill your kitchen, inviting everyone to gather and share stories. This dish is perfect for busy weeknights or special occasions, bringing a taste of Southern hospitality to your home. With each bite, you’ll savor the warmth and love that goes into every ingredient. So, roll up your sleeves, grab your apron, and let this Southern Spaghetti recipe become a cherished part of your culinary repertoire. Trust me, your family will thank you!

Paul

Southern Spaghetti: Discover Your New Favorite Recipe!

A delicious Southern-style spaghetti recipe featuring ground beef, Italian sausage, and a rich tomato sauce.
Prep Time 15 minutes
Cook Time 30 minutes
Total Time 45 minutes
Servings: 6 servings
Course: Main Course
Cuisine: Southern
Calories: 450

Ingredients
  

  • 1 pound ground beef
  • 1 pound Italian sausage
  • 1 medium onion diced
  • 1 medium green bell pepper diced
  • 3 cloves garlic minced
  • 2 14.5-ounce cans diced tomatoes
  • 1 8-ounce can tomato sauce
  • 1 6-ounce can tomato paste
  • 2 teaspoons sugar
  • 1 teaspoon Italian seasoning
  • 1 teaspoon salt
  • 1/2 teaspoon black pepper
  • 1/4 teaspoon red pepper flakes optional
  • 1 pound spaghetti
  • 1/4 cup grated Parmesan cheese
  • Fresh basil leaves for garnish optional

Method
 

  1. In a large skillet over medium heat, cook the ground beef and Italian sausage until browned, breaking it apart with a spoon. Drain any excess fat.
  2. Add the diced onion, green bell pepper, and minced garlic to the skillet. Sauté until the vegetables are soft, about 5 minutes.
  3. Stir in the diced tomatoes, tomato sauce, tomato paste, sugar, Italian seasoning, salt, black pepper, and red pepper flakes. Bring to a simmer and let it cook for about 20 minutes, stirring occasionally.
  4. While the sauce simmers, cook the spaghetti according to package instructions in a large pot of salted boiling water until al dente. Drain and set aside.
  5. Once the sauce has thickened, combine it with the cooked spaghetti in the skillet. Toss to coat the pasta evenly with the sauce.
  6. Serve hot, topped with grated Parmesan cheese and fresh basil leaves if desired.

Notes

  • For a vegetarian version, substitute the meat with lentils or a plant-based ground meat alternative.
  • Add chopped mushrooms or zucchini to the sauce for extra vegetables and flavor.

Baked Eggs with Spinach and Cheese: A Simple Delight!

Introduction to Baked Eggs with Spinach and Cheese

There’s something magical about a dish that feels both comforting and nourishing, and Baked Eggs with Spinach and Cheese is just that. Whether you’re rushing through a busy morning or looking to impress someone special at brunch, this recipe is your go-to. It’s quick, simple, and packed with flavor. Plus, it’s a fantastic way to sneak in some greens without anyone noticing! Trust me, once you try this delightful combination, it’ll become a staple in your kitchen. Let’s dive into this delicious journey together!

Why You’ll Love This Baked Eggs with Spinach and Cheese

This dish is a true lifesaver for busy mornings. It comes together in just 25 minutes, making it perfect for those who crave a hearty breakfast without the fuss. The rich, creamy cheese pairs beautifully with the earthy spinach, creating a flavor explosion in every bite. Plus, it’s versatile! You can easily customize it to suit your taste or dietary needs. What’s not to love?

Ingredients for Baked Eggs with Spinach and Cheese

Gathering the right ingredients is the first step to creating your Baked Eggs with Spinach and Cheese. Here’s what you’ll need:

  • Olive oil: This adds a rich flavor and helps sauté the spinach perfectly.
  • Fresh spinach: Packed with nutrients, it’s the star of the dish. Feel free to swap it with kale or Swiss chard for a twist.
  • Large eggs: The foundation of this recipe, providing protein and creaminess. Choose organic if you can for better flavor.
  • Shredded cheddar cheese: Adds a savory, melty goodness. You can experiment with mozzarella or feta for different flavors.
  • Salt: Enhances all the flavors. Adjust to your taste, especially if you’re watching your sodium intake.
  • Black pepper: A must for a little kick. Freshly ground is always best!
  • Garlic powder: This brings a subtle depth of flavor. Fresh garlic can be used if you prefer.
  • Paprika: Adds a hint of smokiness and color. Try smoked paprika for an extra layer of flavor.
  • Fresh parsley: A lovely garnish that adds a pop of color and freshness.

For exact measurements, check the bottom of the article where you can find everything listed for easy printing. Now, let’s get cooking!

How to Make Baked Eggs with Spinach and Cheese

Creating Baked Eggs with Spinach and Cheese is a straightforward process that anyone can master. Follow these simple steps, and you’ll have a delicious breakfast ready in no time!

Step 1: Preheat the Oven

Start by preheating your oven to 375°F (190°C). This step is crucial because it ensures even cooking. A hot oven helps the eggs set perfectly while keeping the yolks delightfully runny. Trust me, you don’t want to skip this part!

Step 2: Sauté the Spinach

Next, grab a medium skillet and heat the olive oil over medium heat. Add the chopped spinach and sauté for about 2-3 minutes until it wilts. This step is essential for enhancing the flavor of the spinach. Plus, it reduces the moisture, preventing a soggy dish. You want that vibrant green color to shine!

Step 3: Prepare the Baking Dish

Now, take a greased baking dish and spread the sautéed spinach evenly across the bottom. Greasing the dish helps prevent sticking, making cleanup a breeze. Layering the spinach first allows the eggs to sit on top, creating a beautiful presentation.

Step 4: Add the Eggs

Carefully crack the eggs on top of the spinach, spacing them evenly apart. This ensures that each egg cooks uniformly. If you’re feeling adventurous, try cracking them into a small bowl first to avoid any shell mishaps. It’s a simple trick that can save you from a crunchy surprise!

Step 5: Season and Cheese

Now it’s time to sprinkle the shredded cheddar cheese over the eggs. Follow this with a dash of salt, black pepper, garlic powder, and paprika. The cheese melts beautifully, adding a creamy texture and rich flavor. Don’t be shy with the seasoning; it elevates the dish to a whole new level!

Step 6: Bake to Perfection

Place the baking dish in the preheated oven and bake for 12-15 minutes. Keep an eye on it! You want the egg whites to be set while the yolks remain slightly runny. To check for doneness, gently shake the dish. If the whites are firm but the yolks jiggle a bit, you’re good to go!

Tips for Success

  • Use fresh spinach for the best flavor and nutrients.
  • Experiment with different cheeses like feta or goat cheese for a unique twist.
  • Don’t overbake; keep an eye on the eggs to maintain that perfect runny yolk.
  • For added flavor, consider mixing in some diced tomatoes or onions with the spinach.
  • Let the dish cool for a minute before serving to avoid burns!

Equipment Needed

  • Medium skillet: A non-stick skillet works best, but any skillet will do.
  • Baking dish: An 8×8 inch dish is perfect; a pie dish can also work.
  • Spatula: For sautéing and serving.
  • Measuring cups: Handy for precise ingredient amounts.
  • Oven mitts: Essential for safety when handling hot dishes.

Variations

  • Vegetable Medley: Swap spinach for a mix of bell peppers, mushrooms, and zucchini for a colorful twist.
  • Herb Infusion: Add fresh herbs like basil or thyme for an aromatic boost that elevates the dish.
  • Spicy Kick: Incorporate diced jalapeños or a sprinkle of red pepper flakes for those who enjoy a bit of heat.
  • Cheese Lovers: Mix different cheeses like mozzarella, gouda, or even a spicy pepper jack for a flavor explosion.
  • Protein Boost: Add cooked bacon, sausage, or even chickpeas for extra protein and heartiness.

Serving Suggestions

  • Pair with crispy toast or a warm bagel for a satisfying breakfast.
  • Serve alongside fresh fruit for a refreshing contrast.
  • A side of avocado slices adds creaminess and healthy fats.
  • Enjoy with a cup of freshly brewed coffee or herbal tea.
  • Garnish with extra parsley for a pop of color and flavor.

FAQs about Baked Eggs with Spinach and Cheese

Can I make Baked Eggs with Spinach and Cheese ahead of time?

Absolutely! You can prepare the spinach and layer the ingredients in the baking dish the night before. Just cover it and store it in the fridge. In the morning, simply pop it in the oven for a quick breakfast.

What can I substitute for spinach?

If spinach isn’t your thing, don’t worry! You can use kale, Swiss chard, or even a mix of bell peppers and mushrooms. Each option brings its own unique flavor and texture to the dish.

How do I know when the eggs are done baking?

Keep an eye on the eggs while they bake. You want the whites to be set but the yolks to remain slightly runny. A gentle shake of the dish will help you check; if the whites are firm and the yolks jiggle, you’re all set!

Can I add more cheese?

Of course! If you’re a cheese lover, feel free to sprinkle on extra cheese before baking. Just remember that it may take a minute or two longer to melt, so keep an eye on it!

Is this dish suitable for meal prep?

Yes! Baked Eggs with Spinach and Cheese is perfect for meal prep. You can portion it out into individual servings and store them in the fridge. Just reheat in the microwave when you’re ready to enjoy!

Final Thoughts

Cooking Baked Eggs with Spinach and Cheese is more than just preparing a meal; it’s about creating a moment of joy. The aroma wafting through your kitchen as it bakes is enough to make anyone’s mouth water. Each bite is a delightful blend of creamy cheese and vibrant spinach, making it a dish that warms the heart. Whether you’re enjoying it solo or sharing it with loved ones, this recipe brings a sense of comfort and satisfaction. So, roll up your sleeves, embrace the process, and let this simple delight become a cherished part of your breakfast routine!

Paul

Baked Eggs with Spinach and Cheese: A Simple Delight!

Baked Eggs with Spinach and Cheese is a simple and delicious dish that combines the richness of eggs with the nutritious benefits of spinach and the savory flavor of cheese.
Prep Time 10 minutes
Cook Time 15 minutes
Total Time 25 minutes
Servings: 2 servings
Course: Breakfast
Cuisine: American
Calories: 300

Ingredients
  

  • 2 tablespoons olive oil
  • 2 cups fresh spinach chopped
  • 4 large eggs
  • 1/2 cup shredded cheddar cheese
  • 1/4 teaspoon salt
  • 1/4 teaspoon black pepper
  • 1/4 teaspoon garlic powder
  • 1/4 teaspoon paprika
  • Fresh parsley chopped (for garnish)

Method
 

  1. Preheat your oven to 375°F (190°C).
  2. In a medium skillet, heat the olive oil over medium heat. Add the chopped spinach and sauté for about 2-3 minutes, until wilted. Remove from heat.
  3. In a greased baking dish, spread the sautéed spinach evenly across the bottom.
  4. Carefully crack the eggs on top of the spinach, spacing them evenly apart.
  5. Sprinkle the shredded cheddar cheese over the eggs, followed by the salt, black pepper, garlic powder, and paprika.
  6. Bake in the preheated oven for 12-15 minutes, or until the egg whites are set but the yolks are still slightly runny.
  7. Remove from the oven and let cool for a minute. Garnish with fresh parsley before serving.

Notes

  • For a creamier texture, add a splash of heavy cream to the eggs before baking.
  • You can also substitute the spinach with other vegetables like bell peppers or mushrooms for different flavors.

Braised Short Ribs with Creamy Herb Sauce: A Must-Try!

Introduction to Braised Short Ribs with Creamy Herb Sauce

There’s something magical about a dish that warms both the heart and the belly. Braised short ribs with creamy herb sauce is just that—a comforting meal that feels like a warm hug after a long day. Whether you’re looking to impress your loved ones or simply treat yourself, this recipe is a go-to. The rich flavors and tender meat practically melt in your mouth, making it perfect for cozy evenings or special occasions. Plus, it’s surprisingly easy to whip up, even on a busy weeknight. Let’s dive into this culinary adventure!

Why You’ll Love This Braised Short Ribs with Creamy Herb Sauce

This dish is a true crowd-pleaser, combining rich flavors with minimal effort. The beauty of braised short ribs lies in their simplicity; once you sear and simmer, the oven does the heavy lifting. The creamy herb sauce adds a touch of elegance, elevating your meal without requiring culinary expertise. Perfect for impressing guests or enjoying a cozy night in, this recipe is comfort food at its finest.

Ingredients for Braised Short Ribs with Creamy Herb Sauce

Gathering the right ingredients is the first step to culinary success. For this braised short ribs with creamy herb sauce, you’ll need a few key players that come together to create a symphony of flavors.

  • Beef short ribs: The star of the show! These cuts are rich and flavorful, perfect for braising.
  • Olive oil: Essential for searing the ribs and adding depth to the dish.
  • Onion: Adds sweetness and aroma, enhancing the overall flavor profile.
  • Carrots: Their natural sweetness balances the savory elements beautifully.
  • Celery: Provides a subtle earthiness and contributes to the aromatic base.
  • Garlic: A must-have for that irresistible aroma and flavor boost.
  • Beef broth: The foundation of your braising liquid, enriching the dish with savory goodness.
  • Red wine: Adds complexity and depth; choose a wine you’d enjoy drinking.
  • Tomato paste: A touch of acidity that brightens the flavors and adds richness.
  • Dried thyme and rosemary: These herbs infuse the dish with aromatic notes, enhancing the overall experience.
  • Salt and pepper: Essential for seasoning; don’t skip this step!
  • Heavy cream: The secret to that luscious, creamy herb sauce that ties everything together.
  • Fresh parsley and chives: These herbs add freshness and a pop of color to your sauce.

For those looking to experiment, consider adding a splash of Worcestershire sauce for an extra layer of flavor. You can find the exact measurements for each ingredient at the bottom of the article, ready for printing. Happy cooking!

How to Make Braised Short Ribs with Creamy Herb Sauce

Now that you have your ingredients ready, let’s get cooking! This process is straightforward and rewarding. Follow these steps to create a dish that will have everyone asking for seconds. Trust me, the aroma alone will make your kitchen feel like a cozy restaurant.

Step 1: Preheat and Season

Start by preheating your oven to 325°F (160°C). This step is crucial as it ensures even cooking. While the oven warms up, season the short ribs generously with salt and pepper. This simple seasoning enhances the meat’s natural flavors, setting the stage for a delicious meal.

Step 2: Sear the Short Ribs

In a large Dutch oven, heat the olive oil over medium-high heat. Once hot, add the short ribs, searing them on all sides for about 4-5 minutes. This browning process is essential; it locks in juices and creates a rich, caramelized crust. The depth of flavor you develop here will elevate your braised short ribs to a whole new level.

Step 3: Sauté the Vegetables

After removing the short ribs, toss in the chopped onion, carrots, and celery into the same pot. Sauté these veggies for about 5-7 minutes until they soften. This step builds a flavorful base for your dish. The sweetness from the onions and carrots will balance the savory notes beautifully, enhancing the overall taste.

Step 4: Create the Braising Liquid

Next, it’s time to make the braising liquid. Pour in the beef broth and red wine, then stir in the tomato paste, thyme, and rosemary. Bring this mixture to a simmer, scraping up any browned bits from the bottom of the pot. These bits are packed with flavor and will enrich your dish, making every bite unforgettable.

Step 5: Braise the Short Ribs

Return the seared short ribs to the pot, ensuring they’re submerged in the liquid. Cover with a lid and transfer the pot to the preheated oven. Braise for 2.5 to 3 hours, or until the meat is tender and falls off the bone. This slow cooking process allows the flavors to meld beautifully, resulting in melt-in-your-mouth goodness.

Step 6: Prepare the Creamy Herb Sauce

Once the short ribs are done, remove them from the pot and set aside. Strain the cooking liquid into a saucepan, discarding the solids. Simmer the liquid over medium heat until it reduces by half. Lower the heat, then stir in the heavy cream, parsley, and chives. Cook for an additional 5 minutes until the sauce thickens, creating a luscious topping for your ribs.

Step 7: Serve and Enjoy

To serve, place the short ribs on a plate and generously drizzle the creamy herb sauce over them. For a beautiful presentation, consider garnishing with extra parsley or chives. Pair with mashed potatoes or polenta for a comforting meal that’s sure to impress!

Tips for Success

  • Always let the short ribs come to room temperature before cooking for even searing.
  • Don’t rush the braising process; low and slow is key for tender meat.
  • Feel free to customize the herbs in the sauce based on your preferences.
  • Use a good quality wine for the braising liquid; it makes a difference!
  • Make the sauce ahead of time and reheat it for a quick meal.

Equipment Needed

  • Large Dutch oven: Ideal for braising; a heavy pot with a lid works too.
  • Wooden spoon: Perfect for stirring and scraping up those flavorful bits.
  • Meat thermometer: Optional, but great for checking doneness.
  • Strainer: For separating the sauce from solids.

Variations

  • Spicy Kick: Add a pinch of red pepper flakes to the braising liquid for a subtle heat that complements the richness of the ribs.
  • Herb Swap: Experiment with fresh herbs like thyme, oregano, or tarragon in the creamy sauce for a unique flavor twist.
  • Vegetarian Option: Substitute short ribs with hearty mushrooms or jackfruit, and use vegetable broth for a plant-based version.
  • Smoky Flavor: Incorporate smoked paprika into the braising liquid for a delightful smoky undertone.
  • Gluten-Free Adaptation: Ensure the red wine and broth are certified gluten-free, and use cornstarch to thicken the sauce if needed.

Serving Suggestions

  • Pair the braised short ribs with creamy herb sauce over creamy mashed potatoes or polenta for a comforting base.
  • Serve alongside roasted vegetables or a fresh green salad to balance the richness.
  • A glass of robust red wine complements the flavors beautifully.
  • Garnish with extra parsley or chives for a pop of color.

FAQs about Braised Short Ribs with Creamy Herb Sauce

Can I make braised short ribs in a slow cooker?

Absolutely! You can sear the short ribs first, then transfer everything to a slow cooker. Cook on low for 6-8 hours for tender, flavorful results. Just remember to reduce the sauce on the stovetop afterward for that creamy herb sauce.

What can I substitute for red wine in this recipe?

If you prefer not to use red wine, beef broth is a great alternative. You can also use grape juice or a splash of balsamic vinegar mixed with water for a similar depth of flavor.

How do I store leftovers of braised short ribs with creamy herb sauce?

Store any leftovers in an airtight container in the fridge for up to 3 days. Reheat gently on the stovetop or in the microwave, adding a splash of broth if needed to keep the sauce creamy.

Can I freeze braised short ribs?

Yes, you can freeze braised short ribs! Just make sure they are completely cooled before transferring them to a freezer-safe container. They can be frozen for up to 3 months. Thaw in the fridge overnight before reheating.

What sides pair well with braised short ribs?

Mashed potatoes, polenta, or creamy risotto are fantastic choices. You can also serve them with roasted vegetables or a fresh salad to balance the richness of the dish.

Final Thoughts

Cooking braised short ribs with creamy herb sauce is more than just preparing a meal; it’s about creating memories. The aroma wafting through your kitchen, the anticipation as you gather around the table, and the smiles that follow each bite are what make this dish truly special. It’s a recipe that invites conversation and connection, perfect for family gatherings or cozy nights in. With its rich flavors and tender meat, this dish is sure to become a favorite in your home. So roll up your sleeves, embrace the process, and enjoy every delicious moment!

Paul

Braised Short Ribs with Creamy Herb Sauce: A Must-Try!

A delicious recipe for braised short ribs served with a creamy herb sauce, perfect for a comforting meal.
Prep Time 20 minutes
Total Time 3 hours 20 minutes
Servings: 4 servings
Course: Main Course
Cuisine: American
Calories: 550

Ingredients
  

  • 2 pounds beef short ribs
  • 2 tablespoons olive oil
  • 1 large onion chopped
  • 2 carrots chopped
  • 2 celery stalks chopped
  • 4 cloves garlic minced
  • 2 cups beef broth
  • 1 cup red wine
  • 2 tablespoons tomato paste
  • 2 teaspoons dried thyme
  • 2 teaspoons dried rosemary
  • Salt and pepper to taste
  • 1 cup heavy cream
  • 1/4 cup fresh parsley chopped
  • 1 tablespoon fresh chives chopped

Method
 

  1. Preheat your oven to 325°F (160°C). Season the short ribs generously with salt and pepper.
  2. In a large Dutch oven, heat the olive oil over medium-high heat. Add the short ribs and sear on all sides until browned, about 4-5 minutes per side. Remove the ribs and set aside.
  3. In the same pot, add the chopped onion, carrots, and celery. Sauté until softened, about 5-7 minutes. Stir in the minced garlic and cook for an additional minute.
  4. Add the beef broth, red wine, tomato paste, thyme, and rosemary to the pot. Bring to a simmer, scraping up any browned bits from the bottom.
  5. Return the short ribs to the pot, ensuring they are submerged in the liquid. Cover with a lid and transfer to the oven. Braise for 2.5 to 3 hours, or until the meat is tender and falls off the bone.
  6. Once cooked, remove the ribs from the pot and set aside. Strain the cooking liquid into a saucepan, discarding the solids. Simmer the liquid over medium heat until reduced by half.
  7. Lower the heat and stir in the heavy cream, parsley, and chives. Cook for an additional 5 minutes until the sauce is thickened. Season with salt and pepper to taste.
  8. Serve the short ribs topped with the creamy herb sauce.

Notes

  • For a richer flavor, add a tablespoon of Worcestershire sauce to the braising liquid.
  • Serve the short ribs over mashed potatoes or polenta for a comforting meal.

Creamy Garlic Mushroom Chicken Skillet Recipe Awaits!

Introduction to Creamy Garlic Mushroom Chicken Skillet

There’s something magical about a one-pan meal that brings comfort and satisfaction, especially after a long day. The Creamy Garlic Mushroom Chicken Skillet is just that—a delightful dish that combines tender chicken, earthy mushrooms, and a rich, creamy sauce.

It’s perfect for those busy weeknights when you want to impress your loved ones without spending hours in the kitchen. With just a few simple ingredients and minimal cleanup, this recipe is a go-to for anyone looking to whip up something delicious and heartwarming. Trust me, your taste buds will thank you!

Why You’ll Love This Creamy Garlic Mushroom Chicken Skillet

This Creamy Garlic Mushroom Chicken Skillet is a game-changer for your weeknight dinners.

It’s quick to prepare, taking just 35 minutes from start to finish.

The flavors are rich and satisfying, making it a dish that feels indulgent without the fuss.

Plus, it’s a one-pan wonder, meaning less time scrubbing dishes and more time enjoying a delicious meal with family or friends.

What’s not to love?

Ingredients for Creamy Garlic Mushroom Chicken Skillet

Gathering the right ingredients is the first step to creating this mouthwatering dish.

Here’s what you’ll need:

  • Boneless, skinless chicken breasts: The star of the show! Tender and juicy, they cook quickly and soak up all the flavors.
  • Olive oil: A staple in any kitchen, it adds richness and helps to brown the chicken beautifully.
  • Salt and black pepper: Essential seasonings that enhance the natural flavors of the chicken and mushrooms.
  • Sliced mushrooms: Button or cremini mushrooms work well here, adding an earthy depth to the creamy sauce.
  • Garlic: Freshly minced garlic brings a punch of flavor that elevates the dish to new heights.
  • Heavy cream: This is what makes the sauce luxuriously creamy. For a lighter option, consider half-and-half or a plant-based cream alternative.
  • Chicken broth: Adds moisture and depth to the sauce, making it rich and savory.
  • Dried thyme: A fragrant herb that complements the chicken and mushrooms perfectly.
  • Paprika: This spice adds a subtle warmth and a hint of color to the dish.
  • Parmesan cheese: Grated for easy melting, it adds a salty, nutty flavor that ties everything together.
  • Fresh parsley: A sprinkle of chopped parsley not only adds a pop of color but also a fresh finish to the dish.

Feel free to get creative! You can add spinach or sun-dried tomatoes for extra flavor and nutrition.

For exact measurements, check the bottom of the article where you can find everything available for printing.

How to Make Creamy Garlic Mushroom Chicken Skillet

Cooking this Creamy Garlic Mushroom Chicken Skillet is a breeze.

With just a few simple steps, you’ll have a delicious meal ready in no time.

Let’s dive into the process!

Step 1: Prepare the Chicken

Start by seasoning the boneless, skinless chicken breasts with salt and black pepper on both sides.

This simple step enhances the flavor and ensures a tasty bite.

Next, heat a tablespoon of olive oil in a large skillet over medium-high heat.

Once the oil is shimmering, add the chicken.

Cook for about 6-7 minutes on each side until golden brown and cooked through.

When done, remove the chicken from the skillet and set it aside.

This step is crucial; it locks in the juices and keeps the chicken tender.

Step 2: Sauté the Mushrooms

In the same skillet, toss in the sliced mushrooms.

Cook them for about 5 minutes, stirring occasionally, until they’re browned and tender.

The mushrooms will soak up the leftover flavors from the chicken, adding depth to your dish.

Now, add the minced garlic and cook for an additional minute.

Stir frequently to prevent the garlic from burning.

The aroma will be irresistible!

Step 3: Create the Creamy Sauce

Pour in the chicken broth and heavy cream, stirring to combine.

This is where the magic happens!

Add the dried thyme and paprika, bringing the mixture to a gentle simmer.

Reduce the heat to low and let it bubble softly.

Now, stir in the grated Parmesan cheese until it melts and the sauce becomes creamy.

This step transforms your skillet into a luscious, savory delight.

Step 4: Combine and Simmer

Return the chicken to the skillet, spooning the creamy sauce over the top.

Let it simmer for another 2-3 minutes to heat the chicken through.

This final step allows the chicken to absorb the flavors of the sauce.

Once everything is heated, garnish with fresh parsley before serving.

Your Creamy Garlic Mushroom Chicken Skillet is now ready to impress!

Tips for Success

  • Always season your chicken well; it makes a world of difference in flavor.
  • Don’t rush the sautéing process; let the mushrooms brown for maximum flavor.
  • Use fresh garlic for the best taste; it’s worth the extra effort.
  • For a thicker sauce, let it simmer a bit longer before adding the chicken back.
  • Garnish with parsley just before serving for a fresh touch.

Equipment Needed

  • Large skillet: A non-stick skillet works best, but any large pan will do.
  • Wooden spoon or spatula: Perfect for stirring and scraping up those delicious bits.
  • Meat thermometer: Optional, but great for ensuring your chicken is cooked perfectly.
  • Cutting board and knife: Essential for prepping your ingredients.

Variations

  • Spinach and Sun-Dried Tomatoes: Add a handful of fresh spinach and some chopped sun-dried tomatoes to the sauce for a burst of color and flavor.
  • Mushroom Medley: Experiment with different types of mushrooms like shiitake or portobello for a more complex taste.
  • Herb Swap: Try using fresh herbs like basil or rosemary instead of dried thyme for a fresh twist.
  • Low-Carb Option: Serve over zucchini noodles or cauliflower rice instead of traditional pasta for a low-carb meal.
  • Spicy Kick: Add a pinch of red pepper flakes to the sauce for a bit of heat that complements the creaminess.

Serving Suggestions

  • Side Salad: A crisp green salad with a light vinaigrette pairs beautifully with the creamy dish.
  • Garlic Bread: Serve with warm garlic bread to soak up the delicious sauce.
  • Wine Pairing: A chilled Chardonnay complements the richness of the chicken.
  • Presentation: Serve in a rustic skillet for a charming, homey feel.

FAQs about Creamy Garlic Mushroom Chicken Skillet

Can I use chicken thighs instead of breasts?

Absolutely! Chicken thighs are a great alternative. They’re juicier and add a deeper flavor to the Creamy Garlic Mushroom Chicken Skillet. Just adjust the cooking time slightly, as thighs may take a bit longer to cook through.

What can I substitute for heavy cream?

If you’re looking for a lighter option, half-and-half or a plant-based cream alternative works well. Both will still give you that creamy texture without the extra calories.

Can I make this dish ahead of time?

Yes! You can prepare the chicken and sauce ahead of time. Just store them separately in the fridge. When you’re ready to eat, reheat the sauce and add the chicken to warm it through.

How do I store leftovers?

Store any leftovers in an airtight container in the fridge for up to 3 days. Reheat gently on the stove or in the microwave, adding a splash of chicken broth if the sauce thickens too much.

What sides pair well with this dish?

This Creamy Garlic Mushroom Chicken Skillet goes wonderfully with a side salad, garlic bread, or even over rice or pasta. The creamy sauce is perfect for soaking up those delicious flavors!

Final Thoughts

Cooking the Creamy Garlic Mushroom Chicken Skillet is more than just preparing a meal; it’s about creating a moment of joy.

The rich, creamy sauce envelops the tender chicken, making every bite a comforting experience.

Whether you’re sharing it with family or enjoying a quiet dinner alone, this dish brings warmth to the table.

It’s a reminder that good food doesn’t have to be complicated.

With just a few ingredients and a little love, you can whip up something truly special.

So, roll up your sleeves and dive into this culinary adventure—you won’t regret it!

Paul

Creamy Garlic Mushroom Chicken Skillet Recipe Awaits!

A delicious and creamy garlic mushroom chicken skillet recipe that is easy to prepare and perfect for a weeknight dinner.
Prep Time 10 minutes
Cook Time 25 minutes
Total Time 35 minutes
Servings: 4 servings
Course: Main Course
Cuisine: American
Calories: 450

Ingredients
  

  • 1 pound boneless skinless chicken breasts
  • 1 tablespoon olive oil
  • 1 teaspoon salt
  • 1/2 teaspoon black pepper
  • 1 cup sliced mushrooms button or cremini
  • 4 cloves garlic minced
  • 1 cup heavy cream
  • 1/2 cup chicken broth
  • 1 teaspoon dried thyme
  • 1/2 teaspoon paprika
  • 1/4 cup grated Parmesan cheese
  • 2 tablespoons fresh parsley chopped (for garnish)

Method
 

  1. Season the chicken breasts with salt and black pepper on both sides. Heat olive oil in a large skillet over medium-high heat. Add the chicken and cook for about 6-7 minutes on each side, or until golden brown and cooked through. Remove the chicken from the skillet and set aside.
  2. In the same skillet, add the sliced mushrooms and cook for about 5 minutes, or until they are browned and tender. Add the minced garlic and cook for an additional 1 minute, stirring frequently.
  3. Pour in the chicken broth and heavy cream, stirring to combine. Add the dried thyme and paprika. Bring the mixture to a gentle simmer, then reduce the heat to low.
  4. Stir in the grated Parmesan cheese until melted and the sauce is creamy. Return the chicken to the skillet, spooning the sauce over the top. Let it simmer for another 2-3 minutes to heat the chicken through.
  5. Garnish with fresh parsley before serving.

Notes

  • For a lighter version, substitute heavy cream with half-and-half or a plant-based cream alternative.
  • Add spinach or sun-dried tomatoes to the sauce for extra flavor and nutrition.

Ground Beef and Cauliflower Skillet: A Flavorful Delight!

Introduction to Ground Beef and Cauliflower Skillet

After a long day, the last thing I want is to spend hours in the kitchen. That’s where my Ground Beef and Cauliflower Skillet comes in—a quick solution for busy evenings. This dish is not just about convenience; it’s a delightful blend of flavors that will impress your loved ones. With just a handful of ingredients, you can whip up a healthy meal that satisfies both the palate and the stomach. Trust me, this skillet dish will become a go-to in your weeknight rotation, making dinner feel less like a chore and more like a culinary adventure.

Why You’ll Love This Ground Beef and Cauliflower Skillet

This Ground Beef and Cauliflower Skillet is a game-changer for anyone juggling a busy lifestyle. It’s not only quick to prepare, but it also packs a punch of flavor that will leave you craving more. The combination of tender beef and nutritious cauliflower makes it a satisfying meal without the guilt. Plus, cleanup is a breeze since everything cooks in one pan. What’s not to love?

Why You’ll Love This Ground Beef and Cauliflower Skillet

This Ground Beef and Cauliflower Skillet is a lifesaver for those hectic weeknights. It’s quick to make, taking just about 30 minutes from start to finish. The rich flavors of the beef combined with the subtle nuttiness of cauliflower create a dish that’s both hearty and healthy. Plus, it’s versatile enough to please even the pickiest eaters at your table. You’ll find yourself reaching for this recipe time and again!

Ingredients for Ground Beef and Cauliflower Skillet

Gathering the right ingredients is the first step to creating a delicious Ground Beef and Cauliflower Skillet. Here’s what you’ll need:

  • Ground Beef: I prefer 80/20 for the perfect balance of flavor and juiciness. You can also use ground turkey or chicken for a leaner option.
  • Cauliflower: This versatile veggie adds a nice texture and is a great low-carb alternative to rice or pasta. Fresh is best, but frozen works too!
  • Onion: A medium onion, diced, brings sweetness and depth to the dish. Yellow or white onions are great choices.
  • Garlic: Three cloves, minced, add a punch of flavor. Fresh garlic is always better than pre-minced for that aromatic kick.
  • Bell Pepper: Any color will do! Diced bell pepper adds a pop of color and sweetness. Feel free to mix it up with different varieties.
  • Smoked Paprika: This spice gives a smoky depth to the dish. If you don’t have it, regular paprika can work in a pinch.
  • Italian Seasoning: A blend of herbs that enhances the overall flavor. You can make your own or use a store-bought mix.
  • Salt and Pepper: Essential for seasoning. Adjust to your taste for the best flavor.
  • Olive Oil: Two tablespoons for sautéing the veggies and beef. It adds richness and helps everything cook evenly.
  • Shredded Cheddar Cheese: Optional, but who can resist melted cheese? It adds creaminess and a delightful finish.
  • Fresh Parsley: Chopped for garnish, it adds a fresh touch and a pop of color to your dish.

For exact measurements, check the bottom of the article where you can find everything available for printing. Now that you have your ingredients ready, let’s get cooking!

How to Make Ground Beef and Cauliflower Skillet

Now that you have your ingredients ready, let’s dive into the cooking process. This Ground Beef and Cauliflower Skillet is straightforward and fun to make. Follow these simple steps, and you’ll have a delicious meal on the table in no time!

Step 1: Sauté the Vegetables

Start by heating two tablespoons of olive oil in a large skillet over medium heat. Once the oil is shimmering, toss in the diced onion and bell pepper. Sauté them for about five minutes until they soften and become fragrant. This step builds a flavorful base for your dish. Don’t rush it; let those veggies get cozy in the pan!

Step 2: Cook the Ground Beef

Next, add the ground beef to the skillet. Use a spatula to break it apart as it cooks. Season it with smoked paprika, Italian seasoning, salt, and pepper. Cook for about 7-10 minutes, stirring occasionally, until the beef is browned and fully cooked. The spices will infuse the meat with a rich flavor that pairs perfectly with the veggies.

Step 3: Steam the Cauliflower

While the beef is cooking, it’s time to steam the cauliflower. You can do this in a separate pot or even in the microwave. If using the microwave, place the cauliflower florets in a bowl with a splash of water, cover it, and steam for about 5-7 minutes until tender. This step ensures the cauliflower is soft enough to blend seamlessly with the beef.

Step 4: Combine and Finish Cooking

Once the beef is cooked and the cauliflower is tender, it’s time to combine them. Add the steamed cauliflower to the skillet with the beef mixture. Stir everything together and let it cook for an additional 3-5 minutes. This allows the flavors to meld beautifully. You’ll love the aroma wafting through your kitchen!

Step 5: Add Cheese and Garnish

If you’re feeling indulgent, sprinkle shredded cheddar cheese on top of the skillet. Cover the pan for 2-3 minutes to let the cheese melt into gooey perfection. Finally, remove the skillet from heat and garnish with freshly chopped parsley. This adds a vibrant touch and a hint of freshness to your dish.

Tips for Success

  • Prep your ingredients ahead of time. Chopping veggies and measuring spices can save you precious minutes.
  • Don’t rush the sautéing process. Allowing the onions and peppers to soften enhances the flavor.
  • For extra flavor, consider marinating the ground beef with spices before cooking.
  • Adjust the seasoning to your taste. Everyone’s palate is different, so taste as you go!
  • Experiment with different cheeses for a unique twist on the dish.

Equipment Needed

  • Large Skillet: A non-stick skillet works best, but any large pan will do.
  • Spatula: A sturdy spatula is essential for breaking up the ground beef.
  • Steamer Basket or Microwave-Safe Bowl: For steaming the cauliflower, either will work.
  • Knife and Cutting Board: Essential for chopping your veggies.

Variations

  • Spicy Kick: Add red pepper flakes or diced jalapeños to the beef for a fiery twist.
  • Vegetarian Option: Substitute the ground beef with lentils or chickpeas for a hearty plant-based meal.
  • Cheesy Delight: Experiment with different cheeses like pepper jack or mozzarella for varied flavors.
  • Herb Infusion: Fresh herbs like basil or cilantro can be added for a burst of freshness.
  • Low-Carb Twist: Swap cauliflower for zucchini noodles or spaghetti squash for a lighter dish.

Serving Suggestions

  • Side Salad: Pair your skillet with a fresh green salad drizzled with vinaigrette for a refreshing contrast.
  • Crusty Bread: Serve with warm, crusty bread to soak up any delicious juices left on your plate.
  • Drink Pairing: A light beer or sparkling water with lemon complements the flavors beautifully.
  • Presentation: Serve in a colorful bowl and sprinkle extra parsley on top for a vibrant touch.

FAQs about Ground Beef and Cauliflower Skillet

Can I use frozen cauliflower for this recipe?

Absolutely! Frozen cauliflower is a convenient option. Just make sure to thaw and drain any excess water before adding it to the skillet. It will save you time without sacrificing flavor.

How can I make this dish spicier?

If you’re looking for a kick, add red pepper flakes or diced jalapeños when cooking the ground beef. You can also use spicy sausage instead of ground beef for an extra punch!

Can I prepare this Ground Beef and Cauliflower Skillet ahead of time?

Yes! You can chop the veggies and even cook the beef in advance. Just store everything in the fridge and combine them when you’re ready to eat. It’s a great meal prep option!

What can I serve with this skillet dish?

This dish pairs wonderfully with a side salad or some crusty bread. You can also serve it over rice or quinoa for a heartier meal. The options are endless!

Is this recipe suitable for meal prep?

Definitely! This Ground Beef and Cauliflower Skillet stores well in the fridge for up to three days. Just reheat it in the microwave or on the stovetop when you’re ready to enjoy it again.

Final Thoughts

Cooking this Ground Beef and Cauliflower Skillet is more than just preparing a meal; it’s about creating a moment of joy in your busy life. The vibrant colors and rich aromas fill your kitchen, inviting everyone to gather around the table. Each bite is a delightful blend of flavors that satisfies both hunger and the soul. Whether you’re sharing it with family or enjoying it solo, this dish brings comfort and warmth. Plus, knowing it’s healthy makes it even better. I hope this becomes a cherished recipe in your home, just as it has in mine!

Paul

Ground Beef and Cauliflower Skillet: A Flavorful Delight!

A delicious and healthy skillet dish made with ground beef and cauliflower, perfect for a quick weeknight dinner.
Prep Time 10 minutes
Cook Time 20 minutes
Total Time 30 minutes
Servings: 4 servings
Course: Main Dish
Cuisine: American
Calories: 350

Ingredients
  

  • 1 pound ground beef 80/20
  • 1 medium head of cauliflower chopped into small florets
  • 1 medium onion diced
  • 3 cloves garlic minced
  • 1 bell pepper any color, diced
  • 1 teaspoon smoked paprika
  • 1 teaspoon Italian seasoning
  • Salt and pepper to taste
  • 2 tablespoons olive oil
  • 1 cup shredded cheddar cheese optional
  • Fresh parsley chopped (for garnish)

Method
 

  1. Heat olive oil in a large skillet over medium heat. Add the diced onion and bell pepper, cooking until softened, about 5 minutes.
  2. Stir in the minced garlic and cook for an additional minute.
  3. Add the ground beef to the skillet, breaking it apart with a spatula. Season with smoked paprika, Italian seasoning, salt, and pepper. Cook until the beef is browned and cooked through, about 7-10 minutes.
  4. While the beef is cooking, steam the cauliflower florets until tender, about 5-7 minutes.
  5. Once the beef is cooked, add the steamed cauliflower to the skillet. Stir everything together and cook for an additional 3-5 minutes to combine the flavors.
  6. If using, sprinkle the shredded cheddar cheese on top and cover the skillet for 2-3 minutes until the cheese is melted.
  7. Remove from heat and garnish with chopped parsley before serving.

Notes

  • For a spicier dish, add red pepper flakes or diced jalapeños when cooking the beef.
  • You can substitute ground turkey or chicken for a leaner option, adjusting the cooking time as needed.

Chocolate Chip Crumble Muffins: A Delightful Recipe!

Introduction to Chocolate Chip Crumble Muffins

There’s something magical about the aroma of freshly baked muffins wafting through the kitchen.

Chocolate Chip Crumble Muffins are not just a treat; they’re a warm hug on a busy morning.

Whether you’re rushing out the door or enjoying a leisurely weekend brunch, these muffins are the perfect solution.

With their soft, fluffy centers and a delightful crumbly topping, they strike the right balance between indulgence and comfort.

Plus, they’re easy to whip up, making them a go-to recipe for impressing family or friends without breaking a sweat.

Why You’ll Love This Chocolate Chip Crumble Muffins

These Chocolate Chip Crumble Muffins are a game-changer for any busy kitchen.

They come together in just 35 minutes, making them a quick and satisfying option for breakfast or a snack.

The combination of rich chocolate and a sweet, crunchy topping creates a flavor explosion that’s hard to resist.

Plus, they’re versatile enough to adapt to your taste, ensuring everyone at the table will be happy.

Ingredients for Chocolate Chip Crumble Muffins

Creating the perfect batch of Chocolate Chip Crumble Muffins starts with gathering the right ingredients.

Here’s what you’ll need:

  • All-purpose flour: The backbone of your muffins, providing structure and fluffiness.
  • Granulated sugar: Adds sweetness and helps create that lovely golden crust.
  • Brown sugar: Brings a rich, caramel-like flavor that complements the chocolate.
  • Baking powder: This leavening agent ensures your muffins rise beautifully.
  • Baking soda: Works alongside baking powder for that perfect lift.
  • Salt: Enhances all the flavors, making each bite more delicious.
  • Egg: Acts as a binder, giving the muffins a tender texture.
  • Milk: Adds moisture and richness to the batter.
  • Vegetable oil: Keeps the muffins moist and adds a subtle richness.
  • Vanilla extract: A must-have for that warm, comforting flavor.
  • Semi-sweet chocolate chips: The star of the show, providing melty pockets of chocolate goodness.
  • For the crumble topping:
  • More all-purpose flour: Helps create the crumbly texture we all love.
  • Granulated sugar and brown sugar: A mix for sweetness and that delightful crunch.
  • Ground cinnamon: Adds warmth and a hint of spice to the topping.
  • Cold unsalted butter: Essential for achieving that perfect crumble; keep it cold for the best texture.

Feel free to get creative!

You can add chopped nuts for a nutty crunch or swap chocolate chips for dried fruit for a fruity twist.

For exact measurements, check the bottom of the article where you can find everything you need for printing.

How to Make Chocolate Chip Crumble Muffins

Making Chocolate Chip Crumble Muffins is a delightful journey that fills your kitchen with warmth and sweetness.

Let’s dive into the steps that will lead you to muffin perfection!

Step 1: Preheat the Oven

Start by preheating your oven to 350°F (175°C).

This step is crucial because it ensures your muffins bake evenly and rise beautifully.

While the oven warms up, line your muffin tin with paper liners.

This not only makes for easy cleanup but also helps the muffins release effortlessly.

Step 2: Mix Dry Ingredients

In a large bowl, whisk together the all-purpose flour, granulated sugar, brown sugar, baking powder, baking soda, and salt.

Mixing these dry ingredients thoroughly is key to achieving a uniform texture.

Make sure there are no lumps, as this will help your muffins rise evenly.

Step 3: Combine Wet Ingredients

In a separate bowl, crack the egg and add the milk, vegetable oil, and vanilla extract.

Mixing wet ingredients separately allows for better incorporation into the dry mix.

This step ensures that the egg is fully blended, preventing any clumps in your batter.

Step 4: Combine Wet and Dry Ingredients

Now, pour the wet mixture into the dry ingredients.

Gently stir until just combined; it’s okay if there are a few lumps.

Overmixing can lead to dense muffins, and we want them light and fluffy!

Step 5: Prepare the Crumble Topping

In a separate bowl, combine the flour, granulated sugar, brown sugar, and ground cinnamon for the crumble topping.

Add the cold, cubed butter and use a fork or pastry cutter to mix until it resembles coarse crumbs.

This step is essential for that delightful crunch on top of your muffins.

Step 6: Fill Muffin Tin

Spoon the muffin batter into the prepared muffin tin, filling each cup about ¾ full.

This allows room for the muffins to rise without overflowing.

Then, sprinkle the crumble topping generously over each muffin.

Don’t be shy; that’s where the magic happens!

Step 7: Bake the Muffins

Place the muffin tin in the preheated oven and bake for 18-20 minutes.

To check for doneness, insert a toothpick into the center of a muffin.

If it comes out clean, they’re ready!

The aroma will be irresistible, so be prepared for some eager taste testers.

Step 8: Cool and Serve

Once baked, allow the muffins to cool in the pan for about 5 minutes.

This helps them set and makes transferring them easier.

After that, move them to a wire rack to cool completely.

Serve them warm, and watch everyone’s faces light up with joy!

Tips for Success

  • Use room temperature ingredients for better mixing and texture.
  • Don’t overmix the batter; a few lumps are perfectly fine.
  • For extra flavor, try adding a pinch of nutmeg to the dry ingredients.
  • Keep your butter cold for the crumble topping to achieve that perfect crunch.
  • Store leftover muffins in an airtight container to maintain freshness.

Equipment Needed

  • Muffin tin: A standard 12-cup muffin tin works best; silicone molds are a great alternative.
  • Mixing bowls: Use at least two bowls—one for dry and one for wet ingredients.
  • Whisk: A whisk is ideal for mixing; a fork can work in a pinch.
  • Measuring cups and spoons: Essential for accurate ingredient measurements.
  • Cooling rack: Helps muffins cool evenly; a plate can substitute if needed.

Variations

  • Nutty Delight: Add ½ cup of chopped walnuts or pecans to the batter for a crunchy texture and nutty flavor.
  • Fruity Twist: Substitute chocolate chips with dried fruits like cranberries, blueberries, or chopped apples for a refreshing change.
  • Gluten-Free Option: Use a gluten-free all-purpose flour blend to make these muffins suitable for gluten-sensitive friends.
  • Vegan Version: Replace the egg with a flaxseed meal mixture (1 tablespoon flaxseed meal + 2.5 tablespoons water) and use almond milk instead of regular milk.
  • Spiced Up: Add a teaspoon of pumpkin spice or a pinch of cayenne pepper for a unique flavor kick.

Serving Suggestions

  • Pair your Chocolate Chip Crumble Muffins with a hot cup of coffee or tea for a cozy breakfast.
  • Serve them alongside fresh fruit, like berries or sliced bananas, for a refreshing contrast.
  • For a special touch, dust the muffins with powdered sugar before serving.
  • Consider adding a dollop of whipped cream or a scoop of vanilla ice cream for dessert.

FAQs about Chocolate Chip Crumble Muffins

Can I make these muffins ahead of time?

Absolutely! You can prepare the batter the night before and store it in the fridge. Just remember to give it a gentle stir before filling the muffin tin. This way, you can enjoy fresh Chocolate Chip Crumble Muffins in the morning without the hassle!

How do I store leftover muffins?

To keep your muffins fresh, store them in an airtight container at room temperature for up to three days. If you want to keep them longer, consider freezing them. Just wrap each muffin tightly in plastic wrap and place them in a freezer bag.

Can I substitute the chocolate chips?

Definitely! If you’re looking for a different flavor, try using dried fruits like cranberries or blueberries. You can also use white chocolate chips or even butterscotch chips for a fun twist on the classic recipe.

What can I serve with these muffins?

These muffins pair wonderfully with a hot cup of coffee or tea. For a more filling breakfast, serve them with yogurt and fresh fruit. They also make a delightful afternoon snack alongside a glass of milk!

Why are my muffins dense?

Dense muffins can result from overmixing the batter or using cold ingredients. Make sure to mix just until combined and use room temperature ingredients for the best texture. A light touch goes a long way in achieving fluffy Chocolate Chip Crumble Muffins!

Final Thoughts

Baking Chocolate Chip Crumble Muffins is more than just a recipe; it’s an experience that fills your home with warmth and joy.

Each bite offers a delightful combination of soft, chocolatey goodness and a crunchy topping that makes mornings feel special.

Whether you’re sharing them with family or savoring one with your morning coffee, these muffins create moments worth cherishing.

So, roll up your sleeves and embrace the joy of baking.

With this recipe, you’re not just making muffins; you’re crafting delicious memories that will linger long after the last crumb is gone.

Paul

Chocolate Chip Crumble Muffins: A Delightful Recipe!

Delicious chocolate chip muffins topped with a crumbly mixture, perfect for breakfast or a snack.
Prep Time 15 minutes
Cook Time 20 minutes
Total Time 35 minutes
Servings: 12 muffins
Course: Breakfast
Cuisine: American
Calories: 210

Ingredients
  

  • 1 ½ cups all-purpose flour
  • ½ cup granulated sugar
  • ½ cup packed brown sugar
  • 1 teaspoon baking powder
  • ½ teaspoon baking soda
  • ½ teaspoon salt
  • 1 large egg
  • ½ cup milk
  • cup vegetable oil
  • 1 teaspoon vanilla extract
  • 1 cup semi-sweet chocolate chips
For the crumble topping:
  • ½ cup all-purpose flour
  • ¼ cup granulated sugar
  • ¼ cup packed brown sugar
  • ½ teaspoon ground cinnamon
  • ¼ cup cold unsalted butter cubed

Method
 

  1. Preheat the oven to 350°F (175°C) and line a muffin tin with paper liners.
  2. In a large bowl, whisk together 1 ½ cups flour, ½ cup granulated sugar, ½ cup brown sugar, baking powder, baking soda, and salt.
  3. In another bowl, combine the egg, milk, vegetable oil, and vanilla extract.
  4. Pour the wet ingredients into the dry ingredients and stir until just combined. Fold in the chocolate chips.
  5. In a separate bowl, prepare the crumble topping by mixing ½ cup flour, ¼ cup granulated sugar, ¼ cup brown sugar, and cinnamon. Add the cold butter and use a fork or pastry cutter to mix until crumbly.
  6. Spoon the muffin batter into the prepared muffin tin, filling each cup about ¾ full. Sprinkle the crumble topping evenly over each muffin.
  7. Bake for 18-20 minutes, or until a toothpick inserted into the center comes out clean.
  8. Allow the muffins to cool in the pan for 5 minutes before transferring them to a wire rack to cool completely.

Notes

  • For a nutty flavor, add ½ cup of chopped walnuts or pecans to the batter.
  • Try substituting the chocolate chips with dried fruit, such as cranberries or blueberries, for a fruity twist.

Chocolate Protein Fluff: A Creamy Delight Awaits You!

Introduction to Chocolate Protein Fluff

There’s something magical about dessert that feels indulgent yet guilt-free. Chocolate Protein Fluff is just that—a creamy delight that satisfies your sweet tooth while packing a protein punch. Whether you’re rushing home after a long day or looking to impress friends with a quick treat, this recipe is your go-to solution. It’s simple, delicious, and perfect for those moments when you crave something sweet without the extra calories. Trust me, once you whip this up, you’ll wonder how you ever lived without it!

Why You’ll Love This Chocolate Protein Fluff

This Chocolate Protein Fluff is a game-changer for anyone juggling a busy lifestyle. It’s quick to make, taking just about 10 minutes of your time. The taste? Rich, creamy, and utterly satisfying, it feels like a treat without the guilt. Plus, it’s packed with protein, making it a perfect post-workout snack or a delightful dessert. You’ll love how it transforms your cravings into a healthy indulgence!

Ingredients for Chocolate Protein Fluff

Gathering the right ingredients is the first step to creating your Chocolate Protein Fluff masterpiece. Here’s what you’ll need:

  • Unsweetened almond milk: A creamy base that keeps the fluff light and dairy-free.
  • Chocolate protein powder: The star of the show, adding both flavor and a protein boost.
  • Unsweetened cocoa powder: For that rich chocolatey taste without added sugars.
  • Almond butter (or peanut butter): Adds creaminess and healthy fats; feel free to swap for a low-calorie nut butter if desired.
  • Vanilla extract: A splash of this elevates the flavor profile, making it even more delightful.
  • Sweetener of choice: Honey, maple syrup, or stevia can be used to adjust the sweetness to your liking.
  • Salt: Just a pinch enhances all the flavors, making them pop.
  • Whipped coconut cream (optional): A luxurious topping that adds a touch of indulgence.
  • Chocolate shavings or cocoa nibs (optional): For garnish, these add a nice crunch and visual appeal.

For exact measurements, check the bottom of the article where you can find everything listed for easy printing. Enjoy experimenting with these ingredients to create your perfect Chocolate Protein Fluff!

How to Make Chocolate Protein Fluff

Creating your Chocolate Protein Fluff is a breeze. Follow these simple steps, and you’ll have a delicious, protein-packed dessert ready in no time. Let’s dive in!

Step 1: Combine Ingredients

Start by grabbing a medium mixing bowl. Pour in the unsweetened almond milk, followed by the chocolate protein powder and unsweetened cocoa powder. Add the almond butter, vanilla extract, sweetener, and a pinch of salt. Each ingredient plays a role in making this fluff creamy and flavorful. Make sure to mix them all together well!

Step 2: Blend Until Smooth

Now, it’s time to blend! Use a hand mixer or a whisk to combine everything until it’s smooth and creamy. If you like your fluff a bit thicker, feel free to add more protein powder gradually. The goal is to achieve a texture that’s light yet satisfying. Trust me, the blending is where the magic happens!

Step 3: Chill for Thickness

Once you’ve got that perfect blend, cover the bowl and pop it in the refrigerator. Let it chill for about 15 to 30 minutes. This step is crucial as it allows the flavors to meld and the fluff to thicken. You’ll be rewarded with a dessert that’s not only delicious but also has a delightful texture.

Step 4: Serve and Garnish

After chilling, give your Chocolate Protein Fluff a good stir. Now, it’s time to serve! Spoon it into bowls or cups, and if you’re feeling fancy, top it with whipped coconut cream. For an extra touch, sprinkle some chocolate shavings or cocoa nibs on top. This not only adds flavor but also makes your dessert look irresistible!

Tips for Success

  • Use cold almond milk for a creamier texture.
  • Experiment with different protein powder flavors for variety.
  • Adjust the sweetness to your taste; start small and add more if needed.
  • For a thicker fluff, let it chill longer in the fridge.
  • Don’t skip the salt; it enhances the chocolate flavor beautifully.

Equipment Needed

  • Mixing bowl: A medium-sized bowl works best; a large one can also do the trick.
  • Hand mixer or whisk: A hand mixer makes blending easier, but a whisk will work just fine.
  • Measuring cups and spoons: Essential for accurate ingredient portions.
  • Refrigerator: For chilling your Chocolate Protein Fluff to perfection.

Variations

  • Nut-Free Option: Swap almond butter for sunflower seed butter to keep it nut-free while still adding creaminess.
  • Vegan Delight: Ensure your protein powder is plant-based and use maple syrup as your sweetener for a fully vegan treat.
  • Fruit Infusion: Add a handful of mashed bananas or pureed strawberries for a fruity twist that complements the chocolate.
  • Spicy Kick: Mix in a pinch of cayenne pepper or cinnamon for a surprising flavor boost that adds warmth.
  • Chocolate Mint Fluff: Incorporate a few drops of peppermint extract for a refreshing minty version of your Chocolate Protein Fluff.

Serving Suggestions

  • Pair your Chocolate Protein Fluff with fresh berries for a burst of color and flavor.
  • Serve alongside a cup of hot coffee or a chilled glass of almond milk for a delightful contrast.
  • For a fun presentation, use mason jars to showcase the layers and toppings.
  • Drizzle a bit of honey or maple syrup on top for added sweetness.

FAQs about Chocolate Protein Fluff

Can I use a different type of protein powder?

Absolutely! While chocolate protein powder is the star here, feel free to experiment with vanilla or even strawberry protein powder. Each will give your Chocolate Protein Fluff a unique twist!

How can I make this recipe lower in calories?

To lighten up your Chocolate Protein Fluff, consider using a low-calorie nut butter or omitting it altogether. You can also reduce the amount of sweetener to keep it healthier without sacrificing flavor.

Is this dessert suitable for meal prep?

Yes! Chocolate Protein Fluff is perfect for meal prep. Just store it in airtight containers in the fridge, and it will stay fresh for up to three days. Enjoy it as a quick snack or dessert throughout the week!

Can I add toppings to my Chocolate Protein Fluff?

Definitely! Toppings like whipped coconut cream, chocolate shavings, or even fresh fruit can elevate your Chocolate Protein Fluff. Get creative and make it your own!

What’s the best way to store leftovers?

Store any leftover Chocolate Protein Fluff in an airtight container in the refrigerator. It will keep well for about three days, making it a great option for quick snacks or desserts later on.

Final Thoughts

Creating Chocolate Protein Fluff is more than just whipping up a dessert; it’s about embracing a healthier lifestyle without sacrificing flavor. Each spoonful is a reminder that indulgence can be both delicious and nutritious. Whether you’re enjoying it after a workout or as a late-night treat, this creamy delight brings joy and satisfaction. Plus, the versatility of this recipe means you can make it your own, experimenting with flavors and toppings. So, roll up your sleeves, gather your ingredients, and dive into this delightful experience. You’ll be glad you did!

Paul

Chocolate Protein Fluff: A Creamy Delight Awaits You!

Chocolate Protein Fluff is a creamy and delicious dessert that combines protein powder with almond milk and cocoa for a healthy treat.
Prep Time 10 minutes
Servings: 2 servings
Course: Dessert
Cuisine: American
Calories: 180

Ingredients
  

  • 1 cup unsweetened almond milk
  • 1 scoop chocolate protein powder
  • 1 tablespoon unsweetened cocoa powder
  • 1 tablespoon almond butter or peanut butter
  • 1 teaspoon vanilla extract
  • 1 tablespoon sweetener of choice like honey, maple syrup, or stevia
  • 1/4 teaspoon salt
  • 1/2 cup whipped coconut cream optional, for topping
  • Chocolate shavings or cocoa nibs optional, for garnish

Method
 

  1. In a medium mixing bowl, combine the almond milk, chocolate protein powder, cocoa powder, almond butter, vanilla extract, sweetener, and salt.
  2. Using a hand mixer or whisk, blend the mixture until smooth and creamy. If you prefer a thicker consistency, you can add more protein powder gradually.
  3. Once blended, place the mixture in the refrigerator for about 15-30 minutes to chill and thicken.
  4. After chilling, give it a good stir and serve in bowls or cups. Top with whipped coconut cream and garnish with chocolate shavings or cocoa nibs if desired.

Notes

  • For a lighter version, substitute almond butter with a low-calorie nut butter or omit it entirely.
  • You can also experiment with different flavors of protein powder, such as vanilla or strawberry, for a unique twist.

Green Salsa Chicken Rice Skillet: A Flavorful One-Pan Dish!

Introduction to Green Salsa Chicken Rice Skillet

After a long day, the last thing I want is to spend hours in the kitchen. That’s where my Green Salsa Chicken Rice Skillet comes in. This one-pan wonder is not just a meal; it’s a quick solution for busy evenings when you crave something delicious without the fuss. With tender chicken, zesty salsa verde, and fluffy rice, it’s a dish that impresses without demanding too much time or effort. Whether you’re cooking for family or just treating yourself, this recipe is sure to become a go-to favorite in your kitchen.

Why You’ll Love This Green Salsa Chicken Rice Skillet

This Green Salsa Chicken Rice Skillet is a game-changer for anyone who values flavor and convenience. It’s a one-pan dish that comes together in just 30 minutes, making it perfect for those hectic weeknights. The combination of tender chicken, vibrant salsa verde, and hearty rice creates a satisfying meal that’s bursting with taste. Plus, cleanup is a breeze, leaving you more time to relax and enjoy your evening.

Ingredients for Green Salsa Chicken Rice Skillet

Gathering the right ingredients is key to making this Green Salsa Chicken Rice Skillet a success. Here’s what you’ll need:

  • Olive oil: A staple in my kitchen, it adds richness and helps sauté the chicken perfectly.
  • Boneless, skinless chicken breasts: The star of the dish, cut into bite-sized pieces for quick cooking.
  • Salt and black pepper: Essential seasonings that enhance the flavors of the chicken.
  • Garlic powder and onion powder: These add depth and aroma, making every bite irresistible.
  • Long-grain white rice: The base of the dish, it absorbs all the delicious flavors.
  • Chicken broth: This adds moisture and a savory backdrop to the rice.
  • Salsa verde: The zesty kick that brings everything together, adding a fresh, tangy flavor.
  • Corn: Sweet and crunchy, it adds texture and a pop of color.
  • Black beans: Packed with protein, they make the dish heartier and more filling.
  • Shredded cheese: A melty topping that brings comfort and richness to the skillet.
  • Fresh cilantro: Optional, but it adds a burst of freshness and color when sprinkled on top.
  • Lime wedges: For serving, they brighten the dish and enhance the flavors.

For those looking to mix things up, consider adding diced jalapeños for heat or swapping the chicken for extra beans or sautéed veggies for a vegetarian twist. You can find the exact quantities for each ingredient at the bottom of the article, ready for printing!

How to Make Green Salsa Chicken Rice Skillet

Creating this Green Salsa Chicken Rice Skillet is a breeze. Follow these simple steps, and you’ll have a delicious meal ready in no time. Let’s dive in!

Step 1: Sauté the Chicken

Start by heating the olive oil in a large skillet over medium-high heat. Once it’s shimmering, add the bite-sized chicken pieces. Season them with salt, black pepper, garlic powder, and onion powder. Cook for about 5-7 minutes, stirring occasionally, until the chicken is browned and cooked through. This step is crucial; it locks in the flavors. Once done, remove the chicken from the skillet and set it aside.

Step 2: Toast the Rice

In the same skillet, toss in the uncooked long-grain white rice. Toast it for 1-2 minutes, stirring frequently. You want it to turn slightly golden, which enhances its nutty flavor. This little trick makes a big difference in the final dish!

Step 3: Combine Ingredients

Now, pour in the chicken broth and salsa verde. Stir everything together, making sure the rice is well-coated. Bring the mixture to a boil. The vibrant green salsa will start to fill your kitchen with a mouthwatering aroma. It’s a good sign!

Step 4: Simmer the Rice

Once boiling, reduce the heat to low. Cover the skillet and let it simmer for about 15 minutes. This allows the rice to absorb the flavors and become tender. Resist the urge to lift the lid; it’s essential for the cooking process!

Step 5: Add Remaining Ingredients

After the rice has cooked, stir in the corn, black beans, and the previously cooked chicken. Cook for an additional 5 minutes, or until everything is heated through. This step adds texture and heartiness to your skillet. You’ll love how colorful it looks!

Step 6: Melt the Cheese

Remove the skillet from heat and sprinkle the shredded cheese on top. Cover the skillet for a few minutes to let the cheese melt. The gooey, melted cheese is the crowning glory of this dish, adding richness and comfort.

Step 7: Garnish and Serve

Finally, garnish with chopped fresh cilantro if you like. Serve with lime wedges on the side for an extra zing. This Green Salsa Chicken Rice Skillet is not just a meal; it’s a celebration of flavors that will have everyone coming back for seconds!

Tips for Success

  • Prep your ingredients ahead of time to streamline the cooking process.
  • Use a non-stick skillet to prevent sticking and make cleanup easier.
  • Don’t skip toasting the rice; it enhances the flavor significantly.
  • Feel free to customize with your favorite veggies or proteins.
  • For a creamier texture, add a splash of cream or sour cream before serving.

Equipment Needed

  • Large skillet: A non-stick skillet works best, but any large pan will do.
  • Wooden spoon: Perfect for stirring without scratching your skillet.
  • Measuring cups: For accurate ingredient portions, especially the rice and broth.
  • Cutting board and knife: Essential for prepping your chicken and veggies.

Variations

  • Spicy Kick: Add diced jalapeños or a splash of hot sauce for an extra layer of heat.
  • Vegetarian Delight: Substitute the chicken with extra black beans or sautéed vegetables like bell peppers and zucchini.
  • Quinoa Twist: Swap out the rice for quinoa for a protein-packed alternative.
  • Cheesy Goodness: Experiment with different cheeses like pepper jack or feta for a unique flavor.
  • Herb Infusion: Mix in fresh herbs like oregano or thyme for an aromatic touch.

Serving Suggestions

  • Pair with a simple green salad for a refreshing contrast.
  • Serve with tortilla chips and guacamole for a fun appetizer.
  • A cold beer or a zesty margarita complements the flavors beautifully.
  • For presentation, sprinkle extra cilantro on top and serve in colorful bowls.

FAQs about Green Salsa Chicken Rice Skillet

Can I make this Green Salsa Chicken Rice Skillet ahead of time?

Absolutely! You can prepare the dish in advance and store it in the fridge for up to three days. Just reheat it on the stove or in the microwave when you’re ready to enjoy it again.

What can I substitute for chicken in this recipe?

If you’re looking for a vegetarian option, consider using extra black beans or sautéed vegetables like bell peppers and zucchini. Tofu is another great protein alternative that absorbs flavors well.

How can I make this dish spicier?

For a spicy kick, add diced jalapeños or a few dashes of your favorite hot sauce while cooking. You can also use a spicier salsa verde to amp up the heat!

Can I freeze the leftovers?

Yes, this Green Salsa Chicken Rice Skillet freezes well! Just let it cool completely, then transfer it to an airtight container. It can be stored in the freezer for up to three months. Thaw it overnight in the fridge before reheating.

What sides pair well with this dish?

This skillet is hearty on its own, but you can serve it with a simple green salad, tortilla chips, or even some grilled vegetables for a complete meal. A refreshing drink like a margarita also complements the flavors beautifully!

Final Thoughts

Cooking should be a joyful experience, and my Green Salsa Chicken Rice Skillet embodies that spirit. It’s not just about the flavors; it’s about the memories created around the table. This dish brings together family and friends, sparking laughter and conversation over a hearty meal. The ease of preparation means you can focus on what truly matters—enjoying the moment. Whether it’s a weeknight dinner or a casual gathering, this skillet dish is sure to impress. So grab your ingredients, and let’s make some delicious memories together!

Paul

Green Salsa Chicken Rice Skillet: A Flavorful One-Pan Dish!

A flavorful one-pan dish featuring chicken, rice, and salsa verde, perfect for a quick and satisfying meal.
Prep Time 10 minutes
Cook Time 30 minutes
Total Time 40 minutes
Servings: 4 servings
Course: Main Dish
Cuisine: Mexican
Calories: 450

Ingredients
  

  • 2 tablespoons olive oil
  • 1 pound boneless skinless chicken breasts, cut into bite-sized pieces
  • 1 teaspoon salt
  • 1/2 teaspoon black pepper
  • 1 teaspoon garlic powder
  • 1 teaspoon onion powder
  • 1 cup uncooked long-grain white rice
  • 1 3/4 cups chicken broth
  • 1 cup salsa verde
  • 1 cup corn canned or frozen
  • 1 cup black beans drained and rinsed
  • 1 cup shredded cheese cheddar or Monterey Jack
  • 1/4 cup chopped fresh cilantro optional
  • Lime wedges for serving optional

Method
 

  1. In a large skillet, heat the olive oil over medium-high heat. Add the chicken pieces and season with salt, black pepper, garlic powder, and onion powder. Cook for about 5-7 minutes, or until the chicken is browned and cooked through. Remove the chicken from the skillet and set aside.
  2. In the same skillet, add the uncooked rice and toast it for 1-2 minutes, stirring frequently until it becomes slightly golden.
  3. Pour in the chicken broth and salsa verde, stirring to combine. Bring the mixture to a boil.
  4. Reduce the heat to low, cover the skillet, and let it simmer for about 15 minutes, or until the rice is tender and has absorbed most of the liquid.
  5. Stir in the corn, black beans, and cooked chicken. Cook for an additional 5 minutes, or until everything is heated through.
  6. Remove from heat and sprinkle the shredded cheese on top. Cover the skillet for a few minutes to allow the cheese to melt.
  7. Garnish with chopped cilantro if desired and serve with lime wedges on the side.

Notes

  • For a spicier kick, add diced jalapeños or a dash of hot sauce to the skillet.
  • For a vegetarian option, substitute the chicken with extra beans or sautéed vegetables like bell peppers and zucchini.

Stay Connected

Get recipes via email: