Crispy Chili Beef: Unlock Delicious Flavor Today!

Introduction to Crispy Chili Beef

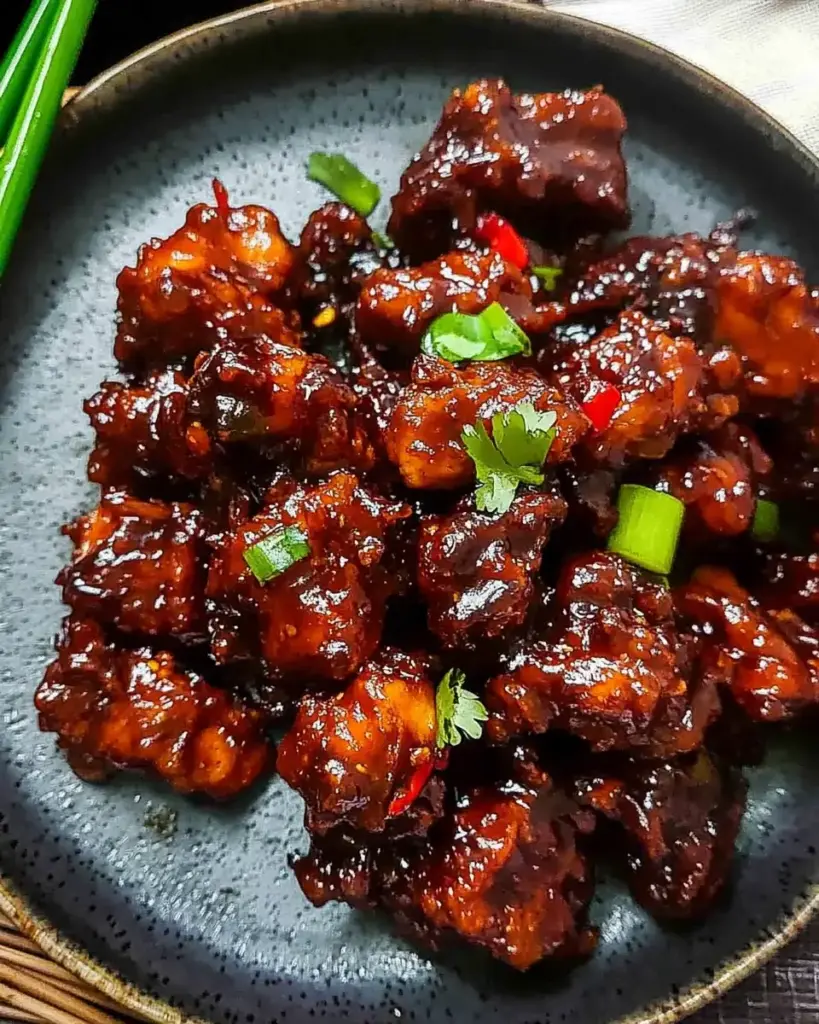
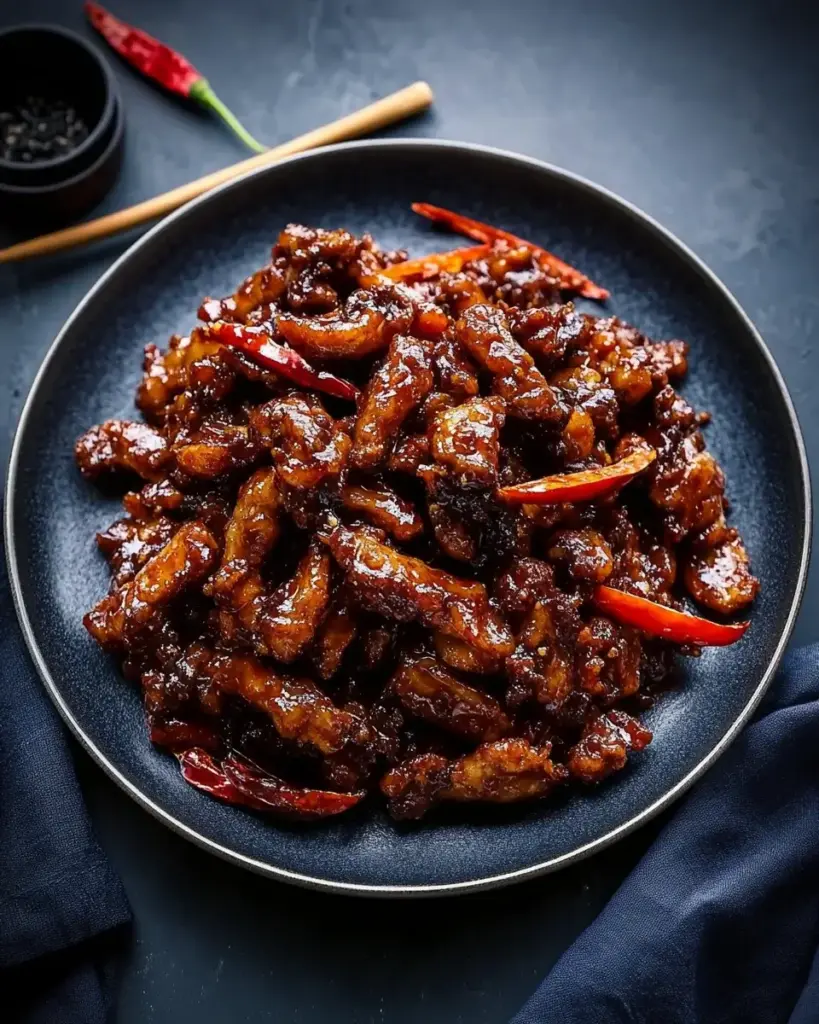
There’s something magical about a dish that brings the family together, and Crispy Chili Beef does just that. This flavorful creation is not only a feast for the taste buds but also a quick solution for those busy weeknights when you want to impress without spending hours in the kitchen. Picture thinly sliced flank steak, perfectly crispy, mingling with vibrant bell peppers in a savory chili sauce. It’s a dish that says, “I care,” while being easy enough for any home cook to master. Let’s dive into this culinary adventure that’s sure to become a favorite!

Why You’ll Love This Crispy Chili Beef

Crispy Chili Beef is a game-changer for your dinner routine. It’s quick to whip up, taking just 35 minutes from start to finish. The combination of crispy beef and colorful veggies creates a dish that’s as pleasing to the eye as it is to the palate. Plus, the savory chili sauce adds a kick that will have everyone coming back for seconds. Trust me, this recipe is a surefire way to impress!

Ingredients for Crispy Chili Beef

Gathering the right ingredients is the first step to creating a mouthwatering Crispy Chili Beef. Here’s what you’ll need:

  • Flank steak: This cut is perfect for its tenderness and ability to absorb flavors. Slice it thinly against the grain for the best texture.
  • Cornstarch: This is your secret weapon for achieving that irresistible crunch. It creates a light, crispy coating when fried.
  • All-purpose flour: Combined with cornstarch, it helps form a golden crust that seals in the juices of the beef.
  • Salt and black pepper: Essential for seasoning, these enhance the natural flavors of the beef.
  • Garlic powder and onion powder: These add depth and a savory aroma, making every bite more flavorful.
  • Vegetable oil: Used for frying, it should have a high smoke point to achieve that perfect crispiness.
  • Soy sauce: This brings a salty umami flavor that complements the beef beautifully.
  • Brown sugar: A touch of sweetness balances the savory elements and enhances the sauce’s richness.
  • Rice vinegar: This adds a tangy note that brightens the dish and cuts through the richness.
  • Chili paste: Adjust this to your heat preference. It’s the star of the show, giving the dish its signature kick.
  • Bell peppers: Red and green peppers not only add color but also a sweet crunch that contrasts with the crispy beef.
  • Green onions: These provide a fresh, mild onion flavor and a pop of color when garnished.
  • Sesame seeds (optional): A sprinkle of these adds a nutty flavor and a touch of elegance to your dish.

For exact measurements, check the bottom of the article where you can find everything listed for easy printing. Now that you have your ingredients ready, let’s move on to the fun part—cooking!

How to Make Crispy Chili Beef

Now that you have your ingredients ready, let’s get cooking! Making Crispy Chili Beef is a straightforward process that will have your kitchen smelling amazing in no time. Follow these steps, and you’ll be on your way to a delicious meal.

Step 1: Prepare the Beef

Start by taking your thinly sliced flank steak and placing it in a large bowl. In another bowl, mix together the cornstarch, all-purpose flour, salt, black pepper, garlic powder, and onion powder. This dry mixture is key to achieving that crispy coating.

Now, toss the sliced beef in the dry mixture until every piece is well coated. Make sure to shake off any excess flour. This ensures that each bite will be perfectly crispy when fried. Trust me, this step is crucial for that satisfying crunch!

Step 2: Fry the Beef

Heat up your vegetable oil in a large skillet or wok over medium-high heat. You want the oil hot enough to sizzle when you add the beef. Fry the coated beef in batches, making sure not to overcrowd the pan. This allows each piece to fry evenly and get that golden brown color.

Cook for about 3-4 minutes per batch, flipping them halfway through for even crispiness. Once they’re done, remove the beef and let it drain on paper towels. This will help keep them crispy and remove any excess oil. You’ll love the sound of that sizzling beef!

Step 3: Make the Sauce

In a separate bowl, whisk together the soy sauce, brown sugar, rice vinegar, and chili paste. This sauce is where the magic happens! The balance of salty, sweet, and spicy flavors will elevate your dish.

Feel free to adjust the chili paste to your heat preference. If you like it spicy, go for a little extra! Set the sauce aside for now; it will come into play shortly.

Step 4: Sauté the Vegetables

In the same skillet, remove any excess oil, leaving about a tablespoon. Add the sliced red and green bell peppers to the hot skillet. Sauté them for about 2-3 minutes until they’re slightly tender but still crisp. This step adds a wonderful texture and flavor to your dish.

The vibrant colors of the peppers will brighten up your meal, making it as visually appealing as it is delicious. Plus, they add a nice crunch that complements the crispy beef perfectly!

Step 5: Combine and Serve

Now it’s time to bring everything together! Pour the prepared sauce over the sautéed peppers in the skillet and bring it to a simmer. Add the crispy beef back into the skillet, tossing everything together to coat the beef and veggies in that savory sauce.

Cook for an additional 2-3 minutes until everything is heated through. Garnish with chopped green onions and a sprinkle of sesame seeds if you like. Serve hot, and watch your family dig in with delight!

Tips for Success

  • Ensure your oil is hot enough before frying; a test piece should sizzle immediately.
  • Don’t overcrowd the pan while frying; this helps achieve that perfect crispiness.
  • Adjust the chili paste to your taste; start with less if you’re unsure about the heat.
  • For extra crunch, let the fried beef rest on paper towels to absorb excess oil.
  • Feel free to mix in other veggies like broccoli for added nutrition.

Equipment Needed

  • Large skillet or wok: A non-stick skillet works well, but a cast-iron skillet can add extra flavor.
  • Mixing bowls: Use any size; just ensure they’re large enough for tossing ingredients.
  • Measuring cups and spoons: Essential for accuracy, but you can eyeball it if you’re confident.
  • Slotted spoon: Perfect for removing the crispy beef from the oil.

Variations

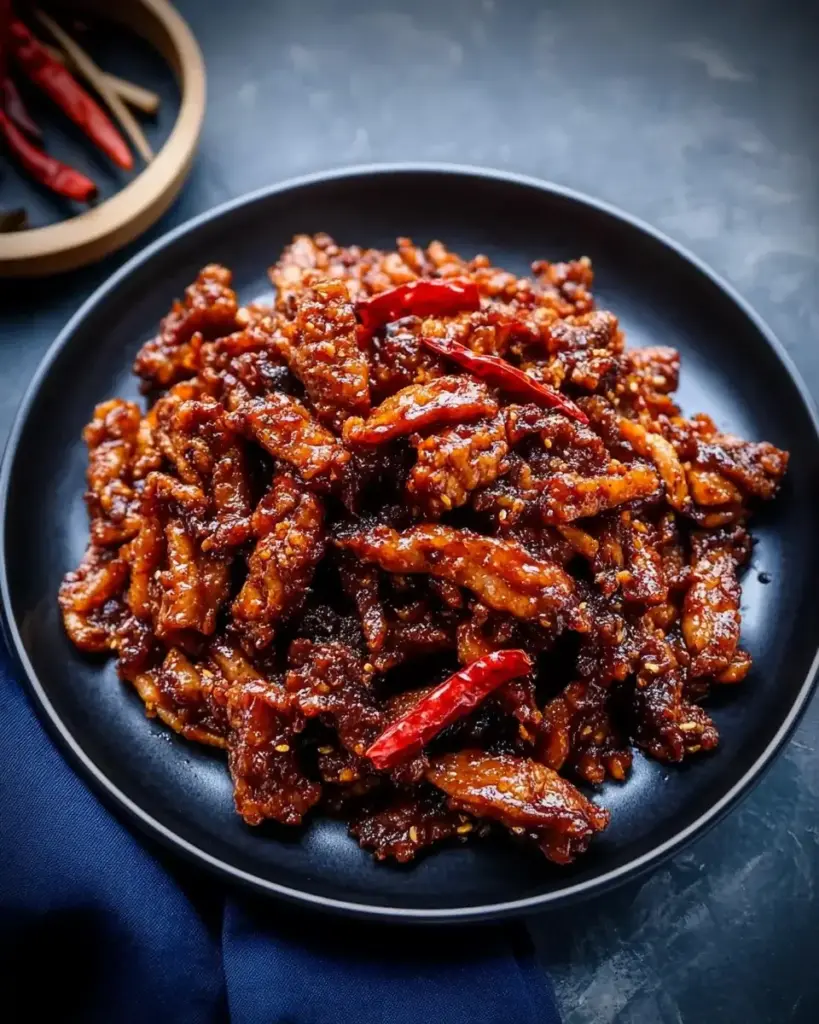
  • Spicy Crispy Chili Beef: Add more chili paste or fresh sliced chilies for an extra kick.
  • Vegetarian Option: Substitute the beef with tofu or tempeh, following the same coating and frying method.
  • Gluten-Free Version: Use gluten-free soy sauce and cornstarch to keep it celiac-friendly.
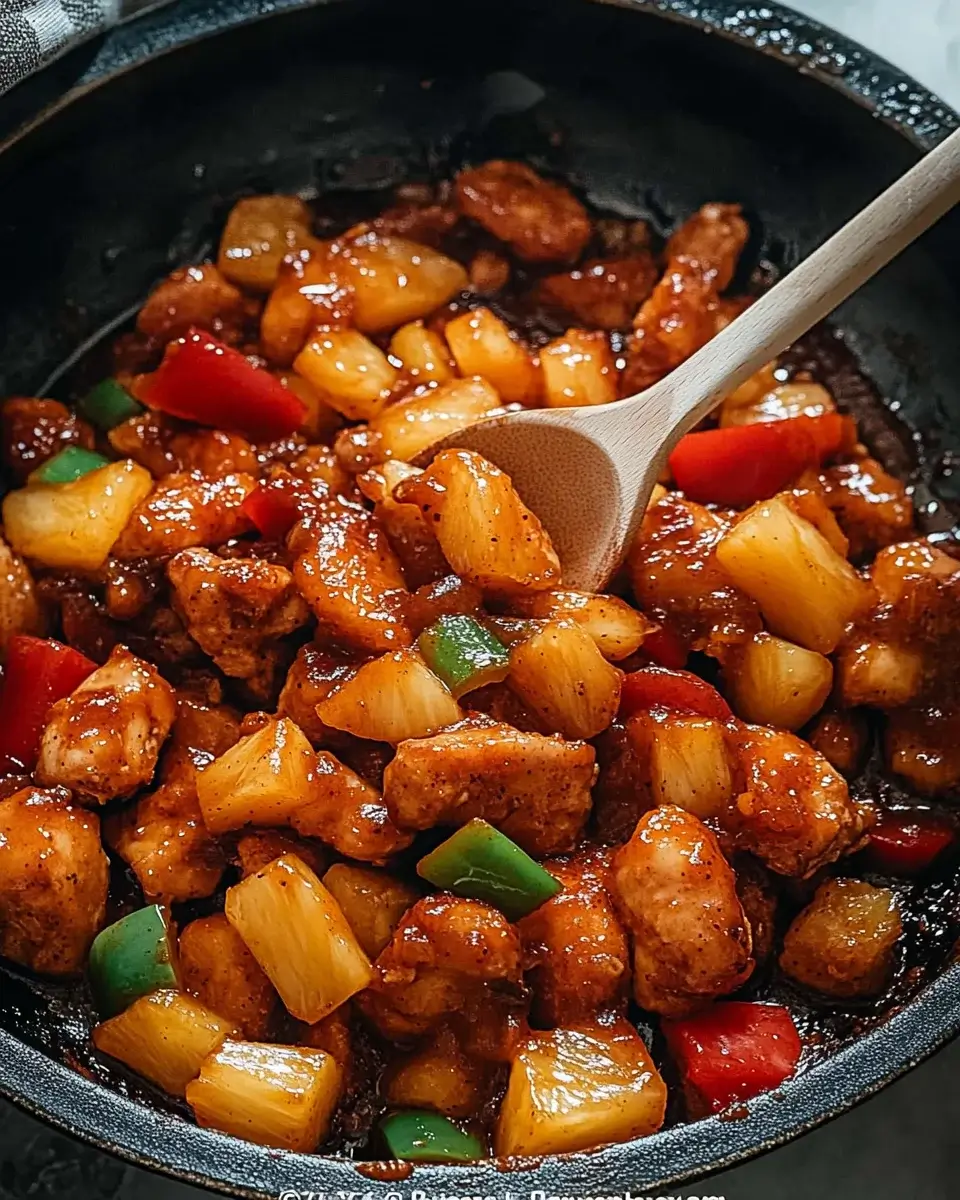
  • Sweet and Sour Twist: Mix in pineapple chunks with the bell peppers for a sweet contrast.
  • Herb-Infused: Add fresh herbs like basil or cilantro at the end for a burst of freshness.

Serving Suggestions

  • Steamed Rice: Serve over fluffy jasmine or basmati rice to soak up the delicious sauce.
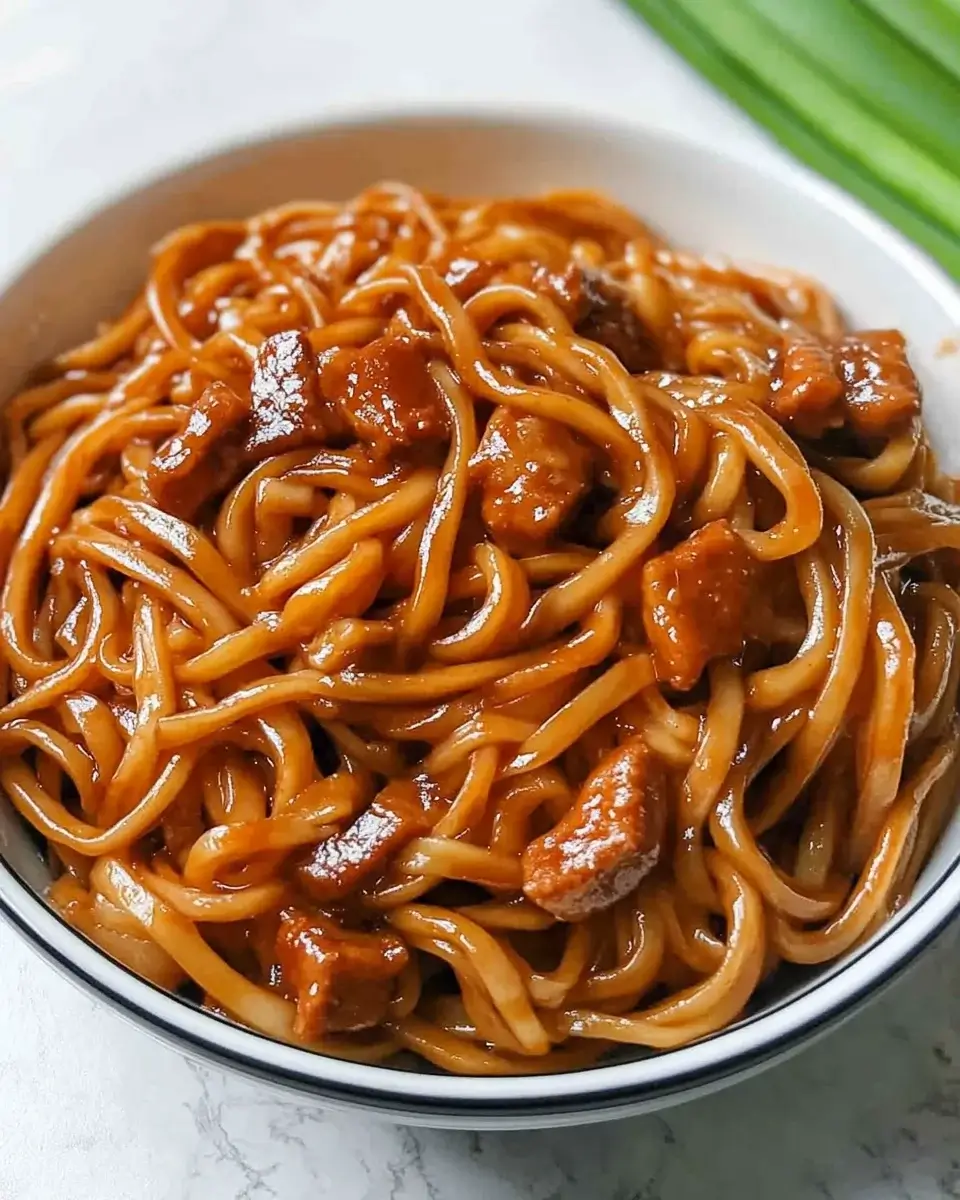
  • Stir-Fried Noodles: Pair with lo mein or rice noodles for a hearty meal.
  • Refreshing Salad: A crisp cucumber salad balances the heat perfectly.
  • Drink Pairing: Enjoy with a cold beer or a light, fruity white wine.

FAQs about Crispy Chili Beef

Can I make Crispy Chili Beef ahead of time?

While this dish is best enjoyed fresh, you can prepare the beef and sauce in advance. Just fry the beef right before serving to maintain that crispy texture. Reheating may make it soggy, so it’s best to keep the components separate until you’re ready to eat.

What can I substitute for flank steak?

If flank steak isn’t available, you can use sirloin or skirt steak. Both cuts are flavorful and will work well with the crispy coating. Just remember to slice them thinly against the grain for the best results.

How can I adjust the spice level?

To control the heat in your Crispy Chili Beef, start with a smaller amount of chili paste. You can always add more to the sauce as it simmers. If you want a milder version, consider using sweet chili sauce instead.

Is this dish gluten-free?

Yes, you can make a gluten-free version of Crispy Chili Beef by using gluten-free soy sauce and cornstarch. Just ensure all your ingredients are labeled gluten-free to avoid any cross-contamination.

What sides pair well with Crispy Chili Beef?

This dish goes wonderfully with steamed rice or stir-fried noodles. A light salad or some sautéed greens can also complement the rich flavors beautifully. Don’t forget a cold drink to wash it down!

Final Thoughts

Crispy Chili Beef is more than just a meal; it’s an experience that brings joy to the table. The satisfying crunch of the beef, the vibrant colors of the peppers, and the bold flavors of the sauce create a symphony of taste that delights the senses. Whether you’re cooking for family or friends, this dish is sure to impress and spark conversation. Plus, it’s quick enough for a weeknight dinner yet special enough for a gathering. So roll up your sleeves, embrace the cooking adventure, and enjoy the delicious rewards of your efforts. Happy cooking!

Paul

Crispy Chili Beef: Unlock Delicious Flavor Today!

Crispy Chili Beef is a flavorful dish featuring thinly sliced flank steak coated in a crispy batter, sautéed with colorful bell peppers, and tossed in a savory chili sauce.
Prep Time 15 minutes
Cook Time 20 minutes
Total Time 35 minutes
Servings: 4 servings
Course: Main Course
Cuisine: Asian
Calories: 350

Ingredients
  

  • 1 pound flank steak thinly sliced against the grain
  • 1/4 cup cornstarch
  • 1/4 cup all-purpose flour
  • 1/2 teaspoon salt
  • 1/4 teaspoon black pepper
  • 1/4 teaspoon garlic powder
  • 1/4 teaspoon onion powder
  • 1/2 cup vegetable oil for frying
  • 1/4 cup soy sauce
  • 2 tablespoons brown sugar
  • 1 tablespoon rice vinegar
  • 1 tablespoon chili paste adjust to taste
  • 1 red bell pepper sliced
  • 1 green bell pepper sliced
  • 2 green onions chopped
  • 1 tablespoon sesame seeds optional

Method
 

  1. In a large bowl, combine cornstarch, flour, salt, black pepper, garlic powder, and onion powder. Toss the sliced flank steak in the mixture until well coated.
  2. Heat the vegetable oil in a large skillet or wok over medium-high heat. Once hot, add the coated beef in batches, frying until golden brown and crispy, about 3-4 minutes per batch. Remove and drain on paper towels.
  3. In a separate bowl, whisk together soy sauce, brown sugar, rice vinegar, and chili paste. Set aside.
  4. In the same skillet, remove excess oil, leaving about 1 tablespoon. Add the sliced red and green bell peppers, sautéing for 2-3 minutes until slightly tender.
  5. Pour the sauce over the peppers in the skillet and bring to a simmer. Add the crispy beef back into the skillet, tossing to coat everything in the sauce. Cook for an additional 2-3 minutes until heated through.
  6. Garnish with chopped green onions and sesame seeds if desired. Serve hot.

Notes

  • For a healthier version, bake the coated beef in a preheated oven at 400°F for 20 minutes, flipping halfway through, instead of frying.
  • Add vegetables like broccoli or snap peas for extra nutrition and color.

Fireworks Cookies and Cream Cookies are a must-bake treat!

Introduction to Fireworks Cookies and Cream Cookies

There’s something magical about baking that takes me back to my childhood. The aroma of cookies wafting through the house always felt like a warm hug. Fireworks Cookies and Cream Cookies are a delightful treat that captures that nostalgia while adding a festive twist. Perfect for any celebration, these cookies are not just delicious; they’re a quick solution for busy days or a fun way to impress your loved ones. With vibrant colors and a rich cookies-and-cream flavor, they’re sure to light up any gathering. Let’s dive into this easy recipe that’s bound to become a favorite!

Why You’ll Love This Fireworks Cookies and Cream Cookies

These Fireworks Cookies and Cream Cookies are a game-changer for any home cook. They come together in just 27 minutes, making them perfect for last-minute gatherings or a sweet craving. The combination of rich chocolate and colorful candy-coated pieces creates a delightful taste explosion. Plus, they’re a hit with both kids and adults, ensuring smiles all around. Who wouldn’t love a cookie that’s as fun to make as it is to eat?

Ingredients for Fireworks Cookies and Cream Cookies

Gathering the right ingredients is the first step to cookie perfection. Here’s what you’ll need for these festive Fireworks Cookies and Cream Cookies:

  • All-purpose flour: The backbone of any cookie, providing structure and chewiness.
  • Baking soda: This little leavening agent helps the cookies rise and become fluffy.
  • Salt: A pinch enhances the flavors, balancing the sweetness beautifully.
  • Unsalted butter: Softened butter creates a rich, creamy texture and adds flavor.
  • Granulated sugar: This sweetener gives the cookies their delightful sweetness and crisp edges.
  • Brown sugar: Packed with moisture, it adds a chewy texture and a hint of caramel flavor.
  • Large eggs: They bind the ingredients together and contribute to the cookies’ structure.
  • Vanilla extract: A must-have for that warm, comforting flavor that elevates any cookie.
  • Crushed chocolate sandwich cookies: Think Oreos! They add a delicious cookies-and-cream flavor and texture.
  • Red, white, and blue candy-coated chocolate pieces: These colorful gems bring a festive flair and a pop of sweetness.
  • White chocolate chips: For a creamy contrast, these chips melt beautifully in the cookies.

For those looking to mix things up, consider adding a teaspoon of almond extract for an extra layer of flavor. You can also swap the candy-coated chocolates for seasonal colors to match any holiday. Exact measurements for each ingredient can be found at the bottom of the article, ready for printing!

How to Make Fireworks Cookies and Cream Cookies

Now that you have all your ingredients ready, let’s get baking! Follow these simple steps to create your Fireworks Cookies and Cream Cookies. Each step is designed to ensure you get the best flavor and texture. Let’s dive in!

Step 1: Preheat and Prepare

First things first, preheat your oven to 350°F. This is crucial for achieving that perfect bake. While the oven warms up, line a baking sheet with parchment paper. This will prevent the cookies from sticking and make cleanup a breeze.

Step 2: Mix Dry Ingredients

In a medium bowl, whisk together the all-purpose flour, baking soda, and salt. This step is essential for combining the flavors and ensuring even distribution of the leavening agent. Set this mixture aside for now.

Step 3: Cream Butter and Sugars

In a large mixing bowl, cream together the softened butter, granulated sugar, and brown sugar. Use an electric mixer for about 2-3 minutes until the mixture is light and fluffy. This step is crucial for creating a soft texture in your cookies.

Step 4: Add Eggs and Vanilla

Next, add the eggs one at a time, mixing well after each addition. This helps to incorporate air into the batter, making your cookies light. Don’t forget to stir in the vanilla extract for that warm, comforting flavor that makes cookies irresistible.

Step 5: Combine Wet and Dry Ingredients

Gradually add the dry ingredients to the wet mixture. Mix until just combined. Be careful not to overmix; this can lead to tough cookies. You want a nice, soft dough that’s ready for the fun part!

Step 6: Fold in Mix-Ins

Now comes the exciting part! Fold in the crushed chocolate sandwich cookies, red, white, and blue candy-coated chocolate pieces, and white chocolate chips. This adds a burst of flavor and color to your cookies, making them truly festive.

Step 7: Shape and Bake

Using a tablespoon, drop rounded portions of dough onto the prepared baking sheet, spacing them about 2 inches apart. This allows room for spreading. Bake for 10-12 minutes or until the edges are lightly golden. Your kitchen will smell amazing!

Step 8: Cool and Enjoy

Once baked, remove the cookies from the oven and let them cool on the baking sheet for 5 minutes. This step is essential for achieving the right texture. After that, transfer them to a wire rack to cool completely. Now, it’s time to enjoy your delicious Fireworks Cookies and Cream Cookies!

Tips for Success

  • Use room temperature butter for easier creaming and a better texture.
  • Don’t skip the chilling step if you have time; it helps the cookies hold their shape.
  • For extra flavor, try adding a pinch of espresso powder to enhance the chocolate.
  • Keep an eye on the cookies while baking; they can go from perfect to overdone quickly.
  • Store cookies in an airtight container to maintain freshness.

Equipment Needed

  • Baking sheet: A standard sheet works, but a silicone mat can help with even baking.
  • Parchment paper: Great for easy cleanup; aluminum foil is a good alternative.
  • Mixing bowls: Use any size, but a large bowl is best for mixing.
  • Electric mixer: A hand mixer is perfect, but a whisk will do in a pinch.
  • Measuring cups and spoons: Essential for accuracy; a kitchen scale can also help.

Variations

  • Gluten-Free: Substitute all-purpose flour with a gluten-free blend to make these cookies suitable for gluten-sensitive friends.
  • Nutty Twist: Add 1/2 cup of chopped nuts, like walnuts or pecans, for an extra crunch and flavor.
  • Dark Chocolate Delight: Swap white chocolate chips for dark chocolate chips for a richer taste.
  • Vegan Option: Use vegan butter and flax eggs (1 tablespoon ground flaxseed mixed with 2.5 tablespoons water) to create a plant-based version.
  • Seasonal Flavors: Incorporate seasonal spices like cinnamon or pumpkin spice for a festive touch during the holidays.

Serving Suggestions

  • Pair these cookies with a tall glass of cold milk for a classic treat.
  • Serve alongside a scoop of vanilla ice cream for an indulgent dessert.
  • For a festive touch, arrange cookies on a colorful platter with fresh fruit.
  • Consider a coffee or hot chocolate pairing for cozy gatherings.

FAQs about Fireworks Cookies and Cream Cookies

Curious about these delightful Fireworks Cookies and Cream Cookies? Here are some common questions that might pop up while you’re baking:

Can I use different types of cookies in this recipe?

Absolutely! While chocolate sandwich cookies are traditional, feel free to experiment with other cookies like peanut butter or vanilla wafers for a unique twist.

How should I store the cookies to keep them fresh?

Store your cookies in an airtight container at room temperature. They’ll stay fresh for about a week, but I doubt they’ll last that long!

Can I freeze the cookie dough for later use?

Yes! You can freeze the dough for up to three months. Just scoop the dough onto a baking sheet, freeze until solid, then transfer to a freezer bag. Bake straight from the freezer, adding a minute or two to the baking time.

What can I substitute for the eggs in this recipe?

If you’re looking for an egg substitute, try using 1/4 cup of unsweetened applesauce or a flax egg (1 tablespoon ground flaxseed mixed with 2.5 tablespoons water) for a vegan option.

Can I make these cookies ahead of time for a party?

Definitely! You can bake them a day in advance. Just store them in an airtight container, and they’ll be ready to impress your guests!

Final Thoughts

Baking Fireworks Cookies and Cream Cookies is more than just a recipe; it’s an experience filled with joy and creativity. The vibrant colors and delightful flavors bring a festive spirit to any occasion, making them perfect for gatherings or simply a sweet treat at home. Each bite is a reminder of the simple pleasures in life, like sharing cookies with family and friends. Whether you’re celebrating a holiday or just indulging in a cozy night in, these cookies are sure to spark happiness. So roll up your sleeves, get baking, and let the good times roll!

Paul

Fireworks Cookies and Cream Cookies are a must-bake treat!

Fireworks Cookies and Cream Cookies are a festive and delicious treat perfect for any celebration.
Prep Time 15 minutes
Cook Time 12 minutes
Total Time 27 minutes
Servings: 24 cookies
Course: Dessert
Cuisine: American
Calories: 180

Ingredients
  

  • 2 cups all-purpose flour
  • 1 teaspoon baking soda
  • 1/2 teaspoon salt
  • 1 cup unsalted butter softened
  • 1 cup granulated sugar
  • 1 cup packed brown sugar
  • 2 large eggs
  • 2 teaspoons vanilla extract
  • 1 cup crushed chocolate sandwich cookies like Oreos
  • 1 cup red white, and blue candy-coated chocolate pieces (like M&M's)
  • 1/2 cup white chocolate chips

Method
 

  1. Preheat your oven to 350°F. Line a baking sheet with parchment paper.
  2. In a medium bowl, whisk together the flour, baking soda, and salt. Set aside.
  3. In a large mixing bowl, cream together the softened butter, granulated sugar, and brown sugar until light and fluffy, about 2-3 minutes.
  4. Add the eggs one at a time, mixing well after each addition. Stir in the vanilla extract.
  5. Gradually add the dry ingredients to the wet ingredients, mixing until just combined.
  6. Fold in the crushed chocolate sandwich cookies, red, white, and blue candy-coated chocolate pieces, and white chocolate chips until evenly distributed.
  7. Drop rounded tablespoons of dough onto the prepared baking sheet, spacing them about 2 inches apart.
  8. Bake for 10-12 minutes or until the edges are lightly golden. Remove from the oven and let cool on the baking sheet for 5 minutes before transferring to a wire rack to cool completely.

Notes

  • For a fun twist, try adding a teaspoon of almond extract for extra flavor.
  • You can also substitute the candy-coated chocolate pieces with seasonal colors for different holidays.

Crispy Golden Brown Egg Rolls: Your Ultimate Cooking Guide

Introduction to Crispy Golden Brown Egg Rolls

There’s something magical about the sound of a crispy golden brown egg roll crunching between your teeth.

Growing up, my family would gather around the table, eagerly waiting for those delightful bites to emerge from the kitchen.

These egg rolls are not just a treat; they’re a quick solution for busy days or a way to impress friends at your next gathering.

Filled with savory ground meat and fresh veggies, they’re versatile and satisfying.

Whether you’re hosting a game night or just craving a snack, these egg rolls are sure to bring smiles all around.

Why You’ll Love This Crispy Golden Brown Egg Rolls

These crispy golden brown egg rolls are a game-changer in the kitchen.

They come together quickly, making them perfect for those hectic weeknights when time is tight.

The flavor? Absolutely irresistible!

With a satisfying crunch and a savory filling, they’re sure to please even the pickiest eaters.

Plus, they’re customizable, allowing you to experiment with different ingredients.

Trust me, once you try them, you’ll be hooked!

Ingredients for Crispy Golden Brown Egg Rolls

Creating the perfect crispy golden brown egg rolls starts with the right ingredients.

Here’s what you’ll need:

  • Shredded cabbage: This adds crunch and a subtle sweetness to the filling.
  • Shredded carrots: They bring color and a hint of earthiness.
  • Chopped green onions: These provide a fresh, zesty flavor that brightens the dish.
  • Ground pork (or chicken): The protein base, offering richness and heartiness. You can also use ground turkey or beef if you prefer.
  • Soy sauce: A must-have for that umami kick, enhancing the overall flavor.
  • Sesame oil: Just a touch adds a nutty aroma that elevates the filling.
  • Garlic powder: For a hint of warmth and depth.
  • Ground ginger: This spice adds a subtle zing that complements the other flavors.
  • Egg roll wrappers: The vessel for all that delicious filling. Look for them in the refrigerated section of your grocery store.
  • Vegetable oil: Essential for frying, ensuring that golden, crispy exterior.
  • Salt and pepper: Simple seasonings that tie everything together.

For those looking to mix things up, consider substituting the meat with tofu or adding extra veggies like mushrooms and bell peppers.

Feeling adventurous? A teaspoon of chili paste can spice things up!

Exact quantities for each ingredient are available at the bottom of the article for easy printing.

How to Make Crispy Golden Brown Egg Rolls

Step 1: Prepare the Filling

To kick things off, heat a tablespoon of vegetable oil in a large skillet over medium heat.

Add your ground pork or chicken, breaking it apart with a spatula as it cooks.

You want it browned and flavorful, so don’t rush this step!

Once the meat is cooked through, drain any excess fat.

Now, toss in the shredded cabbage, carrots, and green onions.

Stir in soy sauce, sesame oil, garlic powder, ground ginger, salt, and pepper.

Cook everything together for about five minutes.

This is where the magic happens!

The veggies should be tender but still have a bit of crunch.

Once done, remove the skillet from heat and let the filling cool slightly.

This cooling step is crucial; it makes wrapping easier and prevents soggy egg rolls.

Step 2: Assemble the Egg Rolls

Now comes the fun part—wrapping those crispy golden brown egg rolls!

Lay an egg roll wrapper on a clean surface, with one corner pointing towards you.

Spoon about two tablespoons of the filling near the corner closest to you.

Fold that corner over the filling, then fold in the sides.

This is where you want to roll tightly away from you.

Make sure to seal the edge with a little water; it’s like glue for your egg rolls!

Repeat this process with the remaining wrappers and filling.

If you find any wrappers tearing, don’t sweat it.

Just use a little extra water to seal them up.

With practice, you’ll become a pro at this!

Step 3: Fry the Egg Rolls

Let’s get those egg rolls crispy!

In a deep skillet or pot, heat about two inches of vegetable oil to 350°F.

This temperature is key for achieving that golden brown exterior.

Carefully add the egg rolls in batches, making sure not to overcrowd the pan.

Fry them for about three to four minutes on each side.

You’ll know they’re ready when they’re beautifully golden and crispy.

Once done, remove them and let them drain on paper towels.

This helps get rid of any excess oil, keeping them light and crunchy.

Serve them hot with your favorite dipping sauce, and watch them disappear!

Tips for Success

  • Ensure your oil is hot enough before frying; a test is to drop in a small piece of wrapper—if it sizzles, you’re good to go!
  • Don’t overfill the egg rolls; this makes sealing difficult and can lead to bursting during frying.
  • Keep the filling cool before wrapping to prevent sogginess.
  • Use a thermometer to maintain oil temperature for even cooking.
  • Experiment with different fillings to find your favorite combination!

Equipment Needed

  • Large skillet: Essential for cooking the filling. A wok works great too!
  • Deep skillet or pot: Needed for frying. A Dutch oven is a solid alternative.
  • Spatula: Perfect for breaking up the meat while cooking.
  • Thermometer: Helps ensure your oil is at the right temperature.
  • Paper towels: For draining excess oil after frying.

Variations

  • Vegetarian Delight: Swap out the meat for tofu or a mix of your favorite vegetables like bell peppers, mushrooms, and zucchini for a hearty vegetarian option.
  • Spicy Kick: Add a teaspoon of chili paste or sriracha to the filling for a fiery twist that will wake up your taste buds.
  • Cheesy Egg Rolls: Incorporate shredded cheese, like mozzarella or cheddar, into the filling for a gooey, indulgent treat.
  • Sweet and Savory: Mix in some diced pineapple or water chestnuts for a sweet crunch that complements the savory flavors.
  • Asian Fusion: Experiment with different sauces like hoisin or teriyaki in the filling for a unique flavor profile.

Serving Suggestions

  • Pair your crispy golden brown egg rolls with a tangy sweet and sour sauce for dipping.
  • Serve alongside a fresh cucumber salad to balance the richness.
  • For drinks, try a light beer or iced green tea to complement the flavors.
  • Garnish with sesame seeds and chopped cilantro for a pop of color.

FAQs about Crispy Golden Brown Egg Rolls

Can I make crispy golden brown egg rolls ahead of time?

Absolutely! You can prepare the filling and wrap the egg rolls in advance. Just store them in the fridge for up to a day. When you’re ready to fry, let them sit at room temperature for about 15 minutes before cooking.

What dipping sauces pair well with egg rolls?

There are plenty of delicious options! Sweet and sour sauce, soy sauce, or a spicy chili sauce are all fantastic choices. You can even whip up a homemade peanut sauce for a unique twist.

How do I store leftover egg rolls?

Store any leftover crispy golden brown egg rolls in an airtight container in the fridge for up to three days. To reheat, pop them in the oven at 350°F for about 10 minutes to regain that crispy texture.

Can I bake the egg rolls instead of frying them?

Yes, you can! Brush the egg rolls with a little oil and bake them at 400°F for about 20-25 minutes, flipping halfway through. They won’t be as crispy as fried, but they’ll still be delicious!

What can I use instead of egg roll wrappers?

If you can’t find egg roll wrappers, you can use spring roll wrappers or even make your own with flour and water. Just keep in mind that the texture will vary slightly.

Final Thoughts

Crispy golden brown egg rolls are more than just a dish; they’re a celebration of flavors and memories.

Each bite transports me back to family gatherings, laughter, and the joy of sharing good food.

Whether you’re whipping them up for a casual weeknight dinner or a festive occasion, these egg rolls are sure to impress.

The satisfaction of creating something delicious from scratch is unmatched.

So, roll up your sleeves, gather your ingredients, and dive into this culinary adventure.

Trust me, once you taste these crispy delights, you’ll be eager to make them again and again!

Paul

Crispy Golden Brown Egg Rolls: Your Ultimate Cooking Guide

Crispy Golden Brown Egg Rolls are a delicious and crunchy appetizer filled with savory ground meat and fresh vegetables, perfect for any occasion.
Prep Time 20 minutes
Cook Time 15 minutes
Total Time 35 minutes
Course: Appetizer
Cuisine: Asian
Calories: 250

Ingredients
  

  • 1 cup shredded cabbage
  • 1 cup shredded carrots
  • 1/2 cup chopped green onions
  • 1/2 pound ground pork or chicken
  • 1 tablespoon soy sauce
  • 1 teaspoon sesame oil
  • 1/2 teaspoon garlic powder
  • 1/2 teaspoon ground ginger
  • 1 package 14 oz egg roll wrappers
  • Vegetable oil for frying
  • Salt and pepper to taste

Method
 

  1. In a large skillet, heat a tablespoon of vegetable oil over medium heat. Add the ground pork (or chicken) and cook until browned, breaking it apart with a spatula. Drain any excess fat.
  2. Add the shredded cabbage, carrots, and green onions to the skillet. Stir in the soy sauce, sesame oil, garlic powder, ground ginger, salt, and pepper. Cook for about 5 minutes until the vegetables are tender. Remove from heat and let the filling cool slightly.
  3. Lay an egg roll wrapper on a clean surface with one corner pointing towards you. Place about 2 tablespoons of the filling near the corner closest to you. Fold the corner over the filling, then fold in the sides and roll tightly away from you. Seal the edge with a little water. Repeat with remaining wrappers and filling.
  4. In a deep skillet or pot, heat about 2 inches of vegetable oil to 350°F. Carefully add the egg rolls in batches, frying until golden brown and crispy, about 3-4 minutes per side. Remove and drain on paper towels.
  5. Serve hot with your favorite dipping sauce.

Notes

  • For a vegetarian option, substitute the meat with tofu or additional vegetables like mushrooms and bell peppers.
  • Add a teaspoon of chili paste to the filling for a spicy kick.

Oatmeal Cream Pie Cheesecake that Will Delight Your Tastebuds

Introduction to Oatmeal Cream Pie Cheesecake

There’s something magical about desserts that remind us of our childhood. The Oatmeal Cream Pie Cheesecake is a delightful blend of nostalgia and indulgence. It’s like taking a bite of your favorite childhood treat, but with a creamy twist that elevates it to a whole new level. This recipe is perfect for those busy days when you want to impress your loved ones without spending hours in the kitchen. With its rich flavors and comforting textures, this cheesecake will surely become a go-to dessert for gatherings or a cozy night in.

Why You’ll Love This Oatmeal Cream Pie Cheesecake

This Oatmeal Cream Pie Cheesecake is a game-changer for dessert lovers. It combines the creamy richness of cheesecake with the nostalgic flavors of oatmeal cookies, making it a unique treat. Plus, it’s surprisingly easy to whip up, even on a busy weeknight. The delightful combination of textures and flavors will have everyone asking for seconds. Trust me, this dessert is a crowd-pleaser that will leave a lasting impression!

Ingredients for Oatmeal Cream Pie Cheesecake

Gathering the right ingredients is the first step to creating this delightful Oatmeal Cream Pie Cheesecake. Here’s what you’ll need:

  • Graham cracker crumbs: These form the base of your cheesecake, providing a sweet and crunchy crust.
  • Unsalted butter: Melted butter binds the crumbs together, adding richness to the crust.
  • Granulated sugar: A touch of sweetness enhances the flavors in both the crust and the filling.
  • Cream cheese: The star of the show! Softened cream cheese gives the cheesecake its creamy texture.
  • Vanilla extract: This adds a warm, aromatic flavor that complements the other ingredients beautifully.
  • Eggs: They help set the cheesecake, giving it structure and a smooth consistency.
  • Sour cream: Adds tanginess and creaminess, making the cheesecake even more luscious.
  • Rolled oats: These bring that classic oatmeal cookie flavor and a bit of chewiness to the filling.
  • Ground cinnamon: A sprinkle of cinnamon adds warmth and depth, reminiscent of freshly baked cookies.
  • Salt: Just a pinch enhances all the flavors, balancing the sweetness.
  • Mini marshmallows: These are a fun topping that adds a sweet, gooey texture.
  • Chocolate chips: For a touch of decadence, chocolate chips provide a delightful contrast to the creamy cheesecake.

For those looking to customize, consider using full-fat cream cheese and sour cream for an even creamier texture. If you need a gluten-free option, simply swap the graham cracker crumbs for gluten-free cookie crumbs. You can find the exact measurements for each ingredient at the bottom of the article, ready for printing!

How to Make Oatmeal Cream Pie Cheesecake

Creating this Oatmeal Cream Pie Cheesecake is a delightful journey. Follow these simple steps, and you’ll have a dessert that’s sure to impress. Let’s dive in!

Step 1: Preheat the Oven

Start by preheating your oven to 325°F. This ensures that your cheesecake bakes evenly. A hot oven is key to achieving that perfect creamy texture.

Step 2: Prepare the Crust

In a medium bowl, combine the graham cracker crumbs, melted butter, and a bit of sugar. Mix until everything is well blended. The mixture should resemble wet sand. This will be the foundation of your cheesecake, so make sure it’s mixed thoroughly!

Step 3: Bake the Crust

Press the crumb mixture firmly into the bottom of a 9-inch springform pan. This creates a solid crust that holds everything together. Bake it for about 10 minutes, then remove it from the oven and let it cool. The crust should be slightly golden and fragrant.

Step 4: Make the Cheesecake Filling

In a large mixing bowl, beat the softened cream cheese with sugar and vanilla extract until smooth. This is where the magic begins! The cream cheese should be creamy and free of lumps. Take your time here; a well-mixed filling is crucial for a silky cheesecake.

Step 5: Combine Ingredients

Add the eggs one at a time, mixing well after each addition. Then, stir in the sour cream, rolled oats, cinnamon, and salt. This combination brings the classic oatmeal cookie flavor to life. Make sure everything is fully combined for a uniform texture.

Step 6: Bake the Cheesecake

Pour the cheesecake batter over the cooled crust in the springform pan. Sprinkle the mini marshmallows and chocolate chips evenly on top. Bake for 50-60 minutes, or until the center is set but still slightly jiggly. This slight jiggle is a sign of a perfectly baked cheesecake!

Step 7: Cool and Refrigerate

Once baked, turn off the oven and crack the door open. Let the cheesecake cool in the oven for about an hour. This gentle cooling helps prevent cracks. After that, refrigerate it for at least 4 hours, or overnight for the best results. Patience is key here!

Step 8: Serve and Enjoy

When you’re ready to serve, slice the cheesecake into wedges. Each slice is a creamy, dreamy delight. Enjoy it as is, or add a drizzle of caramel sauce for an extra touch of sweetness. Your Oatmeal Cream Pie Cheesecake is now ready to impress!

Tips for Success

  • Make sure your cream cheese is at room temperature for easy mixing.
  • Don’t overmix the batter; this keeps your cheesecake light and fluffy.
  • Use a water bath for baking to prevent cracks in the cheesecake.
  • Let the cheesecake cool gradually to avoid sudden temperature changes.
  • For best flavor, refrigerate overnight before serving.

Equipment Needed

  • 9-inch springform pan: Essential for easy removal; a regular cake pan works too, but it may be trickier to serve.
  • Mixing bowls: Use medium and large bowls for mixing ingredients; any size will do.
  • Electric mixer: A hand mixer is perfect; a whisk can work, but it’ll take longer.
  • Measuring cups and spoons: Accurate measurements are key; a kitchen scale is a great alternative.

Variations

  • Nutty Delight: Add chopped walnuts or pecans to the crust for an extra crunch and flavor.
  • Fruit Fusion: Incorporate fresh berries like raspberries or strawberries into the cheesecake filling for a fruity twist.
  • Chocolate Lovers: Use chocolate graham crackers for the crust and add cocoa powder to the filling for a richer chocolate flavor.
  • Vegan Option: Substitute cream cheese with a vegan alternative and use flax eggs instead of regular eggs for a plant-based version.
  • Spiced Up: Experiment with different spices like nutmeg or ginger to give your cheesecake a unique flavor profile.

Serving Suggestions

  • Fresh Berries: Serve with a side of mixed berries for a refreshing contrast to the creamy cheesecake.
  • Whipped Cream: A dollop of whipped cream adds a light, airy touch.
  • Hot Coffee: Pair with a cup of hot coffee or espresso to enhance the flavors.
  • Chocolate Drizzle: Drizzle chocolate sauce over each slice for an elegant presentation.

FAQs about Oatmeal Cream Pie Cheesecake

Curious about this delightful dessert? Here are some frequently asked questions that might help you on your cheesecake journey!

Can I make Oatmeal Cream Pie Cheesecake ahead of time?

Absolutely! This cheesecake actually tastes better after chilling overnight. Make it a day in advance for the best flavor and texture.

What can I substitute for cream cheese?

If you’re looking for a lighter option, you can use Greek yogurt or a vegan cream cheese alternative. Just keep in mind that the texture may vary slightly.

How do I store leftovers?

Store any leftover cheesecake in an airtight container in the refrigerator. It should stay fresh for up to five days, but I doubt it will last that long!

Can I freeze Oatmeal Cream Pie Cheesecake?

Yes, you can freeze it! Wrap individual slices tightly in plastic wrap and then place them in a freezer-safe container. Thaw in the fridge before serving.

What’s the best way to serve this cheesecake?

Serve it chilled, topped with whipped cream or a drizzle of caramel sauce. Fresh berries on the side add a nice touch, too!

Final Thoughts

Creating this Oatmeal Cream Pie Cheesecake is more than just baking; it’s about crafting memories. Each slice is a delightful blend of creamy goodness and nostalgic flavors that transport you back to simpler times. Whether you’re sharing it with family or enjoying a quiet moment alone, this cheesecake brings joy to any occasion. The smiles and compliments you’ll receive are just the cherry on top. So, roll up your sleeves, embrace the process, and let this dessert become a cherished part of your culinary repertoire. Trust me, it’s a sweet adventure you won’t want to miss!

Paul

Oatmeal Cream Pie Cheesecake that Will Delight Your Tastebuds

A delicious and creamy cheesecake inspired by the classic oatmeal cream pie, featuring a graham cracker crust and topped with mini marshmallows and chocolate chips.
Prep Time 20 minutes
Cook Time 1 hour
Total Time 5 hours 20 minutes
Servings: 10 servings
Course: Dessert
Cuisine: American
Calories: 320

Ingredients
  

  • 2 cups graham cracker crumbs
  • 1/2 cup unsalted butter melted
  • 1/4 cup granulated sugar
  • 1 8 oz package cream cheese, softened
  • 1/2 cup granulated sugar
  • 1 teaspoon vanilla extract
  • 2 large eggs
  • 1 cup sour cream
  • 1 cup rolled oats
  • 1 teaspoon ground cinnamon
  • 1/2 teaspoon salt
  • 1 cup mini marshmallows
  • 1/2 cup chocolate chips

Method
 

  1. Preheat your oven to 325°F.
  2. In a medium bowl, combine the graham cracker crumbs, melted butter, and 1/4 cup sugar. Mix until well combined.
  3. Press the mixture firmly into the bottom of a 9-inch springform pan to form the crust.
  4. Bake for 10 minutes, then remove from the oven and let cool.
  5. In a large mixing bowl, beat the softened cream cheese with 1/2 cup sugar and vanilla extract until smooth and creamy.
  6. Add the eggs one at a time, mixing well after each addition.
  7. Stir in the sour cream, rolled oats, cinnamon, and salt until fully combined.
  8. Pour the cheesecake batter over the cooled crust in the springform pan.
  9. Sprinkle the mini marshmallows and chocolate chips evenly on top.
  10. Bake for 50-60 minutes, or until the center is set but still slightly jiggly.
  11. Turn off the oven and crack the door, allowing the cheesecake to cool in the oven for 1 hour.
  12. After cooling, refrigerate the cheesecake for at least 4 hours or overnight for best results.
  13. Before serving, slice into wedges and enjoy!

Notes

  • For a creamier texture, consider using full-fat cream cheese and sour cream.
  • You can also add a layer of caramel sauce on top before serving for extra sweetness.
  • For a gluten-free option, substitute graham cracker crumbs with gluten-free cookie crumbs.

Sweet and Spicy Chicken Manchurian: A Must-Try Recipe!

Introduction to Sweet and Spicy Chicken Manchurian

There’s something magical about the fusion of flavors in Sweet and Spicy Chicken Manchurian. It’s a dish that brings back memories of bustling kitchens and family gatherings. I remember the first time I tried it at a friend’s house; the crispy chicken coated in a tangy sauce was a revelation. This recipe is perfect for those busy weeknights when you want to whip up something impressive yet simple. With just a handful of ingredients and a bit of time, you can create a meal that will have everyone asking for seconds. Let’s dive into this culinary adventure!

Why You’ll Love This Sweet and Spicy Chicken Manchurian

This Sweet and Spicy Chicken Manchurian is a game-changer for your dinner table. It’s quick to prepare, taking just 35 minutes from start to finish. The crispy chicken pieces, drenched in a flavorful sauce, create a delightful balance of sweet and spicy that will tantalize your taste buds. Plus, it’s versatile enough to impress guests or satisfy a family craving. Trust me, this dish will become a staple in your kitchen!

Ingredients for Sweet and Spicy Chicken Manchurian

Gathering the right ingredients is the first step to creating this delightful dish. Here’s what you’ll need:

  • Boneless, skinless chicken breasts: The star of the show! Cut into bite-sized pieces for easy frying and eating.
  • All-purpose flour: This helps create a crispy coating on the chicken. You can substitute with gluten-free flour if needed.
  • Cornstarch: Adds extra crunch to the batter. It’s a secret weapon for that perfect texture.
  • Garlic powder: A must-have for flavor. It brings a savory depth to the dish.
  • Ginger powder: Adds warmth and a hint of spice. Fresh ginger can be used for a more vibrant flavor.
  • Salt and black pepper: Essential seasonings that enhance the overall taste of the chicken.
  • Water: To create a smooth batter. Adjust the amount for your desired consistency.
  • Vegetable oil: Used for frying the chicken. You can also use canola or peanut oil for a different flavor.
  • Onion and bell pepper: These veggies add color and crunch. Feel free to mix in other favorites like broccoli or snap peas.
  • Garlic and ginger (fresh): Minced for a punch of flavor in the sauce. Fresh is always better!
  • Soy sauce: Provides that umami kick. Low-sodium soy sauce is a great alternative if you’re watching your salt intake.
  • Ketchup: Adds sweetness and tang. It’s a surprising ingredient that balances the flavors beautifully.
  • Sugar: Enhances the sweetness of the sauce. You can use brown sugar for a richer taste.
  • Vinegar: A splash of acidity to brighten the dish. Rice vinegar works well here.
  • Red chili flakes: For that sweet and spicy kick! Adjust to your heat preference.
  • Green onions: Chopped for garnish. They add a fresh touch and a pop of color.

For exact measurements, check the bottom of the article where you can find everything listed for easy printing. Happy cooking!

How to Make Sweet and Spicy Chicken Manchurian

Now that you have all your ingredients ready, let’s get cooking! This Sweet and Spicy Chicken Manchurian is straightforward, and I promise you’ll feel like a pro in no time. Follow these steps, and you’ll have a delicious dish that’s sure to impress.

Step 1: Prepare the Batter

Start by grabbing a large bowl. Combine the all-purpose flour, cornstarch, garlic powder, ginger powder, salt, and black pepper. Mix them well. Gradually add water, stirring until you achieve a smooth batter. It should be thick enough to coat the chicken but not too runny. This batter is what gives the chicken that irresistible crunch!

Step 2: Coat the Chicken

Next, take your bite-sized chicken pieces and add them to the batter. Make sure each piece is well-coated. This step is crucial for that crispy texture. If you want an extra layer of crunch, you can double-dip the chicken by coating it in the batter, letting it sit for a minute, and then dipping it again.

Step 3: Fry the Chicken

Heat vegetable oil in a large skillet over medium-high heat. Once the oil is hot, carefully add the battered chicken pieces in batches. Fry them until they turn golden brown and are cooked through, about 5-7 minutes. Don’t overcrowd the pan; this ensures even cooking. Once done, remove the chicken and let it drain on paper towels to absorb excess oil.

Step 4: Sauté the Vegetables

In another pan, heat 2 tablespoons of vegetable oil over medium heat. Add the chopped onion and bell pepper, sautéing until they soften, about 3-4 minutes. The aroma will start to fill your kitchen, and trust me, it’s heavenly! Stir in the minced garlic and ginger, cooking for an additional minute until fragrant.

Step 5: Make the Sauce

In a small bowl, mix together the soy sauce, ketchup, sugar, vinegar, and red chili flakes. Pour this mixture over the sautéed vegetables. Bring it to a simmer, allowing the flavors to meld together. This sauce is the heart of your Sweet and Spicy Chicken Manchurian, so don’t rush this step!

Step 6: Combine Chicken and Sauce

Now, it’s time to bring everything together. Add the fried chicken pieces to the sauce, tossing gently to coat them evenly. Cook for an additional 2-3 minutes to heat everything through. The chicken will soak up all that delicious sauce, making each bite a burst of flavor.

Step 7: Serve and Garnish

Finally, it’s time to serve! Transfer your Sweet and Spicy Chicken Manchurian to a serving dish. Garnish with chopped green onions for a fresh touch. This dish is best enjoyed hot, so dig in and savor the delightful combination of sweet and spicy flavors!

Tips for Success

  • Ensure your oil is hot enough before frying; this prevents the chicken from becoming greasy.
  • Don’t overcrowd the pan while frying; it helps achieve that perfect golden-brown color.
  • Feel free to adjust the spice level by adding more or fewer red chili flakes.
  • For extra crunch, consider double-dipping the chicken in the batter.
  • Serve immediately for the best texture and flavor!

Equipment Needed

  • Large bowl: For mixing the batter. A mixing jug works too.
  • Skillet or frying pan: Essential for frying the chicken. A deep fryer can be used for easier frying.
  • Spatula or tongs: For flipping the chicken. A slotted spoon is a great alternative.
  • Paper towels: To drain excess oil after frying.

Variations

  • Vegetable Manchurian: Swap out the chicken for a mix of your favorite vegetables like cauliflower, bell peppers, and carrots for a delightful vegetarian option.
  • Spicy Garlic Chicken Manchurian: Increase the amount of minced garlic and red chili flakes for an extra kick that garlic lovers will adore.
  • Honey Garlic Chicken Manchurian: Replace sugar with honey for a natural sweetness that pairs beautifully with the savory sauce.
  • Gluten-Free Option: Use gluten-free flour and tamari instead of soy sauce to make this dish suitable for those with gluten sensitivities.
  • Low-Calorie Version: Bake the chicken instead of frying for a healthier take without sacrificing flavor.

Serving Suggestions

  • Steamed Rice: Serve your Sweet and Spicy Chicken Manchurian over a bed of fluffy steamed rice for a satisfying meal.
  • Vegetable Fried Rice: Pair it with vegetable fried rice for a colorful and flavorful combination.
  • Cold Beer: Enjoy with a cold beer or a refreshing iced tea to balance the spice.
  • Presentation: Garnish with sesame seeds and extra green onions for an appealing look.

FAQs about Sweet and Spicy Chicken Manchurian

Can I make Sweet and Spicy Chicken Manchurian ahead of time?

Absolutely! You can prepare the chicken and sauce in advance. Just store them separately in the fridge. When you’re ready to serve, reheat the chicken and sauce together for a quick meal.

What can I serve with Chicken Manchurian?

This dish pairs wonderfully with steamed rice or vegetable fried rice. You can also serve it with a side of crispy spring rolls for a complete meal.

Is Sweet and Spicy Chicken Manchurian spicy?

The spice level is adjustable! You can control the heat by adding more or fewer red chili flakes. For a milder version, simply reduce the amount.

Can I use other proteins instead of chicken?

Definitely! This recipe works well with shrimp, tofu, or even beef. Just adjust the cooking time accordingly to ensure everything is cooked through.

How do I store leftovers?

Store any leftovers in an airtight container in the fridge for up to three days. Reheat in a skillet over medium heat for the best texture.

Final Thoughts

Cooking Sweet and Spicy Chicken Manchurian is more than just preparing a meal; it’s about creating memories around the dinner table. The delightful combination of crispy chicken and a tangy sauce brings joy to every bite. Whether you’re impressing guests or enjoying a cozy night in, this dish is sure to be a hit. Plus, the aroma wafting through your kitchen will have everyone eagerly anticipating dinner. So roll up your sleeves, embrace the flavors, and let this recipe become a cherished part of your culinary repertoire. Happy cooking!

Paul

Sweet and Spicy Chicken Manchurian: A Must-Try Recipe!

Sweet and Spicy Chicken Manchurian is a delicious fusion dish that combines crispy chicken pieces with a flavorful sauce, making it a must-try recipe for any occasion.
Prep Time 15 minutes
Cook Time 20 minutes
Total Time 35 minutes
Servings: 4 servings
Course: Main Course
Cuisine: Chinese
Calories: 350

Ingredients
  

  • 1 pound boneless skinless chicken breasts, cut into bite-sized pieces
  • 1/2 cup all-purpose flour
  • 1/2 cup cornstarch
  • 1 teaspoon garlic powder
  • 1 teaspoon ginger powder
  • 1/2 teaspoon salt
  • 1/2 teaspoon black pepper
  • 1/2 cup water
  • 1/4 cup vegetable oil for frying
  • 2 tablespoons vegetable oil for sauce
  • 1 small onion finely chopped
  • 1 bell pepper diced
  • 2 cloves garlic minced
  • 1 tablespoon ginger minced
  • 1/4 cup soy sauce
  • 1/4 cup ketchup
  • 2 tablespoons sugar
  • 1 tablespoon vinegar
  • 1 teaspoon red chili flakes adjust to taste
  • 2 green onions chopped (for garnish)

Method
 

  1. In a large bowl, combine the flour, cornstarch, garlic powder, ginger powder, salt, and black pepper. Gradually add water to form a smooth batter.
  2. Add the chicken pieces to the batter, ensuring they are well coated.
  3. In a large skillet or frying pan, heat the vegetable oil over medium-high heat. Once hot, add the battered chicken pieces in batches, frying until golden brown and cooked through, about 5-7 minutes. Remove and drain on paper towels.
  4. In another pan, heat 2 tablespoons of vegetable oil over medium heat. Add the chopped onion and bell pepper, sautéing until softened, about 3-4 minutes.
  5. Stir in the minced garlic and ginger, cooking for an additional minute.
  6. In a small bowl, mix together the soy sauce, ketchup, sugar, vinegar, and red chili flakes. Pour this sauce over the sautéed vegetables and bring to a simmer.
  7. Add the fried chicken pieces to the sauce, tossing to coat evenly. Cook for an additional 2-3 minutes to heat through.
  8. Serve hot, garnished with chopped green onions.

Notes

  • For a healthier version, you can bake the chicken instead of frying.
  • To customize the dish, add vegetables like broccoli, carrots, or snap peas to the sauce for extra nutrition and flavor.

Patriotic Thumbprint Cookies: Easy Recipe to Delight!

Introduction to Patriotic Thumbprint Cookies

There’s something magical about baking that brings back memories of childhood. I remember standing on a stool, peering over the counter as my mom whipped up her famous cookies. Today, I want to share a delightful recipe for Patriotic Thumbprint Cookies that’s perfect for any celebration. These cookies are not just easy to make; they’re a quick solution for busy days when you want to impress your loved ones. With vibrant colors and delicious flavors, they’ll surely steal the show at your next gathering. Let’s dive into this fun and festive treat!

Why You’ll Love This Patriotic Thumbprint Cookies

These Patriotic Thumbprint Cookies are a game-changer for any home cook. They’re incredibly easy to whip up, making them perfect for last-minute gatherings or family celebrations. The vibrant colors and sweet jam filling create a delightful treat that’s as pleasing to the eyes as it is to the taste buds. Plus, they’re versatile enough to adapt for any occasion, ensuring you’ll always have a festive dessert on hand!

Ingredients for Patriotic Thumbprint Cookies

Gathering the right ingredients is the first step to creating these delightful Patriotic Thumbprint Cookies. Here’s what you’ll need:

  • Unsalted butter: This is the base of your cookies, providing richness and flavor. Make sure it’s softened for easy mixing.
  • Granulated sugar: Sweetness is key! This ingredient helps create that perfect chewy texture.
  • Large egg: Eggs add moisture and act as a binding agent, ensuring your cookies hold together beautifully.
  • Vanilla extract: A splash of vanilla enhances the overall flavor, making each bite irresistible.
  • All-purpose flour: The backbone of your cookie dough, giving it structure. You can substitute with gluten-free flour if needed.
  • Baking powder: This leavening agent helps the cookies rise, giving them a light and airy texture.
  • Salt: Just a pinch balances the sweetness and enhances the flavors.
  • Raspberry jam: This fruity filling adds a burst of flavor and a pop of color to your cookies.
  • Blueberry jam: Another delicious option for filling, providing a sweet contrast to the raspberry.
  • Red, white, and blue sprinkles: These are the finishing touch, adding a festive flair to your cookies.

For those looking to mix things up, feel free to experiment with different flavored jams like strawberry or apricot. You can also add a teaspoon of almond extract for a unique twist. If you’re curious about exact measurements, they’re available at the bottom of the article for easy printing!

How to Make Patriotic Thumbprint Cookies

Now that you have your ingredients ready, let’s get to the fun part—making these delightful Patriotic Thumbprint Cookies! Follow these simple steps, and you’ll have a batch of cookies that will impress everyone.

Step 1: Preheat the Oven

Start by preheating your oven to 350°F. This step is crucial because it ensures even baking. While the oven heats up, line two baking sheets with parchment paper. This will prevent the cookies from sticking and make cleanup a breeze.

Step 2: Cream Butter and Sugar

In a large mixing bowl, cream together the softened butter and granulated sugar. Use an electric mixer on medium speed for about 3-4 minutes. This process incorporates air into the mixture, giving your cookies that light, fluffy texture we all love. You want it to look pale and creamy—trust me, it makes a difference!

Step 3: Add Egg and Vanilla

Next, add in the large egg and vanilla extract. Beat the mixture until everything is well combined. The egg adds moisture, while the vanilla enhances the flavor, making each bite of your cookies taste like a little piece of heaven.

Step 4: Combine Dry Ingredients

In a separate bowl, whisk together the all-purpose flour, baking powder, and salt. Gradually add this dry mixture to your wet ingredients. Mix until just combined. Be careful not to overmix; you want to keep that tender texture in your cookies!

Step 5: Form the Dough Balls

Using a tablespoon, scoop out the dough and roll it into balls. Aim for about 1 inch in diameter. Place the balls on the prepared baking sheets, spacing them about 2 inches apart. This gives them room to spread while baking, ensuring they don’t stick together.

Step 6: Create Indentations

Now comes the fun part! Using your thumb or the back of a teaspoon, make an indentation in the center of each dough ball. Fill each indentation with a teaspoon of raspberry or blueberry jam. This is where the magic happens—those colorful fillings will shine through once baked!

Step 7: Bake the Cookies

Pop the baking sheets into your preheated oven and bake for 12-15 minutes. Keep an eye on them; you want the edges to be lightly golden. Once they’re done, let the cookies cool on the baking sheets for about 5 minutes before transferring them to a wire rack. This cooling time helps them set perfectly!

Tips for Success

  • Make sure your butter is at room temperature for easy creaming.
  • Don’t skip the parchment paper; it prevents sticking and makes cleanup easier.
  • Use a cookie scoop for uniform dough balls.
  • Experiment with different jams for unique flavors.
  • Let the cookies cool completely before storing to maintain their texture.

Equipment Needed

  • Mixing bowls: A set of various sizes is ideal; you can use any large bowl if needed.
  • Electric mixer: A hand mixer works great, but a whisk can do the job too.
  • Baking sheets: Use any flat baking tray; just ensure it’s lined with parchment paper.
  • Cookie scoop: A tablespoon works well for portioning dough if you don’t have one.
  • Wire rack: A cooling rack is best, but a plate can work in a pinch.

Variations

  • Flavored Jams: Swap out raspberry and blueberry jams for other favorites like strawberry, apricot, or even lemon curd for a zesty twist.
  • Nutty Addition: Add chopped nuts like walnuts or pecans to the dough for a delightful crunch.
  • Chocolate Drizzle: After baking, drizzle melted chocolate over the cookies for an indulgent touch.
  • Gluten-Free Option: Use a gluten-free flour blend to make these cookies suitable for those with dietary restrictions.
  • Vegan Version: Substitute the egg with a flaxseed meal or applesauce and use vegan butter for a plant-based treat.

Serving Suggestions

  • Pair these cookies with a scoop of vanilla ice cream for a delightful dessert.
  • Serve alongside fresh fruit like strawberries or blueberries for a refreshing contrast.
  • For drinks, consider iced tea or lemonade to complement the sweetness.
  • Present on a festive platter, garnished with extra sprinkles for a pop of color.

FAQs about Patriotic Thumbprint Cookies

As you embark on your baking adventure with these delightful Patriotic Thumbprint Cookies, you might have a few questions. Here are some common queries that can help you along the way:

Can I use different types of jam for the filling?

Absolutely! While raspberry and blueberry jams are traditional, feel free to experiment with other flavors like strawberry, apricot, or even lemon curd for a unique twist.

How should I store the cookies?

These cookies can be stored in an airtight container at room temperature for up to one week. Just make sure they’re completely cooled before storing to maintain their texture.

Can I freeze the dough for later use?

Yes! You can freeze the dough balls before baking. Just roll them into balls, place them on a baking sheet, and freeze until solid. Then transfer to a freezer bag. When you’re ready to bake, just add a couple of extra minutes to the baking time.

What if I don’t have unsalted butter?

If you only have salted butter, you can still use it! Just reduce the amount of added salt in the recipe to balance the flavors.

Are these cookies suitable for gluten-free diets?

Yes! You can easily make these Patriotic Thumbprint Cookies gluten-free by substituting all-purpose flour with a gluten-free flour blend. Just ensure that all other ingredients are also gluten-free.

Final Thoughts

Baking these Patriotic Thumbprint Cookies is more than just a culinary task; it’s an experience filled with joy and creativity. The vibrant colors and sweet flavors evoke a sense of celebration, making them perfect for any gathering. Each bite is a reminder of the love and effort you put into creating something special. Whether you’re sharing them with family or friends, these cookies are sure to spark smiles and create lasting memories. So, roll up your sleeves, gather your ingredients, and let the magic of baking bring a little extra joy to your day!

Paul

Patriotic Thumbprint Cookies: Easy Recipe to Delight!

Delightful Patriotic Thumbprint Cookies perfect for celebrations.
Prep Time 20 minutes
Cook Time 15 minutes
Total Time 35 minutes
Servings: 24 cookies
Course: Dessert
Cuisine: American
Calories: 120

Ingredients
  

  • 1 cup unsalted butter softened
  • 1 cup granulated sugar
  • 1 large egg
  • 1 teaspoon vanilla extract
  • 2 ½ cups all-purpose flour
  • ½ teaspoon baking powder
  • ½ teaspoon salt
  • ½ cup raspberry jam
  • ½ cup blueberry jam
  • Red white, and blue sprinkles (for decoration)

Method
 

  1. Preheat your oven to 350°F. Line two baking sheets with parchment paper.
  2. In a large mixing bowl, cream together the softened butter and granulated sugar until light and fluffy, about 3-4 minutes.
  3. Add the egg and vanilla extract to the mixture, and beat until well combined.
  4. In a separate bowl, whisk together the flour, baking powder, and salt. Gradually add the dry ingredients to the wet mixture, mixing until just combined.
  5. Using a tablespoon, scoop out the dough and roll it into balls. Place the balls on the prepared baking sheets, spacing them about 2 inches apart.
  6. Using your thumb or the back of a teaspoon, make an indentation in the center of each dough ball. Fill each indentation with a teaspoon of raspberry jam or blueberry jam.
  7. Sprinkle the tops of the cookies with red, white, and blue sprinkles.
  8. Bake in the preheated oven for 12-15 minutes, or until the edges are lightly golden. Allow the cookies to cool on the baking sheets for 5 minutes before transferring them to a wire rack to cool completely.

Notes

  • These cookies can be stored in an airtight container at room temperature for up to one week.
  • For a twist, try using different flavored jams such as strawberry or apricot.
  • You can also add a teaspoon of almond extract for a unique flavor profile.
  • For a gluten-free version, substitute the all-purpose flour with a gluten-free flour blend.

Sweet and Savory Pineapple Chicken: A Flavorful Delight!

Introduction to Sweet and Savory Pineapple Chicken

When I think of comfort food, Sweet and Savory Pineapple Chicken always comes to mind. It’s that perfect blend of flavors that dances on your palate, making it a go-to dish for any occasion.

Whether you’re racing against the clock after a long day or looking to impress your family with something special, this recipe is your secret weapon.

With just a handful of ingredients and minimal prep time, you can whip up a meal that feels like a warm hug. Trust me, your taste buds will thank you!

Why You’ll Love This Sweet and Savory Pineapple Chicken

This Sweet and Savory Pineapple Chicken is a game-changer for busy weeknights.

In just 25 minutes, you can serve a dish that’s bursting with flavor and color.

The combination of sweet pineapple and savory chicken creates a delightful harmony that even picky eaters will love.

Plus, it’s versatile enough to adapt to your pantry staples, making it a reliable choice for any meal.

Ingredients for Sweet and Savory Pineapple Chicken

Creating this Sweet and Savory Pineapple Chicken is a breeze, thanks to its simple yet flavorful ingredients. Here’s what you’ll need:

  • Boneless, skinless chicken thighs: Tender and juicy, they soak up the flavors beautifully.
  • Vegetable oil: A neutral oil for cooking, helping to achieve that perfect sear on the chicken.
  • Fresh pineapple: Sweet and tangy, it adds a burst of flavor and a tropical twist.
  • Bell pepper: Choose red or green for a pop of color and crunch.
  • Onion: Adds depth and sweetness when sautéed.
  • Garlic: A must-have for that aromatic kick that elevates the dish.
  • Soy sauce: Provides a savory umami flavor that balances the sweetness of the pineapple.
  • Honey: Enhances the sweetness and helps to create a sticky glaze.
  • Rice vinegar: Adds a touch of acidity to brighten the flavors.
  • Cornstarch: Used to thicken the sauce, giving it a nice consistency.
  • Black pepper: A simple seasoning that adds a hint of heat.
  • Red pepper flakes (optional): For those who like a little spice in their life.
  • Cooked white rice: The perfect base to soak up all that delicious sauce.
  • Chopped green onions: A fresh garnish that adds color and a mild onion flavor.

Feel free to get creative! You can swap chicken for shrimp or tofu for a different protein option.

For exact measurements, check the bottom of the article where you can find everything available for printing.

How to Make Sweet and Savory Pineapple Chicken

Making Sweet and Savory Pineapple Chicken is as easy as pie.

With just a few steps, you’ll have a delicious meal ready to impress.

Let’s dive into the process!

Step 1: Cook the Chicken

Start by heating the vegetable oil in a large skillet over medium-high heat.

Once the oil is hot, add the bite-sized chicken thighs.

Cook them for about 5-7 minutes until they’re browned and cooked through.

Make sure to stir occasionally for even cooking.

When done, remove the chicken from the skillet and set it aside.

This step is crucial for achieving that perfect sear!

Step 2: Sauté the Vegetables

In the same skillet, toss in the chopped onion and bell pepper.

Sauté them for about 3-4 minutes until they start to soften.

The vibrant colors will brighten your kitchen!

Next, add the minced garlic and cook for an additional minute.

You want that fragrant aroma to fill the air.

It’s a sign that you’re on the right track!

Step 3: Prepare the Sauce

Grab a small bowl and whisk together the soy sauce, honey, rice vinegar, cornstarch, black pepper, and red pepper flakes if you’re feeling adventurous.

This sauce is the heart of your Sweet and Savory Pineapple Chicken.

Pour this mixture into the skillet with the sautéed vegetables.

Stir it well to combine all those delicious flavors.

Step 4: Combine Ingredients

Now, it’s time to bring everything together!

Add the diced pineapple and the cooked chicken back into the skillet.

Stir everything well to ensure the chicken and pineapple are coated in that tasty sauce.

Cook for another 2-3 minutes until the sauce thickens and everything is heated through.

The sweet and savory aroma will make your mouth water!

Step 5: Serve and Enjoy

Once everything is cooked to perfection, it’s time to serve.

Spoon the Sweet and Savory Pineapple Chicken over a bed of cooked white rice.

Garnish with chopped green onions for that fresh touch.

Now, dig in and enjoy the delightful flavors!

This dish is sure to become a favorite in your home.

Tips for Success

  • Prep all your ingredients before starting to cook. It makes the process smoother.
  • Don’t overcrowd the skillet when cooking the chicken; this ensures even browning.
  • Feel free to adjust the sweetness by adding more or less honey based on your taste.
  • For extra flavor, marinate the chicken in soy sauce and garlic for 30 minutes before cooking.
  • Serve immediately for the best texture and flavor experience.

Equipment Needed

  • Large skillet: A non-stick skillet works wonders, but any large pan will do.
  • Cutting board: Essential for chopping your ingredients safely.
  • Sharp knife: A good knife makes prep a breeze.
  • Measuring cups and spoons: For precise ingredient measurements.
  • Whisk: Perfect for mixing your sauce ingredients smoothly.

Variations

  • Protein Swap: Substitute chicken with shrimp or tofu for a different twist on this dish.
  • Vegetable Boost: Add broccoli, snap peas, or carrots for extra nutrition and color.
  • Spicy Kick: Incorporate sliced jalapeños or a dash of sriracha for a fiery flavor.
  • Sweetness Level: Adjust the honey to your liking; try maple syrup for a unique sweetness.
  • Gluten-Free Option: Use tamari instead of soy sauce to keep it gluten-free.

Serving Suggestions

  • Rice: Serve over fluffy white rice or jasmine rice to soak up the delicious sauce.
  • Vegetable Sides: Pair with steamed broccoli or sautéed green beans for a colorful plate.
  • Drink Pairing: Enjoy with a refreshing iced tea or a light beer.
  • Presentation: Garnish with sesame seeds for an elegant touch.

FAQs about Sweet and Savory Pineapple Chicken

Can I use canned pineapple instead of fresh?

Absolutely! Canned pineapple works well in this recipe. Just make sure to drain it well to avoid excess moisture in your dish.

Is Sweet and Savory Pineapple Chicken gluten-free?

Yes, it can be gluten-free! Simply swap regular soy sauce for tamari, which is a gluten-free alternative.

How can I make this dish spicier?

If you’re looking for a spicy kick, add sliced jalapeños or a dash of sriracha to the skillet while cooking. It’ll elevate the flavor profile!

Can I prepare this dish in advance?

While it’s best enjoyed fresh, you can prep the ingredients ahead of time. Just store them separately in the fridge and cook when you’re ready.

What can I serve with Sweet and Savory Pineapple Chicken?

This dish pairs wonderfully with fluffy white rice, but you can also serve it with quinoa or a fresh salad for a lighter option.

Final Thoughts

Cooking Sweet and Savory Pineapple Chicken is more than just preparing a meal; it’s about creating a moment of joy.

The vibrant colors and tantalizing aromas fill your kitchen, inviting everyone to gather around the table.

Each bite is a delightful dance of sweet and savory flavors that brings smiles and satisfaction.

Whether it’s a weeknight dinner or a special occasion, this dish has a way of making any meal feel extraordinary.

So, roll up your sleeves, embrace the process, and enjoy the delicious rewards of your culinary adventure!

Paul

Sweet and Savory Pineapple Chicken: A Flavorful Delight!

A delicious blend of sweet and savory flavors featuring chicken and pineapple.
Prep Time 10 minutes
Cook Time 15 minutes
Total Time 25 minutes
Course: Main Dish
Cuisine: Asian
Calories: 320

Ingredients
  

  • 2 cups boneless skinless chicken thighs, cut into bite-sized pieces
  • 1 tablespoon vegetable oil
  • 1 cup fresh pineapple diced
  • 1 bell pepper red or green, chopped
  • 1 small onion chopped
  • 2 cloves garlic minced
  • 1/4 cup soy sauce
  • 2 tablespoons honey
  • 1 tablespoon rice vinegar
  • 1 teaspoon cornstarch
  • 1/4 teaspoon black pepper
  • 1/4 teaspoon red pepper flakes optional
  • Cooked white rice for serving
  • Chopped green onions for garnish

Method
 

  1. In a large skillet, heat the vegetable oil over medium-high heat. Add the chicken pieces and cook until browned and cooked through, about 5-7 minutes. Remove the chicken from the skillet and set aside.
  2. In the same skillet, add the chopped onion and bell pepper. Sauté for about 3-4 minutes until they start to soften. Add the minced garlic and cook for an additional 1 minute until fragrant.
  3. In a small bowl, whisk together the soy sauce, honey, rice vinegar, cornstarch, black pepper, and red pepper flakes (if using). Pour this mixture into the skillet with the vegetables.
  4. Add the diced pineapple and cooked chicken back into the skillet. Stir well to combine and cook for another 2-3 minutes until the sauce thickens and everything is heated through.
  5. Serve the pineapple chicken over cooked white rice and garnish with chopped green onions.

Notes

  • For a spicier kick, add sliced jalapeños or a dash of hot sauce to the skillet.
  • Substitute the chicken with shrimp or tofu for a different protein option.

Patriotic Pretzel Bites: A Festive Snack Recipe!

Introduction to Patriotic Pretzel Bites

There’s something magical about gathering with friends and family, especially during festive celebrations. That’s where these Patriotic Pretzel Bites come in, a delightful snack that’s as easy to make as it is to devour. Whether you’re hosting a backyard barbecue or watching fireworks, these colorful treats are the perfect addition to your spread. They’re quick to whip up, making them a lifesaver for busy days. Plus, who can resist that sweet and salty combo? Trust me, your loved ones will be reaching for seconds!

Why You’ll Love This Patriotic Pretzel Bites

These Patriotic Pretzel Bites are a game-changer for any celebration. They come together in just 25 minutes, making them a breeze for even the busiest of schedules. The combination of crunchy pretzels, creamy white chocolate, and vibrant candy melts creates a flavor explosion that’s hard to resist. Plus, they’re a hit with both kids and adults, ensuring everyone leaves the party with a smile and a satisfied snack craving!

Ingredients for Patriotic Pretzel Bites

Gathering the right ingredients is half the fun of making these Patriotic Pretzel Bites. Here’s what you’ll need:

  • Pretzel Bites: The crunchy base of this snack. They provide that satisfying crunch and salty flavor.
  • White Chocolate Chips: These melt beautifully and add a creamy sweetness that balances the saltiness of the pretzels.
  • Red Candy Melts: Perfect for adding a pop of color and a sweet, candy-like flavor. They’re festive and fun!
  • Blue Candy Melts: Just like the red, these bring a vibrant hue to your treats, making them visually appealing.
  • Coconut Oil: A little bit of this helps the candy melts achieve a smooth, drizzle-ready consistency.
  • Sprinkles: Red, white, and blue sprinkles are the finishing touch, adding a festive flair and a bit of crunch.

For those looking to mix things up, consider using different colored candy melts for other holidays or celebrations. You can also add crushed nuts or mini chocolate chips on top for extra texture and flavor. The exact quantities for each ingredient are listed at the bottom of the article for easy printing!

How to Make Patriotic Pretzel Bites

Creating these Patriotic Pretzel Bites is a fun and straightforward process. Follow these simple steps, and you’ll have a festive snack ready in no time!

Step 1: Prepare Your Baking Sheet

Start by lining a baking sheet with parchment paper. This step is crucial for easy cleanup later. The parchment prevents the pretzel bites from sticking, ensuring they come off smoothly once they’re set. Plus, it makes your life a whole lot easier when it’s time to serve!

Step 2: Melt the White Chocolate

Next, grab a microwave-safe bowl and add your white chocolate chips. Microwave them in 30-second intervals, stirring in between. This method helps prevent burning and ensures a smooth melt. You want that creamy texture to coat your pretzel bites perfectly!

Step 3: Dip the Pretzel Bites

Once your white chocolate is melted, it’s time to dip! Take each pretzel bite and submerge it in the melted chocolate. Let the excess chocolate drip off before placing them on the prepared baking sheet. This step is key to avoiding a chocolate puddle!

Step 4: Melt the Red and Blue Candy Melts

In separate bowls, melt the red and blue candy melts with a half tablespoon of coconut oil. Use the same microwave method as before—30 seconds at a time, stirring until smooth. The coconut oil helps achieve that perfect drizzle consistency!

Step 5: Drizzle the Candy Over Pretzels

Now comes the fun part! Using a fork or a piping bag, drizzle the melted red and blue candy over your white chocolate-covered pretzels. Get creative with your patterns! The more colorful, the better!

Step 6: Add Sprinkles

While the candy is still wet, sprinkle on your red, white, and blue sprinkles. This step is essential for adding that festive touch. If you wait too long, the sprinkles won’t stick, and we definitely want that extra crunch and color!

Step 7: Let Them Set

Finally, let your pretzel bites set at room temperature for about 30 minutes. This step is crucial for achieving that perfect texture. You want the chocolate and candy melts to harden, creating a delightful crunch when you bite in. Trust me, the wait is worth it!

Tips for Success

  • Use high-quality chocolate and candy melts for the best flavor and texture.
  • Don’t rush the melting process; stir frequently to avoid burning.
  • Experiment with different sprinkles or toppings for a unique twist.
  • Keep your workspace organized to make the process smoother.
  • Store any leftovers in an airtight container to maintain freshness.

Equipment Needed

  • Microwave-safe bowl: Essential for melting chocolate and candy. A glass bowl works great!
  • Parchment paper: For lining your baking sheet. You can also use a silicone mat.
  • Fork or piping bag: For drizzling the candy melts. A zip-top bag with a corner snipped works too!
  • Baking sheet: A standard one will do, but a cooling rack can help with setting.

Variations

  • Chocolate Pretzel Bites: Swap the white chocolate for milk or dark chocolate for a richer flavor.
  • Nutty Delight: Add crushed nuts like almonds or peanuts on top of the candy melts for extra crunch.
  • Fruit Flavors: Use flavored candy melts, like strawberry or lemon, for a fruity twist.
  • Gluten-Free Option: Substitute regular pretzel bites with gluten-free pretzels to accommodate dietary needs.
  • Vegan Version: Use dairy-free chocolate chips and candy melts to make these treats vegan-friendly.

Serving Suggestions

  • Pair your Patriotic Pretzel Bites with a refreshing lemonade or iced tea for a perfect summer treat.
  • Serve them on a festive platter, garnished with fresh fruit for a colorful display.
  • Consider adding a side of chocolate or caramel dip for an extra indulgent touch.
  • These bites also make great party favors—just package them in clear bags tied with red, white, and blue ribbons!

FAQs about Patriotic Pretzel Bites

Can I make these Patriotic Pretzel Bites ahead of time?

Absolutely! You can prepare these treats a day in advance. Just store them in an airtight container at room temperature to keep them fresh and crunchy.

What can I use instead of candy melts?

If you can’t find candy melts, you can use colored chocolate chips or even colored frosting. Just melt them down and drizzle as you would with the candy melts.

How do I store leftover Patriotic Pretzel Bites?

Store any leftovers in an airtight container at room temperature. They should stay fresh for about a week, but trust me, they won’t last that long!

Can I customize the colors for different holidays?

Definitely! You can switch up the colors of the candy melts to match any holiday or celebration. Think green for St. Patrick’s Day or pastels for Easter!

Are these Patriotic Pretzel Bites suitable for kids?

<pYes, these treats are perfect for kids! They’re fun to make and eat, plus the sweet and salty combination is always a hit with little ones.

Final Thoughts

Creating these Patriotic Pretzel Bites is more than just a cooking project; it’s a way to bring people together. The joy of watching friends and family enjoy your colorful creations is truly rewarding. Each bite is a delightful mix of sweet and salty, evoking the spirit of celebration. Whether it’s a holiday gathering or a casual get-together, these treats add a festive touch to any occasion. So, roll up your sleeves, gather your loved ones, and dive into this fun recipe. Trust me, the smiles and laughter will be the best part of your day!

Paul

Patriotic Pretzel Bites: A Festive Snack Recipe!

A festive and colorful snack perfect for patriotic celebrations, these Patriotic Pretzel Bites are easy to make and delicious.
Prep Time 15 minutes
Cook Time 10 minutes
Total Time 25 minutes
Servings: 12 servings
Course: Snack
Cuisine: American
Calories: 150

Ingredients
  

  • 2 cups pretzel bites
  • 1 cup white chocolate chips
  • 1/2 cup red candy melts
  • 1/2 cup blue candy melts
  • 1 tablespoon coconut oil
  • Sprinkles red, white, and blue

Method
 

  1. Line a baking sheet with parchment paper. Set aside.
  2. In a microwave-safe bowl, melt the white chocolate chips in 30-second intervals, stirring in between until smooth.
  3. Dip each pretzel bite into the melted white chocolate, allowing excess to drip off. Place them on the prepared baking sheet.
  4. In separate bowls, melt the red and blue candy melts with 1/2 tablespoon of coconut oil in the microwave, using the same method as the white chocolate.
  5. Drizzle the melted red and blue candy over the white chocolate-covered pretzels using a fork or a piping bag for more control.
  6. While the candy is still wet, sprinkle the red, white, and blue sprinkles on top for decoration.
  7. Allow the pretzels to set at room temperature for about 30 minutes or until the chocolate and candy melts harden.

Notes

  • For a fun twist, try using different colored candy melts for other holidays or celebrations.
  • Add crushed nuts or mini chocolate chips on top of the pretzels before the candy sets for extra texture and flavor.

Tandoori Chicken: Discover the Ultimate Flavorful Recipe!

Introduction to Tandoori Chicken

There’s something magical about the aroma of Tandoori Chicken wafting through the kitchen. It takes me back to family gatherings, where the grill was the star of the show. This dish is not just a meal; it’s an experience. Perfect for impressing friends or simply treating yourself after a long day, Tandoori Chicken is a flavorful delight that’s surprisingly easy to make. With just a few ingredients and a little patience, you can create a dish that bursts with spices and warmth. Let’s dive into this culinary adventure together!

Why You’ll Love This Tandoori Chicken

This Tandoori Chicken recipe is a game-changer for busy weeknights or weekend gatherings. It’s incredibly easy to whip up, requiring minimal prep time while delivering maximum flavor. The marinade infuses the chicken with a rich, aromatic taste that will have everyone asking for seconds. Plus, it’s versatile—grill it outdoors or bake it indoors. Either way, you’ll enjoy a mouthwatering dish that’s sure to impress!

Ingredients for Tandoori Chicken

Gathering the right ingredients is the first step to creating a delicious Tandoori Chicken. Here’s what you’ll need:

  • Bone-in, skinless chicken thighs: These are juicy and flavorful, perfect for soaking up the marinade.
  • Plain yogurt: This acts as a tenderizer and adds creaminess to the marinade, helping the spices cling to the chicken.
  • Lemon juice: A splash of acidity brightens the flavors and balances the richness of the yogurt.
  • Vegetable oil: This helps the chicken cook evenly and adds moisture, ensuring a tender bite.
  • Garlic: Minced garlic brings a robust flavor that complements the spices beautifully.
  • Fresh ginger: Grated ginger adds a warm, zesty kick that enhances the overall taste.
  • Tandoori spice mix: This is the star of the show! It typically includes spices like coriander, cumin, and turmeric, giving the chicken its signature flavor.
  • Ground cumin: Adds an earthy depth that rounds out the spice profile.
  • Paprika: This contributes a mild sweetness and vibrant color to the dish.
  • Salt and black pepper: Essential for seasoning, enhancing all the other flavors.
  • Cayenne pepper (optional): For those who like a bit of heat, this adds a spicy kick.
  • Fresh cilantro: A garnish that adds a pop of color and freshness to the finished dish.
  • Lemon wedges: Perfect for squeezing over the chicken just before serving, adding a zesty finish.

For exact measurements, check the bottom of the article where you can find everything listed for easy printing. Feel free to get creative with your ingredients! If you’re looking for a vegetarian option, cauliflower florets or paneer work wonderfully as substitutes. Just adjust the cooking times accordingly.

How to Make Tandoori Chicken

Now that you have your ingredients ready, let’s get cooking! Making Tandoori Chicken is a straightforward process that will fill your kitchen with mouthwatering aromas. Follow these steps, and you’ll be on your way to a delicious meal.

Step 1: Prepare the Marinade

Start by mixing the marinade ingredients in a large bowl. Combine the yogurt, lemon juice, vegetable oil, minced garlic, grated ginger, tandoori spice mix, ground cumin, paprika, salt, black pepper, and cayenne pepper if you’re feeling adventurous. Stir everything together until it’s well blended. This marinade is where the magic happens, infusing the chicken with rich flavors that will make your taste buds dance.

Step 2: Marinate the Chicken

Next, add the chicken thighs to the marinade. Make sure each piece is thoroughly coated. This step is crucial; marinating allows the flavors to penetrate the meat, making it tender and juicy. Cover the bowl with plastic wrap and refrigerate for at least 2 hours, but if you can, let it sit overnight. Trust me, the longer it marinates, the better it tastes!

Step 3: Preheat the Grill or Oven

While the chicken is soaking up all that flavor, it’s time to prepare your cooking surface. Preheat your grill or oven to 400°F. If you’re using a grill, oil the grates to prevent sticking. This little tip will save you from a messy cleanup later. If you’re baking, line a baking sheet with foil for easy cleanup.

Step 4: Cook the Chicken

Once your grill or oven is hot, it’s time to cook! Remove the chicken from the marinade, letting any excess drip off. Place the chicken on the grill or baking sheet. Grill the chicken for about 25-30 minutes, turning occasionally, until it reaches an internal temperature of 165°F and has a nice char. If you’re baking, it’ll take about 35-40 minutes, flipping halfway through. The goal is to achieve that perfect balance of juicy meat and crispy edges.

Step 5: Rest and Garnish

After cooking, let the chicken rest for about 5 minutes. This step is essential; it allows the juices to redistribute, ensuring every bite is tender. Once rested, garnish with fresh cilantro and serve with lemon wedges on the side. A squeeze of lemon just before eating adds a refreshing zing that elevates the dish!

Tips for Success

  • Use bone-in, skinless chicken thighs for maximum flavor and juiciness.
  • Don’t rush the marinating process; overnight is best for deep flavor.
  • Keep an eye on the grill or oven temperature to avoid overcooking.
  • Let the chicken rest after cooking to ensure tenderness.
  • Experiment with the spice mix to suit your taste preferences.

Equipment Needed

  • Grill or Oven: Either works well; choose based on your preference.
  • Mixing Bowl: A large bowl for marinating the chicken.
  • Whisk or Spoon: For mixing the marinade thoroughly.
  • Meat Thermometer: Ensures the chicken is cooked perfectly.
  • Plastic Wrap: To cover the bowl while marinating.

Variations

  • Vegetarian Option: Substitute chicken with cauliflower florets or paneer for a delicious meat-free version.
  • Spicy Twist: Add extra cayenne pepper or a dash of hot sauce to the marinade for those who crave heat.
  • Herb-Infused: Incorporate fresh herbs like mint or basil into the marinade for a unique flavor profile.
  • Yogurt Alternatives: Use coconut yogurt for a dairy-free option that still provides creaminess.
  • Grilled Veggies: Toss some bell peppers, onions, or zucchini on the grill alongside the chicken for a colorful side.

Serving Suggestions

  • Naan or Rice: Serve with warm naan or fluffy basmati rice to soak up the delicious juices.
  • Cucumber Raita: A cooling cucumber raita pairs perfectly, balancing the spices.
  • Fresh Salad: A simple salad with tomatoes and onions adds a refreshing crunch.
  • Cold Beverages: Enjoy with a chilled beer or a refreshing mango lassi.

FAQs about Tandoori Chicken

What is Tandoori Chicken?

Tandoori Chicken is a popular Indian dish made from marinated chicken that’s grilled or baked. The marinade typically includes yogurt and a blend of spices, giving it a vibrant color and rich flavor. It’s a staple in Indian cuisine and loved for its smoky taste.

Can I make Tandoori Chicken in the oven?

Absolutely! If you don’t have a grill, baking is a great alternative. Preheat your oven to 400°F and follow the same cooking instructions. Just make sure to flip the chicken halfway through for even cooking.

How long should I marinate the chicken?

For the best flavor, marinate the chicken for at least 2 hours, but overnight is ideal. This allows the spices to penetrate the meat, resulting in a tender and flavorful dish.

Is Tandoori Chicken spicy?

The spice level can be adjusted based on your preference. The traditional recipe includes cayenne pepper for heat, but you can omit it or reduce the amount if you prefer a milder flavor.

What can I serve with Tandoori Chicken?

Tandoori Chicken pairs wonderfully with naan, basmati rice, or a refreshing cucumber raita. You can also serve it with a side salad or grilled vegetables for a complete meal.

Final Thoughts

Cooking Tandoori Chicken is more than just preparing a meal; it’s about creating memories and sharing joy with those you love. The vibrant colors and aromatic spices transform your kitchen into a culinary haven. Each bite is a celebration of flavor, transporting you to the bustling streets of India. Whether you’re grilling for friends or enjoying a quiet dinner at home, this dish brings warmth and satisfaction. So, roll up your sleeves, embrace the process, and let the magic of Tandoori Chicken fill your heart and home with happiness. You won’t regret it!

Paul

Tandoori Chicken: Discover the Ultimate Flavorful Recipe!

A flavorful and aromatic dish made with marinated chicken thighs, grilled to perfection.
Prep Time 2 hours
Cook Time 30 minutes
Total Time 2 hours 30 minutes
Servings: 6 servings
Course: Main Course
Cuisine: Indian
Calories: 320

Ingredients
  

  • 3 pounds bone-in skinless chicken thighs
  • 1 cup plain yogurt
  • 2 tablespoons lemon juice
  • 2 tablespoons vegetable oil
  • 4 cloves garlic minced
  • 1 tablespoon fresh ginger grated
  • 2 tablespoons tandoori spice mix
  • 1 teaspoon ground cumin
  • 1 teaspoon paprika
  • 1 teaspoon salt
  • 1 teaspoon black pepper
  • 1 teaspoon cayenne pepper optional, for heat
  • Fresh cilantro for garnish
  • Lemon wedges for serving

Method
 

  1. In a large mixing bowl, combine the yogurt, lemon juice, vegetable oil, minced garlic, grated ginger, tandoori spice mix, cumin, paprika, salt, black pepper, and cayenne pepper (if using). Mix well to create a marinade.
  2. Add the chicken thighs to the marinade, ensuring they are well coated. Cover the bowl with plastic wrap and refrigerate for at least 2 hours, or preferably overnight for maximum flavor.
  3. Preheat your grill or oven to 400°F. If using a grill, oil the grates to prevent sticking.
  4. Remove the chicken from the marinade, allowing any excess to drip off. Place the chicken on the grill or a baking sheet if using the oven.
  5. Grill the chicken for about 25-30 minutes, turning occasionally, until the internal temperature reaches 165°F and the chicken is charred and cooked through. If baking, cook for 35-40 minutes, flipping halfway through.
  6. Once cooked, remove the chicken from the grill or oven and let it rest for 5 minutes.
  7. Garnish with fresh cilantro and serve with lemon wedges on the side.

Notes

  • For a vegetarian option, substitute chicken with cauliflower florets or paneer, adjusting cooking times as necessary.
  • Serve with naan or rice for a complete meal, and consider adding a side of cucumber raita for a refreshing contrast.

Shanghai Fried Noodles: Discover the Perfect Recipe!

Introduction to Shanghai Fried Noodles

There’s something magical about a steaming plate of Shanghai Fried Noodles that brings back memories of bustling street markets and the tantalizing aroma of sizzling stir-fries. This dish is not just a meal; it’s a quick solution for those busy weeknights when you want something delicious without spending hours in the kitchen. With a medley of colorful vegetables and savory sauces, it’s a dish that can impress your loved ones or simply satisfy your cravings. Trust me, once you try this recipe, it’ll become a staple in your culinary repertoire!

Why You’ll Love This Shanghai Fried Noodles

Shanghai Fried Noodles are a game-changer for anyone looking to whip up a satisfying meal in no time. With just a handful of ingredients, you can create a dish that bursts with flavor and texture. It’s perfect for busy weeknights or lazy weekends. Plus, the versatility of this recipe means you can customize it to suit your taste, making it a go-to favorite for everyone at the table!

Ingredients for Shanghai Fried Noodles

Gathering the right ingredients is the first step to creating a delicious plate of Shanghai Fried Noodles. Here’s what you’ll need:

  • Shanghai noodles or thick egg noodles: These are the stars of the dish, providing a chewy texture that holds up well in stir-frying.
  • Vegetable oil: Essential for frying, it helps achieve that perfect golden color and crispy edges.
  • Garlic: Minced garlic adds a fragrant kick that elevates the overall flavor profile.
  • Onion: Thinly sliced onion brings sweetness and depth to the dish.
  • Cabbage: Shredded cabbage adds crunch and a slight sweetness, balancing the savory elements.
  • Bean sprouts: These little gems provide a delightful crunch and freshness.
  • Carrot: Julienned carrots add color and a hint of sweetness, making the dish visually appealing.
  • Bell pepper: Sliced bell pepper contributes a sweet, juicy bite and vibrant color.
  • Green onions: Chopped green onions are a must for garnish, adding a fresh, oniony flavor.
  • Soy sauce: This savory sauce is the backbone of the dish, infusing it with umami goodness.
  • Oyster sauce: A touch of oyster sauce adds richness and depth, enhancing the overall flavor.
  • Sesame oil: Just a drizzle of sesame oil at the end brings a nutty aroma that ties everything together.
  • Salt and pepper: Simple seasonings that help balance the flavors.

For those looking to add protein, consider tossing in some cooked chicken, shrimp, or tofu. You can also experiment with different vegetables like snap peas, broccoli, or mushrooms for a unique twist. Exact quantities for each ingredient can be found at the bottom of the article, ready for printing!

How to Make Shanghai Fried Noodles

Now that you have all your ingredients ready, let’s dive into the cooking process. Making Shanghai Fried Noodles is straightforward and fun. Follow these simple steps, and you’ll have a delicious meal in no time!

Step 1: Cook the Noodles

Start by boiling a pot of water. Once it’s bubbling, add the Shanghai noodles or thick egg noodles. Cook them according to the package instructions, usually around 4-6 minutes. You want them al dente, so they hold up during stir-frying. After cooking, drain the noodles and set them aside. A quick rinse under cold water can help prevent sticking.

Step 2: Sauté Aromatics

In a large skillet or wok, heat up the vegetable oil over medium-high heat. Once the oil is shimmering, toss in the minced garlic and sliced onion. Sauté for about a minute until they become fragrant. This step is crucial; it sets the flavor foundation for your Shanghai Fried Noodles.

Step 3: Stir-Fry Vegetables

Next, add the shredded cabbage, bean sprouts, julienned carrot, and sliced bell pepper to the skillet. Stir-fry these vibrant veggies for about 3-4 minutes. You want them tender-crisp, retaining some bite. The colors will pop, and the aroma will be irresistible!

Step 4: Combine Noodles and Sauce

Now, push the vegetables to one side of the skillet. On the other side, add the cooked noodles. Pour the soy sauce, oyster sauce, and sesame oil over the noodles. This is where the magic happens! The sauces will coat the noodles beautifully, infusing them with flavor.

Step 5: Mix and Heat

Using tongs or a spatula, gently toss everything together. Make sure the noodles and vegetables are well combined. Season with salt and pepper to taste. Stir-fry for an additional 1-2 minutes until everything is heated through. The sizzling sound is music to your ears!

Step 6: Serve and Enjoy

Finally, stir in the chopped green onions for that fresh touch. Serve your Shanghai Fried Noodles hot, and watch everyone dig in with delight. This dish is not just a meal; it’s a celebration of flavors and textures that will leave you craving more!

Tips for Success

  • Prep all your ingredients before you start cooking. It makes the process smoother and more enjoyable.
  • Don’t overcrowd the skillet; cook in batches if necessary to ensure even cooking.
  • Adjust the sauce to your taste. If you like it saltier, add more soy sauce.
  • For extra flavor, consider marinating your protein before adding it to the stir-fry.
  • Serve immediately for the best texture and taste!

Equipment Needed

  • Large skillet or wok: A non-stick skillet works well if you don’t have a wok.
  • Spatula or tongs: Essential for tossing and mixing the ingredients.
  • Pot: For boiling the noodles; any large pot will do.
  • Measuring spoons: Handy for precise sauce measurements.

Variations

  • Protein Boost: Add cooked chicken, shrimp, or tofu for a heartier meal.
  • Vegetable Medley: Swap in snap peas, broccoli, or mushrooms for a different flavor profile.
  • Spicy Kick: Toss in some red pepper flakes or sliced jalapeños for heat.
  • Gluten-Free Option: Use rice noodles or gluten-free soy sauce to accommodate dietary needs.
  • Vegan Delight: Ensure all sauces are vegan-friendly and load up on veggies for a plant-based feast.

Serving Suggestions

  • Side Dishes: Pair with crispy spring rolls or a light cucumber salad for a refreshing contrast.
  • Drinks: Enjoy with a chilled beer or a refreshing iced tea to complement the flavors.
  • Presentation: Serve in a large bowl, garnished with extra green onions and sesame seeds for a pop of color.

FAQs about Shanghai Fried Noodles

Can I use other types of noodles for this recipe?

Absolutely! While Shanghai noodles are traditional, you can substitute them with thick egg noodles, rice noodles, or even spaghetti in a pinch. Just adjust the cooking time as needed.

How can I make Shanghai Fried Noodles spicier?

If you’re craving some heat, add red pepper flakes or sliced jalapeños during the stir-frying process. You can also drizzle some chili oil over the finished dish for an extra kick!

Can I prepare this dish in advance?

Yes, you can prep the ingredients ahead of time. Just store the chopped vegetables and cooked noodles separately in the fridge. When you’re ready to eat, stir-fry them together for a quick meal.

What can I serve with Shanghai Fried Noodles?

These noodles pair wonderfully with crispy spring rolls, dumplings, or a light salad. A chilled beer or iced tea makes for a refreshing drink alongside this flavorful dish.

Is this recipe suitable for vegetarians?

Yes! This Shanghai Fried Noodles recipe is vegetarian-friendly. Just ensure that the sauces you use, like oyster sauce, are plant-based or opt for a vegetarian alternative.

Final Thoughts

Cooking Shanghai Fried Noodles is more than just preparing a meal; it’s about creating a moment of joy in your kitchen. The vibrant colors, enticing aromas, and satisfying textures come together to form a dish that warms the heart and pleases the palate. Whether you’re sharing it with family or enjoying it solo, each bite is a reminder of the simple pleasures in life. Plus, the ease of this recipe means you can whip it up anytime the craving strikes. So grab your ingredients, fire up that skillet, and let the deliciousness unfold!

Paul

Shanghai Fried Noodles: Discover the Perfect Recipe!

A delicious and easy recipe for Shanghai Fried Noodles, featuring a mix of vegetables and savory sauces.
Prep Time 10 minutes
Cook Time 15 minutes
Total Time 25 minutes
Servings: 4 servings
Course: Main Dish
Cuisine: Chinese
Calories: 320

Ingredients
  

  • 8 ounces Shanghai noodles or thick egg noodles
  • 2 tablespoons vegetable oil
  • 2 cloves garlic minced
  • 1 small onion thinly sliced
  • 1 cup shredded cabbage
  • 1 cup bean sprouts
  • 1 medium carrot julienned
  • 1 bell pepper sliced
  • 2 green onions chopped
  • 3 tablespoons soy sauce
  • 1 tablespoon oyster sauce
  • 1 teaspoon sesame oil
  • Salt and pepper to taste

Method
 

  1. Cook the Shanghai noodles according to package instructions. Drain and set aside.
  2. In a large skillet or wok, heat the vegetable oil over medium-high heat.
  3. Add the minced garlic and sliced onion to the skillet, sautéing for about 1 minute until fragrant.
  4. Add the shredded cabbage, bean sprouts, carrot, and bell pepper to the skillet. Stir-fry for 3-4 minutes until the vegetables are tender-crisp.
  5. Push the vegetables to one side of the skillet. Add the cooked noodles to the other side and pour the soy sauce, oyster sauce, and sesame oil over the noodles.
  6. Toss everything together, mixing the noodles and vegetables thoroughly. Season with salt and pepper to taste.
  7. Stir in the chopped green onions and cook for an additional 1-2 minutes until everything is heated through.
  8. Serve hot and enjoy your Shanghai fried noodles!

Notes

  • For added protein, consider adding cooked chicken, shrimp, or tofu to the stir-fry.
  • Experiment with different vegetables such as snap peas, broccoli, or mushrooms for a unique twist.

Stay Connected

Get recipes via email: