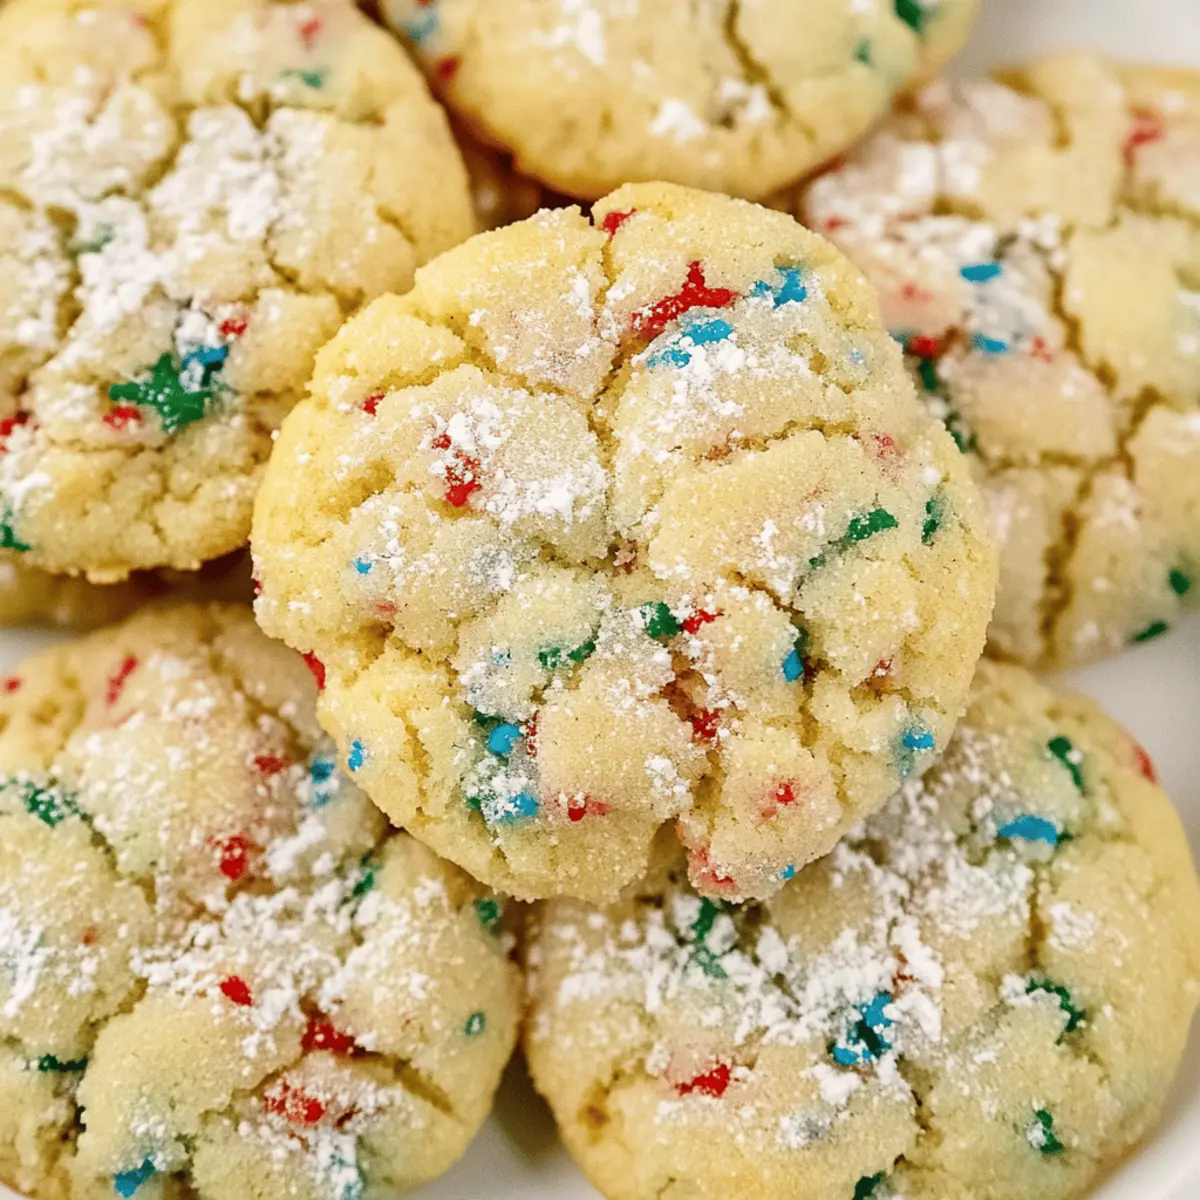
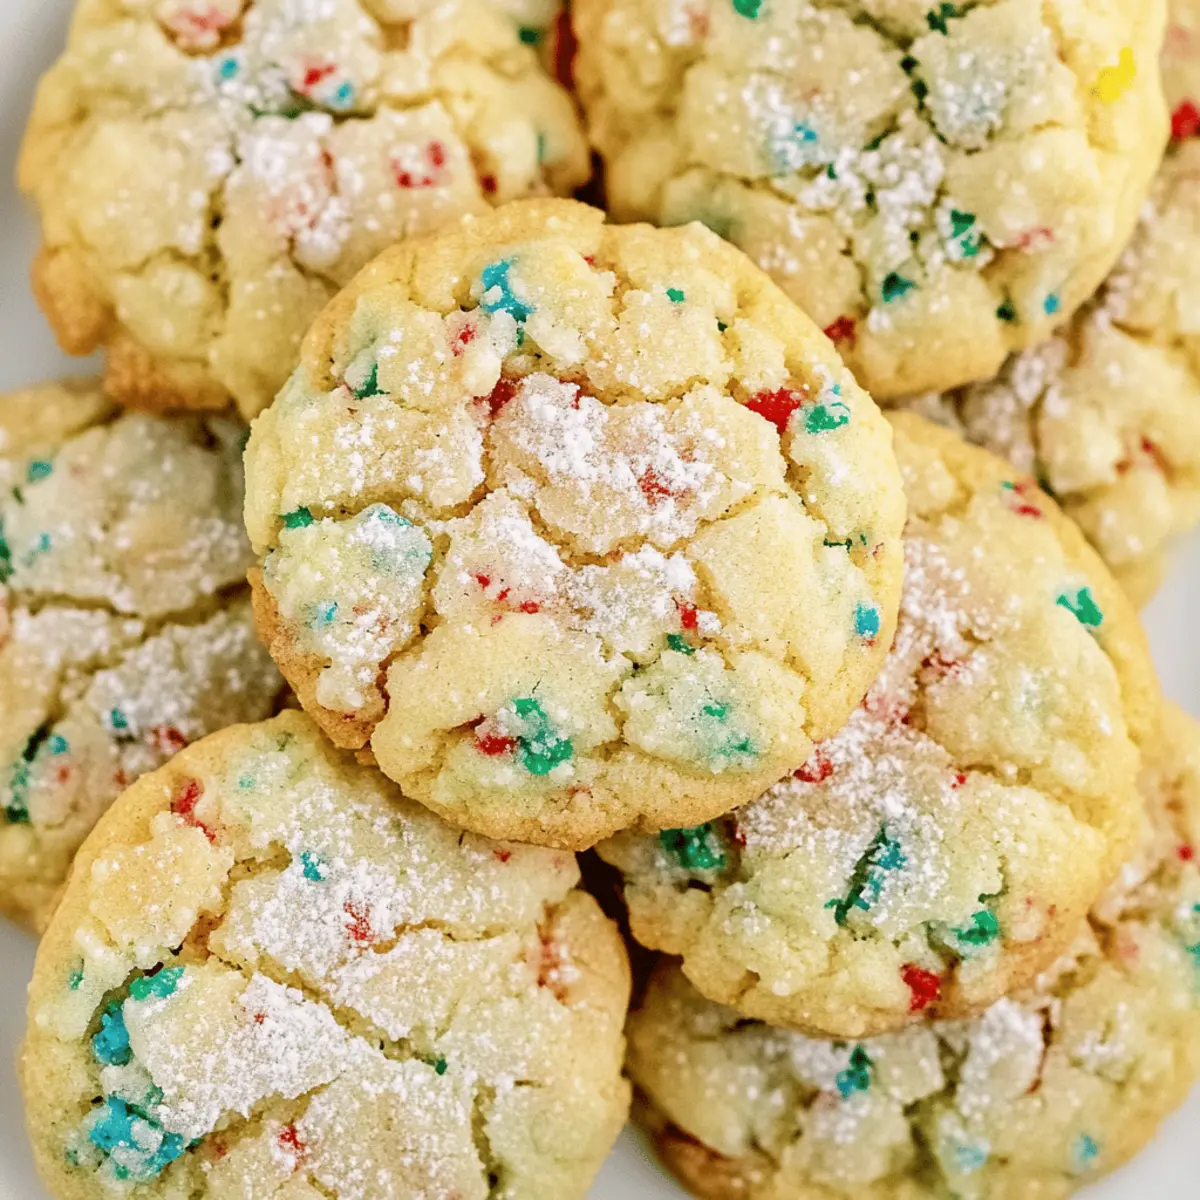
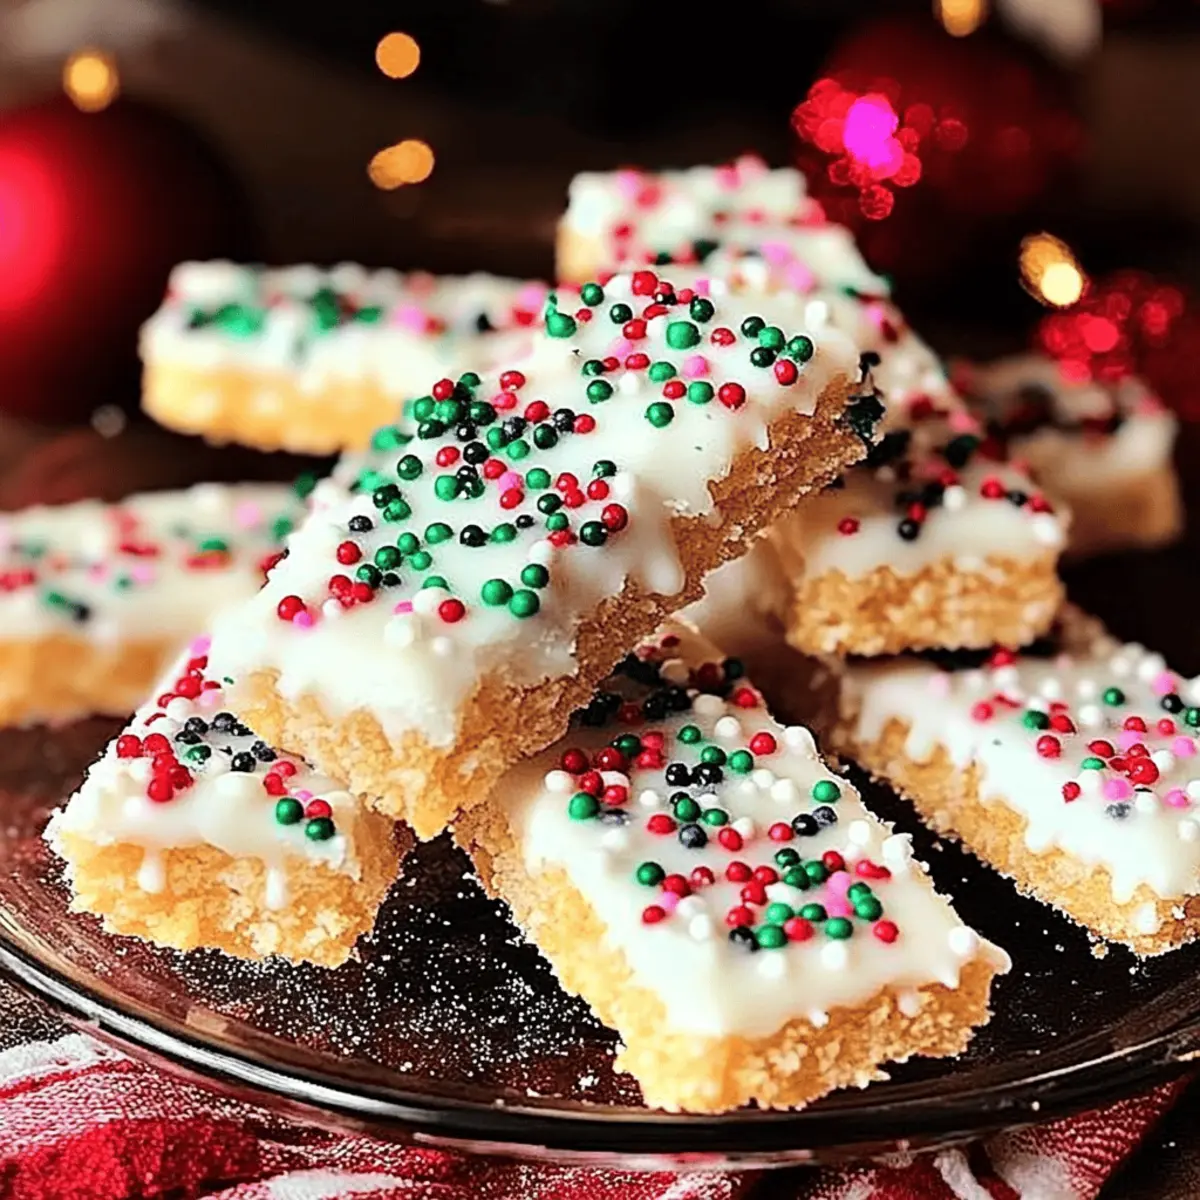
As I sifted through the holiday decorations, a sweet thought struck me: what if I could create a treat that not only delights the eyes but also brings everyone together? Enter my Christmas White Chocolate-Dipped Sugar Wafers! These whimsical no-bake treats are a fantastic way to infuse some festive fun into your kitchen without slaving over a hot stove. With their crispy texture wrapped in creamy white chocolate, they’re a treat that kids will love helping to make, and trust me, they will disappear faster than you can say “ho ho ho.” Quick to assemble and endlessly charming, these sugar wafers are the perfect way to elevate your holiday gatherings. Are you ready to unwrap a little joy this season? Let’s dive in!
Why are these Wafers a Holiday Hit?
Crispy Perfection: Each wafer boasts a delightful crunch that contrasts beautifully with the smooth white chocolate coating.
Quick & Easy: This no-bake recipe is a breeze, making it possible for even the busiest home cooks to whip up a festive treat.
Kid-Friendly Fun: Get the little ones involved! They’ll love dipping and decorating, creating wonderful holiday memories together.
Versatile Toppings: From colorful sprinkles to crushed candy canes, you can customize these sugar wafers to match any celebration.
Crowd Pleaser: With their charming appearance and delightful taste, these Christmas White Chocolate-Dipped Sugar Wafers are sure to vanish from your dessert platter.
Elevate your holiday table this season with these sweet treats, and if you’re looking for more festive inspiration, don’t miss my other delightful recipes like the Oat Tiramisu Sugar. You’re in for a real treat!
Christmas White Chocolate-Dipped Sugar Wafers Ingredients
For the Wafer Base
• Sugar Wafers – These provide the crunch you crave, and no substitutions are necessary; they come in various delightful flavors!
For the Chocolate Coating
• White Chocolate – Melting into a sweet pool of creamy goodness; can be swapped with dark chocolate for a more robust flavor.
• Shortening (e.g., Crisco) – Ensures a silky, smooth chocolate consistency; coconut oil works well as a healthier alternative.
For the Festive Touch
• Sprinkles/Decorations (optional) – Use these to jazz up your wafers with color and flair; seasonal decorations or nuts add a fun twist!
Step‑by‑Step Instructions for Christmas White Chocolate-Dipped Sugar Wafers
Step 1: Prepare Materials
Begin by gathering all your materials: sugar wafers, white chocolate, and optional decorations like sprinkles or crushed candy canes. Make sure your workspace is clean and organized, as this will help the preparation of your Christmas White Chocolate-Dipped Sugar Wafers flow smoothly. Line a baking sheet with parchment paper for easy cooling later.
Step 2: Melt Chocolate
In a microwave-safe bowl, combine the white chocolate and shortening. Heat in the microwave at 50% power for 15-second intervals, stirring between each session until the mixture is fully melted and smooth. This should take about 1-2 minutes. Ensure it’s velvety to ensure a beautiful coating on your sugar wafers.
Step 3: Dip Wafers
Once your chocolate is melted, it’s time to dip! Take a sugar wafer and immerse it in the warm chocolate mixture. Let any excess chocolate drip off back into the bowl, then carefully place the dipped wafer onto the prepared baking sheet. Work quickly to maintain the chocolate’s softness, especially since you want it to stay smooth and glossy.
Step 4: Decorate
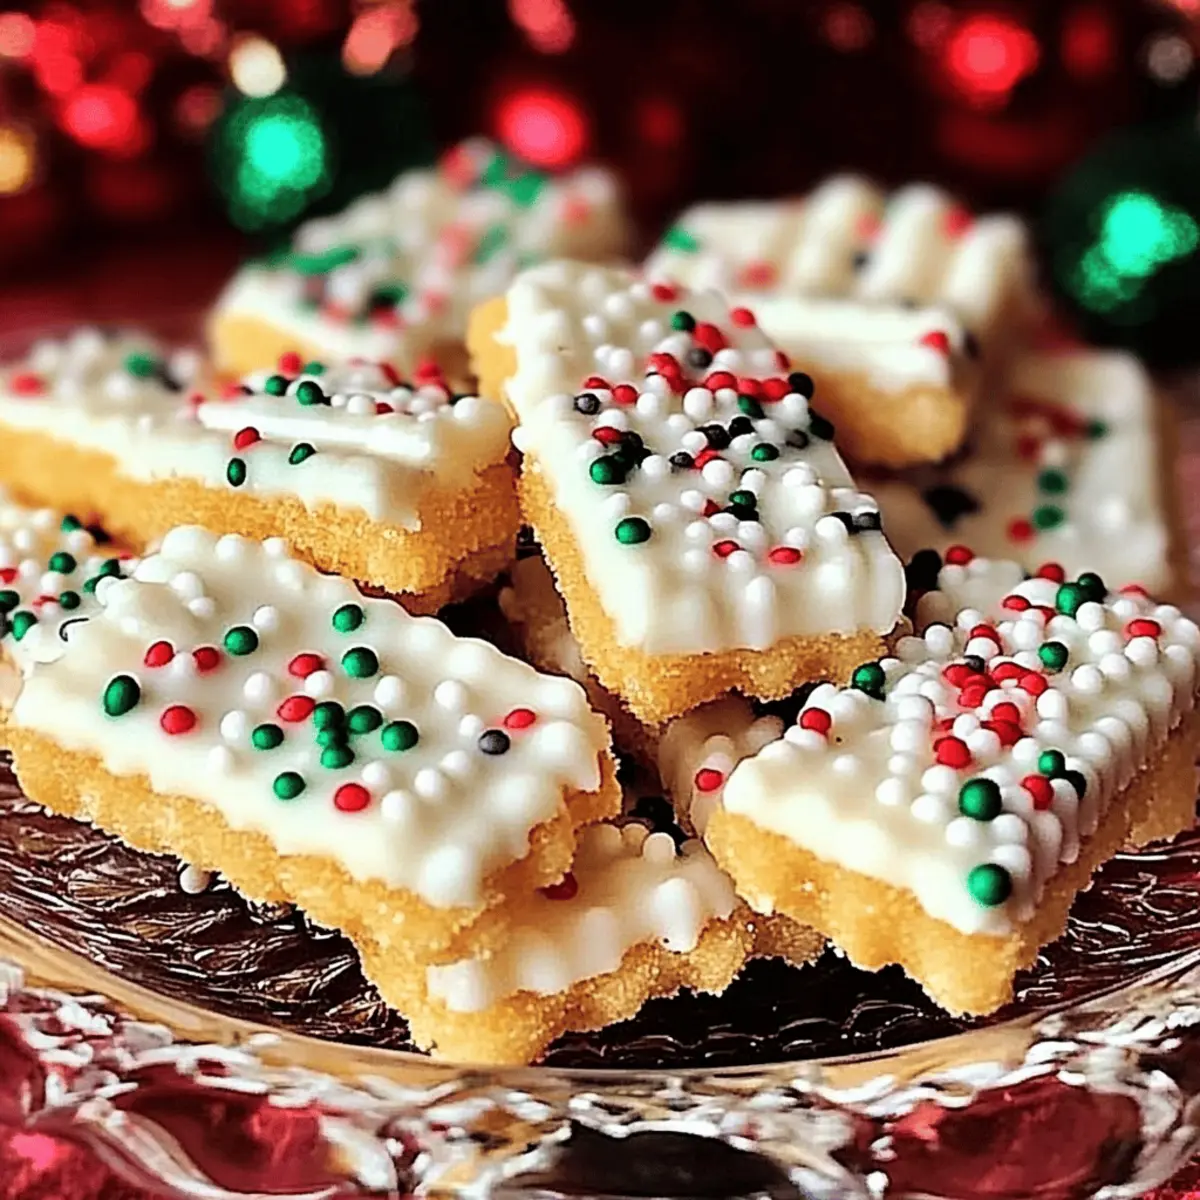
Immediately after dipping, sprinkle your choice of colorful decorations over the wet chocolate on each wafer. This step is fun and allows creativity, so encourage kids to join in! You want the sprinkles to adhere before the chocolate sets, ensuring that your Christmas White Chocolate-Dipped Sugar Wafers look festive and delightful.
Step 5: Cool
Once decorated, leave the sugar wafers at room temperature on the parchment-lined baking sheet for about 15-20 minutes. This will give the chocolate time to harden into a beautiful shell. You’ll know they’re ready when the chocolate appears firm and slightly matte, making them perfect for serving or storing later.
Step 6: Store Safely
After the wafers have cooled, carefully transfer them into an airtight container. If layered, make sure to separate them with parchment paper to prevent sticking. Your Christmas White Chocolate-Dipped Sugar Wafers can be kept fresh for up to two weeks, ensuring your festive treat remains delightful throughout the holiday season!
Expert Tips for Christmas White Chocolate-Dipped Sugar Wafers
- Melt Carefully: Ensure your white chocolate is fully melted and smooth to achieve a glossy finish. Stir well between heating intervals to avoid burning.
- Work Quickly: Dip and decorate your wafers in small batches. This prevents the chocolate from hardening and helps the sprinkles stick effectively.
- Store Properly: Keep your Christmas White Chocolate-Dipped Sugar Wafers in an airtight container at room temperature to maintain their crisp texture.
- Customize Toppings: Experiment with fun toppings beyond sprinkles. Crushed cookies or dried fruit can add a unique twist to your festive treats!
- Avoid Overheating: Be mindful not to overheat the chocolate, as this can cause it to seize. A smooth, melted chocolate ensures easy dipping.
How to Store and Freeze Christmas White Chocolate-Dipped Sugar Wafers
- Room Temperature: Store your Christmas White Chocolate-Dipped Sugar Wafers in an airtight container at room temperature for up to 2 weeks to keep them fresh and crunchy.
- Fridge: If your home is warm, consider placing the wafers in the refrigerator. Just be sure to let them come to room temperature before serving for the best texture.
- Freezer: While not tested, you can freeze the wafers by wrapping them tightly in plastic wrap and placing them in a freezer-safe container. They should last up to 3 months.
- Reheating: If you find the chocolate surface dull after storage, simply place the wafers in a warm oven (200°F) for a few minutes to refresh the glossy look before serving.
Christmas White Chocolate-Dipped Sugar Wafers Variations
Feel free to customize your Christmas White Chocolate-Dipped Sugar Wafers for a unique twist that adds even more festive cheer to your celebrations!
- Dark Chocolate: Swap white chocolate for dark chocolate for a deliciously rich alternative. It pairs beautifully with the crisp wafers, creating a decadent contrast.
- Minty Fresh: Add peppermint extract to your melted chocolate for a refreshing holiday flavor. Just a few drops can turn these wafers into a minty delight that will refresh the palate.
- Coconut Yummy: Use shredded coconut as a topping for a tropical twist! It adds a chewy texture that beautifully contrasts the crunch of the wafer. Plus, it looks festive and fun!
- Nutty Crunch: Top with finely chopped nuts for added crunch, giving your wafers a delightful and hearty bite! Almonds or walnuts can add a wholesome flavor that just sings of the holidays.
- Winter Wonderland: Use crushed candy canes as a colorful topping to sprinkle over your chocolate. This adds a sweet crunch and a stunning presentation that will wow your guests!
- Spicy Chocolate: Introduce a hint of chili powder or cayenne pepper to your melted chocolate for a fun spicy kick. It adds unexpected warmth and flavor to your holiday treat.
- Decorative Sugar: Sprinkle edible glitter or colored sugar for a dazzling holiday effect. A few sparkles will make your wafers look truly magical on any dessert table!
- Fruit Festivity: Consider using freeze-dried fruit pieces as an alternative topping. They bring a vibrant color and unique flavor combination to your festive dish.
If you’re looking for more creative ideas, don’t miss my other delightful recipes, such as the Oat Tiramisu Sugar. Happy baking!
Make Ahead Options
These Christmas White Chocolate-Dipped Sugar Wafers are a fantastic option for those looking to save time during the busy holiday season! You can prepare the sugar wafers and dip them in chocolate up to 24 hours in advance; simply store them in an airtight container at room temperature to keep them crisp. To maintain quality, add your decorative sprinkles just before serving to prevent them from becoming soggy. When you’re ready to present, serve them straight from the container, and your festive treats will not only look stunning but remain just as delicious! With a little planning, you can effortlessly impress your guests while enjoying more time with loved ones.
What to Serve with Christmas White Chocolate-Dipped Sugar Wafers
Elevate your holiday festivities with these delightful treats that perfectly blend sweetness with creativity.
- Festive Fruit Platter: A colorful assortment of fruits adds freshness that balances the sweetness of the wafers. Think vibrant strawberries and juicy oranges for a pop of color!
- Hot Cocoa Bar: Create a cozy beverage station featuring rich hot cocoa, whipped cream, and sprinkles. This warm drink pairs beautifully with the crunchy elegance of the dipped wafers.
- Gingerbread Cookies: The spiced flavor of gingerbread complements the creamy sweetness of the white chocolate, creating a harmonious holiday dessert experience. A delightful combo on any table!
- Peppermint Bark: This vibrant candy delivers a satisfying crunch and refreshing mint flavor that echoes the festive spirit, making it a perfect match for the decadent wafers.
- Coffee or Tea: Offering a warm drink option, a steaming cup of coffee or herbal tea gives a cozy contrast to the sweet wafers, enhancing the overall experience.
- Holiday Cheeseboard: Incorporate light cheeses and artisanal crackers for a delightful mix of textures and flavors that create an exciting yet elegant pairing with your Christmas White Chocolate-Dipped Sugar Wafers.

Christmas White Chocolate-Dipped Sugar Wafers Recipe FAQs
How do I choose the best sugar wafers for this recipe?
Selecting sugar wafers can be fun! Look for wafers that are crisp, fresh, and free from any dark spots or broken pieces. Many brands offer a variety of flavors, but classic vanilla works wonderfully for a versatile base. If you prefer a colorful touch, consider varieties that come in different colors for a more festive feel!
What’s the best way to store the wafers?
Absolutely! To keep your Christmas White Chocolate-Dipped Sugar Wafers fresh, store them in an airtight container at room temperature for up to 2 weeks. If your home is particularly warm, the refrigerator is a good alternative; however, make sure to let them sit at room temperature for a while before serving to regain their perfect crunch.
Can I freeze these sugar wafers?
Yes, you can! While not officially tested, you can freeze your Christmas White Chocolate-Dipped Sugar Wafers by tightly wrapping them in plastic wrap and placing them in a freezer-safe container. Ensure they are well-protected from air to avoid freezer burn. They should last up to 3 months in the freezer, and when you’re ready to enjoy them, let them thaw in the fridge or at room temperature.
What should I do if the chocolate coating is too thick or doesn’t coat well?
If you find your chocolate coating is too thick, it’s likely that it hasn’t been melted enough. Make sure to melt the white chocolate and shortening until you achieve a smooth, runny consistency. If this happens, simply return the mixture to the microwave for additional 15-second intervals, stirring well in between until you reach the desired texture. For dipping, ensure you’re working with small batches to keep the coating manageable.
Can pets eat these wafers?
No, these Christmas White Chocolate-Dipped Sugar Wafers are not safe for pets. Chocolate is toxic to dogs and cats, so it’s important to keep these treats out of reach of your furry friends. If you’re looking for a pet-friendly alternative, consider making a batch of dog-safe treats using ingredients like peanut butter and pumpkin instead!
What if I want a healthier version of these wafers?
Very! You can opt for dark chocolate instead of white for a richer flavor and a healthier option. Additionally, consider using coconut oil instead of shortening for a healthier fat alternative. Incorporating toppings like nuts or dried fruits can also add nutritional value while keeping that festive charm alive!

Delightful Christmas White Chocolate-Dipped Sugar Wafers
Ingredients
Equipment
Method
- Gather all your materials: sugar wafers, white chocolate, and optional decorations. Line a baking sheet with parchment paper.
- Combine the white chocolate and shortening in a microwave-safe bowl. Heat in the microwave at 50% power for 15-second intervals until melted and smooth, about 1-2 minutes.
- Dip a sugar wafer into the melted chocolate, letting excess drip back into the bowl, and place it on the prepared baking sheet.
- Immediately sprinkle decorations over the wet chocolate on each wafer before it sets.
- Let the wafers cool at room temperature for about 15-20 minutes until the chocolate hardens.
- Transfer cooled wafers into an airtight container, separating layers with parchment paper if necessary.