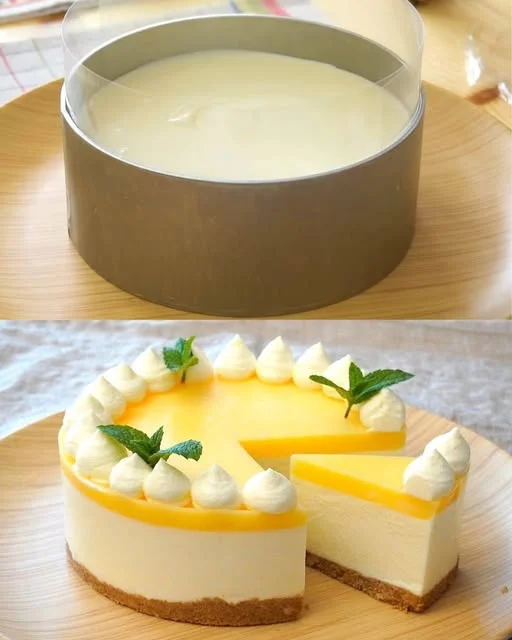
Some desserts are more than just a sweet treat—they hold memories, emotions, and a sense of nostalgia. For me, cream puffs are one of those desserts. I remember standing in my grandmother’s kitchen as a child, watching her effortlessly pipe delicate choux pastry onto baking trays. The oven door would open, and the once-flat dough would transform into golden, airy puffs, perfectly crisp on the outside and light as air on the inside.
But the real magic happened when she filled them with rich, velvety vanilla pastry cream. One bite and I was hooked—the crisp pastry shell giving way to a smooth, luscious filling that made every bite feel like pure indulgence. It wasn’t just the taste that made them special, but the love and tradition behind every batch.
Years later, as I started baking on my own, I searched for that perfect cream puff recipe—one that captured the lightness of the pastry, the richness of the filling, and the joy of homemade baking. After countless trials, I finally found the one. This recipe is foolproof, delicious, and brings back the same warm, comforting feeling of my childhood.
If you’ve been looking for a classic cream puff recipe, you’ve found it. Whether you’re making them for a celebration, a special dessert, or just because—you’re in for a treat!
Why Cream Puffs Are Loved by Everyone
Cream puffs have been a beloved dessert for generations, and it’s easy to see why. These delicate pastries are the perfect balance of light and rich, crisp and creamy. Here’s why they remain a timeless favorite:
1. Light, Airy Pastry with a Crisp Shell
The magic of cream puffs lies in the choux pastry. It’s a dough that, when baked, puffs up into hollow, golden shells, perfect for filling with anything from classic vanilla cream to chocolate, whipped cream, or even savory fillings.
2. Rich and Creamy Filling
A good cream puff isn’t just about the pastry—it’s about what’s inside. The vanilla pastry cream is smooth, luxuriously thick, and packed with flavor. It contrasts beautifully with the crisp pastry, making every bite a perfect combination of textures.
3. No Special Equipment Required
Unlike other pastries that require fancy tools, cream puffs are made with basic ingredients and simple kitchen tools. If you have a saucepan, a spoon, and an oven, you can make them!
4. Elegant Yet Easy
Despite their delicate and impressive appearance, cream puffs are surprisingly easy to make. Once you master the choux pastry technique, you’ll find yourself making them over and over again.
5. Perfect for Any Occasion
Cream puffs are versatile—they can be served as a light dessert, an afternoon tea treat, or even a showstopper at parties and celebrations. Plus, they can be customized with different fillings and toppings to suit any event.
Ingredients
| Ingredient | Quantity |
|---|---|
| Puff pastry | 400 grams (14 oz) |
| Egg (beaten) | 1 |
| Ketchup | 2 tablespoons |
| Boiled sausage (chopped) | 100 grams (3.5 oz) |
| Smoked sausage (chopped) | 100 grams (3.5 oz) |
| Pickled cucumbers (sliced) | 2 |
Directions
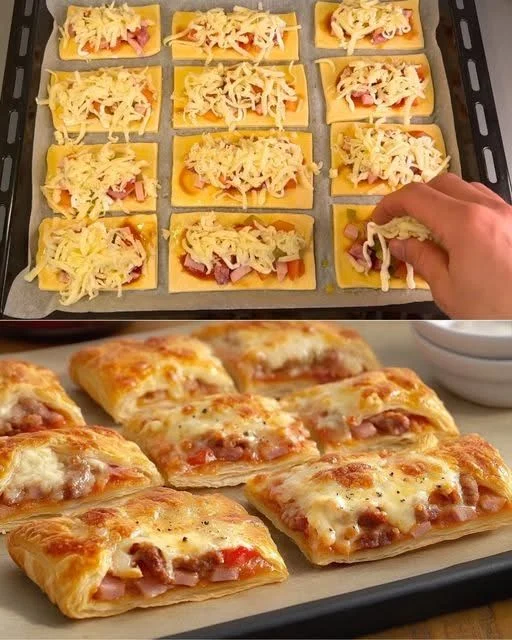
- Prepare the Pastry: Preheat the oven to 200°C (392°F). Roll out the puff pastry on a lightly floured surface and cut it into squares or rectangles.
- Assemble the Puffs: Spread a thin layer of ketchup over each pastry piece. Evenly distribute the boiled and smoked sausages, along with the pickled cucumbers.
- Seal the Edges: Fold the pastry over the filling, pressing the edges down with a fork to seal.
- Egg Wash: Brush the tops with beaten egg for a beautifully golden crust.
- Bake to Perfection: Place the puffs on a baking sheet lined with parchment paper. Bake for 15-20 minutes, or until golden brown and puffed up.
- Serve & Enjoy: Let the puffs cool slightly before serving. Enjoy them warm for the best texture and flavor!
Nutritional Information (Per Serving, Approximate)
| Nutrient | Value |
|---|---|
| Calories | 300-350 kcal |
| Protein | 10-12g |
| Carbohydrates | 25-30g |
| Fat | 18-20g |
| Fiber | 2g |
Ways to Customize Your Cream Puffs
The beauty of cream puffs is that they’re incredibly adaptable. Here are some ways to get creative with your fillings and flavors:
1. Chocolate Lover’s Dream
- Fill your cream puffs with chocolate pastry cream by adding melted dark chocolate to the vanilla custard.
- Drizzle melted chocolate over the top for an elegant finishing touch.
2. Whipped Cream Delight
- Instead of pastry cream, fill them with lightly sweetened whipped cream for a more delicate texture.
- Add a touch of cocoa powder or cinnamon for a hint of extra flavor.
3. Fresh Fruit Perfection
- Fill the puffs with pastry cream and fresh berries like strawberries, raspberries, or blueberries.
- Dust with powdered sugar and serve with a side of fruit compote for a refreshing touch.
4. Caramel or Coffee Infusion
- Add a swirl of caramel sauce into the pastry cream for a decadent twist.
- Mix in espresso powder for a delightful coffee-flavored filling.
5. Savory Variations
Cream puffs aren’t just for desserts! You can also make them savory by filling them with:
- Herbed cream cheese for a light, tangy bite.
- Smoked salmon and dill for an elegant appetizer.
- Chicken or tuna salad for a unique twist on classic finger foods.
FAQs: Everything You Need to Know About Cream Puffs
1. Why Didn’t My Cream Puffs Rise?
This usually happens if the oven temperature is too low or if the dough wasn’t cooked properly before adding the eggs. Make sure to:
- Bake at a high temperature (200°C/392°F) to create steam and allow the puffs to expand.
- Cook the dough fully before adding eggs to ensure the right texture.
2. Can I Make Cream Puffs in Advance?
Yes! The pastry shells can be baked a day ahead and stored in an airtight container at room temperature. The pastry cream should be made fresh and kept in the fridge until ready to fill.
3. How Do I Store Leftover Cream Puffs?
Filled cream puffs should be stored in the refrigerator and are best eaten within 24 hours to keep their texture crisp. If storing for longer, keep the shells separate from the filling.
4. Can I Freeze Cream Puffs?
Absolutely! Unfilled cream puff shells can be frozen for up to 1 month. Simply bake and cool them completely, then store in a freezer bag. To use, reheat in the oven at 180°C (350°F) for a few minutes to crisp them back up.
5. Can I Make Mini Cream Puffs?
Yes! You can pipe smaller portions of dough to create bite-sized cream puffs. Just reduce the baking time by a few minutes, as they will cook faster.
6. What’s the Best Way to Fill Cream Puffs?
You can fill them in two ways:
- Slice them open and spoon the cream inside.
- Use a piping bag to inject the filling through a small hole in the pastry shell.
Final Thoughts: Why You Need to Try These Golden Cream Puffs
Few desserts are as delicate, satisfying, and timeless as cream puffs. They are light yet indulgent, crisp yet creamy, and they always make an impression. Whether you’re making them for the first time or you’re a seasoned baker, this classic recipe is one you’ll want to keep forever.
Baking these at home brings a sense of joy and accomplishment—watching the pastries puff up in the oven, filling them with silky cream, and taking that first bite of pure delight. They’re perfect for any occasion, and once you taste them, you’ll understand why people have loved cream puffs for centuries.
So, if you’ve been searching for the perfect cream puff recipe, look no further. Try them today and fall in love with this classic French-inspired dessert!
Golden Cream Puffs – A Classic Pastry That Never Fails to Impress
Ingredients
Method
- Prepare the Choux Pastry: In a saucepan, bring water, milk, salt, sugar, and butter to a boil. Stir in the flour all at once and cook until the dough pulls away from the sides. Let cool slightly.
- Incorporate the Eggs: Add eggs one at a time, mixing thoroughly after each addition until the dough is smooth and glossy.
- Bake the Pastry Shells: Preheat the oven to 200°C (392°F). Pipe or spoon the dough onto a lined baking sheet. Bake for 20-25 minutes until golden and puffed. Let cool completely.
- Prepare the Pastry Cream: In a saucepan, whisk together sugar, cornstarch, and milk. Cook over medium heat, stirring constantly until thickened. Remove from heat and stir in vanilla extract. Let cool.
- Fill the Cream Puffs: Slice the pastry shells open and fill them with the cooled pastry cream.
- Serve & Enjoy: Dust with powdered sugar or drizzle with chocolate for an extra indulgent touch.
Notes
- For extra crispiness, poke a small hole in each puff after baking to release steam.
- Customize the filling by adding cocoa powder for a chocolate variation.
- Store unfilled pastry shells in an airtight container at room temperature for up to 2 days.
- Refrigerate filled cream puffs and enjoy within 24 hours for the best texture.
- Freeze unfilled choux pastry shells for up to 1 month and reheat in the oven before using.