There was a time when I struggled with breakfast. Mornings were always rushed, and I often skipped eating altogether or grabbed something processed on the go. I knew that I needed to change my habits, especially after feeling sluggish throughout the day. That’s when I discovered this simple, wholesome apple oatmeal bake—a recipe that became a game-changer for my health and weight-loss journey.
At first, I wasn’t sure if something so easy could actually make a difference. But after committing to starting my day with this fiber-rich, nutrient-packed meal, I noticed real changes. I felt full longer, had more energy, and even lost weight effortlessly. The best part? It didn’t feel like a diet food—it was naturally sweet, warm, and comforting, just like a homemade apple pie.
Now, this recipe has become a staple in my kitchen. It’s something I look forward to every morning, and I love knowing that I’m fueling my body with healthy, whole ingredients. Whether you’re trying to lose weight, improve your digestion, or simply want a delicious and filling breakfast, this apple oatmeal bake is a must-try.
Why This Apple Oatmeal Bake Is Perfect for a Healthy Lifestyle
This recipe isn’t just about weight loss—it’s about fueling your body with real, nourishing food. Here’s why it stands out:
- Made with 100% natural ingredients – No processed sugar, flour, or unhealthy fats.
- Packed with fiber and protein – Helps you stay full longer and supports digestion.
- Supports weight loss naturally – Balanced nutrients prevent cravings and overeating.
- Quick and easy to make – A perfect meal prep option for busy mornings.
- Tastes like dessert – Naturally sweetened with bananas and apples, making it feel indulgent without guilt.
If you’re looking for a breakfast that’s delicious, satisfying, and helps with weight management, this is it.
Ingredients
| Ingredient | Quantity |
|---|---|
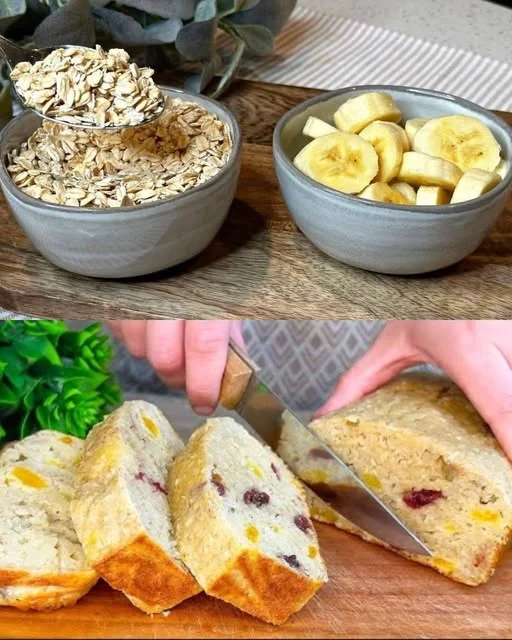
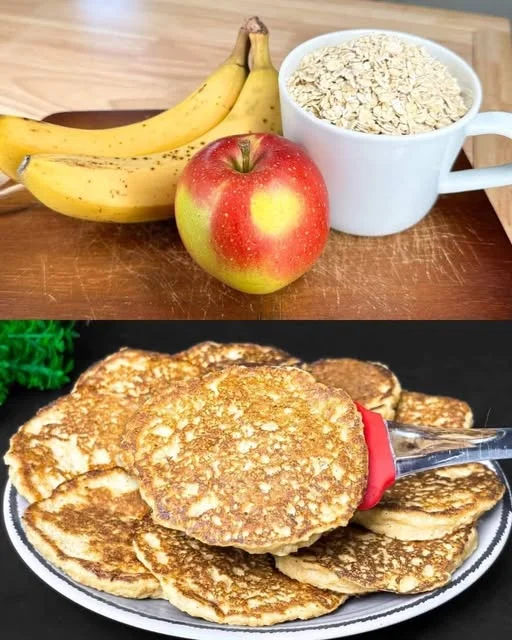
| Oatmeal | 1 cup |
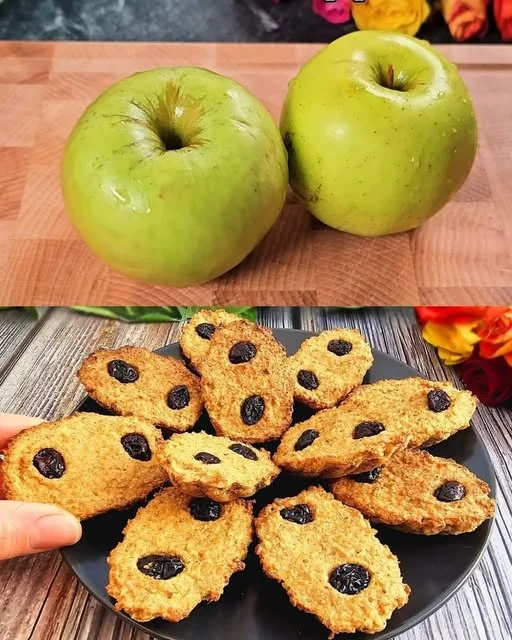
| Apples, peeled and chopped | 2 |
| Bananas, mashed | 2 |
| Eggs | 2 |
| Yogurt | 150g |
| Baking powder | 1 teaspoon |
| Cinnamon | To taste |
Directions
- Preheat the oven – Set to 180°C (350°F) and grease a baking dish.
- Prepare the batter – In a mixing bowl, combine mashed bananas, eggs, yogurt, and cinnamon. Stir well.
- Add dry ingredients – Mix in oatmeal, baking powder, and chopped apples until fully incorporated.
- Transfer to a baking dish – Spread the mixture evenly in the dish.
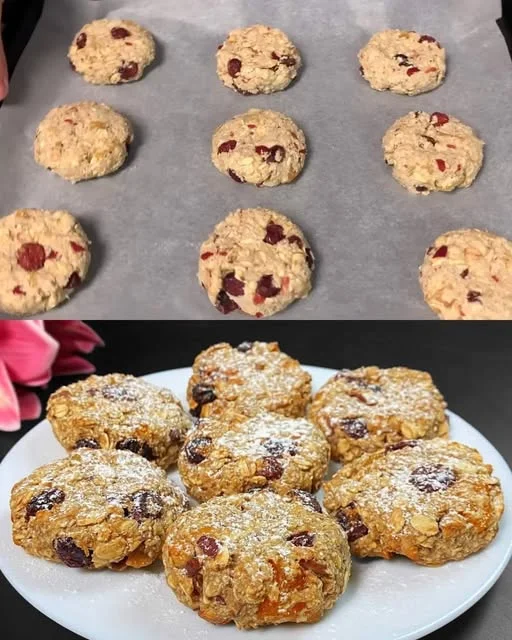
- Bake – Place in the oven and bake for 25–30 minutes until golden brown and firm.
- Cool and serve – Let it cool slightly before serving. Enjoy warm or cold!
Nutritional Information (Per Serving, Approx.)
| Nutrient | Amount |
|---|---|
| Calories | 180–220 kcal |
| Protein | 6–8 g |
| Fat | 4–6 g |
| Carbohydrates | 30–35 g |
| Fiber | 4–5 g |
| Natural Sugar | 12–15 g |
The Nutritional Benefits of This Apple Oatmeal Bake
This isn’t just a delicious breakfast—it’s a powerhouse of nutrients that fuel your body throughout the day.
1. Oatmeal – The Ultimate Weight-Loss Ingredient
Oats are rich in fiber, particularly beta-glucan, which helps:
- Keep you full longer by slowing digestion.
- Stabilize blood sugar levels, reducing cravings.
- Support heart health by lowering cholesterol.
2. Apples – A Natural Source of Sweetness and Fiber
Apples are a great addition to a healthy diet because they:
- Are packed with vitamins and antioxidants.
- Help with digestion and gut health.
- Add natural sweetness without refined sugar.
3. Bananas – A Perfect Natural Sweetener
Bananas make this recipe moist and naturally sweet while also providing:
- Essential vitamins and minerals like potassium.
- Energy-boosting carbohydrates for sustained energy.
- Prebiotic fiber to support gut health.
4. Yogurt – A Creamy, Protein-Rich Addition
Yogurt adds protein, calcium, and probiotics, making this recipe:
- Great for muscle recovery and bone health.
- More satisfying and creamy without needing butter or oil.
5. Cinnamon – A Metabolism-Boosting Spice
Beyond adding warmth and depth to the flavor, cinnamon is known to:
- Regulate blood sugar levels, preventing energy crashes.
- Have anti-inflammatory and antioxidant properties.
Each ingredient plays a role in making this one of the healthiest breakfasts you can eat.
How This Apple Oatmeal Bake Supports Weight Loss
Unlike processed breakfasts that spike blood sugar and leave you hungry soon after, this meal is designed to:
✅ Keep you full for hours – Thanks to fiber and protein, you won’t feel the need to snack before lunch.
✅ Boost metabolism naturally – Oatmeal and cinnamon help regulate digestion and energy levels.
✅ Reduce cravings – The natural sweetness satisfies sugar cravings without added sugars.
✅ Provide steady energy – No crashes, just sustained fuel for your body and brain.
By making this your daily breakfast, you’ll notice how easy it is to stay on track with your health goals.
Tips for Making the Best Apple Oatmeal Bake
While this recipe is simple, a few small adjustments can enhance flavor and texture.
1. Choose the Right Apples
For the best taste, use sweet-tart apples like Honeycrisp, Pink Lady, or Fuji. They hold their texture well and add natural sweetness.
2. Use Extra-Ripe Bananas
The riper the bananas, the sweeter and more flavorful your bake will be. No need for added sugar!
3. Adjust the Texture to Your Liking
- For a softer, pudding-like texture, add an extra ¼ cup of yogurt.
- For a firmer texture, let it cool completely before slicing.
4. Add Nuts or Seeds for Extra Crunch
If you want to add healthy fats and crunch, top your bake with:
- Chopped walnuts or almonds for extra protein.
- Pumpkin or sunflower seeds for a nut-free option.
5. Meal Prep for the Week
- Bake a batch and store in the fridge for up to 5 days.
- Warm a slice each morning for a quick, ready-to-eat breakfast.
These small tips will make sure you get the perfect texture and flavor every time.
FAQs About Apple Oatmeal Bake
1. Can I make this recipe vegan?
Yes! Simply swap the yogurt for plant-based yogurt and replace eggs with flax eggs (1 tbsp ground flaxseed + 3 tbsp water per egg).
2. Can I use instant oats instead of rolled oats?
You can, but rolled oats provide a better texture and more fiber. Instant oats will make the bake softer and less structured.
3. How do I store and reheat this bake?
- Store in an airtight container in the fridge for up to 5 days.
- To reheat, warm in the microwave for 30 seconds or in the oven for 5 minutes at 180°C (350°F).
4. Can I freeze this for later?
Absolutely! Slice and freeze individual portions. Reheat directly from frozen in the microwave for 60 seconds.
5. What can I serve with this?
- Top with almond or peanut butter for extra protein.
- Pair with a cup of coffee or tea for a complete morning routine.
This bake is incredibly versatile, making it easy to customize and enjoy in different ways.
Final Thoughts – A Breakfast Worth Making Every Day
This Apple Oatmeal Bake is more than just a breakfast—it’s a healthy habit that supports your body, satisfies your cravings, and makes mornings easier.
✅ It’s delicious.
✅ It’s nutrient-dense.
✅ It’s easy to make.
Whether you’re on a weight-loss journey or just want a nutritious meal to start your day, this recipe is a must-try.
So the next time you’re looking for a quick, satisfying, and healthy breakfast, skip the processed cereals and make this instead—you won’t regret it!
Apple Oatmeal Bake – A Simple Breakfast That Transformed My Mornings
Ingredients
Method
- Preheat oven to 180°C (350°F) and grease a baking dish.
- Mix wet ingredients – In a bowl, combine mashed bananas, eggs, yogurt, and cinnamon. Stir until smooth.
- Add dry ingredients – Mix in the oatmeal, baking powder, and chopped apples until fully incorporated.
- Transfer to a baking dish – Spread the mixture evenly.
- Bake for 25–30 minutes, or until golden brown and firm.
- Cool and serve – Let it rest for a few minutes before slicing. Enjoy warm or cold!
Notes
- Use ripe bananas for extra natural sweetness.
- Swap yogurt for plant-based yogurt to make it dairy-free.
- Store in an airtight container in the fridge for up to 5 days or freeze for up to 2 months.
- Serve with Greek yogurt, nut butter, or fresh fruit for an extra boost of flavor and protein.