Irresistible Carrot Walnut Cake: A Daily Delight for Every Occasion

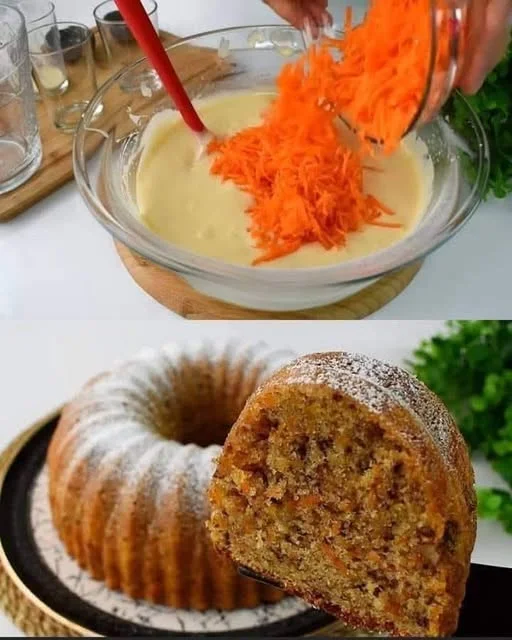
Some recipes are more than just food—they are tied to emotions, nostalgia, and moments that stay with us forever. For me, carrot walnut cake is one of those special treats that instantly transports me back to my grandmother’s cozy kitchen.

She had a way of making everything feel warm and inviting, and her baking was no exception. The scent of cinnamon and vanilla would fill the air as she carefully grated fresh carrots and folded them into the batter. She never measured ingredients with exact precision, yet somehow, the cake always turned out perfect—moist, flavorful, and filled with crunchy walnuts.

As a child, I was always eager to help, sneaking tiny bites of batter when she wasn’t looking. When the cake came out of the oven, we’d wait impatiently for it to cool just enough before cutting generous slices. A cup of tea, a cozy afternoon, and a slice of that cake—it was simple but felt like the ultimate comfort.

Now, as an adult, I find myself making this cake often, not just because it’s incredibly delicious, but because it reminds me of home. It’s a recipe I share with friends, bake for special occasions, and sometimes enjoy just because. And every time I take a bite, I remember the warmth of my grandmother’s kitchen and the love baked into every slice.

Why This Carrot Walnut Cake Is a Must-Try

1. Moist, Fluffy, and Packed with Flavor

Carrots keep the cake incredibly moist, while walnuts add a perfect crunch. The cinnamon and vanilla create a warm, comforting aroma that fills the kitchen as it bakes.

2. A Classic That Never Gets Old

This is the kind of cake that never goes out of style. Whether served at family gatherings, birthdays, or weekend tea times, it’s always a crowd-pleaser.

3. Simple Ingredients, Big Results

Made with pantry staples like eggs, flour, sugar, and milk, this cake is easy to whip up without needing any fancy ingredients.

4. A Healthier Sweet Treat

Carrots add natural sweetness and are packed with vitamins, while walnuts provide healthy fats and protein. You get a delicious dessert with added nutritional benefits.

5. Perfect for Any Time of Day

Enjoy it as a breakfast treat, an afternoon snack, or a dessert after dinner. It pairs beautifully with coffee, tea, or even a light dusting of powdered sugar for extra sweetness.

Ingredients

IngredientQuantity
Eggs4 large
Granulated sugar1.5 cups (225g)
Milk1 cup (200ml)
Oil1 cup (200ml)
All-purpose flour2.5 cups (300g)
Baking powder2 packets (20g)
Vanilla1 packet (5g)
Grated carrots2 cups
Walnuts, chopped1 cup (slightly less than full)
Cinnamon1 teaspoon

Directions

  1. Preheat oven to 350°F (175°C) and grease a cake pan or line it with parchment paper.
  2. Whisk the eggs and sugar in a large bowl until light and fluffy.
  3. Add the milk and oil to the mixture, stirring until well combined.
  4. Sift the flour, baking powder, vanilla, and cinnamon into the wet mixture, folding gently to avoid overmixing.
  5. Incorporate the grated carrots and chopped walnuts, mixing until evenly distributed.
  6. Pour the batter into the prepared cake pan and smooth the top.
  7. Bake for 40-45 minutes or until a toothpick inserted into the center comes out clean.
  8. Let the cake cool completely before slicing and serving. Enjoy!

Nutritional Information (Per Serving, Approximate)

NutrientAmount
Calories280 kcal
Carbohydrates35 g
Protein5 g
Fat14 g
Fiber2 g
Vitamin A60% DV
Iron8% DV

The Health Benefits of Carrots and Walnuts

Carrots: More Than Just a Sweet Addition

Carrots do more than add moisture and natural sweetness to this cake; they’re also loaded with essential nutrients:

  • Rich in Vitamin A – Supports eye health and boosts immunity.
  • High in Fiber – Aids digestion and keeps you feeling full longer.
  • Natural Sweetness – Reduces the need for excessive sugar while still keeping the cake delicious.

Walnuts: A Crunchy Superfood

Walnuts aren’t just for texture—they add a wealth of health benefits:

  • Packed with Omega-3s – Supports heart and brain health.
  • High in Antioxidants – Helps reduce inflammation in the body.
  • Great Source of Protein – Keeps you satisfied and energized.

Together, these ingredients make this cake not just a treat but a nourishing, feel-good dessert.

FAQs About Carrot Walnut Cake

1. Can I make this cake without walnuts?

Yes! If you have a nut allergy or simply prefer a nut-free version, you can skip the walnuts. You can also replace them with raisins, shredded coconut, or even chocolate chips for a twist.

2. What type of carrots should I use?

Fresh, finely grated carrots work best. Avoid pre-shredded store-bought carrots, as they tend to be dry and don’t blend as well into the batter.

3. Can I use whole wheat flour instead of all-purpose flour?

Yes, but keep in mind that whole wheat flour will make the cake denser. If you prefer a lighter texture, try using half all-purpose flour and half whole wheat flour.

4. Can I reduce the sugar in this recipe?

Absolutely! You can reduce the sugar slightly without affecting the texture. If you prefer natural sweeteners, try substituting part of the sugar with honey or maple syrup.

5. How do I store carrot walnut cake?

Store the cake in an airtight container at room temperature for up to 3 days. If refrigerated, it can last up to a week. You can also freeze it for up to 3 months—just wrap individual slices in plastic wrap and store them in a freezer-safe container.

6. Can I add frosting to this cake?

While this cake is delicious on its own, you can take it up a notch with a classic cream cheese frosting. Simply mix cream cheese, butter, powdered sugar, and vanilla for a rich and tangy topping.

7. What’s the best way to make sure my cake stays moist?

Be careful not to overmix the batter, as that can make the cake dense. Also, make sure not to overbake it—check for doneness by inserting a toothpick into the center. If it comes out with just a few crumbs, it’s perfect!

8. Can I turn this into muffins or cupcakes?

Yes! Simply divide the batter into a lined muffin tin and bake at 350°F (175°C) for about 20-25 minutes, or until a toothpick inserted into the center comes out clean.

9. Can I make this cake dairy-free?

Yes! Swap out regular milk for almond milk, oat milk, or coconut milk. The texture will remain soft and delicious.

10. What can I serve with carrot walnut cake?

This cake pairs well with:

  • A hot cup of tea or coffee for a cozy afternoon treat.
  • A drizzle of honey or maple syrup for added natural sweetness.
  • A scoop of vanilla or cinnamon ice cream for an indulgent dessert.

A Timeless Cake You’ll Want to Bake Again and Again

There’s a reason why carrot walnut cake has stood the test of time. It’s simple yet rich in flavor, sweet yet balanced, and comforting in every way. Whether you’re baking it for a special occasion or just because you’re craving something warm and homemade, this cake never disappoints.

With its moist texture, crunchy walnuts, and warm cinnamon spice, it’s a dessert that brings joy with every bite. And the best part? It’s incredibly easy to make—so don’t be surprised if you find yourself baking it every week.

So go ahead, preheat the oven, and let the aroma of freshly baked carrot walnut cake fill your kitchen. One slice, and you’ll understand why this is a recipe worth keeping forever.

Amal

Irresistible Carrot Walnut Cake: A Daily Delight for Every Occasion

This moist and fluffy carrot walnut cake is packed with warm cinnamon flavor, crunchy walnuts, and naturally sweet carrots. It’s an easy, no-fail recipe that requires simple ingredients yet delivers incredible flavor. Perfect for breakfast, afternoon tea, or dessert, this cake is a comforting treat that you’ll want to bake again and again!
Prep Time 10 minutes
Cook Time 45 minutes
Total Time 55 minutes
Servings: 10 -12 slices
Course: Dessert
Cuisine: International

Ingredients
  

  • 4 eggs
  • 1.5 cups granulated sugar 225g
  • 1 cup milk 200ml
  • 1 cup oil 200ml
  • 2.5 cups all-purpose flour 300g
  • 2 packets baking powder 20g
  • 1 packet vanilla 5g
  • 2 cups grated carrots
  • 1 cup walnuts chopped (slightly less than a full cup)
  • 1 teaspoon cinnamon

Method
 

  1. Preheat oven to 350°F (175°C) and grease a cake pan or line it with parchment paper.
  2. In a large bowl, whisk the eggs and sugar until light and fluffy.
  3. Add the milk and oil, mixing until fully combined.
  4. Sift in the flour, baking powder, vanilla, and cinnamon. Gently fold the ingredients together, being careful not to overmix.
  5. Stir in the grated carrots and chopped walnuts, ensuring they are evenly distributed.
  6. Pour the batter into the prepared cake pan and smooth the top.
  7. Bake for 40-45 minutes, or until a toothpick inserted into the center comes out clean.
  8. Let the cake cool completely before slicing. Serve as is, or top with a dusting of powdered sugar or a simple glaze.

Notes

  • For a healthier version, replace half of the all-purpose flour with whole wheat flour.
  • If you prefer a less sweet cake, reduce the sugar slightly or replace part of it with honey or maple syrup.
  • Store leftovers in an airtight container at room temperature for up to 3 days or refrigerate for up to a week.
  • This cake freezes well—wrap slices individually and store in a freezer-safe bag for up to 3 months.
  • Serve with a cream cheese frosting or a drizzle of honey for extra indulgence.

Golden Delight: The Sweet Potato Mochi Bites Everyone Will Love

There’s something about sweet potatoes that reminds me of childhood. When I was young, my grandmother always had a way of turning the simplest ingredients into something magical. She didn’t need elaborate recipes or fancy kitchen tools—just a few pantry staples and a whole lot of love.

One of my favorite memories was sitting by the stove, watching her transform mashed sweet potatoes into warm, chewy treats. She would knead the soft dough with her hands, shaping it effortlessly into small rounds, then gently pan-fry them until they turned golden brown. I would eagerly wait for the first bite, the scent of toasted sesame filling the air, and the taste—a perfect balance of sweetness, chewiness, and warmth—was pure comfort.

It wasn’t until years later that I realized just how simple this recipe was. Sweet potatoes, glutinous rice flour, sugar, and milk—that’s all it takes to recreate this nostalgic treat. Now, every time I make these sweet potato mochi bites, I feel like I’m passing down a little piece of my childhood to my own family. And the best part? Kids love them just as much as I did.

Why You’ll Love This Recipe

1. Soft, Chewy, and Naturally Sweet

These sweet potato bites have a delightful chewy texture, thanks to the glutinous rice flour. The natural sweetness of the sweet potatoes means you don’t need much added sugar, making them a healthier treat.

2. Kid-Friendly and Fun to Make

Kids love their soft, bouncy texture, and they’re easy to shape with little hands. Whether you turn them into balls, discs, or fun animal shapes, they make snack time exciting!

3. Made with Simple, Wholesome Ingredients

No artificial ingredients or preservatives—just a handful of natural ingredients that come together beautifully. You can even swap out the sugar for honey or maple syrup for a different twist.

4. Quick and Easy to Prepare

This recipe requires minimal prep time, and since the sweet potatoes cook quickly, you’ll have a delicious snack ready in no time.

5. Perfect for Any Occasion

Enjoy these mochi bites as a breakfast treat, a healthy afternoon snack, or even a light dessert. They pair well with tea, coffee, or a drizzle of condensed milk for extra indulgence.

Ingredients

IngredientQuantity
Sweet potatoes400g, peeled and chopped
Glutinous rice flour100g
Sugar20g
Milk120ml
Toasted sesame seedsFor topping

Directions

  1. Cook the sweet potatoes: Steam or boil the sweet potatoes until soft, about 15-20 minutes. Drain and mash until smooth.
  2. Prepare the dough: In a bowl, mix the mashed sweet potatoes with glutinous rice flour, sugar, and milk. Knead until a smooth, slightly sticky dough forms.
  3. Shape the bites: Divide the dough into small portions and roll into round discs or desired shapes.
  4. Cook the mochi bites: Heat a non-stick pan over medium heat. Lightly oil the surface and cook the bites for 3-4 minutes per side until golden brown.
  5. Finish with sesame seeds: Remove from heat and sprinkle with toasted sesame seeds for added flavor and crunch.
  6. Serve warm: Enjoy on their own or with a drizzle of honey or condensed milk for extra sweetness.

Nutritional Information (Per Serving, Approximate)

NutrientAmount
Calories180 kcal
Carbohydrates35 g
Protein3 g
Fat2 g
Fiber3 g
Vitamin A120% DV
Calcium8% DV

The Health Benefits of Sweet Potatoes and Glutinous Rice Flour

Sweet Potatoes: A Nutrient Powerhouse

Sweet potatoes aren’t just delicious—they’re packed with nutrients that make them a great addition to any diet:

  • Rich in vitamin A, which supports eye health and the immune system.
  • A great source of fiber, aiding digestion and keeping you full longer.
  • Naturally sweet, making them a healthier alternative to processed sugar.
  • Packed with antioxidants, which help fight inflammation and support overall well-being.

Glutinous Rice Flour: The Secret to Chewy Perfection

Glutinous rice flour (also known as sticky rice flour) gives these bites their signature chewiness:

  • Naturally gluten-free, making it a great alternative for those with gluten sensitivities.
  • Easily digestible, making it gentle on the stomach.
  • Helps create a satisfying texture, perfect for chewy desserts and snacks.

Together, these ingredients create a delicious treat that is both comforting and nourishing.

FAQs About Sweet Potato Mochi Bites

1. What is glutinous rice flour, and can I substitute it?

Glutinous rice flour is made from sticky rice and gives these bites their chewy texture. Despite the name, it does not contain gluten. If you substitute it with regular rice flour or other types of flour, the texture will be completely different—more crumbly and less stretchy.

2. Can I use different types of sweet potatoes?

Yes! While orange sweet potatoes are the most common, you can also use purple or Japanese sweet potatoes for a slightly different flavor and color.

3. Are these mochi bites gluten-free?

Yes! Glutinous rice flour is naturally gluten-free, making this a great treat for those avoiding gluten. Just ensure that your other ingredients, like milk, are also gluten-free if needed.

4. Can I make them dairy-free?

Absolutely! Simply swap out the milk for almond milk, coconut milk, or any other plant-based alternative. The texture may vary slightly, but the flavor will still be delicious.

5. Can I bake these instead of pan-frying?

Yes! To bake, place the shaped dough pieces on a parchment-lined baking sheet and bake at 350°F (175°C) for about 20 minutes, flipping halfway through. They won’t have the same crispy exterior, but they’ll still be soft and chewy.

6. How do I store leftovers?

Store any leftover mochi bites in an airtight container at room temperature for up to a day or in the refrigerator for up to three days. Reheat in a pan or microwave before eating to restore their soft texture.

7. Can I freeze them?

Yes! Freeze them in a single layer on a baking sheet before transferring them to a freezer-safe bag. To reheat, thaw them slightly and pan-fry or bake until warm.

8. How can I make them sweeter?

If you prefer a sweeter treat, increase the sugar slightly or drizzle them with honey, maple syrup, or condensed milk after cooking.

9. Can I add fillings to these mochi bites?

Definitely! Try stuffing them with red bean paste, sweetened coconut, or even chocolate for a fun surprise inside.

10. What should I serve these with?

These sweet potato mochi bites pair wonderfully with:

  • A warm cup of green tea or chai.
  • A side of fresh fruit for a refreshing contrast.
  • A drizzle of honey or condensed milk for extra sweetness.
  • A sprinkle of cinnamon or matcha powder for a unique twist.

A Snack Worth Sharing

There’s something special about food that brings back memories. These sweet potato mochi bites aren’t just a delicious snack—they’re a piece of tradition, a reminder of simple joys, and a recipe worth passing down. Whether you’re making them for kids, sharing them with friends, or enjoying them with a quiet cup of tea, they offer warmth and comfort in every bite.

So if you haven’t tried this recipe yet, now’s the perfect time. Sweet, chewy, and incredibly satisfying—once you taste them, you’ll wonder why you didn’t discover them sooner.

Amal

Golden Delight: The Sweet Potato Mochi Bites Everyone Will Love

These sweet potato mochi bites are soft, chewy, and naturally sweet with a delicate crispness from pan-frying. Made with just a few simple ingredients like sweet potatoes, glutinous rice flour, and milk, they are the perfect snack or dessert for kids and adults alike. Topped with toasted sesame seeds, they offer a delightful texture and flavor that will keep you coming back for more!
Prep Time 10 minutes
Cook Time 20 minutes
Total Time 30 minutes
Servings: 10 -12 pieces
Course: Snack
Cuisine: Asian-inspired

Ingredients
  

  • 400 g sweet potatoes peeled and chopped
  • 100 g glutinous rice flour
  • 20 g sugar
  • 120 ml milk
  • Toasted sesame seeds for topping

Method
 

  1. Steam or boil the sweet potatoes until soft, about 15-20 minutes. Drain and mash until smooth.
  2. In a mixing bowl, combine the mashed sweet potatoes with glutinous rice flour, sugar, and milk. Knead until a smooth, slightly sticky dough forms.
  3. Divide the dough into small portions and shape them into round discs or balls.
  4. Heat a non-stick pan over medium heat and lightly grease it with oil. Place the mochi bites in the pan and cook for 3-4 minutes on each side until golden brown.
  5. Remove from heat and sprinkle with toasted sesame seeds. Serve warm and enjoy!

Notes

  • For a dairy-free version, substitute milk with coconut milk or almond milk.
  • If the dough is too sticky, add a little more glutinous rice flour. If too dry, add a splash of milk.
  • These mochi bites can be baked at 350°F (175°C) for 20 minutes if you prefer a non-fried version.
  • Store leftovers in an airtight container at room temperature for up to one day or refrigerate for up to three days. Reheat before serving.
  • Pair with a drizzle of honey, maple syrup, or condensed milk for extra sweetness.

Golden Bites: Zucchini and Yellow Lentil Patties That Bring Comfort and Nutrition

Growing up, my mother had a magical way of making vegetables taste incredible. She could turn the simplest ingredients into a meal that felt like a warm hug. One of her most creative dishes was a variation of these zucchini and yellow lentil patties. They were crispy on the outside, soft on the inside, and packed with flavor. As a child, I didn’t realize how nutritious they were—I just knew they tasted amazing.

Years later, as I started cooking for myself, I found myself craving that same comforting dish. I experimented, tweaking my mother’s recipe until I found the perfect balance of flavors and textures. The yellow lentils bring a hearty, slightly nutty taste, while the zucchini adds moisture and a fresh, subtle sweetness. Spices like cumin and paprika add depth, making these patties irresistibly delicious.

Now, they’ve become a staple in my kitchen. Whether I’m making them for a quick lunch, a light dinner, or a nutritious snack, they always hit the spot. They’re proof that simple ingredients can come together to create something extraordinary.

Why You’ll Love These Zucchini and Yellow Lentil Patties

1. A Perfect Balance of Flavor and Texture

These patties are crispy on the outside, soft and flavorful on the inside, and have a subtle earthiness from the lentils that pairs beautifully with the fresh taste of zucchini. The added spices bring warmth and complexity to every bite.

2. A Healthy, Protein-Packed Alternative

Yellow lentils are an excellent source of plant-based protein, making these patties a satisfying meal without the need for meat. They’re also packed with fiber, keeping you full longer and supporting digestive health.

3. Easy to Make and Budget-Friendly

With just a few basic ingredients, you can create a nutritious meal without spending a lot of money. Lentils and zucchini are both affordable, making this a great option for meal planning on a budget.

4. Versatile and Customizable

These patties can be served in many ways—enjoy them on their own, in a sandwich, or as part of a grain bowl. You can also add different spices, swap out ingredients, or experiment with toppings to suit your taste.

5. Great for Meal Prep and Freezing

Make a big batch and store leftovers in the fridge or freezer. They reheat beautifully, making them a perfect option for busy weekdays when you need a quick and healthy meal.

Ingredients

IngredientQuantity
Yellow lentils7oz (200g / 1 cup), rinsed
Water16fl oz (450ml / 2 cups)
Zucchini7oz (190g / 1 medium-sized), grated
Garlic2 cloves, minced
Onion1 small, finely chopped
Fresh parsley¼ cup, chopped
Ground cumin½ teaspoon
Paprika½ teaspoon
Salt½ teaspoon (or to taste)
Black pepper¼ teaspoon (or to taste)
Egg1 large
All-purpose flour¼ cup (or chickpea flour for gluten-free)
Olive oilFor frying

Directions

  1. Cook the lentils: In a pot, combine the rinsed lentils and water. Bring to a boil, then reduce to a simmer and cook for about 15-20 minutes until soft. Drain excess water and mash lightly.
  2. Prepare the zucchini: Grate the zucchini and squeeze out excess moisture using a clean kitchen towel.
  3. Mix the ingredients: In a large bowl, combine the mashed lentils, grated zucchini, garlic, onion, parsley, cumin, paprika, salt, black pepper, egg, and flour. Mix well until a thick batter forms.
  4. Form the patties: Take small portions of the mixture and shape them into round patties.
  5. Cook the patties: Heat olive oil in a pan over medium heat. Fry the patties for about 3-4 minutes per side until golden brown and crispy.
  6. Serve and enjoy: Remove from heat, drain on paper towels, and serve warm with a dipping sauce of your choice.

Nutritional Information (Per Serving, Approximate)

NutrientAmount
Calories180 kcal
Carbohydrates25 g
Protein8 g
Fat6 g
Fiber5 g
Vitamin C15% DV
Iron10% DV

The Health Benefits of Zucchini and Yellow Lentils

Zucchini: Light, Hydrating, and Nutrient-Dense

Zucchini is a low-calorie vegetable packed with essential nutrients. It’s high in water content, which helps keep the patties moist while also providing hydration. Here’s why zucchini is a great addition to your diet:

  • Rich in antioxidants, including vitamin C, which supports immune health.
  • Good source of fiber, aiding digestion and promoting gut health.
  • Low in carbohydrates, making it a great option for those watching their carb intake.

Yellow Lentils: A Protein and Fiber Powerhouse

Lentils are one of the best plant-based protein sources, making them a fantastic alternative to meat. They’re also loaded with fiber, helping to keep you full and satisfied. Additional benefits include:

  • Supports heart health, thanks to their high fiber content, which helps lower cholesterol.
  • Stabilizes blood sugar levels, making them a great option for those managing diabetes.
  • Provides essential minerals, such as iron and magnesium, which are important for energy and muscle function.

FAQs About Zucchini and Yellow Lentil Patties

1. Can I make these patties vegan?

Yes! To make them vegan, simply replace the egg with a flaxseed or chia seed egg. Mix one tablespoon of ground flax or chia seeds with three tablespoons of water, let it sit for a few minutes until it thickens, and use it in place of the egg.

2. How do I keep the patties from falling apart?

The key to binding the mixture is making sure the lentils are well mashed and that you’ve removed excess moisture from the grated zucchini. If the mixture still feels too loose, add a bit more flour or breadcrumbs to help hold it together.

3. Can I bake these patties instead of frying?

Absolutely! Preheat your oven to 375°F (190°C) and place the patties on a parchment-lined baking sheet. Lightly brush them with olive oil and bake for 20-25 minutes, flipping halfway through, until golden brown and crispy.

4. What dipping sauces pair well with these patties?

These patties go well with a variety of dips. Try them with:

  • Garlic yogurt sauce – Greek yogurt mixed with minced garlic, lemon juice, and a pinch of salt.
  • Tahini sauce – A creamy mix of tahini, lemon juice, garlic, and water.
  • Spicy aioli – Mayonnaise blended with hot sauce and a touch of garlic powder.
  • Classic hummus – A protein-packed dip that complements the lentils beautifully.

5. How do I store and reheat leftovers?

Store any leftover patties in an airtight container in the refrigerator for up to three days. To reheat, warm them in a pan over medium heat until crispy again. You can also reheat them in the oven at 350°F (175°C) for about 10 minutes.

6. Can I freeze these patties?

Yes! Cooked patties can be frozen for up to three months. Arrange them in a single layer on a baking sheet to freeze, then transfer them to a freezer-safe bag. To reheat, bake at 375°F (190°C) for 15-20 minutes or pan-fry until heated through.

7. Can I use other vegetables instead of zucchini?

Definitely! Grated carrots, sweet potatoes, or even spinach work well as substitutes or additions to this recipe. Just be sure to squeeze out excess moisture if using watery vegetables.

8. What should I serve with these patties?

These patties can be enjoyed in many ways:

  • As a burger – Serve in a bun with lettuce, tomato, and your favorite sauce.
  • With a salad – Pair with a fresh Mediterranean salad for a light meal.
  • In a wrap – Roll them into a tortilla with hummus and greens.
  • As a side dish – Serve alongside roasted vegetables or rice for a complete meal.

A Dish That Brings Comfort and Nutrition Together

Zucchini and yellow lentil patties are more than just a tasty dish—they’re a perfect blend of nutrition, flavor, and comfort. Whether you’re looking for a meatless meal, a way to sneak more vegetables into your diet, or simply a crispy, satisfying bite, these patties deliver on all fronts.

Their versatility makes them suitable for any occasion, from a light lunch to a hearty dinner. Plus, they’re easy to prepare and store, making them a fantastic option for meal prep. With every bite, you get a delicious mix of textures and spices that make healthy eating feel indulgent.

So next time you have a batch of lentils and some fresh zucchini on hand, give this recipe a try. You might just find yourself making it again and again!

Amal

Golden Bites: Zucchini and Yellow Lentil Patties That Bring Comfort and Nutrition

These zucchini and yellow lentil patties are crispy on the outside, tender on the inside, and packed with protein and flavor. Made with simple ingredients like grated zucchini, cooked lentils, and warm spices, they are a delicious and nutritious option for a snack, appetizer, or light meal. Enjoy them with your favorite dipping sauce or as a veggie burger alternative!
Prep Time 10 minutes
Cook Time 20 minutes
Total Time 30 minutes
Servings: 10 -12 patties
Course: Snack
Cuisine: Mediterranean

Ingredients
  

  • 7 oz 200g / 1 cup yellow lentils, rinsed
  • 16 fl oz 450ml / 2 cups water
  • 7 oz 190g / 1 medium-sized zucchini, grated
  • 2 cloves garlic minced
  • 1 small onion finely chopped
  • ¼ cup fresh parsley chopped
  • ½ teaspoon ground cumin
  • ½ teaspoon paprika
  • ½ teaspoon salt or to taste
  • ¼ teaspoon black pepper or to taste
  • 1 large egg
  • ¼ cup all-purpose flour or chickpea flour for a gluten-free option
  • Olive oil for frying

Method
 

  1. In a saucepan, combine the rinsed lentils and water. Bring to a boil, then reduce to a simmer and cook for 15-20 minutes until soft. Drain any excess water and mash the lentils lightly with a fork.
  2. Place the grated zucchini in a clean kitchen towel and squeeze out excess moisture.
  3. In a large bowl, combine the mashed lentils, grated zucchini, garlic, onion, parsley, cumin, paprika, salt, black pepper, egg, and flour. Mix well to form a thick batter.
  4. Shape the mixture into small patties, pressing them together firmly.
  5. Heat olive oil in a pan over medium heat. Cook the patties for about 3-4 minutes per side until golden brown and crispy.
  6. Remove from the pan and drain on a paper towel. Serve warm with your favorite dipping sauce.

Notes

  • To bake instead of frying, place patties on a parchment-lined baking sheet, brush with olive oil, and bake at 375°F (190°C) for 20-25 minutes, flipping halfway through.
  • Store leftovers in an airtight container in the fridge for up to three days. Reheat in a pan or oven for best results.
  • Freeze cooked patties in a single layer, then transfer to a freezer-safe bag. Reheat in the oven or pan-fry to restore crispiness.
  • Pair with garlic yogurt sauce, tahini dressing, or a spicy aioli for extra flavor.

Golden Crunch: The Irresistible Charm of Crispy Cauliflower Fritters

Some of the best food memories come from simple, homemade dishes—meals made with love and whatever ingredients were on hand. Growing up, fritters were a staple in my household. My grandmother could turn almost anything into a crispy, golden patty. Potatoes, zucchini, corn—if it could be grated, mashed, or mixed into a batter, she would find a way to fry it into something magical.

But my favorite? Cauliflower fritters.

At first, I wasn’t a fan of cauliflower. It was bland, too soft when steamed, and honestly, I never understood why adults seemed to love it. That all changed when my grandmother grated it into tiny pieces, mixed it with eggs and flour, and turned it into something unrecognizably delicious. The fritters had a crispy exterior, a tender center, and a rich, savory flavor that made me forget I was eating vegetables.

Years later, I found myself craving that same taste of childhood, so I recreated the recipe—adding a few modern touches while keeping the essence the same. These crispy cauliflower fritters are not just a delicious snack or side dish; they’re a reminder that even the simplest ingredients can be transformed into something extraordinary.

Why You’ll Love These Cauliflower Fritters

1. Crispy, Golden Perfection

There’s nothing more satisfying than the crunch of a well-fried fritter. The cauliflower becomes tender inside, while the outer layer turns golden and crisp, creating the perfect contrast.

2. A Delicious Way to Eat More Vegetables

If you or someone in your family isn’t a big fan of cauliflower, this recipe is a game-changer. The mild flavor of the vegetable blends seamlessly with seasonings and other ingredients, making it incredibly enjoyable.

3. Quick and Easy to Make

With just a handful of ingredients and a few simple steps, you can have these fritters ready in no time. They’re perfect for a last-minute snack, appetizer, or even a light meal.

4. Customizable to Your Taste

Want to add some heat? Sprinkle in some chili flakes or cayenne. Looking for extra richness? Mix in some grated cheese. Prefer a gluten-free option? Swap the all-purpose flour for chickpea or almond flour. These fritters are as versatile as they are delicious.

5. Perfect for Any Occasion

Serve them as a snack with a dipping sauce, as a side dish to complement a meal, or even as a light main course with a fresh salad. They fit into any menu effortlessly.

Ingredients

IngredientQuantity
Cauliflower florets3 cups, finely chopped or grated
All-purpose flour½ cup (or chickpea flour for gluten-free)
Eggs2 large
Garlic2 cloves, minced
Green onions2, finely chopped
Parmesan cheese¼ cup, grated (optional)
Salt½ teaspoon
Black pepper¼ teaspoon
Paprika½ teaspoon
Olive oilFor frying

Directions

  1. Prepare the cauliflower: Finely chop or grate the cauliflower florets. You can also pulse them in a food processor until they resemble rice.
  2. Mix the batter: In a large bowl, combine the cauliflower, flour, eggs, garlic, green onions, parmesan (if using), salt, pepper, and paprika. Stir until well incorporated.
  3. Form the fritters: Take small portions of the mixture and shape them into patties.
  4. Fry the fritters: Heat olive oil in a pan over medium heat. Cook the fritters for about 3-4 minutes per side until golden brown and crispy.
  5. Serve: Remove from heat and drain on paper towels. Enjoy warm with a dipping sauce of your choice!

Nutritional Information (Per Serving, Approximate)

NutrientAmount
Calories180 kcal
Carbohydrates18 g
Protein8 g
Fat9 g
Fiber3 g
Calcium10% DV
Iron8% DV

The Health Benefits of Cauliflower Fritters

A Nutrient-Dense Alternative to Traditional Fritters

Unlike traditional potato-based fritters, cauliflower fritters are lower in carbohydrates but still provide a satisfying texture. Cauliflower is a powerhouse vegetable packed with vitamins and minerals that contribute to overall health.

Rich in Vitamins and Antioxidants

Cauliflower contains high levels of vitamin C, which supports the immune system, and vitamin K, which is essential for bone health. It’s also loaded with antioxidants that help fight inflammation and promote overall well-being.

A Great Source of Fiber

Dietary fiber is crucial for digestive health, and cauliflower delivers a good amount. Fiber not only aids digestion but also helps keep you feeling full longer, making these fritters a satisfying option for any meal.

Supports Heart Health

The compounds found in cauliflower have been linked to improved heart health by helping to lower cholesterol levels and reduce inflammation.

FAQs About Crispy Cauliflower Fritters

1. Can I make these fritters without eggs?

Yes! If you’re looking for a vegan alternative, you can substitute eggs with a flaxseed or chia seed mixture. Use one tablespoon of ground flax or chia seeds mixed with three tablespoons of water per egg. Let it sit for a few minutes until it thickens, then use it in place of eggs.

2. How do I make them gluten-free?

Swap the all-purpose flour for chickpea flour, almond flour, or a gluten-free flour blend. Chickpea flour works particularly well because it binds the mixture together and adds a slightly nutty flavor.

3. Can I bake these instead of frying?

Absolutely! While frying gives the fritters their signature crispiness, you can bake them at 375°F (190°C) for about 20-25 minutes, flipping halfway through. Brush them lightly with olive oil before baking to achieve a golden-brown crust.

4. What dipping sauces go well with these fritters?

These fritters pair beautifully with a variety of dips. Try:

  • Garlic yogurt sauce – A mix of Greek yogurt, minced garlic, lemon juice, and a pinch of salt.
  • Spicy aioli – Mayonnaise mixed with a dash of hot sauce and garlic powder.
  • Tahini sauce – A creamy blend of tahini, lemon juice, garlic, and water.
  • Classic marinara – A simple tomato-based sauce for a comforting Italian twist.

5. How do I store and reheat leftovers?

Store any leftover fritters in an airtight container in the refrigerator for up to three days. To reheat, place them in a pan over medium heat for a few minutes until they’re crispy again. You can also reheat them in an oven at 350°F (175°C) for about 10 minutes. Avoid microwaving, as it can make them soggy.

6. Can I freeze these fritters?

Yes! Freeze the cooked fritters in a single layer on a baking sheet, then transfer them to a freezer-safe bag. They can be stored for up to three months. To reheat, bake at 375°F (190°C) for 15-20 minutes or until crispy.

7. What can I serve with these fritters?

They pair well with a fresh salad, a bowl of soup, or even as a side to grilled meats. You can also serve them as part of a brunch spread with eggs and avocado toast.

8. Can I use frozen cauliflower?

Yes, but be sure to thaw and drain it thoroughly before using. Excess moisture can make the fritters too soft and prevent them from crisping up properly.

9. How do I make them extra crispy?

To enhance crispiness, make sure the batter isn’t too wet. You can also add a bit of cornstarch to the mixture and fry them in a hot pan with enough oil to create a golden crust.

10. Can I add other vegetables?

Definitely! These fritters work well with added zucchini, carrots, or even sweet potatoes. Just be sure to remove excess moisture from watery vegetables like zucchini before mixing them in.

A Crispy Delight That Never Fails

Crispy cauliflower fritters are a perfect example of how simple ingredients can create something truly special. Whether you’re making them as a nostalgic comfort food, a way to sneak in more vegetables, or just because you’re craving something crunchy and delicious, this recipe never disappoints.

So next time you find yourself with a head of cauliflower and a little creativity, give these fritters a try. Serve them hot, enjoy the crunch, and savor every bite of this humble yet irresistible dish.

Amal

Golden Crunch: The Irresistible Charm of Crispy Cauliflower Fritters

These crispy cauliflower fritters are golden brown on the outside, tender on the inside, and packed with flavor. Made with finely chopped cauliflower, eggs, and a hint of seasoning, they are the perfect snack, appetizer, or side dish. Whether pan-fried or baked, these fritters are a delicious way to enjoy cauliflower in a whole new way!
Prep Time 10 minutes
Cook Time 15 minutes
Total Time 25 minutes
Servings: 10 -12 fritters
Course: Snack
Cuisine: Mediterranean

Ingredients
  

  • 3 cups cauliflower florets finely chopped or grated
  • ½ cup all-purpose flour or chickpea flour for a gluten-free option
  • 2 large eggs
  • 2 cloves garlic minced
  • 2 green onions finely chopped
  • ¼ cup Parmesan cheese grated (optional)
  • ½ teaspoon salt
  • ¼ teaspoon black pepper
  • ½ teaspoon paprika
  • Olive oil for frying

Method
 

  1. In a large bowl, combine the finely chopped or grated cauliflower with flour, eggs, garlic, green onions, Parmesan (if using), salt, pepper, and paprika. Stir until well mixed.
  2. Shape the mixture into small patties, pressing them together firmly.
  3. Heat olive oil in a pan over medium heat. Add the fritters and cook for 3-4 minutes per side until golden brown and crispy.
  4. Remove from the pan and place on a paper towel to absorb excess oil.
  5. Serve warm with your favorite dipping sauce.

Notes

  • For extra crispiness, fry in batches and avoid overcrowding the pan.
  • To bake instead of frying, place fritters on a parchment-lined baking sheet and bake at 375°F (190°C) for 20-25 minutes, flipping halfway through.
  • Store leftovers in an airtight container in the refrigerator for up to three days. Reheat in a pan or oven to maintain crispiness.
  • Serve with garlic yogurt sauce, tzatziki, or a spicy aioli for added flavor.

The Ultimate Cheesy Egg & Tomato Grilled Sandwich

Some of the best meals in life aren’t complicated—they’re simple, comforting, and tied to warm memories. This cheesy egg and tomato grilled sandwich is exactly that for me. It takes me back to childhood mornings when the scent of buttered toast filled the kitchen, and I’d sit eagerly at the table, waiting for my mother to flip the sandwich onto my plate.

She had a way of making ordinary ingredients taste magical. Fluffy scrambled eggs, gooey melted cheese, and juicy tomatoes, all tucked between slices of golden, crispy bread—nothing fancy, yet it felt like the most indulgent breakfast. Sometimes she’d add fresh parsley from the garden, other times a sprinkle of paprika for extra warmth, but the essence remained the same: simple, satisfying, and made with love.

Now, whenever I make this sandwich, I’m reminded that great food doesn’t need to be extravagant. With just a few basic ingredients, you can create a dish that feels like home. Whether you’re rushing through a busy morning, looking for a quick lunch, or craving a comforting late-night snack, this sandwich is a timeless classic that always hits the spot.

Why You’ll Love This Sandwich

1. A Perfect Balance of Flavors

This sandwich combines creamy, fluffy eggs with melted cheese and the slight acidity of fresh tomatoes. The buttery, toasted bread adds a crispy contrast, making each bite a delicious combination of textures and flavors.

2. Quick and Easy to Make

Busy morning? No problem! This sandwich comes together in less than 15 minutes, making it the perfect grab-and-go meal.

3. Packed with Protein and Nutrients

Eggs provide a high-quality source of protein, while tomatoes add vitamins and antioxidants. Cheese contributes calcium for strong bones, making this a balanced meal option.

4. Versatile and Customizable

Want to switch things up? Try adding avocado slices, a handful of spinach, or even a slice of ham for extra heartiness. The possibilities are endless!

5. A Comforting Anytime Meal

Though often enjoyed for breakfast, this sandwich is perfect for lunch, dinner, or even as a midnight snack when you need something warm and satisfying.

Ingredients

IngredientQuantity
Eggs3
Onion½ small, finely chopped
Fresh ParsleyTo taste
SaltTo taste
PaprikaTo taste
Tomato SauceAs needed
Cheese4 slices
Tomato Slices4-6, fresh
ButterFor spreading

Directions

  1. Whisk the Eggs: In a bowl, beat the eggs with chopped onions, parsley, salt, and paprika until well combined.
  2. Scramble the Eggs: Heat a non-stick pan over medium heat. Pour in the egg mixture and cook, stirring gently, until the eggs are fully set but still soft. Remove from heat.
  3. Assemble the Sandwich: Spread a thin layer of butter on one side of each bread slice. On the unbuttered side, spread tomato sauce, then layer scrambled eggs, fresh tomato slices, and cheese slices.
  4. Grill the Sandwich: Heat a pan or griddle over medium heat. Place the sandwich butter-side down and cook for 2-3 minutes until golden brown. Flip and cook the other side until the cheese melts and the bread is crispy.
  5. Serve & Enjoy: Remove from heat, slice in half, and serve warm.

Nutritional Information (Per Serving, Approximate)

NutrientAmount
Calories350 kcal
Carbohydrates30 g
Protein15 g
Fat18 g
Fiber3 g
Calcium20% DV
Iron10% DV

Health Benefits of the Key Ingredients

Eggs: A Nutrient Powerhouse

Eggs are one of the most nutrient-dense foods, providing essential vitamins and minerals in every bite:

  • High-quality protein helps with muscle repair and keeps you full longer.
  • Rich in B vitamins, which support energy production and brain function.
  • Contains choline, essential for memory and brain health.
  • Good for eye health, thanks to antioxidants like lutein and zeaxanthin.

Tomatoes: More Than Just Flavor

Tomatoes are not only delicious but also incredibly beneficial for health:

  • Rich in vitamin C, which boosts immunity.
  • Contains lycopene, an antioxidant known to support heart health.
  • Low in calories while being high in water content, making them refreshing and hydrating.

Cheese: A Calcium Boost

While often considered indulgent, cheese provides essential nutrients:

  • Calcium and phosphorus for strong bones and teeth.
  • Healthy fats and protein, which contribute to satiety.
  • Variety of flavors, from mild and creamy to sharp and tangy, depending on the cheese you choose.

Whole-Grain Bread: A Wholesome Choice

Opting for whole-grain bread can enhance the nutritional value of your sandwich:

  • High in fiber, aiding digestion and promoting gut health.
  • Keeps you fuller for longer, reducing unnecessary snacking.
  • Rich in essential minerals, such as magnesium and iron.

FAQs About This Cheesy Egg & Tomato Grilled Sandwich

1. Can I use a different type of bread?

Absolutely! While classic white or whole-wheat bread works great, you can experiment with sourdough, rye, or even a baguette for a different texture and flavor.

2. What type of cheese is best for this sandwich?

Cheddar, mozzarella, Swiss, or even pepper jack work well. Choose a cheese that melts easily for the best results.

3. Can I make this sandwich healthier?

Yes! Use whole-grain bread, reduce the amount of cheese, and cook the eggs with minimal butter or oil. You can also add more vegetables like spinach or bell peppers.

4. Is this sandwich good for meal prep?

It’s best enjoyed fresh, but you can prepare the egg mixture in advance and store it in the refrigerator for up to 24 hours. When ready, just assemble and grill the sandwich.

5. Can I add meat to this sandwich?

Definitely! Turkey, ham, crispy bacon, or smoked salmon all make great additions for extra protein and flavor.

6. What’s the best way to get a crispy, golden-brown exterior?

Use a generous but even layer of butter on the bread and cook over medium heat. A slow cook allows the cheese to melt while achieving the perfect crispy crust.

7. Can I make this sandwich without butter?

Yes! Substitute butter with olive oil or a light spread like avocado for a healthier option.

8. Can I make this in a sandwich press?

Of course! A sandwich press or panini maker will give you an evenly crispy exterior with minimal effort. Just be sure to watch it closely to avoid burning.

9. What sides pair well with this sandwich?

A light salad, a bowl of soup (like tomato or vegetable soup), or even a handful of roasted potatoes make great accompaniments.

10. Can I make this sandwich vegan?

Yes! Use a plant-based egg substitute, dairy-free cheese, and vegan butter for a completely vegan-friendly version.

A Comfort Food Classic Worth Making

Sometimes, the best meals are the simplest ones. This cheesy egg and tomato grilled sandwich is proof that a handful of ingredients can create something truly satisfying. Whether you’re making it for yourself or sharing it with loved ones, every bite is packed with warmth, comfort, and nostalgia.

So the next time you’re looking for a quick yet delicious meal, skip the complicated recipes and go for this timeless favorite. Simple, cheesy, and full of flavor—it’s the kind of dish that never goes out of style.

Amal

The Ultimate Cheesy Egg & Tomato Grilled Sandwich

A crispy, buttery grilled sandwich filled with fluffy scrambled eggs, gooey melted cheese, and fresh tomatoes. This simple yet flavorful combination makes for a satisfying breakfast, lunch, or snack. Quick to prepare and packed with comforting flavors, this sandwich is perfect for any time of the day.
Prep Time 5 minutes
Cook Time 10 minutes
Total Time 15 minutes
Servings: 2 sandwiches
Course: Breakfast
Cuisine: American

Ingredients
  

  • 3 eggs
  • ½ small onion finely chopped
  • Fresh parsley chopped, to taste
  • Salt to taste
  • Paprika to taste
  • Tomato sauce as needed
  • 4 slices of cheese
  • 4-6 fresh tomato slices
  • Butter for spreading
  • 4 slices of bread

Method
 

  1. In a bowl, whisk the eggs with chopped onion, parsley, salt, and paprika until well combined.
  2. Heat a non-stick pan over medium heat and cook the egg mixture, stirring occasionally, until scrambled and set. Remove from heat.
  3. Spread a thin layer of butter on one side of each slice of bread. On the unbuttered side, spread tomato sauce, then layer scrambled eggs, fresh tomato slices, and cheese.
  4. Heat a pan or griddle over medium heat. Place the sandwich butter-side down and cook for 2-3 minutes, until golden brown and crispy. Flip and cook the other side until the cheese melts.
  5. Remove from heat, slice in half, and serve warm.

Notes

  • Use whole-grain bread for a healthier version.
  • Add spinach, avocado, or ham for extra flavor and nutrition.
  • Best enjoyed fresh but can be stored in an airtight container for up to a day.
  • Reheat in a pan over low heat to maintain crispiness.

Golden Garlic Bliss: The Irresistible Magic of Potatoes and Onions

Growing up, my grandmother had a way of turning the simplest ingredients into the most unforgettable meals. She didn’t need expensive cuts of meat or exotic spices—just potatoes, onions, garlic, and a little patience. I still remember the scent of caramelized onions filling her tiny kitchen, blending with the rich aroma of butter and garlic as she stirred a pan of golden potatoes.

It was a dish born out of necessity, but it never felt that way. To us, it was pure comfort. No matter how tough times got, there was always a plate of these hearty potatoes waiting for us. They weren’t just food; they were warmth, love, and home all in one bite.

Now, whenever I make this recipe, I’m transported back to those evenings at my grandmother’s table, where laughter mixed with the clinking of forks and the world felt simple. And while many consider meat to be the heart of a meal, I can confidently say that these potatoes with onions and garlic sauce are more satisfying than any steak I’ve ever had.

Why This Dish Works Every Time

A Perfect Balance of Flavors

This dish is a testament to the idea that simplicity is often the key to the best flavors. The creamy, starchy potatoes soak up the richness of butter, while the garlic adds depth and a slight sharpness. The onions, slowly caramelized to golden perfection, bring a hint of natural sweetness that balances everything out. The finishing touch—fresh parsley—adds a burst of freshness that ties all the flavors together beautifully.

Affordable and Accessible

One of the biggest appeals of this dish is its affordability. Potatoes, onions, and garlic are staples in almost every household, making this an easy go-to recipe for anyone on a budget. Plus, you don’t need any fancy cooking techniques—just a bit of patience and a love for good food.

A Versatile Delight

These potatoes can be enjoyed in so many ways. They can be served as a side dish with grilled vegetables or eggs, stuffed into a warm tortilla for a rustic taco, or even eaten on their own as a hearty main dish. Whether you’re making breakfast, lunch, or dinner, they fit right in.

Ingredients

For the Potatoes with Garlic Sauce
IngredientQuantity
Potatoes (peeled, diced)5 medium
SaltTo taste
Black pepperTo taste
Olive oil2 tbsp
Garlic (minced)2 cloves
Butter2 tbsp
Parsley (chopped)1 bunch
For the Caramelized Onions
IngredientQuantity
Onion (thinly sliced)2 large
Olive oil1 tbsp
Butter1 tbsp
Sugar (optional)½ tsp
SaltTo taste

Directions

  1. Prepare the Potatoes:
    • Bring a pot of salted water to a boil.
    • Add the diced potatoes and cook for about 10–12 minutes until tender but not mushy.
    • Drain and set aside.
  2. Make the Garlic Sauce:
    • Heat olive oil and butter in a large pan over medium heat.
    • Add minced garlic and sauté for about 30 seconds until fragrant.
    • Toss in the cooked potatoes, seasoning them with salt and black pepper.
    • Stir gently for about 5 minutes until they develop a light golden crust.
  3. Caramelize the Onions:
    • In another pan, heat olive oil and butter over medium heat.
    • Add the sliced onions and a pinch of salt. Cook slowly, stirring occasionally.
    • If desired, add a bit of sugar to enhance caramelization.
    • Continue cooking for about 15–20 minutes until onions turn golden brown.
  4. Combine & Serve:
    • Mix the caramelized onions with the garlic-infused potatoes.
    • Sprinkle fresh chopped parsley on top.
    • Serve warm and enjoy!

Nutritional Information (Per Serving, Approximate)

NutrientAmount
Calories250 kcal
Carbohydrates35 g
Protein4 g
Fats10 g
Fiber5 g
Vitamin C20% DV
Iron8% DV

Health Benefits of Potatoes and Onions

Potatoes: More Than Just Comfort Food

Many people assume that potatoes are unhealthy, but in reality, they are packed with essential nutrients. Here’s why they deserve a place in your diet:

  • Rich in vitamins and minerals – Potatoes contain vitamin C, vitamin B6, and potassium, which support immune function, brain health, and muscle function.
  • High in fiber – When eaten with the skin, potatoes provide a good amount of fiber, aiding digestion and keeping you full longer.
  • A great source of energy – The complex carbohydrates in potatoes provide slow-releasing energy, making them an excellent choice for active individuals.

Onions: A Superfood in Disguise

Onions do more than just add flavor to a dish—they also offer a variety of health benefits:

  • Packed with antioxidants – Onions contain quercetin, a powerful antioxidant that helps reduce inflammation and lower the risk of chronic diseases.
  • Supports heart health – Studies suggest that onions can help lower cholesterol levels and regulate blood pressure.
  • Boosts the immune system – Their natural antibacterial properties can help fight off infections and support overall health.

Together, potatoes and onions create a meal that is not only delicious but also nourishing.

FAQs About Potatoes with Onions and Garlic Sauce

1. Can I use different types of potatoes for this recipe?

Absolutely! While russet potatoes are great for a crispy texture, Yukon Gold potatoes offer a creamier bite. Red potatoes also work well, especially if you prefer a firmer texture.

2. How do I prevent my potatoes from becoming mushy?

The key is to parboil them until they are just fork-tender, then sauté them over medium heat. Avoid over-stirring while frying, as this can break them down too much.

3. Can I make this dish vegan?

Yes! Simply replace the butter with extra olive oil or a plant-based alternative. The result will still be incredibly flavorful.

4. What can I serve with these potatoes?

They pair well with eggs for breakfast, grilled vegetables for lunch, or even as a side dish for roasted meats or fish. You can also use them as a filling for tacos or wraps.

5. Can I store leftovers?

Definitely. Store them in an airtight container in the refrigerator for up to three days. To reheat, simply warm them in a pan over medium heat with a little olive oil to restore their crispiness.

6. How can I add more flavor to the dish?

You can experiment with adding smoked paprika, cumin, or even a pinch of chili flakes for extra depth. A splash of lemon juice or a sprinkle of Parmesan cheese can also enhance the flavors.

7. Can I use red or white onions?

Both work well! Red onions will add a slight sweetness, while white or yellow onions provide a stronger, more traditional onion flavor.

A Dish That Feels Like Home

Food has an incredible ability to connect us to memories, traditions, and the people we love. This humble potato dish is more than just a recipe—it’s a reminder of how the simplest ingredients, when treated with care, can create something extraordinary.

So the next time you’re looking for a meal that warms your soul, skip the meat and let these golden, garlic-infused potatoes with caramelized onions take center stage. After all, sometimes the most satisfying meals are the ones made with just a handful of ingredients and a whole lot of love.

Amal

Golden Garlic Bliss: The Irresistible Magic of Potatoes and Onions

Golden, crispy potatoes tossed in a rich garlic butter sauce, perfectly complemented by sweet, caramelized onions. This simple yet flavorful dish proves that humble ingredients can create an unforgettable meal. Whether served as a side or enjoyed on its own, these potatoes are irresistibly delicious and packed with comfort in every bite.
Prep Time 10 minutes
Cook Time 25 minutes
Total Time 35 minutes
Servings: 4 servings
Course: Main Dish
Cuisine: Mediterranean

Ingredients
  

  • 5 medium potatoes peeled and diced
  • 2 large onions thinly sliced
  • 2 cloves garlic minced
  • 2 tablespoons butter
  • 2 tablespoons olive oil
  • ½ teaspoon salt or to taste
  • ½ teaspoon black pepper or to taste
  • ½ teaspoon sugar optional, for caramelizing onions
  • 1 bunch fresh parsley chopped

Method
 

  1. Prepare the potatoes: Boil diced potatoes in salted water for about 10–12 minutes, until fork-tender. Drain and set aside.
  2. Caramelize the onions: Heat 1 tablespoon of olive oil and 1 tablespoon of butter in a pan over medium heat. Add the sliced onions and a pinch of salt. Cook slowly, stirring occasionally, for about 15–20 minutes until golden brown. If desired, add sugar to enhance the caramelization. Set aside.
  3. Make the garlic butter sauce: In another pan, heat the remaining olive oil and butter. Add the minced garlic and sauté for about 30 seconds until fragrant.
  4. Crisp up the potatoes: Add the boiled potatoes to the pan with the garlic butter sauce. Season with salt and black pepper. Sauté for about 5 minutes, stirring occasionally, until they develop a golden crust.
  5. Combine & serve: Mix the caramelized onions into the potatoes. Sprinkle with fresh parsley and serve warm.

Notes

  • Potato choice: Yukon Golds provide a creamy texture, while Russets get extra crispy.
  • Storage: Store leftovers in an airtight container in the refrigerator for up to 3 days. Reheat in a pan for the best texture.
  • Vegan option: Swap butter for additional olive oil or plant-based butter.
  • Additions: Sprinkle with Parmesan cheese, add smoked paprika for a smoky twist, or squeeze fresh lemon juice for brightness.

Cheesy Potato & Egg Skillet – A Simple Meal That Feels Like Home

There’s something special about a meal that comes together quickly yet feels hearty, comforting, and satisfying. This cheesy potato and egg skillet is exactly that—a dish that turns simple ingredients into something extraordinary. It’s crispy, cheesy, packed with flavor, and perfect for breakfast, lunch, or dinner.

I still remember the first time I made this dish. It was one of those nights when I had no idea what to cook, and takeout wasn’t an option. I opened the fridge and found potatoes, eggs, cheese, and a few slices of ham. It didn’t seem like much at first, but I decided to throw everything into a skillet, hoping for the best. What came out was pure magic.

As soon as I took the first bite, I knew this was going to become a regular meal in my home. The potatoes were golden and crispy, the eggs perfectly soft, the ham added just the right amount of saltiness, and the melted cheddar brought everything together. It tasted like comfort—like something my grandmother would have made on a cold evening.

Since then, this dish has become my go-to when I need something quick but satisfying. It’s a meal that requires little effort but delivers big on flavor. Whether I’m making it for myself after a long day or serving it to family on a lazy Sunday morning, it never fails to impress.

If you’re looking for a recipe that’s easy, affordable, and downright delicious, this is it. Let’s dive into why this dish is so great and how you can make it your own.

Why This Cheesy Potato & Egg Skillet Is a Must-Try

1. Quick & Easy to Make

No complicated steps, no fancy ingredients—just chop, cook, and enjoy. This skillet meal comes together in about 20 minutes, making it perfect for busy weeknights or relaxed weekend mornings.

2. Budget-Friendly & Made with Simple Ingredients

This dish proves that you don’t need expensive ingredients to create something delicious. Potatoes, eggs, cheese, and ham are all affordable pantry staples that transform into a flavorful and filling meal.

3. One-Pan Wonder

Minimal cleanup is always a bonus! This entire meal is cooked in a single skillet, meaning less time washing dishes and more time enjoying your food.

4. Perfect for Any Time of Day

This dish works as a breakfast scramble, a quick lunch, or a satisfying dinner. Pair it with toast for a hearty breakfast, serve it with a side salad for lunch, or enjoy it on its own as a warm and comforting dinner.

5. Easily Customizable

One of the best things about this recipe is how versatile it is. You can switch up the ingredients to match your personal taste or whatever you have in your kitchen.

Ingredients

IngredientAmount
Potatoes7-8, peeled and diced
Eggs6-7, depending on size
Onion½, finely chopped
Ham4 slices, diced
Cheddar cheeseAs desired, shredded
SaltTo taste
PepperTo taste
Butter or oil2 tablespoons

Directions

  1. Cook the Potatoes – In a large skillet, heat butter or oil over medium heat. Add the diced potatoes and cook until golden brown and crispy, stirring occasionally.
  2. Sauté the Onion & Ham – Add the chopped onion and diced ham to the skillet. Cook for 2-3 minutes until the onion is soft and the ham is slightly crispy.
  3. Add the Eggs – Crack the eggs directly into the pan, season with salt and pepper, and stir gently to scramble them with the potatoes. Cook until the eggs are set but still soft.
  4. Melt the Cheese – Sprinkle shredded cheddar over the top, cover the skillet for 1-2 minutes until the cheese melts.
  5. Serve & Enjoy – Serve hot straight from the pan for a delicious and filling meal!

Nutritional Information (Per Serving, Approximate)

NutrientAmount
Calories380
Carbohydrates35g
Protein18g
Fat18g
Sugar3g
Fiber4g

Ways to Customize This Recipe

While this cheesy potato and egg skillet is perfect as-is, here are some delicious variations you can try:

  • Make it Spicy – Add a pinch of red pepper flakes or drizzle some hot sauce over the top for a spicy kick.
  • Add More Vegetables – Toss in bell peppers, mushrooms, spinach, or zucchini for extra flavor and nutrition.
  • Switch Up the Cheese – Try mozzarella, gouda, Swiss, or pepper jack instead of cheddar for a different taste.
  • Use a Different Protein – Swap the ham for cooked bacon, sausage, turkey, or even shredded chicken.
  • Go Meatless – Omit the ham and add extra veggies or black beans for a vegetarian version.

Frequently Asked Questions (FAQs)

1. Can I Make This Dish Ahead of Time?

This dish is best enjoyed fresh, but you can prepare the potatoes and chop the ham and onions ahead of time. If you need to reheat leftovers, warm them in a skillet over low heat to maintain the texture.

2. What Type of Potatoes Work Best?

Russet potatoes will give you a crispier texture, while Yukon Gold or red potatoes will provide a softer, creamier bite. Both work well, so use whatever you have on hand.

3. Can I Use Frozen or Pre-Cooked Potatoes?

Yes! If using frozen diced potatoes or hash browns, just cook them straight from frozen. Pre-cooked potatoes (like leftover roasted or boiled potatoes) can also be used—just crisp them up in the pan before adding the other ingredients.

4. How Do I Prevent My Potatoes from Sticking to the Pan?

Make sure to use enough butter or oil and give the potatoes time to develop a crust before stirring. A well-seasoned cast-iron skillet or a good non-stick pan will also help prevent sticking.

5. Can I Make This Dish Dairy-Free?

Absolutely! Use a dairy-free butter alternative and swap the cheddar cheese for a dairy-free version or nutritional yeast for a cheesy flavor.

6. How Can I Make This Meal Healthier?

To lighten it up, you can:

  • Use turkey ham or lean turkey bacon instead of regular ham.
  • Reduce the butter and use olive oil instead.
  • Add more veggies to increase fiber and nutrients.

7. Can I Bake This Dish Instead of Cooking It on the Stove?

Yes! After sautéing the potatoes and ham, transfer everything to an oven-safe dish, crack the eggs on top, and bake at 375°F (190°C) for 10-12 minutes until the eggs are set.

8. What’s the Best Way to Serve This Dish?

While delicious on its own, you can serve it with:

  • Toast or crusty bread for scooping up the cheesy potatoes.
  • A simple green salad for a lighter contrast.
  • A dollop of sour cream or Greek yogurt for added creaminess.

Tips for the Best Cheesy Potato & Egg Skillet

  • Dice the Potatoes Evenly – This ensures they cook evenly and crisp up nicely.
  • Don’t Stir Too Often – Let the potatoes cook undisturbed for a few minutes to get that crispy, golden texture.
  • Use Freshly Grated Cheese – Pre-shredded cheese contains additives that can make it less melty. Grating your own cheese will give you the best texture.
  • Season as You Go – Salt the potatoes while they cook to bring out their flavor. Add more seasoning at the end if needed.
  • Cook the Eggs to Your Preference – Scramble them in for a uniform mix, or crack them on top and cook until set for a more visually appealing dish.

Conclusion – A Comforting, Quick, and Delicious Meal for Any Occasion

Some of the best meals aren’t the ones that take hours to prepare—they’re the ones that come together quickly with simple, familiar ingredients. This cheesy potato and egg skillet is the perfect example of that.

Whether you’re making it for breakfast, lunch, or dinner, this dish is guaranteed to be a hit. It’s crispy, cheesy, comforting, and endlessly customizable. Plus, it’s a fantastic way to use up ingredients you already have in your kitchen.

So the next time you’re wondering what to make for dinner, skip the frying and try this skillet meal instead. It’s faster, tastier, and sure to become a favorite in your home—just like it has in mine!

Amal

Cheesy Potato & Egg Skillet – A Simple Meal That Feels Like Home

This cheesy potato and egg skillet is the perfect combination of crispy potatoes, fluffy eggs, savory ham, and gooey melted cheddar. It’s faster than frying potatoes, packed with flavor, and makes an easy meal for breakfast, lunch, or dinner. Ready in minutes, this one-pan wonder will quickly become a household favorite!
Prep Time 10 minutes
Cook Time 15 minutes
Total Time 25 minutes
Servings: 4 servings
Course: Breakfast
Cuisine: International

Ingredients
  

  • 7-8 potatoes peeled and diced
  • 6-7 eggs depending on size
  • ½ onion finely chopped
  • 4 slices of ham diced
  • Cheddar cheese shredded (as desired)
  • 2 tablespoons butter or oil
  • Salt and pepper to taste

Method
 

  1. Heat butter or oil in a large skillet over medium heat. Add diced potatoes and cook until golden and crispy, stirring occasionally.
  2. Stir in the chopped onion and diced ham. Cook for 2-3 minutes until the onion softens and the ham is slightly crispy.
  3. Crack the eggs directly into the skillet, season with salt and pepper, and stir gently to scramble them with the potatoes. Cook until the eggs are set but still soft.
  4. Sprinkle shredded cheddar cheese over the top, cover the skillet for 1-2 minutes until the cheese melts.
  5. Serve hot and enjoy this delicious, cheesy, and satisfying dish!

Notes

  • For extra flavor, add red pepper flakes, garlic powder, or smoked paprika.
  • Swap ham for cooked bacon, sausage, or turkey for a different twist.
  • If you prefer whole eggs instead of scrambled, make small wells in the potatoes and crack the eggs directly into them, then cover and cook until set.
  • Best served fresh, but leftovers can be stored in an airtight container in the fridge for up to 2 days.

Creamy Egg & Parmesan Pasta – A Simple Dish That Feels Gourmet

There are some recipes that stay with you forever—dishes that are so simple yet so satisfying that they become part of your regular meal rotation. This creamy egg and Parmesan pasta is one of those meals for me. It’s comforting, rich, and made with ingredients that are almost always in my kitchen.

I remember the first time I made this dish. It was late, I was hungry, and my fridge was nearly empty. All I had were some eggs, a block of Parmesan, butter, and a little bit of bacon. I wasn’t expecting much, but after the first bite, I was blown away. The eggs turned into a silky, creamy sauce, coating the pasta perfectly. The crispy bacon added just the right amount of crunch and saltiness, while the Parmesan gave it that deep, nutty flavor.

Since that day, this recipe has become one of my go-to meals. It’s quick, budget-friendly, and always hits the spot. Whether you’re cooking for yourself after a long day or making a quick meal for family or friends, this dish is guaranteed to impress.

Why You’ll Love This Recipe

1. Simple Ingredients, Big Flavor

There’s no need for fancy or hard-to-find ingredients here. Pasta, eggs, cheese, and bacon come together to create an incredibly flavorful dish that tastes far more luxurious than it is.

2. Budget-Friendly & Pantry Staples

This is one of those meals you can make without a trip to the grocery store. Eggs, pasta, and cheese are staples in most kitchens, making this a great meal for those days when you don’t feel like spending extra money.

3. Quick & Easy to Make

From start to finish, this dish takes no more than 20 minutes to prepare. It’s perfect for busy days when you need something delicious without spending hours in the kitchen.

4. Comforting & Satisfying

The creamy egg-based sauce coats every strand of pasta, making it rich and comforting. It’s the kind of meal that feels indulgent without being heavy.

5. No Heavy Cream Needed

Many creamy pasta dishes rely on heavy cream, but this one achieves the same rich texture using eggs. It’s a great way to enjoy a decadent sauce without the extra fat and calories.

Ingredients

IngredientAmount
Pasta200g
Eggs6
SaltTo taste
PepperTo taste
Butter4 tablespoons
Parmesan cheese, grated70g
Bacon, chopped100g

Directions

  1. Cook the Pasta – Bring a pot of salted water to a boil and cook the pasta until al dente. Reserve ½ cup of pasta water, then drain and set aside.
  2. Prepare the Bacon – In a large pan, melt 2 tablespoons of butter over medium heat. Add the chopped bacon and cook until crispy. Remove from heat and set aside.
  3. Mix the Eggs & Cheese – In a bowl, whisk the eggs with grated Parmesan, salt, and pepper until well combined.
  4. Combine Everything – Return the pasta to the pan with the remaining butter and mix. Slowly pour in the egg mixture while stirring continuously to create a creamy sauce. Add reserved pasta water as needed to adjust consistency.
  5. Add the Bacon – Stir in the crispy bacon and mix well.
  6. Serve & Enjoy – Garnish with extra Parmesan and freshly ground pepper. Serve warm and enjoy!

Nutritional Information (Per Serving, Approximate)

NutrientAmount
Calories480
Carbohydrates45g
Protein25g
Fat22g
Sugar2g
Fiber2g

Ways to Customize This Recipe

One of the best things about this dish is how versatile it is. You can stick to the classic version or get creative by adding different ingredients. Here are some ideas:

  • Vegetable Boost – Stir in sautéed spinach, mushrooms, or cherry tomatoes for extra flavor and nutrients.
  • Spicy Kick – Add a pinch of red pepper flakes or chopped fresh chili for a little heat.
  • Garlic Lover’s Twist – Sauté minced garlic in butter before adding the pasta for an extra depth of flavor.
  • Protein Power – Swap bacon for cooked chicken, shrimp, or even smoked salmon.
  • Herb Infusion – Sprinkle fresh parsley, basil, or chives on top for a fresh finish.

Frequently Asked Questions (FAQs)

1. Can I Make This Dish Without Bacon?

Absolutely! If you prefer a vegetarian version, simply skip the bacon. You can add sautéed mushrooms or sun-dried tomatoes for extra depth of flavor.

2. Will the Eggs Cook Properly?

Yes! The key is to mix the eggs with the pasta off the heat. The residual warmth from the pasta gently cooks the eggs, creating a creamy sauce without scrambling them.

3. What’s the Best Type of Pasta to Use?

Spaghetti is the classic choice, but you can also use fettuccine, linguine, or any pasta you have on hand. The sauce works well with almost any shape.

4. How Do I Prevent the Sauce from Becoming Too Thick?

If the sauce is too thick, add a bit of the reserved pasta water. This helps loosen the sauce and gives it a silkier texture.

5. Can I Use Pre-Grated Parmesan?

Freshly grated Parmesan melts better and has a stronger flavor. Pre-grated cheese often contains anti-caking agents that can make the sauce grainy, so I recommend using freshly grated if possible.

6. Can I Make This Recipe Ahead of Time?

This dish is best served fresh, as the sauce thickens when cooled. However, if you have leftovers, store them in an airtight container and reheat gently with a splash of water to restore the creaminess.

7. Is This the Same as Carbonara?

While this dish is similar to carbonara, it has a few key differences. Traditional carbonara uses pancetta and only egg yolks, while this recipe uses whole eggs and bacon for a slightly different texture and flavor.

8. Can I Make This Dish Healthier?

Yes! You can:

  • Use whole wheat or chickpea pasta for added fiber.
  • Reduce the butter or use olive oil for a lighter version.
  • Swap bacon for turkey bacon or smoked salmon.

Tips for the Best Creamy Egg & Parmesan Pasta

  • Use Room Temperature Eggs – This helps them mix more smoothly into the pasta without clumping.
  • Whisk the Eggs & Cheese Together – This ensures an even, creamy sauce.
  • Work Quickly – Mix the eggs in while the pasta is still hot to create the sauce.
  • Don’t Overheat – Keep the pan off the heat when adding the eggs to avoid scrambling.
  • Season Well – Parmesan adds saltiness, but a little extra salt and black pepper enhance the flavor.

Conclusion – A Simple Recipe That Feels Special

This creamy egg and Parmesan pasta proves that you don’t need a long list of ingredients to create something truly delicious. It’s a dish that’s comforting, satisfying, and incredibly easy to make—all with ingredients you likely already have in your kitchen.

Whether you’re making it as a quick weeknight meal, a budget-friendly dinner, or just because you’re craving something creamy and indulgent, this recipe never fails to impress. It’s simple, foolproof, and guaranteed to become a staple in your home—just like it has in mine.

So the next time you have some pasta, eggs, and cheese on hand, give this recipe a try. You’ll be amazed at how such a simple combination can create something so incredibly delicious!

Amal

Creamy Egg & Parmesan Pasta – A Simple Dish That Feels Gourmet

This creamy egg and Parmesan pasta is rich, flavorful, and incredibly easy to make. With just a few simple ingredients, you can create a dish that’s comforting, satisfying, and perfect for any occasion. Whether it’s a quick weeknight dinner or a budget-friendly meal, this recipe will impress every time!
Prep Time 10 minutes
Cook Time 15 minutes
Total Time 25 minutes
Servings: 2 -3 servings
Course: Main Dish
Cuisine: Italian-inspired

Ingredients
  

  • 200 g pasta
  • 6 eggs
  • Salt to taste
  • Pepper to taste
  • 4 tablespoons butter
  • 70 g Parmesan cheese grated
  • 100 g bacon chopped

Method
 

  1. Bring a pot of salted water to a boil and cook the pasta until al dente. Reserve ½ cup of pasta water, then drain and set aside.
  2. In a pan, melt 2 tablespoons of butter over medium heat. Add the chopped bacon and cook until crispy. Remove from heat and set aside.
  3. In a bowl, whisk the eggs with grated Parmesan, salt, and pepper until well combined.
  4. Return the pasta to the pan with the remaining butter. Slowly pour in the egg mixture while stirring continuously to create a creamy sauce. Add reserved pasta water as needed to adjust consistency.
  5. Stir in the crispy bacon and mix well.
  6. Serve warm, garnished with extra Parmesan and freshly ground black pepper.

Notes

  • For a richer taste, use only egg yolks instead of whole eggs.
  • To make it vegetarian, skip the bacon or replace it with sautéed mushrooms.
  • Add a pinch of red pepper flakes for a bit of heat.
  • Best served immediately, as the sauce thickens as it sits.

No-Bake Banana Cream Cake – A Dessert That Amazes Every Time

There’s something magical about a dessert that comes together in just minutes yet tastes like it took hours to make. This no-bake banana cream cake is one of those recipes. It’s smooth, creamy, and bursting with natural sweetness, requiring no oven and minimal effort.

I still remember the first time I made this cake. It was a hot summer afternoon, and I was craving something sweet but couldn’t bear the thought of turning on the oven. I had a few ripe bananas sitting on the counter, some biscuits in the pantry, and cream in the fridge. That’s when I decided to experiment, blending the bananas into a creamy filling and pouring it over a simple biscuit base.

The result? A beautifully set, velvety cake that tasted like a dream. It had the richness of a classic banana pudding, the silkiness of a mousse, and the crunch of a buttery biscuit crust. But what truly amazed me was how easy it was. No complicated steps, no fancy equipment—just simple ingredients coming together in the most delicious way.

Since then, this cake has become my go-to recipe whenever I need a quick dessert that impresses. Whether I’m making it for family, friends, or just myself, it never lasts long. Everyone who tries it is surprised at how something so simple can taste so indulgent.

If you love bananas and creamy desserts, this is a must-try. Let’s dive into what makes this cake so special.

Why This No-Bake Banana Cake is a Must-Try

1. No Oven, No Stress

Not everyone wants to deal with baking temperatures, timers, and the possibility of an overbaked cake. This dessert skips all of that! It sets beautifully in the fridge, giving you a hassle-free, delicious result.

2. Creamy and Naturally Sweet

Bananas bring their own natural sweetness, reducing the need for added sugar. Combined with cream and milk, they create a luscious, silky texture that melts in your mouth.

3. A Perfect Make-Ahead Dessert

This cake needs time to chill, making it ideal for preparing in advance. Whether you’re hosting a party or just want a ready-to-eat treat, you can make it hours—or even a day—before serving.

4. Minimal Ingredients, Maximum Flavor

You don’t need a long list of ingredients to create something incredible. Simple pantry staples come together in the best way, proving that great desserts don’t have to be complicated.

5. A Lighter Alternative to Traditional Cakes

Since this cake doesn’t rely on heavy buttercream, frosting, or flour, it’s lighter than traditional baked cakes. It satisfies your sweet tooth without feeling overly rich.

Ingredients

IngredientAmount
Biscuits200g (7 ounces)
Butter90g (3.1 ounces)
Bananas3
Cream (33%)400ml (13.5 fl oz)
Milk200ml (6.7 fl oz)
Agar agar8g (0.3 ounces)

Directions

  1. Prepare the Base – Crush the biscuits into fine crumbs. Melt the butter and mix it with the biscuit crumbs until well combined. Press the mixture into the bottom of a cake mold and refrigerate.
  2. Make the Banana Cream – In a blender, blend the bananas, cream, and milk until smooth.
  3. Activate the Agar Agar – In a saucepan, heat the banana mixture over low heat and stir in the agar agar. Simmer for 2-3 minutes, stirring continuously, until slightly thickened.
  4. Assemble the Cake – Pour the banana cream mixture over the biscuit base and smooth the top.
  5. Chill & Set – Refrigerate for at least 3 hours or until firm.
  6. Serve & Enjoy – Slice and enjoy this creamy, dreamy no-bake banana cake!

Nutritional Information (Per Slice, Approximate)

NutrientAmount
Calories250
Carbohydrates28g
Protein3g
Fat14g
Sugar12g
Fiber2g

Ways to Elevate This Cake

This cake is delicious as it is, but you can customize it in many ways to add extra flavor and texture:

  • Chocolate Drizzle – Melt some dark or milk chocolate and drizzle it over the top for a luxurious finish.
  • Caramel Touch – A thin layer of caramel sauce between the biscuit base and banana cream adds an indulgent twist.
  • Nutty Crunch – Sprinkle chopped walnuts, almonds, or hazelnuts on top for added texture.
  • Berry Boost – Fresh berries like strawberries, blueberries, or raspberries bring a refreshing contrast to the creamy banana filling.
  • Coconut Infusion – Mix shredded coconut into the filling or sprinkle it on top for a tropical twist.

Frequently Asked Questions (FAQs)

1. Can I Use Gelatin Instead of Agar Agar?

Yes! If you don’t have agar agar, you can substitute it with gelatin. Use 8g of gelatin (about 2 teaspoons), dissolve it in warm milk, and let it set just as you would with agar agar.

2. How Long Does This Cake Take to Set?

The cake needs at least 3 hours in the fridge to fully set, but for the best results, let it chill overnight.

3. Can I Make This Cake Without Dairy?

Absolutely! You can replace the cream with coconut cream and the milk with almond or oat milk for a dairy-free version. The texture will still be smooth and creamy.

4. What Type of Biscuits Work Best?

Digestive biscuits, graham crackers, or shortbread cookies work well for the base. You can also use chocolate biscuits for a richer flavor.

5. How Should I Store Leftovers?

Store any leftover cake in an airtight container in the refrigerator for up to 3 days. Since it contains fresh bananas, it’s best enjoyed as soon as possible.

6. Can I Freeze This Cake?

Yes! This cake can be frozen for up to one month. Wrap it tightly in plastic wrap and place it in an airtight container. Thaw it in the fridge before serving.

7. Can I Make This Recipe Without a Blender?

Yes! If you don’t have a blender, you can mash the bananas until smooth with a fork and whisk everything together by hand. The texture will be slightly chunkier but still delicious.

8. Why Did My Cake Not Set Properly?

If your cake didn’t firm up, it’s likely due to:

  • Not heating the agar agar properly. It needs to be simmered to activate its thickening properties.
  • Not letting it chill long enough. Give it at least 3 hours in the fridge.
  • Using overripe bananas. Extremely ripe bananas can make the filling too watery.

Tips for the Perfect No-Bake Banana Cake

  • Use Ripe but Firm Bananas: Overripe bananas can make the texture too soft, while unripe bananas won’t provide enough sweetness.
  • Don’t Skip the Chilling Time: The longer it sets, the better the texture will be.
  • Mix the Agar Agar Well: Ensure it dissolves completely in warm milk to avoid lumps.
  • Press the Biscuit Base Firmly: This prevents the base from crumbling when slicing.
  • Use a Springform Pan: A removable-bottom pan makes it easier to slice and serve neatly.

Conclusion – A Simple Recipe That Feels Special

There’s something truly satisfying about making a dessert that looks and tastes impressive without any complicated steps. This no-bake banana cake is proof that you don’t need an oven—or hours of work—to create a masterpiece.

The combination of a crunchy biscuit base, silky banana cream, and smooth, melt-in-your-mouth texture makes this cake a guaranteed crowd-pleaser. It’s light enough for an everyday treat but elegant enough for special occasions.

So, the next time you’re craving something sweet but don’t want to deal with baking, try this recipe. You’ll be amazed at how easy and delicious it is—just like I was the first time I made it!

Amal

No-Bake Banana Cream Cake – A Dessert That Amazes Every Time

This no-bake banana cake is creamy, smooth, and incredibly easy to make! With a buttery biscuit base and a luscious banana cream filling, it’s a perfect dessert for any occasion. No oven required—just mix, chill, and enjoy!
Prep Time 10 minutes
Cook Time 5 minutes
Total Time 15 minutes
Servings: 8 servings
Course: Dessert
Cuisine: International

Ingredients
  

  • 200 g biscuits 7 ounces
  • 90 g butter 3.1 ounces
  • 3 bananas
  • 400 ml cream 33% (13.5 fl oz)
  • 200 ml milk 6.7 fl oz
  • 8 g agar agar 0.3 ounces

Method
 

  1. Prepare the Base – Crush the biscuits into fine crumbs. Melt the butter and mix it with the biscuit crumbs until well combined. Press the mixture into a cake mold and refrigerate.
  2. Blend the Banana Cream – In a blender, blend the bananas, cream, and milk until smooth.
  3. Activate the Agar Agar – Heat the banana mixture over low heat, stirring in the agar agar. Simmer for 2-3 minutes, stirring continuously, until slightly thickened.
  4. Assemble the Cake – Pour the banana cream mixture over the biscuit base and smooth the top.
  5. Chill & Set – Refrigerate for at least 3 hours or until firm.
  6. Serve & Enjoy – Slice and enjoy this creamy, delicious no-bake banana cake!

Notes

  • Use digestive biscuits, graham crackers, or shortbread cookies for the base.
  • Let the cake chill overnight for the best texture.
  • For extra flavor, add a drizzle of chocolate or caramel on top before serving.
  • Store leftovers in an airtight container in the fridge for up to 3 days.

The Recipe That Everyone Loves – Simple, Fast, and Absolutely Delicious

Some recipes come with a story, a memory, or a special moment. Others, like this one, become instant favorites simply because they work every single time. There’s something magical about a recipe that’s easy to make yet delivers a perfect result—soft, flavorful, and comforting.

I first made this recipe on a lazy afternoon when I wanted something sweet but didn’t feel like spending hours in the kitchen. I had just a few basic ingredients, so I decided to experiment. To my surprise, the result was better than I had hoped—a light, fluffy, and deliciously satisfying treat that could be enjoyed as a snack, a dessert, or even breakfast with a cup of coffee.

Since that day, this recipe has become my go-to whenever I need a quick and reliable bake. It’s the kind of recipe you can make for any occasion, whether it’s a last-minute gathering, a casual weekend treat, or just because you’re craving something homemade. And the best part? It’s so easy that even beginners can master it without fail.

So, if you’re looking for a no-fuss, fail-proof recipe that always impresses, this one’s for you. Let’s dive into why it works so well and how you can make it your own.

Why This Recipe Works Every Time

1. Simple Ingredients, Big Flavor

This recipe uses pantry staples—flour, butter, sugar, eggs, and milk—yet the result is rich, moist, and full of flavor. No need for fancy or hard-to-find ingredients.

2. Perfect for Any Occasion

One of the best things about this recipe is how versatile it is. It works as a quick dessert, an afternoon snack, or even a sweet breakfast option. Whether you serve it plain, dusted with powdered sugar, or topped with a glaze, it never disappoints.

3. No Special Equipment Required

Some baked goods require mixers, special pans, or complicated techniques. Not this one. All you need is a mixing bowl, a spoon or whisk, and a regular baking pan. It’s as simple as mix, pour, and bake.

4. Foolproof for Beginners

If you’re new to baking or just looking for something that doesn’t require precision and patience, this is the perfect recipe. As long as you follow the basic steps, it’s almost impossible to mess up.

5. Easily Customizable

This recipe is a fantastic base that can be adapted to suit different tastes. Add nuts, chocolate chips, fruit, or spices to make it uniquely yours.

Ingredients

IngredientAmount
All-purpose flour2 cups
Baking powder1 teaspoon
Salt½ teaspoon
Unsalted butter, melted½ cup
Sugar¾ cup
Eggs2
Vanilla extract1 teaspoon
Milk½ cup

Directions

  1. Preheat & Prepare – Preheat your oven to 350°F (175°C) and grease a baking pan.
  2. Mix Dry Ingredients – In a bowl, whisk together the flour, baking powder, and salt.
  3. Combine Wet Ingredients – In a separate bowl, mix the melted butter, sugar, eggs, vanilla extract, and milk until smooth.
  4. Create the Batter – Gradually add the dry ingredients to the wet mixture, stirring until just combined. Do not overmix.
  5. Bake to Perfection – Pour the batter into the prepared pan and bake for 25-30 minutes, or until a toothpick inserted in the center comes out clean.
  6. Cool & Serve – Let it cool before slicing. Enjoy as is or with your favorite topping!

Nutritional Information (Per Serving, Approximate)

NutrientAmount
Calories210
Carbohydrates28g
Protein4g
Fat9g
Sugar12g
Fiber1g

Ways to Customize This Recipe

While this recipe is delicious on its own, you can easily change it up to create different variations. Here are some ideas to make it even more special:

  • Chocolate Lover’s Twist – Stir in chocolate chips or drizzle melted chocolate on top.
  • Nutty Delight – Add chopped almonds, walnuts, or pecans for extra crunch.
  • Fruit-Infused – Mix in fresh or dried fruit like blueberries, raspberries, or chopped apples.
  • Citrus Zing – Add lemon or orange zest for a fresh, fragrant flavor.
  • Spiced Up – A dash of cinnamon, nutmeg, or pumpkin spice adds warmth and depth.
  • Creamy Filling – Spread a layer of jam or Nutella in the middle before baking.

Frequently Asked Questions (FAQs)

1. Can I Make This Recipe Dairy-Free?

Yes! You can substitute the butter with coconut oil or dairy-free margarine and use almond, soy, or oat milk instead of regular milk. The texture will remain soft and delicious.

2. How Should I Store Leftovers?

Store leftovers in an airtight container at room temperature for up to 3 days. If you want to keep it fresh for longer, refrigerate it for up to a week or freeze it for up to three months.

3. Can I Use Whole Wheat Flour Instead of All-Purpose Flour?

Yes, but keep in mind that whole wheat flour will make the texture denser. If you want a lighter consistency while still using whole wheat, try using half whole wheat and half all-purpose flour.

4. Why Is My Cake Dry?

A dry cake usually happens because of one of these reasons:

  • Overbaking: Check your cake a few minutes before the suggested baking time ends.
  • Too much flour: Always measure flour correctly by spooning it into the cup and leveling it off instead of scooping directly from the bag.
  • Not enough fat or liquid: If you made substitutions, ensure the ingredients provide enough moisture.

5. Can I Make This Recipe Gluten-Free?

Yes! You can use a gluten-free all-purpose flour blend. Just make sure it contains a binding agent like xanthan gum to maintain the right texture.

6. What’s the Best Way to Serve This Cake?

This cake is delicious on its own, but you can serve it in different ways:

  • Warm with a scoop of ice cream
  • Topped with whipped cream or yogurt
  • Sliced and toasted for a crunchy texture
  • With a drizzle of honey or maple syrup

7. Can I Make Muffins Instead of a Cake?

Absolutely! Simply divide the batter into muffin cups and reduce the baking time to about 15-18 minutes. This makes them perfect for grab-and-go snacks.

Tips for the Best Results

  • Use Room Temperature Ingredients: This helps everything mix together smoothly and evenly.
  • Don’t Overmix: Stir just until combined to keep the texture soft and fluffy.
  • Let It Cool Before Slicing: Cutting into a hot cake can make it crumbly. Give it time to set for the best texture.
  • Experiment with Toppings: A dusting of powdered sugar, a drizzle of glaze, or a sprinkle of cinnamon sugar can enhance the flavor beautifully.

Conclusion – A Recipe Worth Sharing Again and Again

There’s something special about a recipe that’s both easy and impressive. This one has quickly become a favorite in my home, and I love how it can be enjoyed in so many different ways. Whether you make it as a simple treat, a base for creative variations, or a quick dessert for unexpected guests, it always delivers.

Sometimes, the best recipes are the ones that don’t require a lot of effort but bring a lot of joy. This is one of those recipes. So, the next time you’re in the mood for something homemade, give this a try—you won’t regret it!

Amal

The Recipe That Everyone Loves – Simple, Fast, and Absolutely Delicious

This quick and easy cake is soft, fluffy, and incredibly satisfying. Made with simple ingredients, it’s perfect for any occasion—whether you need a last-minute dessert, a comforting snack, or a sweet breakfast treat. No special skills or equipment required—just mix, bake, and enjoy!
Prep Time 10 minutes
Cook Time 30 minutes
Total Time 40 minutes
Servings: 8 –10 servings
Course: Dessert
Cuisine: International

Ingredients
  

  • 2 cups all-purpose flour
  • 1 teaspoon baking powder
  • ½ teaspoon salt
  • ½ cup unsalted butter melted
  • ¾ cup sugar
  • 2 eggs
  • 1 teaspoon vanilla extract
  • ½ cup milk

Method
 

  1. Preheat your oven to 350°F (175°C) and grease a baking pan.
  2. In a bowl, whisk together the flour, baking powder, and salt.
  3. In a separate bowl, mix the melted butter, sugar, eggs, vanilla extract, and milk until smooth.
  4. Gradually add the dry ingredients to the wet mixture, stirring just until combined. Do not overmix.
  5. Pour the batter into the prepared pan and bake for 25-30 minutes, or until a toothpick inserted in the center comes out clean.
  6. Let the cake cool before slicing. Serve plain, dusted with powdered sugar, or topped with your favorite glaze.

Notes

  • For added flavor, mix in chocolate chips, nuts, or fruit.
  • To make muffins, divide the batter into muffin cups and bake for 15-18 minutes.
  • Store in an airtight container at room temperature for up to 3 days, or refrigerate for up to a week.
  • This cake freezes well—slice before freezing for easy portions.