Hearty Sausage and Potato Casserole: A Comforting Baked Delight

There’s something special about a warm, bubbling casserole fresh from the oven. The golden crust, the rich aroma of melted cheese, and the layers of hearty ingredients make it a meal that brings people together. In my family, casseroles weren’t just about convenience; they were about comfort.

Growing up, my grandmother would make a version of this sausage and potato casserole on cold winter evenings. She never followed a strict recipe—just whatever was available in the kitchen, combined with love and intuition. There was always cheese, always potatoes, and always some kind of savory sausage. The result was a dish that filled our home with warmth and anticipation.

Now, every time I make this casserole, I’m reminded of those simple, joyful moments. The way we’d gather around the table, serving up generous portions, laughing, and sharing stories from the day. It’s more than just food—it’s a memory on a plate.

This recipe captures that nostalgia while adding a few modern touches. With creamy sour cream, savory hunting sausages, tender potatoes, and earthy mushrooms, it’s a dish that satisfies every craving. Whether you’re making it for a family dinner, a weekend gathering, or simply to enjoy throughout the week, this casserole delivers warmth and comfort in every bite.

Why This Casserole Is a Must-Try

1. The Perfect Balance of Flavors and Textures

This casserole has everything—soft, tender potatoes, crispy sausage, creamy sour cream, and the sharp, salty bite of Parmesan cheese. Each layer works together to create a dish that’s rich, satisfying, and impossible to resist.

2. A Hearty Meal That Feels Like Home

Few dishes are as comforting as a well-made casserole. It’s the kind of meal that fills your kitchen with an irresistible aroma and makes everyone eager to dig in.

3. Simple Ingredients, Big Flavor

You don’t need fancy ingredients to create something delicious. This recipe uses pantry staples like eggs, potatoes, and cheese, combined with flavorful sausages and fresh vegetables for a dish that tastes gourmet without the extra effort.

4. Ideal for Meal Prep

This casserole is a fantastic make-ahead meal. Bake it once and enjoy leftovers throughout the week. It reheats beautifully, making it perfect for busy days when you want a home-cooked meal without the hassle.

5. A Crowd-Pleasing Dish for Any Occasion

Whether it’s a family dinner, a holiday gathering, or a casual weekend meal, this casserole is always a hit. It’s easy to make in large batches and pairs well with a variety of side dishes.

Main Ingredients

IngredientQuantity
Chicken eggs4
Sour cream200 g
Spring onions1 bunch
Tomato1
Potatoes500 g
Raw mushrooms150 g
Onion1
Hunting sausages2
Hard Parmesan cheese50 g
SaltTo taste
Black pepperTo taste
Olive oil2 tablespoons

Directions

  1. Prepare the Ingredients
    • Peel and slice the potatoes into thin rounds.
    • Chop the onion, tomato, and spring onions.
    • Slice the hunting sausages and mushrooms.
  2. Sauté the Base
    • Heat olive oil in a pan over medium heat.
    • Sauté the onions and mushrooms until softened.
    • Add the sliced sausages and cook for a few more minutes.
  3. Assemble the Casserole
    • Grease a baking dish and layer half of the sliced potatoes on the bottom.
    • Spread the cooked sausage and mushroom mixture evenly over the potatoes.
    • Add the chopped tomato and spring onions.
    • Layer the remaining potatoes on top.
  4. Prepare the Egg Mixture
    • In a bowl, whisk the eggs with sour cream, salt, and black pepper.
    • Pour the mixture evenly over the layered ingredients.
  5. Bake to Perfection
    • Preheat the oven to 180°C (350°F).
    • Sprinkle the grated Parmesan cheese on top.
    • Bake for 35-40 minutes until golden brown and set.
  6. Serve and Enjoy
    • Let the casserole cool slightly before slicing.
    • Garnish with fresh spring onions and serve warm.

Nutritional Information (Per Serving, Approx.)

NutrientAmount
Calories350 kcal
Protein18 g
Carbohydrates32 g
Fats18 g
Fiber4 g
Sodium450 mg

Tips for Making the Perfect Casserole

1. Choose the Right Sausage

Hunting sausages add a smoky depth to this dish, but you can experiment with different types. Spicy chorizo, bratwurst, or even Italian sausage will each bring a unique flavor.

2. Slice the Potatoes Evenly

For a uniform texture, slice the potatoes as evenly as possible. If they’re too thick, they may not cook through properly; too thin, and they may become mushy. Aim for slices around ⅛ inch thick.

3. Don’t Skip the Sautéing Step

Cooking the onions and mushrooms beforehand enhances their flavor and ensures they blend seamlessly into the casserole. Raw onions can be overpowering, so this step is worth the extra few minutes.

4. Layering Is Key

Proper layering helps the flavors meld together. Start with a base of potatoes, then add the sausage and vegetables, followed by the creamy egg mixture. The cheese on top creates that beautiful golden crust.

5. Let It Rest Before Serving

After baking, allow the casserole to rest for about 10 minutes before cutting into it. This helps the layers set and makes serving much easier.

Delicious Variations to Try

1. Spicy Kick Casserole

Add chopped jalapeños or a sprinkle of red pepper flakes to the egg mixture for a bit of heat. You can also use spicy sausage to amp up the flavor.

2. Mediterranean-Inspired Casserole

Swap out the sausages for grilled chicken or lamb, and add olives, sun-dried tomatoes, and feta cheese for a Mediterranean twist.

3. Vegetarian Version

Omit the sausage and add more mushrooms, bell peppers, and spinach for a delicious vegetarian option. You can also replace the Parmesan with a sharp cheddar or gruyère for extra richness.

4. Extra Cheesy Delight

If you love cheese, add an extra layer of mozzarella or gouda in between the layers for a gooey, indulgent texture.

5. Breakfast Casserole Twist

Turn this into a breakfast dish by adding diced bacon or ham and serving it with a side of toast or fresh fruit.

How to Serve This Casserole

1. As a Standalone Meal

This casserole is filling enough to serve on its own. Pair it with a simple green salad or a bowl of soup for a well-rounded meal.

2. With a Side of Crusty Bread

A slice of warm, crusty bread is perfect for soaking up the creamy sauce and melted cheese.

3. With a Dollop of Sour Cream or Yogurt

Adding a bit of extra sour cream or Greek yogurt on top enhances the creaminess and adds a slight tang.

4. Paired with Roasted Vegetables

For a more balanced meal, serve this casserole alongside roasted carrots, Brussels sprouts, or asparagus.

5. As Leftovers for Lunch

This dish tastes just as good (if not better) the next day. Simply reheat and enjoy for a quick, satisfying lunch.

Frequently Asked Questions

1. Can I Make This Casserole Ahead of Time?

Yes! You can assemble the casserole and store it in the fridge overnight before baking. This makes it a great option for busy mornings or hosting guests.

2. How Long Does It Last in the Fridge?

Stored in an airtight container, this casserole will stay fresh in the refrigerator for up to 3 days.

3. Can I Freeze It?

Yes! Bake the casserole, let it cool completely, then wrap it tightly and freeze for up to 2 months. Reheat in the oven at 180°C (350°F) until warmed through.

4. What’s the Best Way to Reheat It?

Reheat in the oven for the best texture. If using a microwave, cover with a damp paper towel to prevent it from drying out.

5. Can I Use Pre-Cooked Potatoes?

Absolutely! If you have leftover roasted or boiled potatoes, you can slice them and layer them directly in the casserole, reducing the baking time slightly.

6. Can I Add Other Vegetables?

Yes! Bell peppers, zucchini, or even spinach would make great additions. Just be mindful of excess moisture, which can make the casserole too watery.

Final Thoughts: A Dish That Feels Like Home

Few dishes bring as much comfort and joy as a well-made casserole. This sausage and potato bake is more than just a recipe—it’s a reminder of home-cooked meals, family gatherings, and the simple pleasures of good food.

With its creamy texture, rich flavors, and golden, cheesy crust, this dish is perfect for any occasion. Whether you’re making it for a weeknight dinner, a special gathering, or just to enjoy leftovers for days, it’s a meal that never disappoints.

So gather your ingredients, preheat the oven, and get ready to serve up a dish that will have everyone asking for seconds. Because sometimes, the best meals are the ones that bring people together, one comforting bite at a time.

Amal

Hearty Sausage and Potato Casserole: A Comforting Baked Delight

This hearty sausage and potato casserole is the perfect comfort food—creamy, cheesy, and packed with savory flavors. Layers of tender potatoes, smoky hunting sausages, and rich Parmesan cheese come together in a deliciously satisfying dish. Ideal for family dinners, meal prep, or a cozy gathering, this casserole is easy to make and guaranteed to impress!
Prep Time 15 minutes
Cook Time 40 minutes
Total Time 55 minutes
Servings: 4 –6 servings
Course: Main Dish
Cuisine: European

Ingredients
  

  • 4 chicken eggs
  • 200 g sour cream
  • 1 bunch spring onions chopped
  • 1 tomato diced
  • 500 g potatoes peeled and thinly sliced
  • 150 g raw mushrooms sliced
  • 1 onion finely chopped
  • 2 hunting sausages sliced
  • 50 g hard Parmesan cheese grated
  • 2 tablespoons olive oil
  • Salt to taste
  • Black pepper to taste

Method
 

  1. Preheat the oven to 180°C (350°F). Grease a baking dish with olive oil.
  2. Heat a pan over medium heat and sauté the onions and mushrooms until soft. Add the sliced sausages and cook for another 2 minutes.
  3. Layer half of the sliced potatoes in the baking dish. Add the sausage and mushroom mixture, followed by the chopped tomato and spring onions.
  4. Layer the remaining potatoes on top.
  5. In a bowl, whisk together the eggs, sour cream, salt, and black pepper. Pour the mixture over the casserole.
  6. Sprinkle grated Parmesan cheese on top.
  7. Bake for 35-40 minutes until golden brown and the potatoes are tender.
  8. Let it cool slightly before serving. Enjoy warm with a side salad or crusty bread.

Notes

  • For a crispier top, broil the casserole for the last 3-5 minutes.
  • Substitute hunting sausages with smoked chorizo or bratwurst for a different flavor.
  • Store leftovers in an airtight container in the fridge for up to 3 days.
  • Reheat in the oven at 180°C (350°F) or in a pan over low heat for the best texture.

German Apple Delight: A Nutty and Oatmeal-Packed Treat

There’s something deeply comforting about the smell of apples and cinnamon filling the kitchen on a crisp morning. It takes me back to my childhood, to the days when my grandmother would prepare simple yet delicious apple-based dishes that filled our home with warmth. While many people associate German cuisine with hearty meats and rich pastries, Germany is also home to some of the most delightful and wholesome breakfast recipes, and this apple oatmeal dish is one of them.

I first discovered this recipe on a visit to a small German village during the autumn season. The air was cool, the trees were painted in hues of orange and gold, and the markets were overflowing with fresh apples and nuts. One morning, my host prepared a simple yet incredible dish using just oats, apples, and walnuts. It was soft, slightly crunchy, naturally sweet, and so satisfying that I immediately asked for the recipe.

Now, every time I make this dish, it reminds me of that trip—the cozy mornings, the aroma of baked apples, and the pure simplicity of good food made with love. Whether you’re looking for a nourishing breakfast, a quick snack, or a healthy dessert, this German-inspired apple oatmeal will transport you to a place of comfort and warmth.

Why This Apple Oatmeal Recipe Became a German Favorite

1. Simple Ingredients, Big Flavor

This dish proves that you don’t need fancy ingredients to create something delicious. With just oats, apples, walnuts, and a touch of natural sweetener, you get a meal that is wholesome, filling, and full of flavor.

2. Naturally Sweet and Nutritious

Unlike sugar-loaded breakfasts, this recipe relies on the natural sweetness of apples and agave syrup. The oats provide fiber, the walnuts add healthy fats, and the combination keeps you full for hours.

3. A Quick and Easy One-Pot Meal

Life is busy, and not everyone has time to prepare elaborate breakfasts. This recipe comes together in just 10-15 minutes, making it perfect for busy mornings.

4. A Comforting Breakfast for All Seasons

While this dish is especially cozy in fall and winter, it’s light enough to be enjoyed year-round. In warmer months, you can serve it chilled for a refreshing take on oatmeal.

5. A Taste of Germany at Home

If you’ve ever wanted to bring a little bit of German tradition into your kitchen, this dish is a great start. It’s inspired by traditional German breakfast bowls and apple-based desserts, blending wholesome flavors with timeless simplicity.

Ingredients

IngredientQuantity
Oatmeal1 cup
Walnut core50 g
Apples2
Water60 ml
Vanilla essenceTo taste
Agave syrupTo tast

Directions

  1. Prepare the Apples
    • Peel, core, and grate the apples. Set aside.
  2. Toast the Walnuts
    • Chop the walnuts and lightly toast them in a dry pan over medium heat for 2-3 minutes until fragrant.
  3. Cook the Oatmeal
    • In a saucepan, combine the oatmeal, water, and grated apples.
    • Cook over low heat, stirring occasionally, until the oats absorb the liquid and soften.
  4. Add Flavor
    • Stir in the vanilla essence, toasted walnuts, and agave syrup to taste. Mix well.
  5. Serve and Enjoy
    • Transfer to a serving bowl, garnish with extra walnuts if desired, and enjoy warm!

Nutritional Information (Per Serving, Approx.)

NutrientAmount
Calories220 kcal
Protein5 g
Carbohydrates38 g
Fats7 g
Fiber6 g
Sugars12 g

Tips for Making the Best Apple Oatmeal

1. Choose the Right Apples

Some apples are naturally sweeter, while others have a more tart flavor. If you like a sweeter dish, go for Honeycrisp, Fuji, or Gala apples. For a tangy contrast, Granny Smith apples work beautifully.

2. Toast the Walnuts for More Flavor

Toasting the walnuts enhances their nutty aroma and gives them a slightly crisp texture. Just a few minutes in a dry pan over medium heat can make a big difference.

3. Adjust the Sweetness to Your Taste

Agave syrup provides a mild sweetness, but you can adjust it based on your preference. If you like a deeper flavor, try maple syrup or honey.

4. Experiment with Spices

A sprinkle of cinnamon, nutmeg, or even a hint of cardamom can add warmth and complexity to the dish. These spices complement the apples beautifully.

5. Make It Creamier

If you prefer a creamier consistency, stir in a bit of almond milk, coconut milk, or regular milk at the end of cooking. This adds a rich texture without overpowering the natural flavors.

Creative Variations to Try

1. Baked Apple Oatmeal

Instead of cooking it on the stovetop, mix everything together and bake it in the oven for 20-25 minutes at 180°C (350°F). This gives the oats a slightly crispy texture on top while keeping the inside soft and warm.

2. Overnight Apple Oats

For a no-cook version, combine the ingredients with milk or yogurt and let them sit in the fridge overnight. In the morning, you’ll have a chilled, ready-to-eat breakfast.

3. Apple and Raisin Oatmeal

Add a handful of raisins or dried cranberries for extra sweetness and texture.

4. Caramelized Apple Oatmeal

Sauté the apples in a bit of butter and cinnamon before adding them to the oats for a rich, dessert-like flavor.

5. Nut-Free Apple Oatmeal

If you have a nut allergy, swap the walnuts for sunflower seeds or pumpkin seeds for a similar crunch.

How to Serve This Dish

1. Warm and Fresh Out of the Pot

Enjoy it straight from the stove while it’s warm and comforting. Top with extra walnuts and a drizzle of agave syrup for extra flavor.

2. With Yogurt or Whipped Cream

A dollop of Greek yogurt or a touch of whipped cream adds a creamy contrast to the chewy oats and crunchy nuts.

3. As a Dessert Alternative

This dish is naturally sweet and feels indulgent without being unhealthy. Serve it as a healthier dessert with a sprinkle of cinnamon on top.

4. Chilled as a Refreshing Summer Breakfast

Let the oatmeal cool and enjoy it cold with a splash of milk for a lighter, refreshing take on the dish.

Frequently Asked Questions

1. Can I Make This Oatmeal Ahead of Time?

Yes! You can prepare a big batch and store it in the fridge for up to 3 days. Just reheat it with a splash of water or milk before serving.

2. Can I Use Steel-Cut Oats Instead of Rolled Oats?

Absolutely, but steel-cut oats take longer to cook. You may need to increase the cooking time by 10-15 minutes and add extra water.

3. What Can I Use Instead of Agave Syrup?

You can use honey, maple syrup, coconut sugar, or even date syrup for different variations of sweetness.

4. Is This Recipe Gluten-Free?

Yes, as long as you use certified gluten-free oats. Some oats may be processed in facilities that handle wheat, so it’s always good to check the label.

5. Can I Use Other Nuts?

Of course! Try almonds, pecans, or hazelnuts for a different flavor profile.

6. Can I Freeze This Oatmeal?

Yes! Portion the cooked oatmeal into freezer-safe containers and freeze for up to a month. Reheat with a splash of milk or water when ready to eat.

Final Thoughts: A Simple Recipe That Feels Like Home

There’s something special about a dish that takes you back to cozy mornings, family kitchens, and the pure joy of homemade food. This German-inspired apple oatmeal is one of those recipes—simple yet packed with flavor, easy yet deeply satisfying.

Whether you’re making it for a quiet morning alone, a breakfast with loved ones, or a healthy snack to get you through the day, this dish will never disappoint. It’s warm, naturally sweet, and filled with textures that make every bite delightful.

So the next time you have apples and oats in your kitchen, don’t just make another bowl of plain oatmeal—try this recipe instead. It just might become your new favorite way to start the day.

Amal

German Apple Delight: A Nutty and Oatmeal-Packed Treat

This German-inspired apple oatmeal combines the natural sweetness of apples, the heartiness of oats, and the crunch of toasted walnuts for a comforting and nutritious meal. Lightly sweetened with agave syrup and infused with warm vanilla, this dish is perfect for breakfast or a healthy dessert. Quick, easy, and packed with flavor, it’s a recipe you’ll come back to again and again!
Prep Time 5 minutes
Cook Time 10 minutes
Total Time 15 minutes
Servings: 2 servings
Course: Breakfast
Cuisine: German-Inspired

Ingredients
  

  • 1 cup oatmeal
  • 50 g walnut core chopped
  • 2 apples grated
  • 60 ml water
  • Vanilla essence to taste
  • Agave syrup to taste

Method
 

  1. In a dry pan over medium heat, toast the chopped walnuts for 2-3 minutes until fragrant. Set aside.
  2. In a saucepan, combine the oatmeal, grated apples, and water. Cook over low heat, stirring occasionally, until the oats absorb the liquid and soften.
  3. Stir in the vanilla essence and toasted walnuts, mixing well.
  4. Drizzle with agave syrup to taste and serve warm. Enjoy as a cozy breakfast or a nutritious snack!

Notes

  • For extra warmth, add a pinch of cinnamon or nutmeg.
  • Swap agave syrup for honey or maple syrup for a different sweetness profile.
  • This oatmeal can be served warm or chilled for a refreshing summer breakfast.
  • Store leftovers in an airtight container in the fridge for up to 2 days.

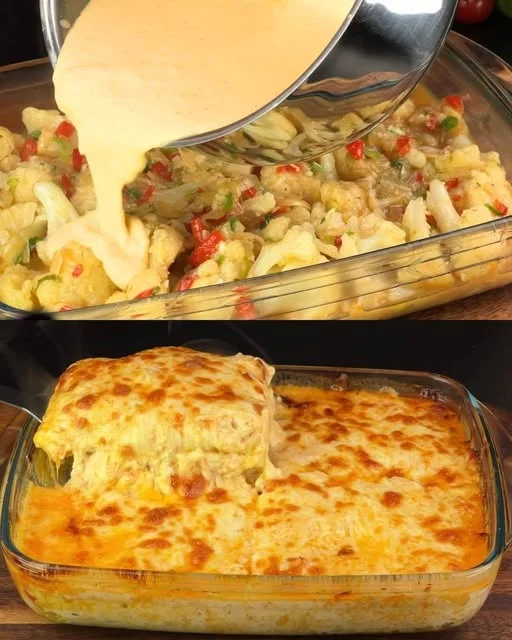
Creamy Cauliflower Delight: A Flavorful and Comforting Dish

Growing up, cauliflower wasn’t exactly my favorite vegetable. Like many kids, I found it bland and uninspiring. But everything changed the day my grandmother made this creamy, cheesy cauliflower dish. It wasn’t just another boiled vegetable on the plate—it was golden, flavorful, and bubbling with deliciousness.

She knew how to take the simplest ingredients and turn them into something magical. I remember standing beside her in the kitchen, watching as she whisked eggs, added cream sauce, and sautéed onions with garlic, filling the kitchen with an irresistible aroma. She would mix everything together and bake it to perfection, creating a dish that was both comforting and indulgent. One bite, and I was hooked.

Now, every time I make this recipe, I’m reminded of those cozy family dinners where even the most ordinary ingredients could become something special. This dish is not just about cauliflower—it’s about tradition, comfort, and the joy of turning simple food into something truly satisfying.

Whether you’re looking for a new way to enjoy cauliflower, searching for a healthy yet delicious meal, or just craving something warm and comforting, this recipe will surprise you with its incredible flavor and ease of preparation.

Why You’ll Love This Recipe

1. A Creamy, Cheesy Dream

This isn’t your typical steamed cauliflower. The combination of cream sauce, eggs, and cheese creates a rich, velvety texture that makes every bite melt in your mouth.

2. A Perfect Balance of Flavors

The sautéed onions and garlic add a deep, savory aroma, while the paprika gives it just the right touch of warmth and spice. The spring onions bring freshness, balancing out the creamy richness.

3. A Healthier Comfort Food

Cauliflower is packed with vitamins and fiber while being low in calories. Instead of heavy pasta dishes, this recipe provides the same creamy satisfaction with far more nutrients.

4. Easy and Versatile

This dish works for any occasion—whether it’s a quick weeknight dinner, a side dish for a family gathering, or even a meal prep option for the week. Plus, it can be baked or pan-fried, depending on how crispy you like it.

5. Budget-Friendly and Made with Simple Ingredients

No fancy ingredients or expensive groceries required! This dish is made with affordable, pantry-friendly items that come together beautifully.

Ingredients

IngredientQuantity
Cauliflower (cut into florets)1 head
Eggs4
Cream sauce100 ml
PaprikaTo taste
Garlic (minced)1 clove
Onion (finely chopped)1
Spring onions (chopped)1 bunch
Cheese (grated)100 g
Olive oil2 tablespoons
SaltTo taste
Black pepperTo taste

Directions

  1. Prepare the Cauliflower
    • Bring a pot of salted water to a boil. Add the cauliflower florets and cook until tender, about 5 minutes. Drain and set aside.
  2. Sauté the Aromatics
    • Heat olive oil in a pan over medium heat. Add the chopped onion and garlic, cooking until soft and fragrant.
  3. Combine and Cook
    • In a bowl, whisk the eggs, cream sauce, paprika, salt, and black pepper.
    • Add the sautéed onion and garlic to the egg mixture. Stir in the cooked cauliflower and chopped spring onions.
  4. Bake or Pan-Fry
    • Oven Method: Preheat the oven to 180°C (350°F). Transfer the mixture to a baking dish, sprinkle with grated cheese, and bake for 20-25 minutes until golden brown.
    • Pan-Fry Method: Pour the mixture into a greased pan and cook over low heat until set, then flip and cook the other side for a few minutes.
  5. Serve and Enjoy
    • Let it cool slightly before serving. Garnish with extra spring onions or fresh herbs.

Nutritional Information (Per Serving, Approx.)

NutrientAmount
Calories220 kcal
Protein12 g
Carbohydrates10 g
Fats15 g
Fiber3 g
Sodium300 mg

Tips for Making the Perfect Creamy Cauliflower Dish

1. Don’t Overcook the Cauliflower

For the best texture, cook the cauliflower until just tender. Overcooking can make it too soft and watery, affecting the final dish.

2. Use High-Quality Cheese

Since cheese plays a key role in this recipe, using a high-quality cheese like aged cheddar, gruyère, or gouda will make a big difference in flavor.

3. Sauté the Onions and Garlic for Depth

Instead of adding raw onions, sautéing them first enhances their natural sweetness and infuses the dish with a rich, aromatic flavor.

4. Customize with Your Favorite Spices

Paprika adds a mild warmth, but you can experiment with cayenne for heat, nutmeg for a hint of earthiness, or Italian herbs for a Mediterranean touch.

5. Let It Rest Before Serving

Allowing the dish to cool slightly before serving helps the flavors settle and makes it easier to slice or scoop without falling apart.

Creative Variations to Try

1. Spicy Cauliflower Bake

Add a dash of cayenne pepper or red pepper flakes for a bit of heat. You can also mix in diced jalapeños for an extra kick.

2. Mediterranean-Inspired Cauliflower

Mix in crumbled feta cheese, black olives, and sun-dried tomatoes for a Mediterranean twist.

3. Low-Carb Cauliflower Gratin

For a more indulgent version, replace the cream sauce with heavy cream and use a mix of parmesan and gruyère for an ultra-creamy gratin.

4. Vegan-Friendly Version

Swap the eggs for a plant-based alternative (such as blended silken tofu) and use a dairy-free cheese substitute. Coconut milk or cashew cream can replace the cream sauce.

5. Protein-Packed Cauliflower Bake

Add shredded chicken, crumbled bacon, or even cooked quinoa to turn this into a hearty main dish.

How to Serve This Dish

1. As a Main Course

This dish is hearty enough to be a standalone meal. Pair it with a simple green salad or roasted vegetables for a balanced plate.

2. As a Side Dish

It’s the perfect side for roasted chicken, grilled steak, or even a holiday feast. The creamy texture pairs beautifully with a variety of proteins.

3. As a Filling for Wraps or Tacos

Scoop some of the creamy cauliflower into a warm tortilla or pita bread and top with fresh herbs for a unique and flavorful wrap.

4. As a Breakfast Dish

Leftovers can be served with a fried or poached egg on top for a delicious and filling breakfast.

Frequently Asked Questions

1. Can I Make This Dish Ahead of Time?

Yes! You can prepare the mixture and store it in the fridge for up to 24 hours before baking. If you’re meal-prepping, it reheats beautifully in the oven or microwave.

2. How Long Does It Last in the Refrigerator?

This dish can be stored in an airtight container in the fridge for up to 3 days.

3. Can I Freeze It?

Absolutely! Bake it first, let it cool completely, then freeze in portions. Reheat in the oven at 180°C (350°F) until warmed through.

4. What Can I Use Instead of Cream Sauce?

If you want a lighter option, substitute with Greek yogurt or a mixture of milk and a little cornstarch to thicken.

5. Can I Use Frozen Cauliflower?

Yes, but make sure to drain it well after boiling to remove excess moisture. Frozen cauliflower tends to hold more water, which can affect the final texture.

6. How Can I Make It Extra Crispy?

If you prefer a crispy top, sprinkle extra cheese and breadcrumbs before baking and broil for the last few minutes.

Final Thoughts: A Dish That Surprises Every Time

Cauliflower may not always be the star of the dinner table, but this recipe changes everything. It takes a humble vegetable and transforms it into something creamy, cheesy, and deeply satisfying.

Whether you’re making this as a comforting weeknight meal, a delicious side dish, or even a meal-prep favorite, it’s bound to become a staple in your kitchen. The combination of flavors, textures, and ease of preparation makes this dish one of those recipes you’ll find yourself coming back to again and again.

So the next time you’re looking for a way to elevate cauliflower beyond the usual steamed or roasted versions, give this recipe a try. It might just surprise you—just like it did for me all those years ago in my grandmother’s kitchen.

Amal

Creamy Cauliflower Delight: A Flavorful and Comforting Dish

This creamy cauliflower dish is the perfect combination of comfort and flavor! Tender cauliflower florets are mixed with eggs, cream sauce, and a blend of savory spices, then baked to golden perfection. The result? A rich, cheesy, and satisfying meal that’s both nutritious and incredibly delicious. Whether served as a main dish or a side, this recipe will quickly become a household favorite!
Prep Time 10 minutes
Cook Time 25 minutes
Total Time 35 minutes
Servings: 4 servings
Course: Main Dish
Cuisine: International

Ingredients
  

  • 1 cauliflower cut into florets
  • 4 eggs
  • 100 milliliters cream sauce
  • Paprika to taste
  • 1 clove garlic minced
  • 1 onion finely chopped
  • 1 bunch spring onions chopped
  • 100 grams cheese grated
  • 2 tablespoons olive oil
  • Salt to taste
  • Black pepper to taste

Method
 

  1. Bring a pot of salted water to a boil and cook the cauliflower florets for about 5 minutes until just tender. Drain and set aside.
  2. Heat olive oil in a pan over medium heat. Sauté the chopped onion and garlic until soft and fragrant.
  3. In a bowl, whisk together eggs, cream sauce, paprika, salt, and black pepper. Stir in the sautéed onion and garlic.
  4. Add the cooked cauliflower and chopped spring onions to the mixture, mixing well to coat.
  5. Preheat the oven to 180°C (350°F). Transfer the mixture to a greased baking dish and sprinkle with grated cheese.
  6. Bake for 20-25 minutes until golden brown and bubbly.
  7. Let it cool slightly before serving. Enjoy warm as a main course or a delicious side dish!

Notes

  • For extra crispiness, add a layer of breadcrumbs on top before baking.
  • Swap cream sauce for Greek yogurt or sour cream for a tangy twist.
  • Experiment with different cheeses like gouda or parmesan for more depth of flavor.
  • This dish reheats well, making it perfect for meal prep.

Cloud-Soft Bread: The Secret to Perfectly Fluffy Dough

There’s something almost magical about the process of making bread. The way simple ingredients—flour, yeast, eggs, and milk—come together to create something warm, soft, and comforting. For me, the memory of homemade bread goes back to my childhood, when my grandmother would wake up early to prepare fresh loaves for the day. The scent of rising dough would fill the house, wrapping us in a warmth that no store-bought bread could ever replicate.

I remember standing on a chair beside her, watching in awe as she kneaded the dough with her strong yet gentle hands. She always told me, “The secret to the softest bread isn’t just the ingredients—it’s the love and patience you put into it.” At the time, I thought it was just one of those things grandmothers said. But now, years later, as I bake bread in my own kitchen, I understand exactly what she meant.

This recipe brings back that nostalgia. It’s simple yet special, creating bread so light and airy that it almost feels like a cloud. The secret ingredient? A little baking powder, which gives the dough an extra lift, making it even softer than traditional recipes. Whether you’re a beginner or an experienced baker, this bread will surprise you with its delicate texture and rich flavor.

Why This Bread Recipe Stands Out

1. The Secret to Soft, Airy Bread

Many bread recipes rely solely on yeast for leavening, but adding a small amount of baking powder takes the fluffiness to another level. It helps create an even softer texture, making the bread almost melt in your mouth.

2. A Foolproof Recipe for Beginners

If you’ve ever been intimidated by making bread from scratch, this recipe is the perfect starting point. With simple steps and easy-to-find ingredients, you can create a bakery-quality loaf without the stress.

3. Perfect Balance of Flavor and Texture

The combination of warm milk, eggs, and a touch of sugar gives this bread a rich, slightly sweet taste, while the sunflower oil ensures a tender crumb. It’s soft enough to enjoy on its own but sturdy enough to use for sandwiches or toast.

4. The Joy of Baking from Scratch

There’s nothing quite like the satisfaction of pulling a freshly baked loaf from the oven. The golden crust, the pillowy interior, and the irresistible aroma make the effort more than worthwhile.

5. A Versatile Bread for Every Occasion

Whether you’re serving it for breakfast, using it for sandwiches, or pairing it with a warm bowl of soup, this bread is incredibly versatile. It also freezes well, so you can always have homemade bread on hand.

Ingredients

IngredientQuantity
Wheat flour700 g
Salt1 teaspoon
Warm milk400 ml
Sugar4 tablespoons
Dry yeast8 g
Eggs2
Sunflower oil80 ml
Baking powder10 g

Directions

  1. Activate the Yeast
    • In a bowl, mix warm milk, sugar, and dry yeast. Let it sit for 10 minutes until foamy.
  2. Prepare the Dough
    • In a large mixing bowl, combine flour, salt, and baking powder.
    • Add the yeast mixture, eggs, and sunflower oil. Mix until a dough forms.
  3. Knead to Perfection
    • Knead the dough for about 10-15 minutes until smooth and elastic.
    • Cover with a damp cloth and let it rise for 1 hour or until doubled in size.
  4. Shape and Proof
    • Punch down the dough, shape it into loaves or rolls, and place on a lined baking tray.
    • Cover and let rise for another 30 minutes.
  5. Bake to Golden Perfection
    • Preheat the oven to 180°C (350°F).
    • Bake for 25-30 minutes or until golden brown and hollow-sounding when tapped.
  6. Cool and Serve
    • Let the bread cool slightly before slicing. Enjoy warm or toasted!

Nutritional Information (Per Serving, Approx.)

NutrientAmount
Calories220 kcal
Protein6 g
Carbohydrates38 g
Fats5 g
Fiber2 g
Sodium150 mg

Tips for Making the Best Cloud-Soft Bread

1. Use Warm Milk to Activate the Yeast

The milk should be warm, not hot—about 38-40°C (100-105°F). Too hot, and it can kill the yeast; too cold, and the yeast won’t activate properly.

2. Knead Until the Dough is Smooth and Elastic

Proper kneading develops the gluten structure, which is key to creating a soft yet chewy bread. If kneading by hand, aim for about 10-15 minutes. If using a stand mixer, 7-10 minutes should be enough.

3. Let the Dough Rise in a Warm Place

Yeast thrives in warmth, so find a cozy spot in your kitchen for the dough to rise. If your kitchen is cold, you can place the dough in the oven with the light on for gentle warmth.

4. Don’t Rush the Second Rise

After shaping the dough into loaves or rolls, let it proof again before baking. This second rise ensures an airy texture and helps prevent dense bread.

5. Bake at the Right Temperature

A preheated oven is essential for even baking. If your oven runs hot or cold, consider using an oven thermometer to ensure the correct temperature.

6. Brush with Butter for a Softer Crust

For an extra soft, golden crust, brush the bread with melted butter as soon as it comes out of the oven. This adds flavor and keeps the crust tender.

Creative Ways to Enjoy This Bread

1. Classic Buttered Bread

There’s nothing better than a warm slice of freshly baked bread with a spread of butter and a drizzle of honey or jam.

2. The Ultimate Sandwich Bread

This bread is sturdy yet soft, making it perfect for sandwiches. Try it with turkey and cheese, peanut butter and banana, or a classic grilled cheese.

3. French Toast Heaven

Because of its slightly sweet taste, this bread makes incredible French toast. Dip slices in a mixture of eggs, milk, and cinnamon, then fry until golden brown.

4. Bread Rolls for Special Occasions

Shape the dough into small rolls and bake them for a perfect side dish at holiday dinners.

5. Homemade Garlic Bread

Slice the bread, spread it with garlic butter, and toast it in the oven for an easy and delicious side to pasta dishes.

Frequently Asked Questions

1. Can I Use Whole Wheat Flour Instead of White Flour?

Yes, but keep in mind that whole wheat flour absorbs more liquid and can result in a denser bread. To keep it soft, replace only half of the flour with whole wheat and add an extra tablespoon of liquid.

2. What If I Don’t Have Sunflower Oil?

Any neutral oil, such as vegetable oil, can be used instead. You can also substitute with melted butter for a richer flavor.

3. How Can I Store This Bread?

Store at room temperature in an airtight container for up to 3 days. For longer storage, slice the bread and freeze it in a sealed bag for up to 2 months.

4. Can I Make This Bread Without Eggs?

Yes! If you need an egg-free version, substitute each egg with ¼ cup of unsweetened applesauce or yogurt.

5. How Do I Know If My Dough Has Risen Enough?

Gently press a finger into the dough. If the indentation slowly springs back, it’s ready. If it stays indented, give it more time to rise.

6. Can I Add Other Ingredients to the Dough?

Absolutely! Feel free to mix in herbs, grated cheese, or even dried fruit for different variations.

Final Thoughts: The Joy of Baking Homemade Bread

There’s something incredibly rewarding about baking your own bread. The moment you pull a warm, golden loaf from the oven, you realize that no store-bought bread could ever compare to the texture, aroma, and taste of homemade.

This recipe proves that making bread from scratch doesn’t have to be complicated. With a little patience and the right technique, anyone can achieve a soft, airy loaf that feels like biting into a cloud. Whether you’re making this for your family, a special occasion, or simply for the joy of baking, this bread will always deliver comfort and satisfaction.

So go ahead—gather your ingredients, roll up your sleeves, and experience the simple pleasure of baking bread the way it was meant to be enjoyed: fresh, homemade, and made with love.

Amal

Cloud-Soft Bread: The Secret to Perfectly Fluffy Dough

This homemade bread is unbelievably soft and fluffy, with a delicate texture that feels like a cloud. The secret? A special ingredient that gives the dough extra lightness and an irresistible softness. Perfect for sandwiches, toast, or enjoying fresh with butter, this bread is easy to make and guaranteed to fill your home with the comforting aroma of freshly baked goodness.
Prep Time 15 minutes
Cook Time 30 minutes
Total Time 2 hours
Servings: 8 rolls
Course: Bread
Cuisine: International

Ingredients
  

  • 700 grams wheat flour
  • 1 teaspoon salt
  • 400 ml warm milk
  • 4 tablespoons sugar
  • 8 grams dry yeast
  • 2 eggs
  • 80 ml sunflower oil
  • 10 grams baking powder

Method
 

  1. In a bowl, mix warm milk, sugar, and dry yeast. Let it sit for 10 minutes until foamy.
  2. In a large mixing bowl, combine flour, salt, and baking powder. Add the yeast mixture, eggs, and sunflower oil.
  3. Knead the dough for 10-15 minutes until smooth and elastic. Cover and let it rise for 1 hour or until doubled in size.
  4. Punch down the dough, shape it into loaves or rolls, and place on a lined baking tray. Cover and let rise for another 30 minutes.
  5. Preheat the oven to 180°C (350°F) and bake for 25-30 minutes until golden brown.
  6. Let the bread cool slightly before slicing. Enjoy warm or toasted!

Notes

  • Ensure the milk is warm, not hot, to activate the yeast properly.
  • Kneading well is essential for achieving a soft and airy texture.
  • Brush the bread with melted butter after baking for a shiny and soft crust.
  • Store at room temperature in an airtight container for up to 3 days or freeze for longer storage.

Flaky Delight: The Easiest Puff Pastry Appetizer That Surprised Everyone

Every gathering has that one dish that disappears from the table before anything else. For my family, that dish used to be the usual tray of sandwiches. Simple, predictable, and easy to prepare. But one day, I decided to change things up. Instead of making another round of sandwiches, I reached for a roll of puff pastry sitting in the fridge and thought, “Why not turn this into something special?”

What came out of the oven was nothing short of magic—crispy, golden puff pastry topped with melted cheese, savory sausages, and tangy pickled cucumbers. The smell alone had everyone gathering in the kitchen, and before I could even set the tray down, half of them were gone. My family was amazed at how something so simple could taste so incredible.

From that moment on, this became our go-to appetizer for parties, lazy weekends, and even quick weekday dinners. It’s effortless to make, yet it feels like a gourmet treat. Whether you’re hosting guests or just craving a delicious snack, this puff pastry appetizer will never let you down.

Why This Puff Pastry Appetizer Is a Must-Try

1. Easier Than Sandwiches, More Impressive

Sandwiches are great, but let’s be honest—they can get boring. This puff pastry recipe takes the same ingredients you’d use for a sandwich and transforms them into something crispy, flaky, and irresistible.

2. Minimal Effort, Maximum Flavor

With just a few basic ingredients, you get a snack that looks and tastes like it came from a bakery. The rich, buttery pastry combined with melted cheese, savory sausages, and tangy pickles creates an explosion of flavors in every bite.

3. Perfect for Any Occasion

Whether you need a quick snack for movie night, an appetizer for a party, or an easy lunch, this recipe fits every occasion. It’s great for both casual gatherings and fancy dinners.

4. Customizable to Your Taste

The best part about this recipe is how flexible it is. You can swap the sausages for other proteins, use different cheeses, or add extra toppings to suit your preferences.

5. A Great Make-Ahead Option

These puff pastry bites can be prepared in advance and baked when needed. This makes them perfect for entertaining—you can have them ready in no time with minimal effort.

Ingredients

IngredientQuantity
Puff pastry400 g
Egg (beaten)1
Ketchup2 tablespoons
Boiled sausage (sliced)100 g
Smoked sausage (sliced)100 g
Tomato (sliced)1
Pickled cucumbers (sliced)2
Mayonnaise1 tablespoon
Cheese (grated)150 g

Directions

  1. Prepare the Puff Pastry
    • Preheat the oven to 200°C (390°F).
    • Roll out the puff pastry on a floured surface and cut it into squares or rectangles.
  2. Add the Fillings
    • Spread a thin layer of ketchup over each piece of pastry.
    • Evenly distribute the boiled sausage, smoked sausage, tomato slices, and pickled cucumbers on top.
  3. Top with Cheese and Mayo
    • Drizzle mayonnaise over the toppings and sprinkle with grated cheese for a rich, melty finish.
  4. Seal and Bake
    • Fold the pastry slightly over the toppings or leave it open like a mini pizza.
    • Brush the edges with the beaten egg for a golden crust.
    • Bake for 15-20 minutes until puffed up and golden brown.
  5. Serve and Enjoy
    • Let cool slightly and serve warm as a delicious alternative to traditional sandwiches.

Nutritional Information (Per Serving, Approx.)

NutrientAmount
Calories320 kcal
Protein12 g
Carbohydrates28 g
Fats18 g
Fiber2 g
Sodium540 mg

Tips for Making the Best Puff Pastry Appetizer

1. Use High-Quality Puff Pastry

A good puff pastry makes all the difference. If using store-bought, choose a brand with a high butter content for the flakiest, most flavorful results. If you’re feeling ambitious, making homemade puff pastry will take this dish to the next level.

2. Don’t Overload the Pastry

It’s tempting to pile on the toppings, but too much filling can make the pastry soggy and prevent it from puffing properly. A little goes a long way.

3. Preheat the Oven for the Perfect Crisp

A hot oven (about 200°C/390°F) is key to getting a beautifully golden and crispy pastry. If the oven isn’t hot enough, the pastry may become dense instead of light and flaky.

4. Brush with Egg Wash for a Beautiful Golden Color

Brushing the pastry with a beaten egg before baking gives it that perfect glossy, golden-brown finish.

5. Let It Cool Slightly Before Serving

As tempting as it is to eat these straight from the oven, letting them rest for a few minutes allows the flavors to settle and prevents burns from molten cheese.

Delicious Variations to Try

1. Spicy Pepperoni & Cheese Bites

Replace the sausages with sliced pepperoni and add a sprinkle of red pepper flakes for a spicy kick.

2. Vegetarian Mediterranean Pastry

Swap the sausage for grilled eggplant or zucchini, add feta cheese, and sprinkle with oregano for a Mediterranean-inspired twist.

3. BBQ Chicken Puff Pastry Bites

Use shredded BBQ chicken instead of sausage, add a drizzle of barbecue sauce, and top with smoked cheddar cheese.

4. Italian Caprese Pastry

Replace the sausages with fresh mozzarella, tomato slices, and basil leaves for a Caprese-inspired appetizer. Drizzle with balsamic glaze after baking for extra flavor.

5. Ham & Cheese Croissant-Style Pastry

Instead of flat squares, roll up ham and cheese inside the puff pastry to create a croissant-like bite.

How to Serve This Puff Pastry Appetizer

1. As a Party Appetizer

Arrange these golden, crispy bites on a serving platter and watch them disappear within minutes at any gathering.

2. With a Side of Dipping Sauce

These pair wonderfully with a variety of dips, such as honey mustard, garlic aioli, marinara sauce, or spicy sriracha mayo.

3. As a Quick and Easy Lunch

Serve with a side salad or a warm bowl of soup for a complete, satisfying meal.

4. As a Brunch Option

Pair with a cup of coffee or tea for a delicious mid-morning treat that’s easy to prepare and serve.

5. Perfect for Meal Prep

Make a batch ahead of time and store them in an airtight container. Simply reheat in the oven or air fryer for a fresh-from-the-oven taste.

Frequently Asked Questions

1. Can I make this appetizer ahead of time?

Yes! You can assemble the puff pastry bites and store them in the fridge for up to 24 hours before baking. When ready to serve, just pop them in the oven.

2. Can I freeze them?

Absolutely. You can freeze unbaked puff pastry appetizers and bake them straight from frozen. Just add a few extra minutes to the baking time.

3. How do I keep the pastry from getting soggy?

Make sure not to overload the pastry with too much sauce or wet ingredients. If using juicy toppings like tomatoes, pat them dry before adding them to the pastry.

4. Can I use homemade puff pastry instead of store-bought?

Yes! Homemade puff pastry will make these even flakier and more delicious, though it does take extra time and effort.

5. What’s the best way to reheat leftovers?

For best results, reheat in an oven at 180°C (350°F) for 5-7 minutes or in an air fryer for 3-4 minutes. Avoid microwaving, as it can make the pastry soft instead of crispy.

Final Thoughts: A Simple Recipe That Impresses Every Time

Sometimes, the simplest recipes are the most memorable. This puff pastry appetizer proves that you don’t need complicated ingredients or hours in the kitchen to create something truly special. Whether you’re making it for a party, a family gathering, or just to treat yourself to something delicious, it never fails to impress.

What started as a last-minute kitchen experiment in my home has now become a favorite dish that everyone looks forward to. The flaky, buttery crust, the cheesy, savory filling, and the delightful crunch make it a snack that’s hard to resist.

So the next time you’re tempted to make plain old sandwiches, reach for some puff pastry instead—you might just surprise yourself and everyone else at the table!

Amal

Flaky Delight: The Easiest Puff Pastry Appetizer That Surprised Everyone

This puff pastry appetizer is a game-changer! Buttery, flaky, and loaded with savory toppings like sausages, cheese, and tangy pickles, it’s an effortless yet impressive snack. Perfect for parties, brunch, or a quick treat, these crispy bites are guaranteed to disappear fast. Simple to make, but bursting with flavor—way more exciting than traditional sandwiches!
Prep Time 10 minutes
Cook Time 20 minutes
Total Time 30 minutes
Servings: 6 –8 servings
Course: Snack
Cuisine: International

Ingredients
  

  • 400 g puff pastry
  • 1 egg beaten
  • 2 tablespoons ketchup
  • 100 g boiled sausage sliced
  • 100 g smoked sausage sliced
  • 1 tomato sliced
  • 2 pickled cucumbers sliced
  • 1 tablespoon mayonnaise
  • 150 g cheese grated

Method
 

  1. Preheat the oven to 200°C (390°F). Roll out the puff pastry on a lightly floured surface and cut it into squares or rectangles.
  2. Brush each piece with ketchup, then evenly layer the boiled sausage, smoked sausage, tomato slices, and pickled cucumbers.
  3. Drizzle a little mayonnaise over the toppings and sprinkle with grated cheese.
  4. Fold the pastry slightly over the toppings or leave it open like a mini pizza. Brush the edges with beaten egg for a golden, glossy finish.
  5. Transfer to a lined baking sheet and bake for 15-20 minutes, until puffed up and golden brown.
  6. Let cool slightly and serve warm. Enjoy as a delicious snack, appetizer, or quick meal!

Notes

  • Feel free to swap the sausages with ham, pepperoni, or even shredded chicken.
  • For extra crispiness, bake the pastries on a preheated baking sheet.
  • Add a sprinkle of dried oregano or paprika for extra flavor.
  • These appetizers taste great with a side of garlic aioli, mustard, or a spicy dipping sauce.
  • Store leftovers in an airtight container and reheat in an oven or air fryer to maintain crispiness.

Golden Potato Wrap: A Simple and Tasty Breakfast

There’s something magical about the smell of potatoes sizzling in butter early in the morning. It’s a scent that instantly transports me back to childhood, to those slow and peaceful mornings when breakfast wasn’t rushed but savored. In my family, potatoes have always been a breakfast staple, whether mashed, fried, or baked into something delicious. But one of the simplest and most satisfying ways we enjoyed them was in a warm tortilla wrap.

This breakfast is a reminder that great food doesn’t have to be complicated. With just a handful of pantry staples—potatoes, eggs, cheese, and a tortilla—you can create a meal that is both filling and incredibly comforting. It’s crispy on the outside, soft on the inside, and packed with the rich, buttery flavors that make breakfast feel special.

Whether you’re preparing a quick meal for yourself, making breakfast for your family, or looking for a hearty dish to start your weekend, this potato wrap is the perfect choice. It’s effortless to make, endlessly customizable, and satisfying in every bite.

Why You’ll Love This Breakfast Wrap

1. Quick and Easy to Make

Mornings can be busy, but this breakfast wrap takes only about 15 minutes to prepare. The ingredients are simple, the process is straightforward, and the result is pure comfort food.

2. Crispy and Cheesy Goodness

The tortilla becomes golden and crisp, holding together the creamy, buttery potatoes and melted cheese inside. The contrast of textures—crispy, soft, and gooey—makes every bite irresistible.

3. A Perfectly Balanced Meal

This dish provides a great balance of carbohydrates, protein, and fats to keep you full and energized throughout the morning. The potatoes offer slow-releasing energy, the eggs provide protein, and the cheese adds richness and depth.

4. Completely Customizable

One of the best things about this recipe is how easily it can be adapted. You can add vegetables for extra nutrition, swap out cheese varieties, or even include different proteins like ham or sausage.

5. A One-Pan Breakfast with Minimal Cleanup

Everything is cooked in a single pan, making this an easy, no-fuss meal with minimal dishes to wash. Perfect for those who love a good breakfast without spending too much time cleaning up afterward.

Ingredients

IngredientQuantity
Tortilla or flatbread1 large
Potatoes (peeled and thinly sliced)2 medium
SaltTo taste
Butter1 tbsp
Eggs2
Cheese (grated)50 g (½ cup)
Black pepper (optional)½ tsp
Paprika (optional)¼ tsp
Olive oilFor frying

Directions

  1. Prepare the Potatoes
    • Heat butter in a pan over medium heat.
    • Add the thinly sliced potatoes, season with salt, and cook until golden and tender.
  2. Cook the Eggs
    • In the same pan, push the potatoes to the side and crack the eggs in. Scramble them lightly or leave them whole, depending on preference.
  3. Assemble the Wrap
    • Place the tortilla or flatbread in the pan.
    • Spread the potatoes and eggs evenly over one half of the tortilla.
    • Sprinkle cheese and any optional seasonings on top.
  4. Fold and Toast
    • Fold the tortilla in half over the filling and press gently.
    • Cook for 1-2 minutes per side until golden brown and crispy.
  5. Serve and Enjoy
    • Slice and serve warm with your favorite dipping sauce or fresh herbs.

Nutritional Information (Per Serving, Approx.)

NutrientAmount
Calories350 kcal
Protein12 g
Carbohydrates38 g
Fats16 g
Fiber3 g
Sodium480 mg

Secrets to Making the Best Potato Wrap

1. Thinly Slice the Potatoes for Faster Cooking

Cutting the potatoes into thin slices ensures they cook evenly and quickly. If you’re in a rush, you can also use pre-cooked or leftover potatoes for an even faster meal.

2. Don’t Skip the Butter

While olive oil works well for cooking, butter adds a deep, rich flavor that makes the potatoes taste incredible. For the best of both worlds, use a combination of both.

3. Use a Good-Quality Tortilla or Flatbread

A soft and flexible tortilla works best for this recipe. If you like a crunchier texture, opt for a slightly thicker flatbread and toast it a little longer in the pan.

4. Season Well for Maximum Flavor

Potatoes have a mild flavor on their own, so don’t be afraid to add seasoning. A pinch of black pepper, paprika, or even garlic powder can make a big difference.

5. Let the Cheese Melt Completely

Melted cheese binds the ingredients together and adds creaminess to the wrap. For the best texture, cover the pan for a minute after adding the cheese to let it melt evenly.

Delicious Variations to Try

1. Spicy Potato and Egg Wrap

Add a dash of smoked paprika, red pepper flakes, or even chopped jalapeños for a spicy twist. A drizzle of hot sauce or sriracha also takes it to the next level.

2. Mediterranean-Inspired Wrap

Swap the cheese for crumbled feta, add a handful of fresh spinach, and sprinkle in some dried oregano for a Mediterranean touch.

3. Meat Lover’s Breakfast Wrap

For an extra protein boost, add diced ham, crispy bacon, or cooked sausage to the wrap before folding.

4. Veggie-Packed Breakfast Wrap

Include sautéed mushrooms, bell peppers, or spinach for added nutrients and flavor.

5. Avocado and Potato Wrap

For a creamy texture, add slices of ripe avocado or a spread of guacamole before folding the wrap.

Serving Suggestions

1. With a Side of Salsa or Dipping Sauce

A fresh tomato salsa, sour cream, or even garlic yogurt sauce pairs beautifully with this breakfast wrap. The slight tanginess complements the richness of the potatoes and cheese.

2. As Part of a Bigger Breakfast Spread

Serve this wrap with a side of fresh fruit, a smoothie, or a hot cup of coffee for a complete and satisfying breakfast.

3. On-the-Go Breakfast

This wrap is portable, making it perfect for a grab-and-go breakfast. Wrap it in foil or parchment paper, and you have a warm, homemade meal ready to take with you.

Frequently Asked Questions

1. Can I make this wrap ahead of time?

Yes! You can prepare the potato filling in advance and store it in the fridge for up to 3 days. When ready to eat, simply reheat it in a pan, assemble the wrap, and enjoy.

2. Can I use sweet potatoes instead of regular potatoes?

Absolutely! Sweet potatoes add a slightly sweet and earthy flavor that pairs beautifully with eggs and cheese.

3. What’s the best cheese to use for this recipe?

Cheddar, mozzarella, or Monterey Jack work well because they melt beautifully. If you prefer a stronger flavor, try using smoked gouda or pepper jack.

4. How do I make this wrap extra crispy?

For a crispier tortilla, brush the outside lightly with butter or olive oil before toasting it in the pan.

5. Can I bake or air-fry this wrap instead of pan-frying?

Yes! To bake, place the assembled wrap on a baking sheet and bake at 375°F (190°C) for 10 minutes, flipping halfway through. For the air fryer, cook at 370°F (185°C) for 6-8 minutes.

6. Is this recipe gluten-free?

If you use a gluten-free tortilla or flatbread, this recipe is naturally gluten-free. Just make sure to check that all your ingredients are certified gluten-free if needed.

Final Thoughts: A Simple Recipe with Endless Possibilities

There’s something incredibly satisfying about taking a few simple ingredients and turning them into a meal that feels like a warm hug. This potato breakfast wrap is proof that you don’t need anything fancy to create something delicious.

Whether you’re making it for yourself or serving it to family and friends, this wrap is the kind of dish that brings people together. It’s easy, quick, and endlessly customizable, making it a breakfast staple you’ll want to enjoy over and over again.

So the next time you have a couple of potatoes and a tortilla on hand, don’t overthink breakfast—just put the potatoes on the tortilla, add your favorite toppings, and enjoy a meal that’s as comforting as it is delicious.

Amal

Golden Potato Wrap: A Simple and Tasty Breakfast

This golden potato wrap is the perfect breakfast—crispy on the outside, soft and cheesy on the inside. With buttery potatoes, fluffy eggs, and melted cheese wrapped in a warm tortilla, it’s a quick and satisfying meal that you can enjoy at home or on the go. Simple ingredients, minimal prep, and maximum flavor make this an instant favorite!
Prep Time 5 minutes
Cook Time 10 minutes
Total Time 15 minutes
Servings: 1 serving
Course: Breakfast
Cuisine: International

Ingredients
  

  • 1 large tortilla or flatbread
  • 2 medium potatoes peeled and thinly sliced
  • Salt to taste
  • 1 tablespoon butter
  • 2 eggs
  • 50 g ½ cup grated cheese (cheddar, mozzarella, or your favorite)
  • ½ teaspoon black pepper optional
  • ¼ teaspoon paprika optional
  • Olive oil for frying

Method
 

  1. Heat butter in a pan over medium heat. Add the thinly sliced potatoes, season with salt, and cook until golden and tender.
  2. Push the potatoes to the side of the pan and crack the eggs in. Scramble them lightly or cook them to your preference.
  3. Place the tortilla or flatbread in the pan and spread the potatoes and eggs evenly over one half.
  4. Sprinkle cheese and any optional seasonings over the top.
  5. Fold the tortilla in half over the filling and press gently. Cook for 1-2 minutes per side until golden brown and crispy.
  6. Slice and serve warm with your favorite dipping sauce or fresh herbs.

Notes

  • For extra crunch, brush the outside of the tortilla with olive oil or butter before toasting.
  • Add cooked bacon, ham, or sautéed vegetables for more flavor and variety.
  • To make it spicy, drizzle hot sauce or add sliced jalapeños inside the wrap.
  • This wrap is perfect for meal prep—simply reheat in a pan or microwave before serving.

Festive Delight: A Wonderful Christmas Salad That Thrilled My Family

Every holiday season, my family has one rule—there must always be a special dish that makes it feel like Christmas. For some, it’s a glazed ham or a golden roast turkey, but in our home, it’s this vibrant, creamy, and irresistible Christmas salad. It’s not just a side dish; it’s a symbol of togetherness, laughter, and the simple joy of sharing a meal with loved ones.

I still remember the first time my grandmother made this salad. She believed that no Christmas table was complete without something colorful, fresh, and comforting. She would carefully chop the vegetables, mix the dressing with just the right balance of creaminess and tang, and serve it in her favorite glass bowl. We all gathered around, eager to taste it before the main meal even started. The combination of crisp vegetables, savory ham, and creamy dressing became an instant favorite. From that moment on, it became our family’s tradition—a dish that we all looked forward to year after year.

Now, as I prepare this Christmas salad for my own family, I realize that it’s more than just a recipe. It’s a reminder of the warmth of home, the magic of holiday traditions, and the love that goes into preparing food for those who matter most. Whether you’re making this for a family gathering, a festive dinner, or even a cozy night in, I hope it brings the same joy to your table as it has to mine.

Why This Christmas Salad Is a Holiday Favorite

1. A Burst of Festive Colors

One of the things that makes this salad stand out is its vibrant, holiday-inspired colors. The bright orange of the carrots, the deep red of the bell peppers, and the golden yellow of the corn make it a stunning addition to any holiday spread. It looks just as festive as it tastes!

2. The Perfect Balance of Flavors

This salad is a beautiful medley of textures and flavors. The crunch of the fresh vegetables, the soft richness of hard-boiled eggs, and the savory, slightly smoky taste of canned ham all come together in perfect harmony. The dressing, made with a combination of mayonnaise and natural yogurt, adds a creamy yet refreshing touch.

3. A Quick and Easy Dish for Busy Holidays

The holiday season can be hectic, with so many dishes to prepare and so little time. This Christmas salad is a lifesaver because it requires minimal cooking—just a bit of chopping and mixing. It can be prepared ahead of time, allowing you to focus on other holiday preparations.

4. Light Yet Satisfying

Unlike heavier holiday dishes, this salad provides a refreshing contrast to rich roasts, buttery sides, and indulgent desserts. It’s light enough to be enjoyed as an appetizer but filling enough to be a main course for those who prefer something on the healthier side.

5. A Crowd-Pleasing Dish

Whether you’re serving it to kids, adults, or even the pickiest eaters, this salad is guaranteed to be a hit. The familiar flavors make it approachable, while the unique combination keeps it exciting.

Ingredients

IngredientQuantity
Carrots3
Eggs7
Canned ham200 g
Red pepper1
Canned peas200 g
Canned corn180 g
Mayonnaise3 tablespoons
Natural yogurt3 tablespoons
Black pepper½ teaspoon
Salt½ teaspoon

Directions

  1. Prepare the Ingredients
    • Boil the carrots until tender, then dice them into small cubes.
    • Hard-boil the eggs, peel, and chop them finely.
    • Dice the canned ham and red pepper into small, uniform pieces.
  2. Mix the Salad
    • In a large bowl, combine the diced carrots, chopped eggs, ham, red pepper, canned peas, and corn.
    • In a separate small bowl, mix the mayonnaise, natural yogurt, black pepper, and salt to create a creamy dressing.
  3. Combine and Chill
    • Pour the dressing over the salad and mix everything gently to coat evenly.
    • Refrigerate for at least 30 minutes to let the flavors meld together.
  4. Serve and Enjoy
    • Serve chilled as a side dish or a light meal, perfect for holiday gatherings.

Nutritional Information (Per Serving, Approx.)

NutrientAmount
Calories220 kcal
Protein12 g
Carbohydrates18 g
Fats10 g
Fiber3 g
Sodium480 mg

Tips for Making the Perfect Christmas Salad

1. Use Fresh Ingredients for the Best Flavor

While canned vegetables are convenient, using fresh carrots and bell peppers enhances the salad’s natural sweetness and crunch. If you have time, opt for freshly boiled peas and corn instead of canned ones.

2. Adjust the Dressing to Your Taste

The combination of mayonnaise and natural yogurt creates a balanced, creamy dressing. However, if you prefer a richer flavor, increase the mayonnaise. For a lighter version, use more yogurt or swap it with sour cream.

3. Let It Chill Before Serving

Refrigerating the salad for at least 30 minutes before serving allows the flavors to meld together, making it even more delicious. It also enhances the texture, keeping everything crisp and fresh.

4. Add a Crunchy Element

If you want an extra layer of texture, toss in some chopped walnuts, almonds, or sunflower seeds. This adds a delightful crunch that contrasts beautifully with the creamy dressing.

5. Experiment with Additional Ingredients

While this recipe is already fantastic as is, you can always get creative by adding extras like diced apples for a touch of sweetness, shredded cheese for extra richness, or even a hint of mustard in the dressing for a slight tang.

How to Serve Christmas Salad

1. As a Side Dish

This salad pairs wonderfully with roasted meats, grilled poultry, or even a hearty vegetable casserole. It provides a refreshing contrast to heavier main dishes.

2. As an Appetizer

Serve this salad in small bowls or on individual plates as a starter for your holiday meal. Garnish with fresh herbs for an elegant touch.

3. As a Main Course

For a lighter meal, enjoy this salad on its own with a slice of crusty bread or some crackers. It’s filling enough to be a standalone dish.

4. In a Festive Salad Platter

If you’re hosting a larger gathering, consider serving this salad alongside other holiday favorites like potato salad, coleslaw, and a green leafy salad.

Frequently Asked Questions

1. Can I Make This Salad Ahead of Time?

Yes! You can prepare the ingredients a day in advance and store them separately. Mix everything together with the dressing just before serving to keep the vegetables crisp.

2. How Long Does This Salad Last in the Refrigerator?

This salad stays fresh for up to 2 days when stored in an airtight container in the fridge. However, it’s best enjoyed within 24 hours for optimal texture and flavor.

3. Can I Use a Different Type of Meat?

Absolutely! If you prefer, you can substitute canned ham with cooked chicken, turkey, or even smoked salmon for a different twist.

4. Is There a Vegan Version of This Salad?

Yes! Simply omit the ham and eggs, and use a plant-based mayonnaise and yogurt alternative. You can also add chickpeas or tofu for extra protein.

5. What Can I Serve This Salad With?

It pairs well with roasted chicken, beef, or even grilled fish. It also goes great with warm bread rolls or crackers.

6. Can I Add Extra Spices?

Definitely! A pinch of paprika, a dash of mustard, or even a bit of garlic powder can enhance the flavors beautifully.

Final Thoughts: A Christmas Tradition Worth Keeping

There’s something magical about dishes that become part of family traditions. This Christmas salad, with its vibrant colors, creamy dressing, and satisfying crunch, is one of those recipes that never fails to bring joy to the holiday table.

Beyond its delicious taste, this salad represents the warmth of the season—the love that goes into preparing food, the laughter shared around the dinner table, and the simple pleasure of enjoying a home-cooked meal with family and friends.

Whether you’re making this for the first time or carrying on a long-standing tradition, I hope this festive salad brings as much happiness to your home as it has to mine. So gather your ingredients, mix up a batch, and share in the joy of a dish that truly makes the holiday season special.

Amal

Festive Delight: A Wonderful Christmas Salad That Thrilled My Family

This vibrant and creamy Christmas salad is the perfect addition to your holiday table! Packed with colorful vegetables, savory ham, and a deliciously light dressing, it brings festive flavors to every bite. Quick to prepare and incredibly satisfying, this salad is a guaranteed crowd-pleaser that will have your family and guests coming back for seconds.
Prep Time 15 minutes
Cook Time 10 minutes
Total Time 25 minutes
Servings: 6 servings
Course: Salad
Cuisine: International

Ingredients
  

  • 3 carrots boiled and diced
  • 7 eggs hard-boiled and chopped
  • 200 g canned ham diced
  • 1 red pepper diced
  • 200 g canned peas drained
  • 180 g canned corn drained
  • 3 tablespoons of mayonnaise
  • 3 tablespoons of natural yogurt
  • 1/2 teaspoon of black pepper
  • 1/2 teaspoon of salt

Method
 

  1. Boil the carrots until tender, then dice them into small pieces.
  2. Hard-boil the eggs, let them cool, peel, and chop them finely.
  3. Dice the canned ham and red pepper into small, even-sized cubes.
  4. In a large bowl, combine the carrots, eggs, ham, red pepper, canned peas, and corn.
  5. In a separate small bowl, mix the mayonnaise, natural yogurt, black pepper, and salt to make the dressing.
  6. Pour the dressing over the salad ingredients and gently mix until everything is evenly coated.
  7. Cover and refrigerate for at least 30 minutes to let the flavors meld together.
  8. Serve chilled and enjoy as a delicious holiday side dish or appetizer!
  9. For extra flavor, add fresh parsley or dill as a garnish before serving.

Notes

  • For extra flavor, add fresh parsley or dill as a garnish before serving.
  • You can substitute canned ham with cooked chicken or turkey for a different variation.
  • This salad tastes even better the next day, making it a great make-ahead dish.
  • Store leftovers in an airtight container in the refrigerator for up to 2 days.

Buttery Bliss: The Irresistible Charm of Melt-in-Your-Mouth Cookies

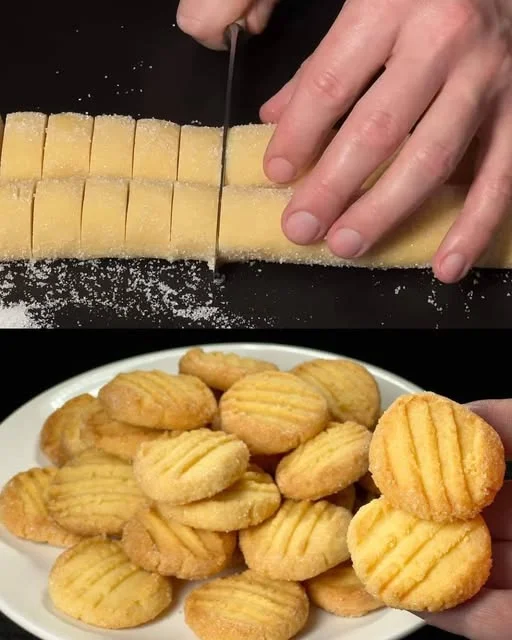
Some recipes are more than just instructions on a page—they carry memories, emotions, and a sense of home. For me, these delicate, buttery cookies that melt in your mouth are one of those recipes.

As a child, my grandmother would bake these cookies on lazy Sunday afternoons. The smell of warm butter and sugar would drift through the house, drawing me into the kitchen where she’d be rolling the soft dough between her hands. She never used a measuring scale, just her instincts and a lifetime of experience. She always said that the best cookies weren’t just made with butter and flour but with patience and love.

I remember the anticipation of waiting for the cookies to cool, the way they crumbled the moment they touched my tongue, and the comforting sweetness that lingered after every bite. Those cookies weren’t just a treat; they were an experience—simple, elegant, and unforgettable.

Now, every time I bake them, I’m transported back to that warm kitchen, back to a time when life was simpler, and happiness could be found in something as small as a perfectly baked cookie. Whether you’re baking these for a special occasion or just to enjoy with a cup of tea, I hope they bring a little bit of that same warmth into your home.

Why You’ll Love These Cookies

1. Delicate and Buttery Texture

These cookies don’t just crumble—they dissolve in your mouth, leaving behind a rich, buttery flavor. The balance between flour, butter, and sugar creates a texture so soft that it feels almost like a sweet cloud.

2. Perfect for Any Occasion

Whether it’s a holiday gathering, a tea-time treat, or just a personal indulgence, these cookies fit every moment. They are elegant enough for a party but simple enough to make on a whim.

3. Minimal Ingredients, Maximum Flavor

With only a handful of pantry staples—flour, butter, and sugar—you can create a batch of cookies that taste like they came from a high-end bakery. The beauty of this recipe lies in its simplicity.

4. Easy to Make and Customize

This dough is incredibly forgiving, making it perfect for bakers of all skill levels. You can also get creative by adding different flavors like vanilla, citrus zest, or even a dusting of cinnamon.

5. A Classic Recipe That Never Gets Old

Some cookies are trends, but these are timeless. Generations have enjoyed variations of this recipe, and it continues to be a favorite across cultures.

Ingredients

IngredientQuantity
Flour250 g
Butter170 g
Sugar100 g (50 g for dough + 50 g for sprinkling)
Vanilla extract (optional)1 tsp
Salt (optional)A pinch

Directions

  1. Prepare the Dough
    • In a mixing bowl, cream the butter and 50 g of sugar until light and fluffy.
    • Gradually add the flour, mixing until a soft dough forms. If using, add vanilla extract and a pinch of salt for extra flavor.
  2. Shape the Cookies
    • Roll the dough into small balls and slightly flatten them. Alternatively, shape them using a cookie cutter.
    • Arrange the cookies on a baking sheet lined with parchment paper.
  3. Bake to Perfection
    • Preheat the oven to 350°F (175°C).
    • Bake for 12-15 minutes or until the edges are lightly golden.
  4. Final Touch
    • While still warm, sprinkle the remaining 50 g of sugar over the cookies for a delicate sweetness.
    • Let them cool completely before serving.

Nutritional Information (Per Cookie, Approx.)

NutrientAmount
Calories120 kcal
Protein1.5 g
Carbohydrates14 g
Fats7 g
Sugars5 g
Sodium10 mg

Secrets to Achieving the Perfect Melt-in-Your-Mouth Texture

1. Use High-Quality Butter

Since butter is the star ingredient, using a good-quality, high-fat butter will make a significant difference in both taste and texture. European-style butter with at least 82% fat content works best.

2. Don’t Overwork the Dough

The key to achieving that delicate, crumbly texture is to mix the ingredients just until combined. Overmixing can lead to tough cookies, which is the opposite of what we want.

3. Chill the Dough for Better Structure

While not strictly necessary, chilling the dough for 20-30 minutes before baking helps the cookies hold their shape and enhances their texture.

4. Bake at the Right Temperature

A moderate oven temperature (around 350°F or 175°C) ensures that the cookies bake evenly without browning too quickly. The goal is a pale, delicate cookie with just a hint of golden edges.

5. Let Them Cool Before Handling

These cookies are incredibly delicate when they come out of the oven. Let them cool on the baking sheet for a few minutes before transferring them to a wire rack. This helps them set properly without breaking.

Creative Variations to Try

1. Vanilla Bean Bliss

Add a teaspoon of vanilla bean paste for an extra layer of depth and aroma. The tiny flecks of vanilla bean also give the cookies a beautiful speckled look.

2. Lemon Zest Elegance

A bit of lemon zest mixed into the dough brightens up the flavor, making these cookies perfect for spring and summer gatherings.

3. Almond Perfection

Substituting part of the flour with finely ground almonds gives the cookies a subtle nutty undertone and enhances their crumbly texture.

4. Cinnamon Sugar Coating

For a warm, spiced twist, roll the cookies in cinnamon sugar before baking. This creates a slightly crisp exterior with a cozy, festive flavor.

5. Chocolate-Dipped Indulgence

Once cooled, dip half of each cookie in melted dark chocolate and let them set. The slight bitterness of the chocolate perfectly balances the buttery sweetness of the cookie.

Frequently Asked Questions

1. Can I make these cookies ahead of time?

Yes! These cookies store beautifully. You can make the dough ahead and refrigerate it for up to 3 days before baking. Alternatively, baked cookies can be stored in an airtight container for up to a week.

2. Can I freeze the dough?

Absolutely. Roll the dough into a log, wrap it tightly in plastic wrap, and freeze for up to 2 months. When ready to bake, slice the dough into rounds and bake straight from frozen, adding a minute or two to the baking time.

3. What’s the best way to store these cookies?

Store them in an airtight container at room temperature. If you prefer a softer texture, add a slice of bread to the container—it helps maintain moisture without making the cookies soggy.

4. Can I use margarine instead of butter?

While you can technically use margarine, the flavor and texture won’t be the same. Butter gives these cookies their rich, melt-in-your-mouth quality, so it’s highly recommended.

5. How do I make these cookies extra light and airy?

Using powdered sugar instead of granulated sugar can make the cookies even more delicate. The fine texture of powdered sugar helps create an even softer crumb.

6. Why did my cookies spread too much?

If your cookies spread too much, it could be due to using overly soft butter or not chilling the dough before baking. Try refrigerating the shaped cookies for 15 minutes before putting them in the oven.

Final Thoughts: A Cookie for Every Moment

Few things in life compare to the simple pleasure of a buttery, delicate cookie that melts in your mouth. These cookies are more than just a treat; they are a reminder that sometimes, the most uncomplicated recipes bring the most joy.

Whether you’re baking these for a special occasion, as a thoughtful homemade gift, or simply as a personal indulgence, they are guaranteed to bring warmth and comfort with every bite. Their delicate texture and rich flavor make them a timeless classic—one that will be loved for generations to come.

So go ahead, whip up a batch, and savor the bliss of a cookie that truly melts in your mouth. And if you’re anything like me, you might just find yourself sneaking one (or three) straight from the baking sheet before they even have a chance to cool.

Amal

Buttery Bliss: The Irresistible Charm of Melt-in-Your-Mouth Cookies

These delicate, buttery cookies crumble and melt the moment they touch your tongue. Made with just a few simple ingredients, they are rich, tender, and irresistibly sweet. Whether served with tea, coffee, or enjoyed as a quick treat, these cookies bring warmth and comfort with every bite.
Prep Time 10 minutes
Cook Time 15 minutes
Total Time 25 minutes
Servings: 20 -24 cookies
Course: Dessert
Cuisine: International

Ingredients
  

  • 250 g flour
  • 170 g butter softened
  • 100 g sugar 50 g for the dough + 50 g for sprinkling
  • 1 tsp vanilla extract optional
  • A pinch of salt optional

Method
 

  1. In a mixing bowl, cream the butter and 50 g of sugar together until light and fluffy.
  2. Add the flour gradually, mixing until a soft dough forms. Stir in vanilla extract and salt if using.
  3. Roll the dough into small balls and gently flatten them, or shape them with a cookie cutter.
  4. Place the cookies on a parchment-lined baking sheet and sprinkle with the remaining 50 g of sugar.
  5. Preheat the oven to 350°F (175°C) and bake for 12-15 minutes, or until the edges are lightly golden.
  6. Allow the cookies to cool on the baking sheet for a few minutes before transferring them to a wire rack.
  7. Serve and enjoy with tea, coffee, or as a sweet snack.

Notes

  • For an extra light texture, substitute half of the flour with cornstarch.
  • To enhance the flavor, add lemon or orange zest to the dough.
  • Store in an airtight container at room temperature for up to a week.
  • These cookies freeze well—store them in a sealed bag and thaw at room temperature before serving.

Crispy Garden Bites: Savory Zucchini Fritters with Ricotta and Fresh Vegetables

Growing up, summer meant one thing in my family—an abundance of zucchini. My grandmother’s backyard garden seemed to produce endless green treasures, and we had to get creative to use them all. While zucchini bread and grilled zucchini were always part of the rotation, my absolute favorite way to enjoy this vegetable was in the form of crispy, golden fritters.

I remember standing on a stool in my grandmother’s kitchen, watching as she effortlessly grated zucchini, squeezing out the excess moisture with a practiced hand. She would mix it with eggs, flour, and whatever cheese she had on hand—sometimes feta, sometimes ricotta—before frying small patties in a pan. The aroma of garlic and onions sizzling in olive oil filled the kitchen, and I knew something delicious was about to hit the table.

We would eat those fritters straight from the pan, barely waiting for them to cool. The contrast of a crispy exterior with a soft, flavorful center was pure magic. And the best part? They were simple, made from ingredients we always had, yet tasted like something truly special.

Now, every time I make zucchini fritters, I’m reminded of those warm summer days, of family gathered around the kitchen, and of how the simplest recipes often bring the greatest joy. Whether you’re looking for a new way to use zucchini or simply want a delicious, easy-to-make dish, these fritters will not disappoint.

Why You’ll Love These Zucchini Fritters

Perfectly Crispy, Soft, and Flavorful

The best zucchini fritters have a crisp, golden-brown crust that gives way to a soft, flavorful interior. The ricotta adds a subtle creaminess, while garlic and green onions provide a savory depth that keeps you coming back for more.

A Versatile Dish for Any Occasion

These fritters work as a quick snack, a satisfying appetizer, or even a light main course. Serve them with a fresh salad for a complete meal or pair them with a dipping sauce for a crowd-pleasing party snack.

A Healthier Alternative to Traditional Fried Foods

Unlike deep-fried foods, these fritters use just a small amount of olive oil for pan-frying. Zucchini is naturally low in calories and high in fiber, making these a nutritious choice without sacrificing flavor. Plus, you can bake or air-fry them for an even lighter version.

Great for Using Up Extra Zucchini

If you have a garden overflowing with zucchini or find yourself with extra from the store, these fritters are an excellent way to use them up. They freeze well too, so you can always have a batch ready to reheat.

Ingredients

IngredientQuantity
Zucchini2 pcs (medium-sized)
SaltTo taste
Eggs4 pcs
Ricotta cheese150 g (⅔ cup)
All-purpose flour80 g (⅔ cup)
Garlic (minced)2 cloves
Green onions (chopped)2 stalks
Carrot (grated)1 small
Black pepper½ tsp
Olive oilFor frying

Directions

  1. Prepare the Zucchini
    • Grate the zucchini and sprinkle with salt. Let it sit for 10 minutes, then squeeze out excess moisture using a clean towel.
  2. Make the Batter
    • In a bowl, beat the eggs, then mix in ricotta cheese, minced garlic, green onions, grated carrot, black pepper, and flour. Add the squeezed zucchini and mix until well combined.
  3. Fry the Fritters
    • Heat olive oil in a pan over medium heat. Spoon small portions of the batter into the pan, flattening them slightly.
    • Fry for 2-3 minutes per side, or until golden brown and crispy.
  4. Serve and Enjoy
    • Drain on paper towels and serve warm with sour cream, yogurt, or a light salad.

Nutritional Information (Per Serving, Approx.)

NutrientAmount
Calories180 kcal
Protein9 g
Carbohydrates15 g
Fats10 g
Fiber2 g
Sodium320 mg

Tips for the Best Zucchini Fritters

1. Remove Excess Moisture

Zucchini contains a lot of water, which can make the batter too wet and prevent the fritters from crisping up. The key is to grate the zucchini, sprinkle it with salt, and let it sit for about 10 minutes. Then, squeeze out as much moisture as possible using a clean kitchen towel. This simple step makes all the difference!

2. Use Ricotta for Creaminess

Ricotta cheese adds a subtle creaminess to the fritters, making them soft and flavorful without being too dense. If you don’t have ricotta, you can substitute feta for a saltier, more tangy version.

3. Season Well

Zucchini has a mild flavor on its own, so don’t be afraid to season the batter generously. Garlic, green onions, black pepper, and even a pinch of smoked paprika can elevate the taste.

4. Don’t Overcrowd the Pan

When frying the fritters, give them space in the pan. Overcrowding lowers the oil temperature, making them soggy instead of crispy. Cook them in batches for the best texture.
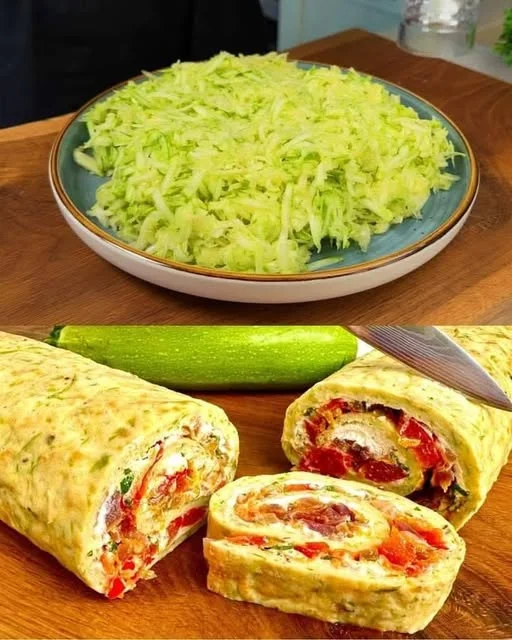
5. Serve Immediately for Maximum Crispiness

These fritters are best enjoyed fresh from the pan while they’re still crispy. If you need to keep them warm, place them on a baking sheet in a low oven (200°F or 90°C) until serving.

Delicious Ways to Serve Zucchini Fritters

Classic with Sour Cream or Yogurt

A dollop of sour cream or Greek yogurt adds a cool, creamy contrast to the crispy fritters. Add a squeeze of lemon for extra brightness.

With a Fresh Salad

Pair the fritters with a simple salad of cherry tomatoes, cucumbers, and fresh herbs for a light and refreshing meal.

As a Sandwich Filling

Tuck a few fritters into a pita with lettuce, tzatziki, and sliced cucumbers for a delicious vegetarian sandwich.

Topped with Poached Eggs

Turn these fritters into a brunch-worthy dish by topping them with poached eggs and a drizzle of hollandaise sauce.

Dipped in Spicy Aioli

For a bolder flavor, serve them with a spicy aioli or a harissa yogurt dip.

Frequently Asked Questions

1. Can I make these fritters ahead of time?

Yes! You can prepare the batter ahead of time and store it in the refrigerator for up to 24 hours before frying. You can also fry the fritters and reheat them in the oven at 350°F (175°C) for about 10 minutes before serving.

2. Can I freeze zucchini fritters?

Absolutely. To freeze, place the cooked fritters in a single layer on a baking sheet until solid, then transfer them to a freezer-safe bag. Reheat in the oven or air fryer until crispy again.

3. Can I bake or air-fry these instead of pan-frying?

Yes! To bake, place the fritters on a parchment-lined baking sheet, brush with olive oil, and bake at 400°F (200°C) for about 20 minutes, flipping halfway through. For the air fryer, cook at 375°F (190°C) for 10-12 minutes, shaking the basket halfway through.

4. How do I keep my fritters from being too wet?

The key is squeezing out as much water from the grated zucchini as possible. If the batter still seems too wet, add a little more flour to help bind it together.

5. Can I add other vegetables to the fritters?

Definitely! Try adding grated carrots, chopped spinach, or even sweet corn for extra flavor and texture.

Final Thoughts: A Simple Recipe with Endless Possibilities

Zucchini fritters are one of those dishes that prove simple ingredients can create something truly delicious. They are light yet satisfying, crispy yet soft, and endlessly customizable to suit any palate. Whether you’re making them for a quick snack, a side dish, or a full meal, these fritters always deliver.

For me, they will always bring back memories of warm summer days and my grandmother’s kitchen, where the best recipes were the ones made with love. I hope that when you make these, they bring a bit of that warmth and joy to your table too.

So the next time you have a couple of zucchinis sitting in your fridge, don’t let them go to waste—turn them into a batch of crispy, flavorful fritters that everyone will love!

Amal

Crispy Garden Bites: Savory Zucchini Fritters with Ricotta and Fresh Vegetables

These crispy zucchini fritters are packed with fresh vegetables and creamy ricotta, making them a light yet satisfying dish. With a perfectly golden crust and a soft, flavorful center, they’re great as a snack, appetizer, or side dish. Serve them with a dollop of sour cream or a zesty yogurt dip for an irresistible treat!
Prep Time 15 minutes
Cook Time 10 minutes
Total Time 25 minutes
Servings: 4 servings
Course: Appetizer
Cuisine: International

Ingredients
  

  • 2 medium-sized zucchini grated
  • Salt to taste
  • 4 eggs
  • 150 g ⅔ cup ricotta cheese
  • 80 g ⅔ cup all-purpose flour
  • 2 cloves garlic minced
  • 2 green onions chopped
  • 1 small carrot grated
  • ½ tsp black pepper
  • Olive oil for frying

Method
 

  1. Grate the zucchini and sprinkle with salt. Let it sit for 10 minutes, then squeeze out excess moisture using a clean kitchen towel.
  2. In a bowl, beat the eggs and mix in ricotta cheese, garlic, green onions, grated carrot, black pepper, and flour. Stir until combined.
  3. Fold in the drained zucchini and mix well to form a thick batter.
  4. Heat olive oil in a pan over medium heat. Spoon small portions of the batter into the pan, flattening them slightly.
  5. Fry for 2-3 minutes per side, or until golden brown and crispy.
  6. Remove and drain on paper towels. Serve warm with sour cream, yogurt, or a fresh salad.

Notes

  • For extra crunch, add 2 tablespoons of breadcrumbs to the batter.
  • To make them gluten-free, use almond flour or chickpea flour instead of all-purpose flour.
  • These fritters can be baked at 400°F (200°C) for 20-25 minutes or air-fried at 375°F (190°C) for 10-12 minutes.
  • Store leftovers in an airtight container in the refrigerator for up to 3 days.

Golden Bites of Comfort: The Magic of Crispy Potato Croquettes

There’s something truly special about potatoes. They have a way of bringing comfort, whether mashed, fried, or baked. But for me, potato croquettes are more than just a dish; they’re a cherished memory.

Growing up, my grandmother had a way of turning simple ingredients into something magical. She never needed fancy kitchen gadgets or complicated recipes—just her hands, a few pantry staples, and a deep sense of love for feeding her family. One of my favorite things she made was crispy potato croquettes. I remember standing on my tiptoes, watching her carefully shape each croquette, dipping them in breadcrumbs before frying them to a perfect golden brown. The kitchen would fill with a warm, irresistible aroma, and I knew something delicious was about to happen.

Now, every time I make potato croquettes, I feel like I’m bringing a little piece of my childhood back to life. Whether you’re making them for a cozy family dinner, a gathering with friends, or simply to enjoy with a warm cup of tea, these golden bites of comfort never fail to bring joy.

Let’s dive into what makes these croquettes so special, from their irresistible texture to creative variations and useful cooking tips.

Why Potato Croquettes Are a Must-Try

The Perfect Crunch

Potato croquettes strike a beautiful balance between a crispy, golden-brown exterior and a soft, flavorful interior. The contrast between the crunchy coating and the fluffy potato filling is what makes them so addictive. Every bite is a textural delight!

A Versatile Treat for Any Occasion

One of the best things about potato croquettes is their versatility. They can be served as an appetizer, a side dish, or even a light meal. Pair them with a dipping sauce, serve them alongside a fresh salad, or enjoy them with a warm bowl of soup.

Budget-Friendly and Made from Pantry Staples

Potatoes, eggs, breadcrumbs, and a bit of seasoning—that’s all you need. These croquettes are incredibly budget-friendly, making them perfect for families looking for delicious meals without breaking the bank.

Easy to Customize

While classic potato croquettes are delicious on their own, they also serve as a blank canvas for creativity. You can add cheese, herbs, spices, or even mix in vegetables for added flavor and nutrition.

Ingredients

For the Potato Croquettes

IngredientQuantity
Potatoes (peeled and boiled)700 g (1.5 lbs)
Salt1 tsp
Cornstarch25 g (2 tbsp)
Eggs (beaten)2
Breadcrumbs100 g (1 cup)
Black pepper (optional)½ tsp
Garlic powder (optional)½ tsp
Parmesan cheese (optional)30 g (¼ cup)
Oil (for frying)As needed

Directions

  1. Prepare the Potatoes
    • Mash the boiled potatoes in a large bowl until smooth. Add salt, cornstarch, and any optional seasonings like black pepper, garlic powder, or Parmesan cheese. Mix well.
  2. Shape the Croquettes
    • Take small portions of the mixture and shape them into cylindrical or round croquettes.
  3. Coat the Croquettes
    • Dip each croquette into the beaten eggs, ensuring it’s fully coated.
    • Roll it in breadcrumbs until evenly covered.
  4. Fry Until Golden
    • Heat oil in a deep pan over medium heat.
    • Fry the croquettes in batches until golden brown and crispy, about 2-3 minutes per side.
    • Remove and drain on paper towels.
  5. Serve and Enjoy
    • Serve hot with your favorite dipping sauce, such as garlic aioli, spicy ketchup, or sour cream.

Nutritional Information (Per Serving, Approx.)

NutrientAmount
Calories220 kcal
Protein5 g
Carbohydrates30 g
Fats9 g
Fiber3 g
Sodium350 mg

The Secret to the Best Potato Croquettes

Choosing the Right Potatoes

For the best results, use starchy potatoes like Russet or Yukon Gold. These varieties are fluffy and light, making them ideal for croquettes. Waxy potatoes tend to be too firm and can result in a dense texture.

The Importance of Seasoning

Potatoes have a mild flavor, so proper seasoning is key. Adding a touch of garlic powder, black pepper, or Parmesan cheese can elevate the taste. Don’t forget the salt—it enhances the overall flavor!

Getting the Perfect Coating

A crispy exterior is what sets a great croquette apart. To achieve this, make sure to coat each croquette properly:

  1. Dip in beaten eggs to help the breadcrumbs stick.
  2. Roll in fine breadcrumbs for an even, golden crust.
  3. If you want extra crunch, double-coat them by repeating the egg and breadcrumb steps.

Frying for the Perfect Crunch

  • Use the right oil: Neutral oils like vegetable, canola, or sunflower oil work best. They have a high smoke point and don’t overpower the flavor.
  • Maintain the right temperature: The oil should be around 350°F (175°C). If it’s too hot, the croquettes will brown too quickly and remain raw inside. If it’s too cool, they’ll absorb too much oil and turn greasy.
  • Fry in batches: Overcrowding the pan lowers the oil temperature, leading to uneven frying.

Baking or Air-Frying for a Healthier Option

If you want a lighter alternative, you can bake or air-fry the croquettes.

  • Baking: Preheat the oven to 400°F (200°C) and bake for 20-25 minutes, flipping halfway through.
  • Air-frying: Set the air fryer to 375°F (190°C) and cook for 10-12 minutes, shaking the basket halfway through.

Creative Variations to Try

Cheesy Potato Croquettes

Mix shredded cheese into the mashed potatoes before shaping them. Cheddar, mozzarella, or Gruyère melt beautifully and add an irresistible gooey center.

Herb-Infused Croquettes

Add chopped fresh herbs like parsley, chives, or dill to the potato mixture. This enhances the flavor and gives the croquettes a fresh, aromatic twist.

Spicy Croquettes

If you love a bit of heat, add a dash of cayenne pepper, smoked paprika, or finely chopped jalapeños to the mix.

Stuffed Croquettes

For a surprise inside, stuff the croquettes with small cubes of cheese, cooked minced meat, or sautéed mushrooms before frying.

Sweet Potato Croquettes

Swap regular potatoes for sweet potatoes for a naturally sweet and slightly healthier version. Pair with a honey-mustard dip for a delicious contrast.

Frequently Asked Questions

1. Can I make potato croquettes ahead of time?

Yes! You can prepare the croquettes up to the coating stage and store them in the refrigerator for up to 24 hours before frying. You can also freeze them for longer storage.

2. How do I freeze potato croquettes?

To freeze, place the breaded croquettes on a tray lined with parchment paper and freeze until solid. Then transfer them to a freezer bag or airtight container. When ready to eat, fry them straight from frozen—no need to thaw!

3. Can I use leftover mashed potatoes?

Absolutely! If you have leftover mashed potatoes, just mix in cornstarch and an egg to help bind the mixture, then proceed with shaping and coating.

4. How do I prevent the croquettes from falling apart?

If your croquettes are too soft and falling apart, chill them in the refrigerator for 30 minutes before frying. This helps them firm up and hold their shape.

5. What sauces go well with potato croquettes?

Potato croquettes pair well with a variety of dipping sauces, including:

  • Garlic aioli
  • Spicy ketchup
  • Sour cream and chives
  • Honey mustard
  • Barbecue sauce

Final Thoughts: A Dish That Brings People Together

Potato croquettes are more than just a snack or side dish—they’re a symbol of warmth, comfort, and tradition. Whether you grew up eating them or are discovering them for the first time, their crispy, golden exterior and soft, flavorful center make them a dish that’s impossible to resist.

Making them from scratch allows you to get creative, adjusting the flavors to suit your taste. They’re a perfect choice for family dinners, casual gatherings, or just those moments when you crave something deliciously crispy. And with easy make-ahead and freezing options, they’re also a convenient choice for busy days.

So next time you have some potatoes on hand, give these croquettes a try. Whether you enjoy them plain, stuffed, or paired with your favorite dip, they’re sure to bring a little extra joy to your table—just like they did for me all those years ago.

Amal

Golden Bites of Comfort: The Magic of Crispy Potato Croquettes

Crispy on the outside, soft and flavorful on the inside, these easy potato croquettes are the perfect snack, appetizer, or side dish. Made with mashed potatoes, coated in golden breadcrumbs, and fried to perfection, they are a delicious way to turn simple ingredients into a crowd-pleasing dish. Serve them with your favorite dipping sauce for an irresistible treat!
Prep Time 15 minutes
Cook Time 10 minutes
Total Time 25 minutes
Servings: 4 servings
Course: Snack
Cuisine: International

Ingredients
  

  • 700 g 1.5 lbs potatoes, peeled and boiled
  • 1 tsp salt
  • 25 g 2 tbsp cornstarch
  • 2 eggs beaten
  • 100 g 1 cup breadcrumbs
  • ½ tsp black pepper optional
  • ½ tsp garlic powder optional
  • 30 g ¼ cup Parmesan cheese (optional)
  • Oil for frying

Method
 

  1. Mash the boiled potatoes in a large bowl until smooth. Add salt, cornstarch, and any optional seasonings like black pepper, garlic powder, or Parmesan cheese. Mix well.
  2. Take small portions of the mixture and shape them into cylindrical or round croquettes.
  3. Dip each croquette into the beaten eggs, then roll in breadcrumbs until fully coated.
  4. Heat oil in a deep pan over medium heat. Fry the croquettes in batches for about 2-3 minutes per side, or until golden brown and crispy.
  5. Remove and drain on paper towels. Serve hot with your favorite dipping sauce.

Notes

  • For a healthier option, bake at 400°F (200°C) for 20-25 minutes or air-fry at 375°F (190°C) for 10-12 minutes.
  • Freeze uncooked croquettes on a tray, then transfer to a freezer bag for up to 2 months. Fry from frozen, adding an extra minute to the cooking time.
  • Add cheese or herbs to the mixture for extra flavor.