Savory Stir-Fried Zucchini and Mushrooms: A Flavorful Low-Carb Delight

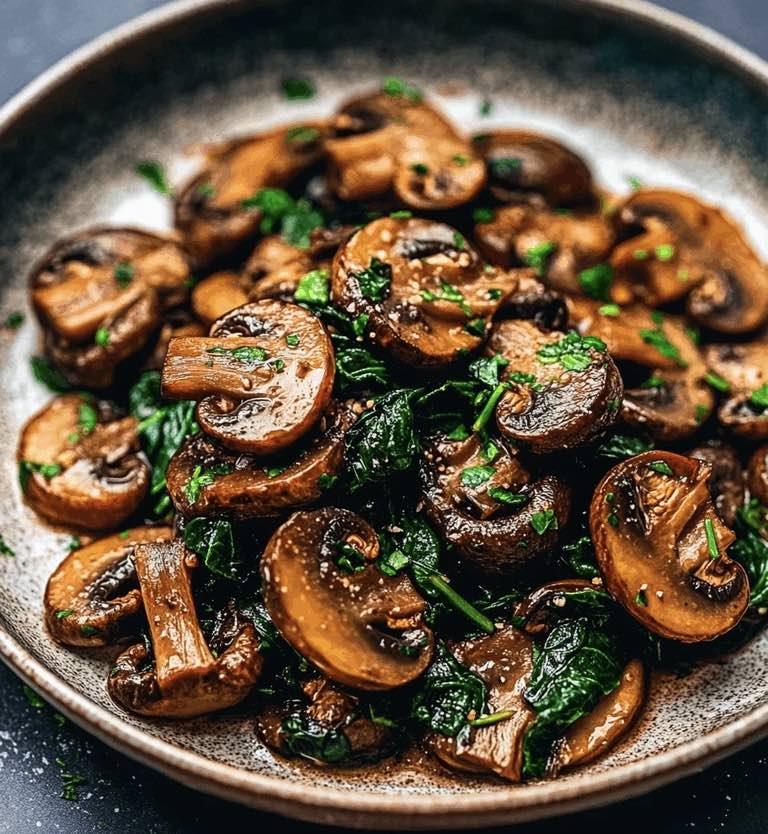
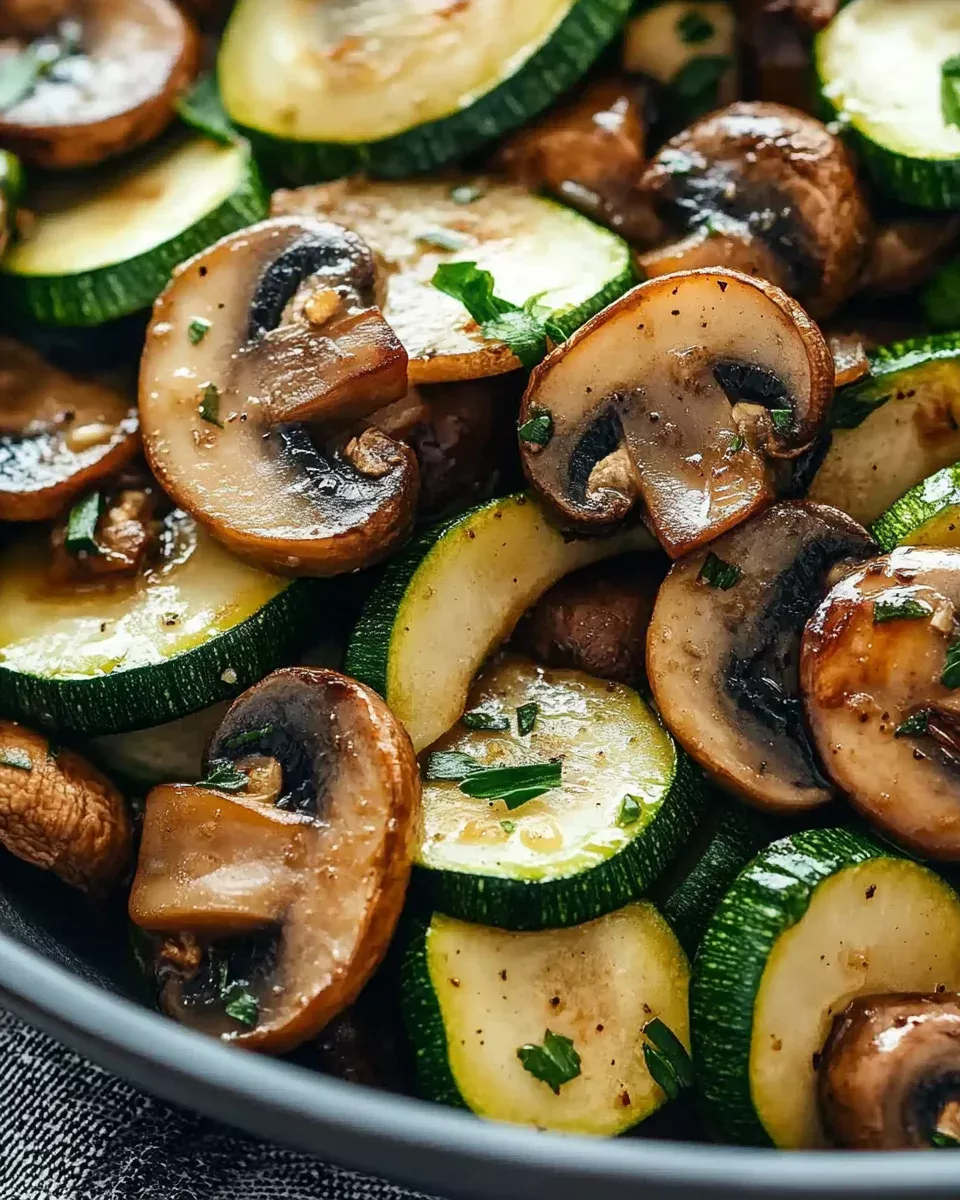
Stir-fries have long been celebrated for their ability to deliver bold flavors and textures in a matter of minutes. This Low-Carb Stir-Fried Zucchini with Mushrooms and Onions is no exception. It’s a quick, healthy, and satisfying dish that can be served as a light main course or a flavorful side dish. Packed with fresh vegetables, aromatic seasonings, and a hint of umami from soy sauce, this recipe is perfect for those following a low-carb or keto-friendly diet without sacrificing taste.

With its tender zucchini, earthy mushrooms, and caramelized onions, this dish offers a balance of sweet, savory, and umami flavors. The best part? It’s highly adaptable—you can easily add proteins, swap out vegetables, or adjust the seasoning to fit your personal preference. Whether you’re looking for a simple weeknight meal or a versatile side to complement your main dish, this recipe is a must-try.

Why This Stir-Fry Should Be on Your Table

1. A Perfect Low-Carb Dish

For those following a low-carb lifestyle, finding dishes that are both nutritious and satisfying can be a challenge. This stir-fry is an ideal choice, as zucchini is naturally low in carbs while being high in fiber, vitamins, and minerals. Paired with mushrooms and onions, it creates a filling and flavorful meal without unnecessary carbohydrates.

2. Quick and Easy to Make

One of the greatest advantages of stir-frying is its speed. This dish comes together in under 20 minutes, making it a perfect last-minute meal for busy days. With just a few ingredients and minimal prep work, you can whip up a restaurant-quality dish at home.

3. Loaded with Nutrients

Zucchini and mushrooms aren’t just delicious—they’re packed with essential nutrients that support overall health.

  • Zucchini is rich in vitamin C, vitamin B6, potassium, and fiber, making it great for digestion and immunity.
  • Mushrooms are a fantastic source of antioxidants, B vitamins, and selenium, supporting brain function and overall well-being.
  • Onions add natural sweetness while providing anti-inflammatory and heart-health benefits.

4. Versatile and Customizable

This recipe is incredibly adaptable. Whether you want to add protein, swap out vegetables, or tweak the seasonings, there are countless ways to make it your own. You can also adjust the spice level, making it as mild or as fiery as you like.

Serving Suggestions: What Pairs Well with This Stir-Fry?

This stir-fry is delicious on its own, but it also makes a fantastic addition to a well-rounded meal. Here are some great ways to serve it:

1. As a Standalone Dish

For a light yet satisfying meal, enjoy this stir-fry on its own or with a side of steamed vegetables for added variety.

2. With Protein for a Complete Meal

To make this dish more filling, consider adding a source of protein:

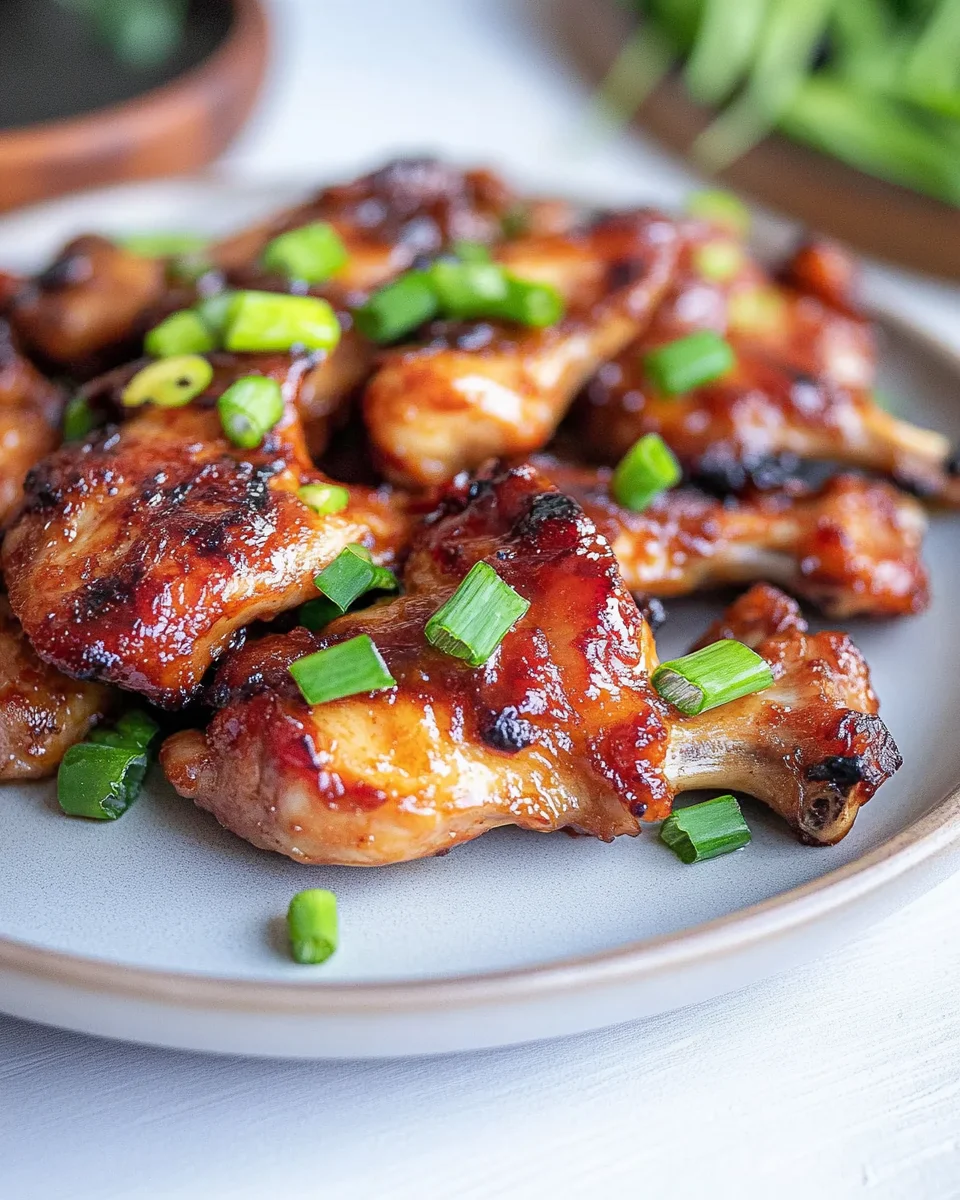
  • Grilled chicken for a lean and flavorful addition
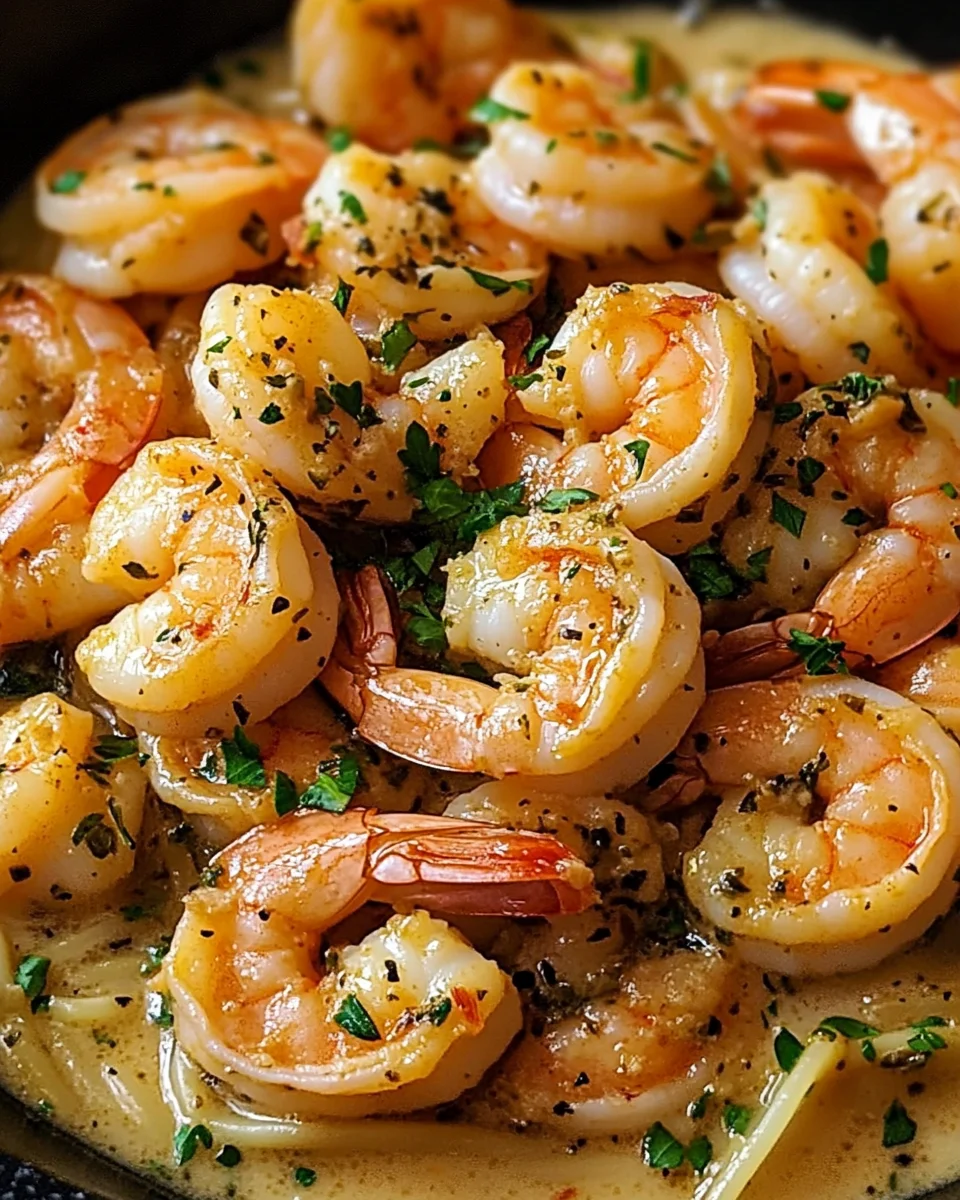
  • Shrimp or salmon for a seafood twist
  • Tofu or tempeh for a plant-based protein option

3. Over a Low-Carb Base

If you want to turn this into a more substantial meal, serve it over:

  • Cauliflower rice for a grain-free, fiber-rich base
  • Zucchini noodles (zoodles) to keep it low-carb while enhancing the texture
  • Quinoa or brown rice for a more balanced dish with added protein

4. With a Side of Fresh Greens

Pairing this stir-fry with a fresh side salad or some roasted asparagus makes for a refreshing contrast in flavors and textures.

Recipe Variations to Suit Every Taste

This stir-fry is a blank canvas for culinary creativity. Here are a few ways to customize it to your liking:

1. Make It Spicy

Love a bit of heat? Add a pinch of:

  • Red pepper flakes for subtle spiciness
  • Sriracha for a bold kick
  • Chili oil for a smoky depth of flavor

2. Boost the Protein

Transform this dish into a protein-packed meal by adding:

  • Shredded chicken or beef strips
  • Grilled shrimp or scallops
  • Crispy tofu or tempeh for a plant-based option

3. Add More Vegetables

While zucchini, mushrooms, and onions are a great combination, you can easily mix and match other vegetables:

  • Bell peppers for sweetness and crunch
  • Broccoli or snap peas for added fiber
  • Cherry tomatoes for a burst of juiciness

4. Experiment with Different Sauces

Instead of soy sauce, try:

  • Tamari for a gluten-free alternative
  • Coconut aminos for a slightly sweeter, soy-free option
  • Teriyaki sauce for a touch of sweetness

Storage and Reheating Tips

Storing Leftovers

If you have leftovers, store them in an airtight container in the refrigerator for up to 3 days. The flavors will continue to develop, making it even more delicious the next day.

Reheating for the Best Texture

  • Stovetop: Reheat in a skillet over medium heat for 3-5 minutes until warmed through.
  • Microwave: Heat in short intervals (30 seconds at a time) to avoid overcooking the zucchini.
  • Air Fryer: Reheat at 350°F for 3-4 minutes to restore crispiness.

Ingredients: A Simple Yet Flavorful Combination

For the Stir-Fry:

  • 2 medium zucchini, sliced into half-moons
  • 1 medium onion, sliced
  • 2 cups mushrooms, sliced (button or cremini)
  • 2 tablespoons olive oil
  • 2 cloves garlic, minced

For the Seasoning:

  • 1 tablespoon soy sauce (or tamari for gluten-free)
  • 1/2 teaspoon ground black pepper
  • 1/4 teaspoon red pepper flakes (optional)
  • 1/4 teaspoon salt (adjust to taste)

For Garnish:

  • 1 tablespoon fresh parsley, chopped

Directions: Quick and Easy Cooking Process

Step 1: Preparing the Ingredients

Slice the zucchini into half-moons, and thinly slice the onions and mushrooms. Mince the garlic.

Step 2: Heating the Skillet

Heat a large skillet over medium-high heat. Add olive oil and allow it to heat until shimmering.

Step 3: Sautéing the Aromatics

Add sliced onions to the skillet and cook for 3-4 minutes until translucent. Then, add mushrooms and continue sautéing for another 4-5 minutes until tender and slightly caramelized.

Step 4: Cooking the Zucchini

Stir in the zucchini and minced garlic, combining well with the onions and mushrooms. Cook for 5-6 minutes, stirring occasionally, until the zucchini is tender yet slightly crisp.

Step 5: Adding Seasonings

Pour in the soy sauce, black pepper, and red pepper flakes (if using). Stir everything together and cook for 1-2 more minutes to allow the flavors to meld.

Step 6: Garnishing and Serving

Remove from heat and sprinkle with fresh chopped parsley. Serve warm as a side dish or light main course.

Nutritional Breakdown: A Guilt-Free Delight

  • Calories: 120 kcal per serving
  • Protein: 3g
  • Carbohydrates: 9g
  • Fat: 8g
  • Fiber: 2g
  • Sodium: 300mg

This Savory Stir-Fried Zucchini and Mushrooms is a perfect low-carb option that is both light and packed with flavor. Whether served as a side dish or a healthy main, this dish delivers a wholesome and satisfying meal that you’ll want to make again and again!

Frequently Asked Questions (FAQs)

1. Can I Make This Stir-Fry Ahead of Time?

Yes! This dish can be prepared in advance and stored in the refrigerator. When ready to serve, simply reheat in a skillet for a quick and easy meal.

2. Can I Use Other Vegetables?

Absolutely! This stir-fry is highly customizable. Bell peppers, snap peas, carrots, and broccoli all make great additions.

3. What’s the Best Way to Keep Zucchini from Getting Soggy?

To prevent zucchini from becoming mushy:

  • Cook it over high heat for a short amount of time.
  • Do not overcrowd the pan—this allows proper caramelization.
  • Use a wide pan to ensure even cooking.

4. Is This Dish Suitable for Meal Prep?

Yes! It’s a great meal-prep option. Make a batch, store it in containers, and enjoy it throughout the week.

5. Can I Make This Stir-Fry Vegan?

Definitely! The recipe is already plant-based, so no modifications are necessary unless you want to add a vegan protein like tofu or tempeh.

Final Thoughts: A Simple Yet Satisfying Dish

This Low-Carb Stir-Fried Zucchini with Mushrooms and Onions is proof that healthy eating doesn’t have to be boring. It’s a flavorful, nutrient-rich dish that can be made in minutes, making it perfect for busy days when you need a quick, satisfying meal.

With its savory, umami-packed flavors and endless customization options, this stir-fry is bound to become a staple in your recipe collection. Whether you enjoy it as a standalone dish or pair it with your favorite protein, it’s a great way to incorporate fresh, wholesome ingredients into your diet.

Try it out, make it your own, and enjoy a meal that’s both delicious and nourishing!

aiting

Savory Stir-Fried Zucchini and Mushrooms: A Flavorful Low-Carb Delight

This Savory Stir-Fried Zucchini and Mushrooms dish is a quick, easy, and flavorful meal that perfectly balances the natural sweetness of zucchini with the earthy taste of mushrooms. With a simple blend of seasonings and fresh ingredients, this stir-fry makes for a delicious side dish or a light, healthy main course.
Prep Time 10 minutes
Cook Time 15 minutes
Total Time 25 minutes
Servings: 4 servings
Course: Side Dish/Main Dish
Cuisine: Asian-inspired

Ingredients
  

For the Stir-Fry:
  • Medium zucchini sliced into half-moons
  • Medium onion sliced
  • Mushrooms sliced (button or cremini)
  • Olive oil
  • Garlic minced
For the Seasoning:
  • Soy sauce or tamari for gluten-free
  • Ground black pepper
  • Red pepper flakes optional
  • Salt adjust to taste
For Garnish:
  • Fresh parsley chopped

Method
 

Prepare the Ingredients:
  1. Slice the zucchini into half-moons, thinly slice the onions and mushrooms, and mince the garlic.
Heat the Skillet:
  1. Heat a large skillet over medium-high heat. Add olive oil and allow it to heat until shimmering.
Sauté the Aromatics:
  1. Add sliced onions and cook for 3-4 minutes until translucent.
  2. Add mushrooms and continue sautéing for another 4-5 minutes until tender and slightly caramelized.
Cook the Zucchini:
  1. Stir in the zucchini and minced garlic, mixing well with the onions and mushrooms.
  2. Cook for 5-6 minutes, stirring occasionally, until the zucchini is tender yet slightly crisp.
Add Seasonings:
  1. Pour in the soy sauce, black pepper, and red pepper flakes (if using).
  2. Stir everything together and cook for 1-2 more minutes to allow the flavors to meld.
Garnish and Serve:
  1. Remove from heat and sprinkle with fresh chopped parsley.
  2. Serve warm as a side dish or a light main course.
  3.  

Notes

  • For added crunch, sprinkle sesame seeds before serving.
  • This dish pairs well with grilled chicken, tofu, or steamed rice.
  • Adjust spice levels by increasing or omitting red pepper flakes.

Golden Crusted Cheesy Cauliflower Steaks: A Vegetarian Delight

Cauliflower has undergone a culinary transformation in recent years, stepping out of the shadow of more popular vegetables to claim its place as a versatile, nutritious, and satisfying ingredient. No longer just a bland side dish, cauliflower now takes center stage in innovative recipes, and one of the most delicious ways to enjoy it is through Cheesy Cauliflower Steaks.

This dish elevates cauliflower to gourmet status, turning simple slices of this cruciferous vegetable into rich, cheesy, golden-brown perfection. The cauliflower is sliced into thick “steaks,” seasoned with aromatic spices, and roasted until tender. A final layer of bubbling Parmesan and mozzarella transforms it into a dish that is both indulgent and wholesome.

Whether you’re following a vegetarian diet, looking for a low-carb alternative to traditional steaks, or simply craving a new way to enjoy cauliflower, these cheesy cauliflower steaks offer a perfect balance of texture and flavor. In this article, we’ll explore what makes this dish so special, how to customize it, serving suggestions, storage tips, and frequently asked questions to help you perfect this recipe.

Why Cheesy Cauliflower Steaks are a Must-Try

If you’ve never tried cauliflower prepared this way before, here are a few reasons why cheesy cauliflower steaks should be on your next dinner menu:

1. A Satisfying Meat-Free Alternative

These cauliflower steaks mimic the heartiness of a traditional steak, offering a substantial bite and a depth of flavor that makes them just as satisfying. The roasting process enhances the natural nuttiness of cauliflower, and the cheesy crust provides a comforting richness, making this an excellent vegetarian alternative for steak lovers.

2. Rich in Nutrients, Low in Carbs

Cauliflower is a nutritional powerhouse, packed with:

  • Vitamin C (for immune health)
  • Vitamin K (for bone strength)
  • Fiber (for digestion)
  • Antioxidants (for overall wellness)

Unlike traditional steak, which is high in saturated fats, cauliflower steaks are naturally low in calories and carbs, making them an ideal option for gluten-free, keto, and plant-based diets.

3. Crispy, Cheesy, and Packed with Flavor

Roasting cauliflower brings out its subtle sweetness, while the combination of Parmesan and mozzarella creates a savory, umami-rich crust. The edges caramelize beautifully, giving each bite a delightful contrast between crispy and tender textures.

4. Quick and Easy to Prepare

With only a few basic ingredients and minimal prep time, you can create a restaurant-quality dish at home. The simplicity of the recipe makes it a great option for busy weeknights, yet it’s impressive enough for a special occasion.

How to Serve Cheesy Cauliflower Steaks

These cauliflower steaks are versatile enough to be served as a main dish or a side, depending on your meal plan. Here are a few delicious serving ideas to complete your plate:

1. As a Standalone Entrée

For a vegetarian main course, serve the cauliflower steaks with:

  • A light salad with lemon vinaigrette
  • Quinoa or couscous for added protein and texture
  • Mashed sweet potatoes for a creamy contrast

2. As a Side Dish

Pair these cheesy cauliflower steaks with:

  • Grilled chicken or fish for a well-rounded meal
  • Roasted chickpeas for extra crunch and protein
  • Steamed asparagus or sautéed spinach for a nutrient boost

3. With a Flavorful Sauce

Drizzling a sauce over the cauliflower steaks can enhance their depth of flavor. Some great options include:

  • Garlic herb butter for a rich, savory finish
  • Balsamic glaze for a tangy contrast
  • Spicy marinara sauce for an Italian twist
  • Tahini dressing for a Mediterranean flair

Creative Variations to Try

While the classic combination of Parmesan and mozzarella is a winning duo, there are many ways to customize cheesy cauliflower steaks to match different flavor profiles:

1. Spicy Cajun Cauliflower Steaks

Add a Cajun spice blend or chili powder for a bold kick. Serve with a cooling yogurt sauce to balance the heat.

2. Mediterranean-Style Cauliflower Steaks

Top the steaks with crumbled feta, olives, and sun-dried tomatoes, and serve with hummus or tzatziki.

3. Smoky Barbecue Cauliflower Steaks

Brush the cauliflower with barbecue sauce before roasting, then top with smoked cheddar or Gouda for a smoky, tangy finish.

4. Vegan-Friendly Cauliflower Steaks

For a dairy-free version, use vegan cheese alternatives or sprinkle nutritional yeast for a cheesy flavor. Drizzle with cashew cream sauce for added richness.

Storage and Reheating Tips

Refrigeration:

  • Store leftovers in an airtight container for up to 3 days.
  • To reheat, bake at 350°F (175°C) for 10 minutes to restore crispiness.

Freezing:

  • While cauliflower steaks can be frozen, the texture may soften after reheating.
  • If freezing, place them in a single layer on a baking sheet until solid, then transfer to a freezer-safe bag.

Best Reheating Method:

  • Avoid microwaving, as it may make them soggy.
  • Use an air fryer or oven to maintain the crispy texture.

Ingredients: A Savory Delight

For the Cauliflower Steaks:

  • 1 large head of cauliflower
  • 2 tablespoons olive oil
  • Salt and black pepper, to taste
  • 1 teaspoon sweet paprika
  • 1 teaspoon garlic powder

For the Cheesy Topping:

  • 1/2 cup grated Parmesan cheese
  • 1/2 cup shredded mozzarella cheese

For Garnish:

  • Fresh parsley, chopped

Directions: From Simple to Gourmet

Step 1: Preparing the Cauliflower

Preheat the oven to 356°F (180°C). Remove the outer leaves from the cauliflower and slice it into 1-inch-thick steaks.

Step 2: Seasoning for Flavor

Place the cauliflower steaks on a lined baking sheet. Drizzle with olive oil, then sprinkle salt, black pepper, paprika, and garlic powder evenly over each piece.

Step 3: First Bake for Tenderness

Sprinkle the Parmesan cheese over the steaks and bake for 20 minutes until slightly golden.

Step 4: Melting the Cheese

Remove from the oven and sprinkle the mozzarella cheese on top. Return to the oven for another 10 minutes until the cheese melts and becomes bubbly.

Step 5: Garnish and Serve

Finish with chopped fresh parsley for color and added freshness. Serve warm and enjoy!

Nutritional Breakdown: A Guilt-Free Indulgence

  • Calories: 220 kcal per serving
  • Protein: 8g
  • Carbohydrates: 10g
  • Fat: 15g
  • Fiber: 3g
  • Sodium: 300mg

These Golden Crusted Cheesy Cauliflower Steaks are rich in flavor, packed with nutrients, and perfect for a delicious vegetarian meal. Serve them as a main dish or a side, and elevate your dining experience with this simple yet gourmet recipe!

Frequently Asked Questions

1. Can I use frozen cauliflower instead of fresh?

Fresh cauliflower is best for this recipe, as frozen cauliflower tends to retain excess moisture, making it difficult to achieve a crispy texture.

2. What other cheeses can I use?

While Parmesan and mozzarella create a perfect crispy-melty balance, you can also try:

  • Gruyère for a nutty depth
  • Cheddar for a sharper bite
  • Provolone for a mild, creamy texture

3. How do I keep cauliflower steaks from falling apart?

To ensure your steaks hold their shape:

  • Use a sharp knife to cut 1-inch-thick slices
  • Roast at high heat to caramelize the edges quickly
  • Handle gently when flipping

4. Can I make these on the stovetop instead of the oven?

Yes! Sear the cauliflower steaks in a hot skillet with olive oil for 3-4 minutes per side before adding cheese and covering with a lid to melt.

5. Are cauliflower steaks filling enough for a full meal?

Yes! When paired with a protein-rich side like quinoa, chickpeas, or a hearty salad, these cauliflower steaks make a satisfying meal.

Final Thoughts: A Dish Worth Adding to Your Recipe Collection

Cheesy Cauliflower Steaks prove that simple ingredients can create extraordinary flavors. With their rich, golden crust and tender texture, these steaks transform cauliflower into a show-stopping dish that is perfect for both weeknight dinners and special occasions.

Not only are they delicious and satisfying, but they also fit into various healthy lifestyles, including vegetarian, gluten-free, and keto-friendly diets. Whether you stick to the classic version or experiment with different flavors, these cauliflower steaks are sure to become a household favorite.

So why not try them tonight? Crispy, cheesy, and packed with flavor, this recipe is bound to impress!

aiting

Golden Crusted Cheesy Cauliflower Steaks: A Vegetarian Delight

Golden Crusted Cheesy Cauliflower Steaks bring together crispy, caramelized edges and a rich, cheesy topping. This dish is packed with flavor and makes for a delicious vegetarian main or side. With a perfect balance of seasonings and melted cheese, these cauliflower steaks are sure to impress!
Prep Time 10 minutes
Cook Time 30 minutes
Total Time 40 minutes
Servings: 4 servings
Course: Main Dish/Side
Cuisine: Vegetarian

Ingredients
  

For the Cauliflower Steaks:
  • Large head of cauliflower
  • Olive oil
  • Salt and black pepper
  • Sweet paprika
  • Garlic powder
For the Cheesy Topping:
  • Grated Parmesan cheese
  • Shredded mozzarella cheese
For Garnish:
  • Fresh parsley chopped

Method
 

Prepare the Cauliflower:
  1. Preheat the oven to 356°F (180°C).
  2. Remove outer leaves and slice cauliflower into 1-inch-thick steaks.
Season for Flavor:
  1. Place cauliflower steaks on a lined baking sheet.
  2. Drizzle with olive oil and evenly sprinkle salt, black pepper, paprika, and garlic powder.
First Bake for Tenderness:
  1. Sprinkle Parmesan cheese over the steaks.
  2. Bake for 20 minutes until slightly golden.
Melt the Cheese:
  1. Remove from the oven and sprinkle mozzarella cheese on top.
  2. Return to the oven for another 10 minutes until the cheese is melted and bubbly.
Garnish and Serve:
  1. Finish with chopped fresh parsley.
  2. Serve warm and enjoy!

Notes

  • For extra crispiness, broil the steaks for the last 2 minutes.
  • Serve with a side of marinara sauce for added flavor.
  • Best enjoyed fresh but can be stored in the refrigerator for up to 2 days.

Garden-Fresh Stuffed Zucchini Boats: A Nutritious and Flavorful Delight

Stuffed vegetables have long been a favorite in kitchens worldwide, offering a perfect balance of nutrition, flavor, and versatility. One of the most elegant and wholesome variations is stuffed zucchini boats, a dish that highlights the natural sweetness of zucchini while pairing it with a rich, creamy, and savory filling.

This Spinach, Mushroom, and Ricotta Stuffed Zucchini Boat recipe is an excellent choice for anyone seeking a meal that is both light and satisfying. Packed with fresh vegetables, creamy cheese, and aromatic seasonings, this dish can stand alone as a main course or complement other dishes as a flavorful side. Whether you’re looking for a low-carb meal, a vegetarian dish, or simply a new way to enjoy zucchini, this recipe is bound to become a staple in your home.

In this guide, we’ll explore everything you need to know about this delicious dish, from serving suggestions and variations to frequently asked questions and storage tips.

Why You’ll Love This Recipe

There are countless reasons to fall in love with these stuffed zucchini boats, but here are a few of the top highlights:

1. A Perfectly Balanced Dish

These zucchini boats offer a perfect balance of textures and flavors—the natural mild sweetness of zucchini pairs beautifully with the richness of ricotta, the earthiness of mushrooms, and the slight bite of garlic and onions. A sprinkle of Parmesan and red pepper flakes adds depth, bringing all the flavors together.

2. A Healthy and Low-Carb Option

For those following a low-carb or keto-friendly diet, this recipe is an excellent choice. Zucchini is naturally low in carbohydrates, and the filling is packed with protein and fiber, keeping you full without the heaviness of carb-laden alternatives.

3. A Quick and Easy Meal

With just 15 minutes of prep time, these zucchini boats are simple enough to make on a busy weeknight but impressive enough to serve at a dinner gathering. The process is straightforward, requiring only a bit of chopping, sautéing, and baking.

4. Customizable to Your Taste

One of the best parts of this dish is how adaptable it is. You can easily swap out ingredients, add different herbs, or include other vegetables to create a unique variation every time you make it.

The Secret to Perfect Stuffed Zucchini Boats

Choosing the Right Zucchini

The key to the best stuffed zucchini boats starts with selecting the right zucchini. Look for medium-sized zucchinis, around 6-8 inches long, as they are easier to hollow out and provide the perfect balance between tenderness and structure. Smaller zucchinis may not hold enough filling, while oversized ones can become too watery.

Scooping Without Breaking

To hollow out the zucchini, use a small spoon or melon baller, being careful not to scoop too deep and break through the bottom. Leaving a thin layer of flesh inside helps keep the zucchini sturdy while baking.

Avoiding Soggy Zucchini

Zucchini naturally contains a lot of water, which can lead to a soggy final dish. To prevent excess moisture:

  • Lightly salt the hollowed-out zucchini halves and let them sit for 10 minutes before stuffing. This helps draw out some of the water.
  • Bake the zucchini briefly before adding the filling to firm them up and reduce moisture content.

How to Serve These Stuffed Zucchini Boats

These savory zucchini boats pair well with a variety of side dishes. Whether you’re looking for something light and refreshing or hearty and comforting, here are some perfect pairings:

1. Light and Fresh Side Dishes

  • Simple Green Salad – A crisp salad with a light vinaigrette balances the richness of the ricotta filling.
  • Cucumber and Tomato Salad – A Mediterranean-style salad with a lemony dressing enhances the fresh flavors.

2. Heartier Side Dishes

  • Roasted Baby Potatoes – Oven-roasted potatoes add a satisfying crunch and a more filling element to the meal.
  • Garlic Butter Quinoa – A protein-packed grain option that soaks up the flavors of the zucchini filling.

3. Protein-Packed Pairings

  • Grilled Chicken or Fish – If you want to add extra protein, serve these zucchini boats alongside grilled chicken or a flaky white fish like cod or tilapia.
  • Lentil Soup – For a vegetarian protein boost, pair the zucchini boats with a hearty bowl of lentil soup.

Variations to Try

1. Mediterranean-Inspired Zucchini Boats

Add sun-dried tomatoes, feta cheese, and Kalamata olives to the filling for a Mediterranean twist. A drizzle of tzatziki sauce on top makes this variation even better.

2. Italian-Style Zucchini Boats

Incorporate marinara sauce and shredded mozzarella into the filling, and top with fresh basil before serving.

3. Vegan Zucchini Boats

Swap out ricotta and Parmesan for dairy-free cheese alternatives or use a blend of mashed tofu and nutritional yeast to create a creamy vegan-friendly filling.

4. Spicy Tex-Mex Zucchini Boats

Add black beans, diced bell peppers, and a sprinkle of taco seasoning for a bold, smoky flavor. Top with avocado slices and a drizzle of hot sauce for extra heat.

Ingredients: A Symphony of Flavors

Zucchini Base:

  • 4 medium zucchini, halved lengthwise and hollowed out

Savory Ricotta Filling:

  • 1 tablespoon olive oil
  • 2 cloves garlic, minced
  • 1 small onion, finely chopped
  • 1 cup mushrooms, chopped
  • 2 cups fresh spinach, chopped
  • 1 cup ricotta cheese
  • 1/4 cup Parmesan cheese, grated
  • 1/4 teaspoon red pepper flakes (optional, for a little heat)
  • Salt and pepper, to taste

For Garnish:

  • Fresh basil (optional)

Directions: From Garden to Table

Step 1: Prepare the Zucchini

Preheat your oven to 375°F (190°C) and line a baking sheet with parchment paper. Cut the zucchini in half lengthwise and scoop out the center to create a cavity for the filling.

Step 2: Sauté the Vegetables

Heat olive oil in a skillet over medium heat. Add minced garlic and chopped onion, cooking until fragrant (about 2 minutes). Add mushrooms and cook for another 3-4 minutes until softened.

Step 3: Wilt the Spinach

Stir in the chopped spinach and cook until wilted (about 2 minutes). Remove the skillet from heat.

Step 4: Create the Creamy Filling

Add ricotta cheese and grated Parmesan to the pan, mixing until well combined. Season with red pepper flakes, salt, and pepper to taste.

Step 5: Assemble the Zucchini Boats

Evenly distribute the ricotta mixture among the hollowed zucchini halves, spooning it generously into each.

Step 6: Bake to Perfection

Place the stuffed zucchini boats on the prepared baking sheet. Bake for 20-25 minutes, or until the zucchini is tender and the filling is lightly golden.

Step 7: Garnish and Serve

Remove from the oven and garnish with fresh basil for added freshness and aroma. Serve warm and enjoy!

Nutritional Breakdown: Light Yet Satisfying

  • Calories: 250 kcal
  • Carbohydrates: 12g
  • Protein: 11g
  • Fat: 17g
  • Fiber: 3g
  • Sodium: 250mg
  • Sugar: 5g
  • Cholesterol: 40mg

These Garden-Fresh Stuffed Zucchini Boats are a perfect balance of creamy, cheesy goodness and nutrient-packed vegetables. Whether served as a main dish or a hearty side, this meal is sure to impress!

Frequently Asked Questions

1. Can I Use Frozen Spinach Instead of Fresh?

Yes! If using frozen spinach, be sure to thaw and drain it well to remove excess moisture. Pressing it between paper towels before adding it to the filling will help prevent the zucchini from becoming soggy.

2. Can I Prepare These in Advance?

Absolutely! You can assemble the zucchini boats up to 24 hours ahead of time and store them in the refrigerator before baking. When ready to eat, simply bake as directed, adding an extra 5 minutes to the cooking time.

3. How Do I Store Leftovers?

  • Refrigeration: Store in an airtight container for up to 3 days.
  • Freezing: While zucchini boats can be frozen, the texture may change slightly. If freezing, store them in an airtight container for up to 2 months, and reheat in the oven at 350°F (175°C) until warmed through.

4. What Other Cheeses Can I Use?

Ricotta provides a creamy texture, but if you want alternatives, try:

  • Goat Cheese – For a tangy kick.
  • Cottage Cheese – For a lower-fat option.
  • Mozzarella – For a melty, gooey finish.

5. Can I Make This Dish Vegan?

Yes! Replace the ricotta and Parmesan with dairy-free cheese alternatives or use a mixture of blended cashews and nutritional yeast for a similar creamy consistency.

Final Thoughts: A Must-Try Vegetarian Delight

Whether you’re looking for a light dinner, a creative way to use zucchini, or a healthy meal that doesn’t compromise on flavor, these Spinach, Mushroom, and Ricotta Stuffed Zucchini Boats are a fantastic choice.

Their creamy, savory filling pairs perfectly with the tender zucchini, creating a dish that feels indulgent yet is packed with vitamins, fiber, and protein. The fact that they are low in carbs, easy to customize, and meal-prep friendly makes them even more appealing.

Try this recipe for your next meal, and don’t be afraid to experiment with different flavors and toppings. Whether served as a standalone dish or alongside a hearty side, these zucchini boats will quickly become a favorite in your kitchen.

Bon appétit!

aiting

Garden-Fresh Stuffed Zucchini Boats: A Nutritious and Flavorful Delight

These Garden-Fresh Stuffed Zucchini Boats are a perfect blend of creamy ricotta filling and nutritious vegetables. They deliver a satisfying bite without being too heavy, making them a delicious option for a light main course or a hearty side dish. Packed with flavors and topped with fresh basil, these baked zucchini boats are both wholesome and delightful.
Prep Time 15 minutes
Cook Time 25 minutes
Total Time 40 minutes
Servings: 4 servings
Course: Main Dish/Side
Cuisine: Mediterranean

Ingredients
  

Zucchini Base:
  • Medium zucchini halved lengthwise and hollowed out
Savory Ricotta Filling:
  • Olive oil
  • Garlic minced
  • Small onion finely chopped
  • Mushrooms chopped
  • Fresh spinach chopped
  • Ricotta cheese
  • Parmesan cheese grated
  • Red pepper flakes optional
  • Salt and pepper
For Garnish:
  • Fresh basil optional

Method
 

Prepare the Zucchini:
  1. Preheat the oven to 375°F (190°C) and line a baking sheet with parchment paper.
  2. Cut the zucchini in half lengthwise and scoop out the center to create a cavity for the filling.
Sauté the Vegetables:
  1. Heat olive oil in a skillet over medium heat.
  2. Add minced garlic and chopped onion, cooking until fragrant (about 2 minutes).
  3. Stir in mushrooms and cook for another 3-4 minutes until softened.
Wilt the Spinach:
  1. Add chopped spinach and cook until wilted (about 2 minutes).
  2. Remove from heat.
Create the Creamy Filling:
  1. Mix ricotta cheese and grated Parmesan into the skillet.
  2. Season with red pepper flakes, salt, and pepper to taste.
Assemble the Zucchini Boats:
  1. Spoon the ricotta mixture generously into each hollowed zucchini half.
Bake to Perfection:
  1. Place the stuffed zucchini boats on the prepared baking sheet.
  2. Bake for 20-25 minutes, or until the zucchini is tender and the filling is lightly golden.
Garnish and Serve:
  1. Remove from the oven and garnish with fresh basil.
  2. Serve warm and enjoy!

Notes

  • You can add cooked ground turkey or sausage for extra protein.
  • For a vegan option, replace ricotta with a dairy-free alternative.
  • Store leftovers in an airtight container in the refrigerator for up to 3 days.
 

Golden Sunrise Stuffed Pancakes: A Savory Vegan Delight

Chinese cuisine is known for its rich flavors, delicate textures, and culinary traditions that span centuries. Among the many cherished dishes, stuffed pancakes hold a special place, offering a satisfying bite of crispy, golden dough filled with delicious savory fillings. This Chinese-style savory stuffed pancake, inspired by traditional jianbing and scallion pancakes, brings together the warmth of a homemade dough with a hearty tofu and vegetable filling.

Perfect for breakfast or as a grab-and-go snack, these Golden Sunrise Stuffed Pancakes are a great way to start your day with plant-based goodness. This dish balances textures and flavors beautifully—crispy on the outside, soft and flavorful on the inside, with a subtle umami kick from the seasoned tofu filling.

In this guide, we’ll explore the origins of this dish, customization ideas, storage tips, and frequently asked questions to help you create the best homemade stuffed pancakes.

The Story Behind Stuffed Pancakes

Chinese-style stuffed pancakes have a history rooted in street food culture, where vendors create warm, flaky pastries filled with everything from meats to vegetables. These pancakes draw inspiration from jianbing, a beloved breakfast crepe, and scallion pancakes (cong you bing), which have a crisp, flaky exterior. Unlike traditional Chinese pancakes that rely on laminated dough for flakiness, this version uses a soft, pliable dough that crisps up when pan-fried.

By incorporating a tofu-based filling, this vegan-friendly variation retains all the elements of a hearty and satisfying breakfast while staying completely plant-based. The turmeric in the filling mimics the rich yellow hue of scrambled eggs, while black salt (kala namak) adds an eggy flavor, making it an excellent alternative for those seeking a healthier, cruelty-free option.

Why You’ll Love This Recipe

  • Crispy Yet Soft – The homemade dough crisps up beautifully in the pan while maintaining a soft, chewy bite.
  • Rich in Plant-Based Protein – Tofu provides an excellent source of protein, keeping you full and energized.
  • Customizable – You can experiment with different fillings, from mushrooms and leafy greens to kimchi or spiced lentils.
  • Make-Ahead Friendly – These pancakes can be refrigerated or frozen, making meal prep a breeze.
  • Perfect Any Time of Day – While commonly eaten as breakfast, they work just as well as a snack, lunch, or even a light dinner.

How to Serve These Stuffed Pancakes

These savory pancakes are delicious on their own, but they can be paired with dipping sauces or side dishes to elevate the experience. Here are some ideas:

Dipping Sauces

  • Soy Vinegar Dip – A simple blend of soy sauce, rice vinegar, and a dash of sesame oil.
  • Chili Crisp Sauce – For those who love a spicy kick, chili oil with crispy garlic and Sichuan peppercorns is a fantastic option.
  • Sweet & Spicy Hoisin – Mix hoisin sauce with a little chili sauce for a mildly sweet and tangy contrast.

Side Dish Pairings

  • Cucumber Salad – A refreshing, tangy salad with sesame oil and crushed garlic balances out the richness of the pancakes.
  • Miso Soup – A light soup can complement the savory flavors of the filling.
  • Steamed Greens – Serve with bok choy, spinach, or Chinese broccoli for an extra serving of vegetables.

Make It Your Own: Filling Variations

While the tofu and vegetable filling in this recipe is delicious on its own, you can get creative with different flavor combinations:

  • Mushroom & Scallion – Swap the tofu for sautéed mushrooms for a rich, umami-packed alternative.
  • Kimchi & Sesame – Add chopped kimchi for a tangy and slightly spicy bite.
  • Sweet Potato & Black Beans – A fusion twist that brings together creamy sweet potato and hearty black beans.
  • Spicy Lentils & Cumin – Inspired by Middle Eastern flavors, cooked lentils with cumin and coriander make a great filling.
  • Curried Chickpeas – For an Indian-inspired version, use mashed chickpeas with curry powder and garam masala.

Storage and Reheating Tips

One of the best things about these pancakes is that they store well, making them a convenient option for meal prepping.

Refrigeration:

  • Store cooked pancakes in an airtight container for up to 5 days.
  • To reheat, pan-fry them for a few minutes on each side until warm and crispy.

Freezing:

  • These pancakes freeze well for up to 2 months.
  • Place them in a single layer on a tray, freeze until solid, then transfer to a freezer bag.
  • Reheat directly from frozen by pan-frying with a splash of water and covering the pan to steam them back to perfection.

Ingredients: The Perfect Harmony of Flavors

For the Dough:
  • 2 cups all-purpose flour
  • 3/4 tsp salt
  • 3/4 cup warm water, plus 1 tbsp water
  • 1 tsp neutral oil
For the Filling:

Tofu Mix:

  • 1 lb extra firm tofu
  • 1 tsp turmeric powder
  • 3/4 tsp black salt (or regular salt)

Vegetable Medley:

  • 1 cup finely shredded carrots
  • 1 cup chopped scallions
  • 1/2 cup diced red bell peppers
  • 1/2 tsp salt
  • 1/4 tsp five-spice powder (optional but recommended)
  • 1 tsp roasted sesame seeds
  • 1 tbsp toasted sesame oil
For Cooking:
  • 1 tbsp neutral oil (for 2 pancakes)
  • 1 tbsp water (for each pancake)
  • Extra sesame oil or neutral oil for frying

Directions: Crafting the Perfect Pancakes

Step 1: Preparing the Dough
  1. In a mixing bowl, combine the flour and salt.
  2. Create a well in the center and pour in the warm water. Mix using a spoon or spatula.
  3. Once the dough starts coming together, add the oil.
  4. Knead for several minutes until the dough becomes smooth. If it feels dry, add a splash of water.
  5. Shape into a ball, cover with a damp towel, and let rest for 30 minutes.
Step 2: Creating the Flavorful Filling
  1. Press the tofu to remove excess liquid, then mash and set aside.
  2. Heat a pan with 2 tbsp sesame oil, then sauté scallions, bell peppers, and carrots.
  3. Season with salt, sesame seeds, and five-spice powder. Cook for 4-5 minutes until tender.
  4. In the same pan, add the tofu, turmeric, and black salt. Mix well and cook until any excess moisture evaporates.
  5. Combine the tofu with the vegetable mix and let cool.
Step 3: Shaping the Wrappers
  1. Lightly flour a work surface and knead the dough a few times.
  2. Shape into a donut, then divide into 8 equal pieces.
  3. Roll each piece into a ball, then flatten and roll out into a 5-inch circle.
  4. Place 1/3 to 1/2 cup of filling in the center of each wrapper.
  5. Pinch the edges to seal, then gently press down to flatten.
Step 4: Pan-Frying to Perfection
  1. Heat a pan with 1 tbsp oil (for every 2 pancakes).
  2. Add the pancakes, pressing lightly, and cook over medium heat for 4-5 minutes until golden brown.
  3. Flip and cook for another 4-5 minutes.
  4. Carefully pour 1 tbsp water per pancake into the pan and cover immediately.
  5. Let steam for 5-6 minutes until the water evaporates.
  6. Remove from the pan and repeat with the remaining pancakes.

Nutritional Breakdown: A Healthy Start to Your Day

  • Calories: 119 kcal
  • Carbohydrates: 24g
  • Protein: 3g
  • Fat: 1g
  • Sodium: 582mg
  • Fiber: 1g
  • Vitamin A: 1 IU
  • Vitamin C: 1 mg
  • Calcium: 6 mg
  • Iron: 2 mg

These Golden Sunrise Stuffed Pancakes are best enjoyed hot and make for a perfect breakfast or snack! They can also be refrigerated or frozen for future indulgence. Enjoy the crispy, savory goodness!

Frequently Asked Questions

1. Can I use store-bought dough instead of making it from scratch?

Yes! While homemade dough provides the best texture, you can use store-bought dumpling wrappers or even pizza dough as a shortcut. Just ensure they are rolled thin for the best results.

2. Can I make these gluten-free?

Absolutely. Swap out the all-purpose flour for a gluten-free flour blend that contains xanthan gum. Alternatively, you can use rice paper wrappers for a lighter, gluten-free version.

3. What if I don’t have black salt?

Black salt (kala namak) is used to mimic an eggy flavor, but if you don’t have it, regular salt will work just fine. You can also add nutritional yeast for a slightly cheesy taste.

4. Can I bake these instead of frying?

Yes, but the texture will be different. Brush them with a little oil and bake at 375°F (190°C) for 15-18 minutes, flipping halfway through. However, pan-frying gives them the best crispiness.

5. Are these kid-friendly?

Definitely! The mild flavors and soft texture make these a great option for kids. If serving to little ones, you can reduce the spice level and add their favorite vegetables.

6. What’s the best way to meal prep these pancakes?

You can prepare the filling and dough in advance. Keep the dough wrapped in plastic wrap in the fridge for up to 24 hours, and store the filling separately. Assemble and cook them fresh for the best taste.

7. Can I air-fry these instead of pan-frying?

Yes! Brush them lightly with oil and air-fry at 375°F (190°C) for 10-12 minutes, flipping halfway through, until golden brown.

Final Thoughts: A Must-Try Savory Pancake Recipe

Whether you’re looking for a hearty breakfast, a satisfying snack, or a new way to enjoy tofu, these Golden Sunrise Stuffed Pancakes are a fantastic choice. They bring together crispy, golden-brown dough and a flavorful, protein-rich filling, making them a wholesome and delicious option for any time of the day.

With their versatility, you can experiment with different fillings and pairings to suit your taste. Plus, they store well, making them perfect for meal prep. So, whether you’re an experienced home cook or a beginner in the kitchen, this recipe is one you’ll want to make again and again.

Try making a batch today, and enjoy the satisfying crunch and rich flavors of these Chinese-style stuffed pancakes.

aiting

Golden Sunrise Stuffed Pancakes: A Savory Vegan Delight

Golden Sunrise Stuffed Pancakes bring together a crispy golden exterior and a savory, flavorful filling. These delightful pancakes are stuffed with a tofu and vegetable medley seasoned to perfection. They make for a hearty breakfast, a satisfying snack, or even a light meal. Enjoy them fresh and hot, or store them for later indulgence!
Prep Time 30 minutes
Cook Time 15 minutes
Total Time 45 minutes
Servings: 8 pancakes
Course: Breakfast/Snack
Cuisine: Fusion

Ingredients
  

For the Dough:
  • All-purpose flour
  • Salt
  • Warm water
  • Neutral oil
For the Filling: Tofu Mix:
  • Extra firm tofu
  • Turmeric powder
  • Black salt or regular salt
Vegetable Medley:
  • Finely shredded carrots
  • Chopped scallions
  • Diced red bell peppers
  • Salt
  • Five-spice powder optional
  • Roasted sesame seeds
  • Toasted sesame oil
For Cooking:
  • Neutral oil
  • Water
  • Extra sesame oil or neutral oil for frying

Method
 

Prepare the Dough:
  1. Mix flour and salt in a bowl.
  2. Add warm water gradually, stirring until combined.
  3. Knead with oil until smooth, adding water as needed.
  4. Cover and let rest for 30 minutes.
Create the Flavorful Filling:
  1. Press tofu to remove excess moisture and mash.
  2. Sauté scallions, bell peppers, and carrots in sesame oil.
  3. Season with salt, sesame seeds, and five-spice powder.
  4. Add tofu, turmeric, and black salt, cooking until moisture evaporates.
  5. Mix everything together and let cool.
Shape the Wrappers:
  1. Knead the dough lightly, divide into 8 pieces, and roll into balls.
  2. Flatten each ball into a 5-inch circle.
  3. Place filling in the center and seal edges.
  4. Flatten gently for an even shape.
Pan-Fry to Perfection:
  1. Heat a pan with oil and cook pancakes until golden brown.
  2. Flip and cook the other side.
  3. Add water, cover, and let steam until fully cooked.
  4. Repeat for remaining pancakes.

Notes

  • Adjust seasonings to taste.
  • Ensure tofu mixture is dry to avoid soggy pancakes.
  • Serve hot with dipping sauces or enjoy plain.
 

Fresh Mint Ice Cream: A Refreshing and Indulgent Treat

There’s something magical about homemade ice cream, and when it’s infused with fresh mint, the experience becomes even more special. Unlike store-bought versions that rely on artificial extracts, this Fresh Mint Ice Cream is bursting with the natural, herbal brightness of real mint leaves. Combined with a rich, creamy base, it offers a refreshing yet indulgent dessert that’s perfect for hot summer days or as a sophisticated after-dinner treat.

In this guide, we’ll explore why fresh mint is the key to elevating your ice cream, expert tips for achieving the perfect texture, creative variations, and frequently asked questions to help you make the best homemade mint ice cream possible.

Why Fresh Mint Ice Cream Stands Out

1. A True Mint Flavor

Most commercially available mint ice creams are flavored with peppermint extract, which gives them a bold but sometimes overpowering taste. Using fresh mint leaves results in a more nuanced, earthy, and refreshing flavor that pairs beautifully with creamy textures.

2. Naturally Vibrant and Aromatic

Steeping fresh mint in the ice cream base infuses it with both flavor and fragrance, making each bite feel crisp and cooling. The mint also provides a slightly greenish hue, a natural alternative to artificially colored mint ice creams.

3. A Homemade Treat with Simple Ingredients

With just a few high-quality ingredients, you can create a dessert that’s both gourmet and wholesome. No artificial flavorings or preservatives—just pure, natural goodness.

4. Versatile and Customizable

While delicious on its own, fresh mint ice cream also serves as a perfect base for mix-ins like chocolate chips, nuts, or fruit. You can also pair it with other desserts, such as chocolate brownies or fresh berries, for an elevated presentation.

Secrets to the Perfect Fresh Mint Ice Cream

Even though homemade ice cream is straightforward, a few expert techniques can take your recipe from good to extraordinary.

1. Use Fresh, High-Quality Mint

The type of mint you choose directly affects the flavor of your ice cream. Some great varieties include:

  • Spearmint: Mild and slightly sweet, ideal for desserts.
  • Peppermint: More intense and cooling, offering a sharper taste.
  • Chocolate Mint: A variety that naturally has hints of cocoa, making it an interesting choice.

2. Steep the Mint for Maximum Flavor

Infusing the warm milk and cream mixture with fresh mint leaves allows the oils and essence to fully release, resulting in a deep, authentic flavor. Let it steep for at least one to two hours before straining.

3. Achieve a Smooth and Creamy Texture

A common challenge in homemade ice cream is achieving a silky texture without ice crystals. To prevent a grainy consistency:

  • Chill the custard base completely before churning.
  • Use an ice bath if you’re short on time.
  • Do not over-churn; stop once the ice cream reaches a soft-serve consistency.

4. Balance Sweetness and Freshness

Too much sugar can overpower the mint’s natural brightness, while too little can leave the ice cream tasting flat. Adjusting the sugar and adding a pinch of salt enhances the overall balance.

5. Store It Properly for the Best Texture

Homemade ice cream doesn’t contain commercial stabilizers, so proper storage is key:

  • Use an airtight container to prevent ice crystals from forming.
  • Press plastic wrap directly on the surface before sealing to keep it extra fresh.
  • Let it soften for a few minutes before scooping for the best consistency.

Creative Variations on Fresh Mint Ice Cream

While the classic version is delightful, there are endless ways to personalize your ice cream for a unique twist.

1. Mint Chocolate Chip Ice Cream

A timeless favorite, this variation combines the freshness of mint with the richness of chocolate. Instead of using chocolate chips, try:

  • Shaved dark chocolate for a delicate, melt-in-your-mouth texture.
  • Cacao nibs for a crunchy, slightly bitter contrast.
  • Chocolate ribbons by drizzling melted chocolate into the ice cream while churning.

2. Mint and Honey Ice Cream

For a naturally sweetened option, replace sugar with pure honey or maple syrup. The floral notes from honey complement the herbal freshness of mint beautifully.

3. Boozy Mint Ice Cream

A splash of creme de menthe or white rum gives this ice cream a sophisticated edge, perfect for serving at dinner parties. Alcohol also helps create a smoother texture, as it lowers the freezing point.

4. Matcha Mint Ice Cream

Adding matcha (green tea powder) enhances the earthy notes of mint and provides a beautiful vibrant green color without food coloring.

5. Coconut Mint Ice Cream

For a dairy-free version, substitute heavy cream with full-fat coconut milk. The combination of coconut and mint creates a tropical, refreshing flavor.

What to Serve with Fresh Mint Ice Cream

This ice cream is fantastic on its own, but pairing it with complementary flavors elevates the experience.

1. Chocolate Desserts

  • Dark chocolate brownies – The richness of chocolate contrasts beautifully with the coolness of mint.
  • Chocolate lava cake – The warm, gooey center paired with cold mint ice cream is pure indulgence.
  • Chocolate-dipped waffle cones – Adds a crunch to every bite.

2. Fresh Fruits

  • Berries (strawberries, raspberries, or blueberries) provide a tart contrast.
  • Sliced mango or pineapple complements the herbal notes of mint.
  • Grilled peaches create a caramelized sweetness that pairs beautifully.

3. Beverages

  • Affogato-style – Pour a shot of hot espresso over a scoop of mint ice cream for a bold contrast.
  • Mint ice cream float – Add a scoop to a glass of sparkling rosé or prosecco for an elegant summer cocktail.
  • Iced coffee or Thai tea – Serve alongside for a refreshing twist on a classic pairing.

A Cool and Creamy Delight: Ingredients You’ll Need

  • Whole Milk & Heavy Cream: The perfect duo for a rich and smooth texture.
  • Fresh Mint Leaves: Infuses the ice cream with a bright, natural mint flavor.
  • Sugar: Adds just the right amount of sweetness.
  • Egg Yolks: Helps create a luscious, custard-like base.
  • Salt: Enhances and balances the flavors.

From Fresh Leaves to Frozen Bliss: Directions

  1. Infuse the Milk: Heat milk, sugar, and cream, then steep with fresh mint leaves for a bold, refreshing flavor.
  2. Prepare the Custard: Whisk egg yolks, then temper with the warm mint-infused mixture.
  3. Cook to Perfection: Gently heat until the mixture thickens and coats the back of a spoon.
  4. Strain & Chill: Remove mint leaves, mix in remaining cream, and chill completely.
  5. Churn & Freeze: Use an ice cream maker to churn into a creamy texture, then freeze until set.
  6. Serve & Enjoy: Scoop into bowls or cones for a cool, herbaceous treat.

Nutritional Highlights: A Guilt-Free Treat

  • Calories: ~200 per serving
  • Fat: 12g
  • Carbohydrates: 18g
  • Protein: 4g
  • Sugar: 15g

This Fresh Mint Ice Cream is a delightful way to enjoy summer, offering a balance of natural herbal flavors and creamy indulgence. Pair it with chocolate desserts, fresh berries, or a drizzle of honey for a truly unforgettable experience!

Frequently Asked Questions (FAQs)

1. Can I Use Dried Mint Instead of Fresh?

Fresh mint is highly recommended, as dried mint doesn’t infuse the same vibrant, fresh flavor into the ice cream base.

2. How Long Does Homemade Ice Cream Last?

Homemade ice cream is best enjoyed within one to two weeks for the freshest taste. Since it lacks preservatives, it doesn’t keep as long as commercial ice cream.

3. Do I Need an Ice Cream Maker?

An ice cream maker ensures a smooth, creamy texture, but if you don’t have one, you can freeze the mixture and stir it every 30 minutes for about four hours to break up ice crystals.

4. How Can I Make It Extra Creamy?

Using a custard base with egg yolks, full-fat dairy, and churning at the right speed ensures a rich, creamy texture.

5. Can I Add Mix-Ins?

Yes! Add chocolate chips, crushed cookies, or toasted nuts during the last few minutes of churning for a customized twist.

Conclusion: A Refreshing and Luxurious Homemade Treat

Fresh Mint Ice Cream is a celebration of natural flavors, combining the vibrancy of real mint leaves with the indulgence of a creamy base. Unlike store-bought varieties, this homemade version is bursting with freshness, free from artificial flavors, and completely customizable.

Whether enjoyed on its own, paired with chocolate desserts, or transformed into a sophisticated cocktail, this ice cream is a must-try for dessert lovers. With just a handful of ingredients and a little patience, you can create a gourmet treat that’s both refreshing and indulgent—one scoop at a time.

aiting

Fresh Mint Ice Cream: A Refreshing and Indulgent Treat

Cool, creamy, and infused with natural mint flavor, this Fresh Mint Ice Cream is a refreshing summer treat. Made with real mint leaves and a luscious custard base, it’s the perfect way to indulge in homemade ice cream with a bright, herbal twist. Pair it with chocolate desserts or fresh berries for an unforgettable experience!
Prep Time 10 minutes
Total Time 8 hours 30 minutes
Servings: 6 servings
Course: Dessert
Cuisine: American

Ingredients
  

  • 2 cups whole milk
  • 1 cup heavy cream
  • ¾ cup sugar
  • 1 cup fresh mint leaves
  • 4 large egg yolks
  • ¼ teaspoon salt

Method
 

  1. Infuse the Milk: In a saucepan over medium heat, combine whole milk, heavy cream, and sugar. Heat until warm but not boiling. Add fresh mint leaves, remove from heat, and let steep for 30 minutes.
  2. Prepare the Custard: In a separate bowl, whisk egg yolks. Slowly pour the warm mint-infused milk mixture into the yolks, whisking constantly to temper the eggs.
  3. Cook to Perfection: Return the mixture to the saucepan and heat over low, stirring constantly, until it thickens and coats the back of a spoon (about 170°F/77°C).
  4. Strain & Chill: Remove from heat and strain out the mint leaves. Stir in salt and let the mixture cool to room temperature before refrigerating for at least 4 hours.
  5. Churn & Freeze: Pour the chilled mixture into an ice cream maker and churn according to the manufacturer’s instructions. Transfer to a container and freeze for at least 4 hours or until set.
  6. Serve & Enjoy: Scoop into bowls or cones and enjoy as is, or pair with chocolate shavings, fresh berries, or a drizzle of honey.

Notes

  • For a more intense mint flavor, steep the mint leaves for a longer time.
  • If you prefer a natural green hue, blend a small amount of the steeped mint leaves before straining.
  • Store in an airtight container in the freezer for up to 2 weeks.


Famous Red Lobster Shrimp Scampi: A Gourmet Seafood Classic at Home

Shrimp scampi is one of those dishes that feels both luxurious and effortless, making it a perfect choice for special occasions or a quick weeknight dinner. Inspired by the famous Red Lobster version, this garlicky, buttery, and citrusy dish is a seafood lover’s dream. It features tender shrimp bathed in a rich white wine sauce, infused with aromatic garlic, bright lemon, and the savory depth of Parmesan cheese.

The beauty of this dish lies in its simplicity and elegance—it comes together in about 30 minutes yet delivers restaurant-quality flavor. Whether served over pasta, alongside crusty bread, or paired with roasted vegetables, this shrimp scampi is a surefire way to impress guests or treat yourself to a gourmet experience at home.

In this guide, we’ll explore what makes this dish special, expert cooking tips, serving ideas, and answers to frequently asked questions to help you perfect your homemade version of Red Lobster Shrimp Scampi.

What Makes This Shrimp Scampi So Special?

1. Classic Flavors with a Touch of Elegance

This dish brings together the richness of butter, the brightness of lemon, and the savory depth of garlic and Parmesan cheese. The combination creates a sauce that’s both indulgent and balanced, coating each shrimp in irresistible flavor.

2. Quick and Easy Preparation

Despite its sophisticated taste, this dish is surprisingly easy to make. In just 30 minutes, you can prepare a meal that looks and tastes like it came from a high-end seafood restaurant.

3. Perfect for Any Occasion

  • Weeknight Dinner: Quick to prepare, yet deeply satisfying.
  • Date Night: A romantic, restaurant-style dish with minimal effort.
  • Entertaining Guests: An impressive dish that’s easy to scale up for a crowd.

4. Versatile and Customizable

This shrimp scampi recipe serves as a fantastic base for creativity. Adjust the seasoning, switch up the protein, or pair it with different sides to suit your preferences.

Secrets to Making the Perfect Shrimp Scampi

Even though this dish is simple, a few key techniques can help elevate your shrimp scampi to restaurant-quality perfection.

1. Choose High-Quality Shrimp

For the best results, use large or jumbo shrimp, preferably fresh or high-quality frozen shrimp that has been peeled and deveined. Wild-caught shrimp often have superior flavor compared to farmed varieties.

2. Sauté the Shrimp Properly

Shrimp cook very quickly, so be careful not to overcook them. They should be pink, opaque, and slightly firm, which usually takes only a couple of minutes per side. Overcooked shrimp become rubbery, so watch them closely.

3. Build Layers of Flavor

  • Sautéing garlic in butter releases its full aroma.
  • Deglazing the pan with white wine adds depth and complexity to the sauce.
  • Finishing with Parmesan cheese provides a rich, nutty finish.

4. Reduce the Sauce for Maximum Flavor

Letting the white wine and lemon juice simmer and reduce intensifies the flavors. Be patient—this step makes the difference between a watery sauce and a rich, velvety coating for your shrimp.

5. Balance the Acidity and Richness

Lemon juice and white wine bring brightness and acidity, which balance the richness of the butter and cheese. Adjust these ingredients to suit your taste preferences.

6. Serve Immediately for the Best Texture

Shrimp scampi is best enjoyed right after cooking while the shrimp are tender and the sauce is warm and glossy.

Creative Variations of Shrimp Scampi

While the classic version is always a hit, there are plenty of ways to add a unique twist to this dish.

1. Spicy Shrimp Scampi

For a bold, spicy kick, add:

  • Red pepper flakes or sliced fresh chilies to the sauce.
  • A drizzle of sriracha or hot sauce for extra heat.

2. Creamy Shrimp Scampi

For a richer, more indulgent version, stir in:

  • A splash of heavy cream or half-and-half.
  • Mascarpone or cream cheese for a smooth, velvety texture.

3. Garlic-Lover’s Shrimp Scampi

If you can’t get enough garlic, add:

  • Roasted garlic puree for a sweeter, deeper garlic flavor.
  • More fresh garlic—finely chopped or even grated for extra intensity.

4. Herb-Infused Shrimp Scampi

Add fresh herbs like:

  • Basil for a slightly sweet, aromatic touch.
  • Parsley for freshness and color.
  • Thyme or oregano for a Mediterranean-inspired twist.

5. Low-Carb & Keto-Friendly Shrimp Scampi

Swap traditional pasta for:

  • Zucchini noodles (zoodles)
  • Spaghetti squash
  • Cauliflower rice

What to Serve with Shrimp Scampi

Shrimp scampi pairs beautifully with a variety of sides. Here are some great serving ideas:

1. Over Pasta or Grains

  • Linguine, fettuccine, or angel hair pasta – Classic pairing to soak up the sauce.
  • Orzo or risotto – A creamy and luxurious alternative.

2. With Fresh Bread

  • Garlic bread or a warm baguette – Perfect for soaking up every drop of sauce.
  • Ciabatta or sourdough – Adds a rustic touch.

3. Light and Fresh Pairings

  • Steamed asparagus, roasted Brussels sprouts, or sautéed spinach – A healthy contrast to the richness of the sauce.
  • A simple green salad with balsamic vinaigrette – Refreshing and crisp.

4. Wine Pairing Suggestions

The best wines for shrimp scampi include:

  • Chardonnay – Rich and buttery, complements the sauce.
  • Sauvignon Blanc – Crisp and citrusy, balances the dish.
  • Pinot Grigio – Light and refreshing, enhances the shrimp’s delicate flavor.

Restaurant-Style Elegance: Famous Red Lobster Shrimp Scampi

A Symphony of Flavors: Ingredients You’ll Need

  • Shrimp: Fresh, peeled, and deveined for a tender bite.
  • Butter & Olive Oil: The perfect duo for a rich, flavorful sauce.
  • White Cooking Wine: Adds depth and a subtle sweetness.
  • Garlic: Bold and aromatic, the backbone of any scampi.
  • Lemon Juice: Brightens the dish with a touch of acidity.
  • Italian Seasoning: A blend of herbs to enhance the overall flavor.
  • Parmesan Cheese: A savory, nutty finish to elevate the dish.

From Skillet to Table: Directions

  1. Sauté the Shrimp: Cook shrimp in olive oil until pink and opaque, then set aside.
  2. Build the Sauce: Melt butter, then sauté garlic until fragrant.
  3. Deglaze & Reduce: Stir in white wine and lemon juice, reducing by half for a concentrated flavor.
  4. Combine & Season: Add shrimp back to the skillet, tossing with Italian seasoning.
  5. Final Touches: Garnish with Parmesan cheese and fresh parsley before serving.

Nutritional Breakdown: A Decadent Yet Balanced Dish

  • Calories: ~300 per serving
  • Protein: 25g
  • Carbohydrates: 5g
  • Fat: 18g
  • Sodium: Moderate (adjustable with lower-sodium ingredients)

This Famous Red Lobster Shrimp Scampi is a quick and indulgent dish perfect for weeknight dinners, special occasions, or impressing guests. Serve it with pasta, crusty bread, or a fresh salad for an unforgettable meal!

Frequently Asked Questions (FAQs)

1. Can I Use Frozen Shrimp?

Yes! Just thaw them completely and pat them dry before cooking to remove excess moisture.

2. What Can I Use Instead of White Wine?

If you prefer to avoid alcohol, try:

  • Chicken or vegetable broth for a similar depth of flavor.
  • A splash of white grape juice or apple cider vinegar for acidity.

3. How Do I Store and Reheat Leftovers?

  • Store in an airtight container in the fridge for up to 2 days.
  • Reheat gently over low heat in a skillet with a splash of broth or butter.
  • Avoid microwaving, as it can make the shrimp rubbery.

4. Can I Make This Dish Ahead of Time?

While best enjoyed fresh, you can prep the sauce ahead of time and reheat it before adding the shrimp.

5. Is This Dish Gluten-Free?

Yes! Just serve it over gluten-free pasta or with a low-carb alternative.

Conclusion: A Classic Dish Worth Mastering

Red Lobster’s Shrimp Scampi has long been a fan-favorite for a reason—its perfect blend of garlic, butter, lemon, and wine creates a symphony of flavors in every bite. The best part? You can recreate this restaurant-quality dish at home in under 30 minutes.

With its quick preparation, simple ingredients, and endless variations, shrimp scampi is a dish that belongs in every home cook’s repertoire. Whether you’re making it for a cozy dinner, a romantic date night, or a gathering with friends, this dish is sure to impress.

So grab some shrimp, heat up your skillet, and enjoy a homemade seafood masterpiece that rivals any restaurant version.

aiting

Famous Red Lobster Shrimp Scampi: A Gourmet Seafood Classic at Home

This Famous Red Lobster Shrimp Scampi is a buttery, garlicky delight that brings restaurant-style elegance to your home kitchen. Quick to prepare and bursting with rich flavors, this dish pairs beautifully with pasta, crusty bread, or a fresh salad. Perfect for weeknight dinners or special occasions!
Prep Time 10 minutes
Cook Time 15 minutes
Total Time 25 minutes
Servings: 4 servings
Course: Main Course
Cuisine: Italian-American

Ingredients
  

  • 1 pound shrimp peeled and deveined
  • 2 tablespoons olive oil
  • 4 tablespoons butter
  • 4 cloves garlic minced
  • ½ cup white cooking wine
  • 2 tablespoons lemon juice
  • 1 teaspoon Italian seasoning
  • ¼ cup Parmesan cheese grated
  • Salt and black pepper to taste
  • Fresh parsley chopped (for garnish)

Method
 

  1. Sauté the Shrimp: Heat olive oil in a large skillet over medium heat. Add shrimp and cook for 2-3 minutes per side until pink and opaque. Remove from the skillet and set aside.
  2. Build the Sauce: In the same skillet, melt butter over medium-low heat. Add minced garlic and sauté until fragrant, about 1 minute.
  3. Deglaze & Reduce: Stir in white wine and lemon juice, allowing the sauce to reduce by half for a concentrated flavor.
  4. Combine & Season: Return the cooked shrimp to the skillet and toss with Italian seasoning, salt, and black pepper. Simmer for 1-2 minutes.
  5. Final Touches: Sprinkle Parmesan cheese over the shrimp and gently mix. Garnish with fresh parsley before serving.

Notes

  • For a thicker sauce, add a tablespoon of heavy cream.
  • Adjust garlic and lemon juice to taste for a more robust flavor.
  • Serve over pasta, rice, or alongside crusty bread to soak up the delicious sauce.
  • Leftovers can be stored in an airtight container in the fridge for up to 2 days.


Sautéed Mushrooms with Spinach: A Simple Yet Sophisticated Dish

Some dishes strike the perfect balance between simplicity and elegance, and sautéed mushrooms with spinach is one of them. Whether served as a side dish, incorporated into a hearty meal, or used as a topping for pasta, grains, or proteins, this dish delivers bold flavors, rich textures, and a wealth of nutrients in just a few minutes.

Mushrooms bring earthy umami to the dish, while fresh spinach adds vibrancy and nutrition. The two ingredients complement each other beautifully, creating a savory, garlicky, and slightly citrusy dish that enhances any meal.

This article explores everything you need to know about sautéed mushrooms with spinach, including expert cooking tips, variations, serving suggestions, and frequently asked questions.

Why This Dish Deserves a Spot on Your Table

1. Quick and Effortless

This dish comes together in under 30 minutes, making it perfect for busy weeknights or last-minute meal additions.

2. Packed with Nutrients

  • Mushrooms are rich in B vitamins, selenium, and antioxidants.
  • Spinach provides vitamin A, C, and K, along with iron and fiber.
  • Garlic supports immune health and enhances the dish’s flavor without adding extra calories.

3. Versatile and Adaptable

This dish works as:

  • A side dish for meats, fish, or tofu.
  • A topping for pasta, rice, or quinoa.
  • A filling for omelets, wraps, or crepes.

4. Budget-Friendly and Readily Available

With simple, everyday ingredients, this dish is easy to make without an expensive grocery list.

Pro Tips for the Best Sautéed Mushrooms and Spinach

Even though this dish is simple, a few techniques can elevate its flavors and texture.

1. Use a Large Skillet

A wide skillet allows the mushrooms to spread out in a single layer, ensuring they brown properly instead of steaming. If mushrooms are overcrowded, they release too much moisture and become soggy.

2. Sauté Mushrooms First for Maximum Flavor

Mushrooms contain a high water content, so they need time to cook down and develop a golden-brown crust before adding spinach. This step intensifies their umami-rich flavor.

3. Keep the Heat at Medium-High

Cooking mushrooms over medium-high heat helps them caramelize and enhances their deep, meaty flavor. Lower heat can make them release water too quickly, leading to a softer texture.

4. Add Garlic at the Right Time

Garlic should be added towards the end of cooking, just before the spinach. This prevents it from burning and turning bitter.

5. Balance Flavors with a Splash of Lemon Juice

A touch of fresh lemon juice or vinegar brightens the dish and cuts through the richness of the mushrooms.

6. Adjust Seasoning to Taste

Salt and pepper are essential, but feel free to enhance the dish with crushed red pepper flakes for heat or grated Parmesan for extra umami.

Creative Variations to Try

One of the best things about this dish is its adaptability. Here are some creative ways to customize it:

1. Creamy Mushroom and Spinach

For a richer variation, stir in a splash of heavy cream, crème fraîche, or coconut milk just before serving. This creates a luxurious, velvety sauce.

2. Spicy Garlic Mushroom and Spinach

Add crushed red pepper flakes or diced chili peppers for a fiery kick. Pair it with grilled meats or roasted vegetables for extra warmth.

3. Parmesan Mushroom and Spinach

A sprinkle of grated Parmesan cheese enhances the umami depth, making this dish an excellent topping for pasta or risotto.

4. Mediterranean-Style Sautéed Mushrooms and Spinach

Toss in sun-dried tomatoes, olives, or feta cheese for a Mediterranean twist. Serve with grilled chicken or lamb.

5. Asian-Inspired Mushroom and Spinach Stir-Fry

For an Asian twist, sauté the mushrooms with sesame oil and soy sauce, then finish with toasted sesame seeds and green onions.

6. Protein-Packed Mushroom and Spinach

Stir in grilled chicken, shrimp, chickpeas, or tofu for a more substantial meal.

Serving Suggestions: How to Pair This Dish

Sautéed mushrooms with spinach pairs beautifully with a variety of meals. Here are some serving ideas:

1. As a Side Dish

  • Serve alongside grilled steak, roasted chicken, or seared salmon.
  • Pair with garlic mashed potatoes or polenta for a comforting meal.

2. Over Grains or Pasta

  • Toss with quinoa, couscous, or farro for a grain-based bowl.
  • Mix with pasta and a drizzle of olive oil or butter for a simple yet satisfying dish.

3. As a Topping

  • Use as a topping for toast, crostini, or bruschetta.
  • Spoon over risotto, baked potatoes, or cauliflower mash.

4. In Breakfast Dishes

  • Fold into an omelet, frittata, or scrambled eggs.
  • Add to a breakfast hash with roasted sweet potatoes.

A Simple Yet Flavorful Delight: Ingredients You’ll Need

  • Mushrooms: Cremini, button, or a mix for a hearty and savory bite.
  • Fresh Spinach: Nutrient-dense greens that wilt beautifully into the dish.
  • Olive Oil: Adds a smooth richness to the sauté.
  • Garlic: Brings aromatic depth and a bold punch of flavor.
  • Lemon Juice: A splash of citrus brightness to balance the earthiness.
  • Salt & Pepper: Essential seasonings to enhance the natural flavors.
  • Optional Garnish: Fresh parsley or red pepper flakes for a finishing touch.

From Skillet to Plate: Directions

  1. Prepare the Ingredients: Clean and slice the mushrooms, wash the spinach, mince the garlic, and squeeze fresh lemon juice.
  2. Sauté the Mushrooms: Cook in olive oil over medium heat until golden brown, allowing them to release moisture and caramelize.
  3. Add the Garlic: Stir in minced garlic, cooking briefly to infuse its flavor without burning.
  4. Incorporate the Spinach: Toss in the spinach, letting it wilt into the mushrooms.
  5. Season & Finish: Add salt, pepper, and lemon juice, tossing everything together for a final burst of freshness.
  6. Serve Immediately: Enjoy hot as a side dish or use it as a topping for grains, pasta, or proteins.

Nutritional Highlights: A Healthy and Wholesome Choice

  • Calories: ~100 per serving
  • Protein: 3g
  • Carbohydrates: 6g
  • Fiber: 2g
  • Fat: 7g
  • Sodium: 150mg

This quick, nutrient-packed dish is perfect for weeknight dinners, meal prep, or an elegant yet effortless addition to any meal. Enjoy the rich umami of mushrooms, the freshness of spinach, and the brightness of lemon in every bite!

Frequently Asked Questions (FAQs)

1. Can I Use Frozen Spinach?

Yes, but thaw and drain it well before adding to prevent excess moisture. Fresh spinach gives the best texture, but frozen works in a pinch.

2. How Do I Keep Mushrooms from Getting Soggy?

  • Use a large pan to avoid overcrowding.
  • Cook over medium-high heat to allow moisture to evaporate.
  • Don’t stir too often—let mushrooms develop a crust before moving them.

3. What’s the Best Type of Mushroom for This Dish?

Cremini, button, shiitake, or oyster mushrooms all work well. Cremini mushrooms offer a rich, meaty flavor, while shiitake mushrooms add a more pronounced umami taste.

4. Can I Make This Ahead of Time?

Yes! This dish stores well for 2-3 days in the refrigerator. Reheat gently on the stovetop with a splash of olive oil or butter.

5. How Can I Make It Vegan?

The base recipe is naturally vegan! If adding cheese, use nutritional yeast or a dairy-free Parmesan alternative.

6. Can I Freeze This Dish?

Freezing isn’t recommended, as spinach can become mushy. However, if necessary, store in an airtight container and freeze for up to 1 month.

7. What’s a Good Substitute for Lemon Juice?

If you don’t have lemon juice, try using:

  • Balsamic vinegar for a slightly sweet depth.
  • Apple cider vinegar for a tangy kick.
  • White wine vinegar for a lighter acidity.

Conclusion: A Dish That Belongs in Every Kitchen

Sautéed mushrooms with spinach is the perfect dish for those who love bold, earthy flavors and nutritious ingredients. Whether you serve it as a quick side, a topping, or a main course, this dish brings comfort, versatility, and elegance to your table.

With endless variations, minimal cooking time, and simple ingredients, it’s a go-to recipe for home cooks looking for something healthy, delicious, and easy to prepare.

So the next time you need a flavorful, nutrient-packed dish, give this recipe a try—you’ll love how effortlessly it fits into any meal.

aiting

Sautéed Mushrooms with Spinach: A Simple Yet Sophisticated Dish

This quick and flavorful sautéed mushroom and spinach dish combines the rich umami of mushrooms with the freshness of spinach and a splash of citrus. Perfect as a side dish, topping for grains or proteins, or a nutritious addition to any meal, it’s a simple yet elegant way to bring depth and vibrancy to your plate.
Prep Time 5 minutes
Cook Time 10 minutes
Total Time 15 minutes
Servings: 2 servings
Course: Side Dish
Cuisine: Mediterranean-Inspired

Ingredients
  

  • 2 cups mushrooms cremini, button, or a mix, sliced
  • 2 cups fresh spinach washed
  • 1 tablespoon olive oil
  • 2 cloves garlic minced
  • 1 tablespoon lemon juice
  • Salt and black pepper to taste
  • Optional garnish: Fresh parsley or red pepper flakes

Method
 

  1. Prepare the Ingredients: Clean and slice the mushrooms, wash the spinach, mince the garlic, and squeeze fresh lemon juice.
  2. Sauté the Mushrooms: Heat olive oil in a skillet over medium heat. Add mushrooms and cook until golden brown, stirring occasionally to allow moisture to release and caramelization to occur.
  3. Add the Garlic: Stir in the minced garlic and cook for about 30 seconds until fragrant, being careful not to burn it.
  4. Incorporate the Spinach: Add the spinach to the skillet and stir gently until wilted, about 1-2 minutes.
  5. Season & Finish: Add salt, black pepper, and lemon juice, tossing everything together for a final burst of freshness.
  6. Serve Immediately: Enjoy hot as a side dish or use it as a topping for grains, pasta, or proteins.

Notes

  • For extra flavor, add a pinch of red pepper flakes or a sprinkle of grated Parmesan cheese before serving.
  • Swap olive oil for butter for a richer taste.
  • Store leftovers in an airtight container and reheat gently on the stovetop.


Thai Red Curry Noodle Soup: A Flavorful Escape in a Bowl

Few dishes can transport you to another world like Thai Red Curry Noodle Soup. With its creamy coconut broth, bold red curry paste, tender chicken, and silky rice noodles, this dish is the perfect balance of heat, sweetness, and umami. Whether you’re craving comfort food or looking to expand your weeknight dinner options, this soup delivers restaurant-quality flavors with minimal effort.

Packed with aromatic ingredients like garlic, ginger, lemongrass, and fresh herbs, this dish is as nourishing as it is satisfying. It’s also incredibly versatile—you can swap the protein, adjust the spice level, and add extra veggies to make it your own.

Let’s dive into what makes this Thai-inspired soup so irresistible, along with expert cooking tips, variations, and frequently asked questions to help you master it in your own kitchen.

Why You’ll Love This Thai Red Curry Noodle Soup

1. A One-Pot Wonder

This soup comes together in a single pot, making cleanup a breeze. The broth develops deep flavor in a short amount of time, thanks to the magic of red curry paste and coconut milk.

2. Creamy, Spicy, and Comforting

Thai cuisine is all about harmony in flavors, and this soup is a perfect example. The richness of coconut milk balances the heat from the red curry paste, while the lime juice and fish sauce add brightness.

3. Quick and Easy to Make

This dish can be on the table in under an hour, making it ideal for busy weeknights. Plus, you can prep ingredients ahead of time for an even faster cooking experience.

4. Customizable to Your Taste

  • Spice Level: Add more or less curry paste to control the heat.
  • Protein Choices: Swap chicken for shrimp, tofu, or even thinly sliced beef.
  • Noodle Options: Use rice noodles, ramen, udon, or even zucchini noodles for a low-carb twist.
  • Extra Veggies: Bok choy, mushrooms, bell peppers, and carrots all work beautifully in this dish.

Secrets to Making the Perfect Thai Red Curry Noodle Soup

Even though this soup is simple to make, a few key techniques will help you achieve authentic Thai flavors at home.

1. Use High-Quality Red Curry Paste

Red curry paste is the heart of this dish, so choosing a good brand is crucial. Some of the best options include:

  • Mae Ploy: Rich, deep flavor with a bit more heat.
  • Thai Kitchen: A milder option that’s more widely available.
  • Maesri: A well-balanced paste with traditional Thai spices.

If you prefer a milder soup, start with less paste and adjust as needed. If you love spice, consider adding an extra teaspoon of curry paste or a sliced Thai chili.

2. Use Full-Fat Coconut Milk

Full-fat coconut milk creates the silky, creamy texture that makes this soup so comforting. While you can use lite coconut milk, it won’t be as rich.

3. Sauté the Curry Paste for Maximum Flavor

To get the most out of the red curry paste, always sauté it in oil before adding the broth. This deepens the flavors and brings out the aromatic spices.

4. Cook Noodles Separately for the Best Texture

If you’re making a big batch, consider cooking the noodles separately and adding them to each bowl before serving. This prevents them from soaking up too much broth and becoming mushy.

5. Balance the Flavors Like a Pro

Thai cuisine is all about balance. To get the perfect flavor:

  • Too spicy? Add a splash of coconut milk or a teaspoon of sugar.
  • Too sweet? A little extra lime juice or fish sauce will balance it out.
  • Missing depth? Fish sauce adds umami, while soy sauce or tamari can be used as a substitute.

Serving Ideas: How to Elevate Your Bowl

This soup is delicious on its own, but pairing it with the right sides and toppings can take it to the next level.

Topping Ideas

  • Fresh Herbs: Chopped cilantro, Thai basil, or green onions add brightness.
  • Lime Wedges: A squeeze of lime enhances the soup’s depth.
  • Sliced Red Chili: For those who love an extra kick.
  • Crushed Peanuts or Cashews: Adds crunch and nuttiness.
  • Crispy Shallots: Provides a slightly sweet and crunchy contrast.

What to Serve on the Side

  • Thai Spring Rolls – A light and crispy appetizer.
  • Chicken Satay with Peanut Sauce – A protein-packed pairing.
  • Garlic Fried Rice – A hearty side that complements the soup.
  • Mango Sticky Rice – A sweet and refreshing dessert to complete the meal.

A Bowl of Comfort: Thai Red Curry Noodle Soup

Aromatic Bliss: Ingredients You’ll Need

  • Chicken Breast: Tender, protein-packed bites that soak up the curry flavors.
  • Red Curry Paste: The heart of the dish, providing warmth and depth.
  • Coconut Milk: Adds a creamy, luscious texture to the broth.
  • Fish Sauce & Brown Sugar: Balances salty, sweet, and umami flavors.
  • Rice Noodles: A soft and slurp-worthy addition that completes the dish.
  • Garlic, Ginger, and Bell Peppers: A fragrant blend of aromatics and fresh crunch.
  • Fresh Herbs & Lime Juice: Cilantro, basil, and lime add a burst of freshness.

From Pot to Bowl: Directions

  1. Sear the Chicken: Cook seasoned chicken pieces until golden brown.
  2. Sauté the Aromatics: Stir in garlic, bell pepper, onion, curry paste, and ginger.
  3. Create the Broth: Pour in chicken broth and coconut milk, letting flavors meld.
  4. Simmer to Perfection: Add the chicken back in and let it cook through.
  5. Cook the Noodles: Stir in rice noodles, fish sauce, and brown sugar until tender.
  6. Finish & Serve: Garnish with fresh herbs, lime juice, and green onions.

Nutritional Breakdown: A Wholesome Indulgence

  • Calories: ~350 per serving
  • Protein: 28g
  • Carbohydrates: 30g
  • Fat: 15g
  • Sodium: Moderate (adjust with low-sodium broth if needed)

This Thai Red Curry Noodle Soup is an explosion of flavor, warmth, and texture, making it the ultimate dish for cozy nights or quick weeknight dinners.

Frequently Asked Questions (FAQs)

1. Can I Make This Soup Vegetarian?

Yes! Simply swap out the chicken for tofu or mushrooms, and use vegetable broth instead of chicken broth. You can also replace fish sauce with soy sauce or coconut aminos for a plant-based version.

2. How Spicy Is This Soup?

The spice level depends on the brand and amount of red curry paste you use. If you’re sensitive to spice, start with one tablespoon of curry paste and increase gradually. If you love heat, add Thai chilies or extra curry paste.

3. Can I Store and Reheat This Soup?

Yes, but for the best texture:

  • Store the broth and noodles separately to prevent the noodles from becoming soggy.
  • Reheat the broth on the stove and add fresh noodles when serving.
  • The soup stays fresh in the refrigerator for 1-2 days.

4. Can I Freeze This Soup?

Coconut milk tends to separate when frozen, so freezing isn’t recommended. However, you can freeze the broth before adding coconut milk and simply stir in fresh coconut milk when reheating.

5. What’s a Good Substitute for Fish Sauce?

If you don’t have fish sauce, you can use:

  • Soy sauce or tamari for a similar salty, umami flavor.
  • Worcestershire sauce (though it has a slightly different taste).
  • Miso paste for a depth of umami.

6. Can I Use a Different Type of Noodle?

Yes! While rice noodles are traditional, you can use:

  • Udon noodles for a thicker, chewier bite.
  • Vermicelli noodles for a delicate texture.
  • Zucchini noodles for a low-carb alternative.

7. What Protein Works Best?

This soup is highly versatile—you can swap chicken for shrimp, tofu, or even thinly sliced beef. If using shrimp, add it towards the end to avoid overcooking.

Conclusion: A Soup That Feels Like a Hug in a Bowl

Thai Red Curry Noodle Soup is more than just a meal—it’s a sensory experience. Every spoonful is filled with aromatic spices, creamy coconut, and satisfying noodles, making it the ultimate comfort food.

Whether you’re making it for a cozy night in or impressing guests, this dish is guaranteed to become a go-to recipe in your kitchen. Plus, with its customizable ingredients and easy preparation, you can tailor it to your own taste and enjoy it all year round.

So grab your favorite curry paste, a can of coconut milk, and a handful of fresh herbs, and bring the flavors of Thailand to your table—one comforting bowl at a time.

aiting

Thai Red Curry Noodle Soup: A Flavorful Escape in a Bowl

This Thai Red Curry Noodle Soup is a bold and comforting dish packed with creamy coconut milk, fragrant aromatics, and slurp-worthy rice noodles. Infused with red curry paste, fresh herbs, and a balance of sweet and savory flavors, it’s the perfect meal for cozy nights or a quick, flavorful dinner.
Prep Time 10 minutes
Cook Time 25 minutes
Total Time 35 minutes
Servings: 4 servings
Course: Soup
Cuisine: Thai

Ingredients
  

  • 2 boneless skinless chicken breasts, cut into bite-sized pieces
  • 2 tablespoons red curry paste
  • 1 can 14 oz coconut milk
  • 4 cups chicken broth
  • 1 tablespoon fish sauce
  • 1 tablespoon brown sugar
  • 8 oz rice noodles
  • 1 bell pepper thinly sliced
  • 3 cloves garlic minced
  • 1 teaspoon ginger grated
  • 1 small onion sliced
  • 1 tablespoon vegetable oil
  • Juice of 1 lime
  • Fresh cilantro and basil for garnish
  • Green onions sliced, for garnish
  • Salt and black pepper to taste

Method
 

  1. Sear the Chicken: Heat vegetable oil in a large pot over medium heat. Add the chicken pieces, season with salt and black pepper, and cook until golden brown. Remove from the pot and set aside.
  2. Sauté the Aromatics: In the same pot, add garlic, ginger, bell pepper, and onion. Stir in red curry paste and cook for 1-2 minutes until fragrant.
  3. Create the Broth: Pour in chicken broth and coconut milk. Stir in fish sauce and brown sugar. Let it simmer for 10 minutes, allowing the flavors to meld.
  4. Simmer to Perfection: Return the cooked chicken to the pot and let it cook through for another 5 minutes.
  5. Cook the Noodles: Add rice noodles to the soup and simmer until tender, about 3-5 minutes.
  6. Finish & Serve: Remove from heat and stir in lime juice. Garnish with fresh cilantro, basil, and green onions before serving.

Notes

  • Adjust the spice level by adding more or less red curry paste.
  • Substitute shrimp or tofu for a different protein option.
  • For a lighter version, use low-fat coconut milk.
  • Leftovers can be stored in an airtight container for up to 3 days; reheat gently to avoid overcooking the noodles.

Air Fryer Chicken Bulgogi: A Flavor-Packed Korean Delight

Korean cuisine is known for its bold flavors, and Chicken Bulgogi is no exception. This dish, also called Dak Bulgogi, is a mouthwatering combination of savory, sweet, smoky, and slightly spicy elements, creating a perfectly balanced marinade that coats juicy, tender chicken.

Traditionally, bulgogi is made with beef and cooked over an open flame, but this chicken version is just as flavorful and incredibly easy to make. What makes this recipe even better? It’s designed for the air fryer, meaning you can achieve crispy, caramelized edges and tender meat in a fraction of the time—without the need for a grill.

Whether you’re looking for a quick weeknight dinner, a meal-prep-friendly dish, or an impressive meal to share with friends, Air Fryer Chicken Bulgogi is a guaranteed crowd-pleaser. Let’s explore the secrets to making this dish perfectly every time, along with serving ideas, expert tips, and answers to common questions.

Why This Recipe is a Game-Changer

1. Authentic Korean Flavors, Made Easy

Bulgogi marinade is one of the most iconic elements of Korean cuisine. The combination of soy sauce, brown sugar, sesame oil, garlic, and ginger creates an explosion of flavor, while ingredients like Korean pear and mirin add a natural sweetness and tenderize the meat.

2. Perfectly Crispy, Yet Juicy

Cooking chicken in an air fryer ensures the best of both worlds—crispy, caramelized edges and juicy, tender meat. The circulating hot air mimics the effect of grilling, creating the slightly charred flavors that make bulgogi irresistible.

3. No Grill? No Problem!

One of the best things about this recipe is that you don’t need a traditional grill to achieve that signature bulgogi texture. While grilling is the classic method, the air fryer offers convenience, speed, and easy cleanup without sacrificing flavor.

4. Versatile and Customizable

This dish is incredibly adaptable—you can make it mild or spicy, serve it with rice or in lettuce wraps, and even use different proteins like pork or tofu.

Expert Tips for the Best Chicken Bulgogi

Even though this dish is simple, a few key techniques will take your Chicken Bulgogi to the next level.

1. Marinate for Maximum Flavor

The longer you let the chicken marinate, the more flavorful and tender it will be. A minimum of one hour is recommended, but for the best results, marinate it overnight. However, avoid marinating for more than 24 hours, as the meat can become mushy.

2. Choose the Right Cut of Chicken

Boneless, skinless chicken thighs are the best choice for this recipe because they stay juicy and tender during cooking. If you prefer chicken breast, be sure not to overcook it, as it can dry out faster.

3. Don’t Skip the Pear

Korean pear (or a substitute like kiwi) plays an important role in this marinade—not only does it add a subtle sweetness, but it also contains natural enzymes that tenderize the chicken, giving it an unbelievably soft texture.

4. Flip the Chicken for Even Cooking

If using an air fryer, flip the chicken halfway through cooking to ensure even caramelization on both sides.

5. Want It Spicier? Add Gochujang

For a spicy kick, mix a tablespoon of gochujang (Korean fermented chili paste) into the marinade. It deepens the flavor and adds a bit of heat, making the dish even more irresistible.

6. Let It Rest Before Slicing

After cooking, let the chicken rest for a few minutes before slicing. This allows the juices to redistribute, keeping the meat moist and flavorful.

Creative Ways to Serve Chicken Bulgogi

This dish is incredibly versatile and can be served in a variety of ways. Here are some ideas to make the most of it:

1. Classic Rice Bowl

The simplest and most traditional way to serve Chicken Bulgogi is over a bowl of steamed white rice or Korean purple rice. Add kimchi, pickled radish, and a soft-boiled egg for a well-rounded meal.

2. Lettuce Wraps

For a low-carb, fresh option, serve the bulgogi in crisp lettuce leaves (such as romaine or butter lettuce). Add some sliced cucumbers, carrots, and a drizzle of spicy gochujang sauce for an extra punch.

3. Bulgogi Tacos

Give this dish a fusion twist by using it as a taco filling. Warm up some tortillas, add the chicken, and top with sliced green onions, sesame seeds, and a squeeze of lime.

4. Meal Prep Power Bowl

This dish is perfect for meal prep—store portions of chicken in containers with quinoa, roasted vegetables, and a sesame dressing for a balanced, protein-packed lunch.

5. Over Noodles

Serve the chicken over stir-fried noodles or ramen for a heartier option. Add stir-fried bok choy, mushrooms, and a sprinkle of sesame seeds for extra flavor.

A Fusion of Sweet, Savory, and Smoky: Ingredients You’ll Need

  • Chicken Thighs: Juicy and tender, the perfect cut for absorbing bold flavors.
  • Korean Pear: Naturally tenderizes the meat while adding a hint of sweetness.
  • Soy Sauce & Brown Sugar: The umami-rich base that balances sweet and salty flavors.
  • Mirin & Sesame Oil: Enhances depth with a subtle nutty aroma.
  • Garlic & Ginger: Essential aromatics that add warmth and complexity.
  • Gochujang (Optional): A fermented chili paste that brings an irresistible kick.

From Marination to Crispy Perfection: Directions

  1. Blend the Bulgogi Marinade: Combine all ingredients in a blender for a smooth, flavor-packed mixture.
  2. Marinate the Chicken: Coat the chicken in the marinade and let it absorb the flavors for at least an hour (overnight for the best taste).
  3. Choose Your Cooking Method:
    • Air Fryer: Cook at 385°F for 25 minutes, flipping for an even caramelized crust.
    • Pan-Fry: Sear on medium-high heat for about 7 minutes per side until golden brown.
    • Grill: Cook on low heat for 8 minutes per side, ensuring a smoky finish.
  4. Serve and Enjoy: Pair with rice, lettuce wraps, or fresh vegetables for a well-rounded meal.

Nutritional Breakdown: A Balanced Delight

  • Calories: ~300 per serving
  • Protein: 25g
  • Carbohydrates: 12g
  • Fat: 15g
  • Sodium: Moderate (adjust with low-sodium soy sauce if needed)

This air fryer Chicken Bulgogi is a perfect blend of ease, nutrition, and bold Korean flavors, making it a go-to dish for weeknights, meal prep, or even summer BBQs.

Frequently Asked Questions (FAQs)

1. Can I make this recipe without an air fryer?

Absolutely! While the air fryer creates a crispier texture, you can also pan-fry or grill the chicken. For pan-frying, cook it over medium-high heat for about 7 minutes per side, and for grilling, cook on low for 8 minutes per side until fully cooked.

2. What if I don’t have Korean pear?

No problem! You can substitute a ripe pear, apple, or even a small amount of kiwi. These fruits help tenderize the meat and add a touch of sweetness.

3. Can I use chicken breast instead of thighs?

Yes, but keep in mind that chicken breasts can dry out more easily. If using chicken breast, try pounding them to an even thickness before marinating and cooking.

4. How long does Chicken Bulgogi last in the fridge?

Leftovers can be stored in an airtight container in the fridge for up to 3 days. For longer storage, you can freeze the marinated uncooked chicken for up to 3 months.

5. Can I double the recipe?

Yes! You can easily double or triple the ingredients to make a larger batch. Just be sure to cook in batches to prevent overcrowding in the air fryer.

6. What sides go well with Chicken Bulgogi?

Some great side dishes include:

  • Kimchi – Fermented Korean cabbage with a spicy kick
  • Asian coleslaw – A fresh and crunchy contrast
  • Garlic fried rice – Adds extra depth to the meal
  • Pickled radishes – A tangy and refreshing addition
  • Sesame cucumber salad – Light and cooling

7. Can I make it gluten-free?

Yes! Simply swap out the soy sauce for tamari or coconut aminos to make it gluten-free.

8. How do I reheat Chicken Bulgogi?

To reheat:

  • Air fryer: 5 minutes at 350°F
  • Microwave: 2 minutes
  • Stovetop: Sauté on medium heat until warmed through

Conclusion: A Must-Try Korean Favorite

Air Fryer Chicken Bulgogi is proof that big flavors don’t require complicated techniques. This recipe delivers the bold, savory-sweet flavors of traditional Korean barbecue while keeping the process simple, quick, and fuss-free.

With its tender texture, rich marinade, and versatile serving options, this dish is bound to become a new staple in your kitchen. Whether you’re enjoying it as a rice bowl, lettuce wrap, or taco filling, it’s a meal that’s both satisfying and packed with flavor.

So the next time you’re craving a Korean-inspired dish that’s easy to make and full of deliciousness, give this Air Fryer Chicken Bulgogi a try—you won’t be disappointed!

aiting

Air Fryer Chicken Bulgogi: A Flavor-Packed Korean Delight

This Air Fryer Chicken Bulgogi is a delicious fusion of sweet, savory, and smoky flavors. Marinated in a rich blend of soy sauce, brown sugar, and aromatic spices, this Korean-inspired dish delivers juicy, caramelized perfection with minimal effort. Perfect for weeknight dinners, meal prep, or summer BBQs, it pairs beautifully with rice, lettuce wraps, or fresh vegetables.
Prep Time 10 minutes
Cook Time 25 minutes
Total Time 35 minutes
Servings: 4 servings
Course: Main Course
Cuisine: Korean

Ingredients
  

  • 1.5 lbs chicken thighs boneless and skinless
  • ½ Korean pear grated
  • ¼ cup soy sauce
  • 2 tablespoons brown sugar
  • 1 tablespoon mirin
  • 1 tablespoon sesame oil
  • 3 cloves garlic minced
  • 1 teaspoon ginger grated
  • 1 tablespoon gochujang optional, for spice
  • 1 teaspoon sesame seeds for garnish
  • 2 green onions chopped (for garnish)

Method
 

  1. Prepare the Marinade: In a blender or mixing bowl, combine grated pear, soy sauce, brown sugar, mirin, sesame oil, garlic, ginger, and gochujang. Blend or mix well until smooth.
  2. Marinate the Chicken: Place chicken thighs in a bowl or zip-top bag. Pour marinade over the chicken, ensuring full coverage. Let it marinate for at least 1 hour, preferably overnight for the best flavor.
Cooking Methods:
  1. Air Fryer: Preheat to 385°F (195°C). Arrange marinated chicken in a single layer and cook for 25 minutes, flipping halfway for even caramelization.
  2. Pan-Fry: Heat a skillet over medium-high heat. Sear the chicken for about 7 minutes per side until golden brown and cooked through.
  3. Grill: Preheat grill to low heat. Cook chicken for 8 minutes per side, ensuring a smoky, slightly charred finish.
  4. Serve and Enjoy: Slice the chicken and garnish with sesame seeds and green onions. Serve with rice, lettuce wraps, or fresh veggies.
  5.  

Notes

  • For a healthier option, use low-sodium soy sauce.
  • Korean pear can be substituted with apple or a splash of pineapple juice.
  • Adjust spice levels by increasing or omitting gochujang.
  • Leftovers store well in an airtight container for up to 3 days.


Greek Chicken and Lemon Rice: A Mediterranean Delight in One Pot

Greek cuisine is known for its fresh, vibrant flavors, and this Greek Chicken and Lemon Rice recipe captures that essence in a simple, one-pot meal. Whether you’re craving a taste of the Mediterranean or looking for a quick and wholesome weeknight dinner, this dish delivers on all fronts.

With juicy, seasoned chicken, aromatic jasmine rice, bright lemon, fresh vegetables, and tangy feta cheese, every bite brings a perfect balance of flavors. The best part? It all comes together in just 30 minutes, making it an excellent choice for busy families or meal preppers.

In this guide, we’ll dive deep into what makes this dish special, how you can customize it to your tastes, and answer common questions about preparation, storage, and ingredient swaps.

Why This Dish Deserves a Spot on Your Table

1. A One-Pot Wonder

Cooking an entire meal in one pan is a lifesaver on busy nights. With fewer dishes to clean, you get to enjoy a delicious homemade meal without the hassle of extra pots and pans. Plus, cooking the chicken, rice, and vegetables together allows all the flavors to meld beautifully.

2. Bold Mediterranean Flavors

Greek cuisine is famous for its bright and fresh ingredients—lemon juice, garlic, olive oil, and herbs like oregano bring out the best in simple ingredients. The tangy feta cheese adds creaminess, while chickpeas and spinach provide extra texture and nutrition.

3. Nutritious and Balanced

This dish isn’t just delicious; it’s also packed with nutrients. Chicken provides lean protein, chickpeas add fiber, and fresh spinach boosts vitamins and minerals. Lemon juice not only enhances flavor but also offers a dose of vitamin C. If you’re looking for a meal that’s both satisfying and nourishing, this one checks all the boxes.

4. Perfect for Meal Prep

If you like having leftovers for quick meals, this dish is an excellent choice. The flavors deepen as it sits, making it even tastier the next day. Store it in the fridge for up to four days or freeze portions for future easy lunches and dinners.

How to Make It Your Own: Customization Ideas

One of the best things about Greek Chicken and Lemon Rice is its versatility. You can switch up ingredients based on your preferences or dietary needs while still maintaining the dish’s Mediterranean charm.

1. Swap Your Protein

  • Chicken Thighs vs. Breasts: The original recipe calls for chicken thighs because they stay moist and flavorful. However, if you prefer leaner meat, chicken breasts work well—just be careful not to overcook them.
  • Seafood Twist: For a coastal Greek feel, swap the chicken for shrimp or salmon, adding them toward the end of cooking to prevent overcooking.
  • Plant-Based Option: Replace the chicken with extra chickpeas, tofu, or tempeh for a vegetarian-friendly version.

2. Experiment with Rice or Grains

  • Basmati or Brown Rice: Basmati rice adds a subtle fragrance, while brown rice offers extra fiber and a nuttier flavor. Keep in mind that brown rice requires a longer cooking time.
  • Orzo or Couscous: For a Greek-inspired variation, try orzo pasta or couscous instead of rice for a different texture and a quicker cooking process.

3. Boost the Veggies

  • Add More Greens: While spinach is a staple in this dish, you can also use kale, Swiss chard, or arugula for added nutrition.
  • Roasted Peppers or Zucchini: If you want even more color, throw in some roasted bell peppers, zucchini, or artichokes for extra Mediterranean flair.

4. Spice It Up

If you love heat, consider adding extra red pepper flakes, a pinch of cayenne pepper, or even a drizzle of harissa for a spicy kick.

Essential Ingredients for a Flavorful Dish

  • 1.5 pounds boneless, skinless chicken thighs
  • 3 tablespoons olive oil, divided
  • 2 teaspoons dried oregano, divided
  • 1 teaspoon paprika
  • ½ teaspoon salt, plus more to taste
  • ¼ teaspoon red pepper flakes
  • 8 ounces grape tomatoes, halved
  • 5 cloves garlic, finely chopped
  • 5 ounces fresh spinach, roughly chopped
  • 4 tablespoons fresh lemon juice, divided
  • 2 cups cooked jasmine rice
  • 1 can (15 ounces) chickpeas, drained
  • 6 ounces feta cheese, cut into small cubes
  • Fresh oregano sprigs for garnish

Step-by-Step Guide to Mediterranean Perfection

1. Season and Sear the Chicken

In a small bowl, mix 1 teaspoon oregano, paprika, salt, and red pepper flakes. Coat both sides of the chicken thighs with the seasoning. Heat 2 tablespoons olive oil in a large skillet over medium heat. Cook the chicken for about 5 minutes per side until golden and cooked through (internal temp 165°F). Remove from the pan and set aside.

2. Build the Mediterranean Base

In the same skillet, add half of the tomatoes, chopped garlic, 1 teaspoon oregano, and a pinch of salt. Cook for about 2 minutes until the tomatoes soften. Add spinach and cook until wilted.

3. Infuse the Rice with Flavor

Stir in the cooked jasmine rice, chickpeas, 3 tablespoons lemon juice, and the remaining tomatoes. Cook for a couple of minutes, stirring occasionally, until everything is well combined and heated through.

4. Add the Creamy Feta Mix

In a small bowl, combine feta cubes with 1 tablespoon olive oil, 1 tablespoon lemon juice, and a sprinkle of oregano. Fold half of this mixture into the rice for a creamy, tangy boost.

5. Finish and Serve

Return the seared chicken to the pan, nestling it into the rice mixture. Top with the remaining feta mixture and garnish with fresh oregano. Adjust seasoning as needed, then serve hot.

Nutritional Breakdown: A Balanced Mediterranean Meal

  • Calories per Serving: 755 kcal
  • Total Fat: 34g
  • Carbohydrates: 62g
  • Protein: 53g

This dish is a wholesome combination of lean protein, fiber-rich chickpeas, and vibrant vegetables, making it a perfect healthy weeknight meal. Enjoy the bold Mediterranean flavors in every bite!

Common Questions About Greek Chicken and Lemon Rice

1. Can I Make This Recipe Ahead of Time?

Absolutely! This dish is perfect for meal prep. You can cook a batch, store it in the fridge for up to four days, and reheat portions as needed. To refresh the flavors, add a squeeze of lemon juice before serving.

2. What Can I Serve With This Dish?

While this meal is complete on its own, you can enhance the experience by serving it with:

  • A Crisp Greek Salad – Fresh cucumbers, tomatoes, red onions, olives, and feta dressed with olive oil and lemon juice.
  • Tzatziki Sauce – A cooling yogurt-based dip with garlic, cucumber, and dill.
  • Warm Pita Bread – Great for scooping up the rice and soaking up the flavors.

3. How Can I Make This Recipe Dairy-Free?

To make this dish dairy-free, skip the feta cheese or substitute it with a dairy-free alternative. You can also add more olives or sun-dried tomatoes to maintain a rich, tangy flavor.

4. Can I Use a Different Type of Cheese?

Feta is the traditional choice, but if you’re looking for alternatives, try:

  • Goat Cheese – A creamy, slightly tangy option.
  • Parmesan or Pecorino – Adds a salty, nutty flavor.
  • Mozzarella – For a milder taste with a bit of meltiness.

5. How Do I Store and Reheat Leftovers?

  • Refrigerator: Store leftovers in an airtight container for up to four days.
  • Freezer: Freeze portions in freezer-safe containers for up to three months.
  • Reheating: Warm it in a pan over medium heat with a splash of olive oil or lemon juice to prevent dryness. You can also microwave it in short intervals, stirring in between.

6. Can I Cook This in an Instant Pot?

Yes! To adapt this recipe for an Instant Pot, follow these steps:

  1. Sear the chicken using the sauté function.
  2. Add rice, chickpeas, tomatoes, and seasoning along with chicken broth instead of pre-cooked rice.
  3. Cook on high pressure for 6 minutes with a 10-minute natural release.
  4. Stir in fresh spinach and lemon juice at the end before serving.

7. How Do I Make It Lower in Carbs?

If you’re following a low-carb or keto-friendly diet, swap the rice for:

  • Cauliflower Rice – Keeps the dish light while absorbing the flavors.
  • Quinoa – Not low-carb, but a great high-protein alternative.

8. What’s the Secret to Juicy Chicken?

To ensure tender and juicy chicken:

  • Use thighs instead of breasts (they retain moisture better).
  • Let the chicken rest for a few minutes after cooking before slicing.
  • Sear at the right temperature – A medium-high heat ensures a golden crust without drying out the inside.

Final Thoughts: A Dish Worth Adding to Your Weekly Rotation

Greek Chicken and Lemon Rice is a perfect balance of convenience, nutrition, and bold flavors. Whether you’re cooking for a family dinner or meal prepping for the week, this one-pot meal makes it easy to enjoy a taste of the Mediterranean without spending hours in the kitchen.

The combination of lemon, garlic, feta, and fresh herbs creates an unforgettable depth of flavor, while the juicy chicken and hearty chickpeas provide satisfying protein. Plus, with endless variations, you can make this dish your own every time you cook it.

So, the next time you’re craving something fresh, flavorful, and easy to prepare, give this Greek-inspired recipe a try—you won’t be disappointed.

aiting

Greek Chicken and Lemon Rice: A Mediterranean Delight in One Pot

This Greek Chicken and Lemon Rice is a vibrant, one-pot Mediterranean wonder! Juicy, seasoned chicken thighs are nestled in a fragrant bed of lemon-infused rice, chickpeas, and fresh vegetables, then finished with creamy feta. A perfect meal for busy weeknights or weekend gatherings!
Prep Time 10 minutes
Cook Time 25 minutes
Total Time 35 minutes
Servings: 4 servings
Course: Main Course
Cuisine: Mediterranean

Ingredients
  

For the Chicken:
  • 1.5 pounds boneless skinless chicken thighs
  • 2 teaspoons dried oregano divided
  • 1 teaspoon paprika
  • ½ teaspoon salt plus more to taste
  • ¼ teaspoon red pepper flakes
  • 2 tablespoons olive oil
For the Rice & Vegetables:
  • 8 ounces grape tomatoes halved
  • 5 cloves garlic finely chopped
  • 5 ounces fresh spinach roughly chopped
  • 2 cups cooked jasmine rice
  • 1 can 15 ounces chickpeas, drained
  • 4 tablespoons fresh lemon juice divided
  • 6 ounces feta cheese cut into small cubes
  • 1 tablespoon olive oil
  • Fresh oregano sprigs for garnish

Method
 

  1. Season & Sear the Chicken – Mix 1 teaspoon oregano, paprika, salt, and red pepper flakes. Coat both sides of the chicken thighs with the seasoning. Heat 2 tablespoons olive oil in a large skillet over medium heat. Cook the chicken for about 5 minutes per side until golden and cooked through (internal temp 165°F). Remove and set aside.
  2. Build the Mediterranean Base – In the same skillet, add half of the tomatoes, chopped garlic, 1 teaspoon oregano, and a pinch of salt. Cook for 2 minutes until the tomatoes soften. Add spinach and cook until wilted.
  3. Infuse the Rice with Flavor – Stir in the cooked jasmine rice, chickpeas, 3 tablespoons lemon juice, and remaining tomatoes. Cook for 2 minutes, stirring occasionally, until well combined and heated through.
  4. Prepare the Feta Mix – In a small bowl, combine feta cubes with 1 tablespoon olive oil, 1 tablespoon lemon juice, and a sprinkle of oregano. Fold half of this mixture into the rice for extra creaminess.
  5. Finish & Serve – Return the seared chicken to the pan, nestling it into the rice mixture. Top with the remaining feta mixture and garnish with fresh oregano. Adjust seasoning as needed and serve hot.

Notes

  • Make it Dairy-Free – Omit the feta or use dairy-free cheese.
  • Add More Veggies – Try zucchini, bell peppers, or artichokes for extra nutrition.
  • Swap the Protein – Use shrimp or tofu as a delicious alternative.
  • Meal Prep Tip – Store leftovers in an airtight container for up to 3 days.