As the sun shines brighter and the days grow longer, I find myself craving something refreshing to sip on. That’s where my beloved Lemon Lavender Spritzer comes in! This delightful drink is not just a treat for the taste buds; it’s a quick solution for those busy summer days when you want to impress your loved ones without spending hours in the kitchen. With its zesty lemon flavor and a hint of floral lavender, this spritzer is the perfect way to cool down and unwind. Trust me, once you try it, you’ll be hooked!
Why You’ll Love This Lemon Lavender Spritzer
This Lemon Lavender Spritzer is a game-changer for busy moms and professionals alike. It’s incredibly easy to whip up, taking just 10 minutes from start to finish. The refreshing taste is like a mini-vacation in a glass, perfect for hot summer days. Plus, it’s a crowd-pleaser! Whether you’re hosting a gathering or enjoying a quiet evening, this drink will elevate any occasion with its delightful flavors.
Ingredients for Lemon Lavender Spritzer
Gathering the right ingredients is the first step to creating your refreshing Lemon Lavender Spritzer. Here’s what you’ll need:
Sparkling water: This bubbly base adds a delightful fizz, making your drink feel festive and refreshing.
Fresh lemon juice: The star of the show! Freshly squeezed lemon juice brings a bright, tangy flavor that perfectly balances the sweetness of the lavender.
Lavender syrup: This sweet, floral syrup is what gives the spritzer its unique character. You can find it at specialty stores or make your own at home!
Lemon slices: Thinly sliced lemons not only enhance the drink’s flavor but also add a beautiful touch to your presentation.
Fresh lavender sprigs: Optional, but they make for a stunning garnish that elevates your drink’s aesthetic.
Ice cubes: Essential for keeping your spritzer chilled and refreshing on those hot summer days.
For those looking to customize, feel free to adjust the sweetness by adding more lavender syrup or try substituting it with honey or agave syrup for a different flavor profile. You can find the exact measurements for each ingredient at the bottom of the article, ready for printing!
How to Make Lemon Lavender Spritzer
Making a Lemon Lavender Spritzer is as easy as pie! Follow these simple steps, and you’ll have a refreshing drink ready in no time. Let’s dive in!
Step 1: Combine Ingredients
Start by grabbing a large pitcher. Pour in the sparkling water, fresh lemon juice, and lavender syrup. Stir gently to mix everything together. Be careful not to stir too vigorously; we want to keep that delightful fizz intact! The combination of flavors will make your taste buds dance with joy.
Step 2: Prepare Glasses
While the mixture is coming together, it’s time to prepare your glasses. Fill each glass with ice cubes. The ice will keep your spritzer chilled and refreshing. Plus, it adds a nice crunch to every sip. You can use any glass you have on hand, but tall glasses work beautifully for this drink.
Step 3: Pour and Garnish
Now comes the fun part! Carefully pour the lemon lavender mixture over the ice in each glass. Watch as the bubbles rise and create a beautiful display. For an extra touch, garnish each drink with a slice of lemon and a sprig of fresh lavender. This not only looks stunning but also enhances the aroma of your spritzer.
Step 4: Serve and Enjoy
Your Lemon Lavender Spritzer is now ready to be served! Enjoy it immediately for the best flavor and fizz. Whether you’re sipping it by the pool or sharing it with friends, this drink is sure to impress. Take a moment to savor the refreshing taste and let the worries of the day melt away.
Tips for Success
Use freshly squeezed lemon juice for the best flavor; bottled juice just doesn’t compare.
Chill your sparkling water beforehand to keep your spritzer extra refreshing.
Adjust the sweetness of your drink by adding more or less lavender syrup to suit your taste.
Experiment with different garnishes like mint or edible flowers for a unique twist.
Make a larger batch for gatherings; it’s a hit at parties!
Equipment Needed
Large pitcher: Essential for mixing your spritzer. A bowl works too if you don’t have one.
Measuring cups: For accurate ingredient measurements. You can use any cup you have on hand.
Stirring spoon: A long spoon is ideal for mixing. A regular kitchen spoon will do just fine.
Glasses: Tall glasses are perfect for serving. Use whatever you have available!
Variations
Herbal Infusion: Add a few sprigs of fresh mint or basil to the mixture for an aromatic twist.
Fruit-Infused: Toss in some fresh berries or cucumber slices for a refreshing flavor boost.
Alcoholic Option: For a fun adult version, add a splash of gin or vodka to your spritzer.
Low-Calorie Version: Use a sugar-free lavender syrup or reduce the amount of syrup for a lighter drink.
Sparkling Tea: Substitute sparkling water with sparkling herbal tea for a unique flavor profile.
Serving Suggestions
Pair your Lemon Lavender Spritzer with light appetizers like cucumber sandwiches or bruschetta for a delightful summer spread.
Serve alongside a fresh fruit salad to enhance the refreshing vibe of your drink.
For a beautiful presentation, use clear glasses to showcase the vibrant colors of the spritzer.
Consider adding a colorful straw or a decorative drink stirrer for a fun touch.
FAQs about Lemon Lavender Spritzer
Can I make Lemon Lavender Spritzer ahead of time?
Absolutely! You can mix the sparkling water, lemon juice, and lavender syrup in advance. Just wait to add the ice and garnishes until you’re ready to serve. This way, your spritzer stays fizzy and fresh!
Is Lemon Lavender Spritzer kid-friendly?
Yes! This refreshing beverage is perfect for kids. The flavors are light and enjoyable, making it a great non-alcoholic option for summer gatherings. Just be sure to adjust the sweetness to their taste!
What can I substitute for lavender syrup?
If you can’t find lavender syrup, honey or agave syrup works well. You can also try making your own lavender syrup at home using dried lavender, sugar, and water for a personal touch.
How long does homemade lavender syrup last?
Homemade lavender syrup can last up to two weeks when stored in the refrigerator. Just make sure to keep it in a sealed container to maintain its freshness.
Can I use bottled lemon juice instead of fresh?
While bottled lemon juice is convenient, I highly recommend using fresh lemon juice for the best flavor. The brightness of fresh lemons truly elevates your Lemon Lavender Spritzer!
Final Thoughts
Creating a Lemon Lavender Spritzer is more than just mixing ingredients; it’s about crafting a moment of joy. This refreshing drink brings a burst of sunshine to any gathering, making it a delightful companion for summer afternoons. I love how it transforms a simple day into something special, whether I’m sipping it solo or sharing it with friends. The combination of zesty lemon and fragrant lavender is like a gentle hug on a hot day. So, gather your ingredients, take a moment to enjoy the process, and let this spritzer brighten your summer days!
Indulge in the ultimate comfort food with these Cheesy Garlic Chicken Wraps. Tender, flavorful chicken is coated in a rich garlic butter sauce and then wrapped in a soft tortilla with melty cheese and fresh greens. Every bite is a perfect blend of creamy, garlicky goodness that will leave your taste buds craving more. Whether you’re looking for a quick weeknight dinner or a satisfying lunch, these wraps are easy to make and packed with flavor. With just a few simple ingredients, you’ll have a cheesy, savory meal that’s sure to impress!
Why You’ll Love This Cheesy Garlic Chicken Wraps
These Cheesy Garlic Chicken Wraps are a lifesaver for busy days. They come together in just 21 minutes, making them perfect for those hectic evenings when you need a quick meal. The creamy filling is bursting with flavor, and the fresh veggies add a delightful crunch. Plus, they’re customizable! You can easily adapt them to suit your family’s tastes, ensuring everyone leaves the table happy and satisfied.
Ingredients for Cheesy Garlic Chicken Wraps
Gathering the right ingredients is key to making these Cheesy Garlic Chicken Wraps a hit. Here’s what you’ll need:
Cooked chicken, shredded: This is the star of the show! Use leftover rotisserie chicken or any cooked chicken you have on hand.
Shredded mozzarella cheese: This cheese melts beautifully, adding that creamy texture we all crave.
Cream cheese: Softened cream cheese gives the filling a rich, velvety consistency that’s simply irresistible.
Mayonnaise: A touch of mayo enhances the creaminess and adds a subtle tang.
Garlic: Freshly minced garlic brings a punch of flavor that elevates the entire dish.
Italian seasoning: This blend of herbs adds warmth and depth, making each bite feel like a cozy hug.
Salt and black pepper: Essential for seasoning, these staples help balance the flavors.
Flour tortillas: Large tortillas are perfect for wrapping up all that delicious filling. You can also use whole wheat or gluten-free options.
Fresh spinach leaves: These add a pop of color and a nutritious crunch to your wraps.
Diced tomatoes: Juicy tomatoes bring freshness and a burst of flavor.
Sliced green onions: These add a mild onion flavor and a lovely crunch.
For those who like a little heat, consider adding diced jalapeños or a splash of hot sauce to the chicken mixture. If you want to switch things up, cooked shrimp or turkey can be great substitutes for the chicken. You’ll find the exact quantities for each ingredient at the bottom of the article, ready for printing!
How to Make Cheesy Garlic Chicken Wraps
Now that you have all your ingredients ready, let’s dive into making these delicious Cheesy Garlic Chicken Wraps. Follow these simple steps, and you’ll have a meal that’s not only quick but also bursting with flavor!
Step 1: Prepare the Chicken Mixture
Start by grabbing a large bowl. In it, combine the shredded chicken, mozzarella cheese, cream cheese, mayonnaise, minced garlic, Italian seasoning, salt, and black pepper. Mix everything together until it’s well combined and creamy. This filling is the heart of your wraps, so make sure it’s nice and smooth. If you want to add a little extra flavor, feel free to toss in some diced jalapeños for a spicy kick!
Step 2: Assemble the Wraps
Next, lay out your flour tortillas on a clean surface. Spread an equal amount of the creamy chicken mixture onto the center of each tortilla. Don’t be shy—load them up! Then, top the chicken mixture with fresh spinach leaves, diced tomatoes, and sliced green onions. These veggies not only add color but also a refreshing crunch that balances the creaminess of the filling.
Step 3: Roll and Cook the Wraps
Now it’s time to roll! Fold in the sides of each tortilla, then roll it up tightly from the bottom to the top. This helps keep all that delicious filling inside. If you want a crispy finish, heat a skillet over medium heat. Place the wraps seam-side down in the skillet and cook for 2-3 minutes on each side until they’re golden brown and crispy. The sound of that sizzle is music to my ears!
Step 4: Serve and Enjoy
Once your wraps are cooked to perfection, slice each one in half and serve them warm. The gooey cheese and flavorful chicken filling will be a hit at your dinner table. Trust me, everyone will be coming back for seconds!
Tips for Success
Prep your ingredients ahead of time to save precious minutes during cooking.
Don’t overfill the tortillas; a little goes a long way to prevent spills.
For extra flavor, let the chicken mixture chill for 30 minutes before assembling.
Experiment with different cheeses like cheddar or pepper jack for a unique twist.
Serve with a side of your favorite dipping sauce for added flavor.
Equipment Needed
Large bowl: For mixing the chicken filling. A mixing spoon works well too.
Skillet: To cook the wraps. A non-stick pan is ideal for easy flipping.
Knife: For slicing the wraps. A sharp knife ensures clean cuts.
Cutting board: To prepare your veggies and slice the wraps.
Variations
Spicy Version: Add diced jalapeños or a splash of your favorite hot sauce to the chicken mixture for a fiery kick.
Vegetarian Option: Substitute the chicken with black beans or chickpeas for a hearty, meat-free wrap.
Herb-Infused: Mix in fresh herbs like basil or cilantro to elevate the flavor profile and add freshness.
Low-Carb Alternative: Use lettuce leaves instead of tortillas for a lighter, low-carb wrap option.
Cheese Lovers: Experiment with different cheeses like pepper jack, gouda, or feta for a unique twist on the classic flavor.
Serving Suggestions
Pair your Cheesy Garlic Chicken Wraps with a crisp side salad for a refreshing contrast.
Serve with a side of homemade ranch or garlic dipping sauce for extra flavor.
A chilled glass of lemonade or iced tea complements the wraps beautifully.
For a fun presentation, cut the wraps into bite-sized pieces for easy sharing.
FAQs about Cheesy Garlic Chicken Wraps
Can I make Cheesy Garlic Chicken Wraps ahead of time?
Absolutely! You can prepare the chicken mixture a day in advance and store it in the fridge. Just assemble the wraps when you’re ready to eat. This makes for a quick meal on busy nights!
What can I use instead of chicken in these wraps?
If you’re looking for alternatives, cooked shrimp or turkey work wonderfully. For a vegetarian option, try using black beans or chickpeas. The flavor combinations are endless!
How do I store leftovers?
Store any leftover wraps in an airtight container in the fridge for up to three days. Reheat them in a skillet for a few minutes to regain that crispy texture.
Can I freeze Cheesy Garlic Chicken Wraps?
Yes, you can freeze them! Wrap each one tightly in plastic wrap and place them in a freezer-safe bag. When you’re ready to enjoy, thaw in the fridge overnight and reheat in a skillet.
What sides pair well with these wraps?
These wraps are delicious on their own, but they pair beautifully with a fresh salad, crispy fries, or even a bowl of soup. The options are endless!
Final Thoughts
Making Cheesy Garlic Chicken Wraps is more than just preparing a meal; it’s about creating moments of joy around the dinner table. The creamy filling and fresh veggies come together to form a dish that’s not only satisfying but also brings smiles to my family’s faces. I love how versatile these wraps are, allowing me to adapt them to everyone’s tastes. Whether it’s a busy weeknight or a casual gathering, these wraps are sure to impress. So, roll up your sleeves, gather your loved ones, and enjoy the deliciousness that these wraps bring to your kitchen!
“`
Paul
Cheesy Garlic Chicken Wraps Recipe That Everyone Loves
A delicious and creamy wrap filled with shredded chicken, cheese, and fresh vegetables, perfect for a quick meal.
In a large bowl, combine the shredded chicken, mozzarella cheese, cream cheese, mayonnaise, minced garlic, Italian seasoning, salt, and black pepper. Mix until well combined and creamy.
Lay out the flour tortillas on a clean surface. Spread an equal amount of the chicken mixture onto the center of each tortilla.
Top the chicken mixture with fresh spinach leaves, diced tomatoes, and sliced green onions.
Fold in the sides of each tortilla, then roll it up tightly from the bottom to the top to form a wrap.
If desired, heat a skillet over medium heat and place the wraps seam-side down. Cook for 2-3 minutes on each side until golden brown and crispy.
Slice each wrap in half and serve warm.
Notes
For a spicy kick, add diced jalapeños or a splash of hot sauce to the chicken mixture.
Substitute the chicken with cooked shrimp or turkey for a different protein option.
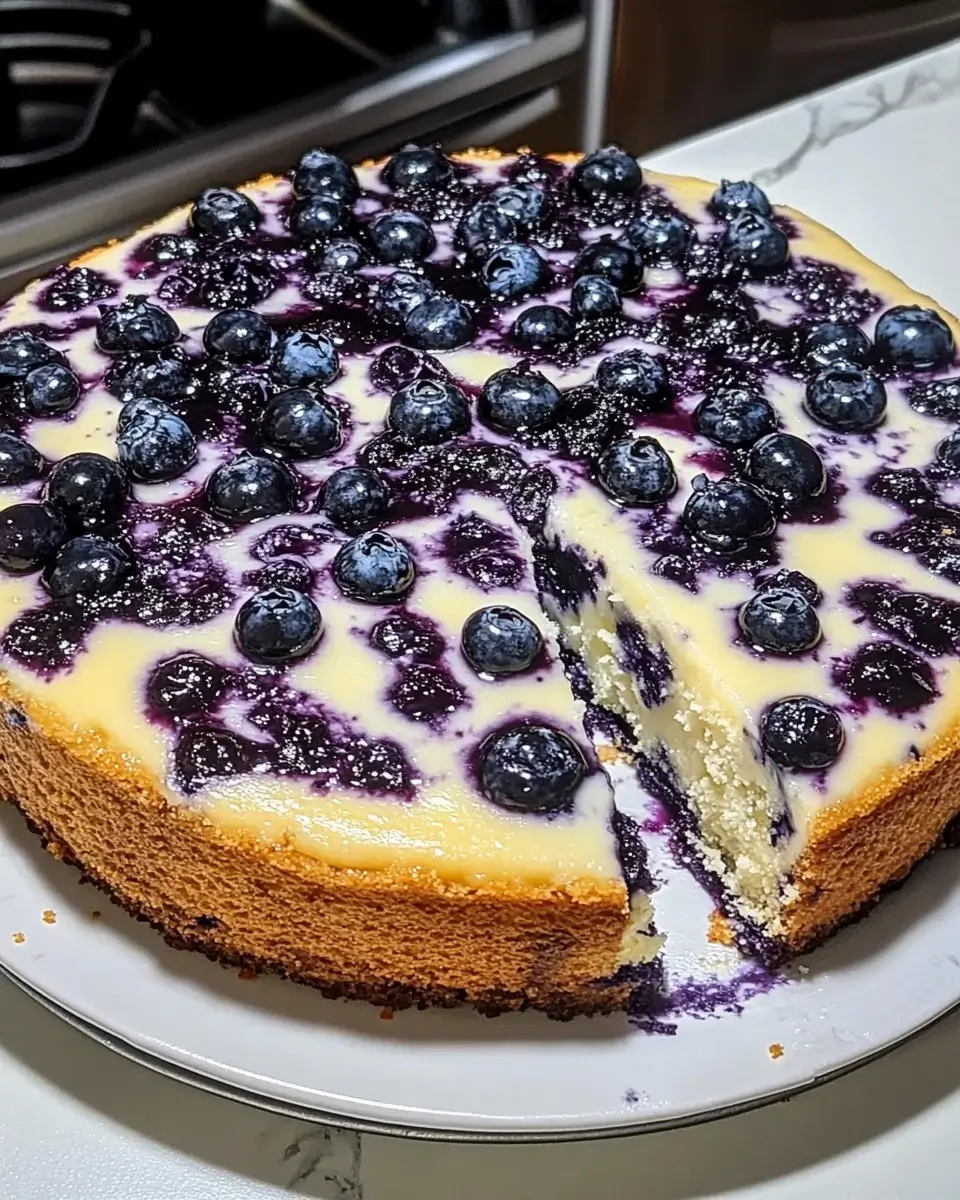
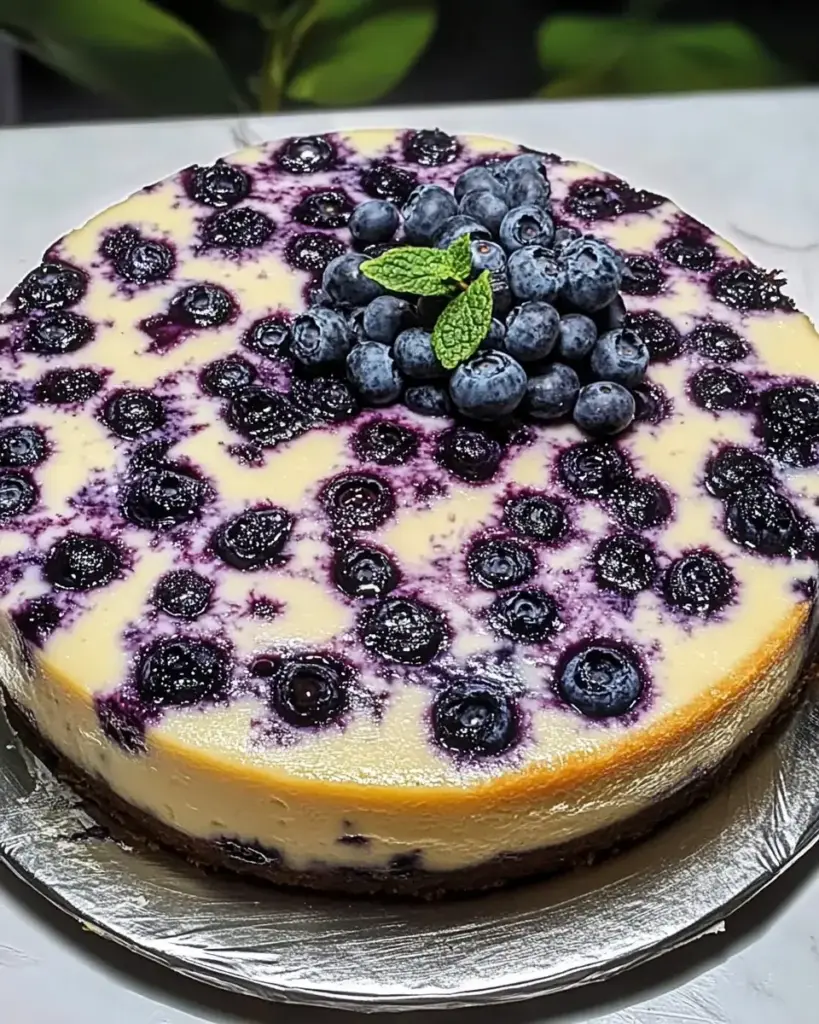
As a passionate home cook, I find joy in creating dishes that bring smiles to my family’s faces. One of my all-time favorites is the Nova Scotia Blueberry Cream Cake. This delightful dessert is not just a treat; it’s a celebration of flavors that can brighten any occasion. Whether you’re hosting a gathering or simply want to indulge after a long day, this cake is a quick solution that requires minimal fuss. With its luscious blueberries and creamy topping, it’s sure to impress your loved ones and leave them asking for seconds!
Why You’ll Love This Nova Scotia Blueberry Cream Cake
This Nova Scotia Blueberry Cream Cake is a dream come true for busy moms and professionals alike. It’s incredibly easy to whip up, taking just about 20 minutes of prep time. The combination of sweet blueberries and rich cream creates a flavor explosion that’s simply irresistible. Plus, it’s versatile enough for any occasion, whether it’s a birthday party or a cozy family dinner. Trust me, your taste buds will thank you!
Ingredients for Nova Scotia Blueberry Cream Cake
Gathering the right ingredients is the first step to creating this delightful Nova Scotia Blueberry Cream Cake. Here’s what you’ll need:
Fresh blueberries: These juicy gems are the star of the show, bursting with flavor and nutrients.
Granulated sugar: This sweetener balances the tartness of the blueberries, enhancing their natural flavor.
Unsalted butter: Softened butter adds richness and moisture to the cake, making it tender and delicious.
Large eggs: Eggs provide structure and stability, helping the cake rise beautifully.
Vanilla extract: A splash of vanilla adds warmth and depth to the overall flavor profile.
All-purpose flour: This is the backbone of the cake, giving it the right texture and body.
Baking powder: This leavening agent ensures your cake rises to perfection, creating a light and airy crumb.
Salt: Just a pinch enhances the sweetness and balances the flavors.
Whole milk: Milk adds moisture and richness, making each bite melt in your mouth.
Heavy cream: This is whipped to create a luscious topping that complements the cake beautifully.
Powdered sugar: Used to sweeten the whipped cream, giving it a light and fluffy texture.
Lemon zest: A hint of citrus brightens the whipped cream, adding a refreshing twist.
For those looking to make adjustments, consider substituting half of the heavy cream with Greek yogurt for a lighter version. If you want to add a nutty flavor, a teaspoon of almond extract can work wonders in the batter. You can find the exact quantities for these ingredients at the bottom of the article, ready for printing!
How to Make Nova Scotia Blueberry Cream Cake
Now that you have all your ingredients ready, let’s dive into the delightful process of making this Nova Scotia Blueberry Cream Cake. Follow these simple steps, and you’ll have a beautiful cake that’s sure to impress!
Step 1: Preheat and Prepare
First things first, preheat your oven to 350°F (175°C). This ensures your cake bakes evenly. While the oven warms up, grease and flour a 9-inch round cake pan. This will help the cake release easily once it’s baked.
Step 2: Prepare the Blueberries
In a mixing bowl, combine the fresh blueberries with 2 tablespoons of granulated sugar. This little trick helps to draw out their juices and enhances their sweetness. Set this mixture aside while you work on the batter.
Step 3: Cream the Butter and Sugar
In another bowl, cream together the softened butter and the remaining sugar until the mixture is light and fluffy. This step is crucial as it incorporates air into the batter, giving your cake a lovely texture.
Step 4: Add Eggs and Vanilla
Next, add the eggs one at a time, mixing well after each addition. This helps to create a smooth batter. Stir in the vanilla extract, which adds a warm, inviting aroma to your cake.
Step 5: Combine Dry Ingredients
In a separate bowl, whisk together the all-purpose flour, baking powder, and salt. This ensures that the leavening agent is evenly distributed throughout the flour, which is key for a well-risen cake.
Step 6: Mix Wet and Dry Ingredients
Gradually add the dry ingredients to the butter mixture, alternating with the whole milk. Start and end with the flour mixture. This method helps to keep the batter smooth and prevents overmixing, which can lead to a dense cake.
Step 7: Fold in Blueberries
Gently fold the blueberry mixture into the batter. Be careful not to overmix; you want those beautiful blueberries to stay intact and not break apart.
Step 8: Bake the Cake
Pour the batter into the prepared cake pan and smooth the top with a spatula. Bake in the preheated oven for 30-35 minutes. To check for doneness, insert a toothpick into the center; it should come out clean.
Step 9: Cool the Cake
Once baked, let the cake cool in the pan for about 10 minutes. Then, carefully transfer it to a wire rack to cool completely. This step is important to prevent sogginess.
Step 10: Prepare the Whipped Cream
While the cake cools, whip the heavy cream with the powdered sugar and lemon zest until soft peaks form. This fluffy topping is the perfect complement to the cake’s sweetness.
Step 11: Assemble the Cake
Once the cake is completely cool, spread the whipped cream over the top. Garnish with additional blueberries for a beautiful presentation. Your Nova Scotia Blueberry Cream Cake is now ready to be enjoyed!
Tips for Success
Use fresh blueberries for the best flavor; frozen can work, but may alter texture.
Ensure your butter is softened to room temperature for easy creaming.
Don’t overmix the batter; gentle folding keeps the cake light and fluffy.
Let the cake cool completely before adding whipped cream to prevent melting.
For a fun twist, try adding a sprinkle of cinnamon to the batter!
Equipment Needed
9-inch round cake pan: A standard choice; you can also use a square pan if that’s what you have.
Mixing bowls: A set of various sizes is handy; even a large pot can work in a pinch.
Electric mixer: This makes creaming butter and sugar easier; a whisk will do if you prefer a workout!
Spatula: Essential for folding in ingredients and smoothing the batter.
Wire rack: Great for cooling; a plate can serve as an alternative.
Variations
Gluten-Free: Substitute all-purpose flour with a gluten-free blend to make this cake suitable for gluten-sensitive friends.
Vegan: Replace eggs with flaxseed meal mixed with water and use plant-based butter and milk for a delicious vegan version.
Berry Medley: Mix in other berries like raspberries or blackberries for a colorful twist and a burst of different flavors.
Chocolate Chip Addition: Fold in some mini chocolate chips for a delightful contrast to the blueberries.
Spiced Version: Add a teaspoon of cinnamon or nutmeg to the batter for a warm, spiced flavor that’s perfect for fall.
Serving Suggestions
Pair with a scoop of vanilla ice cream for a delightful contrast in temperature and texture.
Serve alongside a cup of freshly brewed coffee or tea for a cozy afternoon treat.
For a festive touch, dust with powdered sugar before serving.
Garnish with mint leaves for a pop of color and freshness.
FAQs about Nova Scotia Blueberry Cream Cake
Can I use frozen blueberries instead of fresh?
Yes, you can use frozen blueberries! Just be aware that they may release more moisture, which can slightly alter the cake’s texture. If you do use frozen berries, don’t thaw them before adding to the batter.
How should I store leftover cake?
Store any leftover Nova Scotia Blueberry Cream Cake in an airtight container in the refrigerator. It will stay fresh for about 3-4 days. Just remember to add the whipped cream right before serving to keep it fluffy!
Can I make this cake ahead of time?
Absolutely! You can bake the cake a day in advance. Just let it cool completely, wrap it tightly, and store it at room temperature. Add the whipped cream topping on the day you plan to serve it for the best results.
What can I substitute for heavy cream in the whipped topping?
If you’re looking for a lighter option, you can substitute half of the heavy cream with Greek yogurt. This will give you a creamy texture while reducing the richness.
Is this cake suitable for special diets?
This Nova Scotia Blueberry Cream Cake can be adapted for various diets. For a gluten-free version, use a gluten-free flour blend. You can also make it vegan by replacing eggs and dairy with plant-based alternatives. Enjoy the flexibility!
Final Thoughts
Creating the Nova Scotia Blueberry Cream Cake is more than just baking; it’s about crafting memories and sharing joy with those you love. The delightful combination of fresh blueberries and creamy topping makes every bite a celebration. Whether it’s a special occasion or a simple family dinner, this cake brings smiles and warmth to the table. I hope you find as much joy in making and sharing this cake as I do. So, roll up your sleeves, gather your loved ones, and let the sweet aroma of this cake fill your home with happiness!
“`
Paul
Nova Scotia Blueberry Cream Cake: A Delightful Recipe!
A delightful Nova Scotia Blueberry Cream Cake, perfect for any occasion.
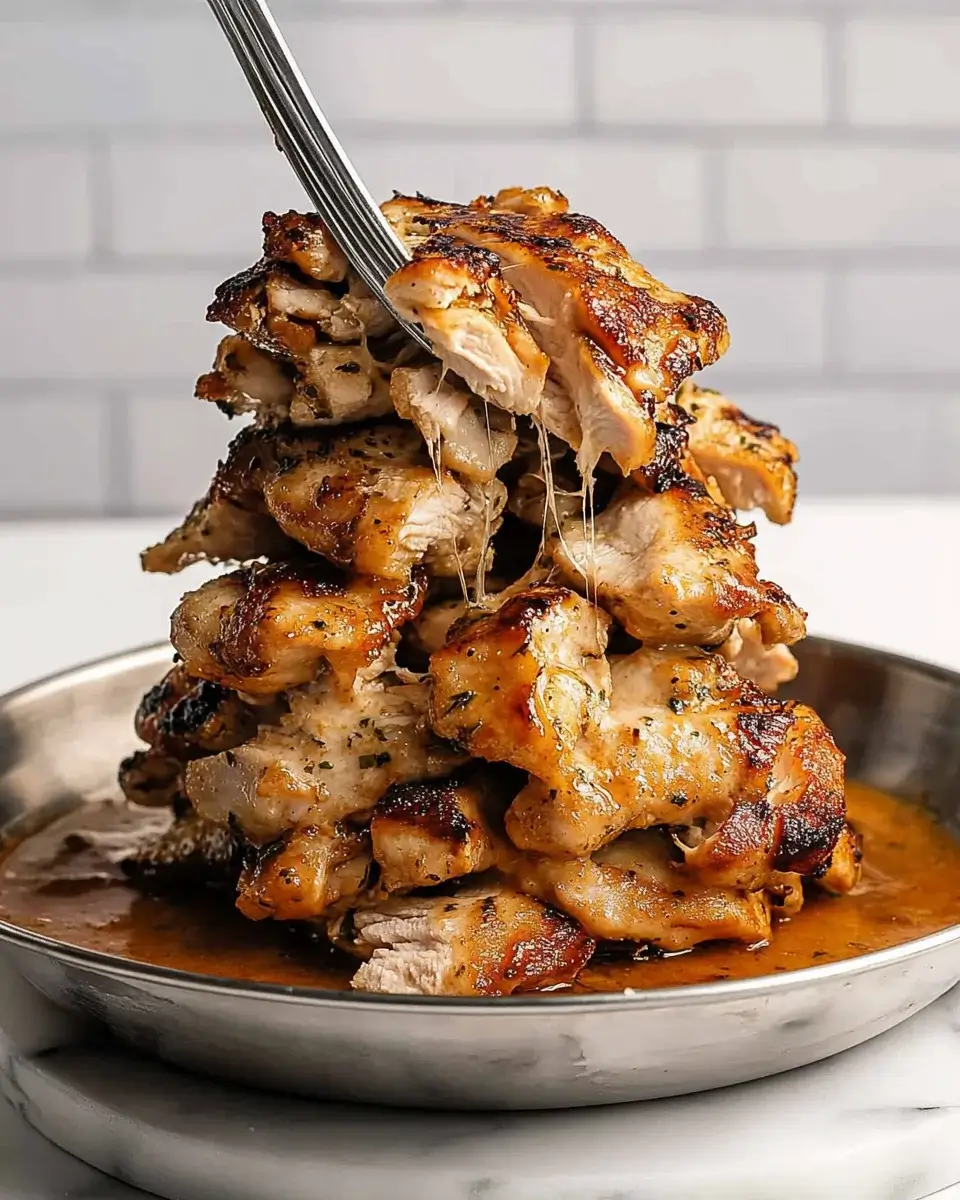
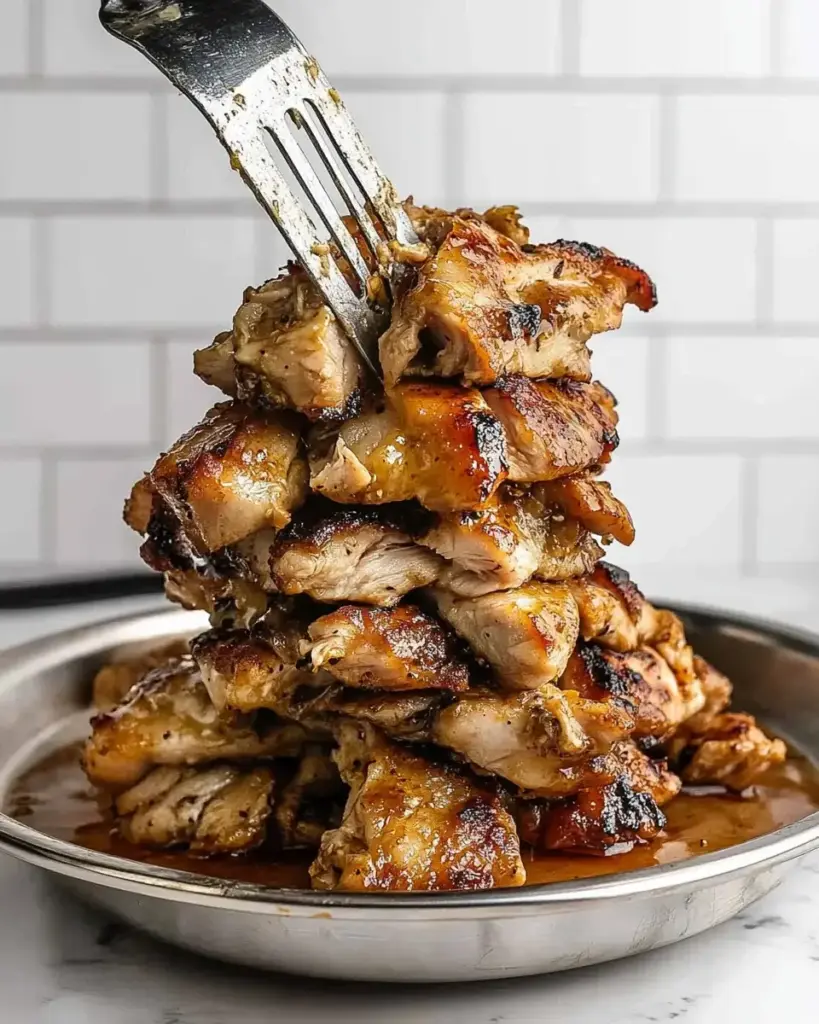
Transport your taste buds to the heart of Greece with these Greek Chicken Gyros. Marinated in a blend of aromatic herbs, garlic, and tangy lemon, the tender chicken is grilled to perfection and served in soft pita bread with a refreshing cucumber-tomato salad, a drizzle of creamy tzatziki sauce, and a sprinkle of feta cheese. These gyros offer the perfect balance of savory, fresh, and creamy flavors in every bite. Whether you’re enjoying them for lunch, dinner, or as a fun family meal, these Greek chicken gyros are sure to become a new favorite.
Why You’ll Love This Greek Chicken Gyros
Greek Chicken Gyros are a game-changer for busy weeknights. They come together quickly, making them perfect for those evenings when time is tight. The flavors are vibrant and satisfying, with juicy chicken and refreshing tzatziki that dance on your taste buds. Plus, they’re customizable! You can add your favorite veggies or adjust the spices to suit your family’s preferences. It’s a delicious meal that everyone will love!
Ingredients for Greek Chicken Gyros
Gathering the right ingredients is key to making delicious Greek Chicken Gyros. Here’s what you’ll need:
Boneless, skinless chicken thighs: These are juicy and flavorful, perfect for grilling. You can also use chicken breasts if you prefer a leaner option.
Olive oil: This adds richness and helps the marinade cling to the chicken. Extra virgin olive oil is a great choice for its robust flavor.
Red wine vinegar: It brings a tangy kick to the marinade, enhancing the overall taste of the chicken.
Lemon juice: Freshly squeezed lemon juice brightens the flavors and tenderizes the meat.
Garlic: Minced garlic adds a wonderful aroma and depth of flavor to the dish.
Dried oregano: A staple in Greek cuisine, it gives the gyros that authentic Mediterranean taste.
Salt and black pepper: Essential for seasoning, they enhance all the other flavors in the dish.
Paprika: This adds a subtle smokiness and a beautiful color to the chicken.
Pita breads: Soft and warm, they are the perfect vessel for holding all the delicious fillings.
Greek yogurt: The base for tzatziki sauce, it’s creamy and tangy, making it a perfect complement to the chicken.
Cucumber: Diced cucumber adds a refreshing crunch to the gyros.
Red onion: Thinly sliced, it provides a sharp bite that balances the richness of the chicken.
Fresh parsley: Chopped parsley adds a pop of color and freshness.
Dill (optional): If you love its unique flavor, feel free to add it to your tzatziki for an extra herbal note.
Salt and pepper to taste: Always adjust seasoning to your preference for the best flavor.
For exact measurements, check the bottom of the article where you can find everything available for printing!
How to Make Greek Chicken Gyros
Now that you have all your ingredients ready, let’s dive into the fun part—making these delicious Greek Chicken Gyros! Follow these simple steps, and you’ll have a meal that’s sure to impress.
Step 1: Marinate the Chicken
Start by whisking together olive oil, red wine vinegar, lemon juice, minced garlic, dried oregano, salt, black pepper, and paprika in a large bowl. This marinade is the heart of your gyros, so don’t rush it!
Add the boneless, skinless chicken thighs to the bowl, making sure they’re well coated. Cover the bowl and let it marinate in the refrigerator for at least one hour. If you have time, letting it sit overnight will deepen the flavors even more.
Step 2: Grill the Chicken
Preheat your grill or grill pan over medium-high heat. Once it’s hot, remove the chicken from the marinade, letting any excess drip off. Grill the chicken for about 6-7 minutes on each side. You want those beautiful grill marks and an internal temperature of 165°F.
As the chicken cooks, the aroma will fill your kitchen, making it hard to resist! Just remember to keep an eye on it to avoid overcooking.
Step 3: Prepare the Tzatziki Sauce
While the chicken is grilling, it’s time to whip up the tzatziki sauce. In a bowl, combine Greek yogurt, diced cucumber, thinly sliced red onion, chopped parsley, and dill if you’re using it. Season with salt and pepper to taste.
Mix everything well and set it aside. This creamy sauce is the perfect complement to your gyros, adding a refreshing touch!
Step 4: Slice the Chicken
Once the chicken is cooked, let it rest for a few minutes. This helps keep it juicy. After resting, slice the chicken into thin strips. The tender pieces will be easy to wrap in the pita.
As you slice, you can already imagine how delicious these gyros will be!
Step 5: Assemble the Gyros
To assemble your gyros, warm the pita breads on the grill for about a minute on each side. This makes them soft and pliable.
Place a generous amount of sliced chicken in the center of each pita. Top it off with a dollop of tzatziki sauce and add extra cucumber, red onion, and parsley if you like. Roll up the pita around the filling, and voilà! Your Greek Chicken Gyros are ready to be devoured.
Tips for Success
Marinate the chicken overnight for maximum flavor.
Use a meat thermometer to ensure the chicken reaches 165°F.
Warm the pita bread just before serving for a delightful texture.
Feel free to customize your toppings with your favorite veggies.
Make extra tzatziki sauce; it’s great as a dip for snacks!
Equipment Needed
Grill or Grill Pan: A grill gives the best flavor, but a grill pan works just as well.
Mixing Bowl: Use any large bowl for marinating the chicken.
Whisk: A whisk helps combine the marinade ingredients smoothly.
Meat Thermometer: This ensures your chicken is cooked perfectly.
Knife and Cutting Board: Essential for slicing the chicken and prepping veggies.
Variations
Spicy Gyros: Add crushed red pepper flakes to the marinade for a fiery kick that will wake up your taste buds.
Vegetarian Option: Swap the chicken for grilled vegetables like zucchini, bell peppers, and eggplant for a delicious meat-free version.
Herbed Tzatziki: Experiment with different herbs like mint or cilantro in your tzatziki for a unique twist.
Whole Wheat Pita: Use whole wheat pita bread for a healthier, fiber-rich alternative.
Greek Salad Gyros: Add a layer of Greek salad ingredients like olives and feta cheese for an extra burst of flavor.
Serving Suggestions
Side Salad: Pair your gyros with a refreshing Greek salad for a colorful and nutritious meal.
Fries: Serve with crispy oven-baked fries or sweet potato fries for a satisfying crunch.
Drinks: Enjoy with a chilled glass of lemonade or a light white wine to complement the flavors.
Presentation: Serve on a wooden board with colorful veggies for a rustic, inviting look.
FAQs about Greek Chicken Gyros
Can I use chicken breasts instead of thighs for Greek Chicken Gyros?
Absolutely! While chicken thighs are juicier, chicken breasts can be used for a leaner option. Just be careful not to overcook them, as they can dry out more easily.
How can I make the tzatziki sauce ahead of time?
You can prepare the tzatziki sauce a day in advance. Just store it in an airtight container in the refrigerator. The flavors will meld beautifully overnight!
What can I serve with Greek Chicken Gyros?
These gyros pair wonderfully with a side salad, crispy fries, or even roasted vegetables. A refreshing drink like lemonade or a light white wine complements the meal perfectly.
Can I freeze the marinated chicken?
Yes! You can freeze the marinated chicken for up to three months. Just thaw it in the refrigerator before grilling for a quick meal later on.
What are some good toppings for Greek Chicken Gyros?
Feel free to get creative! You can add toppings like feta cheese, olives, or even pickled vegetables for an extra burst of flavor. The possibilities are endless!
Final Thoughts
Making Greek Chicken Gyros is more than just cooking; it’s about creating a joyful experience for you and your loved ones. The aroma of marinated chicken sizzling on the grill fills the air, inviting everyone to gather around the table. Each bite is a delightful explosion of flavors, from the juicy chicken to the creamy tzatziki. Plus, the ease of preparation means you can spend less time in the kitchen and more time enjoying precious moments with family. I hope this recipe brings as much joy to your home as it has to mine. Happy cooking!
“`
ating
Greek Chicken Gyros: Discover the Secret Recipe!
A delicious and easy recipe for Greek Chicken Gyros, featuring marinated grilled chicken served in warm pita bread with tzatziki sauce and fresh vegetables.
In a large bowl, whisk together olive oil, red wine vinegar, lemon juice, garlic, oregano, salt, black pepper, and paprika. Add the chicken thighs and toss to coat. Cover and marinate in the refrigerator for at least 1 hour, or up to overnight for best flavor.
Preheat your grill or a grill pan over medium-high heat. Remove the chicken from the marinade and grill for about 6-7 minutes per side, or until the chicken is cooked through and has nice grill marks. The internal temperature should reach 165°F.
While the chicken is grilling, prepare the tzatziki sauce by combining Greek yogurt, diced cucumber, red onion, parsley, dill (if using), and salt and pepper in a bowl. Mix well and set aside.
Once the chicken is cooked, let it rest for a few minutes before slicing it into thin strips.
To assemble the gyros, warm the pita breads on the grill for about 1 minute on each side. Place a generous amount of sliced chicken in the center of each pita, top with tzatziki sauce, and add additional cucumber, red onion, and parsley if desired.
Roll up the pita around the filling and serve immediately.
Notes
For a spicier kick, add crushed red pepper flakes to the marinade.
You can substitute chicken thighs with chicken breasts or even use grilled vegetables for a vegetarian option.
There’s something magical about the aroma of freshly baked Blueberry Cake Donuts wafting through the kitchen. It instantly brings back memories of cozy mornings and sweet indulgences. As a busy mom, I know how precious those moments can be, and this recipe is a delightful solution for a quick treat that will impress your loved ones. Whether you’re looking to brighten up a hectic weekday or celebrate a special occasion, these donuts are the perfect blend of simplicity and flavor. Trust me, once you try them, they’ll become a staple in your home!
Why You’ll Love This Blueberry Cake Donuts
These Blueberry Cake Donuts are not just a treat; they’re a lifesaver for busy days! With a quick prep time of just 15 minutes, you can whip up a batch before the kids even wake up. The delightful burst of blueberries in every bite adds a refreshing twist, making them a hit with everyone. Plus, they’re baked, not fried, so you can enjoy them guilt-free!
Ingredients for Blueberry Cake Donuts
Gathering the right ingredients is the first step to creating these delightful Blueberry Cake Donuts. Here’s what you’ll need:
All-purpose flour: The backbone of your donuts, providing structure and a soft texture.
Granulated sugar: Sweetens the batter and helps create that lovely golden crust.
Baking powder: This leavening agent gives your donuts that perfect rise, making them fluffy.
Salt: Just a pinch enhances the flavors and balances the sweetness.
Ground cinnamon: Adds a warm, comforting spice that complements the blueberries beautifully.
Unsalted butter: Melted for richness, it brings a lovely buttery flavor to the donuts.
Buttermilk: This tangy ingredient keeps the donuts moist and tender.
Large eggs: They bind everything together and add moisture, making your donuts rich.
Vanilla extract: A splash of this adds a lovely aroma and depth of flavor.
Fresh blueberries: The star of the show! They burst with flavor and add a pop of color.
For those looking to mix things up, consider substituting half of the blueberries with chocolate chips for a decadent twist. You can find all the exact measurements at the bottom of the article, ready for printing!
How to Make Blueberry Cake Donuts
Making Blueberry Cake Donuts is a delightful journey that fills your kitchen with warmth and sweetness. Follow these simple steps, and you’ll have a batch of delicious donuts ready in no time!
Step 1: Preheat the Oven
Start by preheating your oven to 350°F (175°C). This step is crucial because it ensures your donuts bake evenly. While the oven warms up, grab your donut pan and grease it with non-stick spray. This will help your donuts slide out easily once they’re baked.
Step 2: Mix Dry Ingredients
In a large mixing bowl, whisk together the all-purpose flour, granulated sugar, baking powder, salt, and ground cinnamon. This combination creates the base of your donuts. Make sure everything is well combined; it’s like giving your donuts a solid foundation to rise and shine!
Step 3: Combine Wet Ingredients
In another bowl, mix the melted butter, buttermilk, eggs, and vanilla extract until smooth. This mixture adds moisture and richness to your donuts. The melted butter should be warm but not hot, so it doesn’t cook the eggs. Think of this step as creating a creamy hug for your dry ingredients!
Step 4: Combine Wet and Dry Mixtures
Now, pour the wet ingredients into the dry ingredients. Stir gently until just combined. Be careful not to overmix; a few lumps are perfectly fine. Overmixing can lead to tough donuts, and we want them soft and fluffy, like a cloud!
Step 5: Fold in Blueberries
Gently fold in the fresh blueberries, ensuring they’re evenly distributed throughout the batter. This step is like tucking in little bursts of joy into each donut. Be gentle to avoid smashing the berries; we want those lovely pops of flavor intact!
Step 6: Fill the Donut Pan
Using a piping bag or a spoon, fill each donut cavity about 2/3 full with batter. This allows room for the donuts to rise without overflowing. If you don’t have a piping bag, a zip-top bag with a corner snipped off works just as well. It’s all about making it easy!
Step 7: Bake the Donuts
Place the filled donut pan in the preheated oven and bake for 12-15 minutes. To check for doneness, insert a toothpick into the center of a donut. If it comes out clean, they’re ready! The smell will be heavenly, and you might find it hard to wait!
Step 8: Cool and Serve
Once baked, allow the donuts to cool in the pan for about 5 minutes. Then, transfer them to a wire rack to cool completely. This step is essential for achieving that perfect texture. Serve them warm or at room temperature, and don’t forget to drizzle with glaze if you like!
Tips for Success
Measure your flour correctly; spoon it into the measuring cup and level it off for accuracy.
Use room temperature ingredients for better mixing and a smoother batter.
Don’t skip the cooling step; it helps the donuts set properly.
Experiment with spices like nutmeg for a unique flavor twist.
Store leftovers in an airtight container to keep them fresh.
Equipment Needed
Donut pan: Essential for shaping your donuts. If you don’t have one, a muffin tin works in a pinch!
Mixing bowls: Use at least two for wet and dry ingredients.
Whisk: Perfect for combining ingredients smoothly.
Piping bag or spoon: For filling the donut cavities easily.
Wire rack: Ideal for cooling your donuts evenly.
Variations
Chocolate Chip Blueberry Donuts: Substitute half of the blueberries with chocolate chips for a delightful twist that chocolate lovers will adore.
Lemon Zest Addition: Add a teaspoon of lemon zest to the batter for a refreshing citrus flavor that pairs beautifully with blueberries.
Gluten-Free Option: Use a gluten-free all-purpose flour blend to make these donuts suitable for those with gluten sensitivities.
Vegan Version: Replace eggs with flax eggs (1 tablespoon of ground flaxseed mixed with 2.5 tablespoons of water) and use plant-based milk and butter alternatives.
Spiced Variations: Experiment with spices like nutmeg or cardamom for a warm, aromatic flavor profile that complements the blueberries.
Serving Suggestions
Pair your Blueberry Cake Donuts with a steaming cup of coffee or tea for a delightful breakfast treat.
Serve with a dollop of whipped cream or a scoop of vanilla ice cream for a decadent dessert.
For a colorful presentation, sprinkle powdered sugar on top and add fresh blueberries as a garnish.
Consider serving them alongside a fresh fruit salad for a refreshing contrast.
FAQs about Blueberry Cake Donuts
As you embark on your journey to make these delightful Blueberry Cake Donuts, you might have a few questions. Here are some common queries that can help you along the way:
Can I use frozen blueberries instead of fresh?
Absolutely! Frozen blueberries work just as well. Just make sure to add them directly to the batter without thawing to prevent excess moisture.
How should I store leftover donuts?
Store your Blueberry Cake Donuts in an airtight container at room temperature for up to three days. For longer storage, consider freezing them!
Can I make the batter ahead of time?
While it’s best to bake the donuts fresh, you can prepare the dry ingredients in advance. Just mix them with the wet ingredients when you’re ready to bake!
What can I use instead of buttermilk?
If you don’t have buttermilk on hand, you can make a quick substitute by mixing one cup of milk with one tablespoon of vinegar or lemon juice. Let it sit for a few minutes before using.
Can I add other fruits to the recipe?
Definitely! Feel free to experiment with other fruits like raspberries or chopped strawberries for a fun twist on these Blueberry Cake Donuts.
Final Thoughts
Making Blueberry Cake Donuts is more than just baking; it’s about creating sweet memories in your kitchen. The joy of watching your loved ones savor each bite is truly priceless. These donuts are not only delicious but also a wonderful way to bring everyone together, whether it’s a busy weekday morning or a cozy weekend brunch. Plus, the delightful aroma that fills your home is a bonus! So, roll up your sleeves, gather your ingredients, and let the magic unfold. Trust me, once you take that first bite, you’ll be hooked!
“`
ating
Blueberry Cake Donuts: The Perfect Sweet Treat Recipe
Delicious blueberry cake donuts that are perfect for a sweet treat.
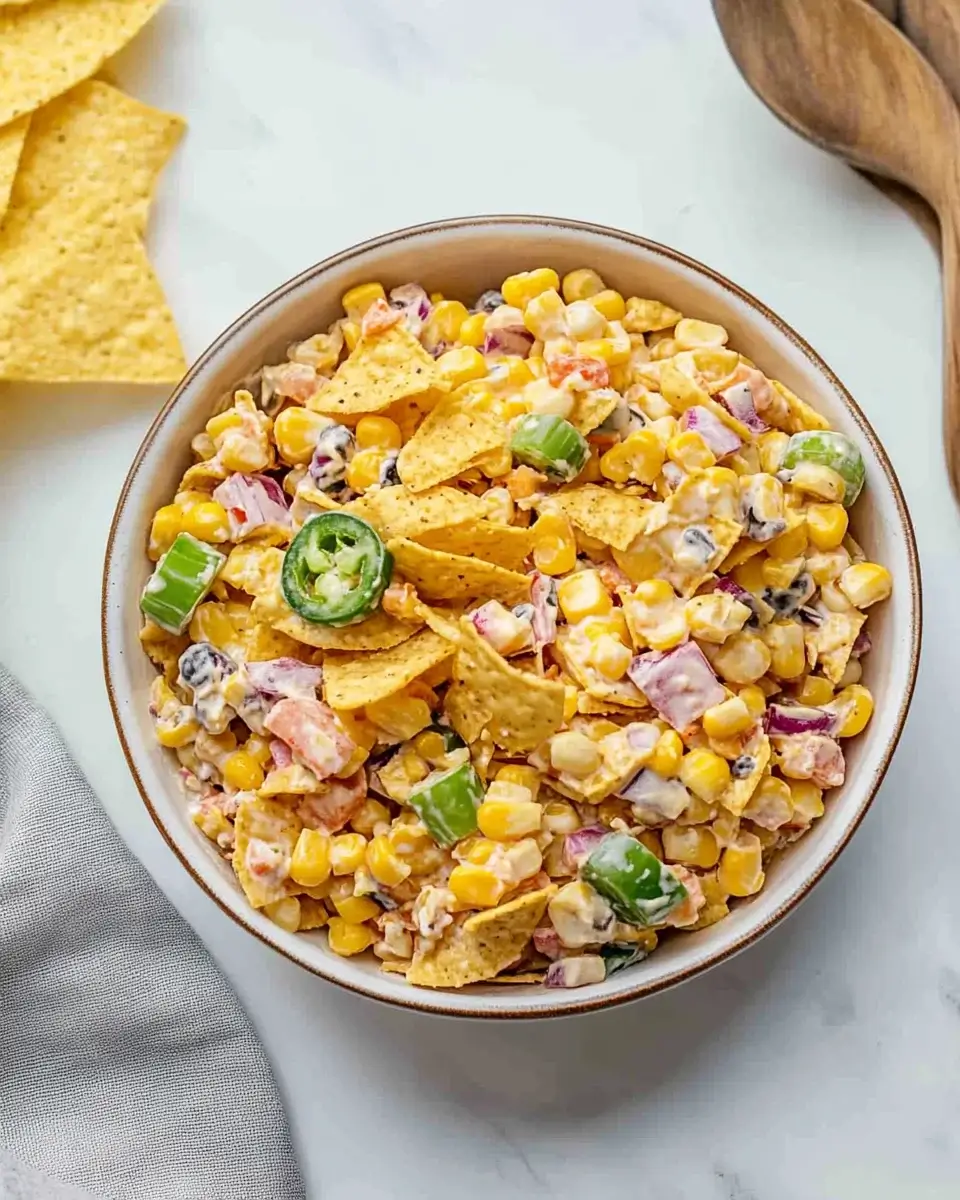
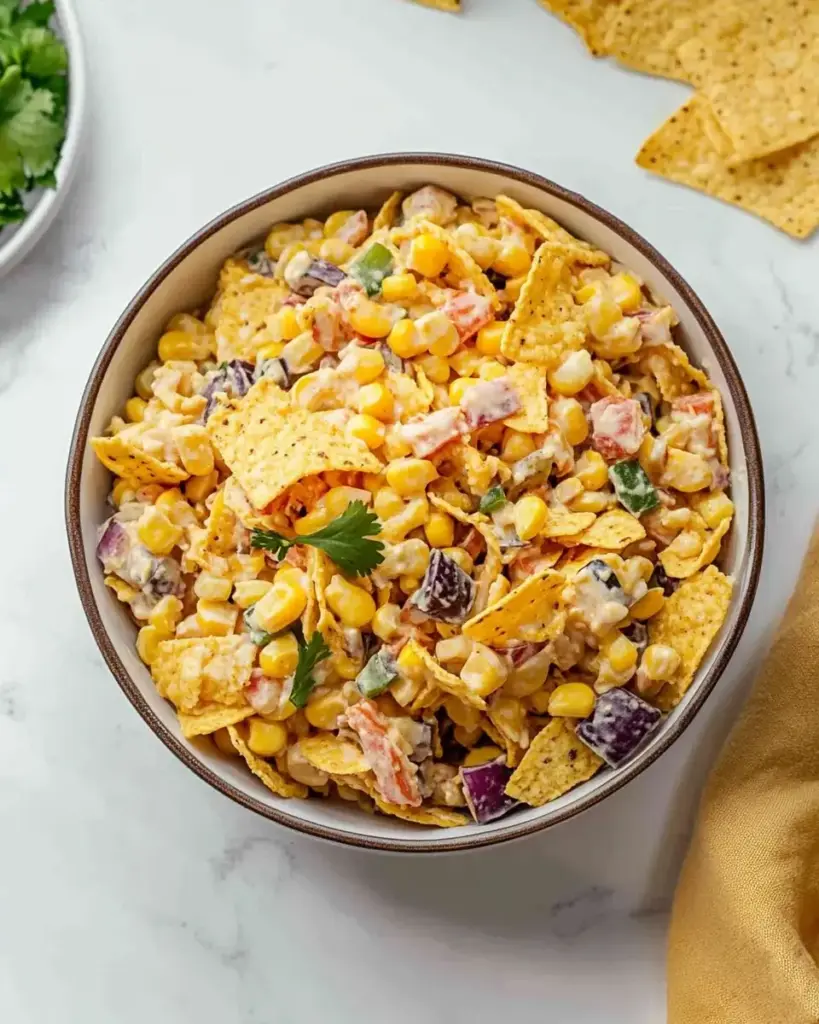
Add some fun to your meal with this Frito Corn Salad, a delightful blend of sweet corn, creamy dressing, and the perfect crunch from Fritos! This crowd-pleasing salad combines fresh corn, peppers, onions, and a zesty mayo-based dressing, topped off with a handful of Frito chips for that irresistible crunch. It’s the ideal side dish for BBQs, picnics, or any casual gathering. The balance of creamy, tangy, and salty flavors will have everyone reaching for seconds. Quick to prepare and full of flavor, this Frito Corn Salad is a guaranteed hit at your next get-together!
Why You’ll Love This Frito Corn Salad
This Frito Corn Salad is a game-changer for busy days! It comes together in just 15 minutes, making it a breeze to whip up. The combination of fresh veggies and creamy dressing creates a flavor explosion that’s hard to resist. Plus, the crunchy Fritos add a delightful twist that keeps everyone coming back for more. It’s a crowd-pleaser that’s perfect for any occasion, and you’ll love how easy it is to make!
Ingredients for Frito Corn Salad
Gathering the right ingredients is key to making a delicious Frito Corn Salad. Here’s what you’ll need:
Corn kernels: Fresh, frozen, or canned—each option brings a sweet crunch to the salad.
Cherry tomatoes: Their juicy sweetness adds a pop of color and flavor.
Bell pepper: Any color works! It contributes a crisp texture and vibrant hue.
Red onion: This adds a sharp bite that balances the creaminess of the dressing.
Sour cream: It provides a rich, tangy base for the dressing.
Mayonnaise: Creamy and smooth, it enhances the dressing’s texture.
Lime juice: A splash of acidity brightens the flavors and adds freshness.
Chili powder: This spice gives the salad a subtle kick and depth of flavor.
Garlic powder: A sprinkle of this adds a savory note that complements the veggies.
Salt and pepper: Essential for seasoning and enhancing all the flavors.
Fritos corn chips: The star of the show! Their crunch is what makes this salad unforgettable.
Shredded cheddar cheese: It adds a creamy, cheesy element that everyone loves.
Green onions: Sliced for garnish, they add a fresh, mild onion flavor.
For those looking to spice things up, consider adding diced jalapeños or a dash of hot sauce to the dressing. If you want a healthier twist, Greek yogurt can replace sour cream, or you can use a dairy-free mayonnaise for a vegan version. You can find the exact quantities for each ingredient at the bottom of the article, ready for printing!
How to Make Frito Corn Salad
Making Frito Corn Salad is as easy as pie! Follow these simple steps, and you’ll have a delicious dish ready in no time. Let’s dive in!
Step 1: Combine the Fresh Ingredients
Start by grabbing a large mixing bowl. Toss in the corn kernels, halved cherry tomatoes, diced bell pepper, and red onion.
Mix everything together gently until the colors blend beautifully. The vibrant hues of the veggies will make your heart sing!
Step 2: Prepare the Dressing
In a separate bowl, whisk together the sour cream, mayonnaise, lime juice, chili powder, garlic powder, salt, and pepper.
Make sure it’s smooth and creamy. This dressing is the magic that ties all the flavors together, so don’t rush this step!
Step 3: Mix the Dressing with the Vegetables
Now, pour that luscious dressing over your colorful vegetable mixture.
Stir gently until every piece is coated in that creamy goodness. You want to see the dressing hugging each veggie, creating a delightful medley of flavors.
Step 4: Add Fritos and Cheese
Here comes the fun part! Carefully fold in the Fritos corn chips and shredded cheddar cheese.
Be gentle to avoid crushing the chips. You want that satisfying crunch to shine through in every bite!
Step 5: Chill and Serve
Cover the salad and pop it in the fridge for at least 30 minutes.
This chilling time allows the flavors to meld beautifully. Trust me, the wait will be worth it when you take that first bite!
Tips for Success
Use fresh ingredients for the best flavor and texture.
Chill the salad longer if you can; it enhances the taste.
Mix the Fritos in just before serving to keep them crunchy.
Feel free to customize with your favorite veggies or spices.
Double the recipe for larger gatherings; it’s always a hit!
Equipment Needed
Large mixing bowl: A big bowl is essential for combining all the ingredients. A salad bowl works too!
Whisk: Perfect for mixing the dressing. A fork can do the job in a pinch.
Measuring cups: Handy for precise ingredient amounts, but eyeballing works for casual cooks.
Spatula: Great for folding in the Fritos without crushing them.
Variations of Frito Corn Salad
Spicy Frito Corn Salad: Add diced jalapeños or a splash of hot sauce to the dressing for an extra kick.
Southwestern Twist: Incorporate black beans and corn for a heartier version that’s packed with protein.
Vegan Option: Substitute Greek yogurt with a dairy-free yogurt and use vegan mayonnaise for a plant-based delight.
Herbed Frito Corn Salad: Mix in fresh herbs like cilantro or parsley for a burst of freshness.
Fruit Fusion: Toss in diced avocado or mango for a sweet and creamy contrast to the crunchy Fritos.
Serving Suggestions for Frito Corn Salad
Pair it with grilled chicken or burgers for a delightful summer meal.
Serve alongside tortilla chips and salsa for a fun appetizer spread.
Drizzle with extra lime juice for a zesty finish.
Garnish with fresh cilantro for a pop of color.
Enjoy with a refreshing iced tea or lemonade!
FAQs about Frito Corn Salad
As you dive into making this delightful Frito Corn Salad, you might have a few questions. Here are some common queries I’ve encountered, along with helpful answers!
Can I make Frito Corn Salad ahead of time?
Absolutely! You can prepare the salad a day in advance. Just remember to add the Fritos right before serving to keep them crunchy.
What can I substitute for sour cream?
If you’re looking for a healthier option, Greek yogurt works wonderfully as a substitute. It adds creaminess without sacrificing flavor!
Is Frito Corn Salad gluten-free?
Yes, as long as you use gluten-free Fritos, this salad can be a great gluten-free option for gatherings.
How long does Frito Corn Salad last in the fridge?
It typically stays fresh for about 3 days in the fridge. Just make sure to store it in an airtight container!
Can I add protein to Frito Corn Salad?
Definitely! Adding grilled chicken, shrimp, or even black beans can turn this salad into a satisfying main dish.
Final Thoughts
Frito Corn Salad is more than just a dish; it’s a celebration of flavors and textures that brings joy to any table. The vibrant colors and crunchy Fritos create a delightful experience that’s perfect for gatherings or a simple family dinner. I love how easy it is to whip up, making it a go-to recipe for busy days. Each bite is a reminder that cooking can be fun and rewarding, even amidst the chaos of life. So, gather your loved ones, serve this salad, and watch as smiles light up the room!
“`
ating
Frito Corn Salad: Discover This Easy, Flavorful Recipe!
Frito Corn Salad is a delicious and easy-to-make dish that combines fresh vegetables, creamy dressing, and crunchy Fritos corn chips for a flavorful side or appetizer.
As the summer sun blazes down, I find myself craving something cool and refreshing. That’s where my Hibiscus Strawberry Refresher comes in! This delightful drink is not just a treat for the taste buds; it’s a quick solution for those busy days when you need a little pick-me-up. With vibrant hibiscus flowers and juicy strawberries, it’s like summer in a glass. Plus, it’s easy to whip up, making it perfect for impressing friends or simply enjoying a moment of bliss on your porch. Trust me, this is one sip you won’t forget!
Why You’ll Love This Hibiscus Strawberry Refresher
This Hibiscus Strawberry Refresher is a game-changer for busy moms and professionals alike. It’s incredibly easy to make, taking just a few simple steps. The vibrant flavors of hibiscus and strawberries dance together, creating a taste that’s both refreshing and satisfying. Plus, it’s a guilt-free treat, perfect for those hot summer days. You’ll love how it brightens your day and impresses your loved ones without breaking a sweat!
Ingredients for Hibiscus Strawberry Refresher
Gathering the right ingredients is the first step to creating your Hibiscus Strawberry Refresher. Here’s what you’ll need:
Water: The base of your drink, it helps extract the vibrant flavors from the hibiscus flowers.
Dried hibiscus flowers: These beautiful petals give the drink its stunning color and tart flavor. You can find them at health food stores or online.
Fresh strawberries: Sweet and juicy, they add a delightful contrast to the tartness of hibiscus. Make sure they’re ripe for the best flavor!
Honey or agave syrup: This natural sweetener balances the tartness. Adjust the amount to suit your taste; you can even use maple syrup for a unique twist.
Fresh lime juice: A splash of lime brightens the drink and adds a zesty kick. Freshly squeezed is always best!
Ice cubes: Essential for serving, they keep your refresher chilled and refreshing.
Fresh mint leaves (optional): These add a lovely aroma and a pop of color when garnishing your drink.
For exact measurements, check the bottom of the article where you can find everything listed for easy printing. Feel free to get creative with your ingredients; after all, cooking is all about experimenting!
How to Make Hibiscus Strawberry Refresher
Now that you have your ingredients ready, let’s dive into making this delightful Hibiscus Strawberry Refresher. Follow these simple steps, and you’ll have a refreshing summer drink in no time!
Step 1: Boil the Water
Start by pouring 2 cups of water into a medium saucepan. Place it on the stove and bring it to a rolling boil. This is the first step in unlocking the vibrant flavors of the hibiscus flowers.
Step 2: Steep the Hibiscus Flowers
Once the water is boiling, remove the saucepan from heat. Add in the dried hibiscus flowers and let them steep for about 15 minutes. The longer you steep, the richer the color and flavor will be. It’s like watching a beautiful sunset unfold in your pot!
Step 3: Strain the Tea
After steeping, grab a fine mesh strainer and pour the hibiscus tea into a pitcher. Discard the flowers; they’ve done their job! You’ll be left with a stunning ruby-red liquid that’s just begging to be enjoyed.
Step 4: Sweeten the Mixture
While the tea is still warm, stir in your choice of honey or agave syrup. This is where you can adjust the sweetness to your liking. Just remember, a little goes a long way! Mix until fully dissolved, and let the sweetness dance with the tartness of the hibiscus.
Step 5: Add Strawberries and Lime Juice
Next, toss in the sliced fresh strawberries and pour in the fresh lime juice. The strawberries will infuse their sweetness, while the lime adds a zesty kick. Give it a gentle stir, and let those flavors mingle!
Step 6: Chill the Refresher
Allow the mixture to cool to room temperature. Then, pop it in the refrigerator for at least an hour. This chilling step is crucial for a refreshing sip on a hot day. Trust me, the wait will be worth it!
Step 7: Serve and Garnish
When you’re ready to serve, fill a glass with ice cubes and pour the chilled refresher over the top. For an extra touch, garnish with fresh mint leaves. Not only does it look beautiful, but it also adds a lovely aroma. Cheers to summer!
Tips for Success
Use fresh, ripe strawberries for the best flavor.
Adjust the sweetness to your preference; taste as you go!
For a fun twist, add a splash of sparkling water before serving.
Make a larger batch and store it in the fridge for quick access.
Experiment with other fruits like raspberries or blueberries for variety.
Equipment Needed
Medium saucepan: A regular pot works just fine if you don’t have one.
Fine mesh strainer: A regular colander can be used in a pinch.
Pitcher: Any large container will do for mixing and serving.
Measuring cups: Use any cup you have on hand for approximate measurements.
Variations
Berry Medley: Swap out strawberries for a mix of your favorite berries like blueberries, raspberries, or blackberries for a colorful twist.
Herbal Infusion: Add a few sprigs of fresh basil or rosemary while steeping the hibiscus for an aromatic herbal note.
Spicy Kick: For those who enjoy a bit of heat, add a slice of jalapeño to the mixture before chilling.
Alcoholic Version: Turn this refresher into a cocktail by adding a splash of vodka or rum for a fun summer drink.
Low-Calorie Option: Use a sugar substitute like stevia or monk fruit to reduce calories while still enjoying the sweetness.
Serving Suggestions
Pair your Hibiscus Strawberry Refresher with light summer salads for a refreshing meal.
Serve alongside grilled chicken or fish for a delightful contrast of flavors.
For a festive touch, use mason jars for serving and add colorful straws.
Enjoy with a slice of lemon or lime on the rim for added zest.
FAQs about Hibiscus Strawberry Refresher
Can I make Hibiscus Strawberry Refresher ahead of time?
Absolutely! This refreshing beverage can be made a day in advance. Just store it in the refrigerator, and it will be ready to serve when you need it. The flavors may even deepen overnight, making it even more delicious!
Is Hibiscus Strawberry Refresher suitable for kids?
Yes! This drink is a great option for kids. It’s naturally sweetened and packed with fruity flavors. Just be mindful of the sweetness level, and feel free to adjust it to suit their taste buds.
Can I use fresh hibiscus flowers instead of dried?
While dried hibiscus flowers are typically used for their concentrated flavor, you can use fresh hibiscus if you have access to them. Just remember that the flavor may be milder, so you might need to adjust the steeping time.
How long can I store the Hibiscus Strawberry Refresher?
This delightful drink can be stored in the refrigerator for up to three days. Just make sure to keep it in an airtight container to maintain its freshness. Give it a good stir before serving, as the ingredients may settle.
Can I add other fruits to the Hibiscus Strawberry Refresher?
Definitely! Feel free to experiment with other fruits like raspberries, blueberries, or even citrus slices. Each fruit will bring its unique flavor, making your refresher even more exciting!
Final Thoughts
Creating this Hibiscus Strawberry Refresher is more than just making a drink; it’s about embracing the joy of summer. Each sip transports me to sun-drenched afternoons, where laughter and good company fill the air. The vibrant colors and refreshing flavors bring a smile to my face, reminding me of the simple pleasures in life. Whether you’re hosting a gathering or enjoying a quiet moment, this refresher is sure to brighten your day. So, gather your ingredients, and let this delightful drink become a staple in your summer routine. Cheers to refreshing moments and cherished memories!
ating
Hibiscus Strawberry Refresher: Refresh Your Summer Sip!
A refreshing summer drink made with hibiscus flowers and strawberries, perfect for hot days.
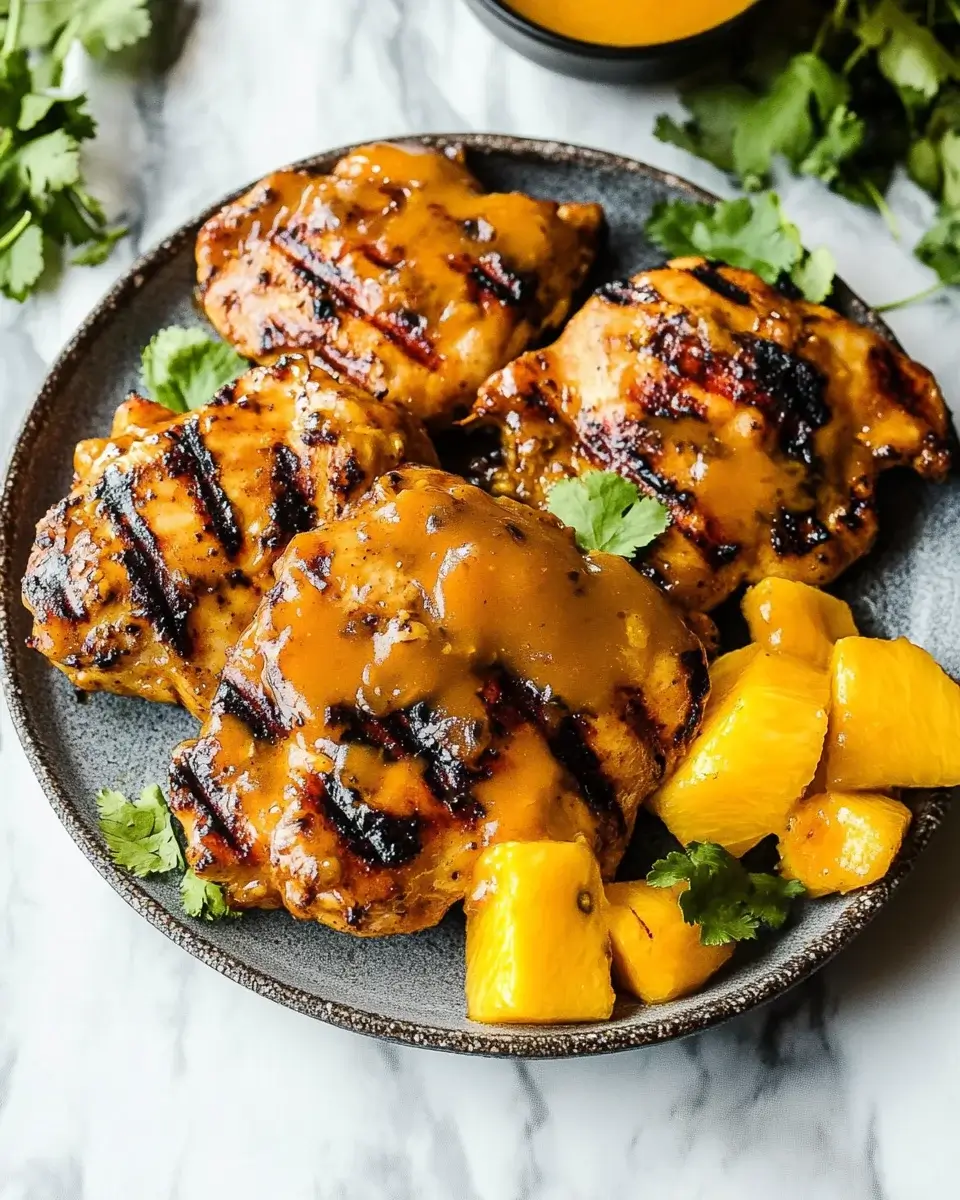
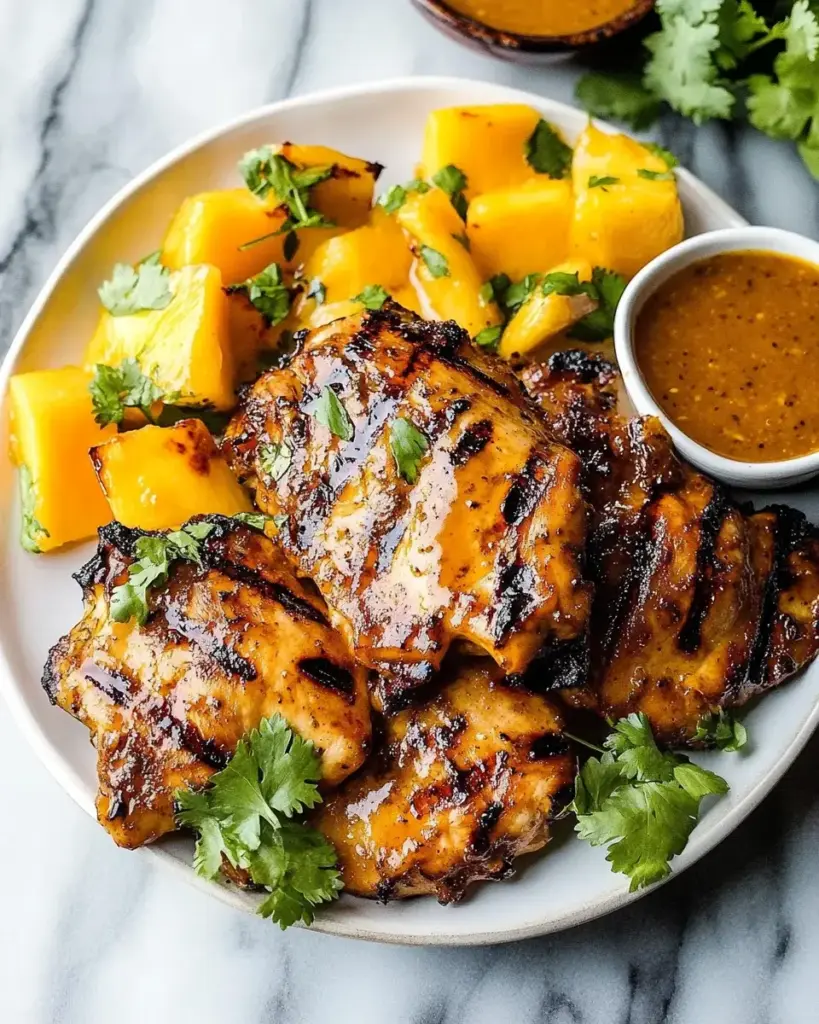
These Sticky Cilantro Lime Chicken Thighs are the perfect balance of tangy, savory, and slightly sweet flavors. Marinated in a zesty cilantro-lime sauce and cooked to perfection, the chicken thighs turn crispy on the outside while remaining tender and juicy on the inside. The sticky glaze creates a mouthwatering finish that will have you coming back for more. Whether you’re serving them with rice, salad, or just on their own, these chicken thighs are sure to steal the show at any meal. Simple to make but full of vibrant, bold flavors—get ready for a dish that’s as satisfying as it is delicious!
Why You’ll Love This Sticky Cilantro Lime Chicken Thighs
This recipe is a game-changer for busy nights! It’s incredibly easy to prepare, requiring just a few simple ingredients that you probably already have in your pantry. The marinade infuses the chicken with a delightful balance of sweet and tangy flavors, making it a hit with both kids and adults. Plus, whether you grill or bake, the cooking time is quick, allowing you to enjoy a delicious meal without the fuss!
Ingredients for Sticky Cilantro Lime Chicken Thighs
Gathering the right ingredients is key to making these Sticky Cilantro Lime Chicken Thighs shine. Here’s what you’ll need:
Bone-in, skin-on chicken thighs: These are juicy and flavorful, perfect for soaking up the marinade.
Fresh lime juice: The star of the show! It adds a zesty brightness that elevates the dish.
Honey: This natural sweetener balances the acidity of the lime, creating that sticky goodness.
Soy sauce: It brings a savory depth to the marinade, enhancing the overall flavor.
Olive oil: Helps to keep the chicken moist while adding richness.
Garlic: Minced garlic adds a punch of flavor that complements the other ingredients beautifully.
Ground cumin: This spice adds warmth and a hint of earthiness to the dish.
Black pepper: A simple seasoning that enhances the overall taste.
Red pepper flakes (optional): For those who like a little heat, these can spice things up!
Fresh cilantro: Chopped cilantro adds a fresh, herbaceous note that brightens the dish.
Lime wedges: For serving, these add an extra burst of freshness when squeezed over the chicken.
For exact measurements, check the bottom of the article where you can find everything listed for easy printing. Feel free to get creative with your ingredients! You can substitute chicken thighs with boneless, skinless chicken breasts for a lighter option, just remember to adjust the cooking time accordingly. Happy cooking!
How to Make Sticky Cilantro Lime Chicken Thighs
Now that you have all your ingredients ready, let’s dive into the steps to create these mouthwatering Sticky Cilantro Lime Chicken Thighs. Follow along, and I promise you’ll have a dish that’s bursting with flavor!
Step 1: Prepare the Marinade
Start by grabbing a large bowl. Whisk together the fresh lime juice, honey, soy sauce, olive oil, minced garlic, ground cumin, black pepper, and red pepper flakes if you’re feeling adventurous. This marinade is the magic potion that will transform your chicken into a sticky, flavorful delight!
Step 2: Marinate the Chicken
Next, add the chicken thighs to the bowl, ensuring they are fully coated in that luscious marinade. Cover the bowl with plastic wrap and pop it in the fridge. Let it marinate for at least an hour, but if you can, aim for four hours. The longer, the better! This allows the flavors to really sink in.
Step 3: Preheat the Grill or Oven
While the chicken is soaking up all that goodness, it’s time to preheat your grill or oven. If you’re grilling, set it to medium-high heat. For baking, preheat your oven to 400°F (200°C). If you’re using a grill, don’t forget to lightly oil the grates to prevent sticking!
Step 4: Cook the Chicken
Once your grill or oven is ready, it’s showtime! Remove the chicken from the marinade, but don’t toss that marinade just yet. If grilling, place the chicken thighs skin-side down and grill for about 6-8 minutes. Flip them over and grill for another 6-8 minutes until they reach an internal temperature of 165°F (75°C). If baking, arrange the chicken on a baking sheet and bake for 35-40 minutes, basting with the reserved marinade halfway through for extra flavor.
Step 5: Rest and Garnish
After cooking, let the chicken rest for about 5 minutes. This helps keep it juicy! Once rested, garnish with freshly chopped cilantro and serve with lime wedges. Squeeze that lime over the chicken for an extra zing. Enjoy your delicious creation!
Tips for Success
Always marinate the chicken for at least an hour; longer is better for flavor.
Use a meat thermometer to ensure your chicken reaches 165°F (75°C) for perfect doneness.
Don’t skip the resting time after cooking; it keeps the chicken juicy.
Feel free to customize the marinade with your favorite herbs or spices.
For a smoky flavor, try adding a dash of smoked paprika to the marinade.
Equipment Needed
Large bowl: For mixing the marinade. A mixing jug works too!
Whisk: To blend the marinade ingredients. A fork can do the trick as well.
Grill or oven: For cooking the chicken. A stovetop grill pan is a great alternative.
Meat thermometer: To check doneness. If you don’t have one, just cut into the chicken to check for clear juices.
Variations
Spicy Cilantro Lime Chicken: Add diced jalapeños to the marinade for an extra kick.
Herb-Infused: Mix in fresh herbs like parsley or basil for a unique twist on flavor.
Honey Mustard Version: Substitute half of the honey with Dijon mustard for a tangy sweetness.
Low-Carb Option: Use a sugar-free honey substitute to keep it keto-friendly.
Vegetarian Delight: Swap chicken for firm tofu or portobello mushrooms, marinating them the same way.
Serving Suggestions
Pair with fluffy jasmine rice or quinoa to soak up the delicious marinade.
Serve alongside a fresh garden salad for a light, refreshing contrast.
Complement with grilled vegetables for a colorful plate.
Enjoy with a chilled glass of white wine or a zesty margarita.
Garnish with extra cilantro and lime wedges for a vibrant presentation.
FAQs about Sticky Cilantro Lime Chicken Thighs
Can I use boneless chicken thighs for this recipe?
Absolutely! Boneless chicken thighs work well, but remember to reduce the cooking time. They usually cook faster, so keep an eye on them to avoid drying out.
How long can I marinate the chicken?
You can marinate the chicken for as little as one hour, but for the best flavor, aim for four hours or even overnight. Just make sure to keep it in the fridge!
What can I serve with Sticky Cilantro Lime Chicken Thighs?
This dish pairs beautifully with jasmine rice, a fresh salad, or grilled veggies. You can also enjoy it in tacos for a fun twist!
Can I make this recipe ahead of time?
Yes! You can marinate the chicken a day in advance. Just cook it when you’re ready to enjoy a delicious meal without the last-minute rush.
Is this recipe gluten-free?
Yes, as long as you use gluten-free soy sauce, this recipe is gluten-free. It’s a great option for those with dietary restrictions!
Final Thoughts
Cooking should be a joyful experience, and my Sticky Cilantro Lime Chicken Thighs recipe embodies that spirit! The vibrant flavors and simple preparation make it a go-to for busy nights or special gatherings. Each bite is a delightful blend of sweet and tangy, sure to bring smiles to your family’s faces. Plus, the versatility of this dish means you can adapt it to suit your tastes. So, gather your loved ones around the table, savor the moment, and enjoy the satisfaction of creating something truly delicious. Happy cooking, friends!
“`
ating
Sticky Cilantro Lime Chicken Thighs: A Flavorful Delight!
Sticky Cilantro Lime Chicken Thighs are a flavorful and juicy dish marinated in a zesty lime and honey sauce, perfect for grilling or baking.
In a large bowl, whisk together lime juice, honey, soy sauce, olive oil, minced garlic, cumin, black pepper, and red pepper flakes (if using) until well combined.
Add the chicken thighs to the marinade, ensuring they are fully coated. Cover and refrigerate for at least 1 hour, or up to 4 hours for more flavor.
Preheat your grill or oven to 400°F (200°C). If using a grill, lightly oil the grates.
Remove the chicken from the marinade, reserving the marinade for later.
Grill the chicken thighs skin-side down for about 6-8 minutes, then flip and grill for another 6-8 minutes until the internal temperature reaches 165°F (75°C). If baking, place the chicken on a baking sheet and bake for 35-40 minutes, basting with the reserved marinade halfway through.
Once cooked, remove the chicken from the grill or oven and let it rest for 5 minutes.
Garnish with chopped cilantro and serve with lime wedges.
Notes
For a spicier kick, add a diced jalapeño to the marinade.
For a lighter option, substitute chicken thighs with boneless, skinless chicken breasts and reduce cooking time accordingly.
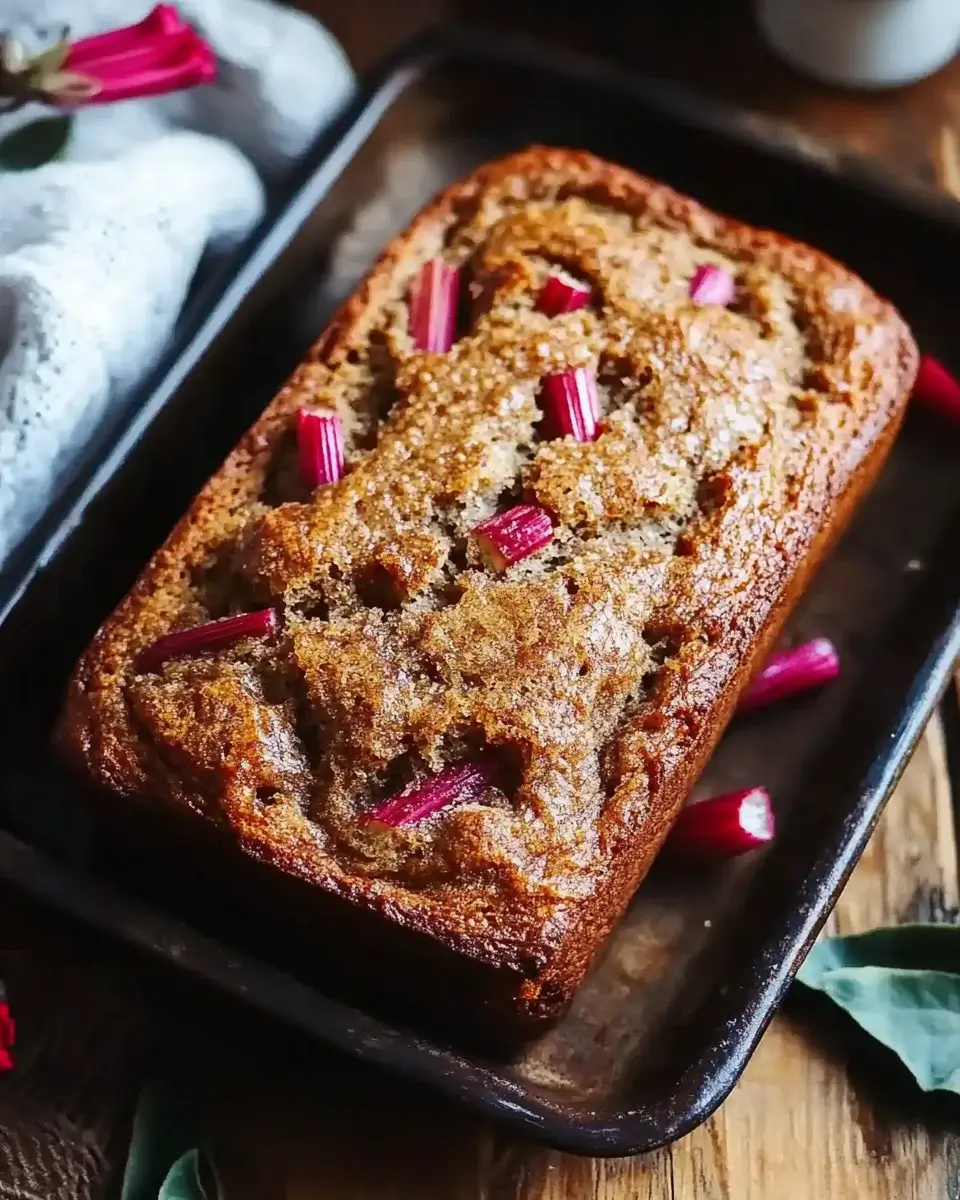
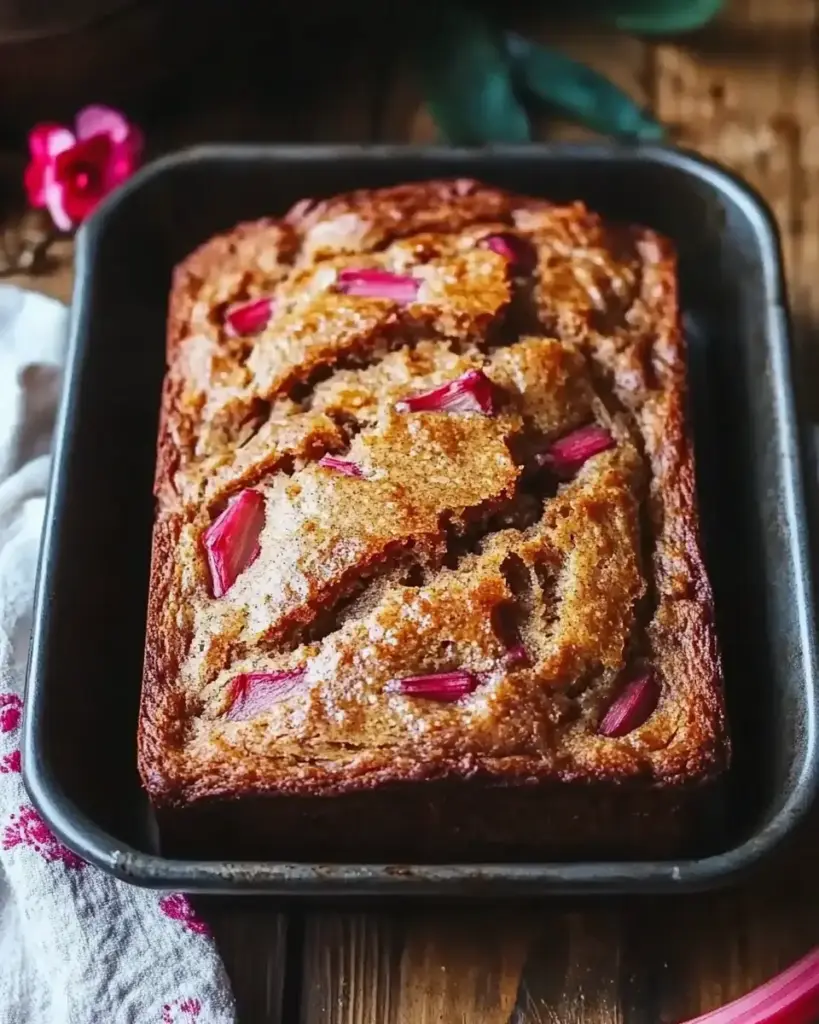
This Cinnamon Rhubarb Bread is the perfect way to celebrate the unique tartness of rhubarb paired with the warmth of cinnamon. The soft, moist bread is swirled with a rich cinnamon-sugar blend, creating an irresistible sweet-spicy aroma as it bakes. With a slightly tangy kick from the rhubarb and a tender crumb, this bread is a cozy treat for breakfast, dessert, or anytime you crave a comforting snack. Whether you enjoy it fresh out of the oven or toasted with a pat of butter, this Cinnamon Rhubarb Bread is sure to become a favorite in your baking repertoire!
Why You’ll Love This Cinnamon Rhubarb Bread
This Cinnamon Rhubarb Bread is not just a treat for your taste buds; it’s a lifesaver for your busy schedule. It comes together quickly, making it perfect for those hectic mornings or last-minute gatherings. The combination of sweet and tart flavors is simply divine, and the warm cinnamon adds a cozy touch. Plus, it’s a fantastic way to sneak in some fruit, making it a guilt-free indulgence!
Ingredients for Cinnamon Rhubarb Bread
Gathering the right ingredients is the first step to creating your Cinnamon Rhubarb Bread. Here’s what you’ll need:
All-purpose flour: This is the base of your bread, providing structure and texture.
Baking powder: A leavening agent that helps the bread rise, making it light and fluffy.
Baking soda: Another leavening agent that works with acidic ingredients like buttermilk.
Salt: Enhances the flavors and balances the sweetness of the bread.
Ground cinnamon: Adds warmth and a delightful aroma, making every bite comforting.
Unsalted butter: Provides richness and moisture; make sure it’s softened for easy mixing.
Granulated sugar: Sweetens the bread and helps create a lovely crust.
Large eggs: Bind the ingredients together and add moisture.
Vanilla extract: A splash of flavor that complements the cinnamon and rhubarb beautifully.
Buttermilk: Adds tanginess and keeps the bread moist; you can substitute with regular milk mixed with a bit of vinegar.
Chopped rhubarb: The star of the show! Its tartness balances the sweetness perfectly.
Chopped walnuts or pecans (optional): For a delightful crunch and added flavor.
Brown sugar and ground cinnamon (for topping): This mixture creates a sweet, crunchy topping that’s simply irresistible.
For exact measurements, check the bottom of the article where you can find everything listed for easy printing. Happy baking!
How to Make Cinnamon Rhubarb Bread
Now that you have your ingredients ready, let’s dive into the fun part: making your Cinnamon Rhubarb Bread. Follow these simple steps, and you’ll have a delicious loaf in no time!
Step 1: Preheat the Oven
First things first, preheat your oven to 350°F (175°C). This ensures your bread bakes evenly. While the oven warms up, prepare your loaf pan by greasing it or lining it with parchment paper. This little step makes for easy removal later!
Step 2: Mix Dry Ingredients
In a medium bowl, whisk together the all-purpose flour, baking powder, baking soda, salt, and ground cinnamon. This mixture is the backbone of your Cinnamon Rhubarb Bread. Set it aside for now; it’ll be ready to join the party soon!
Step 3: Cream Butter and Sugar
In a large mixing bowl, cream together the softened butter and granulated sugar until it’s light and fluffy. This step is crucial as it incorporates air into the mixture, giving your bread a lovely texture. You’ll know it’s ready when it looks pale and fluffy!
Step 4: Add Eggs and Vanilla
Next, beat in the eggs one at a time. Make sure to mix well after each addition. Then, stir in the vanilla extract. The aroma of vanilla combined with butter and sugar is simply heavenly!
Step 5: Combine Ingredients
Now, it’s time to bring everything together. Gradually add the dry ingredients to the butter mixture, alternating with the buttermilk. Start and end with the dry ingredients. Mix until just combined; overmixing can lead to a dense loaf, and we want it light and fluffy!
Step 6: Fold in Rhubarb and Nuts
Gently fold in the chopped rhubarb and nuts, if you’re using them. This is where the magic happens! The tartness of the rhubarb will shine through, balancing the sweetness of the bread.
Step 7: Prepare for Baking
Pour the batter into your prepared loaf pan and smooth the top with a spatula. This helps it bake evenly. You’re almost there!
Step 8: Add Topping
In a small bowl, mix the brown sugar and ground cinnamon for the topping. Sprinkle this mixture evenly over the batter. This will create a sweet, crunchy layer that’s simply irresistible!
Step 9: Bake
Now, pop your loaf pan into the oven and bake for 55-65 minutes. Keep an eye on it! You’ll know it’s done when a toothpick inserted into the center comes out clean. The smell wafting through your kitchen will be worth the wait!
Step 10: Cool
Once baked, allow the bread to cool in the pan for about 10 minutes. Then, transfer it to a wire rack to cool completely. This step is essential for achieving the perfect texture. Plus, it gives you a moment to savor the delightful aroma!
Tips for Success
Make sure your butter is softened for easy mixing; it should be at room temperature.
Don’t skip the cooling step; it helps the bread set and enhances the flavor.
Use fresh rhubarb for the best taste, but frozen works just fine too!
For a fun twist, try adding chocolate chips or a sprinkle of nutmeg.
Store leftovers in an airtight container to keep it fresh longer.
Equipment Needed
9×5-inch loaf pan: Essential for baking your bread; a round cake pan can work in a pinch.
Mixing bowls: Use a large bowl for wet ingredients and a medium one for dry; any size will do.
Whisk: Perfect for mixing dry ingredients; a fork can also get the job done.
Spatula: Great for folding in ingredients; a wooden spoon is a good alternative.
Measuring cups and spoons: Necessary for accuracy; you can use a kitchen scale if you prefer.
Variations
Berry Bliss: Substitute rhubarb with fresh or frozen berries like strawberries or blueberries for a sweeter twist.
Nutty Delight: Add a mix of chopped nuts, such as almonds or pecans, for extra crunch and flavor.
Gluten-Free Option: Use a gluten-free all-purpose flour blend to make this bread suitable for gluten-sensitive friends.
Vegan Version: Replace eggs with flaxseed meal mixed with water and use plant-based butter and milk.
Spiced Up: Add a pinch of nutmeg or ginger for an extra layer of warmth and spice.
Serving Suggestions
Enjoy a warm slice of Cinnamon Rhubarb Bread with a pat of butter for a cozy breakfast.
Pair it with a cup of hot tea or coffee for a delightful afternoon snack.
Serve with fresh fruit or yogurt for a light and refreshing dessert.
For a special touch, dust with powdered sugar before serving.
FAQs about Cinnamon Rhubarb Bread
As you embark on your baking adventure with Cinnamon Rhubarb Bread, you might have a few questions. Here are some common queries I’ve encountered, along with helpful answers to guide you along the way!
Can I use frozen rhubarb in this recipe?
Absolutely! Frozen rhubarb works just as well as fresh. Just make sure to chop it while still frozen to prevent it from becoming mushy.
How do I store leftover Cinnamon Rhubarb Bread?
Store your bread in an airtight container at room temperature for up to three days. For longer storage, wrap it tightly in plastic wrap and freeze it for up to three months.
Can I make this bread ahead of time?
Yes! You can bake it a day in advance. Just let it cool completely before storing it. The flavors will meld beautifully overnight!
What can I substitute for buttermilk?
If you don’t have buttermilk on hand, mix one cup of regular milk with a tablespoon of vinegar or lemon juice. Let it sit for about five minutes, and you’re good to go!
Is this recipe suitable for a gluten-free diet?
Yes! You can easily make a gluten-free version by using a gluten-free all-purpose flour blend. Just ensure it contains xanthan gum for the best texture.
Final Thoughts
There’s something truly special about baking Cinnamon Rhubarb Bread. It’s not just about the delicious flavors; it’s about the memories created in the kitchen. The warm aroma wafting through your home invites everyone to gather around, sharing stories and laughter. Each slice is a reminder that even on the busiest days, we can carve out a moment of joy. Whether you enjoy it fresh from the oven or as a delightful snack later, this bread brings comfort and happiness. So, roll up your sleeves and let this recipe become a cherished part of your family traditions!
“`
ating
Cinnamon Rhubarb Bread: A Deliciously Unique Recipe!
Cinnamon Rhubarb Bread is a deliciously unique recipe that combines the tartness of rhubarb with the warm flavors of cinnamon, creating a delightful loaf perfect for any occasion.
Preheat your oven to 350°F (175°C). Grease a 9×5-inch loaf pan or line it with parchment paper.
In a medium bowl, whisk together the flour, baking powder, baking soda, salt, and ground cinnamon. Set aside.
In a large mixing bowl, cream together the softened butter and granulated sugar until light and fluffy.
Beat in the eggs one at a time, then stir in the vanilla extract.
Gradually add the dry ingredients to the butter mixture, alternating with the buttermilk. Begin and end with the dry ingredients, mixing until just combined.
Gently fold in the chopped rhubarb and nuts, if using.
Pour the batter into the prepared loaf pan and smooth the top.
In a small bowl, mix the brown sugar and ground cinnamon for the topping, then sprinkle it evenly over the batter.
Bake for 55-65 minutes, or until a toothpick inserted into the center comes out clean.
Allow the bread to cool in the pan for about 10 minutes before transferring it to a wire rack to cool completely.
Notes
For a sweeter twist, add 1/2 cup of chocolate chips to the batter.
If rhubarb is not available, substitute it with chopped strawberries or apples for a different flavor profile.
Grilled Mango Chicken Recipe. This delightful meal combines the juicy flavors of grilled chicken with the sweetness of ripe mango, creating a perfect balance that tantalizes your taste buds. Whether you’re hosting a summer barbecue or simply enjoying a weeknight dinner, this recipe is sure to become a favorite.
What Makes Grilled Mango Chicken Recipe Special?
Grilled Mango Chicken Recipe apart is its unique blend of flavors. The marinade, made with fresh lime juice, honey, and spices, infuses the chicken with a zesty kick. The addition of mango not only adds sweetness but also brings a tropical flair to the dish. This recipe is not just about taste; it’s also about health. With lean protein from the chicken and vitamins from the mango, it’s a nutritious choice for any meal.
Moreover, grilling the chicken enhances its natural flavors while giving it a beautiful char. The process is simple and quick, making it perfect for busy weeknights or casual gatherings. Plus, the vibrant colors of the dish make it visually appealing, ensuring it stands out on your dinner table.
Grilled Mango Chicken Recipe is special because it combines health, flavor, and ease of preparation. It’s a dish that brings joy to your palate and warmth to your heart. So, let’s dive into the ingredients and get started on this culinary adventure!
Ingredients for Grilled Mango Chicken Recipe
Grilled Mango Chicken Recipe, you’ll need a few simple yet flavorful ingredients. Each component plays a vital role in enhancing the overall taste of the dish. Here’s what you’ll need:
2 large boneless, skinless chicken breasts (about 1 pound total)
1 ripe mango, peeled and diced
1/4 cup fresh lime juice (about 2 limes)
2 tablespoons honey
2 tablespoons olive oil
2 cloves garlic, minced
1 teaspoon ground cumin
1 teaspoon paprika
Salt and pepper to taste
Fresh cilantro, for garnish (optional)
These ingredients are not only easy to find but also packed with flavor. The chicken breasts provide a lean source of protein, while the mango adds a sweet and tropical twist. Lime juice brings a refreshing acidity, balancing the sweetness of honey. Olive oil helps to keep the chicken moist during grilling, and the spices add depth to the marinade.
Grilled Mango Chicken Recipe lies in its versatility. Now that you have your ingredients ready, let’s move on to the preparation steps!
Step-by-Step Preparation of Grilled Mango Chicken Recipe
Grilled Mango Chicken Recipe. This step-by-step guide will help you create a delicious meal that’s sure to impress. Let’s get started!
Step 1: Marinating the Chicken
Grilled Mango Chicken Recipe is marinating the chicken. This process is crucial as it infuses the chicken with flavor. Begin by placing the chicken breasts in a resealable plastic bag or a shallow dish. Next, pour half of the marinade you prepared earlier over the chicken. Make sure the chicken is well-coated.
Seal the bag or cover the dish tightly. Now, let the chicken marinate in the refrigerator for at least 30 minutes. If you have more time, letting it marinate for up to 2 hours will enhance the flavor even more. While the chicken is soaking up all those delicious flavors, you can move on to the next step!
Step 2: Preparing the Mango Salsa
While the chicken is marinating, you can prepare a fresh mango salsa to serve alongside your grilled chicken. This salsa adds a burst of flavor and freshness to the dish. Start by dicing another ripe mango. You can also add diced red onion, chopped jalapeño, and a sprinkle of salt for extra zest.
Grilled Mango Chicken Recipe to a whole new level!
Step 3: Grilling the Chicken
Once your chicken has marinated, it’s time to fire up the grill! Preheat your grill to medium-high heat. Remove the chicken from the marinade and discard the used marinade. Place the chicken breasts on the grill and cook for about 6-7 minutes on each side. You want the internal temperature to reach 165°F for safe consumption.
During the last few minutes of grilling, brush the reserved marinade over the chicken. This adds an extra layer of flavor and keeps the chicken moist. Once cooked, remove the chicken from the grill and let it rest for about 5 minutes. This resting period allows the juices to redistribute, making the chicken even more tender.
Step 4: Serving the Grilled Mango Chicken
Grilled Mango Chicken Recipe! Slice the grilled chicken into strips and arrange it on a serving platter. Top it with the fresh mango salsa you prepared earlier. For an added touch, garnish with fresh cilantro and extra diced mango if desired.
This dish is not only visually appealing but also bursting with flavor. Serve it alongside rice or quinoa for a complete meal. Your family and friends will be amazed at how delicious and easy this recipe is!
Variations of Grilled Mango Chicken Recipe
Grilled Mango Chicken Recipe is delightful on its own, there are many fun variations you can try. These twists can add new flavors and excitement to your meal. Let’s explore a couple of these tasty options!
Spicy Grilled Mango Chicken Recipe
Grilled Mango Chicken Recipe. To do this, simply add a diced jalapeño to the marinade. This will give your chicken a nice kick without overpowering the sweetness of the mango. You can also sprinkle some red pepper flakes for an extra layer of spice. This variation is perfect for those who love bold flavors!
Grilled Mango Chicken Recipe with Coconut Rice
Grilled Mango Chicken Recipe over coconut rice. To make coconut rice, simply cook your rice in coconut milk instead of water. This adds a creamy texture and a hint of sweetness that pairs beautifully with the grilled chicken. The combination of flavors will transport you to a tropical paradise!
Grilled Mango Chicken Recipe!
Cooking Note for Grilled Mango Chicken Recipe
Grilled Mango Chicken Recipe, there are a few cooking notes to keep in mind. These tips will help ensure that your chicken turns out perfectly every time. First, always preheat your grill. This step is crucial for achieving those beautiful grill marks and ensuring even cooking.
Additionally, consider using a meat thermometer to check the internal temperature of the chicken. This tool takes the guesswork out of cooking and guarantees that your chicken is safe to eat. Remember, the ideal temperature is 165°F. If you don’t have a thermometer, you can cut into the chicken to check that the juices run clear.
Another important note is to let the chicken rest after grilling. This resting period allows the juices to redistribute throughout the meat, making it more tender and juicy. If you slice the chicken too soon, you may lose those delicious juices, resulting in a drier texture.
Grilled Mango Chicken Recipe is versatile, so don’t hesitate to make it your own!
Serving Suggestions for Grilled Mango Chicken Recipe
Grilled Mango Chicken Recipe can be just as fun as preparing it! This dish pairs wonderfully with a variety of sides that complement its tropical flavors. Here are some serving suggestions to elevate your meal:
Rice or Quinoa: Serve the grilled chicken over a bed of fluffy rice or quinoa. Both options absorb the flavors of the marinade beautifully.
Salad: A fresh green salad with mixed greens, cherry tomatoes, and avocado makes a light and healthy side. Drizzle with a lime vinaigrette for added zest.
Grilled Vegetables: Grilled zucchini, bell peppers, or asparagus can add color and nutrition to your plate. The smoky flavor from the grill pairs well with the chicken.
Tortillas: For a fun twist, serve the chicken in warm tortillas with the mango salsa. This creates delicious tacos that are perfect for casual gatherings.
Grilled Mango Chicken Recipe will surely impress your guests and make for a memorable dining experience!
Tips for Perfecting Your Grilled Mango Chicken Recipe
Grilled Mango Chicken Recipe turns out perfectly every time, here are some helpful tips to keep in mind:
Choose the Right Chicken: Opt for fresh, high-quality chicken breasts. Organic or free-range options often have better flavor and texture.
Marinate Longer: If time allows, marinate the chicken for longer than 30 minutes. This will deepen the flavors and make the chicken even more delicious.
Don’t Overcrowd the Grill: Give each piece of chicken enough space on the grill. Overcrowding can lead to uneven cooking and steaming instead of grilling.
Use a Basting Brush: Keep a basting brush handy to apply the reserved marinade during grilling. This adds moisture and flavor to the chicken.
Experiment with Garnishes: Fresh herbs like basil or mint can add a unique touch. Try different garnishes to find your favorite combination!
Grilled Mango Chicken Recipe. Enjoy the process and have fun in the kitchen!
Cooking Note for Grilled Mango Chicken Recipe
Grilled Mango Chicken Recipe, there are a few cooking notes to keep in mind. These tips will help ensure that your chicken turns out perfectly every time. First, always preheat your grill. This step is crucial for achieving those beautiful grill marks and ensuring even cooking.
Additionally, consider using a meat thermometer to check the internal temperature of the chicken. This tool takes the guesswork out of cooking and guarantees that your chicken is safe to eat. Remember, the ideal temperature is 165°F. If you don’t have a thermometer, you can cut into the chicken to check that the juices run clear.
Another important note is to let the chicken rest after grilling. This resting period allows the juices to redistribute throughout the meat, making it more tender and juicy. If you slice the chicken too soon, you may lose those delicious juices, resulting in a drier texture.
Grilled Mango Chicken Recipe is versatile, so don’t hesitate to make it your own!
Serving Suggestions for Grilled Mango Chicken Recipe
Grilled Mango Chicken Recipe can be just as fun as preparing it! This dish pairs wonderfully with a variety of sides that complement its tropical flavors. Here are some serving suggestions to elevate your meal:
Rice or Quinoa: Serve the grilled chicken over a bed of fluffy rice or quinoa. Both options absorb the flavors of the marinade beautifully, making each bite delightful.
Fresh Salad: A crisp green salad with mixed greens, cherry tomatoes, and avocado makes a light and healthy side. Drizzle with a lime vinaigrette for added zest and freshness.
Grilled Vegetables: Grilled zucchini, bell peppers, or asparagus can add color and nutrition to your plate. The smoky flavor from the grill pairs well with the chicken, enhancing the overall taste.
Tortillas: For a fun twist, serve the chicken in warm tortillas with the mango salsa. This creates delicious tacos that are perfect for casual gatherings and family dinners.
Coleslaw: A tangy coleslaw can provide a crunchy contrast to the tender chicken. The creaminess of the slaw balances the sweetness of the mango, making for a delightful combination.
Grilled Mango Chicken Recipe will surely impress your guests and make for a memorable dining experience!
Tips for Perfecting Your Grilled Mango Chicken Recipe
Grilled Mango Chicken Recipe turns out perfectly every time, here are some helpful tips to keep in mind:
Choose the Right Chicken: Opt for fresh, high-quality chicken breasts. Organic or free-range options often have better flavor and texture, making your dish even more delicious.
Marinate Longer: If time allows, marinate the chicken for longer than 30 minutes. This will deepen the flavors and make the chicken even more tender and juicy.
Don’t Overcrowd the Grill: Give each piece of chicken enough space on the grill. Overcrowding can lead to uneven cooking and steaming instead of grilling, which can affect the texture.
Use a Basting Brush: Keep a basting brush handy to apply the reserved marinade during grilling. This adds moisture and flavor to the chicken, enhancing its taste.
Experiment with Garnishes: Fresh herbs like basil or mint can add a unique touch. Try different garnishes to find your favorite combination and elevate the presentation of your dish.
Check for Doneness: Always use a meat thermometer to ensure the chicken reaches an internal temperature of 165°F. This guarantees that your chicken is safe to eat and perfectly cooked.
Let It Rest: After grilling, let the chicken rest for about 5 minutes before slicing. This resting period allows the juices to redistribute, making the chicken more tender and flavorful.
Pair with Fresh Ingredients: Consider serving your grilled chicken with fresh ingredients like avocado or a squeeze of lime. These additions can brighten the dish and enhance the overall flavor.
Grilled Mango Chicken Recipe. Enjoy the process and have fun in the kitchen! Your family and friends will surely appreciate the effort you put into creating this delightful meal.
Breakdown of Time for Grilled Mango Chicken Recipe
Grilled Mango Chicken Recipe can help you plan your meal better. Here’s a simple breakdown of the time you’ll need for preparation and cooking.
Prep Time
Grilled Mango Chicken Recipe is approximately 15-20 minutes. This includes gathering your ingredients, marinating the chicken, and preparing the mango salsa. If you choose to marinate the chicken for longer, you can adjust this time accordingly. Remember, the longer you marinate, the more flavorful your chicken will be!
Cooking Time
Once your chicken is marinated, the cooking time is about 12-15 minutes. This includes grilling the chicken for 6-7 minutes on each side. Make sure to check the internal temperature to ensure it reaches 165°F for safe consumption. During the last few minutes, you can brush on the reserved marinade for added flavor.
Total Time
Grilled Mango Chicken Recipe to take around 45 minutes to 2 hours, depending on how long you choose to marinate the chicken. If you opt for the minimum marinating time of 30 minutes, your total time will be closer to 45 minutes. However, if you let it marinate for 2 hours, the total time will be about 2 hours and 15 minutes. This flexibility allows you to fit the recipe into your schedule easily!
With this time breakdown, you can efficiently plan your cooking and enjoy a delicious meal without any rush. Happy cooking!
Nutritional Information for Grilled Mango Chicken Recipe
Grilled Mango Chicken Recipe is essential for those who are health-conscious or following specific dietary plans. This dish not only tastes great but also provides a balanced meal with lean protein and essential nutrients. Here’s a closer look at the nutritional information per serving:
Calories
Grilled Mango Chicken Recipe contains approximately 250 calories. This makes it a light yet satisfying option for lunch or dinner. The combination of chicken and mango provides a good source of energy without excessive calories, making it a great choice for those watching their intake.
Protein
One of the standout features of this recipe is its protein content. Each serving offers about 30 grams of protein. This high protein content is beneficial for muscle repair and growth, making it an excellent meal for active individuals or anyone looking to maintain a healthy diet. The lean chicken breasts are a fantastic source of protein, helping you feel full and satisfied.
Sodium
Grilled Mango Chicken Recipe is relatively low, making it a heart-healthy option. Each serving contains around 300 milligrams of sodium, depending on how much salt you add during preparation. This allows you to enjoy flavorful chicken without worrying about excessive sodium intake, which is important for maintaining healthy blood pressure levels.
Grilled Mango Chicken Recipe is not only delicious but also nutritious. With a good balance of calories, protein, and low sodium, it’s a meal that supports a healthy lifestyle. Enjoy this dish knowing you’re making a smart choice for your health!
FAQs about Grilled Mango Chicken Recipe
Can I use frozen chicken for the Grilled Mango Chicken Recipe?
Grilled Mango Chicken Recipe. However, it’s important to thaw the chicken completely before marinating. You can do this by placing the chicken in the refrigerator overnight or using the defrost setting on your microwave. Once thawed, follow the marinating and cooking instructions as usual. Just remember that cooking times may vary slightly, so always check the internal temperature to ensure it reaches 165°F.
What can I serve with Grilled Mango Chicken Recipe?
Grilled Mango Chicken Recipe pairs well with a variety of sides. You can serve it over rice or quinoa for a hearty meal. Fresh salads, grilled vegetables, or even warm tortillas with mango salsa are great options too. For a tropical twist, consider coconut rice or a refreshing coleslaw. These sides not only complement the chicken but also enhance the overall dining experience.
How do I store leftovers of Grilled Mango Chicken Recipe?
Grilled Mango Chicken Recipe, let the chicken cool completely before placing it in an airtight container. You can keep it in the refrigerator for up to 3-4 days. If you want to store it for a longer period, consider freezing the chicken. Wrap it tightly in plastic wrap or aluminum foil, then place it in a freezer-safe bag. It can last in the freezer for up to 3 months. When ready to eat, thaw it in the refrigerator and reheat thoroughly before serving.
Can I make the Grilled Mango Chicken Recipe ahead of time?
Grilled Mango Chicken Recipe can be made ahead of time. You can marinate the chicken a day in advance and store it in the refrigerator. This allows the flavors to develop even more. Additionally, you can grill the chicken ahead of time and store it in the fridge. Just reheat it gently before serving. This makes it a convenient option for meal prep or when hosting guests!
Conclusion on Grilled Mango Chicken Recipe
Grilled Mango Chicken Recipe is a delightful dish that brings together the best of both worlds: flavor and nutrition. With its vibrant ingredients and simple preparation, this recipe is perfect for any occasion, whether it’s a casual family dinner or a festive gathering with friends. The combination of juicy grilled chicken and sweet mango creates a mouthwatering experience that is sure to impress.
Grilled Mango Chicken Recipe means you can adapt it to suit your taste preferences or dietary needs.
Moreover, the nutritional benefits of this recipe make it a smart choice for those looking to maintain a healthy lifestyle. With its high protein content and low calories, it supports your health goals while satisfying your taste buds. So, whether you’re grilling for a crowd or just for yourself, this recipe is bound to become a staple in your kitchen.
Grilled Mango Chicken Recipe is not just a meal; it’s an experience that brings joy and flavor to your dining table. Happy grilling!
Paul
Grilled Mango Chicken is a must-try summer dish!
This Grilled Mango Chicken is bursting with tropical flavor, combining juicy chicken thighs with a sweet and savory mango marinade. It’s the perfect warm-weather dish for your next BBQ or summer dinner. The tender meat is infused with mango, garlic, soy sauce, and a hint of ginger—then grilled to smoky perfection and topped with a bright cilantro finish.
2poundsbonelessskinless chicken thighs1/2 cup soy sauce (or tamari for gluten-free)2 ripe mangos, peeled and chopped (or thawed if using frozen)3 garlic cloves, peeled1/2 teaspoon grated fresh ginger2 tablespoons water (add more if needed)Fresh cilantro, chopped (optional, for garnish)
Method
In a blender or food processor, combine soy sauce, chopped mangos, garlic, ginger, and water. Blend until smooth to create the marinade.
Place chicken thighs in a large resealable bag or baking dish. Pour all but 1/4 cup of the marinade over the chicken. Seal and refrigerate for at least 2 hours or overnight for best results.
Preheat your grill to 400°F. Remove the chicken from the marinade, letting the excess drip off.
Grill the chicken for 6–7 minutes per side, or until charred and cooked through with an internal temperature of 165°F.
Remove from grill, plate the chicken, and brush with the reserved 1/4 cup of marinade. Garnish with chopped cilantro if desired. Serve warm.
Notes
This recipe also works well with chicken breasts, but thighs yield juicier results. To make this dish indoors, use a grill pan or cast-iron skillet. Leftovers are great in wraps or salads. For extra tropical flavor, serve with coconut rice or grilled pineapple.