Thai Red Curry Noodle Soup: A Flavorful Escape in a Bowl

Few dishes can transport you to another world like Thai Red Curry Noodle Soup. With its creamy coconut broth, bold red curry paste, tender chicken, and silky rice noodles, this dish is the perfect balance of heat, sweetness, and umami. Whether you’re craving comfort food or looking to expand your weeknight dinner options, this soup delivers restaurant-quality flavors with minimal effort.

Packed with aromatic ingredients like garlic, ginger, lemongrass, and fresh herbs, this dish is as nourishing as it is satisfying. It’s also incredibly versatile—you can swap the protein, adjust the spice level, and add extra veggies to make it your own.

Let’s dive into what makes this Thai-inspired soup so irresistible, along with expert cooking tips, variations, and frequently asked questions to help you master it in your own kitchen.

Why You’ll Love This Thai Red Curry Noodle Soup

1. A One-Pot Wonder

This soup comes together in a single pot, making cleanup a breeze. The broth develops deep flavor in a short amount of time, thanks to the magic of red curry paste and coconut milk.

2. Creamy, Spicy, and Comforting

Thai cuisine is all about harmony in flavors, and this soup is a perfect example. The richness of coconut milk balances the heat from the red curry paste, while the lime juice and fish sauce add brightness.

3. Quick and Easy to Make

This dish can be on the table in under an hour, making it ideal for busy weeknights. Plus, you can prep ingredients ahead of time for an even faster cooking experience.

4. Customizable to Your Taste

  • Spice Level: Add more or less curry paste to control the heat.
  • Protein Choices: Swap chicken for shrimp, tofu, or even thinly sliced beef.
  • Noodle Options: Use rice noodles, ramen, udon, or even zucchini noodles for a low-carb twist.
  • Extra Veggies: Bok choy, mushrooms, bell peppers, and carrots all work beautifully in this dish.

Secrets to Making the Perfect Thai Red Curry Noodle Soup

Even though this soup is simple to make, a few key techniques will help you achieve authentic Thai flavors at home.

1. Use High-Quality Red Curry Paste

Red curry paste is the heart of this dish, so choosing a good brand is crucial. Some of the best options include:

  • Mae Ploy: Rich, deep flavor with a bit more heat.
  • Thai Kitchen: A milder option that’s more widely available.
  • Maesri: A well-balanced paste with traditional Thai spices.

If you prefer a milder soup, start with less paste and adjust as needed. If you love spice, consider adding an extra teaspoon of curry paste or a sliced Thai chili.

2. Use Full-Fat Coconut Milk

Full-fat coconut milk creates the silky, creamy texture that makes this soup so comforting. While you can use lite coconut milk, it won’t be as rich.

3. Sauté the Curry Paste for Maximum Flavor

To get the most out of the red curry paste, always sauté it in oil before adding the broth. This deepens the flavors and brings out the aromatic spices.

4. Cook Noodles Separately for the Best Texture

If you’re making a big batch, consider cooking the noodles separately and adding them to each bowl before serving. This prevents them from soaking up too much broth and becoming mushy.

5. Balance the Flavors Like a Pro

Thai cuisine is all about balance. To get the perfect flavor:

  • Too spicy? Add a splash of coconut milk or a teaspoon of sugar.
  • Too sweet? A little extra lime juice or fish sauce will balance it out.
  • Missing depth? Fish sauce adds umami, while soy sauce or tamari can be used as a substitute.

Serving Ideas: How to Elevate Your Bowl

This soup is delicious on its own, but pairing it with the right sides and toppings can take it to the next level.

Topping Ideas

  • Fresh Herbs: Chopped cilantro, Thai basil, or green onions add brightness.
  • Lime Wedges: A squeeze of lime enhances the soup’s depth.
  • Sliced Red Chili: For those who love an extra kick.
  • Crushed Peanuts or Cashews: Adds crunch and nuttiness.
  • Crispy Shallots: Provides a slightly sweet and crunchy contrast.

What to Serve on the Side

  • Thai Spring Rolls – A light and crispy appetizer.
  • Chicken Satay with Peanut Sauce – A protein-packed pairing.
  • Garlic Fried Rice – A hearty side that complements the soup.
  • Mango Sticky Rice – A sweet and refreshing dessert to complete the meal.

A Bowl of Comfort: Thai Red Curry Noodle Soup

Aromatic Bliss: Ingredients You’ll Need

  • Chicken Breast: Tender, protein-packed bites that soak up the curry flavors.
  • Red Curry Paste: The heart of the dish, providing warmth and depth.
  • Coconut Milk: Adds a creamy, luscious texture to the broth.
  • Fish Sauce & Brown Sugar: Balances salty, sweet, and umami flavors.
  • Rice Noodles: A soft and slurp-worthy addition that completes the dish.
  • Garlic, Ginger, and Bell Peppers: A fragrant blend of aromatics and fresh crunch.
  • Fresh Herbs & Lime Juice: Cilantro, basil, and lime add a burst of freshness.

From Pot to Bowl: Directions

  1. Sear the Chicken: Cook seasoned chicken pieces until golden brown.
  2. Sauté the Aromatics: Stir in garlic, bell pepper, onion, curry paste, and ginger.
  3. Create the Broth: Pour in chicken broth and coconut milk, letting flavors meld.
  4. Simmer to Perfection: Add the chicken back in and let it cook through.
  5. Cook the Noodles: Stir in rice noodles, fish sauce, and brown sugar until tender.
  6. Finish & Serve: Garnish with fresh herbs, lime juice, and green onions.

Nutritional Breakdown: A Wholesome Indulgence

  • Calories: ~350 per serving
  • Protein: 28g
  • Carbohydrates: 30g
  • Fat: 15g
  • Sodium: Moderate (adjust with low-sodium broth if needed)

This Thai Red Curry Noodle Soup is an explosion of flavor, warmth, and texture, making it the ultimate dish for cozy nights or quick weeknight dinners.

Frequently Asked Questions (FAQs)

1. Can I Make This Soup Vegetarian?

Yes! Simply swap out the chicken for tofu or mushrooms, and use vegetable broth instead of chicken broth. You can also replace fish sauce with soy sauce or coconut aminos for a plant-based version.

2. How Spicy Is This Soup?

The spice level depends on the brand and amount of red curry paste you use. If you’re sensitive to spice, start with one tablespoon of curry paste and increase gradually. If you love heat, add Thai chilies or extra curry paste.

3. Can I Store and Reheat This Soup?

Yes, but for the best texture:

  • Store the broth and noodles separately to prevent the noodles from becoming soggy.
  • Reheat the broth on the stove and add fresh noodles when serving.
  • The soup stays fresh in the refrigerator for 1-2 days.

4. Can I Freeze This Soup?

Coconut milk tends to separate when frozen, so freezing isn’t recommended. However, you can freeze the broth before adding coconut milk and simply stir in fresh coconut milk when reheating.

5. What’s a Good Substitute for Fish Sauce?

If you don’t have fish sauce, you can use:

  • Soy sauce or tamari for a similar salty, umami flavor.
  • Worcestershire sauce (though it has a slightly different taste).
  • Miso paste for a depth of umami.

6. Can I Use a Different Type of Noodle?

Yes! While rice noodles are traditional, you can use:

  • Udon noodles for a thicker, chewier bite.
  • Vermicelli noodles for a delicate texture.
  • Zucchini noodles for a low-carb alternative.

7. What Protein Works Best?

This soup is highly versatile—you can swap chicken for shrimp, tofu, or even thinly sliced beef. If using shrimp, add it towards the end to avoid overcooking.

Conclusion: A Soup That Feels Like a Hug in a Bowl

Thai Red Curry Noodle Soup is more than just a meal—it’s a sensory experience. Every spoonful is filled with aromatic spices, creamy coconut, and satisfying noodles, making it the ultimate comfort food.

Whether you’re making it for a cozy night in or impressing guests, this dish is guaranteed to become a go-to recipe in your kitchen. Plus, with its customizable ingredients and easy preparation, you can tailor it to your own taste and enjoy it all year round.

So grab your favorite curry paste, a can of coconut milk, and a handful of fresh herbs, and bring the flavors of Thailand to your table—one comforting bowl at a time.

aiting

Thai Red Curry Noodle Soup: A Flavorful Escape in a Bowl

This Thai Red Curry Noodle Soup is a bold and comforting dish packed with creamy coconut milk, fragrant aromatics, and slurp-worthy rice noodles. Infused with red curry paste, fresh herbs, and a balance of sweet and savory flavors, it’s the perfect meal for cozy nights or a quick, flavorful dinner.
Prep Time 10 minutes
Cook Time 25 minutes
Total Time 35 minutes
Servings: 4 servings
Course: Soup
Cuisine: Thai

Ingredients
  

  • 2 boneless skinless chicken breasts, cut into bite-sized pieces
  • 2 tablespoons red curry paste
  • 1 can 14 oz coconut milk
  • 4 cups chicken broth
  • 1 tablespoon fish sauce
  • 1 tablespoon brown sugar
  • 8 oz rice noodles
  • 1 bell pepper thinly sliced
  • 3 cloves garlic minced
  • 1 teaspoon ginger grated
  • 1 small onion sliced
  • 1 tablespoon vegetable oil
  • Juice of 1 lime
  • Fresh cilantro and basil for garnish
  • Green onions sliced, for garnish
  • Salt and black pepper to taste

Method
 

  1. Sear the Chicken: Heat vegetable oil in a large pot over medium heat. Add the chicken pieces, season with salt and black pepper, and cook until golden brown. Remove from the pot and set aside.
  2. Sauté the Aromatics: In the same pot, add garlic, ginger, bell pepper, and onion. Stir in red curry paste and cook for 1-2 minutes until fragrant.
  3. Create the Broth: Pour in chicken broth and coconut milk. Stir in fish sauce and brown sugar. Let it simmer for 10 minutes, allowing the flavors to meld.
  4. Simmer to Perfection: Return the cooked chicken to the pot and let it cook through for another 5 minutes.
  5. Cook the Noodles: Add rice noodles to the soup and simmer until tender, about 3-5 minutes.
  6. Finish & Serve: Remove from heat and stir in lime juice. Garnish with fresh cilantro, basil, and green onions before serving.

Notes

  • Adjust the spice level by adding more or less red curry paste.
  • Substitute shrimp or tofu for a different protein option.
  • For a lighter version, use low-fat coconut milk.
  • Leftovers can be stored in an airtight container for up to 3 days; reheat gently to avoid overcooking the noodles.
Air Fryer Chicken Bulgogi: A Flavor-Packed Korean Delight

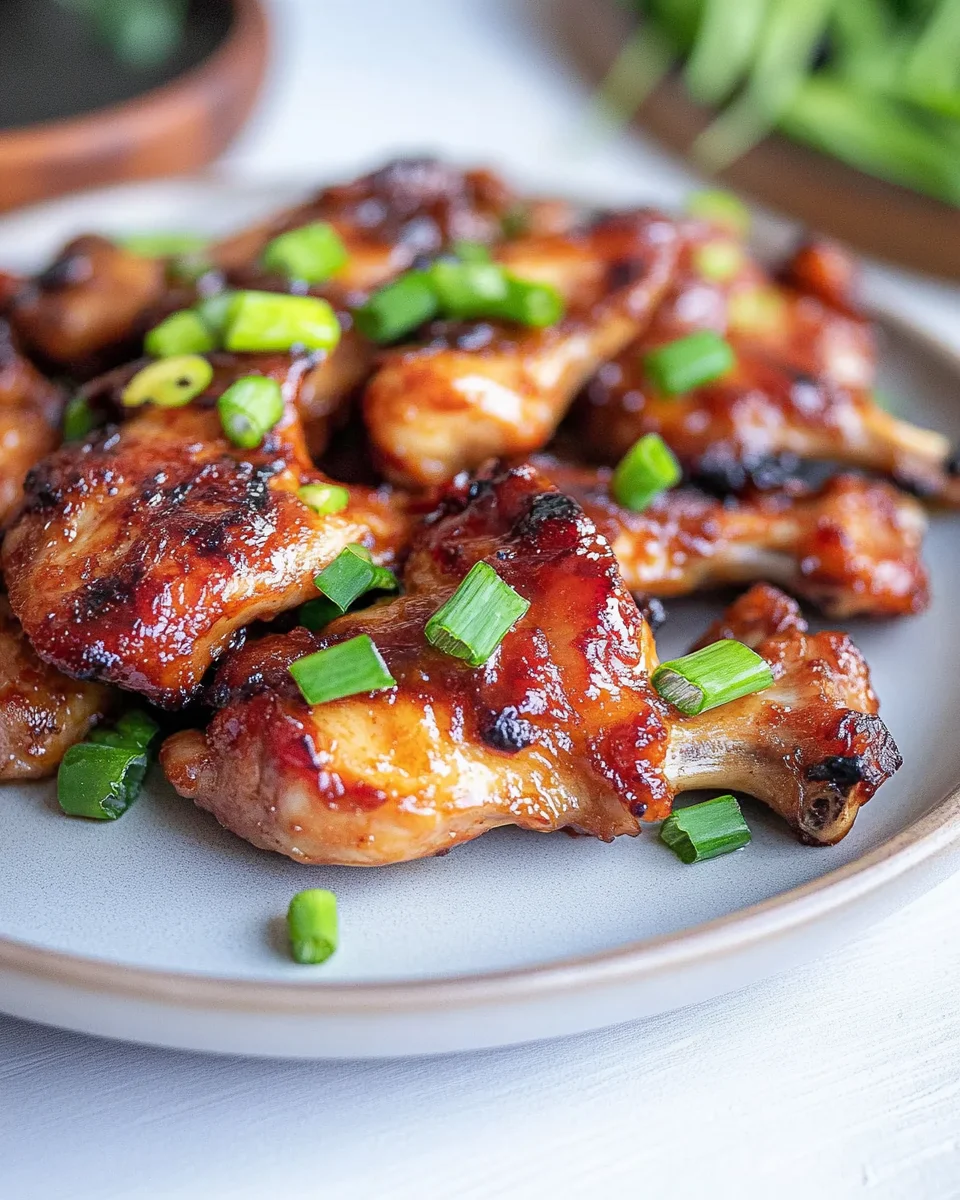
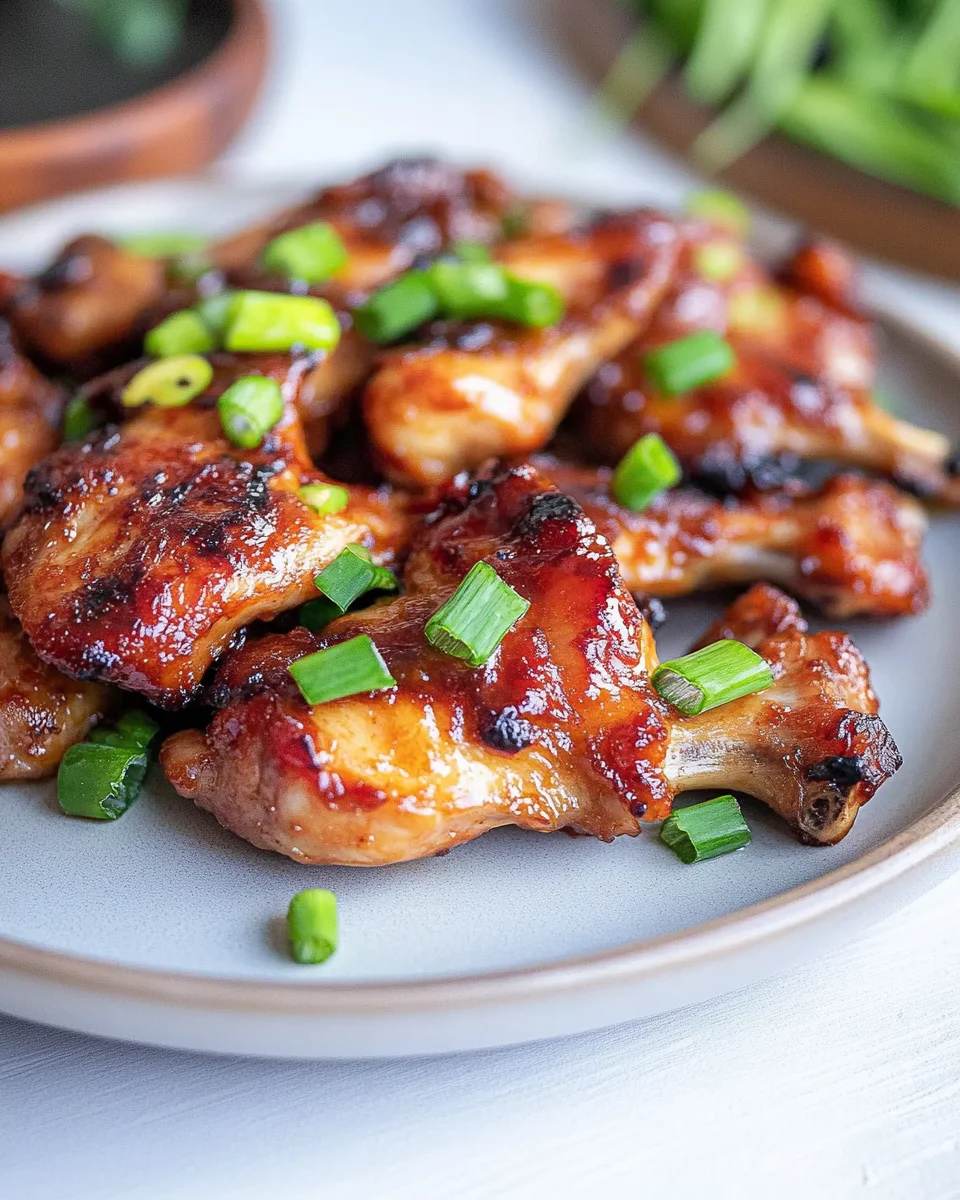
Korean cuisine is known for its bold flavors, and Chicken Bulgogi is no exception. This dish, also called Dak Bulgogi, is a mouthwatering combination of savory, sweet, smoky, and slightly spicy elements, creating a perfectly balanced marinade that coats juicy, tender chicken.

Traditionally, bulgogi is made with beef and cooked over an open flame, but this chicken version is just as flavorful and incredibly easy to make. What makes this recipe even better? It’s designed for the air fryer, meaning you can achieve crispy, caramelized edges and tender meat in a fraction of the time—without the need for a grill.

Whether you’re looking for a quick weeknight dinner, a meal-prep-friendly dish, or an impressive meal to share with friends, Air Fryer Chicken Bulgogi is a guaranteed crowd-pleaser. Let’s explore the secrets to making this dish perfectly every time, along with serving ideas, expert tips, and answers to common questions.

Why This Recipe is a Game-Changer

1. Authentic Korean Flavors, Made Easy

Bulgogi marinade is one of the most iconic elements of Korean cuisine. The combination of soy sauce, brown sugar, sesame oil, garlic, and ginger creates an explosion of flavor, while ingredients like Korean pear and mirin add a natural sweetness and tenderize the meat.

2. Perfectly Crispy, Yet Juicy

Cooking chicken in an air fryer ensures the best of both worlds—crispy, caramelized edges and juicy, tender meat. The circulating hot air mimics the effect of grilling, creating the slightly charred flavors that make bulgogi irresistible.

3. No Grill? No Problem!

One of the best things about this recipe is that you don’t need a traditional grill to achieve that signature bulgogi texture. While grilling is the classic method, the air fryer offers convenience, speed, and easy cleanup without sacrificing flavor.

4. Versatile and Customizable

This dish is incredibly adaptable—you can make it mild or spicy, serve it with rice or in lettuce wraps, and even use different proteins like pork or tofu.

Expert Tips for the Best Chicken Bulgogi

Even though this dish is simple, a few key techniques will take your Chicken Bulgogi to the next level.

1. Marinate for Maximum Flavor

The longer you let the chicken marinate, the more flavorful and tender it will be. A minimum of one hour is recommended, but for the best results, marinate it overnight. However, avoid marinating for more than 24 hours, as the meat can become mushy.

2. Choose the Right Cut of Chicken

Boneless, skinless chicken thighs are the best choice for this recipe because they stay juicy and tender during cooking. If you prefer chicken breast, be sure not to overcook it, as it can dry out faster.

3. Don’t Skip the Pear

Korean pear (or a substitute like kiwi) plays an important role in this marinade—not only does it add a subtle sweetness, but it also contains natural enzymes that tenderize the chicken, giving it an unbelievably soft texture.

4. Flip the Chicken for Even Cooking

If using an air fryer, flip the chicken halfway through cooking to ensure even caramelization on both sides.

5. Want It Spicier? Add Gochujang

For a spicy kick, mix a tablespoon of gochujang (Korean fermented chili paste) into the marinade. It deepens the flavor and adds a bit of heat, making the dish even more irresistible.

6. Let It Rest Before Slicing

After cooking, let the chicken rest for a few minutes before slicing. This allows the juices to redistribute, keeping the meat moist and flavorful.

Creative Ways to Serve Chicken Bulgogi

This dish is incredibly versatile and can be served in a variety of ways. Here are some ideas to make the most of it:

1. Classic Rice Bowl

The simplest and most traditional way to serve Chicken Bulgogi is over a bowl of steamed white rice or Korean purple rice. Add kimchi, pickled radish, and a soft-boiled egg for a well-rounded meal.

2. Lettuce Wraps

For a low-carb, fresh option, serve the bulgogi in crisp lettuce leaves (such as romaine or butter lettuce). Add some sliced cucumbers, carrots, and a drizzle of spicy gochujang sauce for an extra punch.

3. Bulgogi Tacos

Give this dish a fusion twist by using it as a taco filling. Warm up some tortillas, add the chicken, and top with sliced green onions, sesame seeds, and a squeeze of lime.

4. Meal Prep Power Bowl

This dish is perfect for meal prep—store portions of chicken in containers with quinoa, roasted vegetables, and a sesame dressing for a balanced, protein-packed lunch.

5. Over Noodles

Serve the chicken over stir-fried noodles or ramen for a heartier option. Add stir-fried bok choy, mushrooms, and a sprinkle of sesame seeds for extra flavor.

A Fusion of Sweet, Savory, and Smoky: Ingredients You’ll Need

  • Chicken Thighs: Juicy and tender, the perfect cut for absorbing bold flavors.
  • Korean Pear: Naturally tenderizes the meat while adding a hint of sweetness.
  • Soy Sauce & Brown Sugar: The umami-rich base that balances sweet and salty flavors.
  • Mirin & Sesame Oil: Enhances depth with a subtle nutty aroma.
  • Garlic & Ginger: Essential aromatics that add warmth and complexity.
  • Gochujang (Optional): A fermented chili paste that brings an irresistible kick.

From Marination to Crispy Perfection: Directions

  1. Blend the Bulgogi Marinade: Combine all ingredients in a blender for a smooth, flavor-packed mixture.
  2. Marinate the Chicken: Coat the chicken in the marinade and let it absorb the flavors for at least an hour (overnight for the best taste).
  3. Choose Your Cooking Method:
    • Air Fryer: Cook at 385°F for 25 minutes, flipping for an even caramelized crust.
    • Pan-Fry: Sear on medium-high heat for about 7 minutes per side until golden brown.
    • Grill: Cook on low heat for 8 minutes per side, ensuring a smoky finish.
  4. Serve and Enjoy: Pair with rice, lettuce wraps, or fresh vegetables for a well-rounded meal.

Nutritional Breakdown: A Balanced Delight

  • Calories: ~300 per serving
  • Protein: 25g
  • Carbohydrates: 12g
  • Fat: 15g
  • Sodium: Moderate (adjust with low-sodium soy sauce if needed)

This air fryer Chicken Bulgogi is a perfect blend of ease, nutrition, and bold Korean flavors, making it a go-to dish for weeknights, meal prep, or even summer BBQs.

Frequently Asked Questions (FAQs)

1. Can I make this recipe without an air fryer?

Absolutely! While the air fryer creates a crispier texture, you can also pan-fry or grill the chicken. For pan-frying, cook it over medium-high heat for about 7 minutes per side, and for grilling, cook on low for 8 minutes per side until fully cooked.

2. What if I don’t have Korean pear?

No problem! You can substitute a ripe pear, apple, or even a small amount of kiwi. These fruits help tenderize the meat and add a touch of sweetness.

3. Can I use chicken breast instead of thighs?

Yes, but keep in mind that chicken breasts can dry out more easily. If using chicken breast, try pounding them to an even thickness before marinating and cooking.

4. How long does Chicken Bulgogi last in the fridge?

Leftovers can be stored in an airtight container in the fridge for up to 3 days. For longer storage, you can freeze the marinated uncooked chicken for up to 3 months.

5. Can I double the recipe?

Yes! You can easily double or triple the ingredients to make a larger batch. Just be sure to cook in batches to prevent overcrowding in the air fryer.

6. What sides go well with Chicken Bulgogi?

Some great side dishes include:

  • Kimchi – Fermented Korean cabbage with a spicy kick
  • Asian coleslaw – A fresh and crunchy contrast
  • Garlic fried rice – Adds extra depth to the meal
  • Pickled radishes – A tangy and refreshing addition
  • Sesame cucumber salad – Light and cooling

7. Can I make it gluten-free?

Yes! Simply swap out the soy sauce for tamari or coconut aminos to make it gluten-free.

8. How do I reheat Chicken Bulgogi?

To reheat:

  • Air fryer: 5 minutes at 350°F
  • Microwave: 2 minutes
  • Stovetop: Sauté on medium heat until warmed through

Conclusion: A Must-Try Korean Favorite

Air Fryer Chicken Bulgogi is proof that big flavors don’t require complicated techniques. This recipe delivers the bold, savory-sweet flavors of traditional Korean barbecue while keeping the process simple, quick, and fuss-free.

With its tender texture, rich marinade, and versatile serving options, this dish is bound to become a new staple in your kitchen. Whether you’re enjoying it as a rice bowl, lettuce wrap, or taco filling, it’s a meal that’s both satisfying and packed with flavor.

So the next time you’re craving a Korean-inspired dish that’s easy to make and full of deliciousness, give this Air Fryer Chicken Bulgogi a try—you won’t be disappointed!

aiting

Air Fryer Chicken Bulgogi: A Flavor-Packed Korean Delight

This Air Fryer Chicken Bulgogi is a delicious fusion of sweet, savory, and smoky flavors. Marinated in a rich blend of soy sauce, brown sugar, and aromatic spices, this Korean-inspired dish delivers juicy, caramelized perfection with minimal effort. Perfect for weeknight dinners, meal prep, or summer BBQs, it pairs beautifully with rice, lettuce wraps, or fresh vegetables.
Prep Time 10 minutes
Cook Time 25 minutes
Total Time 35 minutes
Servings: 4 servings
Course: Main Course
Cuisine: Korean

Ingredients
  

  • 1.5 lbs chicken thighs boneless and skinless
  • ½ Korean pear grated
  • ¼ cup soy sauce
  • 2 tablespoons brown sugar
  • 1 tablespoon mirin
  • 1 tablespoon sesame oil
  • 3 cloves garlic minced
  • 1 teaspoon ginger grated
  • 1 tablespoon gochujang optional, for spice
  • 1 teaspoon sesame seeds for garnish
  • 2 green onions chopped (for garnish)

Method
 

  1. Prepare the Marinade: In a blender or mixing bowl, combine grated pear, soy sauce, brown sugar, mirin, sesame oil, garlic, ginger, and gochujang. Blend or mix well until smooth.
  2. Marinate the Chicken: Place chicken thighs in a bowl or zip-top bag. Pour marinade over the chicken, ensuring full coverage. Let it marinate for at least 1 hour, preferably overnight for the best flavor.
Cooking Methods:
  1. Air Fryer: Preheat to 385°F (195°C). Arrange marinated chicken in a single layer and cook for 25 minutes, flipping halfway for even caramelization.
  2. Pan-Fry: Heat a skillet over medium-high heat. Sear the chicken for about 7 minutes per side until golden brown and cooked through.
  3. Grill: Preheat grill to low heat. Cook chicken for 8 minutes per side, ensuring a smoky, slightly charred finish.
  4. Serve and Enjoy: Slice the chicken and garnish with sesame seeds and green onions. Serve with rice, lettuce wraps, or fresh veggies.
  5.  

Notes

  • For a healthier option, use low-sodium soy sauce.
  • Korean pear can be substituted with apple or a splash of pineapple juice.
  • Adjust spice levels by increasing or omitting gochujang.
  • Leftovers store well in an airtight container for up to 3 days.


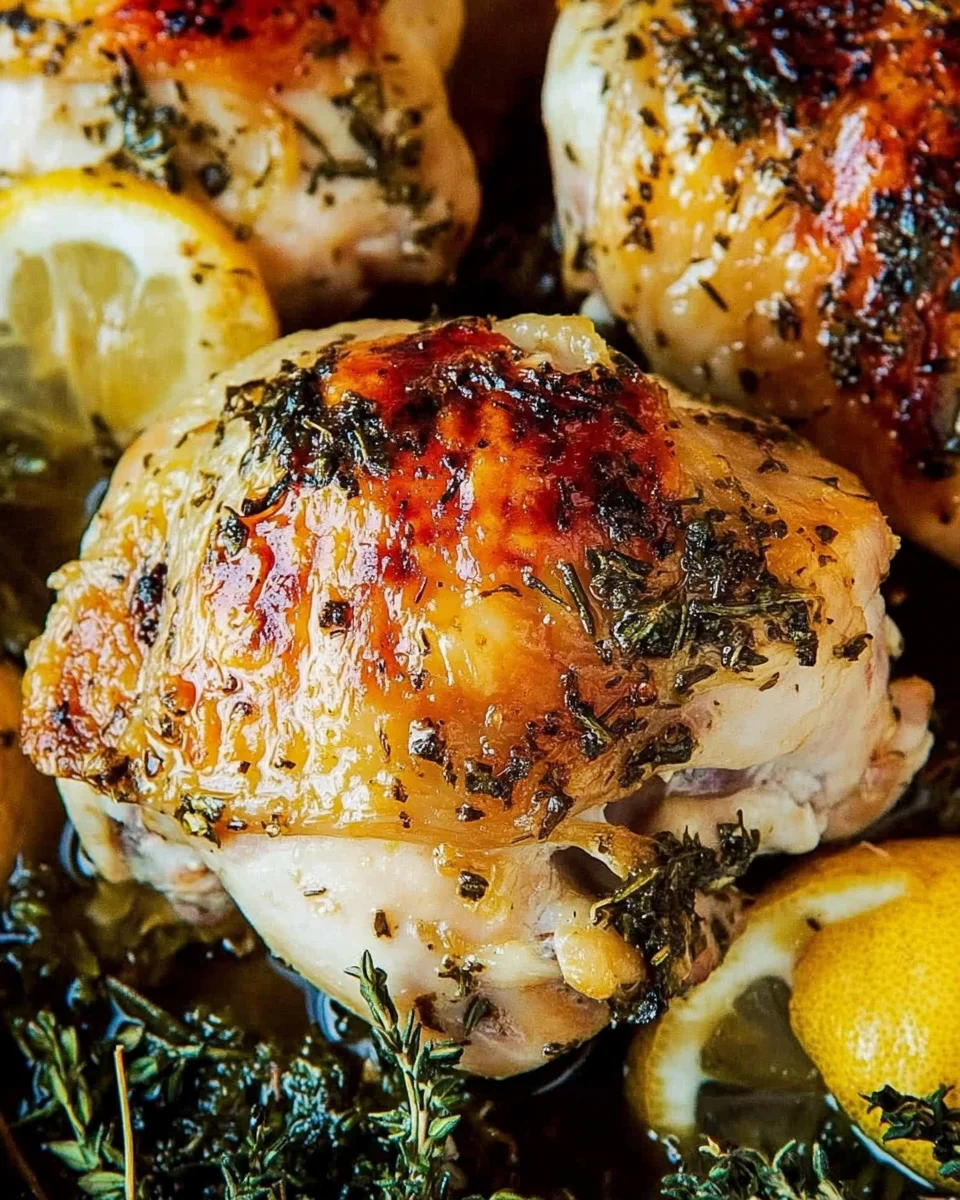
Greek Chicken and Lemon Rice: A Mediterranean Delight in One Pot

Greek cuisine is known for its fresh, vibrant flavors, and this Greek Chicken and Lemon Rice recipe captures that essence in a simple, one-pot meal. Whether you’re craving a taste of the Mediterranean or looking for a quick and wholesome weeknight dinner, this dish delivers on all fronts.

With juicy, seasoned chicken, aromatic jasmine rice, bright lemon, fresh vegetables, and tangy feta cheese, every bite brings a perfect balance of flavors. The best part? It all comes together in just 30 minutes, making it an excellent choice for busy families or meal preppers.

In this guide, we’ll dive deep into what makes this dish special, how you can customize it to your tastes, and answer common questions about preparation, storage, and ingredient swaps.

Why This Dish Deserves a Spot on Your Table

1. A One-Pot Wonder

Cooking an entire meal in one pan is a lifesaver on busy nights. With fewer dishes to clean, you get to enjoy a delicious homemade meal without the hassle of extra pots and pans. Plus, cooking the chicken, rice, and vegetables together allows all the flavors to meld beautifully.

2. Bold Mediterranean Flavors

Greek cuisine is famous for its bright and fresh ingredients—lemon juice, garlic, olive oil, and herbs like oregano bring out the best in simple ingredients. The tangy feta cheese adds creaminess, while chickpeas and spinach provide extra texture and nutrition.

3. Nutritious and Balanced

This dish isn’t just delicious; it’s also packed with nutrients. Chicken provides lean protein, chickpeas add fiber, and fresh spinach boosts vitamins and minerals. Lemon juice not only enhances flavor but also offers a dose of vitamin C. If you’re looking for a meal that’s both satisfying and nourishing, this one checks all the boxes.

4. Perfect for Meal Prep

If you like having leftovers for quick meals, this dish is an excellent choice. The flavors deepen as it sits, making it even tastier the next day. Store it in the fridge for up to four days or freeze portions for future easy lunches and dinners.

How to Make It Your Own: Customization Ideas

One of the best things about Greek Chicken and Lemon Rice is its versatility. You can switch up ingredients based on your preferences or dietary needs while still maintaining the dish’s Mediterranean charm.

1. Swap Your Protein

  • Chicken Thighs vs. Breasts: The original recipe calls for chicken thighs because they stay moist and flavorful. However, if you prefer leaner meat, chicken breasts work well—just be careful not to overcook them.
  • Seafood Twist: For a coastal Greek feel, swap the chicken for shrimp or salmon, adding them toward the end of cooking to prevent overcooking.
  • Plant-Based Option: Replace the chicken with extra chickpeas, tofu, or tempeh for a vegetarian-friendly version.

2. Experiment with Rice or Grains

  • Basmati or Brown Rice: Basmati rice adds a subtle fragrance, while brown rice offers extra fiber and a nuttier flavor. Keep in mind that brown rice requires a longer cooking time.
  • Orzo or Couscous: For a Greek-inspired variation, try orzo pasta or couscous instead of rice for a different texture and a quicker cooking process.

3. Boost the Veggies

  • Add More Greens: While spinach is a staple in this dish, you can also use kale, Swiss chard, or arugula for added nutrition.
  • Roasted Peppers or Zucchini: If you want even more color, throw in some roasted bell peppers, zucchini, or artichokes for extra Mediterranean flair.

4. Spice It Up

If you love heat, consider adding extra red pepper flakes, a pinch of cayenne pepper, or even a drizzle of harissa for a spicy kick.

Essential Ingredients for a Flavorful Dish

  • 1.5 pounds boneless, skinless chicken thighs
  • 3 tablespoons olive oil, divided
  • 2 teaspoons dried oregano, divided
  • 1 teaspoon paprika
  • ½ teaspoon salt, plus more to taste
  • ¼ teaspoon red pepper flakes
  • 8 ounces grape tomatoes, halved
  • 5 cloves garlic, finely chopped
  • 5 ounces fresh spinach, roughly chopped
  • 4 tablespoons fresh lemon juice, divided
  • 2 cups cooked jasmine rice
  • 1 can (15 ounces) chickpeas, drained
  • 6 ounces feta cheese, cut into small cubes
  • Fresh oregano sprigs for garnish

Step-by-Step Guide to Mediterranean Perfection

1. Season and Sear the Chicken

In a small bowl, mix 1 teaspoon oregano, paprika, salt, and red pepper flakes. Coat both sides of the chicken thighs with the seasoning. Heat 2 tablespoons olive oil in a large skillet over medium heat. Cook the chicken for about 5 minutes per side until golden and cooked through (internal temp 165°F). Remove from the pan and set aside.

2. Build the Mediterranean Base

In the same skillet, add half of the tomatoes, chopped garlic, 1 teaspoon oregano, and a pinch of salt. Cook for about 2 minutes until the tomatoes soften. Add spinach and cook until wilted.

3. Infuse the Rice with Flavor

Stir in the cooked jasmine rice, chickpeas, 3 tablespoons lemon juice, and the remaining tomatoes. Cook for a couple of minutes, stirring occasionally, until everything is well combined and heated through.

4. Add the Creamy Feta Mix

In a small bowl, combine feta cubes with 1 tablespoon olive oil, 1 tablespoon lemon juice, and a sprinkle of oregano. Fold half of this mixture into the rice for a creamy, tangy boost.

5. Finish and Serve

Return the seared chicken to the pan, nestling it into the rice mixture. Top with the remaining feta mixture and garnish with fresh oregano. Adjust seasoning as needed, then serve hot.

Nutritional Breakdown: A Balanced Mediterranean Meal

  • Calories per Serving: 755 kcal
  • Total Fat: 34g
  • Carbohydrates: 62g
  • Protein: 53g

This dish is a wholesome combination of lean protein, fiber-rich chickpeas, and vibrant vegetables, making it a perfect healthy weeknight meal. Enjoy the bold Mediterranean flavors in every bite!

Common Questions About Greek Chicken and Lemon Rice

1. Can I Make This Recipe Ahead of Time?

Absolutely! This dish is perfect for meal prep. You can cook a batch, store it in the fridge for up to four days, and reheat portions as needed. To refresh the flavors, add a squeeze of lemon juice before serving.

2. What Can I Serve With This Dish?

While this meal is complete on its own, you can enhance the experience by serving it with:

  • A Crisp Greek Salad – Fresh cucumbers, tomatoes, red onions, olives, and feta dressed with olive oil and lemon juice.
  • Tzatziki Sauce – A cooling yogurt-based dip with garlic, cucumber, and dill.
  • Warm Pita Bread – Great for scooping up the rice and soaking up the flavors.

3. How Can I Make This Recipe Dairy-Free?

To make this dish dairy-free, skip the feta cheese or substitute it with a dairy-free alternative. You can also add more olives or sun-dried tomatoes to maintain a rich, tangy flavor.

4. Can I Use a Different Type of Cheese?

Feta is the traditional choice, but if you’re looking for alternatives, try:

  • Goat Cheese – A creamy, slightly tangy option.
  • Parmesan or Pecorino – Adds a salty, nutty flavor.
  • Mozzarella – For a milder taste with a bit of meltiness.

5. How Do I Store and Reheat Leftovers?

  • Refrigerator: Store leftovers in an airtight container for up to four days.
  • Freezer: Freeze portions in freezer-safe containers for up to three months.
  • Reheating: Warm it in a pan over medium heat with a splash of olive oil or lemon juice to prevent dryness. You can also microwave it in short intervals, stirring in between.

6. Can I Cook This in an Instant Pot?

Yes! To adapt this recipe for an Instant Pot, follow these steps:

  1. Sear the chicken using the sauté function.
  2. Add rice, chickpeas, tomatoes, and seasoning along with chicken broth instead of pre-cooked rice.
  3. Cook on high pressure for 6 minutes with a 10-minute natural release.
  4. Stir in fresh spinach and lemon juice at the end before serving.

7. How Do I Make It Lower in Carbs?

If you’re following a low-carb or keto-friendly diet, swap the rice for:

  • Cauliflower Rice – Keeps the dish light while absorbing the flavors.
  • Quinoa – Not low-carb, but a great high-protein alternative.

8. What’s the Secret to Juicy Chicken?

To ensure tender and juicy chicken:

  • Use thighs instead of breasts (they retain moisture better).
  • Let the chicken rest for a few minutes after cooking before slicing.
  • Sear at the right temperature – A medium-high heat ensures a golden crust without drying out the inside.

Final Thoughts: A Dish Worth Adding to Your Weekly Rotation

Greek Chicken and Lemon Rice is a perfect balance of convenience, nutrition, and bold flavors. Whether you’re cooking for a family dinner or meal prepping for the week, this one-pot meal makes it easy to enjoy a taste of the Mediterranean without spending hours in the kitchen.

The combination of lemon, garlic, feta, and fresh herbs creates an unforgettable depth of flavor, while the juicy chicken and hearty chickpeas provide satisfying protein. Plus, with endless variations, you can make this dish your own every time you cook it.

So, the next time you’re craving something fresh, flavorful, and easy to prepare, give this Greek-inspired recipe a try—you won’t be disappointed.

aiting

Greek Chicken and Lemon Rice: A Mediterranean Delight in One Pot

This Greek Chicken and Lemon Rice is a vibrant, one-pot Mediterranean wonder! Juicy, seasoned chicken thighs are nestled in a fragrant bed of lemon-infused rice, chickpeas, and fresh vegetables, then finished with creamy feta. A perfect meal for busy weeknights or weekend gatherings!
Prep Time 10 minutes
Cook Time 25 minutes
Total Time 35 minutes
Servings: 4 servings
Course: Main Course
Cuisine: Mediterranean

Ingredients
  

For the Chicken:
  • 1.5 pounds boneless skinless chicken thighs
  • 2 teaspoons dried oregano divided
  • 1 teaspoon paprika
  • ½ teaspoon salt plus more to taste
  • ¼ teaspoon red pepper flakes
  • 2 tablespoons olive oil
For the Rice & Vegetables:
  • 8 ounces grape tomatoes halved
  • 5 cloves garlic finely chopped
  • 5 ounces fresh spinach roughly chopped
  • 2 cups cooked jasmine rice
  • 1 can 15 ounces chickpeas, drained
  • 4 tablespoons fresh lemon juice divided
  • 6 ounces feta cheese cut into small cubes
  • 1 tablespoon olive oil
  • Fresh oregano sprigs for garnish

Method
 

  1. Season & Sear the Chicken – Mix 1 teaspoon oregano, paprika, salt, and red pepper flakes. Coat both sides of the chicken thighs with the seasoning. Heat 2 tablespoons olive oil in a large skillet over medium heat. Cook the chicken for about 5 minutes per side until golden and cooked through (internal temp 165°F). Remove and set aside.
  2. Build the Mediterranean Base – In the same skillet, add half of the tomatoes, chopped garlic, 1 teaspoon oregano, and a pinch of salt. Cook for 2 minutes until the tomatoes soften. Add spinach and cook until wilted.
  3. Infuse the Rice with Flavor – Stir in the cooked jasmine rice, chickpeas, 3 tablespoons lemon juice, and remaining tomatoes. Cook for 2 minutes, stirring occasionally, until well combined and heated through.
  4. Prepare the Feta Mix – In a small bowl, combine feta cubes with 1 tablespoon olive oil, 1 tablespoon lemon juice, and a sprinkle of oregano. Fold half of this mixture into the rice for extra creaminess.
  5. Finish & Serve – Return the seared chicken to the pan, nestling it into the rice mixture. Top with the remaining feta mixture and garnish with fresh oregano. Adjust seasoning as needed and serve hot.

Notes

  • Make it Dairy-Free – Omit the feta or use dairy-free cheese.
  • Add More Veggies – Try zucchini, bell peppers, or artichokes for extra nutrition.
  • Swap the Protein – Use shrimp or tofu as a delicious alternative.
  • Meal Prep Tip – Store leftovers in an airtight container for up to 3 days.
 

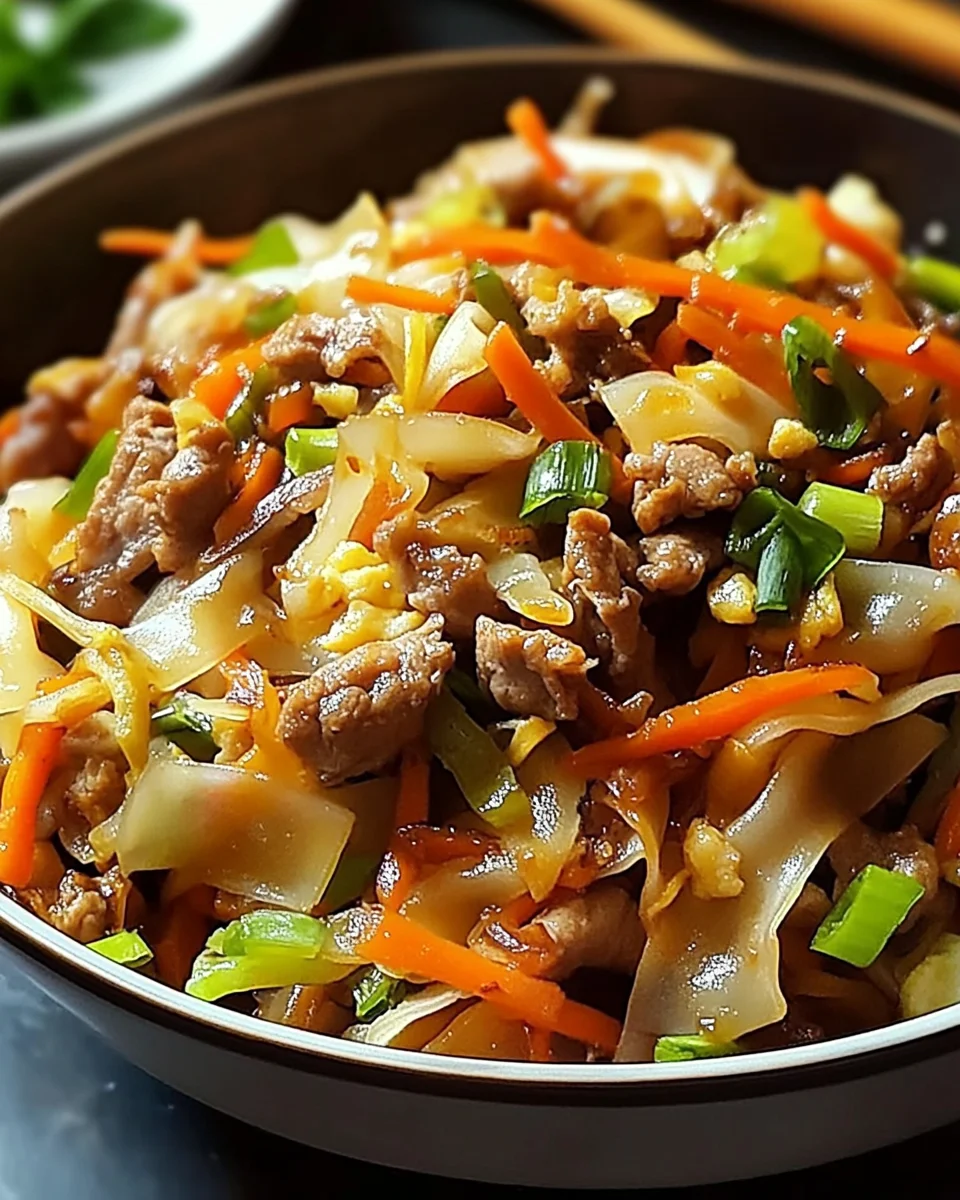
Egg Roll Stir Fry: A Deconstructed Classic for Quick, Healthy Meals

If you love the crispy, savory goodness of egg rolls but want a healthier, low-carb alternative without deep frying, then Egg Roll Stir Fry is the perfect dish for you. This recipe captures all the classic flavors of an egg roll—cabbage, carrots, ground meat, and bold Asian-inspired seasonings—but skips the wrapper, making it a quick, nutritious meal that’s ideal for busy weeknights.

In this article, we’ll dive deep into why this dish is a must-try, how you can customize it to fit different dietary needs, and answer some frequently asked questions to ensure you master this recipe effortlessly.

Why Egg Roll Stir Fry is a Game-Changer

1. A Quick and Easy Meal for Any Day of the Week

Time is precious, especially on hectic weekdays when cooking from scratch can feel overwhelming. Traditional egg rolls require multiple steps—making the filling, rolling the wrappers, and deep frying. This deconstructed version simplifies the process, taking only about 25 minutes from start to finish without sacrificing flavor.

2. Packed with Nutrition, Minus the Guilt

Egg Roll Stir Fry is naturally low in carbohydrates and high in fiber, thanks to its generous amounts of cabbage and carrots. Unlike traditional egg rolls, which are deep-fried, this stir fry is cooked with minimal oil, making it a healthier alternative that still delivers the same rich, umami-packed taste.

3. Versatility at Its Best

One of the best things about this dish is how easily it can be customized to fit different diets and preferences:

  • Vegetarian or Vegan? Swap the ground meat for tofu, tempeh, or a plant-based meat substitute.
  • Gluten-Free? Use tamari or coconut aminos instead of soy sauce.
  • Spicy Lover? Increase the red pepper flakes or drizzle on some sriracha.
  • Extra Veggies? Bell peppers, mushrooms, or snap peas can elevate the dish with more colors and nutrients.

4. Perfect for Meal Prep

Egg Roll Stir Fry isn’t just a great dinner option—it also makes amazing leftovers. The flavors continue to develop as it sits, making it an excellent choice for meal prepping. Store it in an airtight container, and you’ll have a delicious, ready-to-eat lunch for the next few days.

Tips for the Perfect Egg Roll Stir Fry

Choose the Right Protein

Ground chicken, turkey, and pork are all great choices for this recipe, each offering a slightly different flavor profile:

  • Ground Chicken or Turkey: Leaner options that absorb flavors well.
  • Ground Pork: A richer, more traditional egg roll taste.
  • Shrimp: If you want a seafood twist, chopped shrimp works beautifully in this dish.

Use Fresh Ingredients for Maximum Flavor

The key to making a great stir fry is fresh garlic, ginger, and crisp vegetables. Pre-minced garlic and bottled ginger won’t deliver the same aromatic punch as freshly chopped ingredients.

Don’t Overcook the Vegetables

A great stir fry should have some crispness and texture. Overcooking the cabbage and carrots can make them mushy. Stir-fry them just until tender yet slightly crunchy.

Balance the Sauce

The combination of soy sauce, sesame oil, rice vinegar, and a hint of spice creates an addictive sauce. Adjust the seasoning to your preference—less soy sauce for lower sodium, more sesame oil for nuttiness, or a splash of lime juice for brightness.

Make it a Complete Meal

This dish is satisfying on its own, but if you want to bulk it up, serve it with:

  • Steamed jasmine rice or brown rice for a traditional pairing.
  • Cauliflower rice for a low-carb option.
  • Rice noodles for a heartier meal.

Gather Your Ingredients: The Essentials for a Flavorful Feast

  • 1 pound ground meat (chicken, turkey, or pork)
  • 2 tablespoons vegetable oil
  • 1 medium onion, chopped
  • 3 cloves garlic, minced
  • 1 teaspoon grated ginger
  • 1 medium head green cabbage, thinly sliced
  • 2 medium carrots, shredded
  • 1/4 cup soy sauce
  • 1 tablespoon sesame oil
  • 1 teaspoon rice vinegar
  • 1/4 teaspoon crushed red pepper flakes (optional)
  • 2 green onions, sliced (for garnish)
  • Optional: Sesame seeds for garnish

Step-by-Step Magic: Bringing the Dish to Life

  1. Sizzle & Brown: Heat vegetable oil in a large skillet or wok over medium-high heat. Add the ground meat, breaking it apart with a spoon. Cook until browned and fully cooked. Drain excess fat if necessary.
  2. Aromatics Unleashed: Add chopped onion, minced garlic, and grated ginger. Stir and cook for 2-3 minutes until fragrant and the onion softens.
  3. Veggie Fusion: Toss in the sliced cabbage and shredded carrots. Stir frequently, cooking for 5-7 minutes until the vegetables are tender but still crisp.
  4. Flavor Infusion: In a small bowl, whisk together soy sauce, sesame oil, rice vinegar, and crushed red pepper flakes (if using). Pour the sauce over the stir fry and mix well.
  5. Final Touch: Let it cook for another 2 minutes, allowing the flavors to meld beautifully.
  6. Garnish & Serve: Remove from heat and top with green onions and sesame seeds if desired. Enjoy as is or pair with steamed rice or cauliflower rice for a low-carb option.

Nutritional Breakdown: What’s on Your Plate

  • Serving Size: 4 servings
  • Calories per Serving: 280 kcal
  • Protein-Packed & Low-Carb: This dish is rich in protein, loaded with fiber, and naturally low in carbohydrates.

Enjoy this quick, flavorful, and nutritious dish that delivers all the goodness of an egg roll—without the wrapper!

Frequently Asked Questions (FAQs)

1. Can I Freeze Egg Roll Stir Fry?

Yes! This dish freezes well. Let it cool completely, then store it in a freezer-safe container for up to 3 months. When ready to eat, thaw it in the refrigerator overnight and reheat on the stovetop for the best texture.

2. What is the Best Meat for This Recipe?

Ground pork is the most traditional, but ground turkey and chicken are great leaner alternatives. If you prefer seafood, chopped shrimp works wonderfully.

3. Can I Make This Dish Ahead of Time?

Absolutely! This stir fry is even better the next day as the flavors deepen. Store it in the fridge in an airtight container for up to 3 days, and reheat in a skillet or microwave before serving.

4. How Can I Make This Recipe Lower in Sodium?

To reduce the sodium content, use low-sodium soy sauce or substitute it with coconut aminos. You can also dilute soy sauce with a bit of water and avoid adding extra salt.

5. What Can I Serve With Egg Roll Stir Fry?

It’s a well-rounded meal on its own, but you can pair it with:

  • A bowl of steamed rice or quinoa for added fiber.
  • Lettuce wraps for a fresh, low-carb alternative.
  • A side of miso soup or a cucumber salad for a refreshing contrast.

6. Can I Add Other Vegetables?

Yes! While cabbage and carrots are the stars, you can add:

  • Bell peppers for sweetness and color.
  • Mushrooms for umami richness.
  • Zucchini or snap peas for extra crunch.

7. How Do I Keep Leftovers Fresh?

Store leftovers in an airtight container in the refrigerator for up to 3 days. For best results, reheat in a skillet over medium heat to restore the texture.

Conclusion: A Go-To Recipe for Every Home Cook

Egg Roll Stir Fry is a game-changer for anyone looking for a quick, flavorful, and nutritious meal. It’s a healthier take on a takeout classic, offering all the savory goodness of an egg roll without the extra carbs or deep-frying.

What makes this dish truly special is its versatility—you can easily adapt it to suit different diets, add your favorite vegetables, or adjust the spice level. Plus, it’s a fantastic meal prep option, ensuring that you have a delicious, homemade meal ready to go.

Whether you’re making it for a weeknight dinner or packing it for lunch, this one-pan wonder will quickly become a favorite in your recipe rotation. Try it once, and you’ll never miss traditional egg rolls again.

Now, grab your skillet and get ready to enjoy a fast, fresh, and flavorful meal that delivers comfort without the compromise!

aiting

Egg Roll Stir Fry: A Deconstructed Classic for Quick, Healthy Meals

This Egg Roll Stir Fry packs all the bold flavors of a classic egg roll—without the wrapper! A quick, one-pan meal filled with savory ground meat, crunchy cabbage, and a rich umami sauce, this dish is perfect for busy weeknights. Healthy, satisfying, and easily customizable!
Prep Time 10 minutes
Cook Time 15 minutes
Total Time 25 minutes
Servings: 4 servings
Course: Main Course
Cuisine: Asian-inspired

Ingredients
  

The Flavor Symphony:
  • 1 pound ground meat chicken, turkey, or pork
  • 2 tablespoons vegetable oil
  • 1 medium onion chopped
  • 3 garlic cloves minced
  • 1 teaspoon grated ginger
  • 1 medium head of green cabbage thinly sliced
  • 2 medium carrots shredded
  • 1/4 cup soy sauce
  • 1 tablespoon sesame oil
  • 1 teaspoon rice vinegar
  • 1/4 teaspoon crushed red pepper flakes optional
  • 2 green onions sliced (for garnish)
  • Optional: sesame seeds for garnish

Method
 

  1. Heat & Brown the Meat – Heat the vegetable oil in a large skillet or wok over medium-high heat. Add the ground meat and cook until browned, breaking it apart with a spoon. Drain excess fat if needed.
  2. Sauté the Aromatics – Stir in the chopped onion, garlic, and grated ginger. Cook for 2–3 minutes until fragrant and the onion softens.
  3. Stir-Fry the Vegetables – Add the sliced cabbage and shredded carrots. Stir-fry for 5–7 minutes until the vegetables are tender yet crisp.
  4. Mix the Sauce – In a small bowl, whisk together the soy sauce, sesame oil, rice vinegar, and red pepper flakes (if using).
  5. Combine & Finish – Pour the sauce over the stir fry and mix well. Cook for an additional 2 minutes to let the flavors meld.
  6. Garnish & Serve – Remove from heat and garnish with green onions and sesame seeds. Serve hot as is, or pair with steamed rice or cauliflower rice for a low-carb option.

Notes

  • Gluten-Free? – Use tamari or coconut aminos instead of soy sauce.
  • Make it Vegetarian – Swap the meat for crumbled tofu or tempeh.
  • Spice it Up – Add sriracha or extra red pepper flakes for more heat.
  • Storage Tip – Keeps well in the fridge for up to 3 days. Reheat in a skillet for best texture.

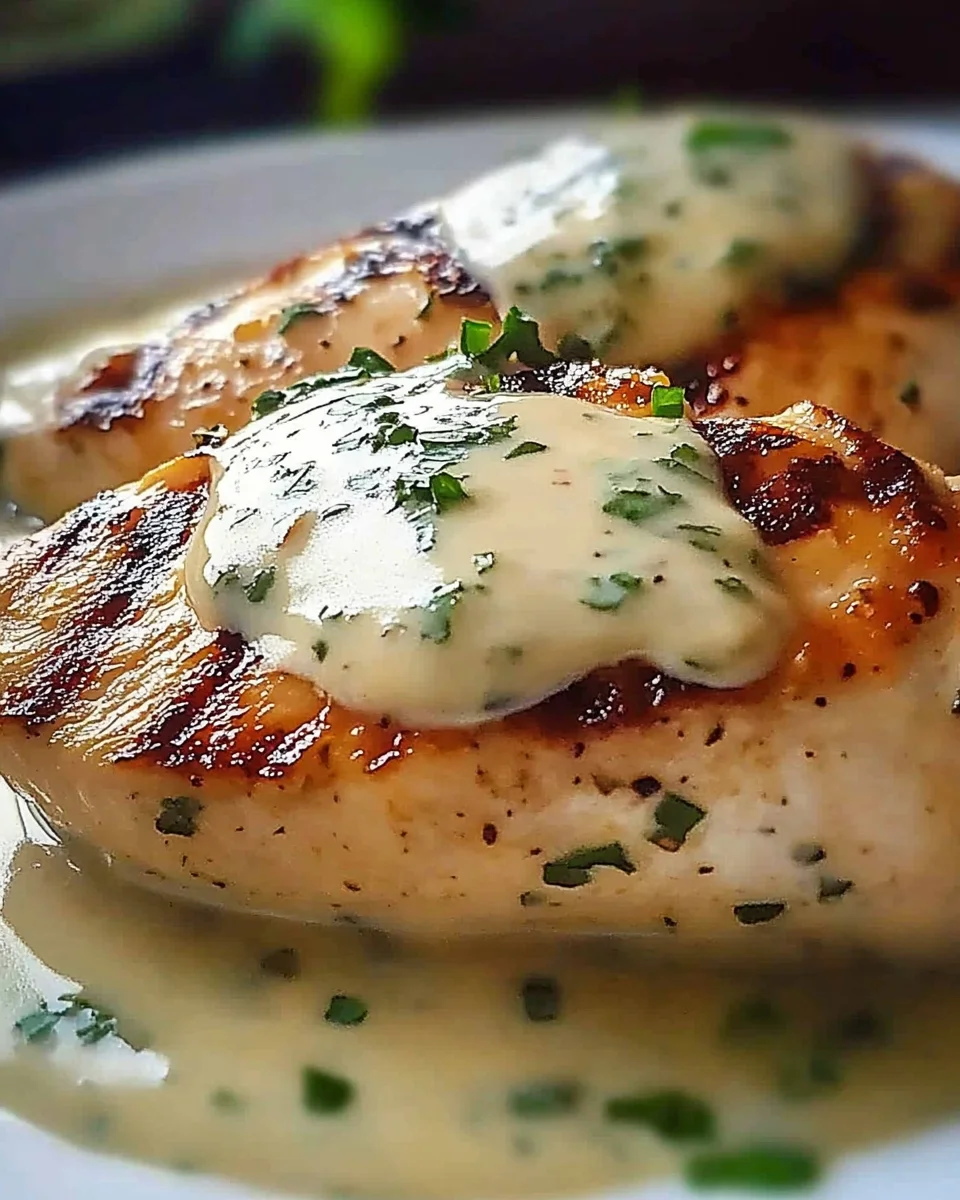
Chicken with Boursin Sauce: A French-Inspired Delight

Why This Dish Deserves a Spot on Your Table

Chicken with Boursin sauce is the kind of recipe that feels extravagant but requires minimal effort. It’s a perfect blend of everyday ingredients and rich, velvety flavors that come together in just 30 minutes. The star of this dish, Boursin cheese, melts into a creamy, herb-infused sauce that elevates simple seared chicken into something truly special.

Whether you’re preparing a romantic dinner, hosting a gathering, or just treating yourself to a restaurant-quality meal at home, this dish never fails to impress. It pairs beautifully with everything from buttery mashed potatoes to roasted vegetables, making it versatile and satisfying.

If you love comfort food with a sophisticated twist, this recipe is a must-try. With its rich flavor and silky texture, it’s the kind of meal that makes an ordinary weeknight feel like an occasion.

The Secret Behind the Silky Boursin Sauce

At the heart of this dish is the Boursin sauce, a creamy, garlicky, and herb-infused blend that coats the chicken in pure indulgence. Boursin cheese, originally created in France, is a soft, spreadable cheese with a velvety consistency and a balanced mix of garlic and fine herbs. Its smooth texture makes it ideal for melting into a sauce, while its bold flavors eliminate the need for complex seasoning.

When combined with chicken broth and heavy cream, Boursin transforms into a silky, spoon-worthy sauce that clings to every bite of chicken. The addition of garlic and onion enhances the depth of flavor, while a touch of fresh parsley adds brightness to balance the richness.

This sauce isn’t just for chicken—it’s incredibly versatile. Drizzle it over pasta, spoon it onto roasted vegetables, or even use it as a decadent dip for crusty bread. Once you master the art of Boursin sauce, you’ll find endless ways to enjoy it.

What Makes This Recipe a Winner?

1. Incredible Flavor with Minimal Effort

One of the best things about this dish is how effortlessly it comes together. The Boursin cheese does most of the work, bringing in layers of garlic and herbs without the need for additional seasonings. A quick sear on the chicken creates a golden crust, while the sauce builds itself in the same pan—capturing all the delicious browned bits left behind.

2. Restaurant-Quality at Home

This dish tastes like something you’d order at a high-end French bistro, yet it’s simple enough to make in your own kitchen. The creamy sauce, combined with tender, juicy chicken, gives it a refined, luxurious feel without the hassle of complex cooking techniques.

3. Versatile and Customizable

While this dish is perfect as is, it also allows for endless variations. You can swap out the chicken for pork, turkey, or even salmon. Want to add more vegetables? Mushrooms, spinach, or asparagus make excellent additions to the sauce. If you’re feeling adventurous, try experimenting with different flavors of Boursin cheese, like Shallot & Chive or Cracked Black Pepper.

4. A Guaranteed Crowd-Pleaser

This recipe isn’t just for fancy dinners—it’s great for feeding a crowd. Whether you’re cooking for family, entertaining guests, or meal-prepping for the week, it’s a dish that’s sure to be a hit. The rich, creamy sauce pairs well with a variety of sides, making it easy to customize based on preference.

Perfect Pairings: What to Serve with Chicken Boursin

1. Classic Comfort: Mashed Potatoes

Creamy mashed potatoes are the ultimate companion for this dish. The sauce seeps into every bite, creating a rich and satisfying combination that’s hard to resist.

2. Lighter Side: Steamed or Roasted Vegetables

Balance out the richness of the sauce with a side of crisp, steamed asparagus, roasted Brussels sprouts, or sautéed green beans. The fresh, slightly bitter notes of the veggies complement the creamy flavors beautifully.

3. French-Inspired Flair: Crusty Bread or Rice

If you love soaking up every bit of sauce, a side of crusty French bread is a must. Alternatively, serve the dish over fluffy rice or buttered noodles to make it a complete meal.

4. A Refreshing Contrast: Simple Green Salad

A fresh salad with a light vinaigrette can help cut through the richness of the dish. A mix of arugula, cherry tomatoes, and a tangy lemon dressing adds brightness to every bite.

Kitchen Tips for Success

1. Let the Boursin Warm Up

Cold Boursin cheese can take longer to melt and may create lumps in the sauce. Let it sit at room temperature while you prepare the other ingredients for a smoother, more even melt.

2. Use a Meat Thermometer

For perfectly cooked chicken, use a thermometer to ensure it reaches an internal temperature of 165°F. This prevents overcooking and guarantees juicy, tender meat.

3. Deglaze for Maximum Flavor

When adding the broth to the pan, use a wooden spoon to scrape up the browned bits from the bottom. These little bits pack a ton of flavor and enrich the sauce.

4. Keep the Heat Low for a Smooth Sauce

Avoid boiling the sauce after adding the cream—gentle simmering is the key to achieving a velvety texture without separation.

Decadent Chicken in Boursin Bliss

Gather Your Magic: Ingredients

  • For the Chicken:
    • 2 large chicken breasts (or thighs for extra juiciness)
    • 1 teaspoon salt
    • ½ teaspoon black pepper
    • 1 teaspoon Italian seasoning
    • 1 tablespoon butter or olive oil
  • For the Luxurious Sauce:
    • 2 cloves garlic, minced
    • ½ small onion, finely chopped
    • ½ cup chicken broth
    • 1 (5.2-ounce) package Boursin Cheese (Garlic & Fine Herbs)
    • ½ cup heavy cream
    • 1 tablespoon fresh parsley, chopped

The Path to Perfection: Directions

1. The Golden Sear

Season both sides of the chicken with salt, pepper, and Italian seasoning. Heat butter or olive oil in a large skillet over medium heat. Sear the chicken for 5 minutes per side until beautifully golden. Remove and set aside.

2. Flavor Base Magic

In the same pan, add the minced garlic and chopped onion. Stir for 2 minutes until fragrant and softened.

3. Building the Dreamy Sauce

Pour in the chicken broth and scrape up any browned bits from the pan. Let it simmer for a minute before adding the Boursin cheese. Stir until it melts into a creamy, aromatic delight.

4. Silken Perfection

Lower the heat and pour in the heavy cream. Whisk gently until the sauce thickens into a velvety consistency.

5. The Grand Finale

Return the chicken to the pan, spooning the sauce over each piece. Let it simmer for 3–5 minutes until the chicken reaches an internal temperature of 165°F.

6. Fresh Finishing Touch

Sprinkle with fresh parsley and serve immediately over mashed potatoes, rice, or roasted vegetables.

Nourishing Indulgence: Nutritional Info (Per Serving)

  • Calories: ~450
  • Protein: ~35g
  • Fat: ~30g
  • Carbs: ~5g
  • Sodium: ~600mg

A simple yet restaurant-worthy dish that turns any meal into a special occasion! Enjoy.

Frequently Asked Questions

1. Can I Make This Recipe Ahead of Time?

Yes! You can prepare the chicken and sauce separately, then store them in the refrigerator for up to three days. Reheat gently on the stove over low heat, adding a splash of cream or broth to bring the sauce back to life.

2. Can I Freeze This Dish?

Cream-based sauces don’t always freeze well, as they can separate when thawed. If you plan to freeze, consider making the chicken in advance and preparing the sauce fresh when ready to serve.

3. What Can I Use Instead of Boursin Cheese?

If you don’t have Boursin, you can substitute it with cream cheese mixed with garlic, herbs, and a pinch of salt. Mascarpone also works well for a smoother, milder alternative.

4. Is This Dish Gluten-Free?

Yes! As long as your chicken broth is gluten-free, this recipe is naturally free from gluten.

5. Can I Add Wine to the Sauce?

Absolutely. A splash of dry white wine before adding the broth can enhance the depth of flavor. Let it simmer for a minute to cook off the alcohol before continuing with the recipe.

Why This Recipe Will Become a Household Favorite

Chicken with Boursin sauce is more than just a meal—it’s an experience. From the first bite, the combination of tender chicken and rich, garlicky sauce creates a comforting yet elegant dish that feels special every time you make it.

The best part? It’s incredibly easy to prepare. With a handful of simple ingredients and a few easy techniques, you can create a restaurant-quality dinner in your own kitchen. Whether you’re cooking for a quiet night in or hosting a dinner party, this dish delivers flavor, sophistication, and pure satisfaction.

So the next time you’re in the mood for something indulgent yet effortless, give this recipe a try. One taste, and it’s sure to become a staple in your home.

aiting

Chicken with Boursin Sauce: A French-Inspired Delight

Indulge in this Decadent Chicken in Boursin Bliss, a creamy, flavorful delight that turns an ordinary chicken dish into a gourmet masterpiece. With juicy, seasoned chicken bathed in a velvety Boursin cheese sauce, this meal is perfect for a cozy dinner or a special occasion!
Prep Time 5 minutes
Cook Time 20 minutes
Total Time 25 minutes
Servings: 2 servings
Course: Main Course
Cuisine: French-inspired

Ingredients
  

For the Chicken:
  • 2 large chicken breasts or thighs for extra juiciness
  • 1 teaspoon salt
  • ½ teaspoon black pepper
  • 1 teaspoon Italian seasoning
  • 1 tablespoon butter or olive oil
For the Luxurious Sauce:
  • 2 cloves garlic minced
  • ½ small onion finely chopped
  • ½ cup chicken broth
  • 1 5.2-ounce package Boursin Cheese (Garlic & Fine Herbs)
  • ½ cup heavy cream
  • 1 tablespoon fresh parsley chopped

Method
 

  1. Sear the Chicken – Season both sides of the chicken with salt, pepper, and Italian seasoning. Heat butter or olive oil in a large skillet over medium heat. Sear the chicken for 5 minutes per side until beautifully golden. Remove and set aside.
  2. Create the Flavor Base – In the same pan, add minced garlic and chopped onion. Stir for 2 minutes until fragrant and softened.
  3. Build the Creamy Sauce – Pour in the chicken broth and scrape up any browned bits from the pan. Let it simmer for a minute before adding the Boursin cheese. Stir until fully melted.
  4. Perfect the Texture – Lower the heat and pour in the heavy cream. Whisk gently until the sauce thickens into a velvety consistency.
  5. Bring It Together – Return the chicken to the pan, spooning the sauce over each piece. Let it simmer for 3–5 minutes until the chicken reaches an internal temperature of 165°F.
  6. Serve & Garnish – Sprinkle with fresh parsley and serve immediately over mashed potatoes, rice, or roasted vegetables.

Notes

  • Add a Crunch – Top with toasted breadcrumbs or crispy bacon bits for extra texture.
  • Vegetable Boost – Stir in spinach or mushrooms for added nutrients.
  • Make it Low-Carb – Serve with cauliflower mash or zucchini noodles.
  • Leftovers? – Store in an airtight container for up to 3 days and reheat gently over low heat.

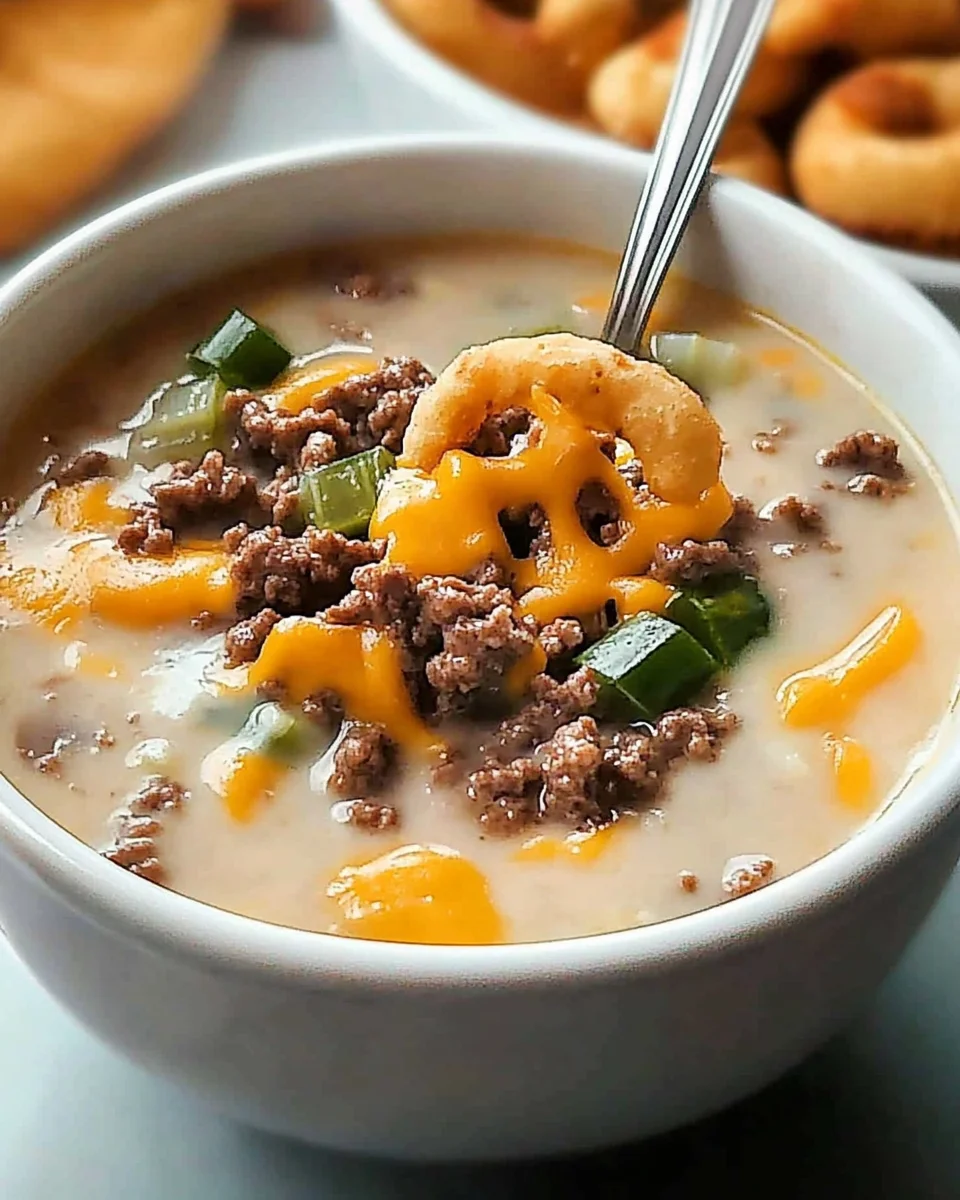
Cheeseburger Soup: A Comforting Classic in a Bowl

When the craving for a juicy, cheesy burger strikes but you’re in the mood for something warm and cozy, Cheeseburger Soup is the answer. It takes everything we love about a classic cheeseburger—savory beef, creamy melted cheese, hearty potatoes, and flavorful seasonings—and transforms it into a rich, comforting bowl of soup.

This dish is perfect for chilly nights, busy weeknights, or meal prepping for the days ahead. It’s also a guaranteed crowd-pleaser, making it a great option for family dinners, potlucks, and game-day gatherings.

In this guide, we’ll explore everything you need to know about Cheeseburger Soup, including tips for enhancing the flavor, serving suggestions, storage advice, and answers to frequently asked questions.

Why Cheeseburger Soup is a Must-Try Dish

The Ultimate Comfort Food

Few things rival the satisfaction of a classic cheeseburger, but imagine that same indulgence in a creamy, spoonable form. This soup captures all the best parts of a cheeseburger—savory beef, melted cheese, and hearty potatoes—wrapped in a rich and velvety broth. It’s a meal that brings warmth and nostalgia with every bite.

Easy to Make, Even Easier to Love

With simple ingredients and a straightforward cooking process, Cheeseburger Soup is perfect for home cooks of all levels. It doesn’t require any fancy techniques or obscure ingredients, making it an accessible and practical dish to prepare.

Customizable to Fit Your Taste

One of the best things about this soup is its versatility. You can modify it to fit your preferences, dietary needs, or whatever ingredients you have on hand. Swap the cheese, add extra veggies, or spice it up—this soup adapts to your creativity.

Ways to Elevate Your Cheeseburger Soup

1. Choose the Right Cheese

Velveeta creates a smooth and creamy consistency, but if you prefer a sharper, more robust flavor, try using a mix of cheddar, Monterey Jack, or even smoked gouda. Adding a small amount of cream cheese can also enhance the richness.

2. Enhance the Meat Flavor

For a deeper, more intense flavor, let the ground beef develop a good sear before breaking it apart. This caramelization adds a layer of richness to the soup. A dash of Worcestershire sauce or steak seasoning can also mimic the savory depth of a grilled cheeseburger.

3. Make it Spicy

If you like heat, add diced jalapeños, a pinch of cayenne pepper, or a splash of hot sauce. Pepper jack cheese is another great way to introduce a little spice.

4. Give it a Smoky Twist

For a smoky, barbecue-inspired version, stir in a bit of smoked paprika or a small spoonful of barbecue sauce. Adding crumbled bacon on top enhances that classic burger flavor.

5. Add Crunchy Toppings

A cheeseburger isn’t complete without texture. Topping your soup with crispy bacon, toasted bread crumbs, crispy onion strings, or croutons made from leftover burger buns gives it that extra bite.

Pairing Ideas: What to Serve with Cheeseburger Soup

While this soup is hearty enough to stand alone, pairing it with the right side dish can take the meal to the next level. Here are some great options:

Classic Sides

  • Toasted Burger Buns – Lightly butter and toast them for an authentic burger experience.
  • Garlic Bread – The rich flavors of the soup pair perfectly with crispy, buttery garlic bread.
  • French Fries or Sweet Potato Fries – Bring the full cheeseburger meal to the table with a side of fries.
  • Pickle Spears – The tangy crunch of pickles balances the creamy richness of the soup.

Lighter Options

  • Crisp Green Salad – A fresh, tangy salad with vinaigrette helps cut through the richness of the soup.
  • Steamed Vegetables – Roasted or steamed broccoli, green beans, or Brussels sprouts make for a nutritious addition.

Dipping Sauces

  • Spicy Mayo – A little heat can elevate the experience.
  • Dijon Mustard Drizzle – Adds a sharp contrast to the creamy soup.
  • Extra Cheese Sauce – Because more cheese is always a good idea.

Storing and Reheating Cheeseburger Soup

Refrigeration: Best for Short-Term Storage

Cheeseburger Soup stores well in an airtight container in the refrigerator for up to 3-4 days. The flavors continue to develop, making it even better the next day.

Freezing: How to Do It Right

Dairy-based soups can sometimes separate when frozen, but if you want to make a freezer-friendly batch, follow these steps:

  • Prepare the soup without the cheese, milk, and sour cream.
  • Freeze the broth, beef, and vegetable mixture in airtight containers for up to 2 months.
  • When reheating, stir in the dairy components fresh to maintain the creamy consistency.

Reheating Tips

  • Stovetop Method: Heat slowly over low to medium heat, stirring frequently to prevent the cheese from separating.
  • Microwave: Heat in 30-second increments, stirring in between, to avoid curdling.

The Must-Have Ingredients

The Hearty Foundation

  • ½ pound ground beef
  • 4 tablespoons butter, divided
  • 4 cups potatoes, diced
  • 3 cups chicken broth

The Flavorful Vegetables

  • ¾ cup carrots, diced
  • ¾ cup celery, diced
  • ¾ cup onion, diced

The Creamy & Cheesy Finish

  • ¼ cup all-purpose flour
  • 1-2 cups Velveeta cheese, cubed
  • 1 ½ cups whole milk
  • ¼ cup sour cream

Seasonings for Depth

  • 1 teaspoon dried basil
  • 1 teaspoon dried parsley
  • ¾ teaspoon salt
  • ¼ to ½ teaspoon black pepper

Optional Toppings for Extra Indulgence

  • Crispy onion rings
  • Chopped green onions
  • Crumbled bacon

Step Into the Kitchen: Directions

Step 1: Brown the Beef

  • In a large pot or Dutch oven, cook and crumble the ground beef over medium-high heat for 6-8 minutes until no longer pink. Drain excess grease and set aside.

Step 2: Build the Flavor Base

  • Melt 1 tablespoon of butter in the same pot.
  • Add diced carrots, celery, onions, basil, and parsley.
  • Sauté for about 10 minutes until the vegetables soften.

Step 3: Simmer for Richness

  • Return the cooked beef to the pot and stir in diced potatoes and chicken broth.
  • Bring to a boil, then reduce the heat to a gentle simmer.
  • Cover and cook for 10-12 minutes until the potatoes become tender.

Step 4: Create a Thick and Creamy Texture

  • In a small saucepan, melt 3 tablespoons of butter over medium-low heat.
  • Whisk in the flour and cook for 3-5 minutes until bubbling.
  • Stir the mixture into the soup and boil for 2 minutes to thicken.

Step 5: Make It Cheeseburger-Worthy

  • Reduce heat to low.
  • Stir in Velveeta cheese, milk, salt, and pepper until fully melted.
  • Remove from heat and mix in sour cream for a smooth, creamy finish.

Step 6: Serve and Customize

  • Ladle the soup into bowls and top with crispy onion rings, bacon, and green onions.
  • Enjoy with a side of toasted burger buns or crusty bread.

Nutritional Breakdown (Per Serving)

  • Calories: 450
  • Total Fat: 22g
  • Carbohydrates: 28g
  • Protein: 18g

Final Thoughts

Cheeseburger Soup is the ultimate comfort dish—bringing the flavors of a classic burger into a rich, creamy bowl of goodness. With tender potatoes, seasoned beef, and gooey cheese, this soup is both nostalgic and indulgent. Whether you’re making it for a cozy dinner, a family gathering, or meal prep, it’s a recipe that will quickly become a household favorite.

Frequently Asked Questions

1. Can I Make This in a Slow Cooker?

Yes! Brown the ground beef first, then add it to the slow cooker with the vegetables, broth, and seasonings. Cook on low for 6-8 hours or high for 3-4 hours. Stir in the cheese, milk, and sour cream during the last 30 minutes for a smooth finish.

2. What’s the Best Cheese to Use?

Velveeta is popular for its creamy melt, but you can also use sharp cheddar, Monterey Jack, American cheese, or a combination. If using real cheese, stir it in gradually to prevent clumping.

3. Can I Use Ground Turkey Instead of Beef?

Absolutely! Ground turkey or chicken makes a lighter version while still delivering great flavor. You may want to add a little extra seasoning since turkey is leaner and has a milder taste.

4. Can I Add More Vegetables?

Yes! Bell peppers, corn, mushrooms, or even shredded zucchini can enhance the texture and nutrition of the soup.

5. Can I Make It Gluten-Free?

Yes! Swap out the all-purpose flour for cornstarch or a gluten-free thickener. Also, check that your broth and cheese are gluten-free.

6. How Do I Make This Soup Thicker?

If you prefer a thicker soup, you can:

  • Mash some of the cooked potatoes into the broth.
  • Stir in an extra tablespoon of flour or cornstarch mixed with cold water.
  • Reduce the broth amount slightly.

7. Can I Turn This Into a Bacon Cheeseburger Soup?

Yes! Add crispy bacon bits to the soup itself or sprinkle them on top for a smoky, bacon-filled twist.

Final Thoughts: A Bowl of Nostalgic Comfort

Cheeseburger Soup is more than just a recipe—it’s a warm, satisfying experience. It takes the beloved flavors of a classic cheeseburger and transforms them into a creamy, hearty dish that’s perfect for any season. Whether you’re looking for a quick weeknight dinner, a meal to impress guests, or a make-ahead option for busy days, this soup delivers on all fronts.

The best part? It’s endlessly customizable. Whether you prefer it extra cheesy, with a kick of spice, or loaded with toppings, there’s no wrong way to enjoy this comforting dish.

So the next time you’re in the mood for something cozy, skip the grill and grab a spoon—Cheeseburger Soup is here to satisfy your cravings in the most delicious way possible.

aiting

Cheeseburger Soup: A Comforting Classic in a Bowl

Enjoy the ultimate comfort food with this Cheeseburger Soup—a creamy, cheesy, and hearty bowl of deliciousness. This recipe combines seasoned beef, tender potatoes, and Velveeta cheese to bring the flavors of a classic cheeseburger into a warm, comforting soup. Perfect for a cozy night in or a satisfying meal-prep option!
Prep Time 10 minutes
Cook Time 30 minutes
Total Time 40 minutes
Servings: 6 servings
Course: Main Course, Soup
Cuisine: American

Ingredients
  

The Hearty Foundation:
  • ½ pound ground beef
  • 4 tablespoons butter divided
  • 4 cups potatoes diced
  • 3 cups chicken broth
The Flavorful Vegetables:
  • ¾ cup carrots diced
  • ¾ cup celery diced
  • ¾ cup onion diced
The Creamy & Cheesy Finish:
  • ¼ cup all-purpose flour
  • 1-2 cups Velveeta cheese cubed
  • 1 ½ cups whole milk
  • ¼ cup sour cream
Seasonings for Depth:
  • 1 teaspoon dried basil
  • 1 teaspoon dried parsley
  • ¾ teaspoon salt
  • ¼ to ½ teaspoon black pepper
Optional Toppings for Extra Indulgence:
  • Crispy onion rings
  • Chopped green onions
  • Crumbled bacon

Method
 

  1. Brown the Beef – In a large pot or Dutch oven, cook and crumble the ground beef over medium-high heat for 6-8 minutes until no longer pink. Drain excess grease and set aside.
  2. Build the Flavor Base – Melt 1 tablespoon butter in the same pot. Add diced carrots, celery, onions, basil, and parsley. Sauté for about 10 minutes until the vegetables soften.
  3. Simmer for Richness – Return the cooked beef to the pot and stir in diced potatoes and chicken broth. Bring to a boil, then reduce the heat to a gentle simmer. Cover and cook for 10-12 minutes until the potatoes are tender.
  4. Create a Thick and Creamy Texture – In a small saucepan, melt 3 tablespoons butter over medium-low heat. Whisk in flour and cook for 3-5 minutes until bubbling. Stir the mixture into the soup and boil for 2 minutes to thicken.
  5. Make It Cheeseburger-Worthy – Reduce heat to low. Stir in Velveeta cheese, milk, salt, and pepper until fully melted. Remove from heat and mix in sour cream for a smooth, creamy finish.
  6. Serve and Customize – Ladle the soup into bowls and top with crispy onion rings, bacon, and green onions. Serve with toasted burger buns or crusty bread for a complete meal.

Notes

  • Bacon Upgrade – Stir crispy bacon directly into the soup for extra smoky flavor.
  • Cheese Options – Swap Velveeta for sharp cheddar or Monterey Jack for a bolder taste.
  • Make-Ahead Tip – This soup reheats well! Store in an airtight container for up to 3 days, and warm over low heat before serving.

The Ultimate Guide to Chicken Ranch Wraps: A Quick and Flavorful Meal

Some meals just hit the spot without requiring hours in the kitchen. Chicken Ranch Wraps are one of those effortless yet satisfying dishes that bring together crispy tortillas, juicy chicken, melted cheese, and the creamy tang of ranch dressing. Whether you need a quick lunch, a kid-approved dinner, or an easy meal-prep option, these wraps offer the perfect balance of convenience and indulgence.

In this article, we’ll dive deep into everything you need to know about Chicken Ranch Wraps, from customization ideas and storage tips to frequently asked questions.

Why Chicken Ranch Wraps Are a Game-Changer

Perfect for Busy Days

Life doesn’t always allow time for elaborate meal prep. That’s where Chicken Ranch Wraps shine. In just 10 minutes, you can have a hot, crispy, and satisfying meal ready to enjoy. Whether you’re juggling work deadlines, packing school lunches, or needing something quick after a long day, this recipe delivers.

A Flavor Combination That Always Works

There’s something irresistible about the combination of ranch dressing, seasoned chicken, and melted cheese wrapped in a warm, golden tortilla. The cool, tangy ranch complements the richness of the cheese and the savory chicken, creating a flavor-packed bite every time.

Customizable to Any Taste

One of the best things about this recipe is its adaptability. Prefer a spicier kick? Add some hot sauce or jalapeños. Looking for a lighter version? Swap out the cheese for a low-fat alternative or use a whole-wheat tortilla. With endless variations, you’ll never get bored of this dish.

Ways to Elevate Your Chicken Ranch Wraps

1. Add a Crunchy Element

For an extra layer of texture, try adding crunchy ingredients like shredded lettuce, crispy bacon, or tortilla strips. These additions provide contrast against the warm, melty interior.

2. Experiment with Cheese Choices

While mozzarella melts beautifully, other cheeses like sharp cheddar, pepper jack, or a Mexican cheese blend can add new dimensions of flavor.

3. Make It a Protein Powerhouse

To boost protein, mix in black beans or add extra chicken. You can also swap the chicken for grilled shrimp or turkey if you want a variation.

4. Toast for a Gourmet Finish

Instead of pan-frying, use a panini press or a sandwich grill to achieve an even crispier wrap with beautiful golden grill marks.

Storage and Meal Prep Tips

Refrigeration for Short-Term Storage

If you plan to eat the wraps within a few days, store them individually wrapped in foil or an airtight container in the refrigerator. They’ll stay fresh for up to three days.

Freezing for Longer Shelf Life

Want to prepare a batch in advance? Wrap each one in plastic wrap and then place them in a freezer-safe bag. They can be frozen for up to two months. To reheat, simply thaw in the fridge overnight and toast in a pan or oven.

Keeping the Wraps from Getting Soggy

If meal-prepping for later, keep the ranch dressing separate and add it just before eating. This prevents the tortillas from becoming soggy over time.

Pairing Suggestions: What to Serve with Chicken Ranch Wraps

Classic Sides

  • A side of sweet potato fries or classic French fries
  • A simple green salad with a light vinaigrette
  • A cup of homemade tomato soup for a cozy meal

Dipping Sauces

  • Extra ranch dressing for dipping
  • A smoky chipotle mayo for a spicy contrast
  • Honey mustard for a hint of sweetness

Refreshing Drinks to Complement the Wraps

  • Iced lemonade for a zesty contrast
  • A light sparkling water with lime
  • A smoothie for a nutrient boost

Gather Your Essentials: Ingredients

Main Components

  • 2 cups cooked grilled chicken breasts, chopped
  • 4 (8-inch) tortillas

Flavor Boosters

  • ¼ cup Hidden Valley® Simply Ranch dressing
  • ½ cup shredded mozzarella cheese
  • ¼ cup minced fresh cilantro (optional)

For Cooking

  • Cooking spray

Wrap It Right: Directions

Step 1: Assemble with Care

Lay out each tortilla and evenly distribute:

  • ½ cup chicken
  • 1 tablespoon ranch dressing
  • 2 tablespoons mozzarella cheese
  • 1 tablespoon cilantro (if using)

Fold into a burrito shape, tucking in the sides tightly.

Step 2: The Golden Touch

  • Heat a pan over medium heat and lightly coat with cooking spray.
  • Place wraps seam-side down and cook 1-2 minutes per side, until crispy and golden brown.

Step 3: Slice and Savor

  • Cut each wrap in half and serve immediately.

Power-Packed Bites: Nutritional Highlights

Exact nutritional values may vary depending on ingredient brands and portion sizes.

  • Calories: ~300 per wrap
  • Protein: ~25g
  • Carbohydrates: ~30g
  • Fat: ~12g
  • Calcium: High (thanks to the cheese!)

Chef’s Notes & Pro Tips

Make it your own – Add crispy bacon, avocado slices, or diced tomatoes.
Want extra crunch? Use a panini press for an evenly crisped texture.
Meal prep tip – Wrap in foil and refrigerate for up to 3 days. Reheat in a skillet or toaster oven.

Enjoy your crispy, cheesy, ranch-infused delight in just 10 minutes!

Frequently Asked Questions

1. Can I Use a Different Type of Tortilla?

Absolutely! While flour tortillas provide a soft and crispy texture, you can use whole wheat tortillas for a healthier option or spinach wraps for added nutrients. Low-carb tortillas also work well if you’re watching your carb intake.

2. How Can I Make These Wraps Spicier?

If you love a little heat, consider adding:

  • Sliced jalapeños inside the wrap
  • A drizzle of hot sauce or Sriracha
  • A sprinkle of cayenne pepper in the chicken seasoning

3. Can I Use Leftover Chicken?

Yes! This recipe is perfect for repurposing leftovers. Rotisserie chicken, grilled chicken from last night’s dinner, or even shredded slow-cooked chicken all work beautifully.

4. What’s the Best Way to Reheat a Wrap?

To keep the crispy exterior, avoid microwaving. Instead, reheat in a pan over medium heat for 2-3 minutes per side or pop it in a toaster oven until warmed through.

5. Can I Make These Wraps Ahead of Time for Lunchboxes?

Definitely! For best results, wrap them tightly in foil and store in the fridge. If packing for lunch, include the ranch dressing separately to keep everything fresh.

6. Are There Any Gluten-Free Options?

Yes! Simply swap the flour tortillas for gluten-free tortillas or lettuce wraps for a lighter alternative.

7. What Other Proteins Work Well in This Recipe?

Aside from chicken, you can try:

  • Sliced turkey for a deli-style wrap
  • Grilled shrimp for a seafood twist
  • Tofu or black beans for a vegetarian option

Final Thoughts: The Wrap That Keeps on Giving

Chicken Ranch Wraps prove that a meal doesn’t have to be complicated to be delicious. With just a handful of ingredients and a few minutes, you can create a satisfying, flavorful dish that works for any occasion. Whether you’re feeding a hungry family, looking for a quick work-from-home lunch, or trying to use up leftover chicken, these wraps have you covered.

Beyond their convenience, what makes them truly special is their versatility. You can customize them endlessly, change up the flavors, and adapt them to suit dietary needs. Their crispy, golden exterior and creamy, savory filling create the perfect balance of texture and taste, making them a meal you’ll come back to again and again.

So next time you’re wondering what to make for a quick bite, let Chicken Ranch Wraps be your go-to solution. Simple, delicious, and endlessly adaptable, they might just become your new favorite meal.

aiting

The Ultimate Guide to Chicken Ranch Wraps: A Quick and Flavorful Meal

Indulge in the ultimate crispy and creamy delight with these Chicken Ranch Wraps. Packed with juicy grilled chicken, melted mozzarella, and a tangy ranch kick, these wraps are a quick and delicious meal perfect for any occasion. Ready in just 10 minutes, they’re great for lunch, dinner, or meal prep!
Prep Time 5 minutes
Cook Time 5 minutes
Total Time 10 minutes
Servings: 4 Wraps
Course: Main Course, Snack
Cuisine: American

Ingredients
  

Main Components:
  • 2 cups cooked grilled chicken breasts chopped
  • 4 8-inch tortillas
Flavor Boosters:
  • ¼ cup Hidden Valley® Simply Ranch dressing
  • ½ cup shredded mozzarella cheese
  • ¼ cup minced fresh cilantro optional
For Cooking:
  • Cooking spray

Method
 

  1. Assemble the Wraps – Lay out each tortilla and evenly distribute ½ cup chicken, 1 tablespoon ranch dressing, 2 tablespoons mozzarella cheese, and 1 tablespoon cilantro (if using). Fold into a burrito shape, tucking in the sides tightly.
  2. Cook to Perfection – Heat a pan over medium heat and lightly coat with cooking spray. Place wraps seam-side down and cook 1-2 minutes per side, until crispy and golden brown.
  3. Serve & Enjoy – Cut each wrap in half and serve immediately.

Notes

  • Customize It! – Add crispy bacon, avocado slices, or diced tomatoes for extra flavor.
  • Extra Crunch – Use a panini press for an evenly crisped texture.
  • Meal Prep Tip – Wrap in foil and refrigerate for up to 3 days. Reheat in a skillet or toaster oven for best results.
 

Savory Lemon Herb Roasted Chicken Thighs: A Timeless Classic for Any Occasion

When it comes to meals that strike the perfect balance between elegance and simplicity, nothing compares to lemon herb roasted chicken thighs. This dish delivers crispy, golden skin and juicy, tender meat, all infused with the fresh, bright flavors of citrus and aromatic herbs. It’s a go-to recipe for busy weeknights, yet sophisticated enough for special occasions.

With minimal preparation and just the right mix of seasonings, this roasted chicken is a culinary staple that never goes out of style. Whether you’re feeding a crowd, planning a meal prep session, or simply craving something hearty and delicious, these lemon herb chicken thighs are bound to impress.

Let’s dive into why this dish is a must-have in your recipe collection, explore expert cooking tips, pairing suggestions, and answer some common questions to help you perfect this flavorful favorite.

Why This Recipe Deserves a Spot on Your Table

1. Simple Ingredients, Extraordinary Flavor

The beauty of this dish lies in its simplicity. The combination of lemon, garlic, olive oil, and fresh herbs enhances the natural richness of the chicken, creating layers of zesty, savory goodness. Unlike heavily breaded or sauce-laden dishes, this recipe lets the flavors shine without overwhelming the palate.

2. The Perfect Balance of Crispy and Juicy

The bone-in, skin-on chicken thighs are key to achieving a crispy exterior while keeping the inside moist and flavorful. The skin locks in the juices, preventing the meat from drying out as it roasts.

3. A Foolproof Recipe for Any Skill Level

Even if you’re new to cooking, this recipe is nearly impossible to mess up. A quick marinade, a hot oven, and minimal effort lead to restaurant-quality results every time.

4. Versatile and Adaptable to Your Taste

Whether you love bold spices or prefer something more subtle, this dish is incredibly flexible. You can experiment with different herbs, citrus variations, and spice levels to create a unique flavor profile that suits your preferences.

5. A Crowd-Pleasing Dish for Every Occasion

From cozy family dinners to dinner parties, this dish works for any setting. The bright citrusy flavors pair well with a variety of side dishes, making it a great choice for both casual and formal meals.

Tips for Mastering the Perfect Lemon Herb Roasted Chicken

Pat the Chicken Dry for Extra Crispiness

Before adding the marinade, use paper towels to remove excess moisture from the chicken. This step helps the skin crisp up beautifully in the oven instead of steaming.

Marinate for Maximum Flavor

While 30 minutes is enough for a flavorful dish, marinating for up to 8 hours allows the chicken to absorb the full depth of the herbs and lemon juice, creating a more robust taste.

Use Fresh Herbs Whenever Possible

Dried herbs work well in a pinch, but fresh herbs like rosemary, thyme, and parsley provide more vibrant flavors and enhance the overall aroma of the dish.

Roast at High Heat for the Best Texture

A 400°F (200°C) oven is the ideal temperature for getting crispy skin and juicy meat. Anything lower can result in soggy skin, while higher temperatures may dry out the meat.

Let the Chicken Rest Before Serving

Allowing the chicken to rest for five minutes after roasting helps redistribute the juices, ensuring a moist and tender bite in every piece.

Broil for an Extra Golden Finish

If you want even crispier skin, switch the oven to broil for the last 2-3 minutes of cooking. Keep an eye on it to prevent burning.

Serving and Pairing Ideas

The Ultimate Side Dishes for a Balanced Meal

While this zesty, herb-infused chicken is delicious on its own, pairing it with the right sides elevates the entire meal. Here are some of the best accompaniments:

  • Roasted Vegetables – Carrots, Brussels sprouts, or asparagus add a sweet, earthy contrast.
  • Garlic Mashed Potatoes – Creamy and rich, they complement the crispy chicken perfectly.
  • Lemon Butter Rice – A bright, citrus-infused grain that enhances the dish’s fresh flavors.
  • Crisp Green Salad – A refreshing side with a light vinaigrette balances the richness of the chicken.
  • Crusty Bread or Dinner Rolls – Perfect for soaking up the flavorful juices.

Best Drinks to Pair with This Dish

  • White Wine – A crisp Sauvignon Blanc or Chardonnay pairs beautifully with the citrus and herb notes.
  • Sparkling Water with Lemon – A simple, refreshing option that enhances the dish’s bright flavors.
  • Iced Herbal Tea – Mint or chamomile tea complements the freshness of the herbs in the dish.

Storage and Reheating Tips

Refrigerating Leftovers

Store any leftover chicken in an airtight container in the refrigerator for up to four days.

Freezing for Later

For longer storage, freeze the chicken in sealed freezer bags for up to three months. When ready to eat, let it thaw overnight in the fridge before reheating.

Best Methods for Reheating

  • Oven: Reheat at 350°F for 10-15 minutes to keep the skin crisp.
  • Air Fryer: Reheat at 375°F for 5-7 minutes for an extra crispy finish.
  • Skillet: Warm over medium heat with a splash of olive oil.
  • Avoid the Microwave: It can make the skin rubbery and the meat dry.

The Flavor Makers (Ingredients)

  • 4 bone-in, skin-on chicken thighs
  • 2 tablespoons olive oil
  • 1 lemon (zested and juiced)
  • 4 garlic cloves (minced)
  • 1 teaspoon dried oregano
  • 1 teaspoon dried thyme
  • 1 teaspoon dried rosemary
  • Salt and pepper to taste
  • Fresh parsley (optional for garnish)

The Path to Perfection (Directions)

1. Set the Stage

Preheat your oven to 400°F (200°C).

2. Mix the Magic

In a small bowl, combine olive oil, lemon zest, lemon juice, garlic, oregano, thyme, rosemary, salt, and pepper to create a fragrant marinade.

3. Coat the Chicken

  • Pat the chicken thighs dry with paper towels to help the skin crisp up.
  • Place them in a shallow dish or a resealable bag.
  • Pour the lemon herb marinade over the chicken, ensuring each piece is coated evenly.
  • Let it marinate for at least 30 minutes (or up to 2 hours for deeper flavor).

4. Roast to Perfection

  • Arrange the marinated chicken on a baking sheet lined with parchment paper or in a baking dish.
  • Roast for 35-40 minutes, or until the internal temperature reaches 165°F (74°C) and the skin turns golden and crispy.

5. Serve and Savor

  • Garnish with fresh parsley before serving.
  • For an extra-crispy finish, broil for 2-3 minutes at the end of cooking.

Know Your Bite (Nutritional Information Per Serving)

  • Calories: 290
  • Protein: 25g
  • Carbohydrates: 3g
  • Sugar: 10g
  • Fiber: 1g
  • Fat: 21g
  • Saturated Fat: 5g
  • Unsaturated Fat: 13g
  • Trans Fat: 0g
  • Cholesterol: 80mg
  • Sodium: 300mg

These lemon herb roasted chicken thighs bring a bright, aromatic twist to any meal. Enjoy their crispy, juicy goodness alongside roasted vegetables, mashed potatoes, or a fresh green salad!

Frequently Asked Questions

1. Can I Use Chicken Breasts Instead of Thighs?

Yes, but keep in mind that chicken breasts cook faster and can dry out more easily. If using boneless, skinless chicken breasts, reduce the cooking time to 25-30 minutes and check for doneness at 165°F (74°C).

2. How Can I Make This Dish Spicier?

For a kick of heat, add:

  • Red pepper flakes to the marinade.
  • Cayenne pepper for a more intense heat.
  • Sliced jalapeños to the baking dish.

3. Can I Grill Instead of Roast?

Absolutely! Grill the marinated chicken thighs over medium heat for 5-7 minutes per side, until the internal temperature reaches 165°F.

4. What If I Don’t Have Fresh Herbs?

Dried herbs work well in place of fresh, but use half the amount since dried herbs have a more concentrated flavor.

5. Can I Make This Dish Ahead of Time?

Yes! You can marinate the chicken up to 24 hours in advance, keeping it refrigerated until ready to roast.

Conclusion: A Dish Worth Making Again and Again

Lemon Herb Roasted Chicken Thighs are the perfect combination of simplicity, flavor, and versatility. With just a handful of ingredients and a few key cooking techniques, you can create a restaurant-quality meal at home with minimal effort.

Whether you’re preparing dinner for your family, hosting a gathering, or meal prepping for the week, this recipe delivers consistently delicious results every time. With its bright citrusy notes, rich herbs, and crispy texture, it’s a dish that you’ll come back to again and again.

So, fire up the oven, let those flavors blend, and enjoy every juicy, herb-infused bite of this timeless chicken dish.

aiting

Savory Lemon Herb Roasted Chicken Thighs: A Timeless Classic for Any Occasion

This Golden Lemon Herb Roasted Chicken is a perfect balance of citrusy brightness and aromatic herbs, creating a crispy, juicy delight that pairs wonderfully with a variety of side dishes.
Prep Time 10 minutes
Cook Time 35 minutes
Total Time 45 minutes
Servings: 4 servings
Course: Main Course
Cuisine: Mediterranean

Ingredients
  

  • 4 bone-in skin-on chicken thighs
  • 2 tablespoons olive oil
  • 1 lemon zested and juiced
  • 4 garlic cloves minced
  • 1 teaspoon dried oregano
  • 1 teaspoon dried thyme
  • 1 teaspoon dried rosemary
  • Salt and pepper to taste
  • Fresh parsley optional for garnish

Method
 

  1. 4 bone-in, skin-on chicken thighs
  2. 2 tablespoons olive oil
  3. 1 lemon (zested and juiced)
  4. 4 garlic cloves (minced)
  5. 1 teaspoon dried oregano
  6. 1 teaspoon dried thyme
  7. 1 teaspoon dried rosemary
  8. Salt and pepper to taste
  9. Fresh parsley (optional for garnish)

Notes

  • For Extra Flavor: Let the chicken marinate overnight.
  • Crispier Skin: Pat the chicken dry before applying the marinade.
  • Pairing Ideas: Serve with roasted vegetables, mashed potatoes, or a fresh green salad.
  • Leftovers: Store in the fridge for up to 3 days and reheat in the oven for best texture.

Philly Cheesesteak Lava Breadsticks: A Crispy, Cheesy Twist on a Classic

Philly cheesesteaks and cheesy breadsticks—two beloved comfort foods—come together in this indulgent, flavor-packed recipe. Imagine tender, seasoned steak wrapped in golden, crispy bread, oozing with melted cheese and sautéed onions and peppers. These Philly Cheesesteak Lava Breadsticks are the ultimate snack, appetizer, or even a fun dinner option. Whether you’re preparing them for game day, a party, or just to satisfy a craving, they deliver all the rich, savory flavors of a classic cheesesteak in a hand-held, dippable form.

But what makes these breadsticks so special? Let’s dive into the magic behind this dish, including expert tips, serving suggestions, storage advice, and frequently asked questions.

Why This Recipe Stands Out

1. A Philly-Inspired Innovation

The Philly cheesesteak has been an American favorite for decades, known for its simple yet bold combination of thinly sliced steak, gooey cheese, and sautéed onions and peppers. By taking those same ingredients and wrapping them in soft, golden bread, this recipe transforms the classic sandwich into an irresistible handheld snack. Each bite delivers layers of flavor, with the crispiness of the baked dough complementing the melty cheese and juicy steak inside.

2. Perfect for Any Occasion

These breadsticks are a hit at parties, potlucks, or family gatherings. They’re easy to grab and dip, making them a convenient and less messy alternative to traditional cheesesteaks. Serve them as an appetizer for a dinner party, as a game-day snack, or even as a fun alternative to pizza on a Friday night.

3. Make-Ahead and Freezer-Friendly

One of the best things about this recipe is its versatility. You can prep these ahead of time and either refrigerate or freeze them for later use. They reheat beautifully, making them a great option for meal prepping or quick, last-minute entertaining.

4. A Customizable Recipe

Not a fan of bell peppers? Prefer a different cheese? Want to add a spicy kick? This recipe is incredibly adaptable, allowing you to tweak the ingredients to match your personal preferences. From adding mushrooms to swapping in roast beef instead of steak, the variations are endless.

Expert Tips for the Perfect Breadsticks

Choose the Right Cut of Beef

The key to tender, flavorful steak in these breadsticks is selecting the right cut. Ribeye is the traditional choice for Philly cheesesteaks due to its rich marbling and juicy texture. However, sirloin and flank steak are excellent alternatives that also deliver great flavor and tenderness. For the best results, slice the meat as thinly as possible—freezing it for about 15 minutes before cutting makes this easier.

Get the Cheese Just Right

Provolone is the classic cheese for Philly cheesesteaks, offering a mild, creamy melt. Mozzarella works well for those who prefer a stretchier cheese, while white American cheese adds a rich, buttery flavor. For a bold twist, try mixing in some sharp cheddar or pepper jack for extra kick.

Don’t Overload the Dough

While it’s tempting to pack these breadsticks with as much steak and cheese as possible, overstuffing them can lead to dough breakage during baking. Keep the filling balanced so that the bread fully seals around the ingredients, preventing leaks and ensuring an even bake.

Brush with Butter for a Flavor Boost

A simple melted butter topping before baking adds an extra layer of richness. Mix in garlic powder or Italian seasoning for even more depth of flavor. A sprinkle of Parmesan cheese on top before baking creates a beautifully golden, slightly crispy crust.

Serving and Pairing Suggestions

Dips That Elevate the Flavor

These breadsticks are delicious on their own, but serving them with the right dipping sauce takes them to another level. Here are a few ideas:

  • Marinara Sauce – A tangy contrast to the cheesy, savory filling.
  • Garlic Butter Sauce – Enhances the rich, buttery flavors of the breadsticks.
  • Cheese Sauce – For those who can’t get enough of the cheesy goodness.
  • Spicy Aioli – A mayo-based dip with a kick of heat from sriracha or cayenne.

Side Dish Ideas

If you’re serving these breadsticks as part of a meal, consider pairing them with:

  • A Fresh Green Salad – To balance out the richness.
  • Tomato or Roasted Red Pepper Soup – A warm, comforting side.
  • Crispy French Fries or Onion Rings – For a full-on indulgent experience.

Storage and Reheating Tips

Refrigeration

If you have leftovers, store them in an airtight container in the refrigerator for up to three days. To reheat, place them in a preheated oven at 350°F for about 10 minutes or until warmed through.

Freezing Instructions

These breadsticks freeze beautifully, making them a great option for quick, future meals. To freeze:

  1. Allow the breadsticks to cool completely.
  2. Wrap them individually in plastic wrap, then place them in a freezer-safe container or bag.
  3. Freeze for up to three months.

To reheat from frozen, bake at 375°F for 15–20 minutes until fully heated and crispy.

Gather Your Goodies (Ingredients)

  • 1 lb flank steak, thinly sliced
  • 1 tablespoon olive oil
  • 1 onion, sliced
  • 1 bell pepper, sliced
  • 1/2 cup mushrooms, sliced
  • 1/4 teaspoon salt
  • 1/4 teaspoon black pepper
  • 2 cups shredded mozzarella cheese (or provolone for a classic Philly taste)
  • 1 pizza dough (store-bought or homemade)
  • 1 tablespoon melted butter
  • 2 tablespoons grated Parmesan cheese
  • 1 teaspoon garlic powder

From Dough to Delicious (Directions)

1. Fire Up the Oven

Preheat your oven to 375°F (190°C).

2. Sizzle the Steak & Veggies

  • Heat olive oil in a skillet over medium-high heat.
  • Cook the thinly sliced steak for 2–3 minutes until browned.
  • Add onions, bell peppers, and mushrooms. Sauté for 5–7 minutes until softened.
  • Season with salt and black pepper. Remove from heat and let cool slightly.

3. Roll and Load

  • Roll out the pizza dough into a rectangle and cut into 2-inch-wide strips.
  • Spoon the steak mixture onto each strip and sprinkle with shredded mozzarella.

4. Wrap & Place

  • Roll the dough tightly around the filling and place the breadsticks on a greased baking sheet, seam-side down.

5. Golden Perfection

  • Brush the tops with melted butter and sprinkle with Parmesan and garlic powder.
  • Bake for 12–15 minutes until golden brown and bubbly.

6. Serve & Devour

  • Serve warm with marinara sauce, garlic butter, or your favorite dip!

Know What You’re Eating (Nutritional Info per Breadstick)

  • Calories: 350 kcal
  • Carbohydrates: 28g
  • Protein: 18g
  • Fat: 18g
  • Saturated Fat: 4g
  • Unsaturated Fat: 3g
  • Cholesterol: 25mg
  • Sodium: 480mg
  • Fiber: 2g
  • Sugar: 4g

Chef’s Secrets

  • For ultra-thin steak slices, freeze the meat for 15 minutes before cutting.
  • Brush baked breadsticks with extra garlic butter for a rich, savory finish.
  • Spice it up with jalapeños or red pepper flakes.
  • Store leftovers in the fridge for up to 3 days and reheat in the oven for a crispy bite.

Enjoy your cheesy, steak-filled Philly-inspired breadsticks!

Frequently Asked Questions

1. Can I Use Store-Bought Dough?

Absolutely! Store-bought pizza dough works great for this recipe, saving time and effort. If you prefer homemade dough, that’s always a delicious option too.

2. What’s the Best Way to Get the Steak Super Tender?

Thinly slicing the steak is key. Using a sharp knife and cutting against the grain helps break down tough fibers, making the steak more tender. Cooking it quickly over high heat also prevents it from becoming chewy.

3. Can I Make These Breadsticks Ahead of Time?

Yes! You can assemble the breadsticks and refrigerate them before baking. When ready to cook, simply place them in the oven and bake as directed. You can also freeze them before baking and cook them straight from frozen, adding a few extra minutes to the baking time.

4. What Other Cheeses Can I Use?

While provolone and mozzarella are popular choices, you can experiment with:

  • Cheddar – For a sharper taste.
  • White American Cheese – Classic for an authentic Philly cheesesteak experience.
  • Swiss Cheese – Adds a nutty, slightly sweet flavor.

5. How Do I Prevent the Filling from Leaking Out?

Make sure the edges of the dough are sealed tightly. You can also pinch or crimp the edges with a fork to create a stronger seal. Brushing the tops with egg wash can help give the bread a firmer structure.

Conclusion: A Must-Try for Cheesesteak Lovers

Philly Cheesesteak Lava Breadsticks are a delicious twist on a beloved classic. Combining all the best elements of a cheesesteak with the convenience and fun of cheesy breadsticks, they’re perfect for any occasion. Whether you’re hosting a party, looking for a creative appetizer, or just craving something indulgent, these breadsticks are sure to satisfy.

With endless customization options, make-ahead convenience, and easy storage, this recipe is one you’ll want to keep in your collection. Pair them with your favorite dips, serve them with a fresh salad, or enjoy them on their own—no matter how you eat them, they’re guaranteed to be a hit.

So, preheat that oven, get your ingredients ready, and prepare to enjoy the ultimate fusion of cheesesteak and breadstick goodness!

aiting

Philly Cheesesteak Lava Breadsticks: A Crispy, Cheesy Twist on a Classic

These Philly Cheesesteak Lava Breadsticks are the perfect fusion of crispy breadsticks and the classic flavors of a Philly cheesesteak. With melty cheese, juicy steak, and buttery garlic topping, they are an irresistible snack or meal!
Prep Time 15 minutes
Cook Time 15 minutes
Total Time 30 minutes
Servings: 6 breadsticks
Course: Appetizer, Snack
Cuisine: American

Ingredients
  

  • 1 lb flank steak thinly sliced
  • 1 tablespoon olive oil
  • 1 onion sliced
  • 1 bell pepper sliced
  • 1/2 cup mushrooms sliced
  • 1/4 teaspoon salt
  • 1/4 teaspoon black pepper
  • 2 cups shredded mozzarella cheese or provolone for a classic Philly taste
  • 1 pizza dough store-bought or homemade
  • 1 tablespoon melted butter
  • 2 tablespoons grated Parmesan cheese
  • 1 teaspoon garlic powder

Method
 

  1. Preheat the Oven
  2. Set your oven to 375°F (190°C) to ensure a crispy and golden finish.
2. Cook the Steak & Veggies
  1. Heat olive oil in a skillet over medium-high heat.
  2. Cook the thinly sliced steak for 2–3 minutes until browned.
  3. Add onions, bell peppers, and mushrooms. Sauté for 5–7 minutes until softened.
  4. Season with salt and black pepper. Remove from heat and let cool slightly.
3. Roll and Fill
  1. Roll out the pizza dough into a rectangle and cut into 2-inch-wide strips.
  2. Spoon the steak mixture onto each strip and sprinkle with shredded mozzarella.
4. Wrap and Arrange
  1. Roll the dough tightly around the filling and place the breadsticks on a greased baking sheet, seam-side down.
5. Bake to Perfection
  1. Brush the tops with melted butter and sprinkle with Parmesan and garlic powder.
  2. Bake for 12–15 minutes until golden brown and bubbly.
6. Serve and Enjoy
  1. Serve warm with marinara sauce, garlic butter, or your favorite dip.

Notes

  • For Ultra-Thin Slices: Freeze the steak for 15 minutes before cutting.
  • Extra Flavor: Brush baked breadsticks with additional garlic butter for a richer taste.
  • Add Some Heat: Spice it up with jalapeños or red pepper flakes.
  • Storage: Keep leftovers in the fridge for up to 3 days and reheat in the oven for a crispy bite.
 

Frikadellen: The Heart of German Comfort Food

Frikadellen, often called German hamburgers, are a staple in traditional German cuisine. These flavor-packed, pan-fried meat patties have been enjoyed for centuries and continue to be a beloved dish in German households today. Unlike their American counterpart, Frikadellen are softer, more seasoned, and typically served without a bun—making them a versatile dish that pairs well with various sides.

This classic comfort food is easy to make, requires simple ingredients, and delivers rich, savory flavors in every bite. Whether served hot or cold, as a main dish or snack, Frikadellen bring a taste of Germany straight to your kitchen.

Why Frikadellen Deserve a Spot on Your Table

1. A Taste of Tradition

Frikadellen are deeply rooted in German culture, dating back to the 17th century. They are often found at Oktoberfest celebrations, family gatherings, and local beer gardens. While the recipe may vary slightly by region, the essence of Frikadellen remains the same—a juicy, well-seasoned meat patty that embodies home-cooked comfort.

2. Richer and More Flavorful than a Hamburger

Unlike American hamburgers, which are often grilled with minimal seasoning, Frikadellen are pan-fried for a crispy outer layer while remaining juicy inside. They also include bread soaked in milk, which makes them softer and more tender. Combined with a blend of spices, onions, and mustard, Frikadellen offer a depth of flavor that stands out.

3. A Versatile Dish for Any Occasion

Frikadellen are incredibly adaptable. You can:

  • Serve them as a main course with potatoes or a salad.
  • Enjoy them cold in a sandwich the next day.
  • Add them to a charcuterie platter alongside cheeses and pickles.
  • Pack them for lunch or a picnic as a hearty snack.

4. Easy to Make and Meal-Prep Friendly

Frikadellen are quick to prepare and can be made in advance. The patties store well in the fridge and freezer, making them perfect for meal prepping. Reheating them is easy, and they maintain their flavor and texture beautifully.

Serving Suggestions: Bringing Out the Best in Frikadellen

1. Traditional German Side Dishes

Frikadellen are most commonly served with:

  • German Potato Salad (Kartoffelsalat) – A tangy and slightly sweet side dish.
  • Sauerkraut – A classic pairing that adds a touch of acidity.
  • Mashed Potatoes with Gravy – Rich and comforting.
  • Rye Bread or Pretzels – A hearty way to enjoy them.

2. Modern Twists on Serving

  • Frikadellen Sandwich: Serve them in a crusty roll with mustard, pickles, and lettuce.
  • Topped with Fried Egg: A hearty brunch option.
  • Served with Spicy Dipping Sauces: Try them with garlic aioli, mustard dip, or a smoky paprika sauce.

Storage and Reheating Tips

1. Storing Leftovers

  • Refrigeration: Keep cooked Frikadellen in an airtight container for up to 3 days.
  • Freezing: Uncooked patties can be frozen for up to 3 months. Just shape them and place them on a baking sheet before transferring to a freezer bag.

2. How to Reheat Frikadellen

  • Stovetop: Reheat in a pan over medium-low heat with a splash of broth or butter.
  • Oven: Place on a baking sheet at 300°F (150°C) for 10 minutes.
  • Air Fryer: Heat at 350°F (175°C) for 5 minutes for a crispy texture.

Creative Variations: Putting a Twist on Tradition

1. Spicy Frikadellen

For a bolder flavor, add cayenne pepper, chili flakes, or smoked paprika to the meat mixture.

2. Cheese-Stuffed Frikadellen

Press a small cube of cheese (cheddar, gouda, or mozzarella) into the center of each patty before frying for a gooey, melty surprise.

3. Herb-Infused Frikadellen

Enhance the flavor with fresh herbs like rosemary, thyme, or oregano.

4. Vegetarian Frikadellen

For a meat-free version, substitute ground meat with mashed beans, lentils, or mushrooms.

5. Low-Carb Frikadellen

Replace breadcrumbs with almond flour or grated zucchini for a keto-friendly alternative.

Ingredients – A Taste of Germany in Every Bite

  • Ground beef and pork mix – For a juicy and flavorful patty
  • Stale bread or breadcrumbs – Adds texture and softness
  • Milk – Used to soften the bread
  • Egg – Helps bind the mixture
  • Onion, finely chopped – Adds a touch of sweetness and depth
  • Parsley, chopped – Brings freshness to the dish
  • Mustard – A signature German flavor enhancer
  • Paprika – For a subtle warmth and color
  • Salt and pepper – Essential seasonings for balance
  • Butter or oil – For frying to golden perfection

Directions – Crafting the Perfect Frikadellen

1. Prep the Bread Mixture

Soak the stale bread in milk until soft, then squeeze out excess liquid. If using breadcrumbs, mix them directly with milk until slightly moistened.

2. Combine Ingredients

Add the ground meat, egg, onion, parsley, mustard, paprika, salt, and pepper to the bread mixture. Gently mix with your hands until well combined, ensuring not to overwork the mixture.

3. Shape the Patties

Divide the mixture into equal portions and shape them into oval patties about ¾-inch thick.

4. Fry to Perfection

Heat butter or oil in a skillet over medium heat. Cook the patties for 4-5 minutes per side until golden brown and cooked through, with an internal temperature of 160°F (71°C).

5. Let Them Rest and Serve

Allow the Frikadellen to rest for a few minutes before serving, which helps retain their juiciness.

Nutritional Breakdown – Satisfying and Hearty

(Per serving, approximate values)

  • Calories: 210
  • Protein: 18g
  • Carbohydrates: 3g
  • Fat: 14g
  • Saturated Fat: 5g
  • Sodium: 400mg
  • Cholesterol: 70mg

Frikadellen are a true comfort food that pairs beautifully with traditional German sides like potato salad, sauerkraut, or crusty rye bread. Enjoy them fresh or as a cold snack the next day!

Frequently Asked Questions (FAQs)

1. What’s the Difference Between Frikadellen and American Hamburgers?

Frikadellen are softer, more seasoned, and include soaked bread for a unique texture. They are also pan-fried instead of grilled.

2. Can I Bake Frikadellen Instead of Frying Them?

Yes! Bake them at 375°F (190°C) for 20-25 minutes, flipping halfway through for even cooking.

3. Can I Make Frikadellen with Only Beef?

Yes, but mixing beef with pork adds extra juiciness and flavor. If using only beef, choose a higher fat content.

4. Are Frikadellen Served with a Sauce?

Traditionally, they are eaten plain, but they pair well with brown gravy, mustard, or garlic sauce.

5. Can I Eat Frikadellen Cold?

Absolutely! They are delicious cold, especially in a sandwich with mustard and pickles.

6. Can I Make Frikadellen Gluten-Free?

Yes! Use gluten-free breadcrumbs or mashed potatoes instead of bread.

7. What’s the Best Way to Keep Frikadellen Moist?

  • Don’t overmix the meat.
  • Use a mix of pork and beef for added fat.
  • Add a splash of broth when reheating.

Conclusion: A Classic Worth Mastering

Frikadellen are more than just a German hamburger—they are a symbol of comfort, tradition, and home-cooked goodness. Their rich flavor, tender texture, and versatility make them a must-try recipe for anyone who loves hearty, satisfying meals.

Whether you serve them with traditional German sides, in a sandwich, or with a modern twist, Frikadellen offer endless possibilities. They are easy to make, store well, and can be customized to suit any dietary preference.

So, the next time you’re looking for a simple yet flavorful dish, try making authentic German Frikadellen. It’s a recipe you’ll come back to again and again—because some classics never go out of style. Guten Appetit!

aiting

Frikadellen: The Heart of German Comfort Food

Frikadellen are juicy, flavorful German meat patties made with a mix of ground beef and pork, aromatic seasonings, and a crispy golden crust. These hearty delights are a staple in German cuisine, perfect for pairing with potato salad or crusty rye bread.
Prep Time 10 minutes
Cook Time 10 minutes
Total Time 20 minutes
Servings: 4 servings
Course: Main Course
Cuisine: German

Ingredients
  

  • Ground beef and pork mix
  • Stale bread or breadcrumbs
  • Milk
  • Egg
  • Onion finely chopped
  • Parsley chopped
  • Mustard
  • Paprika
  • Salt and pepper
  • Butter or oil

Method
 

  1. Soften the Bread
  2. Soak stale bread in milk until soft, then squeeze out excess liquid. If using breadcrumbs, mix them directly with milk until slightly moistened.
2. Mix the Ingredients
  1. In a bowl, combine the ground meat, egg, onion, parsley, mustard, paprika, salt, and pepper with the softened bread.
  2. Gently mix with your hands until well incorporated but avoid overworking the mixture.
3. Shape the Patties
  1. Divide the mixture into equal portions and shape into oval patties, about ¾-inch thick.
4. Cook to Perfection
  1. Heat butter or oil in a skillet over medium heat.
  2. Fry the patties for 4-5 minutes per side until golden brown and cooked through, reaching an internal temperature of 160°F (71°C).
5. Rest and Serve
  1. Let the Frikadellen rest for a few minutes before serving to retain their juiciness.

Notes

  • For Extra Flavor: Add a dash of nutmeg or garlic powder.
  • Crispier Texture: Lightly coat patties with flour before frying.
  • Perfect Pairing: Serve with potato salad, sauerkraut, or fresh rye bread.
  • Meal Prep Friendly: Store leftovers in the fridge for up to 3 days, great for sandwiches!