Cabbage and Beef Bake is a comforting family favorite.

Introduction to Cabbage and Beef Casserole

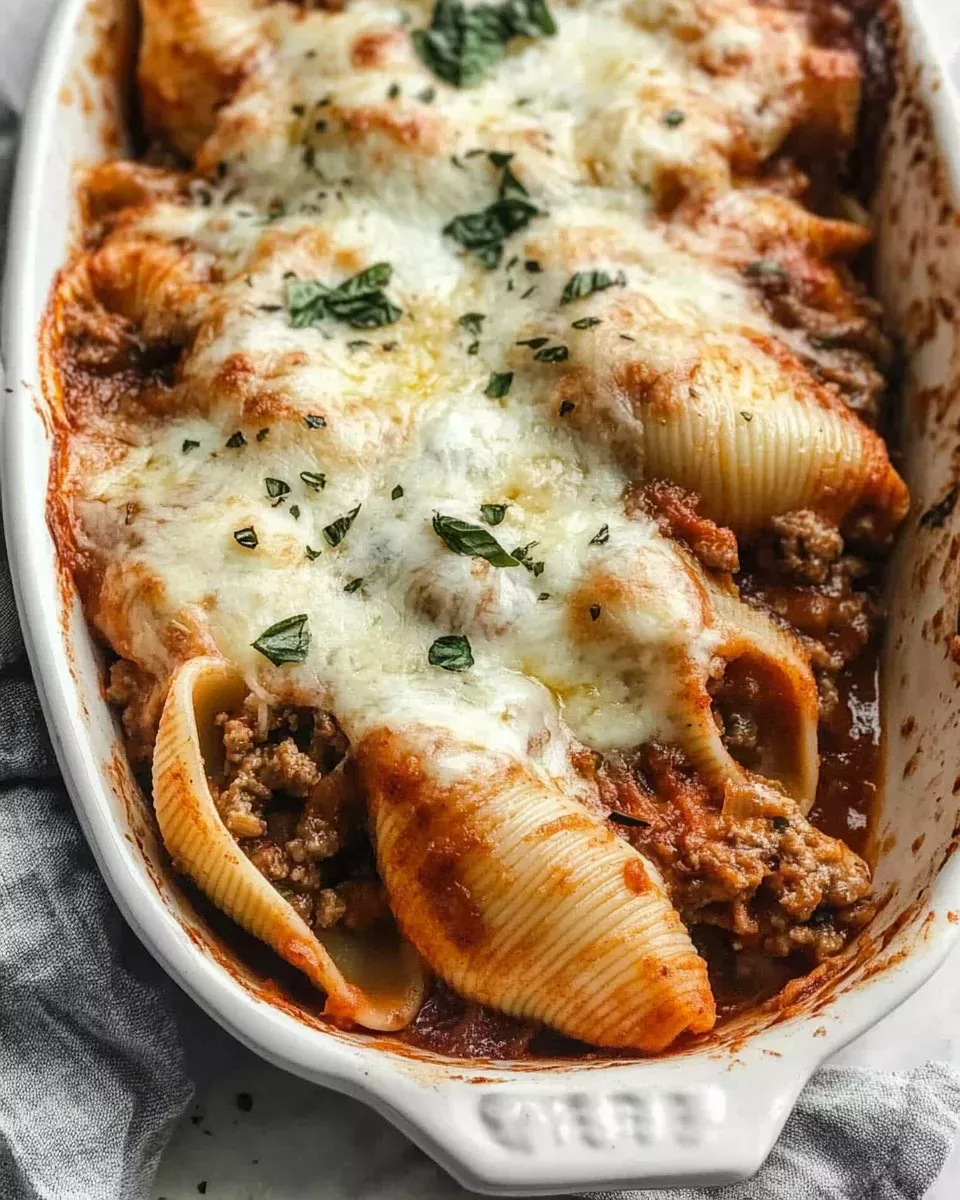
Welcome to the delightful world of Cabbage and Beef Casserole! This dish is not just a meal; it’s a warm hug on a plate. Perfect for family dinners or cozy gatherings, this casserole combines hearty ingredients that create a satisfying and flavorful experience. The blend of ground beef, tender cabbage, and zesty tomatoes makes it a favorite among many.

What makes this casserole truly special is its simplicity. With just a handful of ingredients, you can whip up a dish that is both nutritious and delicious. It’s an excellent way to sneak in some veggies while still enjoying the rich flavors of beef and cheese. Plus, it’s a one-dish wonder, which means less cleanup for you!

Whether you’re a seasoned cook or a beginner in the kitchen, this Cabbage and Beef Casserole is easy to prepare. It’s also versatile, allowing you to customize it to your taste. You can add spices, swap out ingredients, or even make it vegetarian. The possibilities are endless!

So, roll up your sleeves and get ready to dive into this comforting recipe. Let’s explore the ingredients and steps needed to create this mouthwatering Cabbage and Beef Casserole that will surely become a staple in your home.

Ingredients for Cabbage and Beef Casserole

To create a delicious Cabbage and Beef Casserole, you’ll need a few simple ingredients. Each one plays a vital role in building the flavors and textures of this comforting dish. Here’s what you’ll need:

  • 1 pound ground beef: This is the star of the dish, providing protein and rich flavor.
  • 1 medium onion, chopped: Onions add sweetness and depth to the casserole.
  • 2 cloves garlic, minced: Garlic brings a wonderful aroma and enhances the overall taste.
  • 1 small head of green cabbage, chopped (about 4 cups): Cabbage adds crunch and nutrition, making the dish hearty.
  • 1 can (14.5 ounces) diced tomatoes, undrained: These tomatoes contribute moisture and a tangy flavor.
  • 1 cup cooked rice (white or brown): Rice helps to bind the ingredients together and adds a filling element.
  • 1 teaspoon dried oregano: Oregano adds a hint of earthiness and complements the beef.
  • 1 teaspoon salt: Salt enhances all the flavors in the casserole.
  • ½ teaspoon black pepper: Black pepper adds a subtle kick to the dish.
  • 1 cup shredded cheddar cheese: Cheese provides a creamy, melty topping that everyone loves.
  • ½ cup beef broth: Broth adds moisture and richness to the casserole.

These ingredients come together to create a delightful Cabbage and Beef Casserole that is sure to please your family and friends. Feel free to adjust the quantities or swap out ingredients based on your preferences. Now that you have everything you need, let’s move on to the preparation steps!

Step-by-Step Preparation of Cabbage and Beef Casserole

Now that you have gathered all the ingredients, it’s time to dive into the preparation of your Cabbage and Beef Casserole. This step-by-step guide will help you create a delicious meal that your family will love. Let’s get started!

Step 1: Prepping the Ingredients

First things first, you need to prep your ingredients. Start by chopping the onion and mincing the garlic. Make sure to cut the cabbage into small, bite-sized pieces. This will help it cook evenly. If you’re using leftover rice, ensure it’s ready to go. Having everything prepped will make the cooking process smoother and quicker.

Step 2: Cooking the Beef

Next, heat a large skillet over medium heat. Add the ground beef, chopped onion, and minced garlic. Cook this mixture for about 5 to 7 minutes. Stir occasionally until the beef is browned and the onion is translucent. This step is crucial as it builds the base flavor of your casserole. Once cooked, drain any excess fat to keep the dish from becoming greasy.

Step 3: Sautéing the Cabbage

After the beef is cooked, it’s time to add the chopped cabbage. Stir it into the skillet and cook for another 5 minutes. You want the cabbage to wilt slightly but still retain some crunch. Stir occasionally to ensure even cooking. This step adds a wonderful texture to your casserole.

Step 4: Combining Ingredients

Now, it’s time to bring everything together! Add the undrained diced tomatoes, cooked rice, dried oregano, salt, and black pepper to the skillet. Mix everything well and let it simmer for about 5 minutes. This allows the flavors to meld together beautifully. The aroma will be irresistible!

Step 5: Baking the Casserole

Finally, transfer the beef and cabbage mixture into a greased 9×13-inch baking dish. Pour the beef broth evenly over the top, ensuring it seeps into the mixture. Then, sprinkle the shredded cheddar cheese on top. Cover the dish with aluminum foil and bake in the preheated oven at 350°F for 30 minutes. After that, remove the foil and bake for an additional 15 minutes. This will give you a bubbly, golden cheese topping that everyone will love.

Once done, let the casserole cool for a few minutes before serving. Enjoy your homemade Cabbage and Beef Casserole!

Variation of Cabbage and Beef Casserole

While the classic Cabbage and Beef Casserole is a hit on its own, there are many ways to switch things up! Whether you want to try different ingredients or explore various cooking methods, these variations can add a new twist to your favorite dish. Let’s dive into some exciting alternatives!

Alternative Ingredients

One of the best things about the Cabbage and Beef Casserole is its versatility. You can easily swap out ingredients to suit your taste or dietary needs. Here are some alternative ingredients you might consider:

  • Ground Turkey or Chicken: For a leaner option, substitute ground beef with ground turkey or chicken. This will reduce the fat content while still providing a hearty meal.
  • Vegetarian Option: Replace the meat with a mix of beans, lentils, or even tofu. Use vegetable broth instead of beef broth for a delicious vegetarian casserole.
  • Different Cheeses: While cheddar cheese is a favorite, feel free to experiment with mozzarella, Monterey Jack, or even a spicy pepper jack for an extra kick.
  • Additional Vegetables: Add more veggies like bell peppers, carrots, or zucchini for extra nutrition and flavor. These can be sautéed along with the cabbage.
  • Spices and Herbs: Enhance the flavor by adding spices like paprika, cumin, or even a dash of hot sauce. Fresh herbs like parsley or basil can also brighten the dish.

Different Cooking Methods

In addition to ingredient variations, you can also explore different cooking methods for your Cabbage and Beef Casserole. Here are a few ideas:

  • Slow Cooker: For a hands-off approach, try making the casserole in a slow cooker. Simply brown the beef and onions, then combine all ingredients in the slow cooker. Cook on low for 6-8 hours or high for 3-4 hours.
  • Instant Pot: If you’re short on time, the Instant Pot is a great option. Sauté the beef and onions, then add the remaining ingredients. Cook on high pressure for about 10 minutes, followed by a quick release.
  • Stovetop Skillet: For a quicker version, you can cook everything in a large skillet. Just layer the ingredients and cover to let it simmer until the cabbage is tender and flavors meld.

These variations and cooking methods can help you create a Cabbage and Beef Casserole that fits your preferences and lifestyle. So, don’t hesitate to get creative in the kitchen!

Cooking Note for Cabbage and Beef Casserole

When preparing your Cabbage and Beef Casserole, there are a few important cooking notes to keep in mind. These tips will help ensure that your dish turns out perfectly every time. Let’s explore some key points to consider!

First, always make sure to brown the ground beef thoroughly. This step not only enhances the flavor but also helps to develop a rich base for your casserole. If you skip this step, the dish may lack depth and richness.

Next, when sautéing the cabbage, don’t rush it! Allowing the cabbage to wilt slightly while still retaining some crunch is essential. This texture adds a delightful contrast to the tender beef and rice. Stirring occasionally will help achieve even cooking.

Another important note is to drain any excess fat after cooking the beef. This will prevent your casserole from becoming greasy. A little fat is fine, but too much can overwhelm the dish and mask the flavors.

When combining the ingredients, be sure to mix them well. This ensures that every bite is packed with flavor. The spices, tomatoes, and rice should be evenly distributed throughout the mixture.

Lastly, don’t skip the resting time after baking! Allowing the casserole to cool for a few minutes before serving helps the flavors settle and makes it easier to cut into portions. This small step can make a big difference in presentation and taste.

By keeping these cooking notes in mind, you’ll be well on your way to creating a delicious Cabbage and Beef Casserole that your family will love. Happy cooking!

Serving Suggestions for Cabbage and Beef Casserole

Once your Cabbage and Beef Casserole is baked to perfection, it’s time to think about how to serve it! This dish is hearty and filling on its own, but pairing it with the right sides can elevate your meal even further. Here are some delightful serving suggestions to consider:

  • Fresh Salad: A crisp green salad is a perfect complement to the warm casserole. Consider a simple mix of lettuce, cucumbers, and cherry tomatoes, dressed with a light vinaigrette. The freshness of the salad balances the richness of the casserole.
  • Garlic Bread: Serve your casserole with warm garlic bread for a comforting touch. The buttery, garlicky flavor pairs wonderfully with the savory beef and cabbage.
  • Steamed Vegetables: Add a side of steamed vegetables like broccoli, green beans, or carrots. These veggies not only add color to your plate but also provide additional nutrients.
  • Mashed Potatoes: For a truly hearty meal, consider serving the casserole alongside creamy mashed potatoes. The smooth texture of the potatoes complements the casserole beautifully.
  • Pickles or Relish: A side of pickles or relish can add a tangy crunch that contrasts nicely with the casserole’s flavors. This is especially great if you enjoy a bit of zing in your meal.

When serving, consider garnishing the casserole with fresh herbs like parsley or chives. This not only adds a pop of color but also enhances the flavor. You can also offer hot sauce or additional cheese on the side for those who like a little extra kick.

With these serving suggestions, your Cabbage and Beef Casserole will be a hit at the dinner table. Enjoy the warmth and comfort of this delicious meal with your loved ones!

Tips for Perfecting Cabbage and Beef Casserole

Creating the perfect Cabbage and Beef Casserole is all about attention to detail. With a few simple tips, you can elevate your dish from good to great! Here are some helpful suggestions to ensure your casserole turns out delicious every time.

  • Choose Fresh Ingredients: Always opt for fresh vegetables and high-quality ground beef. Fresh ingredients enhance the flavor and texture of your casserole, making it more enjoyable.
  • Season Generously: Don’t be shy with the seasonings! Adjust the salt, pepper, and herbs to your taste. A well-seasoned dish is key to bringing out the flavors of the ingredients.
  • Layering is Key: When transferring the mixture to the baking dish, layer it evenly. This ensures that every bite has a balanced mix of beef, cabbage, and cheese.
  • Experiment with Cheese: While cheddar is a classic choice, try mixing different cheeses for a unique flavor. A blend of mozzarella and parmesan can add a delightful twist!
  • Don’t Overcook the Cabbage: When sautéing the cabbage, remember that it should be slightly crunchy. Overcooking can lead to a mushy texture, which isn’t ideal for a casserole.
  • Let it Rest: After baking, allow the casserole to rest for about 10 minutes before serving. This helps the layers set and makes it easier to cut into portions.
  • Garnish for Presentation: A sprinkle of fresh herbs like parsley or chives on top before serving adds a pop of color and freshness. It makes the dish look more appealing!
  • Adjust Cooking Time: Keep an eye on your casserole as it bakes. Ovens can vary, so check for that golden, bubbly cheese to know when it’s done.

By following these tips, you’ll be well on your way to mastering the art of Cabbage and Beef Casserole. Each time you make it, you’ll discover new ways to enhance the flavors and textures, making it a dish your family will request time and again!

Breakdown of Time for Cabbage and Beef Casserole

Understanding the time needed to prepare your Cabbage and Beef Casserole is essential for planning your meal. Here’s a simple breakdown of the time involved in each step, so you can manage your kitchen time effectively.

Prep Time

The prep time for this delicious casserole is about 15 to 20 minutes. During this time, you will chop the onion, mince the garlic, and cut the cabbage into bite-sized pieces. If you have leftover rice, make sure it’s ready to go. Having everything prepped in advance will make the cooking process smoother and quicker.

Cooking Time

Once your ingredients are prepped, the cooking time is approximately 30 to 35 minutes. This includes:

  • 5 to 7 minutes for browning the ground beef with the onion and garlic.
  • 5 minutes for sautéing the cabbage until it’s slightly wilted.
  • 5 minutes for simmering the combined ingredients to meld the flavors.
  • 30 minutes of baking covered with foil, followed by an additional 15 minutes uncovered to achieve that golden cheese topping.

Total Time

In total, you can expect to spend about 45 to 55 minutes from start to finish. This includes both prep and cooking time. With this efficient timeline, you can have a hearty and delicious Cabbage and Beef Casserole ready to serve in no time!

Nutritional Information for Cabbage and Beef Casserole

Understanding the nutritional content of your Cabbage and Beef Casserole is important for maintaining a balanced diet. This dish is not only delicious but also packed with essential nutrients. Here’s a breakdown of the key nutritional information per serving:

Calories

320 calories. This makes it a satisfying meal option without being overly heavy. The combination of beef, cabbage, and rice provides a good balance of energy and nutrients, making it a great choice for lunch or dinner.

Protein

24 grams of protein. The ground beef is the primary source of protein, contributing to the dish’s heartiness. This makes it an excellent option for those looking to increase their protein intake.

Sodium

600 milligrams. While this is a reasonable amount for a hearty meal, it’s always good to be mindful of your sodium intake, especially if you are watching your salt consumption. You can reduce the sodium content by using low-sodium beef broth and opting for no-salt-added canned tomatoes.

Overall, the Cabbage and Beef Casserole is a nutritious meal that provides a good balance of calories, protein, and essential nutrients. It’s a great option for families looking for a wholesome dish that everyone will enjoy!

FAQs about Cabbage and Beef Casserole

Can I make Cabbage and Beef Casserole ahead of time?

Absolutely! You can prepare your Cabbage and Beef Casserole ahead of time. Simply follow the recipe up to the baking step, then cover the dish and refrigerate it. When you’re ready to bake, just pop it in the oven. You may need to add a few extra minutes to the baking time if it’s coming straight from the fridge. This makes it a great option for busy weeknights or meal prepping!

What can I serve with Cabbage and Beef Casserole?

There are many delicious sides that pair well with Cabbage and Beef Casserole. Consider serving it with a fresh green salad, garlic bread, or steamed vegetables. You can also add a side of mashed potatoes for a heartier meal. These sides complement the casserole’s flavors and add variety to your dinner table.

How do I store leftovers of Cabbage and Beef Casserole?

Storing leftovers is easy! Allow the casserole to cool completely, then cover it tightly with plastic wrap or aluminum foil. You can also transfer it to an airtight container. Store it in the refrigerator for up to 3-4 days. When you’re ready to enjoy it again, simply reheat in the oven or microwave until warmed through.

Can I freeze Cabbage and Beef Casserole?

Yes, you can freeze Cabbage and Beef Casserole! To do this, prepare the casserole as directed, but do not bake it. Instead, cover it tightly with plastic wrap and then aluminum foil to prevent freezer burn. It can be frozen for up to 3 months. When you’re ready to eat, thaw it in the refrigerator overnight and then bake as usual. This makes for a convenient meal option on busy days!

Conclusion on Cabbage and Beef Casserole

In conclusion, the Cabbage and Beef Casserole is a delightful dish that brings comfort and satisfaction to any meal. Its combination of hearty ingredients, including ground beef, tender cabbage, and zesty tomatoes, creates a flavorful experience that is hard to resist. Not only is it easy to prepare, but it also offers versatility, allowing you to customize it to your taste and dietary needs.

This casserole is perfect for family dinners, potlucks, or even meal prepping for busy weeks. With its rich flavors and nutritious components, it’s a dish that everyone can enjoy. Plus, the leftovers are just as delicious, making it a great option for those who love to savor their meals over a few days.

As you explore the various ways to make this casserole your own, remember to have fun in the kitchen! Whether you stick to the classic recipe or try out new ingredients and cooking methods, the Cabbage and Beef Casserole is sure to become a beloved staple in your home.

So, gather your ingredients, follow the steps, and enjoy the warmth and comfort of this wonderful dish. Happy cooking, and may your Cabbage and Beef Casserole bring joy to your table!

ating

Cabbage and Beef Bake is a comforting family favorite.

This Cabbage and Beef Casserole is the ultimate comfort food—simple, hearty, and packed with flavor. Tender cabbage, seasoned ground beef, and a rich tomato sauce come together in a baked, cheesy masterpiece. It’s a budget-friendly, one-pan meal that’s perfect for weeknight dinners, meal prep, or feeding a crowd.


Prep Time 10 minutes
Cook Time 45 minutes
Total Time 55 minutes
Servings: 6 servings
Course: Main Course
Cuisine: American, Comfort Food

Ingredients
  

  • 1 lb ground beef or ground turkey
  • 1 small onion diced
  • 3 cloves garlic minced
  • 1 teaspoon salt
  • ½ teaspoon black pepper
  • 1 teaspoon smoked paprika
  • ½ teaspoon dried oregano
  • ½ teaspoon red pepper flakes optional for spice
  • 1 14.5 oz can diced tomatoes
  • 1 8 oz can tomato sauce
  • 1 tablespoon Worcestershire sauce
  • ½ cup beef broth or water
  • ½ head green cabbage chopped into bite-sized pieces
  • 1 ½ cups shredded cheddar cheese or mozzarella

Method
 

  1. Preheat Oven: Preheat your oven to 375°F (190°C). Grease a 9×13-inch baking dish.
  2. Cook the Beef: In a large skillet over medium heat, cook the ground beef and diced onion until browned, about 5-7 minutes. Drain excess grease.
  3. Season & Simmer: Add minced garlic, salt, black pepper, paprika, oregano, and red pepper flakes. Stir for 30 seconds until fragrant. Pour in the diced tomatoes, tomato sauce, Worcestershire sauce, and beef broth. Simmer for 5 minutes.
  4. Layer the Casserole: Spread half of the chopped cabbage into the baking dish. Pour half of the beef mixture over the cabbage. Repeat the layers with the remaining cabbage and beef mixture.
  5. Bake: Cover with foil and bake for 30 minutes.
  6. Add Cheese & Finish Baking: Remove the foil, sprinkle shredded cheese over the top, and bake uncovered for another 10-15 minutes until the cheese is melted and bubbly.
  7. Serve & Enjoy: Let the casserole cool for a few minutes before serving. Garnish with fresh parsley if desired.

Notes

  • Make Ahead: Assemble the casserole up to 24 hours in advance and bake when ready.
  • Storage: Refrigerate leftovers in an airtight container for up to 3 days or freeze for up to 2 months.
  • Low-Carb Option: Skip the tomato sauce and reduce the broth for a keto-friendly version.
  • Spice It Up: Add cayenne pepper or hot sauce for extra heat.

Garlic Butter Chicken Recipe is easy and delicious!

Introduction to Garlic Butter Chicken Recipe

Garlic Butter Chicken Recipe is a fantastic choice. This dish combines tender chicken thighs with a rich, buttery garlic sauce that is simply irresistible. Not only is it packed with flavor, but it also comes together in just a short amount of time.

Garlic butter is a classic combination that enhances the taste of many dishes. In this recipe, it elevates the chicken to a whole new level. The aroma of garlic wafting through your kitchen will have everyone eagerly waiting for dinner. Plus, this recipe is versatile and can be adapted to suit your taste preferences.

Garlic Butter Chicken Recipe is straightforward and requires minimal ingredients. With just a few simple steps, you can create a mouthwatering meal that is sure to become a family favorite. So, roll up your sleeves and get ready to enjoy a delightful culinary experience!

Ingredients for Garlic Butter Chicken Recipe

Garlic Butter Chicken Recipe, you will need a few simple ingredients. Each one plays a vital role in bringing out the rich flavors of this dish. Here’s what you’ll need:

  • 2 pounds chicken thighs – boneless and skinless for easy cooking and eating.
  • 4 tablespoons unsalted butter – this will create a rich, buttery sauce.
  • 4 cloves garlic – minced to release that wonderful garlic flavor.
  • 1 teaspoon dried thyme – adds a lovely herbal note.
  • 1 teaspoon dried oregano – complements the thyme and enhances the overall taste.
  • 1 teaspoon paprika – gives a hint of smokiness and color.
  • Salt and pepper – to taste, ensuring the chicken is well-seasoned.
  • 1 tablespoon fresh parsley – chopped for garnish, adding a pop of color.
  • Lemon wedges – for serving, providing a fresh, zesty contrast to the rich chicken.

These ingredients are not only easy to find but also work together beautifully. The combination of garlic and butter creates a sauce that clings to the chicken, making every bite flavorful. Feel free to adjust the seasonings to match your taste. Now that you have your ingredients ready, let’s move on to the preparation steps!

Step-by-Step Preparation of Garlic Butter Chicken Recipe

Garlic Butter Chicken Recipe. This section will guide you through each step, ensuring that your chicken turns out perfectly every time. Let’s get started!

Step 1: Preparing the Chicken

First, you need to prepare the chicken thighs. Start by rinsing them under cold water. This helps to remove any residue. Next, pat them dry with paper towels. Drying the chicken is important because it helps achieve a nice golden-brown color when cooking.

Once dried, season both sides of the chicken thighs with salt and pepper. This simple step enhances the flavor of the chicken. After seasoning, sprinkle the dried thyme, oregano, and paprika evenly over the chicken. Make sure to rub the spices into the meat for better flavor absorption. Your chicken is now ready for cooking!

Step 2: Making the Garlic Butter Sauce

Next, let’s make the delicious garlic butter sauce. In a large oven-safe skillet, melt the unsalted butter over medium heat. As the butter melts, it will start to bubble. This is the perfect time to add the minced garlic. Sauté the garlic for about one minute, stirring constantly. You want it to become fragrant but not browned, as burnt garlic can taste bitter.

Once the garlic is fragrant, remove the skillet from the heat. This will prevent the garlic from cooking further. Your garlic butter sauce is now ready to be paired with the chicken!

Step 3: Cooking the Chicken

Now, it’s time to cook the chicken. Place the seasoned chicken thighs into the skillet with the garlic butter sauce. Cook the chicken for about five minutes on each side. You want them to turn a beautiful golden brown. This step not only adds flavor but also gives the chicken a lovely texture.

After browning the chicken, it’s time to transfer the skillet to the preheated oven. Bake the chicken for 20 to 25 minutes. This will ensure that the chicken is cooked through and reaches an internal temperature of 165°F. Using a meat thermometer is a great way to check for doneness!

Step 4: Combining Chicken with Garlic Butter

Once the chicken is cooked, carefully remove the skillet from the oven. Let the chicken rest for about five minutes. This resting period allows the juices to redistribute, making the chicken tender and juicy. After resting, drizzle the garlic butter sauce over the chicken. This adds an extra layer of flavor and makes the dish even more delicious.

Garlic Butter Chicken Recipe is now complete and ready to be enjoyed!

Variations of Garlic Butter Chicken Recipe

Garlic Butter Chicken Recipe is not only delicious on its own, but it also offers plenty of room for creativity. You can easily customize this dish to suit your taste or to include seasonal ingredients. Here are a couple of variations that you might enjoy!

Adding Vegetables to Garlic Butter Chicken Recipe

Garlic Butter Chicken Recipe is by adding vegetables. This not only boosts the nutritional value but also adds color and flavor. Consider including vegetables like:

  • Broccoli – adds a nice crunch and pairs well with garlic.
  • Bell Peppers – their sweetness complements the savory chicken.
  • Zucchini – cooks quickly and absorbs the garlic butter flavor.
  • Carrots – provide a touch of sweetness and vibrant color.

To incorporate vegetables, simply chop them into bite-sized pieces and add them to the skillet along with the chicken. They can cook in the garlic butter sauce, soaking up all the delicious flavors. This variation makes for a complete meal in one pan!

Spicy Garlic Butter Chicken Recipe

Garlic Butter Chicken Recipe. Adding a kick can elevate the dish and make it even more exciting. Here’s how to spice things up:

  • Red Pepper Flakes – Add a pinch when sautéing the garlic for a mild heat.
  • Hot Sauce – Drizzle some over the chicken before serving for an extra kick.
  • Jalapeños – Slice and add them to the skillet for a fresh, spicy flavor.

These spicy additions will give your garlic butter chicken a whole new dimension. Just remember to adjust the amount of spice to your liking. Enjoy experimenting with these variations to find your perfect flavor combination!

Cooking Note for Garlic Butter Chicken Recipe

Garlic Butter Chicken Recipe, there are a few important cooking notes to keep in mind. These tips will help ensure that your chicken turns out perfectly every time, making your cooking experience enjoyable and stress-free.

First, always use a meat thermometer to check the internal temperature of the chicken. This is crucial for food safety. Chicken should reach an internal temperature of 165°F (75°C) to be safe to eat. If you don’t have a thermometer, cut into the thickest part of the chicken; the juices should run clear, and the meat should no longer be pink.

Next, consider the size of your chicken thighs. If they are larger or smaller than the recipe suggests, you may need to adjust the cooking time. Larger thighs will take longer to cook, while smaller ones will cook faster. Keep an eye on them to avoid overcooking, which can lead to dry chicken.

Additionally, if you prefer a crispier skin, you can broil the chicken for the last few minutes of cooking. Just be sure to watch it closely to prevent burning. This step adds a delightful crunch to the dish.

Garlic Butter Chicken Recipe.

By following these cooking notes, you’ll be well on your way to creating a delicious and satisfying meal that everyone will love. Happy cooking!

Serving Suggestions for Garlic Butter Chicken Recipe

Garlic Butter Chicken Recipe is ready, it’s time to think about how to serve it. Presentation can elevate your meal, making it even more enjoyable. Here are some delightful serving suggestions that will complement your chicken perfectly:

  • Over Rice or Quinoa: Serve the chicken on a bed of fluffy rice or quinoa. The grains will soak up the delicious garlic butter sauce, creating a satisfying meal.
  • With a Side Salad: A fresh salad can balance the richness of the chicken. Consider a simple green salad with mixed greens, cherry tomatoes, and a light vinaigrette.
  • Roasted Vegetables: Pair your chicken with roasted vegetables like asparagus, Brussels sprouts, or carrots. The caramelized flavors of the veggies will enhance the overall dish.
  • Garlic Bread: For garlic lovers, serve the chicken with warm garlic bread. It’s perfect for dipping into the buttery sauce!
  • Pasta: Toss some cooked pasta in the garlic butter sauce before serving. This creates a hearty and comforting meal that everyone will love.

Don’t forget to add those lemon wedges on the side! A squeeze of fresh lemon juice brightens the dish and adds a zesty flavor that pairs beautifully with the garlic butter.

Garlic Butter Chicken Recipe is versatile, making it easy to create a meal that suits any occasion. Enjoy your delicious creation!

Tips for Perfecting Garlic Butter Chicken Recipe

Garlic Butter Chicken Recipe turns out perfectly every time, consider these helpful tips. They will enhance the flavor and texture of your dish, making it even more enjoyable for you and your guests.

  • Choose Quality Chicken: Opt for fresh, high-quality chicken thighs. They are more flavorful and tender compared to frozen ones. If using frozen chicken, make sure to thaw it completely before cooking.
  • Marinate for Extra Flavor: For an even richer taste, marinate the chicken in the garlic butter sauce for at least 30 minutes before cooking. This allows the flavors to penetrate the meat.
  • Use Fresh Garlic: Fresh garlic provides a stronger and more vibrant flavor than pre-minced garlic. Always use fresh cloves for the best results.
  • Adjust Seasonings: Feel free to tweak the seasonings to suit your taste. If you love herbs, add more thyme or oregano. If you prefer a bolder flavor, increase the paprika.
  • Don’t Overcrowd the Skillet: When cooking the chicken, make sure not to overcrowd the skillet. This allows for even cooking and helps achieve that beautiful golden-brown color.
  • Let It Rest: After cooking, let the chicken rest for a few minutes before serving. This step is crucial for juicy chicken, as it allows the juices to redistribute.
  • Experiment with Garnishes: While parsley is a great garnish, consider adding other fresh herbs like basil or cilantro for a different flavor profile. You can also sprinkle some grated Parmesan cheese for an extra touch.
  • Pair with the Right Sides: Think about what sides will complement your chicken. A light salad or roasted vegetables can balance the richness of the garlic butter.

Garlic Butter Chicken Recipe. Each bite will be bursting with flavor, and your dish will impress everyone at the table!

Breakdown of Time for Garlic Butter Chicken Recipe

Garlic Butter Chicken Recipe can help you plan your cooking efficiently. Here’s a simple breakdown of the time required for preparation and cooking:

Prep Time

The prep time for this delicious dish is quite short. You will need about 15 minutes to gather your ingredients and prepare the chicken. This includes rinsing, drying, and seasoning the chicken thighs, as well as mincing the garlic and measuring out the spices. With everything ready, you’ll be set to start cooking!

Cooking Time

Once you begin cooking, the total cooking time is approximately 30 to 35 minutes. This includes:

  • 5 minutes for browning the chicken on each side in the skillet.
  • 20 to 25 minutes for baking the chicken in the oven until it reaches the safe internal temperature.

During this time, you can clean up your workspace or prepare any side dishes you plan to serve with the chicken.

Total Time

Garlic Butter Chicken Recipe to take about 45 to 50 minutes. This includes both the prep and cooking times. It’s a quick and satisfying meal that’s perfect for busy weeknights or special occasions!

With this time breakdown, you can easily fit this recipe into your schedule. Enjoy the process and the delicious results!

Nutritional Information for Garlic Butter Chicken Recipe

Garlic Butter Chicken Recipe not only delights your taste buds but also provides valuable nutrients. Here’s a breakdown of the nutritional information per serving:

Calories

350 calories. This makes it a satisfying option for dinner without being overly heavy. The calorie count is primarily derived from the chicken and the butter, which contribute to the rich flavor of the dish.

Protein

30 grams of protein. This is excellent for muscle repair and growth, making it a great choice for those who are active or looking to maintain a healthy lifestyle.

Sodium

Garlic Butter Chicken Recipe is around 600 milligrams per serving. This amount is reasonable for a flavorful dish, but it’s always a good idea to monitor your sodium intake, especially if you are watching your salt consumption. You can reduce the sodium by using less salt when seasoning the chicken or opting for low-sodium butter.

Garlic Butter Chicken Recipe is a nutritious option that balances flavor and health. With its rich protein content and moderate calorie count, it can fit well into various dietary plans. Enjoy this delightful dish while also being mindful of your nutritional needs!

FAQs about Garlic Butter Chicken Recipe

What can I serve with Garlic Butter Chicken?

Garlic Butter Chicken Recipe, there are plenty of delicious options to choose from. Here are some great ideas:

  • Rice or Quinoa: A bed of fluffy rice or quinoa is perfect for soaking up the rich garlic butter sauce.
  • Steamed Vegetables: Lightly steamed broccoli, green beans, or carrots add color and nutrition to your meal.
  • Mashed Potatoes: Creamy mashed potatoes pair wonderfully with the savory chicken and sauce.
  • Salad: A fresh garden salad with a light vinaigrette can balance the richness of the chicken.
  • Pasta: Tossing cooked pasta in the garlic butter sauce creates a hearty and comforting dish.

Garlic Butter Chicken Recipe is versatile and can complement many different dishes!

Can I use other meats for Garlic Butter Chicken Recipe?

Absolutely! While this recipe features chicken thighs, you can easily substitute other meats. Here are some options:

  • Chicken Breasts: Boneless, skinless chicken breasts can be used, but they may require less cooking time.
  • Pork Chops: Boneless pork chops can be a delicious alternative, offering a different flavor profile.
  • Turkey: Turkey cutlets or thighs can also work well with the garlic butter sauce.
  • Fish: For a lighter option, try using firm fish like salmon or cod. Adjust the cooking time accordingly.

Each meat will bring its unique taste to the dish, so feel free to experiment with your favorites!

How do I store leftovers of Garlic Butter Chicken Recipe?

Garlic Butter Chicken Recipe is easy! Here’s how to do it:

  • Cool Down: Allow the chicken to cool to room temperature before storing.
  • Use Airtight Containers: Place the chicken and any remaining sauce in airtight containers. This helps keep it fresh.
  • Refrigerate: Store in the refrigerator for up to 3-4 days. Make sure to label the containers with the date.
  • Freezing: If you want to keep it longer, you can freeze the chicken for up to 3 months. Just make sure to use freezer-safe containers.

When you’re ready to enjoy the leftovers, simply reheat in the microwave or on the stovetop until heated through.

Can I make Garlic Butter Chicken Recipe ahead of time?

Garlic Butter Chicken Recipe ahead of time! Here’s how:

  • Marinate the Chicken: You can marinate the chicken in the garlic butter sauce for up to 24 hours in the refrigerator. This enhances the flavor.
  • Cook and Store: Cook the chicken as directed, then let it cool before storing it in the refrigerator. It can be made a day in advance.
  • Reheat: When ready to serve, reheat the chicken in the oven or on the stovetop. Add a little extra butter or broth to keep it moist.

Garlic Butter Chicken Recipe ahead of time can save you effort on busy days while still providing a delicious meal!

Conclusion on Garlic Butter Chicken Recipe

Garlic Butter Chicken Recipe is a delightful dish that combines simplicity with rich flavors. It’s perfect for any occasion, whether you’re hosting a dinner party or enjoying a cozy family meal. The tender chicken thighs, infused with the aromatic garlic butter sauce, create a mouthwatering experience that is hard to resist.

This recipe not only showcases the beauty of cooking with fresh ingredients but also allows for creativity. You can easily customize it by adding your favorite vegetables or spices, making it a versatile option for everyone. Plus, with its quick preparation and cooking time, you can have a delicious meal on the table in under an hour!

Garlic Butter Chicken Recipe, remember to enjoy the process. Cooking is not just about the end result; it’s about the joy of creating something special. So, gather your ingredients, follow the steps, and savor the delightful aroma that fills your kitchen.

We hope this recipe becomes a staple in your home, bringing smiles and satisfaction to your dining table. Happy cooking, and enjoy every bite of your delicious garlic butter chicken!

ating

Garlic Butter Chicken Recipe is easy and delicious!

This Golden Garlic Butter Chicken is a comforting classic that’s rich, flavorful, and incredibly easy to make. Juicy, pan-seared chicken is bathed in a luscious garlic butter sauce, creating a dish that’s both indulgent and satisfying. Perfect for busy weeknights or elegant dinners, this recipe is sure to become a household favorite!


Prep Time 5 minutes
Cook Time 15 minutes
Total Time 20 minutes
Servings: 2 -4 servings
Course: Main Course
Cuisine: American, Comfort Food

Ingredients
  

  • 2 large boneless skinless chicken breasts (or 4 chicken thighs)
  • ½ teaspoon salt
  • ½ teaspoon black pepper
  • ½ teaspoon paprika
  • ¼ teaspoon garlic powder
  • 1 tablespoon olive oil
  • 3 tablespoons unsalted butter
  • 4 cloves garlic minced
  • ½ teaspoon red pepper flakes optional, for spice
  • ½ cup chicken broth or white wine for extra depth
  • 1 tablespoon fresh lemon juice
  • 1 teaspoon fresh parsley chopped (for garnish)

Method
 

  1. Prepare the Chicken: Pat the chicken dry with paper towels. Season both sides with salt, pepper, paprika, and garlic powder.
  2. Sear the Chicken: Heat olive oil in a large skillet over medium heat. Add the chicken and sear for 4-5 minutes per side, or until golden brown and cooked through (internal temp of 165°F/75°C). Remove from the pan and set aside.
  3. Make the Garlic Butter Sauce: In the same skillet, reduce heat to low and melt the butter. Add minced garlic and red pepper flakes (if using), cooking for 30 seconds until fragrant.
  4. Deglaze the Pan: Pour in the chicken broth (or white wine) and lemon juice, stirring to scrape up any browned bits from the pan. Let simmer for 2-3 minutes.
  5. Combine Everything: Return the chicken to the pan, spooning the sauce over the top. Let cook for another 1-2 minutes until the flavors meld together.
  6. Garnish & Serve: Sprinkle with fresh parsley and serve hot with mashed potatoes, rice, or crusty bread to soak up the sauce.

Notes

  • Butter Substitute: Use ghee or dairy-free butter for a lactose-free version.
  • Storage: Store leftovers in an airtight container in the fridge for up to 3 days. Reheat gently on the stovetop with a splash of broth.
  • Spicy Kick: Add more red pepper flakes or a dash of hot sauce for heat.
  • Herb Variations: Try rosemary or thyme instead of parsley for a different flavor profile.

Seafood Boil Ramen Recipe is a must-try dish!

Introduction to Seafood Boil Ramen Recipe

What is Seafood Boil Ramen?

Seafood Boil Ramen is a delightful fusion dish that combines the rich flavors of a classic seafood boil with the comforting essence of ramen noodles. Imagine succulent shrimp, tender crab legs, and fresh mussels swimming in a savory broth, all served over a bed of soft ramen. This dish is not just a meal; it’s an experience that brings the taste of the ocean right to your table. The combination of spices, seafood, and vegetables creates a symphony of flavors that will tantalize your taste buds.

Why You Should Try This Recipe

There are many reasons to try this Seafood Boil Ramen Recipe. First, it’s incredibly easy to make, even for those who may not consider themselves expert cooks. With just a few simple steps, you can create a dish that looks and tastes gourmet. Second, it’s a versatile recipe. You can customize it to suit your preferences by adding different seafood or vegetables. Plus, it’s a great way to impress family and friends at gatherings or special occasions.

Moreover, this dish is packed with nutrients. Seafood is a fantastic source of protein and healthy fats, while the vegetables add essential vitamins and minerals. The broth is rich in flavor, making it a comforting choice for any season. Whether you’re enjoying it on a chilly evening or a warm summer day, Seafood Boil Ramen is sure to satisfy your cravings.

So, gather your ingredients and get ready to dive into a bowl of deliciousness. This Seafood Boil Ramen Recipe is not just a meal; it’s a celebration of flavors that you won’t want to miss!

Ingredients for Seafood Boil Ramen Recipe

Essential Ingredients

To create a mouthwatering Seafood Boil Ramen, you’ll need a selection of essential ingredients. These components work together to build the rich flavors and textures that make this dish so special. Here’s what you’ll need:

  • 1 pound shrimp: Peeled and deveined for easy eating.
  • 1 pound mussels: Cleaned and ready to cook, adding a briny flavor.
  • 1 pound crab legs: Thawed and perfect for a touch of sweetness.
  • 4 cups chicken broth: The base of your flavorful broth.
  • 2 cups water: To balance the broth’s richness.
  • 2 tablespoons Old Bay seasoning: A classic spice blend that enhances seafood.
  • 2 tablespoons soy sauce: For a savory depth of flavor.
  • 1 tablespoon sesame oil: Adds a nutty aroma and richness.
  • 4 packs of instant ramen noodles: Discard the seasoning packets for a fresh taste.
  • 2 cups corn kernels: Fresh or frozen, for sweetness and texture.
  • 1 red bell pepper: Diced for a pop of color and crunch.
  • 1 cup green onions: Chopped for garnish and flavor.
  • 2 cloves garlic: Minced to infuse the broth with aroma.
  • 1 tablespoon lemon juice: Brightens the dish with acidity.
  • Salt and pepper: To taste, enhancing all the flavors.
  • Lemon wedges: For serving, adding a fresh squeeze of citrus.

Optional Ingredients for Extra Flavor

While the essential ingredients create a fantastic Seafood Boil Ramen, you can elevate the dish even further with some optional ingredients. These additions can enhance the flavor profile and add a personal touch:

  • Red pepper flakes: For those who enjoy a spicy kick.
  • Hot sauce: A dash can add heat and depth.
  • Bok choy: A nutritious green that adds a lovely crunch.
  • Snap peas: For a sweet and crisp texture.
  • Fresh herbs: Such as cilantro or parsley for garnish.

Feel free to mix and match these optional ingredients based on your taste preferences. The beauty of this Seafood Boil Ramen Recipe lies in its versatility, allowing you to create a dish that’s uniquely yours!

Step-by-Step Preparation of Seafood Boil Ramen Recipe

Step 1: Preparing the Broth

To kick off your Seafood Boil Ramen, start by preparing the broth. In a large pot, combine the chicken broth, water, Old Bay seasoning, soy sauce, sesame oil, and minced garlic. Stir everything together to mix the flavors well. Then, bring the mixture to a gentle simmer over medium heat. This step is crucial as it allows the spices to infuse into the broth, creating a rich and savory base for your dish.

Step 2: Cooking the Seafood

Once your broth is simmering, it’s time to add the seafood. Carefully place the shrimp, mussels, and crab legs into the pot. Cover the pot with a lid and let it cook for about 5-7 minutes. During this time, the seafood will cook through, and the mussels will open up, releasing their delicious briny flavor into the broth. Keep an eye on it to ensure everything cooks perfectly!

Step 3: Preparing the Noodles

While the seafood is cooking, you can prepare the ramen noodles. In a separate pot, bring water to a boil and cook the ramen noodles according to the package instructions. This usually takes just a few minutes. Once they are cooked, drain the noodles and set them aside. This step ensures that your noodles are perfectly tender and ready to soak up all the wonderful flavors of the broth.

Step 4: Combining Ingredients

After the seafood is cooked and the noodles are ready, it’s time to combine everything. Stir in the corn and diced red bell pepper into the pot with the seafood and broth. Cook for an additional 2-3 minutes until the vegetables are heated through. This adds a lovely crunch and sweetness to your dish. Then, add the lemon juice and season with salt and pepper to taste. This final seasoning will enhance all the flavors beautifully.

Step 5: Final Touches

Now that everything is cooked and combined, it’s time to serve! Place a portion of the cooked ramen noodles in a bowl. Ladle the seafood boil mixture over the top, ensuring each bowl gets a good mix of seafood and broth. Garnish with chopped green onions for a fresh touch. Don’t forget to serve with lemon wedges on the side for an extra burst of citrus flavor. Enjoy your Seafood Boil Ramen while it’s hot!

Variations of Seafood Boil Ramen Recipe

Spicy Seafood Boil Ramen

If you love a bit of heat, then Spicy Seafood Boil Ramen is the perfect variation for you! To add a fiery kick, simply incorporate red pepper flakes or a splash of your favorite hot sauce into the broth during the simmering stage. This will infuse the broth with a delightful spiciness that complements the seafood beautifully. You can also add sliced jalapeños or a dash of sriracha when serving for an extra layer of flavor. This spicy twist not only enhances the taste but also makes the dish more exciting. Pair it with a cold drink to balance the heat, and you’ll have a meal that’s both comforting and thrilling!

Vegetarian Option for Seafood Boil Ramen

For those who prefer a meat-free meal, a Vegetarian Option for Seafood Boil Ramen is just as delicious! Instead of seafood, you can use a variety of vegetables and plant-based proteins. Consider adding tofu, mushrooms, or even tempeh for a hearty texture. Replace the chicken broth with vegetable broth to maintain the rich flavor. You can also include an array of colorful vegetables like bok choy, snap peas, and carrots to create a vibrant dish. Season the broth with the same Old Bay seasoning and soy sauce for that signature taste. This vegetarian version is not only satisfying but also packed with nutrients, making it a great choice for everyone!

Cooking Note for Seafood Boil Ramen Recipe

Tips for Achieving the Perfect Broth

Creating a flavorful broth is the heart of your Seafood Boil Ramen. Here are some tips to ensure your broth is rich and delicious:

  • Use Quality Broth: Start with a good quality chicken broth. Homemade broth is ideal, but store-bought works well too. The better the broth, the better your dish will taste.
  • Infuse Flavors: Allow the broth to simmer long enough for the spices to meld. The Old Bay seasoning and garlic should have time to release their flavors into the liquid.
  • Adjust Seasoning: Taste your broth before adding the seafood. You can always add more soy sauce or Old Bay seasoning to enhance the flavor. Just remember to adjust for saltiness!
  • Don’t Rush: Take your time with the simmering process. A gentle simmer allows the flavors to develop fully, creating a more complex and satisfying broth.

Common Mistakes to Avoid

Even the best recipes can go awry if you make a few common mistakes. Here’s what to watch out for:

  • Overcooking Seafood: Seafood cooks quickly. If you leave it in the pot too long, it can become tough and rubbery. Keep an eye on the cooking time!
  • Skipping the Broth Tasting: Always taste your broth before serving. This step is crucial to ensure the flavors are balanced. Adjust as needed!
  • Using the Wrong Noodles: Instant ramen noodles are best for this recipe. Avoid using thicker noodles, as they may not absorb the broth’s flavors as well.
  • Not Adding Vegetables: Don’t skip the vegetables! They add texture and nutrition. Plus, they enhance the overall flavor of the dish.

By following these tips and avoiding common pitfalls, you’ll be well on your way to making a Seafood Boil Ramen that’s bursting with flavor and sure to impress!

Serving Suggestions for Seafood Boil Ramen Recipe

Ideal Pairings

When it comes to enjoying your Seafood Boil Ramen, the right pairings can elevate your meal to new heights. Here are some ideal accompaniments that complement the flavors of this dish:

  • Garlic Bread: A warm slice of garlic bread is perfect for soaking up the delicious broth. Its buttery flavor pairs wonderfully with the seafood.
  • Asian Slaw: A refreshing Asian slaw made with cabbage, carrots, and a tangy dressing adds a crunchy contrast to the soft noodles and seafood.
  • Pickled Vegetables: Serve some pickled radishes or cucumbers on the side. Their tangy taste balances the richness of the broth.
  • Cold Beverages: Pair your ramen with a cold drink, like iced tea or a light beer. These beverages can help cleanse your palate between bites.
  • Fresh Salad: A simple green salad with a light vinaigrette can add a fresh element to your meal, enhancing the overall dining experience.

Presentation Tips

Presentation plays a key role in making your Seafood Boil Ramen visually appealing. Here are some tips to make your dish look as good as it tastes:

  • Use Colorful Bowls: Serve your ramen in vibrant bowls to make the colors of the seafood and vegetables pop.
  • Garnish Generously: Don’t skimp on the garnishes! Sprinkle chopped green onions and fresh herbs on top for a burst of color and flavor.
  • Add Lemon Wedges: Place lemon wedges on the side of the bowl. They not only look great but also invite diners to add a fresh squeeze of citrus.
  • Layer Ingredients: When assembling the dish, layer the noodles first, then add the seafood and broth. This creates a beautiful presentation.
  • Serve with Style: Consider using chopsticks alongside a spoon for a traditional touch. This adds to the experience of enjoying ramen.

By following these serving suggestions and presentation tips, you’ll create a Seafood Boil Ramen experience that’s not only delicious but also visually stunning. Your guests will be impressed, and you’ll enjoy every flavorful bite!

Tips for Making the Best Seafood Boil Ramen Recipe

Ingredient Substitutions

Making the Seafood Boil Ramen Recipe is all about flexibility. If you find yourself missing an ingredient, don’t worry! Here are some great substitutions to keep your dish delicious:

  • Shrimp: If you can’t find shrimp, try using scallops or even diced fish like salmon or tilapia. They will add a different but delightful flavor.
  • Mussels: Clams or even canned oysters can be a good alternative. They provide a similar briny taste that complements the broth.
  • Crab Legs: If crab legs are out of reach, consider using imitation crab or even shrimp for a different texture.
  • Chicken Broth: For a lighter option, vegetable broth works well. It keeps the dish flavorful while being vegetarian-friendly.
  • Ramen Noodles: If you prefer a different noodle, udon or soba noodles can be used. Just adjust the cooking time as needed.
  • Vegetables: Feel free to swap in any vegetables you have on hand. Zucchini, carrots, or even spinach can add great flavor and nutrition.

These substitutions allow you to customize your Seafood Boil Ramen to your taste and what you have available. Don’t hesitate to get creative!

Storage and Reheating Tips

After enjoying your Seafood Boil Ramen, you might have some leftovers. Here’s how to store and reheat them properly:

  • Storage: Allow the ramen to cool completely before transferring it to an airtight container. Store it in the refrigerator for up to 2 days. Keep the broth separate from the noodles if possible, as this helps maintain the texture.
  • Reheating: When you’re ready to enjoy your leftovers, reheat the broth in a pot over medium heat. Add the noodles and seafood once the broth is hot. Stir gently until everything is warmed through.
  • Microwave Option: If you’re short on time, you can microwave the ramen. Place it in a microwave-safe bowl, cover it loosely, and heat in 30-second intervals, stirring in between until hot.
  • Freshen Up: To revive the flavors, consider adding a splash of soy sauce or a squeeze of lemon juice when reheating. This will enhance the taste and make it feel fresh again.

By following these storage and reheating tips, you can enjoy your Seafood Boil Ramen even after the first serving. It’s a great way to savor the flavors again!

Breakdown of Time for Seafood Boil Ramen Recipe

Prep Time

Preparing your Seafood Boil Ramen is a breeze! The prep time for this recipe is approximately 15-20 minutes. During this time, you’ll gather all your ingredients, clean the seafood, and chop the vegetables. Having everything ready before you start cooking will make the process smooth and enjoyable. So, take a moment to set up your workspace and get organized!

Cooking Time

The cooking time for the Seafood Boil Ramen is about 20-25 minutes. This includes simmering the broth, cooking the seafood, and preparing the ramen noodles. The key is to keep an eye on the seafood to ensure it cooks perfectly without becoming tough. With a little patience, you’ll have a delicious meal ready in no time!

Total Time

In total, you can expect to spend around 35-45 minutes from start to finish. This includes both prep and cooking time. It’s a quick and satisfying dish that’s perfect for a weeknight dinner or a special occasion. With such a short time commitment, you can enjoy a gourmet meal without spending hours in the kitchen!

Nutritional Information for Seafood Boil Ramen Recipe

Calories and Macronutrients

Understanding the nutritional content of your Seafood Boil Ramen is essential for maintaining a balanced diet. Each serving of this delightful dish contains approximately 450 calories. Here’s a breakdown of the macronutrients:

  • Net Carbohydrates: 45g
  • Protein: 30g
  • Fat: 15g

This combination of macronutrients makes Seafood Boil Ramen a satisfying meal. The protein from the seafood helps build and repair tissues, while the carbohydrates provide energy. The healthy fats contribute to overall well-being, making this dish not only delicious but also nutritious.

Health Benefits of Ingredients

The ingredients in Seafood Boil Ramen offer numerous health benefits, making it a smart choice for your meals. Here are some highlights:

  • Shrimp: Low in calories and high in protein, shrimp is also a great source of selenium, which supports immune function.
  • Mussels: Packed with vitamins and minerals, mussels are rich in omega-3 fatty acids, promoting heart health.
  • Crab Legs: These are not only delicious but also provide essential nutrients like zinc and vitamin B12, which are vital for energy production.
  • Vegetables: The corn and red bell pepper add fiber, vitamins A and C, and antioxidants, which are important for overall health.
  • Garlic: Known for its immune-boosting properties, garlic can help reduce the risk of chronic diseases.
  • Lemon Juice: This adds a refreshing flavor and is rich in vitamin C, which supports skin health and boosts the immune system.

By enjoying Seafood Boil Ramen, you’re not just treating your taste buds; you’re also nourishing your body with wholesome ingredients. This dish is a perfect example of how delicious food can also be good for you!

FAQs about Seafood Boil Ramen Recipe

Can I use frozen seafood for this recipe?

Absolutely! Using frozen seafood is a convenient option for your Seafood Boil Ramen. Just make sure to thaw the seafood properly before cooking. You can do this by placing it in the refrigerator overnight or running it under cold water for a quicker thaw. Frozen shrimp, mussels, and crab legs work just as well as fresh ones, and they can still deliver great flavor and texture in your dish. Just keep an eye on the cooking time, as frozen seafood may take a minute or two longer to cook through.

How can I make the broth richer?

To achieve a richer broth for your Seafood Boil Ramen, consider these tips:

  • Use Homemade Broth: If possible, make your own chicken or seafood broth. This allows you to control the flavors and richness.
  • Add Aromatics: Include additional aromatics like ginger, lemongrass, or shallots to enhance the flavor profile.
  • Simmer Longer: Allow the broth to simmer for a longer time before adding the seafood. This helps the flavors meld together beautifully.
  • Incorporate Fish Sauce: A splash of fish sauce can add depth and umami to your broth, making it more flavorful.

By following these suggestions, you can create a broth that’s bursting with flavor, making your Seafood Boil Ramen even more enjoyable!

What type of noodles work best for Seafood Boil Ramen?

For this Seafood Boil Ramen Recipe, instant ramen noodles are the best choice. They cook quickly and absorb the broth’s flavors well. However, if you prefer a different texture, you can also use udon or soba noodles. Just be sure to adjust the cooking time according to the package instructions. The key is to choose noodles that will complement the seafood and broth, providing a satisfying bite in every spoonful.

Can I make this recipe ahead of time?

Yes, you can prepare parts of the Seafood Boil Ramen ahead of time! You can make the broth and cook the seafood in advance. Store them separately in airtight containers in the refrigerator. When you’re ready to serve, simply reheat the broth and seafood, then cook the ramen noodles fresh. This way, you’ll have a delicious meal ready in no time without sacrificing flavor. Just remember that the noodles are best when cooked fresh, as they can become mushy if stored in the broth.

Conclusion on Seafood Boil Ramen Recipe

Recap of Key Points

In summary, the Seafood Boil Ramen Recipe is a delightful blend of flavors and textures that brings the essence of a seafood boil right to your kitchen. With its easy preparation and versatile ingredients, this dish is perfect for both casual dinners and special occasions. You’ve learned how to create a rich broth, cook fresh seafood, and combine everything into a satisfying meal. The nutritional benefits of the ingredients make it not only delicious but also a healthy choice. Remember, you can customize the recipe to suit your taste, whether you prefer it spicy or vegetarian. The possibilities are endless!

Encouragement to Try the Recipe

Now that you have all the knowledge and tips, it’s time to roll up your sleeves and give this Seafood Boil Ramen Recipe a try! Gather your ingredients, invite some friends or family over, and enjoy the process of cooking together. This dish is sure to impress everyone at the table with its vibrant colors and mouthwatering flavors. Don’t hesitate to experiment with different seafood or vegetables to make it your own. So, what are you waiting for? Dive into this culinary adventure and savor every delicious bite of your homemade Seafood Boil Ramen!

ating

Seafood Boil Ramen Recipe is a must-try dish!

This Seafood Boil Ramen is the ultimate fusion of bold Cajun spices and comforting ramen broth. Juicy shrimp, crab legs, and mussels swim in a rich, seafood-infused broth with Old Bay seasoning, garlic, and a touch of heat, all served over slurp-worthy noodles. A perfect one-pot meal that brings together the heartiness of a seafood boil and the soul-warming satisfaction of ramen!


Prep Time 10 minutes
Cook Time 20 minutes
Total Time 30 minutes
Servings: 2 -3 servings
Course: Main Course, Soup
Cuisine: Cajun-Asian, Fusion

Ingredients
  

  • 2 packs ramen noodles discard seasoning packet
  • 1 tablespoon butter
  • 4 cloves garlic minced
  • 1 teaspoon Old Bay seasoning
  • ½ teaspoon smoked paprika
  • ½ teaspoon Cajun seasoning adjust to taste
  • ¼ teaspoon red pepper flakes optional for spice
  • 4 cups seafood or chicken broth
  • ½ cup water
  • 1 tablespoon Worcestershire sauce
  • 1 teaspoon hot sauce optional
  • 1 ear corn cut into rounds
  • 1 small red potato diced
  • ½ lb shrimp peeled and deveined
  • ½ lb crab legs or substitute with mussels/clams
  • ¼ cup heavy cream optional for richness
  • 2 green onions sliced (for garnish)
  • ¼ cup fresh parsley chopped (for garnish)
  • Lemon wedges for serving

Method
 

  1. Sauté the Garlic & Spices: In a large pot, melt the butter over medium heat. Add the minced garlic, Old Bay seasoning, smoked paprika, Cajun seasoning, and red pepper flakes. Stir and cook for about 1 minute until fragrant.
  2. Build the Broth: Pour in the seafood broth, water, Worcestershire sauce, and hot sauce. Stir well and bring to a boil.
  3. Cook the Vegetables: Add the diced potato and corn rounds. Reduce heat to a simmer and cook for about 10 minutes, or until the potatoes are tender.
  4. Add the Seafood: Drop in the shrimp and crab legs (or mussels/clams). Simmer for another 5-7 minutes, just until the shrimp turns pink and the crab is heated through.
  5. Cook the Noodles: Add the ramen noodles directly into the pot and cook according to package instructions (usually 2-3 minutes). If using cream, stir it in at this stage for a richer broth.
  6. Garnish & Serve: Remove from heat and divide into bowls. Garnish with green onions, parsley, and a squeeze of fresh lemon juice. Enjoy immediately!

Notes

  • Spice Level: Adjust the Cajun seasoning and red pepper flakes to your preferred heat level.
  • Seafood Variations: Use lobster tails, clams, or scallops for variety.
  • Vegetarian Option: Swap seafood for tofu and use vegetable broth.
  • Storage: Best enjoyed fresh, but store the broth separately from seafood and noodles for up to 2 days.

Cheesy Beef Stuffed Shells: Deliciously Savory Recipe Alert!

Picture this: a cozy evening, the aroma of Cheesy Beef Stuffed Shells wafting through your kitchen, and the promise of a delicious meal that brings everyone to the table. As a busy mom or professional, finding time to cook can feel like a juggling act. But fear not! This recipe is your culinary superhero, swooping in to save the day with its savory goodness. It’s perfect for those hectic weekdays when you crave something hearty yet simple. So, let’s dive into this delightful dish that promises to impress your loved ones and make dinner a breeze!

Why You’ll Love This Cheesy Beef Stuffed Shells

These Cheesy Beef Stuffed Shells are a dream come true for anyone juggling a busy schedule. With minimal prep and maximum flavor, they offer a comforting embrace of cheesy, beefy goodness. The recipe is straightforward, making it a breeze to whip up even on the most hectic days. Plus, the rich, savory taste is sure to win over even the pickiest eaters in your family!

Ingredients Cheesy Beef Stuffed Shells

Let’s gather the essentials for our Cheesy Beef Stuffed Shells. First, you’ll need jumbo pasta shells, the perfect vessel for our savory filling. Ground beef brings a hearty, rich flavor, while a small onion and garlic add aromatic depth. Italian seasoning ties everything together with its blend of herbs.

Marinara sauce is the saucy star, providing a tangy base. Ricotta cheese offers creaminess, and mozzarella cheese adds that gooey, melty goodness. Parmesan cheese gives a nutty finish, and an egg helps bind the filling. Don’t forget salt and pepper for seasoning. Fresh basil or parsley makes a lovely garnish, though optional.

For those looking to switch things up, consider using ground turkey or chicken instead of beef. You can also sneak in some chopped spinach or mushrooms for added nutrition and flavor. Remember, exact quantities are listed at the bottom of the article for easy printing!

How to Make Cheesy Beef Stuffed Shells

Preparing the Pasta Shells

Start by bringing a large pot of salted water to a boil. Add the jumbo pasta shells and cook them until they’re al dente, following the package instructions. This usually takes about 10 minutes. Once cooked, drain the shells and set them aside to cool slightly. This step ensures they’re easy to handle when stuffing.

Cooking the Beef Mixture

In a large skillet over medium heat, add the ground beef. Cook it until it’s browned, breaking it apart with a spoon. This should take about 5-7 minutes. If there’s excess fat, drain it off. Next, toss in the diced onion and minced garlic. Sauté until the onion turns translucent, about 3-4 minutes. Stir in the Italian seasoning, salt, and pepper. This blend of flavors will make your kitchen smell heavenly!

Mixing the Cheese Filling

In a mixing bowl, combine the ricotta cheese, half of the shredded mozzarella, Parmesan cheese, and the egg. Mix until everything is well combined. This cheesy concoction is the heart of our stuffed shells. Now, fold in the beef mixture. Stir until the beef and cheese are evenly distributed. This ensures every bite is packed with flavor.

Assembling the Dish

Spread a thin layer of marinara sauce on the bottom of a 9×13 inch baking dish. This prevents the shells from sticking. Take each cooked pasta shell and stuff it with the beef and cheese mixture. Arrange them snugly in the baking dish. Pour the remaining marinara sauce over the stuffed shells, ensuring they’re well-coated. Sprinkle the rest of the mozzarella cheese on top for that irresistible cheesy crust.

Baking to Perfection

Cover the dish with aluminum foil and pop it into a preheated oven at 375°F (190°C). Bake for 25 minutes. Then, remove the foil and bake for an additional 10-15 minutes. This allows the cheese to become bubbly and golden. Once done, let the dish cool for a few minutes before serving. Garnish with fresh basil or parsley if you like. Enjoy the cheesy, beefy goodness!

Tips for Success

  • Cook pasta shells just until al dente to prevent them from becoming too soft during baking.
  • For a richer flavor, use freshly grated Parmesan cheese instead of pre-packaged.
  • Let the beef mixture cool slightly before mixing with the cheese to avoid melting.
  • Use a piping bag to fill the shells for a cleaner, quicker process.
  • Allow the dish to rest for a few minutes after baking for easier serving.

Equipment Needed

  • Large pot for boiling pasta shells
  • Skillet for cooking beef mixture
  • Mixing bowl for cheese filling
  • 9×13 inch baking dish
  • Aluminum foil for covering the dish
  • Wooden spoon or spatula for stirring
  • Optional: Piping bag for filling shells

Variations

  • Swap ground beef for ground turkey or chicken for a lighter version.
  • Add a handful of chopped spinach or kale to the cheese mixture for extra greens.
  • Use a spicy marinara sauce for a kick of heat.
  • Try a blend of cheeses like cheddar or gouda for a different flavor profile.
  • Incorporate sautéed mushrooms or bell peppers for added texture and taste.
  • For a vegetarian option, replace the beef with cooked lentils or black beans.

Serving Suggestions

  • Pair with a crisp green salad drizzled with balsamic vinaigrette for a refreshing contrast.
  • Serve alongside garlic bread or a warm baguette to soak up the delicious sauce.
  • Complement with a glass of red wine, like Chianti, to enhance the Italian flavors.
  • Garnish with freshly grated Parmesan and a sprinkle of chopped basil for a touch of elegance.

FAQs about Cheesy Beef Stuffed Shells

Can I make Cheesy Beef Stuffed Shells ahead of time?

Absolutely! You can prepare the stuffed shells up to the baking step, cover them tightly, and refrigerate for up to 24 hours. When you’re ready to enjoy, simply bake as directed, adding a few extra minutes if needed.

Can I freeze Cheesy Beef Stuffed Shells?

Yes, these shells freeze beautifully. Assemble the dish, cover it with foil, and freeze for up to three months. When you’re ready to bake, thaw overnight in the fridge and bake as usual. It’s a great way to have a comforting meal ready in a pinch.

What can I use instead of ricotta cheese?

If you’re out of ricotta, cottage cheese is a great substitute. Just blend it until smooth for a similar texture. You can also use mascarpone for a richer, creamier filling.

How do I prevent the shells from sticking together?

To keep the pasta shells from sticking, stir them gently while cooking and rinse them under cold water after draining. This stops the cooking process and makes them easier to handle.

Can I make this dish vegetarian?

Definitely! Swap the ground beef for cooked lentils or black beans. You can also add more veggies like mushrooms or zucchini for a hearty, meat-free version that still packs a punch of flavor.

Final Thoughts

There’s something truly magical about gathering around the table with loved ones, sharing a meal that warms both the heart and the belly. Cheesy Beef Stuffed Shells offer just that—a comforting embrace of flavors that feels like a hug on a plate. Whether you’re a busy mom juggling a million tasks or a professional seeking a quick yet satisfying dinner, this dish is your go-to. It’s a testament to the joy of cooking, where simple ingredients transform into a delightful feast. So, roll up your sleeves, dive into this culinary adventure, and savor every cheesy, beefy bite!

Cheesy Beef Stuffed Shells
Paul

Cheesy Beef Stuffed Shells: Deliciously Savory Recipe Alert!

Cheesy Beef Stuffed Shells are a savory and satisfying dish featuring jumbo pasta shells filled with a flavorful mixture of ground beef, ricotta, and mozzarella cheese, all topped with marinara sauce and baked to perfection.
Prep Time 15 minutes
Cook Time 50 minutes
Total Time 1 hour 5 minutes
Servings: 4 -6 servings
Course: Main Course
Cuisine: Italian
Calories: 450

Ingredients
  

  • 12 jumbo pasta shells
  • 1 pound ground beef
  • 1 small onion diced
  • 2 cloves garlic minced
  • 1 teaspoon Italian seasoning
  • 1 jar 24 ounces marinara sauce
  • 1 cup ricotta cheese
  • 1 cup shredded mozzarella cheese divided
  • 1/2 cup grated Parmesan cheese
  • 1 egg
  • Salt and pepper to taste
  • Fresh basil or parsley for garnish optional

Method
 

  1. Preheat the oven to 375°F (190°C). Cook the jumbo pasta shells according to package instructions until al dente. Drain and set aside to cool slightly.
  2. In a large skillet over medium heat, add the ground beef and cook until browned, breaking it apart with a spoon. Drain excess fat if necessary.
  3. Add the diced onion and minced garlic to the skillet with the beef. Sauté until the onion is translucent, about 3-4 minutes. Stir in the Italian seasoning, salt, and pepper. Remove from heat.
  4. In a mixing bowl, combine the ricotta cheese, half of the mozzarella cheese, Parmesan cheese, and the egg. Mix until well combined.
  5. Stir the beef mixture into the cheese mixture until evenly combined.
  6. Spread a thin layer of marinara sauce on the bottom of a 9×13 inch baking dish.
  7. Stuff each cooked pasta shell with the beef and cheese mixture and place them in the baking dish.
  8. Pour the remaining marinara sauce over the stuffed shells and sprinkle the remaining mozzarella cheese on top.
  9. Cover the dish with aluminum foil and bake for 25 minutes. Remove the foil and bake for an additional 10-15 minutes, or until the cheese is bubbly and golden.
  10. Let the dish cool for a few minutes before serving. Garnish with fresh basil or parsley if desired.

Notes

  • For a healthier version, substitute ground turkey or chicken for the beef.
  • Add chopped spinach or mushrooms to the beef mixture for extra vegetables and flavor.

Baked Ranch Chicken: Discover This Delightfully Easy Recipe

Introduction to Baked Ranch Chicken

Oh, the joy of discovering a recipe that feels like a warm hug after a long day! Let me introduce you to Baked Ranch Chicken, a dish that’s as comforting as your favorite cozy sweater. Imagine coming home to the tantalizing aroma of chicken, perfectly seasoned with ranch and topped with gooey cheddar cheese. This recipe is a lifesaver for those busy days when time is scarce, yet you crave something delicious and satisfying. Whether you’re looking to impress your family or simply treat yourself, this Baked Ranch Chicken is your go-to solution for a delightful meal.

Why You’ll Love This Baked Ranch Chicken

This Baked Ranch Chicken is a dream come true for busy moms and professionals alike. It’s quick to prepare, bursting with flavor, and requires minimal cleanup—perfect for those hectic weeknights. The combination of ranch seasoning and cheddar cheese creates a taste sensation that even the pickiest eaters will adore. Plus, it’s a low-carb option that doesn’t skimp on taste, making it a guilt-free indulgence!

Ingredients Baked Ranch Chicken

Let’s dive into the heart of this scrumptious dish—the ingredients! First up, we have boneless, skinless chicken breasts, the star of the show, offering a lean protein base. The ranch seasoning mix is your secret weapon, infusing the chicken with that classic tangy flavor we all love. Greek yogurt adds creaminess and a slight tang, while olive oil ensures everything stays moist and tender.

Shredded cheddar cheese is the crowning glory, melting into a gooey, golden layer. Garlic and onion powders bring depth, while black pepper and salt enhance the overall taste. A dash of paprika adds a hint of warmth and color. For those looking to lighten things up, low-fat yogurt or sour cream can be used instead of Greek yogurt. And if you’re feeling adventurous, toss in some fresh herbs like parsley or chives for an extra burst of flavor.

For exact measurements, scroll down to the bottom of the article where you can find a printable version of the recipe. Happy cooking!

How to Make Baked Ranch Chicken

Preheat and Prepare the Mixture

First things first, let’s get that oven ready. Preheat it to 375°F (190°C). While it warms up, grab a large bowl. In it, combine the ranch seasoning mix, Greek yogurt, and olive oil. Add in the garlic powder, onion powder, black pepper, salt, and paprika. Mix everything until it’s a smooth, creamy blend. This mixture is the magic potion that will transform your chicken into a flavor-packed delight.

Coat the Chicken

Now, it’s time to give those chicken breasts a luxurious spa treatment. Place them in the bowl with the ranch mixture. Use your hands or a spatula to coat each piece thoroughly. Make sure every nook and cranny is covered. This ensures that every bite is bursting with that irresistible ranch flavor. Once coated, transfer the chicken to a greased 9×13-inch baking dish, arranging them in a single layer.

Bake to Perfection

With the chicken snug in its baking dish, sprinkle the shredded cheddar cheese evenly over the top. This cheesy layer will melt into a golden, bubbly topping. Slide the dish into your preheated oven and let it bake for 30-35 minutes. You’ll know it’s done when the chicken reaches an internal temperature of 165°F (74°C). For an extra touch of crispiness, broil the chicken for an additional 2-3 minutes. Once out of the oven, let it rest for 5 minutes before slicing and serving. Enjoy the fruits of your labor!

Tips for Success

  • Use a meat thermometer to ensure the chicken is perfectly cooked at 165°F.
  • For even cooking, pound the chicken breasts to an even thickness.
  • Let the chicken rest before slicing to keep it juicy.
  • Experiment with different cheese varieties for a unique twist.
  • Double the recipe and freeze leftovers for a quick meal later.

Equipment Needed

  • Oven: Essential for baking the chicken to perfection.
  • Large bowl: For mixing the ranch coating.
  • 9×13-inch baking dish: To hold the chicken while it bakes.
  • Spatula or tongs: For coating the chicken evenly.
  • Meat thermometer: Ensures the chicken is cooked through.

Variations

  • Spicy Kick: Add a teaspoon of cayenne pepper to the ranch mixture for a fiery twist.
  • Herb Infusion: Mix in fresh herbs like rosemary or thyme for an aromatic touch.
  • Low-Fat Option: Use low-fat cheese and yogurt to reduce calories without sacrificing flavor.
  • Vegetarian Swap: Replace chicken with thick slices of zucchini or eggplant for a veggie delight.
  • Mexican Flair: Add a sprinkle of taco seasoning and top with jalapeños for a south-of-the-border vibe.

Serving Suggestions

  • Pair with a fresh green salad drizzled with balsamic vinaigrette for a light, refreshing side.
  • Serve alongside roasted vegetables like asparagus or Brussels sprouts for a hearty meal.
  • Complement with a glass of crisp white wine or iced tea for a refreshing beverage.
  • Garnish with chopped parsley or chives for a pop of color and flavor.

FAQs about Baked Ranch Chicken

Can I use chicken thighs instead of breasts?

Absolutely! Chicken thighs are a great alternative and add a richer flavor. Just adjust the cooking time slightly, as thighs may take a bit longer to reach the perfect internal temperature of 165°F.

Is there a way to make this dish dairy-free?

Yes, you can swap the Greek yogurt with a dairy-free yogurt alternative and use a plant-based cheese. The taste will still be delightful, and it caters to those with dietary restrictions.

How can I store leftovers?

Leftovers can be stored in an airtight container in the refrigerator for up to three days. For longer storage, freeze the chicken in individual portions for up to three months. Reheat in the oven for best results.

What if I don’t have ranch seasoning mix?

No worries! You can make your own by mixing dried dill, parsley, garlic powder, onion powder, and a pinch of salt. This homemade version will work just as well in your Baked Ranch Chicken.

Can I prepare this dish ahead of time?

Definitely! You can coat the chicken in the ranch mixture and refrigerate it for up to 24 hours before baking. This makes it a convenient option for meal prep or entertaining guests.

Final Thoughts

As the aroma of Baked Ranch Chicken fills your kitchen, you’ll find yourself wrapped in a comforting embrace of flavors. This dish is more than just a meal; it’s a celebration of simplicity and taste. Whether you’re a busy mom juggling a million tasks or a professional seeking a quick yet satisfying dinner, this recipe is your culinary ally. The ease of preparation, combined with the rich, cheesy goodness, makes it a family favorite. So, gather your loved ones, serve up this delightful dish, and relish the joy of sharing a homemade meal that warms both heart and soul.

Baked Ranch Chicken
Paul

Baked Ranch Chicken: Discover This Delightfully Easy Recipe

Baked Ranch Chicken is a simple and delicious dish featuring chicken breasts coated in a flavorful ranch mixture and topped with cheddar cheese, then baked to perfection.
Prep Time 10 minutes
Cook Time 35 minutes
Total Time 45 minutes
Servings: 4 servings
Course: Main Course
Cuisine: American
Calories: 380

Ingredients
  

  • 2 pounds boneless skinless chicken breasts
  • 1 packet 1 ounce ranch seasoning mix
  • 1 cup plain Greek yogurt
  • 1 cup shredded cheddar cheese
  • 1 tablespoon olive oil
  • 1 teaspoon garlic powder
  • 1 teaspoon onion powder
  • 1/2 teaspoon black pepper
  • 1/2 teaspoon salt
  • 1/2 teaspoon paprika

Method
 

  1. Preheat your oven to 375°F (190°C).
  2. In a large bowl, combine the ranch seasoning mix, Greek yogurt, olive oil, garlic powder, onion powder, black pepper, salt, and paprika. Mix until well combined.
  3. Add the chicken breasts to the bowl and coat them evenly with the ranch mixture.
  4. Place the coated chicken breasts in a greased 9×13-inch baking dish.
  5. Sprinkle the shredded cheddar cheese evenly over the top of the chicken.
  6. Bake in the preheated oven for 30-35 minutes, or until the chicken is cooked through and reaches an internal temperature of 165°F (74°C).
  7. For a golden top, broil the chicken for an additional 2-3 minutes at the end of baking.
  8. Let the chicken rest for 5 minutes before slicing and serving.

Notes

  • For a lighter version, substitute the Greek yogurt with low-fat yogurt or sour cream.
  • Add some chopped fresh herbs like parsley or chives to the ranch mixture for extra flavor.

Coffee Mousse Recipe: A Simple Delight to Enjoy!

A Taste of Comfort: My First Encounter with Coffee Mousse

There are some desserts that feel like a warm embrace, a sweet indulgence that takes you back to a cherished moment in time. Coffee mousse is one of them for me.

I still remember the first time I tasted it. It was a rainy afternoon, the kind that makes you want to curl up with a book and something sweet. My grandmother, a woman with an impeccable taste for both coffee and desserts, had a knack for transforming simple ingredients into something magical. That day, she placed a delicate glass of coffee mousse in front of me—a swirl of velvety smoothness topped with a dusting of cocoa.

“Take a bite,” she said with a knowing smile.

The first spoonful was an experience in itself—light as air, yet rich with the deep aroma of coffee. The gentle bitterness balanced perfectly with the creaminess, melting away almost instantly. It was love at first taste.

Since that moment, coffee mousse has been more than just a dessert to me. It’s a symbol of quiet indulgence, of slowing down and savoring something truly special. Whether enjoyed alone in a peaceful moment or served to guests at a gathering, coffee mousse never fails to impress. It’s elegant, effortless, and utterly irresistible.

In this article, we’ll explore everything you need to know about coffee mousse—from its origins to expert tips, FAQs, and creative serving ideas. If you’re a coffee lover, this dessert might just become your new favorite.

The Allure of Coffee Mousse

Coffee mousse combines the richness of strong brewed coffee with the airy texture of whipped cream and egg whites, creating a dessert that is both indulgent and refreshing. Unlike traditional chocolate mousse, coffee mousse offers a sophisticated bitterness that enhances the overall experience. It’s a dessert that caters to both coffee enthusiasts and those who appreciate light, yet decadent sweets.

One of the best things about coffee mousse is its versatility. It can be dressed up for an elegant dinner party or enjoyed as a simple treat on a quiet afternoon. The basic recipe is easy to master, but it also allows for endless creativity—whether you prefer a splash of liqueur for an extra kick or layers of textures with crushed biscuits or caramel drizzle.

Why Coffee Mousse is a Dessert Worth Making

1. A Perfect Balance of Flavors

Unlike heavier desserts, coffee mousse strikes a balance between richness and lightness. The bold coffee flavor prevents it from being overly sweet, making it a perfect choice for those who prefer desserts with depth.

2. No Baking Required

For those who love desserts but don’t want to deal with the hassle of baking, coffee mousse is a dream come true. All it takes is some whipping, folding, and chilling—making it an effortless yet impressive option.

3. A Make-Ahead Marvel

Coffee mousse is the perfect dessert for entertaining because it can be made ahead of time. Preparing it a day before allows the flavors to develop, ensuring a more intense and satisfying taste when served.

4. A Treat for Every Season

Whether it’s summer or winter, coffee mousse never feels out of place. In warmer months, it’s a refreshing, chilled treat. In colder seasons, its rich coffee notes provide a cozy indulgence, especially when paired with a cup of espresso or hot chocolate.

Expert Tips for the Perfect Coffee Mousse

Making a flawless coffee mousse requires some finesse. Here are a few expert tips to ensure your dessert turns out beautifully every time.

1. Use High-Quality Coffee

Since coffee is the star ingredient, its quality makes a significant difference. Opt for a strong, freshly brewed espresso or dark roast for the best flavor. Avoid using weak or instant coffee unless it’s of premium quality.

2. Whip with Precision

Both the egg whites and whipped cream play a crucial role in achieving the mousse’s airy texture. Overwhipping can lead to a grainy or stiff consistency, while underwhipping may result in a runny mousse. Whip until soft peaks form and fold gently to maintain the lightness.

3. Chill for the Best Texture

Patience is key when making mousse. Allowing it to chill for at least four hours (preferably overnight) ensures that the flavors meld together and the mousse achieves the right consistency.

4. Experiment with Flavors

For an extra layer of depth, consider adding coffee liqueur, a touch of cinnamon, or even a hint of caramel extract. Each variation brings out a new dimension of flavor, making the dessert uniquely yours.

5. Play with Presentation

Serve your coffee mousse in elegant glass cups or ramekins, and don’t shy away from garnishes. A dusting of cocoa powder, chocolate curls, or a dollop of whipped cream can elevate the visual appeal and add an extra touch of indulgence.

Ingredients for a Dreamy Delight

  • 1 cup strong brewed coffee (preferably espresso)
  • 3 tablespoons granulated sugar (adjust for sweetness)
  • 1 tablespoon instant coffee granules (for an extra punch)
  • 3 large eggs (separated)
  • 1 cup heavy whipping cream (for a velvety texture)
  • 1 teaspoon vanilla extract (adds depth)
  • Pinch of salt (enhances flavor)

Steps to Indulge in Perfection

Step 1: Brew the Bold Base

  • Prepare 1 cup of strong coffee and let it cool slightly.

Step 2: Whip the Clouds

  • In a clean bowl, beat 3 egg whites with a pinch of salt until soft peaks form.
  • Gradually add 1 tablespoon of sugar and continue whipping until glossy and stiff peaks form. Set aside.

Step 3: Create the Coffee Cream

  • In a separate bowl, whisk 3 egg yolks with 2 tablespoons of sugar, 1 tablespoon of instant coffee, and 1 teaspoon of vanilla until pale and creamy.
  • Slowly whisk in the cooled coffee until fully combined.

Step 4: The Fluffy Touch

  • In another bowl, whip 1 cup of heavy cream until soft peaks form.

Step 5: Blend with Grace

  • Gently fold half of the whipped cream into the coffee mixture to lighten it.
  • Fold in the remaining whipped cream, followed by the egg whites. Be gentle to keep the airy texture.

Step 6: The Grand Chill

  • Spoon the mousse into serving glasses or cups.
  • Refrigerate for at least 4 hours or overnight for a perfectly set texture.

Step 7: Serve with Elegance

  • Top with whipped cream, chocolate shavings, or a dusting of cocoa powder before serving.

Nutritional Highlights

  • Calories: 250
  • Sugar: 12g
  • Fat: 20g
  • Carbohydrates: 18g
  • Protein: 4g

Enjoy every spoonful of this rich, creamy, and coffee-infused delight!


FAQs About Coffee Mousse

1. Can I Make Coffee Mousse Without Eggs?

Yes! If you prefer an eggless version, you can replace egg whites with whipped aquafaba (chickpea water) or simply rely on whipped cream for structure. The texture will be slightly different, but it will still be delicious.

2. Can I Use Decaffeinated Coffee?

Absolutely! If you want to enjoy coffee mousse without the caffeine buzz, feel free to use decaf espresso or strongly brewed decaf coffee.

3. How Long Does Coffee Mousse Last?

Coffee mousse can be stored in the refrigerator for up to three days. Make sure to cover it well to prevent it from absorbing any fridge odors.

4. Can I Freeze Coffee Mousse?

While it’s possible to freeze mousse, the texture may change slightly upon thawing. If you do freeze it, let it thaw in the refrigerator before serving.

5. How Can I Make Coffee Mousse Vegan?

To make a vegan version, use coconut cream instead of heavy cream, aquafaba instead of egg whites, and a plant-based milk alternative for any liquid components. You can also use agar-agar for added stability.

6. Can I Add Alcohol to Coffee Mousse?

Yes! Coffee liqueur, rum, or Irish cream can add a delightful kick. Just be mindful of the amount so the mousse retains its structure.

Creative Ways to Serve Coffee Mousse

  • Coffee Parfait: Layer coffee mousse with crushed biscuits and whipped cream for a stunning parfait.
  • Chocolate Coffee Duo: Serve coffee mousse alongside chocolate mousse for a contrasting yet complementary dessert experience.
  • Tiramisu-Inspired: Add a layer of soaked ladyfingers to mimic the flavors of tiramisu in mousse form.
  • Espresso Shot Mousse: Serve mousse in small espresso cups for a charming, portion-controlled treat.

Conclusion: A Dessert Worth Savoring

Coffee mousse is more than just a dessert; it’s an experience. From its silky-smooth texture to its deep, aromatic flavor, every spoonful is a moment of indulgence. Whether you make it for a special occasion or as a personal treat, it has a way of making ordinary moments feel extraordinary.

So next time you crave something sweet yet sophisticated, let coffee mousse be your go-to choice. Pour yourself a cup of coffee, take a spoonful of this velvety delight, and enjoy the magic of this timeless dessert.

aiting

Coffee Mousse Recipe: A Simple Delight to Enjoy!

Indulge in a light, airy, and velvety coffee mousse that melts in your mouth with every spoonful. Made with rich brewed coffee, fluffy egg whites, and creamy whipped topping, this dessert is a dreamy treat for all coffee lovers!

Prep Time 15 minutes
Cook Time 4 hours
Total Time 4 hours 15 minutes
Servings: 4 servings
Course: Dessert
Cuisine: French

Ingredients
  

  • 1 cup strong brewed coffee preferably espresso3 tablespoons granulated sugar (adjust for sweetness)1 tablespoon instant coffee granules (for an extra punch)3 large eggs (separated)1 cup heavy whipping cream (for a velvety texture)1 teaspoon vanilla extract (adds depth)Pinch of salt (enhances flavor)

Method
 

Brew the Coffee:
  1. Prepare 1 cup of strong coffee and let it cool slightly.
Whip the Egg Whites:
  1. In a clean bowl, beat 3 egg whites with a pinch of salt until soft peaks form.
  2. Gradually add 1 tablespoon of sugar and continue whipping until glossy and stiff peaks form. Set aside.
Prepare the Coffee Cream:
  1. In a separate bowl, whisk 3 egg yolks with 2 tablespoons of sugar, 1 tablespoon of instant coffee, and 1 teaspoon of vanilla extract until pale and creamy.
  2. Slowly whisk in the cooled coffee until fully combined.
Whip the Heavy Cream:
  1. In another bowl, whip 1 cup of heavy cream until soft peaks form.
Fold Everything Together:
  1. Gently fold half of the whipped cream into the coffee mixture to lighten it.
  2. Fold in the remaining whipped cream, followed by the egg whites. Be gentle to maintain the airy texture.
Chill the Mousse:
  1. Spoon the mousse into serving glasses or cups.
  2. Refrigerate for at least 4 hours or overnight for the best texture.
Serve & Enjoy:
  1. Top with whipped cream, chocolate shavings, or a dusting of cocoa powder before serving.

Notes

  • Use decaf coffee if you want a caffeine-free version.
  • For extra richness, add a splash of coffee liqueur to the mixture.
  • If you prefer a sweeter mousse, increase the sugar by 1 tablespoon.
  • Store leftovers in an airtight container in the fridge for up to 3 days.

Thai Basil Chicken Stir-Fry is a quick, tasty meal.

Introduction to Thai Basil Chicken Stir-Fry Recipe

Thai Basil Chicken Stir-Fry Recipe. This dish is not just a meal; it’s an experience filled with vibrant flavors and fresh ingredients. If you’re looking for a quick and tasty dinner option, this recipe is perfect for you. It combines tender chicken, crisp vegetables, and aromatic Thai basil, all tossed together in a savory sauce. Let’s dive into what makes this dish so special!

What Makes Thai Basil Chicken Stir-Fry Unique?

Thai Basil Chicken Stir-Fry Recipe apart from other stir-fries? First, it features Thai basil, which has a distinct flavor that’s slightly sweet and peppery. This herb is essential in Thai cooking and adds a unique twist to the dish. Additionally, the combination of soy sauce, oyster sauce, and fish sauce creates a rich umami flavor that tantalizes your taste buds.

Moreover, the use of fresh ingredients like bell peppers and green beans not only enhances the taste but also adds a pop of color to your plate. The balance of protein, vegetables, and herbs makes this stir-fry a wholesome meal. Plus, it’s quick to prepare, making it ideal for busy weeknights. Whether you’re a seasoned cook or a beginner, this recipe is easy to follow and guarantees delicious results.

So, are you ready to bring the flavors of Thailand into your kitchen? Let’s gather our ingredients and get started on this mouthwatering journey!

Ingredients for Thai Basil Chicken Stir-Fry Recipe

Thai Basil Chicken Stir-Fry Recipe, you’ll need a variety of fresh ingredients. Each component plays a vital role in building the dish’s unique flavor profile. Here’s what you’ll need:

  • 2 tablespoons vegetable oil: This oil is perfect for stir-frying, as it has a high smoke point.
  • 1 pound boneless, skinless chicken thighs: Thinly sliced for quick cooking and tenderness.
  • 4 cloves garlic: Minced to add a fragrant aroma and depth of flavor.
  • 2-3 Thai bird’s eye chilies: Chopped for a spicy kick. Adjust according to your spice preference.
  • 1 red bell pepper: Sliced to add sweetness and color to the dish.
  • 1 cup green beans: Trimmed and cut into 2-inch pieces for a crunchy texture.
  • 2 tablespoons soy sauce: This adds saltiness and umami flavor.
  • 1 tablespoon oyster sauce: Provides a rich, savory taste.
  • 1 tablespoon fish sauce: A staple in Thai cooking, it enhances the overall flavor.
  • 1 tablespoon sugar: Balances the savory elements with a hint of sweetness.
  • 1 cup fresh Thai basil leaves: The star ingredient that gives the dish its signature taste.

Thai Basil Chicken Stir-Fry Recipe. Each item contributes to the overall harmony of flavors, making this dish a favorite among many. Now that you have everything ready, let’s move on to the preparation steps!

Step-by-Step Preparation of Thai Basil Chicken Stir-Fry Recipe

Thai Basil Chicken Stir-Fry Recipe is straightforward and quick, making it perfect for any night of the week. Follow these steps to create a delicious meal that will impress your family and friends.

Step 1: Preparing the Ingredients

Before you start cooking, it’s essential to prepare all your ingredients. This step ensures a smooth cooking process. Begin by:

  • Thinly slicing the boneless, skinless chicken thighs.
  • Mincing the garlic cloves.
  • Chopping the Thai bird’s eye chilies, adjusting the amount based on your spice preference.
  • Slicing the red bell pepper into thin strips.
  • Trimming the green beans and cutting them into 2-inch pieces.
  • Washing and drying the fresh Thai basil leaves.

Having everything prepped will make your stir-fry come together quickly and easily!

Step 2: Cooking the Chicken

Thai Basil Chicken Stir-Fry Recipe.

Step 3: Stir-Frying the Vegetables

Once the chicken is cooked, it’s time to add the vegetables. Add the minced garlic and chopped chilies to the skillet. Stir them for about 30 seconds until they become fragrant. Then, toss in the sliced red bell pepper and green beans. Cook these vegetables for another 3-4 minutes. You want them to be tender-crisp, adding a delightful crunch to your dish.

Step 4: Combining Ingredients

Thai Basil Chicken Stir-Fry Recipe.

Step 5: Adding the Thai Basil

Thai Basil Chicken Stir-Fry Recipe is now ready to be served!

Variations of Thai Basil Chicken Stir-Fry Recipe

Thai Basil Chicken Stir-Fry Recipe lies in its versatility. You can easily adapt this dish to suit different dietary preferences or to use what you have on hand. Here are some exciting variations to consider!

Vegetarian Options

Thai Basil Chicken Stir-Fry Recipe, you can replace the chicken with tofu. Firm tofu works best as it holds its shape during cooking. Here’s how to make it:

  • Press the tofu to remove excess moisture, then cut it into cubes.
  • Follow the same cooking steps as the chicken, sautéing the tofu until golden brown.
  • Continue with the recipe as usual, adding the vegetables and sauce.

For an extra flavor boost, consider marinating the tofu in soy sauce and garlic before cooking. You can also add more vegetables like mushrooms, carrots, or zucchini to enhance the dish’s texture and nutrition.

Alternative Proteins

If you prefer a different protein, shrimp or beef can be excellent substitutes. Here’s how to adjust the recipe:

  • Shrimp: Use peeled and deveined shrimp. Cook them for about 3-4 minutes until they turn pink and opaque.
  • Beef: Thinly slice flank steak or sirloin. Cook it for about 5-6 minutes until browned and cooked through.

Thai Basil Chicken Stir-Fry Recipe a fantastic choice for any meal!

Cooking Note for Thai Basil Chicken Stir-Fry Recipe

Thai Basil Chicken Stir-Fry Recipe, a few cooking notes can help you achieve the best results. First, ensure your skillet or wok is hot before adding the oil. This step is crucial for achieving that perfect sear on the chicken, which locks in flavor and moisture.

Additionally, it’s important to keep your ingredients moving in the pan. Stir-frying is a quick cooking method, and constant movement helps prevent burning while ensuring even cooking. If you notice that the ingredients are sticking, you can add a splash of water or broth to deglaze the pan.

Another tip is to use fresh Thai basil. This herb is key to the dish’s flavor profile. If you can’t find Thai basil, you can use regular basil, but the taste will differ slightly. Also, remember that the heat from the chilies can vary, so taste as you go. Adjust the number of chilies based on your spice tolerance.

Thai Basil Chicken Stir-Fry Recipe with jasmine rice. This fragrant rice complements the dish beautifully and soaks up the delicious sauce. Enjoy your cooking adventure, and savor the delightful flavors of Thailand!

Serving Suggestions for Thai Basil Chicken Stir-Fry Recipe

Thai Basil Chicken Stir-Fry Recipe, it’s time to think about how to serve it! Presentation can elevate your meal, making it even more enjoyable. Here are some serving suggestions to enhance your dining experience:

  • Over Steamed Rice: The classic way to serve this stir-fry is over a bed of fluffy steamed jasmine rice. The rice absorbs the savory sauce, making each bite delightful.
  • With Noodles: For a different twist, serve the stir-fry over rice noodles or egg noodles. This adds a unique texture and makes the dish even more filling.
  • Garnish with Fresh Herbs: Consider garnishing your dish with extra Thai basil leaves or cilantro. This adds a fresh touch and enhances the dish’s aroma.
  • Serve with Lime Wedges: A squeeze of fresh lime juice over the stir-fry can brighten the flavors. It adds a zesty kick that complements the savory elements beautifully.
  • Pair with a Side Salad: A light cucumber salad or a simple green salad can balance the richness of the stir-fry. The crunchiness of the salad adds a refreshing contrast.
  • Accompany with Spring Rolls: For a complete Thai meal, serve your stir-fry with crispy spring rolls. They make for a delightful appetizer or side dish.

Thai Basil Chicken Stir-Fry Recipe more appealing but also create a well-rounded meal. Enjoy sharing this flavorful dish with family and friends, and watch them savor every bite!

Tips for Perfecting Your Thai Basil Chicken Stir-Fry Recipe

Thai Basil Chicken Stir-Fry Recipe truly shine, consider these helpful tips. They will ensure that your dish is not only delicious but also visually appealing and satisfying. Let’s explore some key pointers to elevate your cooking experience!

  • Use Fresh Ingredients: Fresh vegetables and herbs make a significant difference in flavor. Always opt for fresh Thai basil, crisp bell peppers, and vibrant green beans. The freshness enhances the overall taste of your stir-fry.
  • Prep Ahead: To save time, prepare your ingredients in advance. Chop the vegetables and slice the chicken before you start cooking. This way, you can focus on stir-frying without interruptions.
  • Control the Heat: Stir-frying requires high heat. Make sure your skillet or wok is hot before adding the oil. This helps to sear the chicken quickly, locking in moisture and flavor.
  • Don’t Overcrowd the Pan: If you have a lot of ingredients, consider cooking in batches. Overcrowding can lead to steaming instead of stir-frying, which affects the texture of your dish.
  • Adjust the Sauce: Feel free to tweak the sauce ingredients to suit your taste. If you prefer a sweeter flavor, add a bit more sugar. For a saltier kick, increase the soy sauce. Taste as you go!
  • Experiment with Add-Ins: Get creative by adding other vegetables or proteins. Carrots, snap peas, or even baby corn can add variety. You can also toss in some nuts for added crunch.
  • Serve Immediately: Stir-fries are best enjoyed fresh. Serve your Thai Basil Chicken Stir-Fry Recipe right after cooking to maintain the vibrant colors and crisp textures.
  • Pair with the Right Sides: Consider serving your stir-fry with complementary sides like jasmine rice or a light salad. This balance enhances the meal and makes it more satisfying.

Thai Basil Chicken Stir-Fry Recipe. Each step contributes to a delicious and memorable dish that you and your loved ones will enjoy time and time again. Happy cooking!

Breakdown of Time for Thai Basil Chicken Stir-Fry Recipe

Thai Basil Chicken Stir-Fry Recipe can help you plan your cooking efficiently. Here’s a simple breakdown of the time you’ll need for preparation and cooking.

Prep Time

The prep time for this delicious stir-fry is quite short. You’ll need about 15 minutes to gather and prepare all your ingredients. This includes slicing the chicken, chopping the vegetables, and mincing the garlic. Having everything ready will make the cooking process smooth and quick!

Cooking Time

Once you start cooking, the actual cooking time is approximately 15 minutes. This includes:

  • Cooking the chicken for about 5-7 minutes until browned.
  • Stir-frying the garlic, chilies, and vegetables for another 3-4 minutes.
  • Combining the sauce and adding the Thai basil, which takes about 1-2 minutes.

Overall, the cooking process is quick, making this dish perfect for busy weeknights!

Total Time

Thai Basil Chicken Stir-Fry Recipe without spending hours in the kitchen. It’s a fantastic option for a satisfying meal that doesn’t compromise on taste!

Nutritional Information for Thai Basil Chicken Stir-Fry Recipe

Thai Basil Chicken Stir-Fry Recipe not only delights your taste buds but also provides a good mix of nutrients. Here’s a breakdown of the key nutritional information for this dish:

Calories

Thai Basil Chicken Stir-Fry Recipe contains approximately 350 calories. This makes it a satisfying yet light option for dinner. The calorie count comes from the combination of chicken, vegetables, and sauces, providing a well-rounded meal without excessive calories.

Protein

Protein is vital for muscle repair and overall health. This recipe packs a punch with about 30 grams of protein per serving. The boneless, skinless chicken thighs are the primary source of protein, making this dish an excellent choice for those looking to increase their protein intake.

Sodium

Thai Basil Chicken Stir-Fry Recipe contains around 800 milligrams per serving. This amount is primarily due to the soy sauce and fish sauce used in the recipe. If you’re watching your sodium intake, consider using low-sodium soy sauce or reducing the amount of fish sauce to make it healthier without sacrificing flavor.

Thai Basil Chicken Stir-Fry Recipe is a nutritious option that balances protein, calories, and flavor. It’s a great way to enjoy a delicious meal while also being mindful of your dietary needs. Enjoy this dish knowing it’s not just tasty but also good for you!

FAQs about Thai Basil Chicken Stir-Fry Recipe

Can I use other types of basil in this recipe?

Yes, you can use other types of basil if you can’t find Thai basil. However, keep in mind that the flavor will differ. Sweet basil or regular basil can be used as substitutes, but they won’t provide the same unique taste that Thai basil offers. If you want to mimic the flavor, try adding a bit of mint or a squeeze of lime to enhance the freshness.

What can I serve with Thai Basil Chicken Stir-Fry?

Thai Basil Chicken Stir-Fry Recipe. The most popular choice is steamed jasmine rice, which absorbs the flavorful sauce beautifully. You can also serve it over rice noodles or egg noodles for a different texture. For a refreshing contrast, consider a light cucumber salad or crispy spring rolls as a side dish. These options will complement the stir-fry and create a well-rounded meal.

How spicy is Thai Basil Chicken Stir-Fry?

Thai Basil Chicken Stir-Fry Recipe can vary based on the number of Thai bird’s eye chilies you use. Typically, this dish has a mild to moderate heat level. If you prefer a milder version, you can reduce the number of chilies or omit them entirely. On the other hand, if you love spice, feel free to add more chilies or even a dash of chili sauce for an extra kick!

Can I make Thai Basil Chicken Stir-Fry ahead of time?

Thai Basil Chicken Stir-Fry Recipe is best enjoyed fresh, you can prepare some components ahead of time. You can slice the chicken and chop the vegetables a few hours in advance. However, it’s recommended to cook the dish just before serving to maintain the vibrant colors and crisp textures. If you have leftovers, store them in an airtight container in the fridge for up to two days. Reheat gently on the stove to enjoy again!

Conclusion on Thai Basil Chicken Stir-Fry Recipe

Thai Basil Chicken Stir-Fry Recipe is a delightful dish that brings the vibrant flavors of Thailand right to your kitchen. With its combination of tender chicken, fresh vegetables, and aromatic Thai basil, this stir-fry is not only quick to prepare but also incredibly satisfying. Whether you’re cooking for yourself or entertaining guests, this recipe is sure to impress.

As you’ve seen, the versatility of this dish allows for various adaptations. You can easily switch out the protein or make it vegetarian, ensuring that everyone at the table can enjoy it. The cooking process is straightforward, making it accessible for cooks of all skill levels. Plus, with the tips and serving suggestions provided, you can elevate your meal to new heights.

Thai Basil Chicken Stir-Fry Recipe a try? Gather your ingredients, follow the steps, and savor the delicious results. This dish is perfect for busy weeknights or any occasion when you crave something flavorful and wholesome. Enjoy the journey of cooking and the joy of sharing this delightful meal with your loved ones!

aiting

Thai Basil Chicken Stir-Fry is a quick, tasty meal.

A bold and aromatic Thai-inspired dish with tender ground chicken, fiery chilies, and fragrant basil, all coated in a savory sauce. Served over rice with a crispy fried egg, this dish is an easy, restaurant-quality meal made in under 30 minutes!


Prep Time 10 minutes
Cook Time 15 minutes
Total Time 25 minutes
Servings: 4 servings
Course: Main Course
Cuisine: Thai

Ingredients
  

  • Main Ingredients:1 lb 454 g ground chicken (or substitute with ground pork or beef)4 to 6 Thai bird’s eye chilies, chopped (adjust for spice preference)6 cloves garlic, smashed
  • For the Sauce:1 tablespoon oyster sauce2 teaspoons soy sauce2 teaspoons dark soy sauce½ teaspoon fish sauce optional, for an authentic Thai kick1 teaspoon sugar
  • For the Stir-Fry:1 tablespoon vegetable oil½ yellow onion diced4 oz (113 g) green beans, cut into 1-inch (2.5 cm) pieces1 bunch basil (holy basil preferred, Thai basil or regular basil as alternatives)
  • Optional Garnishes:Fried eggsLime wedges

Method
 

Prepare the Aromatics:
  1. Finely mince the Thai chilies and garlic together until they form a rough paste. Use a mortar and pestle or food processor for efficiency.
Make the Sauce:
  1. In a small bowl, mix oyster sauce, soy sauce, dark soy sauce, fish sauce (if using), and sugar. Stir until the sugar dissolves.
Cook the Aromatics:
  1. Heat vegetable oil in a large skillet over medium-high heat.
  2. Add the garlic-chili paste and sauté until fragrant, about 30 seconds. Be careful not to burn the garlic.
Cook the Chicken:
  1. Add the ground chicken to the skillet, spreading it out evenly. Let it sear undisturbed for about a minute to develop a golden crust.
  2. Break apart the chicken and cook until most of the liquid evaporates, about 2 minutes.
Add the Sauce & Vegetables:
  1. Pour in the prepared sauce and mix well to coat the chicken.
  2. Stir in diced onions and green beans. Cook for another 1-2 minutes, ensuring the vegetables remain crisp.
Finish with Basil:
  1. Turn off the heat and stir in the basil leaves. Toss until they wilt into the dish.
Serve & Enjoy:
  1. Spoon the Thai basil chicken over steamed rice.
  2. Top with a crispy fried egg and squeeze fresh lime juice for extra flavor.

Notes

  • Adjust the spice level by adding more or fewer chilies.
  • Swap green beans with bell peppers, carrots, or zucchini for variety.
  • For a vegetarian version, replace chicken with crumbled tofu or mushrooms.
  • Serve with jasmine rice or cauliflower rice for a low-carb option.

Korean Ground Beef Bowl Recipe is a must-try dish!

Introduction to the Korean Ground Beef Bowl Recipe

Korean Ground Beef Bowl Recipe is a fantastic choice. This dish combines savory flavors with fresh vegetables, making it both satisfying and nutritious. It’s perfect for busy weeknights or when you want to impress your family and friends with minimal effort.

The beauty of this recipe lies in its simplicity. With just a few ingredients, you can create a flavorful meal that captures the essence of Korean cuisine. The ground beef is seasoned with garlic, ginger, and soy sauce, giving it a rich taste that pairs wonderfully with steamed broccoli and fluffy rice.

Not only is this dish easy to prepare, but it also offers versatility. You can customize it to suit your taste preferences or dietary needs. Whether you want to add more vegetables, spice it up, or even switch out the protein, the options are endless!

Korean Ground Beef Bowl Recipe. By the end, you’ll be ready to whip up this delightful dish in no time. So, let’s dive in and discover how to make this delicious meal!

Ingredients for the Korean Ground Beef Bowl Recipe

Korean Ground Beef Bowl Recipe, you’ll need a selection of fresh ingredients. Each component plays a vital role in building the dish’s rich flavors and textures. Here’s what you’ll need:

  • 1 pound ground beef: This is the star of the dish, providing a hearty base.
  • 1 tablespoon vegetable oil: Used for cooking the beef and adding a bit of richness.
  • 3 cloves garlic, minced: Garlic adds a wonderful aroma and depth of flavor.
  • 1 tablespoon fresh ginger, minced: Ginger brings a zesty kick that complements the beef.
  • 1/4 cup soy sauce: This salty ingredient enhances the umami flavor.
  • 2 tablespoons brown sugar: Brown sugar balances the saltiness of the soy sauce.
  • 1 tablespoon sesame oil: This oil adds a nutty flavor that is essential in Korean cooking.
  • 1 teaspoon red pepper flakes: Adjust this to your spice preference for a little heat.
  • 1 cup cooked white rice: Rice serves as a comforting base for the bowl.
  • 1 cup broccoli florets: Broccoli adds color and nutrition to the dish.
  • 1/2 cup shredded carrots: Carrots provide a sweet crunch that contrasts nicely with the beef.
  • 2 green onions, sliced: Green onions add freshness and a pop of color.
  • Sesame seeds for garnish: These seeds add a delightful crunch and visual appeal.

Korean Ground Beef Bowl Recipe. Each item contributes to the overall flavor and presentation, making your meal not only tasty but also visually appealing!

Step-by-Step Preparation of the Korean Ground Beef Bowl Recipe

Korean Ground Beef Bowl Recipe is straightforward and quick, making it perfect for any home cook. Follow these steps to create a delicious meal that everyone will love!

Step 1: Preparing the Ingredients

Before you start cooking, it’s essential to prepare your ingredients. Begin by mincing the garlic and ginger. This will ensure they release their flavors quickly when cooked. Next, slice the green onions and set them aside for garnish. Finally, measure out the soy sauce, brown sugar, and sesame oil. Having everything ready will make the cooking process smooth and enjoyable!

Step 2: Cooking the Ground Beef

Korean Ground Beef Bowl Recipe.

Step 3: Making the Sauce

After the beef is browned, it’s time to add the minced garlic and ginger. Sauté them for 1-2 minutes until they become fragrant. This will fill your kitchen with a wonderful aroma! Next, stir in the soy sauce, brown sugar, sesame oil, and red pepper flakes. Cook this mixture for an additional 2-3 minutes. The sauce should thicken slightly, coating the beef beautifully.

Step 4: Combining Ingredients

While the beef mixture is cooking, steam the broccoli florets until they are tender, which should take about 4-5 minutes. Once everything is ready, it’s time to combine the ingredients. In a bowl, place a scoop of cooked white rice. Top it with the Korean ground beef mixture, steamed broccoli, and shredded carrots. This layering creates a colorful and appetizing dish!

Step 5: Serving the Dish

Korean Ground Beef Bowl Recipe, garnish with sliced green onions and a sprinkle of sesame seeds. These toppings not only add flavor but also enhance the visual appeal of your meal. Serve immediately while it’s hot, and enjoy the delightful combination of flavors and textures!

Variations of the Korean Ground Beef Bowl Recipe

Korean Ground Beef Bowl Recipe is incredibly versatile. You can easily adapt it to suit different dietary preferences or to simply mix things up. Here are some exciting variations to consider!

Vegetarian Alternatives

If you’re looking for a vegetarian option, you can replace the ground beef with plant-based proteins. Here are a few ideas:

  • Ground Tofu: Crumble firm tofu and sauté it just like you would the beef. It absorbs flavors well and provides a great texture.
  • Tempeh: This fermented soy product has a nutty flavor. Crumble it and cook it in the same way as the beef for a protein-packed meal.
  • Chickpeas: Use canned chickpeas for a quick option. Sauté them with the garlic and ginger for a hearty twist.
  • Vegetable Medley: Combine a mix of your favorite vegetables, such as bell peppers, zucchini, and mushrooms, for a colorful and nutritious bowl.

Korean Ground Beef Bowl Recipe.

Spicy Additions

Korean Ground Beef Bowl Recipe. Here are some suggestions:

  • Extra Red Pepper Flakes: Increase the amount of red pepper flakes in the sauce to kick up the heat.
  • Chili Paste: Add a spoonful of gochujang, a Korean chili paste, for a rich and spicy flavor.
  • Sriracha Sauce: Drizzle some Sriracha on top of your bowl before serving for an extra spicy kick.
  • Spicy Kimchi: Serve your bowl with a side of kimchi. This fermented dish adds heat and tanginess.

Korean Ground Beef Bowl Recipe and satisfy your cravings for heat. Feel free to experiment and find the perfect balance that suits your taste!

Cooking Note for the Korean Ground Beef Bowl Recipe

Korean Ground Beef Bowl Recipe, there are a few cooking notes to keep in mind. These tips will help you achieve the best results and ensure your dish is both delicious and visually appealing.

First, choose high-quality ground beef. Look for lean options to reduce excess fat while still enjoying the rich flavor. If you prefer a healthier alternative, consider using ground turkey or chicken. These options can provide a lighter version without sacrificing taste.

Next, be mindful of the cooking temperature. Cooking the beef over medium heat allows it to brown evenly without burning. This step is crucial for developing a deep flavor. If the heat is too high, the beef may cook too quickly and become tough.

Additionally, when making the sauce, taste it as you go. Adjust the soy sauce, brown sugar, and red pepper flakes according to your preference. This flexibility allows you to create a sauce that perfectly suits your taste buds.

Lastly, don’t skip the garnishes! Sliced green onions and sesame seeds not only enhance the dish’s appearance but also add fresh flavors and textures. A well-garnished bowl makes for a more enjoyable dining experience.

Korean Ground Beef Bowl Recipe. Enjoy the process and have fun experimenting with flavors!

Serving Suggestions for the Korean Ground Beef Bowl Recipe

Korean Ground Beef Bowl Recipe, presentation and pairing can elevate your meal to new heights. Here are some delightful serving suggestions to enhance your dining experience:

  • Colorful Plates: Use vibrant bowls or plates to serve your Korean ground beef bowl. The colorful ingredients, like bright green broccoli and orange carrots, will pop against a contrasting background.
  • Side Dishes: Consider serving your bowl with traditional Korean side dishes, known as banchan. Options like pickled radishes, seasoned spinach, or cucumber salad can add variety and freshness to your meal.
  • Fresh Herbs: Garnish with fresh herbs like cilantro or mint for an aromatic touch. These herbs can brighten the flavors and add a refreshing element to the dish.
  • Rice Variations: Instead of plain white rice, try serving your beef bowl over brown rice or cauliflower rice for a healthier twist. This change can add a nutty flavor and extra nutrients.
  • Wrap It Up: For a fun twist, serve the beef mixture in lettuce wraps. This allows everyone to create their own wraps, making it a hands-on dining experience.
  • Drinks: Pair your meal with a refreshing drink. Iced green tea or a light Korean beer can complement the flavors beautifully.

Korean Ground Beef Bowl Recipe more enjoyable but also create a memorable dining experience for you and your guests. Feel free to mix and match these ideas to find what works best for your taste!

Tips for Perfecting the Korean Ground Beef Bowl Recipe

Korean Ground Beef Bowl Recipe, a few tips can make a significant difference. These suggestions will help you enhance the flavors and presentation of your dish, ensuring that every bite is delicious!

  • Use Fresh Ingredients: Fresh garlic, ginger, and vegetables will elevate the taste of your dish. Always opt for the freshest produce available to maximize flavor.
  • Marinate the Beef: For an extra layer of flavor, consider marinating the ground beef in soy sauce, ginger, and garlic for 30 minutes before cooking. This step allows the meat to absorb the flavors deeply.
  • Adjust the Sweetness: Depending on your taste, you can modify the amount of brown sugar in the sauce. If you prefer a sweeter dish, add a bit more sugar, or reduce it for a more savory flavor.
  • Experiment with Vegetables: Feel free to add other vegetables like bell peppers, snap peas, or zucchini. This not only adds color but also boosts the nutritional value of your bowl.
  • Cook Rice Perfectly: For fluffy rice, rinse it under cold water before cooking to remove excess starch. This will prevent it from becoming sticky and clumpy.
  • Let It Rest: After cooking, let the beef mixture sit for a few minutes before serving. This allows the flavors to meld together, creating a more harmonious taste.
  • Garnish Generously: Don’t skimp on the garnishes! A generous sprinkle of sesame seeds and sliced green onions not only enhances the flavor but also makes the dish visually appealing.
  • Serve Hot: Enjoy your Korean Ground Beef Bowl Recipe immediately after serving. The flavors are best when the dish is hot, and the textures are fresh.

Korean Ground Beef Bowl Recipe that will impress your family and friends. Enjoy the cooking process and savor every delicious bite!

Breakdown of Time for the Korean Ground Beef Bowl Recipe

Korean Ground Beef Bowl Recipe can help you plan your cooking efficiently. Here’s a breakdown of the time you’ll need for preparation and cooking:

Prep Time

The prep time for this delicious dish is quite short. You’ll need about 10-15 minutes to gather and prepare all your ingredients. This includes mincing the garlic and ginger, slicing the green onions, and measuring out the sauces. Having everything ready will make the cooking process smoother and more enjoyable!

Cooking Time

Once you start cooking, the total cooking time is approximately 15-20 minutes. This includes:

  • Cooking the ground beef: 5-7 minutes
  • Sautéing the garlic and ginger: 1-2 minutes
  • Making the sauce: 2-3 minutes
  • Steaming the broccoli: 4-5 minutes

These steps come together quickly, allowing you to enjoy a flavorful meal in no time!

Total Time

Korean Ground Beef Bowl Recipe, you’ll have a delicious and satisfying dish ready to serve in no time!

Nutritional Information for the Korean Ground Beef Bowl Recipe

Korean Ground Beef Bowl Recipe not only offers delicious flavors but also provides valuable nutrients. Here’s a breakdown of the nutritional information per serving:

Calories

Korean Ground Beef Bowl Recipe contains approximately 450 calories. This makes it a satisfying meal option that can fit well into a balanced diet. The combination of protein, carbohydrates, and healthy fats contributes to its calorie content, ensuring you feel full and energized.

Protein

Protein is a vital nutrient for building and repairing tissues. In this recipe, you’ll find about 25 grams of protein per serving. The ground beef is the primary source of protein, making this dish an excellent choice for those looking to increase their protein intake. Pairing it with rice and vegetables adds additional nutrients, creating a well-rounded meal.

Sodium

Korean Ground Beef Bowl Recipe is approximately 800 milligrams per serving. This is mainly due to the soy sauce used in the recipe. While sodium is necessary for bodily functions, it’s important to monitor your intake. If you’re watching your sodium levels, consider using low-sodium soy sauce or adjusting the amount to suit your dietary needs.

Korean Ground Beef Bowl Recipe provides a balanced mix of calories, protein, and sodium, making it a nutritious option for any meal. Enjoy this delicious dish while being mindful of your nutritional goals!

FAQs about the Korean Ground Beef Bowl Recipe

What can I substitute for ground beef in the Korean Ground Beef Bowl Recipe?

Korean Ground Beef Bowl Recipe, you have several tasty options. Ground turkey or chicken can be used for a leaner protein choice. They cook similarly and absorb the flavors of the sauce well.

For a vegetarian option, consider using crumbled tofu or tempeh. Both provide a great texture and soak up the delicious sauce. You can also use canned chickpeas for a hearty twist. They add protein and fiber, making your bowl nutritious and filling.

Feel free to experiment with different proteins to find the one that suits your taste best!

Can I make the Korean Ground Beef Bowl Recipe ahead of time?

Korean Ground Beef Bowl Recipe is perfect for meal prep. You can cook the ground beef mixture and steam the vegetables ahead of time. Store them separately in airtight containers in the refrigerator.

When you’re ready to eat, simply reheat the beef and veggies in a skillet or microwave. Prepare fresh rice or use leftover rice to save time. This way, you can enjoy a delicious meal in just a few minutes!

What sides pair well with the Korean Ground Beef Bowl Recipe?

Korean Ground Beef Bowl Recipe. Traditional Korean side dishes, known as banchan, are a great choice. Options like pickled radishes, seasoned spinach, or cucumber salad add freshness and variety.

You can also serve a light soup, such as miso soup, to complement the flavors of the beef bowl. For a crunchy texture, try serving some crispy seaweed snacks or a simple green salad with sesame dressing.

These sides will not only elevate your meal but also create a more authentic Korean dining experience!

Conclusion on the Korean Ground Beef Bowl Recipe

Korean Ground Beef Bowl Recipe is a delightful dish that brings together rich flavors, vibrant colors, and nutritious ingredients. It’s an excellent choice for anyone looking to enjoy a quick yet satisfying meal. With its simple preparation and versatility, this recipe can easily become a staple in your kitchen.

Whether you’re cooking for yourself, your family, or friends, this dish is sure to impress. The combination of savory ground beef, fresh vegetables, and fluffy rice creates a balanced meal that is both filling and delicious. Plus, the ability to customize the recipe with various proteins and vegetables means you can adapt it to suit your taste preferences or dietary needs.

Korean Ground Beef Bowl Recipe serves as a fantastic introduction. It’s a dish that not only satisfies your hunger but also allows you to experience the unique flavors of Korea right in your home. So, gather your ingredients, follow the steps, and enjoy the process of creating this wonderful meal!

Korean Ground Beef Bowl Recipe. Happy cooking, and enjoy every delicious bite!

aiting

Korean Ground Beef Bowl Recipe is a must-try dish!

A quick and flavorful Korean-inspired beef bowl packed with umami, fragrant garlic, and a touch of sesame. Serve it over a warm bed of rice and top with fresh veggies, kimchi, or a fried egg for the perfect balance of taste and texture!


Prep Time 10 minutes
Cook Time 15 minutes
Total Time 25 minutes
Servings: 4 servings
Course: Main Course
Cuisine: Korean-Inspired

Ingredients
  

  • Essential Ingredients:1 pound ground beef 80/20 for optimal flavor2 tablespoons soy sauce (or tamari for gluten-free)1 tablespoon sesame oil3 cloves garlic, minced1 teaspoon ginger, minced2 green onions, chopped (plus extra for garnish)Salt and pepper to taste2 cups cooked rice (jasmine, basmati, or brown rice)
  • Optional Additions:Toppings: Sesame seeds sliced cucumber, kimchi, or pickled vegetablesVegetables: Bell peppers, carrots, broccoli, or spinachEgg: A fried egg on top for added richness

Method
 

Cook the Rice:
  1. Stovetop: Rinse 1 cup of rice under cold water until the water runs clear. Combine with 2 cups of water in a pot, bring to a boil, then reduce heat to low, cover, and simmer for about 15 minutes. Let it rest for 5 minutes before fluffing.
  2. Rice Cooker: Add rinsed rice and water to the rice cooker and cook according to the manufacturer’s instructions.
  3. Instant Pot: Combine rinsed rice and water in the pot. Seal the lid, cook on high pressure for 3 minutes, then allow a natural release.
Prepare the Beef:
  1. Heat a large skillet over medium-high heat. Add the ground beef and break it apart as it cooks, browning for 5-7 minutes. Drain excess fat if needed.
  2. Stir in minced garlic and ginger, cooking for another 1-2 minutes until fragrant.
  3. Add soy sauce, sesame oil, and chopped green onions. Stir well and let simmer for a couple of minutes to blend the flavors. Season with salt and pepper to taste.
Assemble Your Bowl:
  1. Spoon a generous amount of cooked rice into a bowl.
  2. Layer the seasoned beef on top.
  3. Add steamed or fresh vegetables, such as broccoli, bell peppers, or carrots.
  4. Garnish with sesame seeds, extra green onions, kimchi, or a fried egg.

Notes

  • Add a spicy kick by mixing in gochujang or red pepper flakes.
  • Substitute ground beef with ground turkey or chicken for a leaner option.
  • For a low-carb version, swap rice with cauliflower rice.
  • Store leftovers in an airtight container in the fridge for up to 3 days.

Crispy Potato & Savory Ground Beef Delight – A Comforting, Hearty Classic

Some dishes have a way of bringing people together, filling the kitchen with warmth, nostalgia, and the irresistible aroma of home-cooked goodness. This Crispy Potato & Savory Ground Beef Delight is one of those recipes. I remember the first time I had it—sitting in my grandmother’s kitchen, watching her grate potatoes with ease, mixing them with just the right amount of seasoning, and pan-frying them to golden perfection.

The sizzle of the potatoes hitting the hot pan was almost as comforting as the dish itself. She would cook the ground beef with onions, layering it between crispy potato layers, creating a dish that was both simple and deeply satisfying. It wasn’t just food; it was an experience—a meal that felt like a hug on a plate.

Now, I make this recipe when I need something comforting yet quick, when I want to serve my family something hearty and filling without spending hours in the kitchen. It’s budget-friendly, easy to prepare, and packed with flavor, making it perfect for busy weeknights or cozy weekends.

Whether you’re making this for a family dinner, a casual get-together, or just for yourself, this dish will never disappoint. It’s crispy, golden, and full of rich, savory goodness—a true comfort food classic.

What Makes This Dish So Special?

This recipe is a perfect balance of textures and flavors, with crispy potatoes and savory, seasoned beef coming together in a dish that’s simple yet deeply satisfying.

1. Crispy & Golden Perfection

The grated potatoes cook into a crispy, golden crust, creating a delicious contrast with the juicy beef filling inside.

2. A Hearty, Protein-Packed Meal

With ground beef and potatoes, this dish is not only delicious but also filling, making it a great meal for the whole family.

3. Quick & Easy to Prepare

You don’t need fancy ingredients or complicated steps—just a few pantry staples, some basic prep, and a hot pan to create something amazing in under 30 minutes.

4. Budget-Friendly & Made with Simple Ingredients

This recipe uses affordable, everyday ingredients, making it a great option for home cooks looking for a satisfying meal without breaking the bank.

5. Versatile & Customizable

You can adjust the flavors, add extra ingredients, or switch up the seasonings to make this dish your own.

Ingredients

IngredientQuantity
Medium potatoes4-5 (600-750g / 21-26 oz), peeled and grated
Cornstarch2 tablespoons (16g)
Salt & PepperTo taste
Sunflower oil2 tablespoons
Ground beef½ pound (225g)
Onion1 medium (150g), diced

Directions

  1. Prepare the Potatoes: Squeeze excess moisture from the grated potatoes, then mix with cornstarch, salt, and pepper.
  2. Cook the Ground Beef: Heat 1 tablespoon of oil in a pan, sauté the diced onion until soft, then add the ground beef. Cook until browned and season with salt and pepper.
  3. Form the Potato Mixture: In a separate pan, heat the remaining oil. Spread half of the grated potato mixture in the pan, press it down, then add the cooked beef mixture on top. Cover with the remaining potatoes.
  4. Pan-Fry Until Golden: Cook on medium heat for 6-8 minutes per side, until crispy and golden brown.
  5. Serve & Enjoy: Let cool slightly before slicing. Serve warm with sour cream or your favorite dipping sauce.

Nutritional Information (Per Serving, Approximate)

NutrientValue
Calories320-350 kcal
Protein15g
Carbohydrates35g
Fat12g
Fiber4g
Sugar2g

Ways to Customize Your Potato & Ground Beef Delight

One of the best things about this dish is its versatility—you can easily tweak it to suit your taste preferences!

1. Add More Flavor

  • Sprinkle paprika or smoked paprika for a deeper, smoky taste.
  • Mix in garlic powder, thyme, or rosemary for added aroma.
  • Use grated Parmesan or cheddar cheese in the potato mixture for extra richness.

2. Make It Extra Crispy

  • Squeeze out as much moisture as possible from the grated potatoes before cooking to help them crisp up.
  • Cook over medium heat to achieve a perfect golden crust without burning.
  • Try air-frying or baking instead of pan-frying for a lighter version.

3. Turn It Into a Casserole

  • Instead of cooking in a pan, layer the potatoes and beef in a baking dish and bake at 200°C (400°F) for 25-30 minutes for a crispy oven-baked version.

4. Swap the Protein

  • Replace ground beef with ground turkey, chicken, or lamb for a different twist.
  • Try a vegetarian version using mushrooms or lentils instead of meat.

5. Serve It in Different Ways

  • Top with sour cream or Greek yogurt for a creamy contrast.
  • Serve with a side of fresh salad to balance the richness.
  • Drizzle with hot sauce or ketchup for an extra kick.

FAQs – Everything You Need to Know

1. How do I keep the potatoes crispy?

To get the best crispy texture:

  • Squeeze out excess moisture from the grated potatoes using a kitchen towel.
  • Use enough oil—but not too much—to get that perfect golden crust.
  • Cook on medium heat to prevent burning while allowing the potatoes to crisp up properly.

2. Can I use mashed potatoes instead of grated potatoes?

Yes! You can replace the grated potatoes with mashed potatoes and create a potato and beef patty or a layered potato casserole instead.

3. Can I make this ahead of time?

Yes! You can:

  • Prepare the potato and beef mixture and store it separately in the fridge for up to 24 hours before cooking.
  • Cook and store leftovers in an airtight container for up to 3 days. Reheat in a pan or oven to restore crispiness.

4. Can I freeze this dish?

While it’s best enjoyed fresh, you can freeze leftovers:

  • Let it cool completely, then store in an airtight container for up to 2 months.
  • Reheat in a skillet or oven for the best texture—avoid microwaving, as it may make the potatoes soggy.

5. What can I serve with this dish?

  • A fresh green salad for a lighter contrast.
  • A fried or poached egg on top for a delicious breakfast-style meal.
  • Steamed vegetables or roasted bell peppers for added nutrition.

6. Can I bake this instead of frying?

Absolutely! You can layer everything in a greased baking dish and bake at 200°C (400°F) for 25-30 minutes until golden and crispy.

7. What’s the best type of potato to use?

Russet potatoes or Yukon Golds work best because they have the right balance of starch and moisture to get crispy.

Final Thoughts – A Dish That Feels Like Home

There’s something truly special about simple, home-cooked meals that bring comfort and joy. This Crispy Potato & Savory Ground Beef Delight is one of those dishes—it’s hearty, satisfying, and packed with flavor, yet easy enough to make any night of the week.

With its golden, crispy potatoes and perfectly seasoned beef, this dish is sure to become a go-to favorite in your home. Whether you’re cooking for family, meal-prepping for the week, or just craving something crispy, hearty, and delicious, this recipe will never fail you.

So grab some potatoes, heat up the skillet, and enjoy the simple pleasure of a warm, homemade meal that always hits the spot!

Amal

Crispy Potato & Savory Ground Beef Delight – A Comforting, Hearty Classic

This Crispy Potato & Savory Ground Beef Delight is a flavor-packed dish that brings together golden, crispy grated potatoes and seasoned ground beef for a meal that is both hearty and satisfying. Perfect as a main course or a side dish, this recipe is easy to make and perfect for busy weeknights. Serve it warm with your favorite sauce or a dollop of sour cream for extra indulgence!
Prep Time 15 minutes
Cook Time 20 minutes
Total Time 35 minutes
Servings: 4 servings
Course: Main Dish
Cuisine: International

Ingredients
  

  • 4-5 medium potatoes 600-750g / 21-26 oz, peeled and grated
  • 2 tablespoons cornstarch 16g
  • Salt and pepper to taste
  • 2 tablespoons sunflower oil
  • ½ pound ground beef 225g
  • 1 medium onion 150g, diced

Method
 

  1. Prepare the Potatoes: Grate the potatoes and squeeze out excess moisture using a clean kitchen towel. Mix with cornstarch, salt, and pepper.
  2. Cook the Beef: In a pan, heat 1 tablespoon of oil and sauté the diced onion until soft. Add the ground beef and cook until browned. Season with salt and pepper.
  3. Assemble the Dish: In another pan, heat the remaining oil. Spread half of the grated potato mixture in the pan, pressing it down. Add the cooked beef mixture on top, then cover with the remaining potatoes.
  4. Pan-Fry to Perfection: Cook over medium heat for 6-8 minutes per side until golden brown and crispy.
  5. Serve & Enjoy: Let cool slightly before slicing. Serve warm with sour cream, ketchup, or a side of fresh salad.

Notes

  • For extra crispiness, let the grated potatoes sit for 5 minutes before squeezing out moisture.
  • Try different seasonings, such as smoked paprika or garlic powder, for a flavor twist.
  • Make it cheesy by adding a layer of shredded cheddar or mozzarella between the potatoes and beef.
  • For a healthier option, bake in the oven at 200°C (400°F) for 25-30 minutes instead of pan-frying.

Festive Apple Puff Pastry Delight – A Simple Yet Elegant Dessert

Some desserts bring back memories of warmth, laughter, and togetherness, and for me, this Festive Apple Puff Pastry Delight is one of them. I remember the first time I made it for a family gathering—it was a crisp autumn evening, the scent of cinnamon filling the air, and the sound of laughter echoing through the house. As I pulled the golden, flaky pastry from the oven, everyone gathered around, eager to take that first bite.

This recipe reminds me of the simple joys of baking, where a few basic ingredients transform into something delightful and comforting. There’s something special about the way the buttery, crispy layers of puff pastry contrast with the soft, spiced apples, making each bite feel like a warm embrace. It’s a dessert that looks elegant, tastes indulgent, yet is effortless to make—perfect for any occasion, from holiday celebrations to a cozy evening at home.

If you love easy desserts with rich flavors, this Festive Apple Puff Pastry Delight is a must-try. It’s light, flaky, and beautifully infused with cinnamon, making it the perfect treat to share with family and friends.

Why You’ll Love This Recipe

This dessert is a celebration of simplicity—minimal effort, maximum flavor. Here’s why it deserves a spot in your baking rotation:

1. Buttery, Flaky Perfection

Puff pastry bakes into crisp, golden layers, providing the perfect contrast to the tender apple filling.

2. Naturally Sweet & Spiced

With the warmth of cinnamon and the natural sweetness of apples, this recipe delivers rich flavors without needing excessive sugar.

3. Quick and Easy to Make

With just a few ingredients and minimal prep, you can have this dessert ready in under 30 minutes—perfect for last-minute guests or weeknight indulgence.

4. Versatile and Customizable

This pastry can be shaped, filled, and flavored in different ways, making it a recipe that never gets boring.

5. A Beautiful Dessert for Any Occasion

Whether you serve it as a breakfast treat, a holiday dessert, or an elegant dinner party finale, this puff pastry delight always impresses.

Ingredients

IngredientQuantity
Puff Pastry400g (1 sheet)
Cinnamon1 teaspoon
Egg1 large, beaten (for brushing)
Apples2 medium (peeled, cored, thinly sliced)
Icing Sugar2 tablespoons (for sprinkling)

Directions

  1. Preheat the Oven: Set to 200°C (400°F) and line a baking sheet with parchment paper.
  2. Prepare the Apples: In a bowl, toss the sliced apples with cinnamon.
  3. Roll Out the Pastry: Lightly flour your surface and roll out the puff pastry sheet.
  4. Assemble the Pastry: Arrange the apple slices in the center of the pastry, leaving space around the edges.
  5. Seal and Brush: Fold or cut the pastry into a decorative shape, then brush with the beaten egg for a golden finish.
  6. Bake Until Golden: Place in the oven and bake for 18-22 minutes, or until puffed and golden brown.
  7. Cool & Serve: Let cool slightly, dust with icing sugar, and enjoy warm!

Nutritional Information (Per Serving, Approximate)

NutrientValue
Calories220-250 kcal
Protein4g
Carbohydrates30g
Fat10g
Fiber2g
Sugar8g

Ways to Customize Your Apple Puff Pastry Delight

While this recipe is delicious as is, you can make it even more special with these creative twists:

1. Add a Nutty Crunch

Sprinkle chopped walnuts, pecans, or almonds over the apple filling before baking for extra texture and richness.

2. Make It Extra Decadent

Drizzle caramel sauce or honey over the baked pastry for a touch of indulgence.

3. Play with Different Spices

Cinnamon is classic, but you can also experiment with:

  • Nutmeg for warmth.
  • Cardamom for a slightly exotic touch.
  • Ginger for a subtle spice kick.

4. Try a Different Fruit Filling

Swap apples for:

  • Pears for a softer, milder sweetness.
  • Berries for a tangy contrast.
  • Peaches for a summer twist.

5. Serve It in Unique Ways

  • Dust with powdered sugar for a light finish.
  • Serve with vanilla ice cream or whipped cream for extra creaminess.
  • Pair with coffee or mulled wine for a cozy experience.

FAQs – Everything You Need to Know

1. Can I use store-bought puff pastry?

Yes! Store-bought puff pastry works perfectly and makes this recipe incredibly easy. Just be sure to thaw it properly before use.

2. What type of apples work best?

Firm, slightly tart apples like Granny Smith, Honeycrisp, or Pink Lady work best. They hold their shape well and balance the sweetness of the pastry.

3. Can I make this dessert ahead of time?

Yes! You can:

  • Prepare the pastry and apples in advance, then assemble and bake when ready.
  • Store baked pastries in an airtight container at room temperature for up to 2 days.

4. How do I reheat leftovers?

For best results, reheat in the oven at 180°C (350°F) for 5-10 minutes to restore crispiness. Avoid microwaving, as it can make the pastry soft.

5. Can I freeze this dessert?

Yes! To freeze:

  • Assemble the pastry and freeze before baking.
  • When ready to bake, place frozen pastry in a preheated oven and add a few extra minutes to the baking time.

6. Do I need to peel the apples?

Peeling is recommended for a smoother texture, but if you enjoy the extra fiber and texture, you can leave the peels on.

7. How can I prevent my pastry from getting soggy?

  • Ensure your apples are not overly juicy—pat them dry if needed.
  • Avoid overfilling the pastry to prevent excess moisture.
  • Bake at the right temperature to crisp up the pastry properly.

Final Thoughts – A Dessert That Feels Like a Celebration

There’s something undeniably joyful and comforting about a flaky, golden apple pastry. It’s the kind of dessert that feels festive yet effortless, making it perfect for both special occasions and everyday treats.

With buttery, crisp layers, warm cinnamon apples, and a light dusting of sugar, every bite is a balance of texture and flavor that keeps you coming back for more. Whether you’re sharing it with loved ones or treating yourself to something special, this Festive Apple Puff Pastry Delight is a recipe worth making again and again.

So why wait? Preheat your oven, roll out that puff pastry, and experience the magic of homemade pastry goodness today!

Amal

Festive Apple Puff Pastry Delight – A Simple Yet Elegant Dessert

This Festive Apple Puff Pastry Delight is a flaky, golden pastry filled with sweet, spiced apples and finished with a dusting of icing sugar. With its crispy layers and warm cinnamon aroma, this easy yet elegant dessert is perfect for holidays, cozy evenings, or a quick indulgence. Serve it warm with ice cream or alongside your favorite coffee for a treat that’s sure to impress!
Prep Time 10 minutes
Cook Time 20 minutes
Total Time 30 minutes
Servings: 4 –6 servings
Course: Dessert
Cuisine: European-inspired

Ingredients
  

  • 400 g 1 sheet puff pastry
  • 2 medium apples peeled, cored, and thinly sliced
  • 1 teaspoon cinnamon
  • 1 large egg beaten (for brushing)
  • 2 tablespoons icing sugar for sprinkling

Method
 

  1. Preheat the Oven: Set to 200°C (400°F) and line a baking sheet with parchment paper.
  2. Prepare the Apples: In a bowl, toss the sliced apples with cinnamon.
  3. Roll Out the Pastry: Lightly flour your surface and roll out the puff pastry sheet.
  4. Assemble the Pastry: Arrange the apple slices in the center of the pastry, leaving space around the edges.
  5. Seal and Brush: Fold or shape the pastry as desired, then brush with the beaten egg for a golden finish.
  6. Bake Until Golden: Place in the oven and bake for 18-22 minutes, or until puffed and golden brown.
  7. Cool & Serve: Let cool slightly, dust with icing sugar, and enjoy warm!

Notes

  • For extra crunch, add chopped walnuts or almonds before baking.
  • For a richer flavor, drizzle with caramel sauce before serving.
  • Store leftovers in an airtight container at room temperature for up to 2 days.
  • To reheat, bake at 180°C (350°F) for 5-10 minutes to restore crispiness.

Stay Connected

Get recipes via email: