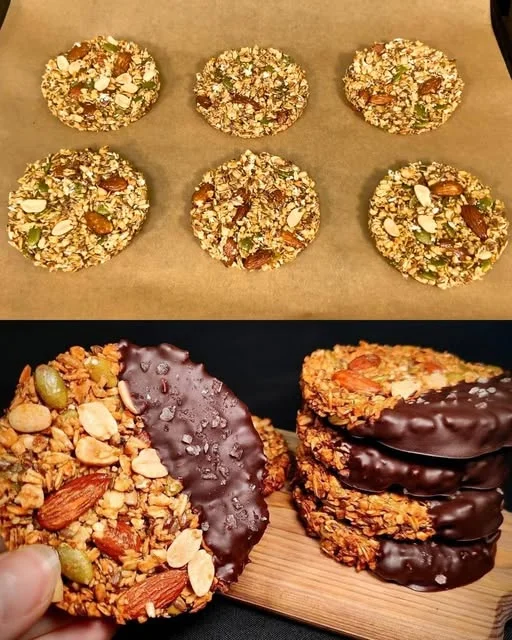
The Ultimate Energy Boost: Super-Energy Dessert

There’s something deeply satisfying about knowing you’ve fueled your body with exactly what it needs. I remember a few years ago when I started paying more attention to how the food I consumed affected my energy levels. I was always chasing that mid-afternoon slump—one cup of coffee, then another, trying to keep my energy up while juggling work, family, and everything else life threw my way.

One day, I hit a turning point. I decided to shift my focus from quick energy fixes to nourishing my body with whole, nutrient-packed foods. I wanted energy that would last throughout the day, not just a sugar rush followed by a crash. I started experimenting with different snack recipes, aiming to create something that would sustain me without the usual aftereffects of processed snacks.

And that’s when I came up with this Super-Energy Dessert—a powerhouse of seeds, oats, nuts, and dark chocolate. I realized that with the right ingredients, I could have an indulgent treat that was as energizing as it was satisfying. It became my go-to snack for boosting energy levels naturally, without relying on artificial stimulants or processed sugars.

This dessert has now become a staple in my kitchen, and it’s my secret weapon when I need a quick energy pick-me-up during a busy day. Packed with healthy fats, protein, and fiber, it’s a sweet, guilt-free treat that will leave you feeling nourished and energized. Whether you’re an athlete looking for a pre-workout snack or someone who simply wants to stay energized throughout the day, this dessert is for you.

What Makes This Dessert So Energizing?

The key to the Super-Energy Dessert lies in its ingredients. Each component is carefully selected for its energy-boosting properties. Let’s take a deeper dive into what makes this dessert not only delicious but incredibly nourishing.

Nutrient-Dense Seeds:

This dessert is loaded with a variety of seeds—pumpkin seeds, sunflower seeds, and flaxseeds. Each of these small but mighty seeds is packed with protein, healthy fats, and fiber, which work together to provide sustained energy. Flaxseeds, for example, are rich in omega-3 fatty acids, which are known to support heart health and brain function, while pumpkin and sunflower seeds are excellent sources of magnesium, which helps regulate energy levels in the body.

Oats for Long-Lasting Fuel:

Oats are a well-known energy powerhouse. Rich in complex carbohydrates, oats provide a slow and steady release of energy. Unlike sugary snacks that cause spikes and crashes in blood sugar, oats keep you feeling full longer and provide lasting energy throughout the day. They also contain a variety of B-vitamins that are essential for turning food into fuel, helping your body efficiently use the energy from the food you eat.

Healthy Fats from Nuts:

Almonds and peanuts are featured prominently in this dessert, and for good reason. Both nuts are rich in healthy fats, which are crucial for maintaining sustained energy. These fats, particularly monounsaturated fats, help stabilize blood sugar levels, keeping your energy steady. In addition to healthy fats, almonds and peanuts also provide protein, which helps in muscle recovery and keeps you feeling satisfied for longer.

Dark Chocolate for a Sweet Kick:

Let’s not forget the star of the show—dark chocolate. It’s not only delicious but also offers an array of health benefits. Dark chocolate (with a cocoa content of 70% or more) contains antioxidants, known as flavonoids, which have been shown to support cardiovascular health. Moreover, the natural caffeine and theobromine in dark chocolate provide a gentle energy boost without the jitteriness that often accompanies coffee or energy drinks. It’s the perfect addition to this dessert for both taste and a healthy energy lift.

Natural Sweeteners for Balanced Energy:

Honey is used in this dessert as a natural sweetener, adding just the right amount of sweetness without the blood sugar spikes that come with refined sugar. Honey contains antioxidants and has been shown to have anti-inflammatory properties. It also offers a quick energy boost, but since it’s combined with fiber-rich oats and protein-rich nuts, it doesn’t cause the crash that sugary treats often do.

Ingredients:

IngredientAmount
Peanuts100 g / 3.5 ounces
Oat flakes200 g / 7 ounces
Pumpkin seeds30 g / 1 ounce
Sunflower seeds30 g / 1 ounce
Almonds40 g / 1.4 ounces
Flaxseeds1 tbsp.
Honey2 tbsp. (or a little more)
Dark chocolate (without sugar)50 g / 1.7 oz
Salt flakesA pinch

Directions:

  1. In a large bowl, combine the peanuts, oat flakes, pumpkin seeds, sunflower seeds, almonds, and flaxseeds.
  2. Drizzle honey over the mixture and stir until everything is evenly coated.
  3. Break the dark chocolate into small pieces and melt it in the microwave or over a double boiler.
  4. Once melted, pour the chocolate over the mixture and stir thoroughly to combine.
  5. Sprinkle a pinch of salt flakes over the mixture and give it one last stir.
  6. Spread the mixture evenly onto a baking sheet lined with parchment paper.
  7. Refrigerate for at least one hour to allow the dessert to firm up.
  8. Once set, break the mixture into small, bite-sized pieces and serve.

Nutritional Information (per serving):

NutrientAmount
CaloriesApprox. 250-300 kcal per serving (depending on portion size)
Fat15-20 g (healthy fats from seeds and nuts)
Protein7-8 g
Carbs25-30 g (mostly from oats and honey)
Fiber4-6 g
Sugar5-7 g (mostly natural from honey and chocolate)
SodiumMinimal (depending on salt flakes used)

How to Incorporate This Super-Energy Dessert Into Your Routine

One of the best things about this dessert is its versatility. It’s perfect for various occasions and can be enjoyed at different times of the day to provide the energy you need. Here are a few ideas on how to incorporate it into your routine:

Pre-Workout Fuel:

If you’re looking for a pre-workout snack, this dessert is an excellent choice. The combination of healthy fats, protein, and slow-digesting carbohydrates provides a steady release of energy that can help you power through your workout. The chocolate also gives you a little extra boost, making it a great snack before heading to the gym.

Midday Snack:

When the afternoon slump hits, having a batch of this dessert on hand can be a lifesaver. Instead of reaching for sugary snacks or another cup of coffee, grab a piece of this Super-Energy Dessert. The high protein and fiber content will keep you full and energized, helping you stay focused and productive.

Breakfast Boost:

Looking for a nutritious breakfast that doesn’t require a lot of preparation? This dessert can double as a quick breakfast option. Pair it with a cup of green tea or your favorite smoothie, and you’ve got yourself a nutrient-packed meal to start the day.

Post-Workout Recovery:

After a workout, it’s essential to replenish your body with a combination of protein and healthy fats. This dessert does just that, making it an ideal post-workout treat. It helps with muscle recovery and provides the energy needed to keep your body functioning at its best.

Frequently Asked Questions (FAQs)

1. Can I make this dessert vegan?

Yes, absolutely! To make this dessert vegan, simply swap out the honey for maple syrup or agave nectar. You can also use a dairy-free chocolate option if needed. The rest of the ingredients are naturally plant-based.

2. Can I substitute the oats with something else?

While oats are a key ingredient in this recipe, you can try substituting them with other whole grains, such as quinoa flakes or amaranth. However, oats are ideal because they provide a great texture and are rich in fiber, making them a beneficial part of the recipe.

3. How long will this dessert stay fresh?

Once made, the Super-Energy Dessert will stay fresh in an airtight container in the refrigerator for up to a week. It can also be frozen for up to two months, allowing you to enjoy it whenever you need a quick, energizing snack.

4. Can I use other nuts instead of almonds and peanuts?

Yes! You can substitute any nuts you like in this recipe. Cashews, walnuts, or pistachios would all work wonderfully. Just keep in mind that different nuts may slightly alter the flavor and texture, but the energy-boosting benefits will still be there.

5. Is this dessert suitable for people with gluten sensitivities?

Yes, this dessert is naturally gluten-free as long as you ensure that the oats you use are certified gluten-free. Some oats are processed in facilities that also handle gluten-containing grains, so it’s always a good idea to check the packaging if you need to avoid gluten.

Conclusion: The Power of a Simple Dessert

In a world where quick fixes often come at the cost of long-term health, the Super-Energy Dessert stands out as a nourishing, guilt-free option that provides lasting energy. Packed with wholesome ingredients like seeds, nuts, and oats, it’s not just a treat for the taste buds—it’s a treat for your body.

The best part is that you can enjoy it knowing that it’s nourishing your body with healthy fats, fiber, and protein, all while offering a delicious sweetness from natural sources like honey and dark chocolate. Whether you’re looking to fuel up before a workout, need a midday snack, or want a satisfying post-workout treat, this dessert is versatile, easy to make, and full of nutrients.

The Super-Energy Dessert is more than just a recipe; it’s a testament to the power of simple, nutrient-dense foods that can elevate your energy, support your health, and satisfy your cravings in the best possible way.

So, the next time you need a boost, skip the processed snacks and enjoy a bite of this delicious, energizing treat. Your body will thank you!
Amal

The Ultimate Energy Boost: Super-Energy Dessert

This Super-Energy Dessert is the perfect balance of sweet, savory, and healthy, packed with seeds, nuts, oats, and dark chocolate. Designed to fuel your body with essential nutrients, it’s ideal for anyone looking for a boost in energy without the crash that comes from sugary snacks.
Prep Time 15 minutes
Cook Time 5 minutes
Total Time 1 hour 20 minutes
Servings: 12 -15 bite-sized pieces
Course: Dessert
Cuisine: Healthy

Ingredients
  

  • 100 g peanuts
  • 200 g oat flakes
  • 30 g pumpkin seeds
  • 30 g sunflower seeds
  • 40 g almonds
  • 1 tbsp flaxseeds
  • 2 tbsp honey or a little more
  • 50 g dark chocolate without sugar
  • Pinch of salt flakes

Method
 

  1. Prepare the Dry Ingredients: In a large bowl, mix together the peanuts, oat flakes, pumpkin seeds, sunflower seeds, almonds, and flaxseeds.
  2. Sweeten with Honey: Drizzle the honey over the dry ingredients and stir to coat everything evenly. You may add a little extra honey depending on how sweet you want your dessert.
  3. Melt the Chocolate: Break the dark chocolate into small pieces and melt it either in the microwave or using a double boiler. Stir the melted chocolate until smooth.
  4. Combine Everything: Pour the melted chocolate over the oat and nut mixture. Stir everything together thoroughly to ensure it is all well-coated.
  5. Add Salt: Sprinkle a pinch of salt flakes over the mixture, enhancing the flavors and balancing the sweetness.
  6. Chill and Set: Line a baking sheet with parchment paper and spread the mixture evenly over it. Refrigerate for about an hour or until the dessert firms up and becomes easier to break into pieces.
  7. Serve: Once set, break the mixture into bite-sized pieces and enjoy your homemade, energy-boosting snack.

Notes

  • Storage: Store the Super-Energy Dessert in an airtight container in the fridge for up to a week.
  • Substitutes: You can substitute the nuts or seeds with other options depending on your preferences. For example, walnuts or cashews can replace almonds, and chia seeds can replace flaxseeds.
  • Vegan Option: Use maple syrup or agave nectar instead of honey for a vegan-friendly version.
  • Sweetness Level: Adjust the honey amount based on how sweet you like your desserts. If you prefer it less sweet, reduce the honey or even eliminate it altogether.
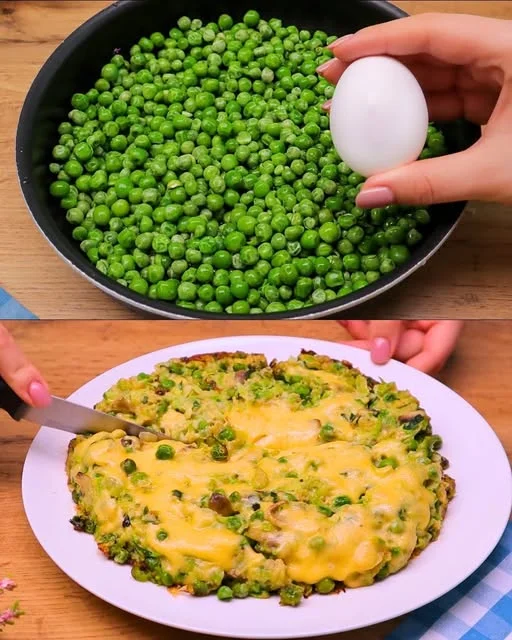
Garden to Table: The Pea and Zucchini Bake That Feeds More Than Hunger

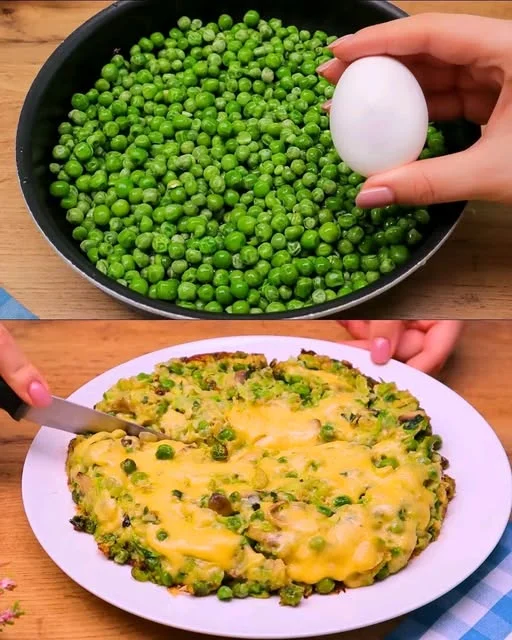
I still remember the quiet rhythm of my mother’s knife against the cutting board, the way her fingers nimbly turned simple vegetables into something warm, familiar, and deeply comforting. We never called it a casserole. It was just “the veggie bake,” something she’d throw together when the fridge was half-full and the garden was overly generous with zucchini.

It wasn’t a flashy dish. No crusty top, no golden panko crumbs. Just zucchini, peas, whatever herbs she had on hand, and a handful of cheese whisked in with eggs. She never measured. She cooked by feel, by instinct. As a child, I didn’t realize how special that kind of cooking was — how much love lived in those spontaneous creations.

This Pea and Zucchini Bake is a gentle echo of those evenings in the kitchen, the scent of parsley in the air, and the warmth of something lovingly made. Over time, I’ve adapted it — adding mushrooms for umami, celery for crunch, oats for a bit more heartiness. But the soul of it remains untouched. It’s humble, wholesome, and deeply nourishing — not just for the body, but for the heart.

Why This Bake Belongs in Your Kitchen

Some recipes earn a place in your regular rotation because they’re easy. Others stick around because they feel like home. This one is both.

At its heart, this bake is a celebration of vegetables. It’s flexible, affordable, and endlessly adaptable. More importantly, it’s the kind of food that leaves you feeling satisfied — not heavy, not guilty, just quietly full and content.

1. Zucchini: The Humble Hero

Zucchini often plays a supporting role in cooking — it’s the filler, the extra green, the thing you sneak into muffins. But here, zucchini gets to shine. Grated finely and baked gently, it releases just enough moisture to keep the dish tender while soaking up the flavor of herbs and cheese.

Not to mention, zucchini is rich in vitamin C, potassium, and antioxidants. It’s low in calories but high in satisfaction, especially when paired with hearty companions like peas and oats.

2. Sweet Green Peas: Nature’s Bright Note

There’s a sweetness that only peas can bring — that little pop of flavor that lifts every bite. Whether you’re using fresh, frozen, or even leftover peas from last night’s dinner, they add color, texture, and a dose of plant-based protein.

Peas are high in fiber and contain important nutrients like folate and manganese. They also help to balance out the savory depth of cheese and mushrooms.

3. Eggs and Cheese: The Binding Soul

The combination of eggs and cheese holds this bake together without making it too dense. Eggs provide structure and protein, while cheese adds richness and umami. Whether you use a sharp cheddar, mild mozzarella, or a blend of what you have in the fridge, the result is a creamy, golden bake with just the right amount of indulgence.

Ingredients

IngredientAmount
Zucchini2, grated
Celery stems3, chopped
Mushrooms7, sliced
Frozen peas300 grams
Fresh parsleyChopped, to taste
Green onionsChopped, to taste
Cheese150 grams, grated
Oatmeal6 tablespoons
Eggs3

Directions

  1. Preheat your oven to 180°C (350°F) and lightly grease a baking dish.
  2. In a large bowl, combine grated zucchini, chopped celery, sliced mushrooms, peas, parsley, and green onions.
  3. Add the grated cheese and oatmeal.
  4. Beat the eggs and pour them into the bowl. Mix until everything is well combined.
  5. Season with salt and pepper if desired.
  6. Transfer the mixture to the prepared baking dish and spread evenly.
  7. Bake for 30–35 minutes or until the top is golden and the center is set.
  8. Let it rest for a few minutes before slicing. Serve warm or at room temperature.

Nutritional Info (Per Serving – Approx. 6 servings)

NutrientAmount (approx.)
Calories185 kcal
Protein9 g
Carbohydrates14 g
Dietary Fiber3 g
Sugars3 g
Fat10 g
Saturated Fat3.5 g
Sodium180 mg
Calcium120 mg

Versatility at Its Best

One of the best things about this recipe is how adaptable it is. Here are a few ideas for how you can make it your own:

  • Add-ins: Chopped red bell peppers, grated carrots, or even a handful of spinach can seamlessly join the mix.
  • Protein boost: Add cooked lentils or shredded chicken if you’re looking to make it more filling.
  • Dairy-free: Use plant-based cheese and swap the eggs with flax eggs or a chickpea flour mixture.
  • Grain swap: Instead of oats, try cooked quinoa, bulgur, or even brown rice.
  • Flavor kicks: A pinch of smoked paprika, a grating of nutmeg, or a crumble of feta can take this bake in a new direction.

Perfect for Any Occasion

This isn’t just a dinner recipe. It fits into your day wherever you need it:

  • Brunch: Serve it warm with a dollop of Greek yogurt and crusty bread.
  • Lunchbox: It’s great cold or at room temperature, so it’s lunch-friendly for work or school.
  • Light dinner: Pair it with a crisp salad and a lemon vinaigrette.
  • Make-ahead: Bake once, eat for days. It reheats beautifully.

It’s also naturally vegetarian, making it a fantastic centerpiece for meatless Mondays or when you’re feeding a mixed crowd.

Tips for Getting It Just Right

  • Grate and squeeze the zucchini: If your zucchinis are very watery, give them a gentle squeeze before mixing to avoid sogginess.
  • Don’t overmix: Just combine the ingredients until they come together — this keeps the texture tender.
  • Use a well-greased baking dish: Helps the bake release easily and gives you those golden edges.
  • Let it rest before slicing: It firms up slightly as it cools, making it easier to cut clean slices.

FAQs About the Pea and Zucchini Bake

Can I use fresh peas instead of frozen?
Absolutely. Just blanch them for 1–2 minutes in boiling water to soften slightly before adding.

Is this recipe gluten-free?
Yes — as long as you use certified gluten-free oats. It’s a great naturally gluten-free option without any special substitutions.

What type of cheese works best?
This recipe is forgiving. Cheddar, mozzarella, gouda, or a mild feta all work beautifully. You can even combine a couple for added depth.

Can I make it ahead of time?
Yes. You can prepare the mixture in the morning and bake it later. Or bake it fully and refrigerate — it reheats well in the oven or microwave.

Can it be frozen?
Yes. Bake it, let it cool, and then wrap slices individually. Thaw overnight in the fridge and reheat before serving.

What if I don’t have mushrooms?
You can leave them out or replace them with another veggie like finely chopped broccoli, spinach, or even sun-dried tomatoes.

How do I store leftovers?
Store in an airtight container in the fridge for up to 4–5 days. You can also freeze for up to 2 months.

Conclusion: A Recipe Rooted in Nourishment

The Pea and Zucchini Bake isn’t just a clever way to use up vegetables — it’s a reflection of how comforting and creative cooking can be. It’s the kind of dish you throw together with what you have, only to discover it’s exactly what you needed.

For me, it’s become a symbol of balance — between healthy and hearty, simple and satisfying, past and present. It reminds me of my mother’s quiet generosity, of cozy family dinners and the joy of turning the ordinary into something special.

I hope it finds a place in your home too — whether you’re cooking for your kids, packing lunch for the week, or simply nourishing yourself with something that tastes like care.

Amal

Garden to Table: The Pea and Zucchini Bake That Feeds More Than Hunger

This Pea and Zucchini Veggie Bake is a delightful, wholesome dish that brings together the best of fresh vegetables, cheese, and oats. Perfect for a light dinner or a satisfying lunch, it’s a colorful, nutrient-packed bake that’s easy to prepare and perfect for meal prep. It’s a savory, comforting dish your whole family will love.
Prep Time 10 minutes
Cook Time 35 minutes
Total Time 45 minutes
Servings: 4 –6 servings
Course: Main Dish
Cuisine: Vegetarian

Ingredients
  

  • 2 zucchinis grated
  • 3 celery stems chopped
  • 7 mushrooms sliced
  • 300 grams frozen peas
  • Fresh parsley chopped (to taste)
  • Fresh green onions chopped (to taste)
  • 150 grams cheese grated (cheddar, mozzarella, or your choice)
  • 6 tablespoons oatmeal
  • 3 eggs

Method
 

  1. Preheat your oven to 180°C (350°F) and grease a baking dish with a light coating of oil or butter.
  2. In a large bowl, combine the grated zucchini, chopped celery, sliced mushrooms, peas, parsley, and green onions.
  3. Add the grated cheese and oatmeal to the vegetable mixture and mix well.
  4. Beat the eggs in a separate bowl and then pour them into the vegetable mixture. Stir everything together until it’s evenly combined.
  5. Season with salt and pepper to taste.
  6. Transfer the mixture into your prepared baking dish and spread it out evenly.
  7. Bake for 30-35 minutes, or until the top is golden and the center is set.
  8. Remove from the oven and let it cool for a few minutes before slicing and serving.

Notes

  • Vegan Variation: You can make this dish vegan by using a plant-based cheese alternative and flax or chia eggs instead of regular eggs.
  • Storage: Leftovers can be stored in the fridge for up to 3 days and can be reheated in the oven or microwave. It also freezes well for up to 2 months.
  • Add-ins: Feel free to experiment with other vegetables like bell peppers, spinach, or carrots. You can also add a protein like cooked chicken or lentils for extra heartiness.
  • Gluten-Free Option: Use gluten-free oats or another gluten-free grain in place of regular oats for a gluten-free variation.

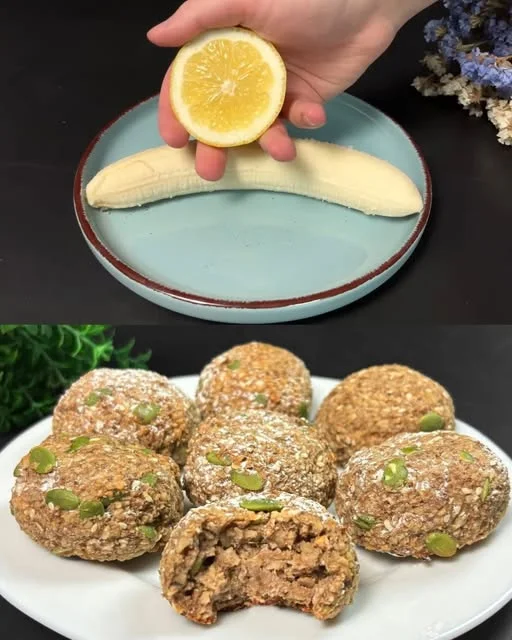
Banana & Oatmeal Energy Bites: Wholesome Snacks for Heart and Home

Some recipes carry the comfort of memory. Not because they were passed down for generations, or scribbled in a grandmother’s notebook, but because they simply happened in a moment when you needed them most. This banana and oatmeal snack came to life one quiet morning when time was short, the kitchen was nearly bare, and I needed something nourishing to keep me going.

It wasn’t anything planned. A ripe banana, a cup of oats, some nuts in the back of the cupboard, and a spark of inspiration from a need for something natural — something real. I remember pressing the sticky mixture into bite-sized rounds and letting them chill while I cleaned up. They weren’t fancy, but the first bite brought such a sense of satisfaction. Sweet, chewy, slightly nutty, and bright with lemon — they were like energy packed into tiny, joyful rounds.

Since then, these bites have become a staple in my kitchen. They’ve been lunchbox saviors, post-yoga rewards, road trip companions, and thoughtful little gifts wrapped in parchment and string. They remind me that food doesn’t always have to be extravagant to be extraordinary. Sometimes, it’s the most humble recipes that stay with us the longest.

Why These Bites Are More Than Just a Snack

Energy bites have surged in popularity over the past decade, and for good reason. They offer a perfect blend of nutrients in a small, portable form. But this recipe — combining oatmeal, banana, walnuts, and seeds — brings something special to the table.

Let’s explore what makes them stand out.

1. A Natural Energy Boost

Unlike sugary granola bars or processed snacks, these bites rely on the natural sweetness of ripe banana and the slow-burning carbs in oats to give you sustainable energy. Oats are rich in soluble fiber, which helps regulate blood sugar levels and keeps hunger at bay. Bananas, on the other hand, provide quick-release glucose along with potassium and vitamin B6, supporting muscle function and brain health.

2. Heart-Healthy Fats

Walnuts and pumpkin seeds are known for their heart-protective benefits. They’re packed with omega-3 fatty acids, antioxidants, and magnesium — all crucial for maintaining a healthy cardiovascular system. A tablespoon of sesame seeds adds a subtle crunch along with calcium and iron.

These bites aren’t just tasty. They’re engineered by nature to fuel your body with kindness.

3. Perfect for All Ages

Whether you’re feeding toddlers or teenagers, active adults or aging parents, these bites check all the boxes. They’re soft and chewable, but dense and satisfying. You can even shape them into bars for easier packing in lunchboxes or picnic bags.

No added refined sugar, no gluten (if using certified oats), and no dairy — they fit most dietary needs and are endlessly adaptable.

Ingredients

IngredientAmount
Oatmeal1 cup
Walnuts1 cup
Vanilla sugar1 tablespoon
Sesame seeds1 tablespoon
Pumpkin seeds40 grams
Banana1, ripe
Lemon juiceA squeeze (to taste)

Directions

  1. In a food processor, combine the walnuts, oatmeal, sesame seeds, and pumpkin seeds. Pulse until the mixture becomes coarse and crumbly.
  2. Add the ripe banana, vanilla sugar, and a squeeze of lemon juice. Blend again until a sticky mixture forms.
  3. Scoop out small portions and roll them into bite-sized balls or flatten them into mini bars.
  4. Chill in the refrigerator for at least 30 minutes to firm up.
  5. Store in an airtight container in the fridge for up to 5 days.

Nutrient Breakdown (per serving, approx. 12 servings)

NutrientAmount (approx.)
Calories110 kcal
Protein3 g
Carbohydrates10 g
Dietary Fiber2 g
Sugars3 g (natural)
Fat7 g
Saturated Fat0.7 g
Sodium1 mg
Potassium110 mg

Ideas to Customize Your Bites

The basic formula is solid, but once you’ve made these a couple of times, you’ll be inspired to play. Here are a few variations to try:

  • Add spice: Cinnamon, cardamom, or ground ginger can add depth and warmth.
  • Chocolate twist: Mix in a few dark chocolate chips or cacao nibs for an indulgent flair.
  • Coconut dream: Roll the bites in unsweetened shredded coconut for added texture.
  • Nut-free version: Swap walnuts for sunflower seeds if you need an allergy-safe snack.
  • Protein punch: Add a scoop of unflavored or vanilla protein powder for an extra boost.

The possibilities are truly endless — all you need is one bowl, one ripe banana, and a bit of imagination.

Storage and Shelf Life

These bites are not just delicious — they’re practical. Once made, they store beautifully:

  • Refrigerator: Keep them in an airtight container for up to 5–7 days.
  • Freezer: Freeze on a tray, then store in a bag or container. They’ll last for up to 3 months. Just thaw for a few minutes before eating.

Whether you prep a batch on Sunday or make them fresh in the morning, they’ll be ready to grab whenever you need a pick-me-up.

Serving Suggestions

These bites are a snack at heart, but they can be more:

  • Pair with Greek yogurt and fruit for a light breakfast.
  • Enjoy with a cup of tea in the afternoon.
  • Crumble over smoothie bowls or porridge.
  • Take them on hikes or long car rides.
  • Use them as a post-workout recovery snack.

They’re also a thoughtful addition to care packages or new parent food baskets. A little love, packed with nutrients.

Frequently Asked Questions

Can I bake these bites instead of chilling them?

Yes, if you prefer a firmer, cookie-like texture, you can bake them at 180°C (350°F) for about 10–12 minutes. They’ll come out lightly golden and hold together well.

Can I use instant oats or steel-cut oats?

Rolled oats are best for this recipe, offering the perfect balance of chewiness and absorbency. Instant oats can be used in a pinch, but the texture will be softer. Steel-cut oats are not recommended unless pre-cooked.

What can I substitute for walnuts?

You can use almonds, pecans, sunflower seeds, or even tahini if you want a nut-free version. Just keep the same quantity for balance.

Can I make this recipe vegan?

It already is! No dairy, eggs, or animal products are used. Just make sure your vanilla sugar or added mix-ins (like chocolate chips) are plant-based.

How do I know when they’re chilled enough?

After about 30 minutes in the fridge, they should be firm to the touch. If you’re in a hurry, pop them in the freezer for 10–15 minutes.

Why This Recipe Belongs in Your Kitchen

In today’s fast-paced world, we often reach for convenience at the expense of health. But this recipe is a gentle reminder that you don’t have to choose between the two. With just a few pantry staples, a banana, and five minutes of effort, you can create something that feels indulgent and nourishing at the same time.

It’s about simplicity, yes. But also about intention — taking a moment to feed yourself something real.

Whether you’re making them with kids on a rainy afternoon, packing them into a work bag, or enjoying them solo with your morning coffee, these little bites have a way of grounding you. They’re more than just snacks. They’re a return to the kind of food that gives back.

Conclusion: Nourish, One Bite at a Time

Not every recipe needs a long story. But sometimes, the ones that show up unexpectedly — the ones you create out of what you already have — become part of your rhythm. These banana and oatmeal energy bites are one of those recipes.

They’re not complicated. They’re not fussy. But they are full of heart.

So next time you find yourself with a soft banana on the counter and a moment to spare, give this recipe a try. Shape them with your hands, chill them with love, and enjoy the kind of snack that feeds more than just hunger.

It feeds intention, comfort, and care — one bite at a time.

Amal

Banana & Oatmeal Energy Bites: Wholesome Snacks for Heart and Home

These no-bake banana and oatmeal bites are packed with wholesome ingredients like walnuts, seeds, and a hint of vanilla. Naturally sweet and delightfully chewy, they’re the perfect snack to fuel your day — whether you’re on the go or enjoying a quiet moment at home.
Prep Time 10 minutes
Total Time 40 minutes
Servings: 12 bites
Course: Snack
Cuisine: International

Ingredients
  

  • 1 cup oatmeal
  • 1 cup walnuts
  • 1 tablespoon vanilla sugar
  • 1 tablespoon sesame seeds
  • 40 grams pumpkin seeds
  • 1 ripe banana
  • A squeeze of lemon juice

Method
 

  1. Add the walnuts, oatmeal, sesame seeds, and pumpkin seeds to a food processor. Pulse until the mixture is crumbly.
  2. Add the banana, vanilla sugar, and a squeeze of lemon juice. Blend again until a sticky dough forms.
  3. Scoop small portions and roll into balls. Optionally, flatten them slightly into discs.
  4. Place in the refrigerator for at least 30 minutes to firm up.
  5. Store in an airtight container in the fridge for up to 5 days.

Notes

  • You can substitute other seeds (like chia or sunflower) for variety.
  • To make them vegan and sugar-free, replace vanilla sugar with pure vanilla extract and add a touch of maple syrup if more sweetness is desired.
  • Add a pinch of cinnamon or nutmeg for warmth and flavor variation.
  • Great for meal prep, school snacks, or as a healthier dessert option.

Green & Glorious: A Pea and Zucchini Bake That Nourishes the Soul

There’s something deeply comforting about a warm oven dish coming together on a quiet afternoon — especially one that’s packed with green goodness and soft, savory aromas. This Pea and Zucchini Veggie Bake is more than just a healthy option. For me, it’s a nostalgic dish with roots in simplicity and the gentle creativity of home cooking.

I first made this bake during a summer visit to my grandmother’s house in the countryside. Her kitchen always had this effortless way of turning what was fresh and available into something that felt special. That particular day, her garden had overflowed with zucchinis, and the freezer was well-stocked with peas from earlier harvests. She didn’t believe in wasting anything. In her world, everything had potential.

She didn’t follow a recipe, of course. A bit of this, a handful of that, a few eggs to bind — and out came a golden, cheesy bake with steam rising as it hit the table. We ate it outdoors, birds chirping, with cool glasses of lemonade and simple joy. Since then, I’ve adapted that freeform spirit into this structured, flavorful dish — one that I come back to whenever I need nourishment that feels a little like a hug.

Why This Recipe Works for Every Table

This veggie bake is ideal for just about any meal. It’s incredibly versatile, nutrient-rich, and easy to make. Whether you’re feeding picky eaters, trying to eat more plant-based, or simply craving something warm and comforting, this recipe fits the moment.

Here’s why it shines:

1. It’s Flexible by Nature

The stars of this bake — zucchini, peas, and mushrooms — are common, easy-to-find ingredients. But the dish welcomes substitutions without compromising flavor. Swap peas for corn, add red bell peppers, or throw in chopped spinach for extra greens. It’s a recipe that allows creativity and accommodates seasonal produce beautifully.

2. It’s Packed with Plant-Based Nutrition

Zucchini provides hydration and fiber, while peas deliver plant protein and sweetness. Mushrooms bring umami and minerals, and oats work as a wholesome, gluten-friendly binding agent. With eggs and cheese for richness and protein, it’s a satisfying dish that won’t leave you missing meat.

3. Great for Make-Ahead and Meal Prep

This bake stores wonderfully and reheats even better. It’s perfect for meal planning, lunchboxes, brunch spreads, or a light dinner with soup or salad. It slices well and can be frozen in portions for busy weeks.

Ingredients

IngredientAmount
Zucchini, grated2
Celery stems, chopped3
Mushrooms, sliced7
Frozen peas300 grams
Fresh parsley, choppedAs desired
Green onions, choppedAs desired
Cheese, grated150 grams
Oatmeal6 tablespoons
Eggs3
Salt and pepperTo taste

Directions

  1. Preheat and Prep: Preheat your oven to 180°C (350°F). Lightly grease or line a baking dish.
  2. Mix the Vegetables: In a large bowl, combine the grated zucchini, chopped celery, sliced mushrooms, and peas.
  3. Add Fresh Flavor: Stir in chopped parsley and green onions for a burst of freshness.
  4. Bind the Mixture: Add the grated cheese, oatmeal, and eggs. Season generously with salt and pepper. Mix until fully combined.
  5. Bake to Perfection: Pour the mixture into the prepared dish and spread evenly. Bake for 30–35 minutes or until golden on top and firm in the center.
  6. Cool and Serve: Let it rest for a few minutes before slicing. Serve warm or at room temperature.

Nutrient Breakdown (per serving, serves approx. 6)

NutrientAmount (approx.)
Calories230–260 kcal
Protein12–14 g
Carbohydrates18–20 g
Fat12–14 g
Fiber4–5 g
CalciumModerate–High
IronModerate

The Appeal of Bakes: Simple, Yet So Nourishing

There’s something about baked dishes that feels inherently homey. A bake like this one doesn’t rely on fancy cooking techniques or complicated prep. It’s made in one bowl, poured into a dish, and cooked slowly until golden. That kind of effortlessness is exactly what makes it magical.

The texture is one of the highlights: soft and tender in the center with slightly crispy, cheesy edges. The oats give it a subtle bite, the cheese melts into creamy pockets, and the zucchini melts into the dish while keeping it moist and light.

Serving Suggestions: Elevate the Everyday

Here are a few favorite ways to serve your Pea and Zucchini Bake:

  • Brunch Boards: Cut the bake into small squares and serve with smoked salmon, avocado slices, and cherry tomatoes.
  • Light Dinners: Pair it with a tangy arugula or citrus-dressed salad and a glass of chilled white wine.
  • Lunchbox Hero: It travels well and tastes great cold or warm — perfect with a dollop of herbed yogurt or hummus.
  • Side Dish Upgrade: Serve it alongside grilled chicken, tofu skewers, or roasted vegetables for a well-rounded meal.

Storage and Reheating Tips

Once cooled, the bake can be refrigerated in an airtight container for up to 4 days. To reheat, place in a preheated oven at 180°C (350°F) for 10–12 minutes or until warmed through. You can also microwave individual portions, though the oven helps maintain its texture best.

If freezing, wrap portions individually. To reheat from frozen, thaw in the fridge overnight, then bake until heated thoroughly.

Frequently Asked Questions

Can I make this recipe dairy-free?

Yes, absolutely. Swap the cheese for a plant-based alternative or nutritional yeast. Use unsweetened plant-based milk in place of regular milk. The texture remains lovely with just a bit of tweaking.

Can I make it gluten-free?

Oats are naturally gluten-free, but make sure to use certified gluten-free oats to avoid cross-contamination. Also, avoid any flour-based additions or thickeners unless they are gluten-free.

What’s the best way to keep the bake from becoming soggy?

Make sure to squeeze out any excess moisture from the grated zucchini. You can use a clean tea towel or cheesecloth. Also, avoid using too much liquid — the eggs and cheese do the binding work perfectly.

Is this recipe kid-friendly?

Definitely. The soft texture and cheesy flavor are usually a big hit with children. If they’re picky about seeing greens, you can finely grate or chop the vegetables so they blend more invisibly into the bake.

Can I serve this cold?

Yes — it actually tastes delicious chilled or at room temperature. It makes a great picnic item or easy lunch straight from the fridge.

How do I make this richer or more indulgent?

You can add a splash of cream to the mixture, use a blend of cheeses (like mozzarella and sharp cheddar), or top with breadcrumbs and extra cheese before baking for a gratin-style finish.

Nutrition at a Glance

While specific nutritional values will vary based on the exact ingredients used, this bake is generally:

  • High in fiber thanks to peas, celery, and zucchini
  • A good source of protein from eggs, cheese, and peas
  • Low in added fat, depending on your choice of cheese and milk
  • Rich in vitamins A, C, and K from fresh vegetables
  • Great for supporting digestion and overall energy

Conclusion: A Dish That Brings Us Back to the Basics

This Pea and Zucchini Veggie Bake is more than just a recipe. It’s a reminder that the most wholesome meals are often the simplest. No heavy sauces, no long lists of ingredients — just fresh vegetables, a bit of binding, and the magic of the oven.

It’s the kind of dish you make when you want to feed the people you love something hearty and nourishing. It invites you to use what you have, to trust your taste, and to enjoy the quiet satisfaction of pulling something homemade and golden from the oven.

As you prepare this dish, maybe you’ll feel a little of what I did that summer in my grandmother’s garden kitchen — gratitude for simplicity, joy in creating, and peace in knowing that yes, vegetables can absolutely be the star of the plate.

Amal

Green & Glorious: A Pea and Zucchini Bake That Nourishes the Soul

A vibrant, savory bake loaded with zucchini, sweet peas, mushrooms, and herbs, bound together with eggs and cheese. This hearty, wholesome dish is easy to make, full of texture, and perfect for brunch, lunch, or a light dinner.
Prep Time 15 minutes
Cook Time 35 minutes
Total Time 50 minutes
Servings: 4 –6 servings
Course: Main Dish
Cuisine: Comfort Food

Ingredients
  

  • 2 zucchini grated
  • 3 celery stems chopped
  • 7 mushrooms sliced
  • 300 grams frozen peas
  • Fresh parsley chopped (as desired)
  • Fresh green onions chopped (as desired)
  • 150 grams cheese grated
  • 6 tablespoons oatmeal
  • 3 eggs
  • Salt and pepper to taste
  • Oil or butter for greasing the baking dish

Method
 

  1. Preheat your oven to 180°C (350°F) and grease a baking dish with oil or butter.
  2. In a large bowl, mix the grated zucchini, chopped celery, sliced mushrooms, and peas.
  3. Add chopped parsley and green onions for fresh flavor.
  4. Stir in the grated cheese and oatmeal.
  5. Crack in the eggs, season with salt and pepper, and mix until fully combined.
  6. Pour the mixture into the prepared baking dish and spread evenly.
  7. Bake for 30–35 minutes, or until the top is golden and the center is set.
  8. Let cool for a few minutes before slicing. Serve warm or at room temperature.

Notes

  • For extra flavor, try adding garlic powder, smoked paprika, or a pinch of chili flakes.
  • You can use quick oats if you don’t have oatmeal.
  • This dish stores well in the fridge and can be reheated or enjoyed cold the next day.
  • Great as a main course with a salad or as a side with grilled protein.

Zucchini Tastes Better Than Meat: A Recipe That Changed How I Cook

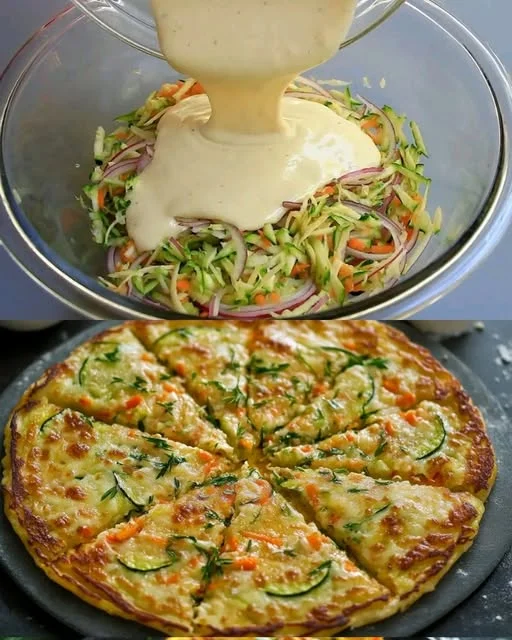
There’s a quiet joy in discovering that something simple can be surprisingly extraordinary. That was exactly how I felt the first time I made these zucchini fritters. It was one of those evenings when the fridge wasn’t particularly full — a lone zucchini, a couple of carrots, half an onion, and some pantry basics. Not exactly the makings of a feast. Or so I thought.

Growing up in a meat-loving household, vegetables were often side characters — steamed, boiled, or sautéed as an afterthought. But life changes you. Health goals, ethical choices, and the pursuit of simpler, cleaner eating slowly pushed me to explore plant-forward meals. I still remember how skeptical I was. Could zucchini, of all things, really satisfy?

That night I grated the vegetables, stirred together a quick batter, and dropped spoonfuls into a hot skillet. The kitchen filled with an aroma I hadn’t expected — sweet from the onions, savory from the sizzling zucchini, and somehow warm and nostalgic. One bite in, and I was floored. Crisp on the edges, tender inside, and full of natural flavor — not masked, not hidden — just celebrated. I served them with a spoonful of Greek yogurt and a squeeze of lemon, and it became a ritual that stuck.

Since then, I’ve made these fritters for everyone: friends, family, picky eaters, meat-lovers, and skeptical guests. And each time, I hear the same thing: “I didn’t think zucchini could taste this good.”

This isn’t just a recipe. It’s a quiet revolution — one bite at a time.

A Love Letter to Zucchini

Zucchini is often underestimated. It doesn’t boast bold colors or intense flavors. But that’s its superpower — its subtlety. It’s incredibly versatile, soaking up seasoning and adapting to almost any cuisine. When shredded and pan-fried in these fritters, zucchini becomes something far more interesting: juicy yet crisp, earthy yet delicate.

Pair it with the gentle sweetness of carrots, the depth of onions, and the richness of egg and flour, and suddenly, your skillet becomes a canvas of textures and flavors. These fritters aren’t pretending to be something they’re not — they’re just really, really good.

And if you’re trying to introduce more vegetables into your meals (or into your kids’), this is one of the easiest and most satisfying ways to do it.

Ingredients

IngredientAmount
Carrot, shredded50 g (½ cup)
Zucchini, shredded1 zucchini (150 g or 1 cup)
Onion, thinly sliced½ small (50 g or ½ cup)
Egg1
Milk100 ml (⅓ cup)
All-purpose flour50 g (⅓ cup)
Salt¼ teaspoon (or to taste)
Black pepper¼ teaspoon (or to taste)
Oil for pan-fryingAs needed

Directions

  1. Prep the Veggies: Shred the carrot and zucchini using a grater. Slice the onion into thin strips. If the zucchini is very moist, lightly squeeze out excess water.
  2. Mix the Base: In a mixing bowl, combine the shredded vegetables and onion with the egg and milk. Stir until combined.
  3. Add the Dry: Add flour, salt, and black pepper. Mix until a thick batter forms that holds its shape.
  4. Fry Until Golden: Heat a non-stick skillet over medium heat and add a little oil. Drop spoonfuls of the batter into the pan and flatten slightly.
  5. Cook and Flip: Cook for 2–3 minutes per side until golden brown and crisp. Repeat with remaining batter.
  6. Serve Warm: Serve immediately with yogurt, sour cream, or your favorite dip.

Nutrient Breakdown (per fritter, approx. 6 fritters)

NutrientAmount (approx.)
Calories80–90 kcal
Protein3 g
Carbohydrates8 g
Fat4 g
Fiber1.2 g
Sodium100 mg
Sugar2 g

Why This Recipe Just Works

These fritters strike a beautiful balance. They’re light, but they fill you up. They’re comforting, but not heavy. Here’s what makes them special:

  • Simplicity: Made from just a few everyday ingredients.
  • Flavor harmony: The sweetness of carrot and onion balances the zucchini’s mildness.
  • Texture contrast: Crisp on the outside, soft and moist inside.
  • Customizable: Add herbs, spices, or even cheese to suit your taste.
  • Budget-friendly: Great for using up produce that’s on its last leg.
  • Kid-friendly: Even picky eaters tend to fall for the crispy edges and fun shape.

Whether served hot off the pan or cooled slightly and packed in a lunchbox, these fritters never disappoint.

Ways to Serve Zucchini Fritters

These fritters are surprisingly flexible. You can enjoy them as a:

  • Light lunch with a side salad and lemony yogurt dressing
  • Appetizer topped with a dollop of sour cream or garlic aioli
  • Brunch dish alongside poached eggs or grilled tomatoes
  • Vegetarian burger patty sandwiched in a toasted bun with toppings
  • Snack with dipping sauces like tzatziki, hummus, or spicy ketchup

They even work cold, tucked into wraps or sandwiches for an easy lunch option.

Creative Additions & Variations

Want to switch things up? This recipe invites creativity. Here are some popular (and delicious) twists:

  • Herbs: Add chopped dill, parsley, or cilantro to the batter.
  • Spices: Mix in a pinch of cumin, smoked paprika, or turmeric.
  • Cheese: A sprinkle of feta, cheddar, or mozzarella gives a richer flavor.
  • Grains: Replace a bit of the flour with oat flour or chickpea flour for added nutrition.
  • Greens: Finely chop spinach or kale and mix into the batter.
  • Heat: A few chili flakes or a splash of hot sauce give it a kick.

This recipe is endlessly adaptable to your pantry and preferences.

Storage & Reheating Tips

These fritters can be made ahead and reheated — ideal for meal prep or busy weeknights.

  • Fridge: Store cooked fritters in an airtight container for up to 3 days.
  • Freezer: Freeze on a tray, then transfer to a bag. They’ll keep for up to a month.
  • Reheat: Warm in a toaster oven or skillet to restore their crispness (avoid microwaving if you want the crunch).

Frequently Asked Questions (FAQs)

Can I bake these instead of frying?
Yes! Brush the fritters lightly with oil and bake them at 400°F (200°C) for about 15–20 minutes, flipping halfway. They won’t be quite as crispy but will still be delicious.

Do I need to peel the zucchini or carrot?
No need to peel either — just wash well. The skins add color, nutrients, and texture.

What if my batter is too wet or too dry?
If your batter feels too wet, add a little more flour. If it’s too dry, add a splash of milk. The consistency should be thick but scoopable.

Can I make this recipe gluten-free?
Yes, you can replace the flour with a gluten-free flour blend or chickpea flour. The results are slightly different in texture but still tasty.

How do I get the fritters extra crispy?
Be sure to squeeze out excess water from the zucchini, don’t overcrowd the pan, and let the oil get hot before adding the batter.

Is this recipe suitable for kids?
Absolutely. In fact, it’s a sneaky way to get more veggies into their diet. You can even cut the fritters into fun shapes using cookie cutters.

Can I add protein to make it more filling?
Yes! Try folding in a bit of cooked quinoa, canned tuna, or shredded cooked chicken — but reduce the liquid slightly to balance the mix.

The Power of Simple Things

It’s easy to fall into the belief that satisfying meals need to be complicated, expensive, or meat-centric. But recipes like these zucchini fritters challenge that idea in the best way possible. They remind us that the heart of good cooking lies in attention, balance, and care — not in fancy labels or extravagant ingredients.

When vegetables are given the spotlight and treated with respect, they shine in ways we often forget they can. These fritters are more than just a clever way to use up zucchini — they’re a gentle lesson in minimalism, creativity, and nourishment.

Conclusion: When Less Truly Is More

This zucchini fritter recipe started as a necessity and became a staple — the kind of dish that never feels repetitive, always welcomes change, and somehow hits the spot every time. Whether you’re a lifelong vegetarian, a curious omnivore, or just someone looking to try something fresh and easy, this recipe is a keeper.

It’s warm. It’s crisp. It’s flavorful.
And maybe, just maybe — zucchini really does taste better than meat.

Amal

Zucchini Tastes Better Than Meat: A Recipe That Changed How I Cook

Crispy on the outside, tender on the inside, these zucchini fritters bring together simple ingredients in the most flavorful way. They’re quick to make, endlessly satisfying, and a perfect plant-powered alternative to heavier meat-based dishes.
Prep Time 10 minutes
Cook Time 10 minutes
Total Time 20 minutes
Servings: 6 –8 fritters
Course: Snack
Cuisine: Mediterranean-Inspired

Ingredients
  

  • 50 g ½ cup shredded carrot
  • 1 zucchini 150 g or 1 cup, shredded
  • ½ small onion 50 g or ½ cup, sliced into thin strips
  • 1 egg
  • 100 ml ⅓ cup milk
  • 50 g ⅓ cup all-purpose flour
  • ¼ teaspoon salt or to taste
  • ¼ teaspoon black pepper or to taste
  • Oil for pan-frying

Method
 

  1. Place the shredded zucchini in a clean towel and squeeze out any excess moisture.
  2. In a mixing bowl, combine the zucchini, carrot, and sliced onion.
  3. Add the egg, milk, salt, and pepper. Mix well.
  4. Stir in the flour and mix until a thick, scoopable batter forms.
  5. Heat a skillet over medium heat and add enough oil to lightly coat the bottom.
  6. Drop spoonfuls of the batter into the hot pan and flatten slightly with the back of a spoon.
  7. Cook for 2–3 minutes per side or until golden and crisp.
  8. Remove and drain on paper towels. Serve warm with a dip or yogurt sauce if desired.

Notes

  • For a gluten-free version, substitute the all-purpose flour with chickpea flour or gluten-free flour.
  • Add a pinch of paprika or garlic powder for extra flavor.
  • These fritters also taste great cold or at room temperature — perfect for lunchboxes or meal prep.
  • Try topping them with a poached egg or serving with a salad for a light, balanced meal.

Crispy Comfort: The Story Behind These Parmesan Potato Fritters

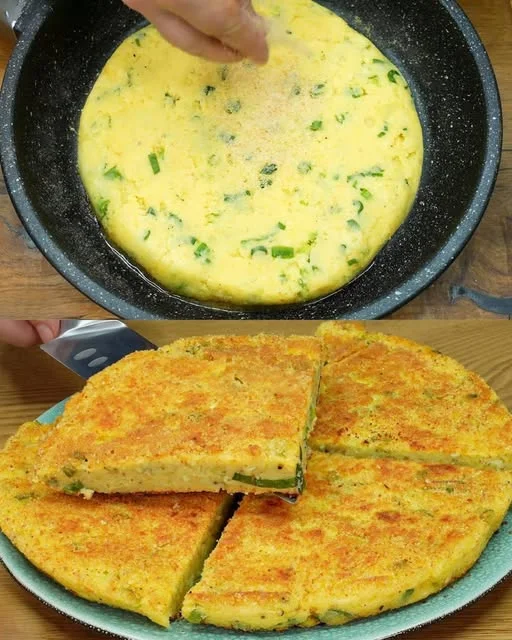
Some recipes are born out of luxury — expensive ingredients, elaborate methods, or restaurant-style flair. But others, the ones I hold closest to my heart, come from necessity. This particular one—Parmesan Potato Fritters—came from a quiet winter afternoon, standing in front of my nearly empty fridge with a leftover bowl of mashed potatoes and one single egg.

I was a college student at the time, living in a tiny apartment where the heating worked half the time, and the kitchen was little more than a counter and a burner. It had been a long week of exams, instant noodles, and late-night cramming. I was homesick, cold, and craving something that felt warm in more ways than one.

That day, I remembered how my grandmother used to make little patties out of mashed potatoes, crisping them on a skillet and serving them with sour cream or whatever pickles she had in her cellar. She never called them “fritters” — just “those golden things.” They were crispy at the edges, soft in the middle, and seasoned with whatever she had on hand. They were modest. They were comforting. They were hers.

So, I mashed the potatoes, cracked the lone egg, added the last of the Parmesan, and shaped the mixture into little patties. I coated them in breadcrumbs and fried them until golden. The smell alone lifted my mood, but the first bite — hot, creamy, cheesy, with that golden crunch — felt like a hug on a plate.

Since that day, I’ve made countless variations. Some with herbs, others with shredded vegetables, sometimes with spices from different cuisines. But no matter how much I dress them up, the heart of this recipe stays the same: turning simple ingredients into something that tastes like home.

Why These Fritters Work Every Time

There’s a certain magic in simplicity. This recipe uses just a handful of ingredients — many of which you likely already have in your kitchen — and transforms them into a snack or side dish that delivers on flavor, texture, and comfort.

The mashed potatoes serve as a creamy, soft base that’s naturally starchy enough to hold shape with just one egg. The Parmesan adds a salty, umami depth that elevates the flavor without overwhelming the mildness of the potato. A little flour binds everything together, while chopped spring onions offer freshness and a subtle bite.

The final touch — breadcrumbs — give these fritters their golden, irresistible crust. Frying them in a shallow pan means you get that beautiful crispiness without deep-frying. The result? A golden round with a tender center and a satisfyingly crunchy exterior.

Whether served hot off the pan or reheated the next day, these fritters are always crowd-pleasers.

Ingredients

IngredientAmount
Potatoes (peeled and boiled)2 medium
Egg1
Parmesan cheese¼ cup, grated
All-purpose flour2 tablespoons
Spring onions1–2, chopped
Breadcrumbs½ cup
Salt and pepperTo taste
Oil (for frying)As needed

Directions to Crispy Perfection

  1. Mash and Mix: In a bowl, mash the boiled potatoes until smooth. Let them cool slightly.
  2. Form the Base: Add the egg, grated Parmesan, flour, chopped spring onions, salt, and pepper. Mix until fully combined and easy to shape.
  3. Shape the Patties: Scoop out about 2 tablespoons of mixture and form into small patties.
  4. Coat and Crisp: Roll each patty in breadcrumbs to coat evenly.
  5. Fry to Golden Glory: Heat a shallow layer of oil in a pan over medium heat. Fry the fritters for 2–3 minutes per side, or until golden brown and crispy.
  6. Drain and Serve: Transfer to a paper towel-lined plate. Serve warm, optionally with sour cream, yogurt, or a dip of your choice.

Nutrient Snapshot (per 1 fritter, approx. 8 fritters)

NutrientAmount (approx.)
Calories90–110 kcal
Protein3 g
Carbohydrates10 g
Fat5 g
Fiber1 g
Sodium110 mg

Perfect Occasions for Parmesan Potato Fritters

These fritters are incredibly versatile and fit a variety of meals and moods. Here’s how people enjoy them:

  • As a brunch side: Served with poached eggs or avocado.
  • As an appetizer: With a yogurt herb dip or spicy aioli.
  • As a light lunch: Paired with a crisp salad or slaw.
  • As a comforting snack: With ketchup, sour cream, or even plain.
  • In lunchboxes: They travel well and taste great at room temperature.

Because they’re made with cooked potatoes, they also make excellent use of leftovers. If you’ve made mashed potatoes for dinner and don’t want to waste the rest, these fritters are the perfect transformation.

Tips for Success

While this is a forgiving and flexible recipe, here are a few tips to make sure your fritters turn out just right:

  • Let the mashed potatoes cool before mixing — Warm mash can cook the egg prematurely.
  • Taste and season — Potatoes love salt. Don’t be shy with seasoning, and remember the Parmesan is salty too.
  • Don’t overcrowd the pan — Fry in batches to ensure even browning.
  • Use oil that can handle higher heat — Vegetable or canola oil work great for shallow frying.
  • Drain on paper towels — This keeps them crisp and removes excess oil.

Creative Variations to Try

Once you’ve nailed the base recipe, you can get creative with flavors and textures:

  • Add herbs: Chopped parsley, dill, or chives blend beautifully into the mix.
  • Include veggies: Grated zucchini, carrot, or even corn kernels add sweetness and color.
  • Spice it up: Try smoked paprika, garlic powder, or chili flakes.
  • Cheese swap: Try cheddar, feta, or Gruyère for different cheese notes.
  • Bake instead of fry: If you prefer a lighter option, brush them with oil and bake at 200°C (400°F) for 20–25 minutes, flipping halfway.

These additions make it easy to customize the fritters to your taste or dietary needs, all while keeping that familiar comfort intact.

Frequently Asked Questions

Can I use leftover mashed potatoes?
Absolutely. In fact, that’s one of the best parts about this recipe. Just be sure the mash isn’t too runny, and adjust flour or breadcrumbs if needed for consistency.

What’s the best potato for this recipe?
Starchy potatoes like Russet or Yukon Gold work best. They mash easily and give a light, fluffy interior.

Can I make them gluten-free?
Yes. Use gluten-free flour and gluten-free breadcrumbs — they hold up well and fry just like the traditional version.

Can I freeze these fritters?
You can! After shaping them, freeze the uncooked fritters on a tray, then transfer to a sealed bag. When ready, cook them straight from frozen — just allow for a few extra minutes per side.

What dips go best with them?
Sour cream is a classic pairing, but they’re also lovely with garlic yogurt, ranch, sriracha mayo, or a simple mustard-based sauce.

How do I reheat them?
They reheat best in a skillet or air fryer to maintain crispness. Microwaving will soften the crust, but they’ll still taste great.

A Dish That Brings You Back

There are meals we cook to impress, and there are meals we cook to feel something — warmth, nostalgia, connection. These Parmesan Potato Fritters fall in the second category. They’re unpretentious, deeply satisfying, and surprisingly elegant for how simple they are.

Maybe you’ll make them on a quiet Sunday morning, or after a long week, or when your fridge looks bare but your heart needs a lift. Maybe you’ll serve them at a party, and someone will ask for the recipe. Maybe you’ll just eat them standing at the stove, one golden bite at a time.

Wherever and however they’re served, these fritters carry a story — one of making the most of what you have, of turning the ordinary into something memorable, and of finding comfort in simplicity.

Amal

Crispy Comfort: The Story Behind These Parmesan Potato Fritters

Golden, crispy, and irresistibly tender inside — these Parmesan Potato Fritters turn humble ingredients into a comforting and delicious snack. Perfect as a side dish, lunch bite, or crowd-pleasing appetizer.
Prep Time 10 minutes
Cook Time 10 minutes
Total Time 20 minutes
Servings: 8 fritters
Course: Side Dish
Cuisine: Comfort Food

Ingredients
  

  • 2 medium potatoes peeled and boiled
  • 1 egg
  • ¼ cup grated Parmesan cheese
  • 2 tablespoons all-purpose flour
  • 1 –2 spring onions chopped
  • ½ cup breadcrumbs
  • Salt and pepper to taste
  • Oil for frying

Method
 

  1. Mash the boiled potatoes in a medium bowl until smooth. Let cool slightly.
  2. Add the egg, Parmesan cheese, flour, and chopped spring onions. Season with salt and pepper.
  3. Mix everything until well combined and shape into small patties (about 2 tablespoons of mixture each).
  4. Coat each patty in breadcrumbs, pressing gently to help them stick.
  5. Heat oil in a skillet over medium heat.
  6. Fry the patties for 2–3 minutes on each side or until golden brown and crispy.
  7. Transfer to a paper towel-lined plate to drain excess oil.
  8. Serve warm with sour cream, yogurt dip, or your favorite sauce.

Notes

  • Leftover mashed potatoes work beautifully for this recipe.
  • You can add chopped herbs like parsley or chives for more flavor.
  • For a spicy twist, add a pinch of chili flakes or paprika to the mix.
  • These fritters are best served fresh but can be reheated in the oven for extra crispiness.

A Slice of Sunlight: The Lemon Cake That Tastes Like Home

There’s something about lemon that brings back memories. For me, it’s my grandmother’s tiny kitchen where the sun always seemed to shine just a little brighter. She had a way of making simple ingredients feel sacred — especially lemons. She didn’t bake often, but when she did, it was almost always a lemon cake. It wasn’t anything fancy, yet it felt like the most special thing in the world.

She would zest the lemon with her old grater, letting the oils perfume the air, while I stood on a stool next to her, sneaking peeks at the batter. It was that balance — sweet but never too sweet, with a gentle tartness that made every bite dance on your tongue. She didn’t follow recipes. She cooked by feeling, and somehow it always turned out perfect.

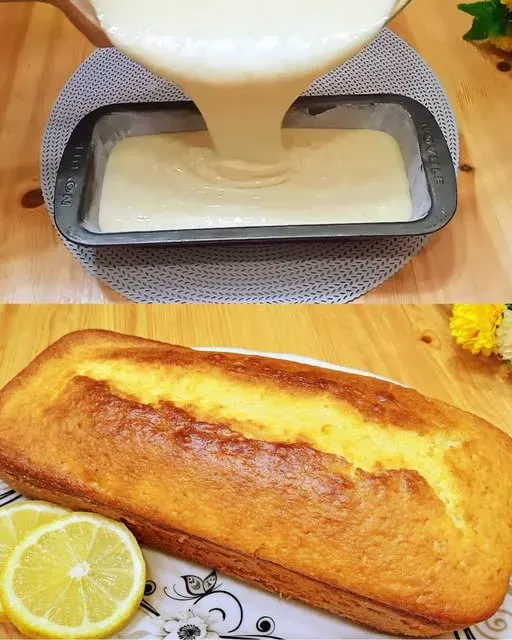
Years later, I found myself craving that same sense of lightness, both in flavor and in spirit. That’s when I recreated this lemon cake: soft-crumbed, golden, and citrus-kissed. Every time I bake it, I remember her, and I think that’s what great recipes are — not just food, but memory. A story you can taste.

The Radiance of Lemon: Why This Cake Works So Well

Lemon has long been loved in baking for its fresh, bright profile. Unlike heavier flavors like chocolate or caramel, lemon feels airy and clean. When baked into a soft cake, it creates a harmony that refreshes the palate and satisfies a sweet craving without overwhelming.

This particular lemon cake balances acidity with richness — the eggs give it structure, oil provides moisture, and milk ensures tenderness. Lemon juice and zest aren’t just flavor additions; they’re mood-lifters. The aroma alone can change the feeling of a kitchen.

But what makes this recipe special is its simplicity. No fancy ingredients. No complicated techniques. It’s the kind of cake you can bake on a whim — when guests are coming over, when you need a homemade dessert, or simply when you want something bright and golden with your afternoon tea.

What Sets This Lemon Cake Apart?

1. No Butter, Yet Utterly Moist

Using oil instead of butter keeps the crumb soft and delicate even after a day or two. Oil is liquid at room temperature, meaning your cake won’t dry out quickly. It’s a great choice for beginners and for those who want consistent results.

2. Zest & Juice: A Dual Lemon Punch

The use of both lemon zest and lemon juice layers the flavor beautifully. The zest carries lemon oil — that fragrant citrus bloom you smell the moment you cut into a lemon. Juice, on the other hand, brings the acidity, cutting through the sweetness to create that refreshing tang.

3. A Blank Canvas for Creativity

While perfect on its own, this cake also invites personalization. From glazes to fruit toppings to layering it with whipped cream, it adapts to any occasion. You can dress it up or leave it rustic and still have something truly wonderful.

Ingredients

IngredientAmount
Eggs4
Sugar200 grams (1 cup)
Lemon juice (fresh)6 tablespoons (from 1 lemon)
Lemon zest1 tablespoon
Vegetable oil200 milliliters (1 cup)
Milk200 milliliters (4/5 cup)
Baking powder20 grams (4 teaspoons)
All-purpose flour300 grams (2 ½ cups)

Directions

  1. Preheat and Prepare: Preheat your oven to 175°C (350°F). Grease and flour a 9-inch round or loaf pan.
  2. Whip the Eggs and Sugar: In a large bowl, beat the eggs and sugar together until pale, thick, and slightly fluffy.
  3. Add the Citrus Goodness: Stir in the lemon juice and zest, blending well to infuse the batter with brightness.
  4. Combine the Wet Ingredients: Add vegetable oil and milk. Mix until smooth.
  5. Fold in the Dry: Gradually sift in the flour and baking powder, folding gently until the batter is just combined.
  6. Pour and Bake: Pour the batter into the prepared pan. Bake for 40–45 minutes or until a toothpick inserted in the center comes out clean.
  7. Cool and Serve: Allow the cake to cool in the pan for 10 minutes before transferring to a wire rack. Serve as-is or dust with powdered sugar.

Nutrient Snapshot (per slice, approx. 10 servings)

NutrientAmount (per serving)
Calories~310 kcal
Carbohydrates~36 g
Protein~5 g
Fat~16 g
Saturated Fat~2.5 g
Fiber~1 g
Sugars~20 g
Sodium~170 mg

Variations to Try

While this recipe is divine as written, here are a few ways to make it your own:

  • Lemon Glaze: Mix powdered sugar with a little extra lemon juice and drizzle over the cooled cake for extra zing.
  • Poppy Seeds: Add 1–2 tablespoons of poppy seeds to the batter for a classic twist and a little crunch.
  • Berry Burst: Gently fold in a handful of blueberries or raspberries for pockets of fruit in each slice.
  • Lemon-Coconut: Replace a portion of the flour with desiccated coconut or sprinkle it on top before baking.
  • Layer Cake Version: Slice the cake in half and sandwich with lemon curd and whipped cream for a showstopping dessert.

Frequently Asked Questions (FAQs)

1. Can I make this lemon cake dairy-free?

Absolutely. Simply substitute the milk with any plant-based alternative such as almond milk, oat milk, or soy milk. Make sure it’s unsweetened to avoid altering the flavor balance.

2. How do I store the cake?

This cake keeps well at room temperature for up to 2 days, tightly wrapped or stored in an airtight container. For longer storage, keep it in the fridge for up to 5 days, though it’s best enjoyed at room temperature.

3. Can I freeze lemon cake?

Yes! Once cooled, wrap the cake tightly in plastic wrap and foil, then freeze for up to 2 months. To serve, thaw overnight in the fridge and bring to room temperature.

4. Why did my cake sink in the middle?

This can happen if the cake is underbaked or if the oven door is opened too early, causing a drop in temperature. Always check with a toothpick inserted in the center — it should come out clean.

5. Can I bake this in a bundt or loaf pan?

Yes. A bundt pan makes a lovely presentation, just ensure it’s greased thoroughly. A loaf pan will work too but may require a few extra minutes of baking. Watch the top for golden color and test for doneness.

6. Is it okay to use bottled lemon juice?

Fresh lemon juice is strongly recommended for flavor. Bottled lemon juice tends to lack brightness and may taste flat. That said, in a pinch, it can be used — but try to still use fresh zest.

7. Can I reduce the sugar?

You can reduce the sugar slightly (by about 25–30 grams), though the texture may change slightly. Keep in mind that sugar doesn’t just sweeten — it also helps with moisture and structure.

8. What makes this cake fluffy instead of dense?

The combination of baking powder and properly whipped eggs is key. Beating the eggs and sugar until pale and slightly airy builds volume, and folding in the dry ingredients gently prevents the batter from deflating.

When to Serve This Cake

  • Afternoon Tea: A perfect companion for a cup of Earl Grey or green tea.
  • Brunch Table: Serve it alongside fresh fruit and coffee for a bright start to the day.
  • Celebration Cake: With a bit of glaze or frosting, it becomes a beautiful centerpiece.
  • Weeknight Treat: Simple enough to whip up after dinner as a last-minute dessert.
  • Gift Bake: Wrapped in parchment and twine, it makes a heartfelt homemade gift.

In Praise of Simple Pleasures

Sometimes, the best recipes aren’t the fanciest. They’re the ones you can make while your favorite song plays in the background, when your kitchen is filled with light, and you’re barefoot on the tiled floor. This lemon cake is exactly that kind of recipe — forgiving, familiar, and joy-filled.

It’s a reminder that a little lemon, a little sweetness, and a little time can go a long way in creating something memorable.

So the next time you find yourself needing a little lift, try this recipe. Let your kitchen smell like sunlit citrus. Let the batter rise, and with it, let your mood rise too.

Conclusion: A Cake That Carries More Than Flavor

Whether you’re baking to celebrate, to share, or just to soothe your own soul, this lemon cake brings more than just taste — it brings feeling. The warmth of a memory, the brightness of a new day, and the satisfaction of creating something beautiful from simple things.

So here’s to cake that reminds us of home. Here’s to the scent of lemons in the air. And here’s to sharing slices of joy, one crumb at a time.

Amal

A Slice of Sunlight: The Lemon Cake That Tastes Like Home

A soft, golden lemon cake bursting with citrusy brightness and just the right amount of sweetness. Moist, fluffy, and easy to make, it’s the perfect dessert to brighten up any day.
Prep Time 10 minutes
Cook Time 45 minutes
Total Time 55 minutes
Servings: 8 -10 servings
Course: Dessert
Cuisine: European-inspired

Ingredients
  

  • 4 eggs
  • 200 grams 1 cup sugar
  • 6 tablespoons lemon juice from 1 lemon
  • 1 tablespoon lemon zest
  • 200 milliliters 1 cup vegetable oil
  • 200 milliliters 4/5 cup milk
  • 20 grams 4 teaspoons baking powder
  • 300 grams 2 ½ cups all-purpose flour

Method
 

  1. Preheat your oven to 175°C (350°F). Grease and flour a 9-inch round or loaf cake pan.
  2. In a large mixing bowl, whisk together the eggs and sugar until light and fluffy.
  3. Stir in the lemon juice and lemon zest until fully combined.
  4. Add the vegetable oil and milk, whisking until smooth.
  5. Sift in the flour and baking powder, then fold into the wet ingredients until no lumps remain.
  6. Pour the batter into the prepared cake pan and smooth the top.
  7. Bake for 40–45 minutes, or until a toothpick inserted into the center comes out clean.
  8. Let the cake cool in the pan for 10 minutes before transferring to a wire rack to cool completely.
  9. Serve plain, dusted with powdered sugar, or topped with a simple lemon glaze if desired.

Notes

  • For extra lemon flavor, you can add ½ teaspoon of lemon extract.
  • A light lemon glaze (made with powdered sugar and lemon juice) adds an elegant finish.
  • This cake pairs beautifully with tea or fresh berries.
  • Store leftovers in an airtight container at room temperature for up to 3 days.

Whispers from the Forest: A Bowl Full of Comfort

I still remember the first time I made this soup — it was a cold, gray afternoon deep in October, when the wind pressed leaves against the windows like nature’s own mosaic. My hands were cold from running errands in the chill, and I craved something simple, warm, and grounding. My pantry was humble that day: a few potatoes, some mushrooms begging to be used, half a bag of noodles, and just enough broth to make something out of nothing.

As I began to cook, something unexpected happened. The aroma of garlic and mushrooms filled the kitchen with a quiet magic. The bubbling pot felt like it was telling stories of woodland walks, rainy afternoons, and moments of silence that somehow speak the loudest. What emerged from that pot wasn’t just soup — it was comfort in a ladle. Since then, this mushroom noodle soup has become more than a recipe. It’s a ritual.

If you’re looking for a way to warm both body and spirit, this bowl delivers in full.

A Flavorful Embrace in Every Spoonful

There’s a reason why this recipe resonates with so many. Mushroom noodle soup hits that rare culinary intersection where rustic charm meets nourishing satisfaction. The mushrooms bring an earthy depth, potatoes add creaminess, noodles offer softness and substance, and herbs like basil and garlic infuse aroma and warmth.

Unlike richer, cream-based mushroom soups, this one leans toward a lighter broth — making it equally suitable for lunch or dinner. Yet, don’t mistake it for bland. The layers of texture and taste create a satisfying experience, especially when the broth has simmered long enough to allow the vegetables to release their sweetness and the mushrooms to deepen the flavor.

Ingredients

IngredientAmount
Onion1, chopped
Carrot1, chopped
Garlic3 cloves, minced
Mushrooms100 g, sliced
Potatoes2, peeled and diced
Corn (fresh or canned)100 g, drained
SaltTo taste
Black pepperTo taste
BasilTo taste
Vegetable broth1 liter
Noodles50 g

Directions to a Steaming Bowl

  1. Sauté the Base: In a large pot over medium heat, add a splash of oil. Sauté the chopped onion, carrot, and garlic until softened and fragrant—about 5 minutes.
  2. Build the Flavor: Add the sliced mushrooms and cook for another 3–4 minutes until they release their juices.
  3. Hearty Additions: Stir in the diced potatoes and corn. Cook for 2 more minutes to blend the flavors.
  4. Pour and Simmer: Add the vegetable broth and bring everything to a boil. Reduce heat, cover, and simmer for 15 minutes, or until potatoes are just tender.
  5. Noodle Time: Add the noodles and cook according to package instructions (usually 7–10 minutes), or until they are soft but not mushy.
  6. Season to Finish: Stir in salt, black pepper, and basil to taste. Adjust the seasoning as desired.
  7. Serve Hot: Ladle into bowls and serve warm. Garnish with fresh herbs or a drizzle of olive oil if desired.

Nutrient Profile per Serving (approx. 4 servings)

NutrientAmount (per serving)
Calories180–200 kcal
Protein5–6 g
Carbohydrates30–35 g
Fats4–5 g
Fiber4–5 g
SodiumDepends on broth
Vitamin AHigh (from carrots)
IronModerate
PotassiumGood source

Why This Soup Stands Out

1. Plant-Based and Nutrient-Rich

This soup is fully vegetarian, even vegan when made with egg-free noodles. It features whole vegetables, is low in fat, and provides a good mix of fiber, vitamins, and minerals. The mushrooms contribute B vitamins and antioxidants, while potatoes add potassium and slow-digesting carbs. Corn gives a hint of sweetness, and garlic is a well-known immune booster.

2. Flexible and Forgiving

Whether you’re working with what’s left in the fridge or planning a weeknight dinner, this soup adapts to you. Out of carrots? Add celery or parsnips. No noodles? Toss in rice, quinoa, or even barley. It’s the kind of recipe that forgives substitutions — and often benefits from them.

3. Minimal Equipment, Maximum Reward

All you need is one sturdy pot and a spoon to stir. This simplicity makes it ideal for small kitchens, student apartments, or anyone looking to cook without a mountain of cleanup afterward.

The Secret Ingredient: Memory

Soup is one of those dishes that transcends ingredients. It’s not just about nourishment — it’s about nostalgia. Maybe it reminds you of your grandmother’s kitchen, or of snow days spent bundled under blankets with a steaming bowl in your lap. This mushroom noodle soup has that kind of memory-making quality.

Its scent alone — earthy mushrooms mingled with onion and garlic — can transport you to a cabin in the woods or a quiet rainy Sunday. It invites slowness. You’ll find that people linger a little longer at the table when this is served.

Frequently Asked Questions

Can I use dried mushrooms instead of fresh?

Absolutely. Dried mushrooms have a concentrated flavor that can even enhance the richness of the broth. If using them, soak in warm water for about 20 minutes first. Don’t discard the soaking liquid — strain it and add it to your broth for an extra layer of umami.

Is this soup freezer-friendly?

Yes, but with a note: noodles can become a bit soft after freezing. If you plan to freeze it, consider cooking the noodles separately and adding them fresh when reheating. The vegetables and broth freeze beautifully and can be stored for up to 3 months.

What type of noodles work best?

You can use just about any variety — egg noodles, fusilli, rice noodles, or even broken spaghetti. Short noodles tend to hold up better and make for easier scooping. Whole grain options also work well if you’re looking to boost fiber.

Can I make this in a slow cooker?

Yes. Simply sauté the onions, garlic, and mushrooms beforehand to bring out their flavor, then transfer everything except the noodles to a slow cooker. Cook on low for 6–8 hours or on high for 3–4 hours. Add the noodles in the last 30 minutes of cooking.

How can I make this heartier for a full meal?

This soup is satisfying as-is, but you can easily bulk it up by adding canned chickpeas, lentils, or cubed tofu. A slice of crusty bread or a grilled sandwich on the side also makes it feel more like a full meal.

Is this recipe gluten-free?

As written, it contains regular noodles, but you can swap them out for gluten-free pasta or rice. Always check your broth to ensure it’s gluten-free as well.

Tips to Elevate Your Soup Game

  • Caramelize Your Mushrooms: Take the time to really sauté them until golden. It adds incredible depth.
  • Herb it Up: A sprig of thyme or rosemary while simmering can bring a savory edge. Remove before serving.
  • Finish with Brightness: A squeeze of lemon juice or a splash of apple cider vinegar at the end sharpens the flavor and balances the sweetness of the corn and carrots.
  • Garnish Wisely: A sprinkle of chopped fresh parsley, cracked black pepper, or even a dusting of nutritional yeast can take it from simple to spectacular.

Ideal Moments for This Soup

  • After a long walk on a crisp day
  • When you’re feeling under the weather and want something gentle
  • As a starter for a dinner party — served in small bowls with herbed croutons
  • A quiet lunch break when the world feels a bit too loud

It’s a dish that soothes, anchors, and reminds us that food can be both functional and poetic.

A Final Note from the Kitchen

This mushroom noodle soup is more than just a recipe — it’s an invitation. An invitation to slow down, to savor, to warm your hands on a bowl and your heart with the memory it creates. It’s for the moments when you want simplicity without sacrifice, comfort without compromise.

In a world that’s always rushing forward, this soup gently suggests: stay a little longer, breathe a little deeper, and maybe go back for seconds.

Let it nourish you in ways beyond the physical — because sometimes, the best meals are the ones that feel like coming home.

Amal

Whispers from the Forest: A Bowl Full of Comfort

A heartwarming and earthy mushroom noodle soup made with simple vegetables, tender noodles, and aromatic herbs. Perfect for cozy nights and comforting meals, this one-pot wonder is nourishing, plant-based, and packed with flavor.
Prep Time 10 minutes
Cook Time 30 minutes
Total Time 40 minutes
Servings: 4 –6 servings
Course: Soup
Cuisine: Vegetarian

Ingredients
  

  • 1 onion chopped
  • 1 carrot chopped
  • 3 cloves garlic minced
  • 100 g mushrooms sliced
  • 2 potatoes peeled and diced
  • 100 g corn fresh or canned, drained
  • Salt to taste
  • Black pepper to taste
  • Basil to taste
  • 1 liter vegetable broth
  • 50 g noodles

Method
 

  1. Heat a splash of oil in a large pot over medium heat. Add chopped onion, carrot, and minced garlic. Sauté for 5 minutes until softened and fragrant.
  2. Add the sliced mushrooms and cook for another 3–4 minutes until they release their juices.
  3. Stir in the diced potatoes and corn. Cook for an additional 2 minutes.
  4. Pour in the vegetable broth and bring the mixture to a boil.
  5. Reduce heat to low, cover, and let it simmer for 15 minutes or until the potatoes are tender.
  6. Add the noodles and cook according to package instructions (about 7–10 minutes), until soft but not mushy.
  7. Season with salt, black pepper, and basil to taste. Adjust seasoning as needed.
  8. Serve hot and enjoy a nourishing bowl of rustic comfort.

Notes

  • You can swap the noodles for rice or orzo for variation.
  • Add a handful of spinach at the end for extra greens.
  • Feel free to use dried basil, but fresh basil adds more aroma.
  • Leftovers keep well for 2–3 days in the refrigerator.
  • For a creamier version, stir in a splash of plant-based cream or coconut milk at the end.

Strawberry Cheesecake Recipe: A Delightful Dessert Guide

Introduction to Strawberry Cheesecake Recipe

strawberry cheesecake recipe is just what you need. This classic dessert is loved by many for its smooth texture and delicious taste. It’s perfect for any occasion, whether it’s a birthday party, a family gathering, or just a cozy night in.

Imagine a buttery graham cracker crust, topped with a velvety cheesecake filling, and finished off with luscious strawberries. Each bite is a heavenly experience that brings joy to your taste buds. Plus, making this cheesecake is easier than you might think! With simple ingredients and straightforward steps, you can create a dessert that looks and tastes like it came from a fancy bakery.

In this article, we will guide you through the entire process of making your very own strawberry cheesecake. From gathering the ingredients to serving it up, we’ll cover everything you need to know. So, roll up your sleeves and get ready to impress your friends and family with this delightful strawberry cheesecake recipe!

Ingredients for Strawberry Cheesecake Recipe

strawberry cheesecake recipe requires a mix of sweet and creamy components that come together to create a delightful dessert. Here’s what you’ll need:

  • 1 ½ cups graham cracker crumbs
  • ⅓ cup granulated sugar
  • ½ cup unsalted butter, melted
  • 16 ounces cream cheese, softened
  • 1 cup powdered sugar
  • 1 teaspoon vanilla extract
  • 1 cup sour cream
  • 2 cups fresh strawberries, hulled and sliced
  • 1 tablespoon lemon juice
  • 1 tablespoon cornstarch
  • 1 cup heavy whipping cream
  • 2 tablespoons granulated sugar (for whipped cream)

These ingredients are easy to find at your local grocery store. The graham cracker crumbs will form a delicious crust, while the cream cheese and sour cream create a rich filling. Fresh strawberries add a burst of flavor and color, making this cheesecake not only tasty but also visually appealing.

Once you have everything ready, you’ll be all set to start making your strawberry cheesecake. The combination of these ingredients will ensure that your dessert is creamy, sweet, and utterly delightful. So, let’s move on to the next step and prepare for the fun of baking!

Step-by-Step Preparation of Strawberry Cheesecake Recipe

strawberry cheesecake recipe. Follow these simple steps to create a delicious dessert that will impress everyone!

Step 1: Preparing the Crust

Start by making the crust, which is the foundation of your cheesecake. In a medium bowl, combine the graham cracker crumbs, ⅓ cup of granulated sugar, and melted butter. Mix everything together until it resembles wet sand. This mixture should hold together when pressed.

Next, take a 9-inch springform pan and firmly press the crumb mixture into the bottom. Make sure it’s even and compact. This will help create a sturdy base for your cheesecake. Once done, bake the crust in a preheated oven at 325°F for about 10 minutes. After baking, remove it from the oven and let it cool completely.

Step 2: Making the Cheesecake Filling

While the crust cools, it’s time to prepare the creamy filling. In a large mixing bowl, beat the softened cream cheese using an electric mixer. Mix until it’s smooth and free of lumps. Gradually add in the powdered sugar and vanilla extract, continuing to mix until everything is well combined.

Next, add the sour cream, lemon juice, and cornstarch to the bowl. Mix again until the filling is creamy and smooth. This mixture will be rich and delicious, making your cheesecake irresistible!

Step 3: Preparing the Strawberry Topping

Now, let’s get the strawberries ready! Take your fresh strawberries and hull them, removing the green tops. Then, slice them into thin pieces. You can toss the sliced strawberries with a tablespoon of lemon juice to enhance their flavor and prevent browning. Set them aside while you finish the cheesecake.

Step 4: Assembling the Strawberry Cheesecake

With the crust cooled and the filling ready, it’s time to assemble your cheesecake. Pour the cream cheese mixture over the cooled crust. Use a spatula to spread it evenly across the top. This will create a smooth layer that will hold the strawberries beautifully.

Once the filling is spread out, gently place the sliced strawberries on top. You can arrange them in a decorative pattern or simply scatter them for a more casual look. Either way, they will add a pop of color and flavor to your cheesecake!

Step 5: Baking the Cheesecake

Now, it’s time to bake your cheesecake! Place the assembled cheesecake in the oven and bake for 50-60 minutes. You want the center to be set but still slightly jiggly. This ensures a creamy texture. Once baked, turn off the oven and leave the cheesecake inside for an additional hour. This gradual cooling helps prevent cracks on the surface.

Step 6: Cooling and Chilling

After the hour is up, remove the cheesecake from the oven and let it cool completely at room temperature. Once cooled, cover it with plastic wrap and refrigerate for at least 4 hours, or overnight if you can wait! Chilling allows the flavors to meld together and makes slicing easier.

And there you have it! You’ve successfully prepared your strawberry cheesecake. The next steps will be to whip up some cream and serve it, but first, let’s explore some variations you can try!

Variation of Strawberry Cheesecake Recipe

strawberry cheesecake recipe is a favorite for many, there are exciting variations you can try! These alternatives allow you to enjoy the same delicious flavors while catering to different preferences or dietary needs. Let’s explore two popular variations: the no-bake strawberry cheesecake and the gluten-free strawberry cheesecake.

No-Bake Strawberry Cheesecake Variation

If you’re looking for a quicker and easier option, the no-bake strawberry cheesecake is perfect for you! This version skips the oven, making it a great choice for hot days or when you want to save time.

To make a no-bake cheesecake, start with the same graham cracker crust. However, instead of baking it, simply chill it in the refrigerator for about 30 minutes to firm up. For the filling, beat together softened cream cheese, powdered sugar, and vanilla extract until smooth. Then, fold in whipped cream instead of sour cream. This will give your cheesecake a light and airy texture.

Once your filling is ready, pour it over the chilled crust. Top with sliced strawberries and refrigerate for at least 4 hours, or until set. This no-bake version is just as creamy and delicious, with the added benefit of being super simple to prepare!

Gluten-Free Strawberry Cheesecake Variation

For those who need to avoid gluten, making a gluten-free strawberry cheesecake is easy and just as tasty! The key is to use gluten-free graham crackers or almond flour for the crust.

To create the crust, crush gluten-free graham crackers or mix almond flour with melted butter and a bit of sugar. Press this mixture into the bottom of your springform pan, just like in the original recipe. Bake it for about 10 minutes, or chill it if you’re making the no-bake version.

For the filling, you can use the same ingredients as the classic recipe. Just ensure that your cream cheese and other components are gluten-free. Once assembled, bake or chill as directed. This gluten-free variation allows everyone to enjoy a slice of delicious strawberry cheesecake without worry!

These variations not only cater to different dietary needs but also add a fun twist to the traditional recipe. Whether you choose to bake or go for a no-bake option, your strawberry cheesecake will surely be a hit!

Cooking Note for Strawberry Cheesecake Recipe

strawberry cheesecake recipe, a few cooking notes can help ensure your dessert turns out perfectly every time. Here are some important tips to keep in mind:

  • Room Temperature Ingredients: Make sure your cream cheese and sour cream are at room temperature before mixing. This helps create a smooth and creamy filling without lumps.
  • Don’t Overmix: While mixing the filling, avoid overmixing once you add the eggs (if using). Overmixing can incorporate too much air, leading to cracks in your cheesecake.
  • Water Bath Method: For an even creamier texture, consider using a water bath. Wrap the bottom of your springform pan in aluminum foil and place it in a larger pan filled with hot water. This helps regulate the temperature while baking.
  • Check for Doneness: Keep an eye on your cheesecake as it bakes. The edges should be set, while the center remains slightly jiggly. This ensures a creamy texture once cooled.
  • Cooling Gradually: Allow your cheesecake to cool gradually in the oven after baking. This step helps prevent cracks from forming on the surface.
  • Chill Time: Be patient! Chilling your cheesecake for at least 4 hours, or overnight, allows the flavors to meld and the texture to firm up.
  • Fresh Toppings: For the best flavor, use fresh strawberries for the topping. They add a burst of sweetness and color that enhances the overall dessert.

By following these cooking notes, you’ll be well on your way to creating a stunning and delicious strawberry cheesecake. Each step is crucial in achieving that perfect balance of flavors and textures. So, get ready to impress your family and friends with your baking skills!

Serving Suggestions for Strawberry Cheesecake Recipe

strawberry cheesecake recipe, it’s time to think about how to serve it! Presentation can elevate your dessert, making it even more appealing. Here are some delightful serving suggestions to consider:

  • Classic Slice: Serve a generous slice of cheesecake on a dessert plate. Add a dollop of whipped cream on top and a few fresh strawberry slices for a classic look.
  • Chocolate Drizzle: For chocolate lovers, drizzle some melted chocolate or chocolate ganache over the cheesecake before serving. This adds a rich flavor that pairs wonderfully with strawberries.
  • Berry Compote: Create a quick berry compote by simmering mixed berries with a bit of sugar and lemon juice. Spoon this warm mixture over each slice for an extra fruity kick.
  • Garnish with Mint: Fresh mint leaves can add a pop of color and a refreshing taste. Place a sprig on top of each slice for a beautiful presentation.
  • Mini Cheesecakes: For a fun twist, consider making mini cheesecakes in muffin tins. This way, everyone can enjoy their own individual serving!
  • Pair with Beverages: Serve your cheesecake with a side of coffee, tea, or even a glass of dessert wine. These beverages complement the rich flavors of the cheesecake beautifully.

These serving suggestions not only enhance the visual appeal of your strawberry cheesecake but also add exciting flavors and textures. Whether you keep it simple or get creative, your cheesecake will surely impress your guests. Enjoy every delicious bite!

Tips for Perfecting Your Strawberry Cheesecake Recipe

strawberry cheesecake recipe can be a delightful journey. With a few helpful tips, you can elevate your cheesecake to a whole new level. Here are some expert suggestions to ensure your dessert turns out beautifully every time:

  • Use Quality Ingredients: The flavor of your cheesecake greatly depends on the quality of your ingredients. Opt for high-quality cream cheese and fresh strawberries. This will enhance the overall taste and texture of your cheesecake.
  • Don’t Skip the Chilling: Chilling your cheesecake is crucial. Allow it to set in the refrigerator for at least 4 hours, or overnight if possible. This helps the flavors meld and gives the cheesecake a firmer texture.
  • Experiment with Flavors: While strawberries are delicious, don’t hesitate to experiment! Try adding a hint of almond extract or a splash of orange zest to the filling for a unique twist.
  • Check Your Oven Temperature: Ovens can vary in temperature. Use an oven thermometer to ensure your cheesecake bakes at the correct temperature. This helps prevent overbaking or underbaking.
  • Let It Rest: After baking, let your cheesecake rest in the oven with the door slightly ajar. This gradual cooling helps prevent cracks and keeps the texture creamy.
  • Use a Sharp Knife: When slicing your cheesecake, use a sharp knife dipped in hot water. Wipe the knife clean between cuts for neat, beautiful slices.
  • Top with Fresh Ingredients: For the best presentation, top your cheesecake with fresh strawberries just before serving. This keeps them vibrant and juicy, adding a fresh touch to each slice.

By following these tips, you’ll be well on your way to mastering the art of making a delicious strawberry cheesecake. Each step is important in creating a dessert that not only looks stunning but also tastes incredible. So, gather your ingredients and get ready to impress everyone with your baking skills!

Breakdown of Time for Strawberry Cheesecake Recipe

strawberry cheesecake recipe is essential for planning. This way, you can ensure everything runs smoothly and your dessert is ready when you want it. Here’s a breakdown of the time involved in making this delightful cheesecake:

Prep Time

The prep time for your strawberry cheesecake is approximately 30 minutes. This includes gathering all your ingredients, preparing the crust, and mixing the cheesecake filling. Make sure to have everything ready before you start, as this will make the process much easier and more enjoyable!

Cooking Time

Once you’ve prepped your ingredients, the cooking time is about 60-70 minutes. This includes baking the crust for 10 minutes and then baking the cheesecake for 50-60 minutes. Remember, the cheesecake should be slightly jiggly in the center when you take it out of the oven. This ensures a creamy texture once it cools.

Total Time

In total, you should plan for about 4 hours and 30 minutes to complete your strawberry cheesecake. This includes the prep time, cooking time, and the minimum chilling time of 4 hours. If you can, letting it chill overnight will enhance the flavors even more. So, be patient and enjoy the anticipation of your delicious creation!

Nutritional Information for Strawberry Cheesecake Recipe

strawberry cheesecake recipe is important, especially if you’re mindful of your diet. This delicious dessert can be enjoyed in moderation, and knowing its nutritional content can help you make informed choices. Here’s a breakdown of the key nutritional components per serving:

Calories

Each serving of this delightful strawberry cheesecake contains approximately 350 calories. This calorie count includes the rich ingredients like cream cheese and heavy whipping cream, which contribute to its creamy texture and delicious flavor. While it’s a treat, enjoying it in moderation is key to maintaining a balanced diet.

Protein

In terms of protein, each slice provides about 6 grams. The protein comes mainly from the cream cheese and sour cream used in the filling. Protein is essential for your body, helping with muscle repair and growth, making this cheesecake not just a sweet indulgence but also a source of beneficial nutrients.

Sodium

The sodium content in each serving is approximately 250 milligrams. This amount is relatively moderate, but if you’re watching your sodium intake, it’s good to be aware. Most of the sodium comes from the cream cheese and butter used in the recipe. Pairing this cheesecake with fresh fruits can help balance out the flavors and add more nutrients to your dessert.

By keeping these nutritional facts in mind, you can enjoy your strawberry cheesecake while being aware of its impact on your diet. Remember, it’s all about balance and enjoying treats in moderation!

FAQs about Strawberry Cheesecake Recipe

Can I use frozen strawberries for the topping?

strawberry cheesecake recipe. However, keep in mind that frozen strawberries may release more moisture when thawed. To prevent a soggy topping, drain any excess liquid before using them. You can also consider cooking the frozen strawberries briefly to create a compote, which adds a delicious flavor and helps thicken the topping.

How do I store leftover strawberry cheesecake?

To store leftover strawberry cheesecake, cover it tightly with plastic wrap or aluminum foil. You can also place it in an airtight container. Store it in the refrigerator for up to 5 days. If you want to keep it longer, consider freezing it. Wrap individual slices in plastic wrap and then place them in a freezer-safe container. This way, you can enjoy a slice whenever you crave it!

Can I make strawberry cheesecake ahead of time?

strawberry cheesecake recipe ahead of time is a great idea. It allows the flavors to meld together and improves the texture. You can prepare the cheesecake a day or two in advance. Just remember to chill it in the refrigerator for at least 4 hours or overnight before serving. This will ensure it’s perfectly set and ready to impress your guests!

What can I substitute for cream cheese in the recipe?

If you’re looking for a substitute for cream cheese, there are a few options you can try. For a lighter version, you can use Greek yogurt or mascarpone cheese. Both will provide a creamy texture, though the flavor may vary slightly. If you need a dairy-free option, consider using cashew cream or a store-bought vegan cream cheese. Just keep in mind that the taste and texture may differ from the traditional cheesecake.

Conclusion on Strawberry Cheesecake Recipe

strawberry cheesecake recipe is a delightful dessert that brings together the best of creamy and fruity flavors. Whether you’re celebrating a special occasion or simply treating yourself, this cheesecake is sure to impress. With its buttery graham cracker crust, smooth cream cheese filling, and fresh strawberry topping, each bite is a taste of heaven.

Throughout this article, we’ve explored the ingredients, preparation steps, and even some fun variations to suit different tastes. From the classic baked version to no-bake and gluten-free options, there’s a strawberry cheesecake for everyone. Plus, with the helpful tips and serving suggestions provided, you can elevate your dessert to new heights.

Remember, the key to a perfect cheesecake lies in the quality of your ingredients and the patience you show during the chilling process. Allowing your cheesecake to set properly will ensure a creamy texture and rich flavor that everyone will love. So, gather your ingredients, follow the steps, and get ready to enjoy a slice of this delicious treat!

We hope you feel inspired to try making your own strawberry cheesecake. It’s a rewarding experience that not only fills your kitchen with delightful aromas but also creates sweet memories with family and friends. Happy baking!

Paul

Strawberry Cheesecake Recipe: A Delightful Dessert Guide

This Strawberry Cheesecake is the perfect fusion of creamy, tangy filling and a sweet, buttery biscuit crust, swirled with fresh strawberries and finished with a vibrant strawberry sauce. Elegant yet easy, it’s a fruity twist on a classic dessert that’s sure to impress.
Prep Time 20 minutes
Cook Time 1 hour
Servings: 12 slices
Course: Dessert
Cuisine: German / European

Ingredients
  

For the Biscuit Base:
  • 200 grams butter biscuits e.g., tea biscuits
  • 100 grams melted butter
  • 50 grams ground almonds
For the Cheesecake Filling:
  • 600 grams cream cheese
  • 250 grams quark or Greek yogurt as a substitute
  • 180 grams sugar
  • 3 tablespoons cornstarch
  • 200 milliliters cream
  • 1 egg
  • 1 tablespoon lemon juice
  • 100 grams strawberries for swirling into the filling
For the Strawberry Sauce:
  • 100 grams strawberries pureed, to serve on top

Method
 

  1. Preheat oven to 180°C (356°F), using top and bottom heat.
  2. Prepare the crust: Crush the butter biscuits until fine. Mix with melted butter and ground almonds. Press into the base of a greased 26 cm (10-inch) springform pan. Pre-bake the crust for 10 minutes.
  3. Make the filling: In a large bowl, beat together cream cheese, quark (or Greek yogurt), sugar, and cornstarch until smooth. Add cream and lemon juice, and stir until well incorporated. Fold in the egg last.
  4. Create the swirl: Puree 100 grams of strawberries. Pour the cheesecake filling over the pre-baked crust. Drop spoonfuls of strawberry puree over the surface and use a skewer or knife to gently swirl for a marbled effect.
  5. Bake the cheesecake: Lower the oven temperature to 160°C (320°F) and bake for 50 minutes. After baking, turn off the oven and let the cheesecake sit inside for 15 minutes. Crack the oven door slightly and allow it to cool gradually.
  6. Finish with sauce: Puree an additional 100 grams of strawberries. Once the cheesecake is completely cooled, pour the strawberry sauce over the top just before serving.

Notes

  • No quark? Substitute with full-fat Greek yogurt or mascarpone for a similar texture.
  • Swirl technique tip: Avoid over-mixing the puree into the filling for a clear marble effect.
  • Room temp ingredients: Ensure cream cheese and egg are at room temperature for a smooth filling.
  • Make ahead: Best made a day in advance for easier slicing and flavor development.
  • Serving idea: Top with fresh strawberries or mint for added flair.

Mini Chicken Sheet Pan Tostadas are a family favorite!

Are you looking for a quick and delicious meal that the whole family will love? Look no further! Mini Chicken Tostadas on a Sheet Pan are the perfect solution. These tasty bites combine the flavors of seasoned chicken, creamy refried beans, and melty cheese, all piled high on crispy corn tortillas. Plus, they’re easy to make and require minimal cleanup, making them ideal for busy weeknights.

Imagine a colorful platter of mini tostadas, each one bursting with flavor and topped with fresh ingredients. Not only are they visually appealing, but they also pack a punch in terms of taste. The combination of spices used to season the chicken creates a savory base that pairs perfectly with the toppings. Whether you’re hosting a casual get-together or simply enjoying a family dinner, these tostadas are sure to impress.

What’s more, this recipe is versatile! You can easily customize it to suit your taste preferences. Want to add a little heat? Toss in some jalapeños. Prefer a vegetarian option? Swap the chicken for black beans or grilled veggies. The possibilities are endless!

In this article, we’ll guide you through the ingredients, preparation steps, and even some variations to try. So, roll up your sleeves and get ready to create a delightful dish that everyone will rave about. Let’s dive into the world of Mini Chicken Tostadas on a Sheet Pan!

Ingredients for Mini Chicken Tostadas on a Sheet Pan

To create your delicious Mini Chicken Tostadas on a Sheet Pan, you’ll need a few simple ingredients. Each component plays a vital role in building flavor and texture. Here’s what you’ll need:

  • 1 pound boneless, skinless chicken breasts: This is the star of the dish! Chicken breasts are lean and cook quickly, making them perfect for this recipe.
  • 1 tablespoon olive oil: Olive oil helps to keep the chicken moist and adds a rich flavor.
  • 1 teaspoon chili powder: This spice gives the chicken a warm, smoky flavor.
  • 1 teaspoon cumin: Cumin adds an earthy taste that complements the other spices.
  • 1 teaspoon garlic powder: Garlic powder enhances the overall flavor profile.
  • 1/2 teaspoon onion powder: This adds a subtle sweetness and depth to the dish.
  • 1/2 teaspoon salt: Salt is essential for bringing out the flavors in the chicken.
  • 1/4 teaspoon black pepper: A little black pepper adds a hint of heat.
  • 8 small corn tortillas: These serve as the base for your tostadas, providing a crispy texture.
  • 1 cup refried beans: Creamy refried beans add richness and help hold the toppings in place.
  • 1 cup shredded cheese: Choose cheddar or a Mexican blend for that gooey, melty goodness.
  • 1 cup diced tomatoes: Fresh tomatoes add a burst of color and freshness.
  • 1/2 cup sliced black olives: Olives provide a briny contrast to the other flavors.
  • 1 avocado, diced: Creamy avocado adds a delightful texture and flavor.
  • 1/4 cup fresh cilantro, chopped: Cilantro brings a fresh, herbal note to the dish.
  • Lime wedges for serving: A squeeze of lime brightens up the flavors.

With these ingredients on hand, you’re ready to create a mouthwatering meal that’s sure to please everyone at the table. Let’s move on to the preparation steps to bring these Mini Chicken Tostadas on a Sheet Pan to life!

Preparation of Mini Chicken Tostadas on a Sheet Pan

Now that you have all your ingredients ready, it’s time to prepare your Mini Chicken Tostadas on a Sheet Pan. This process is straightforward and fun! Follow these steps to create a delicious meal that everyone will enjoy.

Step 1: Preheat the Oven

First things first, preheat your oven to 400°F. This temperature is perfect for cooking the chicken and crisping up the tortillas. While the oven heats up, you can move on to the next step.

Step 2: Prepare the Chicken

In a medium bowl, combine the olive oil, chili powder, cumin, garlic powder, onion powder, salt, and black pepper. This spice mixture is what makes the chicken so flavorful! Next, add the boneless, skinless chicken breasts to the bowl. Make sure to coat them evenly with the spice mixture. This step is crucial for ensuring that every bite is packed with flavor.

Once the chicken is well-coated, place it on a lined baking sheet. This will make cleanup easier later on. Bake the chicken for 20-25 minutes, or until it reaches an internal temperature of 165°F. After baking, let the chicken rest for about 5 minutes before shredding it. This resting time helps keep the chicken juicy.

Step 3: Assemble the Tostadas

While the chicken is resting, it’s time to warm the corn tortillas. Heat a dry skillet over medium heat and warm each tortilla for about 30 seconds on each side. This will make them pliable and easier to work with.

Now, it’s time to assemble your tostadas! Spread a layer of refried beans on each tortilla. Then, top them with the shredded chicken, followed by a generous sprinkle of shredded cheese, diced tomatoes, and sliced black olives. Make sure to distribute the toppings evenly for a balanced flavor in every bite.

Step 4: Bake the Tostadas

Once your tostadas are assembled, return them to the oven. Bake for an additional 5-7 minutes, or until the cheese is melted and bubbly. This step is where the magic happens! The cheese will become gooey, and the tortillas will get a nice crisp.

Step 5: Add Toppings

After baking, remove the tostadas from the oven. Now comes the fun part—adding the fresh toppings! Top each tostada with diced avocado and a sprinkle of fresh cilantro. These toppings add a burst of freshness and flavor that perfectly complements the warm, cheesy base. Serve with lime wedges on the side for an extra zing!

And there you have it! Your Mini Chicken Tostadas on a Sheet Pan are ready to be enjoyed. They’re perfect for sharing or for a cozy family dinner. Let’s explore some variations to keep things exciting!

Variation of Mini Chicken Tostadas on a Sheet Pan

One of the best things about Mini Chicken Tostadas on a Sheet Pan is their versatility. You can easily switch up the ingredients to cater to different tastes and dietary preferences. Here are a couple of exciting variations to try!

Vegetarian Option

If you’re looking for a meat-free alternative, consider making a vegetarian version of these tasty tostadas. Instead of chicken, you can use black beans or pinto beans as the base protein. Simply mash the beans with a fork and season them with cumin, garlic powder, and a pinch of salt for added flavor.

Next, layer the mashed beans on the corn tortillas just like you would with the refried beans. Top them with your favorite vegetables, such as sautéed bell peppers, zucchini, or corn. Don’t forget to add the shredded cheese, diced tomatoes, and black olives. Bake as directed, and finish with avocado and cilantro. This vegetarian option is not only delicious but also packed with nutrients!

Spicy Twist

If you love a little heat, why not add a spicy twist to your Mini Chicken Tostadas on a Sheet Pan? Start by mixing sliced jalapeños into the spice mixture for the chicken. This will infuse the chicken with a delightful kick. You can also sprinkle some crushed red pepper flakes over the assembled tostadas before baking.

For an extra layer of spice, consider using pepper jack cheese instead of regular cheddar or Mexican blend cheese. This cheese melts beautifully and adds a creamy, spicy flavor. After baking, top your tostadas with a drizzle of hot sauce or a dollop of spicy salsa. This variation is sure to satisfy those who crave a bit of heat in their meals!

With these variations, you can enjoy Mini Chicken Tostadas on a Sheet Pan in new and exciting ways. Whether you choose the vegetarian option or the spicy twist, you’re in for a treat that’s bursting with flavor!

Cooking Note for Mini Chicken Tostadas on a Sheet Pan

When preparing Mini Chicken Tostadas on a Sheet Pan, there are a few cooking notes to keep in mind. These tips will help ensure that your tostadas turn out perfectly every time. Let’s dive into some essential points to consider!

First, always check the freshness of your ingredients. Fresh chicken, vegetables, and tortillas will enhance the overall flavor of your dish. If possible, opt for organic or locally sourced ingredients. This not only supports local farmers but also ensures you’re using the best quality products.

Next, when seasoning the chicken, feel free to adjust the spice levels to suit your taste. If you prefer a milder flavor, reduce the amount of chili powder or cumin. Conversely, if you love bold flavors, don’t hesitate to add more spices or even a pinch of cayenne pepper for an extra kick.

Another important note is to keep an eye on the cooking time. Ovens can vary, so it’s wise to check the chicken a few minutes before the suggested cooking time. Use a meat thermometer to ensure the chicken reaches an internal temperature of 165°F. This guarantees that the chicken is safe to eat and perfectly cooked.

When assembling the tostadas, make sure not to overload them with toppings. While it’s tempting to pile on all the delicious ingredients, too many toppings can make the tortillas soggy. Aim for a balanced layer of beans, chicken, and cheese to maintain that delightful crunch.

Lastly, let your tostadas cool for a minute or two after baking. This brief resting period allows the cheese to set slightly, making them easier to serve and eat. Plus, it helps prevent burns from hot cheese and toppings!

By keeping these cooking notes in mind, you’ll be well on your way to creating Mini Chicken Tostadas on a Sheet Pan that are not only delicious but also visually appealing. Happy cooking!

Serving Suggestions for Mini Chicken Tostadas on a Sheet Pan

Once your Mini Chicken Tostadas on a Sheet Pan are ready, it’s time to think about how to serve them. Presentation can elevate your meal, making it even more enjoyable. Here are some delightful serving suggestions to consider:

  • Family Style: Serve the tostadas on a large platter, allowing everyone to help themselves. This creates a fun, communal dining experience.
  • Individual Plates: For a more formal setting, plate each tostada individually. Add a side of lime wedges and a small bowl of salsa for dipping.
  • Garnish: Enhance the visual appeal by garnishing with extra cilantro or a sprinkle of queso fresco. This adds a pop of color and flavor.
  • Side Dishes: Pair your tostadas with a fresh salad, such as a simple green salad or a corn and black bean salad. This adds a refreshing contrast to the warm, cheesy tostadas.
  • Drinks: Complement your meal with refreshing beverages. Consider serving iced tea, lemonade, or even a light beer for adults. These drinks balance the flavors of the tostadas.

These serving suggestions will not only enhance the dining experience but also make your Mini Chicken Tostadas on a Sheet Pan a hit at any gathering. Enjoy the delicious flavors and the smiles they bring to your table!

Tips for Perfect Mini Chicken Tostadas on a Sheet Pan

To ensure your Mini Chicken Tostadas on a Sheet Pan turn out perfectly every time, consider these helpful tips. They will enhance both the flavor and presentation of your dish, making it a delightful experience for everyone at the table.

  • Use Fresh Ingredients: Fresh ingredients make a big difference in flavor. Choose high-quality chicken, fresh vegetables, and soft tortillas for the best results.
  • Don’t Overcrowd the Baking Sheet: Give each tostada enough space on the baking sheet. This allows for even cooking and helps the tortillas stay crispy.
  • Experiment with Cheese: While cheddar and Mexican blend cheese are great, try using different cheeses like Monterey Jack or queso fresco for a unique twist.
  • Adjust Spice Levels: If you prefer milder flavors, reduce the amount of chili powder or cumin. For those who love heat, add more spices or fresh jalapeños.
  • Let Them Cool Slightly: After baking, let the tostadas cool for a minute. This helps the cheese set and makes them easier to handle.
  • Serve with Dipping Sauces: Offer a variety of dipping sauces, such as salsa, guacamole, or sour cream. This adds extra flavor and fun to the meal.

By following these tips, you’ll create Mini Chicken Tostadas on a Sheet Pan that are not only delicious but also visually appealing. Enjoy the process and the tasty results!

Breakdown of Time for Mini Chicken Tostadas on a Sheet Pan

When preparing Mini Chicken Tostadas on a Sheet Pan, it’s helpful to know how much time each step will take. This way, you can plan your cooking efficiently and enjoy your meal sooner. Here’s a breakdown of the time needed for each part of the process:

Prep Time

Getting everything ready is the first step. This includes gathering your ingredients, seasoning the chicken, and warming the tortillas. Expect to spend about 15-20 minutes on prep. This time allows you to chop, measure, and mix everything without feeling rushed.

Cooking Time

Cooking the chicken and baking the assembled tostadas takes a bit longer. The chicken will need 20-25 minutes in the oven. After that, the assembled tostadas will bake for an additional 5-7 minutes. In total, you should plan for about 30-35 minutes of cooking time.

Total Time

When you combine both prep and cooking times, you’re looking at a total of around 45-55 minutes from start to finish. This makes Mini Chicken Tostadas on a Sheet Pan a quick and satisfying meal option for busy weeknights or casual gatherings.

With this time breakdown, you can easily fit this delicious dish into your schedule. Now that you know how to manage your time, let’s move on to the nutritional information for these tasty tostadas!

Breakdown of Time for Mini Chicken Tostadas on a Sheet Pan

When preparing Mini Chicken Tostadas on a Sheet Pan, it’s helpful to know how much time each step will take. This way, you can plan your cooking efficiently and enjoy your meal sooner. Here’s a breakdown of the time needed for each part of the process:

Prep Time

Getting everything ready is the first step. This includes gathering your ingredients, seasoning the chicken, and warming the tortillas. Expect to spend about 15-20 minutes on prep. This time allows you to chop, measure, and mix everything without feeling rushed. Having everything organized will make the cooking process smoother and more enjoyable.

Cooking Time

Cooking the chicken and baking the assembled tostadas takes a bit longer. The chicken will need 20-25 minutes in the oven. After that, the assembled tostadas will bake for an additional 5-7 minutes. In total, you should plan for about 30-35 minutes of cooking time. This ensures that the chicken is perfectly cooked and the cheese is melted to perfection.

Total Time

When you combine both prep and cooking times, you’re looking at a total of around 45-55 minutes from start to finish. This makes Mini Chicken Tostadas on a Sheet Pan a quick and satisfying meal option for busy weeknights or casual gatherings. With this time breakdown, you can easily fit this delicious dish into your schedule. Now that you know how to manage your time, let’s move on to the nutritional information for these tasty tostadas!

Nutritional Information for Mini Chicken Tostadas on a Sheet Pan

Understanding the nutritional content of your meals is essential for maintaining a balanced diet. Mini Chicken Tostadas on a Sheet Pan not only taste great but also provide a good mix of nutrients. Here’s a closer look at the nutritional information for this delicious dish:

Calories

Each serving of Mini Chicken Tostadas on a Sheet Pan contains approximately 420 calories. This makes it a satisfying meal option without being overly heavy. The combination of chicken, beans, and cheese provides a hearty base that keeps you feeling full and energized.

Protein

Protein is vital for muscle repair and overall health. Each serving offers about 30 grams of protein. The chicken and refried beans contribute significantly to this protein content, making these tostadas a great choice for those looking to increase their protein intake.

Sodium

While enjoying your Mini Chicken Tostadas, it’s important to be mindful of sodium intake. Each serving contains around 800 milligrams of sodium. This amount is reasonable for a flavorful dish, but if you’re watching your sodium levels, consider using low-sodium beans and cheese. This small adjustment can help you enjoy the same great taste while keeping your sodium in check.

By being aware of the nutritional information, you can make informed choices about your meals. Mini Chicken Tostadas on a Sheet Pan are not only delicious but also provide a balanced mix of calories, protein, and sodium, making them a fantastic option for any meal!

FAQs about Mini Chicken Tostadas on a Sheet Pan

Can I use a different protein for Mini Chicken Tostadas on a Sheet Pan?

Absolutely! If chicken isn’t your thing, you can easily swap it out for other proteins. Shredded rotisserie chicken is a fantastic option for a quicker meal. You can also use ground turkey, beef, or even shrimp. For a vegetarian twist, consider using black beans, pinto beans, or grilled vegetables. Each protein brings its own unique flavor, so feel free to experiment!

How do I store leftovers of Mini Chicken Tostadas on a Sheet Pan?

Storing leftovers is simple! Allow the tostadas to cool completely before placing them in an airtight container. They can be stored in the refrigerator for up to 3 days. When you’re ready to enjoy them again, reheat in the oven at 350°F for about 10-15 minutes, or until heated through. This will help maintain the crispiness of the tortillas and the melty cheese.

Can I make Mini Chicken Tostadas on a Sheet Pan ahead of time?

Yes, you can prepare some components ahead of time! You can season and cook the chicken a day in advance. Just store it in the refrigerator until you’re ready to assemble the tostadas. You can also warm the tortillas and prepare the toppings ahead of time. When you’re ready to eat, simply assemble and bake them for a quick and delicious meal!

Conclusion on Mini Chicken Tostadas on a Sheet Pan

In conclusion, Mini Chicken Tostadas on a Sheet Pan are a delightful and versatile dish that brings joy to any meal. With their crispy tortillas, flavorful chicken, and fresh toppings, they are sure to please everyone at the table. Whether you’re preparing a quick weeknight dinner or hosting a casual gathering, these tostadas are a fantastic choice.

Not only are they easy to make, but they also allow for endless customization. You can adjust the spices, swap proteins, or even create vegetarian versions to suit your preferences. The combination of textures and flavors makes each bite a delicious experience. Plus, the minimal cleanup required makes them even more appealing!

As you explore this recipe, remember to have fun with it. Cooking is all about creativity and enjoying the process. So, gather your ingredients, invite your loved ones, and dive into the world of Mini Chicken Tostadas on a Sheet Pan. You’ll be amazed at how something so simple can bring so much happiness to your dining table.

We hope you enjoy making and sharing this dish as much as we do. Happy cooking!

Paul

Mini Chicken Sheet Pan Tostadas are a family favorite!

These crispy, cheesy Mini Chicken Tostadas are the perfect bite-sized Tex-Mex treat! Baked, not fried, and piled high with refried beans, rotisserie chicken, and melty cheese, they’re a fun and flavorful option for dinner, parties, or game-day snacking—customizable with all your favorite toppings.
Prep Time 10 minutes
Cook Time 15 minutes
Total Time 25 minutes
Servings: 12 mini tostadas
Course: Appetizer, Main Dish
Cuisine: Tex-Mex

Ingredients
  

For the Tostadas:
  • 12 street taco-size corn tortillas about 4 inches
  • 3 tablespoons vegetable or canola oil or as needed
  • 1 16 oz can traditional refried beans (use just shy of the full can)
  • 2 cups shredded rotisserie chicken breast
  • 2 cups shredded cheese sharp cheddar and Monterey Jack blend recommended
Optional Garnishes:
  • ⅓ cup sour cream
  • ¼ cup finely diced red onion
  • ¼ cup chopped or torn fresh cilantro
  • 6 cherry or grape tomatoes chopped small
  • Hot sauce such as Cholula
  • Optional extras: guacamole salsa, pico de gallo

Method
 

  1. Preheat oven to 450°F (232°C). Line a large baking sheet with foil for easy cleanup.
  2. Bake tortillas: Lightly brush both sides of the corn tortillas with oil and arrange them snugly on the baking sheet. Bake for 9 to 10 minutes, until the tortillas are firm but not browned. Let cool for about 5 minutes.
  3. Flip and layer: Flip tortillas over and spread each with refried beans. Add shredded rotisserie chicken and top with shredded cheese.
  4. Return to oven: Bake again for 5 to 6 minutes, until the cheese is melted and everything is heated through.
  5. Add toppings: Garnish each tostada with your choice of sour cream, red onion, cilantro, tomatoes, hot sauce, and any other favorite toppings. Serve immediately.

Notes

  • Use leftover chicken: Rotisserie chicken makes this recipe super quick, but any cooked and shredded chicken works.
  • Make it vegetarian: Skip the chicken and load up on seasoned beans and veggies instead.
  • Batch-friendly: This recipe easily doubles or triples for parties and gatherings.
  • Customize toppings: Add shredded lettuce, jalapeños, avocado slices, or a drizzle of lime crema for variety.
  • Reheating tip: For best results, reheat leftovers in the oven or air fryer to maintain crispiness.

Stay Connected

Get recipes via email: