Cheesy Ham & Cheese Bread Bake: A Comforting Classic

Growing up, weekend mornings were always special in my household. The smell of something warm and cheesy baking in the oven would drift through the air, pulling us out of bed with eager anticipation. My mother had a way of turning simple ingredients into something extraordinary, and one of her best creations was this Cheesy Ham & Cheese Bread Bake. It wasn’t just about the taste—it was about the feeling of togetherness, the comfort of a home-cooked meal, and the joy of sharing food with family.

Now, as an adult, I find myself reaching for this recipe on lazy Sunday mornings or when I need a dish that feels like a warm hug. The crispy edges of the bread, the gooey melted cheese, and the savory ham all come together in a perfect balance, making this a go-to meal for breakfast, brunch, or even a cozy dinner.

If you’re looking for something easy yet indulgent, something that reminds you of home no matter where you are, this Cheesy Ham & Cheese Bread Bake is exactly what you need.

Why You’ll Love This Recipe

This dish isn’t just another ham and cheese sandwich—it’s an elevated version that combines textures, flavors, and a touch of nostalgia. Here’s why it deserves a spot in your kitchen:

1. Quick and Easy to Prepare

With just a handful of simple ingredients and minimal prep time, this recipe is perfect for busy mornings or last-minute brunch plans. You can assemble everything in under 10 minutes and let the oven do the rest of the work.

2. Perfect for Any Time of the Day

Although it’s traditionally a breakfast or brunch dish, this bake works just as well for lunch or dinner. Pair it with a fresh salad for a lighter meal, or serve it with a bowl of soup for a heartier option.

3. A Crowd-Pleaser

Whether you’re hosting guests or feeding a hungry family, this dish is guaranteed to be a hit. The combination of crispy bread, melted cheese, and smoky ham is universally loved.

4. Customizable to Your Taste

One of the best things about this recipe is its flexibility. Want to add more flavor? Throw in some caramelized onions or sautéed mushrooms. Looking for a spicy kick? A dash of hot sauce or a sprinkle of red pepper flakes will do the trick.

5. Great for Using Leftovers

This bake is an excellent way to repurpose leftover bread, cheese, or ham. Instead of letting those ingredients go to waste, transform them into a delicious, satisfying meal.

Ingredients

IngredientQuantity
Bread8 slices
Cheese (sliced)12 slices
Ham8 slices
Eggs2 large
PaprikaTo taste
Sour Cream2 tablespoons
Cheese (grated)100 grams (about 1 cup)

Step-by-Step Directions

  1. Preheat & Prep — Preheat your oven to 375°F (190°C). Lightly grease a baking dish.
  2. Layer the Goodness — Place 4 slices of bread in the dish. Add half of the sliced cheese, followed by all the ham. Layer the remaining bread on top, then cover with the rest of the sliced cheese.
  3. Make the Egg Mixture — In a bowl, whisk the eggs, sour cream, and paprika until smooth.
  4. Pour & Sprinkle — Evenly pour the egg mixture over the layered bread and sprinkle the grated cheese on top.
  5. Bake to Perfection — Bake for 20–25 minutes or until golden brown and the cheese is bubbly.
  6. Serve & Enjoy — Let it cool slightly before slicing and serving.

Nutritional Information (Per Serving)

NutrientAmount
Calories~320 kcal
Protein~18g
Carbohydrates~25g
Fat~18g
Saturated Fat~9g
Fiber~2g
Sodium~620mg

Tips for the Best Cheesy Ham & Cheese Bread Bake

To make this dish truly exceptional, keep these tips in mind:

Choose the Right Bread

While regular sandwich bread works fine, opting for something with more texture—like sourdough, ciabatta, or a rustic country loaf—will enhance the final dish. Slightly stale bread actually works best, as it absorbs the egg mixture without getting too soggy.

Use High-Quality Cheese

Cheese is the star of this dish, so don’t skimp on quality. A mix of cheeses can add depth—try combining cheddar for sharpness, mozzarella for meltiness, and Gruyère for a nutty flavor.

Season Wisely

A pinch of paprika adds a subtle warmth, but you can experiment with other spices like garlic powder, black pepper, or even a hint of Dijon mustard in the egg mixture for extra depth.

Let It Rest Before Serving

Once out of the oven, give the bake a few minutes to rest before slicing. This helps the cheese set slightly and makes it easier to serve.

Common Questions About This Recipe

1. Can I Make This Ahead of Time?

Yes! You can assemble the bake the night before, cover it with plastic wrap, and store it in the refrigerator. When ready to bake, let it sit at room temperature for 10–15 minutes while the oven preheats. This is especially helpful for holiday mornings or when entertaining guests.

2. Can I Use Different Meats?

Absolutely. While ham is a classic choice, you can swap it out for cooked bacon, turkey, or even shredded rotisserie chicken.

3. What If I Don’t Eat Meat?

This dish can easily be made vegetarian by skipping the ham and adding sautéed spinach, mushrooms, roasted red peppers, or even sun-dried tomatoes.

4. How Do I Store Leftovers?

Leftovers can be stored in an airtight container in the refrigerator for up to 3 days. Reheat in the oven at 350°F (175°C) for 10 minutes, or microwave individual portions for about a minute.

5. Can I Freeze It?

Yes, this bake freezes well. Let it cool completely, then wrap individual portions in plastic wrap and place them in a freezer-safe container. Reheat in the oven at 375°F (190°C) until warmed through.

6. What Can I Serve With It?

This dish pairs well with a light side salad, roasted vegetables, or a warm bowl of tomato soup. For breakfast, serve it with fresh fruit or a side of crispy hash browns.

7. How Can I Make It Healthier?

To lighten up this dish, use whole grain bread, reduced-fat cheese, and lean turkey instead of ham. You can also add more veggies for extra nutrients.

Conclusion: A Dish That Feels Like Home

There’s something undeniably comforting about melted cheese, warm bread, and the familiar flavors of a classic ham and cheese combination. This Cheesy Ham & Cheese Bread Bake isn’t just food—it’s a memory in the making, a dish that brings people together, and a meal that satisfies the soul as much as the stomach.

Whether you’re making it for a lazy weekend brunch, a quick dinner, or a special family gathering, this recipe is guaranteed to become a staple in your home. So gather your ingredients, preheat that oven, and get ready to enjoy a dish that’s simple, delicious, and filled with warmth.

Amal

Cheesy Ham & Cheese Bread Bake: A Comforting Classic

This Cheesy Ham & Cheese Bread Bake is a warm, comforting dish perfect for breakfast, brunch, or even dinner. Layers of crispy bread, melted cheese, and savory ham come together in a rich, creamy egg mixture, creating a dish that’s both simple and indulgent. Easy to prepare and guaranteed to satisfy, it’s a family favorite that feels like a hug on a plate.
Prep Time 10 minutes
Cook Time 25 minutes
Total Time 35 minutes
Servings: 4 –6 servings
Course: Breakfast
Cuisine: American

Ingredients
  

  • 8 slices of bread preferably slightly stale or rustic-style
  • 12 slices of cheese cheddar, mozzarella, or your favorite melting cheese
  • 8 slices of ham or turkey, bacon, or a vegetarian alternative
  • 2 large eggs
  • 2 tablespoons sour cream
  • Paprika to taste
  • 100 grams about 1 cup grated cheese (cheddar, Gruyère, or Parmesan)

Method
 

  1. Preheat the oven to 375°F (190°C). Lightly grease a baking dish.
  2. Layer the bread and fillings — Place half of the bread slices at the bottom of the dish, followed by a layer of ham and half of the sliced cheese. Add the remaining bread on top and cover with the rest of the sliced cheese.
  3. Prepare the egg mixture — In a small bowl, whisk together the eggs, sour cream, and paprika until smooth.
  4. Pour and top — Evenly pour the egg mixture over the layered bread, ensuring it soaks in. Sprinkle the grated cheese on top for an extra cheesy crust.
  5. Bake for 20–25 minutes, or until the cheese is melted and bubbly and the top is golden brown.
  6. Let it rest for a few minutes before slicing and serving. Enjoy warm!

Notes

  • For a heartier dish, add cooked bacon, sautéed mushrooms, or caramelized onions between the layers.
  • Slightly stale bread works best as it absorbs the egg mixture without becoming too soggy.
  • Spice it up by adding a pinch of garlic powder, mustard, or red pepper flakes to the egg mixture.
  • Store leftovers in an airtight container in the fridge for up to 3 days. Reheat in the oven for best results.
  • Freezer-friendly: Wrap individual portions and freeze for up to 2 months. Reheat in the oven at 375°F (190°C) until warmed through.


Peepin’ Chickies Deviled Eggs: Delightful Easter Treat!

Introduction to Peepin’ Chickies Deviled Eggs

Ah, the joy of Easter gatherings! There’s something magical about bringing a dish that not only tastes divine but also sparks a smile. Enter Peepin’ Chickies Deviled Eggs, a delightful treat that transforms the classic deviled egg into adorable little chicks. Perfect for busy moms and professionals, this recipe is a quick solution for those bustling days when you want to impress without the stress. Imagine the delight on your loved ones’ faces as they peep at these charming creations. Let’s dive into this culinary adventure and make your Easter table the talk of the town!

Why You’ll Love This Peepin’ Chickies Deviled Eggs

These Peepin’ Chickies Deviled Eggs are a breeze to whip up, making them perfect for those hectic days when time is of the essence. With their adorable appearance and delightful taste, they’re sure to be a hit with both kids and adults alike. Plus, they add a touch of whimsy to your Easter spread, turning a simple appetizer into a festive centerpiece. What’s not to love?

Ingredients Peepin’ Chickies Deviled Eggs

Creating these charming Peepin’ Chickies Deviled Eggs is a delightful experience, and it all starts with the right ingredients. You’ll need large eggs, the stars of the show, which provide a creamy base for our filling. Mayonnaise adds a rich, smooth texture, while a touch of Dijon mustard brings a subtle tanginess. A splash of white vinegar enhances the flavors, making them pop. Season with salt and pepper to taste, ensuring a balanced flavor profile.

For a sunny hue, a few drops of yellow food coloring can be added, though it’s entirely optional. To bring our little chicks to life, black olives serve as the perfect eyes, and carrot sticks make adorable beaks. If you’re feeling adventurous, consider a pinch of smoked paprika for a smoky twist. For a lighter version, swap mayonnaise with Greek yogurt. Exact quantities are listed at the bottom of the article, ready for printing.

How to Make Peepin’ Chickies Deviled Eggs

Boil the Eggs

Start by placing your eggs in a saucepan, ensuring they’re snug but not overcrowded. Cover them with cold water, about an inch above the eggs. Bring the water to a rolling boil over medium-high heat. Once you see those bubbles dancing, cover the pot, remove it from the heat, and let it sit for 12 minutes. This method ensures perfectly cooked eggs every time.

After the timer dings, transfer the eggs to a bowl of ice water. This icy bath halts the cooking process and makes peeling a breeze. Let them chill for about 5 minutes. Once cooled, gently tap and roll each egg on the counter to crack the shell, then peel them under running water for ease.

Prepare the Yolk Mixture

With your eggs peeled, slice them in half lengthwise. Carefully scoop out the yolks and place them in a mixing bowl. Add mayonnaise, Dijon mustard, and a splash of white vinegar to the yolks. Season with salt and pepper to taste. For a cheerful yellow hue, add a few drops of yellow food coloring, but that’s entirely up to you.

Using a fork, mash the yolk mixture until it’s smooth and creamy. This is where the magic happens, as the flavors meld into a delightful filling. If you’re feeling adventurous, a pinch of smoked paprika can add a smoky depth to the mix.

Assemble the Chicks

Now, it’s time to bring your little chicks to life! Spoon or pipe the yolk mixture back into the egg whites, creating a generous mound. For the eyes, cut small pieces of black olives and gently press them into the yolk filling. Carrot sticks, cut into tiny triangles, make perfect beaks.

Arrange your Peepin’ Chickies Deviled Eggs on a platter, and watch as they transform into the stars of your Easter table. Serve them immediately, or refrigerate until you’re ready to dazzle your guests. These charming appetizers are best enjoyed the same day, ensuring their freshness and flavor.

Tips for Success

  • Use fresh eggs for easier peeling; older eggs can be stubborn.
  • Chill eggs in ice water immediately after boiling to prevent overcooking.
  • For a smoother yolk mixture, use a food processor instead of a fork.
  • Experiment with different mustards for unique flavor profiles.
  • Prepare the yolk mixture a day ahead to save time on busy days.

Equipment Needed

  • Saucepan: A medium-sized one works best for boiling the eggs.
  • Mixing Bowl: For combining the yolk mixture.
  • Fork or Food Processor: To mash the yolks smoothly.
  • Knife: For slicing eggs and cutting decorations.
  • Piping Bag or Spoon: To fill the egg whites with the yolk mixture.

Variations

  • For a spicy kick, add a dash of hot sauce or a pinch of cayenne pepper to the yolk mixture.
  • Swap the mayonnaise with avocado for a creamy, dairy-free alternative.
  • Incorporate finely chopped herbs like dill or chives for a fresh, aromatic twist.
  • Use pickled jalapeños instead of black olives for a zesty eye decoration.
  • Try adding crumbled bacon bits to the yolk mixture for a savory, smoky flavor.

Serving Suggestions

  • Pair with a crisp, refreshing salad to balance the richness of the eggs.
  • Serve alongside a chilled glass of sparkling lemonade for a zesty contrast.
  • Arrange on a bed of fresh greens for a vibrant presentation.
  • Complement with a platter of assorted cheeses and crackers.
  • Garnish with fresh herbs like parsley or dill for an aromatic touch.

FAQs about Peepin’ Chickies Deviled Eggs

How far in advance can I make Peepin’ Chickies Deviled Eggs?

You can prepare the yolk mixture a day ahead and store it in the fridge. Assemble the chicks on the day of serving for the freshest taste and appearance. This ensures your Peepin’ Chickies Deviled Eggs are as delightful as they are delicious.

Can I make these deviled eggs without mayonnaise?

Absolutely! You can substitute mayonnaise with Greek yogurt or mashed avocado for a lighter, creamy alternative. Both options maintain the delightful texture while offering a unique twist to your Peepin’ Chickies Deviled Eggs.

What can I use instead of black olives for the eyes?

If black olives aren’t your thing, try using capers or small pieces of pickled jalapeños. These alternatives add a zesty touch to your Peepin’ Chickies Deviled Eggs, keeping them both cute and flavorful.

How do I prevent the eggs from cracking while boiling?

To avoid cracks, start with cold water and bring it to a gentle boil. Adding a pinch of salt or a splash of vinegar to the water can also help keep the eggs intact, ensuring your Peepin’ Chickies Deviled Eggs are picture-perfect.

Can I add other flavors to the yolk mixture?

Of course! Feel free to experiment with flavors like smoked paprika, hot sauce, or fresh herbs. These additions can elevate your Peepin’ Chickies Deviled Eggs, making them a unique and tasty treat for your Easter gathering.

Final Thoughts

Creating Peepin’ Chickies Deviled Eggs is more than just a culinary task; it’s a joyful experience that brings a smile to everyone involved. These little chicks are not only a feast for the eyes but also a delight for the taste buds. As you place them on your Easter table, watch as they become the centerpiece of conversation and laughter. Whether you’re a busy mom or a professional juggling life’s demands, this recipe offers a moment of creativity and connection. So, gather your loved ones, share the joy, and let these charming chicks peep their way into your heart.

Peepin' Chickies Deviled Eggs
Paul

Peepin’ Chickies Deviled Eggs: Delightful Easter Treat!

Peepin’ Chickies Deviled Eggs are a delightful Easter treat, featuring deviled eggs decorated to look like little chicks, perfect for festive gatherings.
Prep Time 15 minutes
Cook Time 12 minutes
Total Time 27 minutes
Servings: 6 servings
Course: Appetizer
Cuisine: American
Calories: 100

Ingredients
  

  • 6 large eggs
  • 3 tablespoons mayonnaise
  • 1 teaspoon Dijon mustard
  • 1 teaspoon white vinegar
  • Salt and pepper to taste
  • Yellow food coloring optional
  • Black olives for decoration
  • Carrot sticks for decoration

Method
 

  1. Place the eggs in a saucepan and cover them with cold water. Bring the water to a boil over medium-high heat. Once boiling, cover the pot, remove it from heat, and let it sit for 12 minutes.
  2. After 12 minutes, transfer the eggs to a bowl of ice water and let them cool for about 5 minutes. Once cooled, peel the eggs and slice them in half lengthwise.
  3. Remove the yolks from the egg whites and place them in a mixing bowl. Add the mayonnaise, Dijon mustard, white vinegar, salt, and pepper. If desired, add a few drops of yellow food coloring to achieve a cheerful yellow hue.
  4. Mash the yolk mixture with a fork until smooth and well combined. Spoon or pipe the yolk mixture back into the egg whites.
  5. To create the ‘chick’ look, cut small pieces of black olives for eyes and use carrot sticks for beaks. Place them on the yolk filling to resemble little chicks.
  6. Serve immediately or refrigerate until ready to serve. These deviled eggs are best enjoyed the same day.

Notes

  • For a fun twist, try adding a pinch of smoked paprika to the yolk mixture for extra flavor.
  • You can also substitute the mayonnaise with Greek yogurt for a lighter version.

Easter Brunch Delight: Crescent Roll Carrots with a Twist

A Sweet Childhood Memory Turned Easter Tradition

Every Easter morning, my grandmother would wake up early to prepare a feast for the family. She always believed that food should be as festive as the occasion itself. I remember watching her shape dough with practiced hands, her fingers carefully crafting something magical out of the simplest ingredients. One year, she surprised us with golden-brown crescent rolls shaped like carrots, stuffed with creamy egg salad, and garnished with fresh dill. They looked so real that for a moment, my younger self hesitated—was this a pastry or an actual carrot?

That Easter, those Crescent Roll Carrots became an instant tradition in our family. They weren’t just a fun and festive dish; they symbolized the warmth and creativity that my grandmother brought to every meal. Over the years, I’ve carried on her tradition, tweaking the recipe slightly to add my own touch. Now, it’s a staple on my Easter brunch table, bringing smiles to my loved ones just as it did for me as a child.

There’s something undeniably joyful about food that sparks conversation and excitement. These Crescent Roll Carrots do exactly that—they’re not only delicious but also a creative centerpiece that adds charm to any Easter spread. Whether you’re making them for a gathering of family and friends or introducing a fun new tradition for your kids, these pastries are bound to become a highlight of your holiday meal.

Why Crescent Roll Carrots Are the Perfect Easter Treat

Easter is a time for creativity in the kitchen, and this recipe is a fantastic way to make your brunch table more festive. The combination of flaky crescent rolls and creamy egg or ham salad creates a perfect balance of texture and flavor. Here’s why these edible “carrots” deserve a spot on your holiday menu:

1. A Fun, Kid-Friendly Recipe

Children love colorful, playful foods, and this dish makes eating an Easter-themed meal extra fun. They’ll enjoy the novelty of eating a “carrot” that’s actually a delicious pastry. If you let them help in the kitchen, they can participate in rolling the dough or brushing on the orange color. Cooking together is a great way to create lasting family memories.

2. A Versatile Crowd-Pleaser

These Crescent Roll Carrots can be customized with different fillings to suit your guests’ tastes. While traditional egg or ham salad is a classic choice, you can also experiment with chicken salad, tuna salad, or even a vegetarian option like herbed cream cheese or hummus.

3. Aesthetic Appeal for Your Easter Spread

Easter tables are often decorated with pastel colors, fresh flowers, and festive treats. These crescent roll carrots add a visually appealing element that blends perfectly with the holiday theme. With their bright orange hue and delicate sprigs of dill, they look just like real carrots—only much tastier!

Gather Your Ingredients:

  • 1 tube Pillsbury Crescent Recipe Creations Crescent Seamless Dough Sheet
  • 1 egg (whisked with 1 teaspoon of water for egg wash)
  • Yellow and red liquid food coloring (or natural alternatives)
  • 1 ½ cups of your favorite egg or ham salad
  • 1 bunch of fresh dill or parsley

Special Tools for Success:

  • Pizza cutter or knife
  • 6 metal cream horn molds
  • Pastry brush
  • Non-stick aluminum foil-lined baking sheet

Step-by-Step Directions to Easter Perfection

Step 1: Prepping the Dough

Preheat your oven to 400°F. Roll out the Pillsbury Crescent Dough Sheet onto a cutting board and use a pizza cutter or knife to slice it into 6 equal strips.

Step 2: Rolling the Dough Logs

Brush one strip with egg wash, then roll it into a 17–18-inch-long log. Pinch the seam shut and roll it thinner with your hands. Repeat this step for all six strips.

Step 3: Shaping the Carrots

Wrap each dough log around a metal cream horn mold, keeping the seam side against the mold. Ensure the dough doesn’t hang over the open end, as this will make removal tricky after baking.

Step 4: Coloring the Carrots

Mix about 60 drops of yellow food coloring with 2 drops of red to create orange. Using a pastry brush, coat the dough with the food coloring. If you prefer, you can brush the dough with just egg wash for a golden-brown effect.

Step 5: Baking the Carrot Crescents

Place the shaped dough on a lined baking sheet and bake for 6–8 minutes, rotating the pan halfway through for even browning. Let them cool for about 5 minutes before carefully twisting and removing the cream horn molds.

Step 6: Filling & Finishing Touches

Once completely cooled, spoon your favorite egg or ham salad into each crescent roll “carrot.” Garnish with sprigs of fresh dill or parsley for that leafy green effect.

Tip: These are best served fresh but can be stored in the fridge for up to two days.

Nutritional Highlights (Per Serving – Approximate Values)

  • Calories: ~220
  • Carbohydrates: ~18g
  • Protein: ~6g
  • Fat: ~14g
  • Fiber: ~1g

A perfect balance of flaky pastry and creamy filling, these Crescent Roll Carrots are a fun and festive addition to any Easter brunch table!

Common Questions About Crescent Roll Carrots

If you’re making these for the first time, you might have a few questions. Here are some frequently asked questions to help you perfect this Easter recipe.

1. Can I Make These Ahead of Time?

Yes! The crescent rolls can be baked in advance and stored in an airtight container for up to two days. However, it’s best to fill them just before serving to prevent the pastry from becoming soggy. If needed, you can prepare the filling a day ahead and refrigerate it separately.

2. What If I Don’t Have Metal Cream Horn Molds?

No problem! You can make DIY molds by rolling aluminum foil into cone shapes. Some people even use sugar cones as a substitute, though you’ll need to wrap them in foil to prevent burning.

3. Can I Use Puff Pastry Instead of Crescent Dough?

Absolutely! Puff pastry will give the carrots a flakier texture, but it works just as well. Just be sure to pinch the seams together to prevent the layers from separating during baking.

4. How Can I Make These More Natural Without Food Coloring?

If you prefer to avoid artificial food coloring, you can use natural alternatives such as:

  • Carrot juice or puree – Brush it onto the dough for a mild orange tint.
  • Paprika and turmeric – Mix these spices with egg wash for a natural color boost.
  • Beet juice – A tiny drop mixed with yellow food coloring creates a more natural orange shade.

5. Can I Make These Gluten-Free?

Yes! There are gluten-free crescent roll alternatives available in most grocery stores. Just be aware that gluten-free doughs may be more delicate and require extra care when shaping.

6. What Other Fillings Work Well?

Beyond egg and ham salad, consider trying:

  • Smoked salmon and cream cheese for a savory, sophisticated twist.
  • Chicken salad with grapes and almonds for a sweet and crunchy filling.
  • Buffalo chicken dip for a spicy, crowd-pleasing option.
  • Herbed ricotta and spinach for a vegetarian-friendly choice.

Tips for Making the Best Crescent Roll Carrots

To ensure your Crescent Roll Carrots turn out perfectly every time, keep these tips in mind:

1. Roll the Dough Evenly

For uniform carrots, make sure to roll your dough strips evenly before wrapping them around the molds. Uneven dough may cause them to bake inconsistently.

2. Keep an Eye on Baking Time

Crescent dough can go from golden to overbaked quickly, so check them at the 6-minute mark. Rotate the pan halfway through baking for even color.

3. Let Them Cool Before Removing the Molds

Removing the molds too soon can cause the pastries to collapse. Let them cool for at least 5 minutes before gently twisting and pulling out the molds.

4. Don’t Overfill the Carrots

While it’s tempting to load them up with filling, too much can cause the crescent rolls to break apart. Fill them just enough to maintain their structure while still being generous with the stuffing.

A Festive Finish: Making Easter Memorable

Holidays are about more than just food—they’re about the memories we create around the table. These Crescent Roll Carrots are more than just a fun recipe; they represent creativity, joy, and the spirit of celebration. Every time I make them, I think back to that Easter morning in my grandmother’s kitchen, watching her turn simple ingredients into something magical.

Whether you’re making these for a large family gathering, a kids’ Easter party, or a cozy brunch with loved ones, these Crescent Roll Carrots are guaranteed to bring smiles. They remind us that sometimes, the best holiday traditions start with a simple, creative idea—and a little bit of dough.

So this Easter, why not start a new tradition? Get the kids involved, embrace the fun, and watch as these charming edible carrots become a favorite in your household for years to come.

aiting

Easter Brunch Delight: Crescent Roll Carrots with a Twist

These Golden Carrot Crescents are a fun and festive Easter treat! Light, flaky pastry is shaped like a carrot, baked to golden perfection, and filled with your favorite egg or ham salad. A sprig of fresh dill adds the perfect finishing touch, making them a whimsical and delicious addition to your holiday spread.
Prep Time 15 minutes
Cook Time 8 minutes
Total Time 25 minutes
Servings: 6 servings
Course: Appetizer
Cuisine: American

Ingredients
  

  • 1 tube Pillsbury Crescent Recipe Creations Crescent Seamless Dough Sheet 1 egg (whisked with 1 teaspoon of water for egg wash), yellow and red liquid food coloring (or natural alternatives), 1 ½ cups egg or ham salad, 1 bunch fresh dill or parsley.

Method
 

  1. Prepare the Dough – Preheat oven to 400°F. Roll out the Crescent Dough Sheet and cut into 6 equal strips using a pizza cutter or knife.
  2. Shape the Dough – Brush one strip with egg wash, then roll it into a long, thin log (about 17-18 inches). Repeat with the remaining strips.
  3. Wrap & Form – Wrap each dough log around a metal cream horn mold, keeping the seam side down. Avoid overhanging dough at the open end.
  4. Color the Carrots – Mix 60 drops of yellow food coloring with 2 drops of red to create orange. Use a pastry brush to coat the dough. Alternatively, brush with only egg wash for a golden-brown finish.
  5. Bake – Place on a lined baking sheet and bake for 6-8 minutes, rotating halfway through. Let cool for 5 minutes before carefully removing from molds.
  6. Fill & Garnish – Once cooled, spoon egg or ham salad into each crescent roll “carrot.” Garnish with fresh dill or parsley for a realistic touch.

Notes

  • These are best served fresh but can be refrigerated for up to two days.
  • For a natural orange hue, use carrot juice or turmeric instead of food coloring.
  • Fill them just before serving to keep the pastry crisp.

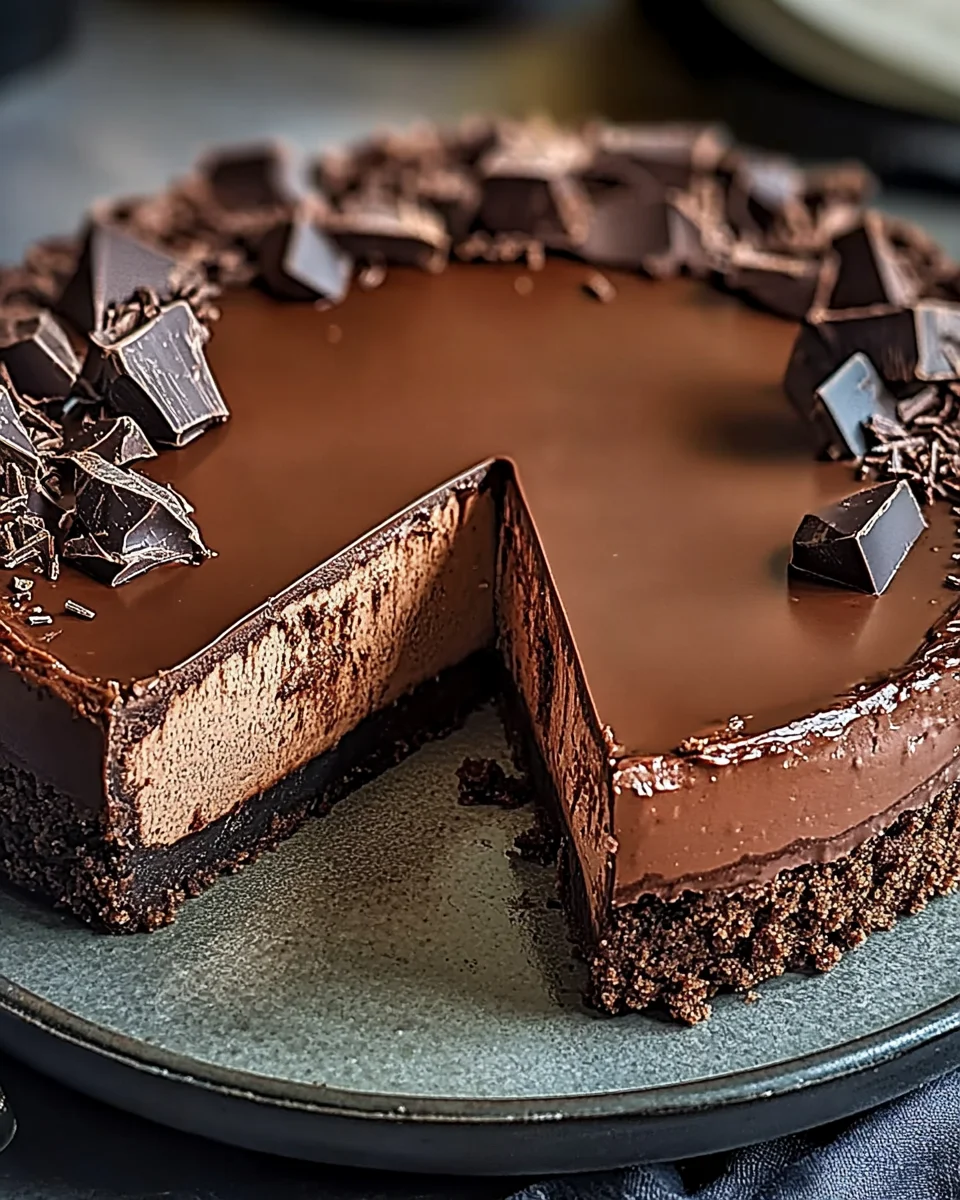
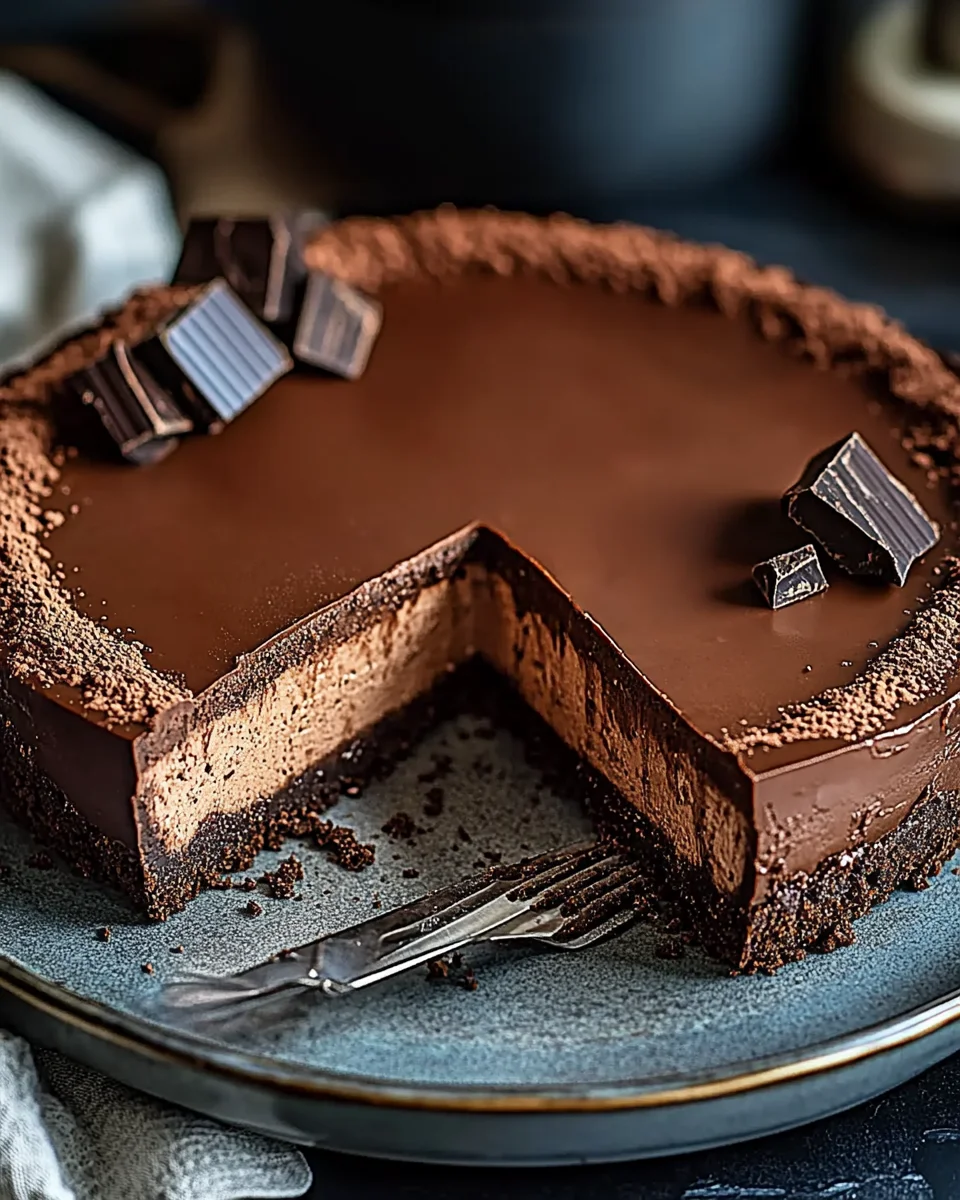
Chocolate Mascarpone Cheesecake: A Decadent Treat for the Soul

A Sweet Memory: The Cheesecake That Started It All

I still remember the first time I made a chocolate mascarpone cheesecake. It was a cold winter evening, and my family was gathered around the kitchen, eagerly watching as I pulled the dessert out of the oven. The scent of melted chocolate and creamy mascarpone filled the air, wrapping us in a warmth that only homemade treats can provide.

That night, as we sliced into the cheesecake, the velvety texture and deep chocolate flavor melted on our tongues. It was rich but not overwhelming, sweet yet sophisticated. My grandmother, who was known for her discerning taste in desserts, smiled and said, “This reminds me of the cheesecakes we used to have in Italy.” That was the moment I knew this recipe was something special.

Chocolate mascarpone cheesecake isn’t just a dessert—it’s an experience. It’s the kind of treat that brings people together, creates lasting memories, and makes any occasion feel extraordinary. Whether you’re baking it for a family gathering, a romantic dinner, or simply to indulge in a moment of self-care, this cheesecake is bound to become a favorite in your home.

Why Mascarpone Makes the Difference

Traditional cheesecakes are made with cream cheese, which gives them a tangy and slightly dense texture. Mascarpone, however, takes the experience to another level. It’s an Italian cream cheese known for its rich, buttery consistency and subtle sweetness. When combined with high-quality chocolate, mascarpone creates a cheesecake that is smoother, silkier, and more refined than any traditional version.

This key ingredient not only enhances the texture but also balances the deep flavors of dark chocolate, making the cheesecake taste luxurious without being overly sweet. Mascarpone’s mild flavor allows the chocolate to shine while adding a velvety richness that lingers with every bite.

The Secret to a Perfect Chocolate Mascarpone Cheesecake

Achieving the perfect chocolate mascarpone cheesecake requires attention to detail and a few expert tips:

1. Choosing the Right Chocolate

The quality of chocolate you use will define the flavor of your cheesecake. Opt for dark chocolate with at least 60-70% cocoa content. This will give your cheesecake a deep, rich taste without excessive sweetness. Semisweet chocolate can also work if you prefer a milder chocolate flavor.

2. Gentle Mixing for a Smooth Texture

Overmixing can introduce too much air into the batter, leading to cracks or a dense texture. Mix each ingredient just until incorporated. Pay special attention when adding the eggs—beating them too much can cause the cheesecake to puff up during baking and then collapse as it cools.

3. The Importance of a Water Bath

A water bath (also called a bain-marie) helps the cheesecake bake evenly and prevents cracks. The gentle steam keeps the texture smooth and creamy. To do this, wrap the springform pan in aluminum foil, place it in a larger baking dish, and fill the dish with an inch or two of hot water before baking.

4. Slow Cooling for the Best Consistency

Once the cheesecake is done baking, don’t rush to remove it from the oven. Let it cool inside with the door slightly ajar for about 30 minutes. This gradual cooling process prevents sudden temperature changes that could cause cracks.

5. Chilling Time is Key

Chocolate mascarpone cheesecake is best enjoyed after it has had time to fully set in the refrigerator. Ideally, let it chill for at least 4 hours, but overnight is even better. This allows the flavors to meld and results in a firmer, more luscious texture.

What You’ll Need: The Perfect Ingredients

For the Crust:

  • 1 ½ cups chocolate graham cracker crumbs
  • ¼ cup unsalted butter, melted
  • 2 tablespoons granulated sugar

For the Filling:

  • 8 oz cream cheese, softened
  • 8 oz mascarpone cheese, softened
  • 1 cup granulated sugar
  • ½ cup sour cream
  • 1 teaspoon vanilla extract
  • 3 large eggs
  • ½ cup melted dark chocolate (70% cocoa or higher)
  • ¼ cup cocoa powder, sifted

For the Ganache Topping (Optional):

  • ½ cup heavy cream
  • ½ cup dark chocolate, chopped

Step-by-Step: Bringing It to Life

1. Crafting the Crust:

  • Preheat the oven to 350°F (175°C).
  • Mix chocolate graham cracker crumbs, melted butter, and sugar.
  • Press mixture into the bottom of a 9-inch springform pan.
  • Bake for 8-10 minutes, then set aside to cool.

2. Preparing the Luxurious Filling:

  • In a large bowl, beat cream cheese, mascarpone, and sugar until smooth.
  • Mix in sour cream and vanilla extract.
  • Add eggs one at a time, mixing on low speed.
  • Stir in melted dark chocolate and sifted cocoa powder.

3. Baking to Perfection:

  • Pour filling over the cooled crust and spread evenly.
  • Bake for 50-60 minutes, until the center is slightly set but still jiggly.
  • Turn off the oven, crack the door open, and let it cool inside for an hour.
  • Remove and let it reach room temperature before refrigerating for at least 4 hours (preferably overnight).

4. Elevate with Ganache (Optional):

  • Heat heavy cream until simmering (but not boiling).
  • Pour over chopped dark chocolate and let sit for 2-3 minutes.
  • Stir until smooth and spread over the chilled cheesecake.

5. Serve & Savor:

  • Slice and serve with fresh berries, chocolate shavings, or whipped cream.

Nutrition Facts (Per Serving):

  • Calories: 450
  • Fat: 34g
  • Carbohydrates: 30g
  • Protein: 8g

Enjoy this rich, creamy Chocolate Mascarpone Cheesecake—every bite is pure bliss.

FAQs About Chocolate Mascarpone Cheesecake

1. Can I Substitute Cream Cheese for Mascarpone?

Yes, but the texture and flavor will be different. Mascarpone has a higher fat content and is less tangy than cream cheese, which makes it smoother and richer. If you substitute cream cheese, your cheesecake will still be delicious, but it will have a denser and slightly tangier taste.

2. Can I Use Milk Chocolate Instead of Dark Chocolate?

Milk chocolate can be used, but it will make the cheesecake much sweeter. If you prefer a lighter chocolate flavor, you might want to reduce the sugar in the recipe slightly to maintain balance.

3. Why Did My Cheesecake Crack?

Cracks can occur for several reasons:

  • Overmixing the batter, which introduces too much air.
  • Baking at too high a temperature.
  • Cooling too quickly after baking.

To prevent this, always mix gently, bake at a low temperature, and let the cheesecake cool gradually. Using a water bath also helps keep the texture smooth and crack-free.

4. How Do I Know When My Cheesecake Is Done?

The edges should be set, but the center should still have a slight jiggle when you shake the pan. The cheesecake will continue to firm up as it cools, so it’s better to slightly underbake than to overbake.

5. Can I Freeze Chocolate Mascarpone Cheesecake?

Absolutely! To freeze, wrap individual slices in plastic wrap and place them in a freezer-safe container. When ready to eat, thaw overnight in the refrigerator. This cheesecake maintains its creamy texture even after freezing.

6. What Are the Best Toppings for This Cheesecake?

This cheesecake is incredible on its own, but toppings can take it to the next level. Some great options include:

  • A drizzle of chocolate ganache
  • Fresh berries (strawberries, raspberries, or blackberries)
  • A dusting of cocoa powder
  • Whipped cream for an extra creamy touch

7. Can I Make This Cheesecake Without a Springform Pan?

A springform pan is ideal because it allows for easy removal without damaging the cheesecake. However, if you don’t have one, you can use a deep pie dish or a regular cake pan lined with parchment paper. Just be extra careful when removing the cheesecake.

8. How Long Will This Cheesecake Stay Fresh?

Stored in the refrigerator, this cheesecake will stay fresh for up to 5 days. Be sure to cover it well to prevent it from absorbing any unwanted fridge odors.

A Dessert Worth Every Bite

Chocolate mascarpone cheesecake is more than just a dessert—it’s a celebration of rich, luxurious flavors and creamy, melt-in-your-mouth texture. Every bite is a balance of deep chocolate and silky mascarpone, making it a truly indulgent treat for any occasion.

Whether you’re serving it at a holiday gathering, surprising a loved one, or simply treating yourself, this cheesecake never fails to impress. And beyond its taste, it’s the kind of dessert that brings people together, creating moments of joy and connection.

So, the next time you need a little indulgence, let this chocolate mascarpone cheesecake be your go-to. After all, life is too short to skip dessert.

aiting

Chocolate Mascarpone Cheesecake: A Decadent Treat for the Soul

Decadent, creamy, and utterly irresistible, this Chocolate Mascarpone Cheesecake is a dream dessert. With a rich chocolate graham cracker crust, a velvety mascarpone filling, and an optional dark chocolate ganache topping, every bite melts in your mouth. Perfect for special occasions—or just because you deserve it!
Prep Time 20 minutes
Cook Time 1 hour
Total Time 5 hours
Servings: 8 -10 servings
Course: Dessert
Cuisine: American

Ingredients
  

  • For the crust:1 ½ cups chocolate graham cracker crumbs ¼ cup unsalted butter (melted), 2 tablespoons granulated sugar.
  • For the filling:8 oz cream cheese softened, 8 oz mascarpone cheese (softened), 1 cup granulated sugar, ½ cup sour cream, 1 teaspoon vanilla extract, 3 large eggs, ½ cup melted dark chocolate (70% cocoa or higher), ¼ cup cocoa powder (sifted).
  • For the ganache topping optional:½ cup heavy cream, ½ cup dark chocolate (chopped).

Method
 

  1. Make the Crust – Preheat the oven to 350°F (175°C). Mix graham cracker crumbs, melted butter, and sugar. Press into the bottom of a 9-inch springform pan. Bake for 8-10 minutes, then set aside to cool.
  2. Prepare the Filling – In a bowl, beat cream cheese, mascarpone, and sugar until smooth. Mix in sour cream and vanilla extract. Add eggs one at a time, mixing on low speed. Stir in melted dark chocolate and sifted cocoa powder.
  3. Bake the Cheesecake – Pour the filling over the cooled crust. Bake for 50-60 minutes until the center is slightly set but still jiggly. Turn off the oven, crack the door open, and let it cool for an hour. Then, let it reach room temperature before refrigerating for at least 4 hours (preferably overnight).
  4. Make the Ganache (Optional) – Heat heavy cream until simmering, then pour over chopped dark chocolate. Let sit for 2-3 minutes, stir until smooth, and spread over the chilled cheesecake.
  5. Serve & Enjoy – Slice and serve with fresh berries, chocolate shavings, or whipped cream.

Notes

  • Use high-quality dark chocolate for a richer flavor.
  • Allowing the cheesecake to chill overnight enhances the texture.
  • For a crunchier crust, chill it for 15 minutes before adding the filling.

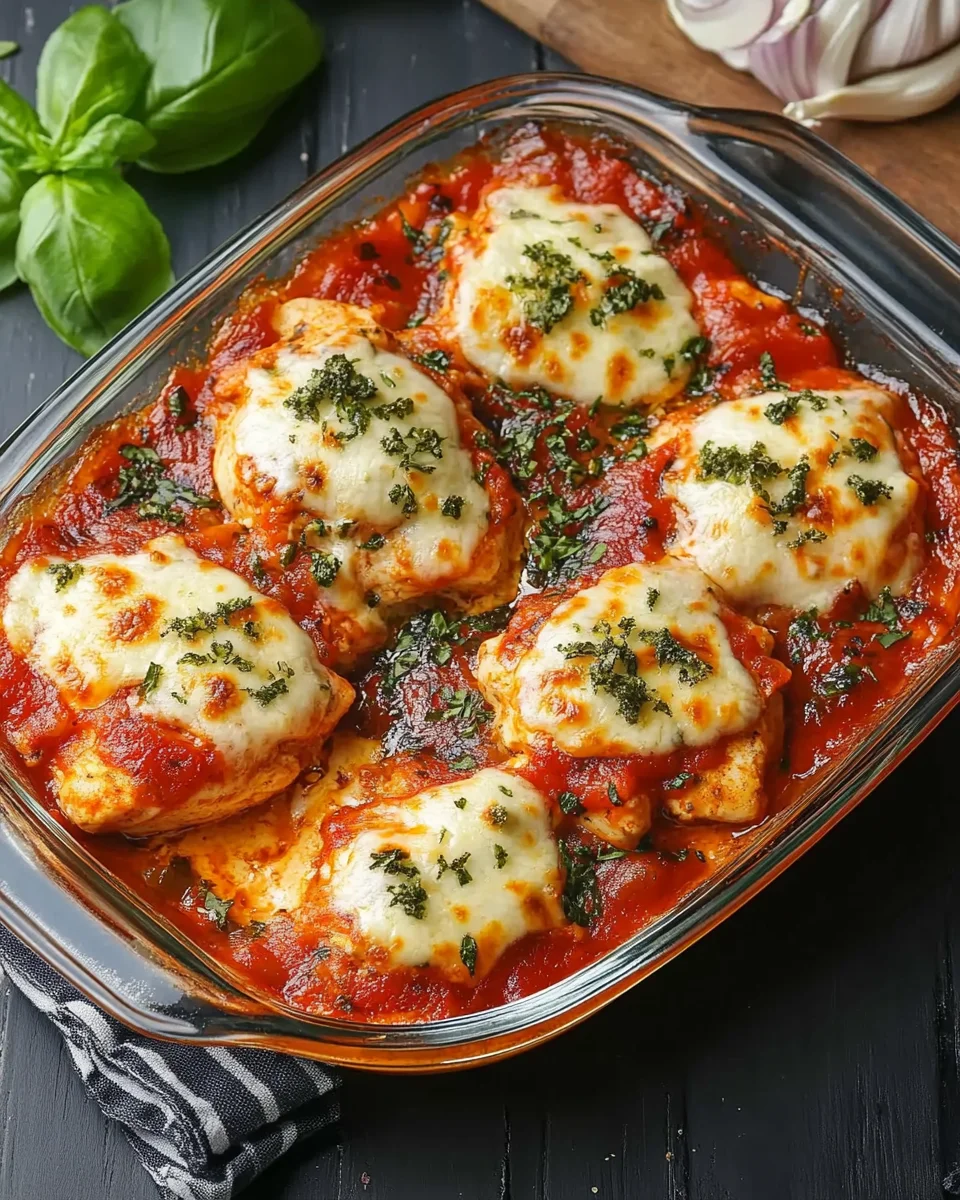
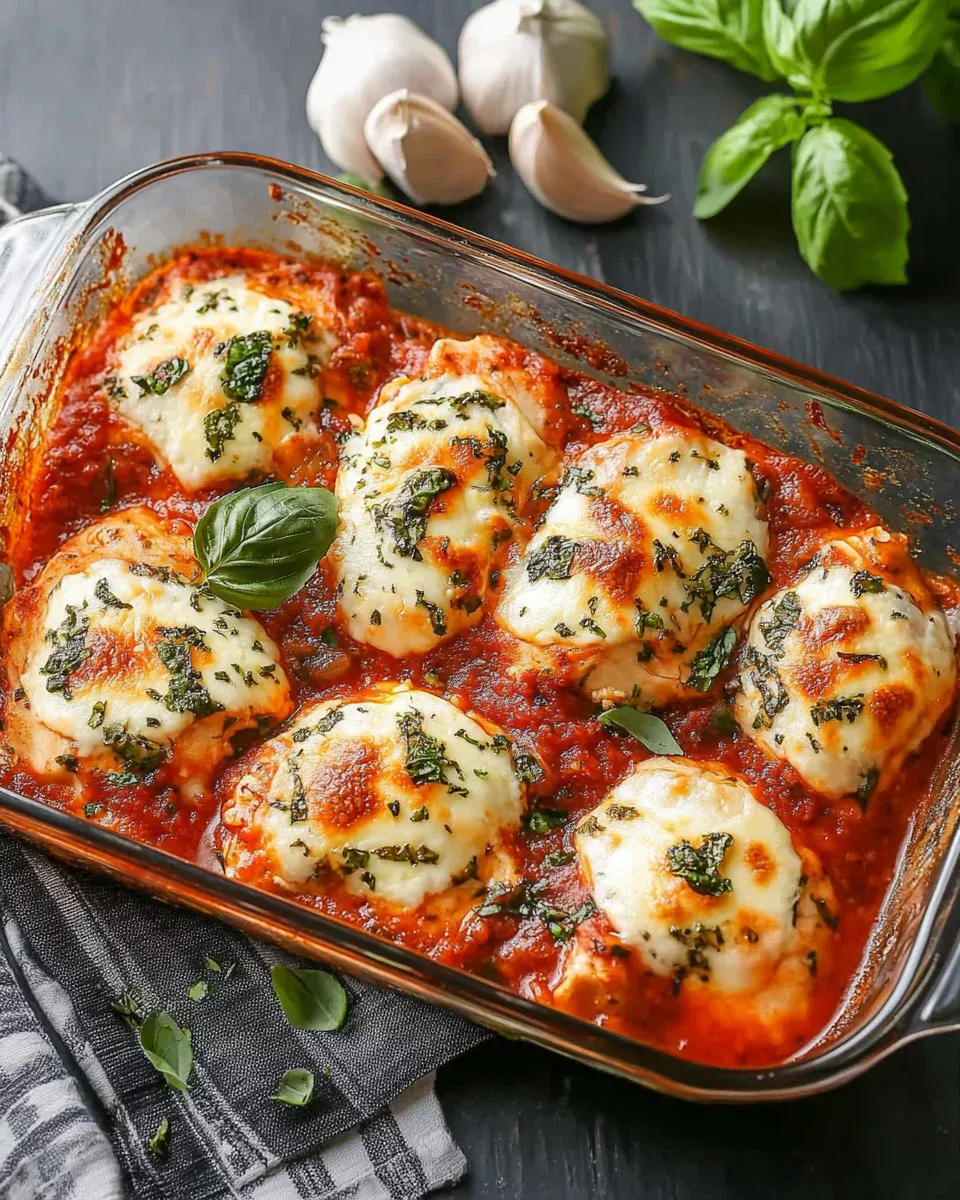
A Taste of Home: The Comforting Embrace of Chicken & Mozzarella Bake

Some meals are more than just food—they carry warmth, nostalgia, and the essence of home. I still remember the first time I had a dish like this. It was one of those long, exhausting days when nothing seemed to go right. The kind of day where you just crave something hearty, familiar, and soul-soothing. I stepped into the kitchen, aimlessly searching for inspiration, and found myself reaching for simple, staple ingredients: chicken, mozzarella, tomatoes, and a handful of aromatic herbs.

As the dish baked, the scent filled the air, wrapping me in a sense of calm. The moment I took the first bite—juicy chicken bathed in a tangy tomato sauce, blanketed with melted mozzarella—I knew this was going to be a household favorite. That’s the beauty of the Chicken & Mozzarella Bake. It’s simple yet indulgent, comforting yet wholesome, and it never fails to bring people together.

This dish isn’t just a recipe; it’s an experience. Whether you’re looking for a quick weeknight dinner, a meal to impress guests, or a wholesome comfort food option, this bake is everything you need and more. Let’s dive into what makes it special and why it deserves a permanent spot in your recipe collection.

Why You’ll Love This Chicken & Mozzarella Bake

1. A Balance of Indulgence and Health

Many comfort foods tend to lean toward the heavy, carb-loaded side, but this dish offers all the indulgence of a rich, cheesy meal while remaining protein-packed and low in carbs. It’s a keto-friendly and gluten-free option that still satisfies cravings without the guilt.

2. Effortless Yet Elegant

There’s something special about a dish that looks gourmet but requires minimal effort. With just a handful of ingredients and a single baking dish, you can create a meal that feels restaurant-worthy, even on a busy night.

3. Perfect for Meal Prep

If you’re someone who loves to prep meals in advance, this bake is a lifesaver. It stores well in the fridge, reheats beautifully, and can be paired with different sides throughout the week for variety.

4. Crowd-Pleaser

From kids to adults, picky eaters to foodies, this recipe has universal appeal. The classic combination of chicken, tomato sauce, and gooey mozzarella is one that everyone loves.

Creative Variations to Try

One of the best things about this recipe is its versatility. Once you’ve mastered the base version, you can easily tweak it to suit different cravings or dietary preferences. Here are some creative ways to switch it up:

1. Mediterranean Twist

Add sliced black olives, sun-dried tomatoes, and crumbled feta cheese for a Mediterranean-inspired version that brings a briny, tangy depth of flavor.

2. Spicy Kick

If you love a little heat, toss some red pepper flakes or diced jalapeños into the sauce before baking. You can also drizzle some hot honey or chili oil over the top before serving.

3. Creamy & Cheesy Upgrade

For an extra layer of indulgence, mix a bit of ricotta or cream cheese into the tomato sauce before layering it over the chicken. It creates a creamy, luscious texture that pairs beautifully with the mozzarella.

4. Pesto Lover’s Dream

Swap the tomato sauce for a rich basil pesto, and you’ll get a completely different but equally delicious flavor profile. Pesto pairs exceptionally well with mozzarella and chicken.

5. Vegetable-Loaded Version

Want to add more nutrients to the dish? Toss in some spinach, zucchini, or mushrooms into the baking dish along with the chicken. They will soak up the flavors and make the dish even heartier.

Pairing Perfection: What to Serve with Chicken & Mozzarella Bake

While this bake is delicious on its own, pairing it with the right side dishes can elevate the experience even more. Here are some great options:

  • Caesar Salad – The crisp lettuce, creamy dressing, and crunchy croutons provide a refreshing contrast to the cheesy bake.
  • Garlic Bread – Perfect for soaking up every last bit of the tomato sauce.
  • Roasted Vegetables – Try roasted asparagus, bell peppers, or Brussels sprouts for a healthy and flavorful side.
  • Steamed Rice or Quinoa – A great base to make the meal more filling.
  • Pasta Primavera – Light, fresh, and veggie-packed pasta that balances out the richness of the bake.

Gather Your Essentials

  • 4 boneless, skinless chicken breasts – The star of the show, juicy and tender.
  • 1 tsp garlic powder – For a rich, savory kick.
  • 1 tsp onion powder – Adds a subtle sweetness.
  • 1 tsp Italian seasoning – A blend of herbs for that signature Italian flair.
  • Salt & black pepper (to taste) – Enhances all the flavors.
  • 16 oz can chopped tomatoes – The heart of the sauce, tangy and fresh.
  • 3 cloves garlic, minced – Brings deep, aromatic richness.
  • ½ red onion, chopped – A sharp bite with a hint of sweetness.
  • 1 tsp oregano – Earthy and bold, a perfect complement.
  • 1 cup shredded mozzarella – The gooey, melty magic.
  • 2-3 fresh basil leaves – A fresh, fragrant garnish.
  • 2 tbsp olive oil – For sautéing and adding a velvety finish.

Bringing It to Life

  1. Preheat & Prep – Heat your oven to 375°F. Rinse and pat dry the chicken breasts.
  2. Score for Flavor – Make shallow cuts in a crisscross pattern on the chicken (don’t cut through).
  3. Season It Up – Place chicken in a baking dish. Sprinkle salt, pepper, Italian seasoning, onion powder, and garlic powder. Drizzle with olive oil.
  4. Saucy Perfection – In a bowl, mix chopped tomatoes, garlic, red onion, oregano, and a pinch of salt and pepper. Stir well.
  5. Layer the Love – Pour the sauce over the chicken, making sure it’s evenly covered.
  6. Cheese It Up – Generously sprinkle mozzarella on top.
  7. Bake to Perfection – Bake for 25-30 minutes. When the chicken is cooked through and the cheese is bubbling, broil for a few minutes for a golden finish.
  8. Final Touch – Garnish with fresh basil leaves and serve warm.

Nutritional Breakdown (Per Serving)

  • Calories: 439 kcal
  • Carbohydrates: 9g
  • Protein: 56g
  • Fat: 19g
  • Saturated Fat: 6g
  • Cholesterol: 167mg
  • Sodium: 602mg
  • Potassium: 1127mg
  • Fiber: 2g
  • Sugar: 4g
  • Vitamin A: 420 IU
  • Vitamin C: 15mg
  • Calcium: 214mg
  • Iron: 3mg

Pair it with garlic bread, roasted vegetables, or a light Caesar salad for a well-rounded meal. Enjoy your indulgent yet healthy Italian-inspired creation!

FAQs: Everything You Need to Know

1. Can I Make This Dish Ahead of Time?

Absolutely! You can prepare the entire dish ahead of time, cover it, and store it in the refrigerator for up to 24 hours before baking. When ready to cook, simply place it in the oven and add a few extra minutes to the baking time.

2. How Do I Store and Reheat Leftovers?

Leftovers can be stored in an airtight container in the fridge for up to 4 days. To reheat, place the portion in an oven-safe dish and bake at 350°F for about 10 minutes, or microwave in 30-second intervals until warmed through.

3. Can I Freeze This Dish?

Yes! This dish freezes well. Allow it to cool completely, then transfer it to a freezer-safe container. It will last up to 3 months in the freezer. To reheat, thaw overnight in the fridge and bake at 350°F until heated through.

4. What Type of Chicken Works Best?

Boneless, skinless chicken breasts are ideal for this recipe, but you can also use boneless chicken thighs for a juicier texture. Just adjust the cooking time accordingly, as thighs may take a few extra minutes to cook.

5. Can I Use Fresh Tomatoes Instead of Canned?

Definitely! If you prefer fresh tomatoes, dice about 3-4 medium tomatoes and use them in place of canned ones. You might want to add a splash of tomato paste for extra depth of flavor.

6. How Can I Make It More Kid-Friendly?

If you have picky eaters, consider using a mild marinara sauce instead of chopped tomatoes, and reduce the amount of herbs and garlic. Kids tend to love the cheesy goodness of this dish, so keeping it simple works best.

Final Thoughts: The Dish That Feels Like a Hug

There’s something deeply satisfying about a meal that is both comforting and nourishing. The Chicken & Mozzarella Bake is a dish that brings warmth to the table, making even the most ordinary nights feel special. Whether you’re sharing it with family, serving it to guests, or enjoying it as a solo treat, it’s one of those recipes that stays with you—becoming a staple in your kitchen and a memory in your heart.

Cooking isn’t just about following a recipe. It’s about the emotions tied to the meals we make, the stories we share around the table, and the moments we create with every bite. This dish is a reminder that even the simplest ingredients can come together to create something truly magical.

So next time you need a pick-me-up or just want to impress without the stress, remember this Chicken & Mozzarella Bake—a dish that’s as easy to make as it is to love.

aiting

A Taste of Home: The Comforting Embrace of Chicken & Mozzarella Bake

This Savory Chicken & Mozzarella Bliss Bake is a one-pan wonder loaded with juicy chicken, a rich tomato-garlic sauce, and bubbly, golden mozzarella. With a perfect balance of herbs and seasonings, it’s an easy and satisfying meal that brings the flavors of Italy straight to your table.
Prep Time 10 minutes
Cook Time 30 minutes
Total Time 40 minutes
Servings: 4 servings
Course: Main Course
Cuisine: Italian

Ingredients
  

  • 4 boneless skinless chicken breasts
  • 1 tsp garlic powder
  • 1 tsp onion powder
  • 1 tsp Italian seasoning
  • Salt & black pepper to taste
  • 16 oz can chopped tomatoes
  • 3 cloves garlic minced
  • ½ red onion chopped
  • 1 tsp oregano
  • 1 cup shredded mozzarella
  • 2-3 fresh basil leaves
  • 2 tbsp olive oil

Method
 

  1. Preheat & Prep – Preheat the oven to 375°F. Pat the chicken dry.
  2. Score & Season – Lightly score the chicken and season with salt, pepper, Italian seasoning, onion powder, and garlic powder. Drizzle with olive oil.
  3. Make the Sauce – In a bowl, mix chopped tomatoes, garlic, red onion, oregano, salt, and pepper.
  4. Assemble – Pour the tomato mixture over the chicken in a baking dish, then top with mozzarella.
  5. Bake – Bake for 25-30 minutes until the chicken is cooked through and the cheese is bubbly. Broil for 2-3 minutes for a golden finish.
  6. Garnish & Serve – Top with fresh basil leaves and enjoy!

Notes

  • Serve with garlic bread, roasted veggies, or a light Caesar salad.
  • For extra richness, add a drizzle of balsamic glaze before serving.
  • Use fresh mozzarella for an extra creamy melt.

Coconut Curry Salmon with Garlic Butter: A Dish That Feels Like Home

A Personal Connection to a Comforting Meal

Some dishes have a way of wrapping you in warmth, making you feel at home no matter where you are. For me, this coconut curry salmon with garlic butter is one of them. I remember the first time I made a dish like this—it was a rainy evening, and I was craving something both hearty and soothing. The rich aroma of coconut milk, infused with garlic and red curry, filled my kitchen as the salmon gently simmered in the sauce. The first bite was a revelation—flaky salmon, buttery smooth curry, and just the right hint of spice. It felt like a meal that nourished more than just my body; it was pure comfort in a bowl.

Since then, this recipe has become a staple in my home, whether for quick weeknight dinners or special gatherings where I want to impress without the stress. It’s a dish that delivers gourmet flavor with minimal effort, proving that sometimes, the most satisfying meals come from the simplest of ingredients.

If you’ve never made coconut curry salmon before, this is your chance to create something truly special—something that might just become your own personal comfort dish.

Why This Recipe Deserves a Spot on Your Table

A Harmony of Flavors

Coconut curry salmon with garlic butter is the perfect marriage of bold and creamy. The richness of the coconut milk balances the heat of the curry, while garlic butter adds depth, making each bite a luxurious experience. It’s the kind of dish that lingers on your palate, keeping you coming back for more.

Quick and Effortless

With a total cooking time of about 25 minutes, this recipe is ideal for busy nights. There’s no need for multiple pots and pans—everything comes together in a single skillet, minimizing both effort and cleanup.

Nutrient-Rich and Wholesome

Not only does this dish taste incredible, but it’s also packed with nutrients. Salmon is rich in omega-3 fatty acids, known for supporting brain health and reducing inflammation. Coconut milk provides healthy fats, while garlic and curry bring powerful antioxidants. This is a meal that satisfies without compromising on health.

A Dish for Every Occasion

Whether you’re cooking for yourself, your family, or hosting guests, this dish is versatile enough to fit any situation. It’s elegant enough for date nights but easy enough to whip up after a long day. Serve it with rice for a cozy meal or alongside a fresh salad for something lighter.

Pro Tips for the Best Coconut Curry Salmon

To take your dish from good to great, here are a few expert tips:

1. Choose the Right Salmon

  • Opt for fresh, wild-caught salmon whenever possible. It has a richer flavor and better texture compared to farmed varieties.
  • If using frozen salmon, let it thaw completely and pat it dry to ensure a perfect sear.

2. Don’t Skip the Butter

  • Butter adds a silky texture and enhances the richness of the dish. For an extra layer of flavor, try using ghee or clarified butter.

3. Adjust the Spice Level to Your Preference

  • Red curry paste can range from mild to very spicy, depending on the brand. Start with less and add more as needed.
  • If you love heat, a pinch of chili flakes will take the dish up a notch.

4. Let the Sauce Simmer

  • Simmering allows the flavors to meld beautifully. The longer the sauce sits, the more depth it develops.

5. Balance the Flavors

  • A squeeze of fresh lime juice at the end brightens the dish and balances the richness of the coconut milk.

Perfect Pairings: What to Serve with Your Salmon

To complete your meal, consider these delicious pairings:

  • Steamed Jasmine Rice: The light fragrance of jasmine rice perfectly complements the creamy curry sauce.
  • Garlic Naan: Ideal for scooping up every last bit of sauce.
  • Quinoa or Cauliflower Rice: A great option if you’re looking for a lower-carb alternative.
  • Sautéed Greens: A simple side of spinach, bok choy, or green beans adds a fresh contrast to the dish.
  • Chilled White Wine: A crisp Sauvignon Blanc or a lightly oaked Chardonnay pairs beautifully with the richness of the curry.

Ingredients: The Stars of the Dish

  • Salmon Fillets – 4 fillets (6 oz each), skin-on for the best texture
  • Coconut Milk – 1 can (13.5 oz), full-fat for creaminess
  • Red Curry Paste – 2 tablespoons, for bold, spicy depth
  • Butter – 3 tablespoons, divided for cooking and flavor
  • Garlic – 4 cloves, minced for aromatic richness
  • Fresh Lime Juice – 1 tablespoon, to brighten the dish
  • Salt and Pepper – To taste
  • Optional:
    • Chili Flakes – ¼ teaspoon, for an extra kick
    • Fresh Cilantro – For garnish

Directions: The Path to Perfection

1. Sear the Salmon

  • Pat the salmon fillets dry with a paper towel and season both sides with salt and pepper.
  • Heat 1 tablespoon of butter in a large skillet over medium-high heat.
  • Once the butter is melted and foamy, add the salmon fillets, skin-side down.
  • Sear for 3-4 minutes per side until golden brown and cooked through. Remove and set aside.

2. Create the Coconut Curry Sauce

  • In the same skillet, add the remaining 2 tablespoons of butter.
  • Add minced garlic and sauté for about 1 minute until fragrant.
  • Stir in the red curry paste and cook for 2 minutes, letting the flavors bloom.
  • Pour in the coconut milk, stirring to combine.
  • Let the sauce simmer for 5-7 minutes, thickening into a luscious consistency.
  • Season with lime juice, salt, and pepper to taste.

3. Bring it All Together

  • Return the seared salmon fillets to the skillet, nestling them into the curry sauce.
  • Let them simmer for an additional 5-7 minutes, allowing the flavors to meld.
  • If you love spice, sprinkle with chili flakes before serving.

Nutritional Breakdown: A Bite of Balance

  • Calories: 425 kcal per serving
  • Protein: High in omega-3-rich salmon
  • Fats: Healthy fats from coconut milk and butter
  • Carbs: Low-carb and keto-friendly
  • Flavor: Unforgettable

Serving Suggestions

  • Pair with jasmine rice, quinoa, or naan for a heartier meal.
  • Garnish with fresh cilantro and a squeeze of lime for extra vibrancy.
  • Want more texture? Add sautéed bell peppers or spinach.

This one-pan wonder delivers a creamy, spicy, and buttery indulgence in just 25 minutes—perfect for a quick, restaurant-quality meal at home.

FAQs: Everything You Need to Know

Can I use a different type of fish?
Absolutely! While salmon works beautifully in this dish, you can also use cod, halibut, or even shrimp. Just adjust the cooking time accordingly.

Can I make this dish dairy-free?
Yes! Simply swap out the butter for a dairy-free alternative like coconut oil or vegan butter.

What if I don’t have red curry paste?
You can substitute with yellow or green curry paste for a different flavor profile. Yellow curry is milder, while green curry has a sharper, herbaceous taste.

Can I make this ahead of time?
Yes, but with a few considerations. The curry sauce can be made ahead and stored in the fridge for up to two days. However, for the best texture, cook the salmon fresh before serving.

How do I store and reheat leftovers?
Store leftovers in an airtight container in the refrigerator for up to two days. To reheat, gently warm the salmon and sauce in a skillet over low heat to prevent the fish from drying out.

Can I freeze this dish?
It’s best enjoyed fresh, but you can freeze the sauce separately. Let it cool completely before transferring to an airtight container. When ready to use, reheat the sauce and add freshly cooked salmon.

How can I make this dish even healthier?
For a lower-calorie version, use light coconut milk, reduce the butter, and add more vegetables like bell peppers, zucchini, or spinach to increase the fiber content.

Conclusion: A Dish That Feels Like a Warm Hug

Coconut curry salmon with garlic butter is more than just a recipe—it’s a dish that delivers comfort, indulgence, and nourishment all in one. Whether you’re making it for a cozy night in or serving it to impress, it’s a meal that never fails to delight. With its rich flavors, creamy sauce, and perfectly cooked salmon, this dish will leave you craving it again and again.

So the next time you’re in need of something truly satisfying, give this recipe a try. Who knows? It might just become your new favorite comfort food, just as it did for me.

aiting

Coconut Curry Salmon with Garlic Butter: A Dish That Feels Like Home

A rich and flavorful salmon dish bathed in a velvety coconut curry sauce, infused with garlic butter and a touch of lime. This one-pan meal is quick, indulgent, and packed with bold flavors—perfect for a restaurant-quality dinner at home.
Prep Time 5 minutes
Cook Time 20 minutes
Total Time 25 minutes
Servings: 4 servings
Course: Main Course
Cuisine: Thai-Inspired

Ingredients
  

For the Salmon:
  • 4 salmon fillets 6 oz each, skin-on for the best texture
  • Salt and pepper to taste
  • 1 tablespoon butter for searing
For the Coconut Curry Sauce:
  • 2 tablespoons butter
  • 4 cloves garlic minced
  • 2 tablespoons red curry paste
  • 1 can 13.5 oz full-fat coconut milk
  • 1 tablespoon fresh lime juice
  • 1/4 teaspoon chili flakes optional, for spice
  • Fresh cilantro for garnish

Method
 

  1. Sear the Salmon
  2. Pat the salmon fillets dry with a paper towel and season both sides with salt and pepper.
  3. Heat 1 tablespoon of butter in a large skillet over medium-high heat.
  4. Once the butter is melted and foamy, add the salmon fillets, skin-side down.
  5. Sear for 3-4 minutes per side until golden brown and cooked through. Remove and set aside.
  6. Create the Coconut Curry Sauce
  7. In the same skillet, add the remaining 2 tablespoons of butter.
  8. Add minced garlic and sauté for about 1 minute until fragrant.
  9. Stir in the red curry paste and cook for 2 minutes, letting the flavors bloom.
  10. Pour in the coconut milk, stirring to combine.
  11. Let the sauce simmer for 5-7 minutes, thickening into a luscious consistency.
  12. Season with lime juice, salt, and pepper to taste.
  13. Bring it All Together
  14. Return the seared salmon fillets to the skillet, nestling them into the curry sauce.
  15. Let them simmer for an additional 5-7 minutes, allowing the flavors to meld.
  16. If you love spice, sprinkle with chili flakes before serving.

Notes

  • For extra richness, use ghee instead of butter.
  • Adjust the spice level by increasing or reducing the red curry paste and chili flakes.
  • Serve with steamed jasmine rice, quinoa, or naan for a heartier meal.
  • Add sautéed bell peppers or spinach for extra texture and nutrients.
  • Store leftovers in an airtight container for up to 2 days; reheat gently to maintain texture.

Rainbow Fried Rice – A Healthy, Flavorful, and Colorful Dish

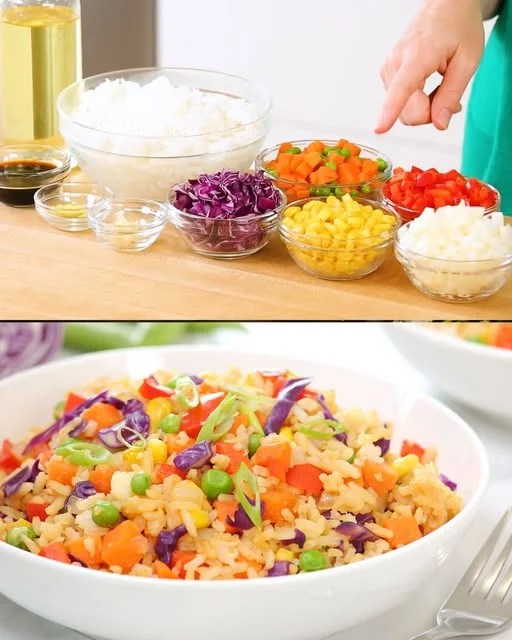
Some meals have the power to instantly brighten your day, and this Rainbow Fried Rice is one of them. The first time I made this dish, I wasn’t even trying to cook something special—I was just using up leftovers in my fridge. But when I plated it, I couldn’t help but smile. The vibrant reds, oranges, greens, yellows, and purples turned a simple dish into something truly beautiful.

It reminded me of when I was a child, sitting in my grandmother’s kitchen, watching her prepare food with such love and care. She always told me that the more colors on your plate, the healthier your meal is. She didn’t use scientific terms like “antioxidants” or “fiber-rich foods,” but she understood that nature’s colors provided nourishment.

Now, whenever I cook Rainbow Fried Rice, I think of her wisdom. It’s not just a meal—it’s a reminder that eating well can be joyful, beautiful, and incredibly satisfying.

Why You’ll Love This Recipe

  1. Bursting with Flavor and Texture – A perfect balance of savory, slightly sweet, and umami flavors with a satisfying crunch.
  2. Packed with Nutrients – Loaded with vitamins, fiber, and antioxidants from a variety of colorful vegetables.
  3. Quick and Easy – A one-pan meal that’s ready in under 20 minutes.
  4. Great for Meal Prep – Stores well and reheats beautifully for a healthy meal anytime.
  5. A Perfect Use for Leftover Rice – No waste, just delicious food!

INGREDIENTS

IngredientAmount
Yellow onion (diced)1
Red bell pepper (diced)1
Frozen peas and carrots1 cup
Frozen corn kernels½ cup
Red cabbage (shredded)½ cup
Garlic cloves (minced)2
Fresh ginger (grated)1 tsp
Cooked rice (chilled)4 cups
Soy sauce¼ cup
Green onions (sliced)2

DIRECTIONS

Step 1: Sauté the Aromatics

  • Heat a pan over medium heat and add a little oil.
  • Sauté the diced yellow onion, garlic, and ginger until fragrant.

Step 2: Cook the Vegetables

  • Add the red bell pepper, peas, carrots, corn, and red cabbage to the pan.
  • Stir-fry for 3-4 minutes until the veggies are slightly tender but still crisp.

Step 3: Add the Rice

  • Add the chilled, cooked rice to the pan and stir well to combine with the vegetables.
  • Pour in the soy sauce and mix until everything is evenly coated.

Step 4: Finish and Serve

  • Stir in the sliced green onions and cook for 1 more minute.
  • Serve hot and enjoy your flavorful, colorful, and healthy fried rice!

NUTRITIONAL INFORMATION (Per Serving, Approximate)

NutrientAmount
Calories320 kcal
Carbohydrates60g
Protein8g
Fat5g
Fiber5g

The Secret to Perfect Fried Rice

Even though fried rice is simple to make, there are a few tricks to elevate the flavor and texture.

1. Always Use Cold, Cooked Rice

Freshly cooked rice is too soft and tends to become mushy when stir-fried. Using chilled rice ensures that every grain stays separate and absorbs flavors perfectly. If you don’t have leftover rice, cook fresh rice and spread it on a baking sheet to cool quickly before using.

2. High Heat is Key

A hot pan helps caramelize the vegetables and rice, giving that delicious, slightly crispy texture. If your pan isn’t hot enough, your rice may become soggy.

3. Layer the Flavors

Instead of dumping everything into the pan at once, sauté aromatics (onions, garlic, ginger) first, then add vegetables, then the rice and seasonings. This builds depth of flavor.

4. Don’t Overdo the Soy Sauce

Too much soy sauce can make fried rice heavy and salty. Start with a little, taste, and adjust as needed. A splash of sesame oil or rice vinegar at the end adds even more depth!

5. Add Protein for a Complete Meal

While this recipe is naturally plant-based, you can easily add protein like:

  • Scrambled eggs
  • Diced tofu
  • Grilled chicken
  • Shrimp or beef slices

The Health Benefits of Eating a Colorful Meal

Each ingredient in this Rainbow Fried Rice isn’t just for color—it brings unique health benefits that make this dish both delicious and nourishing.

1. Red Bell Peppers – Vitamin C Powerhouse

Red bell peppers contain more vitamin C than an orange! They support your immune system and promote healthy skin.

2. Carrots – Eye and Skin Health

Carrots are rich in beta-carotene, which is converted into vitamin A in the body, helping with vision and skin health.

3. Peas – Protein and Fiber

Peas provide plant-based protein and fiber, making this dish more filling and nutritious.

4. Red Cabbage – Antioxidant Boost

The deep purple color comes from anthocyanins, powerful antioxidants that support heart health and reduce inflammation.

5. Garlic and Ginger – Natural Healers

Both garlic and ginger have antibacterial and anti-inflammatory properties, making them a perfect addition for boosting overall health.

6. Rice – Energy and Comfort

Rice provides a good source of carbohydrates, giving you energy while acting as a neutral base that absorbs all the delicious flavors in this dish.

Customizing Your Rainbow Fried Rice

One of the best things about this recipe is how versatile it is. Here are a few ways to switch things up:

1. Make It Spicy

  • Add sriracha or red pepper flakes for a fiery kick.
  • Toss in chopped chili peppers for extra heat.

2. Add More Protein

  • Crack an egg into the pan and scramble it before adding the rice.
  • Stir in cooked chicken, shrimp, beef, or tofu for a heartier meal.

3. Try Different Vegetables

  • Swap red cabbage for broccoli, zucchini, or spinach.
  • Use edamame or chickpeas for added plant-based protein.

4. Go Low-Carb

  • Replace rice with cauliflower rice or quinoa for a lower-carb option.

5. Enhance the Flavor

  • Add a splash of sesame oil at the end for a rich, nutty finish.
  • Sprinkle with crushed peanuts or cashews for extra crunch.

Frequently Asked Questions

1. Can I use freshly cooked rice instead of cold rice?

Yes, but it may become sticky. If you’re using fresh rice, spread it on a baking sheet and let it cool for at least 15 minutes before cooking.

2. How do I store and reheat leftover fried rice?

Store in an airtight container in the fridge for up to 3 days. To reheat, warm it in a pan over medium heat with a splash of water to prevent drying out.

3. Is this dish gluten-free?

The recipe is naturally gluten-free if you use tamari instead of soy sauce.

4. Can I freeze fried rice?

Yes! Let it cool completely, then store in a freezer-safe container for up to 2 months. Reheat in a pan or microwave.

5. What can I serve with this dish?

  • Grilled or roasted meat for a complete meal.
  • A simple miso soup for a light pairing.
  • A fried or poached egg on top for extra richness.

Conclusion – A Dish That Brings Health, Flavor, and Happiness

Rainbow Fried Rice is more than just a meal—it’s a celebration of color, nutrition, and taste. Every bite is packed with flavors, textures, and essential nutrients that make eating healthy effortless and enjoyable.

This recipe is perfect for busy days, yet impressive enough to serve to guests. It’s proof that healthy food can be just as delicious, satisfying, and comforting as any indulgent dish.

So next time you have leftover rice and a handful of veggies, don’t just settle for something ordinary—turn it into this vibrant, nutrient-packed Rainbow Fried Rice. Try it today and discover how a simple dish can bring so much joy to your table!

Amal

Rainbow Fried Rice – A Healthy, Flavorful, and Colorful Dish

This Rainbow Fried Rice is packed with vibrant vegetables, aromatic garlic and ginger, and perfectly seasoned rice. It’s quick, healthy, and bursting with flavor, making it an ideal dish for lunch or dinner. Whether served as a main meal or a side, this colorful fried rice is a delicious way to enjoy a balanced meal in minutes!
Prep Time 10 minutes
Cook Time 15 minutes
Total Time 25 minutes
Servings: 4 servings
Course: Main Dish
Cuisine: Asian-inspired

Ingredients
  

For the Fried Rice:
  • 1 yellow onion diced
  • 1 red bell pepper diced
  • 1 cup frozen peas and carrots
  • ½ cup frozen corn kernels
  • ½ cup red cabbage shredded
  • 2 garlic cloves minced
  • 1 tsp fresh ginger grated
  • 4 cups cooked rice chilled
  • ¼ cup soy sauce
  • 2 green onions sliced

Method
 

  1. Sauté the Aromatics – Heat oil in a large pan over medium heat. Add diced onion, garlic, and ginger. Cook for 2-3 minutes until fragrant.
  2. Cook the Vegetables – Stir in the red bell pepper, peas, carrots, corn, and red cabbage. Sauté for another 3-4 minutes until slightly tender.
  3. Add the Rice – Stir in the chilled, cooked rice and mix well to combine with the vegetables.
  4. Season and Finish – Pour in the soy sauce and stir well. Cook for 2-3 minutes, allowing the rice to absorb the flavors.
  5. Garnish and Serve – Add sliced green onions, give it a final stir, and serve hot!

Notes

  • For best texture, use cold, day-old rice to prevent mushiness.
  • Add protein – Stir in scrambled eggs, tofu, chicken, or shrimp.
  • Make it spicy – Add red pepper flakes or a drizzle of sriracha.
  • For extra flavor, finish with a splash of sesame oil or lime juice.
  • Storage – Keep leftovers in an airtight container in the fridge for up to 3 days.

Oatmeal Pancakes with Fresh Guacamole – A Nutritious Breakfast for Every Day

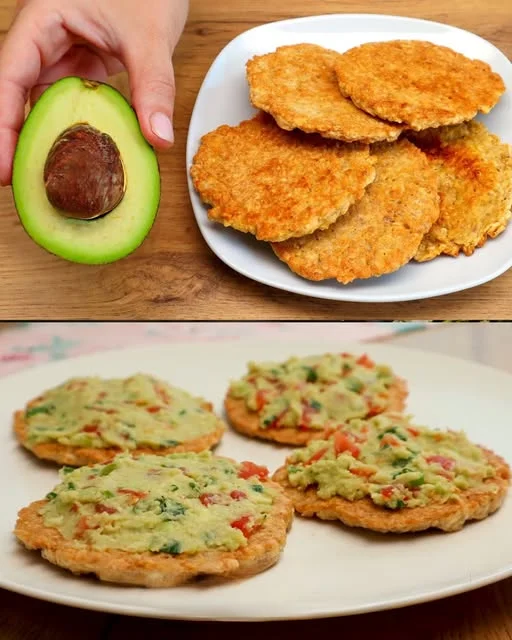
Some meals have a way of becoming part of your routine without you even realizing it. That’s exactly what happened with these oatmeal pancakes and fresh guacamole.

It started on a busy morning when I wanted something quick, healthy, and filling. I had oats, an egg, and an avocado sitting on my counter. Instead of making my usual oatmeal, I blended the oats into a batter, cooked them into pancakes, and mashed up the avocado with some lemon juice and tomatoes. The result? A delicious, nutritious, and incredibly satisfying breakfast that I’ve been making ever since.

What makes this meal special is its balance of flavors and textures—the warm, slightly crispy pancakes pair perfectly with the creamy, tangy guacamole. It’s light but filling, packed with fiber, protein, and healthy fats, making it a great choice for anyone looking for a wholesome way to start the day.

If you’re looking for a simple yet nutritious breakfast you can eat every day, this recipe is for you.

Why This Breakfast Is Perfect for a Healthy Lifestyle

  1. Simple and Quick – Ready in under 15 minutes with minimal ingredients.
  2. Nutrient-Packed – Provides protein, fiber, and healthy fats to keep you full longer.
  3. Naturally Gluten-Free – Made with oats, making it perfect for those avoiding wheat.
  4. Versatile and Customizable – Can be adapted for sweet or savory preferences.
  5. Perfect for Weight Management – High in fiber and protein to prevent unnecessary snacking.

Ingredients

For the Pancakes

IngredientAmount
Oatmeal40g
Egg1
Sunflower oilFor frying

For the Guacamole

IngredientAmount
Avocado1
SaltTo taste
Black pepperTo taste
Lemon juiceFrom ½ lemon
Cherry tomatoes5 (chopped)

Instructions

Step 1: Make the Pancake Batter

  • Blend or mix the oatmeal and egg until smooth. Let sit for 5 minutes to thicken.

Step 2: Cook the Pancakes

  • Heat a pan with a little sunflower oil over medium heat.
  • Pour the batter into small pancakes and cook for 2-3 minutes per side until golden brown.
  • Transfer to a plate and set aside.

Step 3: Prepare the Guacamole

  • Mash the avocado in a bowl.
  • Add salt, black pepper, lemon juice, and chopped cherry tomatoes.
  • Mix until well combined.

Step 4: Serve and Enjoy

  • Spread the guacamole over the pancakes or serve it on the side for dipping. Enjoy immediately!

Nutritional Information (Per Serving, Approximate)

NutrientAmount
Calories250 kcal
Carbohydrates20g
Protein8g
Fat15g
Fiber6g

The Health Benefits of This Meal

1. Oats: A Superfood for Energy and Digestion

Oats are known for their high fiber content, which helps support digestion, regulate blood sugar, and keep you feeling full. They are also a great source of slow-digesting carbohydrates, making them perfect for sustained energy throughout the day.

2. Eggs: A Natural Protein Boost

Eggs are one of the best natural sources of protein, essential for muscle repair, metabolism, and overall health. Including an egg in this recipe ensures that your breakfast is balanced and satisfying.

3. Avocado: A Healthy Fat Powerhouse

Avocados provide heart-healthy monounsaturated fats, which help support brain function, reduce inflammation, and keep you full. They are also rich in potassium and antioxidants, making them a great addition to any meal.

4. Tomatoes and Lemon: A Fresh Flavor Boost

Cherry tomatoes add a natural sweetness, while lemon juice enhances digestion and adds a bright, tangy flavor to the guacamole. Together, they create the perfect contrast to the rich avocado and hearty pancakes.

How to Customize This Recipe to Your Taste

One of the best things about this recipe is its flexibility. Whether you like it savory or slightly sweet, there are plenty of ways to adapt it.

1. Make It Sweeter

  • Add cinnamon and vanilla to the pancake batter.
  • Skip the guacamole and top with Greek yogurt, honey, or berries.
  • Mix in a mashed banana for natural sweetness.

2. Add More Protein

  • Stir chia seeds or flaxseeds into the pancake batter.
  • Serve with a boiled egg or smoked salmon for extra protein.
  • Add a spoonful of Greek yogurt on top.

3. Turn Up the Spice

  • Mix red pepper flakes or cumin into the guacamole.
  • Serve with a side of sriracha or hot sauce.
  • Add finely chopped jalapeños for a little heat.

4. Try Different Textures

  • Add chopped nuts or seeds to the pancakes for crunch.
  • Use coconut flakes or cocoa nibs for an extra flavor twist.
  • Top with grated cheese for a more savory version.

Frequently Asked Questions

1. Can I make these pancakes without blending the oats?

Yes! If you prefer a more textured pancake, simply mix whole oat flakes with the egg instead of blending them into a flour-like consistency.

2. Can I make a big batch and store them?

Absolutely! These pancakes store well in the fridge for up to 3 days. You can also freeze them and reheat in a pan or toaster.

3. Is this meal suitable for a weight-loss diet?

Yes! These oatmeal pancakes and guacamole are high in fiber and protein, which help control hunger and prevent overeating. Plus, the healthy fats from the avocado keep you feeling full longer.

4. What can I use instead of an egg?

If you need an egg-free version, try using a flax egg (1 tablespoon ground flaxseed mixed with 2.5 tablespoons of water) or mashed banana for a slightly sweeter pancake.

5. Can I swap the avocado for something else?

Yes! If you’re out of avocados, try:

  • Hummus for a creamy, protein-rich alternative.
  • Cottage cheese or ricotta for a high-protein, dairy-based option.
  • Mashed sweet potato for a slightly sweet, nutrient-dense alternative.

Conclusion – A Breakfast You Can Enjoy Every Day

This oatmeal pancake and guacamole breakfast is more than just a meal—it’s a healthy habit that fits effortlessly into your routine. Whether you’re looking for a quick and easy breakfast, a weight-friendly meal, or a new way to enjoy oats, this dish checks all the boxes.

The combination of oats, eggs, and avocado provides the perfect balance of fiber, protein, and healthy fats, making it an ideal meal for energy, digestion, and overall well-being. Plus, it’s so easy to customize that you’ll never get bored of it!

If you’ve been searching for a go-to breakfast that is healthy, delicious, and incredibly easy to make, this is it. Try it today and start your morning with a nutritious, satisfying meal that fuels your body the right way.

Amal

Oatmeal Pancakes with Fresh Guacamole – A Nutritious Breakfast for Every Day

This light, nutritious, and satisfying breakfast combines hearty oatmeal pancakes with creamy, flavorful guacamole. Packed with fiber, protein, and healthy fats, this meal is perfect for a balanced start to your day. Quick to make and naturally gluten-free, it’s a delicious breakfast option you can enjoy every day!
Prep Time 5 minutes
Cook Time 10 minutes
Total Time 15 minutes
Servings: 1 serving
Course: Breakfast
Cuisine: Healthy

Ingredients
  

For the Pancakes:
  • 40 g oatmeal
  • 1 egg
  • Sunflower oil for frying
For the Guacamole:
  • 1 avocado
  • Salt to taste
  • Black pepper to taste
  • Juice of ½ lemon
  • 5 cherry tomatoes chopped

Method
 

  1. Prepare the Pancake Batter – Blend or mix the oatmeal and egg until a smooth batter forms. Let it sit for 5 minutes to thicken.
  2. Cook the Pancakes – Heat a pan with a little sunflower oil. Pour the batter into small pancakes and cook for 2-3 minutes per side until golden brown. Set aside.
  3. Make the Guacamole – Mash the avocado in a bowl, then mix in salt, black pepper, lemon juice, and chopped cherry tomatoes. Stir until well combined.
  4. Assemble and Serve – Spread the guacamole over the pancakes or serve it on the side for dipping. Enjoy immediately!

Notes

  • For a gluten-free option, use certified gluten-free oats.
  • To add extra flavor, sprinkle chili flakes or garlic powder into the guacamole.
  • For a sweeter version, swap guacamole for Greek yogurt and honey.
  • Make ahead – Store extra pancakes in the fridge for up to 2 days and reheat in a pan or toaster.

Flourless Oatmeal Bread – A Simple and Wholesome Homemade Loaf

Some recipes are more than just food—they bring a sense of warmth, nourishment, and connection to something greater. That’s exactly how I feel about this flourless oatmeal bread.

I still remember the first time I baked a loaf without traditional flour. I had run out of bread one morning and, instead of heading to the store, I looked at what I had in my pantry. A bag of oat flakes sat there, untouched for weeks, and I wondered: Can I turn this into bread?

I mixed the oats with a few basic ingredients—baking soda, salt, and seeds—and popped the mixture into the oven. The moment the bread came out, golden brown and fragrant, I knew I had stumbled upon something special. The first bite was warm, hearty, and slightly nutty, with a satisfying chewiness that made it perfect for breakfast or a quick snack.

Since then, this recipe has become a go-to in my kitchen. It’s simple, wholesome, and requires just a handful of ingredients. Whether you’re looking for a gluten-free alternative, a nutritious bread option, or just an easy homemade loaf, this flourless oatmeal bread is a must-try.

Why You’ll Love This Recipe

  1. No Flour Needed – Made entirely from oats, this bread is naturally gluten-free and packed with fiber.
  2. Quick and Easy – No yeast, no kneading, and no waiting for the dough to rise.
  3. Healthy and Nourishing – Oats provide slow-digesting carbs, protein, and essential nutrients, making this bread a great option for a balanced diet.
  4. Perfect for Any Occasion – Enjoy it with butter, jam, avocado, or as a base for sandwiches.
  5. Customizable – Add nuts, dried fruits, or spices to create your own unique version.

Ingredients

IngredientAmount
Oat flakes (gluten-free if needed)90 g
SaltA pinch
Baking soda1 teaspoon
Mixed seeds2 tablespoons

Instructions

Step 1: Preheat the Oven

  • Preheat your oven to 350°F (175°C) and line a baking dish with parchment paper.

Step 2: Prepare the Dry Ingredients

  • In a mixing bowl, combine oat flakes, salt, and baking soda.
  • Add the mixed seeds and stir well.

Step 3: Form the Dough

  • Gradually add water (as needed) and mix until a soft dough forms.
  • Let the dough rest for 10 minutes to allow the oats to absorb moisture.

Step 4: Bake the Bread

  • Transfer the dough to the prepared baking dish.
  • Bake for 25-30 minutes, or until the top is golden brown and the bread is firm to the touch.

Step 5: Cool and Serve

  • Let the bread cool completely before slicing.
  • Enjoy as is, toasted, or with your favorite toppings!

Nutritional Information (Per Serving, Approximate)

NutrientAmount
Calories120 kcal
Carbohydrates18g
Protein4g
Fat3g
Fiber3g

The Benefits of Baking with Oats

Oats are often seen as just a breakfast ingredient, but they are so much more. They are a superfood in the world of grains, offering numerous health benefits while being naturally gluten-free, high in fiber, and rich in essential minerals.

1. A Heart-Healthy Choice

Oats contain beta-glucan, a type of soluble fiber known to lower cholesterol and promote heart health. Regular consumption of oats can help reduce the risk of heart disease and support overall cardiovascular health.

2. Keeps You Full for Longer

Unlike white bread, which can cause blood sugar spikes, oat-based bread provides a steady release of energy, keeping you fuller for longer and reducing cravings.

3. Great for Digestion

The fiber in oats aids digestion and promotes gut health, making this bread an excellent option for those who struggle with bloating or digestive issues.

4. Naturally Gluten-Free

For those with gluten sensitivities, oats provide a fantastic alternative to wheat-based bread. Just be sure to use certified gluten-free oats to avoid cross-contamination.

Ways to Customize Your Flourless Oatmeal Bread

One of the best things about this recipe is how easily it can be adapted to suit your taste and dietary preferences.

1. Add Some Sweetness

  • Mix in honey, maple syrup, or mashed bananas for a naturally sweet loaf.
  • Toss in raisins or dried cranberries for a fruity twist.

2. Boost the Protein

  • Stir in chia seeds, hemp seeds, or a scoop of protein powder for an extra protein boost.
  • Add crushed nuts like almonds or walnuts for texture and flavor.

3. Make It Savory

  • Add garlic powder, black pepper, or chopped herbs for a more flavorful, savory loaf.
  • Sprinkle sesame or sunflower seeds on top before baking for extra crunch.

4. Give It a Spiced Kick

  • Add a teaspoon of cinnamon, nutmeg, or cardamom for a warm, spiced version.
  • A pinch of cayenne or chili flakes can give it a subtle heat.

Frequently Asked Questions

1. Can I make this bread without baking soda?

Baking soda helps the bread rise slightly and gives it a light texture. However, you can substitute it with baking powder (1.5 teaspoons) or omit it for a denser loaf.

2. How do I store this bread?

Keep the bread in an airtight container at room temperature for up to 3 days. For longer storage, refrigerate it for up to a week or freeze it for up to 3 months.

3. Can I make this bread vegan?

Yes! This recipe is naturally vegan and dairy-free, as it contains no eggs or butter. Just be sure to check that your oat flakes are certified vegan if needed.

4. How do I get a crispier crust?

To achieve a crispier crust, bake the bread slightly longer and let it cool on a wire rack before slicing. You can also toast individual slices for extra crunch.

5. Can I use oat flour instead of whole oats?

Yes, you can substitute oat flakes with oat flour in the same quantity for a smoother-textured bread. If you don’t have oat flour, simply blend oat flakes into a fine powder using a food processor.

6. What’s the best way to serve this bread?

  • For breakfast – Toast it and top with butter, nut butter, or fruit preserves.
  • For a savory snack – Serve with hummus, avocado, or cream cheese.
  • For a light meal – Use it as a base for open-faced sandwiches or bruschetta.

Conclusion – A Simple Recipe with Endless Possibilities

This flourless oatmeal bread is proof that delicious, homemade bread doesn’t have to be complicated. With just a few basic ingredients, you can create a hearty, wholesome loaf that’s naturally gluten-free, high in fiber, and perfect for any meal.

Whether you’re making it for a quick breakfast, a healthy snack, or as an alternative to traditional bread, this recipe is versatile, nourishing, and easy to make. It’s the kind of bread that feels good to eat—not just because it’s healthy, but because it’s made with simple, real ingredients that you can trust.

So why not give it a try? Your kitchen will be filled with the warm, comforting aroma of freshly baked oats, and your taste buds will thank you for it. And if you find a new way to customize it, I’d love to hear about it! Happy baking!

Amal

Flourless Oatmeal Bread – A Simple and Wholesome Homemade Loaf

This flourless oatmeal bread is the perfect healthy alternative to traditional bread. Made with oats, seeds, and no refined flour, it’s naturally gluten-free, fiber-rich, and incredibly easy to make. Whether you’re looking for a nutritious breakfast, a light snack, or a homemade bread option, this recipe is a must-try!
Prep Time 10 minutes
Cook Time 25 minutes
Total Time 35 minutes
Servings: 1 small loaf
Course: Bread
Cuisine: Healthy

Ingredients
  

  • 90 g oat flakes use gluten-free if needed
  • A pinch of salt
  • 1 teaspoon baking soda
  • 2 tablespoons mixed seeds

Method
 

  1. Preheat the oven to 350°F (175°C) and line a baking dish with parchment paper.
  2. Mix dry ingredients – In a large bowl, combine oat flakes, salt, and baking soda.
  3. Add the seeds – Stir in the mixed seeds for extra crunch and nutrition.
  4. Form the dough – Gradually add water until a soft dough forms. Let it sit for 10 minutes to absorb moisture.
  5. Bake – Transfer the dough to the prepared baking dish and bake for 25-30 minutes, or until golden brown.
  6. Cool and serve – Allow the bread to cool before slicing. Enjoy fresh, toasted, or with your favorite toppings!

Notes

  • Customize with nuts – Add chopped almonds, walnuts, or sunflower seeds for more texture.
  • Make it sweet – Mix in honey, mashed banana, or dried fruits for a slightly sweet version.
  • Storage – Store at room temperature for 2-3 days, or freeze for up to 3 months.
  • Vegan & Dairy-Free – Naturally free of eggs and dairy, making it a great plant-based option.

Cheesy Green Onion Flatbread – A Simple Pleasure from Scratch

Some of the best foods in life are the simplest. I still remember the first time I made flatbread from scratch. It was a cold, rainy evening, and I wanted something warm and comforting but didn’t have the patience for a complicated recipe. I rummaged through my pantry, found some flour, a bit of cheese, and fresh green onions in the fridge, and decided to try making a quick flatbread.

As I mixed the dough, the scent of chopped green onions filled the air, and I knew this was going to be something special. The moment I placed the first flatbread in the hot pan, it sizzled, puffed up slightly, and turned golden brown. I tore off a piece while it was still warm, the melted cheese stretching between my fingers, and took a bite. The crispy edges, the soft and chewy center, the mix of sharp cheese and fresh onions—it was perfect.

Since then, this cheesy green onion flatbread has become a staple in my home. It’s quick to make, requires no yeast, and uses simple ingredients. Whether you eat it on its own, dip it in soup, or use it as a wrap, it’s one of those recipes that feels like a hug in every bite.

Why You’ll Love This Recipe

  1. Simple and Quick – No yeast or long proofing times needed.
  2. Crispy and Chewy – The perfect balance of texture in every bite.
  3. Budget-Friendly – Made with basic pantry staples.
  4. Endlessly Versatile – Serve it as a snack, side, or even a meal.
  5. Perfect for Beginners – Easy to make, even if you’ve never baked before.

Ingredients

IngredientAmount
Water95 ml
Salt1.5 g (0.25 tsp)
Flour150 g (1 cup)
Green onion (chopped)30 g
Baking sodaA pinch
Cheese (grated)50 g
Flour (for dusting)¼ cup
Corn starch¼ cup

Directions

Step 1: Prepare the Dough

  1. In a mixing bowl, combine flour, salt, and baking soda.
  2. Gradually add water, mixing until a dough forms.
  3. Knead for 5-7 minutes until smooth. Cover and let rest for 20 minutes.

Step 2: Add the Fillings

  1. Roll out the dough on a lightly floured surface.
  2. Sprinkle evenly with chopped green onions and grated cheese.
  3. Fold the dough over the filling and knead gently to distribute.

Step 3: Shape and Cook

  1. Divide the dough into equal portions and roll each into a flat circle.
  2. Lightly dust with cornstarch and flour to prevent sticking.
  3. Heat a non-stick pan over medium heat and cook each flatbread for 2-3 minutes per side until golden brown and slightly crispy.

Step 4: Serve and Enjoy

  • Serve warm with butter, yogurt dip, or alongside soups and stews for a comforting meal.

Nutritional Information (Per Serving, Approximate)

NutrientAmount
Calories180 kcal
Carbohydrates28g
Protein6g
Fat5g
Fiber2g

The Secret to the Perfect Flatbread

Making great flatbread isn’t about fancy techniques—it’s about understanding a few key principles that make all the difference.

1. The Right Dough Consistency

Flatbread dough should be soft and pliable but not too sticky. If the dough feels too wet, add a little more flour. If it’s too dry and cracks when rolling, add a few drops of water. Letting it rest for at least 20 minutes helps relax the gluten, making it easier to roll out.

2. The Magic of Green Onions and Cheese

Chopped green onions add a fresh, mild sharpness that pairs beautifully with the rich, melty cheese. The key is to evenly distribute them throughout the dough so that every bite has a little of both.

3. Cooking at the Right Temperature

A hot pan is essential for achieving the golden-brown exterior and soft interior. Cooking on medium heat ensures even cooking—too high, and it burns before cooking through; too low, and it turns dry.

4. Using Cornstarch for Extra Softness

Dusting the dough with a mix of flour and cornstarch helps keep the flatbread soft and prevents it from sticking while rolling. The cornstarch also gives it a delicate crispness without making it too tough.

5. Letting the Cheese Work Its Magic

Grated cheese melts into the dough as it cooks, creating a slightly crispy, golden crust on the outside while keeping the inside soft and cheesy. The result? A perfect blend of textures in every bite.

Ways to Customize Your Flatbread

This flatbread is delicious as is, but you can easily make it your own with these creative variations.

1. Make It Spicy

  • Add chili flakes, black pepper, or finely chopped jalapeños for a little kick.
  • Serve with a side of spicy garlic yogurt dip for extra heat.

2. Add More Herbs and Flavors

  • Mix in chopped parsley, cilantro, or thyme for a fresh, aromatic flavor.
  • A sprinkle of garlic powder or onion powder adds depth to the dough.

3. Try Different Cheeses

  • Swap regular cheese for feta, parmesan, or a mix of mozzarella and cheddar.
  • A little blue cheese or smoked gouda can add a gourmet twist.

4. Turn It Into a Stuffed Flatbread

  • Instead of mixing the cheese into the dough, place a generous layer between two thinly rolled-out pieces, then seal the edges and cook as usual.

5. Gluten-Free Version

  • Substitute the all-purpose flour with gluten-free flour or almond flour for a gluten-free option.

Frequently Asked Questions

1. Can I make this flatbread without cheese?

Yes! You can omit the cheese and add extra green onions or herbs for a lighter version.

2. How do I store leftover flatbread?

Store in an airtight container at room temperature for up to 2 days. For longer storage, refrigerate for up to 5 days or freeze for up to 3 months.

3. How do I reheat flatbread?

  • On the stove – Heat in a dry pan over medium heat for 1-2 minutes per side.
  • In the oven – Wrap in foil and warm at 350°F (175°C) for 5-10 minutes.
  • In the microwave – Heat for 20-30 seconds (though it may lose crispiness).

4. Can I make this dough ahead of time?

Yes! Store the dough in the fridge for up to 24 hours before rolling and cooking. Let it come to room temperature before rolling out.

5. What’s the best way to serve this flatbread?

  • With dips – Try hummus, tzatziki, or garlic butter.
  • As a side – Serve with soups, curries, or stews.
  • As a wrap – Fill with grilled chicken, veggies, or falafel.

Conclusion – A Recipe Worth Making Again and Again

There’s something deeply satisfying about making homemade flatbread. It’s warm, soft, crispy in just the right places, and bursting with flavor from the cheese and green onions. The best part? It’s incredibly easy and quick to make—no long waiting times, no fancy equipment, just a simple dough that comes together beautifully in minutes.

Whether you’re making this for a quick snack, a side for dinner, or even as the base for a delicious wrap, this flatbread will quickly become a favorite in your kitchen.

So, why not try it today? A few ingredients, a little time, and a whole lot of deliciousness await! And if you experiment with different flavors or toppings, I’d love to hear how you make this recipe your own!

Amal

Cheesy Green Onion Flatbread – A Simple Pleasure from Scratch

This cheesy green onion flatbread is the perfect blend of crispy on the outside and soft on the inside, with melty cheese and fragrant green onions in every bite. Made with simple pantry ingredients, it’s quick to prepare and requires no yeast or special equipment. Whether served as a snack, side, or light meal, this flatbread is a guaranteed crowd-pleaser!
Prep Time 10 minutes
Cook Time 15 minutes
Total Time 25 minutes
Servings: 4 flatbreads
Course: Snack
Cuisine: International

Ingredients
  

  • 95 ml water
  • 1.5 g 0.25 tsp salt
  • 150 g 1 cup flour
  • 30 g green onion chopped
  • A pinch of baking soda
  • 50 g cheese grated
  • ¼ cup flour for dusting
  • ¼ cup corn starch

Method
 

  1. Prepare the Dough – In a mixing bowl, combine flour, salt, and baking soda. Gradually add water and mix until a dough forms. Knead for 5-7 minutes until smooth, then cover and let rest for 20 minutes.
  2. Incorporate Fillings – Roll out the dough and sprinkle with chopped green onions and grated cheese. Fold the dough over and knead gently to distribute the ingredients evenly.
  3. Shape and Cook – Divide the dough into equal portions and roll each into a flat circle. Dust lightly with corn starch and flour. Heat a pan over medium heat and cook each flatbread for 2-3 minutes per side until golden brown.
  4. Serve and Enjoy – Serve warm with butter, a yogurt dip, or as a side for soups and stews.

Notes

  • For extra crispiness, brush with olive oil or butter before cooking.
  • To make it dairy-free, omit the cheese or use a plant-based alternative.
  • For a spicier version, add chili flakes or black pepper to the dough.
  • Storage – Keep in an airtight container for up to 3 days or freeze for later.

Stay Connected

Get recipes via email: