Beef Bowtie Pasta: A Comforting and Flavorful One-Pot Meal

Have you ever craved a hearty, comforting meal that’s quick to make but doesn’t sacrifice flavor? Beef bowtie pasta is that dish—the perfect balance of savory ground beef, creamy sauce, and tender pasta, all tied together with simple ingredients you likely already have in your pantry. It’s the kind of recipe that warms you from the inside out and makes your dinner table the coziest place in the house. Whether it’s a busy weeknight or a casual family gathering, this dish brings everyone together with its rich, satisfying taste. Let’s walk you through how to make this ultimate crowd-pleaser!

Why Beef Bowtie Pasta is the Ultimate Comfort Food

Sometimes, life calls for a dish that feels like a warm hug in a bowl. Beef bowtie pasta delivers exactly that. Its creamy, cheesy sauce is a delight for your taste buds, while the tender pasta and perfectly seasoned beef give you that satisfying bite every time. This recipe is also easy to customize, making it versatile enough for picky eaters or creative chefs alike. Plus, it’s all cooked in one pot—fewer dishes mean less stress, and more time to enjoy your meal with loved ones.

Ingredients for Beef Bowtie Pasta

Here’s everything you’ll need to create this delicious and easy dinner:

IngredientQuantity
Bowtie pasta12 oz
Ground beef1 lb
Olive oil1 tablespoon
Onion, diced1 small
Garlic, minced2 cloves
Diced tomatoes (canned)1 can (14.5 oz)
Beef broth1 cup
Heavy cream1/2 cup
Shredded cheese1/2 cup
Paprika1 teaspoon
SaltTo taste
Black pepperTo taste
Fresh parsley (garnish)Optional

These ingredients come together in the most delicious way, with the bowtie pasta acting as the perfect vehicle for the creamy, beefy sauce.

Step-by-Step Guide to Making Beef Bowtie Pasta

1. Gather Your Ingredients

Start by ensuring all your ingredients are prepped and ready. Dice the onion, mince the garlic, and measure out your spices and liquids. Having everything ready before you start cooking saves time and helps the process go smoothly.

2. Cook the Pasta

In a large pot of salted boiling water, cook the bowtie pasta according to the package instructions. Aim for al dente, as the pasta will absorb some of the sauce later. Once cooked, drain and set it aside.

3. Brown the Ground Beef

Heat the olive oil in the same pot over medium heat. Add the ground beef and cook until browned, breaking it up into smaller pieces with a wooden spoon. Season with salt and pepper. Once fully cooked, drain any excess fat and set the beef aside.

4. Sauté the Onion and Garlic

Using the same pot, add a touch more olive oil if needed. Sauté the diced onion until softened and translucent, about 3–4 minutes. Add the minced garlic and cook for another 30 seconds until fragrant. This step builds the base flavor for your sauce.

5. Create the Sauce

Add the canned diced tomatoes (with their juices), beef broth, and paprika to the pot. Stir well to combine. Let the mixture simmer for 5 minutes to allow the flavors to meld together.

6. Add the Heavy Cream

Slowly pour in the heavy cream, stirring constantly to create a creamy, rich sauce. Allow it to simmer gently for another 3–4 minutes. Adjust the seasoning with additional salt and pepper, if needed.

7. Incorporate the Beef

Return the cooked ground beef to the pot, stirring it into the creamy tomato sauce. Let it simmer for a few minutes so the flavors can blend.

8. Combine the Pasta

Add the cooked bowtie pasta to the sauce, tossing gently to coat every piece in the rich, savory mixture.

9. Add the Cheese

Sprinkle in the shredded cheese and stir until melted and well-combined. This step gives the dish its irresistible cheesy finish.

10. Garnish and Serve

Top with freshly chopped parsley for a pop of color and freshness. Serve hot and enjoy the comforting flavors of your homemade beef bowtie pasta.

Tips for Perfect Beef Bowtie Pasta

  • Use Fresh Ingredients: Freshly minced garlic and shredded cheese elevate the flavor of the dish.
  • Experiment with Cheeses: Swap out cheddar for Parmesan, mozzarella, or gouda for a different twist.
  • Add Veggies: Sneak in some spinach, zucchini, or bell peppers for extra nutrition and color.
  • Control the Spice: For a spicier kick, add red pepper flakes or a dash of hot sauce.

Why This Recipe Works

Beef bowtie pasta works because it brings together simple ingredients in a way that feels both familiar and indulgent. The combination of beef, tomatoes, and cream creates a balanced sauce that clings to the bowtie pasta perfectly. Plus, the use of pantry staples like broth, paprika, and cheese ensures that you don’t need anything fancy to create a meal your whole family will love.

Nutritional Benefits

Here’s a quick look at what makes this dish a nourishing choice:

  • Protein: Ground beef provides a hearty dose of protein to keep you full and energized.
  • Carbs: The pasta delivers energy and works as a comforting base for the dish.
  • Dairy: Heavy cream and cheese contribute calcium for strong bones.
  • Vitamins: Tomatoes and parsley bring essential vitamins like C and K to the table.

What to Serve with Beef Bowtie Pasta

To round out your meal, consider serving this dish with:

  • A crisp green salad with vinaigrette
  • Garlic bread or dinner rolls
  • Steamed or roasted vegetables like broccoli or asparagus
  • A refreshing beverage like iced tea or lemonade

Make-Ahead and Storage Tips

This dish is perfect for meal prep or leftovers. Here’s how you can store it:

  • Refrigerate: Store in an airtight container for up to 3 days. Reheat on the stovetop or in the microwave, adding a splash of broth or cream to refresh the sauce.
  • Freeze: Allow the pasta to cool completely, then transfer to a freezer-safe container. Freeze for up to 2 months. Thaw in the refrigerator overnight before reheating.

FAQs About Beef Bowtie Pasta

1. Can I use a different type of pasta?
Absolutely! Penne, rigatoni, or fusilli work just as well in this recipe.

2. Can I make this dish gluten-free?
Yes! Swap the bowtie pasta for a gluten-free alternative to enjoy this dish without worry.

3. What kind of ground beef should I use?
Lean ground beef (85% lean, 15% fat) is ideal for a balance of flavor and minimal grease.

4. Can I substitute the heavy cream?
If you’re looking for a lighter option, use half-and-half or whole milk instead of heavy cream.

5. Can I make this vegetarian?
Of course! Replace the ground beef with plant-based crumbles or mushrooms for a vegetarian version.

6. How do I prevent the pasta from getting mushy?
Cook the pasta to al dente and avoid overcooking it in the sauce. Adding it just before serving helps maintain its texture.

Your Turn to Try Beef Bowtie Pasta

Now that you know how to make this delicious beef bowtie pasta, it’s time to bring it to your own kitchen. This recipe is perfect for any occasion, from a cozy dinner for two to a family feast. With its creamy sauce, tender pasta, and flavorful beef, it’s guaranteed to become a household favorite. Grab your ingredients, and start cooking—you won’t regret it!

Summary for Beef Bowtie Pasta: A Comforting and Flavorful One-Pot Meal

Beef bowtie pasta is the perfect comfort food, combining tender bowtie pasta, savory ground beef, and a creamy tomato-based sauce. Quick, easy, and made with simple ingredients, this one-pot meal is ideal for busy weeknights or cozy family dinners. Customize it with your favorite cheeses or veggies for a dish that everyone will love!
Prep Time 10 minutes
Cook Time 25 minutes
Total Time 35 minutes
Servings: 6
Course: Main Course
Cuisine: American
Calories: 380

Ingredients
  

  • Bowtie pasta 12 oz
  • Ground beef 1 lb
  • Olive oil 1 tablespoon
  • Onion diced 1 small
  • Garlic minced 2 cloves
  • Diced tomatoes canned 1 can (14.5 oz)
  • Beef broth 1 cup
  • Heavy cream 1/2 cup
  • Shredded cheese 1/2 cup
  • Paprika 1 teaspoon
  • Salt To taste
  • Black pepper To taste
  • Fresh parsley garnish Optional

Method
 

  1. Cook Pasta: Boil the bowtie pasta in salted water until al dente. Drain and set aside.
  2. Brown Beef: In a large pot, heat olive oil and cook ground beef until browned. Season with salt and pepper, then set aside.
  3. Sauté Onion and Garlic: In the same pot, sauté the diced onion until soft, then add the minced garlic and cook until fragrant.
  4. Make the Sauce: Add diced tomatoes, beef broth, and paprika. Simmer for 5 minutes, then stir in heavy cream to create a creamy sauce.
  5. Combine Ingredients: Add the ground beef back to the pot, followed by the cooked pasta. Stir to coat everything in the sauce.
  6. Add Cheese: Sprinkle shredded cheese over the mixture and stir until melted and creamy.
  7. Garnish and Serve: Top with freshly chopped parsley and serve hot.

The Ultimate Breakfast Casserole Recipe: Start Your Day with a Hearty Delight

There’s something magical about waking up to the comforting aroma of a warm, hearty breakfast casserole baking in the oven. It’s the kind of dish that wraps you in its delicious embrace, bringing everyone to the table with a smile. Whether you’re hosting a weekend brunch, celebrating a holiday morning, or just looking to make your everyday breakfast special, this breakfast casserole is a guaranteed crowd-pleaser. Packed with savory flavors, vibrant veggies, and wholesome ingredients, it’s a recipe that’s as satisfying as it is simple to make. Let’s dive into this ultimate guide to creating the perfect breakfast casserole!

Why Breakfast Casserole Is the Perfect Choice for Any Morning

You know those mornings when you need something quick yet filling, or those special occasions where you want to impress your family and friends? That’s where breakfast casseroles shine. They’re versatile, can be prepped ahead of time, and offer the perfect balance of protein, carbs, and veggies to fuel your day. Plus, they make your mornings stress-free because you do most of the work the night before!

Ingredients for the Best Breakfast Casserole

Before you begin, gather all the ingredients to ensure a smooth cooking experience. These simple yet flavorful components work together to create a casserole that’s loaded with goodness.

IngredientQuantity
Crusty bread, cubed4 cups
Olive oil1 teaspoon
Ground pork sausage1 pound
Dried rosemary or Italian seasoning1 teaspoon
Yellow onion, chopped3/4 cup
Fresh garlic, minced2 cloves
Bell peppers, chopped2 cups
Fresh mushrooms, sliced1 cup
Fresh spinach, roughly chopped1 cup
Large eggs12
Salt1/4 teaspoon
Black pepper1/8 teaspoon
Milk or half-and-half2/3 cup
Cheddar cheese, shredded1 cup

Step-by-Step Guide to Making the Perfect Breakfast Casserole

1. Prep Your Ingredients

Before diving into the cooking process, take a few minutes to prep all your ingredients:

  • Cube the bread: Use crusty bread for the best texture. Stale bread works great because it absorbs the egg mixture beautifully.
  • Chop and slice veggies: Make sure your onions, bell peppers, mushrooms, and spinach are ready to go.
  • Shred the cheese: Freshly shredded cheese melts better than pre-shredded varieties.

2. Cook the Sausage

Heat the olive oil in a skillet over medium heat. Add the ground pork sausage and cook until it’s browned and fully cooked. As the sausage cooks, break it into smaller crumbles. Sprinkle in the dried rosemary or Italian seasoning for a burst of flavor. Once done, set it aside.

3. Sauté the Veggies

Using the same skillet, sauté the yellow onion, garlic, bell peppers, and mushrooms. Cook until the veggies are tender and fragrant. Add the spinach last, allowing it to wilt slightly. This step enhances the flavor of your casserole while giving it a vibrant, colorful appearance.

4. Assemble the Casserole

Now it’s time to build your casserole:

  • Layer the bread cubes evenly across the bottom of a greased 9×13-inch baking dish.
  • Add the cooked sausage and sautéed vegetables on top of the bread.
  • Sprinkle the shredded cheddar cheese evenly over the mixture.

5. Prepare the Egg Mixture

In a large mixing bowl, whisk together the eggs, milk or half-and-half, salt, and black pepper. Pour this mixture evenly over the layered ingredients in the baking dish, ensuring everything is well-soaked.

6. Let It Rest

Cover the casserole with plastic wrap or aluminum foil and refrigerate for at least 1 hour or overnight. This step allows the bread to absorb the egg mixture, ensuring a cohesive, flavorful dish.

7. Bake to Perfection

Preheat your oven to 375°F (190°C). Remove the plastic wrap and bake the casserole uncovered for 40–45 minutes or until the top is golden brown and the center is set. To check doneness, insert a knife into the center; it should come out clean.

8. Cool and Serve

Let the casserole cool for 5–10 minutes before slicing. This resting time allows the layers to settle, making it easier to serve.

Tips for Customizing Your Breakfast Casserole

One of the best things about breakfast casseroles is their versatility. Here are some ideas to customize your dish to suit your taste buds:

  • Swap the sausage: Try bacon, ham, or even a vegetarian sausage alternative.
  • Add more veggies: Zucchini, cherry tomatoes, or broccoli can be delicious additions.
  • Experiment with cheese: Substitute cheddar with mozzarella, feta, or pepper jack for a different flavor profile.
  • Go gluten-free: Use gluten-free bread or skip the bread altogether and load up on veggies.

The Nutritional Benefits of Breakfast Casserole

This dish isn’t just delicious; it’s also packed with nutrients to kickstart your day. Here’s a quick breakdown of the benefits:

  • Protein: Eggs and sausage provide high-quality protein for energy and muscle repair.
  • Vitamins and minerals: Veggies like spinach, bell peppers, and mushrooms are rich in essential nutrients like vitamin C, iron, and potassium.
  • Calcium: The cheese and milk add a healthy dose of calcium to support strong bones.

Make-Ahead Tips for Busy Mornings

If you’re short on time in the mornings, this casserole has you covered. Here’s how to streamline the process:

  • Prep the night before: Assemble the casserole, cover it, and refrigerate overnight.
  • Freeze for later: Cook the casserole, cool it completely, and freeze individual portions for quick, reheatable breakfasts.

What to Serve with Breakfast Casserole

To elevate your breakfast spread, pair your casserole with:

  • Fresh fruit salad
  • Buttery croissants or biscuits
  • A side of crispy bacon or turkey sausage
  • Freshly brewed coffee or orange juice

FAQs About Breakfast Casserole

1. Can I make this casserole vegetarian?
Absolutely! Swap the sausage for plant-based alternatives or simply load up on more veggies like zucchini, broccoli, or tomatoes.

2. How do I store leftovers?
Cover the casserole tightly or transfer it to an airtight container and refrigerate. It will stay fresh for up to 4 days.

3. Can I freeze breakfast casserole?
Yes, this dish freezes beautifully. Slice it into portions, wrap them individually, and freeze for up to 3 months. Reheat in the oven or microwave before serving.

4. What type of bread works best?
Crusty bread like a baguette or sourdough is ideal, as it holds up well to the egg mixture. Avoid soft, sandwich-style bread, which can turn mushy.

5. Can I use egg substitutes?
Yes, egg substitutes or a combination of eggs and egg whites can be used for a lighter version.

6. How do I reheat the casserole?
To reheat, cover the casserole with foil and warm it in the oven at 350°F (175°C) for 10–15 minutes. Individual portions can also be microwaved.

Your Turn to Try This Breakfast Casserole

Now that you know all the secrets to making the ultimate breakfast casserole, it’s time to give it a try! This hearty, flavorful dish is perfect for feeding a crowd or prepping meals for the week ahead. Once you’ve made it, don’t be surprised if it becomes a staple in your breakfast rotation. Share the joy of this recipe with your loved ones, and let every morning begin with a delicious start!

The Ultimate Breakfast Casserole Recipe: Quick Summary

Wake up to the irresistible aroma of a savory, hearty breakfast casserole! This dish is perfect for family gatherings, holiday mornings, or meal prep. With crusty bread, sausage, veggies, and cheese baked in a creamy egg mixture, it’s as delicious as it is versatile. Prepare it the night before for a stress-free morning and customize it to fit your taste!
Prep Time 20 minutes
Cook Time 45 minutes
Total Time 1 hour 5 minutes
Servings: 8
Course: Breakfast
Cuisine: American
Calories: 220

Ingredients
  

  • 4 cups Crusty bread cubed
  • 1 teaspoon Olive oil
  • 1 pound Ground pork sausage
  • 1 teaspoon Dried rosemary/Italian seasoning
  • Yellow onion chopped
  • 3/4 cup Fresh garlic minced
  • 2 cloves Bell peppers chopped
  • 2 cups Fresh mushrooms sliced
  • 1 cup Fresh spinach chopped
  • 12 Large eggs
  • 1/4 teaspoon Salt
  • 1/8 teaspoon Black pepper
  • 2/3 cup Milk or half-and-half
  • 1 cup Cheddar cheese shredded

Method
 

  1. Prep Ingredients: Cube bread, chop veggies, and shred cheese.
  2. Cook Sausage: Brown sausage in olive oil, seasoning it with rosemary or Italian seasoning.
  3. Sauté Veggies: Cook onion, garlic, bell peppers, mushrooms, and spinach in the same skillet until tender.
  4. Assemble: Layer bread in a greased 9×13-inch baking dish, followed by sausage, veggies, and cheese.
  5. Prepare Egg Mixture: Whisk eggs, milk, salt, and pepper. Pour evenly over the layered ingredients.
  6. Refrigerate: Cover and refrigerate for 1 hour or overnight to let flavors meld.
  7. Bake: Preheat oven to 375°F (190°C). Bake uncovered for 40–45 minutes, or until the top is golden brown and the center is set.
  8. Serve: Let it rest for 5–10 minutes, then slice and enjoy!

Decadent Strawberry Tiramisu with a Citrus Twist

Reimagine the classic tiramisu with a vibrant, fruity twist! This Strawberry Tiramisu combines the delicate sweetness of strawberries with creamy mascarpone and a touch of citrus. Layers of crispy ladyfingers soaked in a strawberry puree are beautifully complemented by fluffy mascarpone cream, making this dessert both light and indulgent. Whether for a special occasion or simply to treat yourself, this no-bake dessert is sure to impress and become a favorite.

Ingredients

For the Strawberry Puree

  • 16 oz. fresh strawberries, hulled and sliced (or substitute raspberries or blueberries)
  • 2 tablespoons orange liqueur (such as Cointreau or Grand Marnier)
  • 1 tablespoon orange juice (or lemon juice as an alternative)
  • 3 tablespoons granulated sugar
  • ¼ cup strawberry preserves (or strawberry jam)

For the Strawberry Tiramisu

  • ½ cup granulated sugar
  • 4 large egg yolks
  • 1⅓ cups heavy whipping cream
  • 16 oz. mascarpone cheese, at room temperature
  • ½ tablespoon orange zest
  • 1 teaspoon vanilla extract
  • 8 oz. fresh strawberries, hulled and sliced
  • 24 crispy ladyfingers (Savoiardi)

Instructions

  1. Make the Strawberry Puree : In a medium saucepan, combine the strawberries, orange liqueur, orange juice, granulated sugar, and strawberry preserves. Cook over medium heat for 5–7 minutes, stirring occasionally, until the strawberries release their juices and soften. Remove from heat and let the mixture cool slightly. Blend it into a smooth puree using a blender or immersion blender. Set aside to cool completely.
  2. Prepare the Mascarpone Cream : In a heatproof bowl, whisk together the egg yolks and granulated sugar. Place the bowl over a pot of simmering water (double boiler method), whisking constantly, for about 5 minutes or until the mixture thickens and is pale yellow. Remove from heat and let it cool. In a separate bowl, whip the heavy cream until stiff peaks form. In another large bowl, beat the mascarpone cheese until smooth. Add the cooled egg yolk mixture, orange zest, and vanilla extract, mixing until fully combined. Gently fold the whipped cream into the mascarpone mixture until smooth and fluffy.
  3. Assemble the Tiramisu : Spread a thin layer of the mascarpone cream on the bottom of a 9×13-inch dish (or a similar-sized dish). Dip each ladyfinger briefly into the strawberry puree, ensuring they are soaked but not soggy, and arrange them in a single layer over the mascarpone cream. Spread half of the mascarpone cream over the ladyfingers. Top with a layer of sliced strawberries. Repeat the layers with the remaining ladyfingers, mascarpone cream, and sliced strawberries.
  4. Chill and Serve : Cover the dish with plastic wrap and refrigerate for at least 4 hours, or overnight, to allow the flavors to meld and the tiramisu to set. Before serving, garnish with additional fresh strawberries or a dusting of powdered sugar if desired.

Conclusion

This Strawberry Tiramisu is the perfect balance of sweetness, creaminess, and fruity freshness, with a delightful hint of citrus to elevate the flavors. The no-bake nature of this dessert makes it ideal for summer gatherings or when you want a show-stopping dessert with minimal effort. Try this recipe for a light and luscious treat that will leave everyone asking for seconds!

Decadent Strawberry Tiramisu with a Citrus Twist

This Strawberry Tiramisu is a fruity twist on the classic Italian dessert, featuring layers of strawberry puree-soaked ladyfingers, mascarpone cream, and fresh strawberries with a hint of citrus.
Prep Time 25 minutes
Resting Time 4 hours
Total Time 4 hours 25 minutes
Servings: 8 Slice
Course: Dessert
Cuisine: Italian-inspired
Calories: 300

Ingredients
  

For the Strawberry Puree
  • 16 oz. fresh strawberries hulled and sliced (or substitute raspberries or blueberries)
  • 2 tablespoons orange liqueur such as Cointreau or Grand Marnier
  • 1 tablespoon orange juice or lemon juice as an alternative
  • 3 tablespoons granulated sugar
  • ¼ cup strawberry preserves or strawberry jam
For the Strawberry Tiramisu
  • ½ cup granulated sugar
  • 4 large egg yolks
  • 1⅓ cups heavy whipping cream
  • 16 oz. mascarpone cheese at room temperature
  • ½ tablespoon orange zest
  • 1 teaspoon vanilla extract
  • 8 oz. fresh strawberries hulled and sliced
  • 24 crispy ladyfingers Savoiardi

Method
 

  1. Make the Strawberry Puree : In a medium saucepan, combine the strawberries, orange liqueur, orange juice, granulated sugar, and strawberry preserves. Cook over medium heat for 5–7 minutes, stirring occasionally, until the strawberries release their juices and soften. Remove from heat and let the mixture cool slightly. Blend it into a smooth puree using a blender or immersion blender. Set aside to cool completely.
  2. Prepare the Mascarpone Cream : In a heatproof bowl, whisk together the egg yolks and granulated sugar. Place the bowl over a pot of simmering water (double boiler method), whisking constantly, for about 5 minutes or until the mixture thickens and is pale yellow. Remove from heat and let it cool. In a separate bowl, whip the heavy cream until stiff peaks form. In another large bowl, beat the mascarpone cheese until smooth. Add the cooled egg yolk mixture, orange zest, and vanilla extract, mixing until fully combined. Gently fold the whipped cream into the mascarpone mixture until smooth and fluffy.
  3. Assemble the Tiramisu : Spread a thin layer of the mascarpone cream on the bottom of a 9×13-inch dish (or a similar-sized dish). Dip each ladyfinger briefly into the strawberry puree, ensuring they are soaked but not soggy, and arrange them in a single layer over the mascarpone cream. Spread half of the mascarpone cream over the ladyfingers. Top with a layer of sliced strawberries. Repeat the layers with the remaining ladyfingers, mascarpone cream, and sliced strawberries.
  4. Chill and Serve : Cover the dish with plastic wrap and refrigerate for at least 4 hours, or overnight, to allow the flavors to meld and the tiramisu to set. Before serving, garnish with additional fresh strawberries or a dusting of powdered sugar if desired.

Raspberry Caramel Millionaire’s Shortbread (Gluten-Free & Vegan)

Elevate your dessert game with this decadent Raspberry Caramel Millionaire’s Shortbread. This gluten-free and vegan-friendly treat combines a buttery almond shortbread base, a tangy raspberry jelly layer, luscious salted caramel, and a rich chocolate topping. Finished with a sprinkle of freeze-dried raspberries, it’s the perfect blend of sweet, salty, and fruity flavors. Whether you’re entertaining guests or treating yourself, this dessert is guaranteed to impress.

Ingredients

Base

  • 1 cup (125 g) gluten-free all-purpose flour (or plain flour if not gluten-free)
  • 1 cup (112 g) ground almonds
  • 4 tablespoons (60 g) vegan butter
  • 2 tablespoons (30 ml) pure maple syrup
  • ¼ teaspoon (1.25 g) sea salt

Raspberry Jelly

  • 4 cups (480 g) fresh raspberries
  • ¼ cup (60 ml) pure maple syrup
  • 1 tablespoon (15 ml) lemon juice
  • 2 ½ teaspoons (12.5 g) agar-agar powder

Salted Caramel

  • 1 cup (256 g) cashew butter
  • ¾ cup (177 ml) pure maple syrup
  • 4 tablespoons (60 g) coconut oil, solid
  • 2 tablespoons (30 g) full-fat canned coconut milk (or coconut cream)
  • 1 teaspoon (5 ml) vanilla extract
  • 1 teaspoon (5 g) sea salt

Topping

  • 7 oz (200 g) vegan chocolate
  • ¼ cup (30 g) freeze-dried raspberries (optional)

Instructions

  1. Make the Base : Preheat your oven to 350°F (175°C). Line an 8×8-inch square baking pan with parchment paper. In a mixing bowl, combine the gluten-free flour, ground almonds, vegan butter, maple syrup, and sea salt. Mix until the dough comes together. Press the dough evenly into the lined baking pan. Bake for 10–12 minutes, or until lightly golden. Remove from the oven and set aside to cool completely.
  2. Prepare the Raspberry Jelly : In a saucepan, combine the raspberries, maple syrup, and lemon juice. Cook over medium heat, stirring frequently, until the raspberries break down (about 5–7 minutes). Strain the mixture through a fine mesh sieve to remove the seeds, then return the strained liquid to the saucepan. Add the agar-agar powder and bring to a boil. Simmer for 2–3 minutes, whisking constantly, until the mixture thickens. Pour the raspberry jelly evenly over the cooled shortbread base. Place in the fridge to set for 20–30 minutes.
  3. Make the Salted Caramel : In a medium saucepan, combine the cashew butter, maple syrup, coconut oil, coconut milk, vanilla extract, and sea salt. Cook over low heat, stirring frequently, until the mixture is smooth and creamy (about 5 minutes). Let the caramel cool slightly before pouring it over the set raspberry jelly layer. Spread evenly and return to the fridge to chill for another 20 minutes.
  4. Add the Chocolate Topping : Melt the vegan chocolate in a heatproof bowl over a pot of simmering water (double boiler method) or in the microwave in 20-second increments. Stir until smooth. Pour the melted chocolate over the chilled caramel layer, spreading it evenly with a spatula. If desired, sprinkle freeze-dried raspberries on top for a decorative finish.
  5. Chill and Serve : Chill the assembled shortbread in the fridge for at least 1 hour, or until the chocolate is fully set. Use a sharp knife to slice into 12 squares or rectangles. Serve and enjoy!

Conclusion

This Raspberry Caramel Millionaire’s Shortbread is a show-stopping dessert that’s as delicious as it is beautiful. The combination of textures and flavors—crunchy shortbread, tart raspberry jelly, creamy salted caramel, and rich chocolate—creates a perfectly balanced treat. Best of all, it’s entirely vegan and gluten-free, so everyone can indulge guilt-free! Perfect for holidays, parties, or any special occasion.

Raspberry Caramel Millionaire’s Shortbread (Gluten-Free & Vegan)

A luxurious vegan and gluten-free dessert featuring a buttery shortbread base, raspberry jelly, salted caramel, and a chocolate topping with freeze-dried raspberries.
Prep Time 30 minutes
Cook Time 15 minutes
Resting Time 1 hour
Total Time 1 hour 45 minutes
Servings: 12 Slice
Course: Dessert
Cuisine: American
Calories: 320

Ingredients
  

Base
  • 1 cup 125 g gluten-free all-purpose flour (or plain flour if not gluten-free)
  • 1 cup 112 g ground almonds
  • 4 tablespoons 60 g vegan butter
  • 2 tablespoons 30 ml pure maple syrup
  • ¼ teaspoon 1.25 g sea salt
Raspberry Jelly
  • 4 cups 480 g fresh raspberries
  • ¼ cup 60 ml pure maple syrup
  • 1 tablespoon 15 ml lemon juice
  • 2 ½ teaspoons 12.5 g agar-agar powder
Salted Caramel
  • 1 cup 256 g cashew butter
  • ¾ cup 177 ml pure maple syrup
  • 4 tablespoons 60 g coconut oil, solid
  • 2 tablespoons 30 g full-fat canned coconut milk (or coconut cream)
  • 1 teaspoon 5 ml vanilla extract
  • 1 teaspoon 5 g sea salt
Topping
  • 7 oz 200 g vegan chocolate
  • ¼ cup 30 g freeze-dried raspberries (optional)

Method
 

  1. Make the Base : Preheat your oven to 350°F (175°C). Line an 8×8-inch square baking pan with parchment paper. In a mixing bowl, combine the gluten-free flour, ground almonds, vegan butter, maple syrup, and sea salt. Mix until the dough comes together. Press the dough evenly into the lined baking pan. Bake for 10–12 minutes, or until lightly golden. Remove from the oven and set aside to cool completely.
  2. Prepare the Raspberry Jelly : In a saucepan, combine the raspberries, maple syrup, and lemon juice. Cook over medium heat, stirring frequently, until the raspberries break down (about 5–7 minutes). Strain the mixture through a fine mesh sieve to remove the seeds, then return the strained liquid to the saucepan. Add the agar-agar powder and bring to a boil. Simmer for 2–3 minutes, whisking constantly, until the mixture thickens. Pour the raspberry jelly evenly over the cooled shortbread base. Place in the fridge to set for 20–30 minutes.
  3. Make the Salted Caramel : In a medium saucepan, combine the cashew butter, maple syrup, coconut oil, coconut milk, vanilla extract, and sea salt. Cook over low heat, stirring frequently, until the mixture is smooth and creamy (about 5 minutes). Let the caramel cool slightly before pouring it over the set raspberry jelly layer. Spread evenly and return to the fridge to chill for another 20 minutes.
  4. Add the Chocolate Topping : Melt the vegan chocolate in a heatproof bowl over a pot of simmering water (double boiler method) or in the microwave in 20-second increments. Stir until smooth. Pour the melted chocolate over the chilled caramel layer, spreading it evenly with a spatula. If desired, sprinkle freeze-dried raspberries on top for a decorative finish.
  5. Chill and Serve : Chill the assembled shortbread in the fridge for at least 1 hour, or until the chocolate is fully set. Use a sharp knife to slice into 12 squares or rectangles. Serve and enjoy!

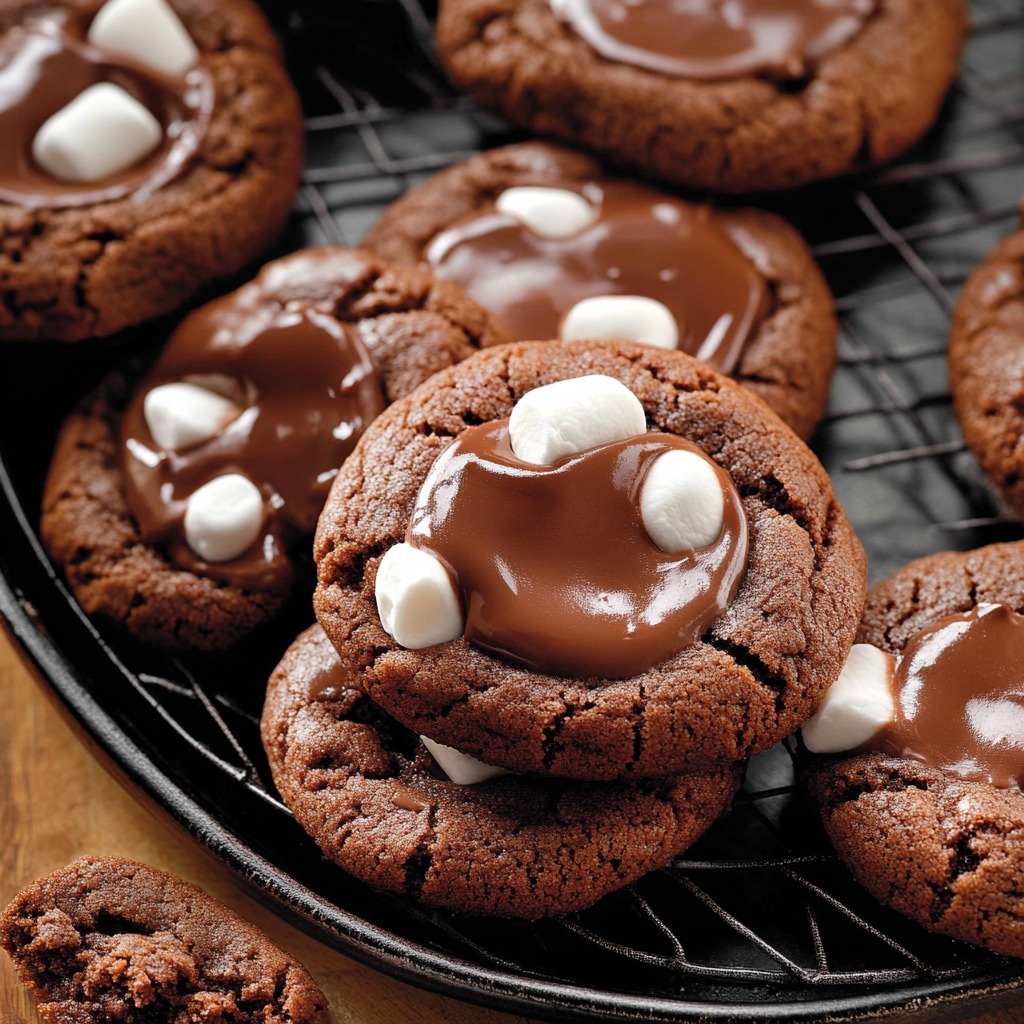
Hot Cocoa Marshmallow Surprise Cookies

Cozy up with these Hot Cocoa Marshmallow Surprise Cookies, a delightful dessert twist inspired by the classic winter beverage. Imagine biting into a soft and chewy chocolate cookie that’s bursting with the rich flavors of cocoa and topped with a gooey marshmallow surprise. Perfect for chilly nights, holiday gatherings, or a simple sweet treat, these cookies will transport you to a winter wonderland of indulgence.

Ingredients

For the Cookies

  • ½ cup (113g) unsalted butter, softened to room temperature
  • ½ cup (100g) granulated sugar
  • ½ cup (100g) packed light or dark brown sugar
  • 1 large egg, at room temperature
  • 1 teaspoon pure vanilla extract
  • 1½ cups (188g) all-purpose flour (spooned & leveled)
  • ⅓ cup (27g) natural unsweetened cocoa powder
  • ¼ cup (40g) dry hot cocoa mix
  • 1 teaspoon baking soda
  • ⅛ teaspoon salt
  • 2 teaspoons (10ml) milk (any kind, dairy or nondairy, is fine)

For the Topping

  • 10–11 large marshmallows, cut in half
  • 8 ounces (226g) semi-sweet chocolate, finely chopped

Instructions

  1. Prepare the Cookie Dough : Preheat your oven to 350°F (177°C) and line baking sheets with parchment paper or silicone baking mats. In a large mixing bowl, cream together the softened butter, granulated sugar, and brown sugar using a hand or stand mixer on medium speed until smooth and creamy. Add the egg and vanilla extract, mixing until fully incorporated. In a separate bowl, whisk together the all-purpose flour, cocoa powder, hot cocoa mix, baking soda, and salt. Gradually add the dry ingredients to the wet ingredients, mixing on low speed until a soft dough forms. Add the milk and mix until the dough is smooth.
  2. Bake the Cookies : Using a cookie scoop or tablespoon, portion out the dough into 1.5-tablespoon-sized balls. Place them on the prepared baking sheets about 2 inches apart. Bake for 8–9 minutes, or until the edges are set but the centers are still soft. Do not overbake.
  3. Add the Marshmallow Surprise : Remove the cookies from the oven and immediately press one marshmallow half (cut side down) into the center of each cookie. Return the cookies to the oven and bake for an additional 2 minutes, just until the marshmallows puff slightly.
  4. Melt the Chocolate : While the cookies cool on the baking sheet, melt the semi-sweet chocolate in a microwave-safe bowl in 20-second increments, stirring after each interval, until smooth. Drizzle the melted chocolate over the cookies, covering the marshmallows and part of the cookie for a rich, glossy finish.
  5. Cool and Serve : Allow the cookies to cool completely on the baking sheets so the chocolate can set. Serve with a cup of hot cocoa or enjoy them as a stand-alone treat!

Conclusion

These Hot Cocoa Marshmallow Surprise Cookies are the ultimate cozy dessert for chocolate lovers. The rich cookie base, gooey marshmallow topping, and decadent chocolate drizzle create a trifecta of flavors and textures that’s irresistible. Whether you’re snuggling by the fire or hosting a holiday party, these cookies are guaranteed to delight and impress. Give them a try, and make every bite a warm, chocolatey hug!

Hot Cocoa Marshmallow Surprise Cookies

Hot Cocoa Marshmallow Surprise Cookies are chewy chocolate cookies infused with cocoa mix, topped with gooey marshmallows, and drizzled with melted chocolate for a warm, comforting dessert treat.
Prep Time 15 minutes
Cook Time 10 minutes
Total Time 25 minutes
Servings: 20 Cookies
Course: Dessert
Cuisine: American
Calories: 120

Ingredients
  

For the Cookies
  • ½ cup 113g unsalted butter, softened to room temperature
  • ½ cup 100g granulated sugar
  • ½ cup 100g packed light or dark brown sugar
  • 1 large egg at room temperature
  • 1 teaspoon pure vanilla extract
  • 1½ cups 188g all-purpose flour (spooned & leveled)
  • ⅓ cup 27g natural unsweetened cocoa powder
  • ¼ cup 40g dry hot cocoa mix
  • 1 teaspoon baking soda
  • ⅛ teaspoon salt
  • 2 teaspoons 10ml milk (any kind, dairy or nondairy, is fine)
For the Topping
  • 10 –11 large marshmallows cut in half
  • 8 ounces 226g semi-sweet chocolate, finely chopped

Method
 

  1. Prepare the Cookie Dough : Preheat your oven to 350°F (177°C) and line baking sheets with parchment paper or silicone baking mats. In a large mixing bowl, cream together the softened butter, granulated sugar, and brown sugar using a hand or stand mixer on medium speed until smooth and creamy. Add the egg and vanilla extract, mixing until fully incorporated. In a separate bowl, whisk together the all-purpose flour, cocoa powder, hot cocoa mix, baking soda, and salt. Gradually add the dry ingredients to the wet ingredients, mixing on low speed until a soft dough forms. Add the milk and mix until the dough is smooth.
  2. Bake the Cookies : Using a cookie scoop or tablespoon, portion out the dough into 1.5-tablespoon-sized balls. Place them on the prepared baking sheets about 2 inches apart. Bake for 8–9 minutes, or until the edges are set but the centers are still soft. Do not overbake.
  3. Add the Marshmallow Surprise : Remove the cookies from the oven and immediately press one marshmallow half (cut side down) into the center of each cookie. Return the cookies to the oven and bake for an additional 2 minutes, just until the marshmallows puff slightly.
  4. Melt the Chocolate : While the cookies cool on the baking sheet, melt the semi-sweet chocolate in a microwave-safe bowl in 20-second increments, stirring after each interval, until smooth. Drizzle the melted chocolate over the cookies, covering the marshmallows and part of the cookie for a rich, glossy finish.
  5. Cool and Serve : Allow the cookies to cool completely on the baking sheets so the chocolate can set. Serve with a cup of hot cocoa or enjoy them as a stand-alone treat!

Savory Garlic Parmesan Cheeseburger Bombs with a Bacon Twist

Looking for a unique, mouthwatering twist on the classic cheeseburger? These Savory Garlic Parmesan Cheeseburger Bombs combine juicy ground beef, crispy bacon, and gooey cheddar cheese, all encased in golden Pillsbury biscuits. Infused with the bold flavors of garlic, Parmesan, and a tangy barbecue-mustard sauce, this recipe is perfect for a quick family dinner, party appetizers, or game-day treats. Each bite is an explosion of comfort food goodness that’s guaranteed to satisfy any craving!

Ingredients

  • 1 can Pillsbury Biscuits (10 biscuits)
  • 1 pound lean ground beef
  • ½ onion, finely chopped
  • 3 slices turkey bacon, chopped
  • ⅓ cup cream cheese
  • 1 tablespoon ketchup
  • 2 tablespoons barbecue sauce
  • 1 teaspoon yellow mustard
  • 1 teaspoon Worcestershire sauce
  • 5 ounces cheddar cheese, chopped into 10 squares
  • 1 egg white, beaten
  • 2 tablespoons sesame seeds
  • 2 teaspoons garlic powder (for garnish)
  • 2 tablespoons grated Parmesan cheese (for garnish)

Instructions

  1. Prepare the Filling : In a large skillet, cook the turkey bacon over medium heat until crispy. Remove and set aside. Using the same skillet, cook the ground beef and onions until the beef is browned and fully cooked. Drain excess grease. Add the cream cheese, ketchup, barbecue sauce, mustard, and Worcestershire sauce. Stir until well combined. Remove from heat and mix in the cooked turkey bacon. Set aside to cool slightly.
  2. Assemble the Cheeseburger Bombs : Preheat your oven to 375°F (190°C). Flatten each Pillsbury biscuit into a 4-inch circle. Place a small scoop of the beef mixture in the center of each biscuit. Top with a cheddar cheese square. Fold the edges of the biscuit dough around the filling, pinching it tightly to seal. Roll gently into a ball.
  3. Add Garlic Parmesan Topping : Arrange the sealed bombs seam-side down on a baking sheet lined with parchment paper. Brush each bomb with the beaten egg white. Sprinkle sesame seeds, garlic powder, and Parmesan cheese on top for extra flavor.
  4. Bake to Perfection : Bake in the preheated oven for 12-15 minutes, or until the biscuits are golden brown and puffed. Remove from the oven and let cool for 5 minutes before serving.
  5. Serve and Enjoy : Serve warm, paired with your favorite dipping sauces like ranch, barbecue, or ketchup.

Conclusion

These Garlic Parmesan Cheeseburger Bombs are an irresistible fusion of hearty and savory flavors, wrapped in buttery, flaky biscuit dough. Whether you’re hosting a party, looking for a kid-friendly meal, or simply craving a comforting snack, these bombs will undoubtedly be a hit. Easy to make and packed with cheesy, meaty goodness, this recipe is sure to become a family favorite in no time!

Savory Garlic Parmesan Cheeseburger Bombs with a Bacon Twist

Garlic Parmesan Cheeseburger Bombs are a delicious combination of ground beef, bacon, and cheddar cheese wrapped in Pillsbury biscuits, infused with garlic and Parmesan seasoning. Perfect for family dinners or appetizers!
Prep Time 20 minutes
Cook Time 15 minutes
Total Time 35 minutes
Servings: 10
Course: Main Course
Cuisine: American
Calories: 320

Ingredients
  

  • 1 can Pillsbury Biscuits 10 biscuits
  • 1 pound lean ground beef
  • ½ onion finely chopped
  • 3 slices turkey bacon chopped
  • ⅓ cup cream cheese
  • 1 tablespoon ketchup
  • 2 tablespoons barbecue sauce
  • 1 teaspoon yellow mustard
  • 1 teaspoon Worcestershire sauce
  • 5 ounces cheddar cheese chopped into 10 squares
  • 1 egg white beaten
  • 2 tablespoons sesame seeds
  • 2 teaspoons garlic powder for garnish
  • 2 tablespoons grated Parmesan cheese for garnish

Method
 

  1. Prepare the Filling : In a large skillet, cook the turkey bacon over medium heat until crispy. Remove and set aside. Using the same skillet, cook the ground beef and onions until the beef is browned and fully cooked. Drain excess grease. Add the cream cheese, ketchup, barbecue sauce, mustard, and Worcestershire sauce. Stir until well combined. Remove from heat and mix in the cooked turkey bacon. Set aside to cool slightly.
  2. Assemble the Cheeseburger Bombs : Preheat your oven to 375°F (190°C). Flatten each Pillsbury biscuit into a 4-inch circle. Place a small scoop of the beef mixture in the center of each biscuit. Top with a cheddar cheese square. Fold the edges of the biscuit dough around the filling, pinching it tightly to seal. Roll gently into a ball.
  3. Add Garlic Parmesan Topping : Arrange the sealed bombs seam-side down on a baking sheet lined with parchment paper. Brush each bomb with the beaten egg white. Sprinkle sesame seeds, garlic powder, and Parmesan cheese on top for extra flavor.
  4. Bake to Perfection : Bake in the preheated oven for 12-15 minutes, or until the biscuits are golden brown and puffed. Remove from the oven and let cool for 5 minutes before serving.
  5. Serve and Enjoy : Serve warm, paired with your favorite dipping sauces like ranch, barbecue, or ketchup.

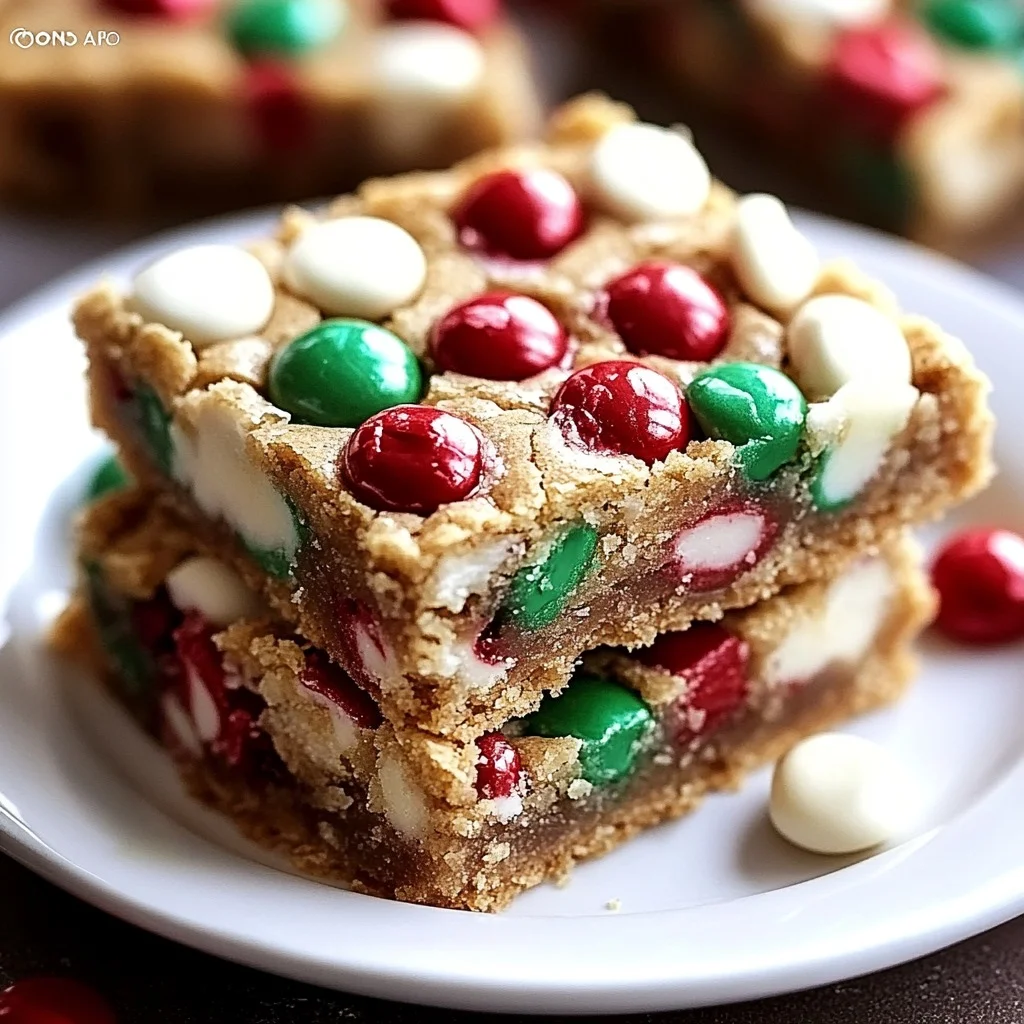
Festive Christmas Cookie Bars: A Holiday Delight

Celebrate the holiday season with these irresistible Christmas Cookie Bars! Soft, chewy, and bursting with festive red and green M&Ms, these bars are the ultimate holiday treat. Perfect for cookie swaps, gifting, or just indulging in the Christmas spirit, they’re easy to make and packed with flavor. Let’s get baking and spread some holiday cheer!

Ingredients

Wet Ingredients:

  • 1 cup unsalted butter, melted
  • 1 cup brown sugar, packed
  • ½ cup granulated sugar
  • 2 large eggs
  • 2 teaspoons vanilla extract

Dry Ingredients:

  • 2 ½ cups all-purpose flour
  • 1 teaspoon baking soda
  • ½ teaspoon salt

Add-ins:

  • 1 cup red and green M&Ms, for festive color
  • ½ cup white chocolate chips, for creamy sweetness

Instructions

  1. Preheat the Oven : Preheat your oven to 350°F (175°C).Grease and line a 9×13-inch baking pan with parchment paper for easy removal.
  2. Prepare the Dough : In a large mixing bowl, combine the melted butter, brown sugar, and granulated sugar. Mix until smooth and creamy.Add the eggs and vanilla extract. Whisk until fully combined.
  3. Combine Dry Ingredients : In a separate bowl, whisk together the all-purpose flour, baking soda, and salt.Gradually add the dry ingredients to the wet ingredients, mixing just until combined. Be careful not to overmix.
  4. Fold in the Festive Add-Ins : Gently fold in the red and green M&Ms and white chocolate chips, reserving a few M&Ms to sprinkle on top for decoration.
  5. Assemble and Bake : Spread the dough evenly into the prepared baking pan, smoothing the top with a spatula. Sprinkle the reserved M&Ms on top for a festive look. Bake in the preheated oven for 20-25 minutes, or until the edges are golden brown and a toothpick inserted in the center comes out clean.
  6. Cool and Slice : Allow the cookie bars to cool completely in the pan before slicing into squares or rectangles.Serve and enjoy the festive flavors of Christmas!

Conclusion

These Christmas Cookie Bars are the perfect blend of chewy, buttery goodness and festive flair. With every bite, you’ll enjoy the creamy sweetness of white chocolate and the crunch of colorful M&Ms. Easy to make and a hit with everyone, these bars will become a holiday baking tradition in no time!

Festive Christmas Cookie Bars: A Holiday Delight

Soft and chewy cookie bars packed with festive redand green M&Ms and creamy white chocolate chips. A perfect holiday treatthat’s easy to bake and share.
Prep Time 10 minutes
Cook Time 25 minutes
Total Time 35 minutes
Servings: 20 Bars
Course: Dessert
Cuisine: American
Calories: 250

Ingredients
  

Wet Ingredients:
  • 1 cup unsalted butter melted
  • 1 cup brown sugar packed
  • ½ cup granulated sugar
  • 2 large eggs
  • 2 teaspoons vanilla extract
Dry Ingredients:
  • 2 ½ cups all-purpose flour
  • 1 teaspoon baking soda
  • ½ teaspoon salt
Add-ins:
  • 1 cup red and green M&Ms for festive color
  • ½ cup white chocolate chips for creamy sweetness

Method
 

  1. Preheat the Oven : Preheat your oven to 350°F (175°C). Grease and line a 9×13-inch baking pan with parchment paper for easy removal.
  2. Prepare the Dough : In a large mixing bowl, combine the melted butter, brown sugar, and granulated sugar. Mix until smooth and creamy. Add the eggs and vanilla extract. Whisk until fully combined.
  3. Combine Dry Ingredients : In a separate bowl, whisk together the all-purpose flour, baking soda, and salt. Gradually add the dry ingredients to the wet ingredients, mixing just until combined. Be careful not to overmix.
  4. Fold in the Festive Add-Ins : Gently fold in the red and green M&Ms and white chocolate chips, reserving a few M&Ms to sprinkle on top for decoration.
  5. Assemble and Bake : Spread the dough evenly into the prepared baking pan, smoothing the top with a spatula. Sprinkle the reserved M&Ms on top for a festive look. Bake in the preheated oven for 20-25 minutes, or until the edges are golden brown and a toothpick inserted in the center comes out clean.
  6. Cool and Slice : Allow the cookie bars to cool completely in the pan before slicing into squares or rectangles. Serve and enjoy the festive flavors of Christmas!

Jalapeño Popper Grilled Cheese: A Spicy Twist on a Classic

Take your grilled cheese game to the next level with this Jalapeño Popper Grilled Cheese! Combining the creamy goodness of cream cheese, the spicy kick of jalapeños, crispy bacon, and melty cheddar and Monterey Jack cheese, this sandwich is a flavor-packed fusion of two all-time favorites. Perfect for a quick lunch or indulgent snack, this recipe will have you coming back for more.

Ingredients

Meat:

  • 4 slices crispy cooked bacon

Produce:

  • 2 jalapeños, sliced lengthwise (seeds and membranes removed)
  • Cilantro (optional, for garnish)

Bread & Baked Goods:

  • 4 slices Italian bread

Dairy:

  • 2 slices sharp cheddar cheese
  • 2 slices Monterey Jack cheese
  • 4 oz cream cheese, softened
  • 1 pat of butter

Instructions

  1. Slice the Jalapeños: Cut the jalapeños lengthwise, removing the seeds and membranes for a milder heat.
  2. Cook the Jalapeños: In a skillet over medium heat, cook the jalapeño halves for 2-3 minutes per side until they are slightly charred and softened. Set them aside.
  3. Spread the Cream Cheese: Evenly spread 1 oz of softened cream cheese onto each slice of Italian bread.
  4. Add the Toppings: Layer one slice of cheddar cheese, the cooked jalapeño slices, 2 slices of crispy bacon, and one slice of Monterey Jack cheese on two slices of bread. Top with the remaining bread slices (cream cheese side down).
  5. Butter the Bread: Spread a thin layer of butter on the outside of each sandwich.
  6. Grill to Perfection: Heat a skillet or griddle over medium heat. Place the sandwiches in the skillet and grill for 3-4 minutes on each side, or until the bread is golden brown and the cheese is melted.
  7. Garnish and Slice: If desired, sprinkle the sandwich with chopped cilantro for added freshness. Slice in half and serve immediately.
  8. Enjoy the Flavors: Bite into the gooey, cheesy, spicy deliciousness of your Jalapeño Popper Grilled Cheese!

Conclusion

This Jalapeño Popper Grilled Cheese is the perfect combination of spicy, cheesy, and crispy textures. Whether you’re looking for a hearty lunch, a unique snack, or a way to spice up your grilled cheese routine, this sandwich delivers bold flavors that you’ll crave again and again.

Jalapeño Popper Grilled Cheese: A Spicy Twist on a Classic

A grilled cheese sandwich packed with creamy creamcheese, sharp cheddar, Monterey Jack, spicy jalapeños, and crispy bacon. Aperfect fusion of comfort food and bold flavors.
Prep Time 10 minutes
Cook Time 10 minutes
Total Time 20 minutes
Servings: 2 sandwichs
Course: Snack
Cuisine: American
Calories: 500

Ingredients
  

Meat:
  • 4 slices crispy cooked bacon
Produce:
  • 2 jalapeños sliced lengthwise (seeds and membranes removed)
  • Cilantro optional, for garnish
Bread & Baked Goods:
  • 4 slices Italian bread
Dairy:
  • 2 slices sharp cheddar cheese
  • 2 slices Monterey Jack cheese
  • 4 oz cream cheese softened
  • 1 pat of butter

Method
 

  1. Slice the Jalapeños: Cut the jalapeños lengthwise, removing the seeds and membranes for a milder heat.
  2. Cook the Jalapeños: In a skillet over medium heat, cook the jalapeño halves for 2-3 minutes per side until they are slightly charred and softened. Set them aside.
  3. Spread the Cream Cheese: Evenly spread 1 oz of softened cream cheese onto each slice of Italian bread.
  4. Add the Toppings: Layer one slice of cheddar cheese, the cooked jalapeño slices, 2 slices of crispy bacon, and one slice of Monterey Jack cheese on two slices of bread. Top with the remaining bread slices (cream cheese side down).
  5. Butter the Bread: Spread a thin layer of butter on the outside of each sandwich.
  6. Grill to Perfection: Heat a skillet or griddle over medium heat. Place the sandwiches in the skillet and grill for 3-4 minutes on each side, or until the bread is golden brown and the cheese is melted.
  7. Garnish and Slice: If desired, sprinkle the sandwich with chopped cilantro for added freshness. Slice in half and serve immediately.
  8. Enjoy the Flavors: Bite into the gooey, cheesy, spicy deliciousness of your Jalapeño Popper Grilled Cheese!

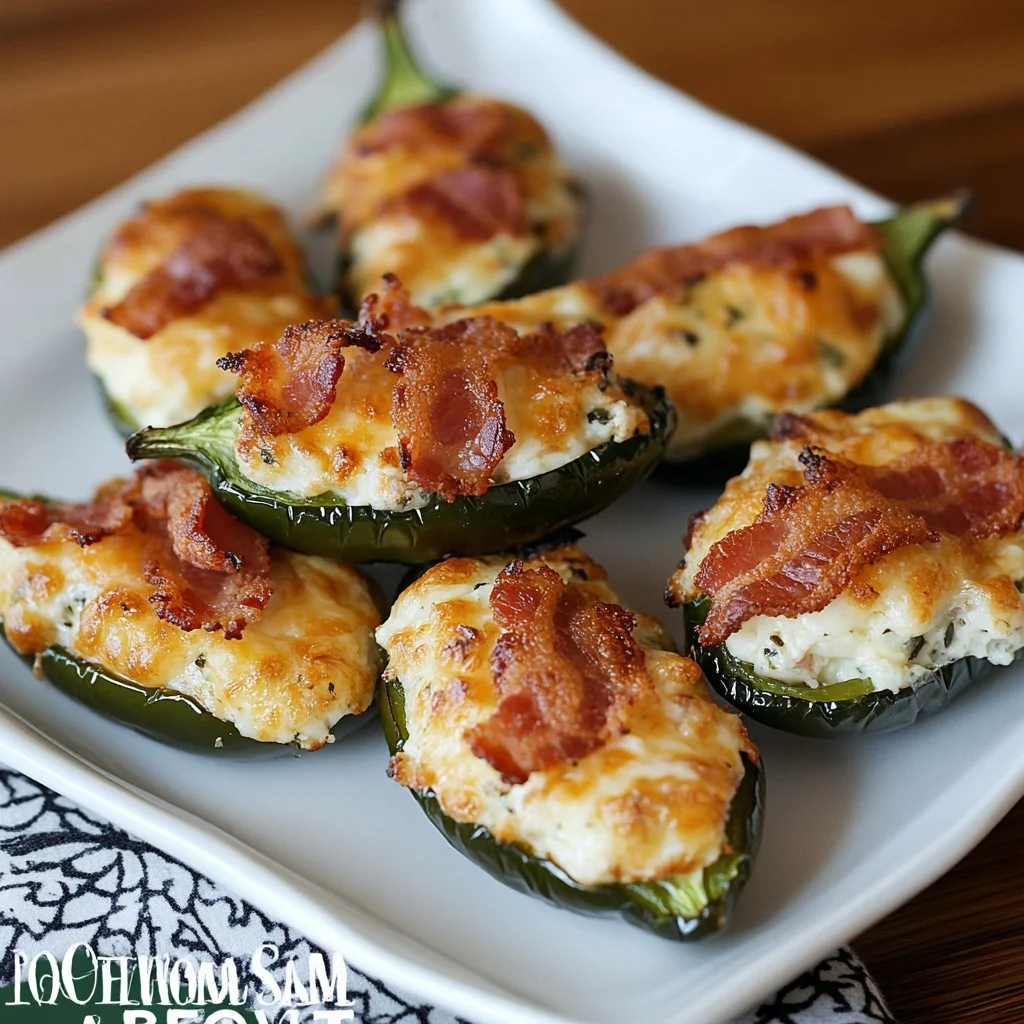
Bacon Stuffed Jalapeño Poppers: The Ultimate Party Snack

Bacon Stuffed Jalapeño Poppers are the perfect crowd-pleasing appetizer for game days, parties, or any casual get-together. These poppers combine the smoky flavor of crispy bacon with creamy cheese, fresh herbs, and the spicy kick of jalapeños. They’re quick to make, easy to bake, and guaranteed to disappear in minutes!

Ingredients

  • 8 Large Jalapeños, seeds removed
  • 8 oz Cream Cheese, softened
  • 1 ½ cups Cheese, grated (Three Alarm Cheese or your favorite blend)
  • ¼ cup Green Onions, sliced
  • ⅛ cup Cilantro, chopped
  • 8 slices Bacon

Instructions

  1. Prepare the Jalapeños : Preheat your oven to 400°F (200°C) and line a baking sheet with parchment paper. Slice the jalapeños in half lengthwise and remove the seeds and membranes. Be careful if you’re sensitive to spice – wearing gloves can help!
  2. Make the Filling : In a medium bowl, combine the softened cream cheese, grated cheese, green onions, and chopped cilantro. Mix until well combined. Using a spoon or piping bag, fill each jalapeño half generously with the cheese mixture.
  3. Wrap with Bacon : Cut each slice of bacon in half. Wrap one piece of bacon around each stuffed jalapeño half, securing the ends with a toothpick if needed.
  4. Bake : Place the bacon-wrapped jalapeños on the prepared baking sheet. Bake in the preheated oven for 20-25 minutes or until the bacon is crispy and the cheese filling is bubbly.
  5. Serve : Remove the poppers from the oven and let them cool slightly. Serve warm as a spicy, cheesy, and smoky appetizer your guests will love!

Conclusion

Bacon Stuffed Jalapeño Poppers are the ultimate appetizer that combines creaminess, smokiness, and spice into a bite-sized delight. Whether you’re entertaining friends or treating yourself, these poppers are sure to bring bold flavors and smiles to the table. Make a double batch – they’ll be gone in no time!

Bacon Stuffed Jalapeño Poppers: The Ultimate Party Snack

Crispy bacon-wrapped jalapeños stuffed with acreamy, cheesy filling and baked to perfection. A spicy, savory appetizerperfect for any occasion!
Prep Time 10 minutes
Cook Time 25 minutes
Total Time 35 minutes
Servings: 16 poppers
Course: Appetizer
Cuisine: American
Calories: 100

Ingredients
  

  • 8 Large Jalapeños seeds removed
  • 8 oz Cream Cheese softened
  • 1 ½ cups Cheese grated (Three Alarm Cheese or your favorite blend)
  • ¼ cup Green Onions sliced
  • ⅛ cup Cilantro chopped
  • 8 slices Bacon

Method
 

  1. Prepare the Jalapeños : Preheat your oven to 400°F (200°C) and line a baking sheet with parchment paper. Slice the jalapeños in half lengthwise and remove the seeds and membranes. Be careful if you’re sensitive to spice – wearing gloves can help!
  2. Make the Filling : In a medium bowl, combine the softened cream cheese, grated cheese, green onions, and chopped cilantro. Mix until well combined. Using a spoon or piping bag, fill each jalapeño half generously with the cheese mixture.
  3. Wrap with Bacon : Cut each slice of bacon in half. Wrap one piece of bacon around each stuffed jalapeño half, securing the ends with a toothpick if needed.
  4. Bake : Place the bacon-wrapped jalapeños on the prepared baking sheet. Bake in the preheated oven for 20-25 minutes or until the bacon is crispy and the cheese filling is bubbly.
  5. Serve : Remove the poppers from the oven and let them cool slightly. Serve warm as a spicy, cheesy, and smoky appetizer your guests will love!

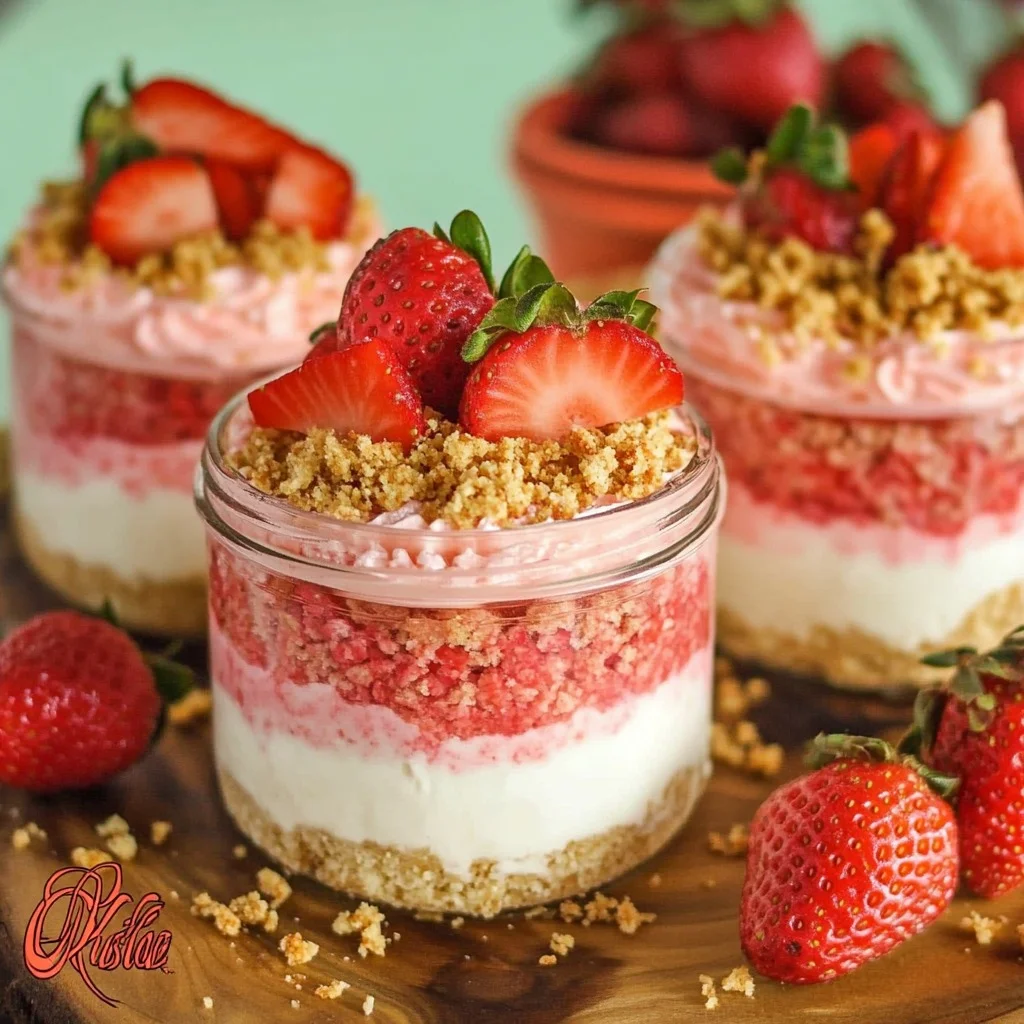
Strawberry Crunch Cheesecake: A No-Bake Dessert Masterpiece

Dive into the sweet and tangy world of this Strawberry Crunch Cheesecake. This no-bake dessert combines a buttery golden Oreo crust, creamy cheesecake layers, and a delightful strawberry crunch topping. Perfect for warm days or when you want to impress your guests with a stunning yet simple treat, this cheesecake will steal the spotlight at any gathering.

Ingredients

Crust:

  • 20 golden Oreos, crushed (about 2 cups)
  • 5 tablespoons unsalted butter, melted

Strawberry Crunch Topping:

  • 10 golden Oreos, crushed
  • ½ cup freeze-dried strawberries, crushed
  • 4 tablespoons unsalted butter, melted

Strawberry Cheesecake Layer:

  • 8 ounces cream cheese, softened
  • ½ cup granulated sugar
  • 1 cup heavy whipping cream
  • 1 tablespoon strawberry gelatin powder
  • ½ cup fresh strawberries, diced

Plain Cheesecake Layer:

  • 8 ounces cream cheese, softened
  • ⅓ cup granulated sugar
  • 1 cup heavy whipping cream
  • 1 teaspoon vanilla extract

Instructions

  1. Crush the Oreos: In a food processor or resealable bag, crush the golden Oreos until they resemble fine crumbs.
  2. Combine with Butter: Mix the crushed Oreos with the melted butter until the mixture resembles wet sand.
  3. Set the Crust: Press the mixture firmly into the bottom of a 9-inch springform pan, creating an even layer. Refrigerate for 20 minutes while preparing the fillings.
  4. Crush the Ingredients: In a food processor, crush the golden Oreos and freeze-dried strawberries together until fine.
  5. Combine with Butter: Mix the crushed mixture with melted butter until evenly coated. Set aside for later.
  6. Whip the Cream: In a large mixing bowl, whip the heavy cream until stiff peaks form. Set aside.
  7. Cream the Base: In another bowl, beat the cream cheese and granulated sugar until smooth and fluffy. Add the strawberry gelatin powder and mix until combined.
  8. Fold in the Whipped Cream: Gently fold the whipped cream into the cream cheese mixture. Add the diced fresh strawberries and stir until evenly distributed.
  9. Layer the Cheesecake: Spread the strawberry cheesecake mixture evenly over the chilled crust. Refrigerate for 15 minutes to set slightly.
  10. Whip the Cream: In a clean bowl, whip the heavy cream until stiff peaks form.
  11. Cream the Base: In another bowl, beat the cream cheese, granulated sugar, and vanilla extract until smooth.
  12. Combine: Gently fold the whipped cream into the cream cheese mixture until smooth and creamy.
  13. Layer on Top: Spread the plain cheesecake layer over the strawberry layer, smoothing it evenly. Refrigerate for at least 4 hours or overnight to set completely.
  14. Top the Cheesecake: Once the cheesecake is fully set, sprinkle the strawberry crunch topping evenly over the top. Gently press it down to ensure it adheres to the surface.
  15. Release the Cheesecake: Remove the cheesecake from the springform pan.
  16. Slice and Enjoy: Cut into slices and serve this beautiful and delicious dessert!

Conclusion

Strawberry Crunch Cheesecake is a perfect combination of creamy layers and crunchy textures. The vibrant colors and refreshing strawberry flavor make it a show-stopping dessert for any occasion. This no-bake recipe is easy to prepare but delivers a stunning result that will have everyone asking for seconds.

Strawberry Crunch Cheesecake: A No-Bake Dessert Masterpiece

A no-bake cheesecake with a golden Oreo crust,creamy strawberry and vanilla cheesecake layers, and a crunchy strawberrytopping. A refreshing and stunning dessert for all occasions!
Prep Time 30 minutes
Resting Time 6 hours
Total Time 6 hours 30 minutes
Servings: 12 Slice
Course: Dessert
Cuisine: American
Calories: 400

Ingredients
  

Crust:
  • 20 golden Oreos crushed (about 2 cups)
  • 5 tablespoons unsalted butter melted
  • Strawberry Crunch Topping:
  • 10 golden Oreos crushed
  • ½ cup freeze-dried strawberries crushed
  • 4 tablespoons unsalted butter melted
Strawberry Cheesecake Layer:
  • 8 ounces cream cheese softened
  • ½ cup granulated sugar
  • 1 cup heavy whipping cream
  • 1 tablespoon strawberry gelatin powder
  • ½ cup fresh strawberries diced
Plain Cheesecake Layer:
  • 8 ounces cream cheese softened
  • ⅓ cup granulated sugar
  • 1 cup heavy whipping cream
  • 1 teaspoon vanilla extract

Method
 

  1. Crush the Oreos: In a food processor or resealable bag, crush the golden Oreos until they resemble fine crumbs.
  2. Combine with Butter: Mix the crushed Oreos with the melted butter until the mixture resembles wet sand.
  3. Set the Crust: Press the mixture firmly into the bottom of a 9-inch springform pan, creating an even layer. Refrigerate for 20 minutes while preparing the fillings.
  4. Crush the Ingredients: In a food processor, crush the golden Oreos and freeze-dried strawberries together until fine.
  5. Combine with Butter: Mix the crushed mixture with melted butter until evenly coated. Set aside for later.
  6. Whip the Cream: In a large mixing bowl, whip the heavy cream until stiff peaks form. Set aside.
  7. Cream the Base: In another bowl, beat the cream cheese and granulated sugar until smooth and fluffy. Add the strawberry gelatin powder and mix until combined.
  8. Fold in the Whipped Cream: Gently fold the whipped cream into the cream cheese mixture. Add the diced fresh strawberries and stir until evenly distributed.
  9. Layer the Cheesecake: Spread the strawberry cheesecake mixture evenly over the chilled crust. Refrigerate for 15 minutes to set slightly.
  10. Whip the Cream: In a clean bowl, whip the heavy cream until stiff peaks form.
  11. Cream the Base: In another bowl, beat the cream cheese, granulated sugar, and vanilla extract until smooth.
  12. Combine: Gently fold the whipped cream into the cream cheese mixture until smooth and creamy.
  13. Layer on Top: Spread the plain cheesecake layer over the strawberry layer, smoothing it evenly. Refrigerate for at least 4 hours or overnight to set completely.
  14. Top the Cheesecake: Once the cheesecake is fully set, sprinkle the strawberry crunch topping evenly over the top. Gently press it down to ensure it adheres to the surface.
  15. Release the Cheesecake: Remove the cheesecake from the springform pan.
  16. Slice and Enjoy: Cut into slices and serve this beautiful and delicious dessert!

Stay Connected

Get recipes via email: