The Best Almond Cake Recipe: A Heartwarming Delight

When I first learned how to bake, it wasn’t from a fancy cookbook or a pastry class. It was in my grandmother’s kitchen, surrounded by the warm aroma of freshly baked goods and the rhythmic sound of her hands working the dough. My grandmother’s recipes were simple, yet full of flavor, and one that always stood out to me was her almond cake. She would often make it for special occasions, birthdays, or just when the family gathered together. It was a cake that effortlessly bridged the gap between everyday life and those special, celebratory moments.

I still remember the look on my grandfather’s face every time she would take a fresh batch out of the oven—his eyes lighting up with a simple smile as if nothing in the world could compare to the aroma of that almond cake. That almond essence, the light texture, and the slight crunch from the almond flour made this cake a family favorite. It became a tradition, passed down from my grandmother to my mother and now to me.

That’s why this almond cake is more than just a recipe for me. It’s a symbol of family, tradition, and the simple pleasures in life. Every time I bake it, I feel a little closer to the past, and I am reminded of those quiet moments in the kitchen with my grandmother. So, whether you’re baking this cake to celebrate an occasion or just to enjoy a slice with a cup of tea, know that you’re sharing in a tradition that’s as rich in flavor as it is in memories.

Why Almond Cake? The Appeal of Simplicity and Flavor

At first glance, almond cake might seem like just another dessert—simple ingredients, simple steps. However, there’s something magical about how the almond flour combines with the richness of butter and the subtle hint of almond essence. It’s a cake that’s not too sweet, allowing the natural flavors to shine through. Whether you’re a fan of nuts, enjoy the light texture of a sponge, or simply crave a comforting treat, almond cake hits all the right notes.

In many ways, this cake is the epitome of balance. It’s not overly complicated, yet it delivers on both flavor and texture. It’s also a versatile cake: perfect for a formal gathering or just a relaxed afternoon with family. The recipe doesn’t require exotic ingredients or complicated techniques—just the basics, done right. And that’s what makes it so special.

Ingredients:

IngredientQuantity
Butter130g (½ cup, 1 tablespoon)
Sugar130g (½ cup, 2 ½ tablespoons)
Plain flour165g (1 cup, 2 tablespoons)
Baking powder1 teaspoon
Ground Almond / Almond flour35g (5 tablespoons)
Almond essence½ teaspoon

Directions:

  1. Preheat the Oven: Begin by preheating your oven to 180°C (350°F) and lining a round cake pan (about 9 inches) with parchment paper or greasing it with butter.
  2. Cream the Butter and Sugar: In a large mixing bowl, cream the butter and sugar together until the mixture is light and fluffy. This will take about 3-4 minutes with an electric mixer on medium speed.
  3. Add the Almond Essence: Stir in the almond essence until fully combined, infusing your batter with that lovely nutty aroma.
  4. Combine Dry Ingredients: In a separate bowl, sift together the plain flour, ground almonds, and baking powder. This ensures the dry ingredients are evenly mixed and free of lumps.
  5. Mix the Dry Ingredients into the Wet: Gradually add the dry ingredients to the butter mixture, mixing until just combined. Be careful not to overmix to maintain the cake’s light texture.
  6. Bake the Cake: Pour the batter into your prepared cake pan and spread it evenly. Bake in the preheated oven for 25-30 minutes or until a toothpick inserted into the center of the cake comes out clean.
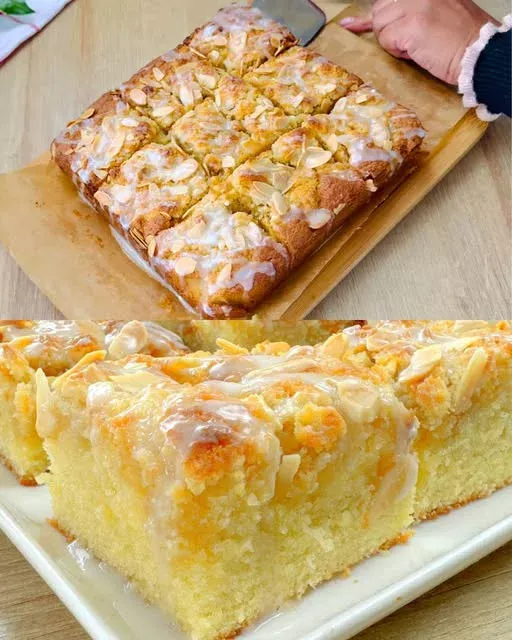
  7. Cool and Serve: Allow the cake to cool in the pan for 10 minutes before transferring it to a wire rack to cool completely. Once cooled, you can optionally dust the top with powdered sugar or serve as is.

Nutritional Information (per serving):

NutrientAmount
Calories320 kcal
Protein4g
Carbohydrates38g
Fat18g
Fiber2g
Sugar18g

The Nutritional Benefits of Almond Cake

Almonds are a star ingredient in this cake, not only contributing to the flavor and texture but also offering a variety of health benefits. Almonds are rich in healthy fats, fiber, and antioxidants, which can help to support heart health, improve cholesterol levels, and even aid in weight management. Additionally, almonds contain a high level of vitamin E, which is great for skin health and immune function.

The almond flour used in this cake also brings a gluten-free aspect to the recipe, making it suitable for those who are avoiding gluten but still want to indulge in a moist, flavorful cake. By incorporating almonds into the recipe, you’re not only adding delicious flavor but also nutritional value. The cake is a satisfying treat that can easily fit into a balanced diet when enjoyed in moderation.

Frequently Asked Questions (FAQs)

  1. Can I make this cake without almond flour?

While almond flour gives this cake its signature nutty flavor and texture, you can substitute it with regular flour if needed. However, the cake’s flavor will be less rich, and the texture may be a bit denser. If you want to keep it gluten-free, try substituting the almond flour with another gluten-free flour, such as rice flour or a gluten-free all-purpose blend.

  1. Can I use margarine instead of butter?

Yes, margarine can be used as a substitute for butter in this recipe. However, keep in mind that butter provides a richer flavor and a slightly flakier texture, so the result may not be as indulgent. If you prefer a vegan version, you can also use plant-based butter or coconut oil as an alternative.

  1. How can I make this cake even more almond-flavored?

If you love the flavor of almonds, you can increase the amount of almond essence or extract in the recipe. You could also fold in some chopped almonds into the batter for added crunch or even top the cake with slivered almonds before baking to give it a delightful texture contrast.

  1. How do I store leftover almond cake?

To store leftover almond cake, simply cover it with plastic wrap or place it in an airtight container. Keep it at room temperature for up to 3 days, or you can refrigerate it for up to a week. If you want to keep it for a longer period, the cake can be frozen for up to 3 months. Just be sure to wrap it tightly in plastic wrap and place it in a freezer-safe container.

  1. Can I frost this almond cake?

While this almond cake is delicious on its own, you can definitely frost it if you wish. A light dusting of powdered sugar would complement the almond flavor nicely, or you could use a cream cheese frosting or whipped cream for a richer dessert. For an extra touch, drizzle some chocolate ganache or even a honey glaze for sweetness.

Conclusion: A Recipe That Lives on in Every Slice

In the end, this almond cake recipe is more than just a treat. It’s a link to my family’s past and a delicious reminder of the simple joys of baking. It’s a recipe that’s been passed down through generations and one that will continue to be shared with love for years to come.

Whether you’re baking it for a special occasion, a cozy afternoon, or just because you crave a slice of something sweet, this almond cake is a reminder that sometimes the simplest recipes are the ones that bring the most joy. Its light, nutty flavor is comforting, familiar, and utterly satisfying. And as you enjoy your first bite, remember that each slice is a little piece of tradition, full of love, history, and delicious flavor.

This almond cake recipe might seem like a small thing, but it carries with it decades of family history and cherished memories. I hope that with every bite, you not only savor the unique flavor of almonds but also experience a sense of connection to those who have come before you, just as I do every time I bake this cake in my kitchen. Enjoy it, share it, and pass it down—because food, after all, is the most powerful way we connect with one another, both in the present and across generations.

Amal

The Best Almond Cake Recipe: A Heartwarming Delight

This Almond Cake is the perfect balance of texture and flavor. Rich, moist, and light, it combines the earthy sweetness of almond flour with a delicate crumb, creating a cake that’s both satisfying and not overly sweet. The hint of almond essence elevates the flavor, making it a great choice for a celebration or a cozy afternoon treat.
Prep Time 15 minutes
Cook Time 30 minutes
Total Time 45 minutes
Servings: 8 -10 servings
Course: Dessert
Cuisine: European-inspired

Ingredients
  

  • 130 g ½ cup + 1 tablespoon Butter, softened
  • 130 g ½ cup + 2 ½ tablespoons Sugar
  • 165 g 1 cup + 2 tablespoons Plain flour
  • 1 teaspoon Baking powder
  • 35 g 5 tablespoons Ground Almond / Almond flour
  • ½ teaspoon Almond essence

Method
 

  1. Preheat the Oven: Preheat your oven to 180°C (350°F) and grease a cake tin with butter or line it with parchment paper.
  2. Cream the Butter and Sugar: In a mixing bowl, cream together the softened butter and sugar until light and fluffy. This will take about 3–4 minutes using an electric mixer.
  3. Add the Almond Essence: Once the butter and sugar are creamed together, add in the almond essence and mix until well incorporated.
  4. Mix Dry Ingredients: In a separate bowl, sift together the plain flour, baking powder, and ground almond flour.
  5. Combine the Ingredients: Gradually add the dry ingredients to the wet ingredients while mixing continuously. Mix until just combined and a thick batter forms.
  6. Bake the Cake: Pour the batter into the prepared cake tin and spread it evenly. Bake in the preheated oven for 25–30 minutes, or until a toothpick inserted into the center comes out clean.
  7. Cool and Serve: Let the cake cool in the tin for 10 minutes before transferring it to a wire rack to cool completely. Slice and serve as desired.

Notes

  • Storage: Store the almond cake in an airtight container at room temperature for up to 3 days, or refrigerate it for up to a week. It can also be frozen for up to 3 months.
  • Flavor Variations: Add a handful of sliced almonds on top of the cake before baking for added texture. You can also drizzle some honey or glaze the cake with chocolate ganache for extra sweetness.
  • Substitutes: If you don’t have almond essence, you can substitute it with vanilla extract for a more classic flavor. You can also swap the ground almonds for more plain flour if you prefer.

Title: Quick & Tasty Breakfast in 5 Minutes: A Family Favorite

In my family, breakfast has always been more than just a meal. It’s a ritual, a comforting tradition that binds us together before we embark on the hustle and bustle of the day. Growing up, my mom was always a master at turning simple ingredients into something extraordinary, especially during those rushed mornings when time was tight, but the need for a satisfying meal remained. One of the quickest and most delicious dishes she would whip up was this 5-minute breakfast, a simple sandwich that combines crispy bacon, gooey cheese, perfectly fried eggs, and fresh herbs. The beauty of this recipe lies not just in how quickly it can be prepared, but in its ability to bring joy to even the busiest mornings.

For years, this was a go-to recipe that brought comfort and warmth to our home. It wasn’t just about the taste; it was about the ritual. The smell of bacon sizzling in the pan, the crack of an egg, the sizzle of bread toasting — all of these sounds and smells would create an atmosphere of warmth and togetherness. Even as I got older, and my days became busier, I found myself recreating this recipe not just for its taste but for the memories it evokes.

Now, as an adult, I make this breakfast for my own family, passing on the tradition. The beauty of this recipe is that it’s not just a meal; it’s a connection to the past, to those mornings when everything seemed possible before the day even began. It’s a reminder that even the simplest of meals can hold the most cherished moments.

Why Choose This Recipe:

This 5-minute breakfast is more than just quick and easy. It’s versatile, packed with flavor, and perfect for busy mornings when you need something hearty to kickstart your day. Whether you’re a busy professional rushing to get out the door or a parent juggling morning routines, this recipe offers a satisfying and nutritious breakfast that doesn’t take up much of your precious time. You’ll find it’s one of those recipes that fits seamlessly into any morning routine. And what’s more, it’s easily customizable to suit different dietary preferences and family tastes.

Ingredients:

IngredientQuantity
Bread6 slices
Cheese6 slices
Bacon6 slices
Eggs4 eggs
SaltTo taste
Black pepperTo taste
Fresh parsley (chopped)As desired
Green onion (chopped)As desired

Instructions:

  1. Prepare the Bacon: Heat a non-stick skillet over medium heat. Add the bacon slices and cook until crispy, about 2-3 minutes per side. Once done, set the bacon aside on a paper towel to absorb excess oil.
  2. Toast the Bread: In the same skillet or a separate one, toast the bread slices until golden brown, about 1-2 minutes per side.
  3. Cook the Eggs: Crack the eggs into the skillet, and cook them to your desired level. You can make sunny side up, scrambled, or however you prefer. Season with salt and black pepper to taste.
  4. Assemble the Sandwiches: Place a slice of cheese on each slice of toasted bread. Add a crispy piece of bacon on top of the cheese, then place an egg over the bacon. Sprinkle chopped parsley and green onions on top for a fresh flavor boost.
  5. Serve and Enjoy: Once assembled, serve immediately and enjoy a quick, delicious, and hearty breakfast that’s ready in just 5 minutes!

Nutrients (Per Serving):

NutrientAmount
Calories350 kcal
Fat22g
Carbohydrates26g
Protein17g
Fiber2g

The Simplicity Behind the Flavor

At first glance, the ingredients in this recipe might seem simple. After all, how special could bread, cheese, bacon, and eggs really be? But the secret lies in how these ingredients come together. The crispy, smoky bacon complements the richness of the eggs, while the melted cheese adds a luscious texture to each bite. The bread, toasted to perfection, becomes the perfect base for these ingredients. A sprinkle of fresh parsley and green onions brightens the dish, giving it a balance of flavors that will leave you feeling full and satisfied without being weighed down.

It’s this balance of flavors that has made this recipe a family favorite for generations. It’s a breakfast that’s not too heavy, yet hearty enough to keep you going for hours. It’s a breakfast that combines all the elements of comfort food with the freshness of simple herbs.

Versatility at Its Best

One of the reasons this breakfast is such a hit is because of its versatility. While the basic ingredients are fantastic, the beauty of this recipe is that you can easily tailor it to your preferences. Want to add a slice of tomato for extra freshness? Go ahead. Prefer turkey bacon over regular bacon? No problem. You could even switch the bread for a whole-grain variety if you’re looking for a healthier option. The possibilities are endless, and you can modify the recipe to suit dietary restrictions or personal tastes.

For those who prefer a more savory start to the day, adding a dollop of spicy sauce or a sprinkle of chili flakes can give the sandwich a nice kick. For a lighter version, you can use egg whites instead of whole eggs, or swap the cheese for a lower-fat variety.

The Nutritional Benefits

While many quick breakfast options may leave you feeling sluggish or lacking in energy, this 5-minute breakfast provides a balanced mix of protein, fats, and carbs to fuel your body throughout the morning. Eggs provide a rich source of protein, which helps keep you feeling full, while the bacon adds a satisfying savory element. The bread gives you a healthy dose of carbs to get your day started, and the fresh parsley and green onions not only add flavor but also provide essential vitamins.

By keeping the ingredients simple and fresh, this recipe avoids the pitfalls of overly processed foods. It’s the perfect balance of satisfying and nutritious, leaving you energized without feeling overly stuffed.

Frequently Asked Questions (FAQs)

1. Can I make this breakfast ahead of time? While this breakfast is best enjoyed fresh, there are ways to prep components ahead of time. You can cook the bacon in advance and store it in the refrigerator, then quickly assemble the sandwiches when you’re ready. Eggs can be scrambled and stored in the fridge for easy reheating as well.

2. Can I use a different type of bread? Absolutely! Feel free to use whatever bread you prefer. Whole wheat, sourdough, or even a gluten-free option would work well in this recipe. The key is to toast it to your preferred level of crispiness.

3. How can I make this recipe vegetarian? To make this breakfast vegetarian, simply omit the bacon and add more veggies such as mushrooms, spinach, or avocado. You can also add plant-based cheese for a fully vegetarian version.

4. What can I serve with this breakfast? This breakfast can be enjoyed on its own or served with a side of fruit or a small green salad. For an extra boost, you could serve it with a smoothie or a glass of freshly squeezed juice.

5. Can I make this healthier? If you’re looking to make this recipe healthier, try using turkey bacon or a vegetarian bacon alternative. You can also substitute a whole-grain bread for the white bread and use a lighter cheese option. For a low-calorie alternative, skip the cheese entirely and use avocado for a creamy texture.

The Perfect Start to Your Day

This 5-minute breakfast is the ideal solution for those mornings when you’re short on time but still want something delicious and satisfying. Whether you’re preparing it for yourself or for your family, it’s a meal that will bring smiles all around the table. It’s simple, it’s fast, and it’s packed with flavor and nutrition. But most importantly, it’s a dish that connects you to those precious moments in the morning when everything slows down, and you can just enjoy the food and the company of those around you.

In conclusion, this recipe is a reminder that the best things in life don’t need to be complicated. Sometimes, the most delicious and meaningful meals are the simplest ones — just like this breakfast that can be made in just five minutes. It’s perfect for busy mornings, and it’s a dish that brings a sense of comfort and nostalgia to each bite. The next time you need a quick breakfast that doesn’t sacrifice taste or nutrition, this 5-minute sandwich is the answer.

Amal

Title: Quick & Tasty Breakfast in 5 Minutes: A Family Favorite

This quick breakfast sandwich is a game-changer for busy mornings! With crispy bacon, gooey cheese, perfectly fried eggs, and a touch of fresh herbs, it’s a satisfying and easy meal that you can make in just 5 minutes.
Prep Time 2 minutes
Cook Time 3 minutes
Total Time 5 minutes
Servings: 4 –6 servings
Course: Breakfast
Cuisine: American

Ingredients
  

  • 6 slices of bread
  • 6 slices of cheese
  • 6 slices of bacon
  • 4 eggs
  • Salt to taste
  • Black pepper to taste
  • Fresh parsley chopped (optional)
  • Green onion chopped (optional)

Method
 

  1. Cook the Bacon: Place the bacon slices in a large skillet over medium heat. Cook until crispy, about 4-5 minutes. Remove from the skillet and set aside.
  2. Fry the Eggs: In the same skillet, crack the eggs and cook to your liking—sunny side up, scrambled, or over-easy. Season with salt and pepper.
  3. Toast the Bread: While the eggs are cooking, toast the bread slices in a separate skillet or toaster until golden brown.
  4. Assemble the Sandwich: Layer the toasted bread with a slice of cheese, followed by a slice of bacon, and the fried egg. Add chopped fresh parsley and green onions for an extra burst of flavor.
  5. Serve: Serve the sandwiches warm, and enjoy your quick and delicious breakfast!

Notes

  • Customization: You can swap the bacon for turkey bacon or even sausage if preferred. For a vegetarian version, simply omit the meat and add sautéed vegetables like spinach or mushrooms.
  • Cheese Options: Use any cheese you like, such as cheddar, Swiss, or mozzarella. For a lower-fat option, use reduced-fat cheese.
  • Add More Veggies: If you want to add more nutrients, try adding avocado slices, spinach, or tomatoes to your sandwich.

A Hearty Meal: Discovering the Beauty of Turkish Potato and Ground Beef Dish

Growing up, I was always surrounded by the tantalizing smells of my grandmother’s kitchen. She was an amazing cook, and every meal she prepared seemed to have its own story. Some of the most vivid memories I have are of the evenings when the entire family would gather at her house, sharing meals that were simple yet so satisfying. One dish that has remained etched in my memory is a Turkish-inspired recipe that combines two humble ingredients – potatoes and ground beef. It’s a dish that’s rich in flavor and history, with every bite offering the comfort of home.

The magic of this dish lies in its simplicity. Potatoes, with their tender texture and comforting flavor, complement the savory richness of ground beef. The beauty of this meal is that, despite its humble ingredients, it can bring everyone together. It’s not only filling, but it’s also versatile enough to be enjoyed on its own or as part of a larger spread.

The first time I tasted this dish was in a small family-owned Turkish restaurant during my travels. The chef, a warm and kind-hearted individual, introduced me to the idea of transforming simple ingredients into something extraordinary. As I watched him prepare the dish, I learned how thoughtful preparation and seasoning could elevate basic items to a level of comfort that could rival any fancy gourmet meal.

The creamy potatoes, mixed with the seasoned ground beef, were an unexpected combination of textures and flavors. The subtle sweetness of the onions, combined with the savory and rich beef, was nothing short of perfection. The dish was then topped with a dollop of creamy mayonnaise – a finishing touch that brought all the elements together in a harmonious, mouth-watering way. It was a comforting meal that felt like a warm hug, a dish you could rely on when you needed something familiar and full of heart.

Incorporating this dish into my cooking repertoire has since become a tradition. It is now a recipe I share with my family and friends, and it has found a permanent place in our dinner rotations. This simple Turkish-inspired dish has the power to create memories and forge connections, just as it did for me. It’s a reminder of the beauty of home-cooked meals and the shared experiences that come with them.

The Secret Behind the Ingredients: Why This Dish Is So Special

The ingredients used in this dish are straightforward, yet their combination creates a delicious harmony of flavors. Potatoes, ground beef, and onions are the primary ingredients, with a generous helping of mayonnaise added to bring everything together. Each component plays a vital role in creating the dish’s satisfying texture and flavor.

  1. Potatoes: Potatoes are not only affordable and widely available, but they also act as the perfect base for this dish. Their natural sweetness and smooth texture complement the savory flavors of the beef, making them the perfect vehicle for the seasoned beef mixture. Whether boiled, mashed, or baked, potatoes bring a richness and comfort that make this dish truly satisfying.
  2. Ground Beef: The ground beef brings depth and umami to the dish. When cooked, it releases its natural juices, which meld perfectly with the potatoes and onions. The beef’s rich, savory flavor enhances the overall taste of the dish and makes it filling and hearty.
  3. Onions: Onions, when sautéed, transform into sweet and aromatic pieces that add another layer of flavor. Their subtle sweetness helps balance the richness of the beef and the earthiness of the potatoes.
  4. Mayonnaise: This might seem like a surprising addition, but the mayonnaise is the key to bringing the dish together. When served alongside, it adds a creamy, tangy element that cuts through the richness of the other ingredients. It provides a cooling contrast to the warmth of the potatoes and beef, making each bite a well-rounded experience.

Ingredients:

IngredientAmount
Potatoes800 grams
Water800 ml
Ground beef500 grams
Salt and pepperTo taste
Onion1 medium
Mayonnaise (for serving)As desired

Directions:

  1. Prepare the Potatoes: Peel and dice the potatoes into bite-sized pieces. Place them in a large pot and cover them with 800 ml of water. Bring to a boil and let them cook until tender, about 15-20 minutes. Once cooked, drain the water and set the potatoes aside.
  2. Cook the Ground Beef: While the potatoes are cooking, heat a pan over medium heat. Add the ground beef and cook until browned, breaking it apart with a spoon. Season with salt and pepper to taste. Once cooked through, set the beef aside.
  3. Sauté the Onion: In the same pan, add a little more oil if needed. Finely chop the onion and sauté it in the pan until it turns golden brown and fragrant, about 5-7 minutes.
  4. Combine the Ingredients: Once the potatoes are ready, return them to the pot or a large mixing bowl. Add the cooked ground beef and sautéed onions. Gently mash everything together, ensuring that the flavors are well combined. Adjust the seasoning with salt and pepper to taste.
  5. Serve: Spoon the mashed potato and ground beef mixture onto plates and serve with a generous dollop of mayonnaise on the side for added creaminess and flavor.

Nutrients:

NutrientAmount (per serving)
Calories350 kcal
Protein20 g
Carbohydrates40 g
Fat15 g
Fiber4 g
Sodium300 mg

Common Questions About This Recipe

1. Can I use other types of meat besides ground beef?

Absolutely! While ground beef is the traditional choice for this dish, you can easily swap it out for ground turkey, chicken, or lamb for a different flavor profile. Each meat will bring its own unique taste, but the combination of potatoes and a savory protein will remain the same.

2. Can I make this dish ahead of time?

Yes! This dish stores beautifully and can be made a day ahead. Simply prepare the potatoes and beef mixture, then let it cool to room temperature. Store it in an airtight container in the fridge for up to 2 days. Reheat it thoroughly before serving, and add the mayonnaise just before serving to keep it fresh.

3. Is there a way to make this dish lighter?

If you want to reduce the richness of the dish, you can use a lighter protein, like lean ground turkey, and replace the mayonnaise with Greek yogurt or a lighter sour cream alternative. You could also use olive oil instead of butter for a healthier fat option.

4. What can I serve this dish with?

This dish is hearty on its own, but you can serve it with a side of steamed vegetables, a simple salad, or pickles for some added freshness. A slice of crusty bread would also go great with this dish to soak up all the delicious flavors.

5. Can I freeze leftovers?

Yes! This dish freezes very well. Once it has been fully cooked, allow it to cool completely before placing it in an airtight container. Freeze for up to 3 months. When ready to eat, simply reheat it in the microwave or on the stovetop.

Why This Dish Will Always Have a Place in My Heart

Food has the power to bring people together. It is a bridge between cultures, a connection to our roots, and a source of comfort in times of joy and sadness. This Turkish-inspired potato and ground beef dish holds a special place in my heart because it reminds me of my roots, my travels, and the simple joy of sharing a meal with those you love.

The beauty of this recipe lies in its ability to adapt to different tastes, preferences, and dietary needs. It’s a dish that brings out the best in its ingredients, and the result is a meal that not only satisfies hunger but also nourishes the soul. Whether you are sharing it with your family or serving it at a dinner party, it’s sure to bring comfort and joy to any occasion.

Conclusion: The Timeless Appeal of Simple Comfort Food

The story behind this dish is one of tradition, simplicity, and the love that goes into cooking for others. What makes it even more special is how it brings people together, just as food should. With just a few key ingredients, this meal offers warmth and satisfaction in every bite. The potatoes and ground beef come together so effortlessly, yet the result is a dish that feels both special and comforting.

As you prepare this recipe in your own kitchen, remember that it’s not just about the food—it’s about the experience of sharing it with others. This Turkish-inspired dish is a perfect reminder of how food can tell a story, evoke memories, and create lasting connections. Whether you’re making it for your family or enjoying it with friends, this dish is sure to become a beloved favorite in your home as it has in mine.

Amal

A Hearty Meal: Discovering the Beauty of Turkish Potato and Ground Beef Dish

This simple Turkish-inspired potato and ground beef dish will quickly become your family’s favorite. Tender potatoes are combined with savory ground beef, sweet onions, and seasoned to perfection for a comforting meal that brings people together.
Prep Time 10 minutes
Cook Time 20 minutes
Total Time 30 minutes
Servings: 4 –6 servings
Course: Main Dish
Cuisine: Turkish

Ingredients
  

  • 800 grams potatoes
  • 800 ml water
  • 500 grams ground beef
  • Salt and pepper to taste
  • 1 onion finely chopped
  • Mayonnaise for serving

Method
 

  1. Prepare the potatoes: Peel and chop the potatoes into medium-sized cubes. Add the potatoes to a pot and cover with 800 ml of water. Bring to a boil and cook for about 10-12 minutes or until the potatoes are tender when pierced with a fork.
  2. Cook the ground beef: While the potatoes are boiling, heat a pan over medium heat. Add the ground beef and cook until browned, breaking it up as it cooks. Season with salt and pepper to taste. Add the finely chopped onion to the beef and sauté until softened, about 5 minutes. Stir occasionally to avoid burning the meat.
  3. Combine: Once the potatoes are cooked, drain them and return them to the pot. Mash the potatoes until smooth. Stir in the cooked ground beef and onion mixture until everything is well combined.
  4. Serve: Transfer the mashed potato and beef mixture to serving plates. Top with a generous spoonful of mayonnaise for added creaminess and flavor.
  5. Enjoy: Serve warm and enjoy the comforting, savory goodness of this simple yet satisfying dish!

Notes

  • Make it lighter: To make the dish a bit healthier, consider swapping the ground beef with ground turkey or chicken.
  • Add vegetables: You can also add peas, carrots, or other vegetables to the dish for extra texture and nutrition.
  • Make it ahead: This dish stores well and can be made in advance. Simply store the cooked mixture in an airtight container in the fridge for up to 2 days. Reheat before serving.

A Family Favorite: The Cauliflower Recipe That Brings Us Together

As a father, I’ve always been on the lookout for ways to get my children to eat their vegetables. Cauliflower was one of those vegetables that they would turn their noses up at, and it broke my heart to see them refuse such a healthy option. However, I wasn’t about to give up on cauliflower. I knew the benefits it offered: rich in vitamins and fiber, a powerful antioxidant, and a great source of plant-based protein. I needed to find a way to make cauliflower not just edible but irresistible to my little ones.

After a few attempts at various recipes, I finally came up with a dish that transformed cauliflower into something that my children couldn’t get enough of. This simple, tasty recipe combines cauliflower with eggs, tomatoes, green onions, and just the right seasonings to create a flavorful dish that is now one of our go-to meals. Every time I make it, my children eagerly wait for their plates, and they devour the cauliflower faster than I can serve it.

It’s amazing how something so simple can bring so much joy to a family meal. This recipe, born out of necessity and trial and error, has now become a cherished family favorite. In fact, my children only eat cauliflower this way! If you’re looking for an easy, nutritious, and mouthwatering way to get your kids to eat cauliflower, or if you simply want to enjoy a new, healthy dish, this recipe is for you.

Why Cauliflower Should Be a Regular Part of Your Diet

Cauliflower often takes a backseat to other vegetables like broccoli or spinach, but it is a true nutritional powerhouse. Not only is it low in calories, but it is also packed with vitamins and antioxidants. High in fiber, it aids in digestion, promotes gut health, and can help maintain healthy blood sugar levels. It is also an excellent source of vitamin C, which helps boost the immune system and promote skin health.

When prepared correctly, cauliflower can be just as delicious as it is healthy. This recipe showcases cauliflower’s natural flavor and texture in a way that’s both satisfying and easy to make. It doesn’t require fancy ingredients or complex techniques. In just a few simple steps, you can have a dish that is both nutritious and absolutely delicious.

Ingredients:

IngredientAmount
Cauliflower1 medium head
IceA few cubes
Eggs3 pcs
Tomato2 pcs
Green onions2 stalks
Sour cream3 tablespoons
Black pepperTo taste
Dried garlicTo taste
SaltTo taste
Vegetable oilFor frying

Instructions:

  1. Prepare the Cauliflower: Begin by washing the cauliflower thoroughly and separating it into small florets. Boil a pot of water, adding a few ice cubes to it to help preserve the cauliflower’s bright color. Add the cauliflower florets to the boiling water and cook for about 3-5 minutes until tender. Once done, drain and set aside.
  2. Prepare the Vegetables: While the cauliflower is boiling, finely chop the tomatoes and green onions. Set aside.
  3. Prepare the Egg Mixture: In a bowl, whisk the eggs and season with salt, black pepper, and dried garlic to taste. Once well-mixed, add the chopped tomatoes and green onions, stirring everything together.
  4. Fry the Cauliflower: Heat vegetable oil in a large skillet over medium heat. Once hot, add the cooked cauliflower florets to the skillet. Sauté for about 5 minutes, ensuring the cauliflower becomes slightly crispy.
  5. Combine Everything: Pour the egg mixture over the sautéed cauliflower in the skillet. Stir gently to coat the cauliflower in the egg mixture, allowing it to cook and become golden brown on both sides.
  6. Serve: Once the egg mixture is fully cooked and the cauliflower is crispy, remove from the skillet. Place it on a serving dish and top with sour cream for extra flavor.

Nutrients (Approximate per serving):

NutrientAmount
Calories250 kcal
Protein10 g
Fat18 g
Carbohydrates12 g
Fiber3 g
Sodium300 mg

Why This Recipe Is a Winner

What sets this recipe apart is its simplicity and versatility. The cauliflower is softened in boiling water, which ensures that it retains its natural sweetness. The addition of eggs, tomatoes, and green onions brings in layers of flavor, while the seasonings—salt, black pepper, and dried garlic—elevate the dish to a whole new level. The final touch of sour cream adds richness and creaminess that perfectly balances the other ingredients.

One of the reasons this recipe is so beloved in my household is its balance of textures. The cauliflower becomes tender yet maintains a slight crispness, while the eggs add a savory depth. The tomatoes bring freshness and juiciness, while the green onions provide a mild bite. It’s a symphony of flavors and textures that work together beautifully.

How to Make This Recipe Your Own

One of the things I love about this cauliflower dish is its adaptability. While my children love it just the way I make it, there’s plenty of room for personalization. You can swap out the sour cream for Greek yogurt for a lighter version or try different seasonings if you prefer a more Mediterranean or spicy twist. You can even add in other vegetables like bell peppers or zucchini if you want to make it even more colorful and nutrient-packed.

For those who are vegan or looking for a dairy-free option, this recipe can be made using plant-based alternatives. Non-dairy sour cream and a tofu-based “egg” mixture can easily be substituted without compromising the taste or texture of the dish. It’s a recipe that can fit into many dietary preferences and can be easily adjusted to suit your personal tastes.

FAQ Section:

Q: Can I prepare this recipe in advance?
A: Yes! This recipe is great for meal prepping. You can prepare the cauliflower and cook the dish ahead of time, then store it in the fridge for up to two days. When you’re ready to serve, simply reheat it in the oven or microwave. It’s just as delicious the second time around!

Q: What can I serve with this dish?
A: This cauliflower dish makes a great side dish, but you can also enjoy it as a main course. It pairs beautifully with roasted chicken, grilled fish, or a light salad. You can also serve it with quinoa or brown rice to create a well-rounded meal.

Q: Can I add other vegetables to the recipe?
A: Absolutely! This recipe is quite versatile, and you can easily add other vegetables such as bell peppers, zucchini, or spinach. Just chop them up and sauté them along with the onions and tomatoes.

Q: Can I freeze leftovers?
A: Yes, this dish freezes well. Simply allow it to cool completely, then transfer it to an airtight container. It can be stored in the freezer for up to a month. When you’re ready to eat it, thaw it in the refrigerator overnight and reheat in the oven.

Q: Can I make this dish spicier?
A: Yes, you can definitely add some heat to this recipe! Try incorporating red pepper flakes or a dash of chili powder into the seasonings. If you enjoy spicy food, feel free to experiment with adding your favorite hot sauce as well.

The Nutritional Benefits of Cauliflower

When it comes to vegetables, cauliflower is often overlooked, but it truly deserves a spot in your weekly meal plan. Here are just a few reasons why you should make this dish part of your routine:

  • Low in Calories: Cauliflower is a low-calorie vegetable, making it an excellent choice for anyone watching their calorie intake or trying to lose weight. It’s a filling food that helps keep you satisfied without adding unnecessary calories.
  • High in Fiber: Cauliflower is an excellent source of dietary fiber, which supports digestive health and keeps your digestive system functioning smoothly.
  • Rich in Antioxidants: The vegetable is full of antioxidants that protect the body from harmful free radicals and promote overall health.
  • Packed with Vitamin C: Cauliflower is rich in vitamin C, which supports a healthy immune system and aids in collagen production, promoting skin health.
  • Versatile: Cauliflower can be prepared in countless ways—boiled, roasted, mashed, or even made into cauliflower rice. This recipe highlights cauliflower’s versatility in a way that is easy to prepare and loved by everyone.

Conclusion: A Family Recipe That Will Last for Generations

This simple cauliflower dish has become a staple in our home, and I am thrilled with how delicious it is. What started as an attempt to get my children to eat more vegetables has turned into a family favorite that we all enjoy together. The beauty of this recipe is in its simplicity and versatility, making it perfect for busy weeknights or special family meals.

In the end, it’s not just about eating vegetables—it’s about finding joy in the food we eat and creating memories around the table. As a father, there’s nothing more rewarding than seeing your children excited to eat something healthy. This recipe has given me that, and I hope it will do the same for you and your family. If you’re looking for a simple, tasty, and nutritious way to incorporate more vegetables into your meals, this cauliflower recipe is a perfect place to start.

By preparing this dish, you not only nourish your body but also create meaningful moments with the ones you love. It’s a recipe that proves the simplest ingredients can create the most heartwarming meals.

Amal

A Family Favorite: The Cauliflower Recipe That Brings Us Together

  This Cauliflower Delight recipe is a family favorite that transforms the humble cauliflower into a mouthwatering dish. With a combination of creamy sour cream, eggs, tomatoes, and a hint of garlic, this dish is packed with flavor and nutrients. Whether you’re looking to serve it as a side or a main course, this recipe is perfect for any occasion. It’s quick, easy, and guaranteed to please even the pickiest eaters!
Prep Time 10 minutes
Cook Time 15 minutes
Total Time 25 minutes
Servings: 4 –6 servings
Course: Main Dish
Cuisine: Healthy

Ingredients
  

  • 1 medium cauliflower
  • 1 teaspoon salt
  • 2 teaspoons paprika
  • 1 teaspoon black pepper
  • 100 ml olive oil
  • 2 cloves garlic minced
  • 2 tomatoes diced
  • 3 tablespoons sour cream
  • 1 tablespoon mayonnaise
  • 3 eggs

Method
 

  1. Prepare the Cauliflower: Start by cutting the cauliflower into florets. Bring a pot of water to a boil, add the cauliflower florets, and cook for about 8 minutes or until tender. Drain and set aside.
  2. Sauté the Vegetables: In a large pan, heat the olive oil over medium heat. Add the minced garlic and sauté until fragrant, about 1 minute. Add the diced tomatoes, salt, paprika, and black pepper. Stir to combine and cook for another 3-4 minutes until the tomatoes soften.
  3. Add the Cauliflower: Once the tomatoes are softened, add the boiled cauliflower to the pan. Stir everything together so the cauliflower is coated with the flavorful mixture. Cook for another 5 minutes, allowing the cauliflower to absorb the seasoning.
  4. Make the Egg Mixture: In a separate bowl, whisk together the eggs, sour cream, and mayonnaise. Pour the mixture over the cauliflower in the pan, stirring gently to combine. Cook for another 3-4 minutes until the eggs are set.
  5. Serve and Enjoy: Once the eggs are cooked, remove from heat and garnish with fresh chopped parsley or extra green onions. Serve warm as a side dish or enjoy it as a main meal.

Notes

  • For extra flavor, consider adding a pinch of red pepper flakes or cayenne pepper for a bit of heat.
  • You can also substitute the sour cream with Greek yogurt for a lighter version of this recipe.
  • If you prefer a creamier texture, add a splash of milk or plant-based milk to the egg mixture.
  • This recipe is great for meal prepping and can be stored in the fridge for up to 2 days. Reheat it in the microwave or on the stove before serving.

Baked Zucchini with Mozzarella: A Simple Comforting Dish That Warms the Heart

Growing up, the kitchen was always the heart of our home. The smell of fresh herbs, sizzling vegetables, and cheesy comfort food filled the air, welcoming us after long days. My mother, a woman of few words, expressed her love through the meals she made, each dish carefully prepared to satisfy both the stomach and the soul. One of the most memorable dishes she would prepare was zucchini—simple yet flavorful, and always a crowd favorite.

Unlike the typical fried versions that are often soggy and heavy, my mother had a secret: she never fried her zucchini. Instead, she baked them. The result was perfectly crispy edges, tender centers, and a golden layer of melted mozzarella on top. The dish became a family staple, and to this day, I find myself preparing it whenever I want to feel connected to those warm, comforting moments in the kitchen.

This Baked Zucchini with Mozzarella is a recipe I’ve made countless times for family gatherings, weeknight dinners, and even as a simple snack. It has all the qualities of a dish that not only tastes amazing but also offers a sense of nostalgia and comfort. It is a healthy twist on classic zucchini preparations, offering all the flavor of fried zucchini without the added oils and calories.

Why Choose Baked Zucchini Over Fried?

Zucchini is one of those vegetables that is incredibly versatile. While it can be fried or grilled, it often ends up being greasy and heavy, overshadowing its natural flavors. The secret to making zucchini shine without frying it is baking. By baking zucchini with just a touch of olive oil, you preserve the vegetable’s lightness and texture while still achieving a crispy, golden result.

Baking zucchini not only results in a healthier dish but also enhances the zucchini’s flavor. The heat draws out the natural sweetness of the vegetable, and when combined with spices like paprika and black pepper, the dish becomes a rich and savory delight.

Furthermore, baking eliminates the hassle of frying, which can be messy and time-consuming. With this method, you can enjoy crispy zucchini with minimal effort and maximum flavor. It’s the perfect solution for anyone who loves comfort food but wants to keep things light and healthy.

Ingredients:

IngredientAmount
Zucchini1 large
Salt1 teaspoon
Paprika2 teaspoons
Black pepper1 teaspoon
Olive oil100 ml
Garlic2 cloves, minced
Mozzarella cheese200 grams, shredded
Sour cream1 tablespoon
Mayonnaise1 tablespoon

Directions:

  1. Preheat the Oven: Preheat your oven to 200°C (400°F) and lightly grease a baking dish with a small amount of olive oil.
  2. Prepare the Zucchini: Slice the zucchini into thin rounds, about 1/4 inch thick. Lay them out in a single layer on the prepared baking dish.
  3. Seasoning the Zucchini: Sprinkle the zucchini slices with salt, paprika, and black pepper. Drizzle olive oil over the top and add the minced garlic, ensuring each slice is coated evenly.
  4. Top with Mozzarella: Sprinkle the shredded mozzarella cheese generously over the zucchini slices, making sure to cover them evenly.
  5. Bake: Place the baking dish in the preheated oven and bake for about 20-25 minutes or until the zucchini is tender and the mozzarella cheese is melted and golden brown.
  6. Prepare the Sauce: While the zucchini is baking, in a small bowl, combine the sour cream and mayonnaise. Stir until smooth and set aside.
  7. Serve: Once the zucchini is done, remove it from the oven and let it cool slightly. Drizzle the sour cream and mayonnaise sauce over the top before serving.

Nutrients (Per Serving):

NutrientAmount
Calories150 kcal
Protein8 g
Carbohydrates7 g
Fiber2 g
Fat12 g
Saturated Fat5 g
Cholesterol25 mg
Sodium350 mg

The Magic of Mozzarella

Mozzarella cheese is one of those ingredients that elevates any dish. When melted, it forms a soft, gooey layer that complements the zucchini perfectly. The cheese adds richness without being too overpowering, and when baked, it becomes golden and crispy at the edges, creating the perfect contrast with the tender zucchini underneath.

One of the best things about mozzarella is its ability to melt beautifully and form that satisfying stretch, making it a hit with both adults and children alike. Whether you’re serving this dish as a side or as the main event, mozzarella is the perfect finishing touch, making every bite feel indulgent.

Health Benefits of Zucchini

Zucchini, often overlooked as a humble vegetable, is actually packed with nutrients. It is low in calories, high in water content, and provides a good amount of dietary fiber. This makes zucchini an excellent choice for anyone looking to maintain a healthy diet, control weight, or simply boost their vegetable intake.

Zucchini is also a good source of antioxidants, particularly lutein and zeaxanthin, which are beneficial for eye health. It contains vitamin C, which helps with immune function and skin health, as well as potassium, which aids in maintaining healthy blood pressure levels.

In addition to the nutritional benefits, zucchini’s mild flavor allows it to absorb the spices and seasonings you add, making it a perfect base for a variety of dishes. By baking it with paprika, garlic, and a touch of salt and pepper, you enhance the zucchini’s natural taste without overwhelming it, creating a flavorful dish that is both healthy and satisfying.

FAQs About Baked Zucchini with Mozzarella

Q: Can I use other types of cheese instead of mozzarella?
A: While mozzarella is ideal for its meltability and mild flavor, you can substitute it with other cheeses such as cheddar, Parmesan, or a mix of cheeses. Just keep in mind that the texture and flavor might change slightly. For a sharper taste, Parmesan is a great choice, or for a creamier texture, cheddar could work well.

Q: Can I make this dish ahead of time?
A: Yes, you can prepare the zucchini and assemble it with the mozzarella ahead of time. Simply store the unbaked dish in the refrigerator for up to 1-2 days. When ready to serve, bake it as directed. This makes it a great dish for meal prep or preparing for a busy week ahead.

Q: Can I use frozen zucchini?
A: Fresh zucchini works best for this recipe as it retains its texture and moisture when baked. Frozen zucchini tends to become mushy when thawed, so it’s not recommended for this dish.

Q: Can I add other vegetables to this recipe?
A: Absolutely! Feel free to add other vegetables such as tomatoes, bell peppers, or mushrooms. These additions can complement the zucchini and add more color and flavor to the dish. Just make sure to slice them thinly so they cook evenly.

Q: Can I make this dish vegan?
A: Yes, you can make this dish vegan by using plant-based mozzarella or other dairy-free cheeses. Additionally, replace the sour cream and mayonnaise with vegan alternatives, such as cashew cream or a dairy-free yogurt.

Perfect Pairings for Baked Zucchini

Baked zucchini with mozzarella makes a versatile side dish that pairs well with a variety of main courses. Here are a few ideas to inspire your next meal:

  • With Grilled Chicken: The light and crispy texture of the zucchini complements grilled chicken perfectly. Add a side of quinoa or a fresh green salad for a balanced and satisfying meal.
  • With Pasta: Serve this baked zucchini alongside your favorite pasta dishes. The melted cheese and roasted zucchini can bring a wonderful contrast to a hearty pasta like spaghetti or penne.
  • As a Stand-Alone Snack: These zucchini slices are delicious on their own, especially with the creamy sour cream and mayonnaise sauce drizzled on top. You can serve them as a tasty snack for a family movie night or as part of a light lunch.

Conclusion: A Recipe That Brings Comfort and Health Together

Baked Zucchini with Mozzarella is not just a dish; it’s a celebration of simple ingredients that come together to create something truly special. This recipe captures the essence of comfort food while keeping it light, healthy, and full of flavor. It’s a dish that’s easy to make, delicious to eat, and versatile enough to pair with many other meals.

Whether you’re looking for a quick weeknight dinner, a healthy side dish for your next gathering, or a simple snack to enjoy, this baked zucchini recipe has got you covered. Its light, crispy texture and melty mozzarella will surely become a favorite in your household, just as it did in mine.

So, next time you find yourself craving something indulgent but without the guilt, give this recipe a try. It’s a perfect balance of comfort, flavor, and nutrition—sure to satisfy your cravings while keeping things light.

Amal

Baked Zucchini with Mozzarella: A Simple Comforting Dish That Warms the Heart

This Baked Zucchini with Mozzarella is a lighter, healthier alternative to traditional fried zucchini. With a crispy outer layer, tender center, and melty mozzarella on top, this dish brings out the natural sweetness of the zucchini while offering rich, savory flavors. It’s the perfect side dish or snack that’s both satisfying and easy to make, ideal for anyone seeking a guilt-free yet delicious comfort food option.
Prep Time 10 minutes
Cook Time 25 minutes
Total Time 35 minutes
Servings: 4 –6 servings
Course: Side Dish
Cuisine: Mediterranean-Inspired

Ingredients
  

  • 1 large zucchini
  • 1 teaspoon salt
  • 2 teaspoons paprika
  • 1 teaspoon black pepper
  • 100 ml olive oil
  • 2 cloves garlic minced
  • 200 grams shredded mozzarella cheese
  • 1 tablespoon sour cream
  • 1 tablespoon mayonnaise

Method
 

  1. Preheat the Oven: Begin by preheating your oven to 200°C (400°F). Lightly grease a baking dish with olive oil.
  2. Prepare the Zucchini: Slice the zucchini into thin rounds, about 1/4 inch thick. Lay the slices in a single layer on the prepared baking dish.
  3. Season: Sprinkle the zucchini slices with salt, paprika, and black pepper. Drizzle with olive oil and evenly distribute the minced garlic over the zucchini slices.
  4. Add Mozzarella: Generously sprinkle shredded mozzarella cheese over the zucchini slices.
  5. Bake: Place the baking dish into the preheated oven and bake for 20-25 minutes, or until the zucchini is tender and the mozzarella cheese is golden and bubbly.
  6. Prepare the Sauce: While the zucchini is baking, mix the sour cream and mayonnaise in a small bowl and set aside.
  7. Serve: Once the zucchini is done, remove it from the oven and allow it to cool slightly. Drizzle with the prepared sauce and serve warm.

Notes

  • For a stronger flavor, feel free to add a sprinkle of grated Parmesan cheese on top of the mozzarella.
  • If you prefer a spicier kick, you can add some red pepper flakes along with the paprika.
  • This recipe can be made ahead of time; simply prepare and refrigerate the zucchini before baking. You can also make extra and store leftovers in an airtight container for up to two days.
  • To make this dish vegan, substitute the mozzarella and sour cream with plant-based alternatives.

Decadent Oatmeal Banana Brownies – A Guilt-Free Indulgence

The kitchen has always been a sanctuary for me. Growing up, my grandmother used to invite me into her kitchen to help her bake, teaching me not just how to cook, but how to appreciate the love and care that went into making food. It was during one of those cherished afternoons that I learned the power of simple ingredients coming together to create something extraordinary. Over the years, I have reimagined those recipes to align with my healthier lifestyle. The desire to enjoy comfort food without compromising my wellness goals led me to create this oatmeal banana brownie recipe – a recipe that combines the richness of bananas, the heartiness of oats, and the satisfying crunch of walnuts, all while keeping it light and low in calories.

What started as a personal experiment to create a healthier dessert has evolved into one of my favorite go-to recipes. These oatmeal banana brownies are not just a treat; they are a reminder that indulgence doesn’t have to be packed with guilt. Whether you’re watching your weight or just looking for a healthier alternative to traditional brownies, this recipe is perfect for anyone who loves to satisfy their sweet tooth without sacrificing their health goals.

Why This Recipe Works: A Perfect Balance of Taste and Nutrition

At the heart of this recipe is the perfect balance of wholesome ingredients. Unlike many traditional brownies that rely on butter, sugar, and refined flour, these brownies are crafted from ingredients that nourish your body. Oatmeal serves as the base, providing fiber that supports digestion and helps keep you feeling full for longer. Bananas not only contribute natural sweetness but also offer potassium and vitamins that boost energy and maintain healthy blood pressure.

The addition of walnuts adds a satisfying crunch while providing healthy fats, protein, and omega-3 fatty acids, making these brownies a much better choice than the typical dessert. When combined with cocoa powder and a hint of vanilla extract, the result is a decadent treat that won’t leave you feeling sluggish or guilty.

What’s more, these brownies are easy to make, require no special equipment, and can be enjoyed fresh or stored for later use. Whether you’re looking for an energy boost after a workout, a quick snack, or a dessert to satisfy your cravings, these brownies check all the boxes.

Ingredients:

IngredientQuantity
Oatmeal150g (5 ounces)
Milk150ml (5 fl oz)
Eggs2
Bananas (mashed)2
Vanilla extract1 teaspoon
Sugar-free cocoa powder20g (0.7 ounces)
Baking powder5g (0.18 ounces)
Salt1 pinch
Vegetable oil (for greasing)As needed
Walnuts (chopped)30g (1 ounce)

Instructions:

  1. Preheat your oven to 180°C (350°F) and lightly grease a baking pan with vegetable oil.
  2. In a large bowl, mix together the mashed bananas, eggs, vanilla extract, and milk until smooth.
  3. Add in the oatmeal, sugar-free cocoa powder, baking powder, and salt. Stir until the mixture is well combined.
  4. Fold in the chopped walnuts for a delightful crunch.
  5. Pour the batter into the prepared baking pan and spread it evenly.
  6. Bake for 25-30 minutes, or until a toothpick inserted into the center comes out clean.
  7. Let the brownies cool completely before cutting them into squares. Enjoy these guilt-free treats!

Nutritional Information (per serving):

NutrientAmount
Calories150 kcal
Carbs20g
Protein4g
Fat6g
Fiber3g
Sugar6g

Health Benefits of Oatmeal Banana Brownies

Oatmeal is the star ingredient in this recipe, and for good reason. Not only is it a great source of fiber, but it also has numerous health benefits, including lowering cholesterol, supporting heart health, and stabilizing blood sugar levels. The oats in this recipe act as a binder, holding the brownies together without the need for any refined flour. This makes the brownies naturally gluten-free (as long as you use certified gluten-free oats) and an ideal choice for anyone with dietary restrictions.

Bananas, another key ingredient, are packed with potassium, which is essential for heart and muscle function. They also provide an energy boost, making these brownies perfect for a mid-afternoon snack. With only a touch of sugar from the cocoa powder and the bananas themselves, these brownies are not overly sweet, keeping your blood sugar levels balanced.

Additionally, walnuts provide healthy fats that promote brain health and reduce inflammation, making these brownies a great choice for overall wellness. The cocoa powder, while adding that rich, chocolatey flavor, also provides antioxidants that help fight free radicals and support heart health.

Frequently Asked Questions (FAQs)

Can I make these brownies vegan?

Yes, this recipe can easily be adapted to a vegan version by substituting the eggs with a flax egg (1 tablespoon ground flaxseed mixed with 3 tablespoons water) and using a non-dairy milk such as almond or oat milk. The rest of the ingredients are already plant-based, making this a great option for those following a vegan diet.

Can I use another type of nut instead of walnuts?

Absolutely! Walnuts provide a rich texture and taste, but if you’re not a fan or if you have an allergy, you can substitute them with almonds, pecans, or even cashews. Just chop them finely to ensure they mix well into the batter.

How long will these brownies stay fresh?

These brownies can be stored in an airtight container at room temperature for up to three days. If you want to keep them for a longer period, they can be frozen. Just wrap them individually in plastic wrap and store them in a freezer-safe container for up to a month.

Can I add other ingredients to customize the recipe?

Of course! These brownies are versatile and can be customized in many ways. You could add dried fruit, such as raisins or cranberries, or even incorporate a spoonful of peanut butter for extra flavor. Adding a sprinkle of cinnamon or a pinch of sea salt on top before baking can also elevate the taste.

Are these brownies suitable for weight loss?

Yes, this recipe is great for those looking to maintain a healthy diet while still enjoying a dessert. The high fiber content from the oats and bananas helps to curb cravings, and the use of wholesome ingredients ensures that you’re nourishing your body while indulging your sweet tooth. However, moderation is key, and these brownies should be part of a balanced diet.

Can I use ripe bananas for this recipe?

Ripe bananas are actually ideal for this recipe! The more ripe your bananas, the sweeter your brownies will naturally be. Plus, the soft texture of ripe bananas will blend better into the batter, making the brownies moist and flavorful.

How to Make These Brownies Even Healthier

While this recipe is already a healthier alternative to traditional brownies, there are a few tweaks you can make to further boost its nutritional value.

  1. Add protein powder: For an extra protein boost, you can add a scoop of your favorite protein powder to the batter. This will help keep you feeling fuller for longer and provide an extra nutritional punch.
  2. Use almond flour: If you’re looking to make the recipe even lower in carbs, substitute half of the oats with almond flour. This will reduce the carbohydrate content while adding healthy fats.
  3. Sweeten naturally: Instead of using sugar-free cocoa powder, you could opt for a natural sweetener like stevia or maple syrup. Just keep in mind that this will alter the texture slightly, so you might need to adjust the amount of flour or oats.

A Recipe for Any Occasion

Whether you’re trying to eat cleaner, lose weight, or simply want a healthier alternative to a traditional dessert, these oatmeal banana brownies are a perfect solution. They make an excellent snack for busy afternoons, a delicious breakfast when you’re craving something sweet, or a great post-workout treat. With minimal ingredients and a simple process, these brownies are both practical and satisfying.

I often make these brownies on a lazy Sunday afternoon, when I want something indulgent but don’t want to overdo it with sugar and calories. They remind me of the joy that comes from simple, homemade treats, and how nourishing food can be both satisfying and healthy.

Conclusion: A Delicious, Guilt-Free Treat

This oatmeal banana brownie recipe is more than just a healthy dessert – it’s a testament to the fact that you don’t need to sacrifice taste for health. By using simple, wholesome ingredients like bananas, oatmeal, and walnuts, you can create a treat that is both delicious and nutritious. Whether you’re baking for yourself or for friends and family, these brownies are sure to be a hit. They are the perfect example of how healthy eating can be simple, fun, and most importantly, satisfying.

So, the next time you’re craving something sweet, reach for these oatmeal banana brownies – your body will thank you, and your taste buds will be delighted.

Amal

Decadent Oatmeal Banana Brownies – A Guilt-Free Indulgence

These guilt-free oatmeal banana brownies are a healthy yet delicious way to satisfy your sweet tooth. Made with simple ingredients like ripe bananas, oatmeal, and walnuts, these brownies offer a perfect balance of sweetness, fiber, and healthy fats—without the excess sugar or calories. Ideal for a mid-afternoon snack or a light dessert!
Prep Time 10 minutes
Cook Time 30 minutes
Total Time 40 minutes
Servings: 12 servings
Course: Dessert
Cuisine: Healthy

Ingredients
  

  • 150 g 5 ounces oatmeal
  • 150 ml 5 fl oz milk (use any plant-based milk for a dairy-free version)
  • 2 eggs
  • 2 bananas mashed
  • 1 teaspoon vanilla extract
  • 20 g 0.7 ounces sugar-free cocoa powder
  • 5 g 0.18 ounces baking powder
  • 1 pinch of salt
  • Vegetable oil for greasing
  • 30 g 1 ounce walnuts, chopped

Method
 

  1. Preheat your oven to 180°C (350°F) and lightly grease a baking pan with vegetable oil.
  2. In a large bowl, mash the bananas and then add the eggs, vanilla extract, and milk. Mix until smooth.
  3. Add the oatmeal, sugar-free cocoa powder, baking powder, and a pinch of salt to the bowl. Stir until well combined.
  4. Fold in the chopped walnuts for added crunch and texture.
  5. Pour the batter into the prepared baking pan, spreading it evenly with a spatula.
  6. Bake for 25-30 minutes, or until a toothpick inserted into the center comes out clean.
  7. Allow the brownies to cool completely before cutting into squares and serving.

Notes

  • Storage: These brownies stay fresh for up to 3 days in an airtight container at room temperature. They can also be frozen for up to a month if wrapped individually in plastic wrap.
  • Customizing: Feel free to add dried fruits like cranberries or raisins, or even a sprinkle of cinnamon or nutmeg for extra flavor. For a chocolatey twist, mix in some dark chocolate chips or cocoa nibs.
  • Vegan Option: To make these brownies vegan, replace the eggs with flax eggs (1 tablespoon ground flaxseed + 3 tablespoons water) and use plant-based milk such as almond or oat milk.

The Comfort of a Hearty Breakfast: A Family Tradition

There are moments in life that stay with you—simple moments, unpretentious yet profound. For me, one of those moments is breakfast with my family. Growing up, our mornings weren’t just about filling our stomachs—they were about connection. It was in the quiet, early hours of the morning, before the rush of the day began, that we sat together, shared stories, and set the tone for the rest of the day. My mother’s kitchen was always filled with warmth, both from the stove and the heart.

One of my fondest memories from those mornings is my mother’s breakfast scramble—a recipe she passed down to me and my siblings. Simple, nourishing, and quick, it was the perfect way to start our busy days. Even today, I still make this dish whenever I want to recreate that sense of comfort and togetherness.

There’s something so special about cooking a dish that’s been handed down through generations. It’s not just about the ingredients or the method—it’s about the love and memories that come with it. Each time I make the Easy Breakfast Scramble, I think of those mornings spent with my family, laughing and talking over scrambled eggs and sausage. The smell of the sizzling vegetables and eggs fills my kitchen, bringing back those cherished moments. And in that quiet, peaceful time of the morning, I’m reminded of the importance of slowing down and savoring life’s simplest joys.

Now, as I prepare this dish for my own children, I find myself sharing those same stories with them—about how their grandmother used to make this dish for us every weekend, and how we would all gather around the table, energized and ready for whatever the day would bring.

Why This Breakfast Scramble is the Perfect Start to Your Day

The Beauty of Simplicity

In the age of elaborate breakfast trends and Instagram-worthy dishes, it’s easy to forget the joy that can be found in the simplest of recipes. This Easy Breakfast Scramble doesn’t require fancy ingredients or complicated techniques—yet it’s full of flavor and nourishment. It’s a reminder that sometimes the best meals are the ones that are the easiest to prepare, with no need for intricate steps or hard-to-find ingredients.

At its core, this dish is a celebration of everyday ingredients. Eggs, vegetables, and a bit of sausage come together to form a filling and balanced meal. This simplicity is precisely what makes the scramble so comforting. It’s the kind of dish you can whip up in under 20 minutes, even on the busiest mornings, and still feel satisfied.

Moreover, the combination of ingredients is not only delicious but also nutritious. Eggs are packed with protein, carrots add a healthy dose of fiber, and chicken sausage provides a lean source of meat. The addition of milk makes the scramble creamy and smooth, creating a satisfying texture. This dish offers the perfect balance of macronutrients to keep you energized throughout the morning.

For me, cooking this breakfast is also a time to slow down. When I’m in the kitchen, cooking with my hands and being present in the moment, I’m reminded of what truly matters. It’s not about perfection—it’s about sharing something wholesome and simple with those I love.

Ingredients

IngredientAmount
Eggs6
Medium carrot, grated1
Onion, finely chopped1/2
Chicken sausage, sliced1
Milk4 tbsp
Scallion, choppedTo taste
Olive oilAs needed
Salt1/4 tsp
Black pepper1/4 tsp

Directions:

  1. Prep the Ingredients: Grate the carrot, finely chop the onion and scallion, and slice the chicken sausage.
  2. Cook the Sausage: Heat a drizzle of olive oil in a large skillet over medium heat. Add the chicken sausage slices and cook until browned and slightly crispy, about 4-5 minutes. Remove from the pan and set aside.
  3. Sauté the Vegetables: In the same skillet, add a bit more olive oil if necessary. Sauté the onion and grated carrot for 2-3 minutes, until softened.
  4. Make the Egg Mixture: In a bowl, whisk together the eggs, milk, salt, and black pepper until fully combined.
  5. Cook the Scramble: Pour the egg mixture into the skillet with the vegetables. Allow it to set for a moment, then gently stir to scramble the eggs. Add the cooked chicken sausage and scallions, and continue cooking until the eggs are fully set.
  6. Serve: Once the scramble is cooked through and fluffy, serve immediately, garnished with additional scallions if desired.

Nutritional Information (Per Serving – based on 4 servings):

NutrientAmount
Calories~220 kcal
Carbohydrates~8 g
Protein~18 g
Fat~15 g
Saturated Fat~4 g
Fiber~1 g
Sodium~300 mg

The Versatility of the Easy Breakfast Scramble

While this Easy Breakfast Scramble is perfect as is, one of the things I love most about it is its versatility. You can easily modify it to suit your preferences or use up leftovers from the fridge. Want to add a bit of spice? Throw in some chili flakes or chopped bell peppers. If you have a few extra mushrooms or spinach on hand, toss them in for added flavor and nutrition. The possibilities are endless!

For those who follow a vegetarian or vegan diet, this recipe can be adapted by replacing the chicken sausage with plant-based sausage or omitting it entirely. The eggs can be substituted with tofu or a vegan egg scramble for a plant-based version that’s just as satisfying.

You can also play with the cheese. While this recipe doesn’t call for cheese, adding a sprinkle of shredded cheddar or feta can elevate the flavor even more. Or, if you prefer something lighter, try adding a dollop of Greek yogurt for a creamy, tangy finish.

The Easy Breakfast Scramble can be served with a side of whole-grain toast or avocado slices for a well-rounded meal. It’s also a great base for meal prepping—make a large batch of the scramble and store it in the fridge for quick, ready-to-eat breakfasts during the week.

Frequently Asked Questions (FAQs)

Can I make this dish ahead of time?

Yes, you can! This dish can be prepared in advance and stored in the refrigerator for up to 3 days. Simply heat it up in the microwave or on the stovetop when you’re ready to eat. It’s a great option for meal prep on a busy week.

What type of sausage should I use for the scramble?

I recommend using chicken sausage for a leaner option, but you can use any type of sausage you prefer. Turkey sausage, pork sausage, or even vegetarian sausages are all excellent substitutes.

Can I use a non-dairy milk in this recipe?

Yes, absolutely! You can replace the milk with any non-dairy milk you prefer, such as almond milk, soy milk, or oat milk. The recipe will still be delicious and creamy.

How can I make this scramble spicier?

If you enjoy a bit of heat, try adding chopped jalapeños, chili flakes, or hot sauce to the scramble. These will add the perfect amount of spice without overpowering the other flavors.

Can I freeze this scramble?

While it’s best enjoyed fresh, you can freeze the cooked scramble for up to a month. Just make sure to cool it completely before transferring it to an airtight container. To reheat, simply warm it up in the microwave or on the stove, adding a bit of extra milk to maintain the creamy texture.

What can I serve with this breakfast scramble?

This scramble pairs perfectly with toast, avocado, or a side of fresh fruit. You can also serve it with roasted potatoes or a light salad for a more substantial meal.

Conclusion: The Power of Simple Ingredients and Shared Moments

In today’s fast-paced world, we often forget the value of simplicity. But recipes like the Easy Breakfast Scramble remind us that there is beauty in the basics. It’s about taking a few humble ingredients and turning them into something nourishing, comforting, and enjoyable.

The best meals are often the ones that bring us together. This breakfast scramble is not just about the food—it’s about the moments spent around the table, sharing stories and enjoying each other’s company. It’s about finding joy in the simple things and making memories that will last a lifetime.

As I continue to make this dish for my family, I can only hope that they, too, will cherish these mornings and the love that goes into every bite. Because at the end of the day, it’s not the complexity of the recipe that matters—it’s the love, tradition, and shared experiences that make it truly special.

Let this Easy Breakfast Scramble be a reminder to slow down, savor the moment, and appreciate the beauty of a simple, delicious meal. Whether you’re cooking for your family or yourself, this dish will bring comfort and warmth to your mornings for years to come.

Amal

The Comfort of a Hearty Breakfast: A Family Tradition

Start your day on the right note with this Easy Breakfast Scramble, packed with protein, vegetables, and savory chicken sausage. A satisfying and quick dish that combines eggs, grated carrot, and onion, all cooked together for a fluffy and flavorful meal. Perfect for busy mornings or a relaxed weekend brunch!
Prep Time 10 minutes
Cook Time 10 minutes
Total Time 20 minutes
Servings: 4 –6 servings
Course: Breakfast
Cuisine: American

Ingredients
  

  • 6 eggs
  • 1 medium carrot grated
  • 1/2 onion finely chopped
  • 1 chicken sausage sliced
  • 4 tbsp milk
  • Scallion chopped (to taste)
  • Olive oil for cooking
  • 1/4 tsp salt
  • 1/4 tsp black pepper

Method
 

  1. Prepare the Ingredients: Grate the carrot, finely chop the onion and scallion, and slice the chicken sausage into thin rounds.
  2. Cook the Sausage: Heat olive oil in a large skillet over medium heat. Add the sliced chicken sausage and cook for about 4-5 minutes, or until golden and crispy. Remove the sausage from the pan and set aside.
  3. Sauté the Vegetables: In the same skillet, add a little more olive oil and sauté the chopped onion and grated carrot for 2-3 minutes until they soften.
  4. Make the Egg Mixture: In a bowl, whisk together the eggs, milk, salt, and black pepper until well combined.
  5. Cook the Scramble: Pour the egg mixture into the skillet with the sautéed vegetables. Let it set for a few seconds before gently stirring. Continue to cook, stirring occasionally, until the eggs are fully set but still creamy.
  6. Add the Sausage and Scallions: Stir in the cooked chicken sausage and chopped scallions. Cook for another 1-2 minutes, then remove from heat.
  7. Serve: Serve the scramble immediately with your favorite toast or fresh avocado on the side. Enjoy!

Notes

  • You can customize this recipe by adding other vegetables like bell peppers, spinach, or mushrooms for extra flavor and nutrition.
  • For a dairy-free version, swap out the milk for a non-dairy alternative and omit the milk-based components.
  • If you prefer a spicy kick, add some chili flakes or hot sauce to the egg mixture.
  • This scramble can be stored in the fridge for up to 3 days. Reheat in the microwave or on the stovetop when ready to enjoy.

The Heart of the Kitchen: A Family Tradition of Puff Pastry Rolls

There are some recipes that, no matter how simple or humble, carry with them deep emotional connections. For me, one such recipe is puff pastry rolls—an unforgettable treat that has become synonymous with family gatherings, celebrations, and comfort food.

As a child, I would spend countless hours in my grandmother’s kitchen, fascinated by the way she could effortlessly transform a few simple ingredients into something extraordinary. It was in her kitchen that I first learned the magic of puff pastry. The process seemed almost like a secret, passed down through generations. The buttery layers of puff pastry, the rich, creamy filling, and the golden, crisp exterior always had a way of making us feel welcome and cherished.

My grandmother wasn’t a chef in the traditional sense. She wasn’t known for creating elaborate dishes. But what she did best was creating warmth and joy through food. The aroma of freshly baked puff pastry rolls, with their cheesy goodness filling the air, is a memory that has stayed with me. Every time I bake them, I am reminded of those moments spent in her kitchen—of the laughter, the love, and the deep connection that food can create.

As I bake these rolls today, I find myself thinking of the family gatherings where these little pastries graced our table, creating moments of togetherness. Every bite was a celebration, a reminder that the simplest things—like sharing a warm meal—can bring us closer.

Now, I’m passing down this recipe to my own children, hoping they will carry on the tradition. Each puff pastry roll represents more than just a snack or an appetizer. It’s a piece of my heart and a legacy that continues to bring warmth to our home.

The Allure of Puff Pastry Rolls: Why These Little Bites Are So Special

Puff pastry rolls are a timeless treat that have been enjoyed by families for generations. Their versatility, combined with their rich flavor, makes them a go-to snack for a variety of occasions. Whether you’re hosting a family gathering, preparing for a holiday meal, or simply craving something savory, puff pastry rolls are the perfect choice.

The beauty of these rolls lies in the perfect balance of textures. The pastry itself is light, flaky, and golden brown, offering a satisfying crunch with each bite. Meanwhile, the creamy cheese filling provides a rich, smooth contrast that melts in your mouth. With just a few ingredients, these rolls manage to deliver complex flavors, making them a favorite among both adults and children.

One of the reasons I love this recipe is its simplicity. There’s no need for fancy tools or complicated techniques. The ingredients are easy to find, and the preparation is straightforward. Yet, despite its simplicity, the result is nothing short of extraordinary. Puff pastry rolls are elegant enough to serve at a dinner party yet comforting enough to enjoy on a quiet evening at home.

What sets this recipe apart from others is its balance of flavors. The combination of cream cheese, feta cheese, and pressed cheese creates a savory, tangy filling that perfectly complements the buttery pastry. The garlic adds just a hint of warmth and depth, while the fresh parsley brightens the dish, making it as visually appealing as it is delicious.

For me, baking these puff pastry rolls brings a sense of nostalgia. As I mix the ingredients and roll out the pastry, I can almost hear my grandmother’s laughter in the background. It’s as though the process of making these rolls has become a way to honor her memory and share the love she once shared with us.

Ingredients

IngredientAmount
Puff pastry600g (21.16 oz)
Cream cheese300g (10.6 oz)
Garlic, minced2 cloves
Feta cheese, crumbled200g (7 oz)
Pressed cheese, grated100g (3.5 oz)
Parsley, chopped20g (0.7 oz)
Egg, beaten1
Pressed cheese, grated (for topping)50g (1.76 oz)

Directions:

  1. Preheat and Prepare: Preheat your oven to 375°F (190°C). Line a baking sheet with parchment paper for easy cleanup.
  2. Make the Filling: In a large mixing bowl, combine the cream cheese, minced garlic, crumbled feta cheese, grated pressed cheese, and chopped parsley. Stir until the mixture is well combined and creamy.
  3. Roll the Pastry: On a lightly floured surface, roll out the puff pastry into a large rectangle. Cut the pastry into even strips, about 2 inches wide.
  4. Fill and Fold: Place a generous spoonful of the cheese mixture on each strip of pastry. Carefully roll each strip into a tight cylinder, sealing the edges by pinching them together.
  5. Brush with Egg: Brush the tops of each roll with the beaten egg for a golden finish when baked.
  6. Add Cheese Topping: Sprinkle the rolls with the remaining grated pressed cheese for an extra cheesy crust.
  7. Bake: Arrange the rolls on the prepared baking sheet, leaving space between them. Bake for 15-20 minutes or until they are golden brown and puffed up.
  8. Cool and Serve: Allow the puff pastry rolls to cool slightly before serving. They are best enjoyed warm!

Nutritional Information (Per Roll – based on 10 servings)

NutrientAmount
Calories~200 kcal
Carbohydrates~15 g
Protein~8 g
Fat~14 g
Saturated Fat~7 g
Fiber~1 g
Sodium~300 mg

Puff Pastry Rolls: A Versatile Delight for Any Occasion

While puff pastry rolls are typically served as appetizers or snacks, they are incredibly versatile. You can easily customize the filling to suit your tastes or dietary preferences. For instance, you can add spinach, olives, or roasted vegetables for a vegetarian version. If you prefer something with a bit of a kick, you can incorporate spicy peppers or sun-dried tomatoes into the filling.

For a more indulgent treat, you can add a handful of shredded mozzarella or Parmesan cheese to the filling, or even drizzle the rolls with a balsamic glaze before serving. The beauty of this recipe lies in its adaptability—you can make it your own with just a few simple tweaks.

These puff pastry rolls are also perfect for meal prep. You can prepare them in advance, freeze them, and then bake them whenever you need a quick snack or appetizer. This makes them a great option for busy weeknights or when you’re hosting unexpected guests. Just bake and serve—these rolls will be a hit every time.

FAQs About Puff Pastry Rolls

Can I use store-bought puff pastry for this recipe?

Yes, store-bought puff pastry works perfectly for this recipe. In fact, using ready-made puff pastry can save you time and effort, making it a great option for those who want a quick and easy solution. However, if you prefer, you can make your own puff pastry from scratch.

Can I freeze puff pastry rolls?

Absolutely! These rolls freeze very well. You can assemble them, place them on a baking sheet, and freeze them before baking. Once frozen, transfer the rolls to an airtight container or zip-top bag and store them for up to a month. When you’re ready to bake them, simply pop them in the oven without thawing for a convenient, fresh snack or appetizer.

Can I make the filling ahead of time?

Yes, you can prepare the filling in advance and store it in the refrigerator for up to 2 days. Just make sure to let it come to room temperature before using it in the puff pastry.

Can I add other fillings?

Definitely! This recipe is highly versatile, and you can experiment with a variety of fillings. Consider adding cooked spinach, mushrooms, or even cooked chicken or bacon for a heartier filling. You can also experiment with different types of cheese, such as ricotta or goat cheese, to create a new flavor profile.

What can I serve these puff pastry rolls with?

These rolls are perfect on their own, but they pair wonderfully with a variety of sides. Serve them with a fresh salad, a bowl of soup, or a dipping sauce like marinara or garlic butter for an extra layer of flavor.

Conclusion: A Recipe to Pass Down Through Generations

Puff pastry rolls are more than just a snack—they’re a way to connect with our past, honor family traditions, and create new memories. Whether you’re baking them for a special occasion or just because, each bite is a reminder that food has the power to bring us together, to evoke emotions, and to carry on the legacy of those who came before us.

Baking these puff pastry rolls is more than just a recipe; it’s a celebration of love, comfort, and the joy that comes from sharing a meal with others. The simple act of preparing these rolls in my kitchen brings me back to my grandmother’s warmth and the times we spent together. And as I serve them to my own family, I can only hope that they too will carry on this tradition for generations to come.

So the next time you’re in the kitchen, take a moment to savor the process, and remember that some of the best memories are made with a few simple ingredients, a little love, and a whole lot of warmth.

Amal

The Heart of the Kitchen: A Family Tradition of Puff Pastry Rolls

These cheesy puff pastry rolls are a delightful treat, perfect for snacking or serving as appetizers at your next gathering. With their flaky, golden exterior and creamy, cheesy filling, every bite promises a burst of savory goodness. They’re easy to make and sure to impress guests or satisfy your cravings at home!
Prep Time 15 minutes
Cook Time 20 minutes
Total Time 35 minutes
Servings: 12 rolls
Course: Snack
Cuisine: Mediterranean-Inspired

Ingredients
  

  • 600 g 21.16 oz puff pastry
  • 300 g 10.6 oz cream cheese
  • 2 cloves garlic minced
  • 200 g 7 oz feta cheese, crumbled
  • 100 g 3.5 oz pressed cheese, grated
  • 20 g 0.7 oz parsley, chopped
  • 1 egg beaten
  • 50 g 1.76 oz pressed cheese, grated (for topping)

Method
 

  1. Preheat the Oven: Preheat your oven to 375°F (190°C). Line a baking sheet with parchment paper for easy cleanup.
  2. Prepare the Filling: In a large mixing bowl, combine cream cheese, minced garlic, crumbled feta, grated pressed cheese, and chopped parsley. Mix until smooth and well combined.
  3. Roll the Pastry: On a lightly floured surface, roll out the puff pastry into a large rectangle. Slice the pastry into strips (about 2 inches wide).
  4. Fill and Roll: Place a generous amount of the cheese mixture onto each pastry strip. Roll them up tightly, sealing the edges to secure the filling.
  5. Brush with Egg: Brush the tops of each roll with the beaten egg for a glossy, golden finish when baked.
  6. Top with Cheese: Sprinkle the grated pressed cheese over the rolls before baking for an extra cheesy crust.
  7. Bake: Arrange the rolls on the prepared baking sheet and bake for 15-20 minutes or until golden brown and puffed up.
  8. Cool and Serve: Allow the rolls to cool slightly before serving. They are best enjoyed warm and fresh out of the oven!

Notes

  • You can customize the filling by adding spinach, olives, or roasted vegetables for a different flavor profile.
  • For a bit of spice, consider adding some chili flakes or hot sauce to the cheese mixture.
  • These rolls can be made ahead of time and frozen. Just bake them directly from the freezer for a quick and easy snack or appetizer.
  • If you prefer a vegan version, substitute the cheese and cream cheese with plant-based alternatives.

A Slice of Comfort: The Journey to Perfecting Banana Bread

There’s something uniquely comforting about the aroma of freshly baked banana bread. The scent fills the house, creating an inviting warmth that signals home. For me, banana bread has always been more than just a dessert—it’s a piece of memory, a connection to my childhood.

Growing up, my grandmother had a way of turning ordinary ingredients into something magical. It was in her kitchen that I first learned the art of making banana bread, a recipe passed down through generations. The way she carefully mashed the bananas, creamed the butter, and mixed the ingredients together with such patience made me realize that baking isn’t just about the outcome—it’s about the love and attention you pour into every step.

As a child, I would sit on the counter, watching her work, eagerly waiting for that moment when the loaf would rise in the oven. The anticipation was always the same: it was a promise of something special, something made with care. And when that loaf finally came out, golden and slightly cracked on top, it never failed to delight. We’d slice it while it was still warm, spread a little butter, and eat it together, savoring every bite.

As I grew older and moved far away from home, that banana bread became a connection to the past. It was my grandmother’s love, captured in every slice. And so, I began baking it myself—not just for special occasions, but for moments when I needed a little reminder of where I came from. Every time I pull that loaf out of the oven, I feel closer to her, and those sweet memories flood back.

Banana bread is not just a recipe; it’s a reminder that some things in life are constant, and the simple act of baking can bring joy, comfort, and a sense of belonging.

Banana Bread: A Simple Yet Perfect Treat

Banana bread is, without a doubt, a classic. It’s one of those baked goods that never goes out of style, and for good reason. The moist, tender texture, paired with the natural sweetness of ripe bananas, makes it an irresistible treat. But what sets this recipe apart is its undeniable richness and texture—it’s moist in all the right ways, with a crumb that melts in your mouth.

It’s easy to see why this loaf is such a beloved recipe. Whether you’re looking for something to serve for breakfast, an afternoon snack, or a simple dessert, banana bread fits the bill. It’s versatile and can be enjoyed by everyone, from kids to adults. Plus, it’s incredibly forgiving—if you’re not a seasoned baker, there’s little chance you’ll mess it up.

However, what really makes this recipe shine is the balance between flavors. The sweetness of the ripe bananas shines through without being overpowering. The butter adds richness, while the buttermilk lends the perfect amount of tang. Each bite is a harmony of flavors, and each slice is guaranteed to bring comfort.

Ingredients

IngredientAmount
Ripe bananas3 large
Butter (softened)1/2 cup (115 g)
Sugar1 cup (200 g)
Eggs2
All-purpose flour1.5 cups (180 g)
Baking soda1 teaspoon
Salt1/4 teaspoon
Buttermilk (or milk)1/4 cup (60 ml)
Vanilla extract1 teaspoon

Directions

  1. Preheat and Prepare: Preheat your oven to 350°F (175°C). Grease and flour a 9×5-inch loaf pan or line it with parchment paper.
  2. Mash the Bananas: In a large bowl, mash the ripe bananas with a fork or potato masher until smooth but with a few lumps. You should have about 1.5 cups of mashed banana.
  3. Cream the Butter and Sugar: In another bowl, cream together the softened butter and sugar until light and fluffy. This will add a fluffy texture to your bread.
  4. Add Eggs and Vanilla: Beat in the eggs, one at a time, ensuring each is fully incorporated before adding the next. Stir in the vanilla extract for an added layer of flavor.
  5. Combine Dry Ingredients: In a separate bowl, whisk together the flour, baking soda, and salt. Gradually add the dry ingredients to the banana mixture, alternating with buttermilk. Start and end with the dry ingredients, mixing until just combined. Be careful not to overmix to avoid a dense loaf.
  6. Pour and Bake: Pour the batter into the prepared loaf pan, smoothing the top with a spatula. Bake in the preheated oven for 60–70 minutes, or until a toothpick inserted into the center comes out clean, with just a few crumbs.
  7. Cool and Serve: Let the banana bread cool in the pan for 10 minutes before transferring it to a wire rack to cool completely. Slice and enjoy!

Nutritional Information (Per Serving – based on 10 slices)

NutrientAmount
Calories~250 kcal
Carbohydrates~35 g
Sugars~18 g
Protein~3 g
Fat~12 g
Saturated Fat~7 g
Fiber~2 g
Sodium~150 mg

The Essential Ingredients That Make the Difference

The beauty of banana bread lies in its simplicity. The ingredients are basic—flour, sugar, butter, and eggs—but the magic happens when these ingredients come together. The key to achieving the perfect banana bread lies in using ripe bananas. Overripe bananas, which are soft and speckled with brown spots, provide the natural sweetness that gives the bread its distinctive flavor. They also contribute to the moist texture, preventing the bread from being dry or dense.

Buttermilk is another essential ingredient. It gives the bread a tender crumb, making each slice light yet satisfying. If you don’t have buttermilk on hand, you can easily substitute it with milk and a splash of vinegar or lemon juice, which will mimic the acidity and add the same effect to the dough.

Butter is the fat that brings richness to the bread. While you can substitute it with oil, butter provides flavor and texture that oil simply can’t match. The combination of butter and bananas results in a loaf that’s not just moist but also full of depth.

Why This Banana Bread Recipe Is the Ultimate Comfort Food

There are many variations of banana bread out there, but this particular recipe stands out. What makes it so special is the balance of texture and flavor. Not too heavy, not too light—it strikes the perfect balance. The crumb is tender and soft, while the crust is golden brown with just the right amount of crispness. It’s the kind of bread that holds up beautifully whether you enjoy it fresh from the oven or toasted the next day with a pat of butter.

The flavor profile of this banana bread is also versatile. It can easily be customized with additional mix-ins such as chocolate chips, walnuts, or even a swirl of cinnamon. However, it’s just as delicious without any extra ingredients. Sometimes, simplicity is best, and this recipe allows the bananas to shine without distraction.

In a world full of fast-paced living and complicated recipes, this banana bread is a reminder that the most comforting foods are often the simplest. It’s a recipe that invites you to slow down and savor each bite, and it’s the kind of food that makes you feel good both physically and emotionally.

Frequently Asked Questions (FAQs)

Can I use frozen bananas for banana bread?

Yes, frozen bananas are actually a great option for banana bread. In fact, many bakers swear by them! Simply thaw the bananas, and they’ll be just as sweet and mushy as ripe bananas. Just make sure to drain any excess liquid before mashing.

Can I use all-purpose flour instead of whole wheat flour?

Yes, this recipe calls for all-purpose flour, and it works perfectly for a light and fluffy loaf. If you prefer a heartier texture, you can substitute part of the all-purpose flour with whole wheat flour. However, whole wheat flour will result in a denser loaf.

How can I make this recipe dairy-free?

If you want to make this recipe dairy-free, you can substitute the butter with vegan butter or coconut oil. For buttermilk, use a dairy-free alternative such as almond milk mixed with a little lemon juice or vinegar.

How do I store banana bread?

Banana bread can be stored at room temperature for up to 3 days. Simply wrap it tightly in plastic wrap or foil. If you want to keep it for longer, it can be stored in the refrigerator for up to 1 week or frozen for up to 3 months.

Can I add other ingredients to the banana bread?

Absolutely! You can customize this banana bread by adding chocolate chips, walnuts, pecans, or even shredded coconut. Just be sure not to overload it with too many additions, as it could affect the texture.

Conclusion: More Than Just a Loaf

Banana bread is more than just a recipe; it’s a slice of nostalgia, a comforting embrace, and a timeless favorite. Whether you’re baking it for the first time or it’s a recipe passed down through generations, the experience of making and enjoying banana bread is always special. It’s simple yet satisfying, and it’s always there when you need a little pick-me-up.

The next time you bake this banana bread, take a moment to savor not only the delicious flavor but also the memories and stories it brings with it. Whether you enjoy it fresh out of the oven with a cup of coffee or toast it for breakfast the next morning, this banana bread is more than just food—it’s a piece of home.

Amal

A Slice of Comfort: The Journey to Perfecting Banana Bread

This banana bread is a slice of pure comfort! With a rich, buttery crumb and the perfect balance of sweetness, it’s the go-to treat for any time of the day. Whether you’re having it for breakfast or as an afternoon snack, each slice of this moist banana bread is sure to delight!
Prep Time 15 minutes
Cook Time 1 hour 10 minutes
Total Time 1 hour 15 minutes
Servings: 10 servings
Course: Dessert
Cuisine: American

Ingredients
  

  • 3 ripe bananas mashed
  • 1/2 cup 115 g unsalted butter, softened
  • 1 cup 200 g granulated sugar
  • 2 large eggs
  • 1.5 cups 180 g all-purpose flour
  • 1 teaspoon baking soda
  • 1/4 teaspoon salt
  • 1/4 cup 60 ml buttermilk (or milk)
  • 1 teaspoon vanilla extract

Method
 

  1. Preheat the Oven: Preheat your oven to 350°F (175°C) and grease or line a 9×5-inch loaf pan with parchment paper.
  2. Prepare the Bananas: Mash the ripe bananas in a large bowl using a fork or potato masher. You should have about 1.5 cups of mashed banana.
  3. Cream the Butter and Sugar: In a separate bowl, cream together the softened butter and granulated sugar until light and fluffy.
  4. Add Eggs and Vanilla: Beat in the eggs, one at a time, ensuring each one is well incorporated. Stir in the vanilla extract.
  5. Combine Dry Ingredients: In a small bowl, whisk together the all-purpose flour, baking soda, and salt.
  6. Mix Wet and Dry Ingredients: Gradually add the dry ingredients to the wet ingredients, alternating with buttermilk. Start with the flour mixture and end with the flour, mixing just until combined.
  7. Bake: Pour the batter into the prepared loaf pan, smoothing the top with a spatula. Bake for 60-70 minutes, or until a toothpick inserted in the center comes out clean or with just a few crumbs.
  8. Cool and Serve: Let the bread cool in the pan for 10 minutes before transferring to a wire rack to cool completely. Slice and serve!

Notes

  • For an extra indulgent banana bread, add chocolate chips or chopped nuts like walnuts or pecans.
  • This banana bread can be stored at room temperature in an airtight container for up to 3 days.
  • If you don’t have buttermilk, you can substitute it with regular milk and add a splash of lemon juice or vinegar to replicate the acidity.

Whispers of Summer: Cake That Melts in Your Mouth

Some of the fondest memories I have are from the summer afternoons spent in my grandmother’s kitchen. The sun would be dipping low, casting a warm glow on everything it touched. The air would smell of freshly cut grass, and yet, the thing that always anchored me in that moment was the scent of cake baking in the oven. It wasn’t the typical chocolate or sponge that you would expect, but a simple, fruity cake—a cake that seemed to hold the sweetness of the summer itself. The gentle fragrance of yogurt and ripe peaches would fill the house, and no matter how much we had eaten earlier in the day, we would always find room for just one more slice.

I remember sitting at the kitchen table, eagerly awaiting the moment the cake would come out of the oven, still warm, golden and slightly crumbly. My grandmother would carefully slice it into generous pieces and pass it around. Every bite felt like a celebration, the cake melting in your mouth with the syrupy sweetness of peaches tucked underneath. It wasn’t just a dessert; it was an experience—one that wrapped us in warmth, nostalgia, and a sense of belonging.

As I grew older and moved away, I realized that there are certain flavors that hold the power to bring you back to the places and people you love. This cake became more than just a recipe; it became a symbol of those moments that will forever be etched in my heart. I started making it myself—sometimes just for a quiet evening, other times for family gatherings. With each slice, I felt a little closer to home, a little closer to those sweet memories.

The Simplicity That Speaks Volumes

This cake is simple. It doesn’t call for extravagant ingredients or time-consuming techniques. What makes it special is how its humble components work together. The combination of yogurt and sunflower oil creates a moist, tender base, while the peaches add just the right balance of sweetness. The crumble topping, made with cold butter, flour, and sugar, gives it a delightful crunch that contrasts beautifully with the soft texture of the cake beneath.

And yet, despite how easy it is to make, this cake is anything but ordinary. It’s a cake that, while simple, fills your home with warmth and a sense of nostalgia. It’s the kind of cake you can bake on a whim with ingredients you likely already have in your pantry, but still leaves a lasting impression on anyone who gets a slice.

Ingredients

Cake Batter:

IngredientAmount
Eggs2
Sugar2/5 cup (100 g)
Salt1 pinch
Sunflower oil2/5 cup (100 ml / 3.4 fl oz)
Yogurt3/4 cup (180 g)
All-purpose flour1.5 cups (220 g)
Baking powder1 teaspoon

Topping:

IngredientAmount
Peaches in syrupAbout 400 g (drained weight)
All-purpose flour2 tablespoons (50 g)
Sugar3 tablespoons (50 g)
Cold butter40 g (cut into small cubes)

Directions

  1. Prepare the cake batter: In a large mixing bowl, beat the eggs with sugar and a pinch of salt until light and frothy. Stir in the sunflower oil and yogurt. Gradually fold in the flour and baking powder until just combined and smooth.
  2. Assemble the base: Pour the cake batter into a greased or parchment-lined 9-inch (23 cm) springform pan or similar.
  3. Add the peaches: Slice the drained peaches and arrange them evenly over the top of the batter.
  4. Make the crumble topping: In a separate bowl, mix flour and sugar. Add the cold butter and rub with fingertips until it resembles coarse crumbs.
  5. Top and bake: Sprinkle the crumble mixture over the peaches. Bake in a preheated oven at 180°C (350°F) for 35–40 minutes or until the top is golden and a toothpick inserted into the cake comes out clean.
  6. Cool and serve: Let the cake cool slightly before slicing. Best served warm or at room temperature.

Nutritional Info (Per Serving – based on 10 slices)

NutrientAmount
Calories~280 kcal
Carbohydrates~32 g
Sugars~18 g
Protein~5 g
Fat~14 g
Saturated Fat~5 g
Fiber~1 g
Sodium~110 mg

A Cake for Every Occasion

There’s no need to wait for a special occasion to bake this cake. It’s perfect for any time you crave something comforting and sweet. Whether you’re hosting friends for afternoon tea, needing a simple dessert after dinner, or preparing a thoughtful gift for a loved one, this cake fits the bill.

Its versatility also makes it ideal for any time of the year. In summer, fresh peaches can take center stage, while during the colder months, canned peaches or even other fruits like pears or plums can be used. It’s a cake that adapts to your cravings and the season, making it a true year-round favorite.

The Power of Fruit in Desserts

The peaches in this cake play a crucial role. While they serve as a delicious topping, they also provide moisture and balance the sweetness of the cake. The syrupy peaches melt into the crumb, creating a harmonious texture that’s both rich and light at the same time.

Fresh fruit in desserts brings with it an incredible depth of flavor. The natural sugars of the fruit caramelize slightly in the oven, adding a richness that you simply can’t get from artificial sweeteners or syrups. Peaches, in particular, have a delicate sweetness that pairs beautifully with the tang of the yogurt in the cake batter, creating a perfect contrast of flavors.

Frequently Asked Questions (FAQs)

Can I use other fruits instead of peaches?

Absolutely! While peaches are the traditional choice, you can easily swap them out for other fruits. Pears, plums, or even apples work well in this recipe. You can also use berries like raspberries, blackberries, or blueberries, though you may need to adjust the sugar slightly depending on the sweetness of the fruit.

Can I make this cake ahead of time?

Yes! This cake actually tastes even better the day after it’s baked, as the flavors have had time to meld together. You can bake it the night before and store it in an airtight container. If you prefer it warm, simply reheat it in the oven at a low temperature for about 10 minutes.

Can I freeze this cake?

Yes, this cake freezes wonderfully. Let it cool completely, then wrap it tightly in plastic wrap or foil and place it in an airtight container. It will keep in the freezer for up to three months. When you’re ready to enjoy it, simply let it thaw at room temperature or reheat it in the oven.

What can I substitute for yogurt?

If you don’t have yogurt on hand or prefer a non-dairy option, you can substitute the yogurt with sour cream, buttermilk, or even a dairy-free yogurt alternative like almond or coconut yogurt. These options will provide the same moisture and slight tang that yogurt adds to the cake.

How can I make this cake gluten-free?

You can substitute the all-purpose flour with a gluten-free flour blend. Be sure to check that the flour blend you use has a good structure for cakes, or consider adding a bit of xanthan gum to help the texture. It’s also a good idea to check the other ingredients to ensure they’re gluten-free, like the baking powder.

Can I use margarine instead of butter for the topping?

Yes, margarine can be used in place of butter for the crumble topping. While butter gives a slightly richer flavor, margarine will still provide the crumbly texture you need for the topping.

The Simple Joy of Baking

What I love most about this cake is its ability to bring people together. It’s a recipe that doesn’t need to be fancy or over-complicated. It’s the kind of dessert that reminds you of the beauty of simplicity. It doesn’t need layers of frosting or intricate decoration—just the soft, comforting cake base, the syrupy peaches, and the buttery crumble topping. In a world where things can often feel rushed and overwhelming, this cake is a gentle reminder of how the simplest things can bring the most joy.

Each slice carries with it the power of memories, family, and time spent together. It’s a cake that invites conversation, a shared moment over a warm dessert. It’s not about impressing others with elaborate techniques, but about creating something that feels familiar, comforting, and timeless.

Conclusion: The Heart of the Home

Baking this cake is more than just a culinary act; it’s a way to reconnect with the past and create new memories. It’s a way to show love and care through the act of preparing something special for the people in your life. It’s a celebration of simple ingredients coming together to create something greater than the sum of its parts.

As you bake this cake, take a moment to enjoy the process. Watch as the dough rises, the peaches caramelize, and the crumble browns in the oven. Let it fill your home with the same warmth and comfort that I experienced all those years ago in my grandmother’s kitchen. And when you finally take that first bite, remember that this cake is more than just a treat. It’s a piece of home, a whisper of summer, and a timeless reminder of the power of good food and cherished memories.

Amal

Whispers of Summer: Cake That Melts in Your Mouth

Golden and soft with every bite, this cake is an invitation to savor the sweetness of summer. With a light yogurt batter and syrupy peaches nestled underneath a buttery crumble topping, this dessert is not only easy to make but absolutely unforgettable. It’s perfect for any occasion, from family gatherings to quiet evenings at home.
Prep Time 15 minutes
Cook Time 40 minutes
Total Time 1 hour
Servings: 8 -10 servings
Course: Dessert
Cuisine: American

Ingredients
  

  • 2 eggs
  • 100 g sugar about 2/5 cup
  • 1 pinch of salt
  • 100 ml sunflower oil about 2/5 cup
  • 180 g yogurt about 3/4 cup
  • 220 g all-purpose flour about 1.5 cups
  • 1 teaspoon baking powder
For the Topping:
  • 400 g peaches in syrup drained
  • 50 g all-purpose flour about 2 tablespoons
  • 50 g sugar about 3 tablespoons
  • 40 g cold butter cut into small cubes

Method
 

  1. Preheat the oven to 180°C (350°F). Grease or line a 9-inch (23 cm) springform pan with parchment paper.
  2. In a large mixing bowl, whisk the eggs with the sugar and a pinch of salt until the mixture is light and fluffy.
  3. Add the sunflower oil and yogurt, stirring until well combined.
  4. Gradually fold in the flour and baking powder until you have a smooth, thick batter.
  5. Pour the batter into the prepared pan, spreading it evenly.
  6. Slice the peaches and arrange them on top of the batter.
  7. In a small bowl, combine the flour and sugar for the topping. Add the cold butter and rub it in with your fingers until the mixture resembles coarse crumbs.
  8. Sprinkle the crumble mixture evenly over the peaches and cake batter.
  9. Bake for 35-40 minutes, or until the top is golden and a toothpick inserted into the cake comes out clean.
  10. Let the cake cool for a few minutes before slicing and serving. Enjoy it warm or at room temperature!

Notes

  • The cake is best enjoyed warm, but it can be stored in an airtight container for up to 3 days.
  • If you don’t have peaches, feel free to substitute with pears, plums, or berries.
  • For a twist, add a pinch of cinnamon to the crumble topping for extra flavor.
  • This cake can be made ahead of time and stored in the refrigerator, making it perfect for dinner parties or casual gatherings.
  • If you prefer a dairy-free option, substitute the yogurt with coconut yogurt and use a non-dairy butter.

Stay Connected

Get recipes via email: