A Taste of Home: The Magic of Cottage Cheese, Banana, and Cookie No-Bake Dessert

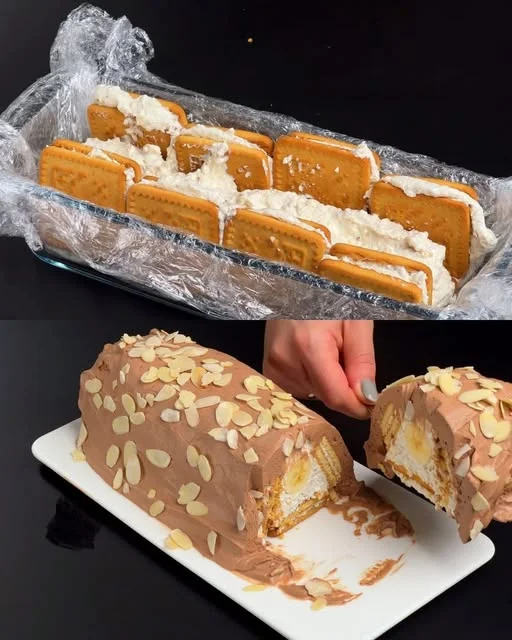
There’s something truly special about desserts that don’t require an oven. They remind me of my childhood summers when my grandmother would make the most delicious sweets without ever turning on the stove. One of my favorites was a simple, creamy, no-bake dessert made with cottage cheese, bananas, and butter cookies. It was effortless yet indulgent, the kind of treat that could bring comfort on the rainiest days or serve as the perfect ending to a family meal.

This dessert is more than just a combination of ingredients—it’s a nostalgic embrace, a reminder of the small joys that make life sweet. It’s perfect for those who crave something rich but don’t want the hassle of baking. Whether you’re making it for a family gathering, a quick treat for yourself, or a dessert to impress guests, this recipe delivers.

Now, let’s dive into what makes this dessert so special, from its health benefits to variations and frequently asked questions.

Why This Dessert Stands Out

No-Bake Simplicity

One of the biggest appeals of this dessert is its simplicity. You don’t need to be an expert baker or spend hours in the kitchen to create something delightful. A few ingredients, a blender, and a little patience while it chills in the fridge are all you need.

Balanced Flavors and Textures

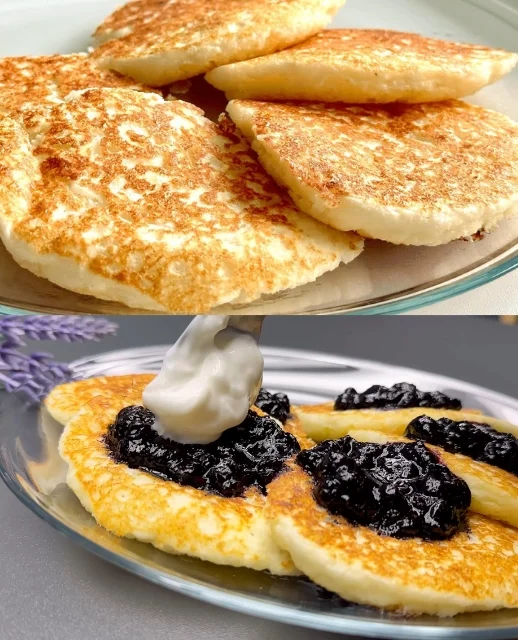
This dessert strikes the perfect balance between creamy, crunchy, and fruity. The cottage cheese mixture provides a rich, velvety base, the bananas add natural sweetness, and the cookies bring a satisfying crunch that softens slightly over time, blending beautifully with the other textures.

A Healthier Indulgence

Compared to traditional baked goods loaded with butter and refined flour, this no-bake treat is a lighter alternative. Cottage cheese is packed with protein and calcium, bananas offer natural sweetness and potassium, and dark chocolate (if used as a topping) brings antioxidants. While condensed milk does add some sugar, the overall nutritional profile is much better than many store-bought desserts.

Customizable to Your Taste

The beauty of this dessert is its versatility. Want a more tropical flavor? Add shredded coconut or a splash of coconut milk. Prefer a nutty crunch? Sprinkle chopped walnuts or almonds between the layers. Love a bit of spice? A dash of cinnamon can work wonders. You can easily tweak it to suit your preferences without compromising its deliciousness.

Ingredients

IngredientQuantity
Cottage cheese400 g
Sour cream5 tablespoons
Condensed milk150 g
Bananas2 (ripe)
Vanilla extract1 teaspoon
Butter cookies200 g
Dark chocolate50 g (for topping)

Directions

  1. Prepare the Base
    • Crush the butter cookies into small crumbs. You can use a food processor or place them in a ziplock bag and crush them with a rolling pin.
  2. Blend the Creamy Mixture
    • In a blender or food processor, combine the cottage cheese, sour cream, condensed milk, and vanilla extract. Blend until smooth and creamy.
  3. Layer the Dessert
    • In a serving dish or individual cups, place a layer of crushed cookies.
    • Slice the bananas thinly and add a layer on top of the cookies.
    • Pour a layer of the cottage cheese mixture over the bananas.
  4. Repeat and Chill
    • Continue layering until all ingredients are used, finishing with the creamy mixture on top.
    • Refrigerate for at least 2 hours to allow the flavors to meld.
  5. Final Touch
    • Melt the dark chocolate and drizzle it over the chilled dessert before serving.

Nutritional Information (Per Serving)

NutrientAmount (Approx.)
Calories280 kcal
Protein12 g
Carbohydrates35 g
Sugars20 g
Fats10 g
Fiber2 g

Health Benefits of Key Ingredients

Cottage Cheese: The Protein Powerhouse

Cottage cheese is often underrated in desserts, but it’s an excellent choice. It provides a creamy texture while being lower in fat than heavy cream. Plus, it’s packed with protein, making this dessert a more filling option compared to traditional puddings or cakes. It also contains calcium, which is essential for strong bones.

Bananas: Nature’s Sweetener

Bananas add natural sweetness, which means you don’t have to use excessive sugar. They also contain fiber, vitamins B6 and C, and potassium, which helps regulate blood pressure and muscle function. Additionally, bananas help create a smooth, pudding-like consistency when blended into the dessert.

Butter Cookies: A Comforting Crunch

While cookies may not be the healthiest ingredient, they bring nostalgia and texture to this dessert. Opt for whole grain or oat-based cookies for a slightly healthier twist, or even try using graham crackers for a similar effect.

Dark Chocolate: The Finishing Touch

If you choose to drizzle melted dark chocolate on top, you’re adding not just a delicious touch but also a dose of antioxidants. Dark chocolate has been linked to heart health, improved mood, and even brain function.

Creative Variations to Try

Chocolate Banana Bliss

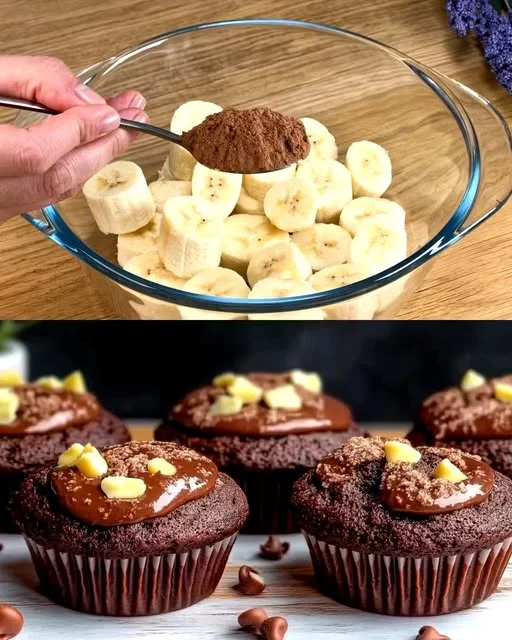
If you’re a chocolate lover, mix a tablespoon of cocoa powder into the cottage cheese mixture and add an extra layer of chocolate shavings between the banana slices. The result is a rich, mousse-like treat with a banana-chocolate harmony.

Berry Delight

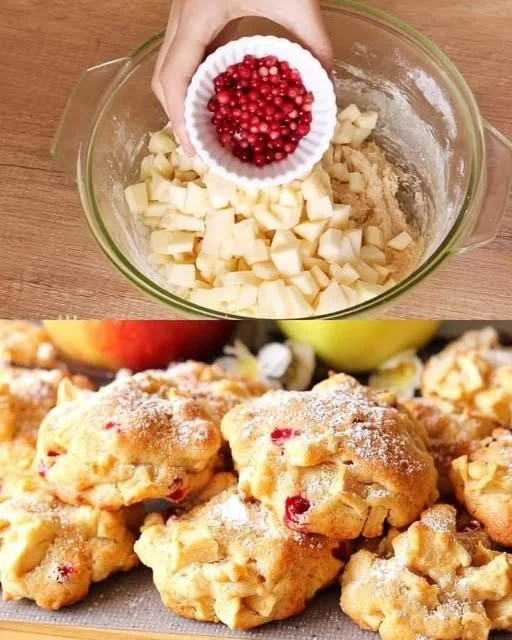
Swap bananas for mixed berries like strawberries, blueberries, or raspberries. The tartness of the berries balances the sweetness of the condensed milk beautifully. This version is also visually stunning, with pops of red and blue in every bite.
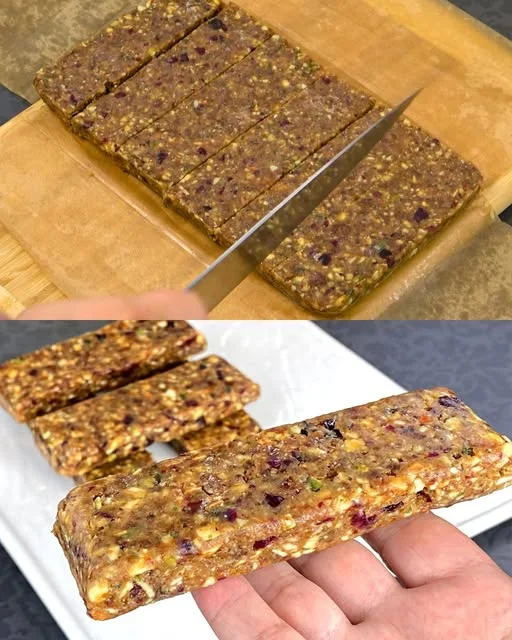
Nutty Indulgence

For a more decadent version, sprinkle crushed hazelnuts or almonds between the layers. A drizzle of almond or peanut butter on top can add an extra layer of flavor.

Coconut Dream

Replace some of the sour cream with coconut cream and add shredded coconut between the layers. This variation has a tropical feel that pairs beautifully with bananas.

Frequently Asked Questions

1. Can I make this dessert ahead of time?

Absolutely! In fact, it tastes even better after a few hours in the fridge, as the flavors meld together, and the cookies soften slightly. You can prepare it a day in advance and store it in the refrigerator until serving.

2. Can I use Greek yogurt instead of sour cream?

Yes! Greek yogurt is a great substitute for sour cream, offering the same tangy flavor with more protein and probiotics. It works just as well in this dessert.

3. What type of cookies work best for this recipe?

Butter cookies, graham crackers, or even ladyfingers work well. The key is to use a cookie that will soften slightly but still provide a bit of texture.

4. Is this dessert suitable for kids?

Definitely! It’s a fantastic treat for kids since it contains natural ingredients like bananas and cottage cheese. You can reduce the amount of condensed milk if you want to cut back on sugar.

5. How can I make this dessert vegan?

To make a vegan version, use plant-based cottage cheese, coconut cream instead of sour cream, and sweetened condensed coconut milk instead of regular condensed milk. Use vegan cookies and dark chocolate without dairy.

6. Can I freeze this dessert?

Yes, you can freeze it, though the texture may change slightly. If frozen, let it sit at room temperature for 10–15 minutes before eating for the best experience. It turns into a creamy frozen treat similar to ice cream.

Final Thoughts: A Dessert for Every Occasion

The beauty of this no-bake cottage cheese, banana, and cookie dessert is that it’s as simple as it is delicious. It’s proof that you don’t need fancy techniques or expensive ingredients to create something memorable. Whether it’s for a last-minute dinner party, a quick family dessert, or just a personal treat, this dish delivers comfort in every bite.

More than anything, this dessert is about joy. It’s about those quiet moments when you take a spoonful and let the flavors transport you to childhood memories, family gatherings, or simply a much-needed break from a busy day. So the next time you’re craving something sweet yet effortless, give this recipe a try—you might just find yourself making it over and over again.

Amal

A Taste of Home: The Magic of Cottage Cheese, Banana, and Cookie No-Bake Dessert

This no-bake cottage cheese, banana, and cookie dessert is a creamy, sweet, and refreshing treat that requires no oven time. Layers of smooth cottage cheese filling, ripe bananas, and crunchy cookies come together effortlessly for a dessert that’s both nostalgic and satisfying. Perfect for a quick family treat or an easy make-ahead dessert for any occasion!
Prep Time 10 minutes
Cook Time 2 hours
Total Time 2 hours 10 minutes
Servings: 4 servings
Course: Dessert
Cuisine: International

Ingredients
  

  • 400 g cottage cheese
  • 5 tablespoons sour cream
  • 150 g condensed milk
  • 2 ripe bananas sliced
  • 1 teaspoon vanilla extract
  • 200 g butter cookies crushed
  • 50 g dark chocolate melted (for topping)

Method
 

  1. Crush the cookies – Place the butter cookies in a food processor or a ziplock bag and crush them into small crumbs.
  2. Blend the creamy mixture – In a blender, combine cottage cheese, sour cream, condensed milk, and vanilla extract. Blend until smooth.
  3. Layer the dessert – In a serving dish or individual cups, start with a layer of crushed cookies, followed by a layer of sliced bananas, and then a layer of the cottage cheese mixture. Repeat until all ingredients are used, ending with the creamy layer on top.
  4. Chill – Cover and refrigerate for at least 2 hours to let the flavors meld.
  5. Finish with chocolate – Drizzle melted dark chocolate over the top before serving. Enjoy chilled!

Notes

  • For extra crunch, sprinkle chopped nuts between the layers.
  • Swap bananas for berries for a tangier version.
  • This dessert can be made a day ahead for even better flavor.
  • Store leftovers in the refrigerator for up to 2 days.

Zesty Orange Delight: A Quick and Fluffy Citrus Cake

There are some recipes that remind us of home—of warm kitchens, laughter, and the simple joy of baking. This Zesty Orange Cake is one of those. It’s not a complicated dessert; in fact, it’s one of the easiest cakes you’ll ever make. But what makes it special is the balance of flavors—the natural sweetness of fresh oranges, the creaminess of vanilla yogurt, and the light, airy texture that melts in your mouth.

This recipe takes me back to my childhood, where my grandmother would make a similar cake on lazy Sunday afternoons. She never believed in fancy, time-consuming desserts. For her, the best treats were made with simple ingredients—what she had in the kitchen that day. One egg, a little yogurt, and a fresh orange were all she needed to create something magical. I remember sitting by the window, watching the cake rise in the oven, the scent of citrus filling the entire house. When it was finally ready, she would brush the top with apricot jam and sprinkle it with coconut, giving it a golden, glossy finish that looked almost too pretty to eat.

Now, whenever I make this cake, I feel that same sense of warmth and nostalgia. It’s a recipe that proves you don’t need complicated ingredients or hours of work to create something delicious. Whether you’re baking for guests, looking for a quick afternoon treat, or simply craving something sweet, this orange cake is the perfect answer.

Why You’ll Love This Recipe

1. A Burst of Fresh Citrus Flavor

Oranges bring a bright, refreshing sweetness to this cake, making it light and vibrant with every bite.

2. Made with Simple, Everyday Ingredients

No need for fancy ingredients—just one egg, yogurt, and an orange create a soft, fluffy cake that’s ready in minutes.

3. Incredibly Easy and Quick to Make

With minimal prep time and no complicated techniques, this is a perfect recipe for beginner bakers or anyone short on time.

4. Soft, Moist, and Perfectly Balanced

Thanks to the yogurt and oil, this cake stays wonderfully soft and moist, while the orange zest adds just the right amount of brightness.

5. Versatile and Customizable

You can add chocolate chips, nuts, or even a drizzle of honey for an extra twist. The base recipe is so simple that you can easily make it your own.

Ingredients

IngredientAmount
Oranges3
Egg1 large
Sugar80 g (about ⅓ cup + 2 tbsp)
Vanilla sugar8 g (1 tsp)
Salt1 pinch
Sunflower oil80 ml (about ⅓ cup)
Vanilla yogurt150 g (about ½ cup)
All-purpose flour150 g (about 1¼ cups)
Baking powder9 g (1 tsp)
Apricot jamFor glazing
Grated coconutFor garnish
Mint leavesOptional, for garnish

Directions

1. Prepare the Oranges

  • Wash the oranges thoroughly and zest one of them.
  • Squeeze the juice from all three oranges and set aside.

2. Make the Batter

  • In a bowl, whisk the egg, sugar, vanilla sugar, and salt until light and fluffy.
  • Add the sunflower oil, vanilla yogurt, and orange juice, stirring until combined.
  • Sift in the flour and baking powder, mixing gently until a smooth batter forms.
  • Fold in the orange zest for extra citrus flavor.

3. Bake the Cake

  • Preheat the oven to 180°C (350°F).
  • Grease a cake pan or line it with parchment paper.
  • Pour the batter into the pan and bake for 25-30 minutes, or until a toothpick inserted in the center comes out clean.

4. Glaze and Garnish

  • While the cake is still warm, brush the top with apricot jam for a glossy finish.
  • Sprinkle with grated coconut and garnish with mint leaves if desired.

5. Serve and Enjoy

  • Let the cake cool slightly before slicing.
  • Serve warm or at room temperature with tea, coffee, or a dollop of whipped cream.

Nutritional Information (Per Serving, Approx.)

NutrientAmount
Calories~180
Protein~3 g
Carbohydrates~25 g
Fat~7 g
Sugar~12 g

Frequently Asked Questions

1. Can I Use a Different Type of Yogurt?

Yes! While vanilla yogurt adds a mild sweetness, you can use plain yogurt, Greek yogurt, or even citrus-flavored yogurt for extra tanginess.

2. Can I Make This Cake Without an Oven?

Yes! You can bake this cake in an air fryer at 160°C (320°F) for about 20-25 minutes or even in a stovetop pan over low heat with a lid for 30-35 minutes. Just check for doneness with a toothpick.

3. Can I Replace the Sugar with Honey or a Sugar Substitute?

Absolutely. Honey, maple syrup, or coconut sugar can be used instead of white sugar, but this may slightly change the texture and moisture level of the cake.

4. How Can I Make This Cake More Moist?

This cake is already soft and fluffy, but if you want an even more tender crumb, try:

  • Adding an extra tablespoon of yogurt.
  • Replacing half of the oil with melted butter for a richer flavor.
  • Using cake flour instead of all-purpose flour for a finer texture.

5. Can I Make This Cake Gluten-Free?

Yes! Swap out the all-purpose flour for a 1:1 gluten-free baking blend. The texture may be slightly different, but the cake will still be delicious.

6. What Can I Use Instead of Apricot Jam for Glazing?

If you don’t have apricot jam, you can use:

  • Orange marmalade for an extra citrus boost.
  • A simple glaze made of powdered sugar and orange juice.
  • A drizzle of honey for a naturally sweet finish.

7. How Long Does This Cake Stay Fresh?

  • At room temperature: Up to 3 days, stored in an airtight container.
  • In the refrigerator: Up to 5 days (but let it come to room temperature before serving).
  • In the freezer: Up to 3 months. Wrap slices individually and thaw when needed.

8. Can I Add Nuts or Chocolate to This Cake?

Yes! Chopped walnuts, almonds, or chocolate chips make great additions. Just fold them into the batter before baking.

9. Can I Use a Different Oil?

Yes! Sunflower oil works well, but you can substitute it with vegetable oil, melted coconut oil, or light olive oil for a different flavor profile.

10. What’s the Best Way to Serve This Cake?

This cake is delicious on its own, but you can elevate it by:

  • Serving it with a dollop of whipped cream or Greek yogurt.
  • Pairing it with a cup of tea or coffee.
  • Adding fresh orange slices on top for decoration.

The Health Benefits of This Citrus Cake

This cake isn’t just delicious—it’s also packed with natural goodness:

Oranges: A Boost of Vitamin C

Fresh oranges provide a natural source of vitamin C, which helps support the immune system and promotes healthy skin.

Yogurt: A Natural Moisturizer for Cakes

Yogurt adds moisture and creaminess while providing probiotics that aid digestion.

Sunflower Oil: A Heart-Healthy Fat

Unlike butter, sunflower oil keeps the cake light while adding beneficial unsaturated fats.

Coconut: A Nutrient-Rich Garnish

Grated coconut not only adds a touch of sweetness but also contains fiber and healthy fats.

Tips for the Perfect Orange Cake

  • Use Freshly Squeezed Orange Juice – Bottled juice won’t have the same bright, natural citrus flavor.
  • Don’t Skip the Zest – Orange zest enhances the overall aroma and taste of the cake.
  • Let It Cool Before Glazing – A warm cake will absorb the jam too quickly, making it less glossy.
  • Sift the Flour – This prevents lumps and ensures a smooth, airy batter.
  • Adjust the Sweetness – If you prefer a more citrusy, less sweet cake, reduce the sugar slightly and add an extra teaspoon of orange juice.

Conclusion: A Cake That Feels Like Sunshine

This Zesty Orange Cake is proof that the simplest ingredients can create something truly special. With just one egg, yogurt, and an orange, you can whip up a fluffy, golden cake that tastes like sunshine on a plate.

It’s a dessert that brings joy—not just because it’s easy to make, but because it carries the warmth of homemade baking. Whether you’re making it for family, friends, or just for yourself, every bite is a reminder that the best recipes are the ones that make you smile.

So, the next time you’re looking for a quick and delightful treat, give this orange cake a try. It’s a little slice of happiness, ready in minutes!

Amal

Zesty Orange Delight: A Quick and Fluffy Citrus Cake

If you have an orange, some yogurt, and one egg, you can make this incredibly soft and flavorful Zesty Orange Cake in just minutes! With a light and fluffy texture, a refreshing citrus aroma, and a touch of sweetness, this cake is the perfect treat for breakfast, dessert, or an afternoon snack. Topped with a glossy apricot jam glaze and a sprinkle of coconut, it’s both simple and irresistibly delicious!
Prep Time 10 minutes
Cook Time 25 minutes
Total Time 35 minutes
Servings: 6 servings
Course: Dessert
Cuisine: International

Ingredients
  

  • 3 oranges zested and juiced
  • 1 large egg
  • 80 g sugar about ⅓ cup + 2 tbsp
  • 8 g vanilla sugar 1 tsp
  • 1 pinch of salt
  • 80 ml sunflower oil about ⅓ cup
  • 150 g vanilla yogurt about ½ cup
  • 150 g all-purpose flour about 1 ¼ cups
  • 9 g baking powder 1 tsp
  • Apricot jam for glazing
  • Grated coconut for garnish
  • Mint leaves optional, for garnish

Method
 

  1. Prepare the Oranges
  2. Wash and zest one orange.
  3. Squeeze the juice from all three oranges and set aside.
  4. Make the Batter
  5. In a bowl, whisk the egg, sugar, vanilla sugar, and salt until light and fluffy.
  6. Add the sunflower oil, yogurt, and orange juice. Stir until combined.
  7. Sift in the flour and baking powder, mixing gently until smooth.
  8. Fold in the orange zest for extra flavor.
  9. Bake the Cake
  10. Preheat the oven to 180°C (350°F).
  11. Grease a cake pan or line it with parchment paper.
  12. Pour the batter into the pan and bake for 25-30 minutes, or until a toothpick inserted in the center comes out clean.
  13. Glaze and Garnish
  14. While the cake is still warm, brush the top with apricot jam for a glossy finish.
  15. Sprinkle with grated coconut and garnish with mint leaves if desired.
  16. Serve and Enjoy
  17. Let the cake cool slightly before slicing.
  18. Serve warm or at room temperature with tea, coffee, or fresh fruit.

Notes

  • Use freshly squeezed orange juice for the best flavor.
  • For extra moisture, add an additional tablespoon of yogurt.
  • Store the cake in an airtight container at room temperature for up to 3 days or refrigerate for up to a week.
  • You can freeze the cake for up to 3 months; just thaw before serving.

Heavenly Condensed Milk Cupcakes: Soft, Sweet, and Irresistible

Some desserts have the power to transport you back to childhood, to a time when the simple pleasure of a homemade treat felt like the most magical thing in the world. For me, these Condensed Milk Cupcakes are one of those special recipes.

I remember the first time I watched my grandmother make them. She didn’t use fancy equipment or complicated techniques—just a mixing bowl, a wooden spoon, and a warm oven. I would sit at the kitchen counter, eagerly waiting for the scent of butter and vanilla to fill the room. When the cupcakes came out of the oven, golden and warm, she would sprinkle them with powdered sugar and hand me one before they had even cooled. That first bite was always the best—soft, slightly sweet, with a melt-in-your-mouth texture that made me close my eyes and savor every moment.

Now, whenever I bake these cupcakes, I’m reminded of those afternoons in my grandmother’s kitchen. They’re simple yet special, easy enough for a weekday treat but elegant enough for celebrations. If you love soft, buttery cakes with a hint of caramel-like sweetness from condensed milk, this recipe will quickly become one of your favorites.

Why You’ll Love These Cupcakes

1. Soft, Moist, and Perfectly Sweet

Thanks to the richness of condensed milk and butter, these cupcakes have a delicate crumb that stays soft for days.

2. Easy to Make with Simple Ingredients

No complicated steps, no unusual ingredients—just a few pantry staples and a little mixing, and you’ll have bakery-quality cupcakes in no time.

3. Great for Any Occasion

Whether you need a quick dessert for a party, an after-school treat, or a companion for your morning coffee, these cupcakes fit the bill.

4. Customizable and Versatile

Add chocolate chips, nuts, dried fruit, or even a drizzle of caramel to personalize your cupcakes. You can also top them with frosting for a more decadent version.

5. A Nostalgic, Classic Flavor

The combination of butter, eggs, and condensed milk creates a taste reminiscent of traditional homemade cakes—comforting, rich, and absolutely delightful.

Ingredients

IngredientAmount
Butter (softened)100 g
Condensed Milk1 can (380 g)
Eggs4 large
All-purpose Flour250 g
Baking Powder10 teaspoons
SaltA pinch
Raisins (optional)50 g
Chocolate or powdered sugarFor topping (optional)

Directions

1. Prepare the Batter

  • In a mixing bowl, beat the softened butter until creamy.
  • Add the condensed milk and mix until well combined.
  • Incorporate the eggs one at a time, beating after each addition.

2. Mix the Dry Ingredients

  • In a separate bowl, sift together the flour, baking powder, and salt.
  • Gradually add the dry ingredients to the wet mixture, stirring until smooth.
  • If using, fold in the raisins.

3. Bake the Cupcakes

  • Preheat the oven to 180°C (350°F).
  • Line a muffin tin with cupcake liners and fill each about ¾ full with batter.
  • Bake for 20-25 minutes, or until a toothpick inserted in the center comes out clean.

4. Add the Finishing Touch

  • Let the cupcakes cool completely.
  • Dust with powdered sugar or drizzle with melted chocolate for extra indulgence.

Nutritional Information (Per Cupcake, Approx.)

NutrientAmount
Calories~230
Protein~5 g
Carbohydrates~30 g
Fat~10 g
Sugar~15 g

Frequently Asked Questions

1. Can I Use Sweetened Condensed Milk Instead of Sugar?

Yes! This recipe is specifically designed to use condensed milk as the main sweetener, which gives the cupcakes their unique texture and flavor. No additional sugar is needed.

2. Why Are My Cupcakes Dense Instead of Fluffy?

  • Overmixing the batter can lead to dense cupcakes. Stir just until the ingredients are combined.
  • Make sure your baking powder is fresh, as old baking powder can prevent proper rising.
  • Room temperature ingredients (especially eggs and butter) help create a light texture.

3. Can I Make These Cupcakes Without Butter?

Yes, you can substitute the butter with an equal amount of vegetable oil for a slightly different texture. Oil will make the cupcakes more moist but slightly less rich in flavor.

4. How Do I Store These Cupcakes?

  • Store them in an airtight container at room temperature for up to 3 days.
  • For longer storage, refrigerate for up to 1 week or freeze for up to 3 months. Simply thaw at room temperature before serving.

5. Can I Turn This Recipe Into a Cake?

Absolutely! Pour the batter into a greased and floured cake pan and bake at 180°C (350°F) for 30-35 minutes, or until a toothpick inserted in the center comes out clean.

6. What Toppings Work Best for These Cupcakes?

These cupcakes are delicious on their own, but if you want to add something extra, try:

  • A dusting of powdered sugar for a classic finish
  • A drizzle of melted chocolate or caramel
  • A simple buttercream or cream cheese frosting
  • A sprinkle of chopped nuts or shredded coconut

7. Are These Cupcakes Very Sweet?

Despite using condensed milk, these cupcakes are not overwhelmingly sweet. They have a balanced flavor that pairs well with both sweet and slightly tangy toppings like fresh berries.

8. Can I Add Fillings to These Cupcakes?

Yes! You can fill them with jam, caramel, or even a spoonful of Nutella before baking for a delicious surprise inside.

9. How Can I Make These Cupcakes Extra Light and Airy?

For a lighter texture, you can:

  • Separate the eggs and whip the egg whites until fluffy before folding them into the batter.
  • Sift the flour before adding it to the mixture to avoid lumps and create a smoother batter.

10. Can I Use Whole Wheat Flour Instead of All-Purpose Flour?

Yes, but the texture will be slightly denser. If using whole wheat flour, try substituting only half of the flour to maintain a soft crumb.

The Magic of Condensed Milk in Baking

Condensed milk is a wonderful ingredient in baking because it adds natural sweetness and a creamy texture without the need for additional sugar or milk. It also contributes to a rich, caramel-like flavor that enhances the depth of the cake.

Unlike granulated sugar, which simply dissolves, condensed milk binds ingredients together, creating a smooth batter that bakes into a soft, moist crumb. It’s a baker’s secret for achieving the perfect balance of tenderness and structure in cakes, cookies, and even frostings.

Tips for the Best Condensed Milk Cupcakes

  • Use Softened Butter – This helps create a smooth, evenly mixed batter. If the butter is too cold, the cupcakes may turn out dense.
  • Don’t Overmix the Batter – Overmixing can make the cupcakes tough. Stir just until everything is combined.
  • Bake Until Golden – The cupcakes should be golden on top with a slight dome. Overbaking can dry them out.
  • Let Them Cool Completely – Allow the cupcakes to cool before adding toppings or storing them to maintain their texture.
  • Experiment with Flavors – Add citrus zest, almond extract, or even a pinch of cinnamon for a fun twist.

Conclusion: A Sweet Treat Worth Making Again and Again

There’s something truly special about a simple cupcake made with love. These Condensed Milk Cupcakes prove that you don’t need complicated ingredients or hours of effort to create a dessert that’s soft, flavorful, and absolutely delightful.

Whether you’re baking them for a celebration, a family treat, or just because you crave something sweet, this recipe is guaranteed to impress. The balance of richness from the butter, sweetness from the condensed milk, and the perfect fluffy crumb makes these cupcakes a must-try.

So, preheat your oven, gather your ingredients, and enjoy the process of baking something wonderful. Because the best recipes aren’t just about taste—they’re about the joy they bring with every bite.

Amal

Heavenly Condensed Milk Cupcakes: Soft, Sweet, and Irresistible

These Condensed Milk Cupcakes are incredibly soft, moist, and perfectly sweet! Made with simple ingredients, they have a rich, buttery flavor with a hint of caramel-like sweetness from the condensed milk. They are quick to prepare and perfect for any occasion—whether as a treat with coffee, a delightful dessert, or a lunchbox snack. Top them with powdered sugar or melted chocolate for an extra indulgence!
Prep Time 10 minutes
Cook Time 25 minutes
Total Time 35 minutes
Servings: 12 cupcakes
Course: Dessert
Cuisine: International

Ingredients
  

  • 100 g butter softened at room temperature
  • 1 can 380 g condensed milk
  • 4 large eggs
  • 250 g all-purpose flour
  • 10 teaspoons baking powder
  • A pinch of salt
  • 50 g raisins optional
  • Chocolate or powdered sugar for topping optional

Method
 

  1. Prepare the Batter
  2. In a mixing bowl, beat the softened butter until creamy.
  3. Add the condensed milk and mix well.
  4. Beat in the eggs one at a time until fully incorporated.
  5. Mix the Dry Ingredients
  6. In a separate bowl, sift together the flour, baking powder, and salt.
  7. Gradually add the dry ingredients to the wet mixture, stirring until smooth.
  8. If using, fold in the raisins.
  9. Bake the Cupcakes
  10. Preheat the oven to 180°C (350°F).
  11. Line a muffin tin with cupcake liners and fill each about ¾ full with batter.
  12. Bake for 20-25 minutes, or until a toothpick inserted into the center comes out clean.
  13. Cool and Serve
  14. Let the cupcakes cool completely before adding toppings.
  15. Dust with powdered sugar or drizzle with melted chocolate for extra flavor.

Notes

  • To ensure a light and fluffy texture, avoid overmixing the batter.
  • For a citrusy twist, add a teaspoon of lemon or orange zest to the batter.
  • Store in an airtight container at room temperature for up to 3 days or refrigerate for up to a week.
  • These cupcakes can be frozen for up to 3 months—just thaw before serving.

Crispy & Flavorful: The Ultimate Vegan Cabbage Fritters

Growing up, cabbage wasn’t exactly my favorite vegetable. It was always boiled, stewed, or added to soups—never something that truly excited me. That all changed the day I discovered cabbage fritters.

One evening, I was craving something crispy and savory but also wanted to make something simple with the ingredients I had on hand. I shredded some cabbage, mixed it with a few pantry staples, and pan-fried the mixture into golden fritters. The result? A crispy, flavorful dish that transformed my perception of cabbage forever.

These vegan cabbage fritters have since become a staple in my kitchen. They are not only incredibly easy to make but also packed with nutrients and flavor. They are crispy on the outside, tender on the inside, and seasoned just right with turmeric and black pepper. The best part? They don’t require eggs or dairy—flax seeds do the job perfectly!

Now, every time I make them, I remember that night when I first fell in love with cabbage in a whole new way. If you’ve never tried cabbage fritters, this recipe will convince you that cabbage is far from boring.


Why You’ll Love This Recipe

1. Crispy and Delicious with Minimal Effort

These fritters come together in minutes and are pan-fried to golden perfection, making them an easy go-to recipe when you want something quick yet satisfying.

2. Healthy and Nutrient-Packed

Cabbage and carrots are full of fiber, vitamins, and antioxidants, while flax seeds add omega-3s and extra protein.

3. Vegan and Allergy-Friendly

Made without eggs, dairy, or nuts, these fritters are completely plant-based and suitable for those with dietary restrictions.

4. Perfect for Any Meal

Enjoy them as a snack, side dish, or even as a main meal with a fresh salad and a dipping sauce.

5. Customizable to Your Taste

You can easily adjust the seasonings, add herbs, or experiment with different vegetables to make them your own.

Ingredients

IngredientAmount
Flax seeds2 tbsp
Water7 tbsp
Cabbage (shredded)500g (about 4 cups)
Carrots (shredded)200g (about 2 cups)
All-purpose flour2 tbsp
Baking powder1 tsp
Turmeric1 tsp
SaltTo taste
Black pepper (optional)To taste
Olive oil (for frying)As needed

Directions

1. Prepare the Flax Egg

  • In a small bowl, mix the flax seeds with water. Let sit for 10 minutes until thickened.

2. Combine Ingredients

  • In a large bowl, mix shredded cabbage, carrots, flour, baking powder, turmeric, salt, and pepper.
  • Add the flax egg and mix until everything is well combined.

3. Cook the Fritters

  • Heat a pan over medium heat with a little olive oil.
  • Scoop small portions of the mixture into the pan, flattening them slightly.
  • Cook for 3-4 minutes per side until golden brown and crispy.

4. Serve and Enjoy

  • Transfer to a plate lined with paper towels to remove excess oil.
  • Serve warm with your favorite dipping sauce or as a side dish.

Nutritional Information (Per Fritter, Approx.)

NutrientAmount
Calories~80
Protein~2g
Carbohydrates~10g
Fat~3g
Fiber~3g

Frequently Asked Questions

1. Can I Use a Different Flour?

Yes! If you want a gluten-free version, swap the all-purpose flour for chickpea flour or oat flour. Chickpea flour will also add extra protein and flavor.

2. Do I Have to Use Flax Seeds?

Flax seeds act as a binder in place of eggs, but if you don’t have them, you can substitute them with chia seeds or use a small mashed potato to help hold everything together.

3. How Do I Make the Fritters Extra Crispy?

  • Make sure to squeeze out any excess moisture from the cabbage before mixing the ingredients.
  • Cook on medium-high heat so the fritters crisp up without absorbing too much oil.
  • Don’t overcrowd the pan—cook in batches for even crispiness.

4. Can I Bake These Instead of Frying?

Yes! If you prefer a lower-oil option, bake the fritters at 375°F (190°C) for 20-25 minutes, flipping halfway through. They won’t be as crispy as pan-fried ones but will still be delicious.

5. How Do I Store and Reheat Leftovers?

  • Store leftover fritters in an airtight container in the refrigerator for up to 3 days.
  • Reheat in a pan over medium heat or in an oven at 350°F (175°C) for about 10 minutes to restore crispiness.

6. Can I Freeze Cabbage Fritters?

Yes! Freeze them in a single layer on a baking sheet, then transfer them to a freezer-safe bag. To reheat, bake straight from frozen at 375°F (190°C) for 15-20 minutes.

7. What Can I Serve with Cabbage Fritters?

These fritters taste amazing on their own, but here are a few serving ideas:

  • Dipping sauces: Try tahini sauce, vegan sour cream, or a simple yogurt-based dip.
  • Salads: Pair them with a fresh cucumber and tomato salad.
  • Grains: Serve with quinoa or brown rice for a more filling meal.

The Health Benefits of Cabbage Fritters

These fritters aren’t just tasty—they’re also a nutritious addition to your diet. Here’s why:

Cabbage: A Superfood in Disguise

Cabbage is packed with fiber, vitamin C, and antioxidants, making it excellent for digestion and immune health. It’s also low in calories but high in volume, keeping you full without weighing you down.

Carrots: A Boost of Beta-Carotene

Carrots add natural sweetness and a boost of beta-carotene, which is essential for eye health and skin protection.

Flax Seeds: A Vegan Nutritional Powerhouse

Flax seeds are rich in omega-3 fatty acids, fiber, and plant-based protein. They also work as a natural egg substitute, helping bind the fritters together.

Turmeric: A Natural Anti-Inflammatory Spice

Turmeric not only gives these fritters a beautiful golden color but also has powerful anti-inflammatory and antioxidant properties.

Tips for the Best Cabbage Fritters

  • Finely Shred the Cabbage – The finer the cabbage, the better the fritters hold together. Use a food processor or a sharp knife for best results.
  • Let the Flax Egg Sit – Allow the flax seeds and water to thicken for at least 10 minutes before adding them to the batter.
  • Don’t Skip the Salt – Salt helps draw out excess moisture from the cabbage, making the fritters crispier.
  • Use a Non-Stick Pan – This ensures the fritters cook evenly and don’t stick.
  • Experiment with Spices – Try adding cumin, garlic powder, or smoked paprika for extra depth of flavor.

Conclusion: A Game-Changer for Cabbage Lovers

Cabbage is often underrated, but these vegan cabbage fritters prove just how delicious it can be. Crispy, flavorful, and packed with nutrients, they are an easy way to turn simple ingredients into a satisfying meal.

Whether you’re looking for a plant-based snack, a creative way to use up extra cabbage, or a dish that’s both healthy and indulgent, these fritters are the answer. Once you try them, you’ll never think of cabbage as boring again!

So next time you’re in the mood for something crispy and comforting, give these cabbage fritters a try—you won’t regret it!

Amal

Crispy & Flavorful: The Ultimate Vegan Cabbage Fritters

These Vegan Cabbage Fritters are crispy on the outside, tender on the inside, and packed with flavor! Made with simple ingredients like cabbage, carrots, and flax seeds, they’re a delicious plant-based alternative to traditional fritters. Whether served as a snack, side dish, or light meal, these fritters are easy to make, naturally gluten-free, and full of nutrients.
Prep Time 15 minutes
Cook Time 15 minutes
Total Time 30 minutes
Servings: 10 fritters
Course: Snack
Cuisine: Vegetarian

Ingredients
  

  • 2 tbsp flax seeds
  • 7 tbsp water
  • 500 g cabbage shredded (about 4 cups)
  • 200 g carrots shredded (about 2 cups)
  • 2 tbsp all-purpose flour or chickpea flour for gluten-free
  • 1 tsp baking powder
  • 1 tsp turmeric
  • Salt to taste
  • Black pepper to taste (optional)
  • Olive oil for frying

Method
 

  1. Prepare the Flax Egg
  2. In a small bowl, mix the flax seeds with water. Let sit for 10 minutes until thickened.
  3. Mix the Ingredients
  4. In a large bowl, combine shredded cabbage, carrots, flour, baking powder, turmeric, salt, and black pepper.
  5. Add the flax egg and mix well until everything is evenly coated.
  6. Cook the Fritters
  7. Heat a pan over medium heat and add a little olive oil.
  8. Scoop small portions of the mixture into the pan, flattening them slightly.
  9. Cook for 3-4 minutes on each side, until golden brown and crispy.
  10. Serve and Enjoy
  11. Remove from the pan and place on a paper towel to absorb excess oil.
  12. Serve warm with your favorite dipping sauce, such as vegan yogurt, tahini dressing, or a garlic aioli.

Notes

  • If the mixture is too wet, add a little more flour to help bind the fritters.
  • For an oil-free version, bake at 375°F (190°C) for 20-25 minutes, flipping halfway through.
  • Store leftovers in the fridge for up to 3 days or freeze for up to 3 months. Reheat in a pan or oven for best results.

Crispy on the Outside, Fluffy on the Inside: The Perfect Homemade Waffle Recipe

Some of the best mornings start with the comforting smell of waffles cooking in the kitchen. Growing up, waffles weren’t just a breakfast staple—they were a weekend tradition. I remember waking up to the sound of my mom pouring batter onto the hot waffle iron, the sizzle of golden perfection forming right before my eyes. It wasn’t just about the food; it was about the ritual.

As a child, I loved the anticipation of waiting for the waffle maker to beep, signaling that a warm, crispy treat was ready. The moment I lifted the lid and saw the beautifully golden grid, I knew it was going to be a good day. Whether we topped them with fresh fruit, drizzled syrup over every square, or kept it simple with powdered sugar, each waffle was a small masterpiece.

Now, as an adult, I realize that homemade waffles hold something special that store-bought or frozen ones never could—freshness, warmth, and the joy of creating something from scratch. If you’ve never made waffles at home before, this recipe will convince you to buy a waffle maker. They are crispy on the outside, soft and airy inside, and incredibly easy to prepare. Once you try them, you’ll never go back to store-bought waffles again.

Why You’ll Love This Recipe

1. The Perfect Texture

These waffles strike the ideal balance—crispy edges with a soft and fluffy center. They hold up beautifully to syrups, spreads, and toppings without becoming soggy.

2. Simple Ingredients, Incredible Flavor

No complicated ingredients are needed—just pantry staples like eggs, milk, flour, and a hint of vanilla to bring out the best flavors.

3. Quick and Easy to Make

With minimal prep time, these waffles can be ready in under 30 minutes. A perfect breakfast solution for busy mornings or relaxed weekend brunches.

4. Better Than Store-Bought

Unlike frozen waffles, which can taste bland and rubbery, these homemade waffles have a rich, buttery taste that melts in your mouth.

5. Customizable to Your Taste

This waffle recipe is a blank canvas. You can add chocolate chips, fresh berries, cinnamon, or even swap out ingredients for a healthier version.

Ingredients

IngredientAmount
Eggs2
Granulated sugar4 tablespoons
SaltA pinch
Oil¼ cup
Milk1 cup
Baking powder1 package (10g or 2 tsp)
Vanilla extract1 package (or 1 tsp)
All-purpose flour1 ½ cups (180g)

Directions

1. Prepare the Batter

  • In a bowl, beat the eggs, sugar, and salt until light and fluffy.
  • Add the oil, milk, baking powder, vanilla extract, and flour. Mix until smooth and lump-free.

2. Heat the Waffle Maker

  • Preheat your waffle maker according to the manufacturer’s instructions.
  • Lightly grease with oil or butter if needed.

3. Cook the Waffles

  • Pour a ladleful of batter into the waffle maker, ensuring an even spread.
  • Close the lid and cook for about 3-5 minutes, or until golden brown and crispy.

4. Serve and Enjoy

  • Remove the waffle and repeat with the remaining batter.
  • Serve warm with syrup, fruit, whipped cream, or your favorite toppings!

Nutritional Information (Per Waffle)

NutrientAmount
Calories~220
Protein~5g
Carbohydrates~30g
Fat~9g
Sugar~8g

Frequently Asked Questions

1. What’s the Secret to Making Waffles Extra Crispy?

A few tricks can help achieve that perfect crispy texture:

  • Use oil instead of butter in the batter. Butter adds flavor but can make waffles softer. Oil keeps them crisp.
  • Preheat the waffle iron properly. A hot waffle iron ensures an evenly cooked, crispy waffle.
  • Don’t stack freshly made waffles. Placing them on a wire rack instead of a plate prevents steam from softening them.

2. Can I Use a Pancake Mix Instead of Making the Batter from Scratch?

Yes, but making your own batter is worth the extra effort. Pancake batter is slightly different from waffle batter—waffle batter typically contains more fat and eggs, giving it a richer texture. If you use pancake mix, add a little extra oil or butter for better results.

3. Can I Make the Batter in Advance?

Absolutely! The batter can be prepared the night before and stored in the refrigerator. Just give it a quick stir before using, as some ingredients may settle overnight.

4. How Do I Keep Waffles Warm While Making Multiple Batches?

If you’re making waffles for a crowd, keep them warm by placing them in a single layer on a baking sheet in a 200°F (95°C) oven. This keeps them crispy while you finish cooking the rest.

5. Can I Freeze Homemade Waffles?

Yes! Allow the waffles to cool completely, then place them in a ziplock bag with parchment paper between each waffle to prevent sticking. When ready to eat, reheat them in a toaster or oven for a crisp, fresh-out-of-the-waffle-maker taste.

6. What Toppings Go Well with These Waffles?

The possibilities are endless! Some great options include:

  • Classic: Maple syrup, butter, and powdered sugar
  • Fruity: Fresh berries, banana slices, or fruit compote
  • Indulgent: Chocolate chips, Nutella, or whipped cream
  • Savory: Fried eggs, bacon, or a sprinkle of cheese for a twist

7. What’s the Best Type of Waffle Maker to Use?

Any waffle maker will work, but Belgian waffle makers create thicker, crispier waffles with deep pockets—perfect for holding syrup and toppings. If you prefer thinner waffles, a classic waffle maker is a great choice.

8. Can I Make This Recipe Dairy-Free?

Yes! Simply replace the milk with almond milk, oat milk, or coconut milk. You can also swap the oil for melted coconut oil for a dairy-free version.

9. What’s the Difference Between Belgian Waffles and Regular Waffles?

Belgian waffles are thicker, have deeper pockets, and are typically crispier due to a different batter consistency. This recipe works for both types of waffle makers.

10. Can I Make These Waffles Gluten-Free?

Yes! Use a 1:1 gluten-free flour blend in place of regular flour, and ensure your baking powder is gluten-free. The waffles will still turn out light and fluffy.

Tips for the Best Homemade Waffles

  • Preheat the Waffle Maker – A fully heated waffle iron ensures the waffles cook evenly and become crispy.
  • Don’t Overmix the Batter – Mix just until combined; overmixing can make waffles dense and tough.
  • Use a Ladle for Even Portions – Pouring the batter with a ladle ensures consistent waffle sizes and prevents overflow.
  • Let the Waffles Rest for a Minute Before Serving – This helps them firm up and develop a crispier texture.

Conclusion: The Waffle Recipe That Will Change Your Mornings

Waffles are more than just breakfast—they are a treat, a tradition, and a reason to gather around the table with family and friends. Once you try these homemade waffles, you’ll never settle for frozen ones again. They’re quick, easy, and infinitely better than anything store-bought.

So, if you don’t already own a waffle maker, now might be the time to get one. With this recipe in your hands, every morning can start with the warm, golden crispiness of freshly made waffles. Top them with your favorites, grab a fork, and enjoy a breakfast that feels like a special occasion—because every day deserves a little extra sweetness.

Amal

Crispy on the Outside, Fluffy on the Inside: The Perfect Homemade Waffle Recipe

These homemade waffles are everything you could want—crispy on the outside, light and airy inside, and incredibly easy to make! Perfect for breakfast or brunch, they pair beautifully with syrup, fresh fruit, or a dusting of powdered sugar. Once you try this recipe, you’ll never go back to store-bought waffles again!
Prep Time 10 minutes
Cook Time 15 minutes
Total Time 25 minutes
Servings: 6 waffles
Course: Breakfast
Cuisine: International

Ingredients
  

  • 2 eggs
  • 4 tablespoons granulated sugar
  • A pinch of salt
  • ¼ cup oil
  • 1 cup milk
  • 1 package baking powder 10g or 2 tsp
  • 1 package vanilla or 1 tsp vanilla extract
  • 1 ½ cups 180g all-purpose flour

Method
 

  1. Prepare the Batter
  2. In a mixing bowl, beat the eggs, sugar, and salt until light and fluffy.
  3. Add the oil, milk, baking powder, vanilla, and flour. Stir until smooth and lump-free.
  4. Heat the Waffle Maker
  5. Preheat your waffle maker according to the manufacturer’s instructions.
  6. Lightly grease with oil or butter if needed.
  7. Cook the Waffles
  8. Pour a ladleful of batter into the waffle maker, spreading it evenly.
  9. Close the lid and cook for 3-5 minutes, or until golden brown and crispy.
  10. Serve and Enjoy
  11. Remove the waffle and repeat with the remaining batter.
  12. Serve warm with your favorite toppings like syrup, fruit, or whipped cream.

Notes

  • For extra crispy waffles, use oil instead of butter in the batter.
  • Don’t overmix the batter—stir just until combined for the fluffiest texture.
  • Keep cooked waffles warm in a 200°F (95°C) oven while making the rest.
  • Store leftovers in an airtight container or freeze for later. Reheat in a toaster for a fresh taste.

Golden Crust Perfection: The Quick and Easy Soft & Crispy Bread

There was a time when I used to buy bread from the store without a second thought. It was convenient, after all—why go through the trouble of making my own when I could just pick up a loaf? But that all changed the day I made this Soft and Crispy Crust Bread for the first time.

It was a chilly afternoon, and the house felt quiet. I had been craving the comforting warmth of fresh bread, but I had never considered myself a bread baker. Still, something about the simplicity of the ingredients called to me. I decided to try, kneading the dough by hand, feeling its soft elasticity take shape under my fingertips. As it rose, the kitchen filled with a subtle warmth, a quiet anticipation.

When the bread emerged from the oven—golden brown, crackling as it cooled—I couldn’t believe I had made it myself. I tore off a piece, the steam escaping as I spread a small pat of butter over the warm, fluffy interior. That first bite was a revelation: crisp on the outside, soft and airy inside, with a depth of flavor no store-bought bread could match.

Since that day, I haven’t bought a single loaf of bread. This recipe became a staple in my kitchen, not just for its incredible taste but for the way it transformed my relationship with baking. It’s fast, foolproof, and endlessly satisfying. If you’ve ever thought that making bread from scratch is too complicated, let this be the recipe that changes everything for you, too.

Why You’ll Love This Bread

1. Quick and Simple to Make

This bread doesn’t require hours of complicated techniques. With a few basic ingredients and minimal effort, you’ll have a fresh, homemade loaf in no time.

2. The Perfect Balance of Soft and Crispy

The inside is light and fluffy, while the crust has a beautiful crispiness that gives each bite a satisfying texture.

3. No Special Equipment Needed

You don’t need a fancy bread machine or mixer—just a bowl, your hands, and an oven.

4. Versatile and Customizable

This bread is delicious as is, but you can easily add seeds, herbs, or even cheese for a personalized touch.

5. Healthier Than Store-Bought

With no unnecessary preservatives or additives, this homemade bread is a much healthier option than most store-bought loaves.

Ingredients

IngredientAmount
Water⅔ cup (160 ml)
Plain yogurt¼ cup (60 g)
Fresh yeast1 tsp (3 g)
or Dry yeast½ tsp (2 g)
SugarA pinch (to activate yeast)
Vegetable oil1 tbsp
All-purpose flour2 ½ cups (300 g)
Salt1 tsp

Directions

1. Activate the Yeast

  • Warm the water slightly (it should be lukewarm, not hot).
  • Stir in the sugar and yeast, then let sit for 5-10 minutes until foamy.

2. Prepare the Dough

  • In a large bowl, mix the flour and salt.
  • Add the yogurt, oil, and activated yeast mixture.
  • Knead the dough for about 10 minutes until smooth and elastic.

3. Let It Rise

  • Cover the dough with a clean towel and let it rise in a warm place for about 1 hour or until doubled in size.

4. Shape and Bake

  • Preheat the oven to 220°C (430°F).
  • Shape the dough into a loaf or rolls and place it on a lined baking tray.
  • Bake for 20-25 minutes, or until golden brown and crisp.

5. Serve and Enjoy

  • Let the bread cool slightly before slicing.
  • Enjoy warm with butter, jam, or your favorite spread!

Nutritional Information (Per Slice, Approx. 50g)

NutrientAmount
Calories~120
Protein~3g
Carbohydrates~22g
Fat~2g
Fiber~1g

Frequently Asked Questions

1. Can I Use Dry Yeast Instead of Fresh Yeast?

Yes! If using dry yeast, reduce the amount slightly. Typically, ½ teaspoon of dry yeast is equivalent to 1 teaspoon of fresh yeast. Just make sure to activate it in warm water with a pinch of sugar before adding it to the dough.

2. What Type of Flour Works Best?

All-purpose flour works well, but if you want a heartier loaf, you can substitute half of the flour with whole wheat flour. Keep in mind that whole wheat flour absorbs more liquid, so you may need to add a little extra water.

3. How Do I Get an Even Crispier Crust?

To enhance the crispiness of the crust, place a small oven-safe dish filled with water on the lower rack of your oven while baking. The steam will help create a crunchier texture.

4. Can I Make This Bread Dairy-Free?

Yes! Simply replace the plain yogurt with an equal amount of dairy-free yogurt or unsweetened almond milk. The texture may be slightly different, but the bread will still turn out soft and delicious.

5. How Long Does This Bread Stay Fresh?

This bread is best enjoyed fresh on the day it’s made. However, you can store it in an airtight container at room temperature for up to two days. If you need to keep it longer, slice and freeze it, then reheat slices in the oven or toaster when needed.

6. Can I Double the Recipe?

Absolutely! This recipe doubles easily. Just make sure to divide the dough into two loaves for even baking.

7. Can I Let the Dough Rise Overnight?

Yes! If you want to prepare the dough in advance, let it rise in the refrigerator overnight. This slow fermentation enhances the flavor of the bread. When ready to bake, let the dough come to room temperature before shaping and baking.

8. Can I Turn This Into Dinner Rolls Instead?

Yes! Instead of shaping the dough into a loaf, divide it into smaller portions and bake them as rolls. Reduce the baking time to about 15-18 minutes.

The Science Behind the Perfect Bread Texture

One of the key reasons this bread achieves its soft inside and crispy crust lies in the balance of ingredients:

  • Yogurt: The acidity in yogurt helps tenderize the dough, making the interior incredibly soft.
  • Oil: A little oil keeps the bread moist while adding richness to the flavor.
  • Steam: If you add steam to your oven while baking, it prevents the crust from setting too quickly, allowing for an even rise before crisping up.

This combination of techniques ensures a loaf that is both deliciously airy and wonderfully crisp.

Tips for the Best Homemade Bread

  • Knead the Dough Well: Kneading develops the gluten, which gives the bread its structure. Aim for about 10 minutes of kneading until the dough is smooth and elastic.
  • Don’t Rush the Rise: Let the dough double in size for the best texture. If your kitchen is cold, place the bowl in a slightly warm oven (turned off) to speed up the process.
  • Use a Preheated Oven: Baking at a high temperature ensures the bread rises properly and the crust crisps up beautifully.
  • Let It Cool Before Slicing: It’s tempting to cut into fresh bread immediately, but letting it cool helps the interior set properly and prevents it from becoming gummy.

Conclusion: The Bread That Will Change the Way You Bake

Baking your own bread isn’t just about making something delicious—it’s about reconnecting with the process of creating food from scratch. There is something truly satisfying about watching simple ingredients transform into a warm, golden loaf.

This Soft and Crispy Crust Bread is proof that making bread at home doesn’t have to be intimidating or time-consuming. It’s quick, easy, and so good that once you try it, you might never want to buy store-bought bread again.

So, roll up your sleeves, gather your ingredients, and experience the joy of baking fresh bread. Whether you enjoy it warm with butter, dipped in olive oil, or as the foundation for your favorite sandwich, one thing is certain—you’ll never look at bread the same way again.

Amal

Golden Crust Perfection: The Quick and Easy Soft & Crispy Bread

Say goodbye to store-bought bread! This Soft and Crispy Crust Bread is incredibly easy to make and delivers bakery-quality results in no time. With a light and airy interior and a perfectly golden, crispy crust, this homemade bread is perfect for sandwiches, dipping, or simply enjoying warm with butter. No special equipment is needed—just simple ingredients and a little kneading.
Prep Time 15 minutes
Cook Time 25 minutes
Total Time 1 hour 40 minutes
Servings: 6 rolls
Course: Bread
Cuisine: European

Ingredients
  

  • cup 160 ml warm water
  • ¼ cup 60 g plain yogurt
  • 1 tsp 3 g fresh yeast or ½ tsp (2 g) dry yeast
  • A pinch of sugar to activate the yeast
  • 1 tbsp vegetable oil
  • 2 ½ cups 300 g all-purpose flour
  • 1 tsp salt

Method
 

  1. Activate the Yeast
  2. In a small bowl, mix warm water with sugar and yeast. Let sit for 5-10 minutes until foamy.
  3. Prepare the Dough
  4. In a large bowl, combine flour and salt. Add yogurt, oil, and activated yeast mixture.
  5. Knead the dough for about 10 minutes until smooth and elastic.
  6. Let It Rise
  7. Cover the dough with a towel and let it rise in a warm place for about 1 hour, or until doubled in size.
  8. Shape and Bake
  9. Preheat the oven to 220°C (430°F).
  10. Shape the dough into a loaf or rolls and place on a lined baking tray.
  11. Bake for 20-25 minutes until golden brown and crispy on the outside.
  12. Cool and Serve
  13. Allow the bread to cool slightly before slicing.
  14. Serve warm with butter, honey, or your favorite spreads.

Notes

  • Ensure the water is warm (not hot) to properly activate the yeast.
  • For a crispier crust, place a small dish of water in the oven while baking.
  • Store in an airtight container at room temperature for up to 2 days or freeze for longer storage.

Flaky Delight: Savory Puff Pastry with Minced Meat and Cheese

Some recipes bring more than just delicious flavors—they bring back memories of home, of family gatherings, of warmth filling the kitchen. This Savory Puff Pastry with Minced Meat and Cheese is one of those dishes for me.

I remember coming home from school on chilly afternoons, greeted by the scent of buttery pastry baking in the oven. My grandmother would stand by the stove, carefully preparing the filling, making sure every spoonful was packed with flavor. She had a way of turning simple ingredients into something extraordinary, and these puff pastries were one of her specialties.

We would sit around the table, breaking into the flaky crust, letting the melted cheese stretch between bites, savoring the perfectly seasoned minced meat. There was something comforting about it—like a warm hug in food form. Over the years, I’ve made my own variations, but I always return to this classic combination. It’s simple, satisfying, and perfect for sharing with loved ones.

Now, whenever I bake these, I think of those moments—of my grandmother’s laughter, of the stories told over plates of warm pastries, and of the way food has the power to bring people together.

If you’ve never tried making savory puff pastries at home, let this be your sign. They are easy to prepare, endlessly versatile, and always a hit at any gathering.

Why You’ll Love This Recipe

1. Crispy, Flaky, and Buttery Perfection

Puff pastry gives these turnovers an irresistible texture—light and crispy on the outside, soft and cheesy on the inside.

2. A Hearty, Flavorful Filling

The combination of seasoned minced meat, melted cheese, and aromatic herbs creates a filling that is rich, savory, and satisfying.

3. Perfect for Any Occasion

These pastries make a great appetizer, snack, or even a light meal. Serve them at parties, family gatherings, or enjoy them as an afternoon treat with tea.

4. Quick and Easy to Prepare

With store-bought puff pastry, you can have these ready in under an hour. The filling comes together in minutes, and the oven does the rest of the work!

5. Customizable to Your Taste

Prefer chicken over beef? Want to add mushrooms or a little spice? This recipe is incredibly flexible, allowing you to experiment with different ingredients and flavors.

Ingredients

For the Filling:

IngredientAmount
Puff pastry1 sheet (or as needed)
ButterFor greasing
Onion1, finely chopped
Dried basil1 tsp
Minced meat (beef, chicken, or pork)300g
Salt and black pepperTo taste
Cheese (mozzarella, cheddar, or preferred type)100g, grated
Parsley1 bunch, chopped
Boiled eggs2, chopped

Directions

1. Prepare the Filling

  • Heat butter in a pan and sauté the chopped onion until soft and golden.
  • Add minced meat, dried basil, salt, and black pepper. Cook until fully browned.
  • Remove from heat and let it cool slightly. Mix in grated cheese, chopped parsley, and boiled eggs.

2. Assemble the Pastry

  • Preheat the oven to 200°C (400°F).
  • Roll out the puff pastry and cut it into desired shapes (squares, rectangles, or circles).
  • Place a spoonful of the filling in the center of each piece, then fold and seal the edges using a fork.

3. Bake to Perfection

  • Arrange the pastries on a greased or lined baking sheet.
  • Brush the tops with a little butter or egg wash for a golden finish.
  • Bake for 20-25 minutes, or until the pastry is puffed and golden brown.

4. Serve and Enjoy

  • Let the pastries cool slightly before serving.
  • Enjoy warm as a snack, appetizer, or paired with a side salad for a complete meal.

Nutritional Information (Per Serving)

NutrientAmount
Calories~250
Protein~12g
Carbohydrates~18g
Fat~14g
Fiber~1g

Frequently Asked Questions

1. Can I Use Homemade Puff Pastry Instead of Store-Bought?

Absolutely! If you have the time and enjoy making things from scratch, homemade puff pastry will take these pastries to the next level. However, store-bought works just as well and saves a lot of time.

2. What Type of Minced Meat Works Best?

You can use beef, chicken, pork, or even turkey. Beef adds a rich, deep flavor, while chicken and turkey make for a lighter version. If you prefer a mix, a combination of beef and pork works wonderfully.

3. Can I Make These Pastries Ahead of Time?

Yes! You can assemble the pastries and store them in the refrigerator for up to 24 hours before baking. You can also freeze them unbaked—just pop them in the oven straight from the freezer and add a few extra minutes to the baking time.

4. How Do I Keep Puff Pastry from Getting Soggy?

To prevent the pastry from becoming soggy, make sure your filling is not too wet. Let the cooked minced meat cool slightly before assembling the pastries. You can also brush a thin layer of beaten egg on the inside of the pastry to create a barrier.

5. What Cheese Works Best for This Recipe?

Mozzarella gives a delicious stretch, while cheddar adds a sharp, rich flavor. You can also try feta for a saltier kick or Gouda for a smokier taste.

6. Can I Add Vegetables to the Filling?

Yes! Diced bell peppers, mushrooms, or spinach all work well. Just be sure to sauté them first to remove excess moisture.

7. What’s the Best Way to Seal the Pastries?

Use a fork to crimp the edges tightly. For extra security, brush the edges with a little water or beaten egg before sealing.

8. How Long Do These Stay Fresh?

They’re best enjoyed fresh, but you can store them in an airtight container in the refrigerator for up to three days. To reheat, pop them in a 180°C (350°F) oven for 5-7 minutes to crisp them up again.

The History and Cultural Significance of Savory Pastries

Stuffed pastries like these exist in many cultures around the world. From empanadas in Latin America to samosas in India and pirozhki in Russia, different regions have their own versions of flaky, filled delights.

The idea of wrapping flavorful fillings in dough has been around for centuries, and for good reason—it’s a simple yet brilliant way to create a satisfying meal. Puff pastry itself originated in France, but variations of stuffed pastries can be found in nearly every cuisine.

What makes this particular recipe special is its versatility. Whether you’re making it with beef, chicken, or even a vegetarian filling, the essence remains the same—a crispy, buttery pastry holding a deliciously savory center.

Tips for the Best Savory Puff Pastries

  • Keep the Puff Pastry Cold – Work quickly and keep the pastry chilled until ready to use. Warm dough becomes sticky and difficult to handle.
  • Don’t Overfill – Too much filling can cause the pastries to burst open while baking. A small spoonful per pastry is enough.
  • Brush with Egg Wash – This gives the pastries a golden, glossy finish. A mixture of beaten egg and a splash of milk works best.
  • Let Them Cool Slightly Before Eating – Fresh out of the oven, the filling will be extremely hot. Let them sit for a few minutes to avoid burning your mouth.
  • Experiment with Flavors – Try adding a pinch of smoked paprika, garlic powder, or even a bit of chili for a twist on the classic flavor.

Conclusion: A Recipe That Brings People Together

Few things are as satisfying as biting into a warm, flaky pastry filled with rich, savory goodness. This Savory Puff Pastry with Minced Meat and Cheese is a dish that’s easy to make yet feels indulgent—perfect for any occasion, whether you’re hosting guests or simply treating yourself to something special.

Beyond the delicious taste, these pastries carry the warmth of tradition. They remind us that food is more than just sustenance—it’s a way to connect, to create memories, and to share moments of joy.

So, the next time you’re in the mood for something comforting, gather your ingredients, preheat the oven, and let the magic of puff pastry work its charm. You won’t be disappointed.

Amal

Flaky Delight: Savory Puff Pastry with Minced Meat and Cheese

Golden, flaky puff pastry filled with a rich, cheesy minced meat filling—this Savory Puff Pastry with Minced Meat and Cheese is the ultimate comfort food. Perfect as a snack, appetizer, or main dish, these pastries are packed with flavor and easy to make. Whether you’re serving them at a gathering or enjoying them fresh from the oven with a cup of tea, they’re a guaranteed hit!
Prep Time 15 minutes
Cook Time 25 minutes
Total Time 40 minutes
Servings: 8 -10 pastries
Course: Snack
Cuisine: European

Ingredients
  

For the Filling:
  • 1 sheet puff pastry or as needed
  • Butter for greasing
  • 1 onion finely chopped
  • 1 tsp dried basil
  • 300 g minced meat beef, chicken, or pork
  • Salt and black pepper to taste
  • 100 g grated cheese mozzarella, cheddar, or preferred type
  • 1 bunch of parsley chopped
  • 2 boiled eggs chopped
For Assembly:
  • 1 egg for egg wash
  • Sesame seeds or black seeds optional, for topping

Method
 

  1. Prepare the Filling
  2. Heat a pan over medium heat and melt a little butter.
  3. Sauté the chopped onion until soft and golden.
  4. Add minced meat, dried basil, salt, and black pepper. Cook until fully browned.
  5. Remove from heat and let cool slightly. Stir in the grated cheese, chopped parsley, and boiled eggs.
  6. Assemble the Pastry
  7. Preheat the oven to 200°C (400°F).
  8. Roll out the puff pastry on a floured surface and cut into desired shapes (squares, rectangles, or circles).
  9. Place a spoonful of filling in the center of each piece. Fold over and press the edges with a fork to seal.
  10. Brush the tops with beaten egg and sprinkle with sesame seeds if desired.
  11. Bake to Perfection
  12. Arrange the pastries on a lined baking sheet.
  13. Bake for 20-25 minutes or until the pastry is golden brown and puffed up.
  14. Serve and Enjoy
  15. Let the pastries cool for a few minutes before serving.
  16. Enjoy warm, either as a snack or paired with a fresh salad for a complete meal.

Notes

  • Make sure the filling is not too hot when assembling to prevent the pastry from becoming soggy.
  • These pastries can be frozen before baking; just add a few extra minutes to the baking time when cooking from frozen.
  • Try different cheeses for unique flavors—feta for a salty kick, gouda for smokiness, or parmesan for extra depth.

Naturally Sweet: Healthy Banana Oatmeal Muffins

There’s something special about baking that brings comfort and joy. For me, these Healthy Banana Oatmeal Muffins hold a deeper meaning—they remind me of early mornings in my grandmother’s kitchen, where the scent of ripe bananas and cinnamon filled the air. She always believed that the best recipes didn’t require fancy ingredients, just a little love and the right balance of flavors.

As a child, I would watch in fascination as she mashed bananas by hand, measuring ingredients without a scale—just by instinct. She never used refined sugar, relying on the natural sweetness of ripe fruit instead. Her muffins were simple yet satisfying, and they became a staple in our home. Even now, when I make them for my own family, I feel connected to those childhood moments—warm, cozy, and full of love.

These muffins are not just a treat; they’re a celebration of natural, wholesome ingredients. They’re soft, naturally sweet, and packed with nutrients, making them a perfect choice for a healthy breakfast or snack. Whether you’re trying to cut down on sugar, avoid processed flour, or simply enjoy a delicious homemade muffin, this recipe is for you.

Why You’ll Love These Muffins

1. Naturally Sweetened with Bananas

No refined sugar needed! The natural sweetness of ripe bananas is enough to give these muffins a soft, mild sweetness that satisfies without overwhelming.

2. No Flour, Just Nutritious Oats

Instead of processed white flour, these muffins use rolled oats, which are rich in fiber and keep you feeling full longer.

3. Quick and Easy to Make

With just a handful of ingredients, these muffins come together in minutes. They’re perfect for meal prep, a quick breakfast, or a snack on the go.

4. Great for All Ages

These muffins are soft and naturally sweet, making them an excellent choice for kids, adults, and even toddlers.

5. Customizable to Your Taste

You can add nuts, dark chocolate chips, or dried fruit to make them your own. Want a little extra protein? Stir in a spoonful of nut butter or protein powder.

Ingredients

IngredientAmount
Ripe bananas2 large
Rolled oats150g (1½ cups)
Eggs2
Baking powder1 tsp
Baking soda½ tsp
Cinnamon½ tsp
SaltA pinch
Vanilla extract1 tsp
Milk (dairy or plant-based)60ml (¼ cup)
Coconut oil (or butter)2 tbsp
Chopped nuts or chocolate chips (optional)¼ cup

Directions

1. Prepare the Batter

  • Preheat the oven to 180°C (350°F) and line a muffin tin with paper liners or lightly grease it.
  • In a bowl, mash the bananas until smooth.
  • Add eggs, milk, vanilla extract, and melted coconut oil. Mix well.
  • Stir in the oats, baking powder, baking soda, cinnamon, and salt. Combine until fully incorporated.
  • Fold in any optional add-ins like chopped nuts or chocolate chips.

2. Bake the Muffins

  • Spoon the batter evenly into the muffin tin, filling each cup about ¾ full.
  • Bake for 18-22 minutes, or until a toothpick inserted in the center comes out clean.
  • Let the muffins cool in the pan for 5 minutes, then transfer to a wire rack to cool completely.

3. Serve and Enjoy

  • Enjoy warm or store in an airtight container for up to 3 days.
  • These muffins also freeze well—simply thaw before eating!

Nutritional Information (Per Muffin)

NutrientAmount
Calories~120
Protein~4g
Carbohydrates~18g
Fat~4g
Fiber~3g

FAQs: Everything You Need to Know About These Muffins

1. Can I Use Instant Oats Instead of Rolled Oats?

Yes, but keep in mind that instant oats absorb liquid faster and may result in a slightly denser muffin. Rolled oats provide the best texture, but instant oats can work in a pinch.

2. Can I Make These Muffins Vegan?

Absolutely! Simply replace the eggs with flax eggs (1 tbsp ground flaxseed mixed with 2.5 tbsp water per egg) or use unsweetened applesauce as a binding agent.

3. How Ripe Should the Bananas Be?

The riper, the better! Bananas with brown spots are ideal because they are naturally sweeter and will provide the best flavor and moisture.

4. Can I Make These Muffins Gluten-Free?

Yes! Just make sure to use certified gluten-free oats, as some oats may be processed in facilities that handle wheat.

5. How Should I Store These Muffins?

Store them in an airtight container at room temperature for up to 3 days. For longer storage, keep them in the refrigerator for up to a week, or freeze them for up to 3 months.

6. Can I Add Sweeteners If I Want Them Sweeter?

Yes! If you prefer a sweeter taste, you can add a tablespoon of honey, maple syrup, or a sugar-free sweetener of your choice.

7. Can I Turn This Recipe Into Banana Oat Pancakes?

Definitely! Simply thin out the batter with a little extra milk and cook on a griddle for soft, healthy pancakes.

8. Are These Muffins Good for Weight Loss?

Since they are made with whole ingredients and contain no refined sugar or flour, these muffins are a great option for a balanced diet. They are nutrient-dense and will keep you satisfied without empty calories.

The Benefits of Baking with Oats and Bananas

These muffins aren’t just tasty—they’re also packed with nutrition. Here’s why they’re a great choice for a healthier lifestyle:

Oats: A Superfood for Energy and Digestion

Oats are rich in fiber, which helps keep digestion smooth and supports heart health. They also provide slow-releasing energy, keeping you full for longer and preventing sugar crashes.

Bananas: Nature’s Sweetener

Bananas add natural sweetness while also providing potassium, vitamin B6, and antioxidants. They help maintain energy levels and support muscle function.

Eggs: A Protein Boost

Eggs provide essential proteins and healthy fats, making these muffins more filling and nutritious. If you opt for a vegan alternative, flax eggs or applesauce can still offer good binding properties and nutrients.

Cinnamon: A Flavorful Health Booster

Cinnamon doesn’t just add warmth and spice—it also has anti-inflammatory properties and can help regulate blood sugar levels.

Tips for Making the Perfect Muffins

  • Use Very Ripe Bananas – The softer and sweeter they are, the better your muffins will taste.
  • Don’t Overmix the Batter – Stir just until combined; overmixing can make the muffins dense.
  • Let the Batter Rest – Allowing the batter to sit for 5 minutes before baking helps the oats absorb moisture, resulting in a softer texture.
  • Use Silicone or Paper Liners – This prevents sticking and makes clean-up easier.
  • Experiment with Add-Ins – Try chopped nuts, shredded coconut, dark chocolate chips, or dried cranberries for variety.

Conclusion: A Muffin for Every Occasion

Baking these Healthy Banana Oatmeal Muffins isn’t just about making a quick snack—it’s about embracing natural ingredients and creating something that nourishes both the body and soul.

This recipe is proof that you don’t need sugar or flour to make something delicious. Whether you enjoy them as a breakfast on the go, a post-workout snack, or a guilt-free dessert, these muffins fit every occasion.

So, the next time you have ripe bananas sitting on your counter, skip the sugary desserts and try these wholesome muffins instead. With their naturally sweet flavor, soft texture, and nourishing ingredients, they just might become your new favorite homemade treat.

Amal

Naturally Sweet: Healthy Banana Oatmeal Muffins

These Healthy Banana Oatmeal Muffins are naturally sweet, soft, and packed with wholesome ingredients—no sugar, no flour, just pure goodness! Made with ripe bananas and hearty oats, they are perfect for a quick breakfast, a nutritious snack, or a healthy dessert. Lightly spiced with cinnamon and super easy to make, they’re a delicious way to satisfy your cravings without guilt.
Prep Time 10 minutes
Cook Time 20 minutes
Total Time 30 minutes
Servings: 12 muffins
Course: Breakfast
Cuisine: Healthy

Ingredients
  

  • 2 large ripe bananas mashed
  • 150 g 1½ cups rolled oats
  • 2 eggs
  • 1 tsp baking powder
  • ½ tsp baking soda
  • ½ tsp cinnamon
  • A pinch of salt
  • 1 tsp vanilla extract
  • 60 ml ¼ cup milk (dairy or plant-based)
  • 2 tbsp coconut oil or melted butter
  • ¼ cup chopped nuts or dark chocolate chips optional

Method
 

  1. Prepare the Batter
  2. Preheat the oven to 180°C (350°F) and line a muffin tin with paper liners or lightly grease it.
  3. In a bowl, mash the bananas until smooth.
  4. Add eggs, milk, vanilla extract, and melted coconut oil, mixing until combined.
  5. Stir in the oats, baking powder, baking soda, cinnamon, and salt. Mix until well incorporated.
  6. Fold in optional add-ins like chopped nuts or dark chocolate chips.
  7. Bake the Muffins
  8. Spoon the batter evenly into the muffin cups, filling each about ¾ full.
  9. Bake for 18-22 minutes, or until a toothpick inserted in the center comes out clean.
  10. Allow the muffins to cool in the pan for 5 minutes, then transfer them to a wire rack to cool completely.
  11. Serve and Store
  12. Enjoy warm or store in an airtight container at room temperature for up to 3 days.
  13. For longer storage, refrigerate for up to a week or freeze for up to 3 months.

Notes

  • The riper the bananas, the sweeter the muffins will be.
  • You can substitute the eggs with flax eggs (1 tbsp ground flaxseed + 2.5 tbsp water per egg) for a vegan version.
  • If you prefer a finer texture, blend the oats into flour before mixing.
  • These muffins are naturally sweet, but you can add a tablespoon of honey or maple syrup if you prefer them sweeter.

Apple Charlotte Cookies: A Delicate Treat for Cozy Moments

There are few things as comforting as the scent of apples and cinnamon filling the kitchen. It’s a fragrance that instantly brings back childhood memories—of crisp autumn afternoons, family gatherings, and warm treats fresh out of the oven.

I first learned to make these Apple Charlotte Cookies from my grandmother. She would always say that the secret to the best cookies wasn’t just in the ingredients but in the love and patience put into making them. I remember sitting on a stool beside her, watching as she diced the apples with practiced hands, humming softly while the butter and sugar blended into a creamy perfection. She never rushed the process, always reminding me that baking was about more than just food—it was about creating something to share with the people you love.

These cookies became a tradition in our home, especially during the colder months. They were the perfect companion to a cup of tea, a sweet yet delicate treat that felt both indulgent and familiar. They have a soft, cake-like texture, with pockets of tender apples and just a hint of cinnamon. Unlike heavier desserts, these cookies are light and airy, making them an irresistible snack for any time of day.

Now, I carry on the tradition, baking these cookies not just to satisfy a craving but to relive those cherished moments. And with this recipe, you too can bring that warmth into your home.

Why You’ll Love These Apple Charlotte Cookies

1. Soft, Moist, and Full of Flavor

Unlike crisp cookies, these Apple Charlotte Cookies have a delicate, cake-like texture. The apples keep them moist, while the cinnamon and butter enhance their comforting flavor.

2. Quick and Easy to Make

These cookies require just a few basic ingredients and minimal effort. In under 30 minutes, you can have a batch of warm, freshly baked cookies ready to enjoy.

3. A Perfect Treat for Tea Time

These cookies are not overly sweet, making them a great companion to a cup of tea or coffee. Their light texture makes them easy to enjoy without feeling too indulgent.

4. Versatile and Customizable

While the traditional recipe is simple, you can easily adjust it to your taste. Add chopped nuts for extra crunch, swap cinnamon for nutmeg, or drizzle with honey for an extra layer of sweetness.

Ingredients

IngredientAmount
Apples (peeled & diced)2
Butter (softened)70 g (5 tbsp)
Sugar60 g (⅓ cup)
Egg1
All-purpose flour140 g (1 cup)
Baking powder1 tsp
SaltA pinch
CinnamonA pinch

Directions

1. Prepare the Dough

  • In a mixing bowl, beat the softened butter with sugar until light and fluffy.
  • Add the egg and mix until smooth.

2. Incorporate Dry Ingredients

  • Sift in the flour, baking powder, salt, and cinnamon. Mix until a soft dough forms.
  • Gently fold in the diced apples, ensuring they are evenly distributed.

3. Shape and Bake

  • Preheat the oven to 180°C (350°F).
  • Line a baking tray with parchment paper. Drop spoonfuls of dough onto the tray, spacing them apart.
  • Bake for 12-15 minutes until the cookies are golden brown.

4. Cool and Serve

  • Allow the cookies to cool slightly before serving.
  • Enjoy warm or at room temperature with a cup of tea!

Nutritional Information (Per Cookie)

NutrientAmount
Calories~120
Protein~2 g
Carbohydrates~18 g
Fat~5 g
Sugar~7 g

FAQs: Everything You Need to Know

1. What Type of Apples Work Best for These Cookies?

Firm apples like Granny Smith, Honeycrisp, or Fuji work best because they hold their shape and add a slight tartness that balances the sweetness of the cookie dough. Softer apples like Red Delicious may become too mushy when baked.

2. Can I Make These Cookies Without Butter?

Yes! If you prefer a dairy-free version, you can replace the butter with coconut oil or a mild-flavored vegetable oil. This will slightly alter the texture, but the cookies will still be soft and delicious.

3. Can I Prepare the Dough in Advance?

Absolutely! You can prepare the dough ahead of time and store it in the refrigerator for up to 24 hours. When ready to bake, simply scoop the dough onto a baking sheet and bake as directed.

4. How Should I Store These Cookies?

Store these cookies in an airtight container at room temperature for up to three days. If you want to keep them fresh for longer, refrigerate them for up to a week. For longer storage, you can freeze them for up to three months—just thaw at room temperature before serving.

5. Can I Use Whole Wheat Flour Instead of All-Purpose Flour?

Yes, but keep in mind that whole wheat flour will make the cookies denser and slightly less tender. If you prefer a softer texture, try using a mix of half whole wheat and half all-purpose flour.

6. Can I Add a Glaze or Topping?

Yes! A simple glaze made of powdered sugar and milk can add an extra touch of sweetness. You can also dust them with cinnamon sugar right after baking for a more rustic finish.

7. Do These Cookies Work Well for Special Diets?

These cookies can easily be adapted for different dietary needs. To make them gluten-free, substitute the flour with a gluten-free baking blend. For a lower-sugar version, you can reduce the sugar slightly or use a sugar substitute.

The Story Behind Apple Charlotte Cookies

The name “Apple Charlotte” originates from a classic European dessert that features layers of spiced apples and bread, baked until golden and fragrant. Over time, bakers experimented with different variations, leading to the creation of cookies inspired by this beloved dish.

These Apple Charlotte Cookies maintain the essence of the original dessert—soft apples, warm cinnamon, and a rich buttery flavor—but in a simpler, handheld form. They have become a favorite in many households because they embody the same nostalgic comfort with less effort and baking time.

While their roots may be traditional, these cookies continue to evolve with each baker’s personal touch. Some prefer them with a hint of nutmeg, others add raisins or chopped pecans. No matter how you make them, they remain a timeless treat that brings warmth and joy with every bite.

Tips for the Best Apple Charlotte Cookies

  • Use Fresh, Crisp Apples: The better the apples, the better the cookies. Opt for fresh apples that are firm and full of flavor.
  • Don’t Overmix the Dough: Overmixing can make the cookies dense. Stir just until the ingredients are combined.
  • Chill the Dough if Needed: If the dough feels too soft, let it rest in the refrigerator for 15 minutes before baking. This helps the cookies hold their shape.
  • Enjoy Them Fresh: These cookies taste best when freshly baked, while the edges are slightly crisp, and the inside remains soft.

Conclusion: A Simple Recipe, A Timeless Tradition

There’s something truly special about baking a recipe that has been passed down through generations. These Apple Charlotte Cookies are more than just a delicious treat—they are a reminder of home, family, and the simple joys of baking.

Their delicate, tender texture and the warmth of cinnamon make them perfect for cozy afternoons or as a thoughtful homemade gift. Whether you bake them for a special occasion or just to enjoy a quiet moment with a cup of tea, these cookies bring a sense of comfort that only home-baked treats can provide.

So, the next time you crave something sweet yet light, take a moment to bake a batch of these Apple Charlotte Cookies. They may just become a tradition in your own home, just as they have been in mine.

Amal

Apple Charlotte Cookies: A Delicate Treat for Cozy Moments

These Apple Charlotte Cookies are the perfect soft and buttery treat, filled with tender apple pieces and a hint of warm cinnamon. They come together quickly and easily, making them an ideal choice for a cozy afternoon snack or a delightful dessert to serve with tea. With their delicate, cake-like texture and comforting flavor, these cookies will quickly become a family favorite.
Prep Time 10 minutes
Cook Time 15 minutes
Total Time 25 minutes
Servings: 12 cookies
Course: Dessert
Cuisine: European

Ingredients
  

  • 2 apples peeled and diced
  • 70 g 5 tbsp butter, softened
  • 60 g ⅓ cup sugar
  • 1 egg
  • 140 g 1 cup all-purpose flour
  • 1 tsp baking powder
  • A pinch of salt
  • A pinch of cinnamon

Method
 

  1. Prepare the Dough
  2. In a mixing bowl, cream the softened butter and sugar until light and fluffy.
  3. Add the egg and mix until well combined.
  4. Incorporate the Dry Ingredients
  5. Sift in the flour, baking powder, salt, and cinnamon. Stir until a soft dough forms.
  6. Fold in the diced apples, ensuring they are evenly distributed.
  7. Shape and Bake
  8. Preheat the oven to 180°C (350°F).
  9. Line a baking sheet with parchment paper. Drop spoonfuls of dough onto the sheet, spacing them apart.
  10. Bake for 12-15 minutes or until golden brown.
  11. Cool and Serve
  12. Let the cookies cool slightly before serving.
  13. Enjoy warm or at room temperature with tea or coffee.

Notes

  • Use crisp, slightly tart apples like Granny Smith or Honeycrisp for the best flavor.
  • Store in an airtight container for up to three days or freeze for longer storage.
  • Add a dusting of powdered sugar for extra sweetness, or drizzle with honey for a finishing touch.

Timeless Elegance: Grandmother’s Classic Cream Puffs

There are some recipes that never fade, no matter how many new trends emerge in the culinary world. They hold a special place in our hearts, reminding us of childhood memories, family gatherings, and the warmth of a home filled with the aroma of something wonderful baking in the oven.

For me, this Classic Cream Puff recipe is one of those treasures. It has been passed down through generations, starting with my great-grandmother, who taught it to my grandmother, who then passed it on to me. I still remember standing on a stool in my grandmother’s kitchen, watching in awe as she skillfully stirred the dough, her hands moving with the kind of expertise that only comes from years of practice.

The magic of this recipe lies in its simplicity. A few basic ingredients—flour, butter, eggs, and cream—come together to create something elegant and utterly delicious. The first bite into a freshly made cream puff is unforgettable: a delicate crisp on the outside, followed by the lightest, most luscious cream filling. Whether dusted with powdered sugar or drizzled with melted chocolate, these pastries never fail to bring joy.

Now, I carry on the tradition, making these cream puffs for special occasions or simply when I need a taste of home. And with this recipe, you too can create a timeless classic that will be cherished for years to come.

What Makes This Recipe So Special?

1. A Classic That Never Goes Out of Style

This recipe has been loved for over a century, proving that good baking doesn’t need to be complicated. The balance of crisp choux pastry and silky cream is a combination that has stood the test of time.

2. Simple Ingredients, Elegant Results

Despite their fancy appearance, cream puffs are made from just a few basic ingredients. No special equipment is needed—just a bit of patience and care.

3. Perfect for Any Occasion

Whether you’re preparing them for a dinner party, a birthday celebration, or simply as an afternoon treat, cream puffs always feel like something special. They are as fitting for a wedding as they are for a quiet weekend at home.

4. A Recipe That Invites Creativity

While the traditional version features whipped cream, there are endless ways to customize this recipe. You can fill them with vanilla pastry cream, chocolate mousse, or even savory options like herbed cheese.

Ingredients

Dough (Choux Pastry):

IngredientAmount
Water200 ml (¾ cup)
Butter50 g (1¾ oz)
All-purpose flour150 g (1¼ cup)
SaltPinch
Eggs3 large

Cream Filling:

IngredientAmount
Heavy cream250 ml (1 cup)
Powdered sugar2 tbsp
Vanilla extract1 tsp

Optional Topping:

IngredientAmount
Powdered sugarFor dusting
Melted chocolateFor drizzling

Directions

1. Make the Choux Pastry

  • In a saucepan, heat water, butter, and salt over medium heat until the butter fully melts.
  • Add the flour all at once, stirring continuously until the dough forms a smooth ball and pulls away from the sides of the pan.
  • Remove from heat and let cool slightly. Beat in eggs one at a time, mixing well after each addition until the dough becomes smooth and glossy.

2. Bake the Pastry

  • Preheat the oven to 200°C (400°F).
  • Pipe or spoon small mounds of dough onto a lined baking sheet, leaving space between each puff.
  • Bake for 25-30 minutes until golden brown, crisp, and puffed.
  • Let the pastries cool completely before filling.

3. Prepare the Cream Filling

  • Whip the heavy cream with powdered sugar and vanilla extract until it reaches stiff peaks.

4. Assemble the Cream Puffs

  • Slice each cooled puff in half and fill with whipped cream.
  • Dust with powdered sugar or drizzle with melted chocolate for a decorative touch.

Nutritional Information (Per Cream Puff)

NutrientAmount
Calories~180
Protein~4 g
Carbohydrates~15 g
Fat~12 g
Sugar~5 g

FAQs: Everything You Need to Know About Making Cream Puffs

1. Why Did My Cream Puffs Collapse?

The most common reason for collapsed cream puffs is underbaking. The shells need to be completely dry before they are removed from the oven. If they are too soft, they will deflate as they cool. To prevent this, bake them until they are deep golden brown and feel crisp to the touch.

2. Can I Make the Dough in Advance?

Yes! Choux pastry dough can be made a few hours ahead of time and kept covered at room temperature. If you want to prepare it even earlier, you can pipe the dough onto a baking sheet, freeze the unbaked puffs, and then bake them directly from frozen when ready.

3. What’s the Best Way to Fill the Puffs?

You can slice them in half and spoon or pipe the filling inside, or for a neater presentation, use a piping bag fitted with a small tip to inject the filling through a small hole in the bottom of each puff.

4. Can I Make the Filling in Advance?

Yes! Whipped cream or pastry cream can be prepared a day in advance and stored in the refrigerator. If using whipped cream, re-whip it slightly before filling the puffs to restore its fluffy texture.

5. How Do I Store Cream Puffs?

Cream puffs are best enjoyed fresh, but they can be stored in an airtight container in the refrigerator for up to 2 days. If you need to store them longer, keep the pastry shells unfilled at room temperature and fill them just before serving.

6. Can I Freeze Cream Puffs?

Yes! The unfilled pastry shells freeze beautifully. Let them cool completely, then place them in a freezer-safe bag or container. When ready to serve, reheat them in a 180°C (350°F) oven for a few minutes to restore their crispness, then fill as desired.

7. Why Didn’t My Cream Puffs Rise?

If your cream puffs didn’t rise properly, it could be due to a few reasons:

  • The dough wasn’t cooked long enough before adding the eggs. This step is crucial to create the right consistency.
  • Too much egg or not enough mixing after each egg was added. The dough should be glossy but still hold its shape.
  • The oven temperature was too low. A hot oven (200°C/400°F) is needed to create steam, which makes the puffs rise.

The History Behind Cream Puffs

Cream puffs, also known as profiteroles, originate from France, dating back to the 16th century. The technique of making pâte à choux (choux pastry) is credited to a pastry chef named Pantanelli, who worked for Catherine de’ Medici. Over the centuries, this delicate pastry became a staple in French patisserie, evolving into beloved desserts like éclairs, croquembouches, and gougères.

While cream puffs are often associated with French baking, they are popular in many cultures. In Italy, they are called bigné, and in Japan, they are known as shu cream, often filled with custard or flavored whipped cream. No matter where you find them, the joy of biting into a perfectly made cream puff remains universal.

Health Benefits of Homemade Cream Puffs

While cream puffs are undoubtedly a treat, making them at home offers a few benefits over store-bought versions:

  • No Preservatives – Homemade pastries contain no artificial additives, making them a fresher and healthier option.
  • Customizable Sweetness – You can control the amount of sugar in the filling and opt for natural sweeteners if desired.
  • Portion Control – Since they are bite-sized, you can enjoy a sweet indulgence without overindulging.

If you’re looking for a lighter version, consider using Greek yogurt instead of whipped cream, or filling the puffs with fresh fruit for a naturally sweet alternative.

Final Thoughts: A Recipe Worth Sharing

Baking is more than just following instructions; it’s about preserving tradition, sharing love, and creating moments that last a lifetime. This Classic Cream Puff recipe is a testament to that. Whether you’re making them for the first time or carrying on a family tradition, each bite is a reminder of the simple joys of homemade baking.

So, the next time you want to impress guests, surprise your family, or simply indulge in a sweet treat, remember this recipe. Let the scent of warm choux pastry fill your kitchen, and enjoy the magic of a dessert that has been cherished for generations.

Amal

Timeless Elegance: Grandmother’s Classic Cream Puffs

This Classic Cream Puff recipe has been passed down through generations, bringing a touch of elegance to any table. With a crisp, airy choux pastry filled with a light and creamy filling, these delicate pastries are a perfect combination of texture and flavor. Whether dusted with powdered sugar or drizzled with chocolate, they make a delightful treat for any occasion.
Prep Time 20 minutes
Cook Time 30 minutes
Total Time 50 minutes
Servings: 12 cream puffs
Course: Dessert
Cuisine: French

Ingredients
  

For the Choux Pastry:
  • 200 ml ¾ cup water
  • 50 g 1¾ oz butter
  • 150 g 1¼ cup all-purpose flour
  • Pinch of salt
  • 3 large eggs
For the Cream Filling:
  • 250 ml 1 cup heavy cream
  • 2 tbsp powdered sugar
  • 1 tsp vanilla extract
For Topping (Optional):
  • Powdered sugar for dusting
  • Melted chocolate for drizzling

Method
 

  1. Prepare the Choux Pastry
  2. In a saucepan over medium heat, bring water, butter, and salt to a boil.
  3. Add the flour all at once, stirring quickly until the dough forms a ball and pulls away from the sides of the pan.
  4. Remove from heat and let cool slightly.
  5. Beat in eggs one at a time, mixing thoroughly after each addition until smooth and glossy.
  6. Bake the Pastry
  7. Preheat the oven to 200°C (400°F).
  8. Pipe or spoon small mounds of dough onto a parchment-lined baking sheet.
  9. Bake for 25-30 minutes, or until golden brown and crisp.
  10. Let the pastry cool completely before filling.
  11. Make the Filling
  12. Whip the heavy cream with powdered sugar and vanilla extract until stiff peaks form.
  13. Assemble the Cream Puffs
  14. Slice each puff in half and fill with the whipped cream using a piping bag or spoon.
  15. Dust with powdered sugar or drizzle with melted chocolate for a decorative finish.

Notes

  • Ensure the pastry is fully baked before removing it from the oven to prevent collapsing.
  • If making ahead, store unfilled puffs in an airtight container at room temperature and fill them just before serving.
  • The choux pastry can also be frozen before baking for later use.