Banana Oatmeal Pancakes – A Wholesome and Delicious Breakfast

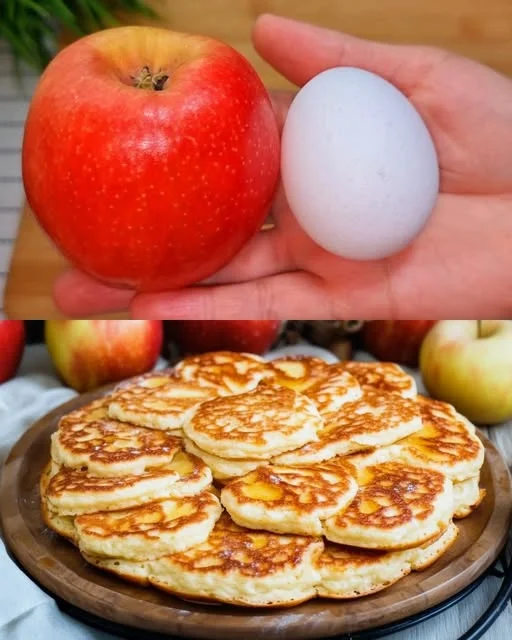
Breakfast is often considered the most important meal of the day, and what better way to start your morning than with a stack of healthy, homemade pancakes? These banana oatmeal pancakes offer the perfect balance of flavor, nutrition, and simplicity, making them a go-to option for a quick and satisfying meal.

With just a handful of ingredients, this recipe delivers a naturally sweet and fluffy pancake that is both nutrient-dense and incredibly delicious. Whether you’re looking for a healthier alternative to traditional pancakes or simply want an easy way to use up ripe bananas, this recipe is a must-try.

Why You’ll Love This Recipe

1. Naturally Sweet and No Refined Sugar Needed

The mashed banana in this recipe not only adds natural sweetness but also provides moisture, eliminating the need for added sugar. This makes these pancakes a healthier option compared to store-bought mixes that often contain artificial flavors and preservatives.

2. High in Fiber and Protein

Oatmeal is a fantastic source of dietary fiber, which aids digestion and helps keep you full for longer. Combined with the protein from eggs and milk, these pancakes provide sustained energy, making them a great choice for breakfast or even a post-workout meal.

3. Gluten-Free and Dairy-Free Options Available

If you’re avoiding gluten, simply use certified gluten-free oats. For a dairy-free version, swap regular milk for almond, oat, or coconut milk. These easy substitutions ensure that the recipe can cater to a variety of dietary needs without compromising taste or texture.

4. Quick and Easy to Make

One of the best things about this recipe is how simple it is. No need for fancy equipment—just a bowl, a fork to mash the banana, and a pan to cook the pancakes. You can have a nutritious breakfast ready in under 15 minutes!

5. Perfect for Meal Prep

These banana oatmeal pancakes store well, making them an excellent option for meal prep. You can make a batch ahead of time, refrigerate or freeze them, and simply reheat when needed. This is perfect for busy mornings when you want a homemade breakfast without the extra effort.

Ingredients

IngredientQuantity
Oatmeal100g
Milk (dairy or plant-based)125ml
Banana (mashed)1
Egg1

Directions

  1. In a bowl, mash the banana until smooth.
  2. Add the egg, milk, and oatmeal, mixing until well combined. Let the batter rest for 5 minutes to thicken.
  3. Heat a non-stick pan over medium heat and lightly grease it.
  4. Pour small portions of batter onto the pan, shaping them into pancakes.
  5. Cook for 2-3 minutes on one side, then flip and cook for another 1-2 minutes until golden brown.
  6. Serve warm with toppings of your choice, such as honey, fruit, or yogurt.

Nutritional Information (Per Serving, Approx.)

NutrientAmount
Calories180 kcal
Protein7g
Carbohydrates30g
Fats4g
Fiber4g
Sugar10g
Calcium80mg
Iron1.2mg

Health Benefits of Banana Oatmeal Pancakes

This recipe is more than just a delicious breakfast—it’s packed with nutrients that contribute to overall health and wellness. Here’s what makes these pancakes a smart choice:

1. Boosts Heart Health

Oats are well-known for their heart-healthy properties, thanks to their high content of beta-glucan, a type of soluble fiber that helps lower bad cholesterol levels. Eating oats regularly can contribute to better cardiovascular health.

2. Supports Digestion and Gut Health

Both bananas and oats contain fiber that promotes healthy digestion. Fiber helps regulate bowel movements, preventing constipation, and supports a healthy gut microbiome.

3. Provides Sustained Energy

Unlike pancakes made with refined flour, which cause a rapid spike and crash in blood sugar levels, the complex carbohydrates in oatmeal provide slow-releasing energy, keeping you full and focused for hours.

4. Helps with Muscle Recovery

Eggs are an excellent source of protein, which is essential for muscle repair and recovery. If you’re someone who works out regularly, these pancakes can serve as a great post-workout meal.

5. Supports a Healthy Immune System

Bananas contain vitamin C, potassium, and antioxidants, all of which support a strong immune system and help reduce inflammation in the body.

How to Customize These Pancakes

One of the best things about banana oatmeal pancakes is how versatile they are. You can easily customize them to suit your taste preferences or dietary needs. Here are some fun and delicious variations to try:

1. Add Extra Protein

If you want to boost the protein content, consider adding:

  • 1 tablespoon of peanut butter or almond butter to the batter
  • 1 scoop of protein powder
  • A sprinkle of chia seeds or flaxseeds

2. Make Them Extra Fluffy

For even fluffier pancakes, add 1/2 teaspoon of baking soda or whip the egg separately before folding it into the batter.

3. Infuse More Flavor

While the banana adds natural sweetness, you can enhance the flavor with:

  • Cinnamon for warmth
  • Vanilla extract for a touch of sweetness
  • Nutmeg for a deeper spice profile

4. Add Toppings for Extra Goodness

Once your pancakes are ready, the right toppings can elevate them from simple to extraordinary. Some great options include:

  • Fresh fruits (strawberries, blueberries, sliced bananas)
  • Drizzle of honey or maple syrup
  • A dollop of Greek yogurt for extra creaminess
  • Chopped nuts for added crunch

Common Mistakes and How to Avoid Them

Even though this recipe is simple, small mistakes can affect the texture and taste of your pancakes. Here are a few things to watch out for:

1. Batter Too Thick or Too Thin?

  • If your batter is too thick, add a little extra milk to loosen it up.
  • If it’s too runny, let it sit for a few extra minutes to thicken as the oats absorb the liquid.

2. Overcooking or Undercooking

Cooking pancakes at too high a temperature can cause the outside to burn while the inside remains undercooked. Keep the heat at medium-low for even cooking.

3. Not Mashing the Banana Properly

For a smooth batter, make sure the banana is well mashed before mixing. If there are large chunks, the batter may not cook evenly.

4. Not Letting the Batter Rest

Letting the batter sit for about 5 minutes before cooking helps the oats absorb the milk, leading to a thicker and more cohesive batter.

FAQs About Banana Oatmeal Pancakes

1. Can I Make These Pancakes Without Eggs?

Yes! You can replace the egg with:

  • A flaxseed egg (1 tbsp ground flaxseed + 3 tbsp water)
  • Unsweetened applesauce (1/4 cup)

2. Can I Use Instant Oats Instead of Rolled Oats?

Yes, instant oats work, but they may result in a slightly softer texture. Rolled oats provide more structure and chewiness.

3. Can I Freeze These Pancakes?

Absolutely! Let them cool completely, then store them in an airtight container or freezer bag. When ready to eat, reheat them in a toaster, oven, or microwave.

4. Can I Use a Blender to Make the Batter?

Yes! Blending the batter will create smoother pancakes with a more uniform texture. This is a great option if you prefer a fluffier pancake.

5. How Do I Make These Pancakes Crispy on the Edges?

For crispy edges, cook the pancakes in a lightly greased pan and avoid flipping them too early. Let the bottom set and brown before flipping.

Conclusion: A Perfectly Balanced and Easy-to-Make Breakfast

Banana oatmeal pancakes are more than just a delicious breakfast—they are a nutritious, filling, and adaptable meal that can be enjoyed in countless ways. Whether you prefer them plain, topped with fresh fruits, or paired with your favorite spreads, these pancakes offer a naturally sweet and wholesome start to your day.

With no refined sugar, plenty of fiber, and essential nutrients, they are a great option for both kids and adults. Plus, they are quick to prepare, require minimal ingredients, and can be customized to fit different dietary needs.

If you’re looking for a healthy yet satisfying breakfast that is easy to make and incredibly tasty, give these banana oatmeal pancakes a try. Once you do, they just might become your new go-to morning favorite!

Amal

Banana Oatmeal Pancakes – A Wholesome and Delicious Breakfast

These banana oatmeal pancakes are soft, naturally sweet, and packed with fiber and protein. Made with just a few wholesome ingredients, they are quick to prepare and perfect for a nutritious breakfast or snack. No refined sugar, no flour—just simple, healthy goodness in every bite!
Prep Time 5 minutes
Cook Time 5 minutes
Total Time 10 minutes
Servings: 6 small pancakes
Course: Breakfast
Cuisine: American

Ingredients
  

  • 100 g oatmeal
  • 125 ml milk dairy or plant-based
  • 1 banana mashed
  • 1 egg

Method
 

  1. In a bowl, mash the banana until smooth.
  2. Add the egg, milk, and oatmeal, then mix until well combined.
  3. Let the batter rest for 5 minutes to allow the oats to absorb the liquid.
  4. Heat a non-stick pan over medium-low heat and lightly grease it.
  5. Pour small portions of batter onto the pan, shaping them into pancakes.
  6. Cook for 2-3 minutes on one side, then flip and cook for another 1-2 minutes until golden brown.
  7. Serve warm with your favorite toppings such as honey, fresh fruit, or yogurt.

Notes

  • For a smoother texture, blend the batter before cooking.
  • Add a pinch of cinnamon or vanilla extract for extra flavor.
  • Use almond, coconut, or oat milk for a dairy-free version.
  • Store leftovers in an airtight container in the fridge for up to 2 days or freeze for later use.

No-Oven Super Soft Milk Bread – The Perfect Homemade Bread Recipe

Making fresh, soft, and fluffy bread at home doesn’t require an oven. This easy no-oven milk bread recipe is a game-changer for those who love homemade bread but don’t have access to traditional baking methods. The result? A light, airy, and slightly sweet bread with a tender crumb that melts in your mouth.

If you’ve ever thought baking bread at home was too complicated, this recipe will prove you wrong. It requires basic pantry ingredients, simple techniques, and a little patience to achieve bakery-quality bread. Whether you’re making it for breakfast, sandwiches, or just to enjoy with butter and jam, this stovetop milk bread is bound to become a household favorite.

Why This No-Oven Milk Bread is a Must-Try

Homemade bread has a charm that store-bought bread simply can’t match. From the warm, inviting aroma to the satisfaction of slicing into a freshly baked loaf, there’s something incredibly rewarding about baking bread from scratch.

This milk bread recipe is particularly special because it:

1. Requires No Oven

Many people assume that soft, fluffy bread can only be baked in an oven, but this recipe proves otherwise. Cooking it in a covered pan on the stovetop ensures that it rises beautifully and develops a golden, tender crust.

2. Has a Soft, Pillow-Like Texture

Unlike regular bread, which can sometimes turn out dense or dry, this milk bread is incredibly soft and light. The secret lies in the combination of milk and butter, which enriches the dough and keeps it moist.

3. Uses Simple and Affordable Ingredients

This recipe doesn’t require any fancy or hard-to-find ingredients. With just flour, milk, yeast, butter, sugar, and salt, you can create a batch of fresh bread at home without breaking the bank.

4. Is Perfect for Multiple Uses

This milk bread can be enjoyed in many ways—toast it for breakfast, make sandwiches, serve it with soups, or even turn it into a dessert by adding sweet toppings. The possibilities are endless.

Ingredients

IngredientQuantity
Warm milk150ml
White sugar25g (2 tbsp)
Active dry yeast3g (1 tsp)
Egg1
All-purpose or bread flour300g
Salt3g (0.5 tsp)
Unsalted butter (for dough)30g (2 tbsp)
Unsalted butter (for baking pan)5g

Directions

  1. In a bowl, mix warm milk, sugar, and yeast. Let sit for 5-10 minutes until foamy.
  2. Add the egg, flour, and salt to the yeast mixture and mix until a rough dough forms.
  3. Knead the dough for 10 minutes, then add butter and knead for another 5 minutes until smooth and elastic.
  4. Cover and let the dough rise for 1 hour, or until doubled in size.
  5. Punch down the dough, divide into equal portions, and shape into rolls.
  6. Grease a pan with butter and place the rolls inside. Cover and let rise for another 30 minutes.
  7. Heat a covered pan on low heat and place the rolls inside. Cook for 10-12 minutes on one side, then flip and cook for another 8-10 minutes until golden brown and fully cooked.
  8. Let the bread cool slightly before serving.

Nutritional Information (Per Serving, Approx.)

NutrientAmount
Calories180 kcal
Protein5g
Carbohydrates30g
Fats5g
Fiber1g
Sugar4g
Calcium50mg
Iron1mg

The Secret to Making Soft and Fluffy Milk Bread

Many home bakers struggle with making bread that is light and airy instead of dense and heavy. Here are a few key tips to ensure your no-oven milk bread turns out perfectly every time:

1. Use Warm Milk for Activation

Warm milk helps activate the yeast, allowing the dough to rise properly. If the milk is too hot, it will kill the yeast; if it’s too cold, the yeast won’t activate effectively. The ideal temperature is around 100-110°F (37-43°C).

2. Knead the Dough Well

Kneading helps develop the gluten in the flour, which is essential for a soft, stretchy dough. Knead until the dough becomes smooth and elastic, which usually takes about 10-15 minutes by hand. If the dough is too sticky, resist the temptation to add too much extra flour, as this can make the bread dry.

3. Allow Proper Rising Time

Patience is key when making bread. The dough needs time to rise and double in size. A warm, draft-free environment is best for proofing. If the dough doesn’t rise enough, the bread may turn out dense.

4. Cook on Low Heat for Even Baking

Since this bread is cooked on the stovetop, maintaining the right heat level is crucial. If the heat is too high, the outside will brown too quickly while the inside remains undercooked. Using low to medium-low heat allows the bread to cook evenly.

Ways to Enjoy No-Oven Milk Bread

This bread is delicious on its own, but you can take it to the next level with these serving ideas:

1. Classic Butter and Jam

Spread a generous layer of butter and your favorite jam on a warm slice of milk bread for a simple yet satisfying treat.

2. French Toast

Dip slices of this bread in a mixture of eggs, milk, and cinnamon, then cook them in a pan for a rich and flavorful breakfast.

3. Sandwiches and Sliders

Since this bread is soft yet sturdy, it makes a fantastic base for sandwiches. Use it for breakfast sandwiches, grilled cheese, or mini sliders.

4. Bread Pudding

If you have leftovers, turn them into a delicious bread pudding by soaking them in a mixture of milk, eggs, sugar, and vanilla, then baking or steaming until set.

Common Mistakes to Avoid

Even though this bread is easy to make, a few mistakes can affect the final outcome. Here’s how to avoid them:

1. Not Activating the Yeast Properly

If your yeast doesn’t foam up after being mixed with warm milk and sugar, it might be expired, or the milk might be too hot or too cold. Always check the freshness of your yeast before starting.

2. Using Too Much Flour

Adding too much flour to the dough can make it stiff and dry. If the dough is slightly sticky, that’s okay—it will become smoother as you knead. Only add extra flour if it’s too wet to handle.

3. Skipping the Second Rise

The second rise allows the dough to develop a better texture. If you skip this step, the bread may turn out dense instead of soft and fluffy.

4. Cooking at Too High a Temperature

Bread needs time to cook through without burning on the outside. Keeping the heat low and covering the pan helps trap steam, which mimics an oven’s baking environment.

FAQs About No-Oven Milk Bread

1. Can I Use Whole Wheat Flour Instead of All-Purpose Flour?

Yes, but whole wheat flour absorbs more liquid and may result in a denser texture. To maintain softness, use half whole wheat and half all-purpose flour.

2. How Do I Store Leftover Milk Bread?

Store the bread in an airtight container or wrap it in plastic wrap at room temperature for up to 3 days. If you need to store it longer, freeze it and reheat before serving.

3. Can I Make This Recipe Vegan?

Yes! Replace milk with a plant-based alternative (such as almond or soy milk), butter with vegan butter or coconut oil, and the egg with a flaxseed or chia egg.

4. What If I Don’t Have Yeast?

You can try making a quick version using baking powder, but the texture will be different. Yeast provides the signature fluffiness of milk bread.

5. Can I Cook This Bread in an Oven Instead?

Absolutely! If you prefer to bake it, preheat your oven to 180°C (350°F) and bake for about 20-25 minutes, or until golden brown on top.

Conclusion: A Soft and Fluffy Bread You Can Make Anytime

This no-oven milk bread proves that homemade bread can be both simple and incredibly delicious. Whether you’re new to bread-making or looking for a stovetop alternative, this recipe is easy to follow and yields a bakery-quality loaf with minimal effort.

With its soft texture, rich flavor, and endless serving possibilities, this bread is perfect for breakfast, snacks, or even meal prep. Plus, it’s a great way to enjoy fresh, preservative-free bread at home without needing an oven.

If you’ve never made bread before, now is the time to try! This easy stovetop bread recipe will change the way you think about homemade bread forever.

Amal

No-Oven Super Soft Milk Bread – The Perfect Homemade Bread Recipe

This incredibly soft and fluffy milk bread is made without an oven, using a simple stovetop method. With just a few basic ingredients, you can enjoy fresh, homemade bread that is perfect for sandwiches, breakfast, or as a snack. The rich, buttery flavor and tender texture make this bread irresistible!
Prep Time 15 minutes
Cook Time 20 minutes
Total Time 1 hour 35 minutes
Servings: 6 -8 rolls
Course: Breakfast
Cuisine: Comfort Food

Ingredients
  

  • 150 ml warm milk
  • 25 g 2 tbsp white sugar
  • 3 g 1 tsp active dry yeast
  • 1 egg
  • 300 g all-purpose or bread flour
  • 3 g 0.5 tsp salt
  • 30 g 2 tbsp unsalted butter (for dough)
  • 5 g unsalted butter for baking pan

Method
 

  1. In a bowl, mix warm milk, sugar, and yeast. Let sit for 5-10 minutes until foamy.
  2. Add the egg, flour, and salt, then mix until a rough dough forms.
  3. Knead the dough for 10 minutes, then add butter and continue kneading for another 5 minutes until smooth and elastic.
  4. Cover the dough and let it rise for 1 hour, or until doubled in size.
  5. Punch down the dough, divide into equal portions, and shape into rolls.
  6. Grease a pan with butter and place the rolls inside. Cover and let rise for another 30 minutes.
  7. Heat a covered pan on low heat and place the rolls inside. Cook for 10-12 minutes on one side, then flip and cook for another 8-10 minutes until golden brown and fully cooked.
  8. Let the bread cool slightly before serving.

Notes

  • Ensure the yeast is active by letting it foam in the warm milk before proceeding.
  • Use low heat while cooking to prevent burning while allowing the bread to cook through.
  • Store in an airtight container at room temperature for up to 3 days or freeze for longer storage.
  • Serve warm with butter, jam, or honey for extra flavor.

The Easiest and Most Delicious Apple Recipe You Can Make in Minutes

Apples are one of the most versatile fruits in the kitchen. Whether baked into pies, blended into smoothies, or eaten fresh, they add natural sweetness, fiber, and a subtle tartness that enhances both sweet and savory dishes. This quick and simple apple recipe transforms an everyday ingredient into a warm, comforting, and delicious treat in just minutes.

If you’re looking for a fast way to use up that single apple sitting on your counter, this recipe is the perfect solution. With a few basic pantry ingredients, you can create a light, fluffy, and subtly spiced apple treat that works for breakfast, a snack, or even dessert.

Why This Apple Recipe Stands Out

Unlike more complex apple-based desserts like pies, crumbles, or tarts, this recipe is straightforward, requiring no special skills or equipment. With just a mixing bowl, a pan, and a few simple steps, you can have a warm, golden treat ready to enjoy.

Here’s what makes this recipe unique:

1. Quick and Easy Preparation

This recipe comes together in under 5 minutes, making it ideal for busy mornings, quick snacks, or last-minute dessert cravings. There’s no need for proofing, chilling, or baking—just mix, cook, and enjoy.

2. Minimal Ingredients, Maximum Flavor

The combination of yogurt, vanilla, and cinnamon enhances the natural sweetness of apples, giving the dish a warm, comforting taste without the need for excessive sugar. The yogurt keeps the texture moist and fluffy, while cinnamon adds a hint of spice that pairs perfectly with the apple.

3. A Healthier Alternative to Traditional Desserts

While many apple-based treats are loaded with butter, sugar, and refined flours, this recipe uses wholesome ingredients like yogurt and apples for a naturally sweet, protein-rich, and fiber-packed dish. It satisfies a sweet craving without the guilt.

4. Versatile for Any Meal or Occasion

This recipe isn’t just for dessert. It can be enjoyed:

  • For breakfast, as a light yet satisfying start to the day.
  • As a snack, when you need something quick and nutritious.
  • As a dessert, topped with honey, a sprinkle of powdered sugar, or a dollop of whipped cream.

Ingredients

IngredientQuantity
Egg1
Sugar40g (3 tbsp)
Vanilla extract1/2 tsp
Yogurt150g (2/3 cup)
All-purpose flour200g (1 2/3 cups)
Baking powder8g (2 tsp)
Medium apple (peeled, cored, and grated)1
CinnamonA pinch

Directions

  1. In a bowl, whisk together the egg, sugar, and vanilla extract until well combined.
  2. Add the yogurt and mix until smooth.
  3. Sift in the flour and baking powder, then gently fold until a thick batter forms.
  4. Stir in the grated apple and cinnamon, ensuring even distribution.
  5. Heat a non-stick pan over medium-low heat and lightly grease it.
  6. Drop spoonfuls of batter onto the pan, flattening slightly.
  7. Cook for 2-3 minutes on each side until golden brown and fully cooked through.
  8. Serve warm, optionally dusted with powdered sugar or drizzled with honey.

Nutritional Information (Per Serving, Approx.)

NutrientAmount
Calories180 kcal
Protein4g
Carbohydrates32g
Fats3g
Fiber2g
Sugar10g
Calcium90mg
Iron1mg

The Secret to Perfect Texture and Flavor

1. The Role of Yogurt

Using yogurt in this recipe does more than just add moisture. It helps create a tender and fluffy texture, similar to a pancake or muffin. Additionally, the slight tanginess of yogurt balances the sweetness of the apple, preventing the dish from becoming overly sweet.

2. Why Grated Apple Works Best

Instead of chopping or slicing, grating the apple ensures that it blends evenly into the batter. This not only enhances the natural sweetness in every bite but also helps the batter stay light and airy. Plus, it eliminates the need for pre-cooking or sautéing the apples, saving time.

3. Cinnamon: A Small Addition with Big Impact

Cinnamon is a classic companion to apples, and for good reason. It adds a warm, aromatic depth of flavor that elevates the dish beyond just a simple apple treat. If you want to experiment, try adding nutmeg, allspice, or even a touch of cardamom for a different twist.

Ways to Customize This Recipe

While this recipe is already delicious as written, it’s also highly adaptable. Here are some variations you can try:

1. Add Nuts for Extra Crunch

For added texture and flavor, stir in chopped walnuts, pecans, or almonds into the batter. The nutty crunch pairs beautifully with the softness of the apple.

2. Make It Chocolatey

If you love chocolate, a handful of chocolate chips or a drizzle of melted chocolate on top can turn this simple recipe into a decadent treat.

3. Go Dairy-Free

For a dairy-free version, substitute the yogurt with coconut yogurt or almond-based yogurt. You can also use plant-based milk with a teaspoon of lemon juice as a yogurt alternative.

4. Sweeten It Naturally

If you prefer to avoid refined sugar, replace the sugar with honey, maple syrup, or coconut sugar for a more natural sweetness.

5. Turn It Into a Baked Dessert

Instead of cooking it in a pan, you can bake the batter in muffin tins for a soft, apple-infused cake. Simply preheat your oven to 180°C (350°F) and bake for about 15-18 minutes.

Common Mistakes and How to Avoid Them

Even though this recipe is simple, a few common mistakes can affect the final result. Here’s what to watch out for:

1. Using Too Much Flour

Adding too much flour can make the batter too thick, resulting in a dense texture. Always measure your flour accurately and avoid packing it into the measuring cup.

2. Overmixing the Batter

Overmixing can lead to a tough, chewy texture instead of a light and fluffy one. Stir just until the ingredients are combined—no more.

3. Cooking at Too High a Temperature

If your pan is too hot, the outside may cook too quickly while the inside remains raw. Use medium-low heat to ensure even cooking.

4. Skipping the Cinnamon

It may seem like a small ingredient, but skipping cinnamon means missing out on the warm, spiced flavor that enhances the apples. Even just a pinch makes a difference.

FAQs About This Recipe

1. Can I Use a Different Type of Apple?

Yes! While any apple will work, sweet and slightly tart varieties like Honeycrisp, Gala, or Fuji are best. Granny Smith apples will add more tartness, while Red Delicious will make the dish naturally sweeter.

2. How Do I Store Leftovers?

This dish is best enjoyed fresh, but leftovers can be stored in an airtight container at room temperature for up to 24 hours or in the fridge for 2-3 days. Reheat gently in a pan or microwave before serving.

3. Can I Freeze This Recipe?

Yes, you can freeze cooked portions for up to 1 month. Wrap them tightly in plastic wrap or store in an airtight container. To reheat, thaw overnight in the fridge and warm in a pan or oven.

4. Is This Recipe Gluten-Free?

Not as written, but you can easily make it gluten-free by using a 1:1 gluten-free flour blend instead of all-purpose flour. The texture may be slightly different, but it will still be delicious.

5. Can I Make This Recipe Vegan?

Yes! Simply replace the egg with a flaxseed egg (1 tbsp ground flaxseed + 3 tbsp water) and use a plant-based yogurt.

Conclusion: A Simple, Delicious, and Versatile Apple Recipe

This quick apple recipe proves that you don’t need complicated steps or fancy ingredients to make something delicious, comforting, and satisfying. With minimal prep time, easy instructions, and plenty of room for customization, this dish is perfect for any occasion.

Whether you enjoy it for breakfast, as a snack, or as a light dessert, its soft texture, natural sweetness, and hint of warm spice make it irresistible. Pl us, with the added bonus of being nutritious and easy to prepare, there’s no reason not to try it today.

If you have just one apple at home, don’t let it go to waste—turn it into this simple, quick, and delicious treat in just five minutes!

Amal

The Easiest and Most Delicious Apple Recipe You Can Make in Minutes

This quick and easy apple recipe is perfect for when you need a delicious treat in minutes! With simple ingredients and no complicated steps, you can create a soft, fluffy, and naturally sweet dish that’s great for breakfast, a snack, or a light dessert.
Prep Time 5 minutes
Cook Time 5 minutes
Total Time 10 minutes
Servings: 6 servings
Course: Snack
Cuisine: Quick & Easy

Ingredients
  

  • 1 egg
  • 40 g 3 tbsp sugar
  • 1/2 tsp vanilla extract
  • 150 g 2/3 cup yogurt
  • 200 g 1 2/3 cups all-purpose flour
  • 8 g 2 tsp baking powder
  • 1 medium apple peeled, cored, and grated
  • A pinch of cinnamon

Method
 

  1. In a bowl, whisk together the egg, sugar, and vanilla extract until smooth.
  2. Add the yogurt and mix until fully combined.
  3. Sift in the all-purpose flour and baking powder, then gently fold until a thick batter forms.
  4. Stir in the grated apple and cinnamon, ensuring even distribution.
  5. Heat a non-stick pan over medium-low heat and lightly grease it.
  6. Drop spoonfuls of batter onto the pan, flattening slightly.
  7. Cook for 2-3 minutes on each side until golden brown and fully cooked through.
  8. Serve warm, optionally dusted with powdered sugar or drizzled with honey.

Notes

  • For extra crunch, add chopped walnuts or almonds to the batter.
  • To make it dairy-free, substitute yogurt with coconut yogurt or almond-based yogurt.
  • Adjust sweetness by adding honey or maple syrup instead of sugar.
  • These can be stored in an airtight container for up to 2 days or frozen for later use.

Cabbage Rolls This Way Is Incredibly Delicious! A Simple Yet Flavorful Recipe

Cabbage rolls have been enjoyed in different cuisines around the world, from Eastern Europe to Asia and the Middle East. Traditionally, they are made by wrapping cabbage leaves around a variety of fillings, often including meat, grains, or vegetables. This particular version offers a lighter, vegetarian take on the dish while still packing plenty of flavor and texture.

What makes this cabbage roll recipe stand out is its simplicity. There’s no need for complex cooking techniques or special equipment—just fresh cabbage, a well-seasoned filling, and a quick cooking process. Whether you are looking for a comforting meal, a healthy side dish, or a vegetarian alternative to classic cabbage rolls, this recipe delivers everything you need.

Why Cabbage Rolls Are a Must-Try Dish

Cabbage rolls are a wonderful combination of fresh, wholesome ingredients and comforting textures. The outer cabbage leaves turn soft and slightly sweet as they cook, while the filling provides a burst of flavor with its mix of mashed potatoes, vegetables, and spices.

1. Simple and Budget-Friendly

One of the best things about this recipe is that it uses basic ingredients that are easy to find. Potatoes, carrots, onions, and cabbage are affordable, nutritious staples that come together beautifully in this dish. If you’re looking for an economical way to create a satisfying meal, this recipe is perfect.

2. Naturally Healthy and Nutritious

Cabbage is packed with fiber, vitamins, and antioxidants, making it a great choice for a healthy diet. The combination of vegetables in this recipe provides a variety of essential nutrients, including vitamin C, potassium, and iron. The absence of heavy oils and excessive fats keeps this dish light while still being filling.

3. Great for Meal Prep

These cabbage rolls can be prepared in advance and stored in the refrigerator for several days. They also freeze well, making them a convenient meal option for busy days. Simply reheat them, and they’re ready to serve.

4. A Versatile Dish for Any Occasion

This dish can be served as a main course, a side dish, or even an appetizer. Whether you’re making a simple home-cooked meal or preparing food for a gathering, cabbage rolls are a great option that everyone will enjoy.

Ingredients

For the Filling

IngredientQuantity
Boiled potato, mashed1 cup
Capsicum, finely chopped2 tbsp
Grated carrot2 tbsp
Onion, finely chopped2 tbsp
Green chili, finely chopped½ tsp
Coriander powder½ tsp
Salt½ tsp
Coriander leaves, chopped1 tbsp

For the Cabbage Rolls

IngredientQuantity
Large cabbage leaves6-8 leaves
Oil1 tbsp
Garlic, minced1 tsp
Tomato puree½ cup
Black pepper¼ tsp
Salt¼ tsp
Water¼ cup

Directions

Step 1: Prepare the Cabbage Leaves

  1. Bring a pot of water to a boil and blanch the cabbage leaves for about 2 minutes until soft.
  2. Drain and set them aside to cool.

Step 2: Make the Filling

  1. In a mixing bowl, combine mashed potatoes, capsicum, carrot, onion, green chili, coriander powder, salt, and coriander leaves. Mix well.

Step 3: Assemble the Rolls

  1. Take a cabbage leaf and place 2 tablespoons of filling at one end.
  2. Roll the leaf tightly, folding the sides in to secure the filling. Repeat for all leaves.

Step 4: Cook the Cabbage Rolls

  1. Heat oil in a pan and sauté garlic until fragrant.
  2. Add tomato puree, black pepper, salt, and water, and let it simmer for 5 minutes.
  3. Place the cabbage rolls in the pan, cover, and cook on low heat for 10 minutes, allowing the flavors to blend.

Step 5: Serve

  1. Remove from heat and serve warm, garnished with fresh coriander leaves.

Nutritional Information (Per Serving, Approx.)

NutrientAmount
Calories120 kcal
Protein3g
Carbohydrates18g
Fats4g
Fiber3g
Sugar3g
Sodium280mg
Vitamin C35% DV

The Secret to Perfect Cabbage Rolls

Making great cabbage rolls comes down to a few key techniques. While this recipe is incredibly easy, paying attention to small details can make a big difference in the final result.

1. Choosing the Right Cabbage

Using the right type of cabbage is essential for soft, pliable rolls. A medium to large-sized green cabbage works best because its leaves are flexible and become tender when cooked. If possible, choose a fresh cabbage with crisp, vibrant leaves, as these will hold up better during cooking.

2. Softening the Cabbage Leaves

Blanching the cabbage leaves before rolling them is a crucial step. This softens the leaves, making them easier to wrap around the filling without tearing. To blanch, simply place the cabbage leaves in boiling water for a minute or two until they become pliable.

3. Balancing the Filling

The filling is what gives cabbage rolls their signature taste and texture. In this recipe, mashed potatoes provide a creamy base, while carrots, onions, and capsicum add texture and flavor. The seasoning enhances the overall taste, making sure each bite is well-balanced.

4. Cooking the Rolls in a Flavorful Sauce

Cooking the cabbage rolls in a lightly seasoned tomato-based sauce helps infuse them with even more flavor. As they simmer, the cabbage absorbs the sauce, making the rolls even more delicious.

Variations to Try

This cabbage roll recipe is incredibly versatile, allowing you to adjust the ingredients and flavors to suit your taste. Here are some ideas to customize it:

1. Add Protein for a Heartier Meal

If you want to make these cabbage rolls more filling, consider adding a protein source such as cooked lentils, crumbled tofu, or shredded cheese to the filling. This will enhance the nutritional value while keeping the dish vegetarian.

2. Try a Spiced Version

For those who enjoy bolder flavors, add a pinch of cumin, paprika, or garam masala to the filling. This will give the cabbage rolls a unique, aromatic taste.

3. Use Different Vegetables

Feel free to experiment with different vegetables in the filling. Finely chopped mushrooms, zucchini, or spinach can be added for more texture and flavor.

4. Make It a Casserole

Instead of rolling individual cabbage leaves, you can layer the cabbage and filling in a baking dish and bake it as a casserole. This method is quicker and still delivers the same great taste.

Common Mistakes and How to Avoid Them

While this recipe is simple, a few common mistakes can affect the final result. Here’s how to ensure your cabbage rolls turn out perfect every time.

1. Cabbage Leaves Tearing During Rolling

This usually happens if the leaves are not softened enough. Make sure to blanch them properly so they are flexible and easy to handle.

2. Filling Falling Out

If the rolls are not sealed tightly, the filling may spill out during cooking. When rolling, tuck in the sides of the cabbage leaf securely before rolling it up completely.

3. Rolls Becoming Too Dry

Cooking the rolls with a sauce helps keep them moist. If they seem dry, add a little extra liquid, such as vegetable broth or tomato sauce, to the pan while cooking.

4. Overcooking the Rolls

Cabbage becomes overly soft and mushy if cooked for too long. Keep an eye on the cooking time to ensure the rolls maintain their structure and texture.

FAQs About Cabbage Rolls

1. Can I Make These Rolls in Advance?

Yes! You can prepare the rolls a day ahead and store them in the refrigerator before cooking. This allows the flavors to develop even more.

2. Can I Freeze Cabbage Rolls?

Absolutely. Once assembled, you can freeze the uncooked rolls in an airtight container for up to 2 months. When ready to eat, thaw them in the refrigerator overnight and cook as usual.

3. How Do I Reheat Leftover Cabbage Rolls?

Reheat them in a pan over low heat with a splash of water or tomato sauce to keep them moist. You can also microwave them for a few minutes.

4. Can I Use Red Cabbage Instead of Green Cabbage?

While green cabbage is the most commonly used variety, red cabbage can also work. However, red cabbage has a slightly different texture and a stronger flavor.

5. What Can I Serve with Cabbage Rolls?

These rolls pair well with a side of rice, a fresh salad, or a yogurt-based dip. They can also be enjoyed on their own as a light and nutritious meal.

Conclusion: A Simple Yet Delicious Dish for Any Occasion

Cabbage rolls are a timeless dish that combines fresh, nutritious ingredients with comforting flavors. This simplified version is perfect for those who want an easy yet delicious way to enjoy this classic recipe.

With a soft cabbage exterior and a well-seasoned filling, these rolls offer the perfect balance of texture and taste. Whether you serve them as a main dish or a side, they are sure to impress.

If you’re looking for a budget-friendly, healthy, and satisfying meal, give this cabbage roll recipe a try. Once you taste how delicious and easy they are to make, they’ll quickly become a favorite in your kitchen.

Amal

Cabbage Rolls This Way Is Incredibly Delicious! A Simple Yet Flavorful Recipe

These cabbage rolls are incredibly easy to make and packed with flavor. Tender cabbage leaves wrap around a deliciously seasoned vegetable filling, making them a healthy and satisfying meal. Whether you serve them as a main dish or a side, they are sure to impress with their taste and simplicity.
Prep Time 15 minutes
Cook Time 15 minutes
Total Time 30 minutes
Servings: 4 servings
Course: Main Dish
Cuisine: Fusion

Ingredients
  

For the Filling:
  • 1 cup boiled potato mashed
  • 2 tbsp capsicum finely chopped
  • 2 tbsp grated carrot
  • 2 tbsp onion finely chopped
  • ½ tsp green chili finely chopped
  • ½ tsp coriander powder
  • ½ tsp salt
  • 1 tbsp coriander leaves chopped
For the Cabbage Rolls:
  • 6-8 large cabbage leaves
  • 1 tbsp oil
  • 1 tsp garlic minced
  • ½ cup tomato puree
  • ¼ tsp black pepper
  • ¼ tsp salt
  • ¼ cup water

Method
 

  1. Bring a pot of water to a boil and blanch the cabbage leaves for about 2 minutes until they are soft. Drain and set aside.
  2. In a mixing bowl, combine mashed potatoes, capsicum, carrot, onion, green chili, coriander powder, salt, and coriander leaves. Mix well.
  3. Take a cabbage leaf and place 2 tablespoons of filling at one end. Roll tightly, folding the sides in to secure the filling. Repeat for all leaves.
  4. Heat oil in a pan and sauté the garlic until fragrant. Add tomato puree, black pepper, salt, and water, then simmer for 5 minutes.
  5. Place the cabbage rolls in the pan, cover, and cook on low heat for 10 minutes, allowing the flavors to blend.
  6. Remove from heat and serve warm, garnished with fresh coriander leaves.

Notes

  • To make this dish spicier, add extra green chilies or a pinch of red pepper flakes.
  • For added protein, mix in cooked lentils or crumbled paneer into the filling.
  • These rolls can be prepared in advance and stored in the refrigerator for up to 3 days.
  • Serve with a yogurt dip or a side of rice for a complete meal.

The Easiest Way to Make Croissants – No Folding, No Machine Required!

Croissants are one of the most beloved pastries worldwide, known for their delicate layers, buttery taste, and crisp, flaky exterior. Traditionally, making croissants is a time-consuming process that involves meticulous folding, laminating, and precise temperature control. However, what if you could enjoy homemade croissants with a much simpler method?

This easy croissant recipe eliminates the need for repeated folding and laminating, making it accessible even for beginners. Without compromising on the buttery richness or the soft, airy texture, this technique allows you to create bakery-quality croissants with minimal effort. Whether you are a seasoned baker or trying homemade croissants for the first time, this method is the perfect solution.

Why This Method Works

Traditional croissant-making involves incorporating layers of butter between thin sheets of dough through a time-consuming folding and rolling process. While this method produces the classic French croissant, it requires skill and patience.

This simplified approach, however, allows you to work butter into the dough in a way that still achieves flakiness but without the repeated laminating process. By using a pre-flattened butter layer and folding it once, the dough still captures air and retains a rich, buttery flavor. The result is a croissant that is crisp on the outside, soft on the inside, and far easier to make.

Here are some key reasons why this method is a game-changer:

  • No Special Equipment Required: Unlike traditional croissant recipes that require a pastry sheeter or stand mixer, this technique can be done entirely by hand.
  • Beginner-Friendly: Since there’s no need for multiple folds, even those new to baking can achieve success.
  • Time-Saving: While croissants typically take 2-3 days to prepare, this method shortens the process significantly.
  • Consistently Flaky: Even without traditional laminating, the butter incorporation method used here still creates beautifully airy and delicate layers.

Ingredients

IngredientQuantity
Bread flour300g (2 cups)
Instant yeast4g (1/2 tbsp.)
Sugar25g (2 tbsp.)
Egg1pc (50g ±)
Milk145g (0.6 cup)
Salt3g (1/2 tsp)
Unsalted butter (for dough)20g (1.4 tbsp.)
Unsalted butter (for layering)90g (6 tbsp.)

Directions

Step 1: Prepare the Dough

  1. In a mixing bowl, combine bread flour, instant yeast, sugar, and salt.
  2. Add the egg and milk, mixing until the dough starts coming together.
  3. Knead the dough for about 5-7 minutes until smooth and elastic.
  4. Add 20g unsalted butter, and continue kneading until fully incorporated.
  5. Cover and let the dough rest for 1 hour, or until doubled in size.

Step 2: Prepare the Butter Layer

  1. Place 90g unsalted butter between two sheets of parchment paper.
  2. Use a rolling pin to flatten it into a thin rectangle (about 15x20cm / 6×8 inches).
  3. Refrigerate until firm but pliable.

Step 3: Incorporate the Butter

  1. Lightly flour a surface and roll out the dough into a larger rectangle (about twice the size of the butter sheet).
  2. Place the butter sheet in the center, then fold the dough over it, sealing the edges.

Step 4: Roll and Shape

  1. Roll the dough into a large rectangle and cut it into triangles.
  2. Roll each triangle from the wide base to the tip to form the classic croissant shape.
  3. Arrange them on a baking sheet and let them rise for 45 minutes.

Step 5: Bake

  1. Preheat the oven to 180°C (350°F).
  2. Brush the croissants with an egg wash (1 beaten egg + 1 tbsp milk).
  3. Bake for 18-20 minutes, or until golden brown and flaky.
  4. Let them cool slightly before serving.

Nutritional Information (Per Croissant, Approx.)

NutrientAmount
Calories260 kcal
Protein6g
Carbohydrates30g
Fats14g
Saturated Fat8g
Fiber1g
Sugar4g
Calcium40mg
Iron1.2mg

The Secret to Flaky, Buttery Croissants Without Folding

One of the defining features of croissants is their signature layers. The traditional method involves folding and chilling the dough multiple times to create ultra-thin layers separated by butter. However, this alternative method simplifies the process while still delivering a flaky, buttery texture.

The key to this technique is preparing a single butter sheet, placing it inside the dough, and then rolling and shaping it. This creates small air pockets that expand during baking, giving the croissants their light and airy structure.

Another important factor is using cold butter that remains solid inside the dough. This ensures that the butter melts gradually in the oven, creating steam that separates the layers and results in the flaky texture croissants are known for.

The Magic of Butter in Croissants

Butter is the soul of a great croissant. It contributes to the pastry’s delicate texture, rich flavor, and golden crust. Here’s why choosing the right butter and using it correctly makes all the difference:

  • High-Quality Butter Matters – European-style butter with a higher fat content (82% or more) is ideal, as it contains less water and more fat, leading to a richer and flakier croissant.
  • Cold Butter is Essential – When butter remains cold throughout the process, it creates air pockets as it bakes, making the layers distinct and crisp.
  • Even Distribution is Key – Flattening the butter into a uniform sheet ensures it is evenly incorporated into the dough, preventing greasy or uneven croissants.

Perfecting the Texture: Tips for Success

Although this method makes croissant-making easier, there are a few important techniques that will ensure perfect results:

1. Use the Right Flour

Bread flour is the best choice for croissants because it has a higher protein content than all-purpose flour. This helps build gluten, giving the dough the strength it needs to rise and create light, airy layers.

2. Knead the Dough Just Enough

Kneading develops gluten, which is essential for a structured dough. However, over-kneading can make the croissants too tough. Knead until the dough is smooth and elastic but still soft.

3. Let the Dough Rise Properly

Allowing the dough to double in size during the first rise gives it a light, airy structure. A warm, draft-free environment is ideal for proper proofing.

4. Chill the Butter But Keep It Pliable

The butter sheet should be firm enough to handle but still flexible. If it’s too hard, it will crack when rolling; if it’s too soft, it will melt into the dough.

5. Bake at the Right Temperature

Baking croissants at 180°C (350°F) ensures they rise properly and develop a crisp, golden crust. If the temperature is too low, the butter will seep out; if it’s too high, they may burn before fully baking.

Common Mistakes to Avoid

Even with a simplified method, certain mistakes can affect the outcome. Here are some of the most common issues and how to fix them:

  • Dough Too Sticky? – If the dough feels too sticky to work with, chill it for 15 minutes before rolling. Adding a light dusting of flour can also help.
  • Butter Oozing Out? – If the butter starts leaking during baking, it may not have been cold enough before rolling. Ensure the dough is always properly chilled before shaping.
  • Dense or Doughy Croissants? – This can happen if the dough was not proofed long enough. Let the shaped croissants rise properly before baking.
  • Uneven Browning? – If the croissants brown too quickly on top but remain undercooked inside, reduce the oven temperature slightly and bake for a few extra minutes.

FAQs About This No-Fold Croissant Recipe

1. Can I Make the Dough in Advance?

Yes! You can prepare the dough a day ahead and let it rise slowly in the refrigerator overnight. This enhances the flavor and makes shaping the croissants easier.

2. Can I Use Regular Butter Instead of European-Style Butter?

Yes, but the texture may be slightly different. Regular butter has a higher water content, which may affect the layers slightly. If using regular butter, try freezing it before rolling it into a sheet.

3. Why Didn’t My Croissants Puff Up?

This could be due to inactive yeast or improper proofing. Make sure the yeast is fresh and that the dough rises properly before baking.

4. Can I Freeze the Dough?

Absolutely! After shaping the croissants, freeze them on a baking sheet, then transfer to an airtight container. When ready to bake, let them thaw and rise for a few hours before baking.

5. How Do I Store Baked Croissants?

Store croissants in an airtight container at room temperature for up to two days. To reheat, bake at 160°C (320°F) for a few minutes to restore crispiness.

Conclusion: A Simple Yet Incredible Way to Make Croissants

With this no-fold, no-machine method, making croissants at home has never been easier. By simplifying the traditional process without sacrificing quality, this recipe allows anyone to enjoy warm, buttery croissants without the need for expert-level skills or professional equipment.

Whether you’re an experienced baker looking for a quicker alternative or a beginner eager to try making croissants for the first time, this method delivers fantastic results with minimal effort. With a few simple techniques, quality ingredients, and the right approach, you can create bakery-worthy croissants from the comfort of your kitchen.

Try this easy croissant recipe today and experience the joy of homemade, flaky, and delicious pastries without the hassle!

Amal

The Easiest Way to Make Croissants – No Folding, No Machine Required!

Making croissants at home doesn’t have to be complicated! This no-fold, no-machine method simplifies the process while still delivering rich, flaky, and buttery croissants. Perfect for beginners or anyone looking for a quicker way to enjoy fresh, homemade croissants without sacrificing quality or taste.
Prep Time 20 minutes
Cook Time 20 minutes
Total Time 1 hour 40 minutes
Servings: 6 -8 croissants
Course: Breakfast
Cuisine: French-inspired

Ingredients
  

  • 300 g 2 cups bread flour
  • 4 g 1/2 tbsp. instant yeast
  • 25 g 2 tbsp. sugar
  • 1 egg about 50g
  • 145 g 0.6 cup milk
  • 3 g 1/2 tsp salt
  • 20 g 1.4 tbsp. unsalted butter (for dough)
  • 90 g 6 tbsp. unsalted butter (for layering)

Method
 

  1. In a large bowl, mix bread flour, instant yeast, sugar, and salt.
  2. Add the egg and milk, stirring until the dough begins to form.
  3. Knead for about 5-7 minutes until smooth and elastic.
  4. Add 20g of unsalted butter and continue kneading until fully incorporated.
  5. Cover and let the dough rest for about 1 hour, or until doubled in size.
  6. Flatten the 90g of butter between two parchment sheets into a thin rectangle and refrigerate until firm.
  7. Roll out the dough into a rectangle larger than the butter sheet. Place the butter in the center and fold the dough over it.
  8. Roll the dough into a large rectangle and cut it into triangular shapes.
  9. Roll each triangle from the wide base to the tip to form croissants.
  10. Arrange the shaped croissants on a baking tray and let them rise for 45 minutes.
  11. Preheat the oven to 180°C (350°F).
  12. Brush the croissants with an egg wash (1 beaten egg mixed with 1 tbsp. milk).
  13. Bake for 18-20 minutes until golden brown and flaky.
  14. Let them cool slightly before serving.

Notes

  • Use high-quality, high-fat butter for the best results.
  • If the dough becomes too soft while working with it, refrigerate for 10-15 minutes before continuing.
  • For extra crispiness, bake at 200°C (400°F) for the last 2 minutes.
  • Store leftovers in an airtight container at room temperature for up to 2 days, or freeze for up to 2 months.

A Delightful Vegetable and Cheese Bake: A Perfect Balance of Flavor and Nutrition

If you are looking for a simple yet hearty dish that combines fresh vegetables, rich cheeses, and fragrant herbs, this vegetable and cheese bake is the perfect recipe. It’s easy to make, full of vibrant flavors, and packed with nutrients, making it an excellent choice for a wholesome meal. Whether you’re serving it for breakfast, brunch, or a light dinner, this dish is sure to satisfy both your taste buds and your nutritional needs.

Why This Vegetable and Cheese Bake Stands Out

This dish is more than just a mix of ingredients; it is a well-balanced combination of textures and flavors that come together beautifully when baked. The sweetness of the peppers and tomatoes complements the saltiness of the feta cheese, while the mozzarella adds a creamy, golden crust. Fresh dill enhances the aroma, giving the dish a refreshing touch.

One of the biggest advantages of this recipe is its versatility. It can be enjoyed as a main dish, a side, or even a quick snack. You can also customize it based on your dietary preferences or the ingredients you have on hand. Whether you’re a vegetarian looking for a protein-rich meal or someone trying to incorporate more vegetables into your diet, this dish offers a perfect solution.

The Perfect Dish for Any Occasion

One of the best things about this vegetable and cheese bake is its adaptability to different meals and events. Here are some ways you can serve and enjoy this dish:

1. A Nutritious Breakfast Option

Starting your day with a protein-rich meal can help keep you full and energized. The combination of eggs, feta, and mozzarella provides a good amount of protein, while the vegetables add essential vitamins and minerals. Pair it with a cup of coffee or a smoothie for a well-rounded breakfast.

2. A Light but Satisfying Lunch or Dinner

This dish works perfectly as a standalone meal when paired with a fresh salad or a bowl of soup. The cheese and eggs offer enough protein to keep you satisfied, while the vegetables provide fiber and essential nutrients. For a heartier meal, you can serve it with whole-grain bread or a side of roasted potatoes.

3. A Crowd-Pleasing Brunch Dish

If you’re hosting a brunch, this dish is an excellent choice. It’s easy to prepare ahead of time and can be served warm or at room temperature. Guests will love its rich flavors and cheesy goodness, making it a guaranteed hit on your brunch table.

4. A Healthy Snack for Any Time of the Day

When you need a quick and nutritious snack, a slice of this vegetable and cheese bake is a great option. It’s packed with protein and fiber, making it a healthier alternative to processed snacks.

Ingredients

IngredientQuantity
Chicken eggs2
Vegetable oil50 ml
Milk100 ml
Baking powder5 g
Flour130 g
Raw sweet yellow pepper1
Raw sweet red pepper1
Tomato1
Green olives50 g
Feta cheese100 g
Dill (fresh)A bunch
Hard mozzarella cheese100 g
Butter20 g

Directions

Step 1: Prepare the Ingredients

  1. Preheat the oven to 180°C (350°F) and grease a baking dish with butter.
  2. Chop the vegetables: Dice the yellow and red peppers, tomato, and green olives into small pieces.
  3. Prepare the cheese: Crumble the feta cheese and grate the mozzarella.
  4. Finely chop the dill and set aside.

Step 2: Make the Batter

  1. In a large bowl, whisk the eggs until slightly frothy.
  2. Add the vegetable oil and milk, whisking until fully combined.
  3. Sift in the flour and baking powder, mixing until smooth and lump-free.

Step 3: Combine Everything

  1. Gently fold in the chopped vegetables, olives, feta cheese, and dill into the batter.
  2. Pour the mixture into the greased baking dish, spreading it evenly.
  3. Sprinkle the grated mozzarella on top for a golden, cheesy crust.

Step 4: Bake and Serve

  1. Bake in the preheated oven for 30-35 minutes, or until the top is golden brown and a toothpick inserted comes out clean.
  2. Let the dish cool for a few minutes before slicing and serving warm.

Nutritional Information

NutrientPer Serving (Approx.)
Calories280 kcal
Protein10 g
Carbohydrates25 g
Fats15 g
Saturated Fats6 g
Fiber3 g
Sugar4 g
Calcium180 mg
Iron1.5 mg

Health Benefits of This Dish

This vegetable and cheese bake is not only delicious but also packed with nutrients that offer numerous health benefits. Here’s why you should add this dish to your regular meal rotation:

1. High in Protein and Healthy Fats

The eggs, feta cheese, and mozzarella provide a good source of protein, which is essential for muscle growth, repair, and overall body function. The healthy fats from cheese and eggs help keep you full longer and support brain function.

2. Rich in Vitamins and Antioxidants

Vegetables like peppers and tomatoes are rich in vitamins A and C, which support immune health and skin health. These vegetables also contain antioxidants that help protect the body from oxidative stress.

3. Supports Digestion and Gut Health

The fiber from vegetables and olives helps improve digestion and promotes a healthy gut microbiome. A diet rich in fiber can also help with weight management and reduce the risk of digestive issues.

4. Strengthens Bones and Teeth

Dairy products like feta and mozzarella cheese are excellent sources of calcium, which is essential for strong bones and teeth. The combination of dairy and eggs also provides vitamin D, which enhances calcium absorption in the body.

5. Low in Processed Ingredients

Unlike store-bought baked goods or frozen meals, this homemade dish is free from preservatives and artificial ingredients. It’s a wholesome, clean-eating option that you can feel good about.

Customization Ideas to Suit Your Taste

While this recipe is already packed with delicious ingredients, you can easily modify it to suit your preferences or dietary needs. Here are some ways to customize this vegetable and cheese bake:

1. Add More Vegetables

If you want to increase the vegetable content, consider adding spinach, mushrooms, or zucchini. These vegetables blend well with the existing ingredients and enhance the nutritional value.

2. Try Different Cheeses

While feta and mozzarella create a great combination, you can experiment with other cheeses like cheddar, gouda, or parmesan for a unique twist. Each cheese brings a different texture and flavor to the dish.

3. Make It Spicy

For those who love a bit of heat, add some chopped chili peppers or a sprinkle of red pepper flakes. This will give the dish an extra kick without overpowering the other flavors.

4. Use Whole Wheat or Gluten-Free Flour

If you’re looking for a healthier alternative, you can swap regular flour with whole wheat flour for added fiber. For a gluten-free version, use almond flour or a gluten-free flour blend.

5. Include Some Protein-Rich Additions

To make this dish even more filling, consider adding shredded chicken, turkey, or even chickpeas. These additions boost the protein content and make the dish more satisfying.

FAQs About This Vegetable and Cheese Bake

1. Can I Make This Dish Ahead of Time?

Yes! You can prepare and bake this dish ahead of time, then store it in the refrigerator for up to 3 days. Reheat individual slices in the microwave or oven before serving.

2. Can I Freeze It for Later?

Absolutely! Once baked, let the dish cool completely, then cut it into portions and store them in an airtight container. Freeze for up to 2 months. To reheat, bake in the oven at 180°C (350°F) until warmed through.

3. What Can I Serve with This Dish?

This dish pairs well with a side salad, roasted vegetables, or a bowl of soup. It also goes well with whole-grain bread or a light yogurt dip.

4. Can I Make This Recipe Without Eggs?

Yes! You can substitute eggs with flaxseed eggs (1 tablespoon ground flaxseed mixed with 3 tablespoons of water per egg) or a store-bought egg replacer. The texture may be slightly different, but it will still be delicious.

5. How Do I Make It Dairy-Free?

For a dairy-free version, replace feta and mozzarella with plant-based cheese alternatives. You can also use almond or oat milk instead of regular milk.

Conclusion: A Delicious and Nutritious Dish for Any Occasion

This vegetable and cheese bake is a wonderful combination of flavors, textures, and nutrients. Whether you enjoy it for breakfast, brunch, lunch, or as a healthy snack, it offers a satisfying and wholesome experience. The blend of fresh vegetables, rich cheeses, and aromatic herbs makes it an irresistible dish that can be customized to suit different dietary needs.

With its ease of preparation and versatile serving options, this dish is a great addition to any home cook’s repertoire. Whether you’re making it for yourself, your family, or guests, it’s bound to be a favorite. Try this recipe today and enjoy a delicious, nutritious meal that is as enjoyable to eat as it is easy to make!

Amal

A Delightful Vegetable and Cheese Bake: A Perfect Balance of Flavor and Nutrition

A simple yet flavorful vegetable and cheese bake that combines fresh peppers, tomatoes, olives, and aromatic dill with rich feta and mozzarella cheese. This easy-to-make dish is perfect for breakfast, brunch, or a light meal. Enjoy a delicious balance of textures and flavors in every bite!
Prep Time 15 minutes
Cook Time 35 minutes
Total Time 50 minutes
Servings: 4 –6 servings
Course: Breakfast
Cuisine: Mediterranean

Ingredients
  

  • 2 chicken eggs
  • 50 ml vegetable oil
  • 100 ml milk
  • 5 g baking powder
  • 130 g flour
  • 1 raw sweet yellow pepper diced
  • 1 raw sweet red pepper diced
  • 1 tomato diced
  • 50 g green olives sliced
  • 100 g feta cheese crumbled
  • A bunch of fresh dill chopped
  • 100 g hard mozzarella cheese grated
  • 20 g butter for greasing

Method
 

  1. Preheat the oven to 180°C (350°F). Grease a baking dish with butter.
  2. In a large bowl, whisk the eggs until frothy, then add vegetable oil and milk. Mix well.
  3. Sift in the flour and baking powder, stirring until a smooth batter forms.
  4. Fold in the diced peppers, tomato, olives, crumbled feta cheese, and chopped dill. Mix gently to combine.
  5. Pour the batter into the prepared baking dish and spread it evenly.
  6. Sprinkle the grated mozzarella cheese on top for a golden crust.
  7. Bake for 30-35 minutes, or until the top is golden brown and a toothpick inserted in the center comes out clean.
  8. Let it cool slightly before slicing. Serve warm and enjoy!

Notes

  • For a gluten-free version, use almond flour or a gluten-free flour blend.
  • Add extra vegetables like spinach, zucchini, or mushrooms for more flavor and nutrition.
  • If you like spice, add a pinch of red pepper flakes or diced chili.
  • Store leftovers in an airtight container in the refrigerator for up to 3 days or freeze for up to 2 months.

Fluffy Skillet Bread – The Easiest Bread for Breakfast or Tea Time

There’s something magical about the smell of freshly baked bread filling the kitchen. It instantly brings warmth, comfort, and nostalgia. For me, this quick and fluffy skillet bread is more than just a recipe—it’s a memory.

Growing up, my grandmother always had fresh bread on the table. She never relied on store-bought loaves, saying that “homemade bread tastes like love.” But what I loved most was when she made quick breads on the stovetop. Instead of waiting hours for dough to rise, she would mix a few simple ingredients, knead them quickly, and within minutes, warm, golden bread would be ready.

We would gather around the table, tearing off pieces of hot, fluffy bread and slathering them with butter or dipping them into honey. It was the simplest meal, yet it felt like a feast. Even now, whenever I make this bread, it brings back those cozy mornings and the joy of sharing homemade food with family.

This 6-minute skillet bread is perfect for anyone who loves fresh bread but doesn’t want to spend hours baking. Whether you’re making breakfast, serving tea, or just need a quick bread fix, this recipe is as easy as it is delicious.

Why This Skillet Bread is a Must-Try

1. Ready in Minutes

Unlike traditional bread that requires proofing and long baking times, this skillet bread cooks in just 6 minutes, making it the perfect quick-fix bread for any occasion.

2. No Oven Required

Not everyone has time to preheat an oven or wait for dough to rise. This recipe is cooked on the stovetop, making it ideal for those who want fresh bread fast.

3. Soft, Fluffy, and Golden

The combination of warm milk, yogurt, and a touch of oil creates a beautifully soft texture inside, while the skillet gives it a perfect golden crust.

4. Simple Ingredients, Big Flavor

You don’t need fancy ingredients—just flour, milk, yogurt, a little oil, and some basic pantry staples. This means you can whip up a fresh batch whenever the craving hits.

5. Perfect for Any Meal

  • Serve it warm with butter and honey for a cozy breakfast.
  • Enjoy it as a savory side with cheese or hummus.
  • Pair it with tea or coffee for a simple, satisfying snack.
  • Use it to scoop up soups, stews, or curries for a comforting meal.

Ingredients

IngredientAmount
Sugar1 teaspoon (5 g)
Salt1 teaspoon (5 g)
Vegetable Oil1 tablespoon (10 ml)
Yogurt1 tablespoon (20 g)
Warm Milk1 glass (200 ml)
Flour2.5 cups (300 g)

Directions

  1. Mix the Wet Ingredients: In a large bowl, combine warm milk, sugar, salt, vegetable oil, and yogurt. Stir until well mixed.
  2. Add the Flour: Gradually add the flour while mixing. Knead the dough until smooth and slightly elastic. Let it rest for 10–15 minutes.
  3. Shape the Bread: Divide the dough into equal portions and roll out each piece into a round flatbread.
  4. Cook in a Skillet: Heat a dry skillet over medium heat. Cook each bread for 3 minutes per side until golden brown and puffed.
  5. Serve Warm: Enjoy fresh with butter, jam, or cheese!

Nutritional Information

NutrientAmount per Serving
Calories180 kcal
Carbohydrates30 g
Protein5 g
Fat4 g
Fiber2 g
Sodium180 mg

The Secret to Soft and Fluffy Skillet Bread

1. The Right Balance of Ingredients

Each ingredient plays a role in creating the perfect bread:

  • Warm milk makes the dough soft and enhances the flavor.
  • Yogurt adds a slight tang and helps keep the bread moist.
  • A little oil keeps it tender while adding richness.

2. Kneading for Elasticity

A quick knead of 5–7 minutes is enough to develop the gluten and give the bread its soft, airy texture. Avoid over-kneading, as it can make the bread tough.

3. Resting the Dough for a Few Minutes

While this bread doesn’t need a long rising time, letting the dough rest for 10–15 minutes helps relax the gluten and makes rolling easier.

4. Cooking Over Medium Heat

A hot skillet ensures the bread puffs up and develops a golden crust, but keeping the heat at medium prevents burning before the inside is fully cooked.

5. Flipping at the Right Time

Wait until bubbles start forming on the surface before flipping—this ensures even cooking and the perfect texture inside.

Serving Suggestions

1. Classic Butter and Honey

A warm piece of skillet bread with butter melting into every bite and a drizzle of honey is a simple but unbeatable combination.

2. With Cheese and Herbs

Top with feta, cheddar, or fresh mozzarella, and sprinkle with herbs like oregano or basil for a savory twist.

3. As a Side for Dipping

This bread pairs wonderfully with soups, stews, and curries. Try it with tomato soup, lentil stew, or creamy chicken curry.

4. With Jam or Nut Butter

Spread it with strawberry jam, peanut butter, or almond butter for a delicious snack.

5. Turn It into a Mini Sandwich

Cut the bread in half and fill it with scrambled eggs, grilled vegetables, or smoked salmon for a quick, easy sandwich.

Frequently Asked Questions (FAQs)

1. Can I Make This Bread Without Yogurt?

Yes! You can substitute yogurt with sour cream, buttermilk, or even an extra tablespoon of vegetable oil for moisture.

2. What Type of Flour Works Best?

This recipe uses all-purpose flour, but you can also use:

  • Whole wheat flour for a heartier, fiber-rich version (just add an extra tablespoon of milk).
  • Gluten-free flour blends for a gluten-free alternative (results may vary).

3. How Can I Make It Vegan?

Replace milk with almond, oat, or soy milk, use dairy-free yogurt, and swap butter for olive oil or coconut oil.

4. Can I Store or Freeze This Bread?

  • Room Temperature: Keep in an airtight container for 1–2 days.
  • Refrigerator: Store for up to 4 days, reheating before serving.
  • Freezer: Wrap in foil and freeze for up to a month. To reheat, warm in a dry skillet or microwave for a few seconds.

5. How Do I Keep It Soft?

To prevent it from drying out, store it wrapped in a clean kitchen towel. This helps maintain moisture while keeping the crust slightly crisp.

6. Can I Make the Dough in Advance?

Yes! You can prepare the dough a few hours ahead and store it in the fridge until ready to cook. Let it come to room temperature before rolling out.

Final Thoughts – The Ultimate Quick Bread for Any Occasion

In a world where time is always in short supply, having a quick, easy, and foolproof bread recipe is a game-changer. This fluffy skillet bread proves that you don’t need long rising times or an oven to enjoy warm, homemade bread.

With just a handful of ingredients and a few minutes on the stovetop, you can have a golden, pillowy bread that pairs beautifully with sweet or savory toppings. Whether you’re making a last-minute breakfast, serving tea-time snacks, or just craving fresh bread, this recipe is one you’ll come back to again and again.

So next time you’re in need of something warm, comforting, and delicious, skip the store-bought bread and make this instead—you won’t regret it!

Amal

Fluffy Skillet Bread – The Easiest Bread for Breakfast or Tea Time

This quick and fluffy skillet bread is soft, golden, and ready in just minutes! Made with simple pantry ingredients like flour, warm milk, yogurt, and a touch of oil, it requires no oven and cooks beautifully in a skillet. Whether served with butter and honey, cheese, or jam, this bread is the perfect companion for breakfast, tea time, or any meal when you need fresh, homemade bread fast!
Prep Time 10 minutes
Cook Time 5 minutes
Total Time 15 minutes
Servings: 4 –6 pieces
Course: Breakfast
Cuisine: International

Ingredients
  

  • 1 teaspoon sugar 5 grams
  • 1 teaspoon salt 5 grams
  • 1 tablespoon vegetable oil 10 ml
  • 1 tablespoon yogurt 20 grams
  • 1 glass warm milk 200 ml
  • 2.5 cups flour 300 grams

Method
 

  1. Prepare the Dough: In a large bowl, combine warm milk, sugar, salt, vegetable oil, and yogurt. Gradually add flour while mixing until a soft dough forms. Knead for 5–7 minutes until smooth.
  2. Rest the Dough: Cover and let the dough rest for 10–15 minutes to relax the gluten.
  3. Shape the Bread: Divide the dough into equal portions and roll each piece into a flat round shape.
  4. Cook in a Skillet: Heat a dry skillet over medium heat. Cook each bread for 3 minutes per side until golden brown and puffed.
  5. Serve & Enjoy: Serve warm with butter, honey, cheese, or your favorite spreads!

Notes

  • For a Softer Texture: Brush with melted butter immediately after cooking.
  • Flavor Boost: Add a sprinkle of sesame seeds, herbs, or garlic powder to the dough.
  • Storage: Keep in an airtight container at room temperature for 1–2 days, or refrigerate for up to 4 days. Reheat before serving.
  • Freezing: Freeze cooked bread for up to 1 month. Warm in a skillet or microwave before eating.

Cheesy Skillet Garlic Bread – Buttery, Soft, and Irresistible

There are certain dishes that instantly bring people together. Cheesy Skillet Garlic Bread is one of them. It’s the kind of bread that fills your kitchen with the comforting aroma of garlic and butter as it bakes to golden perfection. It’s warm, soft, and oozing with cheese, making it impossible to resist.

For me, garlic bread has always been a symbol of shared moments. Growing up, it was a staple at family dinners—whether alongside a bowl of spaghetti, paired with a hot bowl of soup, or simply enjoyed on its own, torn apart and devoured while still warm. My favorite part was always the cheese—melty, slightly crisp at the edges, and stretching with every bite.

Now, I love making this skillet version, which takes the classic garlic bread to another level. The dough is soft and slightly chewy, with a rich garlic butter spread seeping into every bite. The mozzarella adds gooeyness, while the Parmesan brings a salty, nutty depth. Cooked in a skillet, it gets that perfect crisp bottom while staying incredibly soft on top.

Whether you’re making it as a side for dinner, a party appetizer, or a snack just because, this Cheesy Skillet Garlic Bread is guaranteed to disappear fast.

Why This Garlic Bread Stands Out

1. Soft, Fluffy, and Packed with Flavor

Unlike store-bought garlic bread, this homemade version has a soft, pillowy texture with a golden, crispy edge. The homemade dough is light and airy, and every bite is infused with garlicky, buttery goodness.

2. Made with Simple, Everyday Ingredients

This recipe requires basic pantry staples—flour, butter, milk, and yeast. There’s no need for fancy ingredients, yet the result is bakery-quality bread with rich flavors.

3. The Ultimate Comfort Food

Few things are as comforting as warm, cheesy bread straight from the oven. It’s perfect for indulging in on a cozy evening, pairing with your favorite meal, or sharing with loved ones.

4. Skillet-Baked for the Perfect Crust

Baking in a skillet ensures a beautifully crisp bottom while keeping the bread soft and fluffy inside. It’s the best way to achieve that homemade, rustic feel.

5. Versatile and Customizable

This garlic bread is delicious as is, but it’s also easy to customize. Add extra herbs, different cheeses, or even a drizzle of honey for a unique twist.

Ingredients

For the Dough

IngredientAmount
Yeast1 teaspoon (3 g)
Sugar1 tablespoon (12 g)
Butter1 tablespoon (14 g)
Lukewarm Milk½ cup (110 ml)
All-Purpose Flour1 cup (120 g)
Salt¼ teaspoon (1.5 g)

For the Topping

IngredientAmount
Butter (melted)2 tablespoons
Garlic (minced)2 cloves
Dried Oregano½ teaspoon
Mozzarella Cheese½ cup, shredded
Parmesan Cheese2 tablespoons, grated
Fresh ParsleyOptional, for garnish

Directions

  1. Activate the Yeast: In a bowl, mix the yeast, sugar, and lukewarm milk. Let it sit for 5–10 minutes until foamy.
  2. Prepare the Dough: Add flour, salt, and butter to the yeast mixture. Knead until the dough becomes smooth and elastic. Cover the bowl and let the dough rise for 1 hour or until it doubles in size.
  3. Make the Garlic Butter: In a small bowl, combine the melted butter, minced garlic, and dried oregano.
  4. Shape and Rest: Roll the dough into a round shape and place it in a greased skillet. Brush the dough with the garlic butter mixture and let it rest for 10 minutes.
  5. Add Cheese & Bake: Sprinkle mozzarella and Parmesan over the dough. Bake in a preheated oven at 375°F (190°C) for 18–20 minutes, or until golden brown and bubbling.
  6. Garnish & Serve: Sprinkle with fresh parsley if desired, slice, and serve warm.

Nutritional Information

NutrientAmount per Serving
Calories180 kcal
Carbohydrates22 g
Protein6 g
Fat7 g
Fiber1 g
Sodium250 mg

The Secret to Making the Best Garlic Bread

1. Kneading the Dough for the Perfect Texture

Proper kneading is key to creating a soft, elastic dough. It develops the gluten, ensuring the bread is light and chewy rather than dense. Knead for at least 8–10 minutes until smooth and slightly stretchy.

2. Letting the Dough Rise for Maximum Fluffiness

Allowing the dough to rise twice helps develop flavor and texture. The first rise gives the dough structure, while the second allows it to become extra fluffy before baking.

3. Using Fresh Garlic for Bold Flavor

While garlic powder works in a pinch, freshly minced garlic creates a more intense, aromatic taste. Mix it into the melted butter so that the flavors infuse throughout the bread.

4. Mixing Cheese for the Best Melt

Using a combination of mozzarella and Parmesan gives the best result. Mozzarella provides gooeyness, while Parmesan adds a salty, nutty punch.

5. Baking Until Golden and Crispy

Keep an eye on the bread while baking—it should be golden on top, crispy around the edges, and slightly puffed up in the center. Overbaking can dry it out, so remove it as soon as the cheese is melted and bubbly.

Serving Suggestions

1. Pair It with Pasta

Nothing complements a bowl of spaghetti, lasagna, or creamy Alfredo like warm, cheesy garlic bread. Use it to soak up the sauce for the ultimate comfort meal.

2. Dip It into Soup

This bread is perfect for dipping into tomato soup, minestrone, or creamy potato soup. The cheesy, garlicky flavor enhances every spoonful.

3. Serve as a Party Appetizer

Cut it into small squares or breadsticks for an easy-to-grab snack. Serve with marinara sauce or a cheesy dip for extra indulgence.

4. Enjoy It as a Snack on Its Own

Sometimes, all you need is a warm slice of garlic bread with a cup of tea or coffee. It’s simple, delicious, and satisfying.

5. Turn It into a Sandwich Base

Slice the bread in half and use it as a base for grilled cheese, turkey melts, or even a garlic bread pizza.

Frequently Asked Questions (FAQs)

1. Can I Use Store-Bought Dough Instead?

Yes! If you’re short on time, you can use store-bought pizza dough or refrigerated bread dough. Just roll it out, follow the same steps for adding butter and cheese, and bake as directed.

2. Can I Make This Without a Skillet?

Absolutely! If you don’t have a cast-iron skillet, you can use a baking sheet or round cake pan. The skillet adds extra crispiness, but the bread will still be delicious without it.

3. How Do I Store Leftovers?

  • Refrigerator: Store in an airtight container for up to 3 days.
  • Freezer: Wrap individual slices and freeze for up to 2 months. Reheat in the oven or toaster for best results.

4. Can I Add Extra Flavors?

Yes! Try these variations for a fun twist:

  • Spicy Garlic Bread: Add red pepper flakes for a bit of heat.
  • Herbed Garlic Bread: Mix in fresh basil, thyme, or rosemary.
  • Four Cheese Garlic Bread: Use a blend of mozzarella, Parmesan, cheddar, and gouda.

5. How Can I Make It Vegan?

Replace the butter with olive oil and use dairy-free cheese for a vegan-friendly version. The texture will be slightly different but still delicious.

6. What If I Don’t Have Yeast?

You can make a quick yeast-free version by using self-rising flour instead of all-purpose flour and skipping the rising time. The result will be more like a biscuit bread but still tasty.

Conclusion – The Ultimate Homemade Garlic Bread

There’s something magical about making bread from scratch—watching the dough rise, smelling the garlic and butter as it bakes, and finally pulling apart a warm, cheesy slice. This Cheesy Skillet Garlic Bread is the kind of dish that brings people together, whether for a casual dinner, a holiday meal, or a late-night snack.

It’s simple yet indulgent, crispy yet soft, and loaded with garlic and cheese in every bite. If you love homemade bread but want something easy and satisfying, this recipe is a must-try.

So next time you’re craving something warm, cheesy, and delicious, skip the frozen garlic bread and make this homemade version instead. You’ll never look back!

Amal

Cheesy Skillet Garlic Bread – Buttery, Soft, and Irresistible

This Cheesy Skillet Garlic Bread is everything you love about classic garlic bread—warm, fluffy, and packed with garlicky, buttery goodness—but with a crispy skillet-baked crust and gooey melted cheese. Made with simple pantry ingredients, this bread is perfect as a side dish, appetizer, or a comforting snack. Serve it with pasta, soup, or enjoy it on its own straight from the skillet!
Prep Time 15 minutes
Cook Time 20 minutes
Total Time 1 hour 35 minutes
Servings: 4 servings
Course: Snack
Cuisine: Italian-inspired

Ingredients
  

For the Dough:
  • 1 teaspoon yeast 3 grams
  • 1 tablespoon sugar 12 grams
  • 1 tablespoon butter 14 grams
  • ½ cup lukewarm milk 110 ml
  • 1 cup all-purpose flour 120 grams
  • ¼ teaspoon salt 1.5 grams
For the Topping:
  • 2 tablespoons butter melted
  • 2 cloves garlic minced
  • ½ teaspoon dried oregano
  • ½ cup mozzarella cheese shredded
  • 2 tablespoons Parmesan cheese grated
  • Fresh parsley for garnish optional

Method
 

  1. Activate the Yeast: In a bowl, combine yeast, sugar, and lukewarm milk. Stir and let sit for 5–10 minutes until foamy.
  2. Make the Dough: Add flour, salt, and butter to the yeast mixture. Knead until smooth and elastic. Cover and let it rise for 1 hour, or until doubled in size.
  3. Prepare the Topping: In a small bowl, mix the melted butter, minced garlic, and dried oregano.
  4. Shape and Rest: Roll out the dough into a round shape and place it in a greased skillet. Brush with the garlic butter mixture and let it rest for 10 minutes.
  5. Add Cheese & Bake: Sprinkle mozzarella and Parmesan cheese over the top. Bake in a preheated oven at 375°F (190°C) for 18–20 minutes, or until golden brown and bubbly.
  6. Garnish & Serve: Sprinkle with fresh parsley if desired, slice, and enjoy warm!

Notes

  • Make it Extra Cheesy: Add a mix of cheeses like gouda or cheddar for a richer flavor.
  • For a Crispier Crust: Bake an extra 5 minutes for a crunchier bottom.
  • Storage & Reheating: Store leftovers in an airtight container for up to 3 days. Reheat in the oven for a fresh-baked taste.
  • Perfect Pairings: Serve with pasta, soups, or as a snack with marinara sauce.

Hearty & Wholesome Whole Wheat Bread – A Simple and Nutritious Staple

There’s something deeply comforting about the smell of fresh bread baking in the oven. It fills the kitchen with warmth, nostalgia, and a feeling of home. Growing up, my grandmother would bake bread every weekend, her hands skillfully kneading the dough as she hummed an old tune. She never measured anything, yet somehow, her loaves were always perfect—soft inside, golden and slightly crisp on the outside, and full of rich, nutty flavor.

As a child, I didn’t fully appreciate the magic of homemade bread. I just knew that a thick slice, still warm from the oven, slathered with butter and honey, was one of the best things in the world. Now, as an adult, I’ve come to realize the beauty of simple, homemade recipes. This whole wheat bread is one of those recipes—a basic, no-fuss loaf that delivers great flavor, soft texture, and nutritional benefits.

If you’ve never baked bread before, this is the perfect recipe to start with. It’s simple, forgiving, and requires just a handful of pantry staples. Whether you’re looking to cut down on store-bought bread or just enjoy the satisfaction of baking your own, this recipe is one you’ll come back to again and again.

Why You’ll Love This Recipe

1. A Healthier Alternative to Store-Bought Bread

Many commercial breads contain preservatives, added sugars, and artificial ingredients. This homemade version is made with wholesome, natural ingredients—no unnecessary additives, just pure, hearty goodness.

2. The Perfect Balance of Flavors and Textures

Combining whole wheat flour and bread flour creates a loaf that is both nutty and flavorful yet soft and tender. Whole wheat flour alone can sometimes result in a dense, heavy loaf, but the addition of bread flour ensures a lighter, airier texture.

3. High in Fiber and Nutrients

Whole wheat flour is packed with fiber, vitamins, and minerals, making this bread a more nutritious choice compared to white bread. Fiber helps support digestion and keeps you full longer, making this a great option for a balanced diet.

4. Simple Ingredients, Big Impact

This bread uses just six ingredients, most of which you likely already have in your kitchen. No fancy tools or complicated steps—just mix, knead, let it rise, and bake.

5. Versatile and Customizable

This loaf is delicious on its own, but you can easily customize it to suit your taste. Add seeds, nuts, or dried fruit for extra texture, or experiment with different flours for a unique variation.

Ingredients

IngredientAmount
Warm water1 cup (230 ml)
Fresh yeast¾ tsp (3 g) or dry yeast: ½ tsp (2 g)
(Optional) Sugar1 tsp (4 g)
Bread flour1 ½ cups (220 g)
Whole wheat flour¾ cup (100 g)
Salt1 tsp (6 g)

Directions

  1. Activate the Yeast: In a bowl, mix warm water, yeast, and sugar (if using). Let it sit for 5–10 minutes until foamy.
  2. Make the Dough: In a large bowl, combine bread flour, whole wheat flour, and salt. Add the yeast mixture and knead until a smooth, elastic dough forms.
  3. First Rise: Cover the dough and let it rest in a warm place for 1–1.5 hours until doubled in size.
  4. Shape the Loaf: Punch down the dough, shape it into a loaf, and place it in a greased or lined bread pan.
  5. Second Rise: Let it rise again for 30–40 minutes until puffy.
  6. Bake: Preheat the oven to 375°F (190°C) and bake for 25–30 minutes until golden brown and hollow-sounding when tapped.
  7. Cool & Serve: Let the bread cool on a wire rack before slicing. Enjoy fresh or toasted!

Nutritional Information

NutrientAmount per Slice
Calories120 kcal
Carbohydrates24 g
Protein4 g
Fat1 g
Fiber3 g
Sodium150 mg

The Secret to a Perfect Loaf

1. Choosing the Right Flour

  • Whole Wheat Flour: Adds a deep, nutty flavor and boosts the fiber content.
  • Bread Flour: Provides extra gluten, helping create a softer, lighter texture.

If you prefer 100% whole wheat bread, you can use only whole wheat flour, but the loaf may turn out denser. You can also substitute all-purpose flour for bread flour if needed, though the texture may be slightly different.

2. Activating the Yeast Properly

If using dry yeast, let it sit in warm water with a little sugar for 5–10 minutes until it becomes foamy. This step ensures that the yeast is active and will help the bread rise properly.

3. Kneading for the Right Texture

Kneading develops the gluten, which gives the bread its structure. Knead for 8–10 minutes by hand or 5 minutes in a stand mixer until the dough is smooth and elastic. If it’s too sticky, add a little more flour; if it’s too dry, add a splash of water.

4. Letting the Dough Rise Twice

The first rise allows the yeast to do its job, creating a light and airy structure. The second rise, after shaping the dough, helps develop a nice, even crumb and prevents the bread from being too dense.

5. Baking at the Right Temperature

A properly preheated oven is key. Bake at 375°F (190°C) for 25–30 minutes, or until the loaf sounds hollow when tapped on the bottom.

Ways to Enjoy This Whole Wheat Bread

1. Classic Buttered Toast

A thick slice, toasted and spread with butter, jam, or honey, makes for a simple yet delicious breakfast.

2. Perfect for Sandwiches

Use it for grilled cheese, turkey and avocado sandwiches, or peanut butter and banana toast. The hearty texture holds up well to any filling.

3. Serve Alongside Soups and Stews

Dip a warm slice into homemade soup, stew, or chili for a comforting meal.

4. Use for French Toast or Bread Pudding

Slightly stale bread makes the best French toast or bread pudding—the whole wheat flour adds a deeper flavor to sweet dishes.

5. Make Croutons or Bread Crumbs

Cube and toast leftovers for homemade croutons, or pulse in a food processor for fresh bread crumbs.

Frequently Asked Questions (FAQs)

1. Can I Make This Recipe Vegan?

Yes! This recipe is already dairy-free and egg-free, so it’s naturally vegan.

2. Can I Use Only Whole Wheat Flour?

Yes, but the bread may turn out denser and heavier. To help lighten it, add an extra teaspoon of yeast and increase the water slightly to keep the dough hydrated.

3. What If I Don’t Have Bread Flour?

You can replace bread flour with all-purpose flour, but the texture may be slightly less chewy and airy.

4. How Do I Store Homemade Whole Wheat Bread?

  • At Room Temperature: Store in an airtight container for 3–4 days.
  • In the Refrigerator: Keeps for up to a week, but refrigeration can dry it out.
  • In the Freezer: Slice the bread and freeze for up to 3 months. Toast slices directly from frozen.

5. Can I Add Seeds or Nuts?

Absolutely! Add sunflower seeds, flaxseeds, sesame seeds, or walnuts to the dough for extra flavor and crunch.

6. Why Didn’t My Bread Rise?

  • The yeast may have been expired or inactive.
  • The dough didn’t rise in a warm enough environment—try placing it in a warm oven with the light on.
  • Too much flour can make the dough heavy—use just enough to make it smooth and slightly tacky.

Conclusion – A Simple, Homemade Loaf Worth Baking

Baking your own whole wheat bread is one of the most rewarding kitchen experiences. With just a few basic ingredients, you can create a loaf that is healthier, fresher, and more flavorful than anything from the store.

This recipe is great for beginners, easy to customize, and perfect for daily use—whether for sandwiches, toast, or simply enjoying with a drizzle of honey. Once you make your own bread at home, you may never want to go back to store-bought again!

So, grab your flour, knead with love, and let the aroma of fresh bread fill your home. It’s a small effort for a big reward—a wholesome, homemade loaf that nourishes both the body and soul.

Amal

Hearty & Wholesome Whole Wheat Bread – A Simple and Nutritious Staple

This homemade whole wheat bread is soft, flavorful, and packed with wholesome goodness. Made with a blend of whole wheat flour and bread flour, it strikes the perfect balance between nutty richness and a light, airy texture. Whether for sandwiches, toast, or dipping into soups, this bread is easy to make, healthy, and incredibly satisfying!
Prep Time 15 minutes
Cook Time 30 minutes
Servings: 8 –10 slices
Course: Bread
Cuisine: International

Ingredients
  

  • 1 cup 230 ml warm water
  • ¾ tsp 3 g fresh yeast or ½ tsp (2 g) dry yeast
  • 1 tsp 4 g sugar (optional)
  • 1 ½ cups 220 g bread flour
  • ¾ cup 100 g whole wheat flour
  • 1 tsp 6 g salt

Method
 

  1. Activate the Yeast: In a small bowl, combine warm water, yeast, and sugar (if using). Stir and let sit for 5–10 minutes until foamy.
  2. Mix the Dough: In a large bowl, combine bread flour, whole wheat flour, and salt. Add the yeast mixture and mix until a dough forms.
  3. Knead the Dough: Knead on a floured surface for 8–10 minutes until smooth and elastic.
  4. First Rise: Place the dough in a greased bowl, cover, and let it rise in a warm place for 1–1.5 hours, or until doubled in size.
  5. Shape the Loaf: Punch down the dough, shape it into a loaf, and place it in a greased or parchment-lined bread pan.
  6. Second Rise: Let the dough rise again for 30–40 minutes until puffy.
  7. Bake: Preheat the oven to 375°F (190°C) and bake for 25–30 minutes, until golden brown and hollow-sounding when tapped.
  8. Cool & Serve: Let the bread cool completely on a wire rack before slicing.

Notes

  • For a Softer Loaf: Add 1 tbsp of olive oil or melted butter to the dough for extra moisture.
  • Customization: Mix in seeds, nuts, or dried herbs for extra flavor and texture.
  • Storage: Keep at room temperature for up to 4 days or freeze for up to 3 months.
  • Best Uses: Perfect for sandwiches, toast, or served warm with butter and honey.

Savory Cheesy Zucchini Baked Oats – A Healthy, Budget-Friendly Dinner

For years, I thought oats were strictly reserved for sweet breakfasts—warm bowls of oatmeal topped with fruit, honey, and cinnamon. That was until one evening when I found myself staring at my nearly empty pantry, wondering what I could make for dinner. I had a zucchini, some eggs, cheese, and a small bag of oat flakes sitting on the shelf.

I decided to experiment. Instead of making oatmeal, I combined the ingredients, baked them, and hoped for the best. What came out of the oven was golden, cheesy, and packed with flavor—a dish that felt comforting but light, nutritious but incredibly satisfying. From that moment on, savory baked oats became a staple in my home.

This recipe is for anyone looking for a quick, healthy, and affordable meal that doesn’t compromise on taste. Whether you’re trying to use up pantry staples, sneak more vegetables into your diet, or just looking for a creative new way to eat oats, this dish is a game-changer.

Why You’ll Love This Recipe

1. A Healthy and Nutrient-Dense Meal

Oats provide fiber, protein, and essential vitamins, while zucchini adds moisture and nutrients. This dish is filling yet light, making it a great option for a balanced meal.

2. Quick and Easy to Make

With just a few simple ingredients and minimal prep time, you can have a delicious, homemade dinner in under 40 minutes.

3. A Budget-Friendly Option

This recipe uses affordable, everyday ingredients that you likely already have in your kitchen. It’s a great way to make a satisfying meal without spending much.

4. Versatile and Customizable

You can switch up the cheese, add spices, or include extra vegetables to make this dish your own.

5. Great for Meal Prep

This baked oat dish stores well, so you can make a batch and enjoy it throughout the week.

Ingredients

IngredientAmount
Zucchini1, grated
Salt1 teaspoon
Oat flakes30 g
Cheese100 g, grated
Eggs2
Black pepperTo taste

Directions

  1. Prepare the Zucchini: Grate the zucchini and sprinkle with salt. Let it sit for 10 minutes, then squeeze out excess moisture.
  2. Mix the Ingredients: In a bowl, combine the grated zucchini, oat flakes, grated cheese, eggs, and black pepper. Stir until well combined.
  3. Transfer to a Baking Dish: Pour the mixture into a greased baking dish, spreading it evenly.
  4. Bake: Preheat the oven to 375°F (190°C). Bake for 25–30 minutes until golden brown and firm.
  5. Cool & Serve: Let it rest for a few minutes before slicing. Serve warm as a light dinner or side dish.

Nutritional Information

NutrientAmount per Serving
Calories180 kcal
Carbohydrates10 g
Protein12 g
Fat10 g
Fiber2 g
Sodium300 mg

The Secret to Perfect Savory Baked Oats

1. Removing Excess Moisture from the Zucchini

Zucchini has a high water content, which can make the dish soggy. Letting it sit with salt and squeezing out the liquid ensures a firm, crispy texture.

2. Choosing the Right Cheese

  • Cheddar for a sharp, bold flavor.
  • Mozzarella for a mild, melty texture.
  • Parmesan for a salty, nutty taste.
    Mixing different cheeses enhances the overall taste.

3. The Role of Oats

Unlike traditional flour-based casseroles, oats add a light, slightly chewy texture while making the dish higher in fiber and more filling.

4. Seasoning for Maximum Flavor

A little black pepper, garlic powder, or smoked paprika can take this dish to the next level.

5. Baking Until Golden Brown

For the best results, bake until the top turns golden and crispy—this ensures a delicious contrast between the soft interior and slightly crunchy edges.

Ways to Serve This Dish

1. As a Light Dinner or Lunch

Pair it with a fresh side salad for a balanced meal.

2. As a Side Dish

Serve alongside grilled chicken, fish, or roasted vegetables for a hearty and nutritious plate.

3. As a Protein-Packed Breakfast

Who says oats can’t be savory in the morning? This dish makes for a delicious high-protein breakfast option.

4. As a Snack

Cut into squares and enjoy as a healthy snack on the go.

5. With a Sauce or Spread

Try serving it with Greek yogurt, sour cream, or a dollop of pesto for extra flavor.

Frequently Asked Questions (FAQs)

1. Can I Use Instant Oats Instead of Oat Flakes?

Yes, but instant oats will create a softer texture. If you prefer a firmer consistency, stick to oat flakes or old-fashioned rolled oats.

2. Can I Make This Recipe Dairy-Free?

Absolutely! Replace cheese with a dairy-free alternative, and use nutritional yeast for a cheesy flavor.

3. How Do I Store Leftovers?

  • Refrigerator: Store in an airtight container for up to 4 days.
  • Freezer: Freeze in portions for up to 2 months. Reheat in the oven for the best texture.

4. Can I Add More Vegetables?

Yes! This recipe is flexible. Try adding:

  • Grated carrots for natural sweetness.
  • Spinach or kale for extra greens.
  • Chopped bell peppers for a pop of color and crunch.

5. What Can I Use Instead of Eggs?

If you need an egg-free version, replace the eggs with:

  • Flax eggs (1 tbsp flaxseed + 3 tbsp water per egg).
  • Mashed sweet potato or pumpkin for binding.

6. Can I Make It Spicier?

Yes! Add chili flakes, cayenne pepper, or chopped jalapeños for a little heat.

7. How Can I Make It Crispier?

Bake it a little longer or place it under the broiler for 2–3 minutes for a crispier top layer.

Pro Tips for the Best Savory Baked Oats

1. Use Freshly Grated Cheese

Pre-shredded cheese contains anti-caking agents that can affect the texture. Freshly grated cheese melts better and adds richer flavor.

2. Don’t Skip the Resting Time

Letting the mixture sit for 5–10 minutes before baking helps the oats absorb moisture and blend flavors together.

3. Use a Greased Baking Dish

A light layer of oil or butter prevents sticking and ensures a perfectly crisp bottom layer.

4. Cut with a Sharp Knife

If serving warm, use a sharp knife to get clean slices. Letting it cool slightly before cutting helps it hold its shape.

Conclusion – A Simple Recipe with Big Benefits

This Savory Cheesy Zucchini Baked Oats recipe proves that oats aren’t just for sweet breakfasts. With just a handful of ingredients, you can create a dish that is nutritious, satisfying, and packed with flavor.

Whether you’re looking for a quick dinner, a light lunch, or a protein-packed snack, this recipe is easy, affordable, and endlessly customizable. Plus, it’s a great way to sneak more vegetables into your meals without sacrificing taste.

Next time you’re craving something warm, cheesy, and comforting, skip the takeout and try this baked oat dish instead. It just might become your new favorite go-to meal!

Amal

Savory Cheesy Zucchini Baked Oats – A Healthy, Budget-Friendly Dinner

Who said oats are only for breakfast? This Savory Cheesy Zucchini Baked Oats is a delicious and nutritious meal that’s perfect for dinner or a light lunch. Made with grated zucchini, eggs, oat flakes, and cheese, this dish is protein-packed, budget-friendly, and incredibly satisfying. It’s crispy on the edges, soft inside, and bursting with cheesy goodness!
Prep Time 10 minutes
Cook Time 30 minutes
Total Time 40 minutes
Servings: 2 -3 servings
Course: Dinner
Cuisine: International

Ingredients
  

  • 1 zucchini grated
  • 1 teaspoon salt
  • 30 g oat flakes
  • 100 g cheese grated, such as cheddar, mozzarella, or Parmesan
  • 2 eggs
  • Black pepper to taste

Method
 

  1. Prepare the Zucchini: Grate the zucchini and sprinkle it with salt. Let it sit for 10 minutes, then squeeze out excess moisture.
  2. Mix the Ingredients: In a bowl, combine the grated zucchini, oat flakes, cheese, eggs, and black pepper. Stir until well mixed.
  3. Transfer to a Baking Dish: Grease a small baking dish and spread the mixture evenly.
  4. Bake: Preheat the oven to 375°F (190°C). Bake for 25–30 minutes or until golden brown and firm.
  5. Cool & Serve: Let it cool slightly before slicing. Serve warm as a light meal or side dish.

Notes

  • Cheese Options: Use a mix of Parmesan and mozzarella for a rich, cheesy flavor.
  • Make it Spicier: Add red pepper flakes or chili powder for a little kick.
  • Storage: Keep leftovers in an airtight container in the fridge for up to 3 days. Reheat in the oven or microwave.
  • Add More Veggies: Try adding spinach, bell peppers, or mushrooms for extra nutrition.