Shamrock Shake Dessert Lasagna

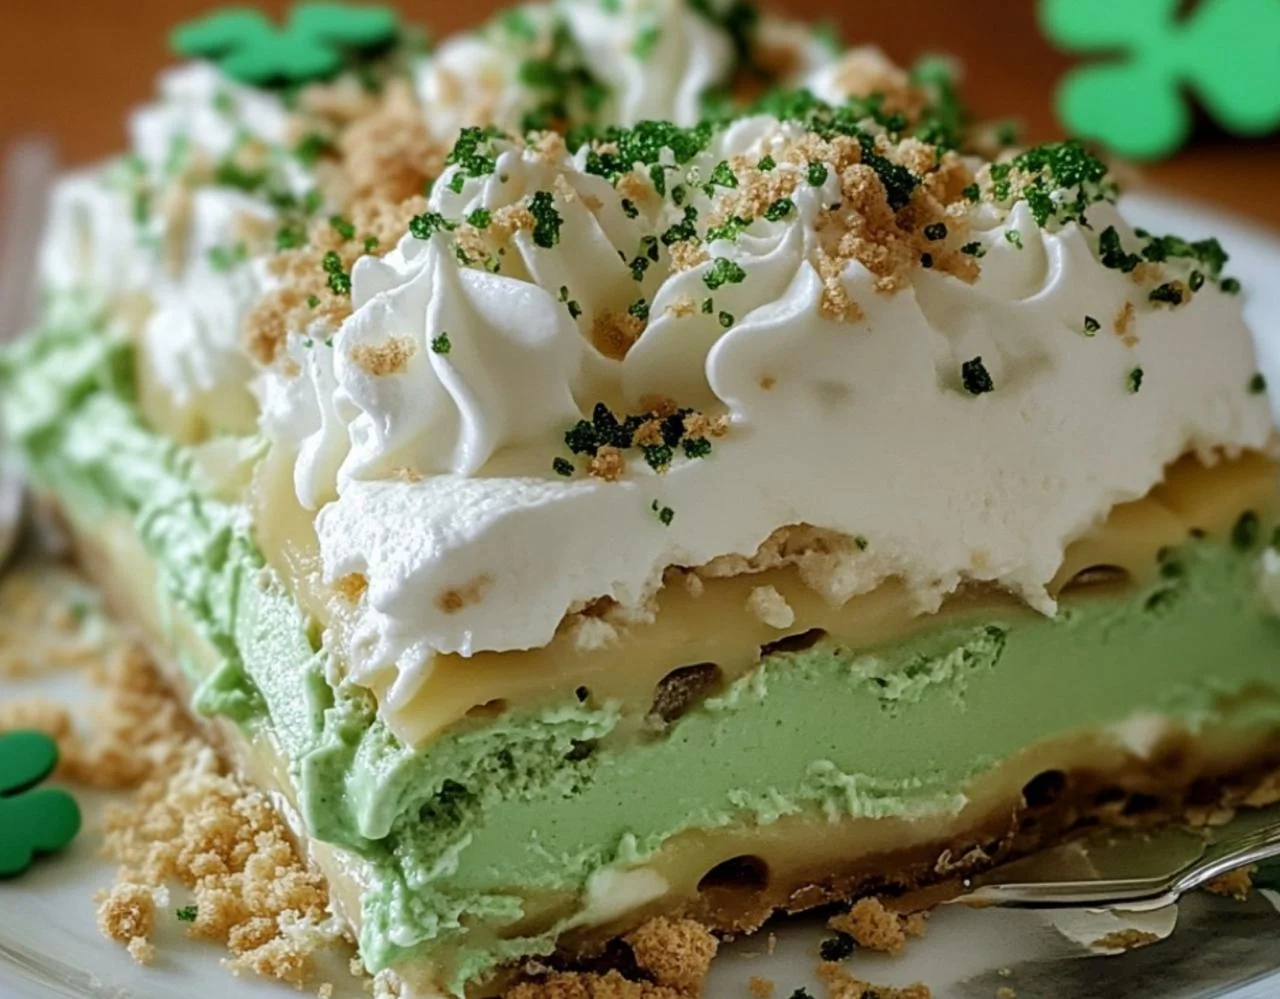
Have you ever tasted a dessert so festive and delicious that it instantly became a family favorite? That’s exactly what happened when I made this Shamrock Shake Dessert Lasagna. Inspired by the beloved seasonal shake, this no-bake dessert layers a crunchy Oreo crust, a creamy mint filling, and a rich chocolate topping to create a showstopping treat perfect for St. Patrick’s Day—or any time you’re craving something sweet and refreshing.

This dessert isn’t just about flavor; it’s about creating something that brings joy and excitement to your table. Picture the smiles as you unveil those vibrant green layers or the “oohs” and “aahs” when guests take their first bite. Whether you’re making it for a family dinner, a festive gathering, or just because, this Shamrock Shake Dessert Lasagna is a recipe you’ll find yourself returning to year after year.

Why You’ll Love This Shamrock Shake Dessert Lasagna

  • No baking required: Perfect for when you want a hassle-free dessert.
  • Minty fresh and chocolatey: A winning flavor combination.
  • Kid-friendly: Little hands can help with the layering and decorating.
  • Eye-catching presentation: Those green layers are sure to impress!
  • Great for make-ahead: Prepare it in advance for stress-free entertaining.

Ingredients

Here’s what you’ll need to bring this festive dessert to life:

Ingredient Table

ComponentIngredientsAmount
CrustOreo cookie crumbs1 ½ cups
Unsalted butter (melted)6 tablespoons
Mint FillingCream cheese (softened)8 oz
Powdered sugar1 cup
Vanilla extract1 teaspoon
Peppermint extract1 teaspoon
Whipped topping (Cool Whip)2 cups
Green food coloring2–3 drops
Chocolate ToppingSemi-sweet chocolate chips1 cup
Heavy cream2 tablespoons
GarnishExtra whipped topping, chocolate shavingsAs desired

How to Make Shamrock Shake Dessert Lasagna

Step 1: Make the Oreo Crust

Crush the Oreo cookies into fine crumbs using a food processor or by placing them in a zip-top bag and crushing them with a rolling pin. In a bowl, combine the crumbs with melted butter. Press the mixture firmly into the bottom of a 9×13-inch pan to form a solid crust. Chill in the refrigerator while preparing the next layer.

Step 2: Prepare the Mint Filling

In a mixing bowl, beat the softened cream cheese until smooth. Gradually add powdered sugar, mixing until well combined. Stir in vanilla and peppermint extracts. Fold in the whipped topping gently, adding green food coloring until you reach your desired shade of green. Spread this mixture evenly over the chilled crust.

Step 3: Make the Chocolate Topping

Melt the chocolate chips with heavy cream using a double boiler or in the microwave (in 30-second intervals, stirring between each). Pour the smooth, melted chocolate over the mint layer, spreading it gently with a spatula.

Step 4: Garnish and Set

Top with extra whipped topping, chocolate shavings, or sprinkles for added flair. Refrigerate for at least 4 hours or until fully set.

Step 5: Serve and Enjoy

Once set, slice into squares and serve. Watch how quickly it disappears!

Tips for Success

  • Use room temperature cream cheese for a smooth filling.
  • Crush the cookies finely to ensure a firm crust.
  • Chill between layers to prevent mixing and achieve distinct layers.
  • Don’t overheat the chocolate to keep it silky and spreadable.
  • Customize the garnish with festive sprinkles or crushed mint candies.

Nutritional Information (Per Serving)

NutrientAmount
Calories320 kcal
Total Fat18 g
Saturated Fat10 g
Carbohydrates38 g
Sugars25 g
Protein3 g
Sodium150 mg

Note: Nutritional values are approximate and vary based on specific ingredients used.

Creative Variations

Mint Chocolate Chip Twist

Fold in mini chocolate chips to the mint layer for added texture.

Oreo Mint Crust Upgrade

Use mint-flavored Oreos for an extra minty base.

White Chocolate Topping

Replace the semi-sweet chocolate with melted white chocolate for a different flavor profile.

Gluten-Free Option

Use gluten-free sandwich cookies for the crust.

Serving and Storage

Serving Suggestions

  • Serve chilled for the best texture.
  • Pair with a hot cup of coffee or mint tea.
  • Add a scoop of vanilla ice cream for extra indulgence.

Storage Tips

  • Refrigerator: Store in an airtight container for up to 5 days.
  • Freezer: Freeze for up to 1 month; thaw in the refrigerator before serving.

FAQs About Shamrock Shake Dessert Lasagna

1. Can I make this dessert ahead of time?

Yes! Prepare it a day in advance and keep it refrigerated until serving.

2. Can I use fresh whipped cream instead of Cool Whip?

Absolutely, just ensure it’s stabilized to maintain the layers.

3. How can I make this dessert less sweet?

Reduce the powdered sugar in the filling or use dark chocolate for the topping.

4. Can I skip the green food coloring?

Yes, the dessert will still taste delicious without the color.

5. What’s the best way to cut clean slices?

Use a sharp knife dipped in warm water and wiped dry between cuts.

6. Can I use a different extract if I don’t like peppermint?

Try vanilla mint, almond, or even orange extract for a unique twist.

Final Thoughts and Next Steps

Making this Shamrock Shake Dessert Lasagna isn’t just about creating a dessert—it’s about making memories. From the vibrant green layers to the cool mint flavor, this no-bake treat is a celebration in every bite. It’s simple enough to whip up on a whim yet impressive enough to grace your holiday table.

So, what are you waiting for? Gather your ingredients, put on your favorite music, and create a dessert that’s as fun to make as it is to eat. Don’t be surprised if your guests ask for seconds—or the recipe!

Shamrock Shake Dessert Lasagna

This Shamrock Shake Dessert Lasagna is a no-bake, minty, and chocolatey layered dessert inspired by the classic Shamrock Shake. With a crunchy Oreo crust, a creamy mint filling, and a rich chocolate topping, it’s the perfect festive treat for St. Patrick’s Day or any occasion where you want to impress with minimal effort.
Prep Time 20 minutes
Resting Time 4 hours
Total Time 4 hours 20 minutes
Servings: 10
Course: Dessert
Cuisine: American
Calories: 350

Ingredients
  

For the Crust:
  • 1 ½ cups Oreo cookie crumbs about 15–20 cookies
  • 6 tablespoons unsalted butter melted
For the Mint Filling:
  • 8 oz cream cheese softened
  • 1 cup powdered sugar
  • 1 teaspoon vanilla extract
  • 1 teaspoon peppermint extract
  • 2 cups whipped topping Cool Whip
  • 2 –3 drops green food coloring optional, but adds a festive touch
For the Chocolate Topping:
  • 1 cup semi-sweet chocolate chips
  • 2 tablespoons heavy cream
For Garnish:
  • Extra whipped topping
  • Chocolate shavings or sprinkles for extra pizzazz

Method
 

  1. Make the Crust: Crush Oreo cookies into fine crumbs and mix with melted butter. Press into the bottom of a 9×13-inch pan and chill.
  2. Prepare the Mint Filling: Beat softened cream cheese until smooth. Mix in powdered sugar, vanilla, and peppermint extracts. Fold in whipped topping and food coloring. Spread over the crust.
  3. Make the Chocolate Topping: Melt chocolate chips with heavy cream. Pour and spread evenly over the mint layer.
  4. Garnish and Set: Add extra whipped topping, chocolate shavings, or sprinkles. Chill for at least 4 hours.
  5. Serve: Slice and enjoy your festive creation!

Easy No-Bake Easter Fudge: Festive Fun—This One’s a Must-Try!

You know that feeling when you create something so delicious it vanishes before you can even grab a second piece? That’s exactly what happened with this Easy No-Bake Easter Fudge. I whipped up a batch for a family gathering, thinking there would be leftovers to enjoy the next day—but nope, it was gone faster than the Easter egg hunt ended! If you’re looking for a simple yet festive treat that requires no oven and minimal prep, you’ve just found your new go-to recipe.

This fudge is smooth, creamy, and packed with colorful surprises. The pastel mini marshmallows and crushed mini chocolate eggs give it a festive touch, making it perfect for Easter celebrations, school parties, or just a sweet springtime indulgence. Ready to dive in? Let’s get started!

Why You’ll Love This Easy No-Bake Easter Fudge

  • Quick and simple: Only a few ingredients and minimal equipment are required.
  • No baking needed: Perfect when you don’t want to turn on the oven.
  • Festive and colorful: A treat that looks just as good as it tastes.
  • Kid-friendly: Little ones will love helping with the stirring and decorating.
  • Great for gifting: Wrap up slices for friends, neighbors, or teachers.

Ingredients You’ll Need

Here’s everything you need to create this mouthwatering fudge:

IngredientAmount
White chocolate chips3 cups
Sweetened condensed milk (14 oz can)1 can
Vanilla extract1 teaspoon
Pastel-colored mini marshmallows1 cup
Crushed mini chocolate eggs½ cup
Salt¼ teaspoon
Additional mini eggs & sprinklesFor decoration (optional)

Step-by-Step Guide to Making Your Easter Fudge

Step 1: Prepare Your Pan

Line an 8×8-inch baking pan with parchment paper, leaving an overhang on the sides to lift the fudge out easily later. Lightly grease the paper to prevent sticking.

Step 2: Melt the White Chocolate

In a medium saucepan over low heat, combine the white chocolate chips and sweetened condensed milk. Stir constantly until the chocolate is fully melted and smooth. Be patient—this step is key to that silky texture.

Step 3: Add Vanilla and Salt

Remove the mixture from heat and stir in the vanilla extract and salt. These simple additions balance the sweetness and enhance the flavor.

Step 4: Fold in the Fun Ingredients

Gently fold in the pastel-colored mini marshmallows and crushed mini chocolate eggs. Be careful not to overmix; you want to keep the marshmallows from melting into the fudge completely.

Step 5: Pour and Spread

Pour the mixture into your prepared pan, spreading it evenly with a spatula. Press additional mini eggs and sprinkles on top for extra color and crunch.

Step 6: Chill and Set

Refrigerate the fudge for at least 2 hours, or until firm. The hardest part is waiting, but trust me—it’s worth it!

Step 7: Slice and Enjoy

Once set, lift the fudge out of the pan using the parchment overhang. Cut into squares and watch them disappear faster than you can say, “Happy Easter!”

Tips for Perfect Easter Fudge Every Time

Use High-Quality Chocolate

Your fudge’s creaminess depends on the chocolate quality. Premium white chocolate chips melt smoother and taste richer.

Don’t Rush the Melting Process

Melting the chocolate slowly over low heat prevents burning and ensures a velvety texture.

Customize with Your Favorite Mix-Ins

While mini marshmallows and mini eggs are festive, you can swap them for chopped nuts, dried fruit, or colorful candies.

Add a Pop of Color

Gel food coloring can give the fudge a pastel swirl effect. Just add a few drops before folding in the mix-ins

Nutritional Information (Per Serving)

NutrientAmount
Calories210 kcal
Total Fat9 g
Saturated Fat5 g
Carbohydrates30 g
Sugars25 g
Protein2 g
Sodium70 mg

Note: Nutritional values are estimates and may vary based on ingredients used.

Creative Variations to Try

Chocolate Lover’s Twist

Swap half the white chocolate for milk or dark chocolate chips for a richer flavor.

Peanut Butter Delight

Add a swirl of peanut butter before setting for a salty-sweet combo.

Spring Garden Fudge

Use flower-shaped sprinkles and green-tinted coconut flakes for a garden-themed treat.

Common Mistakes and How to Avoid Them

Overheating the Chocolate

Melting too quickly causes grainy fudge. Keep the heat low and stir constantly.

Adding Marshmallows Too Soon

Mix them in after removing from heat to avoid melting into gooey blobs.

Skipping the Salt

Even a pinch of salt enhances the overall flavor and cuts through the sweetness.

Serving and Storing Your Easter Fudge

Serving Suggestions

  • Arrange on a festive platter for your Easter brunch table.
  • Wrap in cellophane bags tied with pastel ribbons for thoughtful gifts.
  • Add to Easter baskets for a homemade touch.

Storage Tips

  • Refrigerator: Store in an airtight container for up to 2 weeks.
  • Freezer: Freeze for up to 3 months. Thaw in the fridge before serving.

FAQs About Easy No-Bake Easter Fudge

1. Can I use milk chocolate instead of white chocolate?

Yes! It will change the flavor profile but still taste delicious.

2. How long does the fudge need to set?

At least 2 hours in the refrigerator. Overnight is even better for a firmer texture.

3. Can I make this fudge dairy-free?

Yes, use dairy-free chocolate and sweetened condensed coconut milk for a similar result.

4. What if I don’t have mini chocolate eggs?

Crushed chocolate candies, chopped chocolate bars, or colorful sprinkles work just as well.

5. Is it safe for kids to help with this recipe?

Absolutely! Kids can help stir (with supervision) and decorate the top.

6. How do I cut the fudge neatly?

Use a sharp knife dipped in warm water and wiped dry between cuts for clean slices.

Final Thoughts and Next Steps

Making this Easy No-Bake Easter Fudge isn’t just about creating a sweet treat—it’s about bringing joy to your table and smiles to everyone’s faces. Whether you’re sharing it with family, gifting it to friends, or indulging in a piece yourself, you’ll love how quickly it comes together and how fast it disappears!

Ready to whip up a batch? Gather your ingredients, put on your favorite spring playlist, and get started. And don’t forget to save yourself a piece before it’s all gone!

Easy No-Bake Easter Fudge: Festive Fun—This One’s a Must-Try!

This Easy No-Bake Easter Fudge is a quick, festive treat that’s creamy, colorful, and perfect for Easter celebrations. With just a handful of ingredients and no oven required, it’s a fun recipe for both kids and adults to make. The combination of white chocolate, pastel mini marshmallows, and crushed mini chocolate eggs creates a sweet treat that disappears fast at any gathering!
Prep Time 10 minutes
Resting Time 2 hours
Total Time 2 hours 10 minutes
Servings: 6
Course: Dessert
Cuisine: American
Calories: 210

Ingredients
  

  • 3 cups of white chocolate chips
  • 1 can 14 oz of sweetened condensed milk,
  • 1 teaspoon of vanilla extract
  • 1 cup of pastel-colored mini marshmallows
  • ½ cup of crushed mini chocolate eggs like Cadbury Mini Eggs,
  • ¼ teaspoon of salt
  • Additional mini eggs and sprinkles for decoration.

Method
 

  1. Prepare the Pan: Line an 8×8-inch baking pan with parchment paper, leaving an overhang for easy removal.
  2. Melt the Chocolate: In a medium saucepan over low heat, melt the white chocolate chips with the sweetened condensed milk. Stir constantly until smooth.
  3. Add Flavoring: Remove from heat and stir in vanilla extract and salt.
  4. Mix in Marshmallows and Mini Eggs: Gently fold in the mini marshmallows and crushed mini chocolate eggs without overmixing.
  5. Spread in Pan: Pour the mixture into the prepared pan and smooth the top with a spatula.
  6. Decorate: Press additional mini eggs and sprinkles on top for a festive finish.
  7. Chill: Refrigerate for at least 2 hours until fully set.
  8. Serve: Lift the fudge out, cut into squares, and enjoy!

Shamrock Salad Recipe: Creamy, Crunchy, and Citrusy Goodness for Your Next Family Dinner

Why You’ll Love This Shamrock Salad

Have you ever prepared a dish that surprises everyone at the table, including the pickiest eaters? Shamrock Salad is that delightful combination of creamy texture, refreshing citrus notes, and a satisfying crunch. Whether you’re looking to add something unique to your holiday spread or just want a refreshing side for a family meal, this salad is bound to impress. It’s vibrant, flavorful, and perfect for any occasion.

Ingredients

IngredientQuantity
Lime-flavored gelatin1 (3-ounce) package
Boiling water1 cup
Evaporated milk⅔ cup
Crushed pineapple (with juice)1 (9-ounce) can
Fresh lemon juice1 tablespoon
Cottage cheese1 (12-ounce) container
Finely chopped celery½ cup
Mayonnaise½ cup
Finely chopped pecans½ cup
Lettuce leaves10
Lime slices (for garnish)10

Step-by-Step Instructions

1. Prepare the Gelatin Base

  • In a medium bowl, dissolve the lime-flavored gelatin in 1 cup of boiling water. Stir until fully dissolved.
  • Let the mixture cool to room temperature.

2. Create the Creamy Mixture

  • In another large bowl, combine evaporated milk, crushed pineapple with juice, and fresh lemon juice. Stir well.
  • Add cottage cheese, mayonnaise, and finely chopped celery. Mix until smooth.

3. Combine and Chill

  • Slowly add the cooled gelatin mixture to the creamy base, stirring constantly to prevent lumps.
  • Fold in finely chopped pecans for that extra crunch.
  • Pour the mixture into a serving dish or mold. Refrigerate for at least 2 hours or until set.

4. Serve and Garnish

  • Once set, serve the Shamrock Salad on fresh lettuce leaves.
  • Garnish with lime slices for a pop of color and added citrus flair.

Tips for the Perfect Shamrock Salad

  • Use Fresh Ingredients: Fresh lemon juice makes a noticeable difference in flavor.
  • Chill Thoroughly: Allow enough chill time for the salad to set properly.
  • Texture Control: Chop celery and pecans finely for a smoother texture.
  • Customize Garnish: Add fresh herbs like mint for an extra touch of freshness.
  • Serve Cold: This salad is best enjoyed when fully chilled.

Creative Variations to Try

  • Add Fresh Fruit: Incorporate diced apples or grapes for added sweetness.
  • Make It Lighter: Substitute Greek yogurt for mayonnaise to reduce calories.
  • Extra Crunch: Add more nuts like walnuts or almonds for variety.
  • Sweet Twist: Use marshmallows for a dessert-like version.
  • Tropical Spin: Swap lime gelatin for pineapple gelatin for a fruity twist.

Nutritional Information (Per Serving)

NutrientAmount
Calories220
Total Fat15g
Saturated Fat4g
Carbohydrates18g
Sugars14g
Protein6g
Sodium200mg

Why Shamrock Salad is Perfect for Any Occasion

  • Holiday Dinners: Its vibrant green color makes it ideal for St. Patrick’s Day or festive occasions.
  • Family Gatherings: A guaranteed crowd-pleaser for all ages.
  • Potlucks: Easy to transport and serve, making it perfect for shared meals.
  • Quick Prep: Minimal prep time with maximum flavor payoff.

Frequently Asked Questions (FAQ)

1. Can I make Shamrock Salad a day ahead?
Yes! In fact, making it a day ahead allows the flavors to meld better. Just keep it refrigerated until ready to serve.

2. Can I substitute fresh pineapple for canned?
Fresh pineapple can be used, but the juice from canned pineapple helps with the gelatin setting process.

3. How do I prevent the gelatin from separating?
Make sure the gelatin mixture cools to room temperature before combining with other ingredients to avoid separation.

4. Is there a dairy-free version?
Yes, you can use dairy-free alternatives for evaporated milk, cottage cheese, and mayonnaise.

5. Can I use other types of nuts?
Absolutely! Walnuts, almonds, or even pistachios work well in this recipe.

6. How long will leftovers last?
Stored in an airtight container, Shamrock Salad will last up to 3 days in the refrigerator.

Final Thoughts and Call to Action

Shamrock Salad is more than just a pretty dish—it’s a delightful blend of flavors and textures that brings joy to every table. Whether you’re preparing it for a holiday celebration or a simple family dinner, this salad is sure to become a favorite. Ready to surprise your guests with something refreshingly unique? Gather your ingredients and whip up this creamy, crunchy, and citrusy goodness today!

Shamrock Salad Recipe: Creamy, Crunchy, and Citrusy Goodness for Your Next Family Dinner

The Shamrock Salad Recipe is a delightful blend of creamy, crunchy, and citrusy flavors, perfect for family dinners, holiday celebrations, and potlucks. Made with lime-flavored gelatin, cottage cheese, crushed pineapple, and chopped pecans, this vibrant green salad is easy to prepare and highly refreshing.
Prep Time 20 minutes
Resting Time 2 hours
Total Time 2 hours 20 minutes
Servings: 10
Course: Salad
Cuisine: American
Calories: 250

Ingredients
  

  • 1 3-ounce package lime-flavored gelatin
  • 1 cup boiling water
  • cup evaporated milk
  • 1 9-ounce can crushed pineapple (with juice)
  • 1 tablespoon fresh lemon juice
  • 1 12-ounce container cottage cheese
  • ½ cup finely chopped celery
  • ½ cup mayonnaise
  • ½ cup finely chopped pecans
  • 10 lettuce leaves for serving
  • 10 lime slices for garnish

Method
 

Prepare the Gelatin Base
  1. Dissolve the lime-flavored gelatin in 1 cup of boiling water. Stir until fully dissolved.
  2. Allow the mixture to cool to room temperature.
Make the Creamy Mixture
  1. In a large mixing bowl, combine evaporated milk, crushed pineapple with juice, and fresh lemon juice. Mix well.
  2. Add cottage cheese, mayonnaise, and finely chopped celery. Stir until smooth and evenly mixed.
Combine and Chill
  1. Gradually pour the cooled gelatin mixture into the creamy base, stirring continuously to prevent lumps.
  2. Fold in finely chopped pecans for added crunch.
  3. Pour the mixture into a serving dish or mold. Refrigerate for at least 2 hours or until the salad is set.
Serve and Garnish
  1. Once set, serve the Shamrock Salad on individual lettuce leaves.
  2. Garnish each serving with a slice of lime for a fresh citrus touch.

Cotton Candy Cake: A Magical, Fluffy Cake Bursting with Cotton Candy Flavor and Dreamy Pastel Colors!

Why You’ll Fall in Love with This Cotton Candy Cake

Have you ever tasted a dessert that instantly takes you back to childhood fairs, spinning rides, and the sweet scent of cotton candy floating through the air? This Cotton Candy Cake isn’t just a dessert; it’s a journey into your most cherished memories. Imagine slicing into a pastel masterpiece that looks as magical as it tastes, with every bite offering a fluffy, melt-in-your-mouth texture and the nostalgic sweetness of cotton candy. Whether you’re celebrating a birthday, planning a whimsical party, or just need a pick-me-up, this cake promises smiles, gasps of delight, and empty plates.

Ingredients You’ll Need

For the Cake:

IngredientQuantity
All-purpose flour2 ½ cups
Baking powder2 ½ teaspoons
Salt½ teaspoon
Unsalted butter (softened)1 cup
Granulated sugar1 ¾ cups
Egg whites4 large
Vanilla extract1 teaspoon
Cotton candy extract1 teaspoon (or to taste)
Whole milk1 cup
Pink food coloringAs needed
Blue food coloringAs needed

For the Cotton Candy Frosting:

IngredientQuantity
Unsalted butter (softened)1 cup
Powdered sugar4 cups
Heavy cream (or milk)2 tablespoons
Vanilla extract1 teaspoon
Cotton candy extract1 teaspoon
Pink & blue food coloringAs needed
Cotton candy (for garnish)As desired

Step-by-Step Instructions

1. Preparing the Cake Batter

  • Preheat your oven to 350°F (175°C). Grease and line three 8-inch round cake pans with parchment paper.
  • In a medium bowl, whisk together flour, baking powder, and salt.
  • In a large mixing bowl, beat the softened butter and granulated sugar until light and fluffy.
  • Add egg whites one at a time, beating well after each addition.
  • Stir in vanilla and cotton candy extracts.
  • Alternately add the flour mixture and milk to the butter mixture, beginning and ending with flour. Mix until just combined.
  • Divide batter evenly into two bowls. Color one portion pink and the other blue.
  • Pour batters into prepared pans, swirling gently for a marble effect or layering for distinct colors.
  • Bake for 25-30 minutes or until a toothpick inserted comes out clean. Cool completely before frosting.

2. Making the Cotton Candy Frosting

  • Beat butter until creamy and smooth.
  • Gradually add powdered sugar, mixing on low to prevent clouds of sugar.
  • Stir in heavy cream, vanilla, and cotton candy extracts until fluffy.
  • Divide frosting into two portions. Tint one pink and the other blue.

3. Assembling and Decorating Your Cake

  • Place one cake layer on your serving plate. Spread a layer of frosting on top.
  • Repeat with remaining layers, alternating colors if desired.
  • Frost the outside with a combination of pink and blue frosting, swirling for a dreamy look.
  • Garnish with wisps of cotton candy just before serving.

Tips for the Perfect Cotton Candy Cake

  • Room Temperature Ingredients: Ensure butter, milk, and eggs are at room temperature for smooth batter.
  • Avoid Overmixing: Overmixing can make the cake dense. Mix until just combined.
  • Frosting Consistency: If frosting is too thick, add a touch more cream; if too thin, add powdered sugar.
  • Adding Cotton Candy: Place cotton candy garnish right before serving to prevent it from melting into the frosting.

Creative Variations and Ideas

  • Cupcake Version: Use the same batter and bake in cupcake liners for about 18-20 minutes.
  • Surprise Inside: Add colorful sprinkles or mini marshmallows between layers for a fun surprise.
  • Drizzle Effect: Top with a white chocolate or pastel-colored ganache drizzle.
  • Edible Glitter: Sprinkle with edible glitter for extra magic.

Why Cotton Candy Cake Is Perfect for Any Occasion

  • Birthdays: A pastel dream perfect for kids and adults.
  • Baby Showers: Gender reveal? Let the inside color reveal the surprise.
  • Tea Parties: Impress your guests with a whimsical, sweet treat.
  • Everyday Joy: Who needs a reason to enjoy a bit of nostalgia?

Nutritional Information (Approximate per slice)

NutrientAmount
Calories420
Fat18g
Saturated Fat11g
Carbohydrates60g
Sugar45g
Protein4g
Sodium180mg

Frequently Asked Questions (FAQ)

1. Can I use store-bought cotton candy instead of extract?
Cotton candy extract provides a stronger, more consistent flavor. Using actual cotton candy in the batter is not recommended as it melts and can affect texture.

2. How should I store the Cotton Candy Cake?
Store in an airtight container at room temperature for up to 2 days or refrigerated for up to 5 days. Let it come to room temperature before serving.

3. Can I freeze the cake?
Yes! Freeze unfrosted layers wrapped in plastic wrap for up to 2 months. Thaw before frosting and serving.

4. How can I prevent the cotton candy garnish from melting?
Add the cotton candy garnish just before serving to keep it fluffy and prevent it from dissolving.

5. Is there a substitute for cotton candy extract?
If you can’t find cotton candy extract, vanilla extract with a hint of raspberry extract can mimic the flavor.

6. Can I make this cake gluten-free?
Yes, use a 1:1 gluten-free flour blend. Baking times may vary slightly, so keep an eye on the oven.

Final Thoughts and Call to Action

Nothing brings people together quite like a homemade cake. This Cotton Candy Cake offers a magical combination of flavors, colors, and nostalgia that your family and friends will rave about. Perfect for parties, special occasions, or whenever you need a little whimsy, it’s sure to brighten any day.

Ready to bring some magic into your kitchen? Gather your ingredients, put on your favorite playlist, and let the baking adventure begin!

Cotton Candy Cake: A Magical, Fluffy Cake Bursting with Cotton Candy Flavor and Dreamy Pastel Colors!

A light, fluffy cake bursting with cotton candy flavor and dreamy pastel colors. This cake is perfect for birthdays, celebrations, or anytime you need a nostalgic treat.
Prep Time 20 minutes
Cook Time 30 minutes
Total Time 50 minutes
Servings: 12
Course: Dessert
Cuisine: American
Calories: 350

Ingredients
  

For the Cake:
  • 2 ½ cups all-purpose flour
  • 2 ½ teaspoons baking powder
  • ½ teaspoon salt
  • 1 cup unsalted butter softened
  • 1 ¾ cups granulated sugar
  • 4 large egg whites
  • 1 teaspoon vanilla extract
  • 1 teaspoon cotton candy extract or to taste
  • 1 cup whole milk
  • Pink food coloring
  • Blue food coloring
For the Cotton Candy Frosting:
  • 1 cup unsalted butter softened
  • 4 cups powdered sugar
  • 2 tablespoons heavy cream or milk
  • 1 teaspoon vanilla extract
  • 1 teaspoon cotton candy extract
  • Pink food coloring
  • Blue food coloring
  • Cotton candy for garnish

Method
 

Make the Cake:
  1. Preheat your oven to 350°F (175°C). Grease and line three 8-inch round cake pans with parchment paper.
  2. In a medium bowl, whisk together flour, baking powder, and salt.
  3. In a large mixing bowl, beat butter and sugar until light and fluffy.
  4. Add egg whites one at a time, mixing well after each addition.
  5. Stir in vanilla and cotton candy extracts.
  6. Alternate adding the flour mixture and milk to the butter mixture, starting and ending with flour. Mix until just combined.
  7. Divide batter into two bowls. Tint one pink and the other blue.
  8. Pour into prepared pans. Swirl batters for a marble effect or layer for distinct colors.
  9. Bake for 25-30 minutes or until a toothpick comes out clean. Cool completely.
Make the Frosting:
  1. Beat butter until smooth.
  2. Gradually add powdered sugar, mixing on low.
  3. Stir in heavy cream, vanilla, and cotton candy extracts. Beat until fluffy.
  4. Divide frosting into two bowls. Color one pink and the other blue.
Assemble and Decorate:
  1. Place a cake layer on a serving plate. Spread frosting on top.
  2. Repeat with remaining layers.
  3. Frost the outside with swirls of pink and blue frosting.
  4. Garnish with cotton candy before serving.

Cheesy Shrimp Quiche: A Savory Delight for Any Occasion

A Rich and Flavorful Dish for Every Meal

Quiche is one of those dishes that effortlessly combines sophistication with comfort. It can be served at a fancy brunch, a casual family gathering, or even as a quick weeknight dinner. This cheesy shrimp quiche takes the classic quiche recipe to the next level by adding succulent shrimp and the perfect balance of creamy and spicy flavors.

The combination of chive-and-onion cream cheese, pepper Jack cheese, and juicy shrimp creates a rich, indulgent filling, while the flaky pie crust brings everything together. Whether you are a seafood lover or just looking for a new twist on quiche, this recipe is guaranteed to impress.

Why You’ll Love This Cheesy Shrimp Quiche

1. A Perfect Balance of Creamy and Savory

One of the highlights of this quiche is its velvety, flavorful filling. The chive-and-onion cream cheese adds a slight tang and depth, complementing the mild sweetness of the shrimp. Meanwhile, the pepper Jack cheese gives a hint of heat, creating a well-rounded dish that appeals to different taste preferences.

2. Quick and Easy to Make

Despite its gourmet appeal, this quiche is surprisingly easy to prepare. With a pre-made deep-dish pie crust, the hardest part—making the crust from scratch—is already taken care of. That means you can focus on creating a delicious filling without spending hours in the kitchen.

3. Versatile for Any Meal

This shrimp quiche is perfect for breakfast, brunch, lunch, or dinner. Pair it with a simple side salad for a light meal or serve it alongside roasted vegetables for a heartier option. It’s also great for meal prep since it reheats beautifully, making it an excellent choice for busy weekdays.

4. A Seafood Twist on a Classic Dish

Traditional quiches often feature ingredients like bacon, ham, or spinach, but this version introduces shrimp for a fresh, coastal-inspired flavor. Seafood lovers will appreciate how well the shrimp pairs with the cheesy, custardy filling, creating a dish that feels special yet comforting.

Ingredients:

  • 1 frozen deep-dish pie crust (from a 12-ounce package)
  • 1/2 cup chive-and-onion cream cheese spread
  • 2 large eggs
  • 12 ounces cooked, peeled, and deveined shrimp (thawed and drained)
  • 1/2 cup shredded pepper Jack cheese

Directions:

  1. Preheat the oven to 375°F.
  2. Place the frozen pie crust on a baking sheet to prevent spills.
  3. Spread the chive-and-onion cream cheese evenly over the bottom of the crust.
  4. In a bowl, whisk the eggs until well combined.
  5. Add the shrimp and shredded pepper Jack cheese to the eggs, stirring to mix evenly.
  6. Pour the mixture into the pie crust, spreading it out evenly.
  7. Bake for 30 to 35 minutes, or until the filling is set and the top is golden brown.
  8. Let the quiche cool for a few minutes before slicing and serving.

Nutritional Information (Per Serving, Approximate):

  • Calories: 320
  • Protein: 22g
  • Fat: 18g
  • Carbohydrates: 22g
  • Fiber: 1g
  • Sodium: 580mg

Expert Tips for the Best Shrimp Quiche

Even though this recipe is simple, a few expert tips will help you achieve the best results:

1. Use Cooked Shrimp for Convenience

To save time, use pre-cooked, peeled, and deveined shrimp. If you only have raw shrimp, quickly sauté them in a pan with a little butter or olive oil until they turn pink before adding them to the quiche.

2. Prevent a Soggy Crust

No one likes a quiche with a soggy bottom. To prevent this, consider pre-baking the pie crust for about 5-7 minutes before adding the filling. This extra step helps keep the crust crisp while baking.

3. Let the Quiche Rest Before Slicing

After baking, allow the quiche to sit for at least 5-10 minutes before slicing. This helps the filling set properly, making it easier to cut neat, clean slices.

4. Customize the Cheese for More Flavor

While pepper Jack cheese adds a touch of heat, you can experiment with other cheeses:

  • Gruyère for a nutty, rich flavor
  • Cheddar for a sharp, classic taste
  • Mozzarella for extra creaminess

Variations and Additions

If you love experimenting in the kitchen, here are some great ways to customize this quiche:

1. Add More Vegetables

Enhance the flavor and nutrition by adding sautéed vegetables such as:

  • Spinach
  • Mushrooms
  • Bell peppers
  • Green onions

2. Make It Extra Spicy

If you love heat, turn up the spice by:

  • Adding a pinch of red pepper flakes
  • Using spicy Monterey Jack cheese instead of regular pepper Jack
  • Mixing in diced jalapeños

3. Go Crustless for a Low-Carb Version

If you’re watching your carb intake, skip the pie crust altogether. Pour the filling directly into a greased pie dish and bake as usual. You’ll still get a delicious, custardy quiche without the extra carbs.

4. Swap Shrimp for Another Protein

If you’re not a fan of shrimp, try using other proteins such as:

  • Smoked salmon for a rich, smoky twist
  • Crab meat for an elegant, seafood-inspired dish
  • Shredded rotisserie chicken for a land-and-sea combo

Frequently Asked Questions (FAQs)

1. Can I Use Fresh Shrimp Instead of Frozen?

Yes! If using fresh shrimp, make sure to cook and peel them before adding them to the quiche. Fresh shrimp will add even more flavor to the dish.

2. How Do I Store Leftover Quiche?

Store any leftover quiche in an airtight container in the refrigerator for up to 3-4 days. To reheat, simply warm slices in the oven at 350°F for about 10 minutes or microwave for 30-60 seconds.

3. Can I Freeze This Quiche?

Absolutely! To freeze, wrap the fully baked and cooled quiche tightly in plastic wrap, followed by aluminum foil. Store it in the freezer for up to 2 months. When ready to eat, thaw overnight in the refrigerator and reheat in the oven.

4. What Can I Serve with This Quiche?

This quiche pairs well with:

  • A crisp green salad with lemon vinaigrette
  • Roasted asparagus or Brussels sprouts
  • A light fruit salad for a refreshing contrast

5. How Do I Know When the Quiche is Done?

The quiche is done when the center is set but slightly jiggly and the top is golden brown. A knife inserted near the center should come out clean.

Conclusion: A Must-Try Quiche for Any Occasion

This cheesy shrimp quiche is an easy yet elegant dish that’s perfect for breakfast, brunch, or dinner. With its creamy, cheesy filling and flavorful shrimp, it’s a fantastic twist on traditional quiche recipes. Whether you’re hosting guests or just want a delicious homemade meal, this quiche delivers on both taste and convenience.

Try this recipe today and enjoy a rich, satisfying dish that’s sure to become a family favorite!

Cheesy Shrimp Quiche: A Savory Delight for Any Occasion

This cheesy shrimp quiche is rich, creamy, and packed with flavor! Featuring tender shrimp, chive-and-onion cream cheese, and a hint of spice from pepper Jack cheese, this quiche is perfect for breakfast, brunch, or a light dinner. With a flaky deep-dish crust and a custardy, savory filling, it’s an easy yet elegant dish that everyone will love. Serve it with a fresh salad for a complete meal!
Prep Time 10 minutes
Cook Time 35 minutes
Total Time 45 minutes
Servings: 6
Course: Breakfast
Cuisine: French-American Fusion
Calories: 320

Ingredients
  

  • 1 frozen deep-dish pie crust from a 12-ounce package
  • 1/2 cup chive-and-onion cream cheese spread
  • 2 large eggs
  • 12 ounces cooked peeled, and deveined shrimp (thawed and drained)
  • 1/2 cup shredded pepper Jack cheese

Method
 

  1. Preheat the oven to 375°F (190°C).
  2. Place the frozen deep-dish pie crust on a baking sheet to catch any spills.
  3. Spread the chive-and-onion cream cheese evenly over the bottom of the pie crust.
  4. In a mixing bowl, whisk the eggs until fully combined.
  5. Add the shrimp and shredded pepper Jack cheese to the eggs, stirring gently to combine.
  6. Pour the mixture into the prepared pie crust, making sure the shrimp and cheese are evenly distributed.
  7. Bake for 30 to 35 minutes, or until the center is set and the top is golden brown.
  8. Remove from the oven and let it rest for 5-10 minutes before slicing.

Crispy Mozzarella Stick Onion Rings Recipe: The Ultimate Cheesy Snack

There’s nothing quite like the combination of crispy, golden onion rings and gooey, melty mozzarella sticks—so why not combine them? If you love cheesy appetizers with a satisfying crunch, this Crispy Mozzarella Stick Onion Rings Recipe is a must-try.

Picture this: thick onion rings stuffed with mozzarella cheese, coated in a perfectly seasoned breadcrumb crust, and fried until golden brown. Every bite is a delicious blend of crunch, creaminess, and savory goodness. Whether you’re making these for game night, a party, or just a fun snack, they’ll disappear fast!

Ready to make the ultimate cheese-stuffed onion rings? Let’s get started!

Why You’ll Love This Recipe

  • Crispy & Cheesy – The crunchy coating perfectly contrasts with the melty mozzarella.
  • Perfect for Sharing – A great party appetizer or snack that everyone will love.
  • Easy to Make – Uses simple ingredients and comes together quickly.
  • Customizable – Add spices, swap cheeses, or bake instead of frying.

Ingredients for Crispy Mozzarella Stick Onion Rings

Main Ingredients

IngredientQuantityNotes
Large onions2Use sweet or yellow onions for best flavor
Mozzarella cheese sticks8Cut into pieces to fit inside the onion rings
Eggs2 largeHelps the coating stick
All-purpose flour1 cupCreates a base for the crispy coating
Salt & pepperTo tasteEnhances flavor
Breadcrumbs2 cupsUse panko breadcrumbs for extra crunch
OilFor fryingUse vegetable or canola oil

This simple list of ingredients turns into an unforgettable snack in just a few steps!

How to Make Crispy Mozzarella Stick Onion Rings

Step 1: Prepare the Onion Rings

  1. Peel and slice the onions into thick rings (about ½-inch wide).
  2. Separate the rings, choosing larger outer rings to use.

Step 2: Cut & Insert the Mozzarella Sticks

  1. Cut mozzarella sticks into smaller pieces.
  2. Place a piece of cheese inside two stacked onion rings, creating a cheese-filled onion ring.
  3. Repeat until all rings are stuffed.

Step 3: Coat the Onion Rings

  1. Set up a breading station with three bowls:
    • Bowl 1: Flour, salt, and pepper
    • Bowl 2: Beaten eggs
    • Bowl 3: Breadcrumbs
  2. Dip each cheese-stuffed onion ring into the flour, coating evenly.
  3. Next, dip into the egg mixture.
  4. Finally, coat in breadcrumbs, pressing gently to adhere.
  5. Repeat for all rings.

Step 4: Freeze the Rings (Important Step!)

  • Place coated rings on a baking sheet and freeze for 30 minutes.
  • This prevents the cheese from melting too quickly while frying.

Step 5: Fry Until Golden & Crispy

  1. Heat oil to 350°F (175°C) in a deep pan.
  2. Fry rings in batches for 2–3 minutes per side, until golden brown.
  3. Remove and drain on a paper towel-lined plate.

Step 6: Serve & Enjoy!

  • Serve hot with marinara, ranch, or spicy mayo for dipping.

Tips for the Best Mozzarella Stick Onion Rings

  • Use panko breadcrumbs – They create the crispiest texture.
  • Double-coat for extra crunch – Repeat the breading process for a thicker coating.
  • Freeze before frying – Prevents the cheese from oozing out too soon.
  • Don’t overcrowd the pan – Fry in batches for even cooking.

Dipping Sauce Ideas

Take these crispy cheese-stuffed onion rings to the next level with these delicious dips:

Dipping SauceFlavor Profile
Marinara SauceClassic tomato flavor
Garlic AioliCreamy and garlicky
Ranch DressingCool and tangy
Spicy MayoA little heat with creamy richness
BBQ SauceSmoky and slightly sweet

Variations and Substitutions

Make It Spicier

  • Add cayenne pepper or chili powder to the breadcrumbs.
  • Serve with hot sauce or sriracha mayo.

Try a Different Cheese

  • Swap mozzarella for cheddar, pepper jack, or gouda.

Baked Instead of Fried

  • Place rings on a baking sheet, spray with oil, and bake at 400°F (200°C) for 15–18 minutes, flipping halfway.

Gluten-Free Version

  • Use gluten-free flour and breadcrumbs.

Health Benefits & Nutritional Breakdown

While this is an indulgent snack, you can still enjoy it in moderation!

Nutritional Breakdown (Per Serving, Approximate)

NutrientAmountBenefits
Calories250–300Provides energy
Protein8–10gSupports muscle growth
Carbohydrates20–25gA quick source of fuel
Fiber2gAids digestion
Healthy Fats10–15gSupports brain function

For a lighter version, try baking instead of frying and using low-fat cheese.

Frequently Asked Questions (FAQs)

1. Can I make these ahead of time?

Yes! Bread and freeze the rings in advance. Fry or bake just before serving.

2. How do I store leftovers?

Store in an airtight container in the fridge for up to 3 days.

3. How do I reheat them?

  • Air fryer: 350°F for 3–5 minutes.
  • Oven: 375°F for 10 minutes.

4. Can I use different onions?

Yes! Sweet onions, yellow onions, or white onions work best.

5. Why is my cheese leaking out?

  • Make sure to freeze before frying.
  • Use a thicker coating of breadcrumbs.
  • Fry at the right temperature (350°F)—not too hot!

6. What’s the best way to serve these?

Serve hot with dipping sauces, a side salad, or fries for a full meal!

Final Thoughts: Try This Crispy Mozzarella Stick Onion Rings Recipe Today!

If you love cheesy, crispy, and satisfying snacks, these Crispy Mozzarella Stick Onion Rings are a must-try. With melty cheese inside, crunchy coating outside, and endless dipping possibilities, they’re a guaranteed hit!

So, what are you waiting for? Grab your ingredients and make this mouthwatering recipe today!

ating

Crispy Mozzarella Stick Onion Rings Recipe: The Ultimate Cheesy Snack

These Vegan Cabbage Rolls (Asian-Inspired Wraps) are a delicious and nutritious twist on traditional cabbage rolls! Packed with a flavorful mix of rice, vegetables, and seasonings, all wrapped in tender napa cabbage leaves and coated in a savory Asian-inspired sauce, this dish is perfect for meal prep, family dinners, or special occasions.
Prep Time 15 minutes
Cook Time 25 minutes
Total Time 40 minutes
Servings: 4 servings
Course: Main Dish
Cuisine: Asian-inspired, Vegan

Ingredients
  

Filling Ingredients:
  • 1 1/4 cups dry sushi rice or any short-grain rice
  • 10-12 large napa cabbage leaves
  • 1 tbsp oil divided
  • 1 medium onion diced
  • 3/4 tbsp ginger minced
  • 3 cloves garlic minced
  • 1 medium carrot diced (120 g)
  • 2 medium peppers diced (70 g)
  • 8 white button mushrooms diced (canned or fresh)
  • 2 tbsp tamari or coconut aminos
  • 1/2 tsp sea salt
  • 1/2 tsp black pepper
  • 1/2 tsp onion powder
  • 1/4 tsp red pepper flakes or to taste
  • Sesame seeds for garnish
Sauce Ingredients:
  • 1 tsp oil e.g., sesame oil
  • 1/2 tbsp ginger minced
  • 2 cloves garlic minced
  • 1 1/2 tbsp tamari or coconut aminos
  • 1 tbsp rice vinegar
  • 3/4 tbsp maple syrup
  • 1/2 cup water 120 ml
  • 1/2 tbsp cornstarch
  • Salt pepper, red pepper flakes, smoked paprika to taste

Method
 

Prepare the Rice:
  1. Rinse the sushi rice under cold water until the water runs clear.
  2. Cook the rice according to package instructions. Set aside to cool.
Blanch the Cabbage Leaves:
  1. Bring a large pot of water to a boil.
  2. Carefully separate the cabbage leaves and blanch them in boiling water for 30-40 seconds until they become soft and pliable.
  3. Remove and place them on a towel to dry.
Cook the Filling:
  1. Heat 1/2 tbsp oil in a pan over medium heat.
  2. Add diced onion, ginger, and garlic. Sauté for 2 minutes until fragrant.
  3. Stir in carrots, peppers, and mushrooms. Cook for another 3-4 minutes.
  4. Add tamari, salt, black pepper, onion powder, and red pepper flakes. Stir well.
  5. Mix in cooked rice and cook for another 2 minutes. Remove from heat and let cool slightly.
Assemble the Cabbage Rolls:
  1. Lay a cabbage leaf flat on a clean surface.
  2. Place a spoonful of the filling in the center.
  3. Fold the sides of the cabbage over the filling, then roll tightly from bottom to top like a burrito.
  4. Repeat with the remaining leaves and filling.
Make the Sauce:
  1. Heat 1 tsp oil in a small saucepan over medium heat.
  2. Add ginger and garlic, sauté for 30 seconds.
  3. Stir in tamari, rice vinegar, maple syrup, and water.
  4. Mix cornstarch with a tablespoon of water, then stir into the sauce to thicken.
  5. Cook for 1-2 minutes, then remove from heat.
Cook the Cabbage Rolls:
  1. Heat 1/2 tbsp oil in a large pan over medium heat.
  2. Place the cabbage rolls seam-side down and cook for 2-3 minutes until lightly browned.
  3. Pour the sauce over the rolls and simmer for 5 minutes.
Garnish & Serve:
  1. Sprinkle sesame seeds over the rolls.
  2. Serve hot with extra sauce on the side.

Notes

  • Blanching the cabbage leaves helps prevent tearing.
  • Add tofu, tempeh, or lentils for extra protein.
  • Serve with steamed jasmine rice, miso soup, or an Asian slaw.
  • Store leftovers in an airtight container in the fridge for up to 3 days.
  • Reheat by steaming or microwaving for 1-2 minutes.
  • Can be frozen before cooking; thaw in the fridge overnight before steaming or pan-frying.

Taco Ranch Bites: The Ultimate Party Snack

Imagine biting into a crispy, golden tart shell filled with savory taco-seasoned beef, melty cheddar cheese, and a creamy ranch drizzle. Sounds irresistible, right? That’s exactly what you get with these Taco Ranch Bites—a delicious, bite-sized snack that’s perfect for parties, game nights, or anytime you crave something flavorful and fun.

These crispy, cheesy, and ranch-infused taco bites come together quickly with just a handful of ingredients. Plus, they’re super easy to make and always a hit with kids and adults alike.

So, whether you’re looking for an easy appetizer or a crowd-pleasing snack, this Taco Ranch Bites recipe is exactly what you need. Let’s get started!

Why You’ll Love This Recipe

  • Crispy, Cheesy, and Flavor-Packed: Every bite has the perfect balance of crunch, spice, and creaminess.
  • Quick and Easy: Made with pre-made phyllo tart shells, so you don’t have to worry about rolling dough.
  • Great for Entertaining: These are perfect finger foods for parties, family gatherings, or game days.
  • Customizable: You can adjust the spice level, swap ingredients, or make a vegetarian version.

Ingredients for Taco Ranch Bites

Before you begin, make sure you have all the ingredients ready to go.

Main Ingredients

IngredientQuantityNotes
Ground beef1 lbCan substitute with ground turkey or chicken
Diced tomatoes & green chilies1 can (10 oz)Adds moisture and a slight kick
Premium ranch dressing1 bottle (8 oz)Drizzle for creamy flavor
Taco seasoning1 packet (1 oz)Use store-bought or homemade
Frozen phyllo tart shells5 packs (15-count)Pre-made, crispy, and convenient
Cheddar cheese2 cups, shreddedUse sharp cheddar for the best flavor

This simple ingredient list comes together in under 30 minutes for a quick, crowd-pleasing appetizer.

How to Make Taco Ranch Bites

Step 1: Preheat & Prepare

  1. Preheat your oven to 375°F (190°C).
  2. Arrange the frozen phyllo tart shells on a baking sheet and set them aside.

Step 2: Cook the Taco Meat

  1. Heat a large skillet over medium heat.
  2. Add the ground beef and cook, stirring occasionally, until browned and fully cooked (about 5–7 minutes).
  3. Drain any excess grease.
  4. Stir in the taco seasoning and diced tomatoes with green chilies.
  5. Let the mixture simmer for 2–3 minutes, stirring occasionally.

Step 3: Assemble the Bites

  1. Spoon about 1 tablespoon of the taco meat mixture into each phyllo tart shell.
  2. Sprinkle shredded cheddar cheese over the top of each bite.

Step 4: Bake Until Golden & Melty

  1. Place the baking sheet in the oven and bake for 8–10 minutes, or until the cheese is melted and bubbly.
  2. Remove from the oven and let them cool slightly.

Step 5: Drizzle with Ranch & Serve

  1. Drizzle each taco bite with ranch dressing for the final touch.
  2. Serve immediately and enjoy while warm!

Tips for the Best Taco Ranch Bites

  • Use fresh cheese – Pre-shredded cheese contains anti-caking agents, which can prevent smooth melting.
  • Don’t overfill the tart shells – Too much filling can cause them to overflow in the oven.
  • Make them spicy – Add diced jalapeños or a dash of hot sauce to the taco meat.
  • Prep ahead of time – Cook the taco meat in advance and assemble just before baking.

Variations and Substitutions

Want to switch things up? Here are a few fun ways to customize your Taco Ranch Bites.

Make It Spicier

  • Add chopped jalapeños or red pepper flakes to the taco meat.
  • Use pepper jack cheese instead of cheddar.
  • Drizzle with spicy chipotle ranch instead of regular ranch.

Vegetarian Option

  • Replace ground beef with black beans, refried beans, or crumbled tofu.

Different Cheese Choices

  • Try Monterey Jack, mozzarella, or queso fresco for a different flavor profile.

Add Some Crunch

  • Sprinkle crushed tortilla chips on top before baking for extra texture.

Health Benefits & Nutritional Breakdown

While Taco Ranch Bites are an indulgent treat, you can still enjoy them in moderation.

Nutritional Breakdown (Per Bite, Approximate)

NutrientAmountBenefits
Calories150–180Provides energy
Protein8–10gSupports muscle growth
Carbohydrates10–15gQuick source of fuel
Fiber2gAids digestion
Healthy Fats8–10gGood for brain function

If you want a lighter version, try:

  • Using ground turkey instead of beef.
  • Substituting Greek yogurt for ranch dressing.
  • Reducing the cheese amount slightly.

Frequently Asked Questions (FAQs)

1. Can I make these ahead of time?

Yes! You can cook the taco meat in advance and refrigerate it for up to 3 days. Assemble and bake just before serving.

2. Can I freeze Taco Ranch Bites?

Absolutely! Assemble the bites (without baking), place them on a tray to freeze, then transfer to a freezer-safe bag. Bake directly from frozen at 375°F for 12–15 minutes.

3. How do I store leftovers?

Store leftovers in an airtight container in the refrigerator for up to 3 days. Reheat in the oven for 5 minutes at 350°F.

4. Can I use a different type of shell?

Yes! If you can’t find phyllo tart shells, try:

  • Mini tortilla cups (made by pressing small tortillas into a muffin tin).
  • Mini puff pastry shells for a buttery, flaky option.

5. What dips go well with these bites?

  • Guacamole – Adds creaminess and a fresh touch.
  • Sour cream – A classic, cool balance to the spice.
  • Salsa – Brings freshness and extra flavor.

6. Can I make this recipe without ranch dressing?

Yes! If you’re not a fan of ranch, try drizzling with sour cream, queso, or avocado crema instead.

Final Thoughts: Try These Taco Ranch Bites Today!

If you’re looking for a simple, flavorful, and crowd-pleasing appetizer, these Taco Ranch Bites are the perfect choice. The combination of crispy shells, cheesy taco filling, and creamy ranch drizzle makes them absolutely addictive.

So, what are you waiting for? Gather your ingredients and make these delicious taco bites today!

ating

Taco Ranch Bites: The Ultimate Party Snack

These Taco Ranch Bites are the ultimate party snack! With crispy phyllo tart shells filled with taco-seasoned beef, melty cheddar cheese, and a drizzle of creamy ranch, they deliver an irresistible combination of crunch, spice, and cheesy goodness. Perfect for game nights, family gatherings, or whenever you need a quick and delicious appetizer!
Prep Time 10 minutes
Cook Time 20 minutes
Total Time 20 minutes
Servings: 75 bites (5 packs of 15 tart shells)
Course: Appetizer, Snack
Cuisine: Mexican-American

Ingredients
  

Main Ingredients:
  • 1 lb ground beef or substitute with ground turkey or chicken
  • 1 can 10 oz diced tomatoes & green chilies
  • 1 packet 1 oz taco seasoning (store-bought or homemade)
  • 5 packs 15-count frozen phyllo tart shells
  • 2 cups shredded cheddar cheese
  • 1 bottle 8 oz ranch dressing (for drizzling)

Method
 

Preheat & Prepare:
  1. Preheat your oven to 375°F (190°C).
  2. Arrange frozen phyllo tart shells on a baking sheet and set aside.
Cook the Taco Meat:
  1. Heat a large skillet over medium heat.
  2. Add ground beef and cook, stirring occasionally, until browned and fully cooked (about 5-7 minutes).
  3. Drain excess grease and stir in taco seasoning and diced tomatoes with green chilies.
  4. Let the mixture simmer for 2-3 minutes, stirring occasionally.
Assemble the Bites:
  1. Spoon about 1 tablespoon of the taco meat mixture into each phyllo tart shell.
  2. Sprinkle shredded cheddar cheese over the top of each bite.
Bake Until Golden & Melty:
  1. Place the baking sheet in the oven and bake for 8-10 minutes, or until the cheese is melted and bubbly.
  2. Remove from the oven and let cool slightly.
Drizzle with Ranch & Serve:
  1. Drizzle each taco bite with ranch dressing.
  2. Serve immediately and enjoy while warm!

Notes

  • Use fresh shredded cheese for better melting consistency.
  • Do not overfill tart shells to prevent spilling.
  • Add diced jalapeños or a dash of hot sauce for extra heat.
  • Make the taco meat ahead of time and store it in the fridge for quick assembly.
  • Store leftovers in an airtight container in the fridge for up to 3 days and reheat in the oven at 350°F for 5 minutes.
  • To freeze, assemble the bites (without baking), freeze on a tray, then transfer to a freezer bag. Bake directly from frozen at 375°F for 12-15 minutes.

Apple Cinnamon Muffins: A Cozy, Delicious Treat for Any Occasion

There’s something magical about the combination of sweet apples and warm cinnamon baked into a soft, fluffy muffin. Whether you’re looking for a comforting breakfast, a cozy afternoon snack, or a delightful treat to share, Apple Cinnamon Muffins are the perfect choice.

With a moist texture, bursts of fresh apple, and a hint of spice, these muffins capture the flavors of fall but are delicious enough to enjoy all year round. Plus, with the optional oat streusel topping, you get a slightly crunchy, buttery finish that makes each bite even more irresistible.

Let’s dive into how you can make the best Apple Cinnamon Muffins right in your own kitchen!

Why You’ll Love This Recipe

  • Soft & Moist: Thanks to yogurt and butter, these muffins stay perfectly tender.
  • Naturally Sweet & Spiced: The combination of cinnamon, nutmeg, and fresh apples adds warmth and depth.
  • Wholesome Ingredients: Made with rolled oats, real apples, and minimal refined sugar.
  • Perfect for Any Time of Day: Great for breakfast, brunch, or an afternoon snack.
  • Easy to Make: No special equipment needed—just a bowl, a whisk, and an oven!

Ingredients for Apple Cinnamon Muffins

Main Ingredients

IngredientQuantityNotes
Baking apples (peeled, cored, chopped)2 cups (about 2 apples)Use Honeycrisp, Granny Smith, or Fuji for best flavor
Old-fashioned rolled oats1 cupAdds texture and fiber
Ground nutmeg½ tspEnhances the warm spice profile
Egg1 largeHelps bind the ingredients
Baking powder1 tspProvides lift and fluffiness
Ground cinnamon1 tbspThe key warming spice
All-purpose flour1 cupCan substitute with whole wheat flour
Unsalted butter½ cup, softenedCreates a rich, tender crumb
Plain yogurt (full-fat)1 cupAdds moisture and slight tang
Brown sugar½ cupSweetens and adds depth
Granulated sugar¼ cupBalances flavors
Salt¼ tspEnhances all the other flavors
Baking soda1 tspWorks with the yogurt to help the muffins rise

Optional Oat Streusel Topping

IngredientQuantityNotes
Unsalted butter3 tbspAdds richness and crunch
Brown sugar3 tbspSweetens the topping
All-purpose flour3 tbspHelps create a crumbly texture
Old-fashioned rolled oats3 tbspAdds a slight chewiness
Ground cinnamon½ tspFor extra warmth and spice

How to Make Apple Cinnamon Muffins

Step 1: Preheat & Prepare

  1. Preheat your oven to 375°F (190°C).
  2. Line a 12-cup muffin tin with paper liners or grease with butter.

Step 2: Prepare the Muffin Batter

  1. In a large bowl, whisk together flour, oats, cinnamon, nutmeg, baking powder, baking soda, and salt.
  2. In a separate bowl, cream together the butter and sugars until light and fluffy.
  3. Mix in the egg and yogurt, stirring until fully combined.
  4. Gradually fold the dry ingredients into the wet ingredients, mixing until just combined.
  5. Gently fold in the chopped apples—be careful not to overmix.

Step 3: Prepare the Oat Streusel Topping (Optional)

  1. In a small bowl, mix together butter, brown sugar, flour, oats, and cinnamon until crumbly.

Step 4: Fill & Bake

  1. Spoon the batter into the muffin tins, filling each about ¾ full.
  2. If using the streusel topping, sprinkle it generously over each muffin.
  3. Bake for 18–22 minutes, or until a toothpick inserted into the center comes out clean.
  4. Let the muffins cool in the pan for 5 minutes, then transfer them to a wire rack to cool completely.

Step 5: Serve & Enjoy!

Enjoy these muffins warm or at room temperature, with a cup of coffee, tea, or a glass of milk.

Tips for the Best Apple Cinnamon Muffins

  • Use the right apples – A balance of sweet and tart apples (like Honeycrisp or Granny Smith) gives the best flavor.
  • Don’t overmix – Overmixing leads to dense muffins instead of light, fluffy ones.
  • Use full-fat yogurt – For the creamiest texture, avoid non-fat yogurt.
  • Add nuts for crunch – Stir in chopped walnuts or pecans for extra texture.
  • Make them healthier – Substitute half of the all-purpose flour with whole wheat flour for added fiber.

Variations and Substitutions

Make It Gluten-Free

  • Use gluten-free all-purpose flour and certified gluten-free oats.

Make It Dairy-Free

  • Swap butter for coconut oil and use dairy-free yogurt.

Add More Texture

  • Stir in ½ cup of raisins, chopped pecans, or walnuts.

Try a Different Sweetener

  • Use maple syrup or honey instead of granulated sugar for a more natural sweetness.

Health Benefits of Apple Cinnamon Muffins

These muffins don’t just taste great—they also pack some great nutritional benefits!

Nutritional Breakdown (Per Muffin, Approximate)

NutrientAmountBenefits
Calories180–220Provides energy
Protein4–5gSupports muscle health
Fiber3–4gAids digestion
Healthy Fats6–8gGood for heart and brain function
Vitamin CHighSupports immune health

Since these muffins use fresh apples, oats, and yogurt, they are a nutrient-rich option compared to store-bought muffins filled with preservatives and excess sugar.

Frequently Asked Questions (FAQs)

1. Can I make these muffins ahead of time?

Yes! Store them in an airtight container at room temperature for up to 3 days or in the fridge for up to a week.

2. Can I freeze apple cinnamon muffins?

Absolutely! Place them in a freezer-safe bag and freeze for up to 3 months. Thaw at room temperature or warm in the microwave for 20–30 seconds.

3. Can I make mini muffins instead?

Yes! Use a mini muffin tin and bake for 10–12 minutes.

4. What’s the best way to reheat these muffins?

Warm them in the microwave for 10–15 seconds, or toast them in the oven at 300°F for 5 minutes.

5. Can I reduce the sugar?

Yes! You can reduce the sugar by half or replace some with honey or maple syrup.

6. Can I make these muffins without eggs?

Yes! Substitute the egg with ½ cup unsweetened applesauce or 1 flax egg (1 tbsp flaxseed meal + 3 tbsp water).

Final Thoughts: Try These Apple Cinnamon Muffins Today!

If you’re looking for a warm, comforting, and delicious homemade treat, these Apple Cinnamon Muffins are perfect. Whether you enjoy them as a quick breakfast, an afternoon snack, or a cozy dessert, they’ll bring warmth and flavor to your day.

So, what are you waiting for? Gather your ingredients and start baking these delicious muffins today!

ating

Apple Cinnamon Muffins: A Cozy, Delicious Treat for Any Occasion

Enjoy the warm, cozy flavors of apple and cinnamon in these moist and delicious muffins! Perfect for breakfast, a snack, or dessert, these muffins feature soft apples, aromatic spices, and a delightful oat streusel topping. Easy to make and irresistibly good!
Prep Time 10 minutes
Cook Time 20 minutes
Total Time 30 minutes
Servings: 12 muffins
Course: Breakfast, Dessert, Snack
Cuisine: American

Ingredients
  

Main Ingredients:
  • 2 cups baking apples peeled, cored, chopped
  • 1 cup old-fashioned rolled oats
  • 1/2 tsp ground nutmeg
  • 1 large egg
  • 1 tsp baking powder
  • 1 tbsp ground cinnamon
  • 1 cup all-purpose flour
  • 1/2 cup unsalted butter softened
  • 1 cup plain yogurt full-fat preferred
  • 1/2 cup brown sugar
  • 1/4 cup granulated sugar
  • 1/4 tsp salt
  • 1 tsp baking soda
Optional Oat Streusel Topping:
  • 3 tbsp unsalted butter
  • 3 tbsp brown sugar
  • 3 tbsp all-purpose flour
  • 3 tbsp old-fashioned rolled oats
  • 1/2 tsp ground cinnamon

Method
 

Preheat & Prepare:
  1. Preheat oven to 375°F (190°C).
  2. Line a 12-cup muffin tin with paper liners or grease with butter.
Prepare the Muffin Batter:
  1. In a large bowl, whisk together flour, oats, cinnamon, nutmeg, baking powder, baking soda, and salt.
  2. In a separate bowl, cream butter and sugars until light and fluffy.
  3. Mix in the egg and yogurt until fully combined.
  4. Gradually fold in the dry ingredients, mixing until just combined.
  5. Gently fold in chopped apples without overmixing.
Prepare the Oat Streusel Topping (Optional):
  1. In a small bowl, mix butter, brown sugar, flour, oats, and cinnamon until crumbly.
Fill & Bake:
  1. Spoon the batter into muffin tins, filling each about 3/4 full.
  2. Sprinkle streusel topping over each muffin (if using).
  3. Bake for 18-22 minutes, or until a toothpick inserted in the center comes out clean.
  4. Let muffins cool in the pan for 5 minutes, then transfer to a wire rack to cool completely.
Serve & Enjoy:
  1. Enjoy warm or at room temperature with coffee, tea, or milk.

Notes

  • Use a mix of sweet and tart apples (like Honeycrisp or Granny Smith) for the best flavor.
  • Do not overmix the batter to keep the muffins soft and fluffy.
  • To make these healthier, substitute half the all-purpose flour with whole wheat flour.
  • Store muffins in an airtight container at room temperature for up to 3 days or in the fridge for up to a week.
  • To freeze, place muffins in a freezer-safe bag and store for up to 3 months. Reheat before serving.

Louisiana Voodoo Fries (Wingstop Copycat): The Ultimate Spicy, Cheesy Indulgence

If you’re a fan of bold, cheesy, and spicy flavors, then you’re going to love Louisiana Voodoo Fries (Wingstop Copycat). These loaded fries take crispy French fries and smother them in a rich, creamy cheese sauce with just the right amount of heat.

There’s something irresistible about the perfectly seasoned fries, drizzled with a spicy, cheesy ranch sauce, and topped with just the right amount of kick from cayenne and white cheddar. Whether you’re making these for a snack, game day, or just because you’re craving restaurant-quality fries at home, this Wingstop copycat recipe has you covered.

Let’s dive into everything you need to know about making Louisiana Voodoo Fries right in your own kitchen!

Why You’ll Love This Recipe

  • Crispy, Cheesy, and Spicy: The perfect balance of creamy cheese, zesty ranch, and fiery cayenne.
  • Better Than Takeout: You get to control the spice, quality, and cheesiness.
  • Simple & Easy: Minimal ingredients, yet maximum flavor.
  • Perfect for Any Occasion: Whether it’s a side dish, a snack, or a party appetizer, these fries never disappoint.

Ingredients for Louisiana Voodoo Fries (Wingstop Copycat)

Main Ingredients

IngredientQuantityNotes
Frozen French fries26 ozYou can also use homemade fries
Butter2 tbspAdds richness to the sauce
All-purpose flour2 tbspHelps thicken the cheese sauce
Milk2 cupsUse whole milk for a creamy texture
Salt½ tspEnhances flavor
White or black pepper¼ tspAdds a hint of spice
Ranch seasoning powder2 tspGives the sauce its signature taste
Cayenne powder½ tsp, dividedBrings the heat
White cheddar cheese8 oz, shreddedMelts beautifully into the sauce

These simple ingredients come together to create a luxurious, restaurant-style cheese sauce that coats the fries perfectly.

How to Make Louisiana Voodoo Fries (Wingstop Copycat)

Step 1: Prepare the Fries

  1. Bake or Fry the Fries – Cook the frozen fries according to the package instructions or fry homemade fries in hot oil (375°F) until golden brown and crispy.
  2. Season Immediately – Once the fries are done, sprinkle with a little salt, pepper, and a dash of cayenne for extra flavor.

Step 2: Make the Cheesy Ranch Sauce

  1. Melt the Butter – In a saucepan over medium heat, melt 2 tablespoons of butter.
  2. Add the Flour – Stir in 2 tablespoons of all-purpose flour, whisking continuously for 1 minute to remove the raw flour taste.
  3. Pour in the Milk – Slowly add 2 cups of milk, stirring constantly until the mixture begins to thicken.
  4. Season the Sauce – Add ranch seasoning, salt, white pepper, and half of the cayenne powder. Stir well.
  5. Melt the Cheese – Add the shredded white cheddar cheese, stirring until smooth and creamy.

Step 3: Assemble the Voodoo Fries

  1. Place the Fries in a Serving Dish – Arrange the hot, crispy fries in a single layer.
  2. Drizzle with Cheese Sauce – Generously pour the spicy ranch cheese sauce over the fries.
  3. Garnish and Serve – Sprinkle the remaining cayenne powder on top for extra heat. Serve immediately and enjoy!

Tips for the Best Louisiana Voodoo Fries

  • Use Freshly Grated Cheese – Pre-shredded cheese contains anti-caking agents that prevent smooth melting.
  • Control the Heat – If you want it spicier, add extra cayenne or red pepper flakes.
  • Bake Fries for Extra Crispiness – Toss fries with a little cornstarch before baking to get them extra crunchy.
  • Serve Immediately – Cheese sauce thickens as it cools, so enjoy while it’s hot!

Variations and Substitutions

Make It Extra Spicy

  • Add sliced jalapeños on top.
  • Mix in a little hot sauce or sriracha into the cheese sauce.

Add Some Protein

  • Top with crispy bacon bits for extra crunch.
  • Add grilled chicken or pulled pork for a more filling meal.

Use a Different Cheese

  • Swap white cheddar for pepper jack, gouda, or smoked cheddar.

Try a Different Sauce

  • Instead of ranch, use a chipotle or Cajun-flavored cheese sauce.

Health Benefits & Nutritional Breakdown

While Louisiana Voodoo Fries are definitely a comfort food, you can enjoy them in moderation!

Nutritional Breakdown (Per Serving, Approximate)

NutrientAmountBenefits
Calories400–500Provides energy
Protein10–12gSupports muscle growth
Carbohydrates45–50gA good source of fuel
Fiber3–5gAids digestion
Healthy Fats20–25gImportant for brain health

If you want a lighter version, try:

  • Baking the fries instead of frying
  • Using low-fat milk and cheese
  • Reducing the butter in the sauce

Frequently Asked Questions (FAQs)

1. Can I make these fries ahead of time?

Yes! You can prepare the cheese sauce in advance and store it in the fridge. Just reheat and drizzle over fresh fries when ready to serve.

2. Can I use store-bought cheese sauce instead?

You can, but homemade cheese sauce tastes much better and allows you to control the spice level.

3. How do I keep my fries from getting soggy?

  • Cook them extra crispy.
  • Serve immediately after adding the sauce.
  • If reheating, use an air fryer to crisp them back up.

4. What dipping sauces go well with these fries?

  • Ranch dressing – Enhances the creamy, tangy flavor.
  • Spicy mayo – Adds extra heat and creaminess.
  • BBQ sauce – Gives a sweet and smoky twist.

5. Can I make this recipe dairy-free?

Yes! Use plant-based butter, non-dairy milk, and vegan cheese to create a dairy-free version of the cheese sauce.

6. What’s the best type of fries to use?

Thicker-cut fries hold up better under the sauce, but you can use shoestring, crinkle-cut, or even waffle fries.

Final Thoughts: Try This Louisiana Voodoo Fries (Wingstop Copycat) Recipe Today!

If you’re craving bold flavors, cheesy goodness, and a little spice, these Louisiana Voodoo Fries are the ultimate indulgence. With a rich, creamy cheese sauce and crispy fries, they make the perfect snack, side dish, or game-day treat.

So, what are you waiting for? Grab your ingredients and treat yourself to homemade Wingstop-style fries today!

ating

Louisiana Voodoo Fries (Wingstop Copycat): The Ultimate Spicy, Cheesy Indulgence

Craving a bold, cheesy, and spicy snack? These Louisiana Voodoo Fries (Wingstop Copycat) are the perfect indulgence! Crispy fries are smothered in a creamy, spicy ranch cheese sauce with just the right kick. Whether you’re making them for game day, a party, or just because, this easy recipe will satisfy all your cravings.
Prep Time 10 minutes
Cook Time 15 minutes
Total Time 25 minutes
Servings: 4 servings
Course: Appetizer, Snack
Cuisine: American, Cajun Inspired

Ingredients
  

Main Ingredients:
  • 26 oz frozen French fries or homemade fries
  • 2 tbsp butter
  • 2 tbsp all-purpose flour
  • 2 cups milk whole milk for creamier texture
  • 1/2 tsp salt
  • 1/4 tsp white or black pepper
  • 2 tsp ranch seasoning powder
  • 1/2 tsp cayenne powder divided
  • 8 oz white cheddar cheese shredded

Method
 

Prepare the Fries:
  1. Cook the frozen fries according to the package instructions or fry homemade fries in hot oil (375°F) until golden brown and crispy.
  2. Immediately season with a little salt, pepper, and a dash of cayenne for extra flavor.
Make the Cheesy Ranch Sauce:
  1. In a saucepan over medium heat, melt the butter.
  2. Stir in the flour and whisk continuously for 1 minute to remove the raw flour taste.
  3. Slowly add the milk, stirring constantly until the mixture begins to thicken.
  4. Add ranch seasoning, salt, white pepper, and half of the cayenne powder. Stir well.
  5. Add the shredded white cheddar cheese, stirring until smooth and creamy.
Assemble the Voodoo Fries:
  1. Arrange the hot, crispy fries in a serving dish.
  2. Drizzle generously with the spicy ranch cheese sauce.
  3. Sprinkle the remaining cayenne powder on top for extra heat.
  4. Serve immediately and enjoy!

Notes

  • Use freshly grated cheese for the smoothest melt.
  • Control the spice level by adjusting the cayenne powder.
  • Bake fries for extra crispiness by tossing them with a little cornstarch before baking.
  • Serve immediately as the cheese sauce thickens as it cools.

Spicy Mexican Corn Bites: A Crispy, Flavor-Packed Snack You’ll Love

Have you ever taken a bite of something so crispy, cheesy, and packed with bold flavors that you couldn’t stop eating it? That’s exactly what you’ll experience with these Spicy Mexican Corn Bites!

Whether you’re looking for a quick appetizer, a party snack, or just a fun way to enjoy corn, these golden bites are a game-changer. Made with sweet corn, melted cheese, jalapeños, and a hint of smoky spices, every bite delivers the perfect balance of crunch, heat, and tang.

Ready to bring the flavors of Mexican street food to your kitchen? Let’s dive into the best Spicy Mexican Corn Bites recipe and explore everything you need to know to make them perfectly crispy and delicious.

Why You’ll Love This Recipe

  • Crunchy & Cheesy: The crispy outside and gooey cheese inside make these irresistible.
  • Bold & Spicy: Jalapeños and chili powder add the perfect kick.
  • Easy to Make: A simple mix, shape, and fry recipe—no complicated steps!
  • Customizable: Make them milder or spicier to fit your taste.
  • Perfect for Any Occasion: Great as an appetizer, party snack, or game-day treat.

Ingredients for Spicy Mexican Corn Bites

Before you start cooking, gather all your ingredients. You can use fresh, frozen, or canned corn, making this recipe versatile and convenient.

Main Ingredients

IngredientQuantityNotes
Frozen corn kernels, thawed (or fresh corn)2 cupsAdds natural sweetness
Cotija cheese (or feta)½ cup, crumbledAdds a salty, tangy taste
Shredded cheddar cheese½ cupMelts beautifully
Fresh cilantro¼ cup, choppedProvides freshness
Jalapeños (fresh or pickled)2 tbsp, dicedAdds heat
Egg1 largeHelps bind everything together
All-purpose flour⅓ cupProvides structure
Chili powder1 tspAdds warmth and spice
Smoked paprika½ tspGives a subtle smoky depth
Garlic powder½ tspEnhances the savory flavors
Salt & pepperTo tasteBalances the flavors

For Frying

IngredientQuantityNotes
Vegetable oilAs neededFor deep frying

For Garnish

IngredientQuantityNotes
Lime wedgesFor servingAdds brightness
Extra cilantroFor garnishMore fresh flavor
Chili powder or TajínSprinkle on topExtra heat & zest

How to Make Spicy Mexican Corn Bites

Step 1: Prepare the Mixture

  1. In a large mixing bowl, combine corn, cotija cheese, cheddar cheese, cilantro, and jalapeños.
  2. Add the egg, flour, chili powder, smoked paprika, garlic powder, salt, and pepper.
  3. Mix well until all ingredients are evenly combined. The mixture should be slightly sticky and hold together when pressed.

Step 2: Shape the Corn Bites

  1. Take about 1 tablespoon of the mixture and roll it into a small ball or patty.
  2. Repeat until all the mixture is used.
  3. If the mixture is too loose, add a little more flour to help bind it.

Step 3: Heat the Oil

  1. In a deep skillet or pot, heat vegetable oil to 350°F (175°C).
  2. Make sure the oil is hot enough—drop a small piece of the mixture in, and if it sizzles, it’s ready!

Step 4: Fry the Corn Bites

  1. Carefully drop 3–4 corn bites into the hot oil at a time.
  2. Fry for 2–3 minutes per side or until golden brown and crispy.
  3. Use a slotted spoon to transfer them to a paper towel-lined plate to drain excess oil.

Step 5: Garnish & Serve

  1. Sprinkle with extra chili powder or Tajín for extra heat.
  2. Serve with lime wedges for a zesty finish.
  3. Enjoy them hot with your favorite dipping sauce!

Tips for the Best Spicy Mexican Corn Bites

  • Use fresh corn if available – It adds extra crunch and sweetness.
  • Don’t overcrowd the oil – Fry in batches to keep them crispy.
  • Adjust the spice level – Add more or less jalapeños and chili powder based on your preference.
  • Make them gluten-free – Swap all-purpose flour for cornmeal or gluten-free flour.
  • Air-fry for a healthier option – Cook at 375°F (190°C) for 12–15 minutes, flipping halfway through.

Dipping Sauce Ideas

Want to take your Spicy Mexican Corn Bites to the next level? Try these tasty dips:

Dipping SauceFlavor Profile
Chipotle MayoSmoky & creamy
Sour Cream & LimeCool & tangy
GuacamoleFresh & creamy
Salsa VerdeZesty & slightly spicy
Ranch DressingClassic & smooth

Variations and Substitutions

Make It Extra Spicy

  • Add 1 teaspoon of cayenne pepper to the mixture.
  • Use spicy pickled jalapeños instead of fresh.

Add More Cheese

  • Swap cheddar for pepper jack or Oaxaca cheese for extra meltiness.

Bake Instead of Frying

  • Preheat oven to 400°F (200°C) and bake on a lined tray for 20 minutes, flipping halfway.

Turn It Into a Fritter

  • Flatten each ball into a small patty before frying for a different texture.

Health Benefits of Spicy Mexican Corn Bites

These crispy bites are not just delicious—they also have some nutritional perks!

Nutritional Breakdown (Per Serving, Approximate)

NutrientAmountBenefits
Calories200–250Provides energy
Protein6–8gSupports muscle health
Carbohydrates20–25gA great source of fiber
Fiber3–4gAids digestion
Healthy Fats8–12gGood for brain function
Vitamin CHighSupports immunity

Since they contain corn, cheese, and spices, these bites offer a great mix of fiber, protein, and essential vitamins.

Frequently Asked Questions (FAQs)

1. Can I make these ahead of time?

Yes! Prepare the mixture and store it in the fridge for up to 24 hours. Fry them just before serving.

2. What’s the best way to reheat leftovers?

Reheat in an air fryer (350°F for 5 minutes) or in the oven (375°F for 10 minutes) to keep them crispy.

3. Can I freeze these corn bites?

Yes! Freeze them uncooked on a baking sheet, then transfer to a bag. Fry from frozen for a few extra minutes.

4. Are these gluten-free?

Not as written, but you can use cornmeal or gluten-free flour to make them gluten-free.

5. Can I make these in an air fryer?

Absolutely! Air-fry at 375°F (190°C) for 12–15 minutes, flipping halfway through.

6. What can I serve with these corn bites?

They pair well with Mexican rice, black beans, or a fresh avocado salad.

Final Thoughts: Try This Spicy Mexican Corn Bites Recipe Today!

If you’re craving crispy, cheesy, and spicy flavors, these Spicy Mexican Corn Bites are a must-try! Whether you’re making them for a party, snack, or just because, they’re guaranteed to be a hit.

So, what are you waiting for? Gather your ingredients and make these addictively delicious corn bites today!

ating

Spicy Mexican Corn Bites: A Crispy, Flavor-Packed Snack You’ll Love

Get ready for an explosion of bold flavors and crispy texture with these Spicy Mexican Corn Bites! Packed with sweet corn, gooey cheese, jalapeños, and smoky spices, these bite-sized delights are perfect for parties, appetizers, or a fun snack. Quick, easy, and irresistibly delicious!
Prep Time 10 minutes
Cook Time 10 minutes
Total Time 20 minutes
Servings: 4 servings
Course: Appetizer, Snack
Cuisine: Mexican-inspired

Ingredients
  

Main Ingredients:
  • 2 cups frozen corn kernels thawed (or fresh corn)
  • 1/2 cup Cotija cheese or feta, crumbled
  • 1/2 cup shredded cheddar cheese
  • 1/4 cup fresh cilantro chopped
  • 2 tbsp jalapeños fresh or pickled, diced
  • 1 large egg
  • 1/3 cup all-purpose flour
  • 1 tsp chili powder
  • 1/2 tsp smoked paprika
  • 1/2 tsp garlic powder
  • Salt & pepper to taste
For Frying:
  • Vegetable oil as needed
For Garnish:
  • Lime wedges
  • Extra cilantro
  • Chili powder or Tajín

Method
 

Prepare the Mixture:
  1. In a large bowl, mix corn, Cotija cheese, cheddar cheese, cilantro, and jalapeños.
  2. Add the egg, flour, chili powder, smoked paprika, garlic powder, salt, and pepper.
  3. Stir until fully combined. The mixture should be slightly sticky and hold together when pressed.
Shape the Corn Bites:
  1. Take 1 tablespoon of the mixture and roll it into a small ball or patty.
  2. Repeat until all the mixture is used. If too loose, add a little more flour.
Heat the Oil:
  1. In a deep skillet, heat vegetable oil to 350°F (175°C).
  2. Test the oil with a small piece of mixture; if it sizzles, it’s ready.
Fry the Corn Bites:
  1. Carefully place 3-4 corn bites into the hot oil at a time.
  2. Fry for 2-3 minutes per side until golden brown and crispy.
  3. Transfer to a paper towel-lined plate to drain excess oil.
Garnish & Serve:
  1. Sprinkle with extra chili powder or Tajín.
  2. Serve with lime wedges and your favorite dipping sauce.
  3. Enjoy while hot and crispy!

Notes

  • Use fresh corn for extra crunch and sweetness.
  • Fry in batches to avoid overcrowding.
  • Adjust spice level by adding more or less jalapeños and chili powder.
  • Make it gluten-free by swapping flour for cornmeal or gluten-free flour.
  • For a healthier version, air-fry at 375°F (190°C) for 12-15 minutes, flipping halfway.