Pistachio Macarons: Discover Easy Steps for Success!

Introduction to Pistachio Macarons

There’s something magical about the delicate crunch of a macaron, especially when it’s infused with the rich, nutty flavor of pistachios. I remember the first time I tried these delightful French cookies; it was like a little piece of heaven melting in my mouth. If you’re looking for a sweet treat that impresses without taking all day, Pistachio Macarons are your answer. They’re perfect for any occasion, whether it’s a casual get-together or a fancy dinner party. Plus, making them at home is easier than you might think, and I’m here to guide you through every step!

Why You’ll Love This Pistachio Macarons

These Pistachio Macarons are not just a treat for the taste buds; they’re a feast for the eyes too! With their vibrant color and elegant appearance, they elevate any dessert table. Plus, they’re surprisingly easy to make, even for beginners. The combination of a crunchy shell and creamy filling creates a delightful texture that will have everyone coming back for more. Trust me, you’ll be the star of your next gathering!

Ingredients for Pistachio Macarons

Gathering the right ingredients is key to crafting perfect Pistachio Macarons. Here’s what you’ll need:

  • Powdered Sugar: This sweetener gives the macarons their signature smooth texture. It dissolves easily, ensuring a fine finish.
  • Almond Flour: The base of the macaron shell, almond flour adds a nutty flavor and helps create that delicate crunch.
  • Finely Ground Pistachios: These provide the distinct pistachio flavor. Make sure they’re ground finely for a smooth batter.
  • Egg Whites: Essential for creating the meringue, they should be at room temperature for better volume.
  • Cream of Tartar: This stabilizes the egg whites, helping them hold their shape during whipping.
  • Granulated Sugar: Added gradually to the egg whites, it helps achieve those stiff peaks necessary for a perfect meringue.
  • Vanilla Extract: A splash of this adds depth to the flavor, enhancing the overall taste of the macarons.
  • Green Food Coloring (optional): If you want to amp up the visual appeal, a few drops can give your macarons a lovely green hue.
  • Unsalted Butter: For the creamy filling, softened butter is key to achieving that smooth, luscious texture.
  • Additional Powdered Sugar (for filling): This sweetens the buttercream filling, balancing the flavors perfectly.
  • Chopped Pistachios (for filling): These add a delightful crunch and enhance the pistachio flavor in the filling.

For exact measurements, check the bottom of the article where you can find everything listed for easy printing. Happy baking!

How to Make Pistachio Macarons

Creating Pistachio Macarons is a delightful journey that combines precision with creativity. Follow these steps, and you’ll be on your way to impressing friends and family with your baking skills!

Step 1: Preheat and Prepare

Start by preheating your oven to 300°F. This is crucial for achieving that perfect macaron texture. While the oven warms up, line two baking sheets with parchment paper. This will prevent the macarons from sticking and make cleanup a breeze.

Step 2: Sift Dry Ingredients

In a mixing bowl, sift together the powdered sugar, almond flour, and finely ground pistachios. Sifting is essential; it breaks up any clumps and ensures a smooth batter. This step is where the magic begins, as the flavors start to blend together.

Step 3: Beat Egg Whites

In a separate bowl, whip the egg whites with an electric mixer on medium speed until they become frothy. This is the foundation of your meringue. Once frothy, add the cream of tartar. This stabilizes the egg whites, making them easier to whip into stiff peaks.

Step 4: Create Meringue

Gradually add the granulated sugar to the egg whites while beating on high speed. Keep mixing until you achieve stiff peaks. The mixture should be glossy and hold its shape. This is the key to a successful macaron shell!

Step 5: Fold Ingredients

Now, gently fold the dry ingredients into the meringue using a spatula. Be careful not to deflate the egg whites; you want to maintain that airy texture. Fold until just combined, and the batter flows like lava. This is where patience pays off!

Step 6: Pipe Macarons

Transfer the batter to a piping bag fitted with a round tip. Pipe 1.5-inch circles onto the prepared baking sheets, leaving space between each macaron. Tap the baking sheets gently on the counter to release any air bubbles. This step is crucial for achieving that smooth top.

Step 7: Rest and Bake

Let the piped macarons sit at room temperature for 30-60 minutes. This allows a skin to form on the surface, which is essential for that perfect foot. Once ready, bake the macarons for 15-18 minutes, rotating the sheets halfway through. They should look smooth and slightly puffed.

Step 8: Cool and Fill

After baking, allow the macarons to cool completely on the baking sheets. This prevents them from breaking when you remove them. While they cool, prepare the filling by beating softened butter until creamy, then mixing in powdered sugar and chopped pistachios. Once the shells are cool, pair them up and pipe a small amount of filling onto one shell before sandwiching it with another. Enjoy the process!

Tips for Success

  • Use room temperature egg whites for better volume.
  • Don’t skip the sifting step; it ensures a smooth batter.
  • Be gentle when folding to maintain the airy texture.
  • Let the macarons rest until a skin forms for a perfect bake.
  • Experiment with flavors by adding extracts or zests to the filling.

Equipment Needed

  • Mixing Bowls: Use glass or stainless steel for easy cleaning.
  • Electric Mixer: A hand mixer works just as well as a stand mixer.
  • Piping Bag: If you don’t have one, a zip-top bag with a corner snipped off will do.
  • Parchment Paper: Silicone baking mats are a great reusable alternative.

Variations

  • Chocolate Pistachio Macarons: Add cocoa powder to the dry ingredients for a rich chocolate flavor.
  • Matcha Pistachio Macarons: Incorporate matcha powder into the batter for a unique green tea twist.
  • Nut-Free Option: Substitute almond flour with sunflower seed flour for a nut-free version.
  • Citrus Zest: Add lemon or orange zest to the filling for a refreshing citrus kick.
  • Spiced Pistachio Macarons: Mix in a pinch of cardamom or cinnamon to the batter for a warm, aromatic flavor.

Serving Suggestions

  • Pair with Coffee: Enjoy your Pistachio Macarons alongside a rich espresso or a creamy cappuccino for a delightful afternoon treat.
  • Elegant Presentation: Arrange macarons on a decorative platter, garnished with fresh pistachios or edible flowers for a stunning display.
  • Perfect for Celebrations: Serve these macarons at parties, weddings, or special occasions to impress your guests.

FAQs about Pistachio Macarons

As you embark on your journey to create Pistachio Macarons, you might have a few questions. Here are some common queries that can help you along the way:

Can I use other nuts instead of pistachios?

Absolutely! You can experiment with different nuts like almonds, hazelnuts, or even pecans. Just make sure to grind them finely for the best texture.

Why did my macarons crack on top?

Cracking usually happens if the macarons didn’t rest long enough before baking. Ensure they form a skin on the surface, which helps them rise properly without cracking.

How do I store leftover macarons?

Store your Pistachio Macarons in an airtight container in the refrigerator. They taste even better after a day or two, as the flavors meld beautifully!

Can I freeze macarons?

Yes! You can freeze unfilled macaron shells for up to a month. Just make sure they’re well-wrapped to prevent freezer burn. Fill them after thawing for the best results.

What’s the best way to serve macarons?

For a delightful experience, serve your macarons at room temperature. Pair them with coffee or tea for a perfect afternoon treat!

Final Thoughts

Creating Pistachio Macarons is more than just baking; it’s an experience filled with joy and creativity. Each step, from whipping the egg whites to piping the delicate batter, brings a sense of accomplishment. The moment you take that first bite, with the crunchy shell giving way to the creamy filling, is pure bliss. These macarons are not just a treat; they’re a way to share love and artistry with friends and family. So, roll up your sleeves, embrace the process, and let these delightful cookies bring a little sweetness to your day!

Paul

Pistachio Macarons: Discover Easy Steps for Success!

Pistachio Macarons are delicate French cookies made with almond flour and filled with a creamy pistachio buttercream, perfect for any occasion.
Prep Time 30 minutes
Cook Time 18 minutes
Total Time 1 hour 48 minutes
Servings: 12 servings
Course: Dessert
Cuisine: French
Calories: 120

Ingredients
  

  • 1 cup powdered sugar
  • ½ cup almond flour
  • ¼ cup unsalted pistachios finely ground
  • 2 large egg whites at room temperature
  • ¼ teaspoon cream of tartar
  • ¼ cup granulated sugar
  • ½ teaspoon vanilla extract
  • Green food coloring optional
  • ½ cup unsalted butter softened
  • 1 cup powdered sugar for filling
  • ½ teaspoon vanilla extract for filling
  • 2 tablespoons finely chopped pistachios for filling

Method
 

  1. Preheat your oven to 300°F and line two baking sheets with parchment paper.
  2. In a bowl, sift together the powdered sugar, almond flour, and finely ground pistachios. Set aside.
  3. In a separate bowl, beat the egg whites with an electric mixer on medium speed until frothy. Add the cream of tartar and continue beating until soft peaks form.
  4. Gradually add the granulated sugar while beating on high speed until stiff peaks form and the mixture is glossy. Mix in the vanilla extract and a few drops of green food coloring if desired.
  5. Gently fold the dry ingredients into the egg white mixture using a spatula. Be careful not to deflate the egg whites; fold until just combined and the batter flows like lava.
  6. Transfer the batter to a piping bag fitted with a round tip. Pipe 1.5-inch circles onto the prepared baking sheets, leaving space between each macaron. Tap the baking sheets gently on the counter to release any air bubbles.
  7. Let the piped macarons sit at room temperature for 30-60 minutes until a skin forms on the surface.
  8. Bake the macarons for 15-18 minutes, rotating the sheets halfway through. They should have a smooth top and a slight foot.
  9. Allow the macarons to cool completely on the baking sheets before removing them.
  10. For the filling, beat the softened butter until creamy. Gradually add the powdered sugar and vanilla extract, mixing until smooth. Stir in the chopped pistachios.
  11. Pair the macaron shells and pipe a small amount of filling onto the flat side of one shell, then sandwich it with another shell. Repeat with the remaining shells.
  12. For best flavor, refrigerate the filled macarons for at least 24 hours before serving. Bring to room temperature before enjoying.

Notes

  • Experiment with different nut flavors by substituting almond flour with hazelnut or pecan flour for unique variations.
  • Add a touch of lemon zest or orange zest to the filling for a refreshing citrus twist.
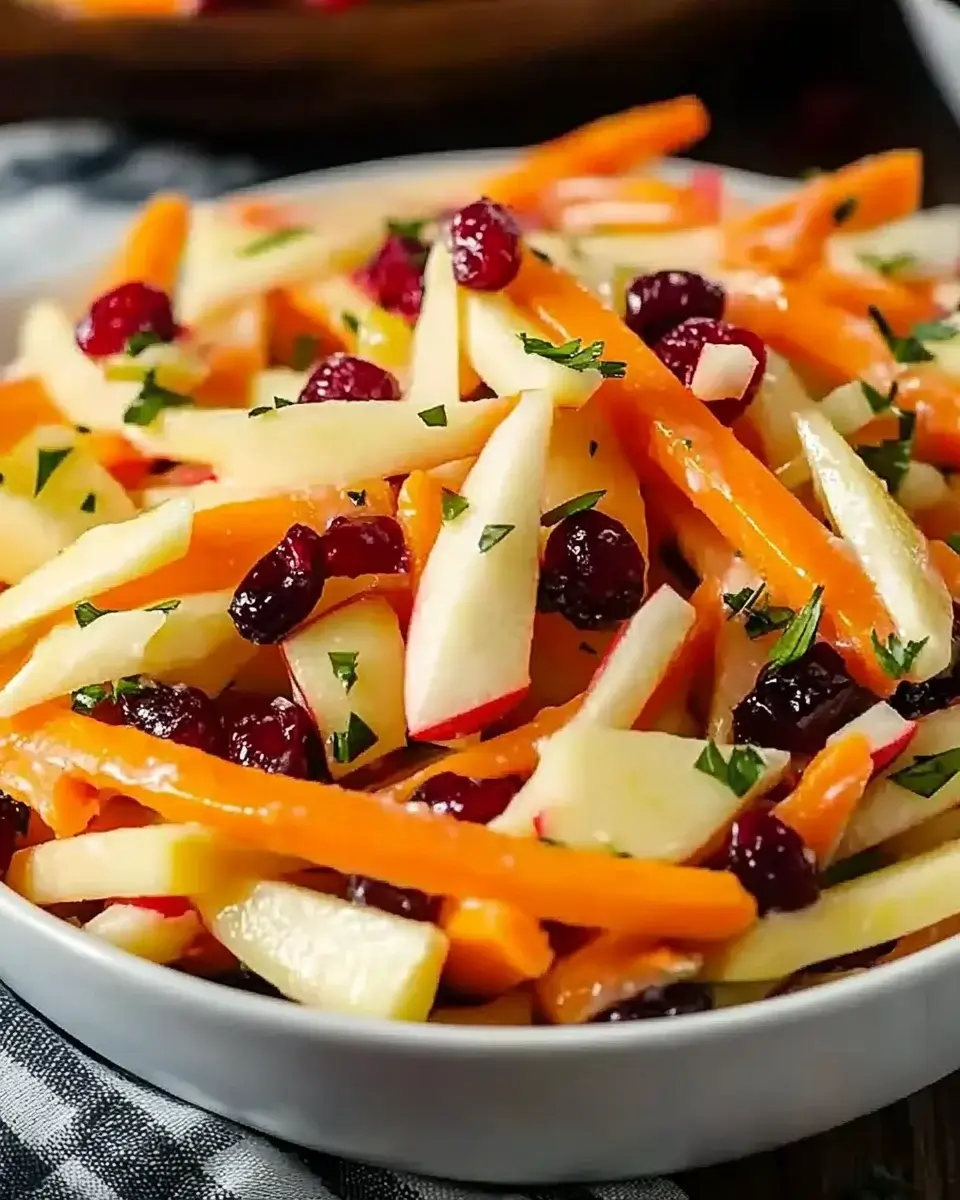
Crisp Apple Cranberry Carrot Salad: A Refreshing Treat!

Introduction to Crisp Apple Cranberry Carrot Salad

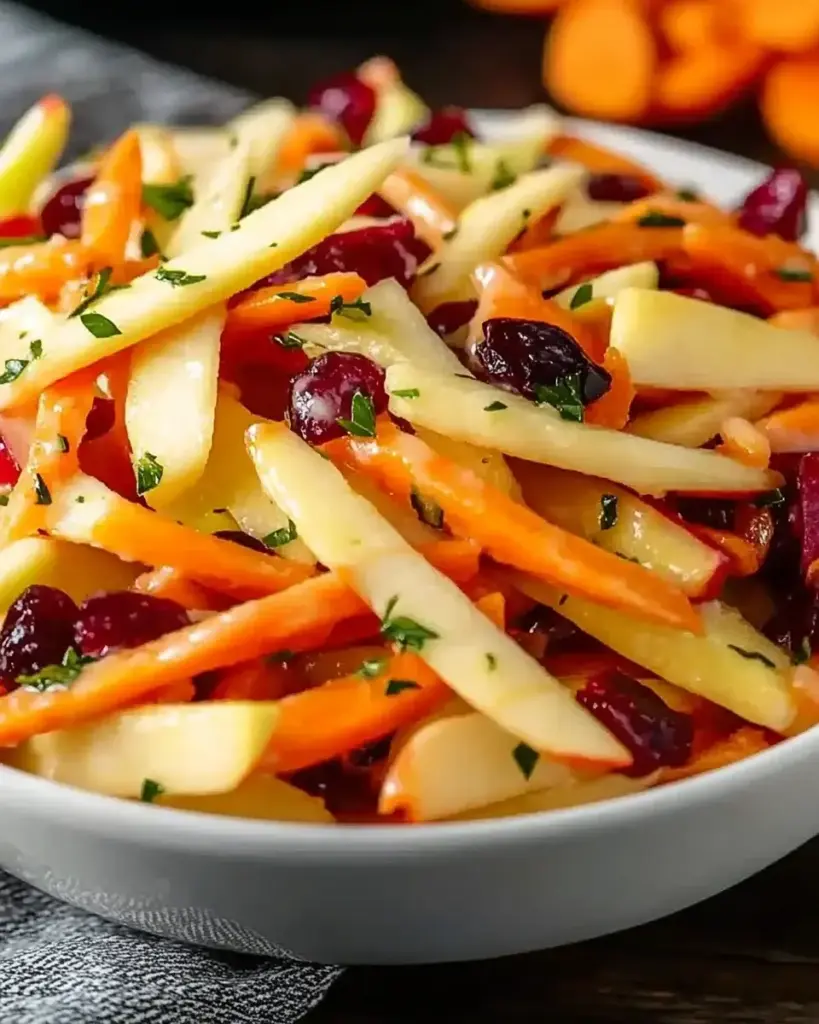
There’s something magical about a salad that feels like a burst of sunshine on your plate. The Crisp Apple Cranberry Carrot Salad is just that—a refreshing treat that’s as vibrant as it is delicious. Whether you’re looking for a quick solution for a busy day or a dish to impress your loved ones at a gathering, this salad fits the bill perfectly. It’s packed with flavor, color, and crunch, making it a delightful addition to any meal. Plus, it’s a breeze to whip up, so you can spend less time in the kitchen and more time enjoying life!

Why You’ll Love This Crisp Apple Cranberry Carrot Salad

This Crisp Apple Cranberry Carrot Salad is a game-changer for anyone who craves a quick, healthy meal. It comes together in just 15 minutes, making it perfect for those hectic weeknights. The combination of sweet apples, tangy cranberries, and crunchy carrots creates a flavor explosion that’s hard to resist. Plus, it’s versatile enough to serve as a side dish or a light lunch, ensuring you’ll enjoy it time and again!

Ingredients for Crisp Apple Cranberry Carrot Salad

Gathering the right ingredients is the first step to creating this delightful Crisp Apple Cranberry Carrot Salad. Here’s what you’ll need:

  • Apples: Choose large, crisp apples for a refreshing crunch. Varieties like Granny Smith or Honeycrisp work beautifully.
  • Shredded Carrots: Freshly shredded carrots add a sweet earthiness and vibrant color to the salad.
  • Dried Cranberries: These little gems bring a burst of sweetness and a chewy texture that complements the crunch of the apples.
  • Chopped Walnuts (optional): For those who enjoy a nutty crunch, walnuts are a fantastic addition. You can also swap them for sunflower or pumpkin seeds for a different twist.
  • Fresh Parsley: Chopped parsley adds a pop of color and a fresh, herbal note that brightens the dish.
  • Plain Greek Yogurt: This creamy base serves as a healthier alternative to mayonnaise, providing a tangy flavor and a boost of protein.
  • Honey: A touch of honey sweetens the dressing naturally. If you prefer, maple syrup can be used for a vegan option.
  • Lemon Juice: Fresh lemon juice adds acidity, balancing the sweetness of the apples and cranberries.
  • Cinnamon: A hint of cinnamon warms the flavors, making the salad feel cozy and inviting.
  • Salt and Pepper: These simple seasonings enhance all the flavors, bringing the salad to life.

For exact quantities, check the bottom of the article where you can find everything listed for easy printing!

How to Make Crisp Apple Cranberry Carrot Salad

Step 1: Prepare the Ingredients

Start by coring and dicing the apples into bite-sized pieces. This ensures every forkful is packed with flavor. Next, grab a box grater or a food processor to shred the carrots. Aim for a fine texture that blends well with the apples. Finally, measure out the dried cranberries and walnuts, if you’re using them. Having everything prepped makes the assembly a breeze!

Step 2: Make the Dressing

In a small bowl, whisk together the plain Greek yogurt, honey, lemon juice, cinnamon, salt, and pepper. Keep whisking until the mixture is smooth and creamy. This dressing is the heart of the Crisp Apple Cranberry Carrot Salad, adding a delightful tang and sweetness that ties everything together. Taste it—adjust the sweetness or acidity to your liking!

Step 3: Combine the Salad

In a large mixing bowl, combine the diced apples, shredded carrots, dried cranberries, and walnuts. Pour the dressing over this colorful mixture. Gently toss everything together, ensuring each piece is coated evenly. This step is crucial; you want every bite to be a harmonious blend of flavors. Don’t rush—take your time to mix it well!

Step 4: Add Fresh Herbs

Now, it’s time to add a burst of freshness! Sprinkle the chopped parsley over the salad and give it another gentle toss. The parsley not only adds color but also enhances the overall flavor profile, making the salad even more inviting.

Step 5: Chill and Serve

Cover the salad and pop it in the refrigerator for at least 30 minutes. This chilling time allows the flavors to meld beautifully. When you’re ready to serve, dish it out while it’s still chilled. Trust me, the refreshing taste is worth the wait!

Tips for Success

  • Use a mix of sweet and tart apples for a balanced flavor.
  • Shred the carrots just before mixing to keep them crisp.
  • For extra flavor, let the salad sit in the fridge for an hour or more.
  • Adjust the dressing ingredients to suit your taste—add more honey for sweetness or lemon for tang.
  • Experiment with different nuts or seeds for added crunch!

Equipment Needed

  • Mixing Bowl: A large bowl for combining ingredients. A glass or stainless steel bowl works well.
  • Whisk: Essential for mixing the dressing. A fork can also do the job in a pinch.
  • Grater or Food Processor: For shredding carrots. A box grater is perfect for quick prep.
  • Knife and Cutting Board: For coring and dicing apples. A sharp knife makes the task easier.

Variations

  • Vegan Option: Substitute Greek yogurt with a plant-based yogurt and use maple syrup instead of honey for a completely vegan salad.
  • Nut-Free: Omit the walnuts and replace them with sunflower seeds or pumpkin seeds for a nut-free crunch.
  • Spicy Kick: Add a pinch of cayenne pepper or a dash of hot sauce to the dressing for a surprising heat that complements the sweetness.
  • Fruit Medley: Mix in other fruits like diced pears or mandarin oranges for added sweetness and variety.
  • Herb Infusion: Experiment with different herbs like mint or cilantro for a unique flavor twist.

Serving Suggestions

  • Pair this Crisp Apple Cranberry Carrot Salad with grilled chicken or fish for a balanced meal.
  • Serve it alongside a warm, crusty baguette to soak up any leftover dressing.
  • For drinks, a light white wine or sparkling water with lemon complements the salad beautifully.
  • Present the salad in a clear bowl to showcase its vibrant colors.

FAQs about Crisp Apple Cranberry Carrot Salad

Can I make the Crisp Apple Cranberry Carrot Salad ahead of time?

Absolutely! This salad is perfect for meal prep. You can make it a day in advance and store it in the fridge. Just remember to give it a good toss before serving to redistribute the flavors.

What can I substitute for Greek yogurt in the dressing?

If you’re looking for a dairy-free option, try using a plant-based yogurt. It will still give you that creamy texture. Alternatively, you can use sour cream or even a tahini-based dressing for a unique twist.

How can I make this salad more filling?

To turn this Crisp Apple Cranberry Carrot Salad into a heartier meal, consider adding protein. Grilled chicken, chickpeas, or even quinoa can elevate it to a satisfying main dish.

Is this salad suitable for a gluten-free diet?

<pYes, this salad is naturally gluten-free! Just ensure that any additional ingredients, like nuts or seeds, are certified gluten-free to avoid cross-contamination.

Can I use fresh cranberries instead of dried?

While fresh cranberries can be used, they are quite tart. If you choose to go this route, consider adding a bit more honey to balance the flavors. Dried cranberries provide a sweeter, chewier texture that complements the salad beautifully.

Final Thoughts

The Crisp Apple Cranberry Carrot Salad is more than just a dish; it’s a celebration of flavors and textures that brings joy to any table. Each bite is a delightful mix of sweetness, crunch, and freshness, making it a perfect companion for any meal. Whether you’re enjoying it solo or sharing it with friends and family, this salad has a way of brightening up your day. Plus, it’s a reminder that healthy eating can be both delicious and satisfying. So, roll up your sleeves, whip up this salad, and savor the happiness it brings!

Paul

Crisp Apple Cranberry Carrot Salad: A Refreshing Treat!

A refreshing and healthy salad made with crisp apples, shredded carrots, and dried cranberries, perfect for any occasion.
Prep Time 15 minutes
Total Time 45 minutes
Servings: 6 servings
Course: Salad
Cuisine: American
Calories: 150

Ingredients
  

  • 2 large apples cored and diced
  • 1 cup shredded carrots
  • 1/2 cup dried cranberries
  • 1/2 cup chopped walnuts optional
  • 1/4 cup fresh parsley chopped
  • 1/4 cup plain Greek yogurt
  • 2 tablespoons honey
  • 1 tablespoon lemon juice
  • 1/2 teaspoon cinnamon
  • Salt and pepper to taste

Method
 

  1. In a large mixing bowl, combine the diced apples, shredded carrots, dried cranberries, and chopped walnuts (if using).
  2. In a separate small bowl, whisk together the Greek yogurt, honey, lemon juice, cinnamon, salt, and pepper until smooth.
  3. Pour the dressing over the apple and carrot mixture and toss gently to coat all the ingredients evenly.
  4. Add the chopped parsley and toss again to combine.
  5. Cover the salad and refrigerate for at least 30 minutes to allow the flavors to meld.
  6. Serve chilled and enjoy!

Notes

  • For added crunch, consider substituting the walnuts with sunflower seeds or pumpkin seeds.
  • To make this salad vegan, replace the Greek yogurt with a plant-based yogurt alternative and use maple syrup instead of honey.

Yogurt Bread: Discover the Easy Recipe Today!

Introduction to Yogurt Bread

There’s something magical about the aroma of freshly baked bread wafting through the kitchen. It takes me back to my childhood, where my mom would whip up loaves that made our home feel warm and inviting. Today, I want to share a delightful recipe for Yogurt Bread that’s not only simple but also incredibly satisfying. This bread is a quick solution for busy days, perfect for impressing your loved ones or simply enjoying with a cup of coffee. With just a few ingredients, you can create a moist, flavorful loaf that will have everyone asking for seconds!

Why You’ll Love This Yogurt Bread

This Yogurt Bread is a game-changer in the kitchen. It’s incredibly easy to make, requiring minimal effort and time. In just 55 minutes, you can have a warm, delicious loaf ready to enjoy. The combination of Greek yogurt and almond flour not only makes it gluten-free but also adds a rich flavor and moist texture. Plus, it’s versatile enough to pair with any meal or stand alone as a snack!

Ingredients for Yogurt Bread

Gathering the right ingredients is the first step to creating your delicious Yogurt Bread. Here’s what you’ll need:

  • Plain Greek yogurt: This is the star of the show! It adds moisture and a slight tang, making the bread incredibly flavorful.
  • Almond flour: A fantastic gluten-free alternative to regular flour, it gives the bread a nutty taste and a tender crumb.
  • Baking powder: This helps the bread rise, ensuring a light and airy texture.
  • Baking soda: Another leavening agent that works in tandem with the baking powder for that perfect lift.
  • Salt: A crucial ingredient that enhances all the flavors in your bread.
  • Olive oil: Adds richness and moisture, making each slice delightful.
  • Eggs: They bind the ingredients together and contribute to the bread’s structure.
  • Garlic powder (optional): For those who love a savory twist, this adds a wonderful depth of flavor.
  • Dried herbs (optional): Think oregano or thyme for an aromatic touch that elevates the bread.

For exact measurements, check the bottom of the article where you can find everything listed for easy printing. Feel free to get creative with your ingredients; this recipe is all about making it your own!

How to Make Yogurt Bread

Making Yogurt Bread is a straightforward process that anyone can master. Follow these simple steps, and you’ll have a delicious loaf ready in no time!

Step 1: Preheat the Oven

Start by preheating your oven to 350°F (175°C). This step is crucial because it ensures even baking. While the oven heats up, prepare your 9×5-inch loaf pan by greasing it or lining it with parchment paper. This will help the bread release easily once it’s baked.

Step 2: Mix Dry Ingredients

In a large mixing bowl, combine the Greek yogurt, almond flour, baking powder, baking soda, and salt. Use a whisk or spatula to mix everything until well combined. This step is essential for ensuring that the leavening agents are evenly distributed, which helps the bread rise beautifully.

Step 3: Prepare Wet Ingredients

In a separate bowl, whisk together the olive oil and eggs until smooth. If you’re feeling adventurous, now’s the time to stir in the garlic powder and dried herbs. These optional ingredients can add a delightful twist to your Yogurt Bread, making it even more flavorful!

Step 4: Combine Mixtures

Pour the egg mixture into the bowl with the yogurt mixture. Stir gently until everything is fully incorporated. The batter will be thick, but that’s perfectly normal. Just make sure there are no dry spots left; you want a uniform mixture for the best texture.

Step 5: Transfer to Loaf Pan

Now it’s time to transfer the batter to your prepared loaf pan. Use a spatula to smooth the top, ensuring it’s even. This will help the bread rise uniformly and create a lovely crust.

Step 6: Bake the Bread

Place the loaf pan in the preheated oven and bake for 40-45 minutes. Keep an eye on it! You’ll know it’s done when the top is golden brown and a toothpick inserted into the center comes out clean. If the top browns too quickly, you can cover it loosely with aluminum foil.

Step 7: Cool and Serve

Once baked, remove the bread from the oven and let it cool in the pan for about 10 minutes. This cooling time helps it set. After that, transfer it to a wire rack to cool completely. Slice it up and enjoy your homemade Yogurt Bread warm or at room temperature!

Tips for Success

  • Use room temperature ingredients for better mixing and texture.
  • Don’t skip the preheating step; it’s key for even baking.
  • For a sweeter loaf, consider adding honey or maple syrup.
  • Experiment with different herbs or spices to customize the flavor.
  • Store leftover bread in an airtight container to keep it fresh.

Equipment Needed

  • 9×5-inch loaf pan: Essential for shaping your bread. A round cake pan works in a pinch.
  • Mixing bowls: Use any size, but a large bowl is best for combining ingredients.
  • Whisk or spatula: Perfect for mixing. A fork can also do the job.
  • Measuring cups and spoons: For accuracy, but eyeballing can work if you’re confident!

Variations

  • Cheesy Yogurt Bread: Mix in 1 cup of shredded cheese, like cheddar or mozzarella, for a savory twist.
  • Herb-Infused Bread: Add a tablespoon of fresh chopped herbs like rosemary or basil for a fragrant flavor.
  • Sweet Yogurt Bread: Incorporate 2 tablespoons of honey or maple syrup for a touch of sweetness.
  • Olive and Feta Bread: Fold in 1/2 cup of chopped olives and 1/2 cup of crumbled feta cheese for a Mediterranean flair.
  • Spicy Yogurt Bread: Add a teaspoon of red pepper flakes or diced jalapeños for a kick of heat.

Serving Suggestions

  • Pair your Yogurt Bread with a fresh garden salad for a light lunch.
  • Enjoy it alongside a bowl of hearty soup for a comforting dinner.
  • Spread a layer of cream cheese or avocado for a delicious snack.
  • Serve warm with a drizzle of honey for a sweet treat.
  • Slice and toast for a crunchy breakfast option topped with your favorite jam.

FAQs about Yogurt Bread

As you embark on your Yogurt Bread journey, you might have a few questions. Here are some common queries that can help you along the way:

Can I use regular yogurt instead of Greek yogurt?

While Greek yogurt is preferred for its thickness and tang, you can use regular yogurt. Just keep in mind that the texture may be slightly different, and you might need to adjust the liquid content.

Is Yogurt Bread gluten-free?

Yes! This recipe is gluten-free thanks to almond flour. It’s a fantastic option for those with gluten sensitivities or anyone looking to reduce gluten in their diet.

How should I store leftover Yogurt Bread?

To keep your bread fresh, store it in an airtight container at room temperature for up to three days. For longer storage, slice and freeze it, then toast slices as needed!

Can I add other ingredients to the batter?

Absolutely! Feel free to mix in ingredients like nuts, seeds, or dried fruits. Just remember to adjust the wet ingredients slightly if you add a lot of dry ingredients.

How can I tell when the bread is done baking?

The best way to check is by inserting a toothpick into the center. If it comes out clean or with a few crumbs, your Yogurt Bread is ready to be enjoyed!

Final Thoughts

There’s a unique joy that comes from baking your own bread, and this Yogurt Bread is no exception. The process is simple, yet the results are incredibly rewarding. Each slice is a testament to your effort, offering a delightful blend of flavors and textures. Whether you enjoy it warm with butter or as a base for your favorite sandwich, this bread brings comfort and satisfaction. Plus, it’s a fantastic way to impress family and friends with your culinary skills. So, roll up your sleeves, embrace the process, and savor the deliciousness of homemade Yogurt Bread!

Paul

Yogurt Bread: Discover the Easy Recipe Today!

Yogurt Bread is a simple and delicious recipe that combines Greek yogurt and almond flour for a moist and flavorful loaf.
Prep Time 10 minutes
Cook Time 45 minutes
Total Time 55 minutes
Servings: 8 servings
Course: Bread
Cuisine: Mediterranean
Calories: 150

Ingredients
  

  • 2 cups plain Greek yogurt
  • 2 cups almond flour
  • 1 teaspoon baking powder
  • 1 teaspoon baking soda
  • 1 teaspoon salt
  • 1 tablespoon olive oil
  • 2 large eggs
  • 1 teaspoon garlic powder optional
  • 1 teaspoon dried herbs optional

Method
 

  1. Preheat your oven to 350°F (175°C) and grease a 9x5-inch loaf pan or line it with parchment paper.
  2. In a large mixing bowl, combine the Greek yogurt, almond flour, baking powder, baking soda, and salt. Mix until well combined.
  3. In a separate bowl, whisk together the olive oil and eggs until smooth. If using, stir in the garlic powder and dried herbs.
  4. Pour the egg mixture into the yogurt mixture and stir until fully incorporated. The batter will be thick.
  5. Transfer the batter to the prepared loaf pan, smoothing the top with a spatula.
  6. Bake in the preheated oven for 40-45 minutes, or until the top is golden brown and a toothpick inserted into the center comes out clean.
  7. Allow the bread to cool in the pan for about 10 minutes before transferring it to a wire rack to cool completely.

Notes

  • For a sweeter version, add 2 tablespoons of honey or maple syrup to the batter.
  • You can mix in shredded cheese or chopped olives for added flavor and texture.

Roasted Carrots with Whipped Ricotta and Spicy Honey delight!

Introduction to Roasted Carrots with Whipped Ricotta and Spicy Honey

There’s something magical about roasted carrots, especially when they’re paired with whipped ricotta and a drizzle of spicy honey. This dish is not just a feast for the eyes; it’s a delightful experience for your taste buds. Whether you’re looking for a quick solution for a busy weeknight or a dish to impress your loved ones at a gathering, this recipe fits the bill perfectly. The sweet, earthy flavors of the carrots combined with the creamy ricotta and a kick of heat create a symphony of taste that’s hard to resist.

Why You’ll Love This Roasted Carrots with Whipped Ricotta and Spicy Honey

This dish is a game-changer for your dinner table. It’s incredibly easy to whip up, taking just 40 minutes from start to finish. The vibrant colors and flavors will impress anyone you serve it to. Plus, it’s a fantastic way to sneak in some veggies without anyone complaining. The combination of creamy ricotta and spicy honey elevates the humble carrot into a star dish that everyone will rave about.

Ingredients for Roasted Carrots with Whipped Ricotta and Spicy Honey

Gathering the right ingredients is the first step to creating this delightful dish. Here’s what you’ll need:

  • Carrots: Fresh, vibrant carrots are the star of this recipe. They bring sweetness and a lovely crunch.
  • Olive Oil: A drizzle of olive oil helps to caramelize the carrots, enhancing their natural flavors.
  • Salt: A pinch of salt elevates the taste, balancing the sweetness of the carrots.
  • Black Pepper: Freshly cracked black pepper adds a subtle kick that complements the dish.
  • Ricotta Cheese: Creamy ricotta provides a rich, smooth base for the whipped topping.
  • Honey: A touch of honey sweetens the ricotta and adds a delightful contrast to the roasted carrots.
  • Red Pepper Flakes: These add a spicy zing. Adjust the amount to suit your heat preference.
  • Lemon Juice: A splash of lemon juice brightens the ricotta, balancing the flavors beautifully.
  • Fresh Parsley: Chopped parsley not only adds color but also a fresh, herbal note to the dish.

For those looking to mix things up, consider adding a sprinkle of cinnamon to the carrots before roasting for a sweeter touch. If you need a dairy-free option, swap the ricotta for a vegan cream cheese alternative. You can find all the exact quantities for these ingredients at the bottom of the article, ready for printing!

How to Make Roasted Carrots with Whipped Ricotta and Spicy Honey

Creating this delightful dish is a breeze! Follow these simple steps, and you’ll have a stunning side that’s sure to impress.

Step 1: Preheat the Oven

Start by preheating your oven to 425°F. This high temperature is key for achieving those beautifully caramelized carrots. While the oven heats up, line a baking sheet with parchment paper. This will make cleanup a snap!

Step 2: Prepare the Carrots

Next, grab your carrot sticks and toss them in a large bowl with olive oil, salt, and black pepper. Make sure they’re evenly coated; this is where the flavor begins! Once coated, spread the carrots out in a single layer on your prepared baking sheet. Give them some space to roast evenly.

Step 3: Roast the Carrots

Now, it’s time to roast! Place the baking sheet in the preheated oven and let the carrots roast for 25-30 minutes. Halfway through, give them a gentle toss to ensure they cook evenly. You’re looking for tender, caramelized edges that will bring out their natural sweetness.

Step 4: Make the Whipped Ricotta

While the carrots are roasting, let’s whip up that creamy topping! In a medium bowl, combine the ricotta cheese, honey, red pepper flakes, and lemon juice. Using a hand mixer or a whisk, blend until smooth and creamy. The mixture should be light and airy, ready to complement those roasted carrots.

Step 5: Assemble the Dish

Once the carrots are done roasting, remove them from the oven and let them cool slightly. To serve, spread the whipped ricotta on a beautiful platter. Top it with the roasted carrots, drizzle with a bit more honey if you like, and finish with a sprinkle of fresh parsley. This dish is as pleasing to the eye as it is to the palate!

Tips for Success

  • Choose carrots that are firm and vibrant for the best flavor.
  • Don’t overcrowd the baking sheet; give the carrots room to caramelize.
  • Adjust the spice level by varying the amount of red pepper flakes.
  • For extra creaminess, let the ricotta sit at room temperature before whipping.
  • Garnish with lemon zest for an added burst of freshness.

Equipment Needed

  • Baking Sheet: A standard baking sheet works well, but a cast-iron skillet can add extra flavor.
  • Parchment Paper: Use this for easy cleanup; aluminum foil is a good alternative.
  • Mixing Bowl: Any medium-sized bowl will do; a stand mixer can save time.
  • Whisk or Hand Mixer: A whisk is great for a workout, but a hand mixer makes it effortless.

Variations

  • Herb-Infused Ricotta: Mix in fresh herbs like basil or thyme into the ricotta for an aromatic twist.
  • Maple Syrup Substitute: Swap honey for maple syrup for a different kind of sweetness that pairs beautifully with carrots.
  • Spicy Kick: Add a dash of sriracha or your favorite hot sauce to the whipped ricotta for an extra layer of heat.
  • Nutty Crunch: Top the dish with toasted nuts like walnuts or pistachios for added texture and flavor.
  • Vegan Option: Use a plant-based ricotta or cashew cream to make this dish completely dairy-free.

Serving Suggestions

  • Pair with grilled chicken or fish for a balanced meal.
  • Serve alongside a fresh green salad for a light lunch.
  • Complement with a crisp white wine, like Sauvignon Blanc.
  • For a rustic touch, present on a wooden board.
  • Drizzle extra spicy honey on the table for guests to customize their servings.

FAQs about Roasted Carrots with Whipped Ricotta and Spicy Honey

Can I use baby carrots for this recipe?

Absolutely! Baby carrots are a great option. Just keep an eye on the roasting time, as they may cook a bit faster than regular-sized carrots.

How can I store leftovers?

Store any leftovers in an airtight container in the fridge for up to three days. Reheat in the oven for the best texture, or enjoy them cold in a salad!

Can I make the whipped ricotta ahead of time?

Yes, you can prepare the whipped ricotta a day in advance. Just store it in the fridge, and give it a quick stir before serving to bring back its creamy texture.

What can I serve with roasted carrots?

These roasted carrots pair beautifully with grilled meats, fish, or even a hearty grain salad. They also make a fantastic addition to a charcuterie board!

Is this dish suitable for meal prep?

Definitely! Roasted carrots with whipped ricotta and spicy honey make for a delicious meal prep option. Just pack them in individual containers for easy grab-and-go lunches.

Final Thoughts

Roasted carrots with whipped ricotta and spicy honey is more than just a side dish; it’s an experience that brings joy to the table. The vibrant colors and contrasting flavors create a feast for the senses, making every bite a celebration. Whether you’re sharing it with family or enjoying it solo, this dish has a way of brightening your day. It’s simple yet elegant, proving that cooking can be both easy and rewarding. So, roll up your sleeves, embrace the process, and let this delightful recipe become a staple in your kitchen. You won’t regret it!

Paul

Roasted Carrots with Whipped Ricotta and Spicy Honey delight!

A delightful dish featuring roasted carrots topped with creamy whipped ricotta and a drizzle of spicy honey.
Prep Time 10 minutes
Cook Time 30 minutes
Total Time 40 minutes
Servings: 4 servings
Course: Side Dish
Cuisine: American
Calories: 220

Ingredients
  

  • 2 pounds carrots peeled and cut into sticks
  • 2 tablespoons olive oil
  • 1 teaspoon salt
  • 1/2 teaspoon black pepper
  • 1 cup ricotta cheese
  • 1 tablespoon honey
  • 1 teaspoon red pepper flakes adjust to taste
  • 1 tablespoon lemon juice
  • Fresh parsley chopped (for garnish)

Method
 

  1. Preheat your oven to 425°F. Line a baking sheet with parchment paper.
  2. In a large bowl, toss the carrot sticks with olive oil, salt, and black pepper until evenly coated. Spread the carrots in a single layer on the prepared baking sheet.
  3. Roast the carrots in the preheated oven for 25-30 minutes, or until they are tender and caramelized, tossing halfway through for even cooking.
  4. While the carrots are roasting, prepare the whipped ricotta. In a medium bowl, combine the ricotta cheese, honey, red pepper flakes, and lemon juice. Use a hand mixer or a whisk to blend until smooth and creamy.
  5. Once the carrots are done, remove them from the oven and let them cool slightly.
  6. To serve, spread the whipped ricotta on a serving platter and top with the roasted carrots. Drizzle with additional honey if desired and garnish with chopped parsley.

Notes

  • For a sweeter touch, add a sprinkle of cinnamon to the carrots before roasting.
  • For a dairy-free option, substitute the ricotta with a vegan cream cheese alternative.

Crispy BBQ Salmon Tacos: A Flavor-Packed Delight!

Introduction to Crispy BBQ Salmon Tacos

There’s something magical about a taco night, isn’t there? The sizzle of ingredients, the vibrant colors, and the tantalizing aromas wafting through the kitchen. Crispy BBQ Salmon Tacos bring that magic right to your table.

This dish is not just a meal; it’s a quick solution for those busy weeknights when you want something delicious without spending hours in the kitchen. With tender salmon, zesty BBQ sauce, and fresh toppings, these tacos are sure to impress your loved ones. Trust me, once you try them, they’ll become a staple in your home!

Why You’ll Love This Crispy BBQ Salmon Tacos

Crispy BBQ Salmon Tacos are a game-changer for your dinner routine.

They come together in just 25 minutes, making them perfect for busy evenings.

The combination of smoky spices and sweet BBQ sauce creates a flavor explosion that will have everyone asking for seconds.

Plus, they’re versatile! You can easily customize them with your favorite toppings.

These tacos are not just a meal; they’re a celebration of flavor and convenience!

Ingredients for Crispy BBQ Salmon Tacos

Creating Crispy BBQ Salmon Tacos is a breeze with the right ingredients. Here’s what you’ll need to whip up this flavorful dish:

  • Salmon fillets: Fresh salmon is the star of the show, providing a rich, buttery flavor that pairs perfectly with BBQ sauce.
  • Smoked paprika: This spice adds a delightful smokiness, enhancing the overall flavor profile of the tacos.
  • Garlic powder: A must-have for that savory kick, garlic powder elevates the taste without overpowering the dish.
  • Onion powder: It complements the garlic and adds depth to the seasoning mix.
  • Salt: Essential for bringing out the natural flavors of the salmon and spices.
  • Black pepper: A dash of black pepper adds a subtle heat and balances the sweetness of the BBQ sauce.
  • BBQ sauce: Choose your favorite brand or homemade version for that sweet and tangy glaze that makes these tacos irresistible.
  • Corn tortillas: Soft, warm corn tortillas are perfect for holding all the delicious fillings together.
  • Shredded cabbage: This adds a crunchy texture and freshness, balancing the richness of the salmon.
  • Avocado: Sliced avocado brings creaminess and a hint of healthy fats to the mix.
  • Fresh cilantro: A sprinkle of cilantro adds a burst of freshness and a pop of color.
  • Lime: Lime wedges are essential for squeezing over the tacos, brightening the flavors with a zesty finish.

Feel free to get creative! For a spicier kick, consider adding sliced jalapeños or a drizzle of hot sauce. If you’re looking for alternatives, grilled shrimp or chicken can also work beautifully in this recipe.

You can find the exact quantities for each ingredient at the bottom of the article, ready for printing!

How to Make Crispy BBQ Salmon Tacos

Making Crispy BBQ Salmon Tacos is a straightforward process that anyone can master.

Follow these simple steps, and you’ll have a delicious meal ready in no time!

Step 1: Preheat the Oven

Start by preheating your oven to 400°F.

This step is crucial because it ensures even cooking.

While the oven heats up, line a baking sheet with parchment paper.

This will prevent the salmon from sticking and make cleanup a breeze.

Step 2: Prepare the Spice Mixture

In a small bowl, combine smoked paprika, garlic powder, onion powder, salt, and black pepper.

Mix them well to create a flavorful spice blend.

These spices will infuse the salmon with a smoky, savory taste that pairs perfectly with the BBQ sauce.

Step 3: Season the Salmon

Pat the salmon fillets dry with paper towels.

This helps the spices stick better and ensures a crispy texture.

Rub the spice mixture evenly over both sides of the fillets.

Make sure every inch is coated for maximum flavor!

Step 4: Bake the Salmon

Place the seasoned salmon on the prepared baking sheet.

Bake for 12-15 minutes, or until the salmon flakes easily with a fork.

To check for doneness, gently poke the thickest part with a fork.

If it flakes apart, it’s ready to come out!

Step 5: Add BBQ Sauce

During the last 5 minutes of baking, brush the salmon with your favorite BBQ sauce.

This adds a sweet and tangy glaze that elevates the dish.

Be generous, but don’t drown the salmon; you want to enhance, not overpower, the flavor.

Step 6: Warm the Tortillas

While the salmon is baking, heat the corn tortillas in a dry skillet over medium heat.

Warm them for about 30 seconds on each side until they’re pliable.

This step enhances their texture and makes them easier to fold.

Step 7: Flake the Salmon

Once the salmon is done, remove it from the oven and let it cool for a minute.

Using a fork, gently flake the salmon into bite-sized pieces.

This makes it easier to fill the tacos and ensures everyone gets a taste of that delicious salmon.

Step 8: Assemble the Tacos

Now it’s time to build your tacos!

Start with a generous amount of shredded cabbage on each tortilla.

Add the flaked salmon on top, followed by avocado slices and a sprinkle of fresh cilantro.

Layering these ingredients not only looks great but also balances the flavors beautifully.

Step 9: Serve with Lime

Don’t forget the lime wedges!

Serving your tacos with lime is essential.

A squeeze of fresh lime juice brightens the flavors and adds a zesty finish.

Trust me, it takes these tacos to the next level!

Tips for Success

  • Always pat the salmon dry before seasoning for a crispier texture.
  • Experiment with different BBQ sauces to find your favorite flavor profile.
  • Warm the tortillas just before serving to keep them soft and pliable.
  • Don’t skip the lime; it’s the secret ingredient that brightens everything up!
  • Feel free to prep the ingredients ahead of time for a quicker assembly.

Equipment Needed

  • Baking sheet: A standard baking sheet works well, but a cast-iron skillet can add extra crispiness.
  • Parchment paper: Use this for easy cleanup; aluminum foil is a good alternative.
  • Mixing bowl: Any bowl will do for mixing spices; a small one is ideal.
  • Fork: Essential for flaking the salmon; a fish spatula can also work.
  • Skillet: A non-stick skillet is perfect for warming tortillas; a griddle is another option.

Variations

  • Spicy Kick: Add sliced jalapeños or a drizzle of your favorite hot sauce for an extra layer of heat.
  • Seafood Swap: Substitute salmon with grilled shrimp or even flaky white fish for a different seafood experience.
  • Vegetarian Option: Replace the salmon with grilled portobello mushrooms or roasted cauliflower for a hearty, plant-based taco.
  • Gluten-Free: Ensure your BBQ sauce is gluten-free and use corn tortillas to keep this dish suitable for gluten-sensitive diets.
  • Extra Creamy: Top with a dollop of sour cream or Greek yogurt for a rich, creamy texture that complements the flavors.

Serving Suggestions

  • Side Salad: Pair your tacos with a refreshing cucumber and tomato salad for a light crunch.
  • Chips and Salsa: Serve with tortilla chips and your favorite salsa for a classic touch.
  • Drink Pairing: A cold beer or a zesty margarita complements the flavors beautifully.
  • Presentation: Serve on a colorful platter with lime wedges and cilantro for a vibrant display.

FAQs about Crispy BBQ Salmon Tacos

Can I use frozen salmon for this recipe?

Absolutely! Just make sure to thaw the salmon completely before seasoning and baking. Frozen salmon can still yield delicious results, especially when coated with that flavorful spice mix.

What type of BBQ sauce works best?

It really depends on your taste! A sweet and tangy sauce complements the salmon beautifully. However, if you prefer a smoky or spicy BBQ sauce, go for it! The key is to choose one that you enjoy.

Can I make these tacos ahead of time?

Yes, you can prep the ingredients in advance! Season the salmon and chop the veggies ahead of time. Just assemble the tacos right before serving for the freshest taste.

What can I serve with Crispy BBQ Salmon Tacos?

These tacos pair wonderfully with a side of chips and salsa, a light salad, or even some grilled corn. A refreshing drink like a margarita or a cold beer also complements the flavors perfectly!

Are these tacos gluten-free?

Yes! As long as you use gluten-free BBQ sauce and corn tortillas, these Crispy BBQ Salmon Tacos are a great option for those avoiding gluten.

Final Thoughts

Crispy BBQ Salmon Tacos are more than just a meal; they’re an experience that brings joy to the table.

The combination of smoky spices, tender salmon, and fresh toppings creates a symphony of flavors that dance on your palate.

Whether you’re enjoying a casual weeknight dinner or impressing friends at a gathering, these tacos are sure to be a hit.

Plus, the ease of preparation means you can focus on what really matters—sharing good food and great moments with loved ones.

So, roll up your sleeves and dive into this delicious adventure!

Paul

Crispy BBQ Salmon Tacos: A Flavor-Packed Delight!

Crispy BBQ Salmon Tacos are a delicious and flavorful dish featuring baked salmon fillets topped with fresh ingredients and served in warm corn tortillas.
Prep Time 10 minutes
Cook Time 15 minutes
Total Time 25 minutes
Servings: 4 servings
Course: Main Course
Cuisine: Mexican
Calories: 320

Ingredients
  

  • 2 6-ounce salmon fillets
  • 1 teaspoon smoked paprika
  • 1 teaspoon garlic powder
  • 1 teaspoon onion powder
  • 1 teaspoon salt
  • 1/2 teaspoon black pepper
  • 1/2 cup BBQ sauce
  • 8 small corn tortillas
  • 1 cup shredded cabbage
  • 1 avocado sliced
  • 1/4 cup fresh cilantro chopped
  • 1 lime cut into wedges

Method
 

  1. Preheat the oven to 400°F. Line a baking sheet with parchment paper.
  2. In a small bowl, mix together the smoked paprika, garlic powder, onion powder, salt, and black pepper.
  3. Pat the salmon fillets dry with paper towels and rub the spice mixture evenly over both sides of the fillets.
  4. Place the salmon on the prepared baking sheet and bake for 12-15 minutes, or until the salmon flakes easily with a fork.
  5. During the last 5 minutes of baking, brush the salmon with BBQ sauce.
  6. While the salmon is baking, heat the corn tortillas in a dry skillet over medium heat for about 30 seconds on each side, until warm and pliable.
  7. Once the salmon is done, remove it from the oven and let it cool for a minute. Flake the salmon into bite-sized pieces with a fork.
  8. Assemble the tacos by placing a generous amount of shredded cabbage on each tortilla, followed by the flaked salmon, avocado slices, and a sprinkle of fresh cilantro.
  9. Serve with lime wedges on the side for squeezing over the tacos.

Notes

  • For a spicier kick, add sliced jalapeños or a drizzle of hot sauce on top of the tacos.
  • You can also substitute the salmon with grilled shrimp or chicken for a different flavor.
  • If you prefer a creamier texture, add a dollop of sour cream or Greek yogurt on top before serving.

Turkish Meatballs with Yogurt Sauce: A Tasty Twist!

Introduction to Turkish Meatballs with Yogurt Sauce

There’s something magical about the aroma of Turkish meatballs with yogurt sauce wafting through the kitchen. It takes me back to family gatherings, where laughter and delicious food filled the air. This recipe is not just a meal; it’s a quick solution for those busy weeknights or a dish to impress your loved ones on special occasions. With tender meatballs and a creamy yogurt sauce, it’s a delightful combination that’s both comforting and flavorful. Trust me, once you try this, it’ll become a staple in your home cooking repertoire!

Why You’ll Love This Turkish Meatballs with Yogurt Sauce

These Turkish meatballs with yogurt sauce are a game-changer for any home cook. They come together in just 30 minutes, making them perfect for busy weeknights. The flavors are bold yet comforting, and the creamy yogurt sauce adds a refreshing twist. Plus, they’re versatile enough to please picky eaters and adventurous palates alike. You’ll find yourself making this dish again and again, and your family will thank you for it!

Ingredients for Turkish Meatballs with Yogurt Sauce

Gathering the right ingredients is the first step to creating these delicious Turkish meatballs with yogurt sauce. Here’s what you’ll need:

  • Ground beef or lamb: The star of the dish, providing rich flavor and texture. Choose lean meat for a healthier option.
  • Onion: Finely grated for sweetness and moisture, it enhances the meatballs’ overall flavor.
  • Garlic: Minced to add a punch of flavor. Fresh garlic is always best for that aromatic kick.
  • Fresh parsley: Chopped for a burst of color and freshness. It brightens up the dish.
  • Breadcrumbs: These help bind the meatballs together while keeping them tender. You can use gluten-free breadcrumbs if needed.
  • Egg: Acts as a binder, ensuring your meatballs hold their shape during cooking.
  • Ground cumin: Adds a warm, earthy flavor that’s essential in Turkish cuisine.
  • Paprika: For a hint of smokiness and color. You can use sweet or smoked paprika based on your preference.
  • Salt and black pepper: Essential seasonings that enhance all the flavors in the meatballs.
  • Red pepper flakes: Optional, but they add a nice kick if you like a bit of heat.
  • Olive oil: Used for frying the meatballs, giving them a crispy exterior.
  • Plain Greek yogurt: The creamy base for the sauce, providing a tangy contrast to the meatballs.
  • Lemon juice: Brightens the yogurt sauce and adds a refreshing zing.
  • Additional garlic: Minced for the yogurt sauce, enhancing its flavor.
  • Salt to taste: Adjust according to your preference for the sauce.
  • Fresh parsley for garnish: A final touch that adds color and freshness when serving.

For exact measurements, check the bottom of the article where you can find everything listed for easy printing. Happy cooking!

How to Make Turkish Meatballs with Yogurt Sauce

Step 1: Prepare the Meatball Mixture

Start by grabbing a large bowl. Combine the ground beef or lamb, grated onion, minced garlic, chopped parsley, breadcrumbs, egg, cumin, paprika, salt, black pepper, and red pepper flakes if you’re feeling adventurous. Mix everything together with your hands or a spoon until well combined. The mixture should feel slightly sticky but hold together well. This is where the magic begins!

Step 2: Shape the Meatballs

Now, it’s time to shape the mixture into meatballs. Aim for about 1 inch in diameter—think of the size of a golf ball. This size ensures they cook evenly and stay juicy. Place them on a plate as you go, ready for the skillet.

Step 3: Cook the Meatballs

Heat the olive oil in a large skillet over medium heat. Once the oil is shimmering, add the meatballs in batches. Avoid overcrowding the pan; this helps them brown nicely. Cook for about 5-7 minutes, turning occasionally. You want them golden brown on all sides and cooked through. The aroma will be irresistible, trust me!

Step 4: Make the Yogurt Sauce

While the meatballs are sizzling away, prepare the yogurt sauce. In a small bowl, mix the plain Greek yogurt, lemon juice, minced garlic, and a pinch of salt. Stir until smooth and creamy. This sauce is the perfect complement to the meatballs, adding a refreshing tang.

Step 5: Serve and Garnish

Once the meatballs are cooked, remove them from the skillet and let them drain on paper towels. Serve them warm, drizzled generously with the yogurt sauce. Don’t forget to sprinkle fresh parsley on top for that pop of color and flavor. Enjoy every bite!

Tips for Success

  • Use lean ground meat for a healthier option without sacrificing flavor.
  • Don’t skip the resting time for the meatballs; it helps them hold their shape.
  • Experiment with spices! Add more cumin or paprika for a bolder taste.
  • For extra moisture, consider adding a splash of beef broth to the mixture.
  • Serve with warm pita bread to soak up the delicious yogurt sauce.

Equipment Needed

  • Large bowl: For mixing the meatball ingredients. A mixing bowl works just as well.
  • Skillet: A non-stick skillet is ideal for frying. You can also use a cast-iron skillet for a nice sear.
  • Measuring cups and spoons: Essential for accurate ingredient measurements.
  • Spatula: To turn the meatballs while cooking. A wooden spoon can do the trick too.

Variations

  • Herbed Meatballs: Add fresh herbs like mint or dill to the meat mixture for a fragrant twist.
  • Spicy Meatballs: Increase the red pepper flakes or add chopped jalapeños for a fiery kick.
  • Vegetarian Option: Substitute ground meat with lentils or chickpeas, and add grated zucchini for moisture.
  • Cheesy Delight: Mix in crumbled feta cheese for a creamy, tangy flavor that pairs beautifully with the yogurt sauce.
  • Gluten-Free: Use gluten-free breadcrumbs or oats to keep the recipe suitable for gluten-sensitive diets.

Serving Suggestions

  • Pair the meatballs with warm pita bread for a delightful scoop of yogurt sauce.
  • Serve alongside a fresh cucumber and tomato salad for a refreshing crunch.
  • A glass of chilled ayran (yogurt drink) complements the meal perfectly.
  • Garnish with lemon wedges for an extra zing.

FAQs about Turkish Meatballs with Yogurt Sauce

Can I use ground turkey instead of beef or lamb?

Absolutely! Ground turkey is a great alternative for a leaner option. Just keep in mind that it may require a bit more seasoning to enhance the flavor.

How can I make the yogurt sauce spicier?

If you’re looking to add some heat, consider mixing in a pinch of cayenne pepper or a dash of hot sauce. This will give your yogurt sauce a nice kick that pairs well with the meatballs.

Can I prepare the meatballs in advance?

Yes! You can shape the meatballs ahead of time and store them in the fridge for up to 24 hours. Just cook them when you’re ready for a quick meal.

What can I serve with Turkish meatballs?

These meatballs are fantastic with warm pita bread, a fresh salad, or even over rice. The creamy yogurt sauce complements any side beautifully!

Are Turkish meatballs gluten-free?

They can be! Just use gluten-free breadcrumbs or oats in the meatball mixture. This way, everyone can enjoy this delicious dish without worry.

Final Thoughts

Cooking Turkish meatballs with yogurt sauce is more than just preparing a meal; it’s about creating memories. The blend of spices and the creamy sauce brings warmth to the table, making every bite a celebration of flavors. Whether you’re sharing this dish with family or enjoying it solo after a long day, it’s sure to bring a smile. Plus, the ease of preparation means you can whip it up anytime. So, roll up your sleeves, embrace the process, and let the delightful aromas fill your kitchen. You’ll find joy in every savory morsel!

Paul

Turkish Meatballs with Yogurt Sauce: A Tasty Twist!

A delicious recipe for Turkish meatballs served with a creamy yogurt sauce, perfect for a flavorful meal.
Prep Time 15 minutes
Cook Time 15 minutes
Total Time 30 minutes
Servings: 4 servings
Course: Main Course
Cuisine: Turkish
Calories: 350

Ingredients
  

  • 1 pound ground beef or lamb
  • 1 small onion finely grated
  • 2 cloves garlic minced
  • 1/4 cup fresh parsley chopped
  • 1/4 cup breadcrumbs
  • 1 large egg
  • 1 teaspoon ground cumin
  • 1 teaspoon paprika
  • 1/2 teaspoon salt
  • 1/4 teaspoon black pepper
  • 1/4 teaspoon red pepper flakes optional
  • 2 tablespoons olive oil for frying
  • 1 cup plain Greek yogurt for the sauce
  • 1 tablespoon lemon juice
  • 1 clove garlic minced (for the sauce)
  • Salt to taste for the sauce
  • Fresh parsley for garnish

Method
 

  1. In a large bowl, combine the ground meat, grated onion, minced garlic, chopped parsley, breadcrumbs, egg, cumin, paprika, salt, black pepper, and red pepper flakes (if using). Mix until well combined.
  2. Shape the mixture into small meatballs, about 1 inch in diameter. You should have approximately 20 meatballs.
  3. Heat the olive oil in a large skillet over medium heat. Add the meatballs in batches, being careful not to overcrowd the pan. Cook for about 5-7 minutes, turning occasionally, until browned on all sides and cooked through.
  4. While the meatballs are cooking, prepare the yogurt sauce by combining the Greek yogurt, lemon juice, minced garlic, and salt in a small bowl. Mix well and set aside.
  5. Once the meatballs are cooked, remove them from the skillet and drain on paper towels.
  6. Serve the meatballs warm, drizzled with the yogurt sauce and garnished with fresh parsley.

Notes

  • For a spicier kick, add more red pepper flakes or a dash of hot sauce to the meat mixture.
  • Serve the meatballs with pita bread and a side salad for a complete meal.

Strawberry Cottage Cheese Mousse: A Deliciously Unique Treat!

Introduction to Strawberry Cottage Cheese Mousse

There’s something magical about dessert that feels light yet indulgent, and that’s exactly what you get with Strawberry Cottage Cheese Mousse. This delightful treat is not just a feast for the eyes; it’s a quick solution for those busy days when you want to impress without the fuss. I remember the first time I whipped this up for friends; their faces lit up with surprise and delight. With fresh strawberries and creamy cottage cheese, it’s a guilt-free way to satisfy your sweet tooth. Let’s dive into this deliciously unique treat that’s sure to become a favorite!

Why You’ll Love This Strawberry Cottage Cheese Mousse

This Strawberry Cottage Cheese Mousse is a game-changer for dessert lovers. It’s incredibly easy to make, taking just 15 minutes of prep time. The combination of fresh strawberries and creamy cottage cheese creates a taste that’s both refreshing and satisfying. Plus, it’s a healthier option compared to traditional desserts, making it perfect for those who want to indulge without the guilt. Trust me, your taste buds will thank you!

Ingredients for Strawberry Cottage Cheese Mousse

Gathering the right ingredients is the first step to creating this delightful Strawberry Cottage Cheese Mousse. Here’s what you’ll need:

  • Cottage cheese: The star of the show! It adds creaminess and protein, making this dessert both satisfying and nutritious.
  • Fresh strawberries: Sweet and juicy, they bring a burst of flavor and vibrant color to the mousse.
  • Honey or maple syrup: A natural sweetener that enhances the flavors without overpowering them. Choose based on your preference!
  • Vanilla extract: This adds a warm, aromatic note that complements the strawberries beautifully.
  • Lemon juice: Just a splash brightens the flavors and balances the sweetness.
  • Heavy whipping cream: For that light, airy texture, it’s essential to whip this into soft peaks before folding it in.
  • Fresh strawberries and mint leaves: These are for garnish, adding a touch of elegance and freshness to your presentation.

For those looking for alternatives, you can substitute cottage cheese with silken tofu for a dairy-free option. Coconut cream can replace heavy whipping cream, giving it a tropical twist. If you want to boost the nutrition, consider adding a tablespoon of chia seeds for extra texture. Just let the mousse sit for an additional 15 minutes to thicken.

Exact quantities for each ingredient are available at the bottom of the article for easy printing!

How to Make Strawberry Cottage Cheese Mousse

Creating this Strawberry Cottage Cheese Mousse is a breeze! Follow these simple steps, and you’ll have a delightful dessert ready in no time. Let’s get started!

Step 1: Blend the Base

First, grab your blender or food processor. Toss in the cottage cheese, sliced strawberries, honey or maple syrup, vanilla extract, and lemon juice. Blend everything until it’s smooth and creamy. This is where the magic begins! The strawberries will turn the mixture into a beautiful pink hue, making it even more inviting.

Step 2: Whip the Cream

Next, take a separate bowl and pour in the heavy whipping cream. Using a hand mixer or a whisk, whip the cream until soft peaks form. This step is crucial for achieving that light, airy texture in your mousse. Don’t rush it; take your time to get it just right!

Step 3: Combine Mixtures

Now, gently fold the whipped cream into the strawberry cottage cheese mixture. Use a spatula and be careful not to deflate the whipped cream. You want to keep that fluffy texture! This is where the mousse starts to come together, creating a delightful blend of flavors and textures.

Step 4: Chill the Mousse

Once combined, spoon the mousse into serving dishes or glasses. Cover them with plastic wrap and pop them in the refrigerator for at least one hour. This chilling time allows the flavors to meld and the mousse to set. Trust me, the wait will be worth it!

Step 5: Garnish and Serve

Finally, it’s time to serve! Before you dig in, garnish each serving with fresh strawberries and a sprig of mint. This adds a pop of color and a refreshing touch. Now, sit back and enjoy your delicious Strawberry Cottage Cheese Mousse. It’s a treat that’s sure to impress!

Tips for Success

  • Use ripe strawberries for the best flavor; they should be sweet and fragrant.
  • Don’t overmix when folding in the whipped cream; gentle is key to keeping it airy.
  • Chill the mousse longer if you prefer a firmer texture.
  • Experiment with different sweeteners like agave or stevia for a unique twist.
  • For a fun presentation, layer the mousse with extra strawberries in clear glasses.

Equipment Needed

  • Blender or food processor: Essential for creating a smooth base. A hand mixer can work in a pinch.
  • Mixing bowls: Use two—one for the mousse and one for whipping cream.
  • Spatula: Perfect for folding in the whipped cream gently.
  • Serving dishes or glasses: Choose clear ones to showcase the beautiful layers.

Variations

  • Berry Medley: Swap out strawberries for a mix of berries like blueberries, raspberries, or blackberries for a colorful twist.
  • Chocolate Delight: Add a tablespoon of cocoa powder to the base for a chocolatey version that’s sure to satisfy any sweet tooth.
  • Nutty Crunch: Fold in some chopped nuts like almonds or walnuts for added texture and a nutty flavor.
  • Minty Fresh: Incorporate fresh mint leaves into the blend for a refreshing herbal note that complements the strawberries.
  • Spiced Up: Add a pinch of cinnamon or nutmeg to the mixture for a warm, cozy flavor that’s perfect for fall.

Serving Suggestions

  • Pair the mousse with a light, crisp salad for a refreshing contrast.
  • Serve alongside a glass of sparkling water or a fruity iced tea to enhance the flavors.
  • For a stunning presentation, layer the mousse with extra strawberries in clear glasses.
  • Top with a dollop of whipped cream for added indulgence.

FAQs about Strawberry Cottage Cheese Mousse

Can I make Strawberry Cottage Cheese Mousse ahead of time?

Absolutely! This mousse can be made a day in advance. Just store it in the refrigerator, covered, until you’re ready to serve. The flavors will meld beautifully, making it even more delicious!

Is Strawberry Cottage Cheese Mousse suitable for a healthy diet?

Yes! This dessert is a healthier alternative to traditional mousse. With protein from cottage cheese and natural sweetness from strawberries, it’s a guilt-free treat that fits well into a balanced diet.

Can I use frozen strawberries instead of fresh?

While fresh strawberries are ideal for flavor and texture, you can use frozen ones in a pinch. Just make sure to thaw and drain them well to avoid excess moisture in your mousse.

How can I make this mousse dairy-free?

For a dairy-free version, substitute cottage cheese with silken tofu and use coconut cream instead of heavy whipping cream. This will still give you a creamy texture while keeping it plant-based!

What can I do if my mousse is too runny?

If your mousse turns out runny, try adding a tablespoon of chia seeds and letting it sit for an additional 15 minutes. This will help thicken it up and add a nice texture!

Final Thoughts

Creating Strawberry Cottage Cheese Mousse is more than just whipping up a dessert; it’s about crafting a moment of joy. Each spoonful is a delightful blend of creamy and fruity goodness that brings a smile to your face. Whether you’re serving it at a gathering or enjoying it solo after a long day, this mousse is a reminder that simple ingredients can create something truly special. Plus, it’s a healthier option that doesn’t skimp on flavor. So, roll up your sleeves, gather your ingredients, and let this deliciously unique treat brighten your day!

Paul

Strawberry Cottage Cheese Mousse: A Deliciously Unique Treat!

A deliciously unique treat made with cottage cheese and fresh strawberries, perfect for a light dessert.
Prep Time 15 minutes
Total Time 1 hour 15 minutes
Servings: 4 servings
Course: Dessert
Cuisine: American
Calories: 150

Ingredients
  

  • 1 cup cottage cheese
  • 1 cup fresh strawberries hulled and sliced
  • 1/4 cup honey or maple syrup
  • 1 teaspoon vanilla extract
  • 1/2 teaspoon lemon juice
  • 1/2 cup heavy whipping cream
  • Fresh strawberries and mint leaves for garnish

Method
 

  1. In a blender or food processor, combine the cottage cheese, sliced strawberries, honey (or maple syrup), vanilla extract, and lemon juice. Blend until smooth and creamy.
  2. In a separate bowl, whip the heavy cream until soft peaks form.
  3. Gently fold the whipped cream into the strawberry cottage cheese mixture until well combined. Be careful not to deflate the whipped cream.
  4. Spoon the mousse into serving dishes or glasses and refrigerate for at least 1 hour to chill and set.
  5. Before serving, garnish with additional fresh strawberries and mint leaves.

Notes

  • For a dairy-free option, substitute cottage cheese with silken tofu and use coconut cream instead of heavy whipping cream.
  • Add a tablespoon of chia seeds for extra texture and nutrition, allowing the mousse to sit for an additional 15 minutes to thicken.

Savory Satay Beef Noodle Soup: A Flavorful Delight Awaiting!

Introduction to Savory Satay Beef Noodle Soup

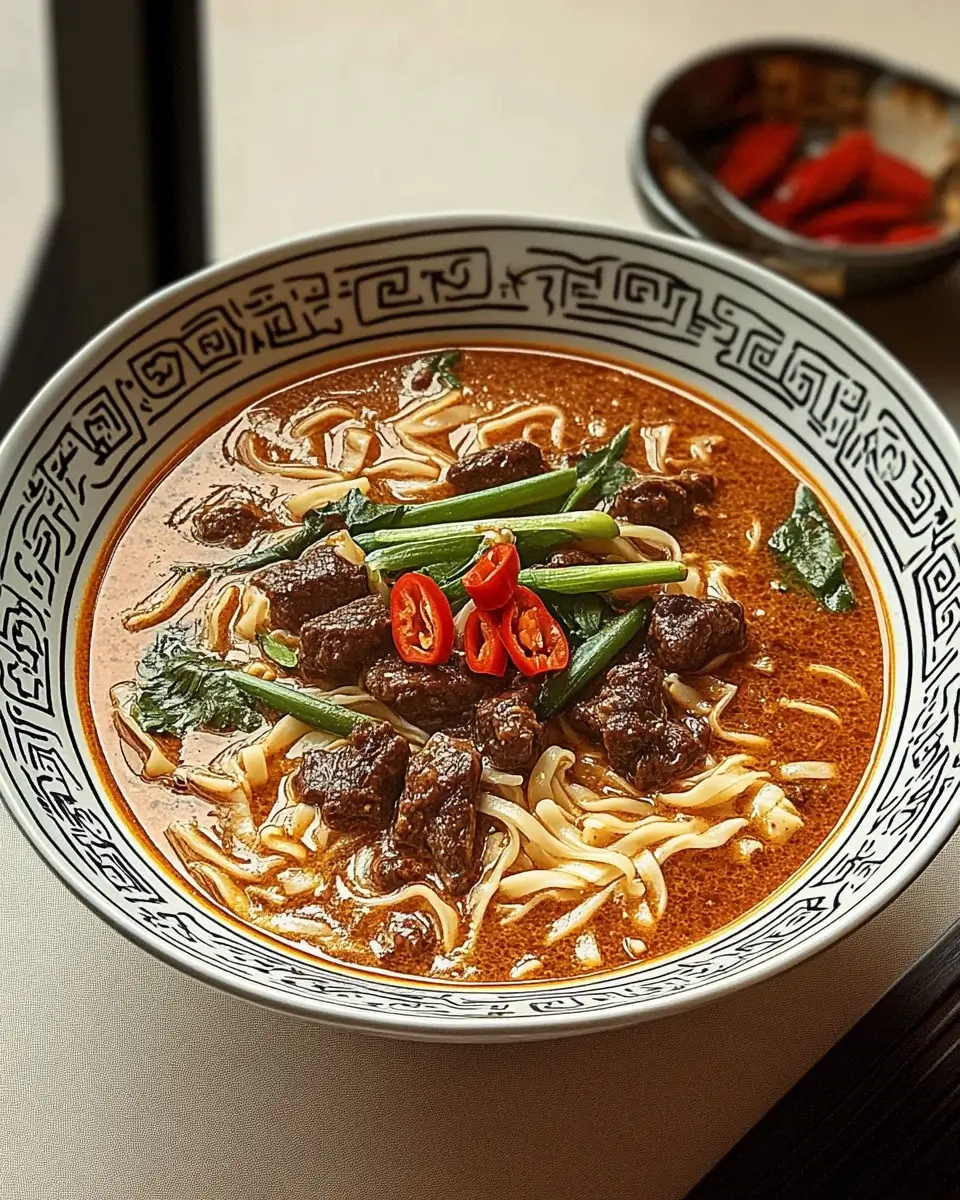
There’s something magical about a steaming bowl of Savory Satay Beef Noodle Soup that instantly warms the soul.

I remember the first time I tried a similar dish at a bustling street market. The aroma of spices and sizzling beef filled the air, drawing me in like a moth to a flame.

This recipe is perfect for those busy weeknights when you crave comfort but don’t have hours to spare.

With tender beef, vibrant veggies, and a rich broth, it’s a delightful way to impress your loved ones or simply treat yourself after a long day.

Why You’ll Love This Savory Satay Beef Noodle Soup

This Savory Satay Beef Noodle Soup is a game-changer for your dinner routine.

It’s quick to whip up, taking just 40 minutes from start to finish.

The rich flavors will transport your taste buds straight to Asia, while the tender beef and fresh veggies make it a hearty meal.

Plus, it’s a one-pot wonder, meaning less cleanup and more time to enjoy with family or friends.

Ingredients for Savory Satay Beef Noodle Soup

Gathering the right ingredients is the first step to creating this delightful dish.

Here’s what you’ll need:

  • Beef sirloin: Tender and flavorful, it’s the star of the show. Thinly sliced for quick cooking.
  • Vegetable oil: A neutral oil that helps sauté the aromatics and beef without overpowering the flavors.
  • Onion: Chopped to add sweetness and depth to the broth.
  • Garlic: Minced for that aromatic punch that elevates any dish.
  • Fresh ginger: Adds a warm, spicy note that complements the beef beautifully.
  • Beef broth: The base of your soup, providing richness and depth. Homemade or store-bought works well.
  • Soy sauce: A splash of umami goodness that enhances the overall flavor.
  • Peanut butter: This creamy ingredient adds a nutty richness, making the broth extra satisfying.
  • Red curry paste: A blend of spices that brings heat and complexity to the soup.
  • Rice noodles: These delicate noodles soak up the broth and provide a comforting texture.
  • Bean sprouts: Fresh and crunchy, they add a delightful contrast to the tender beef.
  • Red bell pepper: Sliced for sweetness and color, making the dish visually appealing.
  • Fresh cilantro: Chopped for a burst of freshness that brightens every bite.
  • Green onions: Sliced for a mild onion flavor and a pop of color on top.
  • Lime juice: A squeeze at the end adds a zesty kick that balances the richness.
  • Salt and pepper: Essential for seasoning to taste, ensuring every flavor shines.

For those looking to spice things up, consider adding sliced jalapeños or a dash of sriracha.

If you prefer a different protein, chicken or tofu can be great substitutes.

Exact quantities for each ingredient can be found at the bottom of the article, ready for printing!

How to Make Savory Satay Beef Noodle Soup

Creating this Savory Satay Beef Noodle Soup is a straightforward process that will have your kitchen smelling divine.

Let’s dive into the steps!

Step 1: Sauté the Aromatics

Start by heating the vegetable oil in a large pot over medium heat.

Add the chopped onion and sauté until it turns translucent, about 5 minutes.

The aroma will start to fill your kitchen, making your mouth water.

Next, stir in the minced garlic and ginger, cooking for an additional minute until fragrant.

This step lays the foundation for a flavor-packed broth.

Step 2: Brown the Beef

Now, it’s time to add the sliced beef sirloin to the pot.

Cook it until browned, which should take about 3-4 minutes.

Don’t forget to season with salt and pepper.

This step is crucial; browning the beef enhances its flavor and gives the soup a rich depth.

Step 3: Create the Flavorful Broth

Pour in the beef broth, soy sauce, peanut butter, and red curry paste.

Stir well to combine all the ingredients.

Bring the mixture to a simmer and let it cook for 10 minutes.

This allows the flavors to meld beautifully, creating a savory base for your soup.

Step 4: Cook the Noodles

While the broth simmers, cook the rice noodles according to the package instructions.

Once cooked, drain them and set aside.

These noodles will soak up the delicious broth, making each bite comforting and satisfying.

Step 5: Add Vegetables

After the broth has simmered, add the sliced red bell pepper and bean sprouts.

Cook for another 3-4 minutes until the vegetables are tender but still crisp.

This adds a lovely crunch and freshness to your Savory Satay Beef Noodle Soup.

Step 6: Serve and Garnish

To serve, divide the cooked rice noodles among bowls.

Ladle the hot soup over the noodles, ensuring each bowl is filled with beef and veggies.

Top with fresh cilantro, sliced green onions, and a squeeze of lime juice.

This final touch brightens the dish and adds a burst of flavor that’s simply irresistible.

Tips for Success

  • Prep all your ingredients before starting to cook. It makes the process smoother.
  • Don’t rush the browning of the beef; it adds depth to the flavor.
  • Adjust the spice level by adding more or less red curry paste to suit your taste.
  • For a creamier broth, blend in a bit more peanut butter.
  • Garnish generously with cilantro and lime for a fresh finish.

Equipment Needed

  • Large pot: A sturdy pot is essential for simmering the soup. A Dutch oven works great too.
  • Cutting board: A solid surface for chopping your ingredients.
  • Sharp knife: For slicing the beef and vegetables with ease.
  • Measuring spoons: Handy for precise ingredient measurements.
  • Colander: Useful for draining the cooked rice noodles.

Variations

  • Spicy Satay Beef Noodle Soup: Add sliced jalapeños or a dash of sriracha for an extra kick.
  • Vegetarian Option: Substitute beef with tofu or tempeh for a plant-based twist.
  • Gluten-Free Version: Use gluten-free soy sauce and ensure your rice noodles are certified gluten-free.
  • Extra Veggies: Toss in additional vegetables like bok choy, mushrooms, or snap peas for more nutrition.
  • Coconut Milk Addition: Stir in a can of coconut milk for a creamier, richer broth.

Serving Suggestions

  • Side Salad: A light cucumber and carrot salad pairs perfectly, adding crunch and freshness.
  • Drink Pairing: Enjoy with a cold Asian lager or a refreshing iced tea.
  • Presentation: Serve in deep bowls, garnished with extra cilantro and lime wedges for a vibrant look.

FAQs about Savory Satay Beef Noodle Soup

Can I make Savory Satay Beef Noodle Soup ahead of time?

Absolutely! This soup can be made ahead and stored in the fridge for up to three days. Just keep the noodles separate until you’re ready to serve to prevent them from getting mushy.

What can I substitute for beef in this recipe?

If you’re looking for alternatives, chicken or tofu work wonderfully. Both options will absorb the flavors of the broth beautifully, making for a delicious meal.

Is Savory Satay Beef Noodle Soup spicy?

The spice level can be adjusted to your liking. The red curry paste adds a mild heat, but you can always add more or include jalapeños for an extra kick!

Can I freeze the leftovers?

Yes, you can freeze the soup! Just remember to store the noodles separately. When you’re ready to enjoy it again, thaw and reheat on the stove.

What are some good sides to serve with this soup?

A light cucumber salad or spring rolls make excellent sides. They add a refreshing contrast to the rich flavors of the Savory Satay Beef Noodle Soup.

Final Thoughts

Cooking Savory Satay Beef Noodle Soup is more than just preparing a meal; it’s about creating a moment of joy.

The rich aromas wafting through your kitchen will draw everyone in, sparking conversations and laughter.

Each bowl is a warm hug, filled with tender beef, vibrant veggies, and a broth that dances on your taste buds.

Whether you’re sharing it with family or enjoying a quiet night in, this dish brings comfort and satisfaction.

So, roll up your sleeves, embrace the process, and let this delightful soup become a cherished part of your culinary repertoire.

Paul

Savory Satay Beef Noodle Soup: A Flavorful Delight Awaiting!

Savory Satay Beef Noodle Soup is a flavorful and hearty dish that combines tender beef, aromatic spices, and fresh vegetables in a rich broth, served over rice noodles.
Prep Time 15 minutes
Cook Time 25 minutes
Total Time 40 minutes
Servings: 4 servings
Course: Soup
Cuisine: Asian
Calories: 380

Ingredients
  

  • 1 pound beef sirloin thinly sliced
  • 2 tablespoons vegetable oil
  • 1 medium onion chopped
  • 3 cloves garlic minced
  • 1 tablespoon fresh ginger minced
  • 4 cups beef broth
  • 1 tablespoon soy sauce
  • 1 tablespoon peanut butter
  • 1 tablespoon red curry paste
  • 8 ounces rice noodles
  • 1 cup bean sprouts
  • 1 red bell pepper sliced
  • 1 cup fresh cilantro chopped
  • 2 green onions sliced
  • Juice of 1 lime
  • Salt and pepper to taste

Method
 

  1. In a large pot, heat the vegetable oil over medium heat. Add the chopped onion and sauté until translucent, about 5 minutes. Stir in the minced garlic and ginger, cooking for an additional minute until fragrant.
  2. Add the sliced beef to the pot and cook until browned, about 3-4 minutes. Season with salt and pepper.
  3. Pour in the beef broth, soy sauce, peanut butter, and red curry paste. Stir well to combine and bring to a simmer. Let it cook for 10 minutes to allow the flavors to meld.
  4. Meanwhile, cook the rice noodles according to package instructions. Drain and set aside.
  5. Add the sliced red bell pepper and bean sprouts to the soup, cooking for another 3-4 minutes until the vegetables are tender but still crisp.
  6. To serve, divide the cooked rice noodles among bowls. Ladle the hot soup over the noodles. Top with fresh cilantro, green onions, and a squeeze of lime juice.

Notes

  • For a spicier kick, add sliced jalapeños or a dash of sriracha to the soup.
  • Substitute chicken or tofu for the beef for a different protein option.

La Scala Chopped Salad: Discover the Perfect Recipe!

Introduction to La Scala Chopped Salad

When I think of summer gatherings, the vibrant colors and fresh flavors of La Scala Chopped Salad come to mind. This dish is more than just a salad; it’s a celebration of fresh ingredients that come together in a delightful medley.

Perfect for a quick lunch or a light dinner, this salad is a go-to for busy days when you want something satisfying yet healthy.

With its mix of crunchy vegetables, savory salami, and tangy dressing, it’s sure to impress your loved ones. Trust me, once you try it, you’ll be hooked!

Why You’ll Love This La Scala Chopped Salad

This La Scala Chopped Salad is a game-changer for anyone looking to whip up a delicious meal in no time.

With just 15 minutes of prep, you can enjoy a refreshing dish that’s packed with flavor and nutrients.

The combination of crisp veggies, hearty salami, and zesty dressing makes every bite a delight.

Plus, it’s versatile enough to serve as a main dish or a side, making it perfect for any occasion!

Ingredients for La Scala Chopped Salad

Creating the perfect La Scala Chopped Salad starts with fresh, vibrant ingredients. Here’s what you’ll need:

  • Romaine lettuce: This adds a crisp texture and a refreshing crunch.
  • Iceberg lettuce: Known for its mild flavor, it complements the romaine beautifully.
  • Cherry tomatoes: Sweet and juicy, they bring a burst of color and flavor.
  • Cucumber: Adds a cool crunch that balances the richness of the other ingredients.
  • Red onion: A touch of sharpness that enhances the overall taste.
  • Kalamata olives: These bring a briny depth, perfect for an Italian flair.
  • Garbanzo beans: Packed with protein, they add heartiness to the salad.
  • Provolone cheese: Creamy and slightly tangy, it elevates the flavor profile.
  • Salami: Adds a savory, meaty element that makes the salad satisfying.
  • Pepperoncini: For a hint of heat and tang, these little peppers are a must.
  • Italian dressing: The finishing touch that ties all the flavors together.
  • Salt and pepper: Essential for seasoning to taste.

Feel free to get creative! If you want a vegetarian option, simply skip the salami and cheese. You can add extra chickpeas or even some creamy avocado for a delightful twist.

For a burst of freshness, toss in a handful of herbs like parsley or basil.

You’ll find the exact quantities for each ingredient at the bottom of the article, ready for printing!

How to Make La Scala Chopped Salad

Making La Scala Chopped Salad is as easy as pie, and trust me, it’s just as satisfying!

Follow these simple steps, and you’ll have a delicious salad ready in no time.

Step 1: Prepare the Vegetables

Start by washing all your fresh veggies.

Chop the romaine and iceberg lettuce into bite-sized pieces.

Halve the cherry tomatoes and dice the cucumber.

For the red onion, slice it thinly to avoid overpowering the salad.

Finally, slice the Kalamata olives and pepperoncini.

The key here is to keep everything uniform in size for a balanced bite!

Step 2: Combine Ingredients

In a large mixing bowl, toss together the chopped romaine, iceberg lettuce, cherry tomatoes, cucumber, and red onion.

Add in the sliced Kalamata olives, garbanzo beans, diced provolone cheese, salami, and pepperoncini.

Mixing these ingredients creates a colorful and hearty base for your salad.

Don’t be shy—get in there and give it a good toss!

Step 3: Dress the Salad

Now it’s time to bring it all together with the Italian dressing.

Drizzle it generously over the salad.

Using tongs or a large spoon, gently toss everything until the dressing coats all the ingredients evenly.

This step is crucial; it’s where the magic happens!

Step 4: Season and Serve

Before serving, sprinkle a little salt and pepper to taste.

For the best flavor, let the salad sit for about 10 minutes.

This allows the flavors to meld beautifully.

You can serve it chilled or at room temperature, depending on your preference.

Enjoy every bite of this refreshing La Scala Chopped Salad!

Tips for Success

  • Use fresh, high-quality ingredients for the best flavor.
  • Chill your salad bowl beforehand for an extra refreshing touch.
  • Don’t skip the resting time; it enhances the flavors.
  • Experiment with different dressings to find your favorite twist.
  • Make it ahead of time for easy meal prep; just add dressing before serving.

Equipment Needed

  • Large mixing bowl: Essential for combining all your ingredients. A salad spinner can double as a bowl!
  • Cutting board: A sturdy surface for chopping veggies. Any flat surface will do in a pinch.
  • Sharp knife: For precise chopping. A good pair of kitchen scissors can work for herbs.
  • Tongs or large spoon: Perfect for tossing the salad. A spatula can also do the trick!

Variations of La Scala Chopped Salad

  • Vegetarian Delight: Omit the salami and provolone cheese. Add extra garbanzo beans or creamy avocado for a satisfying texture.
  • Protein-Packed: Toss in grilled chicken or shrimp for a heartier meal that’s still light and refreshing.
  • Spicy Kick: Add sliced jalapeños or a dash of hot sauce to the dressing for those who love a little heat.
  • Herb Infusion: Mix in fresh herbs like dill, cilantro, or mint for a burst of flavor that brightens the salad.
  • Grain Boost: Incorporate cooked quinoa or farro for added fiber and a nutty flavor that complements the salad.

Serving Suggestions for La Scala Chopped Salad

  • Pair with crusty garlic bread for a satisfying meal.
  • Serve alongside grilled chicken or fish for a complete dinner.
  • Enjoy with a chilled glass of white wine or sparkling water.
  • Garnish with fresh herbs for a beautiful presentation.
  • Use a colorful platter to showcase the vibrant ingredients.

FAQs about La Scala Chopped Salad

Can I make La Scala Chopped Salad ahead of time?

Absolutely! You can prepare the salad a few hours in advance. Just keep the dressing separate until you’re ready to serve. This way, the veggies stay crisp and fresh.

What can I substitute for salami in this salad?

If you’re looking for alternatives, try diced turkey or chicken for a lighter option. For a vegetarian twist, consider adding extra garbanzo beans or some smoked tofu.

Is La Scala Chopped Salad gluten-free?

Yes, this salad is naturally gluten-free! Just ensure that your Italian dressing is also gluten-free, as some brands may contain gluten.

How can I make this salad more filling?

To amp up the heartiness, add cooked quinoa, farro, or even some roasted vegetables. These additions will make it a satisfying main dish.

What’s the best way to store leftovers?

Store any leftovers in an airtight container in the fridge. It’s best enjoyed within a day or two for optimal freshness. Just remember to add dressing right before eating!

Final Thoughts

Creating La Scala Chopped Salad is more than just preparing a meal; it’s about bringing people together.

Each bite bursts with flavor, reminding me of sunny days spent with family and friends.

This salad is a canvas for creativity, allowing you to customize it to your taste.

Whether you’re enjoying it as a light lunch or serving it at a gathering, it never fails to impress.

So, roll up your sleeves, gather your ingredients, and dive into this refreshing dish.

Trust me, once you experience the joy of La Scala Chopped Salad, it will become a staple in your kitchen!

Paul

La Scala Chopped Salad: Discover the Perfect Recipe!

A refreshing and hearty salad featuring a mix of fresh vegetables, olives, cheese, and salami, perfect for a light meal or side dish.
Prep Time 15 minutes
Total Time 15 minutes
Servings: 4 servings
Course: Salad
Cuisine: Italian
Calories: 250

Ingredients
  

  • 1 cup romaine lettuce chopped
  • 1 cup iceberg lettuce chopped
  • 1/2 cup cherry tomatoes halved
  • 1/2 cup cucumber diced
  • 1/4 cup red onion finely chopped
  • 1/4 cup Kalamata olives pitted and sliced
  • 1/4 cup garbanzo beans drained and rinsed
  • 1/4 cup provolone cheese diced
  • 1/4 cup salami diced
  • 1/4 cup pepperoncini sliced
  • 1/4 cup Italian dressing
  • Salt and pepper to taste

Method
 

  1. In a large bowl, combine the romaine lettuce, iceberg lettuce, cherry tomatoes, cucumber, red onion, Kalamata olives, garbanzo beans, provolone cheese, salami, and pepperoncini.
  2. Drizzle the Italian dressing over the salad and toss gently until all ingredients are well coated.
  3. Season with salt and pepper to taste.
  4. For best flavor, let the salad sit for about 10 minutes before serving to allow the flavors to meld.
  5. Serve chilled or at room temperature.

Notes

  • For a vegetarian option, omit the salami and provolone cheese and add extra chickpeas or avocado for creaminess.
  • Add a handful of fresh herbs like parsley or basil for an extra burst of flavor.

Cottage Cheese Microwave Brownie: Quick, Delicious Treat!

Introduction to Cottage Cheese Microwave Brownie

There’s something magical about a warm brownie, isn’t there? The rich, fudgy texture and the sweet aroma wafting through the kitchen can instantly lift your spirits.

Now, imagine whipping up a delicious Cottage Cheese Microwave Brownie in just a few minutes.

This recipe is a game-changer for those busy days when you crave something sweet but don’t have the time or energy to bake.

With simple ingredients and a quick microwave method, you can impress your loved ones or treat yourself without the fuss.

Let’s dive into this delightful dessert that’s as easy as it is satisfying!

Why You’ll Love This Cottage Cheese Microwave Brownie

This Cottage Cheese Microwave Brownie is a lifesaver for anyone juggling a busy schedule.

In just six and a half minutes, you can indulge in a warm, gooey treat that satisfies your sweet tooth.

The best part? It’s packed with protein from the cottage cheese, making it a guilt-free dessert option.

Quick, easy, and delicious—what’s not to love? This brownie is your new go-to for a sweet escape!

Ingredients for Cottage Cheese Microwave Brownie

Creating a Cottage Cheese Microwave Brownie is simple, and the ingredients are likely already in your kitchen.

Here’s what you’ll need:

  • Cottage Cheese: The star of the show! It adds moisture and protein, making the brownie rich and satisfying.
  • Unsweetened Cocoa Powder: This gives the brownie its deep chocolate flavor without added sugars.
  • Granulated Sugar: A touch of sweetness to balance the cocoa and enhance the overall flavor.
  • All-Purpose Flour: This helps bind the ingredients together, giving the brownie structure.
  • Baking Powder: A little leavening agent to ensure your brownie rises just right.
  • Salt: A pinch of salt enhances the sweetness and rounds out the flavors.
  • Vanilla Extract: This adds a warm, aromatic note that complements the chocolate beautifully.
  • Large Egg: Acts as a binder and adds richness to the brownie.
  • Chocolate Chips (Optional): For those who want an extra chocolatey kick, fold in some chocolate chips for added indulgence.

Feel free to get creative! You can substitute half of the cottage cheese with Greek yogurt for a tangy twist.

Or, if you’re feeling adventurous, add a tablespoon of peanut butter or almond butter for a nutty flavor.

Exact measurements are at the bottom of the article, ready for you to print and use!

How to Make Cottage Cheese Microwave Brownie

Making a Cottage Cheese Microwave Brownie is as easy as pie—well, easier actually!

Follow these simple steps, and you’ll have a delicious treat ready in no time.

Step 1: Combine Ingredients

Start by grabbing a microwave-safe bowl.

Add the cottage cheese, unsweetened cocoa powder, granulated sugar, all-purpose flour, baking powder, salt, vanilla extract, and the large egg.

Mix everything together until it’s smooth and well combined.

You want a nice, thick batter that’s free of lumps.

This is where the magic begins!

Step 2: Add Chocolate Chips (Optional)

If you’re a chocolate lover like me, now’s the time to fold in those chocolate chips.

They’ll melt into the brownie, creating pockets of gooey goodness.

But if you prefer a more classic brownie, feel free to skip this step.

Either way, you’re in for a treat!

Step 3: Prepare for Microwave

Next, pour your brownie batter into a greased microwave-safe mug or small bowl.

Make sure it’s greased well to prevent sticking.

You want to leave a little room at the top, as the brownie will rise while cooking.

Trust me, you don’t want a messy microwave!

Step 4: Microwave the Brownie

Now, it’s time to microwave your creation!

Set your microwave to high and cook the brownie for 1 to 1.5 minutes.

Keep an eye on it—microwave times can vary.

You’re looking for a brownie that’s set but still moist in the center.

A toothpick inserted should come out with a few moist crumbs, not wet batter.

Step 5: Cool and Enjoy

Once it’s done, let your brownie cool for about a minute.

This is the hardest part, I know!

But trust me, it’s worth the wait.

Dig in with a spoon, and enjoy your warm, gooey Cottage Cheese Microwave Brownie.

You’ve earned it!

Tips for Success

  • Use full-fat cottage cheese for a creamier texture.
  • Don’t overmix the batter; a few lumps are okay!
  • Check your microwave’s wattage; adjust cooking time if needed.
  • Let the brownie cool slightly before digging in for the best texture.
  • Experiment with different mix-ins like nuts or dried fruit for variety.

Equipment Needed

  • Microwave-safe bowl: Any bowl that can withstand microwave heat will do.
  • Measuring cups: Essential for accurate ingredient portions; you can use a kitchen scale if you prefer.
  • Spoon or spatula: For mixing the batter; a fork works in a pinch!
  • Microwave: The star of the show, of course!

Variations

  • Nutty Delight: Add a tablespoon of almond or peanut butter for a rich, nutty flavor.
  • Fruit Fusion: Mix in some chopped bananas or berries for a fruity twist.
  • Spicy Kick: Sprinkle in a pinch of cinnamon or cayenne pepper for a surprising flavor boost.
  • Vegan Option: Substitute the egg with a flax egg (1 tablespoon ground flaxseed mixed with 2.5 tablespoons water) and use a plant-based yogurt instead of cottage cheese.
  • Gluten-Free: Swap the all-purpose flour with almond flour or a gluten-free flour blend for a gluten-free treat.

Serving Suggestions

  • Ice Cream: A scoop of vanilla or chocolate ice cream on top makes for a decadent pairing.
  • Fresh Berries: Serve with a side of strawberries or raspberries for a refreshing contrast.
  • Whipped Cream: A dollop of whipped cream adds a light, airy touch.
  • Espresso: Enjoy with a shot of espresso for a delightful coffee break.

FAQs about Cottage Cheese Microwave Brownie

Can I use low-fat cottage cheese for this recipe?

Absolutely! Low-fat cottage cheese works just fine. It may slightly alter the texture, but your brownie will still be delicious.

How do I know when my brownie is done?

Check for doneness by inserting a toothpick into the center. It should come out with a few moist crumbs, not wet batter. If it’s too wet, microwave for an additional 10-15 seconds.

Can I make this brownie in advance?

While it’s best enjoyed fresh, you can prepare the batter ahead of time and store it in the fridge. Just microwave it when you’re ready for a treat!

What can I substitute for the egg?

If you’re looking for an egg substitute, try using a flax egg. Mix 1 tablespoon of ground flaxseed with 2.5 tablespoons of water and let it sit for a few minutes until it thickens.

Is this brownie suitable for a gluten-free diet?

Yes! Simply swap the all-purpose flour with almond flour or a gluten-free flour blend, and you’ll have a tasty gluten-free Cottage Cheese Microwave Brownie.

Final Thoughts

There’s something incredibly satisfying about creating a Cottage Cheese Microwave Brownie in just minutes.

It’s not just a dessert; it’s a moment of joy in a busy day.

The rich chocolate flavor combined with the protein-packed cottage cheese makes it a treat you can feel good about.

Whether you’re indulging after a long day or surprising a friend, this brownie is sure to bring smiles.

So, grab your ingredients and let the microwave work its magic.

You deserve this sweet escape, and trust me, it’s worth every bite!

Paul

Cottage Cheese Microwave Brownie: Quick, Delicious Treat!

A quick and delicious brownie made in the microwave using cottage cheese for a unique twist.
Prep Time 5 minutes
Servings: 1 serving
Course: Dessert
Cuisine: American
Calories: 280

Ingredients
  

  • 1 cup cottage cheese
  • 1/4 cup unsweetened cocoa powder
  • 1/4 cup granulated sugar
  • 1/4 cup all-purpose flour
  • 1/4 teaspoon baking powder
  • 1/4 teaspoon salt
  • 1/2 teaspoon vanilla extract
  • 1 large egg
  • 2 tablespoons chocolate chips optional

Method
 

  1. In a microwave-safe bowl, combine the cottage cheese, cocoa powder, sugar, flour, baking powder, salt, vanilla extract, and egg. Mix well until smooth and fully combined.
  2. If desired, fold in the chocolate chips for added richness.
  3. Pour the mixture into a greased microwave-safe mug or small bowl.
  4. Microwave on high for 1 to 1.5 minutes, checking for doneness. The brownie should be set but still moist in the center.
  5. Let it cool for a minute before enjoying.

Notes

  • For a richer flavor, substitute half of the cottage cheese with Greek yogurt.
  • Add a tablespoon of peanut butter or almond butter to the mixture for a nutty twist.