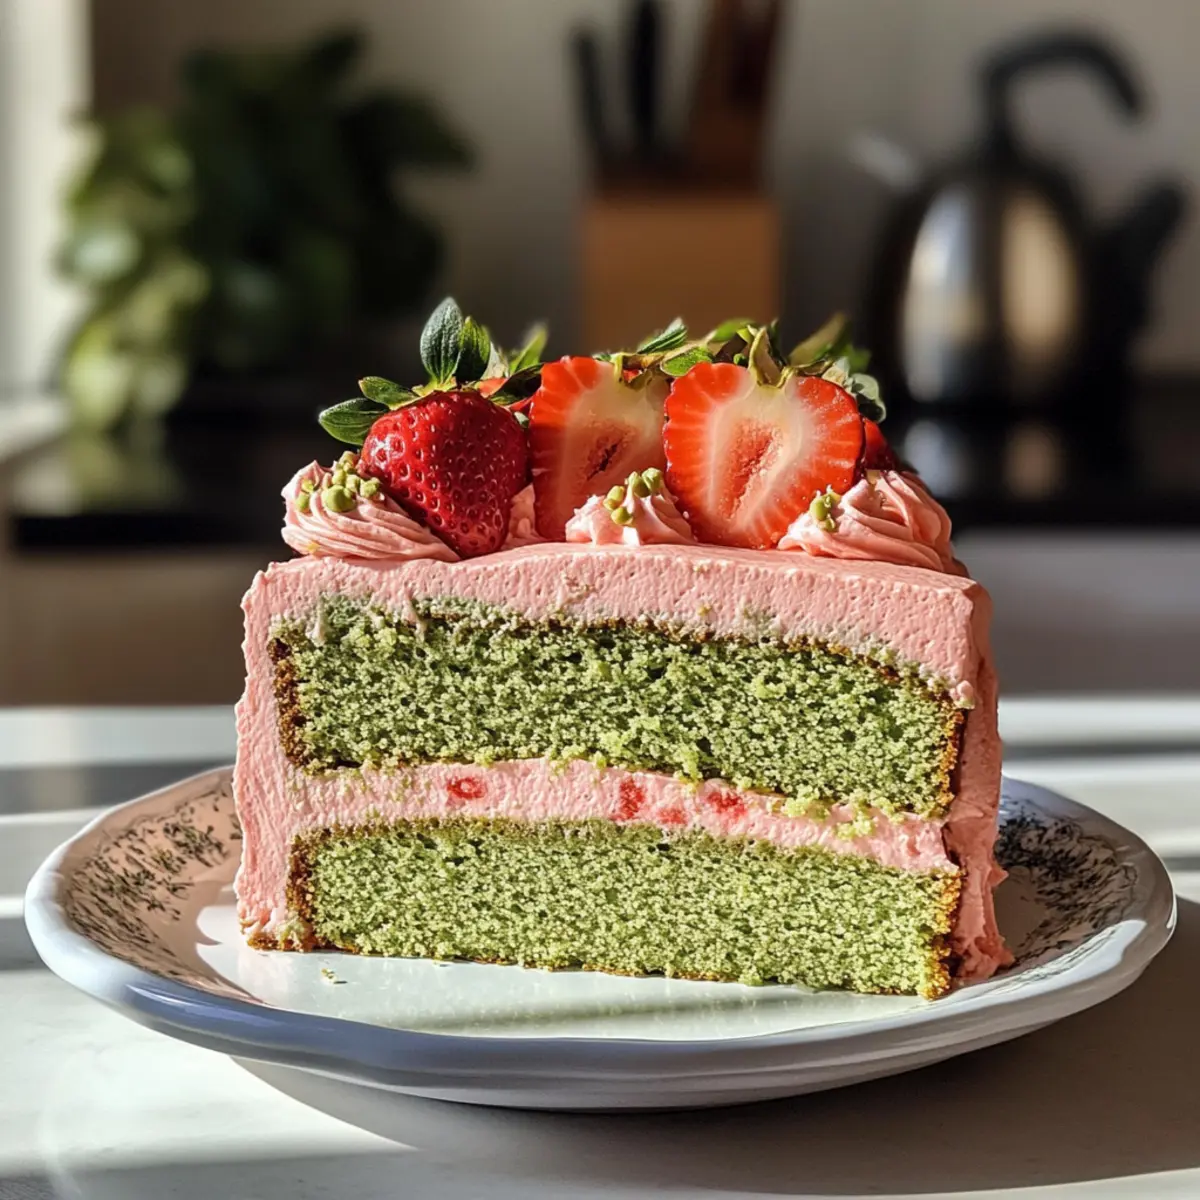
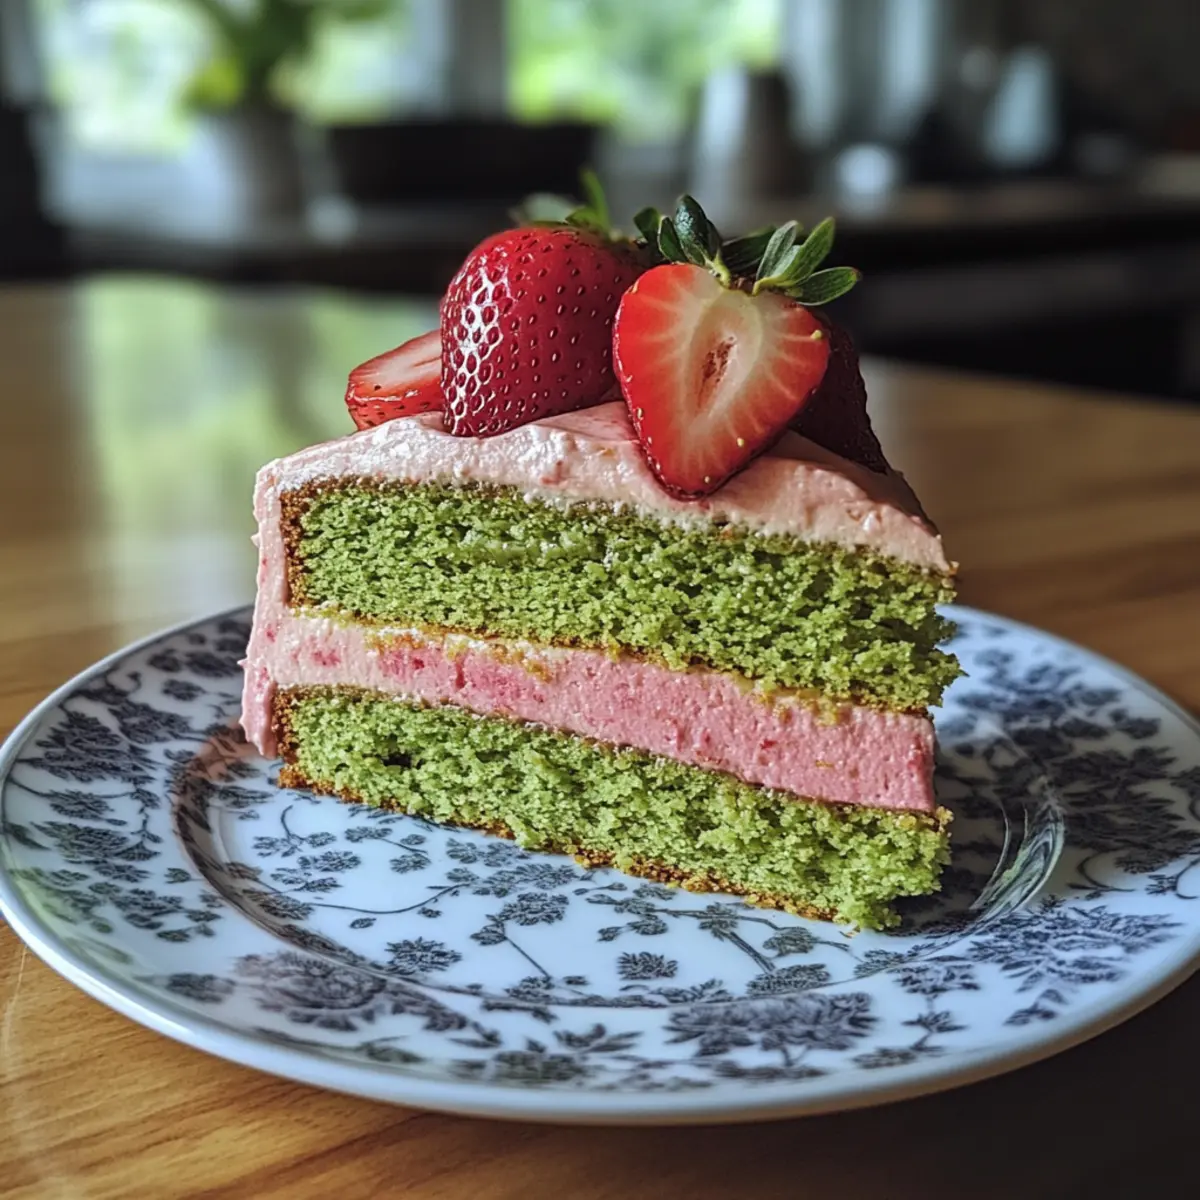
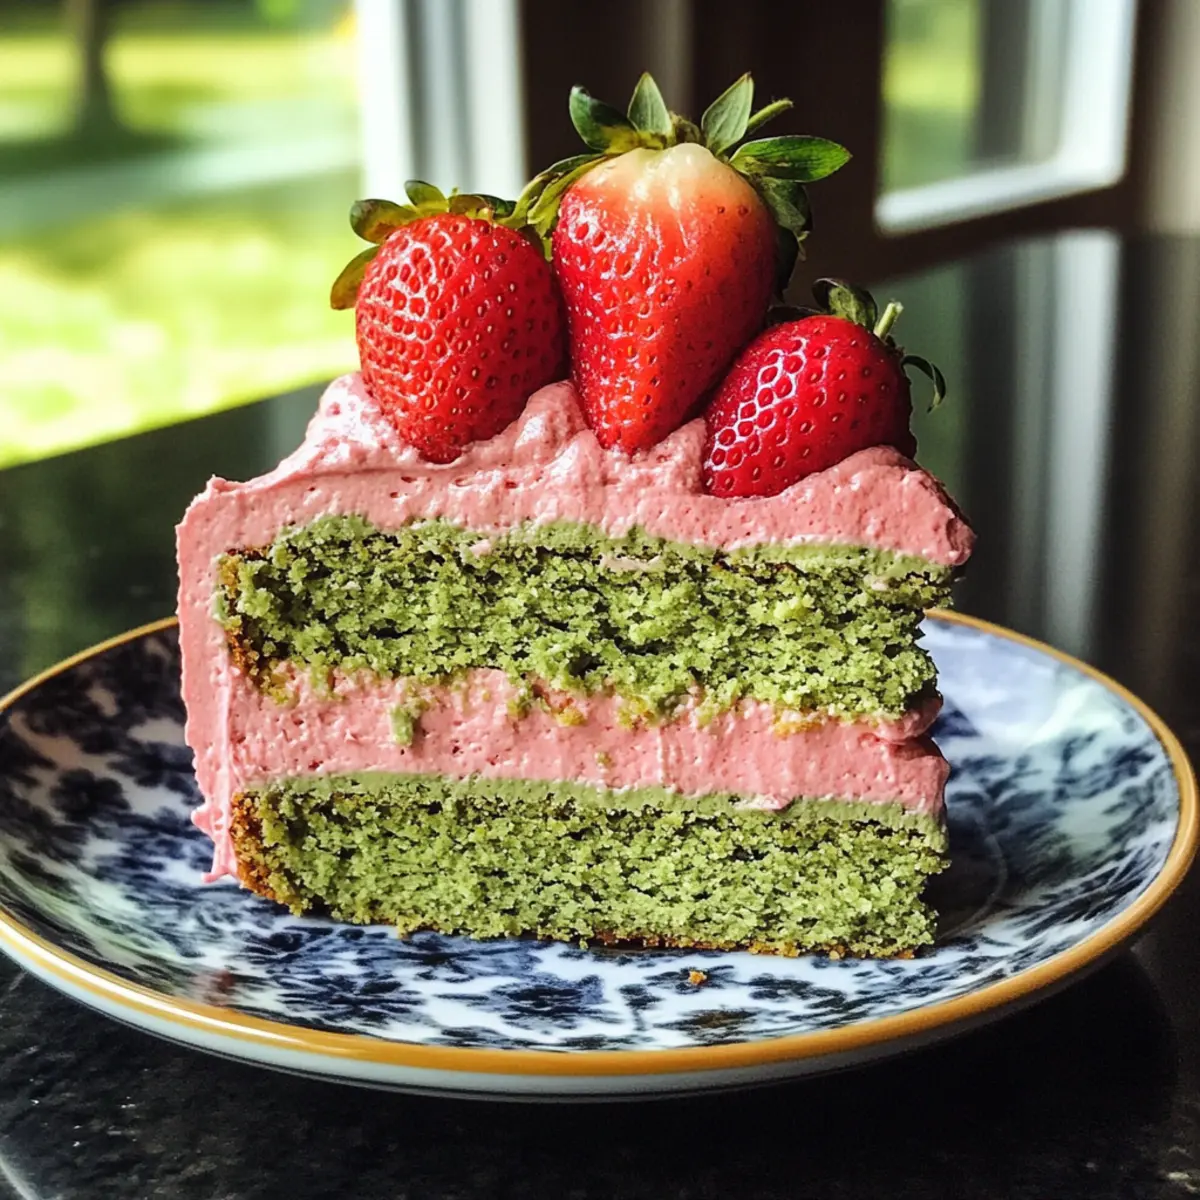
Mini Snowman Pizzas: Fun Family Meal for Winter Days

As the winter chill drapes over us, I found myself searching for a way to bring a little joy and creativity into our cozy kitchen. That’s when I stumbled upon the idea of Mini Snowman Pizzas! These delightful bites not only transform simple pizza-making into a fun family activity but also make lunchtime magical for the little ones. With just a few ingredients, you can whip up these whimsical snowmen that are not only vegetarian but also a guaranteed crowd-pleaser. Plus, they come together quickly, making dinner preparation feel like a joy rather than a chore. How can you resist involving your kids in crafting their own cheesy snowman masterpieces? Let’s dive into the fun of creating these adorable Mini Snowman Pizzas together!

Why Are Mini Snowman Pizzas Fun?

Creativity in the Kitchen: Each Mini Snowman Pizza is a canvas for creativity! Kids will love crafting their snowy masterpieces with various toppings, making mealtime an artistic adventure.

Quick and Easy: With just a handful of ingredients, this recipe is easy enough for busy weeknights. You can even prepare the pizzas in advance, just like our delicious Mini Cheeseburger Breads for a hassle-free dinner!

Family Bonding: This engaging activity brings families together, turning lunch into a fun project you can all enjoy.

Whimsical & Delicious: The combination of melted cheese and playful shapes makes for a delightful dish that kids will devour.

Healthy Options: Customize the pizzas with various toppings to sneak in some veggies, much like our savory Zucchini Potato Mini Pancakes that offer a nutritious twist!

Mini Snowman Pizzas Ingredients

• Dive into making these whimsical Mini Snowman Pizzas with ease!

For the Dough

  • Pizza Dough – This is the base structure for the pizzas; you can substitute with store-bought or whole-wheat dough for convenience.

For the Sauce

  • Pizza Sauce – Adds flavor and moisture; feel free to use homemade or your favorite store-bought varieties.

For the Cheese

  • Mozzarella Cheese – Provides that gooey deliciousness; you can also swap it with cheddar or a dairy-free cheese option for variety.

For the Toppings

  • Olives – Chopped into small pieces for the eyes and buttons; black olives are ideal, but capers can add a zesty twist if you’re feeling adventurous.
  • Carrot – Thinly sliced for the snowman’s nose; bell pepper slices or a small piece of cheese can be cute alternatives.

With these simple ingredients, you’ll be ready to create some adorable Mini Snowman Pizzas that are sure to delight the whole family!

Step‑by‑Step Instructions for Mini Snowman Pizzas

Step 1: Preheat the Oven
Begin by preheating your oven to 400°F (200°C). While the oven warms up, grab a baking sheet and line it with parchment paper. This will help with easy cleanup and prevent sticking. A warm oven is essential to achieve that perfectly golden-brown crust on your Mini Snowman Pizzas.

Step 2: Prepare the Pizza Dough
Roll out your pizza dough on a lightly floured surface until it’s about ¼ inch thick. Using cookie cutters or two round objects, cut out a larger circle for the snowman’s body and a smaller circle for the head. This playful shape is what will bring your Mini Snowman Pizzas to life, so have fun with it!

Step 3: Arrange the Dough on the Baking Sheet
Carefully transfer the cut dough shapes to the lined baking sheet. Position the small circle slightly overlapping the larger one, forming the snowman. This gives your pizzas a delightful and whimsical appearance. Make sure they have enough space between them for even baking.

Step 4: Add Pizza Sauce
Using a spoon, generously spread pizza sauce over each snowman shape, ensuring to cover the dough fully but leaving the edges bare for that crispy crust. The savory sauce will create a flavorful base for your Mini Snowman Pizzas.

Step 5: Sprinkle the Cheese
Now it’s time to layer on the deliciousness! Sprinkle shredded mozzarella cheese evenly over the sauce on each snowman. The cheese will melt beautifully, creating a gooey top that binds the toppings. Don’t be shy; the more, the merrier for these cheesy little snowmen!

Step 6: Decorate Your Snowmen
Get creative by using finely chopped olives for the eyes and buttons, and place a small triangle of carrot for the snowman’s nose. Press the toppings gently into the cheese so they stay put as the Mini Snowman Pizzas bake and the cheese melts. Let your imagination run wild!

Step 7: Bake the Mini Snowman Pizzas
Place the baking sheet in the preheated oven and bake for 10-12 minutes. Keep an eye on the pizzas as they cook; you want to see the cheese melt and bubble while the crust turns a lovely golden brown. This is when your kitchen will fill with mouthwatering aromas!

Step 8: Cool and Serve
Once baked, remove the Mini Snowman Pizzas from the oven and let them cool for a couple of minutes. This brief cooling period will help set the cheese. Transfer them to plates and serve while they’re warm—a joyous treat that both kids and adults will love during the winter!

Mini Snowman Pizzas: Creative Twists

Feel free to personalize these delightful Mini Snowman Pizzas and make them your own with these fun variations!

  • Cheese Swap: Use gouda or a vegan cheese blend for a different flavor profile that still melts wonderfully.

  • Veggie Boost: Add diced bell peppers or spinach for a colorful and nutritious twist that brightens up your snowmen.

  • Meat Lovers: Top with cooked sausage or pepperoni for a savory, hearty addition that will satisfy any meat lover.

  • Spicy Kick: Sprinkle red pepper flakes or jalapeños for an unexpected heat that adds excitement to each bite.

  • Herb Infusion: Mix in dried oregano or basil into the pizza sauce for a fragrant herbal touch that elevates the flavor.

  • Snowy Scene: Surround your snowmen with shredded coconut for a wintery landscape that adds a fun visual element for kids.

  • Mini Sizes: Create a platter of smaller snowman pizzas, similar to our delightful Mini Beef Pies for parties or fun snacks.

  • Gluten-Free: Substitute regular dough with a gluten-free alternative to make these festive pizzas accessible for everyone!

Experiment with these twists, just like our tasty Zucchini Potato Mini Pancakes, and let your creativity shine in the kitchen!

What to Serve with Mini Snowman Pizzas

Delightful meals are all about balance, and these charming snowman pizzas can be complemented perfectly with fresh and hearty sides.

  • Crispy Green Salad: Crisp lettuce and colorful veggies provide a refreshing crunch. Toss in your favorite dressing for an invigorating contrast to the warm pizzas.

  • Vegetable Sticks with Hummus: Crunchy carrots, cucumbers, and bell peppers dipped in creamy hummus create a healthy, satisfying addition that’s fun for kids.

  • Garlic Breadsticks: Golden, buttery breadsticks pair wonderfully with the cheesy pizzas, offering a warm and comforting idea for dipping into extra pizza sauce.

  • Fruit Skewers: Bright, juicy fruit not only adds sweetness to the table but also introduces a playful touch perfect for balancing the savory flavors.

  • Hot Chocolate: A warm mug of hot chocolate, maybe topped with whipped cream or marshmallows, makes for a cozy drink that’ll keep families toasty on winter days.

  • Yogurt Parfaits: Layer creamy yogurt with granola and berries for a delightful dessert that rounds out this whimsical meal with a sprinkle of sweetness.

The combination of these sides with your Mini Snowman Pizzas creates a festive and satisfying winter feast, ensuring everyone leaves the table with smiles!

Make Ahead Options

These Mini Snowman Pizzas are ideal for meal prep, allowing busy home cooks to create a fun meal in advance! You can prepare the pizza dough and cut it into shapes up to 24 hours ahead, storing the cut pieces in an airtight container in the refrigerator. Additionally, you can pre-slice the olives and carrots, keeping them in separate containers to maintain freshness. When you’re ready to bake, simply assemble the pizzas by adding sauce, cheese, and toppings, then bake for 10-12 minutes as directed. This way, your delightful snowman creations are just as delicious, saving you time on busy winter days and making mealtime a breeze!

Expert Tips for Mini Snowman Pizzas

  • Choose the Right Dough: Using fresh pizza dough yields the best texture, but store-bought options work well for convenience. Ensure it’s not too thick for quick baking.

  • Sauce Strategy: Spread the pizza sauce evenly but leave the edges bare to achieve that perfect crispy crust. Too much sauce can lead to soggy pizzas!

  • Cheese Layering: Don’t hold back on the mozzarella! A generous layer creates a delightful gooeyness, which is essential for delicious Mini Snowman Pizzas.

  • Creative Toppings: Encourage kids to personalize their pizzas with toppings like bell peppers or cooked sausage. This fun customization avoids any complaints at the table!

  • Keep an Eye on Baking: Ovens can vary, so check on your pizzas a minute or two early to prevent over-browning and ensure perfectly melted cheese.

How to Store and Freeze Mini Snowman Pizzas

Fridge: Keep any leftovers in an airtight container for up to 3 days. Reheat in the oven for a few minutes to restore that delightful crunch.

Freezer: For longer storage, freeze unbaked Mini Snowman Pizzas on a baking sheet until firm, then transfer to a freezer bag for up to 2 months.

Reheating: To reheat frozen pizzas, bake directly from the freezer at 400°F (200°C) for about 12-15 minutes or until heated through.

Make-Ahead: You can prepare these pizzas in advance, store them unbaked in the fridge for up to 1 day, and enjoy creating the fun as mealtime approaches.

Mini Snowman Pizzas Recipe FAQs

What type of pizza dough should I use?
Absolutely! You can use fresh pizza dough for the best texture, but if you’re short on time, store-bought options work just as well. Whole wheat dough is a great alternative for a healthier twist. Just ensure the dough isn’t too thick for quick baking!

How should I store leftovers?
To keep your Mini Snowman Pizzas fresh, place any leftovers in an airtight container in the fridge, where they will last for up to 3 days. When you’re ready to enjoy them again, reheat in the oven at 350°F (175°C) for about 5-7 minutes to restore that delightful crunch.

Can Mini Snowman Pizzas be frozen?
Yes! For longer storage, freeze unbaked Mini Snowman Pizzas on a baking sheet until they’re firm, then transfer them to a freezer-safe bag for up to 2 months. This way, you can have a fun meal ready to bake whenever the mood strikes!

What if my cheese doesn’t melt properly?
If your cheese isn’t melting well, it could be due to the type of cheese used. Mozzarella generally melts best; if you’re using alternatives, try slicing them thinner or using a mix of mozzarella and the other cheese. Also, keep an eye on your oven temperature; if it’s too low, the melting may take longer than expected.

Are there any dietary considerations with this recipe?
Certainly! The Mini Snowman Pizzas are vegetarian, but if you have any dairy allergies, you can swap out mozzarella for a dairy-free cheese alternative. For those with nut allergies, always check the labels on your pizza sauce and cheese to ensure they’re safe.

Mini Snowman Pizzas

Mini Snowman Pizzas: Fun Family Meal for Winter Days

Mini Snowman Pizzas are a fun, creative, and delicious winter meal for families to enjoy together.
Prep Time 15 minutes
Cook Time 12 minutes
Cooling Time 2 minutes
Total Time 29 minutes
Servings: 4 pizzas
Course: Lunch
Cuisine: Vegetarian
Calories: 250

Ingredients
  

For the Dough
  • 1 batch Pizza Dough Store-bought or whole-wheat dough can be used.
For the Sauce
  • 1 cup Pizza Sauce Homemade or store-bought.
For the Cheese
  • 1 cup Mozzarella Cheese Shredded; can substitute with cheddar or dairy-free.
For the Toppings
  • 1/2 cup Olives Chopped; black olives are ideal.
  • 1 medium Carrot Thinly sliced; can substitute with bell pepper or cheese.

Equipment

  • oven
  • baking sheet
  • parchment paper
  • Rolling Pin
  • Cookie Cutters

Method
 

Step‑by‑Step Instructions
  1. Preheat your oven to 400°F (200°C) and line a baking sheet with parchment paper.
  2. Roll out pizza dough on a lightly floured surface to about ¼ inch thick. Cut out a larger circle for the body and a smaller circle for the head.
  3. Transfer the cut dough shapes to the lined baking sheet, positioning the smaller circle overlapping the larger one.
  4. Spread pizza sauce generously over each dough shape, leaving the edges bare for a crispy crust.
  5. Sprinkle shredded mozzarella cheese evenly over the sauce.
  6. Decorate with chopped olives for eyes and buttons, and add a small triangle of carrot for the nose.
  7. Bake in the preheated oven for 10-12 minutes until the cheese is melted and the crust is golden brown.
  8. Let the Mini Snowman Pizzas cool for a couple of minutes before serving.

Notes

Involve your kids in decorating their snowman pizzas to make mealtime enjoyable.

Christmas Pudding Chocolate Truffles: A Festive Delight!

The aroma of chocolate mingling with spices brings back sweet memories of holiday cheer, doesn’t it? That’s the magic I experienced while creating these Christmas Pudding Chocolate Truffles, a delightful fusion of rich chocolate and festive flavors. With their luscious, creamy ganache center and beautifully decorated exterior, these truffles aren’t just a treat for the taste buds, they’re also a charming gift for friends and family. Not only are they surprisingly quick to whip up, but they make for a stunning display on any holiday table. Whether you choose to infuse them with classic flavors like rum or add a zesty twist with orange, these festive delights are sure to impress. Ready to unwrap the secret to homemade holiday joy? Let’s dive into this delicious adventure together!

Why are these truffles a must-try?

Homemade Goodness: Experience the joy of making festive treats at home with these easy-to-follow Christmas Pudding Chocolate Truffles.
Endless Flavor Possibilities: Tailor them to your taste with variations like mint or orange—your family will love the excitement!
Impressive Presentation: With their charming decorations, these truffles look stunning on any holiday table or as a thoughtful gift.
Quick to Make: Despite their luxurious taste, these truffles are surprisingly quick to whip up, making them perfect for last-minute holiday gatherings.
Crowd-Pleasing Delight: The creamy ganache center and glossy chocolate exterior make these truffles a surefire hit with friends and family. For more delightful treats, don’t miss my Coffee Chocolate Truffles or the mouthwatering Coconut Chocolate Rolls!

Christmas Pudding Chocolate Truffles Ingredients

For the Ganache

  • Milk Chocolate (200g) – Provides a sweet and creamy flavor; feel free to increase to 250g for a sweeter truffle.
  • Dark Chocolate (200g) – Adds depth and richness to the truffles; using chocolate with at least 70% cocoa enhances the flavor.
  • Double Cream (300ml) – Essential for a smooth ganache; this cannot be substituted with evaporated milk, as cream delivers the necessary richness.
  • Unsalted Butter (50g) – Contributes to a glossy and luxurious texture in the chocolate mixture.
  • Sea Salt (1/2 tsp) – Balances sweetness and enhances flavor; can be omitted if you prefer a sweeter truffle.

For the Decoration

  • Ready-to-use White Royal Icing (250g) – Perfect for decorating and mimicking the look of a Christmas pudding; alternatively, use melted white chocolate.
  • Green Fondant – Ideal for creating holly leaves; you can color white fondant to achieve this.
  • Red Fondant – Used for crafting the berries on the holly decoration.

These delightful Christmas Pudding Chocolate Truffles not only taste heavenly but also bring a festive cheer to your holiday celebrations!

Step‑by‑Step Instructions for Christmas Pudding Chocolate Truffles!

Step 1: Heat the Cream
In a medium saucepan, gently heat 300ml of double cream over medium heat until steaming but not boiling, about 5 minutes. Stir occasionally to prevent sticking. Once it’s hot, remove it from the heat, allowing the cream to take on a warm, inviting aroma that signals the beginning of your Christmas Pudding Chocolate Truffles adventure!

Step 2: Create the Ganache
Add 200g of milk chocolate, 200g of dark chocolate, 50g of unsalted butter, and 1/2 teaspoon of sea salt to the warm cream. Stir the mixture briskly until the chocolates and butter melt completely, creating a rich and glossy ganache. This process should take about 2-3 minutes; ensure the mixture is smooth and homogeneous, embracing that decadent chocolate experience.

Step 3: Chill the Mixture
Carefully pour the ganache into a container and cover it with plastic wrap. Refrigerate for 3-4 hours or overnight until the mixture is firm to the touch. You’ll know it’s ready when it holds its shape well, which is crucial for shaping those delightful Christmas Pudding Chocolate Truffles!

Step 4: Shape the Truffles
Once your ganache has set, scoop out portions using a melon baller or two spoons dipped in hot water, which helps to avoid sticking. Roll the scoops into small, round truffles about 1 inch in diameter. Place the shaped truffles on a plate or baking sheet lined with parchment paper. Refrigerate them again for about 30 minutes to firm up their shape.

Step 5: Melt Chocolate for Dipping
While the truffles chill, melt about 200g of additional chocolate (milk or dark based on your preference) in a heatproof bowl over simmering water, or in the microwave, stirring every 30 seconds until glossy and smooth. This step adds an irresistible outer layer to your Christmas Pudding Chocolate Truffles, making them look as good as they taste!

Step 6: Dip the Truffles
Using a fork or dipping tool, carefully dip each chilled truffle into the melted chocolate, ensuring they are fully coated. Allow any excess chocolate to drip off before placing the truffles back on the parchment-lined tray. Let them sit for about 15-20 minutes at room temperature to set completely.

Step 7: Decorate for the Holidays
While the chocolate coating is still setting, roll out green fondant and cut it into holly leaf shapes, then form tiny red berries from red fondant. Once the truffles are fully set, drizzle them with 250g of white royal icing to mimic a traditional Christmas pudding, and finish the festive look by adding the holly leaves and berries on top.

Step 8: Serve or Store
Transfer your beautifully decorated Christmas Pudding Chocolate Truffles to a serving platter or gift box. They can be stored in the refrigerator for up to one week, although they might vanish sooner, given their deliciousness! If left at room temperature, they’ll last for 3-4 days, perfect for sharing or gifting this holiday season.

Make Ahead Options

These Christmas Pudding Chocolate Truffles are perfect for meal prep during the busy holiday season! You can prepare the ganache mixture up to 24 hours in advance by following the initial steps and refrigerating it until firm. This allows the flavors to meld beautifully. Once shaped into truffles, they can be refrigerated for an additional 30 minutes before dipping in chocolate. Finish the decoration just before serving to maintain that fresh, crisp look—simply melt your dipping chocolate and coat the truffles as instructed. By prepping ahead, you ensure delicious, festive treats are ready to impress your guests with minimal last-minute effort!

Christmas Pudding Chocolate Truffles Variations

Customize your Christmas Pudding Chocolate Truffles to suit your festive mood and taste buds!

  • Minty Freshness: Add a few drops of pure peppermint extract to the ganache for a refreshing touch. These truffles will evoke holiday cheer with a delightful minty twist!

  • Zesty Orange: Incorporate orange zest into the ganache for a bright, citrusy flavor that pairs beautifully with the rich chocolates. The burst of orange will wake up your taste buds and add a sunny vibe!

  • Rum Infusion: Swap some cream for a splash of rum to give your ganache a warm, boozy flavor. This classic combination brings a cozy, holiday spirit perfect for festive gatherings.

  • Whisky Enhancement: For a sophisticated twist, add a tablespoon of whisky to the ganache. The deep notes of whisky will elevate your truffles, making them a conversation starter.

  • Nutty Delight: Fold in some crushed nuts like walnuts or hazelnuts into the ganache for added crunch and flavor. This delicious texture complements the creaminess beautifully.

  • Vegan Option: Use dairy-free chocolate and coconut cream to create a vegan version of these truffles. You’ll experience all the richness without compromising on taste!

  • Spicy Twist: Add a pinch of cinnamon or nutmeg to the ganache for a warm, spicy flavor reminiscent of holiday baked goods. This twist brings an unexpected depth that’s sure to surprise!

  • Coconut Bliss: Roll the truffles in shredded coconut instead of cocoa powder for a tropical flair. The coconut adds a lovely chewy texture and visual appeal, making them even more enticing.

These variations are just the beginning! Feel free to mix and match or create your own. If you love exploring flavors, don’t forget to check out my Nutty Chocolate Date cookies or try your hand at the luscious Caramel Milk Pudding for more festive inspiration. Happy cooking!

How to Store and Freeze Christmas Pudding Chocolate Truffles

Fridge: Keep your truffles in the refrigerator for up to one week; wrap them in plastic wrap or store in an airtight container to maintain freshness.

Room Temperature: If serving soon, these decadent Christmas Pudding Chocolate Truffles can be left at room temperature for up to 3-4 days; enjoy them at their best!

Freezer: For longer storage, place truffles in a single layer on a tray to freeze. Once firm, transfer them to an airtight container or freezer bag, where they can last up to 3 months.

Reheating: If chilled, allow the truffles to come to room temperature before serving, which enhances their creamy texture and flavor.

What to Serve with Christmas Pudding Chocolate Truffles?

With these luxurious truffles in hand, it’s time to elevate your festive spread with delightful accompaniments that will please every palate.

  • Rich Hot Chocolate: Perfectly complement your truffles with a warm cup of rich hot chocolate topped with whipped cream for a cozy touch.

  • Classic Eggnog: The creamy and spiced flavor of eggnog balances beautifully with the sweetness of your truffles, making it an ideal festive pairing. This drink warms the heart and heightens holiday cheer!

  • Candied Nuts: A mix of sweet and salty, candied nuts add a crunchy texture that contrasts delightfully with the soft truffle filling. They’re simple to make and add a festive flair to the table.

  • Gingerbread Cookies: The spiced flavor of gingerbread cookies harmonizes wonderfully with the rich chocolate truffles, evoking nostalgic holiday vibes. It’s a combination that feels like wrapping up in a cozy blanket!

  • Fruitcake Slices: Offering a moist, fruity balance, slices of fruitcake serve as a traditional and festive side that will perfectly match the richness of your chocolate truffles.

  • Holiday Fruit Salad: A light and refreshing fruit salad, bursting with seasonal favorites, will cleanse the palate between bites of chocolate indulgence. Enjoy the sweet pops of flavor from pomegranate seeds and citrus slices!

  • Peppermint Tea: For a refreshing beverage option, serve peppermint tea that lightens up the rich flavors of the truffles, creating a delightful taste experience.

  • Sparkling Wine: Celebrate with a glass of sparkling wine or prosecco that elevates the festive atmosphere while pairing delightfully with the sweetness of your Christmas Pudding Chocolate Truffles.

Expert Tips for Christmas Pudding Chocolate Truffles

  • Temperature Matters: Ensure the cream isn’t boiling when mixing with chocolate; overheating can cause the mixture to separate.
  • Stay Clean: Use gloves while shaping the truffles; this keeps your hands clean and avoids melting the chocolate too quickly.
  • Chill Before Dipping: If the truffles soften while being dipped, refrigerate them again briefly to maintain their shape during decoration.
  • Dipping Tools: Consider using a fork or cocktail sticks to dip the truffles in chocolate; this makes the process easier and cleaner.
  • Flavor Variation: Don’t hesitate to infuse your ganache with flavors like mint or orange; it’s a delightful twist on the classic Christmas Pudding Chocolate Truffles!

Christmas Pudding Chocolate Truffles Recipe FAQs

What type of chocolate should I use for the best flavor?
For a rich and delicious experience, use high-quality chocolate. I recommend using at least 70% cocoa dark chocolate to bring depth and richness to your truffles. For a sweeter option, a combination of milk chocolate (200g) and dark chocolate (200g) creates a delightful balance. Don’t hesitate to experiment with your favorite brands!

How should I store my Christmas Pudding Chocolate Truffles?
Store your truffles in the refrigerator for up to one week. Make sure to wrap them in plastic wrap or keep them in an airtight container to preserve their freshness and prevent them from absorbing other odors. If you intend to keep them longer, you can also store them at room temperature for up to 3-4 days.

Can I freeze Christmas Pudding Chocolate Truffles for later?
Absolutely! To freeze your truffles, place them in a single layer on a tray and freeze until firm, which usually takes about an hour. Once solid, transfer them to an airtight container or freezer bag and store them in the freezer for up to 3 months. When you’re ready to enjoy them, let them come to room temperature before serving for that luscious, creamy texture.

What can I do if my ganache is too runny?
If your ganache turns out too runny, don’t worry! You can refrigerate it for another hour or so to help it firm up. If it still isn’t the right consistency, consider melting a bit more chocolate and mixing it in, as this will help thicken the ganache. Just be sure to mix it well until smooth.

Are there any dietary considerations when making these truffles?
Yes! This recipe includes dairy and chocolate, so be mindful of guests with allergies to these ingredients. You can substitute the double cream with a non-dairy cream alternative to make it dairy-free. Also, ensure that any chocolate used is free from allergens if serving to guests with specific dietary needs. Always check the labels on ingredients to ensure they meet your guests’ dietary restrictions.

Can I customize the flavor of the ganache?
The answer is a resounding yes! You can infuse your ganache with various flavors such as peppermint extract for mint truffles or orange zest for a fruity twist. Just add a teaspoon of your chosen flavoring during the ganache-making process and mix well. Experimentation is the spice of life when it comes to these fun Christmas Pudding Chocolate Truffles!

Christmas Pudding Chocolate Truffles!

Christmas Pudding Chocolate Truffles: A Festive Delight!

Experience the joy of Christmas Pudding Chocolate Truffles, a delightful fusion of rich chocolate and festive flavors.
Prep Time 15 minutes
Cook Time 5 minutes
Chilling Time 4 hours
Total Time 4 hours 15 minutes
Servings: 20 truffles
Course: Dessert
Cuisine: Christmas
Calories: 150

Ingredients
  

For the Ganache
  • 200 g Milk Chocolate Provides a sweet and creamy flavor; feel free to increase to 250g for a sweeter truffle.
  • 200 g Dark Chocolate Adds depth and richness to the truffles; using chocolate with at least 70% cocoa enhances the flavor.
  • 300 ml Double Cream Essential for a smooth ganache; cannot be substituted with evaporated milk.
  • 50 g Unsalted Butter Contributes to a glossy and luxurious texture.
  • 0.5 tsp Sea Salt Balances sweetness and enhances flavor; can be omitted if a sweeter truffle is preferred.
For the Decoration
  • 250 g Ready-to-use White Royal Icing Perfect for decorating to mimic a Christmas pudding.
  • Green Fondant Ideal for creating holly leaves; can color white fondant to achieve this.
  • Red Fondant Used for crafting the berries on the holly decoration.

Equipment

  • Medium saucepan
  • mixing bowl
  • Fork or dipping tool
  • parchment paper
  • Melon baller or spoons

Method
 

Step-by-Step Instructions
  1. Heat the cream in a medium saucepan over medium heat until steaming but not boiling, about 5 minutes.
  2. Add milk chocolate, dark chocolate, unsalted butter, and sea salt to warm cream. Stir until melted and smooth, about 2-3 minutes.
  3. Pour ganache into a container and cover with plastic wrap. Refrigerate for 3-4 hours or overnight until firm.
  4. Scoop portions of ganache and roll into 1-inch truffles. Refrigerate on a parchment-lined tray for 30 minutes.
  5. Melt additional chocolate in a heatproof bowl until glossy. This adds an outer layer to the truffles.
  6. Dip each truffle in melted chocolate and allow excess to drip off before placing back on the tray. Let sit for 15-20 minutes.
  7. While chocolate is setting, cut out holly leaves from green fondant and form berries from red fondant. Drizzle with white icing and decorate.
  8. Transfer decorated truffles to a serving platter or gift box. Store in the refrigerator for up to a week.

Notes

Optional flavor variations like mint or orange can be added to the ganache.

Cranberry Turkey Grilled Cheese That Will Wow Your Taste Buds

As the last remnants of Thanksgiving linger in the fridge, I find myself on a mission: to elevate those leftovers into something extraordinary. Enter the cozy wonder that is the Melt-in-Your-Mouth Cranberry Turkey Grilled Cheese! This delightful sandwich transforms ordinary turkey and cranberry sauce into a quick meal that’s anything but boring. Each bite offers a comforting blend of creamy provolone and tangy cranberries, a perfect antidote to fast food cravings. Whether you’re a busy home chef or just someone looking for a hearty snack, this recipe is a crowd-pleaser that comes together in no time. Want to discover a delicious way to beat the post-holiday blues? Let’s dive into this comforting creation!

Why is this sandwich a must-try?

Ridiculously Easy: You don’t need culinary skills to whip this up; just a skillet and a few ingredients transform leftovers into magic.

Flavor Explosion: The contrast of creamy provolone with tart cranberry sauce offers a delightful twist on classic grilled cheese.

Quick Meal Solution: Perfect for busy days, this sandwich can be made in under 15 minutes, making it an excellent option when time is of the essence.

Crowd-Pleasing Delight: Whether it’s lunch or dinner, this sandwich satisfies even the pickiest eaters. Pair it with a warm bowl of soup or a light salad for a full meal!

Versatile Options: Feel free to swap turkey for chicken or ham, or add herbs for an extra layer of flavor. Check out my recipes for Savory Cheese Egg or Savory Vegetable Cheese for more ideas on using leftover ingredients creatively!

Cranberry Turkey Grilled Cheese Ingredients

For the Sandwich

  • Bread – Choose your favorite type like white or whole grain for a sturdy base.
  • Provolone Cheese – This creamy cheese melts beautifully, enhancing the overall flavor; feel free to swap it for white cheddar for a sharper taste.
  • Turkey – Leftover roasted turkey is ideal for adding heartiness and protein to your sandwich.
  • Cranberry Sauce – Use homemade or store-bought; adjust the amount based on your desired sweetness for this cranberry turkey grilled cheese.
  • Butter or Mayonnaise – Both are great for grilling; using mayonnaise lends a rich flavor to the crispy bread.

Optional Add-Ons

  • Fresh Herbs – Try adding thyme or rosemary for a fresh, aromatic twist to your sandwich.
  • Alternative Cheeses – Experiment with gouda or mozzarella for a unique cheese experience!

Step‑by‑Step Instructions for cranberry turkey grilled cheese

Step 1: Prepare the Skillet
Begin your culinary adventure by heating a non-stick skillet over medium heat, allowing it to warm for about 2-3 minutes. This ensures even cooking and a crispy crust on your sandwich. While the skillet heats, gather all your ingredients, including your slices of bread, provolone cheese, turkey, and cranberry sauce, so you’re ready to assemble the cranberry turkey grilled cheese.

Step 2: Butter or Mayo the Bread
Take two slices of your chosen bread and spread a generous layer of butter or mayonnaise on one side of each slice. The butter or mayonnaise should coat the bread evenly, creating a golden, crispy exterior when grilled. This step is crucial for achieving that satisfying crunch in your delightful cranberry turkey grilled cheese.

Step 3: Assemble the Sandwich
With your skillet ready, place one slice of bread in the pan, butter-side down. Layer a slice of provolone cheese on top, followed by a hearty amount of turkey, and then a dollop of cranberry sauce. Finish with another slice of provolone to ensure a melty center. Top with the second slice of bread, butter-side up, ready to sizzle away.

Step 4: Grill the First Side
Cook the sandwich for approximately 3-4 minutes, or until the bottom slice of bread is golden brown and crispy. Gently press down with a spatula to help the cheese melt evenly. Keep an eye on the sandwich to avoid burning, and let the enticing aroma of the cranberry turkey grilled cheese fill your kitchen.

Step 5: Flip and Cook the Other Side
Carefully flip the sandwich using a spatula, allowing the other side to cook for another 3-4 minutes. As it grills, the provolone cheese will begin to melt, combining beautifully with the turkey and cranberry sauce. Look for the bread to turn a luscious golden brown, indicating that it’s ready to be removed from the heat.

Step 6: Serve and Enjoy
Once both sides are perfectly toasted and the cheese is melted, transfer your sandwich onto a cutting board. Let it cool for a minute before slicing it in half, revealing the gooey goodness inside. Serve warm to enjoy the full flavor experience of your cranberry turkey grilled cheese, and savor every delightful bite!

Make Ahead Options

These Cranberry Turkey Grilled Cheese sandwiches are a fantastic option for meal prep, saving you precious time on busy weeknights! You can prepare the sandwich components—sliced turkey and cranberry sauce—up to 3 days in advance to ensure they’re ready to go when you need them. For the best results, store the turkey and cranberry sauce separately in airtight containers in the refrigerator to maintain freshness. When you’re ready to enjoy this delicious grilled cheese, simply assemble and grill the sandwich as per the recipe instructions. You’ll be treated to a flavorful, melt-in-your-mouth experience in no time, making weeknight dinners a breeze!

What to Serve With Cranberry Turkey Grilled Cheese

The perfect meal deserves equally delightful companions to elevate your dining experience!

  • Tomato Basil Soup: The warmth and acidity of tomato soup cut through the richness of the sandwich, creating a comforting duo that warms the soul.

  • Mixed Green Salad: A crisp salad with a zesty vinaigrette introduces a fresh contrast to the creamy sandwich, balancing the flavors beautifully.

  • Sweet Potato Fries: The natural sweetness and crispy texture of sweet potato fries add a fun twist, satisfying that crunch factor while complementing the sandwich’s sweetness.

  • Apple Slices with Honey: Serve alongside refreshing apple slices drizzled with honey for a light, sweet crunch that harmonizes with the cranberry sauce.

  • Mulled Apple Cider: A warm mug of spiced apple cider enhances the festive feel of the meal, echoing the flavors of fall and Thanksgiving.

  • Holiday Fruit Salad: A medley of fruits like oranges and pomegranate adds brightness to the plate, while the tanginess pairs surprisingly well with the grilled cheese.

  • Pumpkin Spice Latte: For a warm drink option, a pumpkin spice latte will cozy up your meal, complementing those autumnal flavors perfectly.

Indulging in these pairings will create a memorable meal that celebrates comfort, flavor, and the joys of home cooking!

Storage Tips for Cranberry Turkey Grilled Cheese

Fridge: Store any leftover cranberry turkey grilled cheese in an airtight container for up to 2 days. This helps maintain the flavor and texture of the sandwich.

Freezer: For longer storage, wrap the sandwich tightly in plastic wrap and aluminum foil, then freeze for up to 2 months. This way, you can enjoy it later on!

Reheating: To reheat, place the sandwich in a skillet over medium heat for about 5 minutes per side, or until it’s warmed through and the cheese has melted again. This keeps the bread crispy while reviving that delicious flavor.

Serving Suggestions: Consider adding a side of hot soup or a fresh salad when serving leftovers for a quick and satisfying meal option.

Expert Tips for Cranberry Turkey Grilled Cheese

  • Choose Fresh Bread: Use freshly baked bread for the best texture. Stale bread can lead to a soggy sandwich, so select a sturdy option!

  • Perfectly Melted Cheese: Opt for block provolone cheese instead of pre-sliced. This ensures a creamier, gooey melt in your cranberry turkey grilled cheese.

  • Mind the Heat: Keep the skillet at medium heat. Too high can burn the bread while leaving the cheese unmelted.

  • Layer Wisely: Don’t skimp on turkey or cranberry sauce! Achieving the right balance is crucial for that delicious flavor in every bite.

  • Experiment with Cheese: Feel free to try different cheeses. Gouda or mozzarella can add a unique twist to your cranberry turkey grilled cheese.

Cranberry Turkey Grilled Cheese Variations

Feel free to explore these fun twists on your grilled cheese adventure; they promise to surprise and delight your taste buds!

  • Chicken or Ham: Swap the turkey for shredded chicken or sliced ham to create a different flavor profile while maintaining that cozy essence.

  • Cheese Shuffle: Use gouda for a smoky twist or mozzarella for extra creaminess—the melting possibilities are endless!

  • Herb Infusion: Add fresh thyme or rosemary to layer in a delightful aroma that elevates each bite. A little goes a long way!

  • Veggie Boost: Toss in some sautéed spinach or roasted red peppers for a nutritious touch, adding both flavor and color.

  • Spicy Kick: Add sliced jalapeños or a dash of hot sauce for those who crave a fiery kick in their grilled cheese.

  • Sweet Tooth: Drizzle some honey or maple syrup on the inside before grilling for a sweet contrast against the savory elements.

  • Luxury Upgrade: Try a slice of brie for a rich and creamy upgrade that melts beautifully and adds a decadent touch.

  • Bready Options: Experiment with sourdough, rye, or even a buttery croissant to change the sandwich’s character entirely—fluffy or crunchy, each bread offers a unique experience!

And if you’re looking for more sandwich inspiration, check out my recipe for Savory Cheese Egg or give the delightful Savory Vegetable Cheese a try!

Cranberry Turkey Grilled Cheese Recipe FAQs

What type of bread is best for my cranberry turkey grilled cheese?
Absolutely! Choosing the right bread can make all the difference. Freshly baked bread is ideal as it provides both structure and flavor. I recommend using white or whole grain for a sturdy base, but any bread you enjoy will work. Just avoid stale bread, as it can lead to a soggy sandwich.

How should I store leftovers from my cranberry turkey grilled cheese?
Very! To keep your sandwich fresh, store any leftovers in an airtight container in the fridge for up to 2 days. If you want to save it for a longer time, wrap the sandwich tightly in plastic wrap and aluminum foil before placing it in the freezer, where it can last for up to 2 months.

How do I reheat a frozen cranberry turkey grilled cheese?
Certainly! To reheat your frozen sandwich, you can do the following:

  1. Remove the sandwich from the freezer and unwrap it.
  2. Heat a skillet over medium heat.
  3. Place the sandwich in the skillet and cook for about 5 minutes on each side, or until warmed through and the cheese has melted again. This method helps maintain that lovely crispy texture!

Can I customize the ingredients in my cranberry turkey grilled cheese?
Absolutely! This sandwich is versatile and completely adaptable. You can substitute turkey with chicken or ham for a different flavor profile. Additionally, feel free to try other cheeses like gouda or mozzarella to elevate your grilled cheese experience. Adding fresh herbs like thyme or rosemary can amplify the aromatic quality and make it even more special!

What if I have allergies or dietary restrictions?
Very! If you or someone at your table has allergies, you might want to avoid certain ingredients in your cranberry turkey grilled cheese. For example, if dairy is a concern, consider using dairy-free cheese alternatives that melt well. Strengthening the flavors with additional herbs or spices can also help compensate for these adjustments. Always feel free to adjust the recipe according to your dietary needs!

How can I tell if my cheese is melting properly while cooking?
Certainly! It’s important to monitor the cooking heat to achieve the perfect melt. If the cheese isn’t melting and the bread is browning too quickly, you might need to lower the heat a little. Look for a soft, gooey texture peeking out between the slices, and if the bread is golden brown on both sides, you know you’re in for a delightful treat!

cranberry turkey grilled cheese

Cranberry Turkey Grilled Cheese That Will Wow Your Taste Buds

Delicious cranberry turkey grilled cheese sandwich, transforming Thanksgiving leftovers into a quick, satisfying meal.
Prep Time 10 minutes
Cook Time 5 minutes
Total Time 15 minutes
Servings: 1 sandwiches
Course: Lunch
Cuisine: American
Calories: 450

Ingredients
  

For the Sandwich
  • 2 slices Bread Choose your favorite type like white or whole grain.
  • 2 slices Provolone Cheese Can swap for white cheddar if desired.
  • 1 cup Turkey Leftover roasted turkey ideal for heartiness.
  • 1 4 Cranberry Sauce Use homemade or store-bought; adjust for sweetness.
  • 1 tbsp Butter or Mayonnaise For grilling; mayonnaise adds richness.
Optional Add-Ons
  • 1 tbsp Fresh Herbs Thyme or rosemary for aromatic twist.
  • 2 slices Alternative Cheeses Gouda or mozzarella for unique flavor.

Equipment

  • Non-Stick Skillet

Method
 

Step-by-Step Instructions
  1. Prepare a non-stick skillet by heating it over medium heat for 2-3 minutes.
  2. Spread butter or mayonnaise on one side of each bread slice.
  3. Assemble by placing one slice butter-side down, topping with provolone, turkey, cranberry sauce, and another provolone. Cap with the second slice of bread, butter-side up.
  4. Grill for 3-4 minutes until the bottom is golden brown.
  5. Flip the sandwich and cook the other side for 3-4 minutes until golden brown.
  6. Slice the sandwich in half and serve warm.

Notes

Use fresh bread for best texture. Experiment with different cheeses for unique flavors.

Grinch Mini Cheesecakes: Festive Treats to Delight Everyone

Every whisk and fold in the kitchen brings back a sweet memory for me, especially around the holidays. This year, I found myself dreaming of festive treats, and that’s when the idea for Grinch Mini Cheesecakes blossomed. These delightful bites, with their vibrant neon green colors and luscious cream cheese filling, can transform any holiday gathering into a whimsical celebration! Not only are they a total showstopper for both kids and adults alike, but they also come together quickly, so you can spend less time in the kitchen and more time creating cherished memories. Are you ready to spread some festive cheer with these adorable cheesecakes? Let’s dive into the delightful details!

Why Are Grinch Mini Cheesecakes a Must-Try?

Unique Twist: These Grinch Mini Cheesecakes offer a whimsical and fun approach to a classic dessert, sure to bring smiles all around.

Quick & Simple: With straightforward steps, you’ll whip up these delightful treats in no time, keeping your holiday preparations stress-free.

Kid-Friendly Fun: Children will love the bright green color and can even help in the kitchen, making it a wonderful family activity.

Versatile Touch: Feel free to customize with flavors like peppermint or different crusts to cater to your taste.

Crowd-Pleasing Delight: Ideal for gatherings, these mini cheesecakes are sure to leave your guests asking for the secret recipe!

Make sure to check out some of our other mini recipes like Mini Pancakes and Mini Beef Pies for more fun ideas!

Grinch Mini Cheesecake Ingredients

For the Cheesecake Filling

  • Cream Cheese (2 x 8 oz) – Ensure it’s softened for a smooth, creamy texture that’s perfect for your Grinch Mini Cheesecakes.
  • Sugar (1/2 cup) – Adds just the right amount of sweetness; feel free to substitute with a sugar alternative if you’re looking for a healthier option.
  • Eggs (2) – These act as the essential binding agents; using room temperature eggs will help achieve a silky filling.
  • Vanilla Extract (1 tsp) – Provides a warm, aromatic flavor that enhances the overall richness of the cheesecake.
  • Neon Green Food Coloring – The star ingredient for that festive Grinch vibe—adjust to your preferred intensity for a truly eye-catching treat.

For the Crust

  • Oreo Crumbs (1 cup) – Delivers a deliciously chocolatey base that complements the creamy filling perfectly; gluten-free cookies can be substituted for a gluten-free option.
  • Butter, Melted (2 1/2 tbsp) – Helps bind the crust ingredients while adding a rich flavor; consider using non-dairy butter if you’re making this vegan!

With these ingredients on hand, you’re just moments away from creating the most delightful Grinch Mini Cheesecakes, guaranteed to impress family and friends!

Step-by-Step Instructions for Grinch Mini Cheesecakes

Step 1: Preheat the Oven
Begin by preheating your oven to 350°F (175°C) and lining a cupcake pan with festive cupcake liners. This simple preparation ensures your Grinch Mini Cheesecakes will bake evenly and release easily once done, saving you from any sticking mishaps.

Step 2: Create the Crust
In a food processor, pulse about 10-11 Oreo cookies until they form about 1 cup of fine crumbs. Transfer these crumbs to a bowl and mix in 2 1/2 tablespoons of melted butter until everything is well combined. The mixture should hold together when pressed, readying it for the next step.

Step 3: Form the Crust
Divide the crumb mixture evenly among the cupcake liners, packing down firmly with your fingers or the bottom of a small glass. This creates a solid foundation for your Grinch Mini Cheesecakes. You should see an even layer that encapsulates the bottom of each liner, holding up beautifully during baking.

Step 4: Mix the Filling
In a medium mixing bowl, combine the softened cream cheese and 1/2 cup of sugar. Beat them together with a hand mixer until smooth and creamy, ensuring there are no lumps. This rich filling brings the essence of the holidays to life in your mini cheesecakes, so take your time to blend it thoroughly.

Step 5: Add Eggs and Flavor
Add 2 room temperature eggs and 1 teaspoon of vanilla extract to the cream cheese mixture. Continue to beat the mixture until completely incorporated and smooth. This stage is crucial as it binds the cheesecakes while enhancing their flavor profile, leading to a delightful overall taste.

Step 6: Color the Filling
Now, add drops of neon green food coloring to the cheesecake filling, mixing until your desired vibrancy is achieved. This step is what transforms your ordinary cheesecake into the whimsical Grinch Mini Cheesecakes that will be the star of any holiday spread!

Step 7: Fill the Crusts
Spoon approximately 1/4 cup of the vibrant cheesecake filling into each prepared crust, filling them evenly. Take a moment to smooth the tops with the back of a spoon or an offset spatula, ensuring that they’re ready to bake to perfection while looking beautiful for presentation.

Step 8: Bake and Cool
Bake the mini cheesecakes in the preheated oven for 15-17 minutes. The centers should be slightly jiggly when you take them out, signaling they will firm up as they cool. Let them sit in the pan until they reach room temperature, which enhances their flavor further.

Step 9: Chill Before Serving
Place the cooled mini cheesecakes in the refrigerator and let them chill for at least 2 hours, allowing them to set properly. This step is essential for achieving that creamy texture, ensuring that your Grinch Mini Cheesecakes are a hit when served at your holiday celebrations.

Step 10: Add the Finishing Touches
Before serving, top these delightful mini cheesecakes with whipped cream and festive sprinkles if desired. This final touch adds a celebratory flair to your Grinch Mini Cheesecakes, making them even more appealing to both kids and adults alike!

How to Store and Freeze Grinch Mini Cheesecakes

Fridge: Store your Grinch Mini Cheesecakes in an airtight container for up to 3 days. This keeps them fresh and ready for those spontaneous holiday dessert cravings!

Freezer: If you want to prepare these ahead of time, freeze them for up to 3 months. Wrap each cheesecake tightly in plastic wrap before placing them in a freezer-safe container.

Thawing: To enjoy frozen mini cheesecakes, thaw them in the refrigerator overnight. This gentle thawing method helps retain their creamy texture.

Reheating: While typically served chilled, if you prefer a warm twist, you can briefly pop them in the microwave for about 10-15 seconds—just be cautious not to overheat!

Grinch Mini Cheesecakes: Personalize Your Delight

Feel free to put your own spin on these festive treats and make them perfect for your gathering.

  • Chocolate Cheesecake: Add 2 tablespoons of cocoa powder to the filling for a delightful chocolatey experience. The combination of chocolate and bright green will be a hit among guests of all ages!

  • Graham Cracker Crust: Swap out Oreo crumbs for crushed graham crackers for a different flavor profile. This light and buttery crust will offer a subtle sweetness that contrasts beautifully with the rich cheesecake.

  • Minty Fresh Twist: Mix in 1/2 teaspoon of peppermint extract to your filling for a refreshing burst of mint. This seasonal addition elevates the holiday spirit and pairs wonderfully with the creamy base.

  • Fruit Toppings: Top the chilled mini cheesecakes with festive fruits like raspberries or strawberries. Not only do they add a pop of color, but they also offer a delightful tartness that complements the sweetness.

  • Vegan Alternative: Substitute cream cheese with a vegan cream alternative and use flax eggs for a delicious plant-based option. You won’t lose the creaminess, and everyone can indulge!

  • Crunchy Toppings: Sprinkle crushed nuts or toffee bits on top for an extra crunch. It’s a great way to add texture and surprise guests with delightful variations in every bite!

  • Different Colored Themes: If you’re feeling adventurous, use different food colorings. Create rainbow mini cheesecakes with layers of color for a vibrant holiday treat that stands out on any dessert table.

  • Decadent Drizzle: Drizzle melted chocolate or caramel sauce over the top just before serving. This sweet finish can elevate the dessert and provide an elegant touch at your holiday parties.

These Grinch Mini Cheesecakes are versatile enough to fit any festive occasion! For more fun inspirations, check out our delightful Mini Cheeseburger Breads and share the joy of cooking with loved ones!

What to Serve with Grinch Mini Cheesecakes

Delight your guests with a festive meal that elevates the joyful spirit of the holidays!

  • Peppermint Hot Chocolate: This warm and cozy drink pairs perfectly with the creamy cheesecakes, adding a festive touch and a hint of minty flavor.

  • Festive Fruit Salad: A refreshing combination of sweet fruits balances the rich sweetness of the mini cheesecakes, adding color and a burst of freshness to your dessert table.

  • Christmas Sugar Cookies: Serve these alongside the cheesecakes for a delightful assortment that captures traditional holiday flavors. Their festive shapes and sugars will entice every guest.

  • Chocolate-Covered Strawberries: A luxurious treat, these add elegance to your spread. Their sweet and tart flavor enhances the creamy richness of the mini cheesecakes.

  • Nutty Biscotti: Crunchy and subtly sweet, these Italian cookies offer a satisfying texture contrast when enjoyed with the smooth cheesecakes. Perfect for dipping in coffee!

  • Sparkling Apple Cider: A fizzy and festive drink that’s suitable for all ages, it complements the flavors of your desserts while keeping the atmosphere joyful.

  • Gingerbread Trifle: Layered with spices and cream, this dessert echoes holiday traditions and adds depth to your dessert options for guests to enjoy.

Prepare a delightful spread that mirrors the whimsical charm of your Grinch Mini Cheesecakes, creating a truly memorable holiday gathering!

Make Ahead Options

These Grinch Mini Cheesecakes are perfect for meal prep enthusiasts looking to save time during the busy holiday season! You can prepare the crusts and cheesecake filling up to 24 hours in advance. Simply follow the crust instructions and press them into the liners, then refrigerate them. You can also mix the cheesecake filling and store it in an airtight container in the refrigerator until you’re ready to bake. When it’s time to bake, simply fill the prepped crusts with the chic green cheesecake mixture and proceed with baking as directed. This way, your Grinch Mini Cheesecakes will be just as delicious as if freshly made, allowing you to enjoy more time with family and friends!

Expert Tips for Grinch Mini Cheesecakes

Soften the Cream Cheese: Ensure it’s at room temperature to avoid lumps in your Grinch Mini Cheesecakes. A smooth batter yields the best texture!

Room Temperature Eggs: Always use room temperature eggs for easier mixing. This helps create a silky filling that binds beautifully.

Check for Doneness: Use a toothpick to test cheesecakes. They should be slightly jiggly in the center when done, ensuring a creamy texture post-chill.

Adjust Color Gradually: When adding neon green food coloring, start with a few drops. You can always add more to achieve your desired Grinchy hue!

Chill Well: Refrigerate the mini cheesecakes for at least 2 hours. This crucial step ensures they set properly and enhances their flavor.

Customize Crusts: Feel free to swap out the Oreo crust for graham cracker or even brownie crusts, adding variety to the Grinch Mini Cheesecakes!

Grinch Mini Cheesecakes Recipe FAQs

What type of cream cheese should I use for the cheesecakes?
I recommend using full-fat cream cheese for a rich and creamy texture. Make sure it’s softened to room temperature for easy mixing. If you’re looking for a lighter option, low-fat cream cheese can work, but it may affect the overall creaminess.

How long can I store Grinch Mini Cheesecakes in the fridge?
You can store your Grinch Mini Cheesecakes in an airtight container in the fridge for up to 3 days. Just make sure to keep them well-covered to prevent them from absorbing odors and maintain their delicious flavor.

Can I freeze Grinch Mini Cheesecakes?
Absolutely! These mini cheesecakes can be frozen for up to 3 months. Wrap each cheesecake tightly in plastic wrap and place them in a freezer-safe container. This ensures they stay fresh and ready for your future cravings!

What should I do if my mini cheesecakes crack while baking?
If your Grinch Mini Cheesecakes crack, don’t fret! This can often happen if they’re baked at too high a temperature or for too long. To avoid this, stick to the recommended baking time and check for doneness by looking for a slight jiggle in the center. Cooling them slowly at room temperature before refrigerating can also help prevent cracks.

Are these mini cheesecakes suitable for people with food allergies?
While these Grinch Mini Cheesecakes are vegetarian, they contain dairy and eggs. If you have allergies, consider using non-dairy cream cheese and flax eggs as alternatives. Additionally, you can use gluten-free cookies for the crust to accommodate gluten sensitivities. Always double-check labels for any specific allergens.

How do I achieve the perfect neon green color for the filling?
Start with a few drops of neon green food coloring, mixing it into the cheesecake filling until you get your desired shade. If the color isn’t vibrant enough, gradually add more drops until it competes with the Grinch’s iconic hue. This creates a festive visual that’s perfect for your holiday celebrations!

Grinch Mini Cheesecakes

Grinch Mini Cheesecakes: Festive Treats to Delight Everyone

Grinch Mini Cheesecakes are colorful, creamy treats perfect for holiday gatherings, sure to delight both kids and adults.
Prep Time 20 minutes
Cook Time 17 minutes
Chilling Time 2 hours
Total Time 2 hours 39 minutes
Servings: 12 cheesecakes
Course: Dessert
Cuisine: American
Calories: 250

Ingredients
  

For the Cheesecake Filling
  • 16 oz Cream Cheese Ensure it’s softened for a smooth texture
  • 0.5 cup Sugar Can substitute with a sugar alternative
  • 2 Eggs Use room temperature for better blending
  • 1 tsp Vanilla Extract Provides rich flavor
  • Neon Green Food Coloring Adjust to reach desired color intensity
For the Crust
  • 1 cup Oreo Crumbs Gluten-free cookies can be used
  • 2.5 tbsp Butter, Melted Consider using non-dairy for vegan option

Equipment

  • Cupcake Pan
  • Food Processor
  • mixing bowl
  • hand mixer

Method
 

Step-by-Step Instructions
  1. Preheat your oven to 350°F (175°C) and line a cupcake pan with festive liners.
  2. Pulse about 10-11 Oreo cookies in a food processor until they form about 1 cup of fine crumbs. Mix with melted butter.
  3. Divide the crumb mixture among the cupcake liners, packing down firmly.
  4. In a medium bowl, combine softened cream cheese and sugar, beating until smooth.
  5. Add room temperature eggs and vanilla extract, mixing until well incorporated.
  6. Add drops of neon green food coloring until desired vibrancy is achieved.
  7. Spoon approximately 1/4 cup of filling into each prepared crust and smooth the tops.
  8. Bake for 15-17 minutes until centers are slightly jiggly. Let cool to room temperature.
  9. Chill in the refrigerator for at least 2 hours.
  10. Before serving, top with whipped cream and festive sprinkles.

Notes

Ensure cream cheese and eggs are at room temperature for optimal mixing. Chill well for the best texture and flavor.

Crispy Spinach and Feta Crisps: A Healthy Snack Delight

Just the other day, I found myself standing in my kitchen, staring at a fridge full of fresh spinach and a longing for something crispy and fulfilling. That’s when I whipped up these delightful Crispy Spinach and Feta Crisps. They are perfect for those moments when you want a tasty snack without the wait. In just a few simple steps, you’ll have a gluten-free, healthy snack that can easily be adapted for vegan diets too! With their golden, crunchy exterior and tender inside, these bites of joy are perfect for last-minute gatherings or solo afternoon cravings. Who knew indulging could be so guilt-free? Ready to dive into this delicious recipe? Let’s get cooking!

Why Are These Crisps a Must-Try?

Simplicity: With just a few ingredients and straightforward steps, you can whip up these crisps in no time, making them an ideal choice for busy days.

Flavorful Twist: The balance of creamy feta and fresh spinach delivers a mouthwatering taste that will leave your taste buds dancing!

Diet-Friendly: Easily transform these into a vegan delight by simply substituting the feta with dairy-free options and using a flaxseed egg.

Versatile Snack: Enjoy them on their own or pair them with a zesty yogurt sauce, hummus, or a fresh salad for a well-rounded meal. If you’re looking to mix things up, try adding sun-dried tomatoes or fresh herbs for an extra flavor boost.

Make-Ahead Magic: Prepare a batch ahead of time, refrigerate or freeze the mixture, and bake whenever cravings hit, saving you precious time during busy weeknights.

Experience these delightful crispy snacks that intrigue guests and satisfy cravings, making you wonder why you ever settled for fast food in the first place!

Crispy Spinach and Feta Crisps Ingredients

For the Filling

  • Fresh Spinach – Provides nutrients and vibrant color; use fresh leaves for the best flavor.
  • Feta Cheese – Adds creaminess and sharp flavor; substitute with dairy-free feta for a vegan option.
  • Eggs – Acts as a binder to hold the mixture together; a flaxseed egg can be used for a vegan alternative.
  • All-Purpose Flour – Gives structure; substitute with gluten-free flour if needed.
  • Seasonings (e.g., salt, pepper) – Enhances overall flavor; adjust based on taste preferences.

Step‑by‑Step Instructions for Crispy Spinach and Feta Crisps

Step 1: Preheat the Oven
Begin by preheating your oven to 375°F (190°C). While the oven heats, line a baking tray with parchment paper to prevent the Crispy Spinach and Feta Crisps from sticking. This step ensures that they will bake evenly, allowing for that perfect golden-brown finish!

Step 2: Prepare the Filling
In a large mixing bowl, combine fresh spinach, crumbled feta cheese, eggs, all-purpose flour, and your chosen seasonings. Stir the mixture until everything is well incorporated and creamy, creating a vibrant filling. The spinach should be evenly distributed to ensure every bite of your crispy treat is bursting with flavor.

Step 3: Portion the Mixture
Using a spoon or an ice cream scoop, dollop the mixture onto the prepared baking tray. Aim for uniform sizes to ensure even baking—about the size of a golf ball works perfectly. Leave some space between the portions, as they will spread slightly while baking, maintaining their crispy texture.

Step 4: Bake
Place the tray in the preheated oven and bake for 15-20 minutes. Keep an eye on them towards the end of the baking time; you’re looking for a crisp, golden exterior and a delightful aroma wafting through your kitchen. This is when your Crispy Spinach and Feta Crisps will reach their peak deliciousness.

Step 5: Cool and Serve
Once they are baked to perfection, remove the tray from the oven and let the Crispy Spinach and Feta Crisps cool for a few minutes. This brief cooling period helps them set while still warm and ready to serve. You can enjoy them immediately or let them reach room temperature for a delightful snack anytime.

Make Ahead Options

These Crispy Spinach and Feta Crisps are a fantastic meal prep solution for busy home cooks! You can prepare the filling up to 24 hours in advance by mixing together the fresh spinach, feta cheese, eggs, and flour, then store it in an airtight container in the refrigerator. This method not only saves time but ensures the flavors meld beautifully. Alternatively, scoop the mixture onto the baking tray and freeze individual portions for up to 3 months—then, bake directly from frozen. When it’s time to enjoy them, simply preheat your oven and bake for 15-20 minutes until golden brown, providing you with delicious, fresh snacks whenever you need them!

Variations for Crispy Spinach and Feta Crisps

Feel free to get creative with this recipe and make it your own—we all love a personal touch in our cooking!

  • Vegan Option: Replace feta with dairy-free cheese and use a flaxseed egg for binding. Indulge guilt-free while savoring the same flavors.

  • Gluten-Free Swap: Use gluten-free all-purpose flour instead of regular flour. Your crispy treats can still be enjoyed by everyone at the table!

  • Herb-Infused: Add fresh herbs like dill or basil to the mixture for an aromatic twist. Herbs boost flavor and add a refreshing element to every bite.

  • Cheese Variety: Experiment with different cheeses such as goat cheese or mozzarella for a unique flavor profile. Each cheese brings its own delightful character to the dish.

  • Spicy Kick: Sprinkle in some red pepper flakes or a dash of hot sauce to add a zesty heat. Turn your snack into a bold, fiery indulgence that’s sure to wow your taste buds.

  • Veggie Boost: Mix in finely chopped bell peppers or mushrooms for added texture and nutrition. The more, the merrier in terms of flavor and health benefits!

  • Mediterranean Muse: Incorporate sun-dried tomatoes or olives for a Mediterranean flair. These add piquancy that complements the spinach and feta beautifully.

  • Savory Sweet: For a sweet-savory combo, consider drizzling some honey on top just before serving. This surprising twist creates a comforting balance to the crispy delights!

If you’re curious about pairing these crisps, I recommend trying them alongside a delectable yogurt sauce or with some Crisp Cabbage Apple for a refreshing crunch!

Expert Tips for Crispy Spinach and Feta Crisps

  • Well-Drain Spinach: Ensure your spinach is dried thoroughly after washing to avoid excess moisture, which can lead to soggy crisps.

  • Uniform Portions: For even baking, scoop out uniform sizes—about the size of a golf ball is ideal. This helps each crispy treat reach the perfect texture.

  • Broil for Extra Crisp: If your crisps need a little extra crunch, switch the oven to broil for the last minute of baking. Just keep an eye on them to prevent burning!

  • Cool Before Serving: Allow the crisps to cool for a few minutes after baking. This helps them firm up and maintain their crispy integrity when served.

  • Airtight Storage: Store any leftovers in an airtight container for up to 3 days. Reheat in the oven for the best crispy results!

  • Vegan Adaptation: To make these Crispy Spinach and Feta Crisps vegan, replace feta with dairy-free cheese and use a flaxseed egg as a binder.

What to Serve with Crispy Spinach and Feta Crisps?

Imagine a delightful spread that complements the irresistible flavors of these golden bites, elevating your snack experience to new heights.

  • Creamy Yogurt Sauce: This cool and creamy dip adds a refreshing contrast, balancing the savory flavors of the crisps perfectly.

  • Zesty Hummus: Rich and satisfying, hummus enhances your snack with its nutty undertones, making every bite a flavor adventure.

  • Garden Fresh Salad: A simple mixed greens salad brings crunchy freshness, offering vibrant colors and textures that complement the warm crisps.

  • Savory Tomato Salsa: The bright acidity of fresh salsa provides a splash of flavor that cuts through the richness of the feta and spinach.

  • Crisp White Wine: Serve chilled white wine to enhance the crispiness and create a light and enjoyable pairing for your gathering.

  • Light Lemonade Spritzer: A fizzy lemonade spritzer infuses a citrusy brightness, making it a refreshing companion for your decadent snacks.

  • Sweet Chocolate Dipped Strawberries: For a delightful dessert contrast, these juicy, sweet berries bring a luscious finish to your meal.

  • Roasted Veggie Platter: A medley of colorful roasted vegetables offers a hearty option, making for a well-rounded, nutritious spread that complements the crisps beautifully.

With these tasty pairings, your next snack time or gathering will be an event to remember!

How to Store and Freeze Crispy Spinach and Feta Crisps

Fridge: Store leftover Crispy Spinach and Feta Crisps in an airtight container for up to 3 days. Reheat in the oven to maintain their crispiness.

Freezer: For longer storage, freeze uncooked dollops of the mixture on a baking sheet. Once frozen, transfer them to a freezer bag for up to 3 months, and bake directly from frozen when ready to enjoy.

Room Temperature: These crisps are best enjoyed warm or at room temperature. However, avoid leaving them out for more than 2 hours for food safety.

Reheating: To revive leftover baked crisps, reheat in the oven at 350°F (175°C) for about 5-7 minutes, ensuring they regain that delicious crispiness!

Crispy Spinach and Feta Crisps Recipe FAQs

What type of spinach is best for this recipe?
Absolutely! Fresh spinach is ideal for achieving the best flavor and vibrant color in your Crispy Spinach and Feta Crisps. If you choose to use frozen spinach, make sure it is thoroughly thawed and well-drained to avoid excess moisture, which can lead to soggy crisps.

How should I store leftovers?
You can store your leftover Crispy Spinach and Feta Crisps in an airtight container in the fridge for up to 3 days. To revive their delightful crunch, simply reheat them in the oven at 350°F (175°C) for about 5-7 minutes. If you want to keep some on hand for longer, you can freeze them as described below.

Can I freeze the uncooked mixture?
Yes! For longer storage, freeze uncooked dollops of the mixture on a baking sheet. Once they are frozen solid, transfer them into a freezer bag, where they can stay good for up to 3 months. When you’re ready to enjoy them, bake directly from frozen at 375°F (190°C) for about 20-25 minutes, keeping an eye out for that perfect golden brown.

Are these crisps safe for people with dietary restrictions?
Very! You can easily adapt your Crispy Spinach and Feta Crisps to suit various dietary needs. To make them vegan, simply substitute feta cheese with a dairy-free alternative and use a flaxseed egg (1 tablespoon of ground flaxseed mixed with 2.5 tablespoons of water, let sit for 5 minutes) in place of the regular egg. Always check for allergens related to any substitutes you choose.

What should I do if my crisps are soggy?
If your Crispy Spinach and Feta Crisps turn out soggy, it could be due to excess moisture in the spinach. Always ensure that it is well-dried after washing. If you’ve already baked them, you can try placing them under the broiler for 1-2 minutes to crisp them up. Just keep a close eye on them to prevent burning!

How can I customize the flavors in my crisps?
If you’re looking to add a flavorful twist, consider throwing in sun-dried tomatoes, fresh herbs like basil or parsley, or even spices such as crushed red pepper flakes for a little heat. Experimenting with different cheeses like mozzarella can also give your Crispy Spinach and Feta Crisps a delightful new taste!

Crispy Spinach and Feta Crisps

Crispy Spinach and Feta Crisps: A Healthy Snack Delight

Crispy Spinach and Feta Crisps are a gluten-free, healthy snack that’s perfect for quick cravings and easily adaptable for vegan diets.
Prep Time 10 minutes
Cook Time 20 minutes
Cooling Time 5 minutes
Total Time 35 minutes
Servings: 4 crisps
Course: Snack
Cuisine: Healthy
Calories: 150

Ingredients
  

Filling Ingredients
  • 2 cups Fresh Spinach Provides nutrients and vibrant color; use fresh leaves for the best flavor.
  • 1 cup Feta Cheese Adds creaminess and sharp flavor; substitute with dairy-free feta for a vegan option.
  • 2 large Eggs Acts as a binder; a flaxseed egg can be used for a vegan alternative.
  • 1 cup All-Purpose Flour Gives structure; substitute with gluten-free flour if needed.
  • to taste Seasonings (e.g., salt, pepper) Enhances overall flavor; adjust based on taste preferences.

Equipment

  • oven
  • mixing bowl
  • baking tray
  • parchment paper
  • Spoon or Ice Cream Scoop

Method
 

Step-by-Step Instructions
  1. Preheat your oven to 375°F (190°C) and line a baking tray with parchment paper.
  2. In a large mixing bowl, combine fresh spinach, crumbled feta cheese, eggs, all-purpose flour, and your seasonings until well incorporated.
  3. Using a spoon or an ice cream scoop, dollop the mixture onto the prepared baking tray, ensuring uniform sizes.
  4. Bake for 15-20 minutes or until crispy and golden brown, watching them closely towards the end.
  5. Remove from the oven and let cool for a few minutes before serving.

Notes

For a vegan option, substitute feta with dairy-free cheese and use a flaxseed egg. Store leftovers in an airtight container in the fridge for up to 3 days.

Loaded Cucumber & Avocado Sandwich: Quick & Healthy Bliss

As I stood in my kitchen, slicing into a ripe avocado, the vibrant green flesh practically begged to be paired with the refreshing snap of cucumbers. That’s when it hit me – the perfect summer delight: a Loaded Cucumber & Avocado Sandwich! This simple, vegan-friendly recipe not only takes mere minutes to whip up but also transforms ordinary ingredients into a delectable and healthy meal. Whether you’re preparing for a quick lunch at home or planning a picnic with friends, this customizable sandwich can easily adapt to suit any palate, ensuring everyone finds something they love. Curious about how you can personalize this delight to make it your own? Let’s dive in!

Why is this sandwich a game changer?

Customization at Every Bite: This Loaded Cucumber & Avocado Sandwich allows you to express your culinary creativity. Healthy and Wholesome: Packed with fresh ingredients, it’s a guilt-free pleasure that nourishes your body. Quick to Make: In just a few minutes, you can prepare a refreshing meal that beats fast food any day. Versatile Ingredients: Swap in your favorite greens or spreads, making it fit any dietary need. For more delightful ideas, check out our Refreshing Avocado Sandwiches and Refreshing Cucumber Carrot recipes to elevate your meal options!

Loaded Cucumber & Avocado Sandwich Ingredients

Get ready to create a fresh masterpiece!

For the Bread
Bread of choice – Opt for whole grain, sourdough, or rye for a robust foundation; gluten-free options are also available.

For the Filling
1 ripe avocado – Choose a soft avocado for creamy goodness and healthy fats without being mushy.
1 medium cucumber – Add a refreshing crunch; feel free to substitute with zucchini ribbons for a twist.
Fresh leafy greens (1/2 cup) – Toss in your favorite greens like lettuce, spinach, or arugula for that vibrant freshness.
Optional cherry tomatoes (1/4 cup) – Halved, these add a burst of sweetness and acidity.
Red onion (2 tbsp, thinly sliced) – Gives a zesty kick; skip it for a milder flavor.
Fresh herbs (1 tbsp, chopped) – Elevate the taste with herbs like dill, basil, cilantro, or mint.
Lemon juice (1 tsp) – Brightens the flavors and prevents the avocado from browning; adjust to your taste.
Salt and pepper – Essential seasonings to enhance all flavors.

For the Spread
Olive oil or favorite sandwich spread (1 tsp, optional) – Adds a rich depth; consider cream cheese or hummus for an alternative touch.

Dive into this deliciously customizable Loaded Cucumber & Avocado Sandwich that’s as nutritious as it is satisfying!

Step‑by‑Step Instructions for Loaded Cucumber & Avocado Sandwich

Step 1: Prep Bread
Begin by selecting your favorite bread, such as whole grain or sourdough, for the Loaded Cucumber & Avocado Sandwich. For added texture, lightly toast the slices in a toaster or on a skillet over medium heat for about 2-3 minutes, until golden. This will enhance the crunch and provide a delightful contrast to the creamy filling.

Step 2: Mash Avocado
In a small bowl, scoop out the flesh of one ripe avocado. Use a fork to mash it until smooth, leaving some small chunks for texture. Add in one teaspoon of lemon juice, a pinch of salt, and freshly cracked pepper to taste. Mix well to incorporate, and set aside—this creamy concoction will be the star of your sandwich!

Step 3: Spread the Avocado
Take the toasted bread slices and generously spread the mashed avocado over one side of each slice, ensuring an even layer that covers the edges. The vibrant green color should be visible, creating a tempting base for the Loaded Cucumber & Avocado Sandwich. The richness of the avocado will add a luxurious feel to every bite.

Step 4: Layer the Vegetables
Next, layer the cucumber slices on top of the avocado spread, allowing for a satisfying crunch to shine through. Follow this with a handful of fresh leafy greens, such as spinach or arugula, to introduce a burst of freshness. If desired, add thinly sliced red onions and halved cherry tomatoes for an extra layer of flavor and color.

Step 5: Garnish with Herbs
Sprinkle the chopped fresh herbs over the layered vegetables—choose from dill, cilantro, or basil for a fragrant touch. This addition will not only enhance the flavor profile of your Loaded Cucumber & Avocado Sandwich, but also infuse it with a delightful vibrancy that’s pleasing to the eyes.

Step 6: Final Touches
If you’re using olive oil or a favorite sandwich spread, drizzle a teaspoon over the assembled ingredients to add richness and depth. Carefully place the second slice of bread on top, ensuring the spread is closely aligned with the filling. Press down gently to help the sandwich hold together.

Step 7: Serve and Enjoy
Using a sharp knife, cut the Loaded Cucumber & Avocado Sandwich in half diagonally for a lovely presentation. Serve immediately to enjoy the perfect balance of creamy, crunchy, and fresh flavors. If preparing for later, wrap tightly and refrigerate, but be sure to assemble right before enjoying for the best texture!

How to Store and Freeze Loaded Cucumber & Avocado Sandwich

Fridge: Store the sandwich tightly wrapped in plastic wrap for up to 1 day. It’s best enjoyed fresh to keep that vibrant crunch and creamy texture.

Freezer: This Loaded Cucumber & Avocado Sandwich doesn’t freeze well due to the avocado and fresh ingredients, which can become mushy upon thawing.

Reheating: Avoid reheating, as this sandwich is intended to be served fresh. Assemble just before eating for the best taste and texture.

Assembly Tips: If you plan to prepare ahead, keep separate components and assemble the sandwich just before serving to prevent sogginess.

What to Serve with Loaded Cucumber & Avocado Sandwich

The perfect accompaniment can elevate your meal from delightful to extraordinary, making every bite a celebration of flavors.

  • Zesty Quinoa Salad: This light, refreshing salad brings a zing with citrus dressing, complementing the creamy sandwich beautifully.
  • Crispy Sweet Potato Fries: Their natural sweetness and crunch provide a delightful contrast, making for a comforting side.
  • Herbed Lemon Water: A chilled glass of this invigorating drink enhances flavor and freshness, perfectly matching the sandwich’s vibrant ingredients.
  • Crunchy Veggie Chips: Adding a satisfying crunch, these chips introduce exciting textures while maintaining the health-conscious theme.
  • Fruit Salad Medley: A mix of seasonal fruits delivers a sweet, refreshing burst that cleanses the palate after each savory bite.
  • Classic Gazpacho: A cool, vibrant soup filled with fresh veggies pairs wonderfully, enhancing the sandwich’s freshness while keeping the meal light.
  • Chilled White Wine Spritzer: For a refreshing drink, this light spritzer is an excellent complement, enhancing the sandwich’s flavors with every sip.
  • Chocolate Avocado Mousse: End your meal with a rich yet healthy dessert, echoing the avocado theme in a delightful way.

Make Ahead Options

These Loaded Cucumber & Avocado Sandwiches are perfect for meal prep enthusiasts! You can prepare the mashed avocado up to 24 hours in advance; just remember to mix in the lemon juice to prevent browning. Additionally, you can slice the cucumbers and prepare your leafy greens (like spinach or arugula) up to 3 days ahead for quick assembly. When you’re ready to enjoy, simply spread the avocado on your preferred bread, layer the prepared vegetables, and finish with your chosen herbs and spreads. This way, you’ll have fresh, delicious sandwiches ready to go during busy weeknights or lunch hours!

Tips for the Best Loaded Cucumber & Avocado Sandwich

Choose Ripe Avocado: Make sure your avocado is ripe for optimal creaminess. Look for a slight give when gently squeezed, but avoid overly mushy fruits.

Layer Strategically: To prevent sogginess, avoid adding tomatoes or wet ingredients until you’re ready to eat your Loaded Cucumber & Avocado Sandwich.

Customize Wisely: Experiment with different herbs and greens; fresh basil or arugula can enhance flavor while keeping it vegan and delicious.

Season Generously: Don’t skip the salt and pepper! They are essential to elevate the taste and make your sandwich truly satisfying.

Use Quality Bread: Select good-quality bread that complements the filling well. Whole grain or artisan bread not only tastes better but also adds nutritional value.

Loaded Cucumber & Avocado Sandwich Variations

Feel free to unleash your inner chef and customize this recipe with delightful twists and substitutions!

  • Zucchini Swap: Replace cucumber with thinly sliced zucchini for a unique, tender texture that complements the avocado beautifully.
  • Crunchy Peppers: Use bell peppers, either raw or roasted, for a pop of color and sweetness alongside the creamy avocado.
  • Herb Infusion: Experiment with different herbs like basil, chives, or cilantro to add a fresh flavor twist that brightens every bite.
  • Spicy Kick: Add a dash of hot sauce or sprinkle chili flakes for a fiery flavor boost that tantalizes the taste buds.
  • Protein Boost: Toss in some chickpeas or grilled tofu for a satisfying addition that transforms your sandwich into a filling meal.
  • Creamy Alternatives: Switch out olive oil for flavored cream cheese or hummus for an added layer of richness and innovation.
  • Yes to Nuts: Add a handful of crunchy nuts or seeds, such as sunflower seeds or walnuts, for a delightful crunch and healthy fats.
  • Unique Spreads: Try a dollop of pesto or a layer of tzatziki on your bread for an unexpected flavor explosion that takes this sandwich over the top!

And if you want to enrich your platter, try pairing with a refreshing side like our Refreshing Cucumber Carrot or even a tangy Crunchy Cucumber Egg salad!

Loaded Cucumber & Avocado Sandwich Recipe FAQs

What is the best way to choose a ripe avocado?
Absolutely! Look for avocados that yield slightly to gentle pressure but aren’t mushy. A ripe avocado should have a dark green or black skin, depending on the variety. You can also check the stem; if it’s green underneath, the avocado is ripe!

How should leftovers of the Loaded Cucumber & Avocado Sandwich be stored?
For sure! Wrap the sandwich tightly in plastic wrap and refrigerate for up to 1 day. However, keep in mind that the sandwich is best enjoyed fresh for that delightful crunch and creamy goodness. If you know you won’t eat it soon, store the components separately to maintain texture.

Can the Loaded Cucumber & Avocado Sandwich be frozen?
Not really! This sandwich doesn’t freeze well due to the avocado and fresh ingredients. Once frozen, the avocado can become mushy and the overall texture will be compromised. I recommend preparing it fresh for the best results.

What can I do if my bread becomes soggy?
Very good question! To prevent sogginess, it’s best to avoid adding wet ingredients like tomatoes until you’re ready to eat. You can also toast your bread before assembling the sandwich to create a protective barrier. Plus, layering your greens under the moist ingredients can help!

Is this recipe suitable for people with allergies?
Definitely! This Loaded Cucumber & Avocado Sandwich is naturally vegan and can be made gluten-free by using gluten-free bread. For those with nut allergies, ensure your spreads are nut-free. Just check each ingredient you decide to use to ensure it meets your dietary needs.

How can I customize this sandwich to suit different tastes?
Absolutely! You can modify this sandwich easily—swap in different greens like spinach or arugula, or add other veggies like bell peppers or sprouts. For an extra flavor kick, try a spicy spread or add a sprinkle of chili flakes. The more the merrier when it comes to customization!

Loaded Cucumber & Avocado Sandwich

Loaded Cucumber & Avocado Sandwich: Quick & Healthy Bliss

A Loaded Cucumber & Avocado Sandwich is a quick, healthy, and customizable delight perfect for lunch or picnics.
Prep Time 5 minutes
Cook Time 3 minutes
Total Time 8 minutes
Servings: 2 sandwiches
Course: Lunch
Cuisine: Healthy, Vegan
Calories: 300

Ingredients
  

For the Bread
  • Bread of choice Opt for whole grain, sourdough, or rye; gluten-free options available.
For the Filling
  • 1 each ripe avocado Choose a soft avocado for creamy goodness.
  • 1 medium cucumber Add a refreshing crunch; zucchini ribbons can be substituted.
  • 1/2 cup fresh leafy greens Use lettuce, spinach, or arugula.
  • 1/4 cup cherry tomatoes Halved for added sweetness and acidity.
  • 2 tbsp red onion Thinly sliced; skip for a milder flavor.
  • 1 tbsp fresh herbs Chopped dill, basil, cilantro, or mint to elevate flavor.
  • 1 tsp lemon juice Brightens flavor and prevents browning.
  • salt and pepper Essential seasonings to enhance flavors.
For the Spread
  • 1 tsp olive oil or sandwich spread Optional for richness; cream cheese or hummus are alternatives.

Equipment

  • Toaster or Skillet

Method
 

Step-by-Step Instructions
  1. Begin by selecting your favorite bread and lightly toast the slices in a toaster or on a skillet over medium heat for 2-3 minutes, until golden.
  2. In a small bowl, scoop out the flesh of one ripe avocado and mash it until smooth. Mix in one teaspoon of lemon juice, a pinch of salt, and pepper.
  3. Spread the mashed avocado over one side of each toasted bread slice.
  4. Layer the cucumber slices on top of the avocado spread, followed by leafy greens. Optionally add red onions and halved cherry tomatoes.
  5. Sprinkle chopped fresh herbs over the layered vegetables.
  6. Drizzle olive oil or sandwich spread over the assembled ingredients, then place the second slice of bread on top, pressing gently.
  7. Cut the sandwich in half diagonally and serve immediately.

Notes

Ensure to use ripe avocado for optimal creaminess. Customize with different herbs and greens for varied flavors.

Delightful Christmas Wreath Palmiers with Cinnamon-Sugar Magic

As the holiday season approaches, I can’t help but get swept up in the joy of festive baking. Enter my Christmas Wreath Palmiers—beautifully shaped puff pastries that are not only simple to whip up but also a stunning centerpiece for any holiday gathering. Imagine flaky layers encased in a sweet, cinnamon-sugar coating, delivering comfort in every crispy bite. These delightful treats are perfect for sharing, making them a must-have addition to your cookie box. Plus, they come together so quickly that you can spend less time in the kitchen and more time savoring joyful moments with loved ones. Curious about how to create these edible wreaths that are bound to impress? Let’s dive into the recipe!

Why Are Wreath Palmiers So Irresistible?

Festive Appeal: This Christmas Wreath Palmiers recipe is not only visually stunning but also embodies the spirit of the season. Shaped like a wreath, they’re the perfect holiday treat!

Quick and Easy: With just simple puff pastry and a few pantry staples, these palmiers come together in no time, making them an ideal last-minute festive bake.

Crispy and Flaky: The flaky layers and crispy texture offer a delightful contrast to the sweet and spicy cinnamon coating, leaving your taste buds dancing with joy.

Versatile Flavor: Feel free to mix up the spices—substituting pumpkin spice or adding chocolate chips can transform the flavor into something uniquely yours.

Crowd-Pleasing Treat: These treats are perfect for gatherings, sure to be a hit alongside your other holiday cookies. Don’t miss out on the opportunity to explore even more festive ideas in your baking adventures!

Christmas Wreath Palmiers Ingredients

Get ready to create these festive treats with just a few simple ingredients!

For the Puff Pastry
Puff Pastry – Two sheets are needed for structure; store-bought makes this process a breeze.

For the Sweet Mixture
Granulated Sugar – 100g adds the perfect sweetness; brown sugar can enhance the flavor with its rich undertones.
Ground Cinnamon – 2 tsp gives warmth and spice; consider pumpkin spice for a holiday twist.

For the Egg Wash
Egg – 1, beaten, is used for the egg wash; it helps achieve that beautiful golden color on top. Omit for a vegan version.

Step‑by‑Step Instructions for Christmas Wreath Palmiers

Step 1: Preheat and Prepare
Begin by preheating your oven to 180°C (350°F). As it heats up, line a baking sheet with parchment paper to ensure the palmiers don’t stick while baking. This will help achieve the perfect crispiness for your Christmas Wreath Palmiers. Set everything aside so you can focus on the delicious layering ahead!

Step 2: Mix Cinnamon and Sugar
In a small mixing bowl, whisk together 100g of granulated sugar and 2 teaspoons of ground cinnamon. This sweet and spicy mixture is the heart of your Christmas Wreath Palmiers, adding warmth and flavor. Once combined, set the bowl aside where you can easily reach it during the next steps.

Step 3: Roll Out Puff Pastry
Take one sheet of the puff pastry out of the fridge and roll it onto a lightly floured surface. Using your rolling pin, adjust the dough to a size of about 30x40cm (12×16 inches). This will create a sturdy base. Now, sprinkle half of your cinnamon-sugar mixture evenly over the surface and lightly press it down with the rolling pin to ensure it adheres.

Step 4: Layer the Second Pastry Sheet
Carefully place the second puff pastry sheet on top of the first one, creating a sandwich of deliciousness. Repeat the process by sprinkling the remaining cinnamon-sugar mixture on top, pressing it down gently again with the rolling pin. This will create beautifully layered flavors in your festive treat!

Step 5: Cut and Shape Strips
Using a sharp knife or a pizza cutter, slice the stacked pastry into 1.5-2cm wide strips. Then, cut each strip into three smaller sections to form plaits. This step is crucial for the design of your Christmas Wreath Palmiers, making them visually appealing and fun to shape.

Step 6: Form the Wreath
Next, take each plaited piece and twist it gently, then arrange them in a circular wreath shape on your prepared baking sheet. Overlap the ends slightly to help create that charming wreath look. Press the ends together gently to seal them, ensuring they hold their shape while baking.

Step 7: Create Decorative Bows (Optional)
If you have leftover pastry strips, get creative by shaping them into bows to add a festive touch to your wreath. Simply twist and tie them into ribbon-like bows, and place them on the baking sheet alongside your palmiers for an extra whimsical holiday flair.

Step 8: Bake to Perfection
Place the baking sheet in your preheated oven and bake the Christmas Wreath Palmiers for 18–20 minutes. Keep an eye on them as they puff up; you want them to turn a gorgeous golden brown. The delicious aroma filling your kitchen will be a sign that they’re nearly ready!

Step 9: Cool and Serve
Once baked, remove the palmiers from the oven and allow them to cool slightly on the baking sheet before transferring them to a wire rack. They should be crispy and light—perfect for serving! Pair them with a cup of hot cocoa or coffee for a delightful holiday treat that everyone will love.

How to Store and Freeze Christmas Wreath Palmiers

Airtight Container: Store leftover Christmas Wreath Palmiers in an airtight container at room temperature for up to 3 days to maintain their crispiness.

Freezer: If you want to preserve these delightful treats longer, freeze them in a single layer on a baking sheet, then transfer to a freezer bag for up to 2 months.

Reheating: To enjoy the palmiers again, reheat from frozen directly in the oven at 180°C (350°F) for about 10 minutes for that fresh-baked crunch.

Make-Ahead Tip: You can shape the palmiers ahead of time and refrigerate them; bake just before serving to enjoy their freshly baked taste!

Make Ahead Options

These Christmas Wreath Palmiers are perfect for meal prep, allowing you to enjoy more holiday moments with loved ones! You can prepare and shape the palmiers up to 24 hours in advance. Simply follow the recipe until the shaping step, then cover them tightly with plastic wrap and refrigerate. When you’re ready to serve, preheat your oven and bake them straight from the fridge for about 18-20 minutes until golden brown. This method ensures they retain their flaky texture and delicious flavor, making it just as enjoyable as fresh-baked treats! Embrace the joy of hassle-free baking this season with these festive palmiers!

Christmas Wreath Palmiers Variations & Substitutions

Feel free to get creative with your Christmas Wreath Palmiers and make them your own—customizing them is half the fun!

  • Brown Sugar: Swap out granulated sugar for brown sugar to deepen the flavor with rich, caramel notes.
  • Pumpkin Spice: Replace ground cinnamon with pumpkin spice for a warm, festive twist that captures the essence of the season.
  • Dairy-Free: Use a plant-based puff pastry and omit the egg wash for a vegan-friendly version that still offers delightful texture.
  • Chocolate Delight: Drizzle melted chocolate over your palmiers after baking for a sweet boost that chocolate lovers won’t resist.
  • Nutty Flavor: Add chopped walnuts or pecans to the cinnamon-sugar mixture; their crunch pairs beautifully with the flaky pastry.
  • Savory Spin: Incorporate fresh herbs like rosemary or thyme into the sugar mix for an intriguing savory twist that is unexpected yet delightful.
  • Fruit Infusion: Mix in some dried cranberries or raisins for a fruity surprise that will add both color and sweetness to your wreath.
  • Spicy Kick: Add a pinch of cayenne pepper to the cinnamon-sugar mix for a subtle heat that will awaken your palate and add an exciting layer to your treats.

Your Christmas Wreath Palmiers can be as unique as your holiday spirit! Enjoy experimenting with these variations, and for more holiday magic, check out my recipe for Classic Gingerbread Cookies or the rich flavors found in Cinnamon Roll Casserole.

Expert Tips for Christmas Wreath Palmiers

  • Keep Pastry Cold: Ensure your puff pastry sheets are cold when working with them. This helps maintain the flakiness and structure during baking.
  • Don’t Skimp on Sugar: Use the full amount of cinnamon-sugar mixture for each layer. Insufficient sugar may lead to less flavor and sweetness in your palmiers.
  • Shape Gently: When forming the wreath shape, press lightly to prevent the layers from compressing. This will keep them puffy after baking and enhance the texture of your Christmas Wreath Palmiers.
  • Oven Check: Every oven is different! Start checking your palmiers a couple of minutes before the suggested baking time to avoid overbaking.
  • Decorative Touch: If you have extra pastry scraps, get creative and make cute bows or other festive shapes to elevate your presentation.

What to Serve with Christmas Wreath Palmiers

As you gather with loved ones this holiday season, complement these delightful treats with a spread of flavors that will warm hearts and stomachs alike.

  • Creamy Hot Chocolate: Rich and velvety, this classic drink enhances the sweet flavors of the palmiers, making each bite even more indulgent.

  • Peppermint Tea: A refreshing herbal tea that brings a hint of coolness to balance the warmth of cinnamon, creating a harmonious pairing.

  • Spiced Mulled Wine: Its aromatic spices and fruity notes echo the cinnamon-sugar, making it a cozy choice for festive gatherings.

  • Whipped Cream: A dollop on the side offers a luscious, creamy contrast, allowing for a delightful texture combination with the crispy palmiers.

  • Fruit Salad: Fresh seasonal fruits like oranges and pomegranates add a burst of color and brightness, rounding out the richness of the treats.

  • Gingerbread Cookies: Offering that extra spiced sweetness, these classic cookies make for a delightful holiday platter alongside the palmiers.

  • Vanilla Ice Cream: Serve warm palmiers over creamy vanilla ice cream to create a dreamy dessert that’s sure to impress your guests!

Christmas Wreath Palmiers Recipe FAQs

How do I choose the best puff pastry?
Absolutely! When selecting puff pastry, look for sheets that are cold and well-sealed. I recommend checking for a golden color on the packaging and ensuring there are no dark spots. This indicates freshness and quality, which is crucial for achieving those delightful layers in your Christmas Wreath Palmiers.

How should I store leftover palmiers?
Very simply! Place your leftover Christmas Wreath Palmiers in an airtight container at room temperature. They will stay crispy for up to 3 days. If you notice they start to soften, you can pop them in the oven for a couple of minutes to regain that delightful crunch!

Can I freeze Christmas Wreath Palmiers?
Absolutely! To freeze, lay the shaped but unbaked palmiers in a single layer on a baking sheet. Once frozen solid, transfer them to a freezer-safe bag for up to 2 months. When you’re ready to bake, you can bake them directly from frozen—just add a couple of extra minutes to the baking time.

What should I do if my palmiers don’t puff up?
If you find your Christmas Wreath Palmiers didn’t puff as expected, there might be a couple of reasons. First, make sure your puff pastry was cold before baking, as working with warm pastry can lead to less fluffiness. Secondly, ensure that you pressed down gently during shaping; compressing the layers too much will affect their rise. Next time, when layering the sugar, be generous—more sugar enhances puffing!

Are these palmiers suitable for people with allergies?
Great question! The primary ingredients for the Christmas Wreath Palmiers include puff pastry, sugar, cinnamon, and egg. If you’re catering to someone with allergies, consider using egg alternatives for the wash, like almond milk or a vegan egg substitute. Always check the labels for allergens in store-bought puff pastry, as they can vary by brand.

Can pets eat puff pastry?
Just a friendly reminder—while the ingredients in puff pastry are generally safe, they are not ideal for pets. The high-fat content and sugar may upset their stomachs. If you want to share a holiday treat with your furry friends, consider making them a special pet-friendly snack instead!

Christmas Wreath Palmiers

Delightful Christmas Wreath Palmiers with Cinnamon-Sugar Magic

These Christmas Wreath Palmiers are simple to make and a stunning centerpiece for any holiday gathering.
Prep Time 15 minutes
Cook Time 20 minutes
Cooling Time 10 minutes
Total Time 45 minutes
Servings: 12 palmiers
Course: Dessert
Cuisine: Baking
Calories: 200

Ingredients
  

For the Puff Pastry
  • 2 sheets Puff Pastry store-bought
For the Sweet Mixture
  • 100 g Granulated Sugar can use brown sugar for enhanced flavor
  • 2 tsp Ground Cinnamon optional: use pumpkin spice for a twist
For the Egg Wash
  • 1 Egg beaten; omit for a vegan version

Equipment

  • oven
  • baking sheet
  • parchment paper
  • Rolling Pin
  • mixing bowl
  • Knife or pizza cutter

Method
 

Step‑by‑Step Instructions for Christmas Wreath Palmiers
  1. Preheat your oven to 180°C (350°F) and line a baking sheet with parchment paper.
  2. Whisk together 100g of granulated sugar and 2 teaspoons of ground cinnamon in a small mixing bowl.
  3. Roll one sheet of puff pastry onto a floured surface to about 30x40cm (12x16 inches) and sprinkle half of the cinnamon-sugar mixture on top.
  4. Layer the second puff pastry sheet on top, sprinkle remaining cinnamon-sugar mixture, and press down lightly.
  5. Slice the stacked pastry into 1.5-2cm wide strips, then cut each strip into three smaller sections to form plaits.
  6. Twist each plaited piece gently and arrange in a circular wreath shape on the baking sheet, overlapping ends slightly to seal.
  7. If you have leftover pastry strips, shape them into bows and add them alongside your palmiers.
  8. Bake for 18–20 minutes until puffed and golden brown.
  9. Allow to cool slightly on the baking sheet before transferring to a wire rack.

Notes

Store in an airtight container at room temperature for up to 3 days or freeze for up to 2 months.

Festive Christmas Popcorn Balls for Sweet Holiday Cheer

“Did you hear what mom is making for Christmas this year?” The excitement in my daughter’s voice was palpable as she shared the latest holiday tradition we were bringing back—No-Bake Christmas Popcorn Balls! This simple yet enchanting recipe perfectly blends fluffy popcorn with gooey marshmallows, buttery goodness, and colorful M&Ms. Not only are these Christmas Popcorn Balls a delightful treat that keeps the holiday spirit alive, but they also come together quickly, making them an ideal project for the whole family. Plus, since they’re no-bake, you can whip them up without any fuss, freeing up time for more joyous holiday moments. Curious about how to create these whimsical bites that everyone will love? Let’s dive in!

Why Are Christmas Popcorn Balls a Must?

Irresistible Festivity: These Christmas popcorn balls are a delightful blend of colors and flavors that instantly brighten any holiday gathering.

Easy and Quick: With no baking required, you can whip them up in just a few minutes, making them a perfect last-minute treat.

Kid-Friendly Fun: Kids love getting involved in the mixing and shaping process, making it a wonderful family activity.

Customizable Treats: You can tailor the ingredients to your family’s tastes—swap M&Ms for dried fruits or add festive spices for a unique twist.

Perfect for Gifting: Individually wrapped, these whimsical bites make charming gifts for friends and neighbors during the holidays. Want to explore more delightful holiday treats? Check out these amazing Spaghetti Homemade Meatballs for another family favorite!

Christmas Popcorn Balls Ingredients

For the Popcorn Base

  • Popcorn Kernels – Provides the base texture and bulk of the treat; feel free to use microwave popcorn for convenience.

For the Sticky Mixture

  • Unsalted Butter – Adds richness and helps melt the marshmallows smoothly; using salted butter is fine, but remember to reduce any added salt.
  • Miniature Marshmallows – The critical binding ingredient that gives the popcorn its sweet, chewy texture; stick with mini marshmallows for the best consistency.

For the Festive Touch

  • Red and Green M&M Candies – Offers sweetness and vibrant color to enhance both appearance and flavor; other colored candies can substitute for different occasions.
  • Festive Sprinkles – Adds a decorative flair to the popcorn balls, making them visually appealing; any colorful sprinkles can do the trick.

Let’s gather these ingredients and create a batch of magical Christmas popcorn balls that will bring joy and sweetness to your holiday season!

Step‑by‑Step Instructions for Christmas Popcorn Balls

Step 1: Pop the Popcorn
Begin by popping about 1 cup of popcorn kernels using an air popper or stovetop method. Once popped, pour the fluffy popcorn into a large mixing bowl, discarding any unpopped kernels. Ensure the popcorn is light and fluffy, and set it aside to cool slightly while you prepare the marshmallow mixture.

Step 2: Melt the Butter and Marshmallows
In a large pot, heat 3 tablespoons of unsalted butter over medium-low heat until melted, swirling the pan gently. Add 5 cups of miniature marshmallows to the melted butter, stirring continuously until the mixture becomes completely smooth and gooey—this should take about 5 minutes. Remove the pot from the heat and allow it to cool slightly before mixing with popcorn.

Step 3: Combine the Popcorn with Marshmallow Mixture
Carefully pour the melted marshmallow mixture over the prepared popcorn in the mixing bowl. Using a spatula, fold the popcorn into the marshmallow mixture, ensuring every piece is coated evenly for delicious Christmas popcorn balls. The marshmallow should be sticky and slightly warm but not too hot to handle.

Step 4: Add the Festive Touch
Once everything is well combined, gently mix in 1 cup of red and green M&M candies and about 1/4 cup of festive sprinkles. This step adds both delightful sweetness and colorful flair to your Christmas popcorn balls. Allow the mixture to cool for about 10 minutes so that it’s safe to handle.

Step 5: Shape the Popcorn Balls
Lightly spray your hands with non-stick cooking spray to prevent sticking, then scoop about 1 cup of the mixture into your hands. Press and shape it into a tight ball, ensuring it holds together well. Repeat this process for the rest of the mixture, forming as many balls as you can—each should look festive and inviting!

Step 6: Cool and Set
Place the formed Christmas popcorn balls on a parchment-lined baking sheet to cool completely at room temperature. Allow them to set for at least 30 minutes, which will help them firm up and keep their shape. Once cooled, these delightful treats are ready to enjoy or share with family and friends!

Make Ahead Options

These festive Christmas popcorn balls are perfect for busy home cooks looking to save time during the hectic holiday season! You can prepare the popcorn and melt the marshmallow mixture up to 24 hours in advance, storing each component separately. Just make sure to let the popcorn cool completely before storing it in an airtight container at room temperature to maintain its freshness. When you’re ready to complete your Christmas popcorn balls, simply combine the cooled popcorn with the marshmallow mixture, then fold in the M&Ms and sprinkles. Shape into balls and allow to set for at least 30 minutes—this way, you’ll have sweet, whimsical treats ready to delight your family and friends with minimal effort!

Christmas Popcorn Balls Variations

Feel free to sprinkle your own magic on these delightful treats with these fun and easy variations!

  • Chocolate Lovers: Swap out M&Ms for chocolate chips or chunks for a rich, indulgent twist.
    Remember, nothing elevates treats like a touch of chocolate.

  • Nutty Delight: Add chopped nuts such as almonds or pecans for a delightful crunch.
    This addition brings a lovely texture and a boost of flavor.

  • Dried Fruit: Incorporate dried cranberries or raisins for a sweet and tangy touch.
    They blend perfectly and add a lovely chewy surprise for everyone!

  • Seasonal Spices: Sprinkle in cinnamon or nutmeg for a warm, comforting flavor.
    These spices bring back cozy memories of holidays past, making them even more special.

  • Marshmallow Medley: Use flavored marshmallows—like strawberry or chocolate—for a fun and colorful twist.
    Each bite can surprise you with bursts of flavor, making them even more fun for the kids!

  • Rice Cereal Swap: Substitute popcorn with rice cereal for a completely different texture and added crunch.
    This makes a wonderful variation that still captures that festive spirit.

  • Spicy Kick: Add a sprinkle of cayenne pepper or chili powder for an unexpected heat.
    The combination of sweet and spicy will delight adventurous taste buds!

  • If you’re looking for more creative holiday ideas, don’t miss my family-favorite Spaghetti Homemade Meatballs—it’s sure to warm up your hearth this Christmas!

Expert Tips for Christmas Popcorn Balls

Warm Mixture: Ensure the marshmallow mixture is warm, not hot, to prevent melting apart when forming into balls.

Avoid Sticking: Lightly spray your hands with non-stick cooking spray before shaping to keep the mixture from sticking to your fingers.

Mix Gently: Be gentle when folding in M&Ms and sprinkles to maintain the popcorn’s fluffy texture, essential for delicious Christmas popcorn balls.

Storage Wisdom: Store finished treats in an airtight container at room temperature for up to 5 days, keeping them fresh and delightful.

Customize Flavors: Don’t hesitate to swap M&Ms for chocolate chips or dried fruit, allowing for personalized and festive variations!

How to Store and Freeze Christmas Popcorn Balls

Room Temperature: Store your Christmas popcorn balls in an airtight container at room temperature for up to 5 days to keep them fresh and chewy.

Freezer: For longer storage, wrap individual popcorn balls tightly in plastic wrap or aluminum foil and freeze for up to 4 weeks. Thaw at room temperature before enjoying.

Reheating: There’s no need to reheat these no-bake treats, as they are delicious served at room temperature and maintain their delightful texture.

Avoiding Sticking: If you notice any sticking, lightly spray your storage container with non-stick cooking spray to help keep the popcorn balls intact.

What to Serve with Christmas Popcorn Balls?

Experience the joy of creating a festive meal that harmonizes beautifully with the delightful magic of these colorful treats.

  • Hot Chocolate Bar: A warm cup of rich, velvety hot chocolate topped with fluffy marshmallows creates a cozy pairing, enhancing the sweetness of your popcorn balls.

  • Gingerbread Cookies: The spiced, molasses-rich flavor of gingerbread cookies adds a delightful contrast, perfect for balancing the sweet crunch of popcorn.

  • Holiday Fruit Salad: A vibrant mix of seasonal fruits like pomegranate and citrus offers freshness, lightening up the sweet indulgence of the popcorn balls.

  • Roasted Chestnuts: Their earthy, nutty flavor brings a comforting warmth, making for a nostalgic holiday snack that complements the sweetness perfectly.

  • Sugar Cookies: Soft, buttery sugar cookies with a light frosting provide a nostalgic, sweet touch that pairs well with the festive colors of the popcorn balls.

  • Milk: Classic and simple, a glass of chilled milk is a timeless pairing that balances the sweetness and makes every bite delightful.

  • Peppermint Bark: Rich, creamy chocolate combined with crunchy peppermint creates a visual feast and a flavor contrast that’s both refreshing and festive.

  • Eggnog: Creamy, spiced eggnog adds a seasonal touch that rounds out the sweetness of the popcorn balls while bringing a festive cheer to your gathering.

Christmas Popcorn Balls Recipe FAQs

How do I choose the best popcorn kernels for my Christmas popcorn balls?
Absolutely! Look for high-quality popcorn kernels that are fresh and stored in a cool, dry place. You can also opt for microwave popcorn for added convenience; simply check the flavor to ensure it matches your desired sweetness!

How should I store Christmas popcorn balls for maximum freshness?
Very good question! Store your room-temperature popcorn balls in an airtight container for up to 5 days to keep them fresh and chewy. If you want to save them for later, wrap individual popcorn balls tightly in plastic wrap and freeze for up to 4 weeks. When you’re ready to enjoy them, simply thaw them at room temperature!

Can I freeze Christmas popcorn balls, and what’s the best way to do it?
Yes, you can freeze your popcorn balls! To do this, individually wrap each ball tightly in plastic wrap or aluminum foil. Place them in a freezer-safe container or bag to prevent freezer burn. When you’re ready to use them, just take them out and let them sit at room temperature for a couple of hours before serving.

What should I do if my popcorn balls are not holding together well?
If your popcorn balls are falling apart, it might be that the marshmallow mixture wasn’t warm enough when you mixed it in. Try warming the mixture slightly and then re-mixing it with the popcorn. Make sure to press them firmly into shape when forming balls. If they’re still problematic, consider adding a bit more melted marshmallow or adjusting the proportions for a better adhesive base.

Are Christmas popcorn balls safe for kids and pets?
While the ingredients are generally safe for children, be cautious about the candy content, especially if your child has specific allergies. For pets, especially dogs, be mindful of the small candies and avoid giving them any, as chocolate can be harmful. Always check for individual ingredient allergens before sharing!

What if I want to make these popcorn balls healthier?
Great idea! You can make a healthier version by swapping M&Ms for dried fruits like cranberries or raisins and using air-popped popcorn to cut down on additional fats. You may also consider using sugar-free marshmallows or experimenting with a blend of nut butter and honey for a more wholesome binding option!

Christmas Popcorn Balls

Festive Christmas Popcorn Balls for Sweet Holiday Cheer

These delightful Christmas Popcorn Balls blend fluffy popcorn, gooey marshmallows, and colorful M&Ms for a magical holiday treat.
Prep Time 15 minutes
Cook Time 10 minutes
Cooling Time 30 minutes
Total Time 55 minutes
Servings: 12 balls
Course: Dessert
Cuisine: American
Calories: 150

Ingredients
  

For the Popcorn Base
  • 1 cup Popcorn Kernels Feel free to use microwave popcorn for convenience.
For the Sticky Mixture
  • 3 tablespoons Unsalted Butter Salted butter can be used; reduce added salt.
  • 5 cups Miniature Marshmallows Use mini marshmallows for the best consistency.
For the Festive Touch
  • 1 cup Red and Green M&M Candies Other colored candies can substitute for different occasions.
  • 1/4 cup Festive Sprinkles Any colorful sprinkles can be used.

Equipment

  • Large mixing bowl
  • Large pot
  • spatula
  • Air popper or stovetop
  • parchment paper

Method
 

Step-by-Step Instructions
  1. Pop about 1 cup of popcorn kernels using an air popper or stovetop method and set aside.
  2. Melt 3 tablespoons of unsalted butter in a large pot over medium-low heat, then add and stir in 5 cups of miniature marshmallows until smooth.
  3. Pour the melted marshmallow mixture over the popcorn and fold until evenly coated.
  4. Mix in 1 cup of red and green M&M candies and 1/4 cup of festive sprinkles, then allow to cool for 10 minutes.
  5. Shape the mixture into tight balls and repeat until done.
  6. Place the popcorn balls on a parchment-lined baking sheet to cool completely for at least 30 minutes.

Notes

Store in an airtight container at room temperature for up to 5 days. Individual popcorn balls can be wrapped and frozen for longer storage.

Leftover Cranberry Turkey Sandwich: A Cozy Thanksgiving Treat

As I stood in the kitchen, leftover turkey gazing back at me from the fridge, inspiration struck like a lightning bolt. What better way to embrace the essence of Thanksgiving than with a Leftover Turkey Cranberry Sandwich? This delightful creation is not only a quick meal solution, but it also transforms holiday leftovers into a satisfying feast. Picture nutty, toasted bread cradling juicy turkey slices, spread with a herbed mayonnaise, and smothered in sweet, tart cranberry sauce. It’s a comforting blend of flavors that captures the spirit of the season while promising minimal effort. Who wouldn’t want to savor a taste of Thanksgiving long after the holiday has ended? So, are you ready to elevate your leftover game and indulge in this scrumptious sandwich? Let’s dive in!

Why is this sandwich a must-try?

Comforting: This Leftover Turkey Cranberry Sandwich embodies the warmth of a home-cooked meal, making it perfect for a cozy lunch or dinner.
Simplicity: The steps are quick and easy, requiring just a few ingredients you likely already have on hand.
Flavor Explosion: With a delightful mix of sweet cranberry sauce and savory turkey, each bite is a celebration of Thanksgiving.
Versatile: Feel free to swap in your favorite greens or even try it with different meats for a fresh twist; check out my Refreshing Avocado Sandwiches for another tasty option!
Crowd-Pleasing: Great for family gatherings or a quick meal, this sandwich is sure to impress everyone at the table.

Leftover Turkey Cranberry Sandwich Ingredients

For the Spread

  • Mayonnaise – Adds creaminess and moisture; consider Greek yogurt for a lighter option.
  • Poultry Seasoning – Enhances the flavor profile; thyme or sage can work as substitutes.
  • Chopped Chives – Offers freshness and mild onion flavor; green onions are a suitable alternative.
  • Salt and Pepper – Essential for seasoning; adjust to your taste preference.

For the Sandwich

  • Nutty Bread – Provides structure and flavor; whole grain or multigrain is ideal.
  • Green Leaf Lettuce – Adds crunch and freshness; feel free to use spinach or arugula.
  • Sliced Leftover Turkey – The star of the show; any leftover cooked poultry can replace it.
  • Cranberry Sauce – Contributes sweetness and tartness; consider using homemade or store-bought; apple sauce makes a good substitute.

Embrace the magic of your Thanksgiving leftovers with this delicious Leftover Turkey Cranberry Sandwich that promises to bring warmth to your table!

Step‑by‑Step Instructions for Leftover Turkey Cranberry Sandwich

Step 1: Prepare the Herbed Mayonnaise
In a small mixing bowl, combine mayonnaise, poultry seasoning, chopped chives, salt, and pepper. Stir until the mixture is well blended and creamy, ensuring the herbs are evenly distributed. This herbed mayonnaise will add delightful flavor and moisture to your Leftover Turkey Cranberry Sandwich. Set the bowl aside while you prepare the rest of the ingredients.

Step 2: Toast the Bread
If you prefer a crunchy texture, lightly toast your nutty bread in a toaster or on a pan for about 2-3 minutes on medium heat until golden brown. The toasty aroma will fill the kitchen as the bread crisps up perfectly. This step not only enhances flavor but also helps to support the layers without getting soggy once the sandwich is assembled.

Step 3: Assemble the Sandwich
Spread a generous layer of the herbed mayonnaise on one side of each slice of toasted bread. The creamy spread should cover the entire surface to ensure every bite of your Leftover Turkey Cranberry Sandwich is bursting with flavor. Feel free to spread extra mayonnaise if you love creaminess—this will enhance the sandwich’s overall texture.

Step 4: Layer the Ingredients
On one slice of the mayonnaise-covered bread, begin layering your sandwich. Start with a few crisp leaves of green lettuce to provide freshness and crunch. Next, add a layer of sliced leftover turkey, ensuring the turkey is distributed evenly for maximum taste in each bite. Finally, spoon a nice, even spread of cranberry sauce over the turkey, allowing its sweetness to compliment the savory elements beneath.

Step 5: Complete the Sandwich
Carefully place the second slice of bread, mayonnaise side down, on top of the layered turkey, lettuce, and cranberry sauce. Press down gently to help bond the sandwich together without causing the fillings to spill out. The combination of textures and flavors will make your Leftover Turkey Cranberry Sandwich not only visually appealing but also incredibly tasty.

Step 6: Cut and Serve
Using a sharp knife, cut the sandwich in half diagonally for an appealing presentation. Serve immediately to capture the freshness of the ingredients. You may pair your sandwich with a side of chips or a light salad to create a complete meal. This cozy sandwich is best enjoyed fresh, but it holds up well in the fridge for a day if needed.

Make Ahead Options

These Leftover Turkey Cranberry Sandwiches are a fantastic choice for meal prep, making your busy weeknights a breeze! You can prepare the herbed mayonnaise and slice the turkey up to 24 hours in advance, storing them separately in airtight containers in the refrigerator to maintain freshness. To keep the nutty bread from getting soggy, avoid assembling the sandwich until just before serving. When you’re ready to enjoy your sandwich, simply spread the herbed mayonnaise on the toasted bread, layer in the lettuce and turkey, and add the cranberry sauce. This ensures that your Leftover Turkey Cranberry Sandwich will be just as delicious as when it was freshly made!

Expert Tips for Leftover Turkey Cranberry Sandwich

Slice Thinly: Always slice the turkey thinly for a tender, enjoyable texture in your Leftover Turkey Cranberry Sandwich. Thick slices can be overwhelming.

Choose the Right Bread: Opt for nutty bread that holds up against wet ingredients. This prevents your sandwich from becoming soggy too quickly.

Balance the Flavors: Don’t overload on cranberry sauce; just a generous spoonful offers the perfect balance without soaking the bread.

Fresh Greens: Adding fresh greens like arugula or spinach boosts the sandwich’s crunch and nutrition, enhancing the overall flavor profile.

Variation Possibilities: Feel free to experiment with different proteins or cheeses to keep your Leftover Turkey Cranberry Sandwich exciting every time!

How to Store and Freeze Leftover Turkey Cranberry Sandwich

Fridge: Store your assembled sandwich in the refrigerator for up to 1 day. Wrap it tightly in plastic wrap or place it in an airtight container to maintain freshness.

Freezer: If you want to make it ahead, freeze the bread and turkey separately for up to 2 months. Assemble the sandwich fresh when you’re ready to enjoy it.

Reheating: If already assembled and stored, it’s best to eat it cold, but you can reheat the turkey in a microwave, keeping it loosely covered for even warming.

Ingredient Separation: To prevent sogginess, keep ingredients like cranberry sauce and lettuce separate if you plan to eat it later.

What to Serve with Leftover Turkey Cranberry Sandwich?

A cozy meal can come together in seconds, transforming leftover turkey into a delightful feast for the senses.

  • Crispy Potato Chips: The crunchiness of potato chips adds a satisfying contrast to the softness of the sandwich, creating a delightful textural balance.
  • Autumn Salad: A fresh salad with leafy greens, nuts, and diced apples brings a refreshing taste that complements the richness of the sandwich.
  • Sweet Potato Fries: The natural sweetness of sweet potato fries beautifully enhances the flavor profile of the savory turkey and cranberry. The crisp exterior and soft interior make for a comforting sidekick.
  • Butternut Squash Soup: A warm, velvety soup wraps you in its embrace, making it a perfect companion to round out your meal. It pairs wonderfully with the sandwich and adds a heartiness that feels like a warm hug.
  • Coleslaw: Tangy and crunchy coleslaw refreshes the palate and adds a lively zing, making each bite of your sandwich feel even more satisfying.
  • Hot Apple Cider: Embrace the warmth of your meal with a cup of spiced apple cider, enhancing the comforting flavors of both the sandwich and the season.
  • Chocolate Chip Cookies: End your meal on a sweet note with classic chocolate chip cookies, providing a delightful contrast to the savory sandwich.
  • Sparkling Water: A refreshing drink like sparkling water with a hint of lemon or lime offers a light complement that balances the richness of your sandwich.

Leftover Cranberry Turkey Sandwich Variations

Feel free to let your creativity shine as you customize this lovely sandwich to suit your taste buds!

  • Dairy-Free: Swap out mayonnaise for a vegan mayo or avocado blend to keep the creamy texture without dairy.
  • Extra Crunch: Add some sliced cucumbers or pickles for added crunch and a pop of freshness in every bite.
  • Different Meats: Use ham or chicken if you don’t have turkey; both options bring their own hearty flavors.
  • Cheese Lover’s Delight: Layer in some creamy brie or sharp cheddar to enhance the flavor profile of your sandwich.
  • Sweet Twist: Consider adding a thin layer of apple slices or caramelized onions for a delightful sweetness that contrasts beautifully with the savory turkey.
  • Spicy Kick: Spread some spicy mustard or sriracha on the inside of the bread to kick up the heat level a notch.
  • Herb Infusion: Mix in fresh herbs like dill or basil into your mayonnaise for an aromatic twist that’s simply out of this world!
  • Fruit Fusion: Substitute cranberry sauce with a mixture of cranberry relish and orange zest to brighten up that classic holiday taste.

With all these variations, you’re bound to find a favorite! So why not try pairing your sandwich with a plate of Refreshing Avocado Sandwiches for an exciting lunch experience? Dive into flavor with these delightful twists!

Leftover Turkey Cranberry Sandwich Recipe FAQs

How do I choose the best leftover turkey for my sandwich?
Absolutely! For the best flavor and texture, choose turkey that has been refrigerated properly after cooking. Look for slices that are not dried out; they should be juicy and tender. If your leftovers have dark spots or a sour smell, it’s best to discard them.

How should I store my leftover turkey cranberry sandwich?
To keep your sandwich fresh, store it in the refrigerator for up to 1 day. I suggest wrapping it tightly in plastic wrap or placing it in an airtight container. This will help lock in moisture and flavors. Just remember, keeping ingredients like lettuce and cranberry sauce separate until you’re ready to eat will help prevent sogginess.

Can I freeze my leftover turkey cranberry sandwich?
Very! To freeze your sandwich, I recommend that you separate the bread and turkey. You can refrigerate both for up to 2 months. When you’re ready to enjoy it, simply thaw the bread and turkey in the fridge overnight. Assemble your sandwich fresh for the best texture and flavor!

What can I do if my sandwich turns out soggy?
If your sandwich becomes soggy, it’s likely due to an overload of cranberry sauce or moisture from the turkey. To avoid this, use a lighter hand when spreading the sauce and layer the turkey with a bit of lettuce to act as a moisture barrier. If you encounter soggy bread after assembly, try toasting the bread lightly beforehand for added texture.

Are there any dietary considerations I should keep in mind?
Absolutely! If you’re serving this sandwich to pets, it’s best to refrain from giving them turkey, especially if it contains seasoning. For allergies, be cautious about possible sensitivities to nuts in the bread. If you’re concerned about gluten, opt for gluten-free bread or turkey.

Leftover Cranberry Turkey Sandwich

Leftover Cranberry Turkey Sandwich: A Cozy Thanksgiving Treat

Enjoy a quick and flavorful Leftover Cranberry Turkey Sandwich that transforms holiday leftovers into a cozy meal.
Prep Time 10 minutes
Cook Time 3 minutes
Total Time 13 minutes
Servings: 2 sandwiches
Course: Lunch
Cuisine: American
Calories: 450

Ingredients
  

For the Spread
  • 1/2 cup Mayonnaise Consider Greek yogurt for a lighter option.
  • 1 teaspoon Poultry Seasoning Thyme or sage can work as substitutes.
  • 2 tablespoons Chopped Chives Green onions are a suitable alternative.
  • to taste Salt and Pepper Essential for seasoning; adjust to your taste preference.
For the Sandwich
  • 4 slices Nutty Bread Whole grain or multigrain is ideal.
  • 4 leaves Green Leaf Lettuce Feel free to use spinach or arugula.
  • 8 oz Sliced Leftover Turkey Any leftover cooked poultry can replace it.
  • 1/3 cup Cranberry Sauce Consider using homemade or store-bought; apple sauce makes a good substitute.

Equipment

  • mixing bowl
  • Toaster
  • Knife

Method
 

Step-by-Step Instructions
  1. Prepare the Herbed Mayonnaise: In a small mixing bowl, combine mayonnaise, poultry seasoning, chopped chives, salt, and pepper. Stir until well blended and creamy.
  2. Toast the Bread: Lightly toast your nutty bread in a toaster or on a pan for about 2-3 minutes until golden brown.
  3. Assemble the Sandwich: Spread a generous layer of the herbed mayonnaise on one side of each slice of toasted bread.
  4. Layer the Ingredients: On one slice, layer green lettuce, sliced turkey, and a spoonful of cranberry sauce.
  5. Complete the Sandwich: Place the second slice of bread on top and press down gently to bond the ingredients.
  6. Cut and Serve: Cut the sandwich in half diagonally and serve immediately.

Notes

For best results, slice the turkey thinly and use bread that holds up against wet ingredients.

Delicious Christmas Dirt Cups for Festive Fun and Flavor

There’s something uniquely magical about the holiday season that brings out our inner child, don’t you think? As I sift through my collection of festive treats, these enchanting No Bake Christmas Dirt Cups stand out brilliantly. They aren’t just a dessert; they’re little edible masterpieces filled with layers of creamy vanilla pudding, crunchy Golden Oreos, and topped with a whimsical Little Debbie Christmas tree cake. What I love most about this recipe is how quick and easy it is to whip up, making it an ideal choice for busy holiday gatherings. Plus, it’s a surefire crowd-pleaser that even the kids will adore! Ready to dive into a fun and festive adventure in your kitchen? Let’s assemble these delightful cups together and spread the joy of the season!

Why are Christmas Dirt Cups so delightful?

Easy Preparation: Whipping up these cups takes minimal time, letting you focus on holiday fun instead of stressful cooking.

Kid-Friendly Fun: With layers of creamy pudding and cookie crumbles, they bring smiles to faces young and old alike!

Visual Appeal: These cups are not just tasty; they look stunning on any table, bringing festive cheer with every layer.

Endless Customization: You can easily swap out cookie or pudding flavors to create your own festive twist, making each batch unique.

Make Ahead Convenience: Prepare these delightful treats up to 24 hours in advance, allowing you to enjoy the festivities without last-minute stress. Try serving them alongside Harvest Salad Cups for a fun party spread!

Christmas Dirt Cups Ingredients

• Get ready to create these festive delights with the following simple ingredients!

For the Pudding Layer

  • Instant Vanilla Pudding Mix (3.3 oz) – This pudding serves as the creamy base; feel free to substitute with chocolate pudding for a delicious twist!
  • Milk (2 cups) – Essential for hydrating the pudding mix; almond or oat milk makes a great dairy-free choice.
  • Cool Whip – Adds a fluffy, creamy texture; homemade whipped cream works beautifully as a substitute.

For the Cookie Crunch

  • Golden Oreo Cookies – These provide a crunchy texture and sweetness; using regular Oreos can offer a fun flavor variation.

For the Festive Touch

  • Little Debbie Christmas Tree Cakes (12) – Acts as a charming decoration that adds nostalgic flair; any small cake or festive cookie can be used instead.
  • Christmas Sprinkles – Perfect for visual appeal; swap them for any seasonal sprinkles you prefer to match your theme.

These simple ingredients help make your Christmas Dirt Cups a crowd-pleasing dessert!

Step‑by‑Step Instructions for Christmas Dirt Cups

Step 1: Prepare Pudding
In a mixing bowl, whisk together the instant vanilla pudding mix and cold milk until fully combined. This should take about 2 minutes, and you’ll know it’s ready when it thickens to a creamy consistency. Cover the bowl and refrigerate the mixture for about 10 minutes, allowing it to firm up nicely for layering in your Christmas Dirt Cups.

Step 2: Combine with Cool Whip
After the pudding has set, gently fold in the Cool Whip using a spatula. Be careful to mix it slowly to keep the mixture light and airy. This should take about 1-2 minutes until you achieve a smooth and creamy texture. Once combined, return the bowl to the refrigerator for another 20 minutes, allowing the flavors to meld beautifully.

Step 3: Crush Cookies
While the pudding is chilling, prepare the Golden Oreo cookies. Using a food processor, pulse the cookies until they become fine crumbs, which should take about 30 seconds. If you don’t have a food processor, place them in a zip bag and crush with a rolling pin instead. Set these crumbs aside as they’ll give your Christmas Dirt Cups that delightful crunchy layer.

Step 4: Assemble Cups
Grab your clear cups or dessert glasses for assembly. Start by adding a layer of the vanilla pudding mixture to the bottom of each cup, about one-third full. Next, sprinkle a generous layer of crushed cookies over the pudding, creating a distinct layer. Continue layering pudding, then cookies until the cups are filled to the brim, ensuring it’s visually appealing for your Christmas Dirt Cups.

Step 5: Decorate
Once your cups are filled, it’s time for the fun part—decorating! Top each cup with a dollop of the remaining pudding to create a snowy effect. Sprinkle festive Christmas sprinkles over the top for added cheer, then place a Little Debbie Christmas tree cake on top of each cup. This adds a whimsical flair that will surely impress your guests!

Step 6: Chill
Finally, cover your assembled Christmas Dirt Cups with plastic wrap and refrigerate them until you’re ready to serve. Let them chill for at least 30 minutes to ensure they’re cool and refreshing. Adding the decorations just before serving will keep them vibrant and prevent sogginess. Enjoy your festive treat with family and friends!

What to Serve with No Bake Christmas Dirt Cups

Elevate your holiday gathering with delightful pairings that enhance these charming dessert cups!

  • Festive Fruit Salad: A vibrant medley of seasonal fruits adds freshness and brightness to balance the creamy richness of the cups. Perfect for a light contrast!

  • Chocolate Peppermint Bark: This sweet treat offers a rich chocolatey crunch with a hint of peppermint, mirroring the dessert’s playful flavors and keeping the festive spirit alive.

  • Spiced Hot Chocolate: Warm up with a cozy mug of spiced hot chocolate. Its creamy texture complements the airy pudding layers beautifully, making for a perfect duo.

  • Gingerbread Cookies: The comforting spice of gingerbread cookies harmonizes with the sweet elements of the Christmas Dirt Cups, creating a nostalgic holiday flavor experience. Their crinkle texture also adds variety!

  • Cranberry Spritzer: Crisp and refreshing, this drink provides a bubbly contrast that cleanses the palate, allowing the sweetness of the dessert to shine brightly.

  • Cheesecake Bites: Bite-sized cheesecake deliver a creamy, dreamy texture that pairs well with the crunchy layers of the cups, creating a delightful dessert tableau.

  • Holiday Spice Cake: A slice of warm holiday spice cake offers a comforting layer of flavor, enhancing the festive experience while keeping guests smiling and satisfied.

  • Eggnog Milkshake: This indulgent shake marries the richness of eggnog with festive flavors, ensuring every sip complements the dessert and adds to the holiday cheer.

Expert Tips for Christmas Dirt Cups

  • Layer Wisely: Carefully layer your pudding and crushed cookies to create visually appealing cups that showcase those delicious textures.

  • Keep Cool Whip Light: When folding in the Cool Whip, use gentle motions to preserve its fluffiness, ensuring a light and creamy pudding layer in your Christmas Dirt Cups.

  • Prep Ahead: To save time, prepare your cups up to 24 hours in advance, but hold off on adding decorative elements until just before serving to retain their crispness.

  • Customize Flavors: Feel free to swap out Golden Oreos for your favorite cookie or use different pudding flavors to create a personal twist on these Christmas Dirt Cups.

  • Chill Time Matters: Allow your cups to chill for at least 30 minutes before serving, as this enhances the flavors and ensures a cool treat on festive occasions.

Christmas Dirt Cups Variations & Substitutions

Let your creativity shine by customizing these fun Christmas Dirt Cups with delightful twists that engage all your senses!

  • Flavorful Oreos: Swap Golden Oreos for chocolate or mint varieties to bring a unique flavor profile to your cups. The rich chocolatey notes can create a fabulous contrast with the creamy pudding.

  • Homemade Whipped Cream: For a fresher taste, use homemade whipped cream instead of Cool Whip. Just whip some heavy cream with sugar and vanilla until fluffy!

  • Pudding Flavor Play: Experiment with different pudding flavors like chocolate, butterscotch, or even banana for a surprise element. Each variation brings a new taste adventure for your guests!

  • Dairy-Free Delight: Use almond or oat milk and coconut whipped cream to create a dairy-free version of these cups. They’ll be just as delightful and creamy!

  • Gluten-Free Option: Opt for gluten-free chocolate sandwich cookies to make these dirt cups suitable for gluten-sensitive guests. Enjoy a tasty dessert without the gluten!

  • Add Some Heat: Sprinkle a pinch of cinnamon or nutmeg into your pudding mixture for a warm, cozy flavor that’s perfect for the holiday season. It adds a delightful twist!

  • Fun Layering: Instead of just cookies and pudding, layer in some crushed candy canes or even mini marshmallows for a textural twist. It will add an extra festive crunch!

  • Alternative Decorations: If you can’t find Little Debbie Christmas Tree Cakes, use any decorative cookie or cupcake on top. A sprinkle of edible glitter could add an enchanting sparkle to your cups.

Feel free to serve these whimsical creations alongside refreshing Harvest Salad Cups for a colorful and delightful holiday gathering!

Make Ahead Options

These No Bake Christmas Dirt Cups are perfect for meal prep enthusiasts! You can prepare the pudding mixture (pudding and Cool Whip combined) up to 24 hours in advance and store it in an airtight container in the refrigerator. Additionally, feel free to crush the Golden Oreo cookies ahead of time and keep them in a separate container to maintain their crunch. When you’re ready to serve, simply layer the chilled pudding and crushed cookies in clear cups, top them with festive sprinkles and a Little Debbie Christmas tree cake, and enjoy the delightful flavors without the last-minute stress! Rest assured, these treats will still be just as delicious and visually stunning!

Storage Tips for Christmas Dirt Cups

Fridge: Store leftover Christmas Dirt Cups in an airtight container for up to 5 to 7 days. This will help maintain their freshness and creamy texture.

Freezer: For longer storage, freeze the pudding mixture (without decorations) for up to 2 months. Thaw completely in the fridge before serving.

Serving: If already assembled, the cups should be eaten within 1-2 days for best taste. Avoid adding sprinkles or decorations until just before serving to keep them from getting soggy.

Reheating: No reheating required, as these delicious cups are best enjoyed chilled!

Christmas Dirt Cups Recipe FAQs

How do I choose the right type of cookies for my Christmas Dirt Cups?
Absolutely! For the best flavor and texture, I recommend using Golden Oreo cookies for their sweetness and crunch. However, if you’re feeling adventurous, regular Oreos or even chocolate sandwich cookies work beautifully too! Just keep in mind the flavor profile you want to highlight in your dessert.

What is the best way to store my Christmas Dirt Cups?
Very good question! You can store leftover Christmas Dirt Cups in an airtight container in the refrigerator for up to 5 to 7 days. This keeps them fresh and maintains that creamy texture that everyone loves. If you’re planning to store them, it’s best not to add the decorative sprinkles or cakes until just before serving to prevent sogginess.

Can I freeze the Christmas Dirt Cups?
Yes, you can! To freeze, assemble only the pudding and cookie layers in airtight containers, excluding any toppings. They can be frozen for up to 2 months. When you’re ready to enjoy them, simply thaw them in the fridge overnight, then add your decorations before serving.

What should I do if my pudding mixture appears lumpy?
If your pudding mixture has lumps, don’t worry; it’s an easy fix! Just whisk it vigorously for a minute or two until it becomes smooth. If the lumps persist, you can use a hand mixer for a minute to achieve that desired creamy consistency. Remember to chill the mixture afterward for about 10 minutes before folding in the Cool Whip!

Are these Christmas Dirt Cups safe for pets?
Great concern! While the ingredients used in Christmas Dirt Cups are safe for human consumption, they could be harmful to pets, especially the chocolate-flavored cookies. It’s best to keep this festive treat strictly for humans and ensure your furry friends enjoy their own special pet-safe treats instead.

Can I make these Christmas Dirt Cups gluten-free?
Absolutely! To create a gluten-free version, simply use gluten-free sandwich cookies as a substitute for the Oreos. There are many great options out there that will retain that delightful cookie crunch, so don’t hesitate to explore the gluten-free aisle at your local store!

Christmas Dirt Cups

Delicious Christmas Dirt Cups for Festive Fun and Flavor

Delight in these festive Christmas Dirt Cups filled with creamy layers and topped with a decorative twist.
Prep Time 15 minutes
Chill Time 30 minutes
Total Time 45 minutes
Servings: 6 cups
Course: Dessert
Cuisine: American
Calories: 250

Ingredients
  

For the Pudding Layer
  • 3.3 oz Instant Vanilla Pudding Mix Substitute with chocolate pudding for a twist
  • 2 cups Milk Almond or oat milk can be used for dairy-free
  • Cool Whip You may substitute with homemade whipped cream
For the Cookie Crunch
  • Golden Oreo Cookies Regular Oreos can be used for flavor variation
For the Festive Touch
  • 12 Little Debbie Christmas Tree Cakes Any small cake or festive cookie can be used
  • Christmas Sprinkles Swap them for seasonal sprinkles to match your theme

Equipment

  • mixing bowl
  • whisk
  • spatula
  • Food Processor
  • clear cups or dessert glasses

Method
 

Step-by-Step Instructions
  1. In a mixing bowl, whisk together the instant vanilla pudding mix and cold milk until fully combined. Cover and refrigerate for about 10 minutes.
  2. Gently fold in the Cool Whip into the pudding mixture until smooth and creamy. Refrigerate for another 20 minutes.
  3. Crush the Golden Oreo cookies into fine crumbs using a food processor or rolling pin, and set aside.
  4. In clear cups, layer the vanilla pudding mixture and crushed cookies until filled, ensuring a visually appealing presentation.
  5. Decorate by topping with the remaining pudding and adding Christmas sprinkles along with a Little Debbie Christmas tree cake on top.
  6. Cover with plastic wrap and refrigerate until serving time, allowing at least 30 minutes to chill.

Notes

These Christmas Dirt Cups are perfect for holiday gatherings and can be prepared up to 24 hours in advance without decorations.